LG Electronics USA GW370 Cellular/PCS GSM/WCDMA/EDGE Phone with Bluetooth User Manual GW370 ATT Eng 0112 indd
LG Electronics USA Cellular/PCS GSM/WCDMA/EDGE Phone with Bluetooth GW370 ATT Eng 0112 indd
Users Manual

LG GW370
U
ser Guide

Part 15.21 statement
" Change or Modifications that are not expressly approved by the manufacturer could void
the user's authority to operate the equipment. “
Part 15.105 statement
This equipment has been tested and found to comply with the limits for a class B digital
device, pursuant to Part 15 of the FCC Rules.
These limits are designed to provide reasonable protection against harmful interference in
a residential installation. This equipment generates uses and can radiate radio frequency
energy and, if not installed and used in accordance with the instructions, may cause harmful
interference to radio communications. However, there is no guarantee that interference will
not occur in a particular installation. If this equipment does cause harmful interference or
television reception, which can be determined by turning the equipment off and on, the user
is encouraged to try to correct the interference by one or more of the following measures:
- Reorient or relocate the receiving antenna.
- Increase the separation between the equipment and receiver.
- Connect the equipment into an outlet on a circuit different from that to
which the receiver is connected.
- Consult the dealer or an experienced radio/TV technician for help.

Part 15 Class B Compliance
This device and its accessories comply with part15 of FCC rules.
Operation is subject to the following two conditions:
(1) This device & its accessories may not cause harmful interference.
(2) This device & its accessories must accept any interference received,
including interference that may cause undesired operation.
Body-worn Operation
This device has been tested for typical body-worn operations
with the distance of 0.79inches (2.0cm) from the user’s body.
To comply with FCC RF exposure requirements, a minimum separation distance
of 0.79inches(2.0cm) must be maintained from the user's body.
Additionally, Belt clips, holsters & other body-worn accessories may not contain
metallic components.

6
u
r
Ph
on
e
Y
o
u
Phone Components
2
5
3
4
6
7
9
8
10
1
1.
C
harger/U
S
B Port
2
. Earpiece: Lets
y
ou hear the caller and
a
utomate
d
prompts.
3
. Main LCD
:
Displays phone status icons,
menu items, web items, web information,
pictures and more in full color. You
c
an select menu items by touchin
g
the
c
orresponding icons on the touchpad.
4. SEND ke
y:
Press this ke
y
in standb
y
mode
to
q
u
i
c
kly
access t
h
e most recent, m
i
sse
d
,
di
a
l
e
d
an
d
rece
i
ve
d
ca
ll
s.
5.
END
/
P
ower:
E
n
d
s or re
j
ects a ca
ll
.
T
urns
the phone on/o
ff
. Press once to return to
the standb
y
screen
.
6. Multi-taskin
g
ke
y
7. microSD™ memory card socke
t
8
.
L
oc
k/U
n
l
oc
k
k
e
y
9.
C
amera ke
y
: Press to start the
C
amera
f
unction. Press and hold to start the Video
reco
r
d
fu
n
c
ti
o
n
.
1
0. Side volume key
s
•
When on the Standby screen:
All
ows
you to set the Rin
g
tone and Touchtone
vo
l
ume.
H
o
ld
t
h
e
D
own
k
ey to togg
l
e t
h
e
V
ibration Mode
O
n and
O
ff.
•
D
ur
i
ng a ca
ll:
All
ows you to c
h
ange t
h
e
Earpiece volume
.
•
When playing background music:
A
llows you to chan
g
e the music volume
.

You
r
Pho
n
e
7
Rear View
Batter
y
cove
r
E
xt
e
rn
a
l
ca
m
e
r
a
l
e
n
s
microSD™ memor
y
ca
r
d
soc
k
et
B
atter
y
Fl
ash
S
IM card socket

You
r
Pho
n
e
8
Slide Open View
Mob
il
e
Em
a
i
l
IM
T
ext
M
sg
C
ontact lis
t
C
aps
P
ress to c
h
an
g
e
b
etween
U
pper Case and Lower Case
.
F
n
P
ress to
i
nput sym
b
o
l
s an
d
numbers on Qwert
y
ke
y
p
ad
.
Space
Press to create a s
p
ace between words
.
Sym
Press to open the menu with Symbol entry
opt
i
ons.
D
el
D
eletes di
g
its
a
n
d
l
e
tt
e
r
s.
P
ress to in
p
ut
“@
”.
P
ress to in
p
ut
“
.
co
m”
.
P
ress to move
t
o t
h
e next
row.
Le
ft
Do
wn
Right
Up

9
t
ting StartedGe
t
Installing the SIM Card and
Battery
1. Remove the battery cove
r
P
r
ess
do
wn
o
n th
e
n
o
t
c
h
a
t th
e
bo
tt
o
m
of
t
he phone and slide the cover. The battery
cover should slide and li
f
t o
ff
easily
.
2
. Remove the batter
y
H
old the top ed
g
e o
f
the battery and usin
g
y
our
f
in
g
ernail, li
f
t the battery
f
rom the
b
attery compartment
.
n
W
arn
i
n
g
Do not remove the battery when the phone is
switched on, as this may damage the phone
.

G
etting
S
tarted
10
3
. Install the SIM car
d
S
lide the
S
IM card into the
S
IM card
h
older. Make sure that the
g
old contact
a
rea on the card is
f
acin
g
downward. To
r
emove the SIM card, pull it
g
ently in the
opposite direction
.
4. Install the batter
y
Insert the top o
f
the battery
f
irst into the
top ed
g
e o
f
the battery compartment.
Ensure that the battery contacts ali
g
n
w
ith the terminals on the phone. Press the
b
ottom o
f
the battery down until it clips
i
nto place
.

G
etting
S
tarted
11
5
.
C
harging your phon
e
Li
f
t the char
g
er port cover on the top side
o
f your LG GW370. Insert the char
g
er
connector to the phone
(
‘B’ side of the
connector has to be
f
acin
g
up when
connectin
g
to the phone
)
and then plu
g
into the wall socket. Your L
G
G
W370 will
n
eed to be char
g
ed until a messa
g
e readin
g
“
Battery
f
ull. Please unplu
g
char
g
er to save
e
ner
g
y.” appears on the screen
.
Im
p
ortant!
You should insert the batter
y
be
f
ore
ch
ar
gi
n
g
.
n
Warnin
g
U
se o
f
unauthorized accessories could damage
y
our p
h
one an
d
vo
id
your warranty
.
To use the travel charger provided with your
p
hone:
Installing a Memory Card
Y
ou can expan
d
t
h
e memory ava
il
a
bl
e on your
p
hone by using a microSD™ memory card.
The LG GW370 will support up to a 16 GB
m
icroSD™ memory card
.
n
Tip
A
memor
y
card is an o
p
tional accessor
y
.
1.
Lift the memor
y
card cover and insert a
m
icro
S
D™ card with the gold contact area
facing downwards.
C
lose the memory card
co
v
e
r
so
th
a
t it
c
li
c
k
s
s
h
u
t
.

G
etting
S
tarted
12
n
N
ot
e
I
f your memory card has existing content it will
automatically be filed in the correct folder. For
exam
p
le, videos will be accessible from the
V
ideos folder. If
y
our memor
y
card has
p
rotected
content
(
i.e. content such as son
g
s or
g
raphics
w
ith Di
g
ital Ri
g
hts Mana
g
ement copywritin
g
loaded from another device
)
, it will not work.
Y
ou will need to re
f
ormat the memory card prior
t
o us
i
ng
i
t w
i
t
h
t
hi
s
d
ev
i
ce
.
G
etting
S
tarted
13
O
n-
S
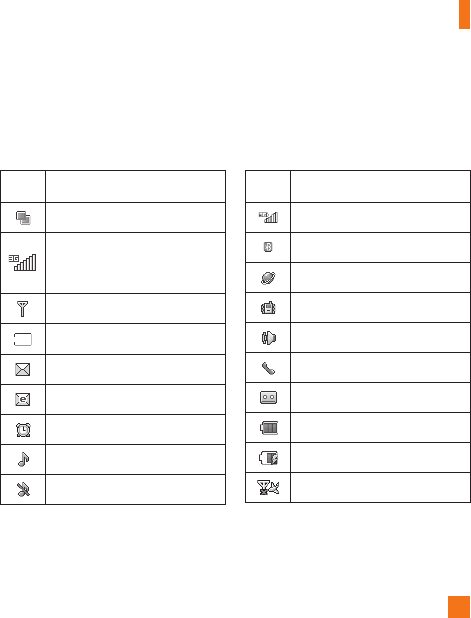
creen Icons
Th
e ta
bl
e
b
e
l
ow
d
escr
ib
es var
i
ous
di
s
pl
a
y
i
n
di
cators or
i
cons
th
at a
pp
ear on t
h
e
ph
one
'
s
di
s
pl
a
y
screen
.
I
CON
/
INDI
C
AT
OR
D
E
SC
RIPTI
O
N
Multitaskin
g
N
etwork si
g
nal stren
g
th
(
number of bars will var
y)
N
o network si
g
na
l
B
atter
y
em
p
t
y
N
ew text messa
ge
Ne
w
e
m
a
i
l
A
n
ala
rm
is
set
N
ormal profile in us
e
S
ilent profile in us
e
I
CON
/
I
NDI
C
AT
OR
D
E
SC
RIPTI
O
N
3
G
availabl
e
Bl
ue
t
oo
th
®
i
s
ac
tiv
e
Th
e
b
rowser
i
s act
i
v
e
V
i
b
r
a
ti
o
n m
ode
Sp
eaker
p
hon
e
C
all in Progres
s
V
o
i
cema
il
Batter
y
Ful
l
Battery
C
hargin
g
Fli
g
h
t
M
o
de

14
u
ch CalibrationTo
u
S
et your touch screen for ease of use. Touch
an
d
press t
h
e
‘
+
’
mar
k
ers to ca
lib
rate
th
e screen.
]
O
nce you’ve finished calibrating your
screen,
S
ave the settings.
n
Not
e
T
o reset t
h
e touc
h
ca
lib
rat
i
on
,
touc
h
,
an
d
the
t
ab
.
Touch
, an
d
c
h
oose
Touch
C
alibratio
n
.
15
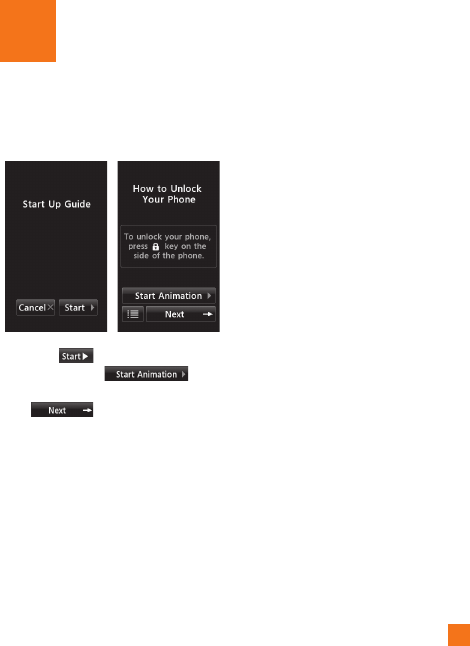
rt Up Guid
e
S
ta
After you install SIM card and battery, and
t
urn on the LG GW370, you will see Start Up
G
uide on the screen.
Touch
S
tart to begin the
S
tart Up
G
uide feature. Touch
to
p
lay the animated
G
uide for that subject.
O
r,
touc
h t
o
m
o
v
e
o
n t
o
th
e
n
e
xt
G
uide. Available
G
uides include
:
]
H
ow to
U
n
l
oc
k
Y
our
Ph
on
e
]
How to Open Menu and Select Ite
m
]
How to
S
croll
]
H
ow to
N
av
i
gate
B
etween
I
tem
s
]
How to Rotate Screen Orientatio
n
]
How to
Op
en Ke
yp
ad and Enter Text
]
How to
C
hange Home
S
cree
n
]
How to Add
S
hortcuts on Home
S
cree
n
]
How to Add
C
ontacts on Home
S
cree
n
16
n
eral FunctionsGe
n
Making a Call
1.
M
a
k
e sure your p
h
one
i
s powere
d
on
.
2.
T
ouc
h
an
d
enter a p
h
one num
b
er us
i
ng
t
h
e touc
h
pa
d
or s
lid
e open t
h
e qwerty pa
d
a
n
d
enter a p
h
one num
b
er us
i
ng t
h
e qwerty
k
eys.
T
o e
di
t a num
b
er on t
h
e
di
sp
l
ay
screen, s
i
mp
l
y press t
h
e
k
ey to erase
one
di
g
i
t at a t
i
me
.
]
P
ress an
d
h
o
ld
t
h
e
k
ey to erase t
h
e
ent
i
re num
b
er
.
3.
P
ress t
h
e[SEND] key to call the
n
umber.
O
r touch on t
h
e touc
h
pa
d.
M
akin
g
a Call with the Send Ke
y
1.
P
ress t
h
e[SEND] key, and the most
r
ecent m
i
sse
d
,
di
a
l
e
d
an
d
rece
i
ve
d
p
h
one
n
um
b
ers w
ill
b
e
di
sp
l
aye
d.
2.
S
elect the desired number.
3.
P
ress t
h
e[SEND] ke
y
or touch
.
M
akin
g
International Call
s
1.
Wh
en enter
i
ng a p
h
one num
b
er, press
t
h
e
k
e
y
an
d
t
h
e
i
nternat
i
ona
l
access
ch
aracter
‘
+
’
w
ill
appear.
Wh
en us
i
ng t
h
e
touc
h
p
a
d
to
di
a
l
, touc
h
an
d
h
o
ld
.
2.
E
nter t
h
e countr
y
co
d
e, area co
d
e an
d
t
h
e
ph
one num
b
er
.
3.
Pr
ess
th
e
[
SEND
]
ke
y
to call the
n
umber.
O
r touch on the
p
ad
.
E
ndin
g
a Call
When
y
ou have finished a call,
p
ress the
[
END
]
ke
y.
M
akin
g
a Call from the Contact
s
Y
ou can store fre
q
uentl
y
called names and
p
hone numbers in the
S
IM card as well as in
t
he
p
hone memor
y
known as the
C
ontacts
.
Y
ou can dial a number by simply selecting a
n
ame in the contacts and pressing the
[
SEND
]
ke
y
.
G
eneral Functions
17
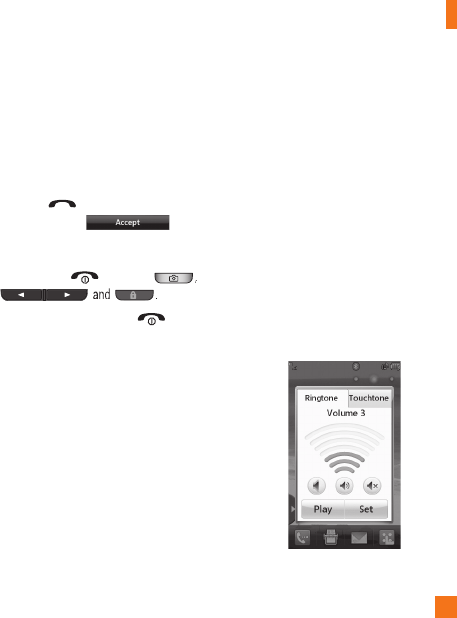
Answering a Call
Wh
en you rece
i
ve a ca
ll
, t
h
e p
h
one r
i
n
g
s an
d
t
he phone icon appears on the screen. I
f
the
caller can be identi
f
ied, the caller’s phone
number (or name if stored in your Address
B
ook) is displayed
.
1.
P
ress t
h
e
[
SEND
]
or unlock the
s
creen an
d
touc
h
.
If Any Key has been set as the Answer
M
o
d
e, any
k
ey press w
ill
answer a ca
ll
e
xcept for the
[
END] key,
2.
E
n
d
t
h
e ca
ll
b
y press
i
ng t
h
e
[
END
]
k
ey.
n
No
t
e
Y
ou can answer a call while usin
g
the Address
B
oo
k
o
r
o
th
e
r m
e
n
u
fea
t
u
r
es
.
Adjusting the Volume
D
urin
g
a call, i
f
you want to ad
j
ust the
e
arp
i
ece vo
l
ume, use t
h
e s
id
e vo
l
ume
k
eys
of
the phone
.
I
n the Standby screen, you can adjust the ring
vo
l
ume us
i
ng t
h
e s
id
e vo
l
ume
k
eys
.
Setting Profi les
P
ress either o
f
the side volume ke
y
s. You can
s
et your Rin
g
tone to Vibrate All, Alarm
O
nly
o
r
S
ilent All
.

G
eneral Functions
18
Y
ou can a
l
so a
dj
ust t
h
e touc
h
tone soun
d
an
d
vibration volume from the Touchtone tab
.
V
ibration Mode
(
Quick
)
Vib
rat
i
on
M
o
d
e can
b
e act
i
vate
d
b
y touc
hi
ng
an
d
h
o
ldi
ng from the dial
p
ad. You
can a
l
so set
Vib
rat
i
on
M
o
d
e
b
y press
i
ng an
d
h
o
ldi
ng
d
own s
id
e vo
l
ume
k
ey as we
ll.
G
eneral Functions
19
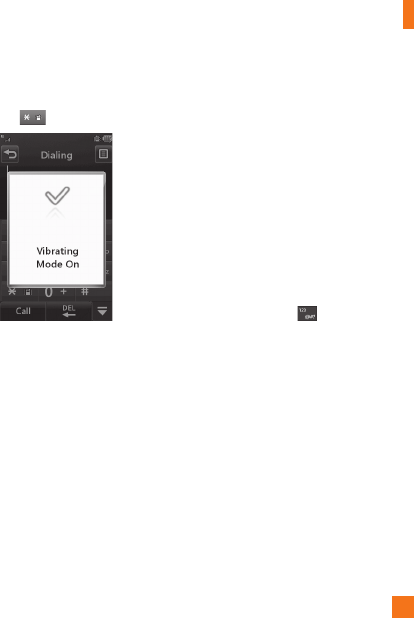
The phone will display ‘Vibrating Mode On’.
I
f you would like to turn Vibration mode Off,
t
ouc
h
an
d
h
o
ld
aga
i
n
.
Si
g
nal Stren
g
t
h
I
f you are inside a building, being near a
window may give you better reception. You
can see the strength of your signal by the
s
ignal indicator on your phone’s display
screen.
Entering Text
Y
ou can enter a
l
p
h
anumer
i
c c
h
aracters
b
y
us
i
n
g
t
h
e p
h
one
’
s touc
h
pa
d
.
F
or examp
l
e,
s
tor
i
n
g
names
i
n t
h
e
Add
ress
B
oo
k
, wr
i
t
i
n
g
a
m
essa
g
e or sc
h
e
d
u
li
n
g
events
i
n t
h
e ca
l
en
d
ar
a
ll
requ
i
re text to
b
e entere
d.
The following text input modes are available
o
n t
h
e p
h
one
.
U
sin
g
the
S
ymbol Mod
e
The Symbol Mode enables you to enter
var
i
ous sym
b
o
l
s or spec
i
a
l
c
h
aracters.
T
o
e
nter a sym
b
o
l
, touc
h
.
Th
en se
l
ect t
h
e
d
es
i
re
d
sym
b
o
l
.
AB
C
Mode
Thi
s mo
d
e a
ll
ows you to enter
l
etters
b
y
t
ouc
hi
ng t
h
e
k
ey
l
a
b
e
l
e
d
w
i
t
h
t
h
e requ
i
re
d
letter once, twice, three or four times until the
l
etter
i
s
di
sp
l
aye
d.
G
eneral Functions
20
123 Mode
(
Numbers Mode
)
T
ype num
b
ers us
i
ng one
k
eytouc
h
per num
b
er.
To change to 123 mode in a text entry field,
t
ouc
h
.
C
hanging the Text In
p
ut Mode
Y
ou can c
h
ange t
h
e text
i
nput mo
d
e
b
y
t
ouc
hi
ng press
i
ng t
h
e
T
ext
I
nput
M
o
d
e togg
l
e
b
utton on t
h
e touc
h
screen
.
U
sin
g
the T9 Mod
e
Th
e
T
9
p
re
di
ct
i
ve text
i
n
p
ut mo
d
e a
ll
ows
y
ou
t
o enter wor
d
s eas
ily
w
i
t
h
a m
i
n
i
mum num
b
er
o
f ke
y
p
resses. As
y
ou touch each ke
y
, the
ph
one
b
eg
i
ns to
di
sp
l
ay t
h
e c
h
aracters t
h
at
i
t t
hi
n
k
s you are typ
i
ng
b
ase
d
on a
b
u
il
t-
i
n
di
ct
i
onar
y
.
A
s new
l
etters are a
dd
e
d
, t
h
e wor
d
changes to reflect the most likely candidate
f
rom the dictionar
y.
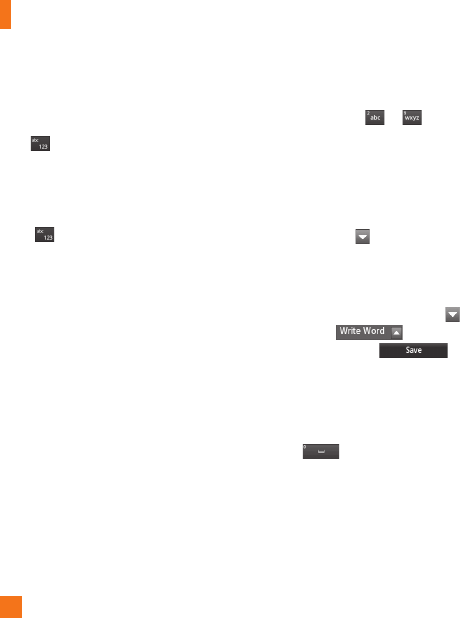
1.
W
hen you are in the T9 predictive text input
m
ode, be
g
in enterin
g
a word by pressin
g
t
he touch screen keys
to
.
P
ress one key per letter.
]
The word chan
g
es as letters are typed
-
i
g
nore what is displayed on the screen
u
ntil the word is typed completely
.
]
I
f
the word is still incorrect a
f
ter typin
g
c
ompletely, press on the pop up
menu to see the options. Then select the
w
ord you want by touch.
]
I
f
the desired word is missin
g
f
rom the
w
ord choices list, add it by pressin
g
a
nd selectin
g
to enter the
n
ew word. Then press to
save the word into the built-in dictionary.
2.
Enter the whole word be
f
ore editin
g
or
d
e
l
et
i
n
g
any
l
etters
.
3.
Complete each word with a space by
touc
hi
n
g
.
G
eneral Functions
21
To delete letters
,
touch . T
ouc
h
a
n
d
h
o
l
d
do
wn to erase the entire text entry.
n
N
ot
e
Pressing the
[
END] key will save your
unsaved message in the Drafts folder.
U
sin
g
the ABC Mod
e
U
se t
h
e touc
h
pa
d
k
eys to enter your text
.
1.
T
ouc
h
t
h
e touc
h
k
e
y
l
a
b
e
l
e
d
w
i
t
h
t
h
e
r
e
q
u
i
re
d
l
etter
:
]
Once for the first lette
r
]
Twice for the second lette
r
]
A
n
d
so o
n
2.
T
o
i
nsert a s
p
ace, touc
h
.
To
dele
t
e
l
etters, touc
h
.
Touch
a
n
d
hold
do
wn
to erase t
h
e ent
i
re text entr
y
.
nNot
e
R
efe
r t
o
th
e
t
ab
l
e
be
l
o
w
fo
r m
o
r
e
in
fo
rm
a
ti
o
n
on t
h
e c
h
aracters ava
il
a
bl
e us
i
ng t
h
e
k
eys.
T
ouc
h
to input a Upper Case letter. To
chan
g
e text entry mode from Lower Case to
U
pper Case, touch twice and the key
will turn to oran
g
e color - indicatin
g
that
Caps Lock has been activated
.
K
e
y
C
haracters in the
O
rder Display
U
pper
C
ase Lower
C
ase
1
.
, '
@
?
! - : / 1
.
, '
@
?
! - : / 1
2
A
B C 2 a b c
2
3
D
E F
3
d
e f
3
4
G
H I
4
g
h i 4
5
J
K
L
5
j
k
l
5
6
M N
O
6
m n o
6
7
P
Q
R
S
7 p q r s
7
8
T U V
8
t
u v
8
9
W
X Y Z
9
w x
y
z 9
0
S
p
ace Ke
y
,
0
(
Lon
g
press
)
S
p
ace Ke
y
,
0
(
Lon
g
press
)

G
eneral Functions
22
U
sin
g
the 123 (Numbers) Mod
e
Th
e 123
M
o
d
e ena
bl
es
y
ou to enter num
b
ers
in a text message (a telephone number,
f
or exam
p
le) more
q
uickl
y
. Touch the ke
y
s
corresponding to the required digits before
m
anua
ll
y sw
i
tc
hi
ng
b
ac
k
to t
h
e appropr
i
ate
t
ext entr
y
mo
d
e
.
T9 Dictionar
y
The T9 Dictionar
y
is a feature that allows the
user to a
dd
an
y
un
iq
ue or
p
ersona
l
wor
d
s to
th
e
T
9 stan
d
ar
d
l
anguage
d
ata
b
ase.
Th
e
T
9
D
ictionar
y
function can be selected from the
Text Entry
S
ettings by using
O
ptions
.
Within the T9 Dictionar
y
function, the user
can add, modif
y
, delete or reset
p
ersonal
wor
d
s
.
n
Not
e
Y
ou can select a di
ff
erent T9 lan
g
ua
g
e
f
rom the
same
O
ptions menu. The default setting on the
ph
one
i
s t
h
e
T
9
di
sa
bl
e
d
mo
d
e
.
Qwerty Keypad
T
ext
i
nput mo
d
e us
i
ng t
h
e
Q
werty Keypa
d
When you are required to enter text,
f
or
e
xample when writin
g
a messa
g
e, the keypad
will default to ABC mode. If you are enterin
g
a number,
f
or example when makin
g
a call,
t
he keypad number keys will de
f
ault to
n
umbers. In ABC mode you can enter numbers
b
y
f
irst pressin
g
and then the number
you require
.
n
N
ot
e
S
ome fields may allow only one text input mode
(e.g. telephone number in Address Book fields)
.
To input a symbol in the text entry field,
press t
h
e key and select a symbol from
t
ouch screen. Or to enter a symbol from the
q
werty
k
eys,
j
ust press an
d
t
h
en press
t
he corresponding key. To return to ABC mode,
press aga
i
n.
G
eneral Functions
23
Complete each word with a space by pressing
.
T
o
d
e
l
ete a c
h
aracter, press
k
ey.
U
s
i
n
g
t
h
e
K
orean
M
o
d
e
All
ows you to type
i
n
K
orean w
h
en you set
th
e
l
anguage to
K
orean
.
Wh
en you use
T
ouc
h
K
ey
p
a
d
All
ows you eas
il
y
i
nput t
h
e
l
etters.
T
o
i
nput ,
t
ouc
h
an
d
touc
h
.
T
o
i
nput
,
touc
h
an
d
touc
h
.
W
hen you use Qwerty Keypad
O
pen the slide and touch
.
C
hoose Text
E
ntry Settin
g
s and Show Key Guide. You can
s
ee the Korean key
g
uide on the monitor. To
input numbers, touch
.
T
ouc
h once, and you can see the
Korean key
g
uide as below. To return its
normal input mode, touch a
g
ain
.
24
d
ress
B
oo
k
Add
F
rom stan
dby
screen, touc
h
an
d
touc
h
. You will see following Address Book’s
s
u
b
menus
.
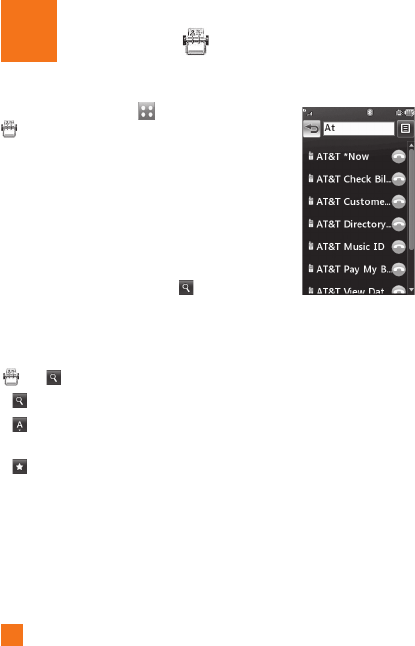
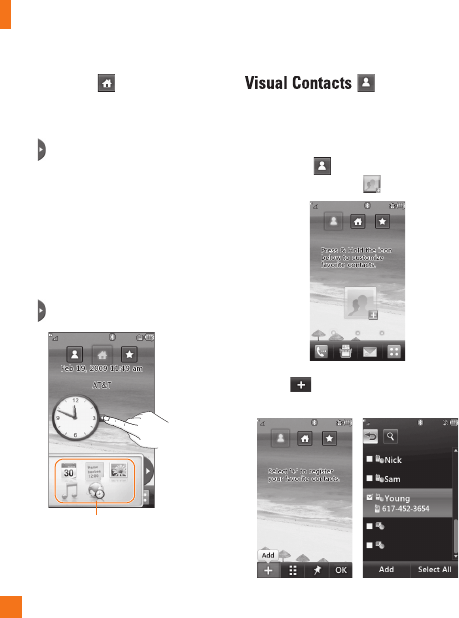
Contact List
Thi
s menu a
ll
ows you to save an
d
manage
contact address information. The
C
ontact
L
ist's functions allow
y
ou to add a new
a
dd
ress or searc
h
save
d
contact a
dd
resses
by
name.
T
o searc
h
a contact, touc
h
an
d
in
p
ut the contact
p
erson’s name. If
y
ou in
p
ut
‘A
t
’
,
i
t w
ill
s
h
ow a
ll
contacts
b
eg
i
nn
i
ng w
i
t
h
‘A
t
’
i
n
i
ts name.
F
rom t
h
e stan
dby
screen,
y
ou
can directly search for a contact by touching
an
d
.
]
:
S
earch a contact.
]
:
S
hows
y
our contacts b
y
first letter
/
c
h
a
r
ac
t
e
r
.
]
:
S
hows your contacts designated as
F
a
v
o
rit
es.

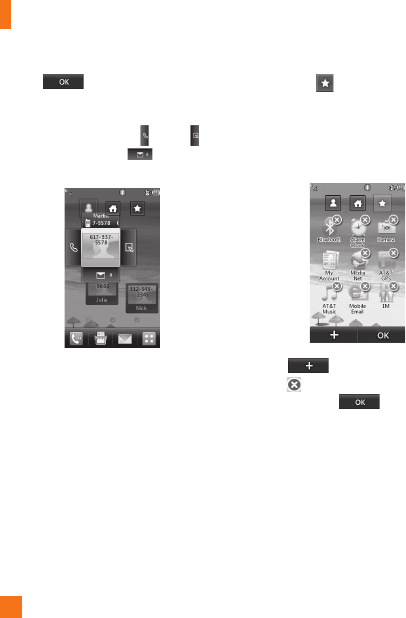
Add
r
ess
Book
25
New Contact
Thi
s menu a
ll
ows you to a
dd
a new contact
a
dd
ress.
Y
ou can enter contact a
dd
ress
information, including: name, phone numbers,
e
mail addresses, group information, pictures,
r
i
ngtone an
d
a memo.
1
.
From the standb
y
screen, Touch
a
n
d
touc
h
.
2.
T
ouc
h
to set a Picture ID for a contact
b
y using a saved picture from Pictures or
t
aking a new picture of the contact person.
C
hoose from
N
o
pi
ctur
e
,
Pi
ctures or
T
a
k
e
N
ew
Pi
ctur
e
.
After
y
ou take a new
p
icture of the contact
p
erson, touch
s
et as the
C
ontact Picture ID. To delete the
pi
cture, touc
h
,
se
l
ect
Y
es, an
d
ta
k
e a
n
ew
pi
cture
.
]
Enter the First name, last name or both.
]
Enter u
p
to five different numbers. Touch
and
y
ou can set that number as
Sp
eed
Di
a
l
.
]
Ent
e
r
a
n
e
m
a
il
add
r
ess.
]
S
elect a
G
rou
p
for the contact
.
]
S
et the rin
g
tone for the contact or leave it
a
s default rin
g
tone
.
]
Add memo i
f
necessar
y
.
]
C
hoose whether to save the contact to
Phone or
S
IM
C
ard memor
y
.
3.
T
ouc
h t
o
sa
v
e
th
e
co
n
tact.
Add
r
ess
Book
26
Caller Groups
Thi
s menu a
ll
ows you to manage group
information. By default, there are 4 groups:
Colleague, Family, Friends and School. Or you
can put a contact in No Group. You can also
configure a ring tone for a group so that the
group ring tone sounds when a call from a
s
pecific contact address within that group is
received and there is no ring tone configured
f
or the specific contact address
.
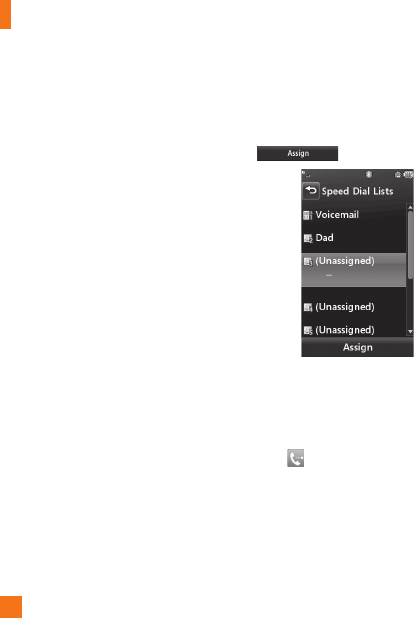
Speed Dial
You can assign a frequently-called contact
t
o a spee
d
di
a
l
li
st.
Y
ou can se
l
ect a num
b
er
f
rom 2 to 9 as a speed dial. You can configure
s
peed dial numbers for any of the 8 numbers
f
or a specific contact address
.
]
Y
our
V
o
i
cema
il
i
s a
l
rea
d
y set to spee
d
d
ial 1. This is a default setting and can not
b
e c
h
ange
d
.
T
ouc
h
t
h
e num
b
er you w
i
s
h
to ass
i
gn a spee
d
di
a
l
contact, t
h
en touc
h
.
]
This will o
p
en
y
our address book. Touch
the contact you would like to assi
g
n to that
n
u
m
be
r twi
ce
.
]
To call an assi
g
ned speed dial number,
t
ouc
h from the
S
tandb
y
S
creen. Then
touch and hold the assi
g
ned number; the
c
all will be placed to the assi
g
ned number
a
utomaticall
y.

Add
r
ess
Book
27
Management
This menu allows you to copy information
f
rom your SIM card, e.g. name, handset
number, etc. to your handset. If a name is
d
up
li
cate
d
d
ur
i
ng t
h
e copy
i
ng operat
i
on, t
h
e
information is also duplicated
.
You can also copy entries from the SIM card
t
o the phone memory and entries from the
handset memory to the SIM card (not all the
data will be copied)
.
F
rom t
hi
s menu, you are a
l
so a
bl
e to
d
e
l
ete
e
ntries in the SIM card and the Handset.
Service Numbers
You can view the list of Service Dialing
Numbers (SDN) assigned by your network
p
rovider. Such numbers could include the
e
mergency serv
i
ces,
di
rectory ass
i
stance an
d
vo
i
ce ma
il
num
b
ers
.
1
.
Select the Service dial number option
.
2.
The names o
f
the available services will
b
e s
h
own
.
3.
T
ouc
h
a serv
i
ce num
b
er.
P
ress t
h
e
[
SEND] key.
My Numbers
This displays your own phone numbers stored
in your phone/SIM card. You can edit its name
and number by touchin
g
or you can
c
h
oose
a
n
d
de
l
e
t
e
th
e
in
fo
rm
a
ti
o
n
.
28
C
all Menu
I
n-
C
Your phone provides a number of control
f
unctions that you can use during a call. To
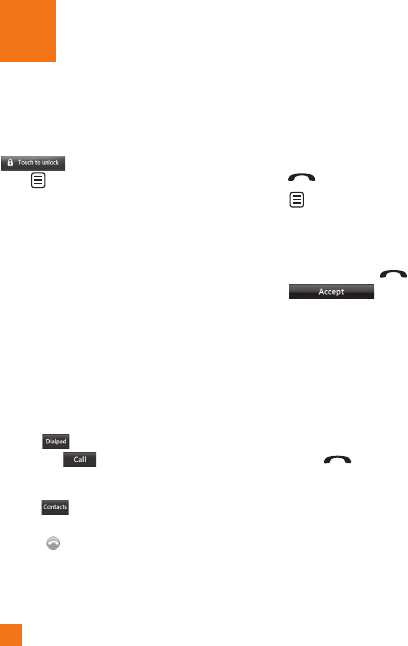
access these functions during a call, touch
to un
l
oc
k
t
h
e screen an
d
t
h
en
t
ouc
h
.
During a Call
Th
e menu
di
sp
l
aye
d
on t
h
e
h
an
d
set screen
during a call is different from the default main
m
enu displayed when in the Standby screen,
an
d
t
h
ese opt
i
ons are
d
escr
ib
e
d
b
e
l
ow.
M
akin
g
a Second Cal
l
Y
ou can se
l
ect a num
b
er you w
i
s
h
to
di
a
l
, to
m
a
k
e a secon
d
ca
ll
.
1.
Unlock the Screen. During a call, an In-Call
menu w
ill
ava
il
a
bl
e
.
2.
P
ress
,
enter t
h
e 2n
d
ph
one num
b
er
a
n
d
p
ress
.
or
P
ress to select a contact from
y
our
Address Book and then
p
ress the
C
all
b
utton
.
S
wa
pp
ing Between Two Call
s
B
y using one of the two methods below, you
can switch between two on-going calls
.
1.
Pr
ess
[
SEND
]
ke
y.
2.
T
ouc
h and select “
S
wa
p
C
alls.
”
Answering an Incoming
C
all
To answer an incomin
g
call when the handset
is rin
g
in
g
, simply press the
[
SEND
]
ke
y
o
r t
ouc
h
.
Th
e
h
a
n
dse
t i
s
also able to warn you o
f
an incomin
g
call
while
y
ou are alread
y
on a call. A tone will
s
ounds in the ear
p
iece, and the dis
p
la
y
will
s
how that a second call is waitin
g
. This
f
eature
,
known as Call Waitin
g
,
is onl
y
available i
f
y
our network su
pp
orts it
.
If
C
all Waitin
g
is turned on, you can put the
fir
s
t
ca
ll
o
n h
o
l
d
a
n
d
a
n
s
w
e
r th
e
seco
n
d
ca
ll
b
y pressin
g
the
[
SEND
]
ke
y.

In-
C
all Men
u
29
R
ejectin
g
an Incomin
g
Cal
l
You can reject an incoming call without
answering by simply pressing the
[
END
]
k
ey or touching
.
M
uting the Micro
p
hone
You can mute the microphone during a call by
t
ouching
.
Th
e
h
a
n
dse
t
ca
n
be
u
nm
u
t
ed
by touching again. When the handset is
m
uted, the caller cannot hear
y
ou, but
y
ou can
s
till h
ea
r th
e
ca
ll
e
r.
U
sing the S
p
eaker
p
hone
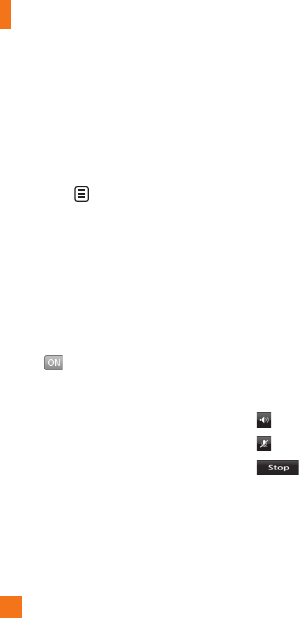
You can use the integrated
S
peakerphone
during a call by touching
.
The louds
p
eaker
is automaticall
y
deactivated when
y
ou end
t
h
e
ca
ll
.
n
Warnin
g
D
ue to
i
ncrease
d
vo
l
ume
l
eve
l
s,
d
o not p
l
ace
th
e p
h
one near your ear w
hil
e t
h
e spea
k
erp
h
one
i
s ena
bl
e
d
.
Video Share Calling
M
akin
g
a Video Share Call
You can make or answer a Video
S
hare call
with other 3G video phones. In order to start
a Video Share call, both sides must have a 3G
Video Share capable phone and both must be
in a 3G coverage area.
n
No
t
e
Before
y
ou start a Video Share Call
y
ou must
check the
f
ollowin
g:
•
Phone must be in an AT
&
T 3
G
service area.
I
n-
C
all Men
u
30
To initiate Video Share follow these
s
t
eps:
1
.
Make a phone call by dialin
g
a number, or
selectin
g
a number
f
rom the Address book.
Or directly you can make a video share call
d
irectly from the Recent Call or Contact List
b
y selectin
g
>
[
Video Share Call
]
and
selectin
g
Video Type
(
Live or Recorded
)
. In
this case skip steps 2-3
.
2.
A
fe
w
seco
n
ds
af
t
e
r th
e
co
nn
ec
ti
o
n i
s
established, a "Video Share Ready" prompt
will
appear on t
h
e screen once t
h
e ot
h
er
party is ready to use the Video Share
service. I
f
the Audio alert in the Video
Share settin
g
(
See Application Settin
g)
is
se
t
t
o
,
au
di
o a
l
ert w
ill
soun
d
a
l
on
g
wi
t
h
t
h
e prompt
.
3.
To Share Video with another party, touch
the Video icon or press the Camera key and
select Video Type (Live or Recorded)
.
n
Not
e
T
he
S
peakerphone will be automatically
activated when a Video
S
hare session begins,
unless a hands-free device (Bluetooth
®
or stereo
headset) is connected
.
•
L
ive: Share a real-time video stream with the
other
p
art
y
.
•
Reco
r
ded
: Share a
p
re-recorded video
clip with the other party.
(
Note that H.263
&
Mpeg4 video formats in 176x144 size is
s
upported
)
4
.
If the other party accepts the Video Share
i
nvitation
,
the Video Share session will
b
e
g
in. (After acceptin
g
, it may take several
seconds before the actual Video
S
hare
starts.)
Durin
g
a Video Share call, you can do the
f
ollowin
g
by touchin
g
the icons below
:
]
:
You can turn on/off the Speakerphone
.
]
:
Y
ou can mute
/
unmute t
h
e m
i
crop
h
one
.
]
:
You can stop a Video Share Call
a
nd proceed to a Voice Call
.

In-
C
all Men
u
31
You can choose from the following
:
]
B
r
igh
tness
:
Y
ou can a
dj
ust t
h
e
b
r
i
g
h
tness
of the screen by selecting Brightness
.
]
Z
oom:
Y
ou can zoom
i
n
/
out t
h
e v
id
eo
b
y
se
l
ect
i
ng
Z
oom
.
]
A
u
di
o to
Bl
uetoot
h
®
/Audio to Phone:
®
Wh
en
A
u
di
o to
Bl
uetoot
h
®
i
s se
l
ecte
d
, you
c
an
h
ave a conversat
i
on us
i
ng
Bl
uetoot
h
®
.
Wh
en
A
u
di
o to
Ph
one
i
s se
l
ecte
d
, you
c
an
h
ave a conversat
i
on us
i
ng e
i
t
h
er
spea
k
erp
h
one or
h
ea
d
set
.
]
Record Video
S
hare/
S
to
p
Recording
:
Y
ou can start recor
di
ng t
h
e
li
ve v
id
eo
b
y selecting ‘Record Video Share’. Once
y
ou are recor
di
ng t
h
e v
id
eo, you can stop
r
ecording by selecting ‘Stop Recording’
.
]
End
C
all:
Y
ou can en
d
t
h
e
ph
one ca
ll
by
selecting ‘End Call’. (Note: Video Share will
sto
p
as well
)
]
Hold Call: You can hold the phone call by
selectin
g
‘Hold Call’.
(
Note: Video Share
w
ill stop when you select ‘Hold Call’
)
D
urin
g
the Video Share session, turn the
s
peakerphone on/off usin
g
the ‘Spk. off’
/
‘Spk. on’ key
.
n
No
t
e
Recorded video clip will be saved in
[
M
y
stuff] - [More].
5
.
1.
Sto
p
a Video Share call and
p
roceed to a
vo
i
ce ca
ll
by
1
. Touching [Stop] Ico
n
5.2
.
E
n
d
a vo
i
ce ca
ll
a
l
ong w
i
t
h
t
h
e
Vid
eo
S
hare call b
y
1
. Pressing [End] Ke
y
2. Selecting > [End Call
]

I
n-
C
all Men
u
32
n
Not
e
1.
A Video
S
hare
C
all will be terminated in the
f
ollowing cases:
• When trying to make a conference call
/
s
econd call during a Video Share Call.
• When the voice call is
p
laced on hold
.
• Wh
e
n th
e
v
o
i
ce
ca
ll i
s
d
i
sco
nn
ec
t
ed
.
• When movin
g
out of an AT&T 3G service
area.
•
Wh
en t
h
e networ
k
connect
i
on
i
s poor.
2. A Video
S
hare
C
all will be unavailable in
the following cases (“Video Share Ready”
messa
g
e will not appear
).
• When tryin
g
to make a conference call
/
s
econd call durin
g
a Video Share Call.
•
Wh
en t
h
e vo
i
ce ca
ll
i
s p
l
ace
d
on
h
o
ld.
• When moving out of an AT
&
T 3
G
service
area.
Answerin
g
a Video Share Cal
l
1.
Touch [Acce
p
t] when
y
ou receive a
p
rom
p
t
a
s
ki
ng
“Th
e ot
h
er party wants to s
h
are
V
ideo
S
hare with
y
ou” a
pp
ears, to start
the Video Share Call. Touch
[
Decline
]
to
d
ecline the Video Share call.
(
Note that
a
fter accepting the call, it may take several
seconds before the Video
S
hare session
starts.
)
Y
ou can choose from the following
:
]
Landscape mode: When Landsca
p
e mode
i
s selected
y
ou can watch shared video in
landsca
p
e mode
.
]
A
ud
i
o
t
o
Bl
ue
t
oo
t
h
®
/Audio to Phone:
®
W
h
e
n A
ud
i
o
t
o
Bl
ue
t
oo
th
®
is selected,
y
ou
c
an have a conversation using Bluetoot
h
®
.
W
hen Audio to Phone is selected,
y
ou
c
an have a conversation using either
s
p
eaker
p
hone or headset
.
n
Not
e
Th
e spea
k
erp
h
one w
ill
b
e automat
i
ca
ll
y turne
d
on when a Video
S
hare
C
all begins, and
automat
i
ca
ll
y reverts
b
ac
k
to t
h
e prev
i
ous mo
d
e
w
hen a Video
S
hare
C
all ends
.

In-
C
all Men
u
33
M
akin
g
a Video Share Call from
t
he Video Recordin
g
Mode or
Vi
deo
Wh
en you are
R
ecor
di
ng
Vid
eo, you can eas
il
y
m
ake a Video Share Call to a person in your
C
ontact List
.
1.
Start Video Share call as follows
:
]
I
n
R
ecor
d
Vid
eo
M
o
d
e,
T
ouc
h
.
]
In Video Galler
y
, touch an
d
c
h
oose
V
ideo
S
hare
C
all
.
n
N
o
t
e
This menu item is active only in 3G covera
g
e
areas and on Video Share ca
p
able devices
.
n
N
ot
e
I
f the other party is not ready for Video
S
hare,
th
e ca
ll
w
ill
procee
d
to an or
di
nary vo
i
ce ca
ll.
S
avin
g
your Video Shar
e
The sender can record video durin
g
the Video
S
hare session b
y
1
.
Selectin
g
[
Option
]
>
[
Record Video Share
]
d
urin
g
a live Video Share call
.
2.
Settin
g
Auto Record to ‘ON’
(See Application Settin
g
s).
S
ender can save the recorded video b
y
1.
Selectin
g
[Option] > [Stop Recordin
g
] durin
g
a
live Video
S
hare call
.
2.
Endin
g
Video Share call
.
R
ecorded video will be saved in [My Stuff] >
[Videos] folder in the phone
.

I
n-
C
all Men
u
34
Conference Calls
The con
f
erence service provides you with the
a
bili
ty to
h
ave a s
i
mu
l
taneous conversat
i
on
with more than one caller. The con
f
erence
call
f
eature can be used only i
f
your network
s
ervice provider supports this
f
eature
.
O
nce a conference call is set up, calls may
be added, disconnected or separated (that
is, removed from the conference call but still
connected to you) by the person who set up
t
he conference call. These options are all
available from the In-
C
all menu
.
The maximum number of callers in a
conference call is five. Once started, you are
in control of the conference call, and only you
can add calls to the conference call
.
M
akin
g
a Second Cal
l
Y
ou can ma
k
e a secon
d
ca
ll
w
hil
e current
ly
o
n a ca
ll
s
i
mp
l
y
b
y access
i
ng t
h
e
Di
a
l
P
a
d
,
from the In-
C
all Menu, entering the second
n
um
b
er an
d
press
i
ng t
h
e
[
SEND] ke
y
.
When the second call is connected, the first
ca
ll
i
s automat
i
ca
lly
pl
ace
d
on
h
o
ld
.
Y
ou can
s
wap
b
etween ca
ll
s
b
y press
i
ng t
h
e
[SEND] ke
y
.
S
etting U
p
a Conference Cal
l
To set u
p
a conference call,
p
lace the first
call.
O
nce that is connected, follow the ste
p
s
a
b
ove to ma
k
e a secon
d
ca
ll
.
Y
ou can t
h
en
j
o
i
n t
h
e two separate ca
ll
s
b
y touc
hi
ng
and select the Join
C
alls from the
C
onference
C
all menu
.

In-
C
all Men
u
35
Activate the
C
onference
C
all
o
n H
o
l
d
To activate a conference call on hold,
p
ress
th
e
k
e
y.
Addin
g
Calls to the Conference
C
al
l
To add a call to an existing conference call,
t
ouc
h
and then select the
J
oin
C
alls from
t
he Conference Call option.
Private
C
all in a
C
onference
C
al
l
To have a private call with one caller from a
conference call, touch an
d
se
l
ect
P
r
i
vate
Call from the Conference Call option. When
t
he numbers of the callers are displayed,
s
e
l
ect t
h
e one you w
i
s
h
to spea
k
i
n pr
i
vate
with. Only the person who initiates the
C
onference
C
all can initiate a Private
C
all
.
Endin
g
a Conference Cal
l
The currentl
y
active conference call can be
di
sconnecte
d
b
y press
i
ng t
h
e
k
e
y
.
36
u
r Standb
y
Screen
Y
o
u
F
rom
h
ere you can access a
ll
menu opt
i
ons,
m
ake a quick call and view the status of your
ph
one - as we
ll
as many ot
h
er t
hi
ngs
.
Touch
S
creen Tips
Th
e stan
db
y screen
i
s a
l
so a great p
l
ace to
get accustome
d
to t
h
e touc
h
screen
.
T
o se
l
ect an
i
tem, touc
h
t
h
e
i
con accurate
l
y.
Your LG GW370 can be set to vibrate slightly
w
h
en
i
t recogn
i
ses you
’
ve touc
h
e
d
an opt
i
on
.
T
o scro
ll
t
h
roug
h
li
sts, touc
h
t
h
e
l
ast
i
tem
visible and slide your finger up the screen.
Th
e
li
st w
ill
move up so more
i
tems are
v
i
s
ibl
e
.
]
Th
ere
’
s no nee
d
to press
h
ar
d
, t
h
e
touc
h
screen
i
s sens
i
t
i
ve enoug
h
to p
i
c
k
up
on a light yet firm touch
.
]
Use the tip of your finger to touch the
o
p
tion
y
ou re
q
uire. Be careful not to touch
a
n
y
ot
h
er
k
e
y
s
.
]
When the screen light is off, press the
restore t
h
e stan
db
y screen
.
]
D
on
’
t cover t
h
e p
h
one w
i
t
h
a case or cover
a
s t
h
e touc
h
screen w
ill
not wor
k
w
i
t
h
any
mater
i
a
l
cover
i
ng
i
t
.
Q
uick keys
37
Your
S
tandb
y
S
creen
The Quick Ke
y
s
Th
e
q
u
i
c
k
k
e
y
s on
y
our stan
dby
screen
p
rov
id
e eas
y
, one-touc
h
access to
y
our most use
d
f
unctions.
Touch to bring up the touch
dialling pad to make a call. Input
t
he number as you would using a
normal ke
y
p
ad and touch
o
r
p
ress the hard ke
y
.
Touch to o
p
en
y
our contacts and
s
earch for the number
y
ou want
to
ca
ll. Y
ou
ca
n
a
l
so
c
r
ea
t
e
n
e
w
contacts and edit existing ones.
T
ouc
h
to access t
h
e
M
essag
i
ng
op
t
i
ons menu.
F
rom
h
ere
y
ou can
create a new outgo
i
ng
M
essage
.
Touch to o
p
en the full To
p
menu
which is se
p
arated into four sub
-
me
n
us
.
Touch
t
he
v
e
rt
ical
t
abs
t
o
view further o
p
tions
.
38
Home
S
creen
All
ows you to use
Wid
gets an
d
even a
dd
th
em to
y
our
H
ome screen
.
]
C
lick to o
p
en the Home
S
creen
.
]
Drag a Widget from the roll-out Menu onto
the Home screen. This will enable
y
ou to
use Widgets
.
]
You can play songs, add memos, check the
c
alendar,
p
la
y
slide show, set an alarm or
a
dd events directl
y
from the standb
y
screen
using Home
S
creen
.
]
C
lick again to close the Home
S
creen
.
Wid
g
e
t
A
llows
y
ou to easil
y
contact
y
our friends and
family by displaying your favorite contacts on
th
e stan
dby
screen
.
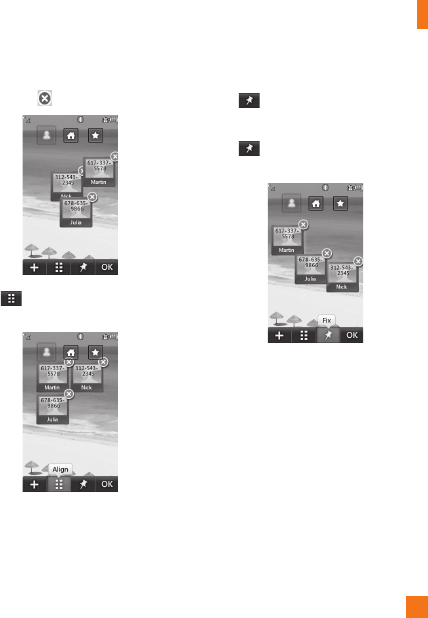
]
First, touch from the standb
y
screen.
Touc
h
a
n
d
h
o
l
d
do
wn
.
]
S
elect t
o
c
h
oose
a
co
nt
ac
t. Y
ou
ca
n
c
hoose up to 6 contacts
f
or one pa
g
e.
Y
our
S
tandb
y
S
cree
n
39
Your
S
tandb
y
S
creen
]
If you want to delete a contact from this
screen, touc
h
.
]
T
ouc
h
to a
li
gn t
h
e contacts on t
h
e
screen.
n
Not
e
Touch
an
d
t
h
e contact w
ill
h
ave a s
li
g
h
t
shadow around it. I
f
you slightly shake or move
t
he phone, the contacts will float in the screen.
Touch again and the contacts will be fixed
and not be moved b
y
the
p
hone’s status.
40
Y
our
S
tandb
y
S
cree
n
]
T
ouc
h to
f
inish editin
g
the
C
ontacts on this screen. Then to access
y
our Contacts, simply touch on their
c
orrespondin
g
icon. Touch to call
,
to send a messa
g
e and t
o
c
h
ec
k
messa
g
es received
f
rom that person.
]
If you want to edit one of the Contacts,
touc
h
an
d
h
o
ld
t
h
e contact or t
h
e marg
i
n
space of the screen. It will turn to the Edit
screen.
S
hortcuts
A
dd
y
our favorite menu on the standb
y
s
creen
.
]
Touch and hold down an
y
of the items and
i
t will turn to the Edit
S
creen
.
]
T
ouc
h to add another a
pp
lication,
t
ouc
h to delete the a
pp
lication
f
rom
S
hortcuts
,
touch t
o
f
ini
s
h
.
41
Your
S
tandb
y
S
creen
Ann
u
n
c
i
a
t
o
r
With L
G
G
W370’s Annunciator,
y
ou can
q
u
i
c
kly
connect to t
h
e
M
us
i
c
Pl
a
y
er,
Bl
uetoot
h
s
erv
i
ce an
d
more
.
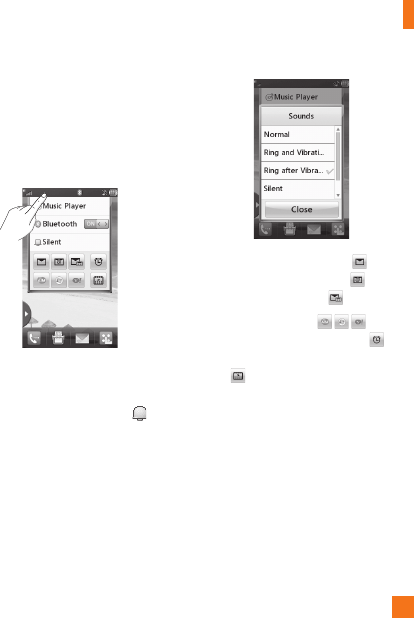
Touch the to
p
side of the standb
y
screen.
]
Y
ou can use
M
us
i
c
Pl
a
y
er to e
di
t a
pl
a
yli
st
or turn on
Bl
uetoot
h.
]
You can set your profile by touching
.
Y
ou can set your profile to Normal, Ring
a
nd Vibration, Ring after Vibration or
Silent and Vibration
.
]
To send a Text message, touch
.
T
o send a Mobile Email, touch
.
T
o check Voicemail, touch
.
]
To use IM, choose from
.
If
y
ou want to set an Alarm, touch
.
T
o view the
C
alendar and add new events,
t
ouc
h
.
42
Phone
D
ialin
g
Add
ress
B
oo
k
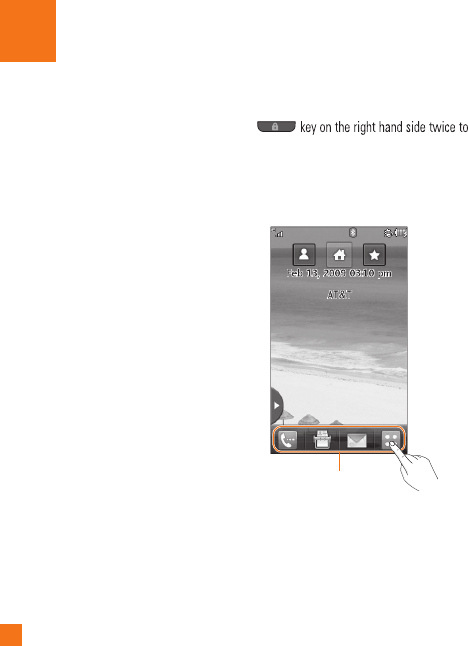
Recent
C
all
s
M
essa
g
in
g
M
o
bil
e
E
ma
il
IM
AT
&
T
G
P
S
YELL
O
WPA
G
E
S
.
COM
Multimedia
M
E
d
i
a
N
et
M
E
d
i
a
M
a
l
l
AT&T Music
CV
A
pp
lication
s
G
ames
C
amer
a
W
eb Pages
My Stuff
A
u
di
o
Pi
c
t
u
r
es
Vi
deo
T
oo
ls
C
alenda
r
Alarm
C
loc
k
C
alculato
r
M
or
e
Settings
C
al
l
D
ate
&
Tim
e
S
ound
Di
s
pl
a
y
T
ouch
Ph
o
n
e
Bl
uetoot
h
M
or
e
T
ouc
h
i
n t
h
e stan
dby
screen to o
p
en a
T
o
p
menu
.
From here you can access the following
m
enus:
Ph
on
e
,
M
u
l
t
i
me
dia
,
M
y
S
tuff an
d
S
etting
s
nu
T
re
e
M
e
43
ssag
i
ng
M
e
This menu includes functions related to
S
M
S
(
Short Message Service), MMS (Multimedia
M
essage Service), voice mail as well as the
networ
k'
s serv
i
ce messages
.
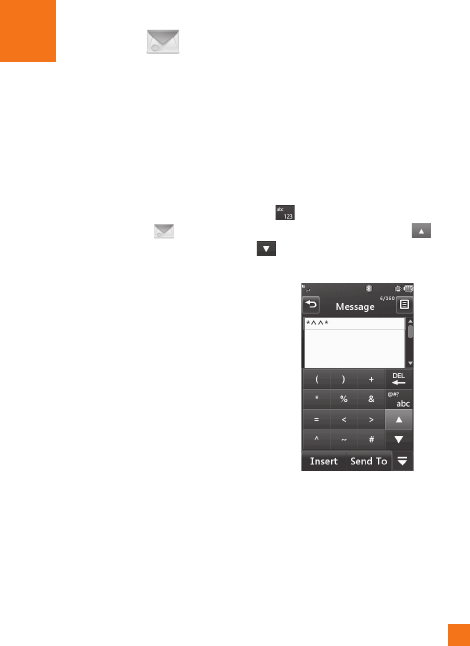
New Message
1.
I
n t
h
e stan
db
y screen, se
l
ect
.
2.
T
ouc
h
C
reate Messa
g
e
.
n
No
t
e
If
you attach a
g
raphic or an audio
f
ile while
w
ritin
g
a multimedia messa
g
e, the
f
ile loadin
g
ti
me can ta
k
e up to 5 secon
d
s.
Y
ou w
ill
not
b
e
able to activate any key during the
f
ile loading
t
ime. When the
f
ile loading is complete, you
will
b
e a
bl
e to wr
i
te a mu
l
t
i
me
di
a message.
Editin
g
a messa
ge
The following options are available when
Edi
t
i
ng a
M
essage
.
]
S
y
mbol
:
Y
ou can
i
nsert sym
b
o
l
s rang
i
ng
from sentence notes to emoticons. Touching
t
he
tw
i
ce, an
d
y
ou can se
l
ect t
h
e
s
y
m
b
o
l
s
y
ou want.
Y
ou can use
a
n
d
to scro
ll
t
h
roug
h
t
h
e var
i
ous pages
of s
y
mbols
.
M
essag
i
n
g
44
I
nserting Multimedia files in outgoing
m
essages
i
s easy.
P
ress t
h
e
b
utton
and select an option from below
:
]
Pi
cture
:
Y
ou can prev
i
ew t
h
e se
l
ecte
d
pi
cture.
T
ouc
h
to
i
nsert
t
h
e se
l
ecte
d
p
i
cture.
]
A
u
di
o: You can insert from your saved
Audio files
.
]
Vid
eo: You can insert from your saved
Vid
eo c
li
ps.
]
N
ew
Pi
cture
:
Y
ou can
i
nsert a new
i
mage
taken from the camera by touching
[
Ca
p
ture].
n
N
o
t
e
Re
f
er to pa
g
e 77
f
or camera options.
]
N
e
w A
ud
i
o:
Y
ou
ca
n r
eco
r
d
a
n
e
w
aud
i
o
c
lip by touchin
g
.
•
R
eco
r
d
M
ode
:
M
M
S
mode record
time is about 6 minutes and the
General mode provides a lon
g
er
r
ecordin
g
time
.
•
Q
uality
:
Set the audio quality to
Fine, Normal or Economy
.
•
Select Stora
g
e Defaults
:
You can
a
ssi
g
n the de
f
ault stora
g
e to Phone
Memory or Memory Card
.
]
N
ew
Vid
eo:
Y
ou can recor
d
a new v
id
eo.
Th
e opt
i
ons are s
i
m
il
ar to t
h
ose w
h
en
i
nsert
i
n
g
a
N
ew
Pi
cture
.

M
essag
i
ng
45
]
T
emplat
e
-
T
e
xt: You can easily insert
f
requently used
s
entences in the text messa
g
e
.
-
Mu
ltim
ed
i
a
: Preset multimedia templates
a
r
e
a
v
a
il
ab
l
e
.
-
S
i
g
nature: Input your own created
s
i
g
nature. For
f
urther details, see pa
g
e 52
.
]
M
ore: Allows you to insert Sub
j
ect, vCard,
v
Calendar
,
vNote
,
vTask or Contact
.
n
No
t
e
v
Card, vCalendar, vNote, vTask and Contact are
created b
y
the Address Book, Calendar, Note
p
ad
and Tasks functions. Go to the correspondin
g
sec
ti
o
n
s
fo
r m
o
r
e
de
t
a
il
ed
in
fo
rm
a
ti
o
n.
U
sing Option
s
T
ouc
hto use the options below
.
•
Text Entry Settin
gs
-
T
ext
E
ntry
L
an
g
ua
g
e
:
All
ows you to
s
et the text entry lan
g
ua
g
e to En
g
lish,
Fran
ç
ais, Español or Korean.
-
S
how/Hide
C
andidate List
:
Wh
en
i
n
T
9
E
ntry
M
o
d
e, you can see t
h
e wor
d
can
did
ates as you type
.
-
S
how/Hide Next Wor
d
-
T
9
Di
ct
i
onary
:
H
ere you can a
dd/d
e
l
ete
/
r
eset/modi
f
y words to the T9 Dictionary
.
•
Delivery
Op
tion
s
-
D
e
li
very
R
ece
ip
t
:
If this is set to
On
in
thi
s menu, you can c
h
ec
k
w
h
et
h
er your
m
essage was sent successfully.
-
R
ea
d
R
ece
ip
t
:
You can set this to
O
n or
O
ff.

M
essag
i
n
g
46
•
S
ave to Drafts
:
S
aves the selected
m
essa
g
e to Dra
f
ts
.
•
Writing Font Size:
S
et the writin
g
Font
s
ize to Small, Medium and Lar
g
e
.
•
C
ancel Messa
g
e
:
Allows you to exit
t
he Messa
g
e without savin
g
your input
message.
S
endin
g
a Messa
g
e
A
f
ter completin
g
a messa
g
e usin
g
the
I
nsert
/
Op
tions
,
se
l
ect
S
end T
o
to sen
d
a messa
g
e
.
•
Enter the recipient(s). From , you can
c
h
oose an opt
i
on
i
tem
b
e
l
ow.
-
E
nter
N
um
b
er:
Y
ou can
i
nput t
h
e
r
ecipient(s) number using the Touch
keypad or Qwerty keypad
.
-
E
nter
E
ma
il
:
Y
ou can enter an
E
ma
il
a
ddress instead of a phone number.
-
C
aller
G
rou
p
s
:
Displays Contact Groups.
- Recent Messa
g
es
:
C
hoose a contact
f
rom recent messa
g
es
.
- Recent Calls
:
C
hoose a contact from
rece
nt
ca
ll
s.
- Delivery Options: Options of Delivery
Receipt
,
R
ead Receipt
,
Add
C
c
,
and
Add Bc
c
.
- Edit Messa
g
e
:
Go back to the messa
g
e
editin
g
mode
.
-
S
ave to Drafts:
S
aves the selected
messa
g
e to Dra
f
ts
.
- Text Entry
S
ettin
g
s
:
Thi
s menu a
ll
ows
y
ou to set t
h
e text entry
L
an
g
ua
g
e.
I
t a
l
so a
ll
ows you to
S
how/Hide
C
andidate
,
S
how/Hide Next Word an
d
a
ccess t
h
e
T
9
Di
ct
i
onar
y
to
d
e
l
ete
/
a
dd/
modi
f
y words.
-
C
ancel Messa
g
e
:
Y
ou can cance
l
t
h
e
messa
g
e
.

M
essag
i
ng
47
M
essa
g
e folders
The folder structure on
y
our L
G
G
W370 was
designed to be fast and easy to use
.
]
I
n
bo
x
:
All
t
h
e messsages you rece
i
ve are
pl
ace
d
i
nto
y
our
I
n
b
ox.
]
D
r
a
ft
s
: If
y
ou don’t have time to finish
w
riting a message, you can save what
y
ou’ve done so far here.
]
O
utbox: This is a temporary storage folder
w
here messages are stored while being
se
n
t.
n
Not
e
I
f you see the messa
g
e “No space for U
S
IM
m
essages
”
, t
h
en you s
h
ou
ld
d
e
l
ete some
m
essages from your Inbox. If you see the
m
essage “No space for messages”, then you
can delete either messages or saved files to
crea
t
e s
p
ace.
Inbox
Y
ou w
ill
b
e a
l
erte
d
w
h
en you rece
i
ve a
m
essa
g
e.
Th
ey w
ill
b
e store
d
i
n t
h
e
I
n
b
ox.
I
n
t
he Inbox, you can identi
f
y each messa
g
e by
icons. To reach the Inbox, from the Standby
s
creen
,
touc
h
an
d
touc
h
I
n
b
ox
.
The following options are available when you
s
e
l
ect a message an
d
touc
h
.
C
onversation View
Thi
s mo
d
e a
ll
ows you to v
i
ew a
ll
messages
w
i
t
h
eac
h
contact
i
n conversat
i
ona
l
or
d
er
.
C
hoose to see messages
i
n
d
eta
il
or
c
h
oose for the simple view.

M
essag
i
n
g
48
S
tandard Vie
w
The following options are available in
s
tan
d
ar
d
v
i
ew
:
]
Add
t
o
Add
r
ess
Book
:
You
ca
n
sa
v
e
t
he
sender's
p
hone number in the
C
ontact List
.
]
S
elect
S
lide: If the multimedia message
has more than one slide,
y
ou can select and
m
o
v
e
t
o
th
e
des
ir
ed
s
li
de.
]
Extr
ac
t D
a
t
a:
Y
ou
ca
n m
a
k
e
a
v
o
i
ce
ca
ll
o
r
send a message. You can save the number
As New contact or Updating Existing
.
]
Message Details
:
Y
ou
ca
n vi
e
w
i
n
f
ormation about received messages;
message Type,
S
ubject,
S
ender's address,
a
nd message Time.
The following Options are available in Inbox
folder
.
]
D
e
l
ete
:
Y
ou can p
i
c
k
a message an
d
d
e
l
ete
i
t.
]
S
tandard
/C
onversation View
:
Y
ou can
se
l
ect
b
etween t
h
e two v
i
ew
i
ng mo
d
es
.
]
S
ort By
:
Y
ou can sort a
ll
messages
b
y
N
ame,
Ti
t
l
e,
D
ate an
d
R
ea
d/U
nrea
d.
]
D
e
l
ete
All
R
ea
d
M
essages
:
Y
ou can
d
e
l
ete a
ll
rea
d
messages
.
Drafts
Y
ou can view the messages saved as drafts.
To see the Drafts folder, touch the . Quick
key from the Standby screen, then touch
Dra
f
t
s
.

M
essag
i
ng
49
Outbox
O
utbox is a temporary stora
g
e place for
m
essa
g
es wa
i
t
i
n
g
to
b
e sent.
Wh
en you press
th
e [SEND] key, you can make a call
t
o the number o
f
the recipient number o
f
the
s
e
l
ecte
d
messa
g
e
.
I
f the message is not sent from the Outbox,
you w
ill
rece
i
ve a soun
d
a
l
ert a
l
ong w
i
t
h
a Message Sending Failure notice on the
s
creen.
A
not
h
er attempt w
ill
b
e ma
d
e to
s
end the failed message and after two
unsuccessful attempts, the message will no
l
onger
b
e sent automat
i
ca
ll
y.
I
n or
d
er to sen
d
t
he message that has failed, you must touch
to resen
d
t
h
e message
.
After the maximum number of Send attempts
h
as
b
een reac
h
e
d
, t
h
e
S
end function has
f
ailed. If you were trying to send a text
m
essage, open t
h
e message an
d
c
h
ec
k
t
h
at
t
he Sending options are correct
.
O
utbox list will display messages in sending
f
ailed, sending or waiting, sent order. Touch
to use options available from Outbox list
.
]
De
l
e
t
e:
Deletes a messa
g
e you choose
.
]
Sort by: Sorts by name, title and date
.
]
De
l
e
t
e
All: Delete all messa
g
es
.
Th
ose opt
i
ons are ava
il
a
bl
e w
h
en you c
h
oose
a messa
g
e in Outbox
.
]
View
S
tatus
:
Shows messa
g
e status as
f
ailed
,
sent or error.
]
Edi
t
:
All
ows you to e
di
t t
h
e se
l
ecte
d
messa
g
e.
]
S
elect slide: I
f
the multimedia messa
g
e
h
as more t
h
an one s
lid
e, you can se
l
ect an
d
move to t
h
e
d
es
i
re
d
s
lid
e
.
]
Vi
ew
A
ttac
h
ment
:
View attachment of
t
h
e message
.
]
M
essa
g
e
D
eta
il
s
:
All
ows you to v
i
ew t
h
e
i
nformation on the message
.

M
essag
i
n
g
50
Voicemail
This menu provides you with a quick way o
f
accessin
g
your voice mailbox (if provided by
your network).
n
No
t
e
Please check with
y
our network service
p
rovider
f
or details o
f
their service in order to con
f
i
g
ure
t
he handset accordin
g
ly.
Message Settings
To configure
M
essaging setting
s
,
touch the
Quick key from the Standby screen, then
touc
h
M
essage Setting
s
.
M
essa
g
e Aler
t
You can set the
S
ounds and Alert T
yp
e here
.
S
ave t
o
C
hoose between Phone and
S
IM
C
ard to save
message.
Si
g
natur
e
This feature allows
y
ou to create
y
our Text
s
ignature. You can use symbols, templates
and contacts as part of the signature
.
Text Messa
ge
]
T
ext
T
em
pl
at
e
There are 6 predefined messages in the
li
st.
Y
ou can v
i
ew an
d
e
di
t t
h
e tem
pl
ate
m
essages or crea
t
e new ones.
The following options are available when
y
ou touc
h
.
-
A
dd
N
e
w
:
Allows
y
ou to create a new
tem
p
late.
-
D
e
l
e
t
e:
Allows
y
ou to delete the selected
template message.
-
D
e
l
e
t
e
All
:
Deletes all messages in the
fo
l
de
r.
To edit an existin
g
Template, touch it
(
to open
)
t
hen touch the text. The Edit Tem
p
late screen
will automaticall
y
o
p
en.
]
Message Subject
:
You can enter
S
M
S
S
ub
j
ect when this menu is
O
N. You can
s
wit
c
h
be
tw
ee
n
to
by dra
gg
in
g
it
f
rom le
f
t to ri
g
ht
.
]
I
nsert Signature
:
Insert si
g
nature you
c
r
ea
t
ed
.

M
essag
i
ng
51
M
ultimedia Messa
ge
]
M
u
l
t
i
me
di
a
T
em
pl
ates:
M
u
l
t
i
me
di
a
tem
pl
ates are ava
il
a
bl
e an
d
can
b
e create
d
h
ere.
]
P
r
i
or
i
t
y:
Y
ou can c
h
oose to set t
h
e
p
r
i
or
i
t
y
of the message.
]
Message Subject
:
Y
ou
ca
n
e
nt
e
r th
e
MM
S
S
ubject when this option is
.
You
ca
n
s
wit
c
h
be
tw
ee
n
to
b
y
d
ragging it from left to right
.
]
V
alidit
y
Period
:
Thi
s
n
e
tw
o
rk
se
rvi
ce
a
llows you to decide how long your
multimedia messages will be stored at the
message cen
t
er.
]
Send Delivery Receipt
:
Allows
y
ou to
send a deliver
y
confirmation mail for a
Multimedia Message
.
]
Send Read Receipt
:
Allows
y
ou to send
a
messa
g
e read confirmation mail for a
Multimedia Messa
g
e
.
]
D
ownload Option
s
-
D
o
wnl
oad
With
ou
t A
s
k
:
All
o
w
s
Multimedia Messa
g
es to be downloaded
automatically.
-
Ask Always
:
Y
ou
ca
n
do
wnl
oad
a
m
ultimedia messa
g
e manually.
-
Discard
:
Used when the user re
j
ects
download o
f
the Multimedia Messa
g
e
.
]
Messa
g
e
C
enter
:
The details
f
or the
M
u
l
t
i
me
di
a
g
ateway are pre-
l
oa
d
e
d
onto
y
our
h
an
d
set an
d
s
h
ou
ld
not
b
e c
h
an
g
e
d.
V
o
i
cema
il
N
um
b
e
r
Thi
s menu a
ll
ows you to set t
h
e vo
i
cema
il
center number i
f
this
f
eature is supported by
AT
&
T. Please check with AT
&
T for details of
t
heir service in order to con
f
i
g
ure the handset
correct
l
y.
S
ervice Messag
e
You can set the Service option to determine
w
h
et
h
er or not you w
ill
rece
i
ve serv
i
ce
m
essa
g
es
.

M
essag
i
n
g
52
IM
The Instant Messa
g
in
g
f
eature can only
be used with the support o
f
the network
o
perator or commun
i
t
i
es suc
h
as
AIM
®
,
Wi
n
d
ows
Li
ve
™
an
d
Y
a
h
oo
!
®
M
essen
g
er.
F
or
I
nstant
M
essa
gi
n
g
users, a va
lid
U
ser
ID
an
d
P
asswor
d
w
ill
b
e requ
i
re
d
i
n or
d
er to
l
o
gi
n
an
d
exc
h
an
g
e messa
g
es as we
ll
as c
h
ec
ki
n
g
th
e on
li
ne status
.
To access the IM
f
eatur
e
1.
T
ouc
h
an
d
touc
h
.
2.
Y
ou can see ava
il
a
bl
e
IM
c
li
ents.
Th
e menu
i
tems
b
e
l
ow m
i
g
h
t not appear as not a
ll
IM
c
ommun
i
t
i
es support t
h
e var
i
ous opt
i
ons.
I
n a
ddi
t
i
on, t
h
e menu str
i
ngs may appear
d
ifferently. This depends on the selected
IM
commun
i
t
i
es.
Th
e
k
eywor
d
s suc
h
as
User ID, Login and
C
ontact will be used as
g
enera
l
terms
i
n
IM
menus accor
di
ng to
t
h
e current
l
y se
l
ecte
d
commun
i
t
i
es suc
h
a
s
AIM
®
,
Wi
n
d
ows
Li
ve
™
an
d
Y
a
h
oo
!
®
M
essenge
r
O
ffline Men
u
S
ign I
n
This allows users to login by filling in the User
ID
a
n
d
P
ass
w
o
r
d.
n
Not
e
O
nce the User ID and Password are saved, you
will
not
b
e requ
i
re
d
to type t
h
em
i
n aga
i
n
d
ur
i
ng
t
he Login process. This feature is optional
.
S
aved
C
onversation
s
Thi
s
i
s w
h
ere a user can v
i
ew save
d
conversat
i
ons
.
]
O
ffline
C
onversations
:
Thi
s
i
s w
h
ere a
user can view offline conversations
.
S
ettin
g
s/Preferences
]
S
et
S
ound
:
All
ows you to turn a
l
erts
O
n
/O
ff for a Contact when they have
a
ct
i
v
i
ty on t
h
e
i
r sess
i
on
.
]
N
etwor
k:
Y
ou ma
y
c
h
ec
k
y
our
N
etwor
k
Profiles or Server Address information
.
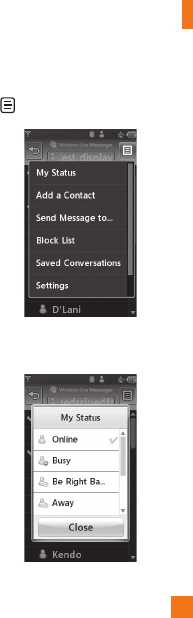
M
essag
i
ng
53
IM Inf
o
rm
a
ti
o
n
This displays the Instant Messaging
C
lient
I
nformation such as
C
lient Name and Version
N
um
b
er.
O
nline Menu
/
1-t
o
-1
co
nv
e
r
sa
ti
on
After a successful Login, a list of contacts
with Screen Names will a
pp
ear on the screen.
T
ouc
h
an
d
h
o
ld
eac
h
i
tem,
i
t w
ill
s
h
ow var
i
ous
m
enu
p
o
p
u
p
.
G
eneral O
p
tion
s
T
ouc
h
.
]
My Status: Allows you to set your status
to Available, Busy or Invisible
.
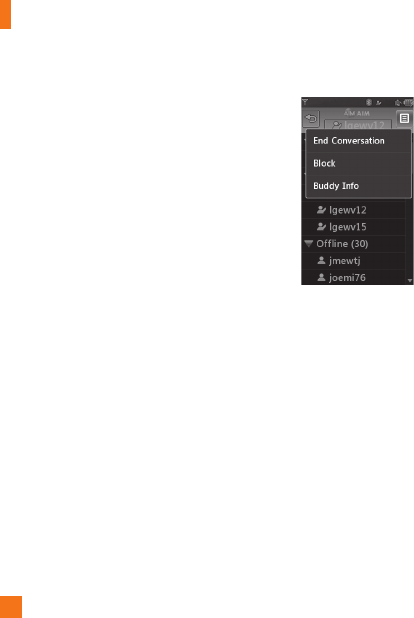
M
essag
i
n
g
54
]
Add a Contact
:
Thi
s
adds
a
n
e
w
co
nt
ac
t
to the selected contacts list
;
contacts are
sea
r
c
h
ed
o
n th
e
bas
i
s
of
Em
a
il A
dd
r
ess
.
Fir
s
t N
a
m
e
o
r L
as
t N
a
m
e.
]
Send Messa
g
e to: Allows you to send a
messa
g
e to someone by inputtin
g
an email
a
ddress
.
]
Block List
:
Displays the list o
f
all blocked
C
ontacts.
]
Saved Conversations
:
This is where a
user can view saved conversations
.
]
S
ettin
g
s
:
-
Di
s
pl
ay
N
am
e
- My
S
tatus
:
All
ows you to set your status
to
A
va
il
a
bl
e,
B
usy or
I
nv
i
s
ible
-
O
ffline
C
ontact
s
-
S
et
S
ound
:
Allows you to turn on/off
a
n alert for the Contact when they have
a
ct
i
v
i
ty on t
h
e
i
r sess
i
o
n
- Auto
S
i
g
n In
T
ouc
h
an
d
h
o
ld
a conversat
i
on
.
]
End Conversation
:
Thi
s
c
l
oses
th
e
se
l
ec
t
ed
co
nv
e
r
sa
ti
o
n. If
a
n
u
nkn
o
wn
c
ontact was selected, that contact is
de
l
e
t
ed.
]
Block
/
Unblock Contact
:
This allows
y
ou
to block/unblock the selected
C
onversations
C
ontact.
]
Contact Info: This allows
y
ou to view the
U
ser ID and
S
tatus Text information
.
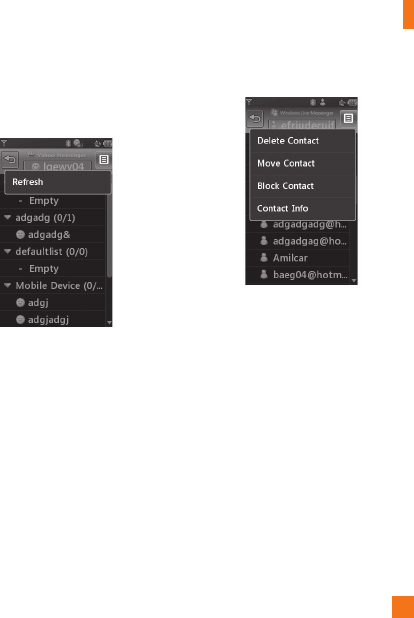
M
essag
i
ng
55
T
ouc
h
an
d
h
o
ld
t
h
e contact
Li
st
.
]
Re
f
resh
:
This refreshes the current
i
nformation on the contacts within the list
.
T
ouc
h
an
d
h
o
ld
a contact
.
]
D
elete Contact
:
Thi
s
de
l
e
t
es
th
e
se
l
ec
t
ed
C
ontact.
]
Move Contact
:
Allows
y
ou to move a
C
ontact to another
C
ontact List
.
]
B
lock/Unblock Contact: This allows
y
ou
to block/unblock a conversation with the
selected
C
ontact
.
]
Contact Info: This allows
y
ou to view
i
nformation. It
p
rovides User ID,
S
tatus Text
.

M
essag
i
n
g
56
M
enu o
p
tions available in the
C
onversation scree
n
]
I
nsert: You can insert a
Sy
mbol, Tem
p
late
a
n
d
emot
i
cons
i
n t
h
e conversat
i
on screen.
T
his feature is accessed by pressing the
left soft ke
y.
]
Back to
C
ontacts:
Thi
s
b
r
i
ngs t
h
e screen
b
ac
k
to t
h
e contacts
.
]
M
y
C
ommunities: Dis
p
la
y
s the list of
E
ma
il
p
rov
id
ers
.
]
Block
/
Unblock
C
ontact:
Thi
s a
ll
ows
y
ou
to
bl
oc
k/
un
bl
oc
k
a conversat
i
on w
i
t
h
t
h
e
selected
C
ontact.
]
Add to
C
ontact List
:
Allows
y
ou to add
the person you are currently having a
c
onversation with to a
C
ontact List
.
]
S
ave
C
onversation:
S
tores the currentl
y
ac
tiv
e
co
nv
e
r
sa
ti
o
n
.
]
E
nd
C
onversation:
T
hi
s
e
n
ds
th
e
ac
tiv
e
co
nv
e
r
sa
ti
o
n
a
n
d
c
l
ea
r
s
th
e
co
nv
e
r
sa
ti
o
n
bu
ff
e
r.
]
Settin
g
s
:
- Display Nam
e
- My Status
:
Allows you to set your status
to Available, Busy or Invisible
.
-
O
ffline
C
ontact
s
-
S
et
S
ound
:
Allows you to turn on/o
ff
a
n alert for the Contact when they have
a
ct
i
v
i
ty on t
h
e
i
r sess
i
on
.
- Auto
S
i
g
n In
]
T
ext
E
ntry
M
o
d
e: Sets the text input mode
such as abc
,
Abc
,
ABC
,
T9 abc
,
T9 Abc
,
T9
AB
C
and 123
.
]
T
ext Entry Mode
S
ettin
g
s
:
Thi
s se
l
ects
t
h
e
T
9 pre
di
ct
i
ve mo
d
e
L
anguage.
Thi
s
f
eature also allows you to turn T9 mode on
or off, and to access the T9 Dictionary, Text
E
ntry
L
anguage
.
]
Mi
n
i
m
i
ze
:
Mi
n
i
m
i
zes t
h
e
IM
w
i
n
d
ow an
d
returns to stan
db
y mo
d
e
.
]
S
i
g
n
O
ut
:
Thi
s
b
eg
i
ns t
h
e
l
ogout process
.

M
essag
i
ng
57
n
Not
e
•
I
n t
h
e conversat
i
on w
i
n
d
ow, you can use t
h
e
up/down
Q
werty keys to scroll through the
conversat
i
on
.
•
The maximum number of characters
supported by a messa
g
e is 800 characters, for
receivin
g
, and 127 characters for sendin
g.
•
The current in
f
ormation mi
g
ht not update
in real time so the "Re
f
resh List"/"Re
f
resh
C
ontact” option can be used for the most up
to
da
t
e
s
t
a
t
us
.
Mobile Email
M
o
bil
e
E
ma
il
a
ll
ows you to access your
Yahoo! Mail
,
AOL Mail
,
AIM Mail
,
Windows
L
ive Hotmail
,
AT&T Yahoo!
,
BellSouth Mail
and Other providers accounts on your phone.
S
o, now you can quickly and easily check your
e
mail while you are away
f
rom your computer.
To Set Up Mobile Emai
l
]
Open Mobile Email
:
From the standby
screen
,
Touch
,
and touch .
]
Select an Email Provider
:
T
ouc
h th
e
email provider you wish to use
.
]
Read and Acce
p
t the Terms o
f
Us
e
]
L
o
g
In
1.
Hi
g
hli
g
ht the ID entry
f
ield, touch and
th
en type
i
n your ex
i
st
i
n
g
ema
il
ID.
2.
Touch the Password
f
ield, to hi
g
hli
g
ht it,
an
d
enter your passwor
d
.
Q
uick Ti
p:
Y
our passwor
d
i
s case
s
ens
i
t
i
ve.
P
ress t
h
e
b
utton on t
h
e
k
eypa
d
to c
h
ange to
l
ower case or upper
case
.
3.
T
o save your passwor
d
scro
ll
d
own to
R
emem
b
er
M
e an
d
press
d
own on t
h
e
s
e
l
ect to c
h
ec
k
t
h
e
b
ox.
4.
S
elect
S
i
g
n I
n
.

M
essagin
g
58
]
Op
ening an Email
:
J
ust scro
ll
d
own an
d
p
ress on t
h
e su
bj
ect
li
ne to
highligh
t t
h
e
messa
g
e you want to open, t
h
en press
ag
a
i
n to open t
h
e messa
g
e.
Wh
en t
h
e
ema
il
i
s open, se
l
ect
Op
tions to rep
l
y,
fo
rw
a
r
d
o
r
de
l
e
t
e.
]
D
e
l
et
i
n
g
an
E
ma
il:
S
croll down to the
ema
il
you want to
d
e
l
ete, touc
h
t
h
e su
bj
ect
li
ne to
highligh
t
i
t, press
Op
tions
,
an
d
t
h
en
D
e
l
ete.

59
&
T GPS AT
&
T
ouc
h, then touch
.
The AT
&
T Navigator application on your
device uses
G
P
S
p
osition determination
t
echnology and access to your carrier’s data
network to provide you with driving directions
and a host of other services, including
:
]
G
P
S
navigation that gives you turn-by-turn
d
irections to an
y
destination address in
the continental United
S
tates. If
y
ou miss
a
turn or get off-track, AT
&
T Navigator
w
ill calculate a new route for
y
ou. You can
enter a destination address by using AT
&
T
N
avigator’s automatic voice recognition
system or by typing on the device’s keypad
.
]
Audio and visual traffic alerts while drivin
g
or viewin
g
maps, as well as traffic re
-
r
outin
g
capabilities to minimize delays on
y
our tri
p.
]
A Search feature that allows you to find
b
usinesses or points of interest near your
c
urrent
l
ocat
i
on, an a
i
rport, a waypo
i
nt, or
a
ny ot
h
er entere
d
a
dd
ress.
Y
ou can rea
d
r
atings and reviews for businesses and
easily call the business that you have found
to check on the availability of an item or to
ma
k
e a reservat
i
on.
Y
ou can nav
i
gate to t
h
e
b
us
i
ness
l
ocat
i
on now or save t
h
e a
dd
ress
for later use
.
]
Ma
p
s of the area around
y
our current
l
ocat
i
on, aroun
d
a mar
k
e
d
wa
yp
o
i
nt, or
a
roun
d
an a
dd
ress t
h
at
y
ou
h
a
d
p
rev
i
ous
ly
entered. You can pan the map (adjust left,
r
ight, up, or down) and zoom in or out.
Y
ou can a
l
so mar
k
a
p
o
i
nt un
d
er t
h
e cursor
a
s a wa
yp
o
i
nt
.
]
A
compass-
lik
e
i
n
di
cator present
i
ng your
d
irection of travel, location, and s
p
eed
.

A
T
&
T
G
P
S
60
]
Th
e a
bili
ty to persona
li
ze your app
li
cat
i
on
p
references by selecting U.S. customary
or metric distance units, the language for
a
u
dibl
e gu
id
ance, an
d
so on
.
You can also use many of AT&T Navigator’s
f
eatures on the TeleNav website, such as
getting driving directions (Route Planning) and
using the Search function to find businesses,
churches, schools, and government offices.
Y
ou can a
l
so use t
h
e
T
e
l
e
N
av we
b
s
i
te to a
dd
an a
dd
ress to your
M
y
F
avor
i
tes
li
st, manage
y
our
My
F
avor
i
tes an
d
R
ecent
Pl
aces
li
sts, an
d
s
ho
p
at the TeleNav Store
.
n
Not
e
For best
G
P
S
performance
•
In order to improve
G
P
S
antenna sensitivity,
do not cover the GPS antenna area of the
device.
•
Your GPS antenna sensitivity mi
g
ht be
w
eakened i
f
you are in a hi
g
h risin
g
buildin
g
,
un
d
er
g
roun
d
, or
l
ocat
i
on surroun
d
e
d
b
y meta
l
o
r
co
n
c
r
e
t
e.
•
U
se near the window indoors for better
G
P
S
antenna sens
i
t
i
v
i
ty
.
•
For batter
y
durabilit
y
,
p
lease use vehicle
p
ower ada
p
ter in
y
our car
.
•
It could take 2~3 minutes to
g
et your GPS
p
osition dependin
g
on the condition o
f
the
e
nv
i
r
o
nm
e
nt
o
r n
e
tw
o
r
k
.

61
L
LOWPAGES.COM
Y
E
L
T
ouc
h, then touch
.
U
nleash the
p
ower of YELL
O
WPA
G
E
S
.
CO
M
local search on
y
our mobile
p
hone.
F
ind a business, get maps and directions,
and save your favorites: our mobile app gives
y
ou what
y
ou need, whenever and wherever
y
ou need it
.
]
S
earch for local businesses.
]
View ratin
g
s and call businesses.
]
S
ave businesses for future access.
]
G
et ma
p
s and view ste
p
-b
y
-ste
p
directions
.
*
For more information
,
refer to
www.yellowpages.com
ypg
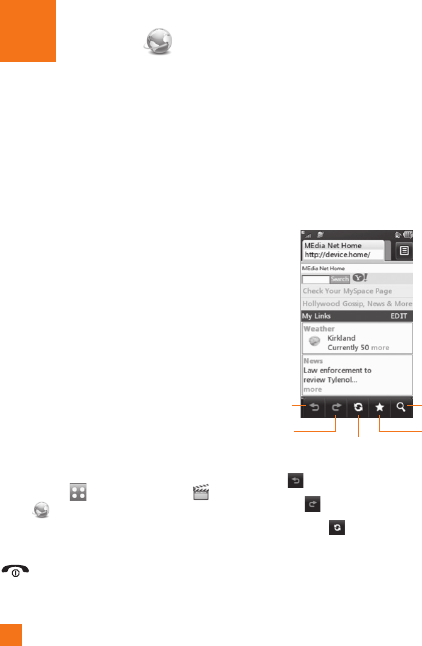
62
dia
Ne
t
ME
MEdia Net
Thi
s
b
rowser connects you to t
h
e
h
omepa
g
e,
which is de
f
ined in the activated account.
The default account connects to AT
&
T’s
h
omepa
g
e.
Thi
s menu s
h
ows
h
ow to access t
h
e
I
nternet
b
y
l
aunc
hi
n
g
t
h
e
WAP
b
rowser.
M
Edia Net is one o
f
the services provided by
AT&T and it
g
ives you access to all the cool
thi
n
g
s you can
d
o w
i
t
h
your w
i
re
l
ess p
h
one.
n
No
t
e
C
heck the availability of WAP services, pricin
g
and tari
ff
s with
y
our network o
p
erator and/or
th
e serv
i
ce
p
rov
id
er w
h
ose serv
i
ce
y
ou w
i
s
h
t
o use. Service providers will also
g
ive you
i
n
s
tr
uc
t
io
n
s
o
n
ho
w t
o
use
t
hei
r
se
rv
ices.
Pl
ease contact your serv
i
ce prov
id
er to open an
I
nternet account.
To launch the browser in Standby mode, touch
t
he Quick key t
h
en c
h
oose t
h
e ta
b
.
T
ouc
h
.
O
nce connected, the homepage is displayed.
T
o ex
i
t t
h
e
b
rowser at any t
i
me, press t
h
e
k
ey.
Me
n
us
f
o
r th
e
Br
o
w
ser
Y
ou can surf the Internet using either the
t
ouc
h
screen or t
h
e
q
wert
yk
e
y
p
a
d
s
.
U
sin
g
the WAP Browser Men
u
U
s
i
ng t
h
e
B
rowser
T
oo
l
B
a
r
B
oo
k
mar
k
Zoo
m
R
efresh/Sto
p
Bac
k
F
orwar
d
]
B
ac
k
:
Moves to the previous pa
g
e
.
]
F
o
rw
a
r
d
:
Moves to the next pa
g
e
.
]
Refresh/Stop
:
Loads the current pa
g
e
ag
ain. When a pa
g
e is loadin
g
, press to
stop loadin
g
the current pa
g
e
.

MEdia
Net
63
]
Boo
km
a
rk
s
:
Takes
y
ou to
y
our
Bookmark menu. Holdin
g
down this key
w
ill add the current pa
g
e to your saved
B
oo
km
a
rk
s.
]
Zoo
m
:
Displays the Zoom bar to Zoom
i
n and out while browsin
g.
O
nce you are connected to the Internet, the
f
ollowin
g
menu options are available as
buttons or throu
g
h the Options menu
:
n
N
ot
e
I
f you are browsing the Internet in Landscape
m
ode,
y
ou can access the O
p
tions Menu b
y
t
appin
g
any part of the browser screen that
does
n
o
t
co
nt
a
in
a
link
.
]
H
o
m
e:
Moves to the initial homepage
.
]
Windows:
C
reate, manage or view
d
iff
e
r
e
nt
b
r
o
w
se
r win
do
w
s
. Thi
s
a
ll
o
w
s
y
ou to access multiple web pages
simultaneousl
y
.
]
Enter
U
RL
:
C
onnects to the s
p
ecific URL
a
fter editing
.
]
Boo
km
a
rk
s:
Y
ou
ca
n
add
o
r
sa
v
e
th
e
c
urrent pa
g
e to Bookmark or view the list
sa
v
ed
u
n
de
r B
oo
km
a
rk.
]
V
iew Full Screen/View Normal Screen:
Hold your phone horizontally and you can
v
iew
f
ull screen, I
f
you hold the phone
v
ertically, you can view normal screen
.
]
Search Text
:
Y
ou
ca
n
sea
r
c
h th
e
t
e
xt wh
a
t
y
ou want to
f
ind
.
]
Recent Pa
g
es
:
You can mana
g
e the list o
f
the Internet pa
g
es you visited
.
]
S
ettin
g
s
:
All
ows you to set opt
i
ons suc
h
as
Full Screen View
,
Cache
,
Cookie and other
Browser Settin
g
s
.
]
Hel
p
: Help
f
or browser menu and option
s
]
E
x
i
t:
E
x
i
t
b
rowse
r

64
dia
Mall
ME
To launch MEdia Mall while in the Standby
s
creen, touch the Quick key
,
touc
h
ta
b
an
d
t
h
en touc
h
.
Ringtones
This menu option connects to AT&T’s rin
g
tone
d
own
l
oa
d
s
i
te
.
n
No
t
e
A
dditional charges may incur when
downloadin
g
rin
g
tones. Contact AT&T for
add
iti
o
n
a
l in
fo
rm
a
ti
o
n
.
Games
This menu option connects to AT
&
T’s game
do
wnl
oad
s
it
e
. Thi
s
a
ll
o
w
s
use
r
s
t
o
do
wnl
oad
t
he various games by connecting to the
I
nt
e
rn
e
t.
n
Not
e
Addi
t
i
ona
l
c
h
ar
g
es may
i
ncur w
h
en
downloading games.
C
ontact AT
&
T for
add
iti
o
n
a
l in
fo
rm
a
ti
o
n
.
Color Graphics
This menu option connects to AT&T’s
g
raphics
d
own
l
oa
d
s
i
te.
n
No
t
e
A
dditional charges may incur when
downloadin
g
g
raphics. Contact AT&T for
add
iti
o
n
a
l inf
o
rm
a
ti
o
n
.
Multimedia Store
This allows
y
ou to connect to AT
&
T’s
mul
t
i
m
edia
do
wn
load
si
t
e.
n
Not
e
Addi
t
i
ona
l
c
h
ar
g
es may
i
ncur w
h
en
downloadin
g
multimedia contents.
C
ontact
A
T
&
T for additional information
.

MEdia
Mall
65
Cool Tools/Apps
This menu option connects to AT&T’s
app
li
cat
i
on
d
own
l
oa
d
s
i
te.
Thi
s a
ll
ows users
t
o
d
own
l
oa
d
t
h
e var
i
ous app
li
cat
i
ons
b
y
connect
i
n
g
to t
h
e
I
nternet.
n
No
t
e
A
dditional charges may incur when
d
ownloadin
g
applications. Contact AT&T for
add
iti
o
n
a
l in
fo
rm
a
ti
o
n.
Videos
This menu o
p
tion connects to AT
&
T’s video
do
wn
load
si
t
e.
n
Not
e
Addi
t
i
ona
l
c
h
ar
g
es may
i
ncur w
h
en
d
ownloadin
g
applications.
C
ontact AT
&
T for
add
iti
o
n
a
l in
fo
rm
a
ti
o
n.
MEdia Net Home
Thi
s connects to t
h
e
h
omepa
g
e, w
hi
c
h
i
s
de
f
ined in the activated account. The de
f
ault
account connects to AT&T’s homepa
g
e.

66
&
T Music AT
&
Music Player
To launch AT&T Music while in Standby
m
ode, touch the Quick key
,
touc
h
ta
b
an
d
t
h
en touc
h
.
]
All
S
on
g
s
:
Y
ou can v
i
ew a
ll
t
h
e son
g
s
i
n
y
our mus
i
c
lib
rary.
]
Pl
ay
li
sts:
Y
ou can ma
k
e your own p
l
ay
li
sts
.
]
A
rt
i
sts:
S
hows the list of artists of all the
son
g
s
i
n your mus
i
c
lib
rary, an
d
s
h
ows a
ll
t
h
e son
g
s
b
y a c
h
osen art
i
st
.
]
Alb
ums
:
S
hows the list of albums of all the
songs
i
n your mus
i
c
lib
rary, an
d
s
h
ows a
ll
t
h
e songs on a c
h
osen a
lb
um.
]
G
enres
:
Shows the list of genres of all the
songs
i
n your mus
i
c
lib
rary, an
d
s
h
ows a
ll
songs of a specific genre
.
]
S
huffle songs
:
Y
ou can v
i
ew a
ll
t
h
e songs
i
n your music library with shuffle
.
n
Not
e
C
opyri
g
hts of music files may be protected by
copyr
i
g
h
t an
d
i
nte
ll
ectua
l
property
l
aws.
Pl
ease
ensure t
h
at you a
dh
ere to t
h
e app
li
ca
bl
e
T
erms
of Use of materials laws prior to downloading
or copying files
.
P
layin
g
Musi
c
T
o
li
sten to mus
i
c
i
n your p
h
one or t
h
e
e
xternal memory, follow these quick easy
s
teps
:
1.
From the Standby screen, touch t
h
en
open t
h
e
M
u
l
t
i
me
di
a ta
b
b
y touc
hi
ng
.
2.
Th
en touc
h
.
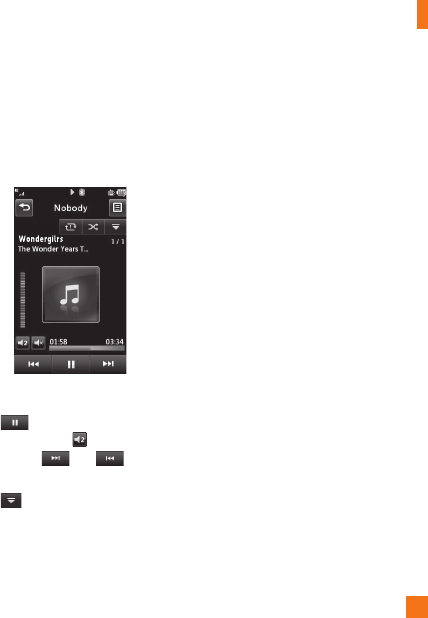
A
T
&
T Musi
c
67
3.
S
elect Music Pla
y
er to view
y
our o
p
tions.
Y
ou can select from All
S
on
g
s, Playlists,
A
rtists, Albums,
G
enres and
S
huffle son
g
s
t
o select your Music. The Now Playin
g
m
enu will be onl
y
available when music
is playin
g.
]
T
ouc
h
t
h
e song you w
i
s
h
to p
l
ay.
]
T
ouc
h
to pause t
h
e se
l
ecte
d
song.
Whil
e p
l
ay
i
ng, touc
h
to a
dj
ust t
h
e
v
o
l
ume.
T
ouc
h
an
d
to s
ki
p to
t
h
e next song or prev
i
ous song
.
]
T
ouc
h
to
Mi
n
i
m
i
ze t
h
e mus
i
c
pl
a
y
er
a
nd access other
p
hone functions while
mus
i
c
i
s p
l
ay
i
ng.
n
Not
e
Fil
es un
d
er 300
kb
may not
b
e
di
sp
l
aye
d
i
n t
hi
s
f
unction and may be categorized as Ringtones.
Addi
ng
M
us
i
c
T
o
Y
our
H
an
d
se
t
M
usic
f
iles can be added to your handset by
usin
g
one or more o
f
the
f
ollowin
g
methods
:
]
Download music and rin
g
tones over the
A
T&T network directly to your device via
the Shop Music link in the AT&T Music
Folder or the Rin
g
tones link in the AT&T
MEdia Mall
f
older
.
]
From your existin
g
di
g
ital media collection
on your PC via Windows Medi
a
®
Player
a
nd/or Windows Explorer
.
]
From your PC usin
g
other music subscription
services, such as Napster or eMusic
.

A
T
&
T Musi
c
68
P
urchasin
g
and downloadin
g
M
usic directl
y
to
y
our Device
1.
T
ouc
h
t
h
en touc
h
.
2.
T
ouc
h
.
3.
Select
S
ho
p
Musi
c
.
4.
N
av
i
gate t
h
e
S
ho
p
Music page to
d
own
l
oa
d
to
d
ay
’
s
h
ottest mus
i
c, r
i
ngtones
a
n
d
ot
h
er
p
ersona
li
ze
d
content
di
rect
ly
to
y
our
ph
one
.
n
N
o
t
e
S
ome sites are data intensive
(
i.e.
p
reviews via
streamin
g)
so the user should be enrolled in an
unlimited data plan be
f
ore using these services
t
o avo
id
per-use
d
ata c
h
arges
.
n
No
t
e
A
dditional charges may apply when
downloadin
g
music, rin
g
tones etc.
Transferrin
g
Music usin
g
your
PC
B
efore You
G
et
S
tarte
d
To transfer music from
y
our PC to
y
our device,
you will need the following
:
]
Wi
n
d
ows
M
e
di
a
®
Pla
y
er 10 (or above) or
other digital music management software
suc
h
as
N
a
p
ster or e
M
us
i
c
]
A micro
S
D™ card
*
(
su
pp
orts u
p
to 16GB cards
)
]
U
S
B data cable
*
*
micro
S
D™ card and U
S
B data cable sold
separately; go to att.com/wireless for
d
eta
il
s
.
n
N
o
t
e
Thi
s
d
ev
i
ce
i
s not compat
ibl
e w
i
t
h
iT
unes an
d/
or
i
T
u
n
es
f
il
es
.

A
T
&
T Musi
c
69
Transferrin
g
Music from the
Di
g
ital Music Servic
e
1.
Using your computer, open your preferred
P
C music management client
.
2.
D
own
l
oa
d
t
h
e se
l
ecte
d
song to your
lib
rary.
3.
Make sure the microSD™ card is inserted
p
ro
p
er
ly
i
nto t
h
e
h
an
d
set
.
4.
Use the USB ada
p
ter cable to connect the
h
andset to the PC. When
y
ou tr
y
to connect
h
andset on
y
our PC, the handset dis
p
la
y
s
“
Connecting as Music Sync...”
.
5.
O
nce the U
S
B connection has been
e
sta
bli
s
h
e
d
, t
h
e
h
an
d
set
di
s
pl
a
y
s
“C
onnected as Music
Sy
nc Mode. Do
n
ot disconnect during transfer.“ and the
com
p
uter screen then shows the L
G
G
W370
device. If the detection does not occur, ski
p
t
o
C
hanging U
S
B
C
onnection
S
etting
s
s
ect
i
on on page 71
.
6.
F
o
ll
ow t
h
e
i
nstruct
i
on
i
n t
h
e program to
t
ransfer music to
y
our handset
.
n
Not
e
I
f you have a U
S
B hub, connect the handset
di
rect
l
y to your computer rat
h
er t
h
an t
h
roug
h
th
e
h
u
b
.
Trans
f
erring Music using
Wi
n
d
ows
M
e
di
a
Pl
aye
r
1
.
Open Windows Media
®
Player on your
c
omputer
(
version 10.0 or hi
g
her
).
2.
Use the USB adapter cable to connect the
h
andset to the PC. When you try to connect
h
andset on your PC, the handset displays
“Connectin
g
as Music Sync...”
.
3.
O
nce the
US
B connection has been
e
stablished, the handset displays
“Connected as Music Sync Mode. Do
n
ot disconnect durin
g
trans
f
er.“ and the
c
omputer screen then shows the LG
G
W370 device
.

A
T
&
T Musi
c
70
n
Not
e
If
the tar
g
et computer does not detect the
new
l
y connecte
d
h
an
d
set or prov
id
e an
MTP
Player dialog window on the P
C
screen, skip to
C
hanging USB Connection Settings sect
i
on
on page
71
.
4.
F
rom w
i
t
hi
n t
h
e
Wi
n
d
ows
M
e
dia
®
Player application, click on the Sync tab.
P
rev
i
ous
l
y
d
own
l
oa
d
e
d
songs are t
h
en
l
isted on the left side of the application
.
5.
Choose the destination location for the
media files. The LG GW370 Music Sync
Pl
ayer appears
i
n a
d
rop-
d
own
li
st on t
h
e
r
ight side of the screen
.
n
N
o
t
e
If
there are no items
p
resent in the
p
la
y
list,
c
li
c
k
t
h
e
Edi
t
Pl
ay
li
st
b
utton an
d
b
e
gi
n a
ddi
n
g
t
he music
f
iles
f
rom among the various media
categor
i
es
.
6.
Click on the checkmark boxes
(
to the left of
the son
g
entry
)
to select the son
g
you want
to synchronize to your handset
.
7
.
C
lick the
S
tart
Sy
nc button to download the
selected son
g
s to your handset.
A
“synchronization in pro
g
ress” messa
g
e
a
ppears on the application. Do not unplu
g
the handset durin
g
this process.
O
nce
c
omplete, the pro
g
ress bar will disappear.
8.
It is now safe to unplu
g
the USB connector
f
r
o
m th
e
h
a
n
dse
t
.
D
rag an
d
D
rop
M
us
i
c
U
s
i
ng
L
G GW370 As A Mass Storage
D
e
vi
ce
1.
Make sure the micro
S
D™ card is inserted
p
ro
p
erl
y
into the headset.
2.
C
onnect the device to a P
C
usin
g
a
L
G
G
W370 U
S
B data cable.
3.
A bubble ma
y
a
pp
ear on the P
C
, “Found
N
ew Hardware L
G
U
S
B Modem”
.
4
.
Access M
y
C
om
p
uter on the P
C.

A
T
&
T Musi
c
71
5.
The
p
hone’s memor
y
card will be listed
u
nder “Devices with Removable
S
tora
g
e” in
t
he same location as an o
p
tical drive
.
n
N
ot
e
The P
C
will automatically assign a drive letter.
7.
File explore in a new window
f
or desired
m
usic
f
iles.
8.
D
ra
g
an
d
d
rop t
h
e
d
es
i
re
d
mus
i
c content
from the PC window to the “Stora
g
e Card”
w
i
n
d
ow
.
9.
Disconnect the device from the cable.
10
.
A
ccess t
h
e
M
us
i
c
Pl
ayer on t
h
e p
h
one
.
n
No
t
e
If
the tar
g
et computer does not detect the
newly connected handset as Mass Stora
g
e,
skip to Chan
g
in
g
USB Connection Settin
g
s
sec
t
io
n
belo
w.
C
han
g
in
g
USB Connection
Settin
gs
1.
T
ouc
h
an
d
touc
h
t
h
e ta
b
.
2.
T
ouc
h
.
3.
Select
C
onnection
.
4.
T
ouc
h
US
B
C
onnection Mod
e
.
5.
Touch Music Sync (if using Windows
M
e
dia
®
Pl
ayer or ot
h
er
Di
g
i
ta
l
M
us
i
c
S
ervices) or Mass Storage (if you are going
t
o drag or drop files).
6.
Reconnect the device to a P
C.
Deletin
g
Music File
s
The following are the three options available
t
o delete Music from
y
our Phone
:
1.
Delete a file using Mass
S
torage, but not
u
sing Music sync function
.
2.
Delete a file by directly inserting the
m
icro
S
D™ external memor
y
onto the P
C.
3.
Delete a file using delete function on the
p
hone
.

A
T
&
T Musi
c
72
n
Not
e
If
you delete a playlist
f
rom the phone, the
songs
i
n t
h
e p
l
ay
li
st w
ill
not
b
e remove
d
an
d
remain in All songs
f
older.
Do your file operations like Delete, Move and
C
opy using Music
S
ync.
n
No
t
e
Be aware that all of the existin
g
data will be
erased on microSD™ card if
y
ou use the below
process
.
•
Use the
S
ettin
g
s > Phone > Reset
S
ettin
g
s >
M
aster
C
lear > Memory
C
ard function in the
S
ettings menu
.
•
Format external memory using Mass Storage
.
Additional Music Services
There may be other AT&T music applications
p
reloaded or available for your phone that
a
ll
ow you to
:
]
Identify the name, artist and album to a
song from a song sample
.
]
Listen to the latest Hip Hop, R&B, Rock,
J
azz, or Country streamin
g
commercial-free
ra
di
o c
h
anne
l
s, anyw
h
ere you
g
o
.
]
Vi
ew t
h
e
l
atest mus
i
c v
id
eos
.
]
View music news and in
f
ormation
.
]
Cut custom-made ringtones from the
f
avorite parts of your favorite songs, etc
.
n
No
t
e
Some sites are data intensive
(
i.e.
p
reviews via
s
treamin
g)
so the user should be enrolled in an
unlimited data plan be
f
ore usin
g
these services
t
o avo
id
per-use
d
ata c
h
ar
g
es.
n
N
ot
e
A
dditional charges may apply for downloading
content or use of these services
.

73
CV
T
ouc
h
, t
h
en c
h
oose t
h
eta
b
.
T
ouc
h
.
C
V brings you quick, on-demand access to
news, s
p
orts, weat
h
er an
d
enterta
i
nment
video cli
p
s.
C
atch u
p
on TV’s hottest shows,
f
unniest comedians, biggest headlines
an
d
l
atest s
p
orts scores.
Y
ou can even
p
ersonalize your homepage for quick access
t
o
y
our favorites. In addition, the
C
V service
automat
i
ca
lly
streams
l
oca
li
ze
d
weat
h
er
information to
y
our
p
ersonalized “News
&
W
eat
h
er
”
page eac
h
an
d
every
d
ay.

74
pli
cat
i
ons
App
To launch Applications while in the Standby
s
creen, touch the Quick key
,
touc
h
ta
b
an
d
t
h
en touc
h
.
This menu displays the list o
f
Java pro
g
rams
d
own
l
oa
d
e
d
us
i
n
g
WAP
.
All
prev
i
ous
l
y
d
own
l
oa
d
e
d
pro
g
rams can
b
e se
l
ecte
d
,
d
e
l
ete
d
or v
i
ewe
d
i
n
d
eta
il
w
i
t
hi
n t
h
e
A
pp
li
cat
i
on menu.
Shop Applications
This menu option connects to AT&T’s
app
li
cat
i
on
d
own
l
oa
d
s
i
te.
Thi
s a
ll
ows users
t
o
d
own
l
oa
d
t
h
e var
i
ous app
li
cat
i
ons
b
y
connect
i
n
g
to t
h
e
I
nternet.
MobiTV
Thi
s app
li
cat
i
on ena
bl
es you to watc
h
M
o
bil
e
TV.
Mobile Banking
Thi
s app
li
cat
i
on prov
id
es easy access to your
b
ankin
g
account
f
rom your phone where you
can v
i
ew your account
b
a
l
ances an
d
hi
story,
t
rans
f
er
f
unds, receive and pay bills and more
.
I
f
your bankin
g
institution doesn’t currently
participate, check back
f
requently as new
b
an
k
s are
j
o
i
n
i
n
g
a
ll
t
h
e t
i
me
.
My-Cast Weather
A
llows you to search quickly weather
f
orecast.

75
m
es Ga
m
Access Games on your LG GW370 or Browse
t
he catalo
g
o
f
g
ames available to buy and
d
own
l
oa
d
new ones.
To launch Games while in the Standby screen,
t
ouch the Quick key
,
touc
h
an
d
t
h
en
t
ouc
h
.
n
No
t
e
The JAR file is a com
p
ressed format of the Java
p
ro
g
ram and the JAD
f
ile is a description
f
ile
t
h
a
t in
c
l
udes
a
ll
de
t
a
il
ed
in
fo
rm
a
ti
o
n. Fr
o
m th
e
networ
k
, pr
i
or to
d
own
l
oa
d
, you can v
i
ew a
ll
d
etailed
f
ile descriptions
f
rom the JAD
f
ile
.
n
W
arn
i
n
g
O
nly J2ME (Java 2 Micro Edition) based
p
rograms will run in a phone environment.
J
2SE
(
Java 2 Standard Edition
)
based pro
g
rams
w
ill onl
y
run in a PC environment.
]
Shop Games: This menu o
p
tion connects
to AT
&
T’s game download site
.
Y
ou
ca
n
see
th
e
de
f
au
lt
a
n
d
do
wnl
oaded
games in the list
.

76
l
t
i
m
edia
Mu
Camera
T
ouc
h
,
t
h
en c
h
oose ta
b
.
T
ouc
h
.
T
a
k
e
Ph
ot
o
U
s
i
n
g
t
h
e camera mo
d
u
l
e
b
u
il
t
i
nto your
p
hone, you can take pictures o
f
people or
e
vents while on the move. Additionally, you
can send photos to other people in a picture
m
essa
g
e
.
P
ress
O
r choose
f
rom the ta
b
.
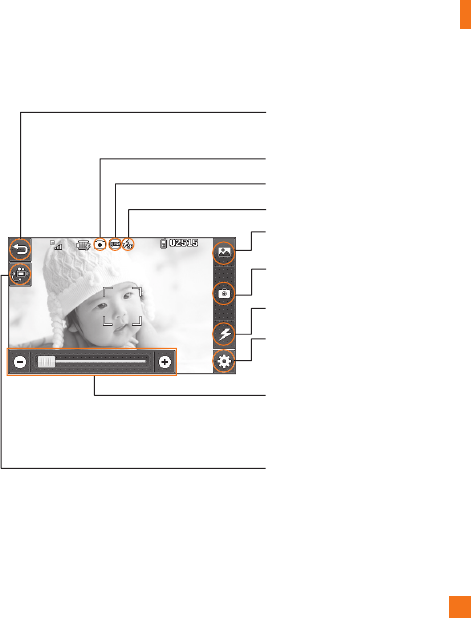
Mul
t
i
m
edia
77
G
etting to know the viewfinde
r
S
ettin
g
s
:
Touch this icon to o
p
en the
s
ettin
g
s menu. See Usin
g
the advanced
s
ettings on page 78
f
or details
.
C
amera mode:
C
amera mode is selected
.
Flash
s
t
a
t
us
I
ma
g
e
S
ize
Back:
T
ouc
h
h
ere to return to t
h
e
p
rev
i
ous
screen.
Flash
A
lbu
m
Capture: Take the picture
Video
ca
m
e
r
a
m
ode:
T
ogg
l
e
b
etween
ca
m
e
r
a
t
o
v
ideo
ca
m
e
r
a
m
ode
.
Z
oo
m B
a
r: Allows
y
ou to zoom in and
o
ut w
h
en ta
ki
n
g
a p
i
cture.
Thi
s opt
i
on
i
s
o
n
l
y ava
il
a
bl
e w
h
en ta
ki
ng p
i
ctures
i
n t
h
e
640
*
480 or 320
*
240 resolution
.
n
No
t
e
The shortcut o
p
tions disa
pp
ear after a few seconds automaticall
y
.
To recall the options, touch the screen a
g
ain.

Mul
t
i
m
edia
78
Settin
g
s Menu
P
rev
i
ew ta
b
]
Vi
ew
M
o
d
e
:
C
hoose between Full Image
a
nd Full
S
creen
.
]
I
mage
S
ize
:
The resolution of the image
c
an be ca
p
tured in 1600
*
1200 / 1280
*
960
/
640
*
480 / 320
*
240.
]
Brightness
:
Adjust brightness by adjusting
s
li
de
r.
]
C
olor Effects: Includes o
p
tions of
C
olor
/
M
ono/
S
epia/Negative/Blue
.
]
W
hit
e
B
a
l
a
n
ce:
S
et the White Balance as
Auto/Daylight/
C
loudy/Illuminate/Indoors
.
]
Night Mode
:
This is useful to take a
p
hoto
a
t dark
p
lace.
]
T
im
e
r
:
S
et the Timer can be set to
O
ff/3
S
econds/5
S
econds/10
S
econds
.
]
I
mage Quality:
S
et the ima
g
e quality as
S
u
p
er Fine/Fine/Normal
.
]
Continuous Shot
:
This is
g
reat
f
or takin
g
p
hotos o
f
movin
g
ob
j
ects or at sportin
g
events. Allows
y
ou to set 3 shots, 6 shots
or 9 shots continuousl
y.
O
thers ta
b
]
Video Share
:
You can make a Video
S
hare
Call. For more details
,
refer to Video Share
Callin
g
(
pa
g
e 29
).
]
Save to
:
Choose to save a photo to Phone
or Memory Card
.
]
Shutter Tones
:
Can be set to Tone 1
/
T
one 2
/
Tone 3
/
Off
.
]
Reset
S
ettin
g
s
:
All
ows you to set to t
h
e
d
e
f
ault settin
g
s
.
n
No
t
e
In Take Photo mode, you can adjust the zoom
s
cale by movin
g
the slider. The maximum zoom
levels de
p
end on the resolution as follows.
R
eso
l
ut
i
on
Z
oom sca
l
e
1600*1200
L
eve
l
1
1280*96
0
L
eve
l
1
6
40*48
0
L
eve
l
1 ~
L
eve
l
1
0
320*24
0
L
eve
l
1 ~
L
eve
l
1
0
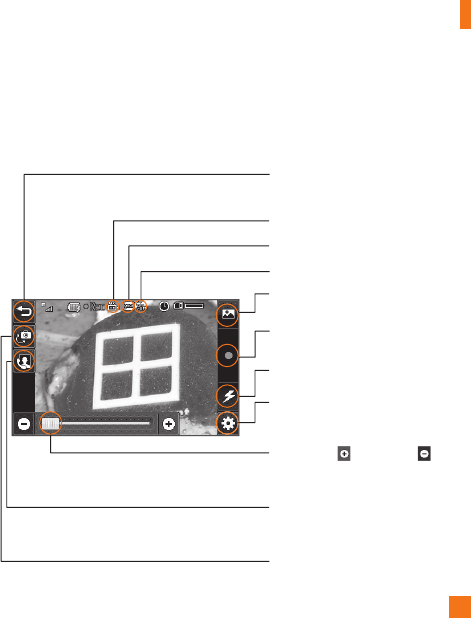
Mul
t
i
m
edia
79
Reco
r
d
Vi
deo
When recording video, you have many of the same
S
ettings options as with taking a photo.
O
ne
additional option is using Video
S
hare:
G
etting to know the viewfinde
r
S
ettin
g
s
:
T
ouc
h
t
hi
s
i
con to open t
h
e
s
ett
i
ngs menu.
Video mode
:
Video mode is selected
.
Flash
s
t
a
t
us
Video
S
iz
e
Back
:
Touch here to return to the standb
y
s
creen.
Fl
as
h
Album
R
ecor
di
n
g
start
Zoom: Touch to zoom in or to
zoom out. Alternativel
y
y
ou can use the
s
ide volume ke
y
s
.
C
amera mode: Chan
g
e from video
ca
m
e
r
a
t
o
ca
m
e
r
a
m
ode
.
Video
S
hare: Y
ou
ca
n m
a
k
e
a
Vi
deo
Share Call. For more details
,
refer to Video
Share Callin
g
(
pa
g
e 29
)
.

Mul
t
i
m
edia
80
Settin
g
s Menu
P
rev
i
ew
T
a
b
]
Video
S
ize:
S
ets the size of video to
3
2
0*
24
0
or 17
6*
144. The selected size
app
ears on t
h
e ca
p
ture screen
.
]
B
r
i
g
h
tness
:
Adj
ust
b
r
i
g
h
tness
b
y a
dj
ust
i
ng
s
lid
er.
]
C
olor Effects: Includes o
p
tions of
C
olor
/
M
ono/
S
epia/Negative/Blue
.
]
W
hit
e
B
a
l
a
n
ce:
S
et the White Balance as
Auto/Daylight/
C
loudy/Illuminate/Indoors
.
]
Night Mode
:
This is useful to take a
p
hoto
a
t dark
p
lace.
]
Video Qualit
y
: Determines the
q
ualit
y
of a video cli
p
. Includes o
p
tions for
S
u
p
er
Fine/Fine/Normal.
]
T
ype
:
Use one of the recordin
g
duration
p
resets, made for different
p
ur
p
oses.
G
eneral/Video
S
hare/MM
S
Mode
.
O
thers Tab
]
Save to:
C
hoose to save a video clip to
Phone or Memory Card.
]
V
o
i
ce
: M
u
t
e
o
r
u
nm
u
t
e
th
e
v
o
i
ce.
]
Recordin
g
Tones
:
Set Recordin
g
Tones
O
n or
O
ff
.
]
Reset Settin
g
s
:
All
ows you to set to t
h
e
d
e
f
ault settin
g
s
.
n
No
t
e
In Video Record mode, you can adjust the zoom
s
cale by moving the slider. The maximum zoom
levels de
p
end on the resolution as follows.
R
eso
l
ut
i
on
Z
oom sca
l
e
320*24
0
L
eve
l
1 ~
L
eve
l
1
0
1
76*14
4
L
eve
l
1 ~
L
eve
l
1
0
Mul
t
i
m
edia
81
Al
bum
Y
ou can v
i
ew t
h
e
Alb
um conta
i
n
i
ng your
Pi
ctures an
d
Vid
eos.
F
or more ava
il
a
bl
e
op
t
i
ons, touc
h
.
O
ne b
y
O
ne View/
S
ort b
y
/
S
end/Print via
Bluetooth
/
Delete
/S
lide
S
how
/
Delete Al
l
.
Web Pages
T
ouc
h
t
h
en c
h
oose ta
b
an
d
touc
h
.
RSS
Reade
r
With this function,
y
ou can o
p
en and view
f
iles created in the format with RSS. The
f
ollowing options are available with the
m
enu.
]
Upd
ate: You can u
p
date one RSS feed if
y
ou can access t
h
e networ
k
.
]
Upd
ate a
ll
: You can u
p
date R
SS
feeds with
j
ust one c
li
c
k.
]
New R
SS
Feed
:
You can add an R
SS
feed
manua
lly
.
]
M
o
v
e:
Move a R
SS
feed to another folder
w
hich
y
ou added manuall
y.
]
De
l
e
t
e:
Allows you to erase the selected
R
SS
feed.
]
Send URL: Allows the R
SS
information to
b
e sent via SMS to another person
.
]
N
e
w F
o
l
de
r
:
Add a new
f
older manually.
]
U
p
d
ate sc
h
e
d
u
l
e:
Y
ou can c
h
an
g
e t
h
e
schedule for updatin
g
RSS feeds
.
]
D
elete All: Delete all R
SS
feed.
B
oo
k
mar
k
s
This
f
unction allows you to store and edit
f
requently accessed sites
.
The
f
ollowin
g
options are available with the
menu.
]
N
ew
B
oo
k
mar
k
:
Add
a new
b
oo
k
mar
k
manua
ll
y.
]
S
end URL:
All
ows t
h
e
b
oo
k
mar
k
i
nformation to be sent via
S
M
S
to another
person
.

Mul
t
i
m
edia
82
]
N
e
w F
o
l
de
r
:
Allows
y
ou to add a new
f
older, manuall
y
.
]
Li
s
t Vi
e
w: You can view the preset
boo
km
a
rk
s
li
s
t
.
<
P
ortra
i
t
Vi
ew
>
n
No
t
e
Pre-installed bookmarks cannot be deleted or
edited b
y
users.
I
n order to chan
g
e the text input mode
f
or
s
y
mbol in
p
ut,
p
lease refer to the General
Fu
n
c
t
io
n
s
sec
t
io
n.
S
aved Pa
g
es
This saves the page on display as an offline
file. A maximum of 20 pages can be saved
.
R
ecent Pa
g
e
s
Y
ou can view a list of some of the pages
r
ecent
ly
v
i
s
i
te
d.
83
Stuff My
Audio
T
ouc
h
an
d
t
h
eta
b,
t
h
en c
h
oose .
]
S
ho
p
Tones:
Thi
s menu opt
i
on connects to
A
T&T’s rin
g
tone download site
.
]
A
nswer
T
ones:
Thi
s menu opt
i
on s
h
ows
the list o
f
the sites which is related with
A
T
&
T’s answer tone.
]
V
o
i
ce
R
ecor
d
er
:
Y
ou can recor
d
your own
a
u
di
o
b
y touc
hi
n
g
.
]
You can view the audio files in the list
.
Pictures
T
ouc
h
an
d
t
h
eta
b,
t
h
en c
h
oose .
Thi
s a
ll
ows you to v
i
ew p
i
ctures w
h
en
b
rows
i
n
g
.
]
S
ho
p
G
ra
p
hics
:
C
onnects to AT
&
T’s
g
rap
hi
c
d
own
l
oa
d
s
i
te
.
]
T
a
k
e
Ph
oto:
I
t ta
k
es you to move to
t
h
e camera mo
d
e.
]
M
ake
G
IF Animated file:
Y
ou can
make an animation file with the selected
i
mages
i
n t
h
e
li
st
.
]
You can view the graphic files in the list
.
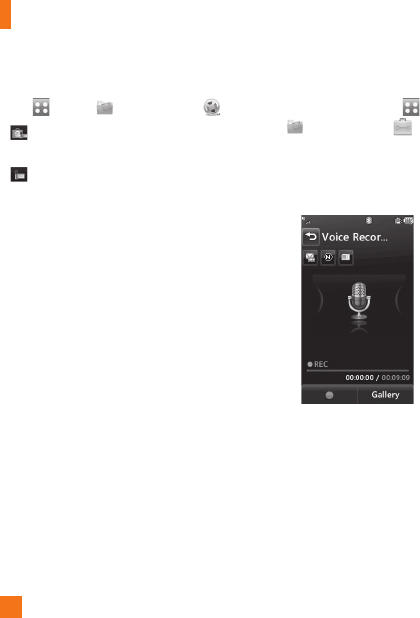
My
Stuf
f
84
Video
T
ouc
h
an
d
t
h
eta
b,
t
h
en c
h
oose .
]
S
ho
p
Videos
:
Y
ou can
d
own
l
oa
d
vid
eos.
]
R
ecor
d
Vid
eo
:
Y
ou can recor
d
your
own v
id
eo
.
]
You can view the video
f
iles in the list
.
n
No
t
e
DRM sometimes restricts some functions
,
such
as
se
n
d
a
n
d
ed
it.
Tools
F
rom the Standby screen, touch
,
an
d
t
h
eta
b,
t
h
en c
h
oose .
V
o
i
ce
R
ecor
d
er
U
se the Voice Recorder to record voice
m
emos or other sounds
.
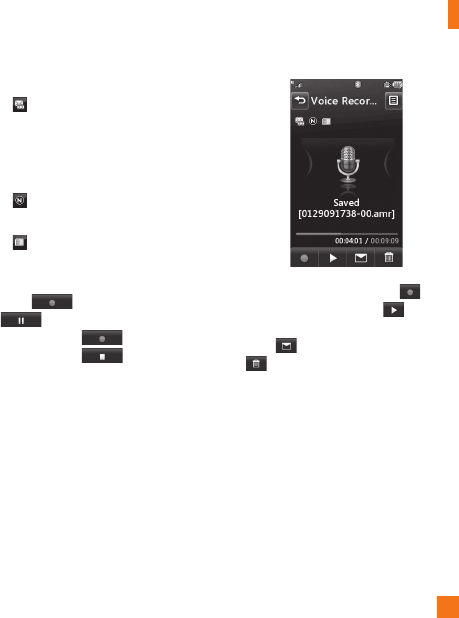
My
Stuf
f
85
]
Settings
•
R
eco
r
d
M
ode
:
M
M
S
record
m
ode
s
h
o
rt
e
n
s
th
e
tim
e
so
th
a
t
the recordin
g
can fit in an MMS
a
nd General mode provides lon
g
er
r
ecordin
g
time
.
•
Quality: Set the audio's quality to
Fine, Normal or Economy
.
•
S
elect Stora
g
e Defaults
:
Y
ou
ca
n
a
ssi
g
n the de
f
ault stora
g
e to Phone
Memory or Memory Card.
]
T
ouc
h
to start recor
di
n
g
.
T
ouc
h
to pause recor
di
n
g
.
T
o cont
i
nue
r
ecor
di
n
g
, touc
h
a
g
a
i
n.
T
o stop
r
ecor
di
n
g
, touc
h
.
Th
e recor
di
n
g
will
b
e save
d
automat
i
ca
ll
y
.
]
To start a new recording, touch
.
T
o play the recording, touch . T
o
se
n
d
the recording by Message or Bluetooth,
t
ouc
h . To delete the recording, touch
a
n
d
co
nfirm Y
es.

My
Stuf
f
86
Voice
C
ommand
Voice command is the function whereb
y
your p
h
one
’
s vo
i
ce recogn
i
t
i
on eng
i
ne
identifies the voice of the user and carries
o
ut t
h
e re
q
ueste
d
comman
d
s.
Wh
en t
h
e user
op
erates the voice command function, there
are five
p
ossible commands, call <name or
num
b
er>,
Li
sten to vo
i
cema
il
, m
i
sse
d
ca
ll
s,
m
essages an
d
t
i
me an
d
d
ate.
1.
C
all
<
Name or Number
>:
This function
i
s act
i
vate
d
on
ly
w
h
en t
h
e user sa
y
s t
h
e
c
ommand "
C
all" followed b
y
the name
stored in the Address Book or s
p
ecified
p
h
one num
b
er.
Th
e vo
i
ce eng
i
ne
i
ns
id
e t
h
e
h
an
d
set recogn
i
zes t
h
e user
'
s utterance
a
n
d
di
s
pl
a
y
s name
li
sts or
ph
one num
b
ers
from the
p
hone's Address Book. However,
i
nterfering noise might cause a problem
di
sp
l
ay
i
ng can
did
ates.
Addi
t
i
ona
ll
y, t
h
e user
h
as t
h
e o
p
t
i
on to su
p
er
i
m
p
ose a num
b
er
t
yp
e at t
h
e en
d
, suc
h
as
"
mo
bil
e
"
,
"h
ome
"
or "office"
.
2
. Li
s
t
e
n V
o
i
ce
m
a
il: thi
s
co
mm
a
n
d
i
s
a
ctivated when the user sa
y
s the words
"
Li
s
t
e
n V
o
i
ce
m
a
il". Th
e
use
r will th
e
n
be
a
utomaticall
y
connected to voicemail
.
3
. Missed Calls: thi
s
co
mm
a
n
d
i
s
ac
tiv
a
t
ed
w
hen the user says the words "Missed
C
alls". The mobile phone presents missed
ca
ll li
s
t
s.
•
co
mm
a
n
ds
a
v
a
il
ab
l
e
t
o
user
-
y
es:
ma
k
e t
h
e p
h
one ca
ll
-
no: moves to the next missed call lis
t
-
cance
l:
g
o
b
ac
k
to t
h
e ma
i
n vo
i
ce
c
omman
d
menu
-
ex
i
t
:
term
i
nate vo
i
ce comman
d
4.
M
essa
g
es
:
t
hi
s comman
d
i
s act
i
vate
d
wh
en t
h
e user says t
h
e wor
d
"M
essa
g
es
"
.
T
he phone displays details of unread SMS
or MMS messa
g
es
.

My
Stuf
f
87
•
co
mm
a
n
ds
a
v
a
il
ab
l
e
t
o
user
-
y
es
: make the phone cal
l
-
no
: moves to the next unread messa
ge
-
ca
n
ce
l
:
g
o back to the main voice
co
mm
a
n
d
m
e
n
u
-
ex
i
t
:
term
i
nate vo
i
ce comman
d
5. Time & Date: this command is activated
when the user says the words "time and
date". The phone displays the current local
t
ime and date
.
The Voice Command function also has options
access
ibl
e
b
y press
i
n
g
w
h
en
i
n t
h
e
V
o
i
ce
Command screen. They are
:
•
M
o
de
-
Sp
eed
:
vo
i
ce comman
d
i
s a
bb
rev
i
ate
d
-
N
orma
l
: vo
i
ce comman
d
i
s p
l
aye
d
n
orma
ll
y
• B
es
t m
a
t
ch
-
1 M
a
t
c
h
:
the most likely match will be
displayed,
f
indin
g
a number
f
rom the
Add
r
ess
B
ook
-
4 M
a
t
c
h
es
: the
f
our most likely matched
n
ames will be displayed,
f
indin
g
names
f
r
o
m th
e
A
dd
r
ess
B
oo
k
• Sensitivit
y
-
High:
Operation and performance of
th
e vo
i
ce reco
g
n
i
t
i
on en
gi
ne
i
s rare
l
y
a
ff
ected by the user's voice command and
s
urroun
di
n
g
soun
d.
-
Medium
:
Operation of voice reco
g
nition
e
n
g
ine is normally a
ff
ected by user's voice
command and surroundin
g
sound
.
-
L
ow
:
Operation of voice reco
g
nition
e
n
g
ine is stron
g
ly a
ff
ected by user's voice
comman
d
an
d
surroun
di
n
g
soun
d.
My
Stuf
f
88
• Speakerphone Mode
-
Automatic On
:
When this option is
selected, sound is loud enou
g
h so you can
h
ear the output when the phone is away
f
rom the ear
,
at a distance.
-
Off
:
When this option is selected, sound
i
s quieter, and can only be heard throu
g
h
the Earpiece
.
• Call Alert
-
Ri
n
g
on
l
y:
Ri
n
g
repeate
dl
y w
h
en you
r
ece
i
ve a ca
ll.
-
Rin
g
A
f
ter Name
:
Tells name o
f
the
c
ontact you saved once and then rin
g
r
epeatedly when you receive a call
.
-
N
ame
R
e
p
eat
:
Tells name o
f
the contact
y
ou save
d
repeate
dl
y w
h
en you rece
i
ve a
c
a
ll
.
N
ote
p
ad
Y
ou can create u
p
to a maximum of 30
m
emos
.
1.
T
ouc
h
an
d
c
h
oose .
T
ouc
h
an
d
ch
oose
N
ote
p
a
d
.
2.
T
o create a new
N
ote, touc
h
N
ew
N
ote
,
i
n
p
ut t
h
e memo an
d
touc
h
to save
.
W
orld
C
lock
The World clock function
p
rovides time
information for major cities worldwide
.
n
Not
e
T
he
f
irst time you use this
f
unction, you will be
asked to enter the name of your current
C
ity.
1
. To add a new City from where you can
see the local time
,
touch
a
n
d
se
l
ec
t
New Cit
y
.
2.
Touch the City in the red box, a list of
a
vailable cities
(
in different time zones
)
will
d
isplay. From there you can select what
tim
e
z
o
n
e
t
o
add.
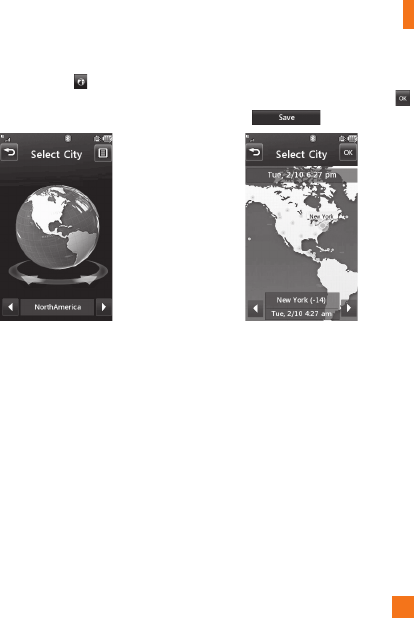
My
Stuf
f
89
]
T
o make it easier
,
touch
a
n
d
It will
show the
G
lobe. Touch the continent and
c
hoose cit
y
y
ou want to know the time.
]
Y
ou will see its date and time o
f
that cit
y
o
n th
e
bo
tt
o
m
s
i
de
of
th
e
sc
r
ee
n. T
ouc
h
a
n
d
t
ouc
h
.
My
Stuf
f
90
T
as
k
s
This feature allows you to save and manage
a tas
k.
1.
T
ouc
h
.
2.
In
p
ut Due Date, Note and Priorit
y
for the
n
ew
T
as
k.
3.
T
ouc
h
to save t
h
e
T
as
k
i
tem
.
The following options are available by
p
ressing in th
e
m
a
in T
as
k
s
m
e
n
u
:
]
N
e
w T
as
k: Allows
y
ou to create a new
t
as
k
.
]
De
l
e
t
e:
Op
ens the menu from where
y
ou
ca
n
se
l
ec
t T
as
k
s
t
o
de
l
e
t
e
.
]
Selective Delete
:
Allows
y
ou to delete
tasks for All
C
om
p
leted/All Past Tasks
selectivel
y
.
]
Send Task Via: En
ab
l
es
th
e
se
l
ec
t
ed
t
as
k
to be sent via Text Messa
g
e/Multimedia
M
essa
g
e/Bluetooth
®
.
]
View Calendar: Th
e
ca
l
e
n
da
r win
do
w
w
ill dis
p
la
y
, from there
y
ou will be able to
c
r
ea
t
e
N
e
w T
as
k
s.
S
to
p
watc
h
Thi
s menu a
ll
ows
y
ou to recor
d
t
h
e e
l
a
p
se
d
t
ime of an event. The duration of an individual
l
a
p
time (u
p
to 20 times) and the total time
can a
l
so
b
e
di
s
pl
a
y
e
d.
]
N
ew
Ti
m
e
1.
T
o start t
i
m
i
ng, touc
h
.
Th
e runn
i
ng t
i
me
i
s
di
sp
l
aye
d
as
H
H.MM.SS.hh
(
hours, minutes, seconds,
h
undredths of a second
).
2.
D
ur
i
ng t
h
e t
i
m
i
ng, you can recor
d
an
i
n
di
v
id
ua
l
l
ap t
i
me
b
y touc
hi
ng
.
Up
to 20
l
a
p
t
i
mes can
b
e recor
d
e
d.
3.
You can stop timing by touching
o
r restart by touching
.
4.
To reset the sto
p
watch, touch
.
]
S
aved Times
:
Y
ou
ca
n
see
th
e
sa
v
ed
r
eco
r
ded
tim
es
.
]
S
how Last
:
Dis
p
la
y
s the last time taken
w
ith the
S
to
p
Watch
.
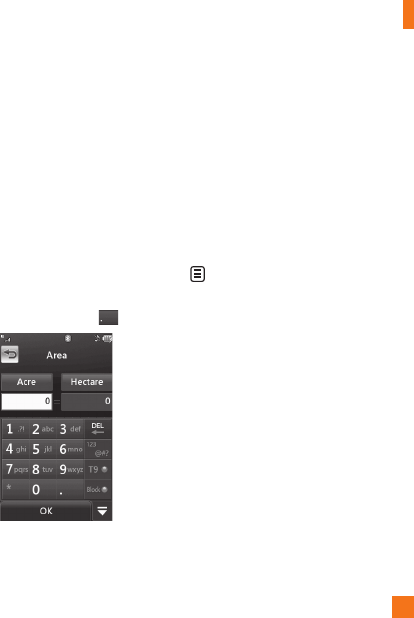
My
Stuf
f
91
Ti
p
Calculator
This feature allows
y
ou to
q
uickl
y
and easil
y
ca
l
cu
l
ate t
h
e t
ip
amount
b
ase
d
on t
h
e tota
l
bill as well as the s
p
lit of the total bill based
o
n the number of
p
eo
p
le
.
U
nit
C
onverter
This function converts an
y
measurement into
a un
i
t
y
ou want.
There are 6 t
yp
es of units that can
b
e converte
d
:
A
rea,
L
engt
h
,
W
e
i
g
h
t,
T
em
p
erature,
V
o
l
ume an
d
V
e
l
oc
i
t
y
.
T
o
i
n
p
ut
d
ec
i
ma
l
num
b
er, touc
h
.
C
alendar
Wh
en
y
ou enter t
hi
s menu, a ca
l
en
d
ar w
ill
b
e
di
s
pl
a
y
e
d
.
Th
e re
d
s
q
uare cursor
i
s use
d
t
o
l
ocate a
p
art
i
cu
l
ar
d
a
y
.
Th
e
b
ottom
b
ar on
t
he calendar indicates schedule
(
s
)
for that
da
y
. This function hel
p
s to remind
y
ou of the
s
c
h
e
d
u
l
e.
Th
e
ph
one w
ill
soun
d
an a
l
arm tone
if it has been set for a s
p
ecific schedule item
.
The following options are available when you
op
en the
C
alendar function and touch the
menu.
]
New
S
chedule:
All
ows
y
ou to a
dd
a new
sc
h
e
d
u
l
e on t
h
e
d
ate
y
ou se
l
ect
.
]
S
earch:
All
ows
y
ou to searc
h
t
h
e save
d
schedule
(
s
)
.
]
S
end
S
chedule Via:
S
end
y
our schedule
v
ia text message, multimedia message or
b
l
ue
t
oo
th
.
]
Set Holida
y:
Allows
y
ou to set
y
our
p
ersonal holida
y
for the selected date.
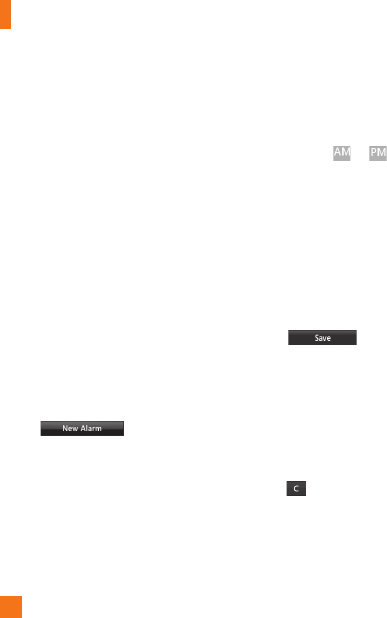
My
Stuf
f
92
]
Vi
e
w All: Allows
y
ou to view all saved
sc
h
edu
l
es.
]
Wee
k Vi
e
w: Allows you to chan
g
e
Calendar view mode from Monthly View to
Wee
k Vi
e
w.
]
Go to Date: Allows you to
j
ump to a
speci
f
ic date
.
]
Selective Delete
:
Allows you to delete
Old Schedules or All Schedules selectively.
]
S
ettin
g
s
:
Allows you set De
f
ault View and
W
ee
kl
y
B
e
gi
n
d
ay.
Alarm
C
loc
k
The alarm
f
unction allows you to set up
m
ultiple separate alarms. You can also set
t
he time, repetition interval and alarm sound.
S
elect your desired alarm settin
g
to confi
g
ure
f
rom the alarm list. I
f
there is no alarm
s
ett
i
n
g
,
.
]
T
im
e:
S
elect the desired set time mode
usin
g
the select. Input your desired alarm
time by speci
f
yin
g
the hour and minutes. I
f
the time is in the 12 hour
f
ormat,
y
ou have
t
o
se
l
ec
t
e
ith
e
r
or
by touchin
g
it
.
]
Repeat: Select the desired repeat mode
usin
g
the select.
]
Al
a
rm T
o
n
e
:
S
elect the alarm sound to use
f
or the alarm usin
g
the Center key.
]
M
e
m
o
: Input alarm name.
]
S
nooze Interval
:
Y
ou can set t
h
e snooze
i
nterva
l
at 5
Mi
nutes
,
15
Mi
nutes
,
3
0
Mi
nutes
,
45
Mi
nutes or
I
H
our.
N
ow
,
T
ouc
h
t
o save your new
Al
arm.
C
alculato
r
The calculator
f
unction allows you to add,
s
u
b
tract, mu
l
t
i
p
l
y an
d
di
v
id
e.
Y
ou can
i
nput
n
um
b
ers an
d
operators us
i
n
g
t
h
e touc
h
k
ey
pad
.
U
se the touch key to delete numbers
.

My
Stuf
f
93
More
O
ther File
s
When you receive
f
iles o
f
an unde
f
ined
f
ormat
(
such as .vcs, .vcf, etc.) via email, the files are
s
aved in this
f
older.
The
f
ollowin
g
options are available by
t
ouchin
g
the menu
.
]
S
end
:
S
end the selected file via Bluetoot
h
®
or MM
S.
]
D
e
l
ete
:
All
ows you to
d
e
l
ete t
h
e se
l
ecte
d
f
ile.
]
M
ove
T
o: You can move selected
f
iles to
the Phone Memory or Memory Card
(if applicable)
.
]
C
o
p
y To: You can copy selected files to the
Phone Memory or Memory Card
(if applicable)
.
]
R
ename
:
You can edit the name of the
selected file
.
]
N
ew
F
o
ld
er
:
All
ows you to ma
k
e a new
folder.
]
Sort b
y
: You can sort the
f
olders b
y
name,
d
ate and t
yp
e
.
]
De
l
e
t
e
All: Y
ou
ca
n
de
l
e
t
e
a
ll
f
il
es
a
n
d
fo
l
de
r
s.
]
Used Space
:
Y
ou
ca
n vi
e
w int
e
rn
a
l
a
n
d
external memory status
.
M
emory
C
ar
d
Thi
s
fu
n
c
ti
o
n
s
h
o
w
s
th
e
f
il
es
in th
e
e
xt
e
rn
a
l
m
icroSD™ card memory.

94
t
tingsSe
t
Call
T
ouc
h
an
d
t
h
eta
b,
t
h
en c
h
oose .
C
all Forwardin
g
Wh
en t
hi
s networ
k
serv
i
ce
i
s act
i
vate
d
, you
can direct your incomin
g
calls to another
number,
f
or example, to your voice mailbox
number. For details
,
contact AT&T. Select one
of
the divert options,
f
or example, select I
f
B
usy to divert voice calls when your number is
busy or when you re
j
ect an incomin
g
call.
The
f
ollowin
g
options are available:
]
All Voice
C
alls:
Di
verts vo
i
ce ca
ll
s
uncon
di
t
i
ona
ll
y.
]
If
Busy:
Di
verts vo
i
ce ca
ll
s w
h
en t
h
e p
h
one
i
s
i
n use
.
]
If
No Answer:
Di
verts vo
i
ce ca
ll
s w
hi
c
h
y
ou
d
o not answer
.
]
I
f
O
ut of Reach
:
Di
verts vo
i
ce ca
ll
s
w
hen the phone is switched off or out of
c
overage
.
]
D
eact
i
vate
All
: Turns
O
ff all call
f
orwarding options so that all incoming
c
a
ll
s are rece
i
ve
d
b
y your
h
an
d
set
.
S
end M
y
Number
Thi
s networ
k
serv
i
ce a
ll
ows
y
ou to set
y
our
ph
one num
b
er to
b
e
di
s
pl
a
y
e
d
O
nor
hidd
en
O
ff from the person you are calling. You
can se
l
ect
S
et b
y
Networ
k
if
y
ou
p
refer to
h
ave different settings for different service
p
rov
id
ers
.
A
u
t
o
R
ed
i
a
l
S
elect On,
y
our
p
hone redials the number
you're trying to call up to 10 times after you
h
ear a qu
i
c
k
,
b
usy s
i
gna
l
.
P
ress to sto
p
th
e ca
ll
attem
p
ts
.
This feature attem
p
ts to redial numbers that
are engage
d
d
ue to t
h
e w
i
re
l
ess networ
k
.
I
t
d
oes not re
di
a
l
num
b
ers to an engage
d
party
.
n
N
o
t
e
Th
ere w
ill
b
e no a
l
ert
i
n
di
cat
i
n
g
t
h
e ca
ll
h
as
b
een connecte
d
.
Y
ou must sta
y
on t
h
e
li
ne to
hea
r w
he
n t
he
call
is
co
nn
ec
t
ed.

Settings
95
An
s
w
e
r M
ode
Thi
s a
ll
ows
y
ou to
d
eterm
i
ne
h
ow to answer
th
e
ph
one
.
]
A
n
y
K
e
y
:
Y
ou can answer an
i
ncom
i
ng ca
ll
b
y touc
hi
ng t
h
eor t
h
e mu
l
t
i
tas
ki
ng
k
ey.
]
S
end Ke
y
O
nl
y
:
Y
ou can on
ly
answer an
i
ncom
i
ng ca
ll
b
y press
i
ng t
h
e
k
e
y.
M
in
u
t
e
Min
der
This o
p
tion allows
y
ou to s
p
ecif
y
whether the
ph
one w
ill
b
eep every m
i
nute
d
ur
i
ng a ca
ll
to
k
eep you informed of the length of the call
.
C
all Waitin
g
The network will notify you of a new incoming
call while you have a call in progress.
S
elect
A
ct
i
vate to re
q
uest t
h
e networ
k
to act
i
vate
ca
ll
wa
i
t
i
ng, or se
l
ect
D
eact
i
vate to request
th
e networ
k
to
d
eact
i
vate ca
ll
wa
i
t
i
ng or
View
S
tatus, to check if the function is active
o
r not
.
C
all Re
j
ec
t
This menu allows
y
ou to turn
O
n or
O
ff
C
all
R
eject for all numbers or the numbers in the
C
all Reject List
.
]
C
all Re
j
ect
O
n/
O
ff
:
This feature allows
y
ou to c
h
oose w
h
et
h
er to re
j
ect
i
ncom
i
ng
c
alls, or calls from s
p
ecific
p
hone numbers.
Wh
en t
h
e
R
e
j
ect All
C
all
s
o
p
t
i
on
i
s set,
all
i
ncom
i
ng ca
ll
s are route
d
di
rect
l
y to
V
o
i
cema
il
.
R
e
j
ect on
Li
st a
ll
ows
y
ou to
enable
C
all Reject for the numbers saved on
y
our
C
all Reject List
.
]
C
all Re
j
ect List: After touching
,
y
ou can a
dd
to t
h
e ca
ll
r
eject list by selecting [Contact List] or
[
New Number]. When
y
ou add a number to
the
C
all Reject list, you can add the number
b
y entering it directly or by searching for
the number in the
C
ontact List
.
S
etting
s
96
S
end DTMF Tones
S
elect from
/
.
TTY
S
elect from TTY Full/TTY Talk/TTY Hear/TTY
O
ff
.
Time
&
C
os
t
You can check Call Duration and Data Counter.
Date & Time
T
ouc
h
, an
d
t
h
eta
b
, t
h
en c
h
oose
.
]
S
et Date
:
Thi
s a
ll
ows
y
ou to enter t
h
e
d
a
y
,
mont
h
an
d
year.
Y
ou can c
h
ange t
h
e
d
ate
f
ormat via the Date Format menu o
p
tion
.
d
dd, MMM DD (da
y
, month date)
M
M/DD/YYYY (month/date/
y
ear)
D
D/MM/YYYY (date/month/
y
ear
)
YYYY/MM/DD (
y
ear/month/date
)
]
Set Time: This allows
y
ou to enter the
cu
rr
e
nt tim
e
. Y
ou
ca
n
c
h
oose
th
e
tim
e
f
ormat via the Time Format menu o
p
tion,
w
hi
c
h
a
r
e
12 H
ou
r
s
a
n
d
24 H
ou
r
s.
Also you can set Dayli
g
ht
S
avin
g
Time for
1 H
ou
r
o
r 2 H
ou
r
s.
]
Auto Update
:
S
elect to set the phone
to automatically update the time and date
a
ccordin
g
to the current local time zone
.
Sound
T
ouc
h
,
and the tab
,
then choose
.
S
hop Tone
s
C
onnects to AT
&
T Rin
g
tone
S
hops
.
V
o
l
ume
This menu controls Rin
g
tone
&
Alerts,
Multimedia,
C
all and Keypad volume
.

Settings
97
R
in
g
tone
]
S
ounds:
S
hows and plays ring tones.
Y
ou can select your preferred Ringtone by
touc
hi
ng t
h
e r
i
ngtone
li
ste
d.
]
Al
ert
T
y
p
e:
S
upports 3 ring alert types.
Ring, Ring
&
Vibrate and Ring after
Vib
rat
i
on
.
]
I
ncreas
i
ng
Ri
ngtone
:
All
ows
y
ou to se
l
ect
a
n
I
ncreas
i
ng
Ri
ngtone type w
hi
c
h
i
s p
l
aye
d
wh
en you rece
i
ve an
i
ncom
i
ng ca
ll
.
Y
ou can
e
l
ect to turn t
hi
san
d
.
M
essa
g
e Tone
]
S
ounds:
S
hows and plays message tones.
Y
ou can select your preferred Ringtone by
touc
hi
ng t
h
e r
i
ngtone
li
ste
d.
]
Al
ert
T
y
p
e:
S
upports 6 message alert
types: Ring
O
nce, Ring Every 2 Min., Ring
Every 15 Min., Ring
&
Vibrate, Vibrate and
S
ilent
.
n
N
o
t
e
F
u
ll
l
en
g
t
h
mus
i
c trac
k
s cannot
b
e set as e
i
t
h
er
r
i
ngtones or message tones
.
Al
e
rt T
o
n
e
]
S
ounds
:
Allows
y
ou to select a set of alert
tones.
S
u
pp
orts 2 alert tone t
yp
es, Alert
T
one 1 an
d
Al
ert
T
one 2
.
]
Al
ert
T
y
p
e:
Y
ou can e
l
ect to turn
Al
ert
T
ones to Ring or
S
ilent.
K
ey
p
ad Tone
Thi
s menu o
p
t
i
on a
ll
ows
y
ou to se
l
ect a tone
th
at t
h
e
ph
one soun
d
s w
h
en a
k
e
y
i
s
p
resse
d
.
Y
ou can se
l
ect an o
p
t
i
on
b
etween
B
ee
p
an
d
V
o
i
ce
.
Power On
/
Off Tones
You can elect to turn Power
O
n/
O
ff Tones to
Ri
n
g
or
S
ilent
.
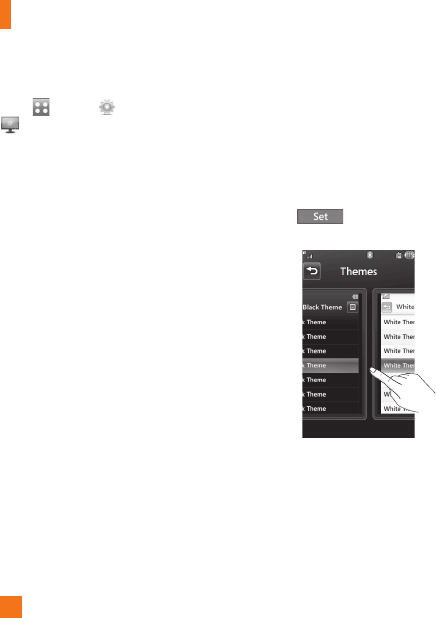
S
etting
s
98
Display
T
ouc
h
,
an
d
t
h
eta
b,
t
h
en c
h
oose
.
G
et New
G
raphics
Connects to AT&T’s
g
raphics download site
.
W
a
ll
paper
s
F
rom this menu you can select to have a
p
icture
f
or a back
g
round or no back
g
round
at all.
F
onts
You can con
f
i
g
ure the
f
ont size and color
of
the numbers which appear in the Dialin
g
s
creen w
h
en you ma
k
e a ca
ll.
B
r
i
g
h
tnes
s
You can set the bri
g
htness o
f
the display
s
creen
.
B
ackli
g
ht Time
r
Use this to set the duration of the touch
s
creen
b
ac
kli
g
h
t an
d
k
eypa
d.
Th
e
m
es
Y
ou can change the whole look of display.
Touch the screen and drag it from right to left
an
d
touc
h
to c
h
ange
di
sp
l
ay t
h
eme
from Black to White or vice versa
.
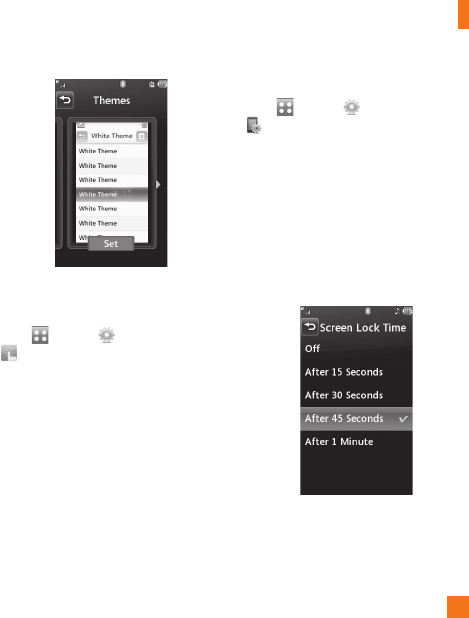
Settings
99
Touch
T
ouc
h, and the tab, then choose
.
You can customize the Touch settings and
change Touchscreen Feedback types such
as Vibration,
S
ound, Vibration
&
S
ound and
S
ilent.
Also
y
ou can choose Vibration t
yp
e and
adjust its intensity. When you set
S
ound as
Touchscreen Feedback t
yp
e,
y
ou can choose
s
ound type and adjust its volume
.
Phone
T
ouc
h
,
an
d
t
h
eta
b,
t
h
en c
h
oose
.
L
anguages
You can chan
g
e the lan
g
ua
g
e
f
or the display
t
ext on your phone. This chan
g
e will also
a
ff
ect the Lan
g
ua
g
e Input mode
.
Auto
S
creen Loc
k
This allows you to set the amount o
f
time
be
f
ore your screen locks automatically
.
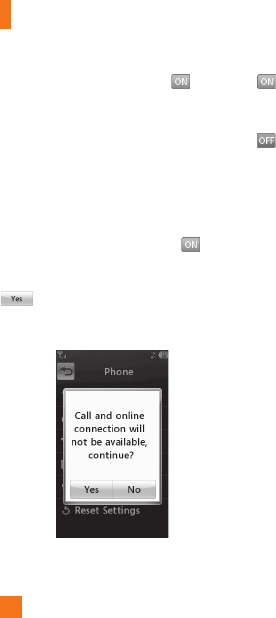
S
etting
s
100
If
y
ou set Wh
e
n
s
li
de
r i
s
c
l
osed
,
the
s
creen will be locked automaticall
y
when
y
ou
s
lide down the
p
hone
.
S
et Flight Mode
This allows
y
ou to use onl
y
the
p
hone's
f
eatures that do not re
q
uire the use o
f
the
wireless network when
y
ou are in an air
p
lane
o
r in
p
laces where the wireless network is
p
rohibited. I
f
you set the
f
li
g
ht mode
,
y
ou will be
p
rom
p
ted to con
f
irm
y
our
s
election. A
f
ter you con
f
irm it by touchin
g
the Fli
g
ht mode icon will be displayed
o
n the screen instead o
f
the network si
g
nal
i
co
n
.
]
:
You cannot make
(
or receive
)
an
y
c
alls, includin
g
emer
g
ency calls or use other
f
eatures that require network covera
g
e
.
]
:
Deactivates Fli
g
ht Mode and re
-
establishes your wireless connections
.
S
ecurit
y
V
arious codes and passwords are used to
protect the
f
eatures and settin
g
s o
f
your
phone. They are described in the
f
ollowin
g
sec
ti
o
n
s.
]
Ph
o
n
e
l
oc
k: You can use a security code
to avoid unauthorized use o
f
the phone.
I
f you set phone lock to When Power On,
the phone will request a security code
w
henever you switch the phone on. I
f
you
set the phone lock to When SIM Chan
g
ed,
y
our phone will request a security code only
w
hen you chan
g
e your SIM Card. If you set
the phone lock to Lock Phone Now, your
p
hone will lock immediately.

Settings
101
]
PIN Code Request
:
Wh
e
n th
e
PIN
code
r
e
q
uest
f
eature is set to ,
y
ou mus
t
enter
y
our PIN each time
y
ou switch the
p
hone on.
C
onse
q
uentl
y
, an
y
p
erson who
d
oes not have
y
our PIN cannot use
y
our
p
hone without
y
our a
pp
roval
.
n
Not
e
Before setting the PIN code request feature to
O
ff, you must enter your PIN.
The following options are available:
]
:
Y
ou must enter t
h
e
PIN
eac
h
t
i
me t
h
e
ph
one
i
s sw
i
tc
h
e
d
on
.
]
:
Th
e
ph
one connects
di
rect
ly
to t
h
e
n
etwor
k
w
h
en
y
ou sw
i
tc
h
i
t on
.
]
Fi
xe
d
Di
a
l
N
um
b
er
:
Thi
s a
ll
ows
y
ou to
r
estr
i
ct your outgo
i
ng ca
ll
s to se
l
ecte
d
p
hone numbers, if this function is su
pp
orted
by
y
our
S
IM
C
ard. The PIN2 code is
r
e
q
u
i
re
d
.
• FDN On/Of
f
-
: You can only call phone numbers
s
t
o
r
ed
in th
e
FDN Li
s
t. Y
ou
m
us
t
e
nt
e
r
your PIN2
.
-
: You can call any number
.
• FDN Li
s
t
:
You can enter new FDN entry.
n
N
ot
e
N
ot all
S
IM
C
ards have a PIN2. If your
S
IM
C
ard
does not, this menu o
p
tion is not dis
p
la
y
ed
.
]
C
hange
C
odes: The Change codes feature
all
ows you to c
h
ange your current passwor
d
to a new one.
Y
ou must enter t
h
e current
p
assword before
y
ou can s
p
ecif
y
a new
one. You can change the access codes for:
S
ecurit
y
C
ode, PIN1, PIN
2

S
etting
s
102
A
u
t
o
R
o
t
a
ti
on
S
elect whether or not
y
ou want the
p
hone
t
o rotate automaticall
y
when
y
ou rotate
t
he
p
hone
(
for exam
p
le, from Portrait to
L
andsca
p
e Mode
)
.
P
lease note that the
p
hone ma
y
not alwa
y
s
rotate, depending on what function may be
currently running
.
R
eset Settin
g
s
This function allows
y
ou to restore factor
y
s
ettings. To do this, you need the security
code.
]
M
as
t
e
r R
ese
t
:
Restores the settings
(
e.g.:
Audio, Display, Language, Date
&
Time,
Bl
ue
t
oo
t
h
®
Settings
)
stored in the handset
memor
y
to default values
.
]
Master Clear
:
Deletes downloaded/user
c
reated contents
(
e.
g
.: ima
g
es, videos
)
f
r
o
m H
a
n
dse
t
co
nt
e
nt
a
n
d
th
e
Ext
e
rn
a
l
M
emor
y
card
.
•
Ph
one
-
D
e
l
etes a
ll
d
own
l
oa
d
e
d/
user create
d
Ima
g
es, Videos & Sounds from the
H
an
d
set
M
emory
.
-
Deletes Personal In
f
ormation stored
i
n the handset memory (e.
g
.: address
b
ook, messa
g
es, tasks, alarm, Calendar
schedules) to default values
.
-
R
estores t
h
e sett
i
n
g
s store
d
i
n t
h
e
h
andset memory to the de
f
ault values
.
•
M
emory
C
ard: Deletes all contents from
t
he External Memory Card
.
S
ettings
103
Bluetooth®
T
ouc
h
, an
d
t
h
e ta
b
, t
h
en c
h
oose
.
Y
our p
h
one
h
as
b
u
il
t-
i
n
Bl
uetoot
h
®w
i
re
l
ess
t
echnology, which makes it possible for you
t
o connect your p
h
one w
i
re
l
ess
l
y to ot
h
er
Bl
uetoot
h
®
devices such as a hands-free
device, P
C
, PDA, a remote screen or other
ph
ones.
Th
e
d
ev
i
ces reg
i
stere
d
i
n your p
h
one
can only be connected one at a time. (To make
a connection to the same type of device or
c
h
ange
Bl
uetoot
h
®
preferences, disconnect
t
he existing device first.
)
Y
ou can
h
ave a conversat
i
on v
i
a a cor
dl
ess
Bl
uetoot
h
®
hands-free
p
hone or browse the
I
nternet, w
i
re
l
ess
ly
connecte
d
, v
i
a a mo
bil
e
ph
one.
You can also exchange, for example, business
car
d
s, ca
l
en
d
ar
i
tems an
d
pi
ctures
.
M
o
biTV
,
XMR
a
di
o or
M
us
i
c
Pl
ay
i
ng
i
s
s
upporte
d
t
h
roug
h
a
Bl
uetoot
h
®
h
ea
d
set
.
Hands-
f
ree
p
ro
f
ile
T
his icon appears when the hands-
f
ree
p
ro
f
ile is used between the hands-
f
ree
d
ev
i
ce.
Thi
s a
ll
ows you to ca
ll
us
i
n
g
a
Bl
uetoot
h
®connect
i
on
.
A2DP profile
T
his icon appears when the A2DP pro
f
ile
is
used
be
tw
ee
n th
e
s
t
e
r
eo
h
eadse
t
d
evice and the phone. This allows you
to listen to an audio clip. A2DP is the
Advanced Audio Distribution Pro
f
ile
,
w
hich provides support
f
or streamin
g
either mono or stereo audio usin
g
Bl
ue
t
oo
t
h
®
.
Hands-free + A2DP profil
e
T
his icon a
pp
ears when both
p
rofiles of
th
e
h
a
n
ds
-fr
ee
a
n
d
th
e
A2DP
a
r
e
used
between the com
p
atible device and
the
p
hone. This allows
y
ou to call and
listen to an audio clip using a Bluetoot
h
®
co
nn
ec
ti
o
n
.
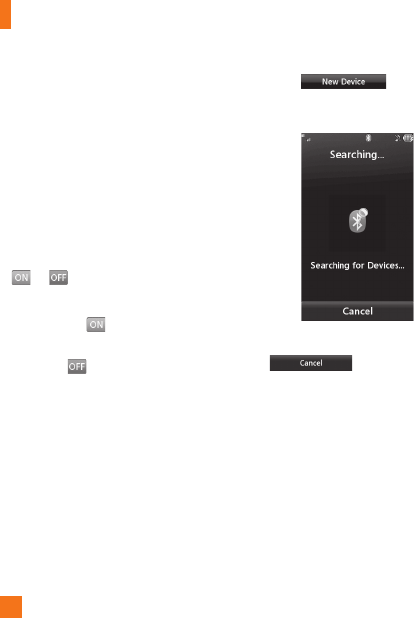
S
etting
s
104
Wh
en us
i
ng eac
h
d
ev
i
ce, see t
h
e manua
l
t
h
at
comes w
i
t
h
t
h
e
d
ev
i
ce
.
n
N
o
t
e
W
e recommend that
y
our
p
hone and the
Bl
ue
t
oo
th
®
device you are communicatin
g
with
s
h
ou
ld
b
e no more t
h
an 10 meters apart.
Th
e
connection may be improved i
f
there are no
so
lid
o
bj
ects
b
etween your p
h
one an
d
t
h
e ot
h
er
Bl
uetoot
h
®
d
ev
i
ce
.
]
Bl
uetoot
h
®
:
Thi
s menu sets t
h
e
Bl
uetoot
h
®
or
.
]
M
y
Vi
s
ibili
ty
- Selecting the opt
i
on exposes your
p
h
one to ot
h
er
Bl
uetoot
h
®
d
ev
i
ces
.
- Selecting s
h
ows your p
h
one to
a
l
rea
d
y-pa
i
re
d
d
ev
i
ces on
l
y
.
]
S
earch New Device
:
This function allows
y
ou to search for and add new devices
.
]
My
D
ev
i
ces: This function allows
y
ou to
v
iew the list of all devices that are
p
aired
wi
t
h
y
our
ph
one.
1.
T
ouc
h
to search
f
or
th
e
d
ev
i
ce t
h
at can
b
e connecte
d,
an
d
whi
c
h
i
s a
l
so w
i
t
hi
n ran
g
e
.
2.
If you want to stop searching, touch
.
3.
All of the devices found are dis
p
la
y
ed
.

S
ettings
105
T
ouc
h th
e
des
ir
ed
de
vi
ce
a
n
d
e
nt
e
r th
e
p
assword. I
f
you would like to search a
g
ain,
touc
h .
]
My Bluetoot
h
®
In
fo
: This menu allows you
to con
f
i
g
ure the pro
f
ile
f
or Bluetoot
h
®
.
-
My Device Name
:
Allows you to chan
g
e
t
he handset's name, this can be seen by
o
th
e
r Bl
ue
t
oo
t
h
®
de
vi
ces
.
-
Supported Services
:
Shows you all
s
ervices that the handset supports
.
-
Primary
S
tora
g
e
:
S
elect from Handset
and Memory Card to save data you
r
ece
i
ve
d
us
i
n
g
Bl
uetoot
h.
More
Touch
,
and the tab
,
then choose
.
C
onnectio
n
US
B
C
onnection Mod
e
You can transfer files from a compatible PC
t
o t
h
e memory
i
n your p
h
one us
i
n
g
t
h
e
M
ass
S
tora
g
e. When you connect the phone to a PC
usin
g
the USB cable, this will be displayed as
a remova
bl
e
di
s
k
t
h
rou
gh
Wi
n
d
ows
E
xp
l
orer
.
The
US
B
C
onnection Mode determines how
your
Ph
one w
ill
commun
i
cate w
i
t
h
ot
h
er
U
SB devices when they are connected with
a
US
B cable
.

S
etting
s
106
I
nternet Pro
f
iles
This menu shows the Internet Pro
f
iles. You
can add, delete and edit Internet Pro
f
iles by
us
i
n
g
t
h
e
M
enu.
H
owever, you cannot
delete or edit de
f
ault con
f
i
g
urations provided
by AT&T.
A
ccess
P
o
i
nt
s
Thi
s menu s
h
ows t
h
e
A
ccess
P
o
i
nts.
Y
ou can
reg
i
ster,
d
e
l
ete an
d
e
di
t
b
y us
i
ng t
h
e
M
enu.
H
owever, you cannot
d
e
l
ete or e
di
t
default configurations provided by AT&T
.
S
tart Up
G
uid
e
Thi
s menu w
ill
start t
h
e an
i
mate
d
gu
id
e.
Thi
s
gu
id
e w
ill
h
e
l
p you, us
i
ng an
i
mate
d
v
i
sua
l
s,
q
uickly learn some of the functions of your
L
G GW370. For the complete list of Guides in
thi
s menu, see page 15
.
Touch
C
alibratio
n
Thi
s menu opt
i
on w
ill
a
ll
ow you to ca
lib
rate
your touc
h
screen.
F
o
ll
ow t
h
e
i
nstruct
i
ons on
th
e screen to comp
l
ete t
hi
s tas
k.
M
emor
y
U
sed Space
Thi
s
f
u
n
c
ti
o
n
s
h
o
w
s
th
e
s
t
a
t
us
o
f th
e
use
r
m
emor
y
of the handset
.
]
Phone Common: This will dis
p
la
y
the
memor
y
currentl
y
used u
p
in
y
our
p
hone
a
nd will cate
g
orize it by types of files usin
g
the memor
y
.
]
Memor
y
Card: I
f
y
our
p
hone has a
multimedia memor
y
card in the card slot,
y
ou can save ima
g
es, sounds and videos on
the memor
y
card. You can check the current
status o
f
the external memor
y
card in the
M
emor
y
status menu
.
]
Ph
o
n
e
R
ese
rv
ed
:Thi
s
fu
n
c
ti
o
n
s
h
o
w
s
th
e
status o
f
the reserved memor
y
f
or the user
(
Text Messa
g
e, Contacts, Calendar, Tasks,
M
emo
)
.
]
SIM Card: Thi
s
fu
n
c
ti
o
n
s
h
o
w
s
th
e
s
t
a
t
us
of the
S
IM
C
ard user memor
y
.
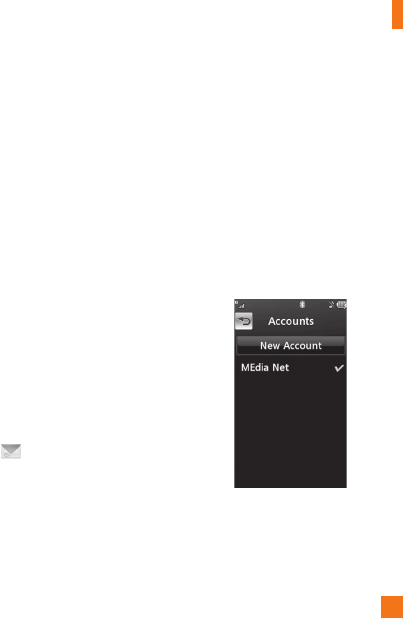
S
ettings
107
S
et
S
tora
g
e Default
s
You can set Stora
g
e default for each case.
When you need to save files from Camera,
I
nternet
D
own
l
oa
d,
Bl
uetoot
h
an
d
V
o
i
ce
R
ecor
d
er, set
Ph
one
M
emory or
M
emory car
d
.
Y
ou can set eac
h
case separate
l
y or c
h
oose
All and set the Stora
g
e Default all the same
.
A
pp
li
cat
i
on
s
Thi
s
M
enu a
ll
ows you to a
dj
ust t
h
e sett
i
n
g
s
t
o the
f
ollowin
g
f
eatures on the phone
:
Video
S
hare
]
A
u
di
o
Al
ert
:
E
na
bl
e
/Di
sa
bl
e au
di
o a
l
ert
w
hen Video
S
hare is available
.
]
A
uto
R
ecor
d
:
E
na
bl
e
/Di
sa
bl
e automat
i
c
r
ecording of live Video Share
.
M
essag
i
n
g
To set the message settings from standby
s
creen, touc
h
.
T
ouc
h
Message
S
etting
s
.
F
or more information regarding Message
S
ettings, please refer to page 50
.
B
rowser
Thi
s menu a
ll
ows you to custom
i
ze your
B
rows
i
n
g
exper
i
ence
b
y
gi
v
i
n
g
you t
h
e opt
i
on
of
chan
g
in
g
the
f
ollowin
g
settin
g
s
:
A
ccount
s
This includes the network information used
t
o connect the browser to the Internet.
S
elect
th
e
d
es
i
re
d
account
b
y tapp
i
ng t
h
e screen.
Thi
s w
ill
act
i
vate t
h
e account t
h
at w
ill
b
e
used for future connections. MEdia Net is the
p
redefined account that is set as default
.

S
etting
s
108
The following options will be available when
you touc
h
:
]
D
e
l
ete
:
All
ows
y
ou to
d
e
l
ete t
h
e account
.
]
D
e
l
ete a
ll
n
N
o
t
e
Y
ou cannot e
di
t an
d
d
e
l
ete
p
re-
i
nsta
ll
e
d
accounts.
I
n or
d
er to create a new account
,
p
lease
f
ill in the network in
f
ormation
.
1.
A
ccount
N
ame
:
N
ame assoc
i
ate
d
w
i
t
h
n
ew account
.
2.
H
omepage: Homepage URL
.
3
.Internet Profile: You can choose one from
the Internet
p
ro
f
iles
.
n
Not
e
1.
AT
&
T has provided default settin
g
s re
g
ardin
g
accou
nt in
fo
rm
a
ti
o
n
.
2.
C
reating or editing an account requires
c
aution. The browser cannot connect to
the Internet if the account information is
incorrect.
App
earanc
e
Y
ou can choose the settin
g
s o
f
the browser
appearance (Text size, Encodin
g
, Show Ima
g
e,
Java Script)
.
C
ach
e
Th
e we
b
pages you
h
ave accesse
d
are store
d
in the memory of the phone
.
]
C
lear
C
ache:
R
emove a
ll
cac
h
e
d
d
ata
i
n
t
h
e memory.
n
No
t
e
A
cache is a buffer memor
y
, which is used to
s
tore data tem
p
oraril
y
, es
p
eciall
y
when it is
o
n
li
n
e.

S
ettings
109
C
ookies
The in
f
ormation o
f
services you have accessed
are stored in what is called a
C
ookie.
R
en
d
er
i
n
g
Y
ou can set t
h
e
R
en
d
er
i
ng mo
d
e to
S
tandar
d
o
r Text
O
nl
y
.
S
ecurit
y
A list of the available certificates is shown.
]
C
ertificates: You can see the list of
c
ertificates and view them in detail.
]
C
lear
S
ession
:
R
emoves t
h
e secure
sess
i
on.
S
ecure Po
p
u
p
Y
ou can contro
l
t
h
e
p
o
p
-u
p
w
hi
c
h
i
n
di
cates a
s
ecure page or no
t
.
S
hortcu
t
If
this is set to
O
n
,
you can use t
h
e
b
rowser
m
ore qu
i
c
kl
y an
d
conven
i
ent
l
y w
i
t
h
t
h
e
Qwerty key pad in the phone. If Shortcut is on,
t
he followin
g
Shortcut keys are available
:
Enter URL This page
View Bookmarks Pa
g
e Overvie
w
Full Scree
n
Normal Scree
n
P
a
g
e u
p
R
ecent
P
a
g
e
s
Zoo
m
I
n
S
earch Tex
t
P
age
D
ow
n
Zoom
O
ut
Voice
C
omman
d
•
M
o
de
-
Sp
eed
:
vo
i
ce comman
d
i
s a
bb
rev
i
ate
d
-
N
orma
l
: vo
i
ce comman
d
i
s p
l
aye
d
n
orma
ll
y

S
etting
s
110
•
B
est
M
atc
h
-
1
M
atc
h:
t
h
e most
lik
e
l
y matc
h
w
ill
b
e
d
isplayed,
f
indin
g
a number
f
rom the
add
ress
b
oo
k
-
4
M
atc
h
es
:
the
f
our most likely matched
n
ames will be displayed,
f
indin
g
a name
f
rom the address book
•
S
ensitivity
-
High:
Operation and performance of
t
h
e vo
i
ce recogn
i
t
i
on eng
i
ne
i
s rare
l
y
a
ffected by the user's voice command and
surroun
di
ng soun
d.
-
M
e
di
um
:
Operation of voice recognition
engine is normally affected by user's voice
c
omman
d
an
d
surroun
di
ng soun
d.
-
L
ow
:
Operation of voice recognition
engine is strongly affected by user's voice
c
omman
d
an
d
surroun
di
ng soun
d.
•
Sp
eaker
p
hone Mode
-
Automatic
O
n
:
Wh
en t
hi
s opt
i
on
i
s
se
l
ecte
d
, soun
d
i
s
l
ou
d
enou
gh
so you can
h
ear t
h
e output w
h
en t
h
e p
h
one
i
s away
f
rom the ear
,
at a distanc
e
-
O
ff
:
Wh
en t
hi
s opt
i
on
i
s se
l
ecte
d
, soun
d
i
s qu
i
eter, an
d
cannot
b
e
h
ear
d
w
h
en t
h
e
phone is away
f
rom the ear, at a distanc
e
-
C
all Alert:
All
ows you to se
l
ect an a
l
ert
type between Rin
g
Only, Rin
g
After Name
a
n
d
N
ame
R
epeat
.
S
oftware Updat
e
If new software exists
,
the AT&T server
n
oti
f
ies devices usin
g
a WAP push messa
g
e.
B
e
f
ore updatin
g
new so
f
tware a
f
ter
downloadin
g
it from the AT&T server, users
can
d
ec
id
e w
h
et
h
er t
h
ey wou
ld
lik
e to
postpone t
h
e operat
i
on.
Wh
en t
h
e t
i
me
i
s up,
u
sers are prompte
d
a
g
a
i
n or users can resume
th
e postpone
d
operat
i
on us
i
n
g
t
hi
s menu at
any t
i
me.

S
ettings
111
Ph
o
n
e
Inf
o
rm
a
ti
on
This menu is used to view M
y
Numbers,
M
anufacturer, Model Name, Device ID,
H
ardware Version,
S
oftware Version,
L
anguage and DM
C
lient Version
.
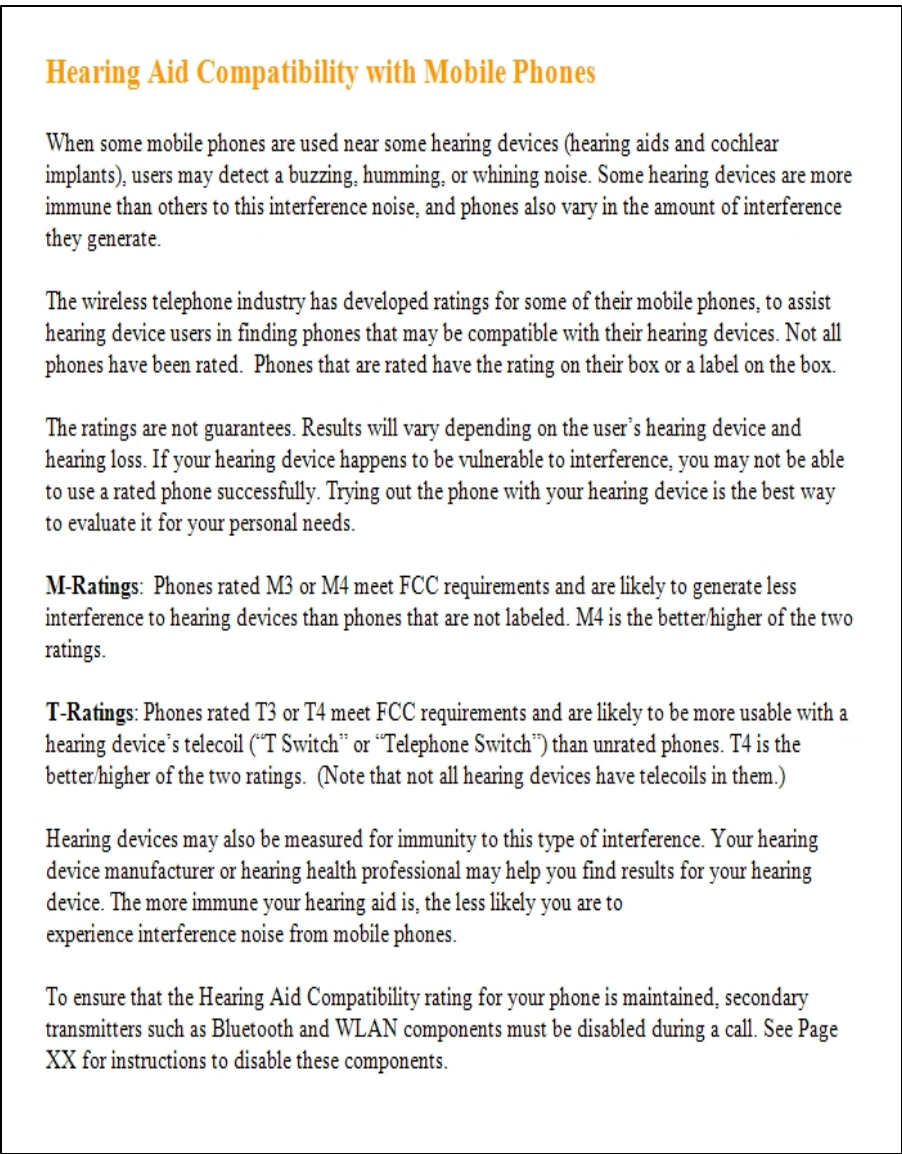
HAC Statement