LG Electronics USA H340F Multi-band GSM/EDGE/WCDMA/LTE Phone with WLAN and Bluetooth User Manual LG H340F Latin UG EN 141224 indd

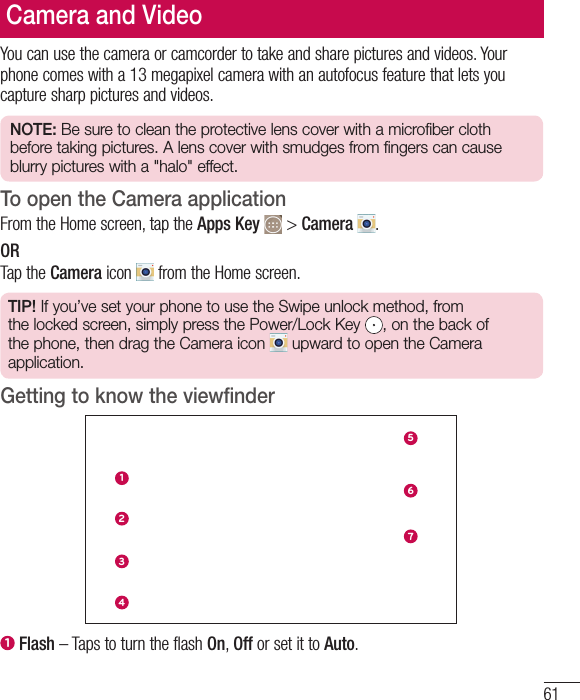
LG Electronics MobileComm USA, Inc. Multi-band GSM/EDGE/WCDMA/LTE Phone with WLAN and Bluetooth LG H340F Latin UG EN 141224 indd
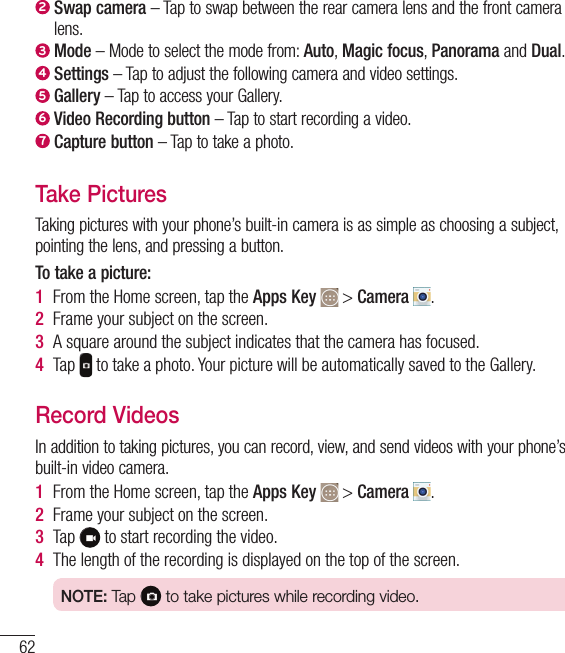
Users Manual

MFL00000000 (1.0)  www.lg.comENGLISHUser GuideLG-H340F
21Important noticePlease check to see whether any problems you encountered with your phone are described in this section before taking the phone in for service or calling a service representative.1. Phone memory When there is less than 10% of space available in your phone memory, your phone cannot receive new messages. You need to check your phone memory and delete some data, such as applications or messages, to make more memory available.To uninstall applications:1  Tap   >   > Apps tab >   Settings > General tab > Apps.2  Once all applications appear, scroll to and select the application you want to uninstall.3  Tap Uninstall.2. Optimizing battery lifeExtend your battery's power by turning off features that you don't have to run constantly in the background. You can monitor how applications and system resources consume battery power.Extending your phone's battery life:•  Turn off radio communications when you are not using. If you are not using Wi-Fi, Bluetooth or GPS, turn them off.•  Reduce screen brightness and set a shorter screen timeout.•  Turn off automatic syncing for Gmail, Calendar, Contacts and other applications.•  Some applications you have downloaded may reduce battery power.•  While using downloaded applications, check the battery charge level.Please read this before you start using your phone!
22NOTE: If you accidently press the Power/Lock Key while the device is in your pocket, the screen will turn off automatically in order to save battery power.To check the battery power level:•  Tap   >   > Apps tab >   Settings > General tab > About phone > Battery.The battery status (charging or discharging) and battery level (percentage charged) is displayed at the top of the screen.To monitor and control how battery power is being used:•  Tap   >   > Apps tab >   Settings > General tab > About phone > Battery > Battery use.Battery usage time is displayed on the screen. It tells you how long it has been since you last connected your phone to a power source or, if currently connected, how long the phone was last running on battery power. The screen shows the applications or services using battery power, listed in order from the greatest to smallest amount used.3.  Before installing an open source application and OS WARNINGIf you install and use an OS other than the one provided by the manufacturer it may cause your phone to malfunction. In addition, your phone will no longer be covered by the warranty. WARNINGTo protect your phone and personal data, only download applications from trusted sources, such as Play Store™. If there are improperly installed applications on your phone, the phone may not work normally or a serious error may occur. You must uninstall those applications and all associated data and settings from the phone.Important notice
234. Using an unlock patternSet an unlock pattern to secure your phone. Tap   >   > Apps tab >   Settings > Display tab > Lock screen > Select screen lock > Pattern. This opens a screen that will guide you through how to draw a screen unlock pattern. You have to create a Backup PIN as a safety measure in case you forget your unlock pattern.Caution: Create a Google account before setting an unlock pattern and remember the Backup PIN you created when creating your pattern lock. WARNINGPrecautions to take when using pattern lock.It is very important to remember the unlock pattern you set. You will not be able to access your phone if you use an incorrect pattern 5 times. You have 5 opportunities to enter your unlock pattern, PIN or password. If you have used all 5 opportunities, you can try again after 30 seconds.When you can’t recall your unlock Pattern, PIN or Password:< If you have forgotten your pattern >If you logged in to your Google account on the phone but failed to enter the correct pattern 5 times, tap the Forgot pattern? button at the bottom of the screen. You are then required to log in with your Google Account or you have to enter the Backup PIN which you entered when creating your Pattern Lock.If you have not created a Google account on the phone or you forgot Backup PIN, you have to perform a hard reset.< If you have forgotten your PIN or Password > If you forget your PIN or Password, you will need to perform a hard reset.Caution: If you perform a hard reset, all user applications and user data will be deleted.
24NOTE: If you have not logged into your Google Account and have forgotten your Unlock Pattern, you will need to enter your Backup PIN.5.  Using the Hard Reset (Factory Reset)If your phone does not restore to its original condition, use a Hard Reset (Factory Reset) to initialize it.1  Turn the power off.2  Press and hold the Power/Lock key + Volume Down key on the back of the phone.3  Release the Power/Lock Key only when the LG logo is displayed, then immediately press and hold the Power/Lock Key again.4  Release all keys when the Factory hard reset screen is displayed.5  Press the Power/Lock Key to continue or either of the Volume Keys to cancel.6  Press the Power/Lock Key once more to confi rm or either of the Volume Keys to cancel. WARNINGIf you perform a Hard Reset, all user applications, user data and DRM licenses will be deleted. Please remember to backup any important data before performing a Hard Reset.6.  Opening and switching applicationsMulti-tasking is easy with Android, you can keep more than one application running at the same time. There is no need to quit an application before opening another one. Use and switch between several open applications. Android manages each application, stopping and starting them as needed to ensure that idle applications don't consume resources unnecessarily.Important notice
251  Tap Recent Key . A list of recently used applications will be displayed.2  Tap the application you want to access. This does not stop the previous app running in the background on the phone. Make sure to tap Back Key  to exit an app after using it.•  To remove an app from the recent apps list, swipe the app preview to the left or right. To clear all apps, tap Clear all. 7.  Transferring music, photos and videos using Media sync (MTP)1  Tap   >   > Apps tab >   Settings > General tab > Storage to check out the storage media. 2  Connect the phone to your PC using the USB cable.3  Slide down the status bar and tap USB connected and select Media device (MTP) option.4  Open the memory folder on your PC. You can view the mass storage content on your PC and transfer the fi les from PC to Device memory folder or vice versa.5  After transfering fi les ,slide down the status bar and tap USB connected and select Charge phone from USB connection type list.8.  Hold your phone uprightHold your cell phone vertically, as you would a regular phone. Your phone has an internal antenna. Be careful not to scratch or damage the back of the phone, as this may affect performance.When making/receiving calls or sending/receiving data, avoid holding the lower part of the phone where the antenna is located. Doing so may affect call quality.
269.  Do not connect your phone when you power on/off your PCMake sure to disconnect your phone from the PC when powering your PC on or off as it might result in PC errors.10. Hardware key control modeIf your phone display is damaged or broken, you can answer an incoming call, end a call, or turn off an alarm using the hardware keys.1  Turn your phone off.2  Press and hold the Power/Lock Key and the Volume Keys at the same time for more than 6 seconds to enter the Hardware key control mode.3  Press the Volume Keys to scroll to the desired option, then press the Power/Lock Key to confirm.•  Answer a call: Press the Volume Keys at the same time.•  End a call: Press the Power/Lock Key during a call.•  Stop an alarm: When an alarm rings, press and hold the Volume Up Key or Volume Down Key to stop the alarm.NOTE: If you use your phone with a broken display glass, your phone can break even more or you can be injured. Make sure to visit the LG authorized service center to get your phone repaired.Important notice
27Phone overviewBack Key •  Returns to the previous screen. Also closes pop-up items such as menus, dialog boxes, and the on-screen keyboard. Touch and hold it to access Dual window.Notofication LEDFront Camera LensHome Key •  Return to the Home screen from any screen.Proximity SensorEarpieceTouch ScreenRecent Key•  Displays recently used applications. If you touch and hold this key, it opens available options menu.NOTE: Proximity sensor When receiving and making calls, the proximity sensor automatically turns the backlight off and locks the touch screen by sensing when the phone is near your ear. This extends battery life and prevents you from unintentionally activating the touch screen during calls.WARNINGPlacing a heavy object on the phone or sitting on it can damage the LCD and touch screen functions. Do not cover the LCD proximity sensor with protective film. This could cause the sensor to malfunction.Getting to know your phone
28 WARNING•  This part encloses the battery compartment.•  Be careful not to damage the NFC touch point on the phone, which is part of the NFC antenna.Volume Keys (Whilst screen is switched off)•  Long Press Up to launch QuickMemo•  Long Press Down to launch CameraHeadset JackMicrophoneCharger/USB portPower/Lock Key •  Switch your phone on/off by pressing and holding this key•  Short press to lock/unlock the screenNFC Touch PointLaser Detection AutoFocusSpeakerRear Camera LensFlashMicrophoneInfrared LEDGetting to know your phone
29Installing the SIM card and batteryBefore you can start exploring your new phone, you'll need to set it up.1  To remove the back cover, hold the phone fi rmly in one hand. With your other hand, lift off the back cover with your thumbnail as shown in fi gure below.2  Slide the SIM card into the lower slot for the SIM card as shown in fi gure. Make sure the gold contact area on the card is facing downwards.
303  Insert the battery into place by aligning the gold contacts on the phone and the battery (1) and pressing it down until it clicks into place (2).4  Align the back cover over the battery compartment (1) and press it down until it clicks into place (2).Getting to know your phone
31Charging your phoneCharge the battery before using it for the first time. Use the charger to charge the battery. A computer can be also used to charge the device by connecting them via the USB cable. WARNINGUse only LG-approved chargers, batteries and cables. If you use unapproved chargers, batteries or cables, it may cause battery charging delay or pop up message regarding slow charging, Or this can cause the battery to explode or damage the device, which are not covered by the warranty.The charger connector is at the bottom of the phone. Insert the charger and plug it into an electrical outlet.NOTE:  •  The battery must be fully charged initially to improve battery lifetime.•  Do not open the back cover while your phone is charging.
32Using the memory cardYour phone supports the use of microSDTM or microSDHCTM memory cards of up to 2TB capacity. These memory cards are specifically designed for mobile phones and other ultra-small devices and are ideal for storing media-rich files such as music, programs, videos, and photographs for use with your phone.To insert a memory card:Insert the memory card into the upper slot for the memory card. Make sure the gold contact area of Memory card is facing downwards.To safely remove the memory card:Touch   > Apps tab >   Settings > General tab > Storage > Unmount SD card.NOTE:  •  Use only compatible memory cards with your phone. Using incompatible memory cards may damage the card and data stored on the card, as well as the phone.•  It’s important to unmount the memory card prior to removing it from the phone to avoid damage to it or the data saved on the card.Getting to know your phone
33To format the memory card:Your memory card may already be formatted. If it isn't, you must format it before you can use it.NOTE: All files on your memory card are deleted when it is formatted.1  Touch   to open the application list.2  Scroll and touch   Settings > General tab > Storage.3  Touch Unmount SD card.4  Touch Erase SD card > Erase SD card > Erase everything.5  If you have set a pattern lock, input the pattern lock then select Erase everything.NOTE: If there is content on your memory card, the folder structure may be different after formatting, as all the files will have been deleted.Locking and unlocking the screenIf you do not use the phone for a while, the screen will be automatically turned off and locked. This helps to prevent accidental taps and saves battery power.When you are not using the phone, press the Power/Lock key  to lock your phone. If there are any programs running when you lock your screen, they may be still running in Lock mode. It is recommended that you exit all programs before entering Lock mode to avoid unnecessary charges (e.g. phone calls, web access and data communications).To wake up your phone, press the Power/Lock key . The Lock screen will appear. Touch and slide the Lock screen in any direction to unlock your Home screen. The last screen you viewed will open.
34Getting to know your phoneKnock CodeThe Knock Code feature allows you to tap the screen with your own Knock Code pattern using the screen divided by 4 squares to easily turn the screen on or off. You can disable this feature in the Lock screen settings.NOTE:  •  If you enter the wrong Knock Code 6 times, it will compulsorily take you to your google account log in/backup PIN.•  Use the fingertip instead of finger nail to tap the screen for turning it on or off.•  When the Knock Code is not in use, you can use Knock On function by taping the screen.1  From the Home screen, tap the   Apps Key >   Settings .2  Tap Lock screen > Select screen lock > Knock Code.3  Tap the squares in a pattern to set your knock code.Your knock code pattern can be 3 to 8 taps. Tap Done when you're finished.Unlock the screen using the Knock CodeYou can unlock the screen by tapping the Knock Code pattern you already set.1  When the screen turns off, press the Power key .
352  Tap the Knock Code pattern you set before.KnockONYou can lock or unlock the screen by just double-tap.Double-tap the center screen quickly to unlock the screen. To lock the screen, double-tap the status bar in any screen (except on the camera viewfinder) or empty area on the Home screen. NOTE: When turning the screen on, make sure you do not cover the proximity sensor. Doing so will turn the screen off immediately after turning it on in order to prevent abnormal turning on in your pocket or bag.Stereo headset with microphoneWith the headset connected, you can enjoy music or video with stereo sound, and easily switch from your music/video to take and end calls.< Front >Volume Up/Down ButtonsCall/End Button•  For an incoming call, press to receive or end a call.•  When you listen to music, press to stop playback or resume. Press twice to play the next track. < Back >Microphone
361  Plug in the headset as shown below.2  The applications panel displays and you can select an app to run.NOTE: You can edit the applications to display on the panel and set not to show the applications panel. Please see < Accessory >.3  If a call is coming when the headset is connected to the phone, press the   to take the call. 4  To end the call, press the   again. Getting to know your phone
37Your Home screenTouch screen tipsHere are some tips on how to navigate on your phone.Tap or touch – A single finger tap selects items, links, shortcuts and letters on the on-screen keyboard.Touch and hold – Touch and hold an item on the screen by tapping it and not lifting your finger until an action occurs. For example, to open a contact's available options, touch and hold the contact in the Contacts list until the context menu opens.Drag – Touch and hold an item for a moment and then, without lifting your finger, move your finger on the screen until you reach the target position. You can drag items on the Home screen to reposition them.Swipe or slide – To swipe or slide, quickly move your finger across the surface of the screen, without pausing when you first tap it (so you don’t drag an item instead). For example, you can slide the screen up or down to scroll through a list, or browse through the different Home screens by swiping from left to right (and vice versa).Double-tap – Double-tap to zoom on a webpage or a map. For example, quickly double-tap a section of a webpage to adjust that section to fit the width of the screen. You can also double-tap to zoom in and out while viewing the picture.Pinch-to-Zoom – Use your index finger and thumb in a pinching or spreading motion to zoom in or out when using the browser or Maps, or when browsing pictures.Rotate the screen – From many applications and menus, the orientation of the screen adjusts to the device's physical orientation.NOTE:•  To select an item, tap the center of the icon.•  Do not press too hard; the tap screen is sensitive enough to pick up a light, yet firm tap.•  Use the tip of your finger to tap the option you want. Be careful not to tap any other keys.
38Home screenThe Home screen is the starting point for many applications and functions, and it allows you to add items like application shortcuts, or Google widgets to give you instant access to information and applications. This is the default canvas and accessible from any menu by tapping  .Status BarShows phone's status information including the time, signal strength, battery status, and notification icons.WidgetWidgets are self-contained applications that can be accessed through the Apps screen or on the Home screen or an extended home screen. Unlike a shortcut, the Widget appears as an on-screen application.Application IconsTap an icon (application, folder, etc.) to open and use it.Location IndicatorIndicates which Home screen canvas you are viewing.Quick Key AreaProvides one-touch access to the function in any home screen canvas. Home touch buttonsExtended home screen  The operating system provides multiple Home screen canvases to provide more space for adding icons, widgets, and more. Slide your finger left or right across the Home screen. Your Home screen
39Customizing the Home screenYou can customize your Home screen by adding apps, widgets or changing wallpapers. To add items on your Home screen1  Touch and hold the empty part of the Home screen. 2  In the Add Mode menu, select the item you wish to add. You will then see this added item on the Home screen.3  Drag it to the desired location and lift your fi nger.TIP! To add an application icon to the Home screen from the Apps menu, touch and hold the application you want to add.To remove an item from the Home screen Home screen > touch and hold the icon you want to remove > drag it to  .To add an app as a Quick key From the Apps menu or on the Home screen, touch and hold an application icon and drag it to the Quick key area. Up to 7 apps can be added. To remove an app from the Quick key area Touch and hold the desired quick key and drag it to  .NOTE:   Apps key cannot be removed.To customize apps icons on the Home screen1  Touch and hold an application icon until it is unlocked from its current position. Then drop it on the screen. The editing icon   will appear in the upper right corner of the application.2  Tap the application icon again and select the desired icon design and size. 3  Tap OK to save the change.
40Returning to recently-used applications1  Tap  . A list of recently used applications will be displayed.2  Tap an icon to open the application. Or tap   to return to your previous screen.Notifications panelNotifications alert  you the arrival of new messages, calendar events, and alarms, as well as to ongoing events, such as when you are on a call.When a notification arrives, its icon appears at the top of the screen. Icons for pending notifications appear on the left, and system icons such as  Wi-Fi or battery strength shown on the right.NOTE: The available options may vary depending on the region or service provider.Pending notificationsBluetooth, Wi-Fi & battery statusYour Home screen
41Opening the notifications panelSwipe down from the status bar to open the notifications panel. Quick Toggle AreaTap each quick toggle key to turn it on/off. Touch and hold the key to access the settings menu of the function. To see more toggle keys, swipe left or right. Tap   to remove, add, or rearrange toggle keys.Tap to clear all the notifications. NotificationsThe current notifications are listed, each with a brief description. Tap a notification to view it. To close the notifications panel, touch and drag the tab toward the top of the screen.  Indicator icons on the Status BarIndicator icons appear on the status bar at the top of the screen to report missed calls, new messages, calendar events, device status and more.
42The icons displayed at the top of the screen provide information about the status of the device. The icons listed in the table below are some of the most common ones.Icon Description Icon DescriptionNo SIM card inserted Ringer is silencedNo network signal available Vibrate mode is onAirplane mode is on Battery fully chargedConnected to a Wi-Fi network Battery is chargingWired headset connected Phone is connected to PC via USB cableCall in progress Downloading dataMissed call Uploading dataBluetooth is on GPS is onNFC is on Data is synchronizingSystem warning  New Gmail message availableAn alarm is set New Hangouts message availableNew voicemail available Choose input methodNew text or multimedia messageMedia server content sharing onYour Home screen
43A song is currently playing Mobile hotspot is activeNOTE: The icons location in the status bar may differ according to the function or service.On-screen keyboardYou can enter text using the on-screen keyboard. The on-screen keyboard appears automatically on the screen when you need to enter text. To manually display the keyboard, simply tap a text field where you want to enter text.Using the keypad & entering text Tap once to capitalize the next letter you type. Double-tap for all caps. Tap to switch to the numbers and symbols keyboard. Tap to switch to handwriting mode. Tap to enter a space. Tap to create a new line. Tap to delete the previous character.Entering accented lettersWhen you select French or Spanish as the text entry language, you can enter special French or Spanish characters (e.g. "á").For example, to input "á", touch and hold the "a" key until the zoom-in key grows bigger and displays characters from different languages. Then select the special character you want.
44Google account setupWhen you first turn on your phone, you have the opportunity to activate the network, to sign into your Google Account and select how you want to use certain Google services. To set up your Google account: •  Sign into a Google Account from the prompted set-up screen. OR •  Tap   >   > Apps tab > select a Google application, such as Gmail > select New to create a new account. If you have a Google account, tap Existing, enter your email address and password, then tap  .Once you have set up your Google account on your phone, your phone automatically synchronizes with your Google account on the Web.Your contacts, Gmail messages, Calendar events and other information from these applications and services on the Web are synchronized with your phone. (This will depend on your synchronization settings.)After signing in, you can use Gmail™ and take advantage of Google services on your phone.
45Connecting to Networks and DevicesWi-FiWith Wi-Fi, you can use high-speed Internet access within the coverage of the wireless access point (AP). Enjoy wireless Internet using Wi-Fi, without extra charges. Connecting to Wi-Fi networksTo use Wi-Fi on your phone, you need to access a wireless access point or ‘hotspot’. Some access points are open and you can simply connect to them. Others are hidden or use security features; you must configure your phone to be able to connect to them.Turn off Wi-Fi when you're not using it to extend the life of your battery. NOTE: If you are out of the Wi-Fi zone or have set Wi-Fi to OFF, additional charges may be applied by your mobile operator for mobile data use. Turning Wi-Fi on and connecting to a Wi-Fi network1  Tap   >   > Apps tab >   Settings > Networks tab > Wi-Fi.2  Set Wi-Fi to ON to turn it on and start scanning for available Wi-Fi networks.3  Tap the Wi-Fi menu again to see a list of active and in-range Wi-Fi networks.•  Secured networks are indicated by a lock icon.4  Tap a network to connect to it.•  If the network is secured, you are prompted to enter a password or other credentials. (Ask your network administrator for details)5  The status bar displays icons that indicate Wi-Fi status.
46BluetoothYou can use Bluetooth to send data by running a corresponding application, but not from the Bluetooth menu as on most other mobile phones.NOTE: •  LG is not responsible for the loss, interception or misuse of data sent or received via the Bluetooth wireless feature.•  Always ensure that you share and receive data with devices that are trusted and properly secured. If there are obstacles between the devices, the operating distance may be reduced.•  Some devices, especially those that are not tested or approved by Bluetooth SIG, may be incompatible with your device.  Turning on Bluetooth and pairing up your phone with a Bluetooth deviceYou must pair your device with another device before you connect to it.1  Tap   >   > Apps tab >   Settings > Networks tab > set Bluetooth to ON.2  Tap the Bluetooth menu again. You will see the option to make your phone visible and option to search devices. Now tap Search for devices to view the devices in the Bluetooth Range.3  Choose the device you want to pair with from the list.Once the paring is successful, your device will connect to the other device. NOTE: Some devices, especially headsets or hands-free car kits, may have a fixed Bluetooth PIN, such as 0000. If the other device has a PIN, you will be asked to enter it.Connecting to Networks and Devices
47Send data using the Bluetooth wireless feature1  Select a fi le or item, such as a contact, calendar event or media fi le, from an appropriate application or from Downloads.2  Select the option for sending data via Bluetooth.NOTE: The method for selecting an option may vary by data type. 3  Search for and pair with a Bluetooth-enabled device.Receive data using the Bluetooth wireless feature1  Tap   >   > Apps tab >   Settings > Networks tab > set Bluetooth to ON. 2  Tap the Bluetooth menu again and mark the checkbox at the top of the screen to visible on other devices.NOTE: To select the length of time that your device will be visible, tap   > Visibility timeout.3  Select Accept to confi rm that you are willing to receive data from the device. Sharing your phone's data connectionUSB tethering and portable Wi-Fi hotspot are great features when there are no wireless connections available. You can share your phone's mobile data connection with a single computer via a USB cable (USB tethering). You can also share your phone's data connection with more than one device at a time by turning your phone into a portable Wi-Fi hotspot.When your phone is sharing its data connection, an icon appears in the status bar and as an ongoing notification in the notifications drawer.For the latest information about tethering and portable hotspots, including supported operating systems and other details, visit http://www.android.com/tether.
48To share your phone's data connection as a portable Wi-Fi hotspot1  Tap   >   > Apps tab >   Settings > Networks tab > Tethering & networks > Wi-Fi hotspot switch to activate. 2  Enter a password and tap Save.TIP! If your computer is running Windows 7 or a recent distribution of some flavours of Linux (such as Ubuntu), you will not usually need to prepare your computer for tethering. But, if you are running an earlier version of Windows or another operating system, you may need to prepare your computer to establish a network connection via USB. For the most current information about which operating systems support USB tethering and how to configure them, visit http://www.android.com/tether.To rename or secure your portable hotspotYou can change the name of your phone's Wi-Fi network name (SSID) and secure its Wi-Fi network.1  Tap   >   > Apps tab >   Settings > Networks tab > Tethering & networks > Wi-Fi hotspot.2  Tap Set up Wi-Fi hotspot.•  The Set up Wi-Fi hotspot dialogue box will open.•  You can change the Network SSID (name) that other devices see when scanning for Wi-Fi networks.•  You can also tap the Security menu to configure the network with Wi-Fi Protected Access 2 (WPA2) security using a pre-shared key (PSK).•  If you touch the WPA2 PSK security option, a password field is added to the Set up Wi-Fi hotspot dialogue box. If you enter a password, you will need to enter that password when you connect to the phone's hotspot with a computer or other device. You can set Open in the Security menu to remove security from your Wi-Fi network.3  Tap Save.Connecting to Networks and Devices
49ATTENTION! If you set the security option as Open, you cannot prevent unauthorised usage of online services by other people and additional charges may be incurred. To avoid unauthorized usage, you are advised to keep the security option active.Wi-Fi DirectWi-Fi Direct supports a direct connection between Wi-Fi enabled devices without an access point. Due to the high battery usage of Wi-Fi direct, it is recommended that you plug your phone into a power outlet while using the Wi-Fi Direct feature. Check your Wi-Fi & Wi-Fi Directed network in advance and make sure the users are connected to the same network.To turn on Wi-Fi Direct:1  Tap   >   > Apps tab >   Settings > Networks tab > Wi-Fi.2  Tap the Menu Key  > Wi-Fi Direct.3  Select a device to connect with from the scanned device list.Using SmartShareSmartShare uses DLNA (Digital Living Network Alliance) technology to share digital content through a wireless network. Both devices must be DLNA certified to support this feature. You can enjoy SmartShare feature on Gallery, and Music.1  On the content you want to play or beam, tap  or Menu Key  > SmartShare.2  Tap Play or Beam in the dialog box. •  Play: You can stream your content via TV, Bluetooth speaker, etc.•  Beam: You can send your content to Bluetooth devices or SmartShare Beam*-supported LG phones or tablets.*SmartShare Beam quickly transfers multimedia contents through Wi-Fi Direct. 3  Tap the device to play or receive on the list.
50•  If the device is not on the list, make sure on the device that Wi-Fi, Wi-Fi Direct, or Bluetooth connection is turned on. And tap Rescan.   4  Tap Send.  To enjoy content from nearby devices such as a computer or mobile device on your phone 1  To connect the nearby devices to your phone, tap Nearby devices on Gallery, Music application as below.<Gallery> <Music>•  Ensure that your phone and nearby devices are connected to the same Wi-Fi network. •  Make sure DLNA feature on the nearby device is turned on. 2  Tap the device to connect. If the device is not on the list, tap Search nearby devices. After connection, you can enjoy the contents from the nearby device on your phone.Connecting to Networks and Devices
51PC connections with a USB cableLearn to connect your device to a PC with a USB cable in USB connection modes. Transferring music, photos and videos using the USB mass storage mode1  Connect your phone to a PC using a USB cable.2  If you haven't installed the LG Android Platform Driver on your PC, you will need to manually change the settings. Slide down the status bar > Tap USB connected > Select USB connection method, then select Media device (MTP).3  You can now view the mass storage content on your PC and transfer the fi les.Synchronize with Windows Media PlayerEnsure that Windows Media Player is installed on your PC.1  Use the USB cable to connect the phone to a PC on which Windows Media Player has been installed.2  Select the Media sync (MTP) option. When connected, a pop-up window will appear on the PC.3  Open Windows Media Player to synchronize music fi les.4  Edit or enter your device’s name in the pop-up window (if necessary).5  Select and drag the music fi les you want to the sync list.6  Start synchronization.•  The following requirements must be satisfied to synchronize with Windows Media Player. Items RequirementOS Microsoft Windows XP SP2, Vista or higherWindow Media Player version Windows Media Player 10 or higher•  If the Windows Media Player version is lower than 10, install version 10 or higher.
52CallsMaking a call1  Tap   to open the keypad.2  Enter the number using the keypad. To delete a digit, tap the  .3  Tap   to make a call.4  To end a call, tap the End icon  .TIP! To enter "+" to make international calls, touch and hold  .Calling your contacts1  Tap   to open your contacts.2  Scroll through the contact list or enter the fi rst few letters of the contact you want to call by tapping Search contacts.3  In the list, tap   you want to call.Answering and rejecting a callWhen you receive a call in Lock state, swipe the   in any direction to Answer the incoming call.Swipe the   in any direction to Decline an incoming call. Adjusting the in-call volumeTo adjust the in-call volume during a call, use the Volume up and down keys on the back side of the phone.
53Making a second call1  During your fi rst call, tap Menu key  > Add call and dial the number. You can also go to the recently dialled numbers list by tapping Call logs or can search contacts by tapping Contacts and selecting the contact you want to call. Also, you can search contacts by tapping Favorites or Groups.2  Tap   to make the call.3  Both calls are displayed on the call screen. Your initial call is locked and put on hold.4  Tap the displayed number to toggle between calls. Or tap   Merge calls to start a conference call.5  To end active calls, tap End or tap   and slide the notifi cation bar down and select the End call icon  .NOTE: You are charged for each call you make.Viewing your call logsOn the Home screen, tap   and choose the Call logs.View a complete list of all dialled, received and missed calls.TIP! •  Tap any call log entry to view the date, time and duration of the call.•  Tap the Menu key , then tap Delete all to delete all the recorded items.
54Call settingsYou can configure phone call settings such as call forwarding, as well as other special features offered by your carrier. 1  On the Home screen, tap  .2  Tap .3  Tap Call settings and choose the options that you wish to adjust.Calls
55ContactsAdd contacts to your phone and synchronize them with the contacts in your Google account or other accounts that support contact syncing.Searching for a contactOn the Home screen1  Tap   to open your contacts. 2  Tap Search contacts and enter the contact name using the keyboard.Adding a new contact1  Tap  , enter the new contact's number, then tap the Menu key . Tap Add to Contacts > New contact. 2  If you want to add a picture to the new contact, tap the image area. Choose from Take photo or Select from Gallery.3  Tap a category of contact information and enter the details about your contact.4  Tap Save.Favourites contactsYou can classify frequently called contacts as favourites.Adding a contact to your favourites1  Tap   to open your contacts.2  Tap a contact to view its details.3  Tap the star to the right corner of the contact's name. The star will turn yellow color.
56ContactsRemoving a contact from your favourites list1  Tap   to open your contacts.2  Tap the Favourites tab, and choose a contact to view its details.3  Tap the yellow color star to the right corner of the contact's name. The star turns white color and the contact is removed from your favourites.Creating a group1  Tap   to open your contacts.2  Tap Groups and tap the Menu key . Select New group.3  Enter a name for the new group. You can also set a ringtone for the newly created group.4  Tap Save to save the group.NOTE: If you delete a group, the contacts assigned to that group will not be lost. They will remain in your contacts.
57MessagingYour phone combines SMS and MMS into one intuitive, easy-to-use menu.Sending a message1  Tap   on the Home screen and tap   to open a blank message.2  Enter a contact name or contact number in the To fi eld. As you enter the contact name, matching contacts will appear. You can tap a suggested recipient. You can add more than one contact.NOTE: You will be charged for a text message for every person to whom you send the message.3  Tap the Enter message fi eld and begin composing your message.4  Tap  to open the Options menu. Choose from Quick message, Insert smiley, Schedule sending, Add subject and Discard. TIP! You can tap the   icon to attach the file, that you want to share with message.5  Tap Send to send your message.6  Responses will appear on the screen. As you view and send additional messages, a message thread is created. WARNING: •  The 160-character limit may vary from country to country, depending on the language and how the SMS is coded.•  If an image, video or audio file is added to an SMS message, it is automatically converted into an MMS message and you are charged accordingly.
58Threaded box Messages (SMS, MMS) exchanged with another party can be displayed in chronological order so that you can conveniently see an overview of your conversation.Changing your message settingsYour phone message settings are pre-defined, so you can send messages immediately. You can change the settings according to your preferences.•  Tap the Messaging icon on the Home screen, tap  and then tap Settings.Messaging
59E-mailYou can use the E-mail application to read emails from services like Gmail. The E-mail application supports the following account types: POP3, IMAP and Exchange.Your service provider or system administrator can provide you with the account settings you need.Managing an email accountThe first time you open the E-mail application, a set-up wizard opens to help you to set up an email account.After the initial set-up, E-mail displays the contents of your inbox. To add another email account:•  Tap   >   > Apps tab > E-mail >tap  > Settings >   Add account.To change an email account's settings:•  Tap   >   > Apps tab > E-mail > tap  > Settings > General settings.To delete an email account:•  Tap   >   > Apps tab > E-mail > tap  > Settings > tap  > Remove account > Select the account to delete > Remove  > select Yes.Working with account foldersTap   >   > Apps tab > E-mail > tap  and select Folders.Each account has an Inbox, Outbox, Sent and Drafts folder. Depending on the features supported by your account's service provider, you may have additional folders.
60Composing and sending emailTo compose and send a message1  While in the E-mail application, tap the  .2  Enter an address for the message's intended recipient. As you enter text, matching addresses will be proposed from your Contacts. Separate multiple addresses using semicolons.3  Tap the  to add a Cc/Bcc and tap   to attach fi les, if required.4  Enter the text of the message. 5  Tap  .TIP! When a new email arrives in your Inbox, you will be notified by a sound or vibration. E-mail
61You can use the camera or camcorder to take and share pictures and videos. Your phone comes with a 13 megapixel camera with an autofocus feature that lets you capture sharp pictures and videos.NOTE: Be sure to clean the protective lens cover with a microfiber cloth before taking pictures. A lens cover with smudges from fingers can cause blurry pictures with a "halo" effect.To open the Camera applicationFrom the Home screen, tap the Apps Key   > Camera  .ORTap the Camera icon   from the Home screen.TIP! If you’ve set your phone to use the Swipe unlock method, from the locked screen, simply press the Power/Lock Key  , on the back of the phone, then drag the Camera icon   upward to open the Camera application.Getting to know the viewfinder51627341  Flash – Taps to turn the flash On, Off or set it to Auto.Camera and Video
622  Swap camera – Tap to swap between the rear camera lens and the front camera lens.3  Mode – Mode to select the mode from: Auto, Magic focus, Panorama and Dual.4  Settings – Tap to adjust the following camera and video settings.5  Gallery – Tap to access your Gallery.6  Video Recording button – Tap to start recording a video.7  Capture button – Tap to take a photo.Take PicturesTaking pictures with your phone’s built-in camera is as simple as choosing a subject, pointing the lens, and pressing a button.To take a picture:1  From the Home screen, tap the Apps Key   > Camera  .2  Frame your subject on the screen.3  A square around the subject indicates that the camera has focused.4  Tap   to take a photo. Your picture will be automatically saved to the Gallery.Record VideosIn addition to taking pictures, you can record, view, and send videos with your phone’s built-in video camera.1  From the Home screen, tap the Apps Key   > Camera  .2  Frame your subject on the screen.3  Tap   to start recording the video.4  The length of the recording is displayed on the top of the screen.NOTE: Tap   to take pictures while recording video.Camera and Video
635  Tap   to pause recording video. You can resume recording again tapping  .OR6  Tap   to stop recording. Your video will be automatically saved to the Gallery.Camera and Video SettingsFrom the camera mode, tap each icon to adjust the following camera settings.•  Flash  : Taps to turn the flash On, Off or set it to Auto.•  Swap camera  : To swap between the rear camera lens and the front camera lens.•  Mode  : Mode to select the mode from: Auto, Magic focus, Panorama and Dual. Auto: Captures a auto photo shot. Magic focus: Magic focus lets you choose your focus again after taking a photo. Panorama: Creates a wide photo of a panoramic view. Hold the phone horizontally, press the shutter to start and slowly sweep the camera across the scene. Dual: Captures a photo or recording a video using both of camera lens. Touch and hold the small screen to resize or move it.•  Settings  : To adjust the following camera and video settings. Dynamic tone (HDR): Combines photos taken at multiple exposures into one optimal photo to get a better photo in tricky lighting situations. Image size: Set the size of your picture. Choose from 13M 4160x3120, W10M 4160x2340, 9M 3120x3120 or 3M 2048x1536. Set the size of your video. Choose from UHD 3840x2160, FHD 1920x1080, HD 1280x720 or 120HD Slow Motion. Cheese shutter: Allows you to take pictures with voice commands. When on, you just say "Cheese", "Smile", "Whiskey", "Kimchi", or "LG" to take a picture. Timer: Set your camera's timer. This is ideal if you want to be a part of the picture. Grid: It is easily used to take better pictures to keeping horizontal and verticals. SD card: Set the storage location for your pictures. Choose from IN or SD. This menu appears only when the SD card is inserted. Help: Allows you to learn how a function works. This icon will provide you with a quick guide.
64Multi-point Auto FocusWhen you take a picture, the Multi-point Auto Focus (AF) function operates automatically and will allow you to see a clear image.DualThe Dual feature allows you to take a picture or record video with the front and rear cameras at the same time.1  From the Home screen, tap the Apps Key > Camera  .2  Tap   >  .NOTE: Drag the small screen to move it to your desired location. Touch and hold the small screen to resize it. Tap on the small screen to switch screens.3  Tap   to stop dual recording.Camera and Video
65Gesture shotTake a picture with hand gesture. To take photo, raise your hand until front camera detects it and a box appears on the screen.Super ZoomingYou can use a zoom up to 8 times while taking pictures.TIP! This function operates automatically while zooming in and out.NOTE: Use a steady hand. This feature does not work with some functions Objects can be overlapped when taking a picture of fast-moving subjects.View Your PicturesThe Gallery is where you can access the Gallery of stored camera images. You can view them in a slideshow, share them with your friends, and delete and edit them.1  From the Home screen, tap the Apps Key   > Gallery  .2  Select a location and tap an image to view your picture.
66Gallery OptionsThe Gallery application presents the pictures and videos in your storage, including those you’ve taken with the Camera application and those you downloaded from the web or other locations.If you have one of your phone’s Google Accounts, you’ll also see your Picasa web albums in Gallery.1  From the Home screen, tap the Apps Key   > Gallery  to view the images stored in the storage. Drag left or right to view more albums.2  Tap an album to open it and view its contents. (The pictures and videos in the album are displayed in chronological order.)3  Tap a picture in an album to view it. Tap a picture group again to reveal the following icons:•   Camera: Opens the Camera.•    Share: You can share the picture via various methods such as Messaging or Bluetooth.•   Delete: Deletes the picture. Tap a picture in an album then tap   for the following options: SmartShare, Set Camera and Video
67image as, Move, Copy, Copy to Clip Tray, Lock, Slideshow, Rotate left, Rotate right, Crop, Add location, Rename, Print and Details. Tap the Back Key  to return to the previous screen.Assign PicturesAfter taking a picture, assign it as a picture ID for a Contacts entry or as the Home screen background image (wallpaper).1  From the Home screen, tap the Apps Key   > Gallery  .2  Tap an album and tap an image to view it.3  With the picture displayed, tap   > Set image as.4  Select an option. Contact photo to assign the picture to a Contact entry as a picture ID. Tap an entry from Contacts, crop the image and tap OK to assign the picture. Home screen wallpaper to assign the picture as a background image, crop the image and tap OK to assign the picture. Lock screen wallpaper to assign the picture as a background image for your lock screen. Wallpaper to assign the picture as a background image, crop the image and tap SET WALLPAPER to assign the picture.Video OptionsThe Gallery is where you can access the Gallery of stored video images. You can view them, share them with your friends, and delete and edit them.1  From the Home screen, tap the Apps Key   > Gallery   to view the videos stored in storage. Scroll left or right to view more albums.2  Tap an album to open it and view its contents. (The pictures and videos in the album are displayed in chronological order.)3  Tap a video to view it. You can access the following options:
68Camera and Video  Rotation: Changing the orientation of screen content.  QSlide: Enables an overlay on your phone’s display for easy multitasking.  SmartShare: Shares media files with DLNA certified devices.  Menu: Tap to access Screen ratio, Subtitles, Share, Trim, Settings, Details options.  Screen shot: Captures a screen shot while playing a video.NOTE: Tap   > Settings > Screenshot on.  Volume: Tap to display the Volume slider bar, then adjust the playback volume on the slider bar.  Lock/Unlock: Locks the touch keys to prevent unintentional touches.Play a Video1  From the Home screen, tap the Apps Key   > Gallery   to view videos stored in the storage. Scroll left or right to view more albums.2  Tap an album to open it and view its contents. (The pictures and videos in the album are displayed in chronological order.)3  3. Tap a video in an album to play. Tap the video to view the playback controls.NOTE: While a video is playing, slide the left side of the screen up or down to adjust the screen brightness. While a video is playing, slide the right side of the screen up or down to adjust the sound. While playing a video, tap the timeline point to preview that portion of the video via a small screen. Tap the small screen to jump to that part of the video. While playing a video, slide your finger from left to right (or vice versa) to fast-forward and rewind.
69Live ZoomLive Zoom allows you to zoom in or zoom out on a portion of a video that is being played to make the desired section appear larger or smaller.When viewing a video, use your index finger and thumb in a pinching or spreading motion to zoom in or out.NOTE: Do not press too hard; the touch screen is sensitive enough to pick up a light, but firm touch.Dual PlayDual Play (connected wired or wirelessly to two displays) can be run on a different screen.NOTE: Connect two devices using wired (Slimport-HDMI) cable or a wirelessly (Miracast). The connectable device can be a TV or a monitor supported by an HDMI cable or Miracast. The Gallery, Video apps are supported on Dual Play. Tap the Home Key  once when two displays are a different status (i.e. the monitor is playing a video and your phone’s video app is displaying empty screen), then Dual Play will start. Not all videos are supported by Dual Play. Dual Play operates at 1280X720 or higher display resolution.
70Camera and VideoGalleryOpen the Gallery application to view albums of your pictures and videos.To open the Gallery application•  From the Home screen, tap the Apps Key  > Gallery  .Viewing your albumsThe Gallery application presents the pictures and videos saved in your phone, including those you’ve taken with the Camera application and those you downloaded from the web or other locations.•  Tap an album to open it and view its contents.•  Tap a picture or video in an album to view it.•  Tap the Menu Key  (at the top right corner of the screen) to access New Album, Delete, Hide/Show album, Settings, and Help.•  Tap the Camera icon  to return to the Camera application.To share an albumYou can share the entire contents of one or more albums or individual images or videos from an album.1  From the Home screen, tap the Apps Key   > Gallery  .2  Touch and hold the desired album, tap Share, select the application to use to share your images, then complete the sending method as necessary.Working with photosUse the Gallery application to view pictures that you’ve taken with the Camera application, downloaded.To view and browse photos1  From the Home screen, tap the Apps Key   > Gallery  .2  Open an album and tap a picture.
713  Tap the Menu Key  (at the top right corner of the screen) to access SmartShare, Set image as, Move, Copy, Copy to Clip Tray, Lock, Slideshow, Rotate left, Rotate right, Crop, Add/Remove location, Rename, Print, or Details.Share IconTap here to share the photo using the method you select.Camera Mode IconTap here to go to camera mode.Gallery IconTap here to return to your Gallery.Edit IconTap here to edit your picture.Delete IconTap here to delete the photo.Swipe horizontally to scroll through the photos in the current album.Swipe here to quickly scroll through the images in the album, then tap the one you want to view.To share a video1  Open an album to view its contents, then tap the Share icon   at the top of the Gallery screen.2  Checkmark the video(s) you want to share, tap Share at the bottom of the screen, select how to share the fi le(s), then complete as necessary.To delete a video1  Open an album to view its contents, then tap the Delete icon   at the top of the Gallery screen.2  Checkmark the video(s) you want to delete, tap Delete at the bottom of the screen, then tap Yes to confi rm.NOTE: You can also pinch in on your video list, then swipe a video up, off the screen to quickly delete it.
72QSlide while playing videosYou can play videos in a QSlide window allowing you to use other applications while the video is playing.1  Open the Gallery application and begin playing the video.2  Tap the QSlide icon   at the top right corner of the screen to activate the QSlide feature to play the video in a QSlide window.3  To close the QSlide window, tap the   in the upper-right corner of its title bar.Camera and Video
73FunctionQuickMemo+The QuickMemo+ allows you to create memos and capture screen shots.Capture screens, draw on them and share them with family and friends with QuickMemo+.OR1  (While screen is switched off) Press and hold the Volume Up key.  OR Touch and slide the status bar downward and tap  .2  Select the desired menu option from Pen type, Colour, Eraser and create a memo.
743  Tap   in the Edit menu to save the memo with the current screen. To exit QuickMemo+ at any time, tap  .  NOTE: Please use a fingertip while using the QuickMemo+. Do not use your fingernail.Using the QuickMemo+ optionsYou can easily use the editing tools when using the QuickMemo+.Undo or Redo.Use complex concept function.Select the pen type and the colour.Erase the memo that you created.Save the memo with the current screen in the Gallery or QuickMemo+.Option: Tap to choose Share, Paper style for the memo.Viewing the saved QuickMemo+ Tap QuickMemo+/Gallery and select the QuickMemo+ album.Function
75QSlideFrom any screen, bring up a notepad, calendar, and more as a window inside your screen. ORTap to exit the QSlide and return to full window.Tap to adjust transparency.Tap to end the QSlide.Tap to adjust the size.1  Touch and slide the status bar downwards > tap QSlide apps or while using applications that support QSlide, tap  . The function will be continuously displayed as a small window on your screen.2  You can make a call, browse the Web, or choose other phone options. You can also use and tap the screen under the small windows when the transparency bar is not full  .NOTE: The QSlide can support up to two windows at the same time.
76QuickRemoteQuickRemote turns your phone into a Universal Remote for your home TV, Set top box, audio system.1  Touch and slide the status bar downwards and tap   > ADD REMOTE.OR Tap   >   > Apps tab > QuickRemote > tap  . 2  Select the type and brand of device, then follow the on-screen instructions to confi gure the device(s).3  Touch and slide the status bar downwards and use QuickRemote functions.NOTE: The QuickRemote operates the same way as an ordinary remote control infrared (IR) signals. Be careful not to cover the infrared sensor at the top of the phone when you use the QuickRemote function. This function may not be supported depending on the model, the manufacturer or service company.Function
77Smart KeyboardSmart Keyboard recognizes your keyboard input habit and provide your own keyboard quickly inputting without errors.Move cursor using space barTouch and hold the space bar and left or right to move the cursor.Enter suggested word using gesture controlEnter text on the keyboard and the related word suggestions appear. Flick upward on the left to select the left-side suggestion. Flick upward on the right to select the right-side suggestion.
78LG SmartWorldLG SmartWorld offers an assortment of exciting content – fonts, themes, games, applications.How to Get to LG SmartWorld from Your Phone1  Tap   >   > Apps tab > tap the   icon to access LG SmartWorld.2  Tap Sign in and enter ID/PW for LG SmartWorld. If you have not signed up yet, tap Register to receive your LG SmartWorld membership.3  Download the content you want.*  When you use Cellular network, data fee could be charged by data plan that you signed-up with carrier.* LG SmartWorld may not be available from all carriers or in all countries.NOTE: What if there is no   icon? 1  Using a mobile Web browser, access LG SmartWorld (www.lgworld.com) and select your country.2  Download the LG SmartWorld App.3  Run and install the downloaded file.4  Access LG SmartWorld by tapping the   icon.Special benefit only in LG SmartWorld1  Decorate your own style on your Smartphone, Use Home Theme & Keyboard Theme & Font that provided on LG SmartWorld. (However this service is available to specific device. please check in LG SmartWorld website whether it is feasible or not whether it is feasible or not)2  Enjoy LG SmartWorld's special service by joining promotion that consistently provided.Function
79MusicYour phone has a built-in music player that lets you play all your favorite tracks. To access the music player, tap   >   > Apps tab >   Music.Add music files to your phoneStart by transferring music files to your phone:•  Transfer music using Media sync (MTP).•  Download from the wireless Web.•  Synchronize your phone to a computer.•  Receive files via Bluetooth.Transfer music using Media sync (MTP)1  Connect the phone to your PC using the USB cable.2  Select the Media sync (MTP) option. Your phone will appear as another hard drive on your computer. Click on the drive to view it. Copy the fi les from your PC to the drive folder.3  When you’re fi nished transferring fi les, swipe down on the Status Bar and tap USB connected > Charge phone. You may now safely unplug your device.Playing a song1  Tap   >   > Apps tab >   Music. 2  Tap Songs.3  Select the song you want to play.Tap to pause playback.Tap to resume playback.Tap to skip to the next track in the album, playlist, or shuffle. Touch and hold to fast forward.Multimedia
80Tap to restart the current track or skip to the previous track in the album, playlist, or shuffle. Touch and hold to rewind.Tap to display the Volume slider bar, then adjust the playback volume on the slider bar.Tap to set audio effects.Tap to open the current playlist.Tap to add the song to your favourites.Tap to play the current playlist in shuffle mode (tracks are played in random order).Tap to toggle through the repeat modes to repeat all songs, repeat current song, or repeat off.Tap to share your music via the SmartShare funtion.To change the volume while listening to music, press the up and down volume keys on the back side of the phone.Touch and hold any song in the list. The Play, Add to playlist, Share, Set as ringtone, Delete, Details and Search options will be displayed.NOTE:•  Some file formats are not supported, depending on the device software.•  If the file size exceeds the available memory, an error can occur when you open files.NOTE: Music file copyrights may be protected by international treaties and national copyright laws. Therefore, it may be necessary to obtain permission or a licence to reproduce or copy music. In some countries, national laws prohibit private copying of copyrighted material. Before downloading or copying the file, check the national laws of the relevant country concerning the use of such material.Multimedia
81Setting your alarm1  Tap   >   > Apps tab >   Clock >  .2  After you set the alarm, your phone lets you know how much time is left before the alarm will go off.3  Set Repeat, Snooze duration, Vibration, Alarm sound, Alarm volume, Auto app starter, Puzzle lock and Memo. Tap Save.NOTE: To change alarm settings in the alarm list screen, tap the Menu key   and select Settings.Using your calculator1  Tap   >   > Apps tab >   Calculator.2  Tap the number keys to enter numbers.3  For simple calculations, tap the function you want to perform (+, –, x or ÷) followed by =.4  For more complex calculations, slide the left then choose sin, cos, tan, log etc.5  To check the history, tap the icon  .Adding an event to your calendar1  Tap   >   > Apps tab >   Calendar.2  On the screen, you can fi nd the different view types for the Calendar (Day, Week, Month, Year, Agenda).3  Tap on the date for which you wish to add an event and tap  .4  Tap Event name and enter the event name.5  Tap Location and enter the location. Check the date and enter the time you wish your event to start and fi nish.6  If you wish to repeat the alarm, set REPEAT and set REMINDERS, if necessary.7  Tap Save to save the event in the calendar.Utilities
82Voice RecorderUse the voice recorder to record voice memos or other audio files.Recording a sound or voice1  Tap   >   >   Voice Recorder.2  Tap   to begin recording.3  Tap   to end the recording.4  Tap   to listen to the recording.NOTE: Tap   to access your album. You can listen to the saved recording. The available recording time may differ from actual recording time.Sending the voice recording1  Once you have fi nished recording, you can send the audio clip by tapping  .2  Choose from Bluetooth, Drive, Email, Gmail, Messaging, QuickMemo+ or SmartShare Beam. When you select Bluetooth, Drive, Email, Gmail, Messaging, QuickMemo+ or SmartShare Beam the voice recording is added to the message. You may then write and send the message as you usually would.TasksThis task can be synchronized with MS Exchange account. You can create task, revise it and delete it in MS outlook or MS Office Outlook Web Access.To Synchronize MS Exchange1  From the Home Screen, Tap   >   > Apps tab >   Settings.2  Tap General tab > Accounts & sync > Add account.3  Tap Microsoft Exchange to create Email address and Password.4  Make sure if you checkmark Sync task.Utilities
83NOTE: MS Exchange may not be supported depending on email server.Google+Use this application to stay connected with people via Google’s social network service.•  Tap   >   > Apps tab >   Google+.NOTE: This application may not be available depending on the region or service provider.Voice SearchUse this application to search webpages using voice.1  Tap   >   > Apps tab >   Voice Search.2  Say a keyword or phrase when Speak now appears on the screen. Select one of the suggested keywords that appear.NOTE: This application may not be available depending on the region or service provider.DownloadsUse this application to see what files have been downloaded through the applications.•  Tap   >   > Apps tab >   Downloads.NOTE: This application may not be available depending on the region or service provider.
84The WebInternetUse this application to browse the Internet. Browser gives you a fast, full-color world of games, music, news, sports, entertainment and much more, right on your mobile phone wherever you are and whatever you enjoy.NOTE: Additional charges apply when connecting to these services and downloading content. Check data charges with your network provider.1  Tap   >   > Apps tab >   Internet.Using the Web toolbarTap slide it upwards with your finger to open.Tap to go back one page.Tap to go forward one page, to the page you connected to after the current one. This is the opposite of what happens when you tap  , which takes you to the previous page.Tap to go to the Home page. Tap to add a new window.Tap to access bookmarks.Viewing webpagesTap the address field, enter the web address and tap Go.Opening a pageTo go to new page, tap     .To go to another webpage, tap  , scroll up or down, and tap the page to select it.
85Searching the web by voiceTap the address field, tap   , speak a keyword, and then select one of the suggested keywords that appear.NOTE: This feature may not be available depending on the region or service provider.BookmarksTo bookmark the current webpage, tap  > Add to bookmarks > OK.To open a bookmarked webpage, tap   and select one.HistoryTap   > History to open a webpage from the list of recently-visited webpages. To clear all history, tap    Yes.Using Popup BrowserUse this feature to access the Internet without closing the current application.While viewing content, such as contacts or notes that include web addresses, select a web address and then tap Popup Browser to open the pop-up browser. Touch and drag the browser to move it to another location.To view the browser in full screen, tap  .To close the browser, tap  .
86ChromeUse Chrome to search for information and browse webpages.1  Tap   >   > Apps tab >   Chrome.NOTE: This application may not be available, depending on your region and service provider.Viewing webpagesTap the Address field, and then enter a web address or search criteria.Opening a pageTo go to a new page, tab      New tab.To go to another webpage, tap  , scroll up or down and tap the page to select it.Syncing with other devicesSync open tabs and bookmarks to use with Chrome on another device when you are logged in with the same Google account.To view open tabs on other devices, tap Menu key   Other devices. Select a webpage to open.To add bookmarks, tap  .The Web
87SettingsThis section provides an overview of items you can change using your phone's System settings menus. To access the Settings menu:Tap   >  > System settings.- or -Tap   >  > Apps tab >   Settings. Networks< Wi-Fi >Wi-Fi – Turns on Wi-Fi to connect to available Wi-Fi networks.TIP! How to obtain the MAC addressTo set up a connection in some wireless networks with MAC filters, you may need to enter the MAC address of your phone in the router.You can find the MAC address in the following user interface: tap   >   > Apps tab >  Settings > Networks tab > Wi-Fi >   > Advanced Wi-Fi > MAC address.< Bluetooth >Turn the Bluetooth wireless feature on or off to use Bluetooth.< Mobile data >Displays the data usage and set mobile data usage limit.< Call >Configure phone call settings such as call forwarding and other special features offered by your carrier.Voicemail – Allows you to select your carrier’s voicemail service.Fixed dialing numbers – Turn on and compile a list of numbers that can be called from your phone. You’ll need your PIN2, which is available from your operator. Only numbers within the fixed dial list can be called from your phone.
88Incoming voice call pop-up – Display incoming voice call pop-up when an app is in use.Call reject – Allows you to set the call reject function. Choose from Call reject mode or Reject calls from.Decline with message – When you want to reject a call, you can send a quick message using this function. This is useful if you need to reject a call during a meeting.Privacy keeper – Hides the caller name and number for an incoming call.Call forwarding – Choose whether to divert all calls when the line is busy, when there is no answer or when you have no signal.Auto answer – Set the time before a connected hands-free device automatically answers an incoming call. Choose from Disable, 1 second, 3 seconds, and 5 seconds.Connection vibration – Vibrates your phone when the other party answers the call.Voice enhancement – Enhances voice quality in noisy environments so you can hear more clearly.Save unknown numbers – Add unknown numbers to contacts after a call.Power key ends call – Allows you to select your end call.Call barring – Lock incoming, outgoing or international calls.Call duration – View the duration of calls including Last call, Outgoing calls, Incoming calls and All calls.Additional call settings – Allows you to change the following settings:   Caller ID: Choose whether to display your number in an outgoing call.  Call waiting: If call waiting is activated, the handset will notify you of an incoming call while you are on a call (depending on your network provider).< Share & connect >NFC – Your phone is an NFC-enabled mobile phone. NFC (Near Field Communication) is a wireless connectivity technology that enables two-way communication between electronic devices. It operates over a distance of a few centimeters. You can share your content with an NFC tag or another NFC support device by simply tapping it with your device. If you tap an NFC tag with your device, it will display the tag content on your device.Settings
89   To switch NFC on or off: From the Home screen, touch and slide the notification panel down with your finger, then select the NFC icon to turn it on.NOTE: When airplane mode is activated, the NFC application can be used.  Using NFC: To use NFC, make sure your device is switched on, and activate NFC if disabled.Android Beam – When this feature is turned on, you can beam app content to another NFC-capable device by holding the devices close together. Just bring the device together(typically back to back) and then tap your screen. The app determines what gets beamed.SmartShare Beam – Enable to receive files from LG phones.Media server – Share the phone display and sound on TV.Miracast – Mirror phone screen and sound onto Miracast dongle or TV Wirelessly.LG PC Suite – Connect LG PC Suite with your phone to easily Manage multimedia content and apps.< Tethering & networks >USB tethering – Connect the USB cable to share the internet connection with the computer.Wi-Fi hotspot – You can also use your phone to provide a mobile broadband connection. Create a hotspot and share your connection. Please "Sharing your phone's data connection" for more information. Bluetooth tethering – Allows you to set your phone whether you are sharing the Internet connection or not.Help – Tap to view help information on the Wi-Fi hotspot and Bluetooth tethering functions.Airplane mode – After switching to Airplane mode, all wireless connections are disabled.
90NOTE: You must set a lock screen PIN or password before you can use credential storage.Mobile networks – Set options for data roaming, network mode & operators, access point names (APNs) etc. VPN – Displays the list of Virtual Private Networks (VPNs) that you've previously configured. Allows you to add different types of VPNs.SoundSound profile – Choose the Sound, either Sound, Vibrate only or Silent.Volumes – Adjust the phone's volume settings to suit your needs and your environment.Vibrate strength – Allows you to set the vibrate strength for calls, notifications, and touch feedback.Quiet mode – Set up your Quiet mode. Tap the Quiet mode to toggle it On or Off. You can schedule Quiet mode to activate automatically and designate exceptions to your Quiet mode.Sound profile – Choose the sound, either Silent or Vibrate only.  Set time – Choose the Set time, either Always on or schedule. If you tap schedule, you can set the days and times to automatically turn Quiet mode on.  Block notification LED – Checkmark to turn LED notification off. Block alarms – Checkmark to allow the screen not to turn on and no alarms sound.   Block incoming calls – Checkmark to allow or block incoming calls from certain contacts.  Incoming call settings   Auto reply to block calls – Set how to you want to automaticlly reply to silenced calls.  Allow repeated calls – Checkmark to allow a call that is repeated within 3 minutes. Allowed contact lists – Designate which contacts calls will be allowed. Settings
91 Help – Display Quiet mode setting information.Ringtone – Set the ringtone for calls. You can also add a ringtone by tapping  at the top right corner of the screen.Notification sound – Set the notification sound. You can also add a notification sound by tapping   at the top right corner of the screen.Ringtone with vibration – Checkmark to set the phone to vibrate in addition to the ringtone when you receive calls.Vibrate on tap – Checkmark to vibrate when tapping the Home touch buttons and during other UI interactions.Sound effect – Tap to set the dial pad touch tones, touch sounds, and screen lock sound. Dial pad touch tones – Checkmark to play tones while using dial pad. Touch sounds – Checkmark to play sound when making screen selection.  Screen lock sound – Checkmark to play sound when locking and unlocking the screen.Message/call voice notification – Tap the Message/call voice notification switch to toggle it On or Off. On allows your device to incoming call and message events automaticallyDisplay< HOME & LOCK > Home screenSelect Home – Set Home or EasyHome as default home.Smart Bulletin – Tap the Smart Bulletin switch to toggle it On or Off. It includes an additional Home screen showing customized information. Checkmark LG Health, or Smart Tips.Theme – Sets the screen theme for your device. You can download it from LG SmartWorld.
92Wallpaper – Sets the wallpaper to use on your Home screen. Select it from Gallery, Live Wallpapers, Multi-photo, Photos or Wallpaper gallery.Screen swipe effect – Sets the effect when you swipe to change screens. Choose from Domino, Breeze, Accordion, Panorama, Carousel, Layer, or Slide.Allow Home screen looping – Checkmark to allow continuous Home screen scrolling (loop back to first screen after last screen).Home backup & restore – Set to backup and restore Home app layout and wallpaper.Help – Displays information regarding the Home screen items and functions.Lock screenSelect screen lock – Set a screen lock type to secure your phone. Opens a set of screens that guide you through drawing a screen unlock pattern. Set None, Swipe, Face Unlock, Knock Code, Pattern, PIN or Password.If you have enabled a Pattern lock type when you turn on your phone or wake up the screen, you will be asked to draw your unlock pattern to unlock the screen.Screen swipe effect – Sets the screen swipe effect options. Choose from Ripple, Dewdrop, White hole, Particle, and Crystal.NOTE: This setting name may be Pattern effect if the Screen lock is set to Pattern.Wallpaper – Sets your Lock screen wallpaper. Select it from Gallery or Wallpaper gallery.Missed calls & new messages – Checkmark to show notifications of missed calls and new messages on Lock screen.Shortcuts – Allows you to change the shortcuts on the Swipe Lock screen.Weather animation – Checkmark to show weather animation for current location on lock screen.Contact info for lost phone – Checkmark to set the device owner’s name to be displayed on the Lock screen. Tap  to enter the text to be displayed as the Owner info.Settings
93Lock timer – Sets the amount of time before the screen automatically locks after the screen has timed-out.Power button instantly locks – Checkmark to instantly lock the screen when the Power/Lock Key is pressed. This setting overrides the Security lock timer setting.Home touch buttonsSet the Home Touch Keys displayed at the bottom of all of the screens. Set which ones are displayed, their position on the bar, and what they look like. Select the keys and order, the theme, and the background.< FONT >Font type – Sets the type of font used for the phone and menus.Font size – Sets the size of the font displayed in the phone and menus.< OTHER SCREEN SETTINGS >Brightness – Adjusts the brightness of the screen. For best batteryperformance, use the dimmest comfortable brightness.Notification LED – Tap the switch to toggle it On or Off. On will activate the LED light for the notifications you select, in the color you set for each one.Auto-rotate screen – Checkmark to set the phone to automatically rotate the screen based on the phone orientation (portrait or landscape).Screen timeout – Sets the amount of time before the screen times out.Smart Screen – Checkmark to allow the screen to stay on when phone detects your face.< ADVANCED SETTINGS >Screen-off effect – Sets the screen-off effect. Choose from Fade out, Black hole, and Retro TV.Daydream – Tap the Daydream switch to toggle it On or Off. On allows the set screensaver to be displayed when the phone is sleeping while docked and/or charging. Choose from Clock and Goole Photos.
94General< Language & input >Use the Language & input settings to select the language for the text on your phone and to configure the on-screen keyboard, including words you've added to its dictionary.Language – Sets the language to use on your device.Default – Sets the default on-screen keyboard to use when entering text.LG Keyboard – Checkmark to select the LG Keyboard to enter data. Tap the Settings icon to change the following settings: Input language and type – Sets the keyboard language and characters.  Word suggestion – Checkmark to set Auto correction, Suggest next word, Advanced word selection, and Clear history. Tap the Settings icon to access these settings.  Auto capitalization – Checkmark to automatically capitalize the first letter of each sentence.  Auto punctuation – Checkmark to insert a period when the space key is double-tapped. Voice input – Checkmark to display the Voice typing key on the keyboard. Path input – Checkmark to enter a word by drawing a path through all of the letters.  Handwriting – Checkmark to set the handwriting style. Tap the Settings icon to set the pen type (thickness), color, delay time, and Gesture guide.   Sets the keyboard gestures to use including Hide Keyboard, Split Keyboard, and One-handed operation.  Additional settings – Sets additional settings including Keyboard theme, Extend keyboard, Vibrate on keypress, Sound on keypress, Preview on keypress. Help – Tap the Help for more information.Google voice typing – Checkmark to select Google voice typing to enter data. Tap the Settings icon (Settings icon)to change the Google voice settings. Choose input languages – Sets the languages supported with Google voice typing. Block offensive words – Checkmark to hide recognized offensive text.Settings
95 Offline speech recognition – Enables voice input while offline.Voice Search – Sets voice search options. Language – Sets the Google search by voice language.  Speech output – Sets when to use speech output. Choose from Always, Informative only, or Hands-free only. To turn on speech output only when you’ve got a headset attached to your phone, select Hands-free only. Block offensive words – Checkmark to hide offensive voice results.  Offline speech recognition – Sets one or more additional languages for speech recognition when you don’t have a network connection.  Bluetooth headset – Checkmark to record audio through a connected Bluetooth headset.Text-to-speech output – Sets the preferred speech engine and speech rate (very slow to very fast). Also plays a short demonstration of speech synthesis.Pointer speed – Sets the pointer speed on a slide bar.< Location >Turn on location service, your phone determines your approximate location using GPS, Wi-Fi and mobile networks.Mode – Set the location mode from High accuracy, Battery saving and Device sensors only.Google Play services – Tap to check Google Play services app information.LOCATION SERVICESCamera – Checkmark to tag photos or videos with their locations.Google Location Reporting – Select whether to turn on or off Google Location Reporting options. For further information, tap  > Help.< Accounts & sync >Permits applications to synchronize data in the background, whether or not you are actively working in them. Deselecting this setting can save battery power and lower (but  not eliminate) data usage.
96< Cloud >Add a cloud account to quickly and easily use cloud service on LG apps. < Accessibility >Use the Accessibility settings to configure accessibility plug-ins you have installed on your phone.NOTE: Requires additional plug-ins to become selectable.< One-handed operation >Dial keypad – Checkmark to enable you move the dial keypad to the right or left side of the device. Simply tap the arrow to move it to one side or the other.LG keyboard – Checkmark to enable you move the keyboard to the right or left side of the device. Simply tap the arrow to move it to one side or the other.Lock screen – Checkmark to enable you move the PIN Lock screen keypad to the right or left side of the device. Simply tap the arrow to move it to one side or the other.Help – Displays information regarding one-handed operation.< Shortcut key >Get quick access to apps by pressing and holding the Volume keys when screen is off or locked. Tap the Shortcut key switch (Shortcut key switch image) at the top right corner of the screen to toggle it On or Off.< Security >Content lock – Select lock types to lock files in Gallery. Choose from Password or Pattern.Encrypt phone – Allows you to encrypt data on the phone for security. You will be required to enter a PIN or password to decrypt your phone each time you power it on.Encrypt SD card storage – Allows you to encrypt SD card storage and keep data unavailable for other devices.Set up SIM card lock – Set up Micro-USIM card lock or change the Micro-USIM card PIN.Settings
97Password typing visible – Show the last character of the hidden password as you type.Phone administrators – View or deactivate phone administrators.Unknown source – Default setting to install non-Play store applications.Verify apps – Disallow or warn before installation of apps that may cause harm.Storage type – Software onlyTrusted credentials – Display trusted CA certificates.Install from storage – Choose to install encrypted certificates.Clear credentials – Remove all certificates.< Guest mode >To protect your privacy or limit some applications to your children, you can use the Guest mode.When you lend your phone to others, you can limit the applications to be displayed.In advance, set the Guest mode and customize the options.< Gestures >Answer an incoming call – Checkmark to enable you to bring the phone to your ear to automatically answer the incoming call.Fade out ringtone – Checkmark to enable you to pick up the phone from the flat surface to fade out the incoming call ringtone.Silence incoming calls – Checkmark to enable you to flip the phone to silence incoming calls.Snooze or stop alarm – Checkmark to enable you to simply flip the device to snooze or stop the alarm.Pause video – Checkmark to enable you to simply flip the device to pause the currently playing video.Help – Opens a help guide on how to use the Gestures features of your device.Motion sensor calibration – Allows you to improve the accuracy of the tilt and speed of the sensor.
98  < QuickCircle case >Activate to make features, such as music, weather, and clock, available in small view when using the QuickCircle case.< Dual Window >The two split-screen can be viewed at the same time.1. Touch and hold the Back button to split the screen.2. Tap or drag app icon you want to use. – Switch two screens. – View app list. – Open full screen. – Close most recent app.Split view – Checkmark to tap a link on the full screen or attachment from emails to run dual windows automatically.Help – Display tips for using dual window.< Date & time >Use Date & time settings to set how dates will be displayed. You can also use these settings to set your own time and time zone rather than obtaining the current time from the mobile network.< Storage >INTERNAL STORAGE – View the internal storage usage.< Battery >BATTERY INFORMATIONThe Battery charge information is displayed on a battery graphic along with the percentage of the remaining charge and its status. Touch the Battery charge icon to display the Battery use screen to see battery usage level and battery use details. It displays which components and applications are using the most battery power. Tap one of the entries to see more detailed information.Battery percentage on status bar – Checkmark to display the battery level Settings
99percentage on the Status Bar next to the battery icon.BATTERY SAVERTap the Battery saver switch to toggle it On or Off. Tap Battery saver to access the following settings:Turn Battery saver on – Sets the battery charge percent level that will automatically turn on Battery saver. Choose from Immediately, 10% battery, 20% battery, 30% battery, and 50% battery.BATTERY SAVING ITEMSAuto-sync – Checkmark to turn off Auto-sync when Battery saver is activated.Wi-Fi – Checkmark to turn Wi-Fi off when data is not being used while Battery saver is activated.Bluetooth – Checkmark to turn Bluetooth off when not connected while Battery saver is activated.Vibrate on tap – Checkmark to turn off touch feedback when Battery saver is activated.Brightness – Checkmark to set the screen brightness when Battery saver is activated. Tap   to change the setting.Screen timeout – Checkmark to set the screen timeout when Battery saver is activated. Tap the Settings icon to change the setting.Notification LED – Checkmark to turn off the LED light for notifications when Battery saver is activated.Help – Display battery saving items information.< Smart cleaning >Display the space in use and free in your phone. Tap (... icon) at the top right corner of the screen to set notification interval and idle time period.< Apps >View and manage your applications.
100< Default message app >Set Messaging or Hangouts as default app.< Backup & reset >Change the settings for managing your settings and data.Backup my data – Set to backup your settings and application data to the Google server.Backup account – Set to backup your account.Automatic restore – Set to restore your settings and application data when the applications are reinstalled on your device.LG Backup service – Backs up all information on the device and restores it in the event of data loss or replacement.Factory data reset – Reset your settings to the factory default values and delete all your data. If you reset the phone this way, you are prompted to re-enter the same information as when you first started Android.< Printing >Cloud Print – Tap to searching for printers. Tap the Cloud Print switch atthe top right corner of the screen to toggle it ON or OFF.< About phone >View legal information and check your phone status and software version.Settings
101"LG PC Suite" PC software is a program that helps you connect your device to a PC via a USB cable and Wi-Fi. Once connected, you can use the functions of your device from your PC.With your "LG PC Suite" PC Software, You Can...•  Manage and play your media contents (music, movie, picture) on your PC.•  Send multimedia contents to your device.•  Synchronizes data (schedules, contacts, bookmarks) in your device and PC.•  Backup the applications in your device.•  Update the softwares in your device.•  Backup and restore the device data.•  Play multimedia contents of your PC from your device.•  Backup and create and edit the memos in your deviceNOTE: You can use the Help menu from the application to find out how to use your "LG PC Suite" PC software.Installing "LG PC Suite" PC Software"LG PC Suite" PC software can be downloaded from the webpage of LG.1  Go to www.lg.com and select a country of your choice.2  Go to Support > MOBILE SUPPORT > LG Mobile Phones > Select the Model orGo to Support > Mobile > Select the Model.3  Click PC SYNC from MANUALS & DOWNLOAD and click DOWNLOAD to download "LG PC Suite" PC software.PC software (LG PC Suite)
102System Requirements for "LG PC Suite" PC software•  OS: Windows XP (Service pack 3) 32bit, Windows Vista, Windows 7, Windows 8•  CPU: 1 GHz or higher processors•  Memory: 512 MB or higher RAMs•  Graphic card: 1024 x 768 resolution, 32 bit color or higher•  HDD: 500 MB or more free hard disk space (More free hard disk space may be needed depending on the volume of data stored.)•  Required software: LG integrated drivers, Windows Media Player 10 or laterNOTE: LG Integrated USB DriverLG integrated USB driver is required to connect an LG device and PC and installed automatically when you install "LG PC Suite" PC software application.Synchronizing your Device to a PCData from your device and PC can be synchronized easily with "LG PC Suite" PC software for your convenience. Contacts, schedules and bookmarks can be synchronized.The procedure is as follows:1  Connect your device to PC. (Use a USB cable or Wi-Fi connection.)2  Slide down the status bar > Tap USB connected > Select USB connection method, then select Media device (MTP).3  After connection, run the program and select the device section from the category on the left side of the screen.4  Click Personal information to select.5  Select the checkbox of contents to synchronize and click the Sync button.NOTE: To synchronize your phone with your PC, you need to install LG PC Suite onto your PC. Please refer to previous pages to install LG PC Suite.PC software (LG PC Suite)
103Moving contacts from your Old Device to your New Device1  Export your contacts as a CSV fi le from your old device to your PC using a PC sync program.2  Install "LG PC Suite" on the PC fi rst. Run the program and connect your Android mobile phone to the PC using a USB cable.3  On the top menu, select phone > Import/Export contacts > Export to your phone.4  A popup window to select the fi le type and a fi le to export will appear.5  On the popup, click the Select a fi le and Windows Explorer will appear.6  Select the contacts fi le to export in Windows Explorer and click the Open.7  Click Export.8  A Field mapping popup to link the contacts in your device and new contacts data will appear.9  If there is a confl ict between the data in your PC contacts and device contacts, make the necessary selections or modifi cations in LG PC Suite.10 Click OK.
104Phone software updateLG Mobile phone software update from the InternetFor more information about using this function, please visit http://www.lg.com/common/index.jsp   select your country and language. This feature allows you to conveniently update the firmware on your phone to a newer version from the Internet without needing to visit a service center. This feature will only be available if and when LG makes a newer firmware version available for your device.Because the mobile phone firmware update requires the user's full attention for the duration of the update process, please make sure you check all instructions and notes that appear at each step before proceeding. Please note that removing the USB data cable during the upgrade may seriously damage your mobile phone.NOTE: LG reserves the right to make firmware updates available only for selected models at its own discretion and does not guarantee the availability of the newer version of the firmware for all handset models.LG Mobile Phone software update via Over-the-Air (OTA)This feature allows you to conveniently update your phone's software to a newer version via OTA, without connecting using a USB data cable. This feature will only be available if and when LG makes a newer firmware version available for your device.You should first check the software version on your mobile phone: Settings > General tab > About phone > Update Center > Software Update > Check now for update.Phone software update
105NOTE: Your personal data from internal phone storage—including information about your Google account and any other accounts, your system/application data and settings, any downloaded applications and your DRM licence—might be lost in the process of updating your phone's software. Therefore, LG recommends that you backup your personal data before updating your phone's software. LG does not take responsibility for any loss of personal data.NOTE: This feature depends on your network service provider, region and country.
106About this user guide•  Before using your device, please carefully read this manual. This will ensure that you use your phone safely and correctly.•  Some of the images and screenshots provided in this guide may appear differently on your phone.•  Your content may differ from the final product, or from software supplied by service providers or carriers, This content may be subject to change without prior notice. For the latest version of this manual, please visit the LG website at www.lg.com.•  Your phone's applications and their functions may vary by country, region, or hardware specifications. LG cannot be held liable for any performance issues resulting from the use of applications developed by providers other than LG.•  LG cannot be held liable for performance or incompatibility issues resulting from edited registry settings being edited or operating system software being modified. Any attempt to customize your operating system may cause the device or its applications to not work as they should.•  Software, audio, wallpaper, images, and other media supplied with your device are licensed for limited use. If you extract and use these materials for commercial or other purposes is, you may be infringing copyright laws. As a user, you are fully are entirely responsible for the illegal use of media.•  Additional charges may be applied for data services, such as messaging, uploading and downloading, auto-syncing, or using location services. To avoid additional charges, select a data plan to is suitable for your needs. Contact your service provider to obtain additional details.Trademarks•  LG and the LG logo are registered trademarks of LG Electronics.•  All other trademarks and copyrights are the property of their respective owners.About this user guide
107DivX HD ABOUT DIVX VIDEO: DivX® is a digital video format created by DivX, LLC, a subsidiary of Rovi Corporation. This is an official DivX Certified® device that has passed rigorous testing to verify that it plays DivX video. Visit divx.com for more information and software tools to convert your files into DivX videos. ABOUT DIVX VIDEO-ON-DEMAND: This DivX Certified® device must be registered in order to play purchased DivX Video-on-Demand (VOD) movies. To obtain your registration code, locate the DivX VOD section in your device setup menu. Go to vod.divx.com for more information on how to complete your registration.DivX Certified® to play DivX® video up to HD 720p, including premium content.DivX®, DivX Certified® and associated logos are trademarks of Rovi Corporation or its subsidiaries and are used under license.Dolby Digital Plus Manufactured under license from Dolby Laboratories. Dolby, Dolby Digital Plus, and the double-D symbol are trademarks of Dolby Laboratories.Notice: Open Source SoftwareTo obtain the corresponding source code under GPL, LGPL, MPL and other open source licences, please visit http://opensource.lge.com/ All referred licence terms, disclaimers and notices are available for download with the source code.
108These accessories are available for use with the your phone. (Items described below may be optional.)Travel adaptor Stereo headsetQuick Start Guide Data cableBatteryAccessoriesNOTE: •  Always use genuine LG accessories. •  Failure to do this may void your warranty.•  Accessories may vary in different regions.
109TroubleshootingThis chapter lists some problems you might encounter when using your phone. Some problems require you to call your service provider, but most are easy to fix yourself.Message Possible causes Possible corrective measuresMicro-USIM card errorThere is no Micro-USIM card in the phone or it is inserted incorrectly.Make sure that the Micro-USIM card is correctly inserted.No network connection/ Dropped networkSignal is weak or you are outside the carrier network.Move toward a window or into an open area. Check the network operator coverage map.Operator applied new services.Check whether the Micro-USIM card is more than 6~12 months old. If so, change your Micro-USIM card at your network provider's nearest branch. Contact your service provider.Codes do not matchTo change a security code, you will need to confirm the new code by re-entering it.If you forget the code, contact your service provider.The two codes you have entered do not match.
110Message Possible causes Possible corrective measuresNo applications can be setNot supported by service provider or registration required.Contact your service provider.Calls not availableDialling error  New network not authorized.New Micro-USIM card inserted. Check for new restrictions.Pre-paid charge limit reached.Contact service provider or reset limit with PIN2.Phone cannot be switched onOn/Off key pressed too briefly.Press the On/Off key for at least two seconds.Battery is not charged.Charge battery. Check the charging indicator on the display.Troubleshooting
111Message Possible causes Possible corrective measuresCharging errorBattery is not charged. Charge battery.Outside temperature is too hot or cold.Make sure phone is charging at a normal temperature.Contact problem Check the charger and its connection to the phone.No voltage Plug the charger into a different socket.Charger defective Replace the charger.Wrong charger Use only original LG accessories.Number not allowedThe Fixed dialling number function is on.Check the Settings menu and turn the function off.Impossible to receive / send SMS & photosMemory full Delete some messages from your phone.Files do not openUnsupported file format Check the supported file formats.
112Message Possible causes Possible corrective measuresThe screen does not turn on when I receive a call.Proximity sensor problemIf you use a protection tape or case, make sure it has not covered the area around the proximity sensor. Make sure that the area around the proximity sensor is clean.No sound Vibration modeCheck the settings status in the sound menu to make sure you are not in vibration or silent mode.Hangs up or freezesIntermittent software problemTry to perform a software update via the website.Troubleshooting
113CategorySub-CategoryQuestion AnswerBTBluetoothDevicesWhat are the functions available via BluetoothYou can connect a Bluetooth audio device such as a Stereo/Mono headset or Car Kit. Also, when the FTP server is connected to a compatible device, you can share content stored on the storage media.BTBluetoothHeadsetIf my Bluetooth headset is connected, can I listen to my music through my 3.5 mm wired headphones?When a Bluetooth headset is connected, all system sounds are played over the headset. As a result, you will not be able to listen to music through your wired headphones.DataContactsBackupHow can I backup Contacts?The Contacts data can be synchronized between your phone and Gmail™.DataSynchronizationIs it possible to set up one-way sync with Gmail?Only two-way synchronization is available.DataSynchronizationIs it possible to synchronize all email folders?The Inbox is automatically synchronized. You can view other folders by tapping the Menu Key   and select Folders to choose a folder.Google™ ServiceGmail Log-InDo I have to log into Gmail whenever I want to access Gmail?Once you have logged into Gmail, no need to log into Gmail again.FAQ
114CategorySub-CategoryQuestion AnswerGoogle™ ServiceGoogle AccountIs it possible to filter emails?No, email filtering is not supported via the phone.Phone FunctionEmailWhat happens when I execute another application while writing an email?Your email will automatically be saved as a draft.Phone FunctionRingtoneIs there a file size limitation for when I want to use  MP3 file as  ring tone?There is no file size limitation.Phone FunctionMessage TimeMy phone does not display the time of receipt for messages older than 24 hrs. How can I change this?You will only be able to see the times for messages received the same day.Phone FunctionNavigationIs it possible to install another navigation application on my phone?Any application that is available at Play Store™ and is compatible with the hardware can be installed and used.Phone FunctionSynchronisationIs it possible to synchronize my contacts from all my email accounts?Only Gmail and MS Exchange server (company email server) contacts can be synchronized.FAQ
115CategorySub-CategoryQuestion AnswerPhone FunctionWait and PauseIs it possible to save a contact with Wait and Pause in the numbers?If you transferred a contact with the W & P functions saved into the number, you will not be able to use those features. You will need to re-save each number.How to save with Wait and Pause:1.  From the Home screen, tap the Phone icon  .2.  Dial the number, then tap the Menu Key  .3.  Tap Add 2-sec pause or Add wait.Phone FunctionSecurityWhat are the phone’s security functions?You are able to set the phone to require that an Unlock Pattern be entered before the phone can be accessed or used.
116CategorySub-CategoryQuestion AnswerPhone FunctionUnlockPatternHow do I create the Unlock Pattern?1.  From the Home screen, tap the Menu Key .2.  Tap System settings > Display tab > Lock screen.3.  Tap Select screen lock > Pattern. The first time you do this, a short tutorial about creating an Unlock Pattern will appear.4.  Set up by drawing your pattern once, and once again for confirmation.Precautions to take when using the pattern lock.It is very important to remember the unlock pattern you set. You will not be able to access your phone if you use an incorrect pattern five times. You have five chances to enter your unlock pattern, PIN or password. If you have used all 5 opportunities, you can try again after 30 seconds. (Or, if you preset the backup PIN, you can use the backup PIN code to unlock the pattern.)FAQ
117CategorySub-CategoryQuestion AnswerPhone FunctionUnlockPatternWhat should I do if I forget the unlock pattern and I didn’t create my Google account on the phone?If you have forgotten your pattern:If you logged into your Google account on the phone but failed to enter the correct pattern 5 times, tap the forgot pattern button. You are then required to log in with your Google account to unlock your phone. If you have not created a Google account on the phone or you have forgotten it, you will have to perform a hard reset.Caution: If you perform a factory reset, all user applications and user data will be deleted. Please remember to backup any important data before performing a factory reset.Phone FunctionMemoryWill I know when my memory is full? Yes, you will receive a notification.Phone FunctionLanguage SupportIs it possible to change my phone's language?The phone has multilingual capabilities.To change the language:1.  From the Home screen, tap the Menu Key  and tap System settings.2.  Ta p  General tab > Language & input > Language.3.  Tap the desired language.
118CategorySub-CategoryQuestion AnswerPhone FunctionVPNHow do I set up a VPN?VPN access configuration is different for each company. To configure VPN access from your phone, you must obtain the details from your company’s network administrator.Phone FunctionScreen time outMy screen turns off after only 15 seconds. How can I change the amount of time for the backlight to turn off?1.  From the Home screen, tap the Menu Key .2.  Tap System settings > Display tab.3.  Tap Screen timeout.4.  Tap the preferred screen backlight timeout time.Phone FunctionWi-Fi & mobile networkWhen Wi-Fi and mobile network are both available, which service will my phone use?When using data, your phone may default to the Wi-Fi connection (if Wi-Fi connectivity on your phone is set to On). However, there will be no notification when your phone switches from one to the other.To know which data connection is being used, view the mobile network or Wi-Fi icon at the top of your screen.Phone FunctionHome screenIs it possible to remove an application from the Home screen?Yes. Just touch and hold the icon until the dustbin icon appears at the top and center of the screen. Then, without lifting your finger, drag the icon to the trash can.FAQ
119CategorySub-CategoryQuestion AnswerPhone FunctionApplicationI downloaded an application and it causes a lot of errors. How do I remove it?1.  From the Home screen, tap the Menu Key .2.  Tap System settings > General tab > Apps > DOWNLOADED.3.  Tap the application, then tap Uninstall.Phone FunctionChargerIs it possible to charge my phone using a USB data cable without installing the necessary USB driver?Yes, the phone will be charged by the USB cable regardless of whether the necessary drivers are installed or not.Phone FunctionAlarmCan I use music files for my alarm?Yes. After saving a music file as a ringtone, you can use it as your alarm.1.  Touch and hold a song in a library list. In the menu that opens, tap Set as ringtone > Phone ringtone or Contact ringtone.2.  In the alarm clock setting screen, select the song as a ringtone.Phone FunctionAlarmWill my alarm be audible or will it go off if the phone is turned off?No, this is not supported.Phone FunctionAlarmIf my ringer volume is set to Off or Vibrate, will I hear my alarm?Your alarm is programmed to be audible even in these scenarios.
120CategorySub-CategoryQuestion AnswerRecovery SolutionHard Reset (Factory Reset)How can I perform a factory reset if I can’t access the phone’s setting menu?If your phone does not restore to its original condition, use a hard reset (factory reset) to initialize it.FAQ
2-1For your safetyFor your safetySafety InformationPlease read and observe the following information for safe and proper use of your phone and to prevent damage.WARNING! This product contains chemicals known to the State of California to cause cancer and birth defects or reproductive harm. Wash hands after handling.Caution: Violation of the instructions may cause minor or serious damage to the product.t For your safety, do not remove the battery incorporated in the product.t Do not disassemble or open crush, bend or deform, puncture or shred.t Repairs under warranty, at LG’s option, may include replacement parts or boards that are either new or reconditioned, provided that they have functionality equal to that of the parts being replaced.t Do not modify or remanufacture, attempt to insert foreign objects into the battery, immerse or expose to water or other liquids, expose to fire, explosion or other hazard.t Avoid dropping the phone. If the phone is dropped, especially on a hard surface, and the user suspects damage, take it to a service center for inspection.t For those host devices that utilize a USB port as a charging source, the host device’s user manual shall include a statement that the phone shall only be connected to products that bear the USB-IF logo or have completed the USB-IF compliance program.
2-2Charger and Adapter Safetyt The charger and adapter are intended for indoor use only.t Insert the battery pack charger vertically into the wall power socket.t Unplug the power cord and charger during lightning storms to avoid electric shock or fire.t Use the correct adapter for your phone when using the battery pack charger abroad.Battery Information and Caret Please read the manual of specified charger about charging method.t Do not damage the power cord by bending, twisting, or heating. Do not use the plug if it is loose as it may cause electric shock or fire. Do not place any heavy items on the power cord. Do not allow the power cord to be crimped as it may cause electric shock or fire.t Unplug the power cord prior to cleaning your phone, and clean the power plug pin when it’s dirty. When using the power plug, ensure that it’s firmly connected. If not, it may cause excessive heat or fire. If you put your phone in a pocket or bag without covering the receptacle of the phone (power plug pin), metallic articles (such as a coin, paperclip or pen) may short-circuit the phone. Short-circuit of the terminal may damage the battery and cause an explosion. Always cover the receptacle when not in use.t Charging temperature range is between 0°C/32°F and 45°C /113 °F. Do not charge the battery out of recommended temperature range. Charging out of recommended range might cause the generating heat or serious damage of
2-3For your safetybattery. And also, it might cause the deterioration of battery’s characteristics and cycle life.t The battery pack has protection circuit to avoid the danger. Do not use near places that can generate static electricity more than 100V which could damage the protection circuit. Damaged protection circuits may generate smoke, rupture or ignite.t When using the battery for the first time, if it emits a bad smell, you see rust on it, or anything else abnormal, do not use the equipment and bring the battery to the shop which it was bought.t Do not handle the phone with wet hands while it is being charged. It may cause an electric shock or seriously damage your phone.t Do not place or answer calls while charging the phone as it may short-circuit the phone and/or cause electric shock or fire.t Do not use harsh chemicals (such as alcohol, benzene, thinners, etc.) or detergents to clean your phone. This could cause a fire.t Always unplug the charger from the wall socket after the phone is fully charged to save unnecessary power consumption of the charger.Care and MaintenanceYour mobile device is a product of superior design and craftsmanship and should be treated with care. The suggestions below will help you fulfill any warranty obligations and allow you to enjoy this product for many years:
2-4Keep your Mobile Device away from:  Liquids of any kindKeep the mobile device dry. Precipitation, humidity, and liquids contain minerals that will corrode electronic circuits. If the mobile device does get wet, do not accelerate drying with the use of an oven, microwave, or dryer, because this may damage the mobile device and could cause a fire or explosion.Do not use the mobile device with a wet hand.Doing so may cause an electric shock to you or damage to the mobile device.Extreme heat or coldt Avoid temperatures below 0°C /32°F or above 45°C /113°F.t Use your phone in temperatures between 0°C /32°F and 40°C /104°F, if possible. Exposing your phone to extremely low or high temperatures may result in damage, malfunction, or even explosion.MicrowavesDo not try to dry your mobile device in a microwave oven. Doing so may cause a fire or explosion.Dust and dirtDo not expose your mobile device to dust, dirt, or sand.Sunscreen lotionDo not expose or wear your device to any liquid like sunscreen lotion.Doing so may cause your device to or damage to the mobile device.
2-5For your safetyCleaning solutionsDo not use harsh chemicals, cleaning solvents, or strong detergents to clean the mobile device.Wipe it with a soft cloths lightly dampened in a mild soap-and-water solution.Shock or vibrationDo not drop, knock, or shake the mobile device.Rough handling can break internal circuit boards.PaintDo not paint the mobile device. Paint can clog the device’smoving parts or ventilation openings and prevent proper operation.General Noticet An emergency call can be made only within a service area. For an emergency call, make sure that you are within a service area and that the phone is turned on.t Do not place items containing magnetic components such as a credit card, phone card, bank book, or subway ticket near your phone. The magnetism of the phone may damage the data stored in the magnetic strip.t Talking on your phone for a long period of time may reduce call quality due to heat generated during use.t When the phone is not used for a long period time, store it in a safe place with the power cord unplugged.t Using the phone in proximity to receiving equipment (i.e., TV or radio) may cause interference to the phone.
2-6t Do not use the phone if the antenna is damaged. If a damaged antenna contacts skin, it may cause a slight burn. Please contact an LG Authorized Service Center to replace the damaged antenna.t The data saved in your phone might be deleted due to careless use, repair of the phone, or upgrade of the software. Please backup your important phone numbers. (Ringtones, text messages, voice messages, pictures, and videos could also be deleted.) The manufacturer is not liable for damage due to the loss of data.t When you use the phone in public places, set the ringtone to vibration so you don’t disturb others.t Do not turn your phone on or off when putting it to your ear.t Your phone is an electronic device that generates heat during normal operation. Extremely prolonged, direct skin contact in the absence of adequate ventilation may result in discomfort or minor burns. Therefore, use care when handling your phone during or immediately after operation.Use accessories, such as earphones and headsets, with caution. Ensure that cables are tucked away safely and do not touch the antenna unnecessarily.Part 15.19 statementThis device complies with part 15 of FCC rules. Operation is subject to the following two conditions: (1) This device may not cause harmful interference, and (2) this device must accept any interference received, including interference that causes undesired operation.
2-7For your safetyBodily Contact During OperationThis device was tested for typical use with the back of the phone kept 0.39 inches (1.0 cm) from the body. To comply with FCC RF exposure requirements, a minimum separation distance of 0.39 inches (1.0 cm) must be maintained between the user’s body and the back of the phone. Third-party belt-clips, holsters, and similar accessories containing metallic components may not be used. Avoid the use of accessories that cannot maintain 0.39 inches (1.0 cm) distance between the user’s body and the back of the phone and have not been tested for compliance with FCC RF exposure limits.Consumer Information About Radio Frequency EmissionsYour wireless phone, which contains a radio transmitter and receiver, emits radio frequency energy during use. The following consumer information addresses commonly asked questions about the health effects of wireless phones.Are wireless phones safe?Scientific research on the subject of wireless phones and radio frequency (“RF”) energy has been conducted worldwide for many years, and continues. In the United States, the Food and Drug Administration (“FDA”) and the Federal Communications Commission (“FCC”) set policies and procedures for wireless phones. The FDA issued a website publication on health issues related to cell phone usage where it states, “The scientific community at large …believes that the weight of scientific evidence does not show an association between exposure to radiofrequency (RF) from cell phones and adverse health outcomes. Still the scientific community does recommend conducting additional research to address gaps in knowledge. That research is being
2-8conducted around the world and FDA continues to monitor developments in this field. You can access the joint FDA/FCC website at http://www.fda.gov (under “c” in the subject index, select Cell Phones > Research). You can also contact the FDA toll-free at (888) 463-6332 or (888) INFO-FDA. In June 2000, the FDA entered into a cooperative research and development agreement through which additional scientific research is being conducted. The FCC issued its own website publication stating that “there is no scientific evidence that proves that wireless phone usage can lead to cancer or a variety of other problems, including headaches, dizziness or memory loss.” This publication is available at http://www.fcc.gov/cgb/cellular.html or through the FCC at (888) 225-5322 or (888) CALL-FCC.What does “SAR” mean?In 1996, the FCC, working with the FDA, the U.S. Environmental Protection Agency, and other agencies, established RF exposure safety guidelines for wireless phones in the United States. Before a wireless phone model is available for sale to the public, it must be tested by the manufacturer and certified to the FCC that it does not exceed limits established by the FCC. One of these limits is expressed as a Specific Absorption Rate, or “SAR.” SAR is a measure of the rate of absorption of RF energy in the body. Tests for SAR are conducted with the phone transmitting at its highest power level in all tested frequency bands. Since 1996, the FCC has required that the SAR of handheld wireless phones not exceed 1.6 watts per kilogram, averaged over one gram of tissue. Although the SAR is determined at the highest power level, the actual SAR value of a wireless phone while operating can be less than the reported SAR value. This is because the SAR value may vary from call to call, depending on factors such as proximity to a cell site, the proximity of the phone to the body while
2-9For your safetyin use, and the use of hands-free devices. For more information about SARs, see the FCC’s OET Bulletins 56 and 65 at http://www.fcc.gov/Bureaus/ Engineering_Technology/Documents/bulletins or visit the Cellular Telecommunications Industry Association website at http://www.ctia.org/consumer_info/index.cfm/AID/10371. You may also wish to contact the manufacturer of your phone.Can I minimize my RF exposure?If you are concerned about RF, there are several simple steps you can take to minimize your RF exposure. You can, of course, reduce your talk time. You can place more distance between your body and the source of the RF, as the exposure level drops off dramatically with distance. The FDA/FCC website states that “hands-free kits can be used with wireless phones for convenience and comfort. These systems reduce the absorption of RF energy in the head because the phone, which is the source of the RF emissions, will not be placed against the head. On the other hand, if the phone is mounted against the waist or other part of the body during use, then that part of the body will absorb more RF energy. Wireless phones marketed in the U.S. are required to meet safety requirements regardless of whether they are used against the head or against the body. Either configuration should result in compliance with the safety limit.”Also, if you use your wireless phone while in a car, you can use a phone with an antenna on the outside of the vehicle. You should also read and follow your wireless phone manufacturer’s instructions for the safe operation of your phone.
2-10Do wireless phones pose any special risks to children?The FDA/FCC website states that “the scientific evidence does not show a danger to users of wireless communication devices, including children.” The FDA/FCC website further states that “some groups sponsored by other national governments have advised that children be discouraged from using wireless phones at all”. For example, the Stewart Report from the United Kingdom [“UK”] made such a recommendation in December 2000. In this report a group of independent experts noted that no evidence exists that using a cell phone causes brain tumors or other ill effects. [The UK’s] recommendation to limit cell phone use by children was strictly precautionary; it was not based on scientific evidence that any health hazard exists. A copy of the UK’s leaflet is available at http://www.dh.gov.uk (search “mobile”), or you can write to: NRPB, Chilton, Didcot, Oxon OX11 ORQ, United Kingdom. Copies of the UK’s annual reports on mobile phones and RF are available online at www.iegmp.org.uk and http://www.hpa.org.uk/radiation/ (search “mobile”). Parents who wish to reduce their children’s RF exposure may choose to restrict their children’s wireless phone use.Where can I get further information about RF emissions?For further information, see the following additional resources (websites current as of April 2005):U.S. Food and Drug AdministrationFDA Consumer magazine November-December 2000 Telephone: (888) INFO-FDA http://www.fda.gov (Under “c”in the subject index, select Cell Phones > Research.)
2-11For your safetyU.S. Federal Communications Commission445 12th Street, S.W. Washington, D.C. 20554 Telephone: (888) 225-5322 http://www.fcc.gov/oet/rfsafetyIndependent Expert Group on Mobile Phoneshttp://www.iegmp.org.ukRoyal Society of Canada Expert Panels on Potential Health Risks of Radio Frequency Fields from Wireless Telecommunication Devices283 Sparks Street Ottawa, Ontario K1R 7X9 Canada Telephone: (613) 991-6990 http://www.rsc.ca/index.php?page=Expert_Panels_RF&Lang_id=120World Health OrganizationAvenue Appia 20 1211 Geneva 27 Switzerland Telephone: 011 41 22 791 21 11 http://www.who.int/mediacentre/factsheets/fs193/en/International Commission on Non-IonizingRadiation Protection c/o Bundesamt fur Strahlenschutz Ingolstaedter Landstr. 1 85764 Oberschleissheim
2-12Germany Telephone: 011 49 1888 333 2156 http://www.icnirp.deAmerican National Standards Institute1819 L Street, N.W., 6th Floor Washington, D.C. 20036 Telephone: (202) 293-8020 http://www.ansi.orgNational Council on Radiation Protection and Measurements7910 Woodmont Avenue, Suite 800 Bethesda, MD 20814-3095 Telephone: (301) 657-2652 http://www.ncrponline.orgEngineering in Medicine and Biology Society, Committee on Man and Radiation (COMAR) of the Institute of Electrical and Electronics Engineershttp://ewh.ieee.org/soc/embs/comar/TIA Safety InformationThe following is the complete TIA Safety Information for wireless handheld phones.
2-13For your safetyExposure to Radio Frequency SignalYour wireless handheld portable phone is a low power radio transmitter and receiver. When ON, it receives and sends out Radio Frequency (RF) signals. In August, 1996, the Federal Communications Commissions (FCC) adopted RF exposure guidelines with safety levels for handheld wireless phones. Those guidelines are consistent with the safety standards previously set by both U.S. and international standards bodies:ANSI C95.1 (1992) *NCRP Report 86 (1986) ICNIRP (1996)*  American National Standards Institute; National Council on Radiation Protection andMeasurements; International Commission on Non-Ionizing Radiation ProtectionThose standards were based on comprehensive and periodic evaluations of the relevant scientific literature. For example, over 120 scientists, engineers, and physicians from universities, government health agencies, and industry reviewed the available body of research to develop the ANSI Standard (C95.1).The design of your phone complies with the FCC guidelines (and those standards).
2-14Tips on Efficient OperationFor your phone to operate most efficiently:Don’t touch the antenna unnecessarily when the phone is in use. Contact with the antenna affects call quality and may cause the phone to operate at a higher power level than otherwise needed. Electronic DevicesMost modern electronic equipment is shielded from RF signals. However, certain electronic equipment may not be shielded against the RF signals from your wireless phone.PacemakersThe Health Industry Manufacturers Association recommends that a minimum separation of six (6) inches be maintained between a handheld wireless phone and a pacemaker to avoid potential interference with the pacemaker. These recommendations are consistent with the independent research by and recommendations of Wireless Technology Research.Persons with pacemakers:t Should ALWAYS keep the phone more than six (6) inches from their pacemaker when the phone is turned ON;t Should not carry the phone in a breast pocket;t Should use the ear opposite the pacemaker to minimize the potential for interference;t Should turn the phone OFF immediately if there is any reason to suspect that interference is taking place.
2-15For your safetyHearing AidsSome digital wireless phones may interfere with some hearing aids. In the event of such interference, you may want to consult your service provider (or call the customer service line to discuss alternatives).Other Medical DevicesIf you use any other personal medical device, consult the manufacturer of your device to determine if it is adequately shielded from external RF energy. Your physician may be able to assist you in obtaining this information.Health Care FacilitiesTurn your phone OFF in health care facilities when any regulations posted in these areas instruct you to do so. Hospitals or health care facilities may use equipment that could be sensitive to external RF energy. VehiclesRF signals may affect improperly installed or inadequately shielded electronic systems in motor vehicles. Check with the manufacturer or its representative regarding your vehicle. You should also consult the manufacturer of any equipment that has been added to your vehicle.Posted FacilitiesTurn your phone OFF in any facility where posted notices so require.AircraftFCC regulations prohibit using your phone while in the air. Switch OFF your phone before boarding an aircraft.
2-16Blasting AreasTo avoid interfering with blasting operations, turn your phone OFF when in a “blasting area” or in areas posted: “Turn off two-way radio”. Obey all signs and instructions.Potentially Explosive AtmosphereTurn your phone OFF when in any area with a potentially explosive atmosphere and obey all signs and instructions. Sparks in such areas could cause an explosion or fire resulting in bodily injury or even death.Areas with a potentially explosive atmosphere are often, but not always marked clearly. Potential areas may include: fueling areas (such as gasoline stations); below deck on boats; fuel or chemical transfer or storage facilities; vehicles using liquefied petroleum gas (such as propane or butane); areas where the air contains chemicals or particles (such as grain, dust, or metal powders); and any other area where you would normally be advised to turn off your vehicle engine.For Vehicles Equipped with an Air BagAn air bag inflates with great force. DO NOT place objects, including either installed or portable wireless equipment, in the area over the air bag or in the air bag deployment area. If in-vehicle wireless equipment is improperly installed and the air bag inflates, serious injury could result.FDA Consumer UpdateThe U.S. Food and Drug Administration’s Center for Devices and Radiological Health Consumer Update on Mobile Phones:
2-17For your safety1. Do wireless phones pose a health hazard?The available scientific evidence does not show that any health problems are associated with using wireless phones.There is no proof, however, that wireless phones are absolutely safe. Wireless phones emit low levels of Radio Frequency (RF) energy in the microwave range while being used. They also emit very low levels of RF when in idle mode. Whereas high levels of RF can produce health effects (by heating tissue), exposure to low level RF that does not produce heating effects causes no known adverse health effects. Many studies of low level RF exposures have not found any biological effects. Some studies have suggested that some biological effects may occur, but such findings have not been confirmed by additional research. In some cases, other researchers have had difficulty in reproducing those studies, or in determining the reasons for inconsistent results.2.  What is the FDA’s role concerning the safety of wireless phones?Under the law, the FDA does not review the safety of radiation-emitting consumer products such as wireless phones before they can be sold, as it does with new drugs or medical devices. However, the agency has authority to take action if wireless phones are shown to emit Radio Frequency (RF) energy at a level that is hazardous to the user. In such a case, the FDA could require the manufacturers of wireless phones to notify users of the health hazard and to repair, replace, or recall the phones so that the hazard no longer exists.Although the existing scientific data does not justify FDA regulatory actions, the FDA has urged the wireless phone industry to take a number of steps, including the following:
2-18t Support needed research into possible biological effects of RF of the type emitted by wireless phones; t Design wireless phones in a way that minimizes any RF exposure to the user that is not necessary for device function; andt Cooperate in providing users of wireless phones with the best possible information on possible effects of wireless phone use on human health.The FDA belongs to an interagency working group of the federal agencies that have responsibility for different aspects of RF safety to ensure coordinated efforts at the federal level. The following agencies belong to this working group:t National Institute for Occupational Safety and Healtht Environmental Protection Agencyt Occupational Safety and Health Administrationt National Telecommunications and Information AdministrationThe National Institutes of Health participates in some interagency working group activities, as well.The FDA shares regulatory responsibilities for wireless phones with the Federal Communications Commission (FCC). All phones that are sold in the United States must comply with FCC safety guidelines that limit RF exposure. The FCC relies on the FDA and other health agencies for safety questions about wireless phones.The FCC also regulates the base stations that the wireless phone networks rely upon. While these base stations operate at higher power than do the wireless phones themselves, the RF exposures that people get from these base stations are typically thousands of times lower than those they can get from wireless phones. Base stations are thus not the subject of the safety questions discussed in this document.
2-19For your safety3.  What kinds of phones are the subject of this update?The term “wireless phone” refers here to handheld wireless phones with built-in antennas, often called “cell”, “mobile”, or “PCS” phones. These types of wireless phones can expose the user to measurable Radio Frequency (RF) energy because of the short distance between the phone and the user’s head. These RF exposures are limited by FCC safety guidelines that were developed with the advice of the FDA and other federal health and safety agencies. When the phone is located at greater distances from the user, the exposure to RF is drastically lower because a person’s RF exposure decreases rapidly with increasing distance from the source. The so-called “cordless phones,” which have a base unit connected to the telephone wiring in a house, typically operate at far lower power levels, and thus produce RF exposures far below the FCC safety limits. 4.  What are the results of the research done already?The research done thus far has produced conflicting results, and many studies have suffered from flaws in their research methods. Animal experiments investigating the effects of Radio Frequency (RF) energy exposures characteristic of wireless phones have yielded conflicting results that often cannot be repeated in other laboratories. A few animal studies, however, have suggested that low levels of RF could accelerate the development of cancer in laboratory animals. However, many of the studies that showed increased tumor development used animals that had been genetically engineered or treated with cancer-causing chemicals so as to be pre-disposed to develop cancer in the absence of RF exposure. Other studies exposed the animals to RF for up to 22 hours per day. These conditions are not similar to the conditions under which people use wireless phones, so we do not know with certainty what the results of such studies mean for human health. Three large epidemiology studies
2-20have been published since December 2000. Between them, the studies investigated any possible association between the use of wireless phones and primary brain cancer, glioma, meningioma, or acoustic neuroma, tumors of the brain or salivary gland, leukemia, or other cancers. None of the studies demonstrated the existence of any harmful health effects from wireless phone RF exposures. However, none of the studies can answer questions about long-term exposures, since the average period of phone use in these studies was around three years.5.  What research is needed to decide whether RF exposure from wirelessphones poses a health risk?A combination of laboratory studies and epidemiological studies of people actually using wireless phones would provide some of the data that are needed. Lifetime animal exposure studies could be completed in a few years. However, 166 very large numbers of animals would be needed to provide reliable proof of a cancer promoting effect if one exists. Epidemiological studies can provide data that is directly applicable to human populations, but ten or more years followup may be needed to provide answers about some health effects, such as cancer. This is because the interval between the time of exposure to a cancercausing agent and the time tumors develop — if they do — may be many, many years. The interpretation of epidemiological studies is hampered by difficulties in measuring actual RF exposure during day-to-day use of wireless phones. Many factors affect this measurement, such as the angle at which the phone is held, or which model of phone is used.6.  What is the FDA doing to find out more about the possible health effects ofwireless phone RF?The FDA is working with the U.S. National Toxicology Program and with groups of investigators around the world to ensure that high priority animal studies are
2-21For your safetyconducted to address important questions about the effects of exposure to Radio Frequency (RF) energy.The FDA has been a leading participant in the World Health Organization International Electro Magnetic Fields (EMF) Project since its inception in 1996. An influential result of this work has been the development of a detailed agenda of research needs that has driven the establishment of new research programs around the world. The project has also helped develop a series of public information documents on EMF issues.The FDA and the Cellular Telecommunications & Internet Association (CTIA) have a formal Cooperative Research And Development Agreement (CRADA)to do research on wireless phone safety. The FDA provides the scientific oversight, obtaining input from experts in government, industry, and academic organizations. CTIA-funded research is conducted through contracts with independent investigators. The initial research will include both laboratory studies and studies of wireless phone users. The CRADA will also include a broad assessment of additional research needs in the context of the latest research developments around the world. 7.  How can I find out how much Radio Frequency energy exposure I can get byusing my wireless phone?All phones sold in the United States must comply with Federal Communications Commission (FCC) guidelines that limit Radio Frequency (RF) energy exposures. The FCC established these guidelines in consultation with the FDA and the other federal health and safety agencies. The FCC limit for RF exposure from wireless phones is set at a Specific Absorption Rate (SAR) of 1.6 watts per kilogram (1.6 W/kg). The FCC limit is consistent with the safety standards developed by the Institute of Electrical and Electronic Engineering (IEEE) and the National Council on Radiation Protection
2-22and Measurement. The exposure limit takes into consideration the body’s ability to remove heat from the tissues that absorb energy from the wireless phone and is set well below levels known to have effects. Manufacturers of wireless phones must report the RF exposure level for each model of phone to the FCC. The FCC website (http://www.fcc.gov/oet/rfsafety) gives directions for locating the FCC identification number on your phone so you can find your phone’s RF exposurelevel in the online listing.8.  What has the FDA done to measure the Radio Frequency energy comingfrom wireless phones?The Institute of Electrical and Electronic Engineers (IEEE) is developing a technical standard for measuring the Radio Frequency (RF) energy exposure from wireless phones and other wireless handsets with the participation and leadership of FDA scientists and engineers. The standard, “Recommended Practice for Determining the Spatial-Peak Specific Absorption Rate (SAR) in the Human Body Due to Wireless Communications Devices: Experimental Techniques”, sets forth the first consistent test methodology for measuring the rate at which RF is deposited in the heads of wireless phone users. The test method uses a tissue-simulating model of the human head. Standardized SAR test methodology is expected to greatly improve the consistency of measurements made at different laboratories on the same phone. SAR is the measurement of the amount of energy absorbed in tissue, either by the whole body or a small part of the body. It is measured in watts/kg (or milliwatts/g) of matter. This measurement is used to determine whether a wireless phone complies with safety guidelines.
2-23For your safety9.  What steps can I take to reduce my exposure to Radio Frequency energyfrom my wireless phone?If there is a risk from these products — and at this point we do not know that there is — it is probably very small. But if you are concerned about avoiding even potential risks, you can take a few simple steps to minimize your exposure to Radio Frequency (RF) energy. Since time is a key factor in how much exposure a person receives, reducing the amount of time spent using a wireless phone will reduce RF exposure. If you must conduct extended conversations by wireless phone every day, you could place more distance between your body and the source of the RF, since the exposure level drops off dramatically with distance. For example, you could use a headset and carry the wireless phone away from your body or use a wireless phone connected to a remote antenna. Again, the scientific data does not demonstrate that wireless phones are harmful. But if you are concerned about the RF exposure from these products, you can use measures like those described above to reduce your RF exposure from wireless phone use.10.  What about children using wireless phones?The scientific evidence does not show a danger to users of wireless phones, including children and teenagers. If you want to take steps to lower exposure to Radio Frequency (RF) energy, the measures described above would apply to children and teenagers using wireless phones. Reducing the time of wireless phone use and increasing the distance between the user and the RF source will reduce RF exposure.Some groups sponsored by other national governments have advised that children be discouraged from using wireless phones at all. For example, the government in the United Kingdom distributed leaflets containing such a recommendation in December 2000. They noted that no evidence exists that using a wireless phone causes brain
2-24tumors or other ill effects. Their recommendation to limit wireless phone use by children was strictly precautionary; it was not based on scientific evidence that any health hazard exists. 11.  What about wireless phone interference with medical equipment?Radio Frequency (RF) energy from wireless phones can interact with some electronic devices. For this reason, the FDA helped develop a detailed test method to measure Electro Magnetic Interference (EMI) of implanted cardiac pacemakers and defibrillators from wireless telephones. This test method is now part of a standard sponsored by the Association for the Advancement of Medical Instrumentation (AAMI). The final draft, a joint effort by the FDA, medical device manufacturers, and many other groups, was completed in late 2000. This standard will allow manufacturers to ensure that cardiac pacemakers and defibrillators are safe from wireless phone EMI.The FDA has tested hearing aids for interference from handheld wireless phones and helped develop a voluntary standard sponsored by the Institute of Electrical and Electronic Engineers (IEEE). This standard specifies test methods and performance requirements for hearing aids and wireless phones so that no interference occurs when a person uses a “compatible” phone and a “compatible” hearing aid at the same time. This standard was approved by the IEEE in 2000.The FDA continues to monitor the use of wireless phones for possible interactions with other medical devices. Should harmful interference be found to occur, the FDA will conduct testing to assess the interference and work to resolve the problem.12. Where can I find additional information?For additional information, please refer to the following resources:Federal Communications Commission (FCC) RF Safety Program(http://www.fcc.gov/oet/rfsafety)
2-25For your safetyInternational Commission on Non-lonizing Radiation Protection(http://www.icnirp.de)World Health Organization (WHO) International EMF Project(http://www.who.int/emf)National Radiological Protection Board (UK)(http://www.hpa.org.uk/radiation/)DrivingCheck the laws and regulations on the use of wireless phones in the areas where you drive and always obey them. Also, if using your phone while driving, please observe the following:t Give full attention to driving -- driving safely is your first responsibility;t Use hands-free operation, if available;t Pull off the road and park before making or answering a call if driving conditions or the law require it.Consumer Information on SAR (Specific Absorption Rate)This model phone meets the Government’s requirements for exposure to radio waves. Your wireless phone is a radio transmitter and receiver. It is designed and manufactured not to exceed the emission limits for exposure to radiofrequency (RF) energy set by the Federal Communications Commission (FCC) of the U.S. Government. These FCC exposure limits are derived from the recommendations of two expert organizations, the National Counsel on Radiation Protection and
2-26Measurement (NCRP) and the Institute of Electrical and Electronics Engineers (IEEE). In both cases, the recommendations were developed by scientific and engineering experts drawn from industry, government, and academia after extensive reviews of the scientific literature related to the biological effects of RF energy.The exposure limit for wireless mobile phones employs a unit of measurement known as the Specific Absorption Rate, or SAR. The SAR is a measure of the rate of absorption of RF energy by the human body expressed in units of watts per kilogram (W/kg). The  FCC requires wireless phones to comply with a safety limit of 1.6 watts per kilogram (1.6 W/kg). The FCC exposure limit incorporates a substantial margin of safety to give additional protection to the public and to account for any variations in measurements.Tests for SAR are conducted using standard operating positions specified by the FCC with the phone transmitting at its highest certified power level in all tested frequency bands. Although SAR is determined at the highest certified power level, the actual SAR level of the phone while operating can be well below the maximum value. Because the phone is designed to operate at multiple power levels to use only the power required to reach the network, in general, the closer you are to a wireless base station antenna, the lower the power output.Before a phone model is available for sale to the public, it must be tested and certified to the FCC that it does not exceed the limit established by the government adopted requirement for safe exposure. The tests are performed in positions and locations (e.g., at the ear and worn on the body) as required by the FCC for each model.The FCC has granted an Equipment Authorization for this model phone with all reported SAR levels evaluated as in compliance with the FCC RF emission guidelines.
2-27Part 15.105 statementThis equipment has been tested and found to comply with the limits for a class B digital device, pursuant to Part 15 of the FCC rules. These limits are designed to provide reasonable protection against harmful interference in a residential installation. This equipment generates, uses, and can radiate radio frequency energy and, if not installed and used in accordance with the instructions, may cause harmful interference to radio communications. However, there is no guarantee that interference will not occur in a particular installation. If this equipment does cause harmful interference or television reception, which can be determined by turning the equipment off and on, the user is encouraged to try to correct the interference by one or more of the following measures:-   Reorient or relocate the receiving antenna.-  Increase the separation between the equipment and receiver.-  Connect the equipment into an outlet on a circuit different from that to which the receiver is connected. -  Consult the dealer or an experienced radio/TV technician for help. Part 15.21 statementChanges or modifications that are not expressly approved by the manufacturer could void the user’s authority to operate the equipment.Battery information and care Always unplug the charger from the wall socket after the phone is fully charged to save unnecessary power consumption of the charger.

Navigation menu