LG Electronics USA HSTND-2781-G LCD MONITOR User Manual User s Manual G
LG Electronics USA LCD MONITOR User s Manual G
UserManual.wiki
>
LG Electronics USA
>
HSTND 2781 G User Manual
Users Manual
Navigation menu
Upload a User Manual
Namespaces
Wiki Guide
HTML
PDF
Info
Views
User Manual
Discussion / Help
Navigation

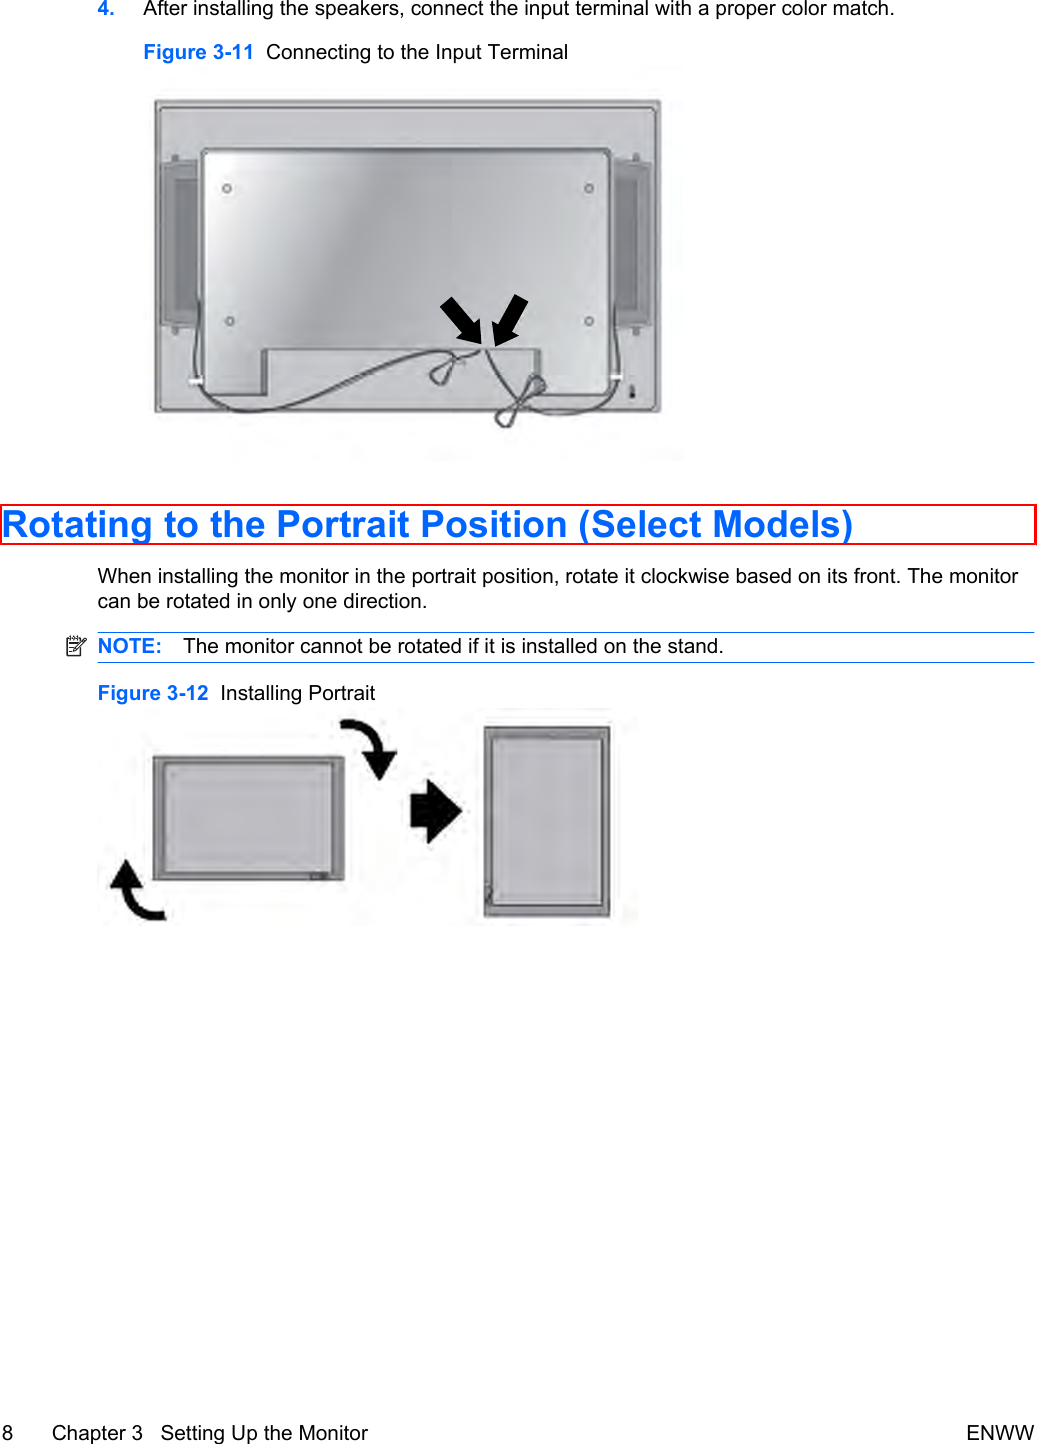
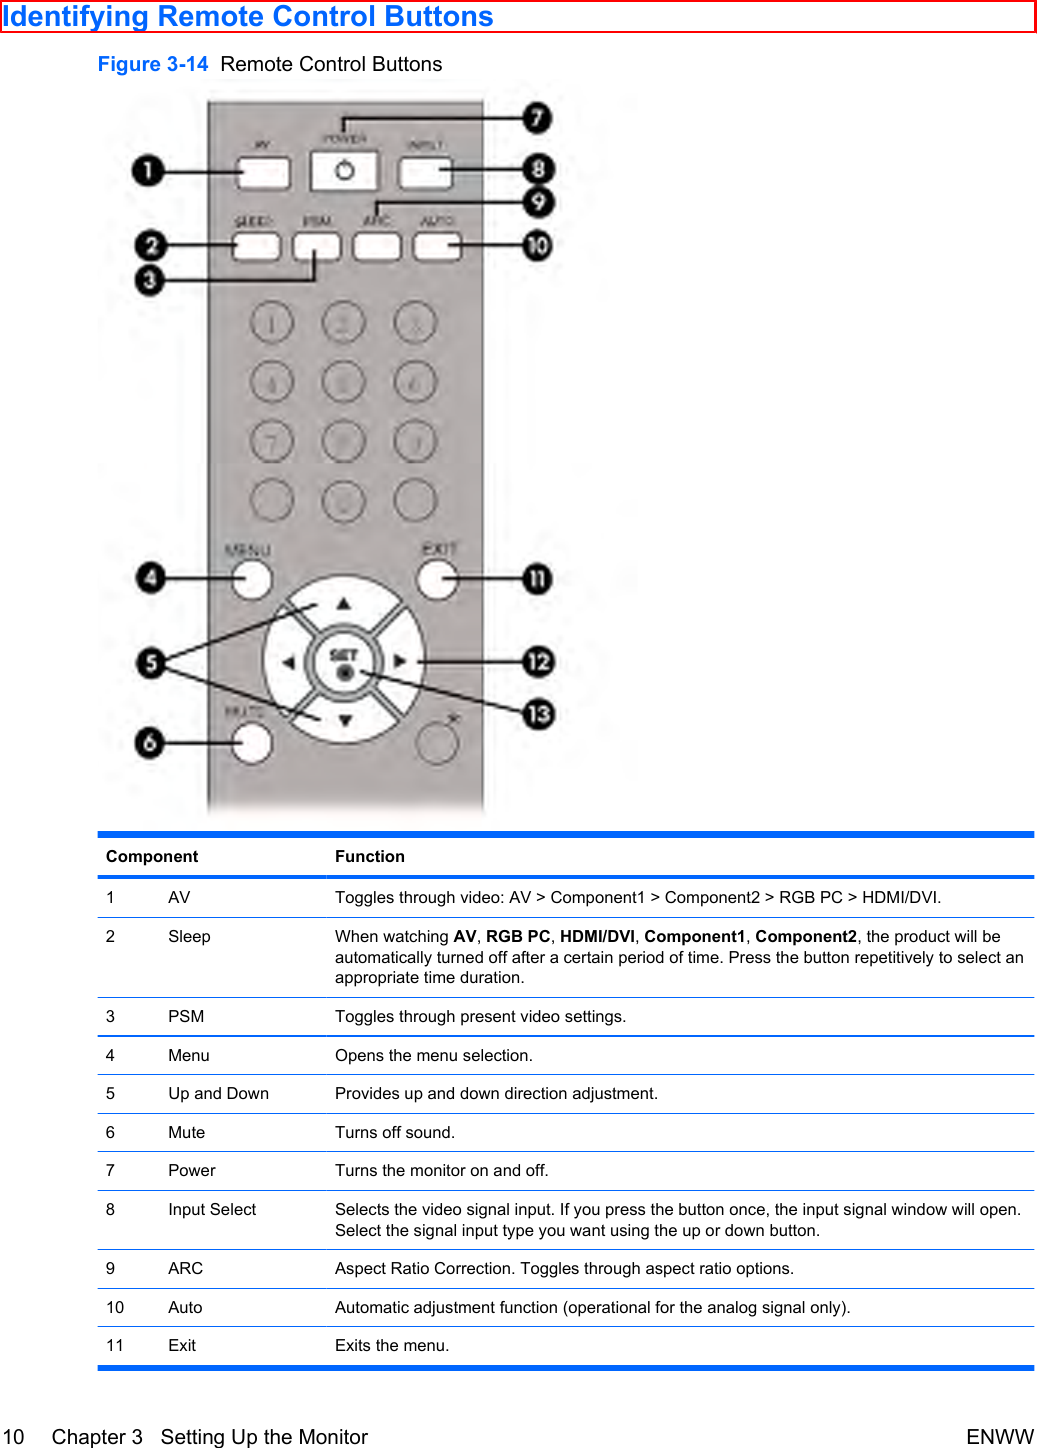
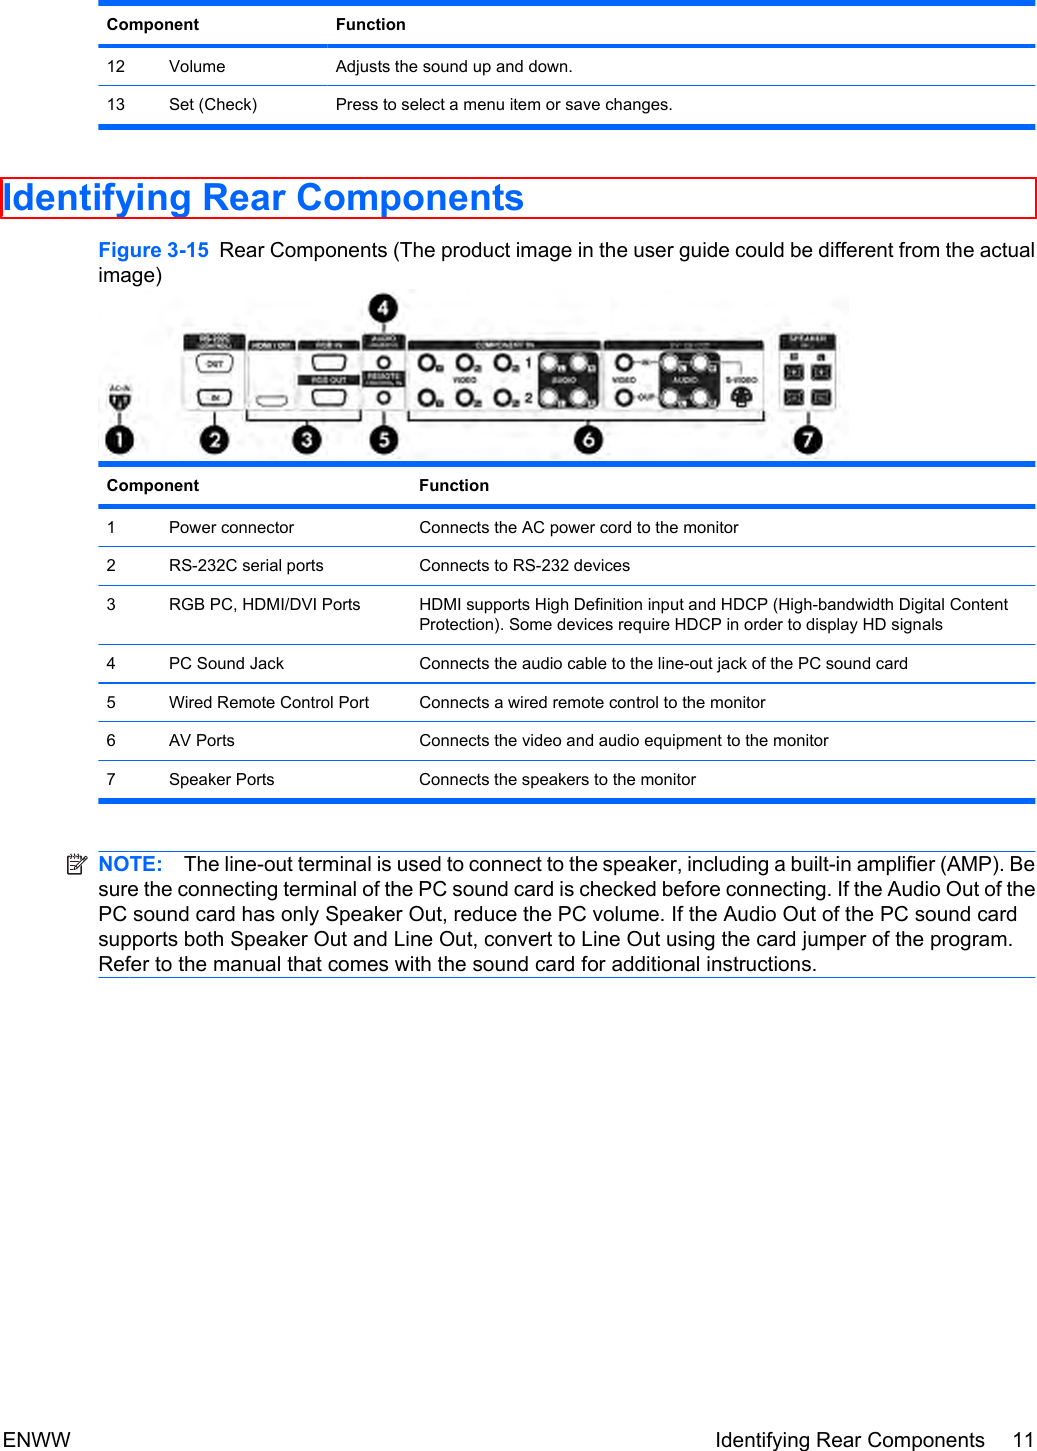
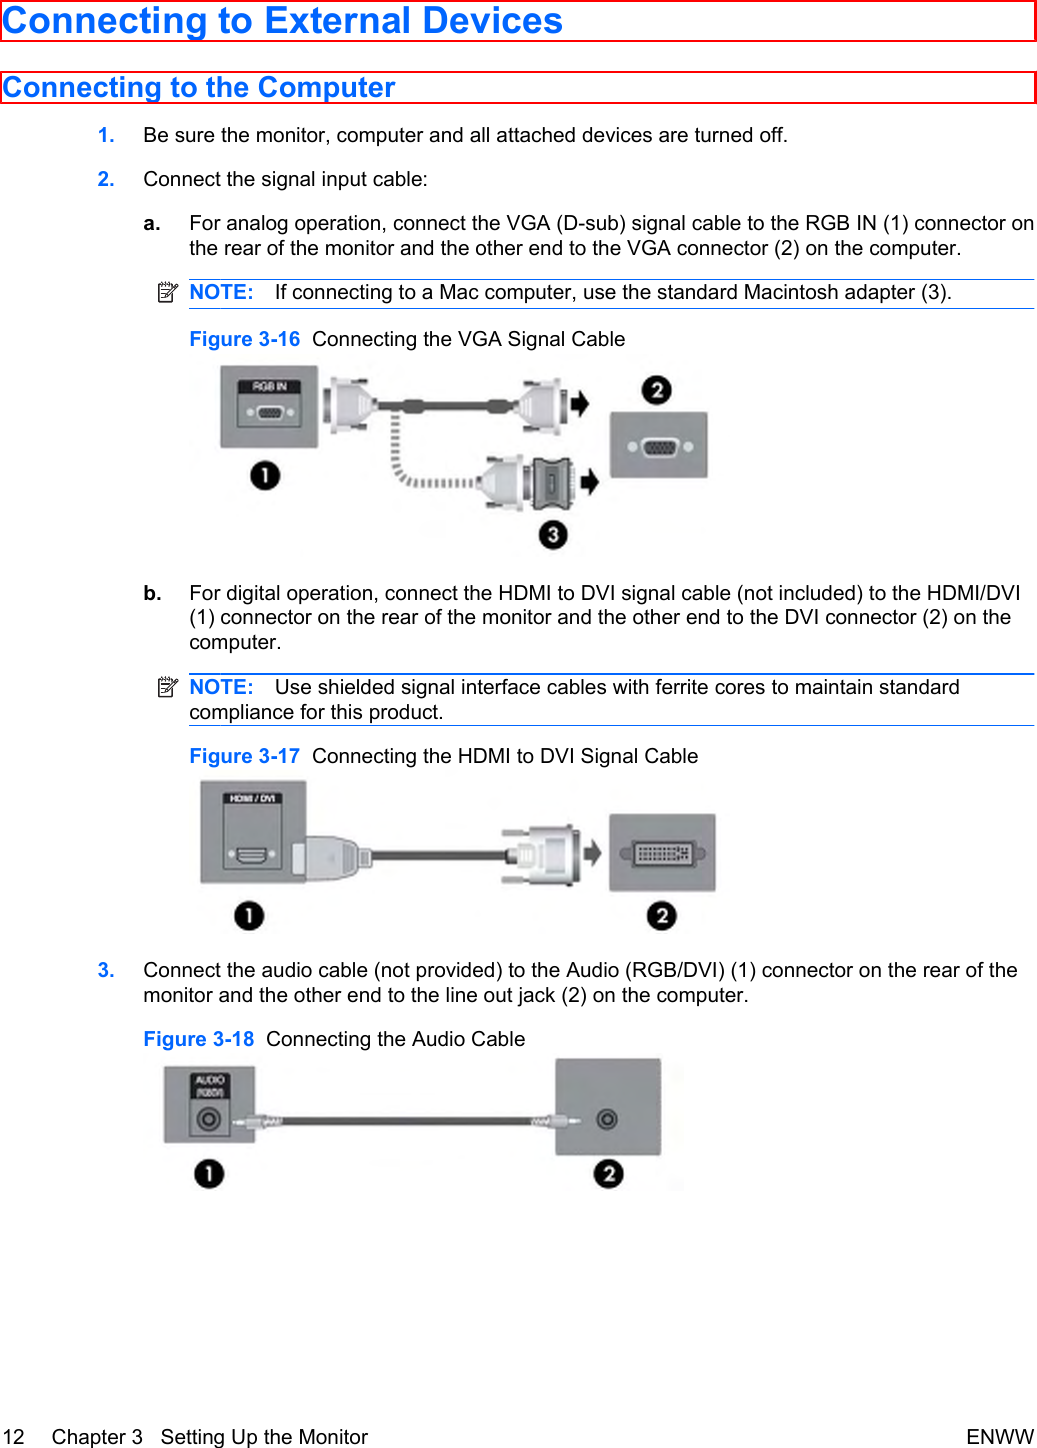


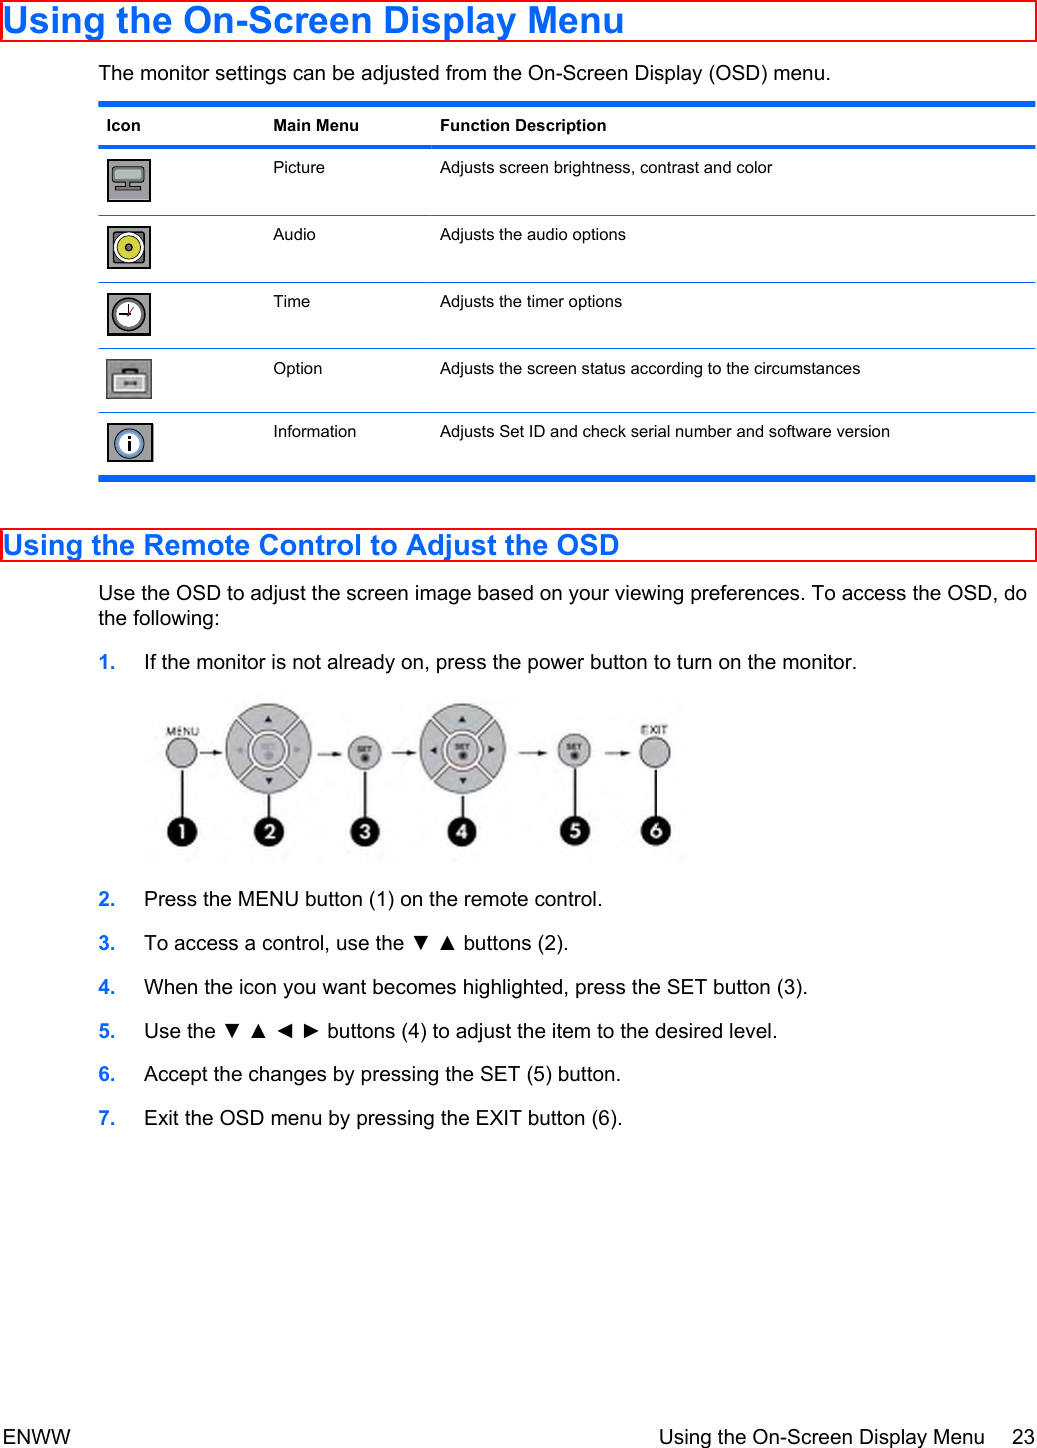

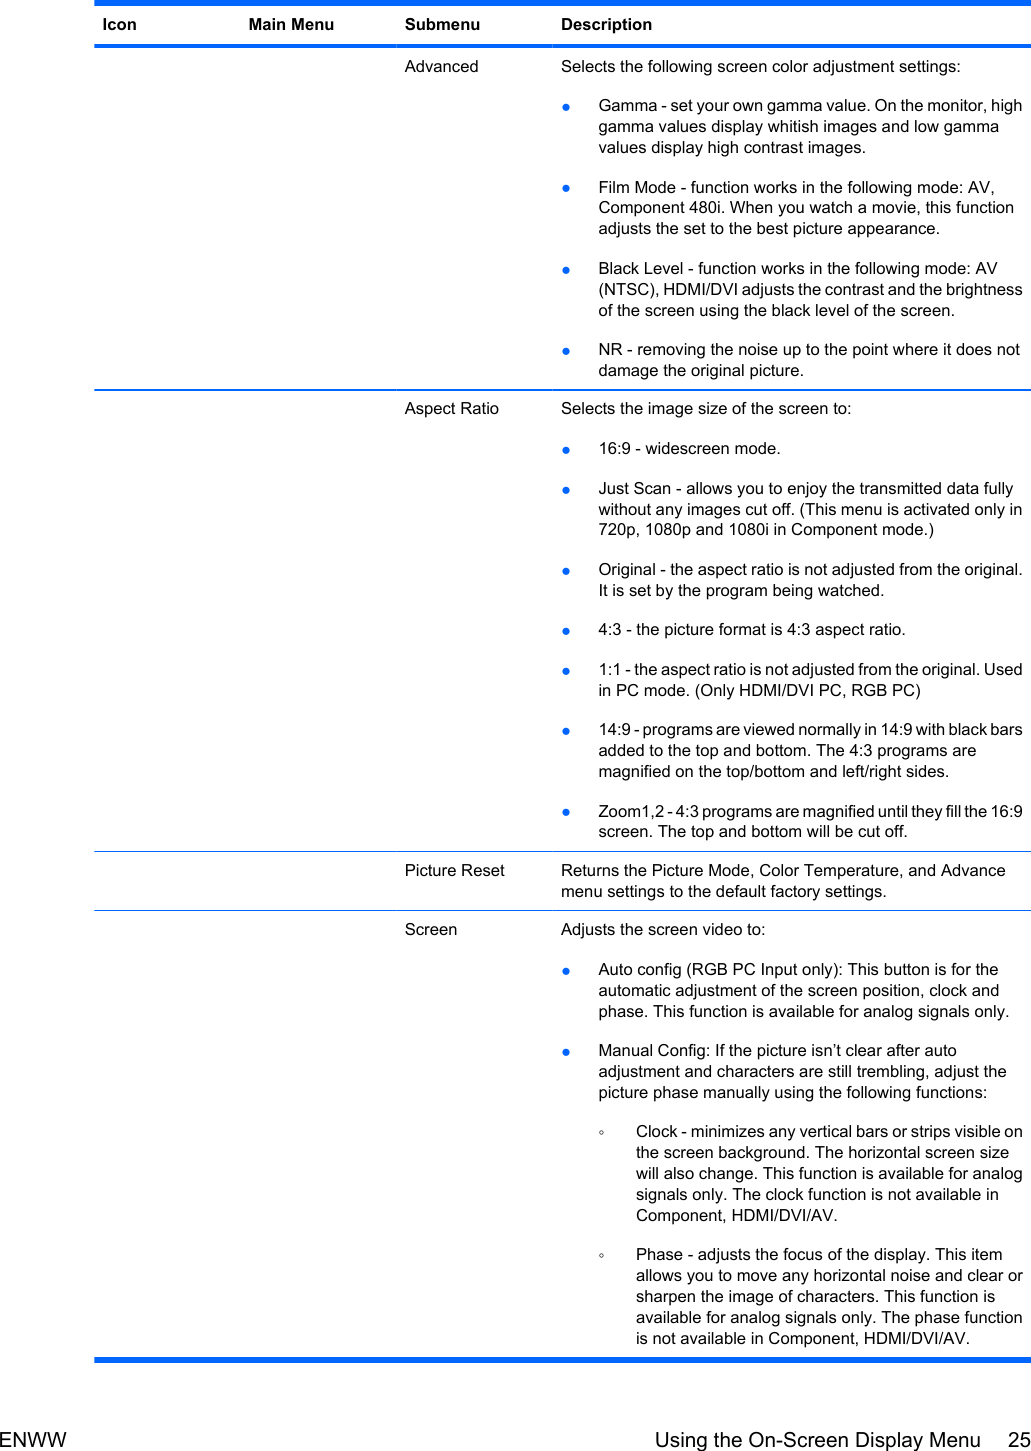
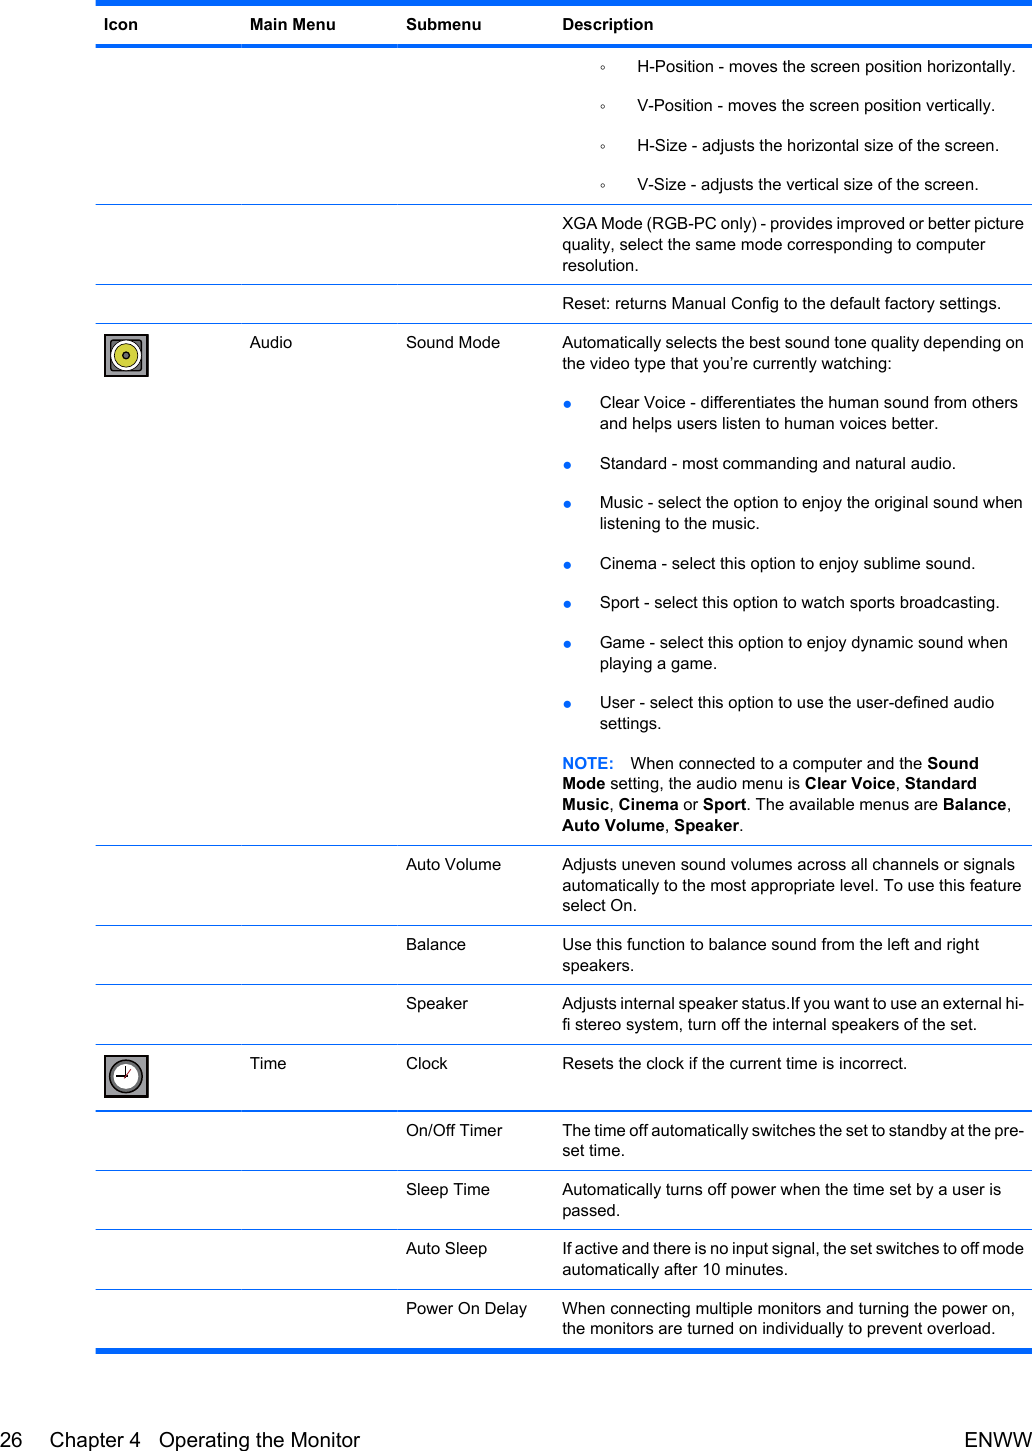
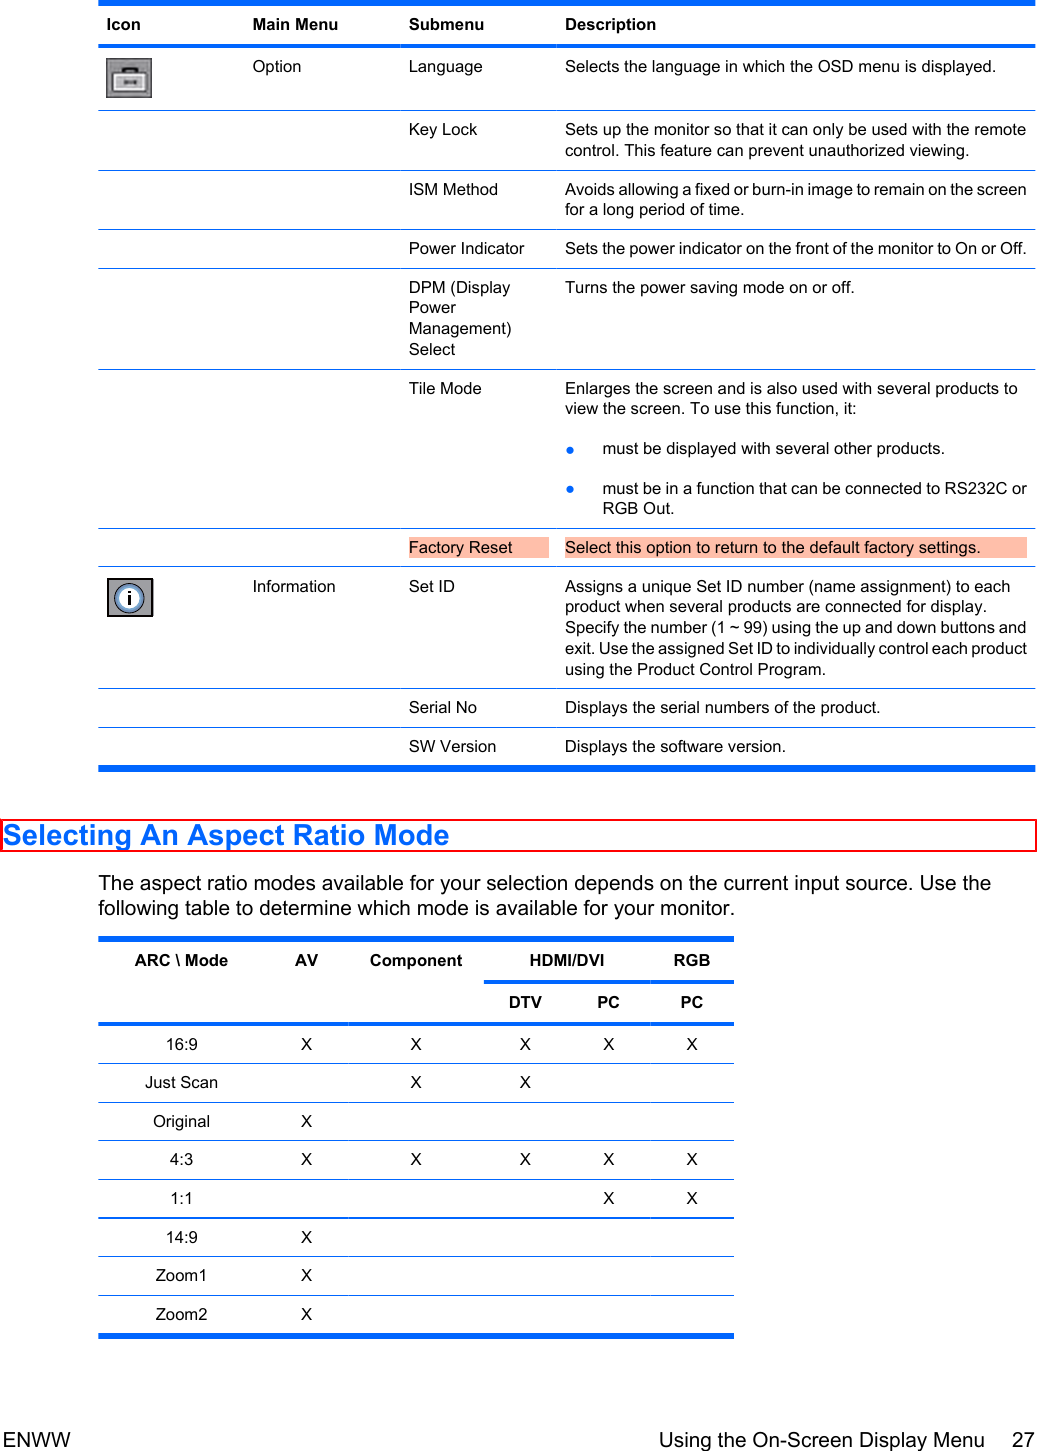
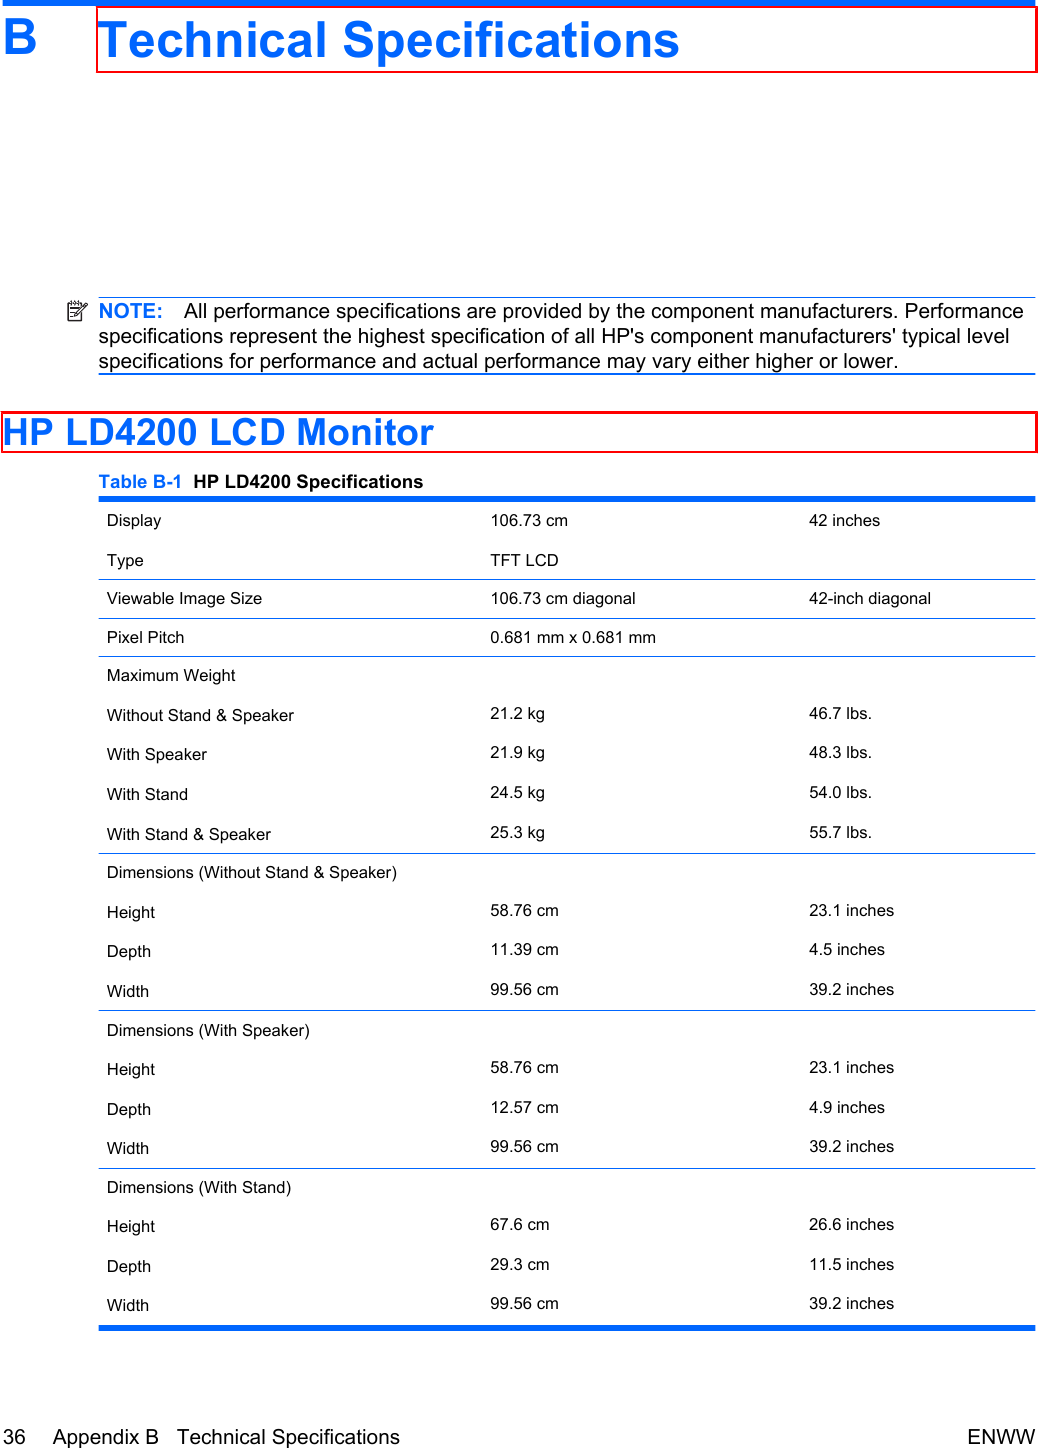
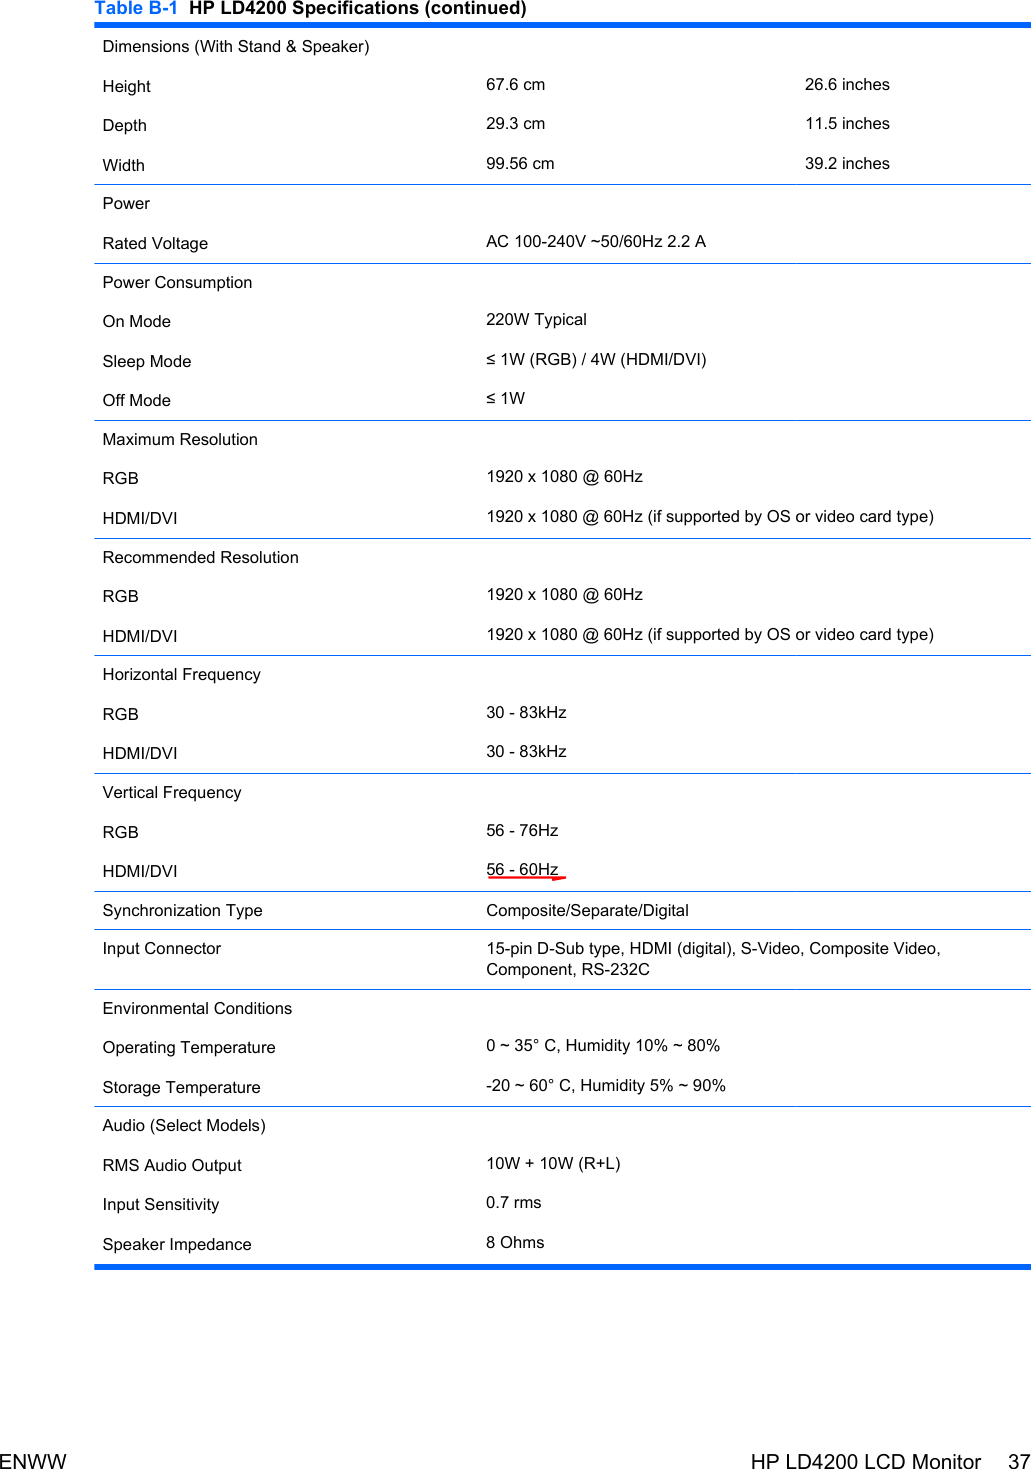
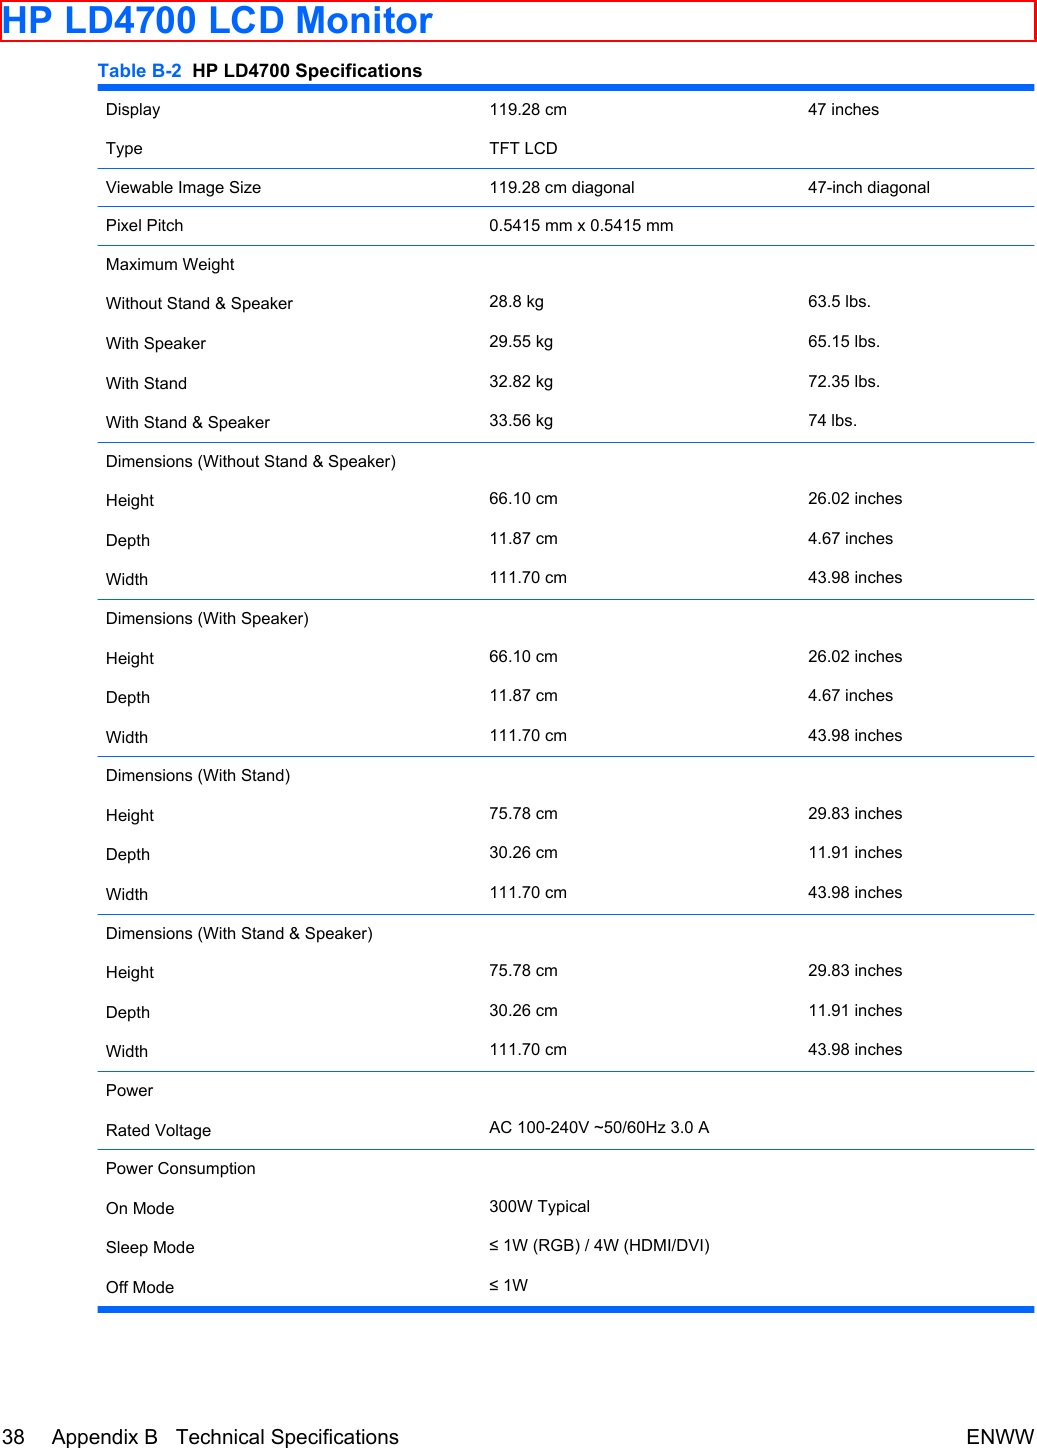
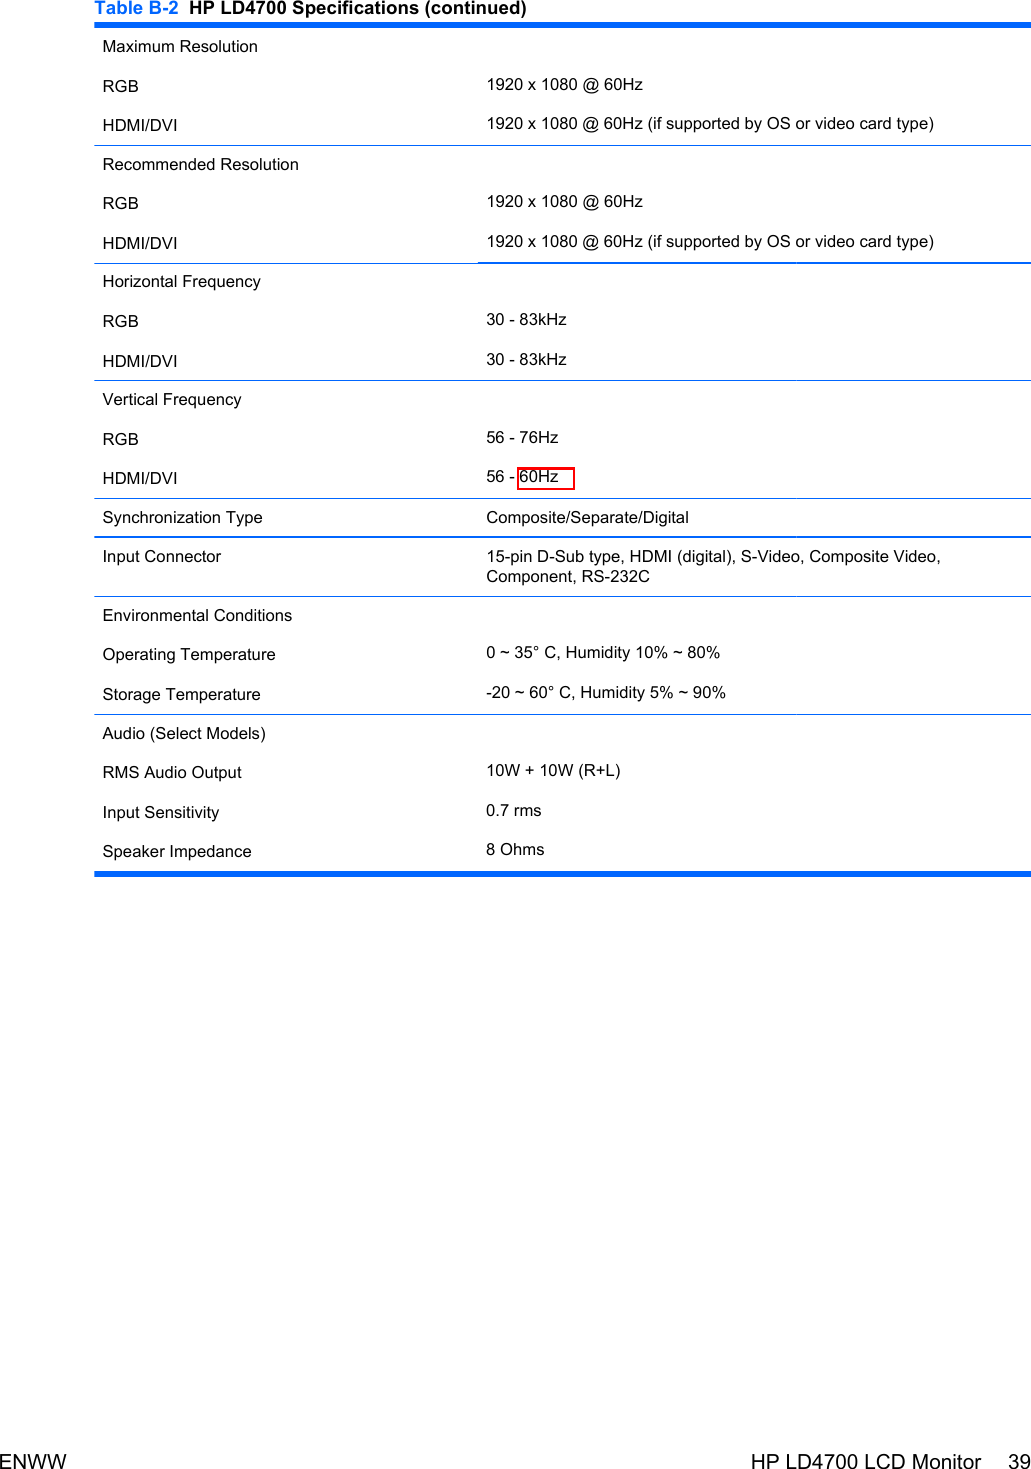
![*[DATA]: To transmit command data.Transmit 'FF' data to read status of command.*[Cr]: Carriage ReturnASCII code ‘0x0D’*[ ]: ASCII code Space (0x20)’OK Acknowledgement[Command2][ ][Set ID][ ][OK][Data][x]*The Product transmits ACK (acknowledgement) based on this format when receiving normal data. Atthis time, if the data is data read mode, it indicates present status data.If the data is data write mode, it returns the data of the PC computer.Error Acknowledgement[Command2][ ][Set ID][ ][NG][Data][x]*If there is error, it returns NG01. Power (Command : a)To control Power On/Off of the Set.Transmission[k][a][ ][Set ID][ ][Data][Cr]Data 0 : Power Off 1 : Power OnAcknowledgement[a][ ][Set ID][ ][OK][Data][x]To show the status of Power On/Off.Transmission[k][a][ ][Set ID][ ][FF][Cr]Acknowledgement[a][ ][Set ID][ ][OK][Data][x]ENWW Transmission / Receiving Protocol 45](https://usermanual.wiki/LG-Electronics-USA/HSTND-2781-G/User-Guide-1120472-Page-45.png)