LG Electronics USA HX350YJE DLP PROJECTOR User Manual G User s manual
LG Electronics USA DLP PROJECTOR G User s manual
UserManual.wiki
>
LG Electronics USA
>
HX350YJE User Manual
user manual
Navigation menu
Upload a User Manual
Namespaces
Wiki Guide
HTML
PDF
Info
Views
User Manual
Discussion / Help
Navigation

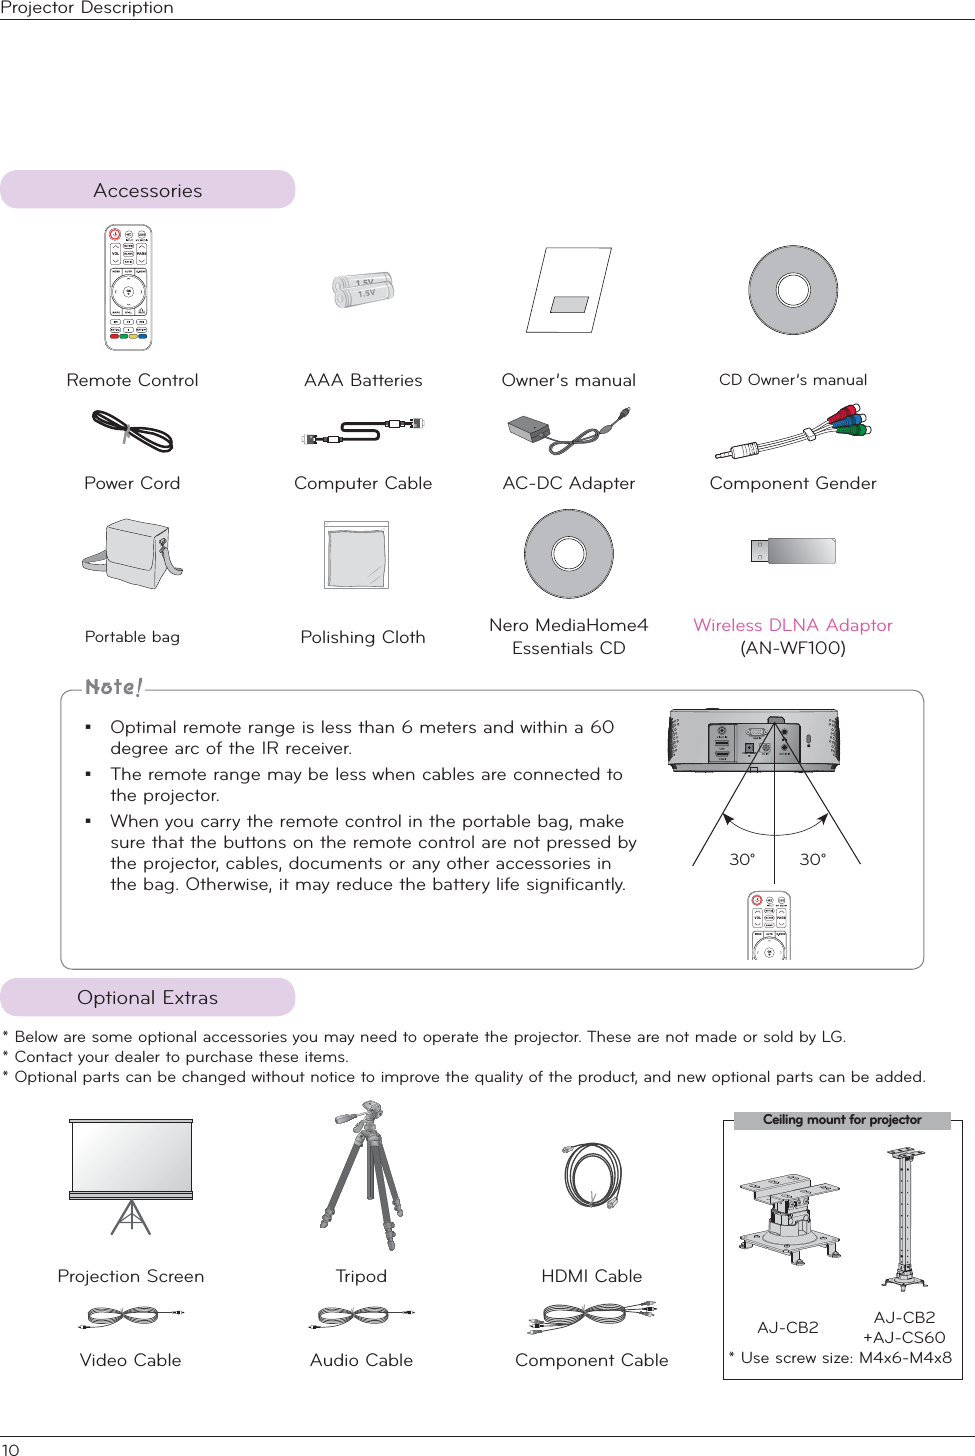
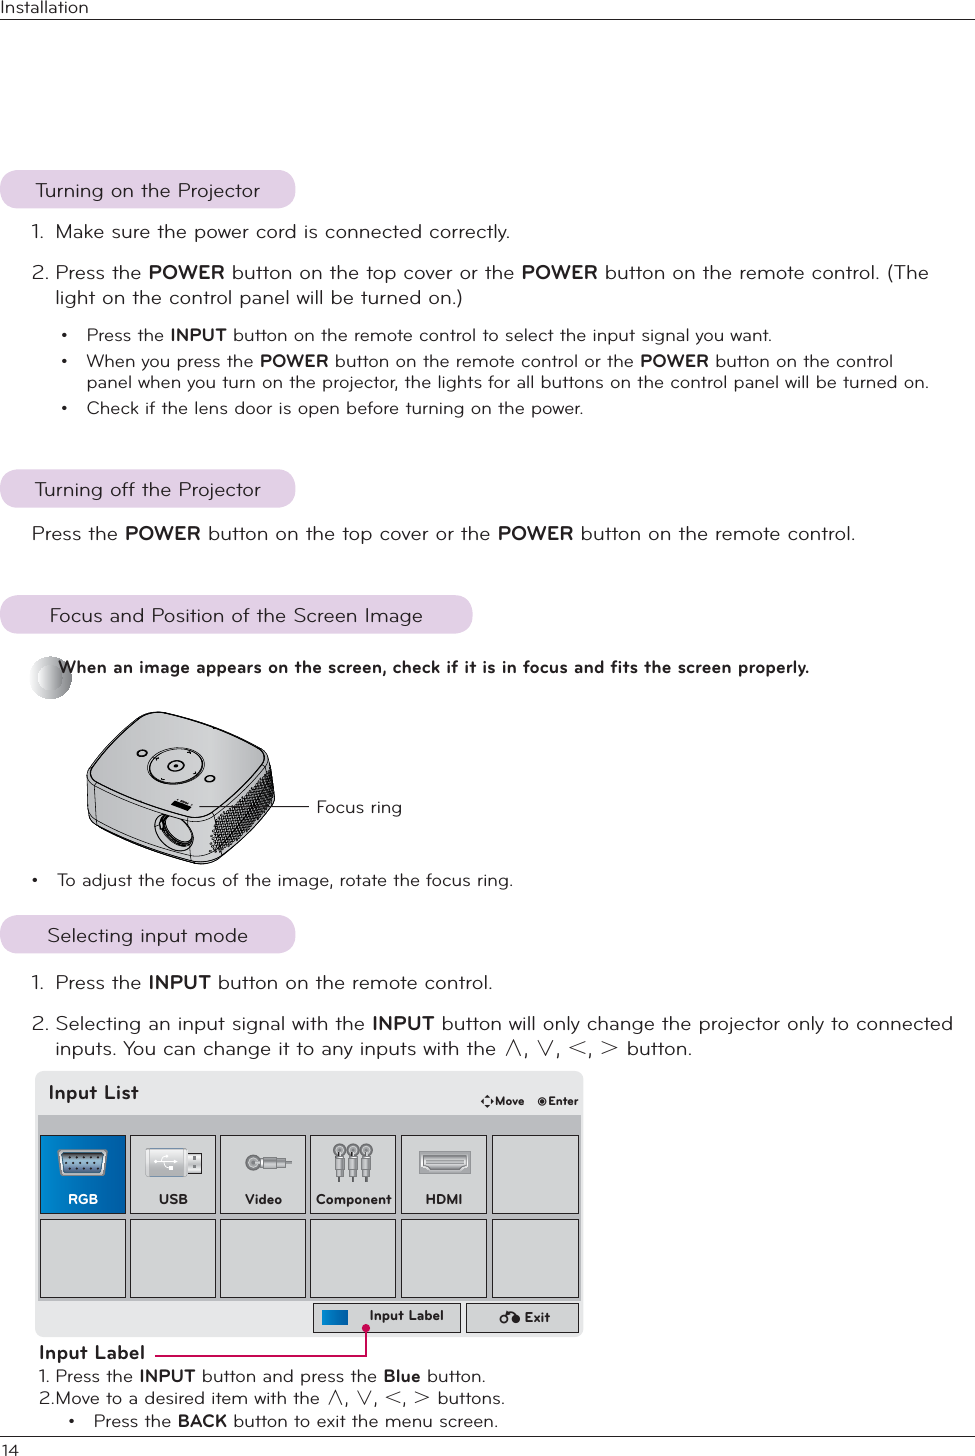
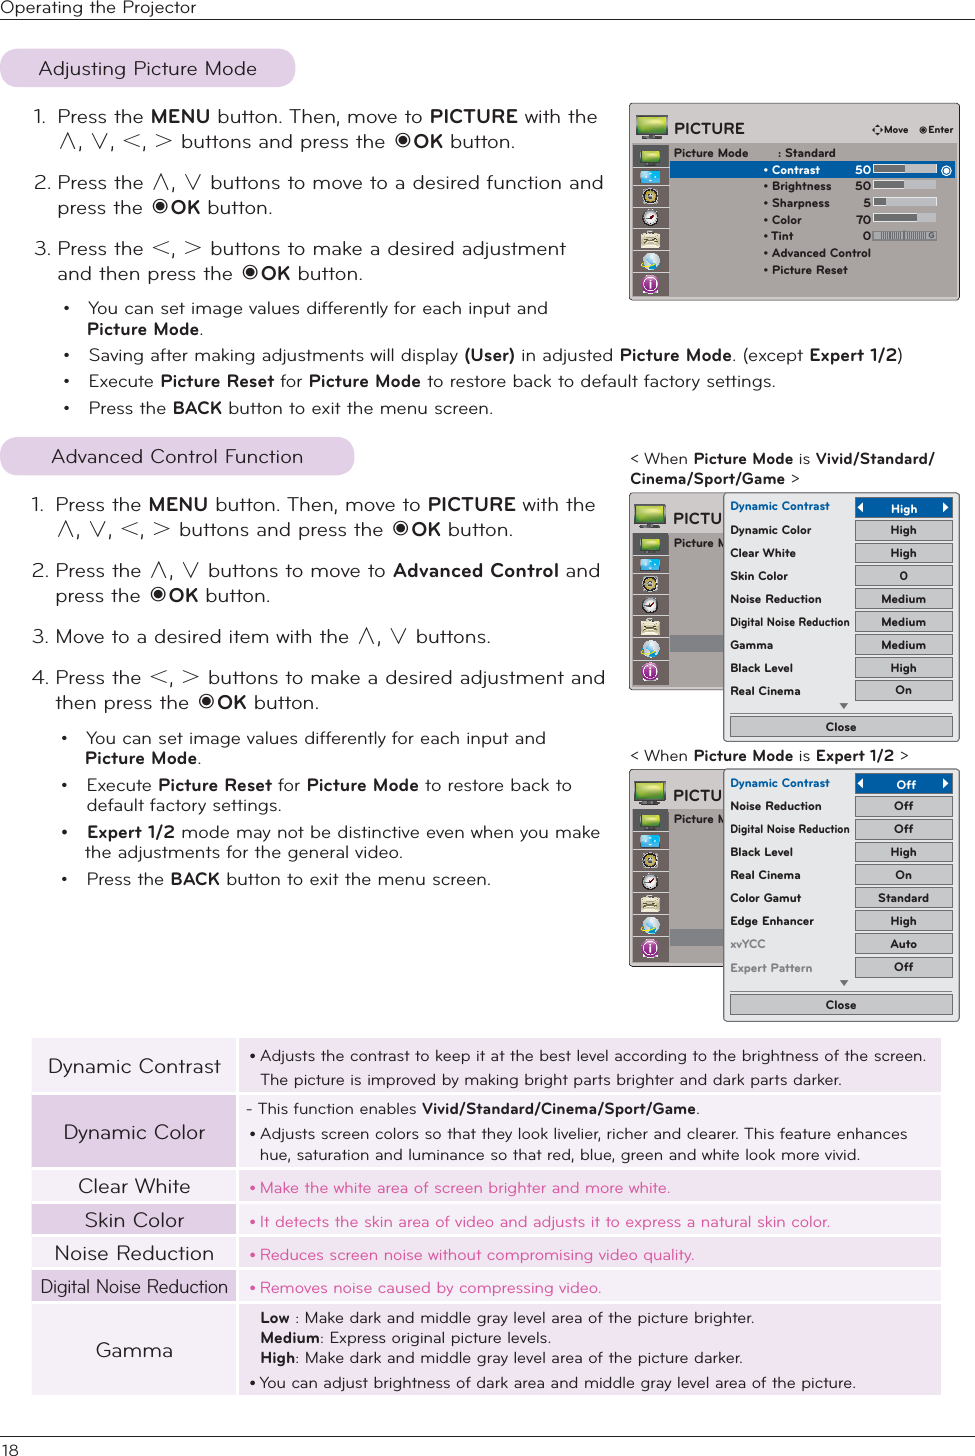

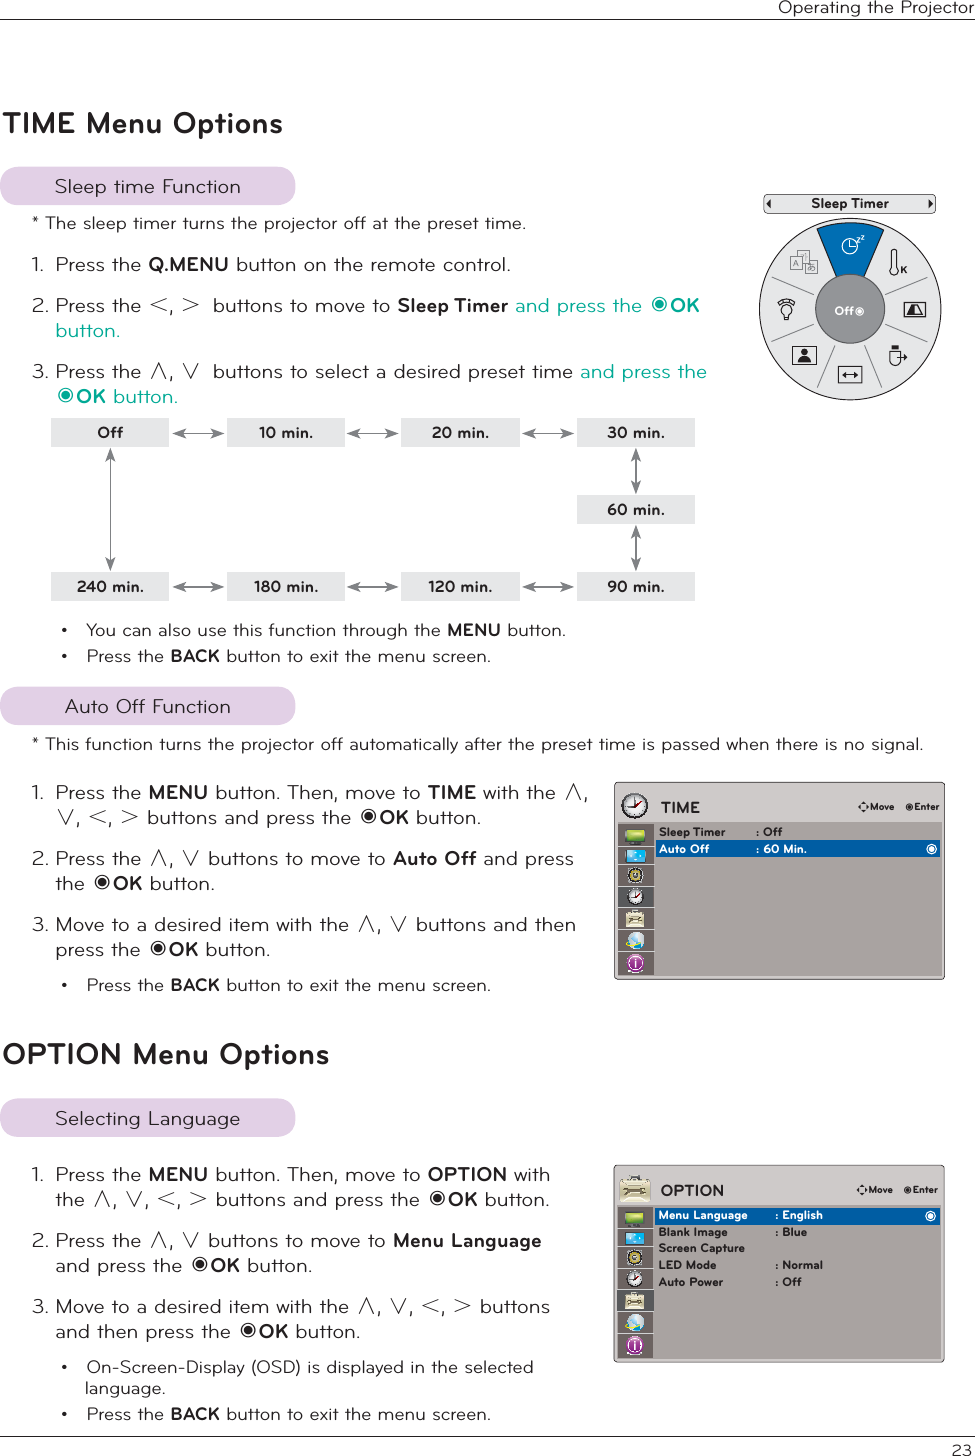
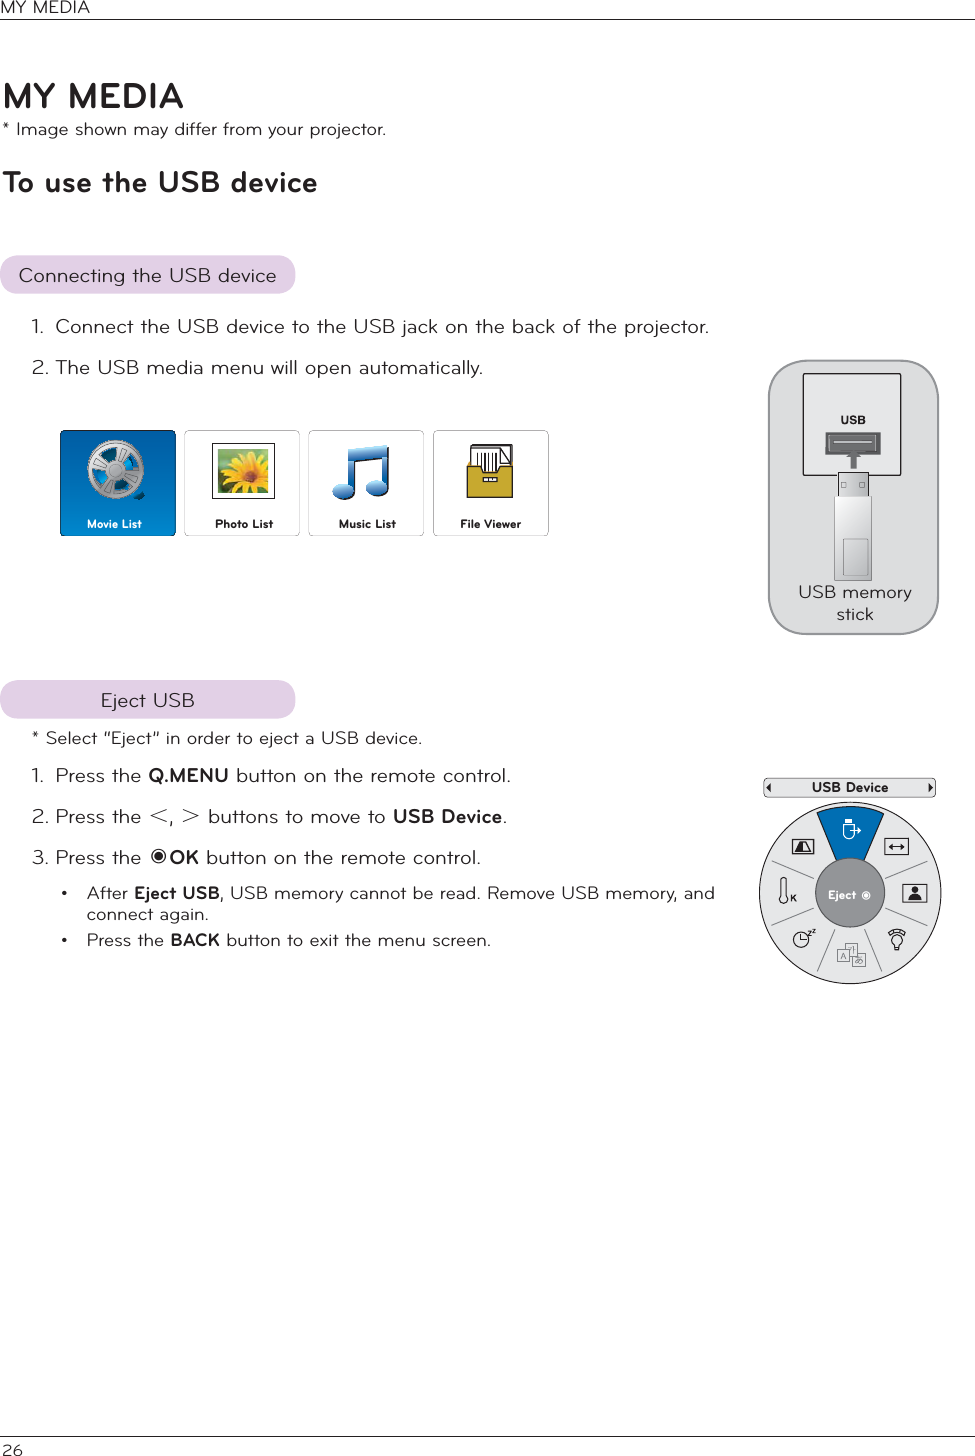

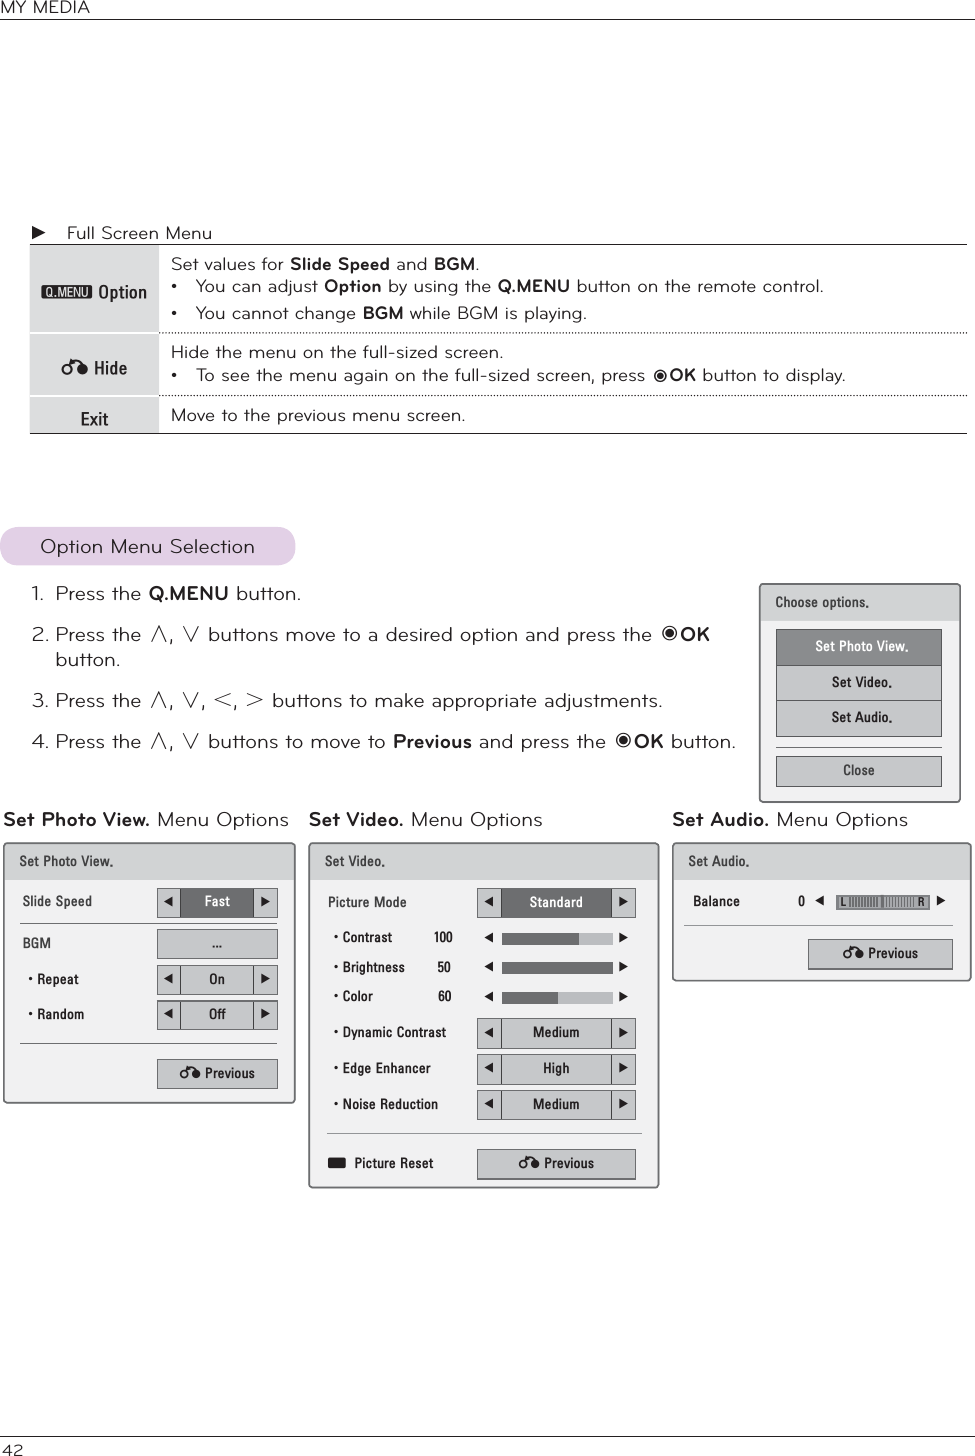
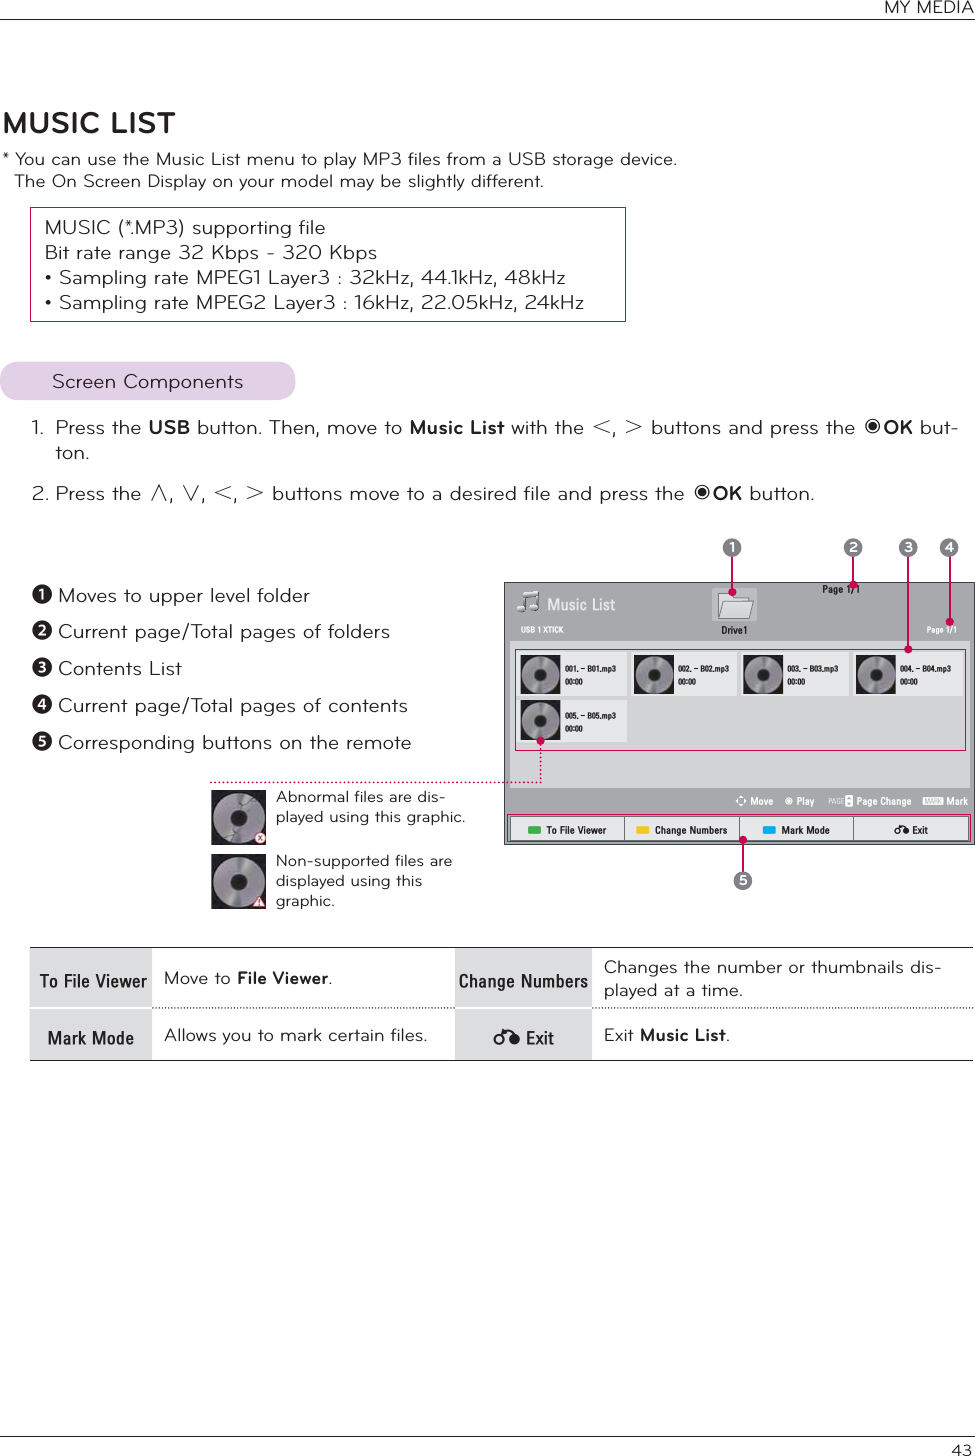
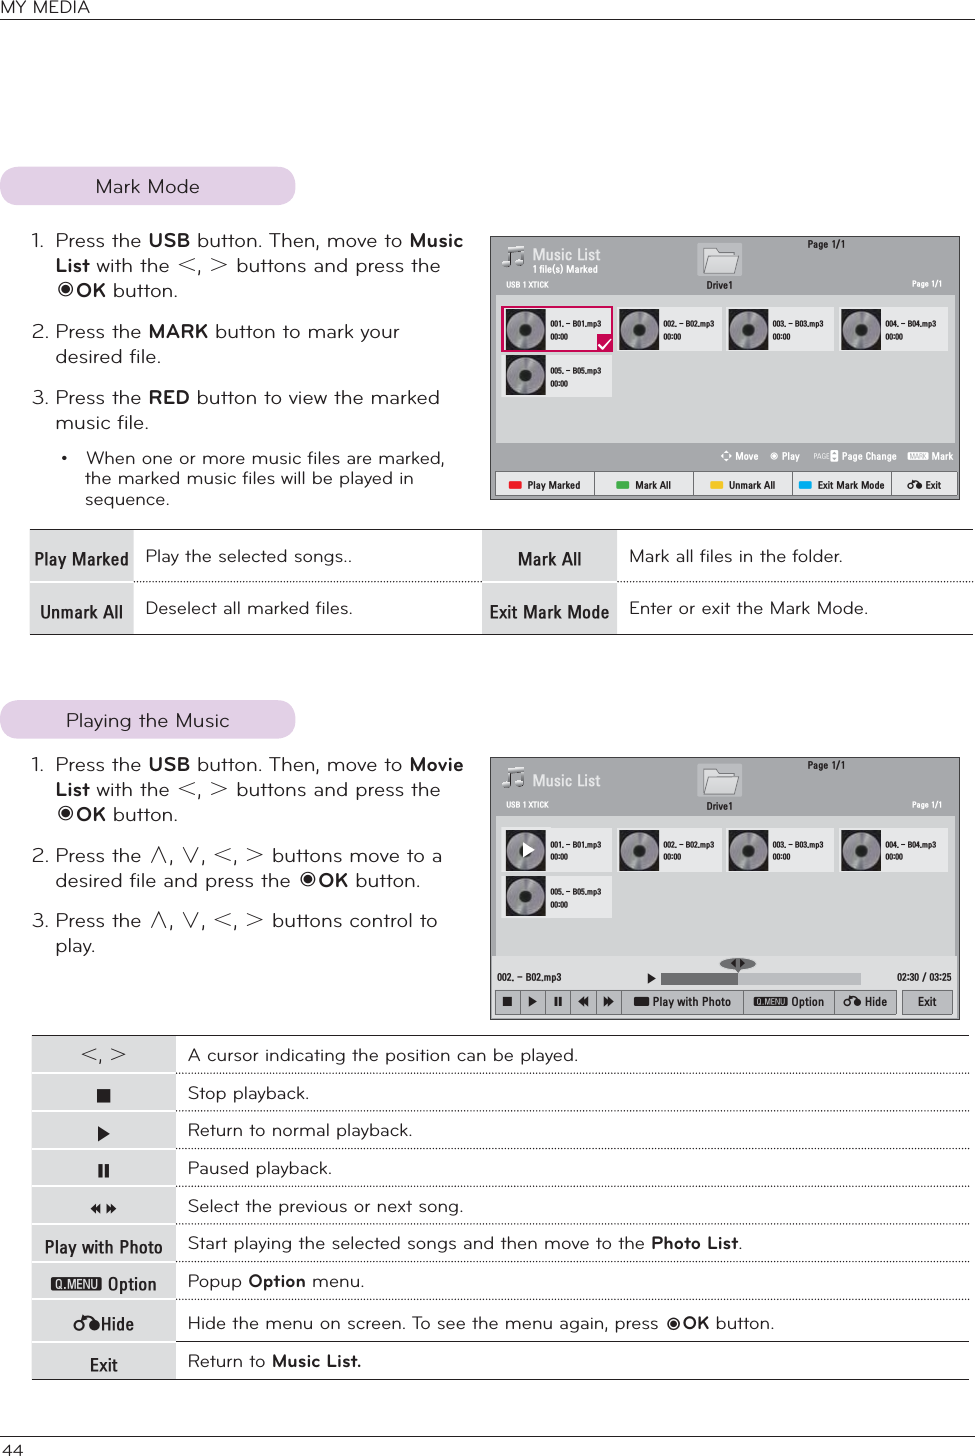
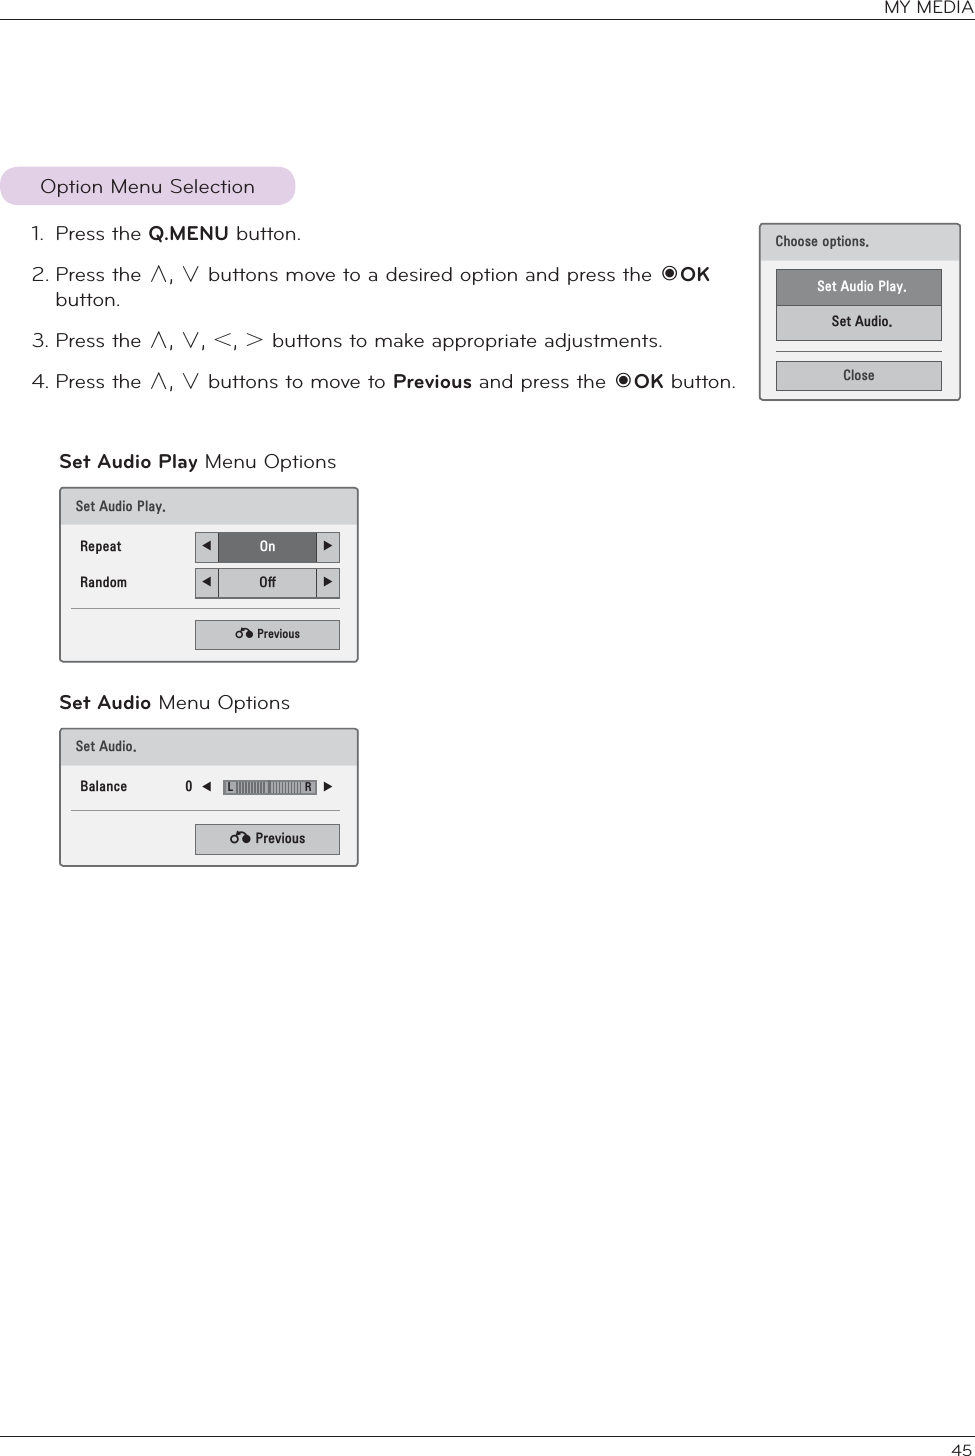
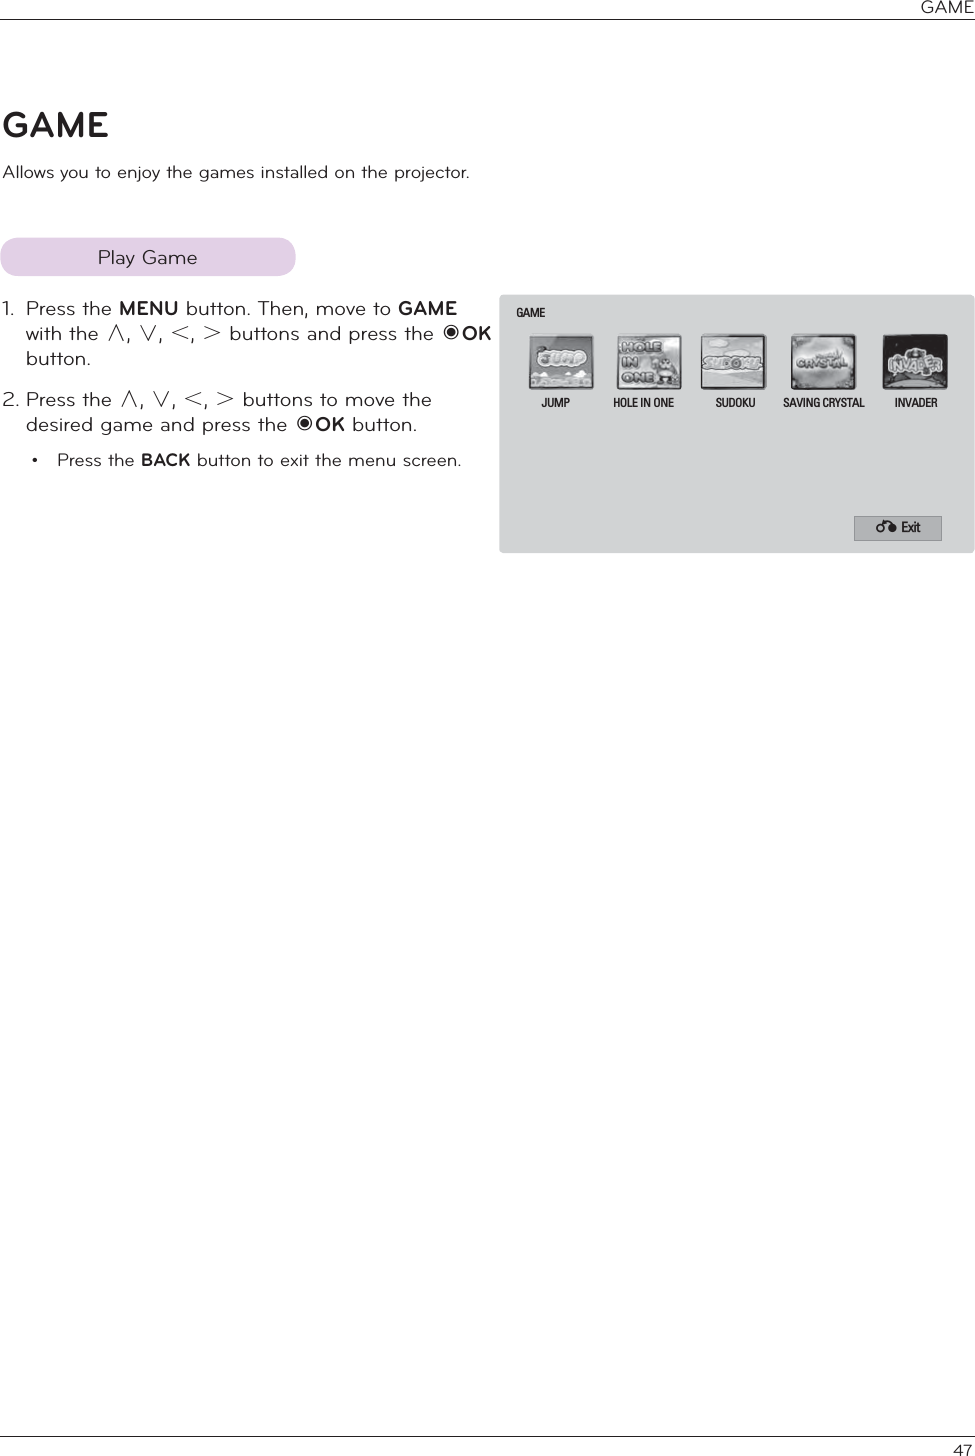
![38Picture Size Selects your desired picture format for videos.Option DescriptionFull Files are played in full screen mode regard-less of the aspect ratio of video.16:9 Files are Played in 16:9 screen mode.Original Files are played according to the aspect ratio of video.Audio Language Changes the Language Group of the audio for video files. Files with a single audio track cannot be selected.Subtitle Language The subtitles can be turned on or off.• Language Activated for SMI subtitles and can select the language within the subtitle.Subtitle Language GroupSupported LanguageLatin1 French, Spanish, Catalan Basque, Portuguese, Italian, Albanian, Rhaeto-Romanic, Dutch, German, Danish, Swedish, Norwegian, Finnish, Faeroese, Icelandic, Irish, Scottish, EnglishLatin2 Czech, Hungarian, Polish, Romanian, Croatian, Slovak, Slovenian, ServianLatin4 Estonian, the Baltic languages Latvian(Lettish)and Lithuanian, Greenlandic and LappishLatin5 English, TurkishCyrillic Bulgarian, Byelorussian, Macedonian, Russian, Serbian and pre-1990 (no ghe with upturn)UkrainianGreek English, modern GreekHebrew English, modern HebrewChinese ChineseKorean English, KoreanArabic English, Arabic• Code Page Subtitle font selection. When set to default, contents are displayed in the language set in OPTION - Menu Language.• Sync When the video is not synchronized with the captions, it can be adjusted by 0.5 second.• Position Move the location of the subtitles.• Size Changes the subtitle font size.Repeat Turn on/off repeat function of movie playback.When turned off, if the next file name is similar to the previous file, it can be played sequentially.6HW9LGHR3OD\3LFWXUH6L]H ܁)XOO ۽$XGLR/DQJXDJH ܁۽6XEWLWOH/DQJXDJH ܁2Q ۽ؒ/DQJXDJH ܁(QJOLVK ۽ؒ&RGH3DJH ܁'HIDXOW ۽ؒ6\QF ܁۽ؒ3RVLWLRQ ܁۽ؒ6L]H ܁1RUPDO ۽5HSHDW ܁2II ۽ᰙ3UHYLRXVOption Menu Selection1. Press the Q.MENU button.2. Press the ġ, Ģ buttons move to a desired option and press the OK button.3. Press the ġ, Ģ, ˘, ˚ buttons to make appropriate adjustments.4. Press the ġ, Ģ buttons to move to Previous and press the OK button. &KRRVHRSWLRQV6HW9LGHR3OD\6HW9LGHR6HW$XGLR&ORVHSet Video Play. Menu OptionsMY MEDIA](https://usermanual.wiki/LG-Electronics-USA/HX350YJE/User-Guide-1361601-Page-39.png)