LG Electronics USA KP202 PCS GSM Phone User Manual KP202 UK 120613
LG Electronics USA PCS GSM Phone KP202 UK 120613
UserManual.wiki
>
LG Electronics USA
>
KP202 User Manual
Users Manual
Navigation menu
Upload a User Manual
Namespaces
Wiki Guide
HTML
PDF
Info
Views
User Manual
Discussion / Help
Navigation
![Guidelines for Safe and Efficient Use8Guidelines for Safe and Efficient Usenetwork. In some cases, transmission of data filesor messages may be delayed until such aconnection is available. Ensure the aboveseparation distance instructions are followed untilthe transmission is completed. The highest SARvalue for this device when tested for use at thebody is {a.bc} W/kg.* The SAR limit for mobile devices used by the publicis 2.0 watts/kilogram (W/kg) averaged over tengrams of body tissue. The guidelines incorporate asubstantial margin of safety to give additionalprotection for the public and to account for anyvariations in measurements. SAR values may varydepending on national reporting requirements andthe network band. For SAR information in otherregions please look under product information atwww.{terminal-manufacturer}.com.The exposure standard for wireless mobile phonesemploys a unit of measurement known as the SpecificAbsorption Rate, or SAR. The SAR limit set by theFCC is 1.6W/kg. * Tests for SAR are conducted usingstandard operating positions specified by the FCCwith the phone transmitting at its highest certifiedpower level, the actual SAR level of the phone whileoperating can be well below the maximum value. Thisis because the phone is designed to operate atmultiple power levels so as to use only the powerrequired to reach the network. In general, the closeryou are to a wireless base station antenna, the lowerthe power output. Before a phone model is available for sale to thepublic, it must be tested and certified to the FCCthat ist does not exceed the limit established by thegovernment-adopted requirement for safe exposure.The tests are performed in positions and locations(e.g., at the ear and worn on the body)as required bythe FCC for each model. The highest SAR value forthis model phone when tested for use at the ear is0.467 W/kg and when worn on the body, asdescribed in this user guide, is 0.295W/kg, (Body-worn measurements differ among phone models,depending upon available accessories and FCCrequirements). [Labeling Committee note : ifapplicable, if body-worn SARs are required]. Whilethere may be differences between the SAR levels ofvarious phones and at various positions, they allmeet the government requirement for safe exposure.](https://usermanual.wiki/LG-Electronics-USA/KP202/User-Guide-753961-Page-6.png)
![9Guidelines for Safe and Efficient UseThe FCC has granted an Equipment Authorization forthis model phone with all reported SAR levelsevaluated as in compliance with the FCC RF emissionguidelines. SAR information on this model phone ison file with the FCC and can be found under theDisplay Gant section of http://www.fcc.gov/oet/fccidafter searching on FCC ID BEJKP202.Product care and maintenance]Do not disassemble this unit. Take it to a qualifiedservice technician when repair work is required.]Keep away from electrical appliances such as aTV's, radios or personal computers.]The unit should be kept away from heat sourcessuch as radiators or cookers.]Never place your phone in a microwave oven as itwill cause the battery to explode.]Do not drop.]Do not subject this unit to mechanical vibration orshock.]The coating of the phone may be damaged ifcovered with wrap or vinyl wrapper.]Do not use harsh chemicals (such as alcohol,benzene, thinners, etc.) or detergents to cleanyour phone. There is a risk of this causing a fire.]Do not subject this unit to excessive smoke ordust.]Do not keep the phone next to credit cards ortransport tickets; it can affect the information onthe magnetic strips.]Do not tap the screen with a sharp object as itmay damage the phone.]Do not expose the phone to liquid or moisture.]Use accessories, such as earphones and headsets,with caution. Ensure that cables are tucked awaysafely and do not touch the antenna unnecessarily.]Please remove the data cable before powering onthe handset.WARNING! Only use batteries, chargers and accessories approved for usewith this particular phone model. The use of any other typesmay invalidate any approval or warranty applying to thephone, and may be dangerous.](https://usermanual.wiki/LG-Electronics-USA/KP202/User-Guide-753961-Page-7.png)
![Guidelines for Safe and Efficient Use10Guidelines for Safe and Efficient UseEfficient phone operationTo enjoy optimum performance with minimumpower consumption please.]Do not hold the antenna when the phone is in use.If you hold it, it can affect call quality, it may alsocause the phone to operate at a higher power levelthan needed and shorten talk and standby times.Electronic devicesAll mobile phones may get interference, whichcould affect performance.]Do not use your mobile phone near medicalequipment without requesting permission. Avoidplacing the phone over pacemakers. (i.e. in yourbreast pocket.)]Some hearing aids might be disturbed by mobilephones.]Minor interference may affect TVs, radios, PCs, etc.Road safetyCheck the laws and regulations on the use ofmobile phones in the areas when you drive.]Do not use a hand-held phone while driving.]Give full attention to driving.]Use a hands-free kit, if available.]Pull off the road and park before making oranswering a call if driving conditions so require.]RF energy may affect some electronic systems inyour motor vehicle such as a car stereo or safetyequipment.]If your vehicle is equipped with an air bag, do notobstruct it with installed or portable wirelessequipment. It can cause serious injury due toimproper performance.If you are listening to music whilst outside andabout, please ensure that the volume is at areasonable level so that you are aware of yoursurroundings. This is particularly imperative when attempting tocross the street.](https://usermanual.wiki/LG-Electronics-USA/KP202/User-Guide-753961-Page-8.png)
![11Guidelines for Safe and Efficient UseAvoid damage to your hearing]Damage to your hearing can occur if you areexposed to loud sound for long periods of time.We therefore recommend that you do not turn thehandset on or off close to your ear. We alsorecommend that music and call volumes are set toa reasonable level.]If you are listening to music whilst out and about,please ensure that the volume is at a reasonablelevel so that you are aware of your surroundings.This is particularly imperative when attempting tocross the street.Blasting areaDo not use the phone where blasting is in progress.Observe restrictions, and follow any rules orregulations.Potentially explosive atmospheres]Do not use the phone at a refueling point. Don'tuse near fuel or chemicals.]Do not transport or store flammable gas, liquid, orexplosives in the compartment of your vehicle,which contains your mobile phone and accessories.In aircraftWireless devices can cause interference in aircraft.]Turn off your mobile phone before boarding anyaircraft.]Do not use it on the ground without crewpermission.ChildrenKeep the phone in a safe place out of small children'sreach. It includes small parts which if detached maycause a choking hazard.Emergency callsEmergency calls may not be available under all mobilenetworks. Therefore, you should never depend solelyon your mobile phone for emergency calls. Checkwith your local service provider.](https://usermanual.wiki/LG-Electronics-USA/KP202/User-Guide-753961-Page-9.png)
![Guidelines for Safe and Efficient Use12Guidelines for Safe and Efficient UseBattery information and care]You do not need to completely discharge thebattery before recharging. Unlike other batterysystems, there is no memory effect that couldcompromise the battery's performance.]Use only LG batteries and chargers. LG chargersare designed to maximize the battery life.]Do not disassemble or short-circuit the batterypack.]Keep the metal contacts of the battery pack clean.]Replace the battery when it no longer providesacceptable performance. The battery pack may berecharged hundreds of times until it needsreplacing.]Recharge the battery if it has not been used for along time to maximize usability.]Do not expose the battery charger to directsunlight or use it in high humidity, such as thebathroom.]Do not leave the battery in hot or cold places, thismay deteriorate the battery performance.](https://usermanual.wiki/LG-Electronics-USA/KP202/User-Guide-753961-Page-10.png)
![11For Your SafetyVehicle Mounted External Antenna(optional, if available)A minimum separation distance of 8 inches (20cm) must bemaintained between the user/bystander and the vehiclemounted external antenna to satisfy FCC RF exposurerequirements. For more information about RF exposure, visitthe FCC website at www.fcc.govFCC Part 15 Class B ComplianceThis device and its accessories comply with part 15 of FCCrules. Operation is subject to the following two conditions: (1) This device and its accessories may not cause harmfulinterference, and (2) this device and its accessories mustaccept any interference received, including interference thatmay cause undesired operation.Cautions for Battery]Do not disassemble.]Do not short-circuit.]Do not expose to high temperature: 60°C (140°F).]]Do not incinerate.Battery Disposal]Please dispose of your battery properly or bring to yourlocal wireless carrier for recycling.]Do not dispose in fire or with hazardous or flammablematerials.Adapter (Charger) Cautions]Using the wrong battery charger could damage your phoneand void your warranty.]The adapter or battery charger is intended for indoor useonly.Do not expose the adapter or battery charger to direct sunlightor use it in places with high humidity, such as the bathroom.](https://usermanual.wiki/LG-Electronics-USA/KP202/User-Guide-753961-Page-11.png)
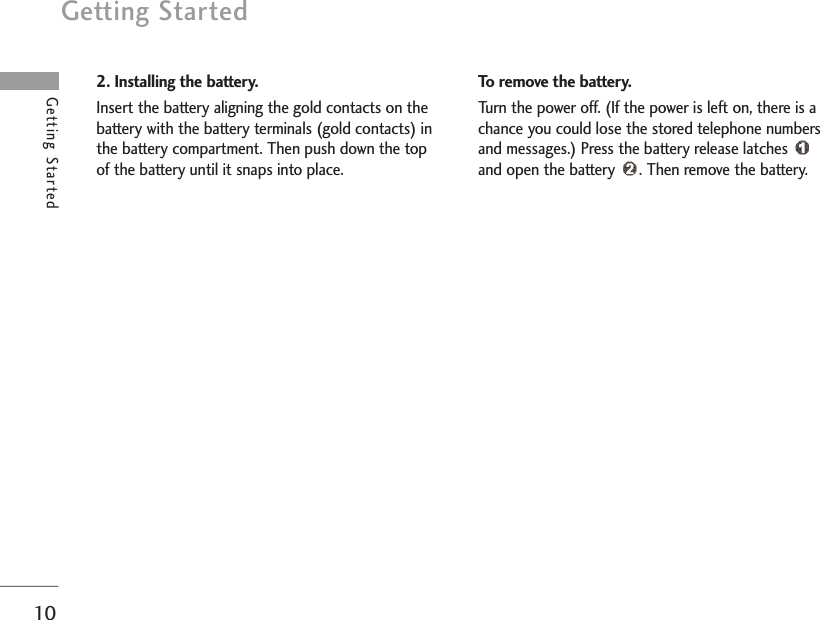
![Getting Started9Getting StartedInstalling the USIM card and battery1. Installing the USIM card.Your USIM card contains your phone number, service details and contacts and must be insertedinto your handset.If your USIM card is removed then your handsetbecomes unusable (except for emergency calls) untila valid one is inserted. Always disconnect the chargerand other accessories from your handset beforeinserting and removing your USIM card. Slide theUSIM card into the USIM card holder. Make sure that the USIM card is properly insertedand the gold contact area on the card is facingdownwards. To remove the USIM card, press downlightly and pull it in the reverse direction.Note]The metal contact of the USIM card can easily bedamaged by scratches. Pay special attention to theUSIM card while handling. Follow the instructionssupplied with the USIM card.](https://usermanual.wiki/LG-Electronics-USA/KP202/User-Guide-753961-Page-13.png)
![11Getting StartedCharging the BatteryBefore connecting the travel adapter to the phoneyou must first install the battery.1. With the arrow facing you as shown in the diagrampush the plug on the battery adapter into thesocket on the left side of the phone until it clicksinto place.2. Connect the other end of the travel adapter to the mains socket. 3. The moving bars on the battery icon will stop after charging is complete.4. Ensure the battery is fully charged before usingthe phone for the first time.Disconnecting the chargerDisconnect the travel adapter from the phone as shown in the diagram below.Note]Only use the charger included in the box.WARNING! • Unplug the power cord and charger during lightning stormsto avoid electric shock or fire.• Make sure that no sharp-edged items such as animal teethor nails, come into contact with the battery. This may cause a fire.• Do not place or answer calls while charging the phone as it may short-circuit the phone and/or cause electricshock or fire.CAUTION!• Do not force the connector as this may damage the phoneand/or the travel adapter.• If you use the battery pack charger when abroad, use anattachment plug adaptor for the proper configuration.• Do not remove your battery or the USIM card whilecharging.](https://usermanual.wiki/LG-Electronics-USA/KP202/User-Guide-753961-Page-15.png)
![Getting Started12Getting StartedAttention:]Avoid using the Flash Memory Card when thebattery is low.]When writing to the card, wait for the operation tocomplete before removing the card.]The card is designed to fit easily into the systemone way only.]Do not bend the card or force it into the slot.]Do not insert any memory cards other than thosemade by microSD.]If the microSD has been formatted using FAT32,format the microSD using FAT16 again.For more information on the microSD, please refer tothe memory card instruction manual.Memory card formattingBefore you start to use the memory card you have toformat it. After you insert the memory card, selectMenu > Settings > Phone settings > Memory status> Format external memory, then press . This operation should only be done when you insertthe memory card for the first time. During formatting various folders will be created fordifferent data types.Turning the handset on/offTurning your handset onEnsure that your USIM card is in your handset andthe battery is charged. Press and hold until thepower comes on. Enter the USIM PIN code that wassupplied with your USIM card if the PIN coderequest is set to On. (Note: Please refer to page 71)After a few seconds you will be registered on thenetwork.Turning your handset off Press and hold until the power goes off. There may be a few seconds delay while the handsetpowers down.Do not turn the handset on again during this time.](https://usermanual.wiki/LG-Electronics-USA/KP202/User-Guide-753961-Page-16.png)
![13Getting StartedAccess codesYou can use the access codes described in thissection to avoid unauthorised use of your phone.The access codes (except the PUK and PUK2 codes)can be changed by using the Change codes feature[Menu #.1.4.3].PIN code (4 to 8 digits)The PIN (Personal Identification Number) codeprotects your USIM card against unauthorised use.The PIN code is usually supplied with the USIM card.When the PIN Code Request is set to On, yourphone will request the PIN code every time it isswitched on. When the PIN Code Request is set toOff, your phone connects to the network directlywithout the PIN code.PIN2 code (4 to 8 digits)The PIN2 code, supplied with some USIM cards, isrequired to access functions such as Fixed DialNumber. These functions are only available ifsupported by your USIM card.PUK code (4 to 8 digits)The PUK (PIN Unblocking Key) code is required tounblock a blocked PIN code. The PUK code may besupplied with the USIM card. If not, contact yournetwork operator’s customer service department forthe code. If you lose the code, contact your networkoperator’s customer service department.PUK2 code (4 to 8 digits)The PUK2 code, supplied with some USIM cards, isrequired to unblock a blocked PIN2 code. If you losethe code, contact your network operator’s customerservice department.Security code (4 to 8 digits)The security code prevents unauthorised use of your phone. The default security code is set to‘0000’ and the security code is required to delete allphone entries and to restore the handset to thefactory settings.](https://usermanual.wiki/LG-Electronics-USA/KP202/User-Guide-753961-Page-17.png)
![General Functions16General FunctionsMaking and answering calls Making a voice call1. Enter the number including the full area code, or select the phone number from call logs bypressing .]To delete a digit press .To delete all digits press and hold .2. Press to make the call.3. Press to finish the call, or close the handset.Making a video callYou can make a video call in a 3G covered servicearea. If the called user has a 3G video phone in a 3Gcovered service area, the call will be established. You can also answer a video call for video incomingcall. To make/answer a video call, do the following.1. Input the phone number using the keypad, or select the phone number from the callsmade/received lists by pressing .]To correct mistakes, press briefly to deletethe last number, or press and hold to deleteall numbers.2. If you do not want to use the speakerphone,ensure you have the headset plugged in.3. To start the video function, press .]You will be notified that you will need to closeother applications to Make video call.4. Adjust the camera position if necessary.5. Press to finish the call, or close the handset.Note]The video call may take some time to connect.Please be patient. The connection time will alsodepend on how quickly the other party answersthe call. While the video call is connecting, youwill see your own image; after the other partyhas answered, their image will be displayed onthe screen.Note]To activate the speakerphone during a call, press.](https://usermanual.wiki/LG-Electronics-USA/KP202/User-Guide-753961-Page-20.png)
![17General FunctionsMaking a voice/video call from ContactsIt is easy to call anyone whose number you havestored in your Contacts.1. Press to access the contacts list. 2. Scroll to the contact to make a call.3. Press to make a voice call. Press to make a video call. Or press the leftsoft key and select Make video call.4. Press to finish the call.Making international calls1. Press and hold for the international prefix.The ‘+’ character prefixes the international accesscode.2. Enter the country code, area code, and the phonenumber.3. Press .Adjusting the volumeDuring a call, if you want to adjust the earpiecevolume, use on the left side of the handset. In idle mode with the phone open, you can adjustthe key volume using .Answering a callWhen you receive a call, the phone rings and theflashing phone icon appears on the screen. If thecaller can be identified, the caller’s phone number (or name if stored in your Contacts) is displayed.1. Open the phone and press to answer anincoming call. If the answer mode is set to Pressany key, any key will answer a call except for .Note]To reject an incoming call, press or the right soft keytwice.]If you set Answer mode as Open flip (Menu #.5.0.4), you can answer the call simply by opening the phone.2. End the call by closing the handset or pressing .Note]You can answer a call while using Contacts or other menufeatures.]When the compatible headset is connected, you can alsoanswer a call using the headset key, as well as using thephone. To reject an incoming call, press .]You can mute the ringtone when a call comes in by pressingand holding the volume down side key.](https://usermanual.wiki/LG-Electronics-USA/KP202/User-Guide-753961-Page-21.png)
![19General FunctionsChanging the text input mode 1. When you are in a field that allows characters tobe entered, you will notice the text input modeindicator in the upper right corner of the LCDscreen.2. Press to switch between T9Abc, T9abc, Abc,abc and 123.Using the T9 ModeThe T9 predictive text input mode allows you toenter words easily with a minimum number of keypresses. As you press each key, the handset begins to display the characters that it thinks you are typingbased on a built-in dictionary. As new letters areadded, the word changes to reflect the most likelycandidate from the dictionary.1. When you are in the T9 predictive text inputmode, start entering a word by pressing keys to . Press one key per letter.]The word changes as letters are typed. Ignore what’s on the screen until the word istyped completely.]If the word is still incorrect after typingcompletely, press once or more to scrollthrough the other word options.ExamplePress to type Good.Press to get Home.]If the desired word is missing from the wordchoices list, add it by using the ABC mode.2. Enter the whole word before editing or deletingany keystrokes.3. Complete each word with a space by pressing .To delete letters, press . Press and hold downto erase entire words.Using the ABC ModeUse to to enter your text.1. Press the key labelled with the required letter:]Once for the first letter.]Twice for the second letter.]And so on.](https://usermanual.wiki/LG-Electronics-USA/KP202/User-Guide-753961-Page-23.png)
![General Functions20General Functions2. To insert a space, press once. To deleteletters, press . Press and hold down toclear the display. Refer to the following table for more information onthe characters available using the alphanumeric keys.Note]The characters assigned to the keys and their order ofappearance depends on the language selected using theoption Input method. The table above provides thecharacters set for English language.Using the 123 (Number) modeThe 123 mode enables you to enter numbers in atext message (a telephone number, for example).Press the keys corresponding to the required digitsbefore manually switching back to the appropriatetext entry mode.Using the symbol modeThe symbol mode enables you to enter varioussymbols or special characters. To enter a symbol,Options > Insert > Symbol. Use the navigation and numeric keys to select the desired symbol and press .Lower CaseUpper Case. , / ? ! - : ' " 1. , / ? ! - : ' " 1a b c 2AB C 2d e f 3D E F 3g h i 4G H I 4j k l 5J K L 5m n o 6M N O 6p q r s 7P Q R S 7t u v 8T U V 8w x y z 9W X Y Z 9Space 0Space 0Characters in the order displayKey](https://usermanual.wiki/LG-Electronics-USA/KP202/User-Guide-753961-Page-24.png)
![Games & Applications22Games & ApplicationsGames & Applications Menu 1.1 You can easily download games and otherapplications in this menu. It has two folders, Gamesand Applications, as default. Each folder has anembedded link for downloading games orapplications. Please note that additional costs maybe incurred when using online services. You cancreate a folder using the left soft key [Options].](https://usermanual.wiki/LG-Electronics-USA/KP202/User-Guide-753961-Page-26.png)
![Browser 23Browser Internet Menu 2.1You can launch the web browser and access thehomepage of the web service provided by Vodafone.]You can also directly access Vodafone live! bypressing the right soft key in idle mode.](https://usermanual.wiki/LG-Electronics-USA/KP202/User-Guide-753961-Page-27.png)
![Multimedia25MultimediaCamera Menu 3.1 Press the Menu key and select Camerausing thenavigation keys. Or you can directly open the cameramodule by a press of the Camera key in standbymode. The camera module opens and you’ll see theview to be captured.1. Press the left soft key to access Menu and set thedesired environment as follows. ]Move between the options menus with / .]Select the desired value with / and confirmthe selection with the left soft key [Select] or .MMeennuu AAllbbuummpreview optionmenu barResolution640x480 ( ), 320x240 ( ), 160x120 ( )Super fine ( ), Fine ( ), Normal ( )You can delay the camera shutter time. 3 seconds, 5 seconds, 10 seconds“ ” is shown when the timer is activated.You can view Full image or Full screen. One, Three( ), Six ( ) (Note: Availablemultishot depends on the size.)off, Sepia, Mono, NegativeYou can adjust the tone of the backgroundphoto according to the weather.Auto, DaylightSelect the desired shutter sound.Select the reset setting or notQualityTimerView mode MultishotEffectWhitebalanceSutter toneResetsetting](https://usermanual.wiki/LG-Electronics-USA/KP202/User-Guide-753961-Page-29.png)
![2. After finishing all the settings, press the right softkey [Close].3. Focus the camera on what you want to take andpress .4. Press to save the picture. It is saved in thePictures folder of My Files. You can directly send the picture via Message,Postcard, Email or Bluetooth by pressing the right soft key [Send].Voice recorder Menu 3.2 In this feature you can record up to 10 voice memos,up to a maximum of 20 seconds each.NotePress to go back to the preview mode without saving thepicture.Multimedia26Multimedia](https://usermanual.wiki/LG-Electronics-USA/KP202/User-Guide-753961-Page-30.png)
![Messages27Write text message Menu 5.1You can write and edit text messages up to 10 pages.1. Enter the Messagesmenu by pressing [OK].2. If you want to write a new message, select Writetext message.3. To make text input easier, use T9. For details, referto page 21 through 24 (Entering text).4. Press [Insert] to attach the following ;Insert]Symbol:You can add special characters.]Text templates:You can use Text templates alreadyset in the phone.]Contacts:You can add phone numbers or e-mailaddresses in the address book.]My Business card:You can add your business cardto the message.5. After you have completed the message, to selectthe required option, press the left soft key[Options].Options]Send to:Sends the text message.1. Enter the number of the recipient.2. Press key to add more recipients.3. You can add phone numbers from the addressbook.4. Once the numbers have been entered, press theleft soft key to send the message. All messages will automatically be saved in theoutbox folder, even after a sending failure.]Save to drafts:Stores messages in the Draftsfolder.]T9 languages:Select the desired language for T9input mode. You can also deactivate the T9 inputmode by selecting ‘T9 off’.]New T9 word:You can add your own words. Thismenu will only be shown when the edit mode hasbeen set to T9ABC/T9Abc/T9abc. ]Clear text Messages](https://usermanual.wiki/LG-Electronics-USA/KP202/User-Guide-753961-Page-31.png)
![Messages28Messages]Exit:If you press Exit whilst writing a message, youwill be taken back to the message menu. Also thewritten message will not have been saved.Note]This phone supports EMS release 5, so is available tosend colour pictures, sounds, text styles, etc.. If theother parties handsets do not support such options, thepictures, sounds or texts sent may not be displayedcorrectly on their phones.Write multimedia message Menu 5.2 Inbox Menu 5.3You will be alerted when you have received messages.They will be stored in the Inbox.In the Inbox, you can identify each message by theiricons. For detail, see the icon directive.]Icon directiveIf the phone shows ‘No space for SIM message’, youonly have to delete the SIM messages from the Inbox.If the phone displays ‘No space for message’, you willthen need to delete messages, media or applicationsto free up space.Note]SSIIMM mmeessssaaggee::SIM message means the message isexceptionally stored in the SIM card.When you are notified that you have received amultimedia message, you have to wait for themessage to be downloaded before you can view it.For notification setting, see (Menu 4.8.2) for detail.Icon DescriptionMultimedia messageShort messageSIM messageRead Short messageRead Multimedia messageReadNotified multimedia message](https://usermanual.wiki/LG-Electronics-USA/KP202/User-Guide-753961-Page-32.png)
![29MessagesTo read a message, select one of the messages bypressing .]View:You can view the selected message.]Reply:You can reply to the sender.]Forward:You can forward the selected message toanother party.]Return call:You can call the sender back.]Delete:You can delete the current message.]Delete all:Cancels all the message transmissionand deletes all of them.]Information:You can view information aboutreceived messages; Sender's address, Subject (onlyfor Multimedia message), Message date & time,Message type, Message size.]Replay (applicable to Multimedia message only): You can replay multimedia messages.]Receive (In the case of notification message):If Multimedia message is set to Auto download off,you can get only Notification. To receive amessage, you need to select [Receive].Drafts Menu 5.4 You can view the messages saved as a draft. The draftmessages are listed with the date and time when theywere saved. Scroll through the list using up/downnavigation keys.Each draft has the following options. Press[Options].]View:You can view the selected message.]Edit:You can edit the selected message.]Delete:Deletes the selected message from thedrafts folder.]Information: You can view the information ofselected message: subject (only for multimediamessage), the date and time when saved, messagetype and size, the priority (only for multimediamessage).Icon DescriptionMultimedia messageText message](https://usermanual.wiki/LG-Electronics-USA/KP202/User-Guide-753961-Page-33.png)
![Messages30Messages]Delete all:Deletes all the messages from draftsfolder.Outbox Menu 5.5 You can view the list and contents of sent messagesin this menu and can also verify if the transmissionwas successful.In each message, the following options are availableby pressing the left soft key [Options].The messages of which transmission wascompleted has the following options.]View:You can view the selected message.]Forward:You can forward the selected message toother recipients.]Delete:Deletes the selected message from outbox.]Information: You can view the information ofselected message: subject (only for multimediamessage), the date and time when you sent it,message type and size, the priority (only formultimedia message), and recipients.]Delete all:Deletes all the messages in the outboxfolder.The messages of which transmission is inprogress has the following options.]View:You can view the selected message.]Send:Select this to send it again.]Cancel:Cancels transmitting of the message.]Delete:Cancels transmitting the message anddeletes the message.]Information:You can view the information ofselected message: subject (only for multimediamessage), the date and time when you sent it,message type and size, the priority (only formultimedia message), and recipients.MMS sentMMS unsentMMS delivery confirmedSMS sentSMS unsentSMS delivery reportDescriptionIcon](https://usermanual.wiki/LG-Electronics-USA/KP202/User-Guide-753961-Page-34.png)
![31Messages]Delete all:Cancels all the message transmissionand deletes all of them.Listen to voice mail Menu 5.6 This menu provides you with a quick way of accessingyour voice mailbox (if provided by your network).Before using this feature, you must enter the voicemail number obtained from your network operator. When a new voice message is received, the symbol will be displayed on the screen. A long pressof the key will take you directly into yourvoicemail. Please check with your service operator fordetails of their service in order to configure thehandset correctly.Info message Menu 5.7 Shows the messages you sent (Message/ Postcard/Email).[Options]]View: Opens the selected message.]Reply: Creates a reply to sender or all recipients ofthe selected message.]Forward: Forwards the selected message.]Delete: Deletes the current message.]Edit: You can edit the selected message.]Create new message: You can write a newmessage.]Save number: Save the sender's number.]Mark/Unmark: You can select one or moremessages for multiple deletion.]Filter: Displays messages by desired messagetypes.]Copy: In case of SMS, you can copy the messageinto handset or USIM. ]Move: In case of SMS, you can move the messageinto handset or USIM.]Message info.: You can check the message type,date and time and where it is saved.](https://usermanual.wiki/LG-Electronics-USA/KP202/User-Guide-753961-Page-35.png)
![Messages32MessagesTemplates Menu 5.8 Text templates (Menu 5.8.1) You can add, edit, and delete frequently used usefulphrases using the left soft key [Options].The followings are pre-defined text templates.• Please call me back.• I’m late. I will be there at• Where are you now?• I’m on the way.• Top urgent. Please contact.• I love you. The following options are available.]View: Select this to view the selected template.]Edit:Use this to edit the selected template.]Write messages- Write text message: Use this to send theselected template message by SMS.- Write multimedia message:Use this to send theselected template message by MMS.]Add new: Use this to create a new template.]Delete:Deletes the selected template from thetext template list.]Delete all: Deletes all templates.Signature (Menu 5.8.2)1. Press the left soft key [Edit].2. After keying in the name, press the left soft key[OK].3. Key in the mobile phone number, home number,office number and fax number.4. Press the left soft key [Save].After creating the business card template, you canaccess the following menus by pressing the left softkey [Options]. NoteDepending on your service provider, useful phrases are savedas a default.](https://usermanual.wiki/LG-Electronics-USA/KP202/User-Guide-753961-Page-36.png)
![33Messages]Edit: Use this to edit the business card.]Send via:You can send your business card viaMultimedia messge.]Delete:Use this to delete the signature.Settings Menu 5.9Text message (Menu 5.9.1)]Message types:Text, Voice, Fax, Natl. paging, X.400, Email,ERMESUsually, the type of message is set to Text. You canconvert your text into alternative formats. Contactyour service provider for the availability of thisfunction.]Validity period:This network service allows you toset how long your text messages will be stored atthe message centre.]Delivery report:If you set to Yes, you can checkwhether your message is sent successfully.]Reply charging: When a message is sent, it allowsthe recipients to reply and charge the cost of thereply to your telephone bill. ]SMS centre:Saves or changes the number of yourSMS centre when sending text messages. You mustobtain this number from your service provider.Voice mail centre (Menu 5.9.2) You can receive voicemail if this feature is supportedby your network service provider. When a newvoicemail has arrived, the symbol will be displayed onthe screen. Please check with your network serviceprovider for details of their service in order toconfigure the phone accordingly.1. Hold down key in standby mode.2. You can check the following submenus.]Home:You can listen to voice mails by selectingHome.]Roaming: Even when you are abroad, you canlisten to voice mails if a roaming service issupported.](https://usermanual.wiki/LG-Electronics-USA/KP202/User-Guide-753961-Page-37.png)
![Messages34MessagesInfo message (Menu 5.9.3) ]Receive- Yes:If you select this menu, your phone willreceive Info service messages.- No:If you select this menu, your phone will notreceive Info service messages any more.]Alert- Yes :Your phone will beep when you have receivedInfo service message numbers.- No:Your phone will not beep even though youhave received info service messages.]Languages- You can select the language you want by pressing[On/Off]. Then, the info service message will beshown in the language that you have selected.Push message (Menu 5.9.4) You can set the option whether you will receive themessage or not.How to access t-zones.You can use your phone for so much more than justtexting and talking. t-zones provides information suchas news, weather forecast, information on sports ortraffic whenever you need it. In addition, t-zonesprovides superior multimedia services such as thelatest music or ring tones, wallpapers or games foryour entertainment and device personalisation.Press Menu from idle mode and select t-zones usingnavigation keys. You can also access directly bypressing the t-zones key in idle mode.Note] Additional cost may occur when using online services.Please contact your network operator/ service providerfor more details.](https://usermanual.wiki/LG-Electronics-USA/KP202/User-Guide-753961-Page-38.png)
![My Files35My FilesGames & Applications Menu 6.1 You can easily download games and otherapplications in this menu. It has two folders, Gamesand Applications, as default. Each folder has anembedded link for downloading games orapplications. Please note that additional cost may beincurred when using online services. You can create afolder using the left soft key [Options].Images Menu 6.2 The Pictures folder consists of embedded links for downloading pictures through the Internet andDefault images.Pictures taken using the camera are stored in thePictures folder and you can create new folders tomanage them. You can also save selected files asanimated Gifs and send multiple files to other people.When a file is selected, the following options will bedisplayed by pressing the left soft key [Options].]Connect: You can connect the Internet. ]New folder: You can create a new folder within thefolder currently selected.]Delete more: - Multi delete: Deletes the selected image. - Delete all: Deletes all images. ]Sort by: You can sort the files by date,type orname. ]View style: You can view the images as aThumbnail view or List view. Sounds Menu 6.3 The Sounds folder consists of embedded links fordownloading ringtones and music as well as folderscontaining the Default sounds and Voice recordings.Here you can manage, send or set sounds asringtones.Others Menu 6.4 Other files except pictures, sounds, videos, games &applications are stored in this folder.](https://usermanual.wiki/LG-Electronics-USA/KP202/User-Guide-753961-Page-39.png)
![Fun & Tools 36Fun & Tools LG Electronics Menu 7.1 Alarm clock Menu 7.2 If you set the alarm, the appears on the indicatorbar. The specified alarm sounds at the scheduledtime. Press to stop the alarm, and the alarm isreleased. Press the right soft key [Snooze] andchoose the snooze interval. The alarm sound stopsand resumes after the selected Snooze duration. Youcan configure up to 5 alarms.1. Select your desired alarm to configure in the alarmlist. If there is no alarm, press the right soft key[Add] to add a new alarm.2. Set/Cancel alarm: Set or cancel the alarm usingthe options for specifying whether the alarm is onor by choosing the alarm time.3. Input alarm time: Input your desired alarm timeby specifying Hour and Minute. Choose either‘AM’ or ‘PM’ which is visible if 12 hour format isspecified for the phone.4. Select repeat mode: Select the desired repeatmode using / or select the desired onefrom the list by pressing .5. Select bell: Select the bell to ring at the alarmtime using / or opening the list by pressing.6. Input memo: Input alarm name.7. Snooze: You can set the snooze duration for thealarm.8. When you have finished setting the alarm, pressthe right soft key [Done].Calendar Menu 7.3 You can refer to your schedule by months. Thecursor is on the current date, and the registered dateis marked. The schedule saved for the date where the cursor islocated is represented by an icon. Pressing theshortcut key moves to the previous year andpressing move to the next year and pressingmoves to today. Pressing moves to theprevious month, and moves to the next month.You can move the date using the / / / .Note]The alarm will go off even when the phone is switched off.](https://usermanual.wiki/LG-Electronics-USA/KP202/User-Guide-753961-Page-40.png)
![37Fun & Tools You can enter a schedule or memo in the schedulerby pressing the left soft key [Options].]View:Shows the schedule note or memo for thechosen day. Press the left soft key [Options] toedit or delete the note you selected.]Add new:Select this to enter a new schedule ormemo. After a schedule note is entered on a date,the date is shown in a different colour and appears on the right bottom of the screen. Thisfunction reminds you of your schedule. And thephone will sound an alarm tone if you set thephone to do so.]Scheduler tone:Adjust the Scheduler tone.]All schedules:Shows all the notes that are enteredin the phone. Use the up/down navigation keys tobrowse through the note lists.]Go to date:Shows schedule of the date you put.]Delete past:Select this to delete the expiredschedule notes that you have already been notifiedof.]Delete all:Select this to delete all the schedulenotes and memos.Tasks Menu 7.4 You can view, edit and add tasks to do. Tasks aredisplayed in time order. Tasks that have beencompleted or not completed are displayed indifferent ways.AddTo add a task, press the right soft key [Add] in theTasks list management screen. Then input the date,description and priority for the task.When you have finished entering the data, press theright soft key [Done] key to save the new task.Detailed view and EditTo view detailed task contents, locate the cursor onthe desired item in the Tasks list, and then press .You can edit and delete a task using the left soft key[Options]. You can also delete multiple or all tasks atonce using the Mark/Unmark option in the menu.Set job statusTasks set as finished are displayed as crossed outbelow the unfinished tasks in the Tasks list. You canset Finished tasks to Not finished by selectingOption.](https://usermanual.wiki/LG-Electronics-USA/KP202/User-Guide-753961-Page-41.png)
![Fun & Tools 38Fun & Tools Memo Menu 7.5 Using the memo management function, you can viewand manage saved memo contents and add newmemo.Add memoTo add a new memo, press the right soft key [Add].Enter the contents of the memo. You can save thememo to the list by pressing the right soft key[Done].Edit and delete memoHighlight the desired memo and press to view itscontents. You can edit or delete the contents of amemo using the left soft key [Options]. You canreturn to the memo management screen by pressing. You can select Multiple or All memos using theMark/Unmark option and then delete a memo bypressing the right soft key [Delete].Calculator Menu 7.6 The calculator module allows you to perform basicarithmetic functions such as addition, subtraction,multiplication, and division as well as some scientificfunctions.1. Press the left soft key [Funct.].2. Select the appropriate function.3. Select Calculator.You can enter numbers by using the number keys,and the operators by using the / / /direction keys. You can enter a decimal point bypressing . Whenever you press , charactersare sequentially deleted in reverse order. Wheneveryou hold down, all the characters are deleted inreverse order in one go.When calculation is complete and the result isdisplayed on the screen, pressing a number clears theprevious result and the calculator waits for new input,even if you did not press the right soft key [AC].When calculation is complete and the result isdisplayed on the screen, pressing a symbol saves theresult into the symbol and continues calculation.Unit converter Menu 7.7Using this menu, users can convert Currency, Surface,Length, Weight, Temperature, Volume and Velocity.](https://usermanual.wiki/LG-Electronics-USA/KP202/User-Guide-753961-Page-42.png)
![39Fun & Tools Surface (Menu 7.7.1)1. Select Surface menu.2. Select the desired unit to convert using [Unit].3. Enter the standard unit and view the convertedvalue.4. Press [Reset] to clear the current input Field and locate the cursor in the input field.5. To exit the Surface conversion function, press[Back] key.Length (Menu 7.7.2)1. Select the length menu.2. Select the desired unit to convert using [Unit].3. Enter the standard unit and view your convertedvalue.4. Press [Reset] to clear the current input field andlocate the cursor in the input field.5. To exit the length conversion function, press the [Back] key.Weight (Menu 7.7.3)1. Select the Weight menu.2. Select the desired unit to convert using [Unit].3. Enter the standard unit and view the convertedvalue.4. Press [Reset] to clear the current input Field, and locate the cursor in the input field.5. To exit the Weight conversion function, press the [Back] key.Temperature (Menu 7.7.4)1. Select the Temperature menu.2. Position the cursor on the desired unit by usingthe up or down arrow keys.3. Enter the standard unit and view the convertedvalue.4. Press [Reset] to clear the current input field andlocate the cursor in the input field.5. To exit the Temperature conversion function, pressthe [Back] key.6. You can insert negative values by selecting [-].](https://usermanual.wiki/LG-Electronics-USA/KP202/User-Guide-753961-Page-43.png)
![Fun & Tools 40Fun & Tools Volume (Menu 7.7.5)1. Select the Volume menu.2. Select the desired unit to convert using [Unit].3. Enter the standard unit and view the convertedvalue.4. Press [Reset] to clear the current input field and locate the cursor in the input field.5. To exit the volume conversion function, press the[Back] key.Velocity (Menu 7.7.6)1. Select the Velocity menu.2. Select the desired unit to convert using [Unit].3. Enter the standard unit and view the convertedvalue.4. Press [Reset] to clear the current input field andlocate the cursor in the input field.5. To exit the Velocity conversion function, press the[Back] key.World time Menu 7.8 The World time function provides time informationon major cities worldwide.You can view the time of the desired country or cityby navigating using / . You can select a desired city as a base using the rightsoft key [Home].Stopwatch Menu 7.9](https://usermanual.wiki/LG-Electronics-USA/KP202/User-Guide-753961-Page-44.png)
![Settings43SettingsPhone settings Menu 9.1Many features of your phone can be customised tosuit your preferences. All of these features areaccessed via the Phone settings menu.Date & time (Menu 9.1.1) Set date (Menu 9.1.1.1)1. Select the Date item from the Date & Time listand then press .2. Select the date format using /.3. Enter Day, Month and Year using the numberkeys.4. Press the right soft key [Done] to set the datewith the specified value.Date format (Menu 9.1.1.2)Set time (Menu 9.1.1.3)You can enter the current time. Time format (Menu 9.1.1.4)You can set the time format between 24-hour and12-hour. Language (Menu 9.1.2) Select the display language. You can selectAutomatic language option to change displaylanguage to the USIM card supported language.PIN code request (Menu 9.1.3)In this menu, you can set the phone to ask for thePIN code of your SIM card when the phone isswitched on. If this function is activated, you’ll berequested to enter the PIN code.1. Select PIN code request in the security settingsmenu, and then press [OK].2. Set Enable/Disable.3. If you want to change the setting, you need toenter PIN code when you switch on the phone.4. If you enter the wrong PIN code more than 3times, the phone will lock out. If the PIN isblocked, you will need to key in the PUK code.](https://usermanual.wiki/LG-Electronics-USA/KP202/User-Guide-753961-Page-47.png)
![Settings44Settings5. You can enter your PUK code up to 10 times. Ifyou enter the wrong PUK code more than 10times, you can not unlock your phone. You willneed to contact your service provider.Phone lock (Menu 9.1.4)You can lock your phone. The following 4 lockfunctions are available.When switch on: Locks the handset whenever thehandset is switched on.When SIM changed: Locks the handset when thephone's SIM card has been changed.Off: Deactivates the lock function.Immediately: Locks the handset immediately.You are requested to enter the security code toconfirm the selection.]To unlock the handset, you need to enter thesecurity code.Change codes (Menu 9.1.5)You can change the PIN, PIN2, the mobile phonepassword and the call barring password.PIN codePIN is the abbreviation for Personal IdentificationNumber, and is used to restrict use by anunauthorised user.PIN code change procedure1. Select ‘PIN code’ from the ‘Change codes’ list andthen press .2. Enter the current PIN code and press .3. Enter the new PIN code and press .4. Enter the new PIN code once again and press .]If the PIN code is different from that of step 3,the procedure is restarted from step 3.5. When the PIN code is changed properly, a Changedmessage is displayed. If you enter an incorrect PINcode in step 2, the procedure is restarted from step2, and the number of attempts you have left toenter the number is decreased by 1.6. Press in the PIN code entry window to returnto the previous step.](https://usermanual.wiki/LG-Electronics-USA/KP202/User-Guide-753961-Page-48.png)
![45SettingsPIN2 codePIN2 is the abbreviation for Personal IdentificationNumber 2, and is used to restrict use byunauthorised users as with the PIN. The PIN2 codechange procedure is the same as the one for the PINcode. 3 incorrect PIN2 code entries would invalidatethe PIN2 code. In this case, you have to enter thePUK2 code in order to use the PIN2 code again. Themaximum number of times you may try to enter thePUK2 code is 10, like PUK1. 10 incorrect PUK2 codeentries would invalidate the PIN2 code.Security codeThe security code is used to change the mobilephone password. The maximum number of attemptsto enter the security code is not limited as it is withPIN and PIN2.Profiles Menu 9.2In Profiles, you can adjust and customise the phonetones for different events, environments, or callergroups. There are five preset profiles: Vibrate only,Silent, Normal, Outdoor and Headset. Each profile can be personalised(Except Vibrate only,Silent menu).Display Menu 9.3This menu allows you to personalise the display optionsof the screens and of the menus entire graphic interface.Wallpaper (Menu 9.3.1) You can select an image to be displayed on the mainscreen.Backlight (Menu 9.3.2)You can set the backlight duration on the Homescreen, External screen and Keypad individually.Brightness (Menu 9.3.3)The screen brightness can be adjusted.Note]Three incorrect PIN code entries in the PIN code entrywindow would invalidate the PIN code. In this case, youhave to enter the PUK (PIN Unblock Key) code toconfigure the PIN code again. The maximum number oftimes you may enter the PUK code is 10. (Note: If youenter an incorrect PUK code10 times, the USIM card willbe blocked and must be replaced.)](https://usermanual.wiki/LG-Electronics-USA/KP202/User-Guide-753961-Page-49.png)
![Settings48Settings2. When the operates the menu is selected – It activates and operates the International excepthome country menu. It operates in the same wayas the Outgoing calls menu.All incoming1. When is selected, it operates in the same wayas the Outgoing calls menu.2. When the Options menu is selected, it activatesand operates the Incoming calls menu. It operatesin the same way as the Outgoing calls menu.Incoming when abroad1. When is selected, it operates in the same wayas the Outgoing calls menu.2. When the Options menu is selected, it activatesand operates the Incoming calls when abroadmenu. It operates in the same way as theOutgoing calls menu.Cancel all Change password Send my number (Menu 9.4.3)]On: Configures to send my phone number whenmaking an outgoing call.]Off: Configures not to send my phone numberwhen making an outgoing call.]Set by network: Configures with the defaultsettings determined by the service provider.Auto redialAllows you to set the auto redial function when a callattempt has failed.Call durations (Menu 9.4.4) You can view call time by types. Press the left softkey [Options] to choose either partial initialisation orentire initialisation. Also press right soft key [Clear]to initialise a selected duration type. Initialization willrequire your Security code.The following timers are available:]Last call: Shows the latest call time in units ofhours/minutes/seconds.]Dialled calls: Shows outgoing call time.](https://usermanual.wiki/LG-Electronics-USA/KP202/User-Guide-753961-Page-52.png)
![49Settings]Received calls: Shows incoming call time.]All calls: Shows total call time.Fixed dial numbers (Menu 9.4.5) ]FDN ON/OFF: Select whether to activate FDN ornot. PIN authentication is required.]FDN list: Displays the current FDN list. You canedit, add, or delete fixed dial numbers. PIN2authentication is required to edit the list. And theconfiguration information is saved on the USIM.The information saved on the USIM is used whenFDN restricts outgoing calls.Answer mode (Menu 9.4.6)Allows you to set the answering method. You canchoose between Flip open, Press any key and Sendonly. Call costs (Menu 9.4.7) 1. This function displays the call costs of the Last calland All calls.2. To initialise, press the right soft key [Clear] andenter the PIN2 code.3. You can select either Unit or Currency in Set callcost. According to your setting, the call cost isdisplayed during a call (If USIM and Networksupport Advice Of Charge(AOC)).4. In the Set limit configuration, select On toconfigure the cost limit. When a cost limit isconfigured, and the call costs reach the limit,making a call will not be allowed.Call divert (Menu 9.4.8)Call divert menus for voice and video calls areprovided.The menu consists of Voice calls, Video calls andDeactivate all.All voice callsIf busyIf no replyIf out of reachAll data calls](https://usermanual.wiki/LG-Electronics-USA/KP202/User-Guide-753961-Page-53.png)
![Settings50SettingsAll fax callsCancel all1. When the Deactivate menu is selected Deletes Call Divert Number registered to thenetwork. While waiting for the result from thenetwork, Requesting message and animationappears. When the network answers, the result ofthe operation is displayed.2. When To a number is selectedA dialogue window appears allowing you to enter aphone number to divert to. Input a phone numberto divert calls to, and press . While waiting theresult from the network, Requesting message andanimation appears. When the network answers, theresult of the operation is displayed.3. When Recent divert number list is selected Divert registration is performed with the selectednumber. Select the number, and press . Whilewaiting for the result from the network, aRequesting message and animation appears. Whenthe network answers, the result of the operation isdisplayed.4. Options menuAfter activating All voice calls menu, selecting theOptions menu at the bottom of the menusdisplays the Deactivate, Activate, Deactivate all,View status and clear list menus.Activate: Move to Settings menu to activate calldivert.The View status menu shows the settings on thenetwork. If you select this menu, Requesting.message and animation appear. Then the networksettings are displayed when the information isreceived from the network. Selecting Status in theright soft menu gives the same result. If you selectthe Deactivate menu, the call divert numbersregistered in the network are deleted after userconfirmation. Selecting the Cancel all menu willdisplay the operation result after showing theRequesting message and animation. Clear listmenu will delete all divert number list.Call waiting (Menu 9.4.9) ]Activate: Activates waiting service. Selecting thisitem, displays requesting message and animation.When the network answers, the result of theoperation is displayed.](https://usermanual.wiki/LG-Electronics-USA/KP202/User-Guide-753961-Page-54.png)
![51Settings]Deactivate: Deactivates Call waiting service.Selecting this item displays requesting messageand animation. When the network answers, theresult of the operation is displayed.]View status: Displays activated Call waiting servicegroup item of the network. Selecting this itemdisplays requesting message and animation. Whenthe network answers, the result of the operation isdisplayed.Others (Menu 9.4.0)Auto redialAllows you to set the auto redial function when a callattempt has failed. Minute minderDetermines whether to sound a 1 minute tone every1 minute when you are on the phone. Send DTMF tones DTMF tones allow your phone to make use of anautomated switchboard. Network settings Menu 9.5 For detailed information, please refer to page 64.(Menu 8.7)Reset Menu 9.6You can initialise all factory defaults. You will needthe Security code to activate this function.Memory status Menu 9.7You can check the status of memory in use.](https://usermanual.wiki/LG-Electronics-USA/KP202/User-Guide-753961-Page-55.png)