LG Electronics USA KP260D Cellular/ PCS GSM Phone with Bluetooth User Manual KP260d ENG 080514 indd
LG Electronics USA Cellular/ PCS GSM Phone with Bluetooth KP260d ENG 080514 indd
UserManual.wiki
>
LG Electronics USA
>
KP260D User Manual
Users Manual
Navigation menu
Upload a User Manual
Namespaces
Wiki Guide
HTML
PDF
Info
Views
User Manual
Discussion / Help
Navigation
![8For Your SafetyImportant InformationThis user guide contains important information on the use andoperation of this phone. Please read all the informationcarefully for optimal performance and to prevent any damageto or misuse of the phone. Any changes or modifications notexpressly approved in this user guide could void your warrantyfor this equipment.Before You StartSafety InstructionsWARNING! To reduce the possibility of electric shock, do notexpose your phone to high humidity areas, such as thebathroom, swimming pool, etc.Always store your phone away from heat. Never store yourphone in settings that may expose it to temperatures less than32°F or greater than 104°F, such as outside during extremeweather conditions or in your car on a hot day. Exposure toexcessive cold or heat will result in malfunction, damageand/or catastrophic failure.Be careful when using your phone near other electronicdevices. RF emissions from your mobile phone may affectnearby in adequately shielded electronic equipment. Youshould consult with manufacturers of any personal medicaldevices such as pacemakers and hearing aides to determine ifthey are susceptible to interference from your mobile phone.Turn off your phone in a medical facility or at a gas station.Never place your phone in a microwave oven as this willcause the battery to explode.IMPORTANT! Please read the TIA SAFETY INFORMATION onpage 78 before using your phone.Safety InformationRead these simple guidelines. Breaking the rules may bedangerous or illegal. Further detailed information is given in thisuser guide.]Never use an unapproved battery since this could damagethe phone and/or battery and could cause the battery toexplode.]Never place your phone in a microwave oven as it willcause the battery to explode.]Do not dispose of your battery by fire or with hazardous orflammable materials.]Make sure that no sharp-edged items come into contactwith the battery. There is a risk of this causing a fire.]Store the battery in a place out of reach of children.]Be careful that children do not swallow any parts such asrubber plugs (earphone, connection parts of the phone,etc.). This could cause asphyxiation or suffocation.](https://usermanual.wiki/LG-Electronics-USA/KP260D/User-Guide-959804-Page-4.png)
![9For Your Safety]Unplug the power cord and charger during lightning stormsto avoid electric shock or fire.]When riding in a car, do not leave your phone or set up thehands-free kit near to the air bag. If wireless equipment isimproperly installed and the air bag is activated, you may beseriously injured.]Do not use a hand-held phone while driving.]Do not use the phone in areas where its use is prohibited.(For example: aircraft).]Do not expose the battery charger or adapter to directsunlight or use it in places with high humidity, such as abathroom.]Never store your phone in temperatures less than- 4°F orgreater than 122°F.]Do not use harsh chemicals (such as alcohol, benzene,thinners, etc.) or detergents to clean your phone. There is arisk of this causing a fire.]Do not drop, strike, or shake your phone severely. Suchactions may harm the internal circuit boards of the phone.]Do not use your phone in high explosive areas as the phonemay generate sparks.]Do not damage the power cord by bending, twisting, pulling,or heating. Do not use the plug if it is loose as it may causea fire or electric shock.]Do not place any heavy items on the power cord. Do notallow the power cord to be crimped as it may cause fire orelectric shock.]Do not handle the phone with wet hands while it is beingcharged. It may cause an electric shock or seriouslydamage your phone.]Do not disassemble the phone.]Do not place or answer calls while charging the phone as itmay short-circuit the phone and/or cause electric shock orfire.]Only use the batteries, antennas, and chargers provided byLG. The warranty will not be applied to products provided byother suppliers.]Only authorized personnel should service the phone and itsaccessories. Faulty installation or service may result inaccidents and consequently invalidate the warranty.]Do not hold or let the antenna come in contact with yourbody during a call.]An emergency call can be made only within a service area.For an emergency call, make sure that you are within aservice area and that the phone is turned on.](https://usermanual.wiki/LG-Electronics-USA/KP260D/User-Guide-959804-Page-5.png)
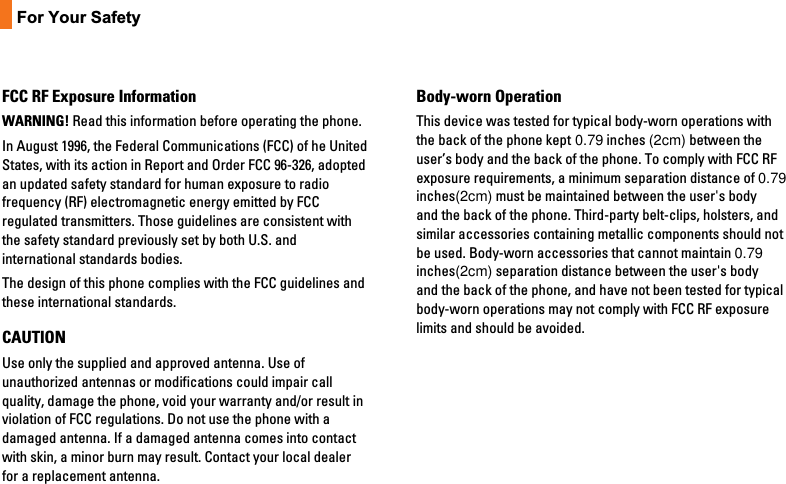
![11For Your SafetyVehicle Mounted External Antenna(optional, if available)A minimum separation distance of 8 inches (20cm) must bemaintained between the user/bystander and the vehiclemounted external antenna to satisfy FCC RF exposurerequirements. For more information about RF exposure, visitthe FCC website at www.fcc.govFCC Part 15 Class B ComplianceThis device and its accessories comply with part 15 of FCCrules. Operation is subject to the following two conditions: (1) This device and its accessories may not cause harmfulinterference, and (2) this device and its accessories mustaccept any interference received, including interference thatmay cause undesired operation.Cautions for Battery]Do not disassemble.]Do not short-circuit.]Do not expose to high temperature: 60°C (140°F).]]Do not incinerate.Battery Disposal]Please dispose of your battery properly or bring to yourlocal wireless carrier for recycling.]Do not dispose in fire or with hazardous or flammablematerials.Adapter (Charger) Cautions]Using the wrong battery charger could damage your phoneand void your warranty.]The adapter or battery charger is intended for indoor useonly.Do not expose the adapter or battery charger to direct sunlightor use it in places with high humidity, such as the bathroom.](https://usermanual.wiki/LG-Electronics-USA/KP260D/User-Guide-959804-Page-7.png)
![181. When you are in the T9 predictive text input mode, start entering a word by pressing keys to . Press one key per letter.► The word changes as letters are typed. Ignore what’s on the screen until the word is typed completely.► If the word is still incorrect after typing completely, press the key once or more or press the down navigation key to cycle through the other word options.ExamplePress to type Good► If the desired word is missing from the word choice list, add it as a new T9 word, using the ABC mode.► You can select the language of the T9 mode. Press the left soft key [Option], then select T9 languages. Select the desired language of T9 mode. You can also turn off the T9 mode by selecting T9 off. The default setting on the phone is T9 enabled mode.2. Enter the whole word before editing or deleting any keystrokes.3. Complete each word with a space by pressing the key. To delete letters, press the key. Press and hold down the key to erase entire words.NoteTo exit from the text input mode, press the key. The phone goes back to standby mode and the edited message gets stored in drafts.Using the ABC modeUse the to keys to enter your text.1. Press the key labeled with the required letter:► Once for the first letter► Twice for the second letter► And so onGeneral FunctionsGeneral Functions](https://usermanual.wiki/LG-Electronics-USA/KP260D/User-Guide-959804-Page-11.png)
![20In-call menuYour phone provides a number of control functions that you can use during a call. To access these functions during a call, press the left soft key [Options].During a callThe menu displayed on the handset screen during a call is different than the default main menu displayed when in idle screen, and the options are described below.Making a Second Call(Network Dependent)You can search and dial the number from Contacts to make a second call.Swapping Between Two CallsTo switch between two calls, press the key or the left soft key, and then select Swap Call.Answering an Incoming CallTo answer an incoming call when the handset is ringing, simply press the key. The handset is also able to warn you of an incoming call while you are already on a call.A tone sounds in the earpiece, and the display will show that a second call is waiting.This feature, known as Call waiting, is only available if your network supports it. For details of how to activate and deactivate it see Call waiting feature.If Call waiting is on, you can put the first call on hold and answer the second, by pressing the left soft key.Rejecting an Incoming CallYou can reject an incoming call without answering by simply pressing the key.During a call, you can reject an incoming call by pressing the key.In-call menu](https://usermanual.wiki/LG-Electronics-USA/KP260D/User-Guide-959804-Page-13.png)
![21Muting the MicrophoneYou can mute the microphone during a call by pressing the right soft key [Mute]. The handset can be unmuted by pressing the right soft key [Unmute]. When the handset is muted, the caller cannot hear you, but you can still hear them.DTMF tones while callingTo switch on DTMF tones while calling (e.g. to use the phone with an automatic switchboard) press the left soft key [Options] followed by Enable DTMF. Select Disable DTMF to disable DTMF tones. DTMF tones are normally on.Conference CallsThe conference service provides you with the ability to have a simultaneous conversation with more than one caller, if your network service provider supports this feature.A conference call can only be set up when you have one active call and one call on hold, both calls having been answered.Once a conference call is set up, calls may be added, disconnected or separated (that is, removed from the conference call but still connected to you) by the person who set up the conference call. These options are all available from the In-Call menu. The maximum callers in a conference call are five. Once started, you are in control of the conference call, and only you can add calls to the conference call.Making a Second CallYou can make a second call while currently in call. Enter the second number and press the key.When the second call is connected, the first call is automatically placed on hold. You can swap between calls, by pressing the key.In-call menu](https://usermanual.wiki/LG-Electronics-USA/KP260D/User-Guide-959804-Page-14.png)
![22In-call menuIn-call menuSetting Up a Conference CallTo set up a conference call, place one call on hold and while the active call is on, press the left soft key and then select the Join menu of Conference call.Activate the Conference Call on HoldTo activate a conference call on hold, press the key. Alternatively press the left soft key [Options] and select Join all/Hold all calls. Other users on hold will stay connected. To return to conference call mode, press the left soft key [Options] followed by Conference call.Adding Calls to the Conference CallTo add a call to an existing conference call, press the left soft key, and then select the Join menu of Conference call.Private Call in a Conference CallTo have a private call with one caller from a conference call, display the number of the caller you wish to talk to on the screen, then press the left soft key. Select the Private menu of Conference call to put all the other callers on hold.Ending a Conference CallCurrently displayed caller from a conference call can be disconnected by pressing the key.](https://usermanual.wiki/LG-Electronics-USA/KP260D/User-Guide-959804-Page-15.png)
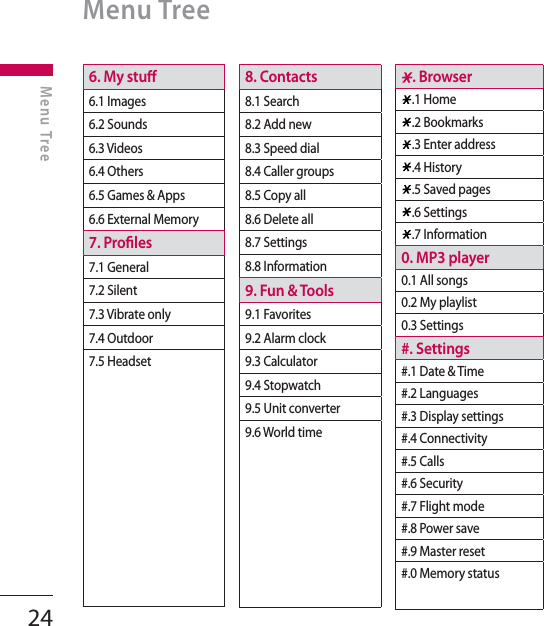
![23The menu in this phone can be displayed in 2 ways. One is by grid view or secondly by list view.Please note that menu number options are different in each view.The default setting on the phone is set to show the menu in grid view, so therefore all the menu number selections throughout the manual are shown according to that setting.You can go to the desired menu using the left soft key [Menu], navigation keys and the OK key. And you can also take a shortcut by pressing the corresponding number key of desired menu after pressing the left soft key [Menu].1. SIM Services2. Call register2.1 All calls2.2 Missed calls2.3 Dialed calls2.4 Received calls2.5 GPRS information2.6 Call duration3. Organizer3.1 Calendar3.2 Memo 3.3 To-do4. Multimedia4.1 Camera4.2 Video camera 4.3 Voice recorder5. Messages5.1 New message5.2 Inbox5.3 Email box5.4 Drafts5.5 Outbox5.6 Sent5.7 Listen voice mail5.8 Info service5.9 Templates5.0 SettingsMenu TreeMenu Tree](https://usermanual.wiki/LG-Electronics-USA/KP260D/User-Guide-959804-Page-16.png)
![25SIM Services [Menu 1]With the SIM services menu your phone is future-proof and will support additions to your service provider’s service. For more information contact your service provider.SIM Services](https://usermanual.wiki/LG-Electronics-USA/KP260D/User-Guide-959804-Page-18.png)
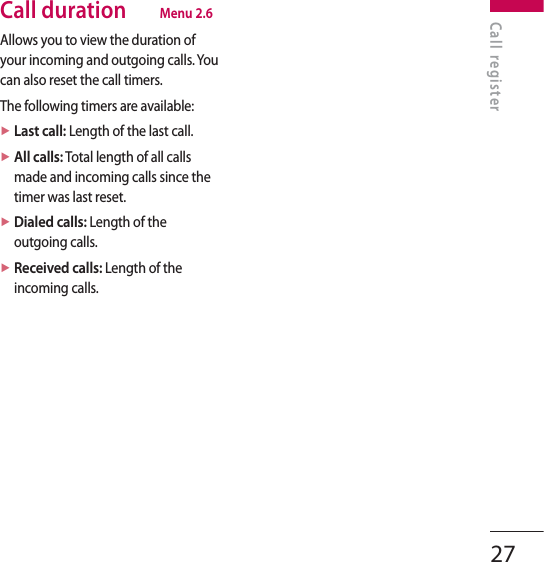
![26Call register [Menu 2]You can check the record of missed, received, and dialed calls only if the network supports the Calling Line Identification (CLI) within the service area.The number and name (if available) are displayed together with the date and time at which the call was made. You can also view the number of times you have called.All calls Menu 2.1You can view all lists of outgoing or incoming calls.Missed calls Menu 2.2Allows you to view missed call records, make a call, send a message, and save the number in the contacts.Dialed calls Menu 2.3Allows you to view dialed call records, make a call, send a message, and save the number in the contacts.Received calls Menu 2.4Allows you to view received call records, make a call, send a message, and save the number in the contacts.GPRS information Menu 2.5You can check the amount of data transferred over the network through the GPRS information option. In addition, you can also view how much time you are online.Call register](https://usermanual.wiki/LG-Electronics-USA/KP260D/User-Guide-959804-Page-19.png)
![28Organizer [Menu 3]Calendar Menu 3.1You can refer to your schedule by months. The cursor is on the current date, and the registered date is marked.Each press of skips back a year. skips forward a year. moves to today. skips back a month. skips forward a month.You can enter a schedule or memo in the scheduler by pressing the left soft key [Options].► View daily schedules: You can view the schedule note or memo for the chosen day.► All new: Select this to enter a new schedule or memo.► Set alarm tone: You can set the scheduler tone.► All schedules: You can see all the schedules.► Go to date: You can go the chosen date directly.► Delete old: Select this to delete the expired schedule notes that you have already been notified of.► Delete all: Select this to delete all the schedule notes and memos.Memo Menu 3.2You can add new memo, view and manage saved memos.1. If the entry is empty, press the left soft key [New] and enter the contents of the memo. You can save the memo to the list by the left soft key [Options] then choose [Save].2. If you have saved memos, you can access following options with the left soft key [Options] : View, Delete, New memo, Send via, Edit, Multi delete, Delete all.NoteIf you want to change the text input mode, press the key in order.Organizer](https://usermanual.wiki/LG-Electronics-USA/KP260D/User-Guide-959804-Page-21.png)
![29To-do Menu 3.3You can view, edit and add tasks to do. Tasks are displayed in time order. Tasks that have been completed or not completed are displayed in different ways.1. If the entry is empty, press the left soft key [New].2. Input the Due date, Note, Priority, and Status.3. When you have finished entering the data, press the left soft key [Save].4. You can manage saved to do notes by pressing the left soft key [Options].Organizer](https://usermanual.wiki/LG-Electronics-USA/KP260D/User-Guide-959804-Page-22.png)
![30MultimediaYou can enjoy your multimedia function such as camera, video camera, voice recorder for your fun and convenience.Note► When the status of the battery indicates low, you may not be able to use Camera or Multimedia function.► While using Multimedia function, the status of the battery is changeable.Camera Menu 4.1Using the camera module built in your phone, you can take pictures of people. Additionally, you can send photos to other people and select photos as wallpaper.NoteWhen using the camera, power consumption increases. If the battery is too low, you may not be able to use the Camera feature, please recharge the battery before use.Shutter sound or video recording sound is emitted even when setting mode, including silent mode.• To take a picture- To take clear pictures, press the camera hot key , camera side key (only when flip is closed) or OK key while holding the camera without any movement.- Appropriately adjust distance to the object that you want take a picture of (more than 50 cm).- Handle carefully since the camera is vulnerable to shock and use a soft cloth when cleaning the camera lens.- Do not disassemble or modify the camera as this may lead to fire or malfunctioning.1. Press the camera key in standby mode.2. Focus on the subject to capture the image, and then press the camera key or the OK key.Multimedia [Menu 4]](https://usermanual.wiki/LG-Electronics-USA/KP260D/User-Guide-959804-Page-23.png)
![31Before take a photo, you can set the following options by pressing the left soft key [Options].► Resolution: Allows you to set the image size. (320x240/640x480)► Quality: Allows you to set the image quality from Normal, Fine and Super fine.► Timer: Allows you to select the delay time (Off/3 Secs/5 Secs/10 Secs). Then the phone takes a photo after the specified time.► View mode: You can set the view mode. (Full image/Full screen)► Save to: You can set the save option for a picture. (Phone/External)► Multi shot: Allows to take multishot-photos successively.► Color effect: 4 settings are available. (Off/Sepia/Mono/Negative)► White balance: Allows you to change the settings according to the environment. (Auto/Daylight/Incandescent/Cloudy/Fluorescent)► Shutter tone: You can set the sound when taking a picture.► Reset settings: Allows you to reset the settings.Note► You can adjust the brightness by using the , .► The zoom function varies depending on the resolution the camera is set to. For example, if the camera resolution is set to the highest setting you can’t zoom.3. The photo you have taken and saved is automatically saved in the Images folder of My stuff. After taking a photo, you can select the submenus by pressing the left soft key [Options].Multimedia](https://usermanual.wiki/LG-Electronics-USA/KP260D/User-Guide-959804-Page-24.png)
![32Multimedia► New photo: You can take a new photo.► Set as: You can set the taken photo as a Wallpaper or Picture ID.► Send via: You can send the photo via Multimedia message or E-mail.► Album: You can access the Images folder of My stuff.Video camera Menu 4.2You can record and save a video clip.1. To start recording press the OK key. As soon as it starts to record a timer will be displayed.Before record a video clip, you can set the following options by pressing the left soft key [Options].► Video mode: Allows you to set the mode to MMS or General. MMS mode resticts the video file to MMS size.► Resolution: Allows you to set the size. (128X96/176X144)► Quality: Allows you to set the image quality from Normal, Fine and Super fine.► Save to: You can set the save option for a video clip. (Phone/External)► Color effect: 4 settings are available. (Off/Sepia/Mono/Negative)► White balance: Allows you to change the settings according to the environment. (Auto/Daylight/Incandescent/Cloudy/Fluorescent)► Reset settings: Allows you to reset the settings.2. Press the left soft key [Stop] to end the recording.3. The video clip you recorded is automatically saved in the Videos folder of My stuff. After recording a video, you can select the submenus by pressing the left soft key [Options].► New: You can record a new video.Multimedia](https://usermanual.wiki/LG-Electronics-USA/KP260D/User-Guide-959804-Page-25.png)
![33► Play: You can play the recorded video clip.► Send via: You can send the photo via Multimedia message or E-mail.► Album: You can access the Videos folder of My stuff.Voice recorder Menu 4.3You can record a voice memo.1. Press the OK key to start recording. Once recording is started, the message “REC” and the recording time are displayed, talk into the microphone.2. If you want to finish recording, press the right soft key [Stop]. The recorded file is automatically saved in Sounds folder of My stuff.3. If you press the left soft key [Options], you can select the submenus as follow:► New voice record: You can start a new voice recording.► Send via: You can send the voice memo via Multimedia message or E-mail.► Album: You can access the Sounds folder of My stuff.Multimedia](https://usermanual.wiki/LG-Electronics-USA/KP260D/User-Guide-959804-Page-26.png)
![34MessagesNew message Menu 5.1This menu includes functions related to SMS (Short Message Service), MMS (Multimedia Message Service), E-mail, as well as the network’s service messages.Text (Menu 5.1.1)You can write and edit text message.1. Enter the New message menu by pressing the left soft key [OK].2. If you want to write a new message, select Text.3. To make text input easier, use T9.4. Press the left soft key [Options] to attach the following.Options► Send to: Sends text messages.1. Enter numbers of recipient.2. Press the down navigation key to add more recipients.3. You can add phone numbers in the contacts.4. Press the left soft key [Options] and then select Send after entering numbers. The message will automatically be saved in the Sent folder. If the message has not been sent, it will remain in the Outbox with a failed status.► Insert- Symbol: You can add special characters.- Image: You can insert the default graphics or graphics in the Images folder that are available for short messages.- Sound: You can insert sounds that are available for short messages.- Text template: You can use Text templates already set in the phone.- Contacts: You can add phone numbers or email addresses in the contacts.- Business card: You can add your business card to the message.Messages [Menu 5]](https://usermanual.wiki/LG-Electronics-USA/KP260D/User-Guide-959804-Page-27.png)
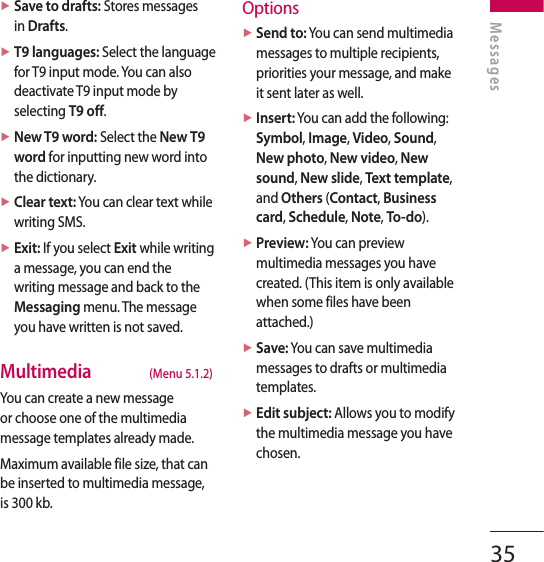
![36Messages► Delete slide: You can delete the desired slide.► Slide duration: You can set the duration of slide of multimedia message.► T9 languages: Select the language for T9 input mode. You can also deactivate T9 input mode by selecting T9 off.► New T9 word: Select the New T9 word for inputting new word into the dictionary.► Exit: You can get back to the Messaging menu.NoteIf you select the picture (200K) on writing multimedia message, loading duration will take around 10 seconds at least. Furthermore, you can’t activate any key during loading time. After 10 seconds, it is available to write multimedia message.E-mail (Menu 5.1.3)To send/receive an e-mail, you should set up the e-mail account.1. Key in the subject of the e-mail and press the OK key.2. After writing an e-mail message, press the left soft key [Options]. You can access the following option menus.► Send to: Enter the e-mail address or select the e-mail address from the contacts.► Insert: You can add Symbol/Text template/Contact/Business card.► Attachment: You can add the following: Image/Video/Sound/New photo/New video/New sound/Contact/Business card/Schedule/Memo/To-do/Others.► Preview: You can preview e-mail you wrote.► Save to drafts: Select this to save the message in the Drafts.Messages](https://usermanual.wiki/LG-Electronics-USA/KP260D/User-Guide-959804-Page-29.png)
![37Messages► Edit subject: You can edit the subject.► T9 language: Select the language for T9 input mode. You can also deactivate T9 input mode by selecting T9 off.► New T9 word: Select the New T9 word for inputting new word into the dictionary.► Clear text: Allows you to delete all the text within the e-mail.► Exit: If you select Exit while writing a message, you can end the writing message and back to the Messaging menu. The message you have written is not saved.3. When you have finished writing an email, press the left soft key and select Send to.4. Enter the email address of the recipients. You can search the contacts by pressing the left soft key [Options].5. Press the left soft key [Options] and select Send to send the e-mail.Note► Enter the reference e-mail address to forward the e-mail in Cc (Carbon copy) field.► Enter a hidden reference e-mail address to forward the e-mail without forwarding information in Bcc (Blind Carbon Copy) field.► Only valid e-mail addresses are allowed for the recipient (To), reference address (Cc) and hidden reference address (Bcc) fields. When an e-mail address has been specified, another field where you can specify another address appears. You can specify up to 20 recipients for the To, Cc, Bcc address fields.](https://usermanual.wiki/LG-Electronics-USA/KP260D/User-Guide-959804-Page-30.png)
![38MessagesMessagesInbox Menu 5.2You will be alerted when you have received messages. They will be stored in Inbox. You can save SMS up to 110(SMS: 100, Delivery report: 10).If the phone shows ‘No space for SIM message’, you have to delete only SIM messages from Inbox. If the phone displays ‘No space for message’, y o u can make space of each repository as deleting messages, media and applications.※ SIM messageSIM message means the message exceptionally stored in SIM card. You can move this message to the phone.For notified multimedia message, you have to wait for downloading and processing of the message.To read a message, select one of the messages by pressing the left soft key [Options].The following options are available.► View: You can view the received messages.► Reply: You can reply to the sender.► Delete: You can delete the current message.► Forward: You can forward the selected message to another party.► Return call: You can call back to the sender.► Number: You can save the sender’s phone number in the contacts.► Information: You can view information about received messages.► Multi delete: After selecting the messages you want to remove, you can delete the selected messages.► Delete all read: You can delete all messages read.► Delete all: You can delete all messages.](https://usermanual.wiki/LG-Electronics-USA/KP260D/User-Guide-959804-Page-31.png)
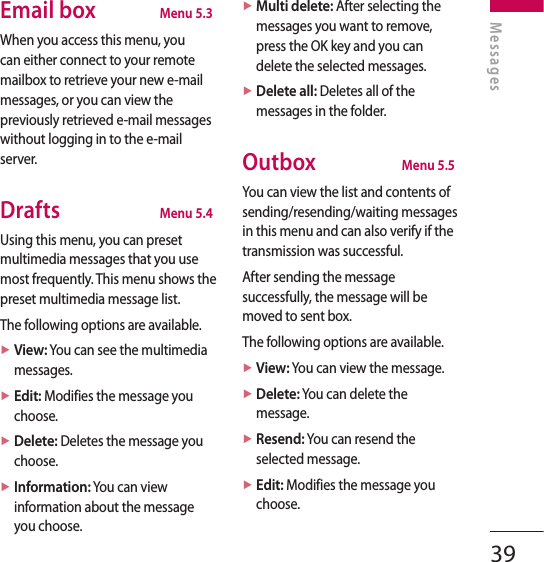
![40Messages► Information: You can check information of each message.► Multi delete: Select and delete the selected messages.► Delete all: You can delete all messages in the folder.Sent Menu 5.6This menu allows you to view the messages which are already sent. You can check the time and the contents of message.Listen voice mail Menu 5.7This menu provides you with a quick way of accessing your voice mailbox (if provided by your network). Before using this feature, you must enter the voice server number obtained from your network operator.Once this menu has been selected, simply press the left soft key [OK] to listen to voice mail. You can also hold down the key in standby mode to listen to voicemail.NoteWhen you receive a voicemail, your phone displays the icon and you hear an alert. Please check with your network provider for details of their service in order to configure the handset correctly.Info service Menu 5.8(Dependent to network and subscription)Info service messages are text messages delivered by the network to GSM. They provide general information such as weather reports, traffic news, taxis, pharmacies, and stock prices.Each network has its own number; therefore, you can contact service provider to input the certain number for the information.Messages](https://usermanual.wiki/LG-Electronics-USA/KP260D/User-Guide-959804-Page-33.png)
![41When you have received an info service message, you can see the popup message to show you that you have received a message or the info service message is directly displayed.To view the message again or not in standby mode, follow the sequence shown below;Read (Menu 5.8.1)1. When you have received an info service message and select Read to view the message, it will be displayed on the screen. You can read another message by scrolling the left or right navigation key.2. The message will be shown until another message is reached.Topics (Menu 5.8.2)(Dependent to network and subscription)You can see info service message numbers which you added. If you press the left soft key [Options], you can edit and delete info message category which you added.You can select info service message numbers in the active list. if you activate an info service number, you can receive messages sent from the number.Templates Menu 5.9Text (Menu 5.9.1)You have 6 text templates as below;• Please call me back.• I’m late. I will be there at• Where are you now?• I am on the way.• Urgent! Please, contact• I love you.The following options are available.► View: You can see selected templates.► Edit: Use this to write a new message or edit the selected template message from the text template list.Messages](https://usermanual.wiki/LG-Electronics-USA/KP260D/User-Guide-959804-Page-34.png)
![44► Permitted message type- Personal: Personal message.- Advertisements: Commercial message.- Information: Necessary information.E-mail (Menu 5.0.3)You can configure settings for receiving and transmitting e-mail.Email account (Menu 5.0.3.1)1. Select New from the Email account menu options.2. The following items need to be configured.- Account name: You can edit the e-mail account name.- Email address: Enter the e-mail address given to you by your service provider.- My name: Enter a user name.- Incoming mail server: Enter the POP3 or IMAP4 address that receives your e-mail.- User name: Allows you to enter the user ID of the POP3 or IMAP4 server.- Password: Allows you to enter the user password of the POP3 or IMAP4 server.- Outgoing mail server: Allows you to enter the SMTP address.- Outgoing mail authentication: When you send the mail, you can set authentication whether or not.- Outgoing server ID: Allows you to enter the user ID of the SMTP server.- Outgoing server password: Allows you to enter the user password of the SMTP server.Using the left soft key [Options], you can set the advanced settings.- Reply email address: You can set up the reply e-mail address.- Incoming port number: Enter the POP3 or IMAP4 port number that receives your e-mail.MessagesMessages](https://usermanual.wiki/LG-Electronics-USA/KP260D/User-Guide-959804-Page-37.png)
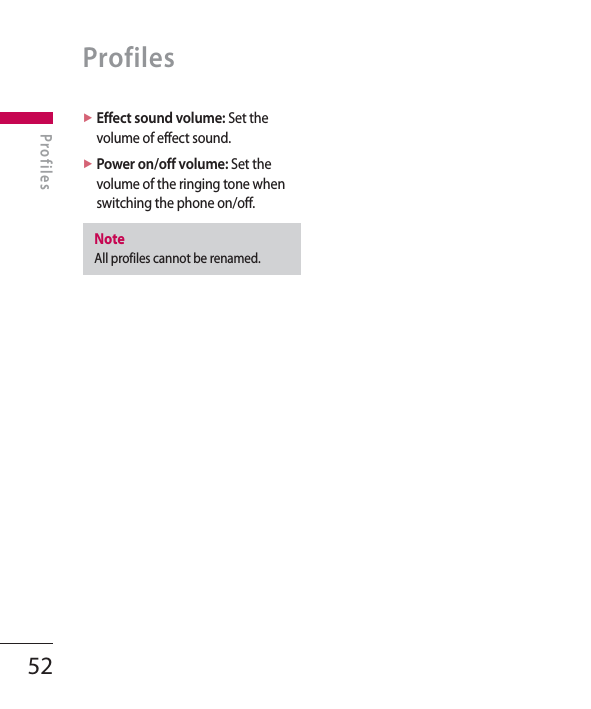
![47Images Menu 6.1The Images folder consists of embedded links for downloading pictures through the internet and default images. To view the image in details, press the OK key.When a file is selected, the following options will be displayed by pressing the left soft key [Options].► View: You can see the selected file.► Delete: Delete a selected file.► Set as- Wallpaper: Currently selected image can be set as a Wallpaper.- Picture ID: Currently selected image can be set as a Picture ID.► Send via: Send the selected file to another device via MMS or E-mail.► File- Rename: Change the file name of selected file. You cannot change the extension of file.- Move to folder: Move the selected file to the folder.- Move to external memory / Move to phone memory: Move the selected file to the external memory (if inserted) or multimedia memory in your phone.- Copy to external memory/ Copy to phone memory:Copy the selected file to the external memory or multimedia memory in your phone.- Information: Shows the file information.► Slide show: You can view a slide show of the files you stored.► New folder: You can create a new folder.► Multi delete: You can remove a number of files you selected.► Delete all: Delete all files in the list.► Sort by: You can arrange the files as date, type and name.My stuff [Menu 6]My stuff](https://usermanual.wiki/LG-Electronics-USA/KP260D/User-Guide-959804-Page-40.png)
![48My stuffMy stuff► Thumbnail view/List view: Allows you to set the view type.Sounds Menu 6.2The Sounds folder consists of embedded links for downloading ringtones and music as well as folders containing the default sounds and voice recordings.When a file is selected, the following options will be displayed by pressing the left soft key [Options].► Play: You can play the selected file.► Delete: Delete a selected file.► Set as: Currently selected sound can be set as a Ring tone or Ring tone ID.► Send via: Send the selected file to another device via MMS or E-mail.► File- Rename: Changes the file name of the selected file.- Move to folder: Move the selected file to the folder.- Move to external memory / Move to phone memory: Move the selected file to the external memory (if inserted) or multimedia memory in your phone.- Copy to external memory / Copy to phone memory: Copy the selected file to the external memory (if inserted) or multimedia memory in your phone.- Information: Shows the selected file information.► New folder: You can create a new folder.► Multi delete: You can remove a number of files you selected.► Delete all: Delete all files in the list.► Sort by: You can arrange the files as date, type and name.](https://usermanual.wiki/LG-Electronics-USA/KP260D/User-Guide-959804-Page-41.png)
![49My stuffVideos Menu 6.3Shows the list of video files at My media/Videos in Multimedia memory. Supports only .3gp files, that are encoded with MPEG4 and h.263 videocodecs and AMR audio-codec.Here you can manage or send saved video clips. When a file is selected, the following options will be displayed by pressing the left soft key [Options].► Play: You can play the selected file.► Delete: Delete a selected file.► Send via: Send the selected file to another device via MMS or E-mail.► File- Rename: Change the file name of selected file. The maximum length of characters is 71.Warning!You can‘t use the following characters: \ / : * ? < > |- Move to folder: Move the selected file to the folder.- Move to external memory / Move to phone memory: Move the selected file to the external memory (if inserted) or multimedia memory in your phone.- Copy to external memory / Copy to phone memory: Copy the selected file to the external memory (if inserted) or multimedia memory in your phone.- Information: Shows the file information.► New folder: You can create a new folder.► Multi delete: You can remove a number of files you selected.► Delete all: Delete all files in the list.► Sort by:](https://usermanual.wiki/LG-Electronics-USA/KP260D/User-Guide-959804-Page-42.png)
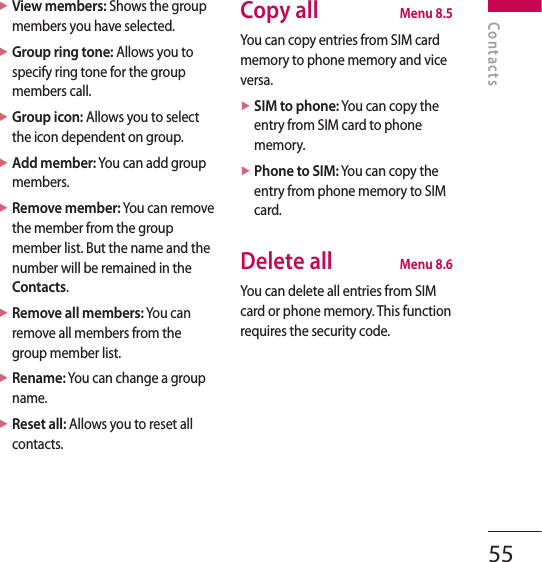
![51ProfilesProfiles [Menu 7]In Profiles, you can adjust and customize the phone tones for different events, environments, or caller groups.There are five preset profiles: General, Silent, Vibrate only, Outdoor and Headset.Each profile can be personalized except Silent and Vibrate only. Press the left soft key [Menu] and select Profiles using up/down navigation keys.Activate (Menu 7.X.1)1. A list of profiles is displayed.2. In the Profiles list, scroll to the profile you want to activate and press the left soft key [OK] or the OK key.3. Then, select Activate.Personalise (Menu 7.X.2)Scroll to the desired profile in the Profiles list. After pressing the left soft key or the OK key, select Personalise.The profile setting option opens. Set the option as required.► Call alert type: Set the alert type for incoming calls.► Ring tone: Select the desired ring tone from the list.► Ring volume: Set the volume of the ringing tone.► Message alert type: Set the alert type for messages.► Message tone: Select the alert tone for messages.► Message volume: Set the volume of message tone.► Keypad tone: Select the desired keypad tone.► Keypad volume: Set the volume of keypad tone.► Flip tones: Allows you to set the tone to sound when opening flip.](https://usermanual.wiki/LG-Electronics-USA/KP260D/User-Guide-959804-Page-44.png)
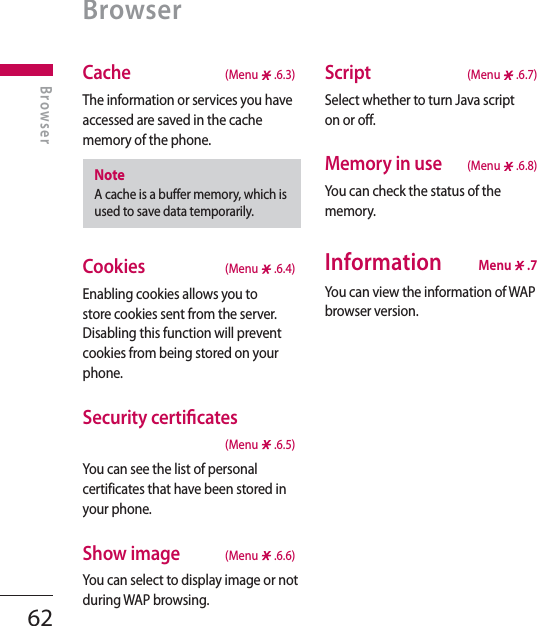
![53Contacts [Menu 8]ContactsSearch Menu 8.11. Select Search and enter the name that you want to search.Note► Instant searching is available by inputting the initial letter of the name.2. After finding the desired contact, you can make a call to the number by pressing the send key.3. If you want to edit, delete, or copy, select the left soft key [Options].The following menu will be displayed.► View: You can view each entry in details.► Edit: You can edit the selected contact.► Message: After you have found the number you want, you can send a text/multimedia message to the selected number.► Send via: You can send the data of the contacts via Text message or Multimedia message.► Delete: You can delete an entry.► Assign speed dial: Allows you to set the selected number to add a speed dial list.► Add new: After selecting the place (SIM/Phone) you want to save, you can add to the contacts.► Multi delete: Allows you to remove a number of files selected.► Copy to handset: You can copy an entry from phone to SIM or from SIM to phone.](https://usermanual.wiki/LG-Electronics-USA/KP260D/User-Guide-959804-Page-46.png)
![54Add new Menu 8.2You can register a new contact address. You can enter the name, different phone numbers and email addresses of a new contact. You can also assign the contact to groups, include a picture, assign a specific ringtone and enter the anniversary for the contact. You can enter and manage contact addresses depending on the memory usage.Note► The contact entry fields may differ when you register a contact address in the SIM.► Maximum stored name and number length depends on SIM card type.Speed dial Menu 8.3Using this menu you can manage speed dials.You can assign any of the keys to with a name list entry. You can call directly by pressing this key.1. Open the Contacts first by pressing the right soft key [Contacts] in standby mode.2. Scroll to Speed dial, then press the left soft key [OK].3. If you want to add speed dial, select <Empty> by pressing the left soft key [Assign]. Then, you can search the name in the contacts.4. After assigning the number as speed dial, you can change and delete the entry. You can also make a call or send a message by this number.Caller groups Menu 8.4You can list up to the members per each group. In the handset memory, there are 7 default groups: Family, Friends, Colleagues, VIP, Group 1, Group 2, and Group 3.Select the group name that you want to manage by pressing the left soft key [Option]. The following submenus will be displayed.ContactsContacts](https://usermanual.wiki/LG-Electronics-USA/KP260D/User-Guide-959804-Page-47.png)
![56Settings Menu 8.7View options (Menu 8.7.1)You can set the contact display option.► Names only: Set the contact information with only name.► Name and Number: Set the contact information with name and number.► With pictures: Set the contact information with picture.Information Menu 8.8Service dial number (Menu 8.8.1)You can view the list of Service Dialing Numbers (SDN) assigned by your service provider (if supported by the SIM card).Own number (Menu 8.8.2)(SIM dependent)You can save and check your own number in the SIM card.Business card (Menu 8.8.3)This option allows you to create your own business card featuring name, any numbers and email. To create a new business card, press the left soft key [New] and enter the information into the fields. If you want to edit, delete or to send a business card, select the left soft key [Options].ContactsContacts](https://usermanual.wiki/LG-Electronics-USA/KP260D/User-Guide-959804-Page-49.png)
![57Fun & ToolsFun & Tools [Menu 9]Favorites Menu 9.1This option allows you to add your favorites on the current list.Alarm clock Menu 9.2You can set the alarm to sound at a specified time.1. If there is no alarm, press the left soft key [New] to add a new alarm.2. Set or cancel the alarm using the options for specifying whether the alarm is on or by choosing the alarm time.3. Select the repeat period: Once, Daily, Mon~Fri, Mon~Sat, Sat~Sun.4. Select the alarm tone by using Options → Sounds. You can press the up/down navigation keys and select the sound you want, then press the left soft key [OK].5. Edit the title and press the left soft key [Save].Calculator Menu 9.3The calculator module allows you to perform basic arithmetic functions such as addition, subtraction, multiplication, and division as well as some scientific functions.1. You can enter numbers by using the number keys, and the operators by using navigation key.Note► To erase any mistake or clear the display, use the key.► To include a decimal point, press the key.► To include parentheses, press the key.2. To calculate the result, press the OK key.3. After calculation, press the key to return to the initial state.](https://usermanual.wiki/LG-Electronics-USA/KP260D/User-Guide-959804-Page-50.png)
![58Stopwatch Menu 9.4This menu allows you to record the elapsed time of an event.1. Press the left soft key [Start] to take time and record the lap time by pressing the right soft key [Lap].2. Press the left soft key [Stop] to ascertain the record of lap time.3. Press the right soft key [Reset] to default condition.Unit converter Menu 9.5This converts any measurement into a unit you want. There are 7 types that can be converted into units: Currency, Area, Length, Weight, Temperature, Volume and Velocity.World time Menu 9.6The World clock function provides time information on major cities worldwide.You can select the following options by pressing the left soft key [Options].► Change city: You can change the current city.► New city: You can add a desired city.Fun & ToolsFun & Tools](https://usermanual.wiki/LG-Electronics-USA/KP260D/User-Guide-959804-Page-51.png)
![59BrowserBrowser [Menu ]You can access various WAP (Wireless Application Protocol) services such as banking, news, weather reports and flight information. These services are specially designed for mobile phones and they are maintained by WAP service providers.Check the availability of WAP services, pricing and tariffs with your network operator or the service provider whose service you wish to use.Service providers will also give you instructions on how to use their services.Once connected, the homepage is displayed. The content depends on the service provider. To exit the browser at any time, press the key. The phone will return to the idle menu.Navigating with the WAP browserYou can surf the Internet using either the phone keys or the WAP browser menu.Using the phone keysWhen surfing the Internet, the phone keys function differently to phone mode.Icon Description Scrolls each line of the content areaReturns to the previous pageSelect options and confirm actionsUsing the WAP browser menuThere are various menu options available when surfing the Mobile Web.NoteThe WAP browser menus may vary, depending on your browser version.](https://usermanual.wiki/LG-Electronics-USA/KP260D/User-Guide-959804-Page-52.png)
![60Home Menu .1Connects to a homepage. The homepage will be the site which is defined in the activated profile. It will be defined by the service provider if you have not defined it in the activated profile.Bookmarks Menu .2This menu allows you to store the URL of favorite web pages for easy access at a later time.To create a bookmark1. Press the left soft key [Options].2. Select New bookmark and press the OK key.3. After entering the desired name and URL, press the OK key.After selecting a desired bookmark, the following options are available.► Connect: Connects to the selected bookmark.► View: You can see the selected bookmark.► Edit: You can edit the selected bookmark.► Delete: You can delete the selected bookmark.► New bookmark: Select this to create a new bookmark.► New folder: Select this to create a new folder.► Move: You can move the selected bookmark to sub folder.► Copy: You can copy the selected bookmark.► Send URL via: Sends the selected bookmark via Text message, Multimedia message or E-mail.► Multi delete: Allows you to select and delete saved bookmarks.► Delete all: Deletes all the bookmarks.BrowserBrowser](https://usermanual.wiki/LG-Electronics-USA/KP260D/User-Guide-959804-Page-53.png)
![61BrowserEnter address Menu .3You can connect directly to the site you want. After entering a specific URL, press the left soft key [Options] and select the Connect.History Menu .4This menu shows the recently browsed pages.Saved pages Menu .5The phone can save the page on display as an offline file.Settings Menu .6You can set the profile, cache and security related to internet service.Network profi le (Menu .6.1)A profile is the network information used to connect to the Internet.There are default profiles for some operators, stored in phone memory. It’s impossible to rename default profiles.Each profile has submenus as follows:► Activate: Activates the selected profile.► View: You can see the selected profile.► Edit: You can edit the selected profile.► New profile: You can add a new profile.► Delete: Deletes the selected profile from the list.View style (Menu .6.2)You can select the view mode you want.](https://usermanual.wiki/LG-Electronics-USA/KP260D/User-Guide-959804-Page-54.png)
![63MP3 playerMP3 player [Menu 0]The KP260d has an integrated MP3 player built-in. You can enjoy listening to MP3 music files on your phone using a compatible headset or via the internal loudspeaker.NoteBecause of the small dimension of the speaker, in some cases the audio could be distorted, especially at maximum volume and when there are lots of bass sounds. Therefore, we recommend you to use the stereo headset in order to appreciate the high quality of your music.The music player supports:• MPEG-2 Layer III, MPEG-2.5 Layer III: Sampling frequency up from 8KHz to 48KHz. Bit rate up to 320Kbps, stereo.• AAC: ADIF, ADTS formats (Sampling frequency from 8KHz to 48KHz)• AAC+: V1: (Bit rate 16~128Kbps)V2 : (Bit rate 16~48Kbps)(Sampling frequency from 8KHz to 48KHz)NoteKP260d doesn’t support the variable bit rate of all mentioned file types. Therefore, you can’t change the file from MP3 format to AAC.You can transfer MP3 files from a compatible PC to the memory in your phone using the Mass Storage.When you connect the phone to a PC using the USB cable the phone appears as a removable disk through windows explorer. When you go to disconnect the phone please eject the phone safely before disconnecting the USB cable.Note► You should copy MP3 to Sounds/ MP3 folder. If you copy another folder, you can’t see MP3 files.► The PC should run Windows 98 SE, Windows ME, Windows 2000, Windows XP operating system.► In case that any invalid file is included in the playlist, an error message will pop up and take you go back to the prior screen.](https://usermanual.wiki/LG-Electronics-USA/KP260D/User-Guide-959804-Page-56.png)
![65SettingsDate & Time Menu #.1You can set functions relating to the date and time.Set date (Menu #.1.1)You can enter the current date.Date format (Menu #.1.2)You can set the Date format such as YYYY/MM/DD, DD/MM/YYYY, MM/DD/YYYY. (D: Day / M: Month / Y: Year)Set time (Menu #.1.3)You can enter the current time.Time format (Menu #.1.4)Your can set the time format between 24 hours and 12 hours.Auto update (Menu #.1.5)Select On, the phone will automatically update the data and time.Languages Menu #.2You can change the language for the display texts in your phone. This change will also affect the language Input mode.Display settings Menu #.3Wallpaper (Menu #.3.1)You can select the background pictures in standby mode.Backlight time (Menu #.3.2)You can set the backlight duration of the display.Brightness (Menu #.3.3)You can set the brightness of LCD.Settings [Menu #]](https://usermanual.wiki/LG-Electronics-USA/KP260D/User-Guide-959804-Page-58.png)
![66Home screen shortcut (Menu #.3.4)You can set the functions of the 4 navigation keys for using shortcut in the idle mode.Theme (Menu #.3.5)You can set the screen theme to be displayed on the main screen.Menu style (Menu #.3.6)Your phone provides you with Grid view and List view menu themes. Set the menu style by scrolling and pressing the left soft key [OK].Greeting note (Menu #.3.7)If you select On, you can edit the text which is displayed in standby mode.Network name (Menu #.3.8)If this function is activated, network name will be displayed on LCD.Dial font color (Menu #.3.9)You can set the font color of the numbers which appear in the home screen when you type numbers.Connectivity Menu #.4Network (Menu #.4.1)You can select a network which the phone will be registered to, either automatic or manual.Network selection (Menu #.4.1.1)Usually, the network selection is set to Automatic.► Automatic: If you select Automatic mode, the phone will automatically search for and select a network for you. Once you have selected Automatic, the phone will be set to Automatic even if you turn the power off and on.SettingsSettings](https://usermanual.wiki/LG-Electronics-USA/KP260D/User-Guide-959804-Page-59.png)
![68- APN: Input the APN of the GPRS.- User ID: The users identify for your APN server.- Password: The password required by your APN server.- Primary server: Input the IP address of the primary DNS server you access.- Secondary server: Input the IP address of the secondary DNS server you access.USB connection (Menu #.4.2)You can choose one mode of Data service and USB Mass storage.► Mass storageYou can connect your phone to your PC, as a USB storage device, using the cable in three ways.1. Connect the phone to the PC when the idle(or Top menu) screen is displayed.2. Connect the phone while it is performing an operation or menu function, and then move to the idle(or Top menu) screen.3. Connect the phone while it is performing an operation or menu function, and then select the USB Mass Storage menu.When you have finished using the phone memory, click Exit and take the following steps.Caution!Before you remove the cable, it is necessary that you click Exit. Or, the integrity of transferred data is not guaranteed.1. Click on the notification area. [Unplug or Eject Hardware]2. Select USB mass Storage Device, click on Stop. The following message will appear: The USB mass Storage Device can now be safely removed from the system.3. Then remove the cable.SettingsSettings](https://usermanual.wiki/LG-Electronics-USA/KP260D/User-Guide-959804-Page-61.png)
![69Settings► Data serviceSelect the Data service menu to use the LG Mobile Sync program.Calls Menu #.5You can set the menu relevant to a call by pressing the left soft key [Select] in the Setting menu.Call divert (Menu #.5.1)The Call divert service allows you to divert incoming voice calls, fax calls, and data calls to another number. For details, contact your service provider.► All voice calls: Diverts voice calls unconditionally.► If busy: Diverts voice calls when the phone is in use.► If no reply: Diverts voice calls when you do not answer.► If out of reach: Diverts voice calls when the phone is switched off or out of coverage.► All data calls: Diverts to a number with a PC connection unconditionally.► All fax calls: Diverts to a number with a fax connection unconditionally.► Cancel all: Cancels all call divert service.The submenusCall divert menus have the submenus shown below.- Activate: Activate the corresponding service.To other number: Inputs the number for diverting.To favorite number: You can check recent 5 diverted numbers.- Cancel: Deactivate the corresponding service.- View status: View the status of the corresponding service.](https://usermanual.wiki/LG-Electronics-USA/KP260D/User-Guide-959804-Page-62.png)
![71SettingsSend DTMF tones (Menu #.5.7)You can send touch tones during an active call to control your voice mailbox or other automated phone services.Security Menu #.6PIN code request (Menu #.6.1)In this menu, you can set the phone to ask for the PIN code of your SIM card when the phone is switched on.If this function is activated, you’ll be requested to enter the PIN code.1. Select PIN code request in the security settings menu, and then press the left soft key [OK].2. Set On/Off.3. If you want to change the setting, you need to enter PIN code when you switch on the phone.4. If you enter wrong PIN code more than 3 times, the SIM will lock out. If the PIN is blocked, you will need to key in PUK code.5. You can enter your PUK code up to 10 times. If you put wrong PUK code more than 10 times, you can not unlock your SIM. You will need to contact your service provider.Phone lock (Menu #.6.2)You can use a security code to avoid unauthorized use of the phone. Whenever you switch on the phone, the phone will request security code if you set phone lock to When switch on.If you set phone lock to When SIM changed, your phone will request security code only when you change your SIM card.](https://usermanual.wiki/LG-Electronics-USA/KP260D/User-Guide-959804-Page-64.png)
![73SettingsChange codes (Menu #.6.5)PIN is an abbreviation of Personal Identification Number to prevent use by unauthorized person.You can change the access codes: Security code, PIN2 code, PIN code.1. If you want to change the Security code/PIN2 code input your original code, and then press the left soft key [OK].2. Input new Security code/PIN2 code and verify them.Flight mode Menu #.7This allows you to use only the phone s features that do not require the use of the wireless network when you are in an airplane or in places where the wireless network is prevented.If you set the flight mode on, the icon will be displayed on the screen instead of the network signal icon.► On: You cannot make (or receive) any calls, including emergency calls, or use other features that require network coverage.► Off: You can deactivate the flight mode and restart your handset to access the network.Power save Menu #.8Choose to switch the factory set power saving settings on or off.Master reset Menu #.9You can initialize all factory defaults. You need Security code to activate this function.Memory status Menu #.0You can check free space and memory usage of phone, SIM card and external memory (if inserted).](https://usermanual.wiki/LG-Electronics-USA/KP260D/User-Guide-959804-Page-66.png)
