LG Electronics USA KU450 PCS GSM Phone with Bluetooth User Manual KU450 ENG 070413
LG Electronics USA PCS GSM Phone with Bluetooth KU450 ENG 070413
UserManual.wiki
>
LG Electronics USA
>
KU450 User Manual
Users Manual
Navigation menu
Upload a User Manual
Namespaces
Wiki Guide
HTML
PDF
Info
Views
User Manual
Discussion / Help
Navigation
![8For Your SafetyImportant InformationThis user guide contains important information on the use andoperation of this phone. Please read all the informationcarefully for optimal performance and to prevent any damageto or misuse of the phone. Any changes or modifications notexpressly approved in this user guide could void your warrantyfor this equipment.Before You StartSafety InstructionsWARNING! To reduce the possibility of electric shock, do notexpose your phone to high humidity areas, such as thebathroom, swimming pool, etc.Always store your phone away from heat. Never store yourphone in settings that may expose it to temperatures less than32°F or greater than 104°F, such as outside during extremeweather conditions or in your car on a hot day. Exposure toexcessive cold or heat will result in malfunction, damageand/or catastrophic failure.Be careful when using your phone near other electronicdevices. RF emissions from your mobile phone may affectnearby in adequately shielded electronic equipment. Youshould consult with manufacturers of any personal medicaldevices such as pacemakers and hearing aides to determine ifthey are susceptible to interference from your mobile phone.Turn off your phone in a medical facility or at a gas station.Never place your phone in a microwave oven as this willcause the battery to explode.IMPORTANT! Please read the TIA SAFETY INFORMATION onpage 78 before using your phone.Safety InformationRead these simple guidelines. Breaking the rules may bedangerous or illegal. Further detailed information is given in thisuser guide.]Never use an unapproved battery since this could damagethe phone and/or battery and could cause the battery toexplode.]Never place your phone in a microwave oven as it willcause the battery to explode.]Do not dispose of your battery by fire or with hazardous orflammable materials.]Make sure that no sharp-edged items come into contactwith the battery. There is a risk of this causing a fire.]Store the battery in a place out of reach of children.]Be careful that children do not swallow any parts such asrubber plugs (earphone, connection parts of the phone,etc.). This could cause asphyxiation or suffocation.](https://usermanual.wiki/LG-Electronics-USA/KU450/User-Guide-783262-Page-4.png)
![9For Your Safety]Unplug the power cord and charger during lightning stormsto avoid electric shock or fire.]When riding in a car, do not leave your phone or set up thehands-free kit near to the air bag. If wireless equipment isimproperly installed and the air bag is activated, you may beseriously injured.]Do not use a hand-held phone while driving.]Do not use the phone in areas where its use is prohibited.(For example: aircraft).]Do not expose the battery charger or adapter to directsunlight or use it in places with high humidity, such as abathroom.]Never store your phone in temperatures less than- 4°F orgreater than 122°F.]Do not use harsh chemicals (such as alcohol, benzene,thinners, etc.) or detergents to clean your phone. There is arisk of this causing a fire.]Do not drop, strike, or shake your phone severely. Suchactions may harm the internal circuit boards of the phone.]Do not use your phone in high explosive areas as the phonemay generate sparks.]Do not damage the power cord by bending, twisting, pulling,or heating. Do not use the plug if it is loose as it may causea fire or electric shock.]Do not place any heavy items on the power cord. Do notallow the power cord to be crimped as it may cause fire orelectric shock.]Do not handle the phone with wet hands while it is beingcharged. It may cause an electric shock or seriouslydamage your phone.]Do not disassemble the phone.]Do not place or answer calls while charging the phone as itmay short-circuit the phone and/or cause electric shock orfire.]Only use the batteries, antennas, and chargers provided byLG. The warranty will not be applied to products provided byother suppliers.]Only authorized personnel should service the phone and itsaccessories. Faulty installation or service may result inaccidents and consequently invalidate the warranty.]Do not hold or let the antenna come in contact with yourbody during a call.]An emergency call can be made only within a service area.For an emergency call, make sure that you are within aservice area and that the phone is turned on.](https://usermanual.wiki/LG-Electronics-USA/KU450/User-Guide-783262-Page-5.png)
![11For Your SafetyVehicle Mounted External Antenna(optional, if available)A minimum separation distance of 8 inches (20cm) must bemaintained between the user/bystander and the vehiclemounted external antenna to satisfy FCC RF exposurerequirements. For more information about RF exposure, visitthe FCC website at www.fcc.govFCC Part 15 Class B ComplianceThis device and its accessories comply with part 15 of FCCrules. Operation is subject to the following two conditions: (1) This device and its accessories may not cause harmfulinterference, and (2) this device and its accessories mustaccept any interference received, including interference thatmay cause undesired operation.Cautions for Battery]Do not disassemble.]Do not short-circuit.]Do not expose to high temperature: 60°C (140°F).]]Do not incinerate.Battery Disposal]Please dispose of your battery properly or bring to yourlocal wireless carrier for recycling.]Do not dispose in fire or with hazardous or flammablematerials.Adapter (Charger) Cautions]Using the wrong battery charger could damage your phoneand void your warranty.]The adapter or battery charger is intended for indoor useonly.Do not expose the adapter or battery charger to direct sunlightor use it in places with high humidity, such as the bathroom.](https://usermanual.wiki/LG-Electronics-USA/KU450/User-Guide-783262-Page-7.png)
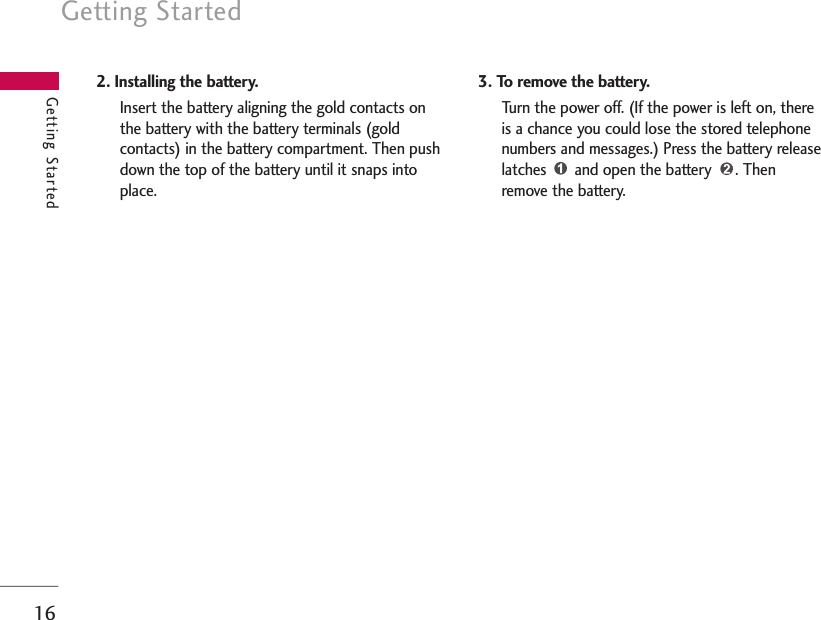
![15Getting StartedGetting StartedInstalling the USIM card and battery1. Installing the USIM card.Your USIM card contains your phone number, service details and contacts and must be insertedinto your handset.If your USIM card is removed then your handsetbecomes unusable (except for emergency calls)until a valid one is inserted. Always disconnectthe charger and other accessories from yourhandset before inserting and removing your USIMcard. Slide the USIM card into the USIM cardholder. Make sure that the USIM card is properlyinserted and the gold contact area on the card isfacing downwards. To remove the USIM card,press down lightly and pull it in the reversedirection.Note]The metal contact of the USIM card can easily be damagedby scratches. Pay special attention to the USIM card whilehandling. Follow the instructions supplied with the USIMcard.](https://usermanual.wiki/LG-Electronics-USA/KU450/User-Guide-783262-Page-12.png)
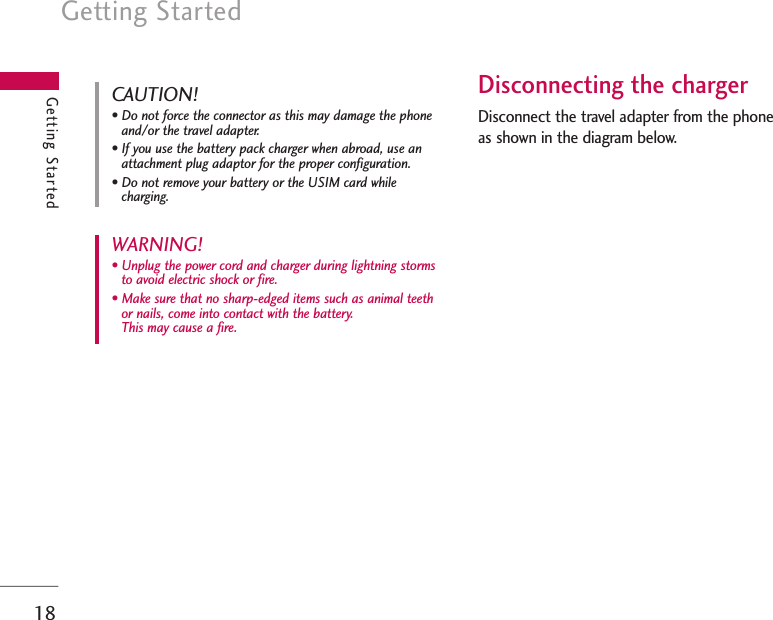
![17Getting StartedCharging the BatteryBefore connecting the travel adapter to the phoneyou must first install the battery.1. With the arrow facing you as shown in the diagrampush the plug on the battery adapter into thesocket on the left side of the phone until it clicksinto place.2. Connect the other end of the travel adapter to the mains socket. 3. The moving bars on the battery icon will stop after charging is complete.4. Ensure the battery is fully charged before usingthe phone for the first time.Note]Only use the charger included in the box.](https://usermanual.wiki/LG-Electronics-USA/KU450/User-Guide-783262-Page-14.png)
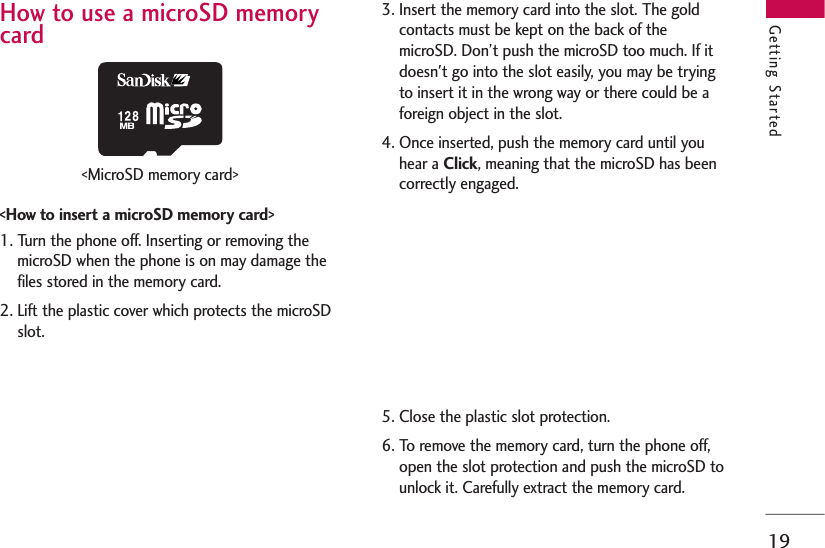
![20Getting StartedGetting StartedAttention:]Avoid using the Flash Memory Card when thebattery is low.]When writing to the card, wait for the operation tocomplete before removing the card.]The card is designed to fit easily into the systemone way only.]Do not bend the card or force it into the slot.]Do not insert any memory cards other than thosemade by microSD.]If the microSD has been formatted using FAT32,format the microSD using FAT16 again.For more information on the microSD, please refer tothe memory card instruction manual.Memory card formattingBefore you start to use the memory card you have toformat it. After you insert the memory card, selectMenu >Settings >Phone settings >Memorystatus >Format external memory, then press . This operation should only be done when you insertthe memory card for the first time. During formatting various folders will be created fordifferent data types.Turning the handset on/offTurning your handset onEnsure that your USIM card is in your handset andthe battery is charged. Press and hold until thepower comes on. Enter the USIM PIN code that wassupplied with your USIM card if the PIN coderequest is set to On. (Note: Please refer to page 71)After a few seconds you will be registered on thenetwork.Turning your handset off Press and hold until the power goes off. There may be a few seconds delay while the handsetpowers down.Do not turn the handset on again during this time.](https://usermanual.wiki/LG-Electronics-USA/KU450/User-Guide-783262-Page-17.png)
![21Getting StartedAccess codesYou can use the access codes described in thissection to avoid unauthorised use of your phone.The access codes (except the PUK and PUK2 codes)can be changed by using the Change codes feature[Menu #.1.4.3].PIN code (4 to 8 digits)The PIN (Personal Identification Number) codeprotects your USIM card against unauthorised use.The PIN code is usually supplied with the USIM card.When the PIN Code Request is set to On, yourphone will request the PIN code every time it isswitched on. When the PIN Code Request is set toOff, your phone connects to the network directlywithout the PIN code.PIN2 code (4 to 8 digits)The PIN2 code, supplied with some USIM cards, isrequired to access functions such as Fixed DialNumber. These functions are only available ifsupported by your USIM card.PUK code (4 to 8 digits)The PUK (PIN Unblocking Key) code is required tounblock a blocked PIN code. The PUK code may besupplied with the USIM card. If not, contact yournetwork operator’s customer service department forthe code. If you lose the code, contact your networkoperator’s customer service department.PUK2 code (4 to 8 digits)The PUK2 code, supplied with some USIM cards, isrequired to unblock a blocked PIN2 code. If you losethe code, contact your network operator’s customerservice department.Security code (4 to 8 digits)The security code prevents unauthorised use of your phone. The default security code is set to‘0000’ and the security code is required to delete allphone entries and to restore the handset to thefactory settings.](https://usermanual.wiki/LG-Electronics-USA/KU450/User-Guide-783262-Page-18.png)
![24General FunctionsGeneral FunctionsMaking and answering calls Making a voice call1. Enter the number including the full area code, or select the phone number from call logs bypressing .]To delete a digit press .To delete all digits press and hold .2. Press to make the call.3. Press to finish the call, or close the handset.Making a video callYou can make a video call in a 3G covered servicearea. If the called user has a 3G video phone in a 3Gcovered service area, the call will be established. You can also answer a video call for video incomingcall. To make/answer a video call, do the following.1. Input the phone number using the keypad, or select the phone number from the callsmade/received lists by pressing .]To correct mistakes, press briefly to deletethe last number, or press and hold to deleteall numbers.2. If you do not want to use the speakerphone,ensure you have the headset plugged in.3. To start the video function, press .]You will be notified that you will need to closeother applications to Make video call.4. Adjust the camera position if necessary.5. Press to finish the call, or close the handset.Note]The video call may take some time to connect. Please bepatient. The connection time will also depend on how quickly the other party answers the call. While the video call is connecting, you will see your own image; after theother party has answered, their image will be displayed onthe screen.Note]To activate the speakerphone during a call, press .](https://usermanual.wiki/LG-Electronics-USA/KU450/User-Guide-783262-Page-21.png)
![25General FunctionsMaking a voice/video call from ContactsIt is easy to call anyone whose number you havestored in your Contacts.1. Press to access the contacts list. 2. Scroll to the contact to make a call.3. Press to make a voice call. Press to make a video call. Or press the leftsoft key and select Make video call.4. Press to finish the call.Making international calls1. Press and hold for the international prefix.The ‘+’ character prefixes the international accesscode.2. Enter the country code, area code, and the phonenumber.3. Press .Adjusting the volumeDuring a call, if you want to adjust the earpiecevolume, use on the left side of the handset. In idle mode with the phone open, you can adjustthe key volume using .Answering a callWhen you receive a call, the phone rings and theflashing phone icon appears on the screen. If thecaller can be identified, the caller’s phone number (or name if stored in your Contacts) is displayed.1. Open the phone and press to answer anincoming call. If the answer mode is set to Pressany key, any key will answer a call except for .2. End the call by closing the handset or pressing .Note]You can answer a call while using Contacts or other menufeatures.]When the compatible headset is connected, you can alsoanswer a call using the headset key, as well as using thephone. To reject an incoming call, press .]You can mute the ringtone when a call comes in by pressingand holding the volume down side key.Note]To reject an incoming call, press or the right soft keytwice.]If you set Answer mode as Open flip (Menu #.5.0.4), you can answer the call simply by opening the phone.](https://usermanual.wiki/LG-Electronics-USA/KU450/User-Guide-783262-Page-22.png)
![27General FunctionsChanging the text input mode 1. When you are in a field that allows characters tobe entered, you will notice the text input modeindicator in the upper right corner of the LCDscreen.2. Press to switch between T9Abc, T9abc, Abc,abc and 123.Using the T9 ModeThe T9 predictive text input mode allows you toenter words easily with a minimum number of keypresses. As you press each key, the handset begins to display the characters that it thinks you are typingbased on a built-in dictionary. As new letters areadded, the word changes to reflect the most likelycandidate from the dictionary.1. When you are in the T9 predictive text inputmode, start entering a word by pressing keys to . Press one key per letter.]The word changes as letters are typed. Ignore what’s on the screen until the word istyped completely.]If the word is still incorrect after typingcompletely, press once or more to scrollthrough the other word options.ExamplePress to type Good.Press to get Home.]If the desired word is missing from the wordchoices list, add it by using the ABC mode.2. Enter the whole word before editing or deletingany keystrokes.3. Complete each word with a space by pressing .To delete letters, press . Press and hold downto erase entire words.Using the ABC ModeUse to to enter your text.1. Press the key labelled with the required letter:]Once for the first letter.]Twice for the second letter.]And so on.](https://usermanual.wiki/LG-Electronics-USA/KU450/User-Guide-783262-Page-24.png)
![28General FunctionsGeneral Functions2. To insert a space, press once. To deleteletters, press . Press and hold down toclear the display. Refer to the following table for more information onthe characters available using the alphanumeric keys.Using the 123 (Number) modeThe 123 mode enables you to enter numbers in atext message (a telephone number, for example).Press the keys corresponding to the required digitsbefore manually switching back to the appropriatetext entry mode.Using the symbol modeThe symbol mode enables you to enter varioussymbols or special characters. To enter a symbol,Options>Insert>Symbol. Use the navigation and numeric keys to select the desired symbol and press .Upper caseLower case. , ? ! ' " 1 - ( ) @ / : _. , ? ! ' " 1 - ( ) @ / : _A B C 2 À Á Â Ã Ä Å Æ Ça b c 2 à á â ã ä å æ ç D E F 3 È É Ê Ëd e f 3 è é ê ëG H I 4 Ì Í Î Ïg h i 4 ì í î ïJ K L 5 £j k l 5 £M N O 6 Ñ Ò Ó Ô Õ Ö Ø OEm n o 6 ñ ò ó ô õ ö ø oeP Q R S 7 ß $p q r s 7 ß $T U V 8 Ù Ú Û Üt u v 8 ù ú û üW X Y Z 9w x y z 9Space, 0Space, 0Characters in the order displayKeyNote]The characters assigned to the keys and their order ofappearance depends on the language selected using theoption Input method. The table above provides thecharacters set for English language.](https://usermanual.wiki/LG-Electronics-USA/KU450/User-Guide-783262-Page-25.png)
![30Entertainment EntertainmentGames & Applications Menu 1.1 You can easily download games and otherapplications in this menu. It has two folders, Gamesand Applications, as default. Each folder has anembedded link for downloading games orapplications. Please note that additional costs maybe incurred when using online services. You cancreate a folder using the left soft key [Options].Mobile TV Menu 1.2You can access live Vodafone TV channels and videoclips by selecting this menu. Contact your serviceprovider for further information.Java settings Menu 1.3Activating a profile1. Move the cursor to the profile which you wouldlike to activate.2. Press or select Activate from the Optionsmenu.Adding a new profile 1. Select Add new from the Options menu. The following items need to be configured.2. Press the right soft key [Done] to save anyconfiguration changes.You can edit or delete a profile by selecting Editand Delete from Options menu.Enter an account name for the profile.Service name Choose from the given list of connectionmodes. (Default is TCP with Proxy)Connection mode Enter the WAP Gateway IP address providedby the operator. (e.g. 195. 115. 025. 129)IP addressPort details are provided by the operator,depending upon the Connection mode.Proxy server port Access point setting for the correspondingservice. (For more details on adding or editinga new access point, refer to page 90.)Access point](https://usermanual.wiki/LG-Electronics-USA/KU450/User-Guide-783262-Page-27.png)
![31Vodafone live!Vodafone live!Homepage Menu 2.1You can launch the web browser and access thehomepage of the web service provided by Vodafone.]You can also directly access Vodafone live! bypressing the right soft key in idle mode.Enter URL Menu 2.2You can manually enter a URL address and access the associated web page.]To enter a symbol, press or the right soft key[Symbol] to display the Symbol table.]To switch input mode, press . History Menu 2.3Shows the recently-browsed pages.Bookmarks Menu 2.4You can store frequently accessed or favouriteURLs/Pages. Open, Send, Add new, Edit,Mark/Unmark or Delete operations can beperformed on Bookmarks. Several preconfiguredURLs are stored as bookmarks.Adding a new bookmark1. Press the right soft key [Add].2. Enter the title and associated URL information.3. Press the right soft key [Done] to save.Connecting to a desired bookmarkPress or select Open from the Options menu.Sending the bookmark to othersSelect Send from Options menu. You can send it viaMessage or Email.Deleting a bookmarkSelect Delete from Options menu. You can deletemultiple bookmarks using the Mark/Unmark option.](https://usermanual.wiki/LG-Electronics-USA/KU450/User-Guide-783262-Page-28.png)
![32Vodafone live!Vodafone live!Saved pages Menu 2.5The phone can save the page on display as an offlinefile. Up to 20 pages can be saved.Browser settings Menu 2.6You can change the settings for browser display,security, and certificates. Profiles (Menu 2.6.1)Select the appropriate profile by pressing . Thiswill activate the profile to initiate the browser launch.Security (Menu 2.6.2)CertificatesIf stored, a list of root/ca certificates required forWTLS/TLS can be found here. Certificates can beviewed from the list.Session clearSecure (WTLS/TLS) session data can be clearedusing this option. Session data should be cleared toestablish a new secure session.Character encoding (Menu 2.6.3)Sets the browser default character set to one of the following: Automatic, English(ASCII), English(ISO),English(LATIN), Unicode(UCS2 BE), Unicode(UCS2 LE), Unicode(UCS2 Auto),Unicode(UTF-16 BE), Unicode(UTF-16 LE),Unicode(UTF-16 Auto), Unicode(UTF-8).Scrolling control (Menu 2.6.4)Allows you to set the scroll speed by selecting the number of lines to scroll. Select one from Small(1 line), Medium(2 lines), Large(3 lines).Show image (Menu 2.6.5)Allows you to enable or disable the image displayduring browsing.Note]Enabling this function will delay displaying images until thecompletion of transmission. Disabling this function willprevent the browser from downloading images from theserver, thus allowing faster transmission.](https://usermanual.wiki/LG-Electronics-USA/KU450/User-Guide-783262-Page-29.png)
![34MusicMusicRecently played Menu 3.1This menu will be activated when there are sometracks currently played.All tracks Menu 3.2You can view the entire music files in thephone/external memory.Playlists Menu 3.3You can create your own playlists by choosing tracksfrom the All tracks menu list.Radio DJ Menu 3.4Song recognition Menu 3.5Selecting this menu starts dialling a number for songrecognition. For further information, please contactyour service provider.My wishlist Menu 3.6Music store Menu 3.7Connects to the Vodafone music download site.Note]Additional charges may be incurred when downloadingmusic. Contact your service provider for furtherinformation.](https://usermanual.wiki/LG-Electronics-USA/KU450/User-Guide-783262-Page-31.png)
![35CameraCameraStill camera Menu 4.1This application enables you to take a still picture. You can take a picture in the size you want and use it for the address book photo, home screen and other more general purposes. Once taken, the picture can be sent by Message, Postcard, Email or Bluetooth.1. Press the left soft key to access Options and set the desired environment as follows. ]Move between the options menus with / .]Select the desired value with / and confirm the selection with the left soft key [Select] or .Displays the currentcamera settings.You can switch cameraand the video recorderusing /.Press the to take a picture. The Picturesfolder is launched anddisplays existing pictures as thumbnails.You can view pictures by pressing .You can also send the selected picture toanother party via Message, Postcard,Email or Bluetooth.](https://usermanual.wiki/LG-Electronics-USA/KU450/User-Guide-783262-Page-32.png)
![36CameraCamera2. After finishing all the settings, press the right soft key [Close].3. Focus the camera on what you want to take and press .4. Press to save the picture. It is saved in the Pictures folder of My Files. You can directly send the picture via Message, Postcard, Email or Bluetooth by pressing the right soft key [Send].Night modeYou can take better pictures at night byselecting On.Frame ShotYou can apply one of 10 frame effects whentaking a picture. (available only in case of Wallpapersize)TimerYou can delay the camera shutter time. None, 3seconds, 5 seconds, 10 seconds“ ” is shown when the timer is activated.EffectNone, Black & White, Negative, SepiaSoundSelect the desired shutter sound.MemorySelect the desired memory, either HandsetorExternal.MirrorYou can activate the mirror effect by selectingOn.Size1280x960 ( ), 640x480 ( ), 320x240( ), Wallpaper ( ), 176x144 ( ),External display ( ), Contact ( )QualitySuper fine ( ), Fine ( ), Standard ( )MultishotOne, Three( ), Six ( ), Nine ( ) (Note: Available multishot depends on the size.)Zoomx1 ( ), x2 ( ) (Note: Available zoom leveldepends on the size.)]You can zoom in with / zoom out within preview mode.BrightnessFrom –2.0 to 2.0 at 0.5 intervals. The higherthe level, the brighter the screen. ]You can adjust the brightness using inpreview mode.You can adjust the tone of the backgroundphoto according to the weather.Auto, Daylight, Cloudy, Illuminate, IndoorsWhitebalanceNote]Press to go back to the preview mode without saving the picture.](https://usermanual.wiki/LG-Electronics-USA/KU450/User-Guide-783262-Page-33.png)
![37CameraVideo recorder Menu 4.2This application enables you to record a video clip. You can play and watch a saved video file in this menu. Oncerecorded, a video clip can be sent by Message, Email or Bluetooth.1. Press the left soft key to access Options and set the desired environment as follows. ]Move between the options menus with / .]Select the desired value with / and confirm the selection with the left soft key [Select] or .Displays the currentcamera settings.You can switch between cameraand the video recorder using/.Press the to record a video clip. The Videosfolder is launched anddisplays existing videos asthumbnails. You can view videos bypressing . You can also send theselected video to another party viaMessage, Email or Bluetooth.](https://usermanual.wiki/LG-Electronics-USA/KU450/User-Guide-783262-Page-34.png)
![38CameraCamera2. After finishing all the settings, press the right soft key [Close].3. Focus the camera on what to record and press to start recording. And press to stop recording.]You can pause the recording by pressing the right soft key [Pause].4. Press to save the video clip. It is saved in the Videos folder of My Files. You can directly send the video clip via Message, Email or Bluetooth by pressing the right soft key [Send].Size176x144 ( ), 128x96 ( )QualitySuper fine ( ), Fine ( ), Standard ( )Zoomx1 ( ), x2 ( ) (Note: Available zoom leveldepends on the size.) ]You can zoom in with / zoom out within preview mode.BrightnessFrom –2.0 to 2.0 at 0.5 intervals. The higherthe level, the brighter the screen. ]You can adjust the brightness using inpreview mode.You can adjust the tone of the backgroundvideo according to the weather.Auto, Daylight, Cloudy, Illuminate, IndoorsNight modeYou can take better shots at night by selectingOn.EffectNone, Black & White, Negative, SepiaDurationSelect the desired recording time. Message, 30 seconds, 1 minute, 2 minutes, 5minutesand 60 minutesMemorySelect the desired memory, either HandsetorExternal.MirrorYou can activate the mirror effect by selectingOn.SoundDecide whether to record the sound or not.WhitebalanceNote]Press to go back to the preview mode without saving the video clip.](https://usermanual.wiki/LG-Electronics-USA/KU450/User-Guide-783262-Page-35.png)
![39Create new Menu 5.1Message (Menu 5.1.1)You can write and edit a message containing a combination of text, image, video and audio.1. Enter your message in the Message field.Option menus in Message field]Insert: You can perform the following actions:1. Pictures: You can insert an image. (One imageper slide)2. Take Picture: The camera module opens and you can take a picture. The picture is theninserted in the message window. (One pictureper slide)3. Videos: You can insert a video clip. (One video clip per slide)4. Take Video: The video recorder module opensand you can record a video. The recordedvideo is inserted in the message. (One videoclip per slide)5. Sounds: You can insert a sound file. (Onesound per slide)6. Record Sound: The voice recorder moduleopens and you can record a sound. Therecorded sound is inserted in the message.(One sound per slide)7. Contact details: You can add a name and/or a number stored in the Contacts. Make yourselection to send either the Name, Number orName & Number and press . The Contactslist opens and you can search the desiredcontact to be inserted.8. Templates: You can insert a text templatesaved on the phone. After selecting one, press. The selected template is inserted into theMessage window.9. Cc: Select this to insert Cc.0. Subject: Select this to insert a subject.. New slide: Select this to add a new slide.#. Symbol: You can insert symbols. Afterentering the corresponding number keys, press .MessagingMessaging](https://usermanual.wiki/LG-Electronics-USA/KU450/User-Guide-783262-Page-36.png)
![Messaging40Messaging]Add recipients: You can add recipients fromyour Contacts or enter the number directly.]Send: Select this to send the created message.]Save to drafts: Saves the message to drafts.]Input method: Select the desired dictionarymode.]Add to dictionary: You can add a word to thedictionary.2. Press the right soft key [Continue]. You can addrecipients from Contacts or enter the numberdirectly. (You can enter up to 10 numbers.) Option menus in To field]Add recipients: You can add recipients fromyour Contacts or enter the number directly.]Send: Select this to send the message.]Save to drafts: Saves the message to drafts.3. Press the right soft key [Send] to send themessage. The message will automatically be savedin the Sent messages folder. If the message hasnot been sent, it will remain in the Outbox with afailed status.E-Mail (Menu 5.1.2)To send/receive an email, you should set up theemail account. (Refer to page 48-50 for how to setup an E-mail account.)1. Enter the email addresses of the recipients in theTo, Cc, Bcc fields. You can search the Contacts bypressing .2. Move the cursor to the Subject field and key inthe subject. 3. You can enter the message contents by movingthe cursor to the Message field.4. Use the following functions by using the left softkey [Options].Note]Enter the reference email address to forward the email inCc(Carbon copy) field.]Enter a hidden reference email address to forward the emailwithout forwarding information in Bcc(Blind Carbon Copy)field.]Only valid email addresses are allowed for the recipient (To),reference address (Cc) and hidden reference address (BCC)fields. When an email address has been specified, anotherfield where you can specify another address appears. Youcan specify up to 20 recipients for the To and Cc addressfields and 10 recipients for the BCC address field.](https://usermanual.wiki/LG-Electronics-USA/KU450/User-Guide-783262-Page-37.png)
![41Messaging]Insert: Select this menu to insert specialcharacters, templates, and contacts. It is alsopossible to attach multimedia files (pictures,videos and sounds).]Add recipients: Select this menu to insert emailaddresses saved in Contacts. (Only shown inOption menu when cursor is located inTo/Cc/Bcc fields.)]Send: Sends the created email.]Save to drafts: Select this menu to save themessage in Drafts.]Preview: You can preview the created emailbefore sending it.]View attachment: Shows the attached files.(This item is only available in Option menu whensome files have been attached.)]Input method: Select the desired dictionarymode.]Add to dictionary: You can add a new word tothe dictionary.]Set mail priority: You can configure the priorityof the email you wish to send.5. When you have finished writing an email, press theright soft key [Send] to send the email.Inbox Menu 5.2 1. You can view saved messages. Select a messageand then press to view the message.2. You can view the previous or next message byusing / .3. To view a multimedia message (Notification),select Retrieve in the message notification viewscreen. Then the file is transmitted and you canview the file when the transmission is complete.You can use the following functions by using theleft soft key [Options] in the Inbox.]View: Opens the selected message.]Reply: Creates a reply to the sender or allrecipients of the selected message.]Forward: Forwards the selected message. Note]Not supported for multimedia message (Notification) andWAP push messages.](https://usermanual.wiki/LG-Electronics-USA/KU450/User-Guide-783262-Page-38.png)
![42MessagingMessaging]Make video call: You can make a video call.]Delete: Deletes the current message.]Create new message: You can write a newmessage or an Email.]Mark/Unmark: You can select one or moremessages for multiple deletion.]Filter: Displays messages by desired messagetypes.]Copy: In case of SMS, you can copy themessage into handset or USIM. ]Move: In case of SMS, you can move themessage into handset or USIM. ]Message info.: You can check the message type,date and time and where it is saved.Drafts Menu 5.3 You can view saved messages. Select a message andthen press to edit the message.You can use the following functions by using left softkey [Options].]Edit: You can edit messages.]Delete: Deletes the selected message.]Create new message: You can write a newmessage or an Email.]Mark/Unmark: You can select one or moremessages for multiple deletion.]Filter: Displays messages by desired messagetypes.]Message info.: You can check the message type,date and time and where it's saved.Outbox Menu 5.4 The Outbox is a temporary storage place formessages waiting to be sent. Failed messages are alsoplaced in Outbox. For example, Emails will be placedin Outbox if the Email account is not correctlyconfigured.1. Select a message and then press to view themessage.Note]You can check the saved Emails in Email [Menu 5.6].](https://usermanual.wiki/LG-Electronics-USA/KU450/User-Guide-783262-Page-39.png)
![43Messaging2. You can use the following functions by using theleft soft key [Options].[For sending / waiting messages]]Create new message: You can write a newmessage or an Email.]Cancel: You can stop sending/waiting status.]Message info.: You can check the message type,date and time and where it's saved.[For sending a failed message]]Resend: Resends the selected message.]Forward: Forwards the selected message.]Edit: You can edit the selected message.]Delete: Deletes the current message.]Create new message: You can write a newmessage or an Email.]Mark/Unmark: You can select one or moremessages for multiple deletion.]Message info.: You can check the message type,date and time and where it's saved.Sent messages Menu 5.5 Shows the messages you sent (Message/ Postcard/Email).[Options]]View: Opens the selected message.]Reply: Creates a reply to sender or all recipients ofthe selected message.]Forward: Forwards the selected message.]Delete: Deletes the current message.]Edit: You can edit the selected message.]Create new message: You can write a newmessage.]Save number: Save the sender's number.]Mark/Unmark: You can select one or moremessages for multiple deletion.]Filter: Displays messages by desired messagetypes.]Copy: In case of SMS, you can copy the messageinto handset or USIM.](https://usermanual.wiki/LG-Electronics-USA/KU450/User-Guide-783262-Page-40.png)
![44MessagingMessaging]Move: In case of SMS, you can move the messageinto handset or USIM.]Message info.: You can check the message type,date and time and where it is saved.E-Mail Menu 5.6 Viewing email message list1. Select an email account and then press toview the received email list.2. Using the right soft key [Retrieve], you canretrieve a new email list from the email server ofthe selected account.3. In email list, you can use the following functionsby using the left soft key [Options].]View: Opens selected email. ]Reply: Creates a reply to the selected email.]Forward: Forwards the selected email messageto others.]Retrieve: Retrieves new email messages.]Delete: Deletes the email.]Create new message: Creates a new messageor Email.]Save address: Save sender's address toContacts.]Mark/Unmark: Use mark/unmark option formultiple deletion.]Set as read/unread: You can set the selectedemail to read or unread.]Message info.: Brief information on themessage including size, type, date andfilenames.Viewing an email message1. Select one of the received emails and press theOpen key to receive the contents of the email.2. The contents of the received email areautomatically displayed in the View screen.3. You can view the contents of the previous or nextemail by using / .4. In the email View screen, you can select thefollowing functions by using the left soft key[Options].](https://usermanual.wiki/LG-Electronics-USA/KU450/User-Guide-783262-Page-41.png)
![45Messaging]Reply: Creates a reply to the selected email. ]Forward: Forwards the selected email messageto others.]Delete: Deletes the email.]Save address: Saves the sender's address toContacts.]Create new message: Creates a new message.]Use: Extracts the number, email address or URLfrom email message.]View attachment: Shows the attached file.]View to address: Shows the email addresses ofthe recipients and reference (Cc).]Message info.: Brief information on themessage including size, type, date andfilenames.Templates Menu 5.7 Text templates (Menu 5.7.1) You can add, edit, and delete frequently used usefulphrases using the left soft key [Options].Multimedia templates (Menu 5.7.2) You can create, edit and view available templateswhen creating multimedia messages. Five types oftemplate (Birthday, Greeting, Holiday, Thanks, Sorry)are saved by default.The following options are available.]Add new: You can create a new multimediatemplate.]Write multimedia message: Creates a multimediamessage with the selected template.]View: Displays the selected template.]Edit: Edits the selected template.]Delete: Deletes the selected template. (Notavailable for default five templates)Media Album Menu 5.8 (Note: This service is not available in all countries. Please contact your service provider for further information.)Accessses the remote media album.Note]Depending on your service provider, useful phrases aresaved as a default.](https://usermanual.wiki/LG-Electronics-USA/KU450/User-Guide-783262-Page-42.png)
![46MessagingMessagingMessaging settings Menu 5.9SMS (Menu 5.9.1)You can configure text message related options.1. Text message centre: Input the address of theText message centre.2. Delivery report: By enabling this option, you canverify whether your message has been sentsuccessfully.3. Validity period: This network service allows you toset how long your text messages will be stored atthe message centre.4. Message types: Text,Voice,Fax,X.400,Email Usually, the type of message is set to Te x t . You can convert your text into alternative formats.Contact your service provider for the availability of this function.5. Character encoding: Auto/Default alphabet/Unicode.]Auto(default):Message with single bytecharacter is normally encoded in Defaultalphabet(GSM7). Message with double-bytecharacter is automatically encoded inunicode(UCS2).]Default alphabet: Message with even doublebyte character is encoded in single byte. Pleasenote that double byte characters with accentmay be converted into single byte characterwithout accent.]Unicode: Message is encoded in double byte.Please note that you may be charged double.6. Send long text as: Select a long text message asMultiple SMS or MMS.MMS (Menu 5.9.2) You can configure Multimedia message relatedoptions.1. Retrieval mode: You can set the retrieval modeusing Home network and Roaming networkrespectively. If you select Automatic, you willreceive multimedia messages automatically. If youselect Manual, you will only receive a notificationmessage in the inbox and then you can decidewhether to download multimedia messages or not.2. Delivery report: Allows you to determine whetherto request a delivery confirmation mail to arecipient, and whether to allow sending a deliveryconfirmation mail to a sender.](https://usermanual.wiki/LG-Electronics-USA/KU450/User-Guide-783262-Page-43.png)
![47Messaging]Request report: Determines whether to request adelivery confirmation mail for a Multimedia message.]Allow report: Determines whether to allowsending a delivery confirmation mail for adelivery confirmation mail request.3. Read reply: Allows you to determine whether torequest a read confirmation mail to a recipient,and whether to allow sending a read confirmationmail to a sender.]Request reply: Determines whether to request aread confirmation mail for a Multimedia message.]Allow reply: Determines whether to allowsending a read confirmation mail for a readconfirmation mail request.4. Priority: You can select the priority level of themessages (Low, Normal and High).5. Validity period: Allows you to configure the termof validity for a message when transmitting amultimedia message. The message would be savedin the multimedia message server only for theconfigured term.6. Slide duration: Allows you to configure theduration of each page when writing the message.7. Delivery time: Configures the delivery time ofmessage to the recipient. The Multimedia messagecentre will deliver the message after the deliverytime.8. Multimedia msg. centre: Allows you to configurenetwork information such as the MMSC and theWAP gateway, to send a multimedia message.Using the left soft key [Options], you can activate,add or delete a profile. A profile name selected by acheckmark is the currently configured value. You canview and edit the contents of the profile in edit modeby pressing the right soft key [Edit]. The edit screenalso appears when creating a new profile underOptions. The meaning of each item is given below.]Title: Profile name.]MMSC URL: Enter the multimedia messagecentre URL.]MMS Proxy: Enter the WAP gateway addressand port number.]Connection mode: Select one of theconnection mode. (TCP with Proxy, TCP withoutProxy, UDP)]Access points: Specify the access point name.(See WAP connection settings.)](https://usermanual.wiki/LG-Electronics-USA/KU450/User-Guide-783262-Page-44.png)
![48MessagingMessagingPress the right soft key [Done] to save the changesand complete Multimedia msg centre setting.If you have made the changes, press the right softkey [Done] to save the changes and exit.E-Mail (Menu 5.9.3) You can configure settings for receiving andtransmitting emails.1. Vodafone Mail: Access to Vodafone Mail.(Note: This service is not available in all countries. Please contact your service provider for furtherinformation.)2. Allow reply email: Determines whether to allowsending a read confirmation mail for a readconfirmation mail request.3. Request reply email: Determines whether torequest a read confirmation mail.4. Auto retrieve: You can configure Auto retrieve toretrieve emails automatically from the incoming mailserver. When a new email arrives, an icon appears atthe top of the screen. You can select the autoreceiving time slot to Off, 15 minutes, 30 minutesor 1 hour. Please note that additional charges maybe incurred using the Auto retrieve feature.5. Include message in Fwd. & Reply Determines whether to include the received messagewhen you forward the message or reply to it.6. Signature: You can configure a text signature tobe attached to the end of an email. The configuredsignature text is automatically or manuallyattached to the end of the email when it is sent.7. Priority: You can select the priority level of Emails(Low, Normal and High).8. Email accounts: You can create or configure anemail account including the email server and userID. You can edit a selected email account bypressing the right soft key [Edit]. You can selectan email account to be used to send an emailusing . You can select the following functionsusing the left soft key [Options].]Add new: Create a new email account.]Edit: To edit the selected email account.]Activate:Activates the selected account foroutgoing mail.]Delete: Deletes a selected email account. Allthe emails included in the account will bedeleted.](https://usermanual.wiki/LG-Electronics-USA/KU450/User-Guide-783262-Page-45.png)
![49MessagingCreating a new email account1. Select Add new from the Email account menuoptions.2. The following items need to be configured.Enter the user name of the email account.UsernameEnter a title.TitleEnter the email account password.PasswordEnter the email address for outgoing mail.Email addressEnter the email address to reply to your email.Reply email addressEnter the outgoing email server.Outgoing mail serverEnter the incoming email server.Incoming mail serverEnter the mail server port number. In general, theSMTP (Outgoing mail server port number) is 25.Enter the mail server port number. In general,the incoming mail server port number is110(POP3) or 143(IMAP4).Incoming server portSelect the maximum email receive size using. The permissible maximum receive size isno more than 1MB.Maximum receive sizeSMTP port numberSelect the email inbox type either POP3 orIMAP4 using .Determine whether to leave a copy ofmessages on the incoming server or not using. When the mailbox type is set to IMAP4,a copy of messages are always saved to theserver.Mailbox typeSave to serverSelect where to save the sent mails (when themailbox type is set to IMAP4). When themailbox type is POP3, sent mails are alwayssaved into handset.Save sent mail intoSelect an access point to connect to theInternet. You can select a configured accesspoint using .Access pointsDecide whether to activate Auto retrieve ornot using . You can set the autoreceiving time slot using the Auto retrieve[Menu 5.9.3.4]. (See page 48.)Auto retrieveDecide whether the outgoing mail server torequire authentication or not using .When the SMTP authentication is set to On,you can enter the SMTP Username and SMTPPassword for SMTP authentication.SMTP authenticationDecide whether to activate APOP secure loginor not using . When the mailbox type isIMAP4, APOP secure login is always set toOFF.APOP secure login](https://usermanual.wiki/LG-Electronics-USA/KU450/User-Guide-783262-Page-46.png)
![3. Press the right soft key [Done] to complete theemail account configuration.Editing an email account1. Select a desired email account from the emailaccount list and press the right soft key [Edit].2. You can edit desired fields by moving the cursorup and down.3. When configuration is complete, press the rightsoft key [Done] to complete the email accountconfiguration.Info. service (Menu 5.9.4) ]Cell broadcast: You can set the reception status.]Channels: You can add or modify the channels.]Languages: You can select the language you wantby pressing . Then, the info service message willbe shown in the language that you have selected.Service message (Menu 5.9.5) You can configure the service message receipt option. Messaging50MessagingNote]When you try to change the mailbox type, all emailsdownloaded before would be deleted.](https://usermanual.wiki/LG-Electronics-USA/KU450/User-Guide-783262-Page-47.png)
![My FilesPictures Menu 6.1 The Pictures folder consists of embedded links for downloading pictures through the Internet andDefault images.Pictures taken using the camera are stored in thePictures folder and you can create new folders tomanage them. You can also save selected files asanimated Gifs and send multiple files to other people.When a file is selected, the following options will bedisplayed by pressing the left soft key [Options].]View: You can view the selected picture.]Create new folder: You can create a new folderwithin the folder currently selected.]Send: You can send the selected image viaMessage, Postcard, Email or Bluetooth.]File- Move: Enables the file to be moved to otherfolder.- Copy: Enables the file to be copied to otherfolder.- Rename: You can rename the image.- Edit: Enables the image to be edited.- Make GIF animation: You can create an animatedGIF file with different photos (up to 10 files of176X220 resolution with a 2Mbyte file size limitfor display).- Info.: Shows information on the selected image file.]Delete: Deletes the selected image.]Mark/Unmark: Using the Mark function, you cansend, delete, move and copy multiple files.]Main display: You can set an image as the maindisplay theme (Home screen, Outgoing call, Startup image, Power off image).]External display: You can set an image as theexternal display theme (Home screen, Outgoingcall).]Slide show: You can start a slide show.]Sort by: You can sort the files by name, date, orfile type.]List view/Grid view: You can view the images as aList view or Grid view.]Memory status: You can view the memory status(handset or external memory card).51My Files](https://usermanual.wiki/LG-Electronics-USA/KU450/User-Guide-783262-Page-48.png)
![My Files52My FilesSounds Menu 6.2 The Sounds folder consists of embedded links fordownloading ringtones and music as well as folderscontaining the Default sounds and Voice recordings.Here you can manage, send or set sounds asringtones.Videos Menu 6.3Here you can manage or send downloaded orcaptured videos clips. Videos recorded using thevideo recorder are stored in the Videos folder. There is as well an embedded link for downloadingvideos.The following are available using the left soft key[Options] in the Video list.]Play: Plays the video.]Create new folder: You can create a new folder.]Send: You can send the selected video clip viaMessage, Email or Bluetooth if not protected byDigital Rights Management (DRM).]File- Move: Moves the file into handset memory orexternal memory.- Copy: Copies the file in handset memory orexternal memory.- Rename: You can rename the video.- Info.: Shows information on the selected video file.]Delete: Deletes the selected video.]Mark/Unmark: Using the Mark function, you cansend, delete, move and copy multiple files.]Sound theme: You can set a video as the voiceringtone or video ringtone.]Sort by: You can sort files by name, date, or filetype.]List view/Grid view: Displays the video files as a List view or Grid view.]Memory status: Displays the memory status(handset or external memory card).You can view a video using the video player. Video files are displayed in the list as thumbnails. You can select a desired video by using the / ,/ . Select a desired video and select Play toview the recorded video.Select the right soft key [Send] to attach theselected video to a message, Email or Bluetooth.](https://usermanual.wiki/LG-Electronics-USA/KU450/User-Guide-783262-Page-49.png)
![53My FilesWhen option 1. Play is selected, the video clip willbe played with the Media Player. To pause theplayback, press during the playback. To resumethe paused playback, press once again.To capture the screen shot, press the right soft key[Capture] when the playback is paused.To view the current playback in full screen, press theright soft key during the playback.To return to the previous screen size, press the rightsoft key once again in full screen mode.When viewing video clips in the Media Player, thefollowing options are available:]Pause/Play: You can play or pause playing a filefor a moment.]Send: You can send the video via Message, Emailor Bluetooth if the file is not protected by DigitalRights Management (DRM).]Go to list: Goes back to the list.]Delete: Deletes the selected video.]Sound theme: You can set a video as the voiceringtone or video ringtone.]Wide view: You can view the video in wide viewmode.]Mute/Unmute: If the Volume is set to more than0, Mute mode is activated and if the Volume is setto 0, the Unmute mode is activated. ]Capture: You can save what is on the pausedscreen as an image file (only possible in Pausemode).]Set repeat: You can set the repeat option(None/Current file/All files).]Move to file- Previous file: Plays the previous video file.- Next file: Plays the next video file.]Player skin: You can select the player skinbetween Default skin and Cool summer.]File info.: You can check information on files beingplayed (File name, Size, Date, Type, Duration,Protection).](https://usermanual.wiki/LG-Electronics-USA/KU450/User-Guide-783262-Page-50.png)
![Games & Applications Menu 6.4 You can easily download games and otherapplications in this menu. It has two folders, Gamesand Applications, as default. Each folder has anembedded link for downloading games orapplications. Please note that additional cost may beincurred when using online services. You can create afolder using the left soft key [Options].Bluetooth data Menu 6.5 The files received using Bluetooth are saved in thisfolder. You cannot create a sub-folder within theBluetooth data folder.You cannot copy or move files that are not managedby My Files.The options displayed depend on the type of fileselected. For instance, in case of an image, thefollowing functions are supported.]View/Edit/Move/Copy/Delete/Rename file(s).]Mark/Unmark one or all file(s).]Send a file via MMS, Email or Bluetooth if notprotected by Digital Rights Management (DRM).]If relevant, you can set an image as the maindisplay theme.]If relevant, start or set (normal or full screen, at what pace) a slide show.]If relevant, create an animated GIF file withdifferent pictures.]Sort the files by name, date, or file type.]Check the memory status (handset or externalmemory).]View file information.Other files Menu 6.6 Other files except pictures, sounds, videos, games &applications are stored in this folder. My Files54My FilesNote]For the image files of which resolution is 640x480 orabove, you can send them via Postcard.](https://usermanual.wiki/LG-Electronics-USA/KU450/User-Guide-783262-Page-51.png)
![Alarms Menu 7.1 If you set the alarm, the appears on the indicatorbar. The specified alarm sounds at the scheduledtime. Press to stop the alarm, and the alarm isreleased. Press the right soft key [Snooze] andchoose the snooze interval. The alarm sound stopsand resumes after the selected Snooze duration. Youcan configure up to 5 alarms.1. Select your desired alarm to configure in the alarmlist. If there is no alarm, press the right soft key[Add] to add a new alarm.2. Set/Cancel alarm: Set or cancel the alarm usingthe options for specifying whether the alarm is onor by choosing the alarm time.3. Input alarm time: Input your desired alarm timeby specifying Hour and Minute. Choose either‘AM’ or ‘PM’ which is visible if 12 hour format isspecified for the phone.4. Select repeat mode: Select the desired repeatmode using / or select the desired onefrom the list by pressing .5. Select bell: Select the bell to ring at the alarmtime using / or opening the list bypressing .6. Input memo: Input alarm name.7. Snooze: You can set the snooze duration for thealarm.8. When you have finished setting the alarm, pressthe right soft key [Done].Calendar Menu 7.2 Schedule inquiry and search1. Reference by Months You can refer to your schedule by months. Thecursor is on the current date, and the registereddate is marked. The schedule saved for the date where the cursoris located is represented by an icon. Pressing theshortcut key moves to the previous year andpressing move to the next year and pressingOrganiser & Tools 56Organiser & ToolsNote]The alarm will go off even when the phone is switched off.](https://usermanual.wiki/LG-Electronics-USA/KU450/User-Guide-783262-Page-53.png)
![moves to today. Pressing moves to theprevious month, and moves to the nextmonth. Pressing moves to the weeklycalendar, and moves to the monthly calendar.You can move the date using the / / /.2. Reference by DaysPressing in the reference by month moves toreference by day where you can refer to yourschedule by days. You can refer to the movingdate tab using / . As a search result, briefschedule contents, repetition set up configuration,and alarm set up configuration are displayed. Youcan send the schedule to another phone or anInternet site through SMS (Text message) or MMS(Picture message) or Email or Bluetooth.3. Detailed referenceYou can refer to a detailed schedule, that is thewhole contents of the schedule configured by theuser. You can send the schedule to another phoneor an Internet site through SMS (Text message) orMMS (Picture message) or Email or Bluetoothusing the left soft key [Options].Search scheduleYou can add a schedule. You can configure the startdate, end date, start time, end time, contents, type ofschedule, repetition, alarm of the schedule.]Schedule types: Appointment, Anniversary,Birthday, Others]Configurable repetition options: Once, Daily,Weekly, Monthly, Annually, User setting]Configurable alarm options: No alarm, On time,15 mins before, 30 mins before, 1 hour before, 1 day before, 3 days before, 1 week beforeDelete schedule1. Delete elapsed schedulesYou can delete all elapsed schedules using thisfunction.2. Delete allYou can delete all saved schedule contents usingthis function.57Organiser & Tools](https://usermanual.wiki/LG-Electronics-USA/KU450/User-Guide-783262-Page-54.png)
![Set up and release holidayYou can set up or release user holidays. Press the leftsoft key [Options] and select Set holiday. Theselected date will be displayed in red.To release the holiday, press the left soft key[Options] and select Reset holiday.Schedule notificationIf the user has configured the alarm setting, thespecified alarm sound will ring. If the notification timeis before the schedule start time, you can set up thealarm again.Tasks Menu 7.3 You can view, edit and add tasks to do. Tasks aredisplayed in time order. Tasks that have beencompleted or not completed are displayed indifferent ways.AddTo add a task, press the right soft key [Add] in theTasks list management screen. Then input the date,description and priority for the task.When you have finished entering the data, press theright soft key [Done] key to save the new task.Detailed view and EditTo view detailed task contents, locate the cursor onthe desired item in the Tasks list, and then press .You can edit and delete a task using the left soft key[Options]. You can also delete multiple or all tasks atonce using the Mark/Unmark option in the menu.Set job statusTasks set as finished are displayed as crossed outbelow the unfinished tasks in the Tasks list. You canset Finished tasks to Not finished by selectingOption.Memo Menu 7.4 Using the memo management function, you can viewand manage saved memo contents and add newmemo.Add memoTo add a new memo, press the right soft key [Add].Enter the contents of the memo. You can save thememo to the list by pressing the right soft key[Done].Organiser & Tools58Organiser & Tools](https://usermanual.wiki/LG-Electronics-USA/KU450/User-Guide-783262-Page-55.png)
![Edit and delete memoHighlight the desired memo and press to view itscontents. You can edit or delete the contents of amemo using the left soft key [Options]. You canreturn to the memo management screen by pressing. You can select Multiple or All memos using theMark/Unmark option and then delete a memo bypressing the right soft key [Delete].Voice recorder Menu 7.51. Press the left soft key [Options] to display theoption pop up menu before recording.2. Move to the desired menu item using / andpress .]Quality: You can select a recording quality fromSuper Fine, Fine and Normal.]Duration: You can set the recording duration toMMS msg. size, 30 secs or 1 min.]New recording: Select this menu to startrecording to a new file.]My Files: Opens the Voice recordings folder inMy Files.3. Pressing starts recording. When a recording isstarted, the recording time appears on the LCD.To cancel the recording, press the right soft key[Cancel].4. When you finish the recording, press to exit.The recorded file is automatically saved in theVoice recordings folder in My files.5. When no recording is in progress, pressing starts recording on a new file.After recording, press the right soft key [Send] tosend a recorded file.Select one from Message, Email or Bluetooth using/ and press .6. Press the left soft key to select the various optionsafter the voice recording.7. Select the desired menu using / and press.]Delete: Select this menu to delete a recordedfile.]New recording: Select this menu to start a newvoice recording.59Organiser & Tools](https://usermanual.wiki/LG-Electronics-USA/KU450/User-Guide-783262-Page-56.png)
![]Send: To send the recorded file. Select one fromMessage, Email and Bluetooth using /and press .]Sound theme: You can set the recorded file asthe Voice Ringtone, Video Ringtone, Start upsound or Power off sound.]My Files: Opens the Voice recordings folder in My Files.8. Press the right soft key to close the sub-menupopup window.Calculator Menu 7.6The calculator module allows you to perform basicarithmetic functions such as addition, subtraction,multiplication, and division as well as some scientificfunctions.1. Press the left soft key [Options].2. Select the appropriate function.3. Select Calculator.You can enter numbers by using the number keys,and the operators by using the / / /direction keys. You can enter a decimal point bypressing . Whenever you press , charactersare sequentially deleted in reverse order. Wheneveryou hold down, all the characters are deleted inreverse order in one go.When calculation is complete and the result isdisplayed on the screen, pressing a number clears theprevious result and the calculator waits for new input,even if you did not press the right soft key [Clear].When calculation is complete and the result isdisplayed on the screen, pressing a symbol saves theresult into the symbol and continues calculation.Converter Menu 7.7Using this menu, users can convert Currency, Surface,Length, Weight, Temperature, Volume and Velocity.Currency (Menu 7.7.1)1. Select the Currency menu.2. Users can set a currency exchange rate using[Rate].3. Enter currency rates for up to 6 currenciesequivalent to GBP and then press [Save]. Then you can convert to one currency from another.Organiser & Tools60Organiser & Tools](https://usermanual.wiki/LG-Electronics-USA/KU450/User-Guide-783262-Page-57.png)
![4. You can view the value of up to 6 currency units.5. Press [Reset] to clear the current input Field.6. To exit the currency conversion function, press the[Back] key.Surface (Menu 7.7.2)1. Select Surface menu.2. Select the desired unit to convert using [Unit].3. Enter the standard unit and view the convertedvalue.4. Press [Reset] to clear the current input Field and locate the cursor in the input field.5. To exit the Surface conversion function, press[Back] key.Length (Menu 7.7.3)1. Select the length menu.2. Select the desired unit to convert using [Unit].3. Enter the standard unit and view your convertedvalue.4. Press [Reset] to clear the current input field andlocate the cursor in the input field.5. To exit the length conversion function, press the [Back] key.Weight (Menu 7.7.4)1. Select the Weight menu.2. Select the desired unit to convert using [Unit].3. Enter the standard unit and view the convertedvalue.4. Press [Reset] to clear the current input Field, and locate the cursor in the input field.5. To exit the Weight conversion function, press the [Back] key.Temperature (Menu 7.7.5)1. Select the Temperature menu.2. Position the cursor on the desired unit by usingthe up or down arrow keys.3. Enter the standard unit and view the convertedvalue.61Organiser & Tools](https://usermanual.wiki/LG-Electronics-USA/KU450/User-Guide-783262-Page-58.png)
![Organiser & Tools62Organiser & Tools4. Press [Reset] to clear the current input field andlocate the cursor in the input field.5. To exit the Temperature conversion function, pressthe [Back] key.6. You can insert negative values by selecting [-].Volume (Menu 7.7.6)1. Select the Volume menu.2. Select the desired unit to convert using [Unit].3. Enter the standard unit and view the convertedvalue.4. Press [Reset] to clear the current input field and locate the cursor in the input field.5. To exit the volume conversion function, press the[Back] key.Velocity (Menu 7.7.7)1. Select the Velocity menu.2. Select the desired unit to convert using [Unit].3. Enter the standard unit and view the convertedvalue.4. Press [Reset] to clear the current input field andlocate the cursor in the input field.5. To exit the Velocity conversion function, press the[Back] key.World time Menu 7.8The World time function provides time informationon major cities worldwide.You can view the time of the desired country or cityby navigating using / . You can select a desired city as a base using the rightsoft key [Home].](https://usermanual.wiki/LG-Electronics-USA/KU450/User-Guide-783262-Page-59.png)

![Video call67Video callYou can make a video call using this menu. 1. Enter the number you want to dial. ]You can key in the number.]You can select the number from Contact usingthe left soft key [Contacts]. ]You can find the number from call logs bypressing [Calls].2. Press the right soft key [V-Call] to make a videocall.During a video callWhen you are in a video call, the screen will show thecontact's name and duration of call, contact's image,volume indicator, video control panel and your image.You can access the following option menus bypressing the left soft key [Options].]Microphone on/off]Speaker on/off]Bluetooth/Handset talk (When the Bluetoothheadset is connected)]Private/Show mode]Hold/Resume]Capture]View sender number]Settings]End callIncoming Video CallWhen a video call is received, the caller's informationis displayed as following.]Picture/Animation: Displays picture ID, graphicimage configured in Contacts or default animationindicating the incoming call.]Caller's name and number: Shows incomingcaller's number. If the number is stored inContacts, displays the name of the contacts.Picture ID and animation setting is used in the orderof Contacts, video file used in Group ringtone andvideo file used in Profile.](https://usermanual.wiki/LG-Electronics-USA/KU450/User-Guide-783262-Page-64.png)
![Video call68Video callAlso, sound can be set for the incoming video call.The sound setting is used in the order of Contacts,Group ringtone and Profile.You can accept the incoming call by pressing the leftsoft key [Accept]. The incoming call ringing can be silenced by pressingthe right soft key [Silent]. It can be also silenced bylong press on on the left side of the phone.When ringing is silenced, press the right soft key[Reject] to reject the call.](https://usermanual.wiki/LG-Electronics-USA/KU450/User-Guide-783262-Page-65.png)
![Settings69SettingsProfiles Menu #.1You can select ringtone or vibration for an incomingcall and configure the sound and volume of theringtone, key sound and sound effect, according to aprofile. The profiles provided include [Normal],[Silent], [Vibrate only], [Outdoor], [Headset],[Customised 1], [Customised 2] and [Customised3]. Select a profile and press to activate theprofile. After pressing the left soft key [Options],select the Edit menu for the [Normal], [Outdoor],[Headset], [Customised 1], [Customised 2] and[Customised 3] profile to change the configuration.A different list of options is available for each profilethat has been selected for editing.Alert byThis option determines the incoming call notificationmode. You can select from [Ring], [Vibration],[Silent], [Ring & vibration], [Ring after vibration],[Max Ring & Vibration].Voice ringtoneYou can select the ringtone for incoming voice call.Video ringtoneYou can select the ringtone for incoming video calls.VolumeSet the ringtone volume.Message alertYou can set how often the phone is to inform you ofa received message until it is read.Message toneYou can select a file from among your own personalfiles or from the default files, to be played by thephone upon receiving a message.Key toneYou can set the key tone to be played when pressingthe keys.Key tone volumeYou can set the volume of the chosen effect,choosing from 7 available levels.](https://usermanual.wiki/LG-Electronics-USA/KU450/User-Guide-783262-Page-66.png)
![Settings70SettingsFlip toneSelect the desired tone the phone will emit when youopen/close the phone.Confirmation toneYou can set the confirmation tone to be played bythe phone to confirm actions.Start up soundYou can set the effect to be played when the phoneis switched on.Select start up soundYou can select which file will be played when thephone is switched on.Power off soundYou can set the effect to be played when the phoneis switched off.Select power off sound You can select which file will be played when thephone is switched off.Phone settings Menu #.2Date & Time (Menu #.2.1) Time 1. Select the Time item from the Date & time list,and then press .2. Move to your desired field, Hour, Minute oram/pm field using the navigation keys. (when youhave selected 12 hour as Time format)3. Enter Hour and Minutes using the number keys.4. Select the time format using / .5. Scroll down to select the hour indicator format i.e.Off, Cuckoo clock or Chime bell.6. Press the right soft key [Done] to set the timewith the specified value.Date 1. Select the Date item from the Date & Time listand then press .2. Select the date format using / .](https://usermanual.wiki/LG-Electronics-USA/KU450/User-Guide-783262-Page-67.png)
![71Settings3. Enter Day, Month and Year using the numberkeys.4. Press the right soft key [Done] to set the datewith the specified value.Auto update date/time When Auto Update is configured to On, the time anddate are automatically updated according to thecurrent time zone. If Confirm first is selected, thetime and date update is confirmed before it isupdated automatically.Daylight saving Select whether to activate the daylight saving function ornot. You can set the Summer time difference of selectedhome city for 1 hour or 2 hours.Language (Menu #.2.2) Select the display language. You can selectAutomatic language option to change displaylanguage to the USIM card supported language.Security (Menu #.2.3)PIN code request When this is set to On, you are requested to enteryour PIN each time you switch the phone on.Note]Press in the PIN code entry window to return to theprevious step.]3 incorrect PIN code entries would invalidate the PINcode. And you have to enter the PUK (PIN Unblock Key)code to configure the PIN code again.]The maximum number of times you may enter the PUKcode is 10. (Note: If you enter an incorrect PUK code 10times, the USIM card will be blocked and must bereplaced.)]If the PIN code request cannot be disabled by operatorsettings, you will not be able to choose this menu item.](https://usermanual.wiki/LG-Electronics-USA/KU450/User-Guide-783262-Page-68.png)
![Settings72SettingsHandset lock You can lock your phone. The following 4 lockfunctions are available.When switching on: Locks the handset whenever thehandset is switched on.If USIM changed: Locks the handset when thephone's USIM card has been changed.Immediate: Locks the handset immediately.None: Deactivates the lock function.You are requested to enter the security code toconfirm the selection.]To unlock the handset, you need to enter thesecurity code.Change codes You can change the PIN, PIN2, the mobile phonepassword and the call barring password.PIN codePIN is the abbreviation for Personal IdentificationNumber, and is used to restrict use by anunauthorised user.PIN code change procedure1. Select ‘PIN code’ from the ‘Change codes’ list andthen press .2. Enter the current PIN code and press .3. Enter the new PIN code and press .4. Enter the new PIN code once again and press .]If the PIN code is different from that of step 3,the procedure is restarted from step 3.5. When the PIN code is changed properly, a Changedmessage is displayed. If you enter an incorrect PINcode in step 2, the procedure is restarted from step2, and the number of attempts you have left toenter the number is decreased by 1.6. Press in the PIN code entry window to returnto the previous step.Note]Three incorrect PIN code entries in the PIN code entrywindow would invalidate the PIN code. In this case, youhave to enter the PUK (PIN Unblock Key) code toconfigure the PIN code again. The maximum number oftimes you may enter the PUK code is 10. (Note: If youenter an incorrect PUK code10 times, the USIM card willbe blocked and must be replaced.)](https://usermanual.wiki/LG-Electronics-USA/KU450/User-Guide-783262-Page-69.png)
![Settings74SettingsFormat external memorySelect this to format the external memory.Handset information (Menu #.2.6)This functions shows the USIM card telephonenumber, model name and software version of themobile phone.Reset settings (Menu #.2.7)Clear memorySelect this to clear the memory. You are requested toenter the security code.]Handset contents: Deletes all the multimediacontents downloaded.]Handset personal info.: Deletes personalinformation such as received messages or emails.Default setting Select this to reset your phone to its defaultconfiguration. You are requested to enter the securitycode.Display settings Menu #.3This menu allows you to personalise the display optionsof the screens and of the menus entire graphic interface.Main Display (Menu #.3.1)You can set the screen theme to be displayed on thefront screen.Home screen ]Wallpaper: You can select an image to bedisplayed on the main screen.]Display items: You can select which items todisplay on the screen: Calendar + Clock, Calendar,Clock, Dual clock or Do not show.Outgoing call You can select the image to be displayed whiledialling a number.Start up image You can select the image to be displayed while thephone is being switched on.Power off image You can select the image to be displayed while thephone is being switched off.](https://usermanual.wiki/LG-Electronics-USA/KU450/User-Guide-783262-Page-71.png)
![75SettingsTheme (Menu #.3.2) You can select the desired theme between Normaland Extreme.Menu style (Menu #.3.3)You can select the desired menu style from Grid styleand One by one style.Font (Menu #.3.4)You can set the font style, dialling font size anddialling font colour using / .External display (Menu #.3.5)You can set the front display background to display.]Home screen: Select the wallpaper and clock typeto display in idle mode.]Outgoing call: Select the image file to displaywhen you make a call.Backlight (Menu #.3.6)You can set the backlight duration on the Homescreen, External screen and Keypad individually.Welcome message (Menu #.3.7)After selecting On, you can write a welcome message.Java settings Menu #.4Activating a profile1. Move the cursor to the profile you would like toactivate.2. Press or select Activate from the Optionsmenu.Adding a new profile 1. Select Add new from the Options menu. The following items need to be configured.Enter the Java setting account name.Service name Choose from the given list of connectionmodes. (Default is TCP with Proxy)Connection mode Enter the WAP Gateway IP address provided by the operator. (e.g. 195. 115. 025. 129)IP addressPort details are provided by the operator,depending upon the Connection mode.Proxy server port Choose from the given list of access points.(For more details for adding or editing a newAccess point, refer to page 90.)Access points](https://usermanual.wiki/LG-Electronics-USA/KU450/User-Guide-783262-Page-72.png)
![Settings76Settings2. Press the right soft key [Done] to save anyconfiguration changes.You can edit and delete a profile by selecting Editand Delete from the Options menu.Messaging settings Menu #.5For detailed information, please refer to page 46.Call settings Menu #.6 Call durations (Menu #.6.1) You can view call time by types. Press the left softkey [Options] to choose either partial initialisation orentire initialisation. Also press right soft key [Clear]to initialise a selected duration type. Initialization willrequire your Security code.The following timers are available:]Last call: Shows the latest call time in units ofhours/minutes/seconds.]Received calls: Shows incoming call time.]Dialled calls: Shows outgoing call time.]All calls: Shows total call time.Call barring (Menu #.6.2)Call barring menus for Voice and Video calls areprovided.The menu consists of Voice calls, Video calls andDeactivate all. The Voice calls and Video calls menushave the following submenus.The Call barring menu consists of All outgoing,Outgoing international, Outgoing internationalcalls except home country, All incoming andIncoming when abroad submenus. The All outgoing menu bars dialling all outgoingcalls, the Outgoing international menu bars diallingoutgoing international calls and the Outgoinginternational calls except home country menu barsdialling outgoing international calls except for theHome PLMN country. All incoming rejects allincoming calls and the Incoming when abroad menurejects incoming calls when roaming.](https://usermanual.wiki/LG-Electronics-USA/KU450/User-Guide-783262-Page-73.png)
![Settings78SettingsAll incoming1. When is selected, it operates in the same wayas the Outgoing calls menu.2. When the Options menu is selected, it activatesand operates the Incoming calls menu. It operatesin the same way as the Outgoing calls menu.Incoming when abroad1. When is selected, it operates in the same wayas the Outgoing calls menu.2. When the Options menu is selected, it activatesand operates the Incoming calls when abroadmenu. It operates in the same way as theOutgoing calls menu.Fixed dial numbers (Menu #.6.3) ]FDN ON/OFF: Select whether to activate FDN ornot. PIN authentication is required.]FDN list: Displays the current FDN list. You canedit, add, or delete fixed dial numbers. PIN2authentication is required to edit the list. And theconfiguration information is saved on the USIM.The information saved on the USIM is used whenFDN restricts outgoing calls.Data volume (Menu #.6.4) Allows you to check the sent, received and all datavolume transferred. (Data volume transferred throughTE connection is excluded from counting.) Press the left soft key [Options] to choose for partialinitialization or entire initialization. You can also usethe right soft key [Clear] for the initialization of theselected volume type. Initialization will require yourSecurity code.Call costs (Menu #.6.5) 1. This function displays the call costs of the Last calland All calls.](https://usermanual.wiki/LG-Electronics-USA/KU450/User-Guide-783262-Page-75.png)
![79Settings2. To initialise, press the right soft key [Clear] andenter the PIN2 code.3. You can select either Unit or Currency in Set callcost. According to your setting, the call cost isdisplayed during a call (If USIM and Networksupport Advice Of Charge(AOC)).4. In the Set limit configuration, select On toconfigure the cost limit. When a cost limit isconfigured, and the call costs reach the limit,making a call will not be allowed.Diverts (Menu #.6.6)Call divert menus for voice and video calls areprovided.The menu consists of Voice calls, Video calls andDeactivate all.Voice callsAll voice callsWhen busyNo answerNot reachable1. When the Deactivate menu is selected Deletes Call Divert Number registered to thenetwork. While waiting for the result from thenetwork, Requesting message and animationappears. When the network answers, the result ofthe operation is displayed.2. When To a number is selectedA dialogue window appears allowing you to enter aphone number to divert to. Input a phone numberto divert calls to, and press . While waiting theresult from the network, Requesting message andanimation appears. When the network answers, theresult of the operation is displayed.](https://usermanual.wiki/LG-Electronics-USA/KU450/User-Guide-783262-Page-76.png)
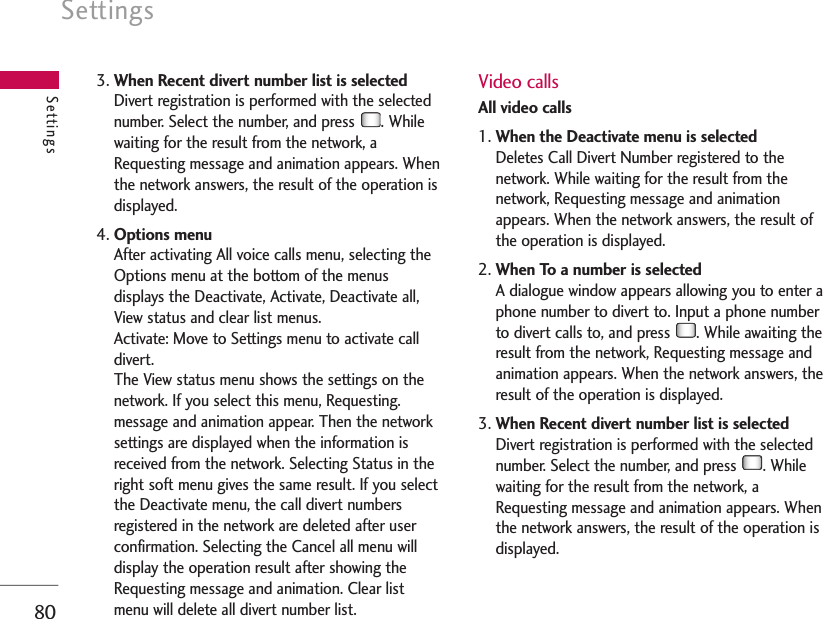
![Settings82Settings2. When To a number is selectedIt operates the same as All voice calls menu.3. When Recent divert number list is selectedIt operates the same as All voice calls menu.4. When Options menu is selectedActivates and operates If out of reach menu.It operates the same as All voice calls menu.Call waiting (Menu #.6.7) ]Activate: Activates waiting service. Selecting thisitem, displays requesting message and animation.When the network answers, the result of theoperation is displayed.]Deactivate: Deactivates Call waiting service.Selecting this item displays requesting messageand animation. When the network answers, theresult of the operation is displayed.]View status: Displays activated Call waiting servicegroup item of the network. Selecting this itemdisplays requesting message and animation. Whenthe network answers, the result of the operation isdisplayed.Voice mail (Menu #.6.8) You can add or modify voice mail centre.Video call (Menu #.6.9)You can set the screen display when making/receiving a video call.]Show my image: Determine whether to displayyour image on a screen during a video call or not.]Show private image: Determine whether to use astill image or not as substitute image.]Select still image: Select a still image assubstitute image. You can use the still imagestored in handset/external memory.]Mirror: Select to activate the mirror effect or not. - On: Displays the image flipped side to side. - Off: Displays the image as it is.]My image size: Select my image size to bedisplayed.]My image position: Select the position whereyour image will be displayed.](https://usermanual.wiki/LG-Electronics-USA/KU450/User-Guide-783262-Page-79.png)
![83SettingsCommon settings (Menu #.6.0)Call reject You can set whether to reject incoming calls.1. Select On in Reject menu to activate call reject.The Reject list menu appears.2. Set the desired call reject option in the Reject listmenu.]All calls: Rejects all calls.]Contacts: Rejects the calls from the numberstored in Contacts.]Groups: You can specify call rejects by group unitsstored in Contacts.]Unregistered: Rejects calls from the number notstored in Contacts.]No caller ID: Reject calls which do not have CLIinformation.Send my number]Set by network: Configures with the defaultsettings determined by the service provider.]On: Configures to send my phone number whenmaking an outgoing call.]Off: Configures not to send my phone numberwhen making an outgoing call.Auto redialAllows you to set the auto redial function when a callattempt has failed.Answer modeAllows you to set the answering method. You canchoose between Press send key,Open flip andPress any key.Minute minderDetermines whether to sound a 1 minute tone every1 minute when you are on the phone.BT answer mode]Hands-free: You can answer a call using theBluetooth headset, when the Bluetooth isconnected.](https://usermanual.wiki/LG-Electronics-USA/KU450/User-Guide-783262-Page-80.png)
![Settings84Settings]Handset: If you press on the handset toanswer a call, you can talk on the handset. If youpress the Bluetooth headset key to answer a call,you can talk using the Bluetooth headset.This is the initial answer mode selection. And whiletalking, you can switch from handset to headset orfrom headset to handset.Contact settings Menu #.7 For detailed information, please refer to page 64.(Menu 8.7)Connectivity Menu #.8 Bluetooth (Menu #.8.1) Bluetooth connectionYour phone has built-in Bluetooth wirelesstechnology which makes it possible for you toconnect your phone wirelessly to other Bluetoothdevices such as a handsfree, PC, PDA or otherphones.You can, for example, have a conversation via acordless Bluetooth handsfree or browse the Internet,wirelessly connected via a mobile phone. You canalso exchange, for example, business cards, calendaritems and pictures.1. Getting started• Menu >#. Settings >7. Connectivity >1. Bluetooth >1. Paired devicesTo use the Bluetooth function, you must first setBluetooth to On.2. Configuring Bluetooth settings• Menu >#. Settings >7. Connectivity >1. Bluetooth >2. Settings- Bluetooth: To use the Bluetooth function, set it to[On]. Otherwise, set it to [Off].- My handset’s visibility: Set [My handset’s visibility]to [Show to all] so that other devices can detectyour phone when they are searching for aNote]We recommend that your phone and the Bluetooth device you are communicating with be within a range of 10 meters. The connection may be improved if there areno solid objects between your phone and the otherBluetooth device.](https://usermanual.wiki/LG-Electronics-USA/KU450/User-Guide-783262-Page-81.png)
![85SettingsBluetooth device. If you select [Hidden], otherdevices will not be able to detect your phone whenthey are searching for a Bluetooth device.- My handset’s name: You can name or rename yourphone as it will appear on other devices. Yourphone's name will be shown on other devices onlywhen [My handset’s visibility] is set to [Show to all].3. Paired devicePairing Devices (Pairing with a device)If a paired Bluetooth device already exists.• Menu >#. Settings >7. Connectivity >1. Bluetooth >1. Paired devices >Options >Add newIf there is no paired Bluetooth device.• Menu >#. Settings >7. Connectivity >1. Bluetooth >1. Paired devices >AddOptions]Add new: Using this menu, you can pair a newBluetooth device with your phone.]Assign short name: Using this menu, you canrename a paired phone as required.]Connecting/Disconnecting the device1. If you want to open the connection to theselected device, select the Connect.2. If you want to close the connection to theselected device, select Disconnect.]Delete: Using this menu, you can delete the pairedBluetooth device.]Delete all: Using this menu, you can delete all ofthe paired Bluetooth devices.<Pairing devices>1. To search for a Bluetooth device to pair, pressAdd or Add new.2. The screen shows Searching for devices.Bluetooth devices within a range of 10m will befound.Note]When user uses Bluetooth Device in the handset, thesecurity of the handset is at risk.Therefore, we recommend that Bluetooth visibility be setto Hidden after configuration or device pairing.For incoming files via Bluetooth regardless of paireddevices, you can choose to accept or reject theconnection, after checking the sender details.](https://usermanual.wiki/LG-Electronics-USA/KU450/User-Guide-783262-Page-82.png)
![Settings86Settings3. If Bluetooth devices are found, these devices arelisted on the screen. If no Bluetooth device isfound, you will be asked if you want to searchagain.4. Pairing procedure.- Press . A window will appear on the screenasking you to enter your password.- After creating a password (of 1 to 16 digits),the user of the other device must enter thepassword for pairing. The user of the otherdevice must know the password in advance forauthentication.<Deleting devices>1. Select a device to delete from the Paired devicesscreen.2. You can delete a device by pressing the Delete keyor by selecting Options >Delete. To delete allpaired devices, select Options >Delete All.<Transmitting data using Bluetooth>1. To transmit data from your phone to anotherBluetooth device, first select the application wherethe target data is saved. For example, to send datain the My Files to another device, selectMenu >6. My Files >1. Pictures /2. Sounds / 3. Videos/ 5. Bluetooth data / 6. Other files / 7. External memory >Select data to transmit >Send >3. Bluetooth2. Transmitting data1) Last device found is displayed. If the desireddevice does not exist in the list, select [Moredevices].2) Select the device to which you want to transmitdata from the devices on the screen and press.3) If the other party selects [Yes] for [Connectionrequest], the data is transmitted.<Receiving data using Bluetooth>Menu >#. Settings >7. Connectivity >1. Bluetooth >1. Paired devices](https://usermanual.wiki/LG-Electronics-USA/KU450/User-Guide-783262-Page-83.png)
![87SettingsIf another party attempts to transmit data, the[Connection request] question will appear on thescreen. If you select [Yes], the data will betransmitted to your phone. During data transmission,the Bluetooth icon flashes.<Bluetooth data storage folder>You can check the received data by selecting Menu>6. My Files >5. Bluetooth data.4. Device<Connecting a headset>Menu >#. Settings >7. Connectivity >1. Bluetooth1. Connect the headset according to the proceduresdescribed in the Pairing Devices section.2. To use the headset, select the headset from theregistered devices, press the Option key and thenselect 3.Connect.3. To check that the selected headset has beenconnected successfully, press the Option key. If itis properly connected, 3. Disconnect will appear. Ifit is not connected, 3. Connect will appear.<Connecting a handsfree kit>Menu >#. Settings >7. Connectivity >1. Bluetooth1. Connect the handsfree kit according to theprocedures described in the Pairing Devicessection.2. To use the handsfree kit, select the handsfree kitfrom the registered devices, press the Option keyand then select 3. Connect.3. To check that the selected handsfree kit has beenconnected successfully, press the Option key. If itis properly connected, 3. Disconnect will appear. Ifit is not connected, 3. Connect will appear.Synchronisation (Menu #.8.2)(Note: This service is not available in all countries. Please contact your service provider for further information.)If Sync service is supported by your networkoperator, this service function synchronizes the datain a phone and the data on a server such asContacts, Calendar and Tasks via a wireless network.](https://usermanual.wiki/LG-Electronics-USA/KU450/User-Guide-783262-Page-84.png)
![Settings88SettingsConnect1. Select the Connect item and then press .2. Connect to the server with the selected serverprofile and the synchronization animation isdisplayed while the synchronization is performed.LogsSelect the Logs item and then press to view thelog for the last synchronization operation performed.Server synch. centre1. Select the Server synch. centre item and thenpress .2. This menu allows you to configure the profile for asynchronization server.]Profile name: Input the name for the profile.]Host address: Contact your service provider.]Proxy IP address: Enter the WAP gatewayaddress and port number.]User name: Enter your user ID forsynchronization server.]Password: Input your password.]Contacts: Select whether to synchroniseContacts or not.]Contact name: Input the contacts databasename for server access.]Calendar: Select whether to synchroniseCalendar or not.]Calendar name: Input the calendar databasename for server access.]Tasks: Select whether to synchronise Tasks ornot.]Tasks name: Input the Tasks database name forserver access.]Sync type: Select the synchronization typebelow.- NormalThe phone and the server are required toexchange information about the modified data.- BackupThe phone sends all the data from a database tothe server. The server is expected to replace alldata in the target database with the data sentby the phone. This means the phone overwritesall the data in the server database.](https://usermanual.wiki/LG-Electronics-USA/KU450/User-Guide-783262-Page-85.png)
![89Settings- Restore The server sends all its data from a database tothe phone. The phone is expected to replace alldata in the target database with the server sentby the server. This means the server overwritesall data in the phone database.]Access point: Select an access point to use forthe data connection.Network (Menu #.8.3)Network selection Select between Automatic and Manual.]Automatic: Automatically searches for the networkand registers the handset to the network. This isrecommended for best service and quality.]Manual: All the currently 2G(GSM) and3G(UMTS) available networks are shown and youcan select one of them for registration. If theregistration of the network has failed, all thecurrently available networks are listed again andyou can select any other one for registration.Network modeYou can set a type of network to search for whennetworks are searched in the Network selection menu.]Automatic: Searches all the networks connectable.]UMTS: Searches only networks supporting 3G.]GSM 900/1800: Searches only networkssupporting GSM 900/1800 band.]GSM 1900: Searches only networks supportingGSM 1900 band.Preferred listsIf the network is searching automatically, you can adda preferable network to be connected to. And thefollowing options are available.]Add new: You can add a new network using thefollowings.- Search: You can select one from the network liststored in the phone.- Enter new network: You can enter the countrycode (MCC) and the network code (MNC) toadd. After setting, press Done key.]Delete: Deletes the selected network.]Edit: You can modify the information of theselected network.](https://usermanual.wiki/LG-Electronics-USA/KU450/User-Guide-783262-Page-86.png)
![Settings90Settings]Move up: Moves the selected network upward.]Move down: Moves the selected networkdownward.Access points (Menu #.8.4)This menu shows the access point list. You can createnew profiles, delete or edit them by using the OptionMenu. However, you cannot delete or edit defaultconfigurations depending on country variant.You can edit the following configuration items byselecting the right soft key, if allowed.]Press Done key to save any configuration changes.Browser settings (Menu #.8.5) ProfilesSelect the appropriate profile by pressing . This will activate the profile to initiate browserlaunch.SecurityIf user presses Certificates, certification information is shown.User can clear secure session information by pressingSession clear.CertificatesIf stored, a list of root/ca certificates required forWTLS/TLS can be found here. Certificates can beviewed from the list.Session clearSecure (WTLS/TLS) session data can be clearedusing this option. Session data should be cleared toestablish a new secure session.Character encodingSets the browser default character set to one of thefollowing.Access Point profile name.Choose the bearer from the list. (Default is UMTS.)Choose the authentication from the list.(Default is No auth)Information provided by service provider.Information provided by service provider.APN name to access network. Informationprovided by service provider.Connection titleBearerAuthenticationUser namePasswordAPN](https://usermanual.wiki/LG-Electronics-USA/KU450/User-Guide-783262-Page-87.png)
![91Settings]Automatic, English(ASCII), English(ISO),English(LATIN), Unicode(UCS2 BE),Unicode(UCS2 LE), Unicode(UCS2 Auto),Unicode(UTF-16 BE), Unicode(UTF-16 LE),Unicode(UTF-16 Auto), Unicode(UTF-8).Scrolling controlAllows you to set the scroll speed by selecting thenumber of lines to scroll. Select from Small(1 line), Medium(2 lines), Large(3 lines).Show image Allows you to enable or disable image display during browsing.CacheEnabling Cache allows you to store accessed pagesto your phone. Once a page has been stored incache it will greatly enhance the page loading speedon subsequent browsing of the same page.Cookies Enabling Cookies allows you to store cookies sentfrom the server. Disabling this function will preventcookies from being stored on your phone.JavaScriptSelect On/Off.Reset settingsSelect this to reset your phone to its defaultconfiguration.Streaming (Menu #.8.6)If you want to set different network setting to playstreaming content, you can set different networksettings.Dial-up network (Menu #.8.7) You can use your phone with a variety of PCconnectivity and data communications applications.Select USB and Bluetooth you want to use for thedata connection.Note]Enabling this function will delay displaying of images until transmission is completed. Disabling this function will prevent the browser from downloading images fromthe server, thus allowing faster transmission.](https://usermanual.wiki/LG-Electronics-USA/KU450/User-Guide-783262-Page-88.png)
![Accessories92AccessoriesThere are various accessories for your mobile phone. You can select these options according to your personal communication requirements.Travel Adapter This charger allows you to charge the batterywhile away from home oryour office.Standard Battery CD You can connect yourphone to PC to exchangethe data between them. Stereo headset Allows hands freeoperation. Includesearpiece and microphone.Note]Always use genuine LG accessories.]Failure to do so may invalidate your warranty.]Accessories may vary in different regions; please check with our regional service company or agent for furtherinformation.](https://usermanual.wiki/LG-Electronics-USA/KU450/User-Guide-783262-Page-89.png)