LG Electronics USA L180P 18" LCD Monitor User Manual Microsoft PowerPoint F User s Manual
LG Electronics USA 18" LCD Monitor Microsoft PowerPoint F User s Manual
UserManual.wiki
>
LG Electronics USA
>
L180P User Manual
users manual
Navigation menu
Upload a User Manual
Namespaces
Wiki Guide
HTML
PDF
Info
Views
User Manual
Discussion / Help
Navigation


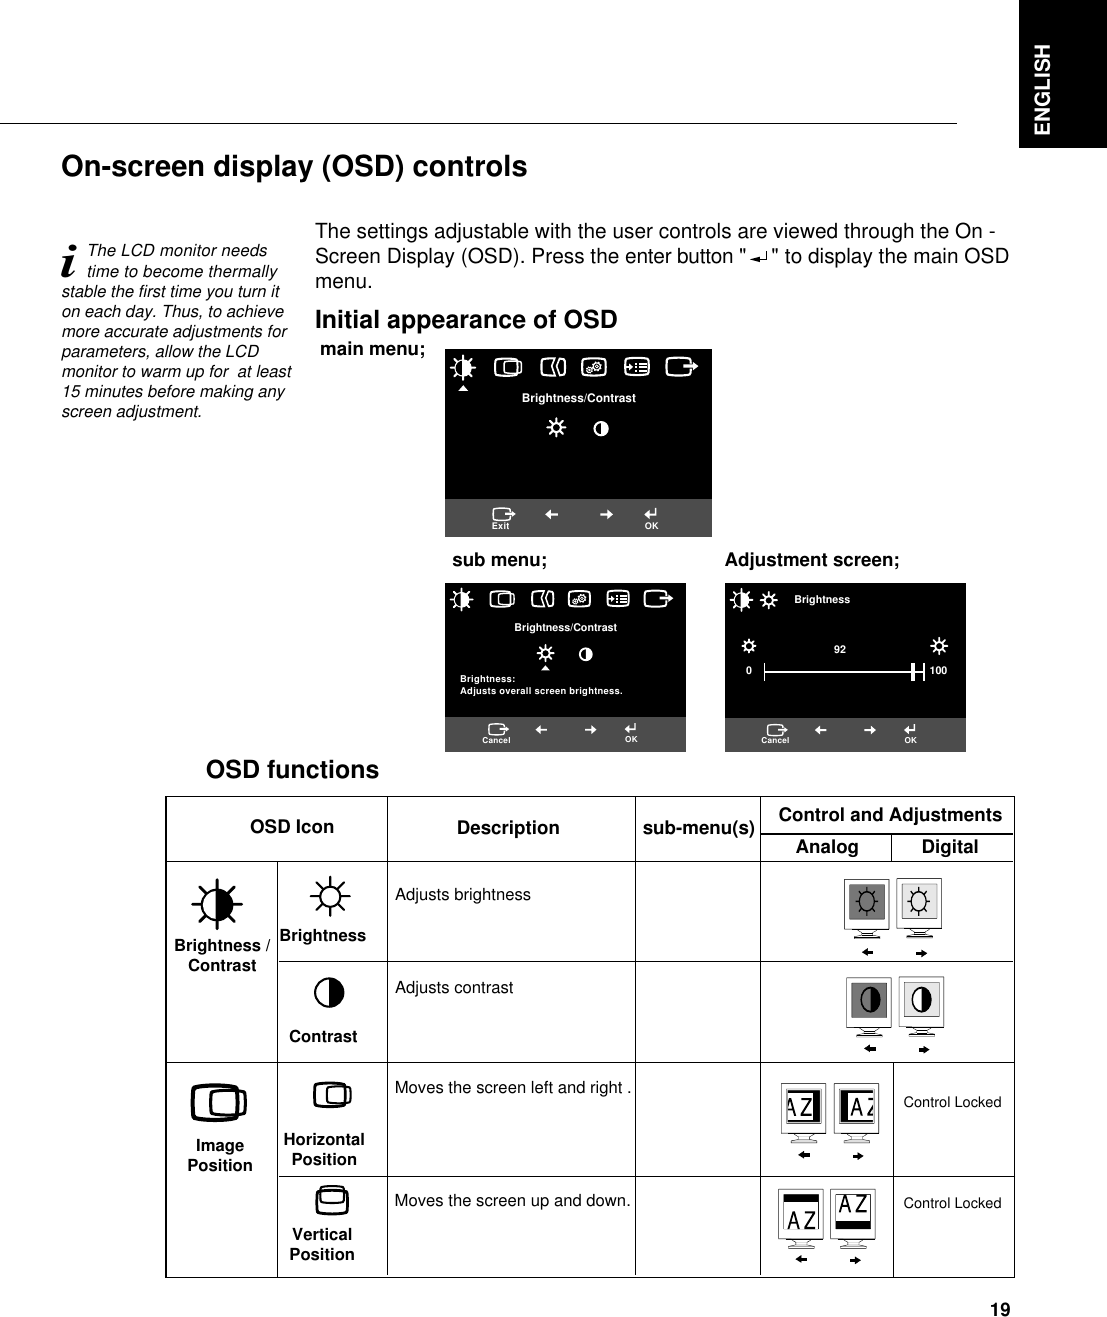
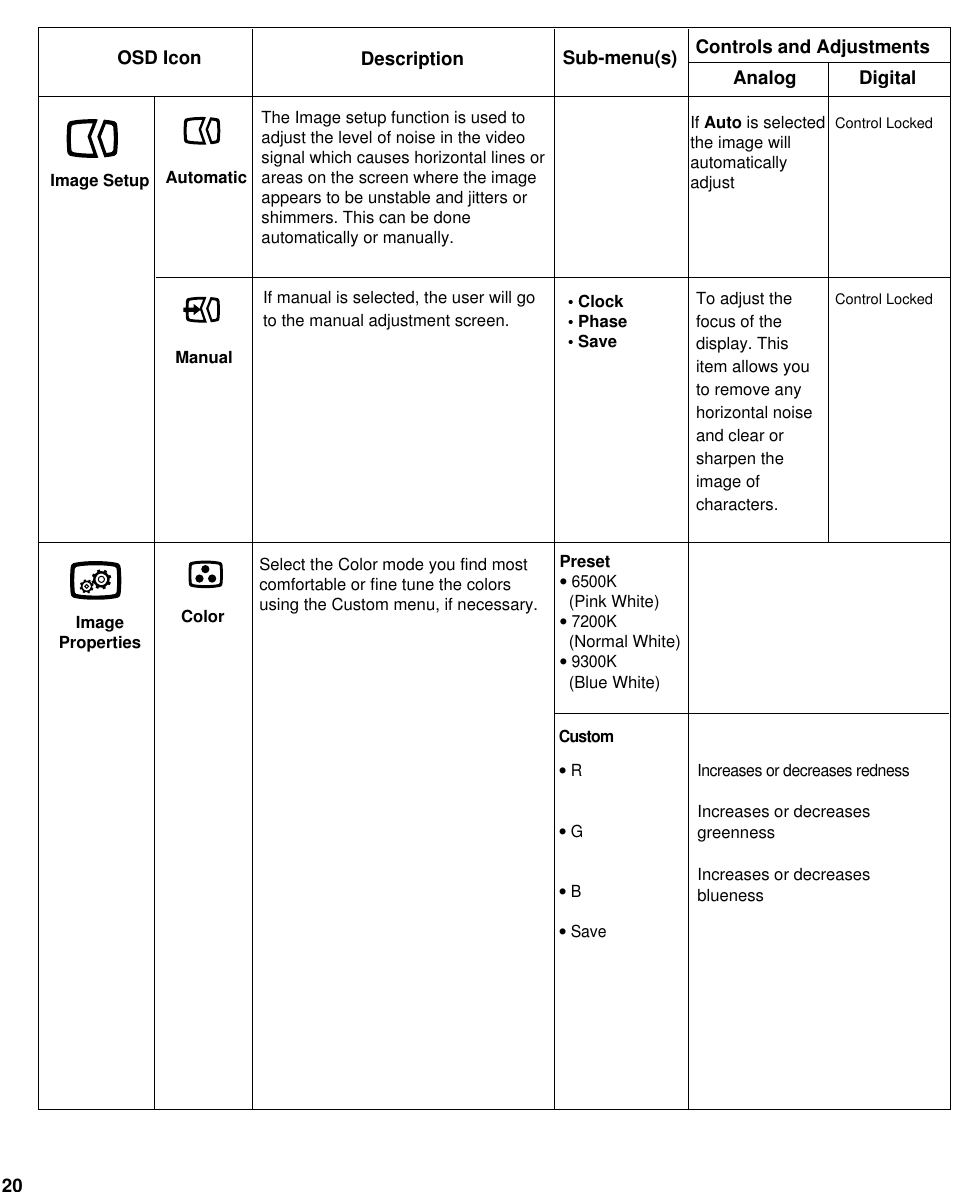
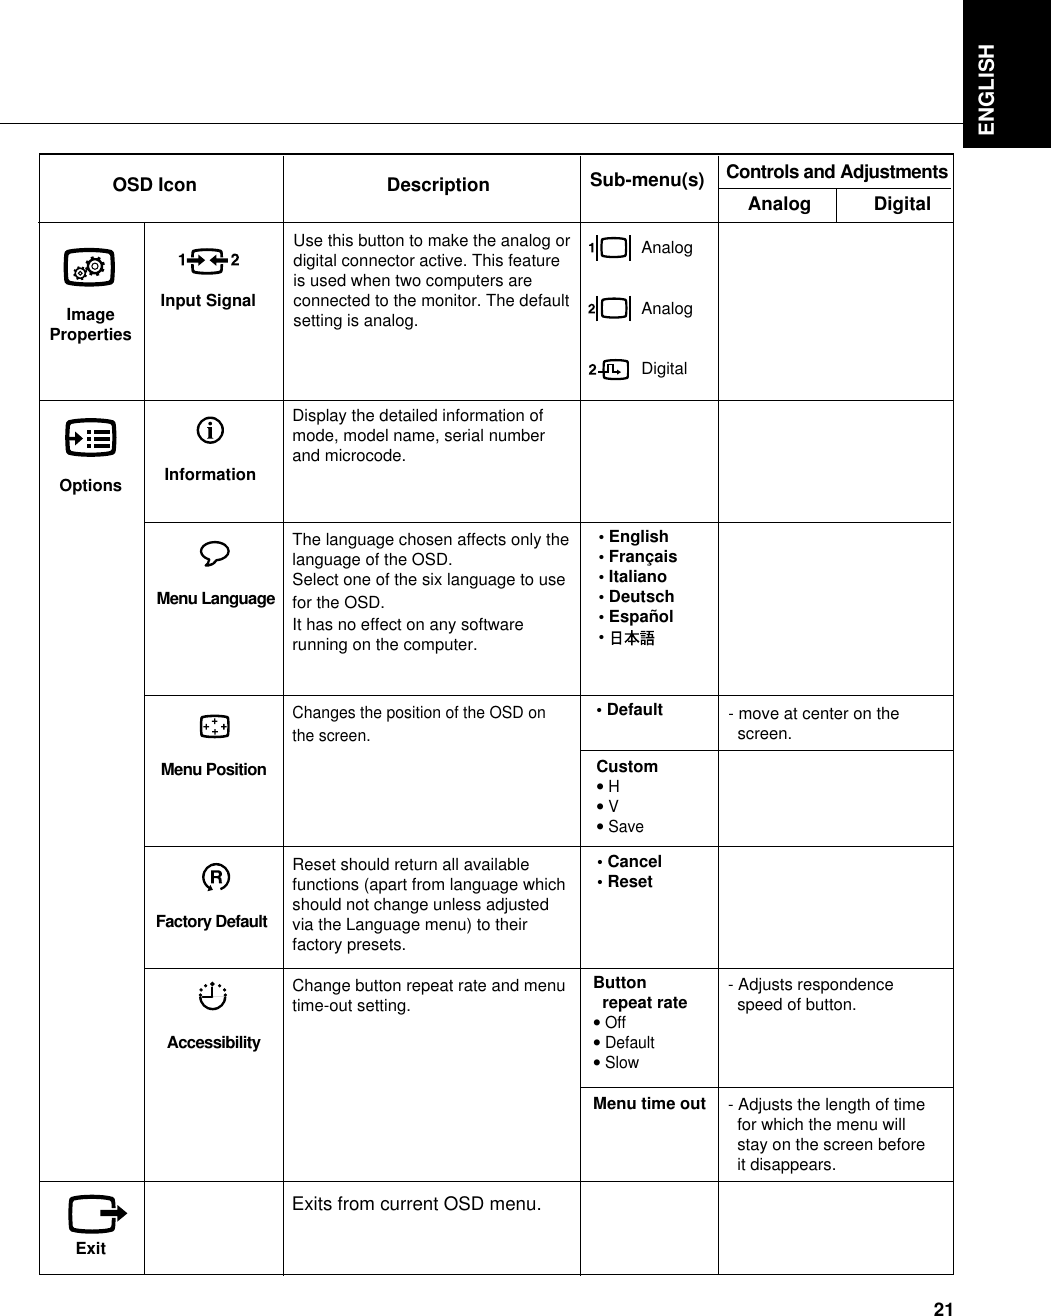
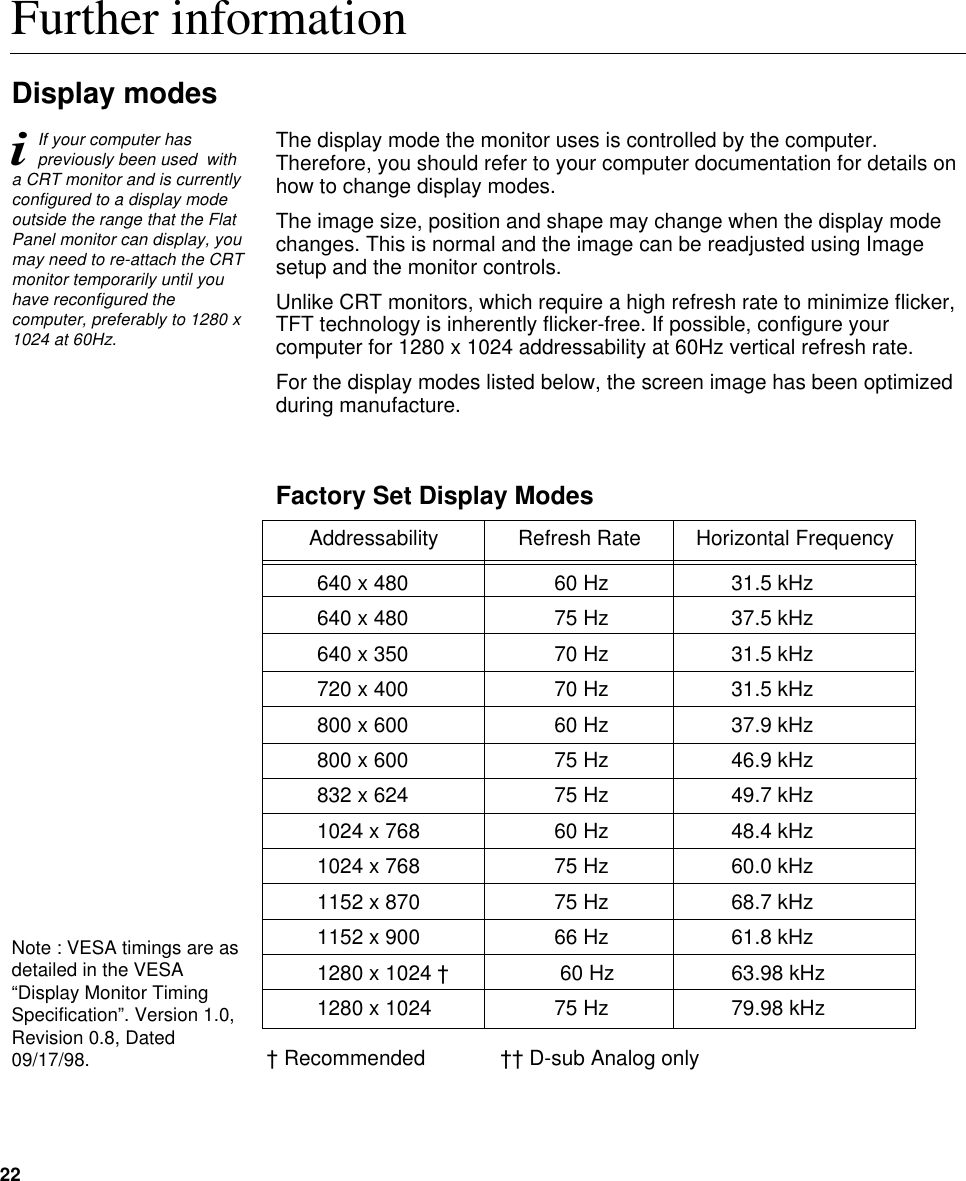
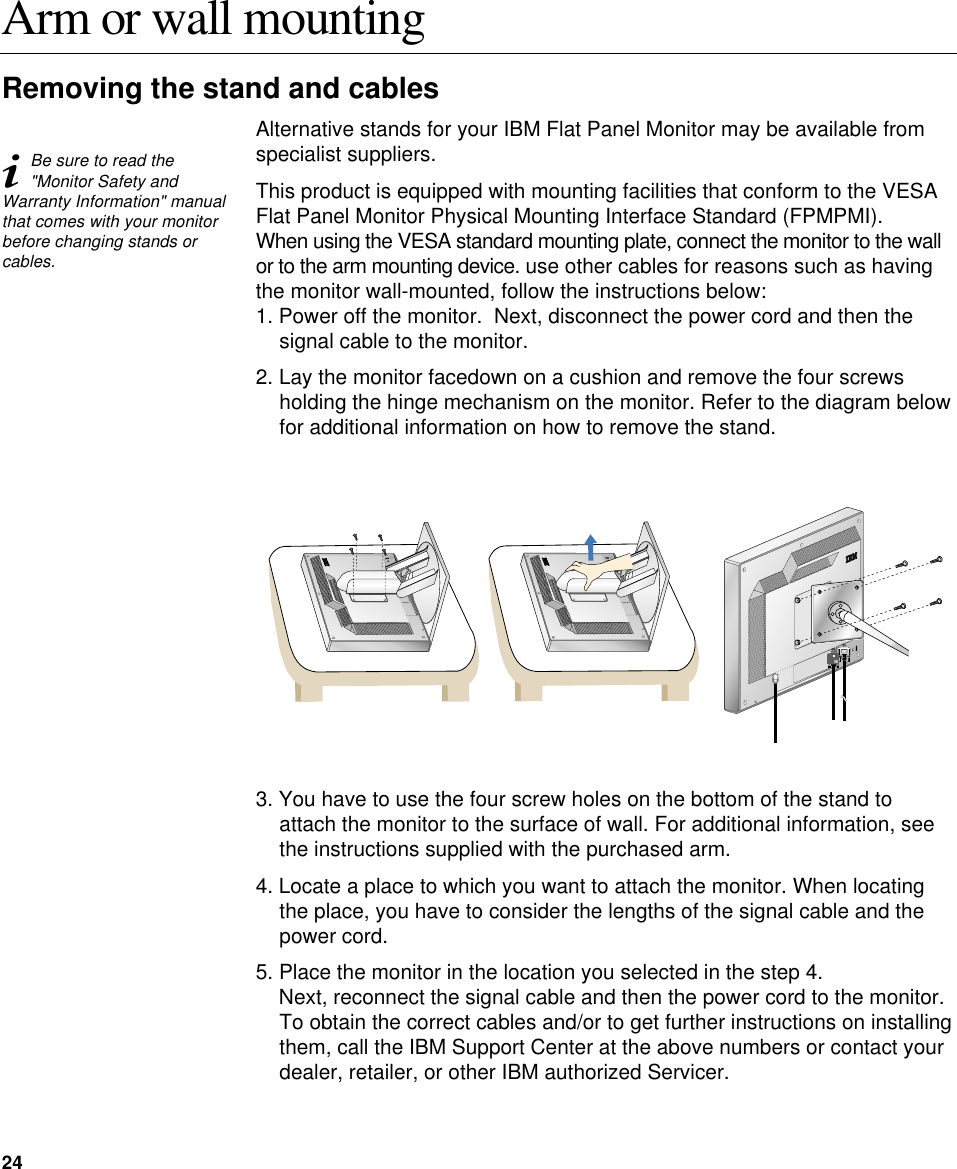
![18Adjusting your LCD monitorUser controlsUSER CONTROL FEATURESiThe image is alreadyoptimized for many displaymodes, however the usercontrols can be used to adjustthe image to your liking.iThe settings are savedafter adjustment andwhen exiting the OSD andwill be effective thereafter.ThinkVisionIcon Direct Access FunctionsSwitches the monitors on and off.Bring up Brightness adjustment.Executes automatic image setup.Switch between input signals.Icon Monitor controlsandDisplay main OSD menu and selects highlighted menu item.Moved the cursor to highlight icons or make adjustments.Exits from current OSD menu.CONTROLS LOCK / UNLOCKThis feature allows you to secure the current control settings,while allowing the user to adjust Brightness, so that they cannotbe inadvertently changed. Push and hold the enter button[ ] for10 seconds; the message “Menu is Locked” appears.You can unlock the OSD controls at any time by pushing the enterbutton[ ] for 10 seconds; the message “Menu is Unlocked” willappear.](https://usermanual.wiki/LG-Electronics-USA/L180P/User-Guide-390984-Page-25.png)