LG Electronics USA L96G Cellular/PCS GSM/WCDMA Phone with WLAN and Bluetooth User Manual
LG Electronics MobileComm USA, Inc. Cellular/PCS GSM/WCDMA Phone with WLAN and Bluetooth Users Manual
Users Manual

LGL96G User Guide
This guide helps you to get started using your phone.
•Someofthecontentsofthismanualmaynotapplytoyourphone,
dependingonthesoftwareandyourserviceprovider.
•Thishandsetisnotsuitableforpeoplewhohaveavisualimpairment
duetothetouchscreenkeyboard.
•Copyright©2012LGElectronics,Inc.Allrightsreserved.LGandthe
LGlogoareregisteredtrademarksofLGGroupanditsrelatedentities.
Allothertrademarksarethepropertyoftheirrespectiveowners.
•Google™,GoogleMaps™,Gmail™,YouTube™,GoogleTalk™and
AndroidMarket™aretrademarksofGoogle,Inc.
ENGLISH

Part 15.21 statement
" Change or Modifications that are not expressly approved by the manufacturer could void
the user's authority to operate the equipment. “
Part 15.105 statement
This equipment has been tested and found to comply with the limits for a class B digital
device, pursuant to Part 15 of the FCC Rules.
These limits are designed to provide reasonable protection against harmful interference in
a residential installation. This equipment generates uses and can radiate radio frequency
energy and, if not installed and used in accordance with the instructions, may cause harmful
interference to radio communications. However, there is no guarantee that interference will
not occur in a particular installation. If this equipment does cause harmful interference or
television reception, which can be determined by turning the equipment off and on, the user
is encouraged to try to correct the interference by one or more of the following measures:
- Reorient or relocate the receiving antenna.
- Increase the separation between the equipment and receiver.
- Connect the equipment into an outlet on a circuit different from that to
which the receiver is connected.
- Consult the dealer or an experienced radio/TV technician for help.
This device is not intended for sale in the USA.

FCC Part 15 Class B Compliance
This device and its accessories comply with part 15 of FCC
rules and ICES-003 Class B digital apparatus requirements
for Industry Canada. Operation is subject to the following
two conditions:(1) This device and its accessories may not
cause harmful interference, and (2) this device and its
accessories must accept any interference received, including
interference that may cause undesired operation.
Body-worn Operation
This device was tested for typical body-worn operations
with the back of the phone kept 1.5cm (0.59 inches) between
the user’s body and the back of the phone. To comply with
FCC RF exposure requirements, a minimum separation
distance of 1.5cm (0.59 inches) must be maintained between
the user's body and the back of the phone. Third-party
belt-clips, holsters, and similar accessories containing
metallic components

20
Pleasechecktoseewhetheranyproblems
youencounteredwithyourphoneare
describedinthissectionbeforetakingthe
phoneinforserviceorcallingaservice
representative.
1. Phone memory
Whenthereislessthan10%ofspace
availableinyourphonememory,yourphone
cannotreceivenewmessages.Youneedto
checkyourphonememoryanddeletesome
data,suchasapplicationsormessages,to
makemorememoryavailable.
To uninstall applications:
1 Touch >Appstab>Settings>
Apps fromtheDEVICEcategory.
2 Onceallapplicationsappear,scrollto
andselecttheapplicationyouwantto
uninstall.
3 TouchUninstall.
Getting to know your phone
Before you start using the phone, please read this!

21
2. Optimising battery life
Extendyourbattery'slifebetweencharges
byturningofffeaturesthatyoudon'tneedto
havingrunningconstantlyinthebackground.
Youcanmonitorhowapplicationsand
systemresourcesconsumebatterypower.
Extending your phone's battery life:
•Turnoffradiocommunicationsyouarenot
using.IfyouarenotusingWi-Fi,Bluetooth
orGPS,turnthemoff.
•Reducescreenbrightnessandseta
shorterscreentimeout.
•TurnoffautomaticsyncingforGoogle
Mail™,Calendar,Contactsandother
applications.
•Someapplicationsyouhavedownloaded
mayreducebatterypower.
To check the battery power level:
•Touch >Appstab>Settings >
About phonefromtheSYSTEM>Status
Thebatterystatus(chargingornotcharging)
andlevel(percentagecharged)isdisplayed
atthetopofthescreen.

22
Getting to know your phone
To monitor and control how battery
power is being used:
•Touch >Appstab > Settings >
Power SaverfromtheDEVICE>Battery
usefromtheBATTERY
Batteryusagetimeisdisplayedatthetopof
thescreen.Ittellsyouhowlongithasbeen
sinceyoulastconnectedyourphonetoa
powersourceor,ifcurrentlyconnected,how
longthephonewaslastrunningonbattery
power.Thescreenshowstheapplicationsor
servicesusingbatterypower,listedinorder
fromthegreatesttosmallestamountused.
3. Using folders
Youcancombineseveralappiconsina
folder.Droponeappiconoveranotheron
aHomescreen,andthetwoiconswillbe
combined.
NOTE: To see a smaller collection of
frequently used apps, touch the Google
Apps folder near the bottom of the
screen. As with any folder, you can
customize its contents.

23
NOTE: After you open an app, you can
usually adjust its settings by choosing
items from its Menu icon near the top or
bottom of the screen.
4. Before installing an open
source application and OS
WARNING
If you install and use an OS other than
the one provided by the manufacturer it
may cause your phone to malfunction.
In addition, your phone will no longer be
covered by the warranty.

24
Getting to know your phone
WARNING
To protect your phone and personal
data, only download applications from
trusted sources, such as Android
Market™. If there are improperly
installed applications on your phone,
it may not work normally or a serious
error may occur. You must uninstall
those applications and all associated
data and settings from the phone.
5. Using the hard reset
(Factory reset)
Ifyourphoneneedstoberestoredtoits
originalcondition,usehardresettoreboot
yourphone.
1.Whenthephoneisswitchedoff,press
andholdtheVolume down key +
Powerkey withyourlefthand.
2.WhentheLEDonthebottomofthephone
lightsup,touchandholdtheMenu key
withyourrighthand.Youneedtodothis
immediately,beforethescreendisplaysthe
LGlogo.Makesureyourlefthandisstill

25
holdingtheVolumedownandPowerkeys.
Thenreleasethepowerkeyatvibrationtime.
3.WhentheLGlogoisdisplayedonthe
screen,continuetoholdthekeysfor
around2seconds,andthenreleaseall
thematthesametime,beforetheLG
logodisappears.
Leaveyourphoneforatleastaminutewhile
thehardresetiscarriedout.Youwillthenbe
abletoswitchyourphonebackon.
Caution: If you perform a hard reset,
all user applications and user data will
be deleted. This cannot be reversed.
Remember to back up any important data
before performing a hard reset.
6. Opening and switching
applications
MultitaskingiseasywithAndroidbecause
youcankeepmorethanoneapplication
runningatthesametime.There'sno
needtoquitanapplicationbeforeopening
another.Useandswitchbetweenseveral
openapplications.Androidmanageseach
application,stoppingandstartingthemas
neededtoensurethatidleapplicationsdon't
consumeresourcesunnecessarily.

26
Getting to know your phone
To return to view list recently used
applications:
SimplypressandholdtheHomekey.
To stop applications:
1 Touch >Appstab>Settings>
AppsfromtheDEVICE
2 Scrollandtouchthedesiredapplication
andtouchStoptostopit.
7. Installing PC Software
(LG PC Suite)
"LGPCSuite"PCApplicationisaprogram
thathelpsyouconnectyourdevicetoaPC
viaaUSBcableandWi-Fi.Onceconnected,
youcanusethefunctionsofyourdevice
fromyourPC.
With your "LG PC Suite" PC Application,
You Can...
•Manageandplayyourmediacontents
(music,movie,pictures)onyourPC.
•Sendmultimediacontentstoyourdevice.

27
•Synchronisesdata(schedules,contacts,
bookmarks)inyourdeviceandPC.
•Backuptheapplicationsinyourdevice.
•Updatethesoftwaresinyourdevice.
•Backupandrestorethedevice.
•PlaymultimediacontentsofyourPCfrom
otherdevice.
NOTE: You can use the Help menu
from the application to find out how to
use your "LG PC Suite" PC application.
Installing "LG PC Suite" PC Application
"LGPCSuite"PCapplicationcanbe
downloadedfromthewebpageofLG.
1 Gotowww.lg.comandselectacountryof
yourchoice.
2 GotoSupport>Mobile PhoneSupport
>SelecttheModel(LGL96G).
3 ClickPC SyncfromDownload,and
clickWINDOW PC Sync Downloadto
download"LG PC Suite"PCsoftware.

28
Getting to know your phone
System Requirements for "LG PC Suite"
PC software
•OS:WindowsXP32bit(Servicepack2),
WindowsVista32bit/64bit,Windows7
32bit/64bit
•CPU:1GHzorhigherprocessors
•Memory:512MBorhigherRAMs
•Graphiccard:1024x768resolution,
32bitcolororhigher
•HDD:100MBormorefreeharddisk
space(Morefreeharddiskspacemaybe
neededdependingonthevolumeofdata
stored.)
•Requiredsoftware:LGintegrateddrivers
NOTE: LG Integrated USB Driver
LG integrated USB driver is required
to connect an LG device and PC and
installed automatically when you install
"LG PC Suite" PC software.

29
8. Synchronising your phone to
a computer via USB
NOTE: To synchronise your phone with
your PC using the USB cable, you need
to install LG PC Suite onto your PC.
Please refer to previous pages to install
LG PC Suite.
1 UsetheUSBcabletoconnectyourphone
toaUSBportonyourcomputer.Once
connected,youwillreceiveanotification
thataUSBconnectionhasbeenmade.
2 Openthenotificationdrawerandtouch
USBconnected.
3 TouchPC softwaretoconfirmthat
youwanttotransferfilesbetweenyour
phone'smicroSDcardandthecomputer.
TIP! To use the microSD card on your
phone again, you need to open the
notification drawer and touch >
Charge only.

30
Getting to know your phone
Duringthistime,youcan'taccessthe
microSDcardfromyourphone,soyoucan't
useapplicationsthatrelyonthemicroSD
card.
To disconnect your phone from the
computer:
Openthenotificationdrawerandtouch
>Charge onlytodisconnectyour
phonefromthecomputersafely.
9. Hold your phone upright
Holdyourmobilephonevertically,asyou
wouldaregularphone.TheLGL96Ghasan
internalantenna.Becarefulnottoscratchor
damagethebackofthephone,asthismay
affectperformance.
Whilemaking/receivingcallsorsending/
receivingdata,avoidholdingthelowerpart
ofthephonewheretheantennaislocated.
Doingsomayaffectcallquality.

31
10. When the screen freezes
If the screen freezes or the phone does
not respond when you try to operate it:
Removethebattery,reinsertit,thenturnthe
phoneon.
OR
PressandholdthePower/Lockkeyfor
10secondstoturnitoff.
Ifitstilldoesnotwork,pleasecontactthe
servicecentre.
32
Getting to know your phone
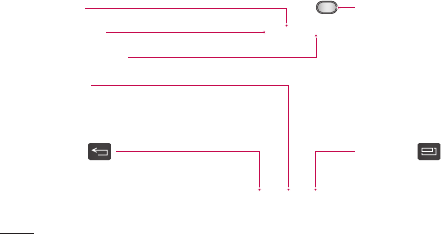
Device components
Earpiece
Proximity sensor
Camera lens
Home key
ReturntotheHomescreenfrom
anyscreen.
Back key
Returntothepreviousscreen.
Power/Lock key
•Switchyourphoneon/offbypressing
andholdingthiskey.
•Shortpresstolock/unlockthe
screen.
Menu key
•Checkwhatoptionsareavailable.
•GotoGoogleSearch™bypressing
andholdingthiskey.

33
NOTE: Proximity sensor
When receiving and making calls, the
proximity sensor automatically turns
the backlight off and locks the touch
screen by sensing when the phone is
near your ear. This extends battery life
and prevents you from unintentionally
activating the touch screen during calls.
WARNING
Placing a heavy object on the phone
or sitting on it can damage the LCD
and touch screen functions. Do not
cover the LCD proximity sensor with
protective film. This could cause the
sensor to malfunction.

34
Getting to know your phone
Power/Lock key
Charger/USB port
Microphone
Earphone Jack
Volume keys
•IntheHomescreen:Controlringer
volume.
•Duringacall:Controlyourearpiece
volume.
•Whenplayingatrack:Control
volumecontinuously.
Battery cover
Camera lens
microSD Card slot
SIM card slot
Speaker
Battery

35
Installing the SIM card and
battery
Beforeyoucanstartexploringyournew
phone,you'llneedtosetitup.Toinsertthe
SIMcardandbattery:
1 Toremovethebatterycover,holdthe
phonepulloffthebatterycoverwithyour
thumbnailasshowninfigure.
NOTE: Put your thumbnail into the USB
port hole and lift off the battery cover.

36
Getting to know your phone
2 SlidetheSIMcardintotheSIMcardslot.
Makesurethegoldcontactareaonthe
cardisfacingdownwards.
3 Insertthebatteryintoplacebyaligning
thegoldcontactsonthephoneandthe
battery(1)andpressingitdownuntilit
clicksintoplace(2).

37
4 Alignthebatterycoveroverthebattery
compartment(1)andpressitdownuntilit
clicksintoplace(2).
Charging your phone
Thechargerconnectorisatthebottomof
thephone.Insertthechargerandplugitinto
anelectricaloutlet.
NOTE: The battery must be fully
charged initially to improve battery
lifetime.
38
Getting to know your phone
NOTE: Do not open the battery cover
during the charging your phone.
Using the memory card
To insert a memory card:
Insertthememorycardintotheslot.
Makesurethegoldcontactareaisfacing
downwards.
To remove the memory card safely:
Touch >Appstab > Settings>
StoragefromtheDEVICE>Unmount SD
card>OK.
NOTE: The LGL96G supports memory
cards up to 32 GB.
39
WARNING
Do not insert or remove the memory
card when the phone is on. Doing so
may damage the memory card as well
as your phone, and the data stored on
the memory card may get corrupted.
To format the memory card:
Yourmemorycardmayalreadybe
formatted.Ifitisn't,youmustformatit
beforeyoucanuseit.
NOTE: All files on your memory card
are deleted when it is formatted.
1 Onthehomescreen,touch >Apps
tabtoopenthemenu.
2 ScrollandtouchSettings>Storage.
3 TouchUnmount SD cardandtouchOK
toconfirmit.
4 TouchErase SD card>Erase SD card
>Erase everything,thenconfirmyour
choice.

40
Getting to know your phone
5 Ifyouhavesetapatternlock,input
thepatternlockthenselectErase
Everything.
NOTE: If there is content on your
memory card, the folder structure may
be different after formatting as all the
files will be deleted.
Locking and unlocking the
screen
Ifyoudonotusethephoneforawhile,the
screenisturnedoffandlockedautomatically.
Thishelpstopreventaccidentaltouchesand
savesbatterypower.
WhenyouarenotusingtheLGL96G,press
thePower/Lock keytolockyour
phone.

41
Ifthereareanyprogramsrunningwhenyou
setlockscreen,theymaybestillrunningin
Lockmode.Itisrecommendedthatyouexit
allprogramsbeforeenteringLockmodeto
avoidunnecessarycharges(e.g.phonecalls,
webaccessanddatacommunications).
Towakeupyourphone,pressthePower/
Lock key.Thelockscreenwillappear.
Touchandslidethelockscreeninany
directiontounlockyourhomescreen.The
lastscreenyouviewedwillopen.
Secure your lock screen
Youcanlockyourscreensothatonlyyou
canunlockittoaccessyourphone.
To set an Unlock Pattern, PIN or
Password for the first time:
•Touch >Appstab>Settings > Lock
screen > Select screen lock > Swipe,
Face Unlock,Pattern,PinorPassword

42
Getting to know your phone
NOTE:
Precautions to take when using
pattern lock.
It is very important to remember the
unlock pattern you set. You will not be
able to access your phone if you use
an incorrect pattern 5 times. You have
5 opportunities to enter your unlock
pattern, PIN or password. If you have
used all 5 opportunities, you can try
again after 30 seconds.
When you cannot recall your unlock
pattern:
IfyouloggedintoyourGoogleaccounton
thephonebutfailedtoenterthecorrect
pattern5times,taptheForgotpattern
button.Youarethenrequiredtologinwith
yourGoogleaccounttounlockyourphone.
IfyouhavenotcreatedaGoogleaccount
onthephoneoryouforgotit,youhaveto
performahardreset.

43
Your Home screen
Touch screen tips
Herearesometipsonhowtonavigate
aroundyourphone.
Touch–Tochooseamenu/optionoropen
anapplication,touchit.
Touch and hold–Toopenanoptionsmenu
orgrabanobjectyouwanttomove,touch
andholdit.
Drag–Toscrollthroughalistormove
slowly,dragacrossthetouchscreen.
Flick–Toscrollthroughalistormove
quickly,flickacrossthetouchscreen(drag
quicklyandrelease).
NOTE:
• To select an item, touch the centre of
the icon.
• Do not press too hard; the touch
screen is sensitive enough to pick up
a light, firm touch.
• Use the tip of your finger to touch the
option you want. Be careful not to
touch any other keys.
44
Home
Simplyswipeyourfingertotheleftorright
toviewthepanels.Youcancustomiseeach
panelwithApps,Downloads,Widgetsand
wallpapers.
NOTE: Some screen images may be
different depending on your phone
provider.
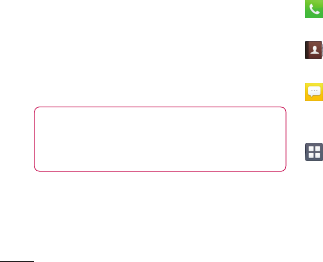
OnyourHomescreen,youcanviewquick
keysatthebottomofthescreen.Quick
keysprovideeasy,one-touchaccesstothe
functionsyouusethemost.
TouchthePhoneicontobringupthe
touchscreendialpadtomakeacall.
TouchthePeopleicontoopenyour
contacts.
TouchtheMessagingicontoaccess
themessagingmenu.Thisiswhereyoucan
createanewmessage.
TouchtheAppsiconatthebottom
ofthescreen.Youcanthenviewall
yourinstalledapplications.Toopenany
application,simplytouchtheiconinthe
applicationslist.
Your Home screen
45
Customising the Home screen
YoucancustomiseyourHomescreen
byaddingApps,Downloads,Widgetsor
Wallpapers.Formoreconvenienceusing
yourphone,addyourfavouritewidgetsto
theHomescreen.
To add items on your Home screen:
1 Touchandholdtheemptypartofthe
Homescreen.
2 IntheAddModemenu,selectitemsyou
wanttoadd.Youwillthenseeadded
itemsontheHomescreen.
3 Dragittothelocationyouwantandlift
yourfinger.
To remove an item from the Home
screen:
•Home screen>touchandholdtheicon
youwanttoremove>dragitto
TIP! To add an application icon to the
Home screen from the Applications
menu, touch and hold the application
you want to add.
48
Your Home screen
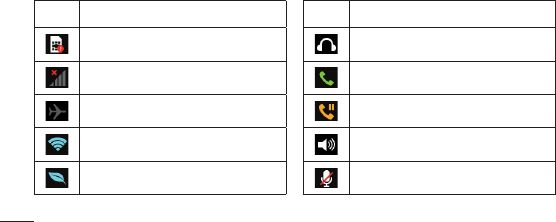
Icon Description
NoSIMcard
Nosignal
Airplanemode
ConnectedtoaWi-Finetwork
Powersaverison
Icon Description
Wiredheadset
Callinprogress
Callhold
Speakerphone
Phonemicrophoneismuted
Belowisatableexplainingthemeaningoficonsyou'relikelytoseeinthestatusbar.
50
Your Home screen
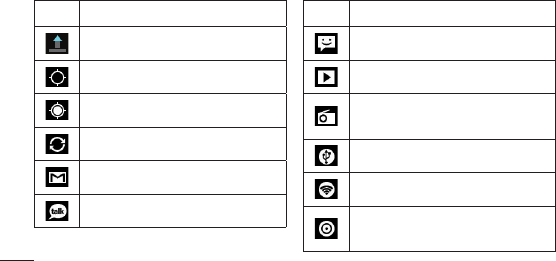
Icon Description
Uploadingdata
GPSisacquiring
ReceivinglocationdatafromGPS
Dataissyncing
NewGmail
NewGoogleTalkmessage
Icon Description
Newmessage
Songisplaying
FMradioturnedoninthe
background
USBtetheringisactive
PortableWi-Fihotspotisactive
BothUSBtetheringandportable
hotspotareactive
51
Onscreen keyboard
Youcanentertextusingtheonscreen
keyboard.Theonscreenkeyboardappears
automaticallyonthescreenwhenyou
needtoentertext.Tomanuallydisplaythe
keyboard,simplytouchatextfieldwhere
youwanttoentertext.
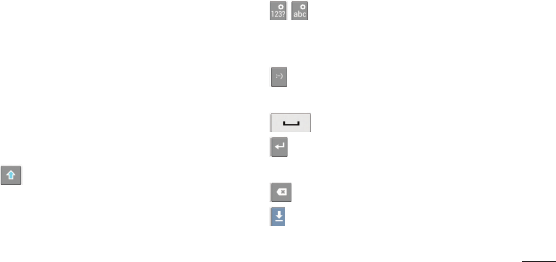
Using the keypad & entering text
Taponcetocapitalisethenextletteryou
type.Double-tapforallcaps.
Taptoswitchtothenumbersand
symbolskeyboard.Youcanalsotouchand
holdthistabtoviewtheSettingsmenu.
Taptoinsertanemoticonwhenwriting
amessage.
Taptoenteraspace.
Taptocreateanewlineinthemessage
field.
Taptodeletethepreviouscharacter.
Taptohidetheonscreenkeyboard.

52
Your Home screen
Entering accented letters
WhenyouselectFrenchorSpanishasthe
textentrylanguage,youcanenterspecial
FrenchorSpanishcharacters(e.g."á").
Forexample,toinput"á",touchandhold
the"a"keyuntilthezoom-inkeygrows
biggeranddisplayscharactersfromdifferent
languages.
Thenselectthespecialcharacteryouwant.

53
Google account set up
Whenyoufirstturnonyourphone,youhave
theopportunitytoactivatethenetwork,to
signintoyourGoogleAccountandhowyou
wanttousesomeGoogleservices.
To set up your Google account:
•SignintoaGoogleAccountfromthe
promptedsetupscreen.
OR
•Touch >Appstab>selectaGoogle
application,suchasGmail>selectNEW
tocreateanewaccount.
IfyouhaveaGoogleaccount,touch
Existing,enteryouremailaddressand
password,thentouchSign in.
OnceyouhavesetupyourGoogleaccount
onyourphone,yourphoneautomatically
synchroniseswithyourGoogleaccounton
theweb.
Yourcontacts,Gmailmessages,Calendar
eventsandotherinformationfromthese
applicationsandservicesonthewebare
synchronisedwithyourphone.(Thisdepends
onyoursynchronisationsettings.)
Aftersigningin,youcanuseGmail™and
takeadvantageofGoogleservicesonyour
phone.

54
Connecting to Networks and Devices
Wi-Fi
WithWi-Fi,youcanusehigh-speedInternet
accesswithinthecoverageofthewireless
accesspoint(AP).EnjoywirelessInternet
usingWi-Fi,withoutextracharges.
Connecting to Wi-Fi networks
TouseWi-Fionyourphone,youneedto
accessawirelessaccesspointor"hotspot".
Someaccesspointsareopenandyoucan
simplyconnecttothem.Othersarehidden
orusesecurityfeatures;youmustconfigure
yourphonetobeabletoconnecttothem.
TurnoffWi-Fiwhenyou'renotusingitto
extendthelifeofyourbattery.
NOTE: If you are out of the Wi-Fi zone
or set Wi-Fi to OFF, additional charges
may be applied by your mobile operator
for mobile data use.
Turning Wi-Fi on and connecting to a
Wi-Fi network
1 Touch >Appstab>Settings>
Wi-FifromtheWIRELESS&NETWORKS
2 SetWi-FitoONtoturnitonandstart
scanningforavailableWi-Finetworks.

55
3 TapWi-Fimenuagaintoseealistof
activeandin-rangeWi-Finetworks.
•Securednetworksareindicatedbyalock
icon.
4 Touchanetworktoconnecttoit.
•Ifthenetworkisopen,youareaskedto
confirmthatyouwanttoconnecttothat
networkbytouchingConnect.
•Ifthenetworkissecured,youare
promptedtoenterapasswordor
othercredentials.(Askyournetwork
administratorfordetails)
5 Thestatusbardisplaysiconthatindicate
Wi-Fistatus.
Bluetooth
YoucanuseBluetoothtosenddataby
runningacorrespondingapplication,not
fromtheBluetoothmenuasonmostother
mobilephones.

56
Connecting to Networks and Devices
TIP! With LGL96G, you can enjoy
Bluetooth high speed.
If the device you want to share files with
also supports high speed Bluetooth,
the files will automatically be transferred
via the high-speed network. To use
Bluetooth high speed data transfer,
please make sure the Wi-Fi is OFF on
your devices before use. The settings
for Bluetooth high speed may be
different depends on the device. Please
check the device's settings with their
service provider.
Turning on Bluetooth and pairing up your
phone with a Bluetooth device
Youmustpairyourdevicewithanother
devicebeforeyouconnecttoit.
1 Touch >Appstab>Settings>Set
BluetoothtoONfromtheWIRELESS&
NETWORKS
2 TapBluetoothmenuagain.Yourphone
willscanforanddisplaytheIDsofall
availableBluetoothin-rangedevices.If
thedeviceyouwanttopairwithisn’ton
thelist,makesurethetargetdeviceis
settobediscoverable,thentapSEARCH

57
FOR DEVICESagain.
3 Choosethedeviceyouwanttopairup
withfromthelist.
Oncetheparingissuccessful,yourdevice
willconnecttothedevice.
Sending pictures using Bluetooth
1 SelectaPicture> >Bluetooth
2 CheckwhetherBluetoothisON,then
selectSEARCH FOR DEVICES.
3 Choosethedeviceyouwanttosenddata
tofromthelist.
Sharing your phone's data
connection
USBtetheringandportableWi-Fihotspotare
greatfeatureswhentherearenowireless
connectionsavailable.Youcanshareyour
phone'smobiledataconnectionwitha
singlecomputerviaaUSBcable(USB
tethering).Youcanalsoshareyourphone's
dataconnectionwithmorethanasingle
deviceatatimebyturningyourphoneintoa
portableWi-Fihotspot.
Whenyourphoneissharingitsdata
connection,aniconappearsinthestatus

58
Connecting to Networks and Devices
barandasanongoingnotificationinthe
notificationsdrawer.
Forthelatestinformationabouttethering
andportablehotspots,includingsupported
operatingsystemsandotherdetails,visit
http://www.android.com/tether.
To change Portable Wi-Fi hotspot
settings:
•Touch >Appstab>Settings>
More fromtheWIRELESS&NETWORKS>
Portable Wi-Fi hotspot>Chooseoptions
thatyouwanttoadjust
TIP!
If your computer is running Windows 7
or a recent distribution of some flavours
of Linux (such as Ubuntu), you don't
usually need to prepare your computer
for tethering. But if you're running an
earlier version of Windows or another
operating system, you may need to
prepare your computer to establish
a network connection via USB. For
the most current information about
which operating systems support USB
tethering and how to configure them,
visit http://www.android.com/tether.

59
To rename or secure your
portable hotspot
Youcanchangethenameofyourphone's
Wi-Finetworkname(SSID)andsecureits
Wi-Finetwork.
1 OntheHomescreen,touch >Apps
tab>Settings
2 TouchMorefromtheWIRELESS&
NETWORKSandselectPortable Wi-Fi
hotspot.
3 EnsurePortable Wi-Fi hotspotisticked.
4 TouchConfigure Wi-Fi hotspot.
•TheConfigure Wi-Fi hotspotdialogbox
willopen.
•YoucanchangethenetworkSSID(name)
thatothercomputersseewhenscanning
forWi-Finetworks.
•YoucanalsotouchtheSecuritymenuto
configurethenetworkwithWi-FiProtected
Access2(WPA2)securityusingapre-
sharedkey(PSK).

60
Connecting to Networks and Devices
•IfyoutouchtheWPA2 PSKsecurity
option,apasswordfieldisaddedtothe
Configure Wi-Fi hotspotdialog.Ifyou
enterapassword,youwillneedtoenter
thatpasswordwhenyouconnecttothe
phone'shotspotwithacomputerorother
device.YoucansetOpenintheSecurity
menutoremovesecurityfromyourWi-Fi
network.
5 TouchSave.
ATTENTION!
If you set the security option as Open,
you cannot prevent unauthorised usage
of online services by other people and
additional charges can be incurred.
To avoid unauthorised usage, you are
advised to keep the security option
active.

61
Using the Wi-Fi Cast
Youcanshareyourmusic,pictureandvideo
contentbetweenuserswhouseAndroid
PhonesconnectedviathesameWi-Fi&
Wi-FiDirectednetwork.
CheckyourWi-Fi&Wi-FiDirectednetwork
inadvanceandmakesuretheusersare
connectedtothesamenetwork.
1 Touch >Appstab>Settings>
MorefromtheWIRELESS&NETWORKS
> Wi-Fi Direct
2 Touchthewi-fidirectcheckboxtoturn
on.
3 Selectadevicetoconnectfromthe
scanneddevicelist.
4 TouchConnect.
Enabling Wi-Fi Direct to share
through SmartShare
Wi-FiDirectautomaticallyscansnearby
Wi-FiDirectdevicesandthesearched
devicesarelistedastheyarefoundand
youcanselectaspecificdevicetoshare
multimediadatathroughSmartShare.
Wi-FiDirectcannotbeenabledwhileusing
otherWi-Fifunctions.

62
Connecting to Networks and Devices
1 Touch >Appstab>Settings >
MorefromtheWIRELESS&NETWORKS
>Wi-Fi Direct
2 Selectadevicetoconnectfromthe
scanneddevicelist.
Forced Group owner mode–Touchto
activategroupownermode,whichenables
thelegacyWi-Fidevicestoconnectby
scanningyourphone.Inthiscaseyoumust
enterthepasswordthatissetinPassword.
NOTE: When your phone becomes
a group owner, it will consume more
battery power than when it is a client.
Wi-Fi Direct connection does not
provide Internet service. Additional
costs may be incurred when connecting
and using online services. Check data
charges with your network provider.

63
Using SmartShare
SmartShareusesDLNA(DigitalLiving
NetworkAlliance)technologytosharedigital
contentthroughawirelessnetwork.
BothdevicesmustbeDLNAcertifiedto
supportthisfeature.
To turn SmartShare on and allow sharing
contents
1 Touch >Appstab>SmartShare
2 Press andselectSettings.
3 TouchDiscoverablecheckboxtoturnoff.
•TouchAlways accept requestifyou
wouldliketoautomaticallyacceptsharing
requestsfromotherdevices.
•TouchReceive filesifyouwouldliketo
automaticallyallowuploadfilestomy
phonefromotherdevices.
4 UndertheSharingcontentssection,
touchtocheckmarkthetypesofcontent
youwouldliketoshare.Choosefrom
Pictures,VideosandMusic Player.
5 SmartShareisnowactivatedandready
tosharecontents.

64
Connecting to Networks and Devices
To share contents from remote content
library to other devices
Letyourrendererdevice(e.g.TV)play
multimediacontentsfromyourremote
contentlibrary(e.g.PC).
NOTE: Make sure that the DLNA
functionality of your devices is properly
configured (e.g. TV and PC).
1 Touchthetoprightbuttontoorselectthe
devicefromrendererlists.
2 Touchthetopleftbuttonandselectthe
deviceoftheremotecontentlibrary.
3 Youcanbrowsethecontentlibrary.
4 Touchacontentthumbnailorpressthe
MenukeyandselectPlaybutton.
To share contents from your phone to
your renderer device(e.g. TV)
NOTE: Make sure that your renderer
device is properly configured.
1 Whilebrowsingyourpicturesorvideos
usingtheGalleryapplication,touch
toselectfiles.Thenyouwillbeableto
selectmultiplefilestobeshared.

65
2 TouchShareonthemenuandselectthe
SmartShare.
3 SmartShareisautomaticallylaunched
withtheselectedfiles.
4 Selectthedevicefromrendererliststo
playthefiles.
NOTE: Follow the similar steps to use
the Music Player, Camera and Video
player to share contents.
Notice: Check that your device is
connected with your home network using
Wi-Fi connection to use this application.
Some DLNA enabled devices (e.g. TV)
support only the DMP feature of DLNA and
will not appear in the renderer device list.
Your device might not be able to play some
contents.
To download contents from remote
content library
1 Touch >Appstab>SmartShare
2 Touchthetopleftbuttonandselectthe
deviceoftheremotecontentlibrary.
66
Connecting to Networks and Devices
3 Youcanbrowsethecontentlibrary.
4 Touchacontentthumbnailthentouch
Download menu key.
Notice: A few types of contents are not
supported.
To upload contents from my phone to
remote content library
NOTE: Mare sure that SD card is
correctly mounted and the Receive files
in settings menu is checked.
1 Touch >Appstab>SmartShare
2 TouchthetopleftbuttonandselectMy
phone.
3 Youcanbrowsethecontentlibrary.
4 Touchandholdacontentthumbnailand
thentouchtheUpload menu key.
5 Selectadeviceofremotecontentlibrary
tobeuploaded.
Notice: Some DLNA enabled devices
do not support DMS upload functionality
and will not be uploaded. A few types of
contents are not supported.
67
Calls
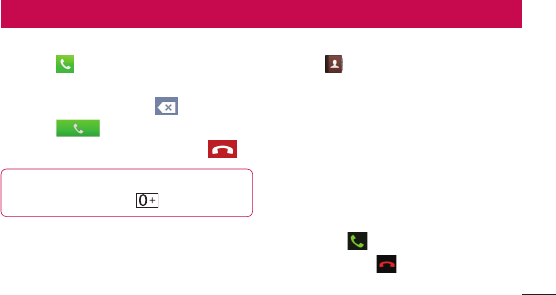
Making a call
1 Touch toopenthekeypad.
2 Enterthenumberusingthekeypad.To
deleteadigit,touchthe .
3 Touch tomakeacall.
4 Toendacall,touchtheEndicon .
TIP! To enter "+" to make international
calls, touch and hold .
Calling your contacts
1 Touch toopenyourcontacts.
2 Scrollthroughthecontactlistorenterthe
firstfewlettersofthecontactyouwantto
callbytouchingSearch.
3 Inthelist,touchthecontactyouwant
tocall.
Answering and rejecting a call
WhenyoureceiveacallinLockstate,hold
andslidethe toanswerincomingcall.
Holdandslidethe torejectanincoming
call.

68
Calls
HoldandslidetheQuick msgiconfromthe
bottomifyouwanttosendone.
TIP! Quick msg
You can send a message quickly using
this function. This is useful if you need
to reply the message during a meeting.
Adjusting call volume
Toadjustthein-callvolumeduringacall,
usetheVolumeupanddownkeysonthe
left-handsideofthephone.
Making a second call
1 Duringyourfirstcall,touchMenu>
Addcallanddialthenumber.Also,you
cangorecentdialledlistbytouching
orcansearchcontactsbytouching
andselectthenumberyouwanttocall.
2 Touch tomakethecall.
3 Bothcallsaredisplayedonthecall
screen.Yourinitialcallislockedandput
onhold.
4 Touchthedisplayednumbertotoggle
betweencalls.Ortouch Merge calls
tomakeaconferencecall.
69
5 Toendactivecalls,touchEndorpress
HomeKeyandslidethenotificationbar
downandselectEnd callicon .
NOTE: You are charged for each call
you make.
Viewing your call logs
OntheHomescreen,touch andchoose
theCall logtab .
Viewacompletelistofalldialled,received
andmissedvoicecalls.
TIP! Touch any call log entry to view the
date, time and duration of the call.
TIP! Press the Menu key, then touch
Delete all to delete all the recorded
items.
Call settings
Youcanconfigurephonecallsettingssuch
ascallforwardingandotherspecialfeatures
offeredbyyourcarrier.

70
Calls
1 OntheHomescreen,touch .
2 Touchmenu.
3 TapCall settingsandchoosetheoptions
thatyouwanttoadjust.
Fixed dialing numbers–Toturnonand
compilealistofnumbersthatcanbecalled
fromyourphone.You’llneedyourPIN2,
whichisavailablefromyouroperator.Only
numberswithinthefixeddiallistcanbe
calledfromyourphone.
Voicemail service–Allowsyoutoselect
yourcarrier’svoicemailservice.
Voicemail settings–Ifyouareusingyour
carrier’svoicemailservice,thisoptionallows
youtoenterthephonenumbertousefor
listeningtoandmanagingyourvoicemail.
Save unknown numbers–Addunknown
numberstocontactsafteracall.
Call reject–Allowsyoutosetthecallreject
function.ChoosefromDisabled,Reject
calls on listorReject all calls.
Quick messages–Whenyouwanttoreject
acall,youcansendaquickmessageusing
thisfunction.Thisisusefulifyouneedto
rejectacallduringameeting.

71
Call forwarding–Choosewhethertodivert
allcalls,whenthelineisbusy,whenthereis
noanswerorwhenyouhavenosignal.
Call barring–Selectwhenyouwouldlike
callstobebarred.Enterthecallbarring
password.Pleasecheckwithyournetwork
operatoraboutthisservice.
Call duration–Viewthedurationofcalls
includingallcalls,dialledcalls,receivedcalls
andlastcall.
Call costs–Viewthechargesapplied
toyourcalls.(Thisserviceisnetwork
dependent;someoperatorsdonotsupport
thisfunction)
Additional settings–Thisletsyouchange
thefollowingsettings:
Caller ID:Choosewhethertodisplayyour
numberonanoutgoingcall.
Call waiting:Ifcallwaitingisactivated,
thehandsetwillnotifyyouofan
incomingcallwhileyouareonthephone
(dependingonyournetworkprovider).
72
Contacts
Addcontactstoyourphoneandsynchronise
themwiththecontactsinyourGoogle
accountorotheraccountsthatsupport
contactsyncing.
Searching for a contact
In the Home screen
1 Touch toopenyourcontacts.
2 TouchSearch contactsandenterthe
contactnameusingthekeyboard.
Adding a new contact
1 Touch ,enterthenewcontact's
number,thenpresstheMenukey.Touch
Add to contacts>Create new contact.
2 Ifyouwanttoaddapicturetothenew
contact,touchtheimagearea.
ChoosefromTake photoorSelect from
gallery.
3 Selectthecontacttypebytouching .
4 Touchacategoryofcontactinformation
andenterthedetailsaboutyourcontact.
5 TouchSave.

73
Favourite contacts
Youcanclassifyfrequentlycalledcontacts
asfavourites.
Adding a contact to your favourites
1 Touch toopenyourcontacts.
2 Touchacontacttoviewtheirdetails.
3 Touchthestartotherightofthecontact's
name.Thestarturnsblue.
Removing a contact from your favourites
list
1 Touch toopenyourcontacts.
2 Touchthe tab,selectFavouritesat
thetopofthelistandchooseacontactto
viewitsdetails.
3 Touchthebluestartotherightofthe
contact'sname.Thestarturnsgrey
andthecontactisremovedfromyour
favourites.

74
Contacts
Moving contacts from your Old
Device to your New Device
Export your contacts as a CSV file from
your old phone to your PC using a PC
sync program.
1 InstallLGPCSuiteonthePCfirst.Run
theprogramandconnectyourAndroid
mobilephonetothePCusingaUSB
cable.
2 Selectthe .GotoFile>Importand
selecttheCSVfilesavedonyourPC.
3 IfthefieldsintheimportedCSVfileare
differentfromthoseinLGPCSuite,you
needtomapthefields.Aftermapping
thefields,clickOK.Thecontactsarethen
addedtoLGPCSuite.
4 IfLGPCSuitedetectstheconnection
ofyourLGL96Gphone(usingtheUSB
cable),clickSyncorSynccontactsto
synchronisethecontactssavedonyour
PCwithyourphone.
75
Messaging
YourLGL96GcombinesSMSandMMSinto
oneintuitive,easy-to-usemenu.
Sending a message
1 Touch onthehomescreen,and
touch toopenablankmessage.
2 Enteracontactnameorcontactnumber
intheTofield.Asyouenterthecontact
name,matchingcontactsappear.Youcan
touchasuggestedrecipient.Youcanadd
multiplecontacts.
NOTE: You will be charged for a text
message for every person you send the
message to.
3 TouchEntermessagefieldandstartto
composeyourmessage.
4 Press toopentheOptionsmenu.
ChoosefromAdd subject,Discard,
Attach,Insert smiley andAll
messages.
5 TouchSendtosendyourmessage.
76
Messaging
6 Themessagescreenopens,withyour
messageafterRecipientName/Number.
Responsesappearonthescreen.Asyou
viewandsendadditionalmessages,a
messagethreadiscreated.
WARNING: The 160-character
limit may vary from country to country
depending on the language and how
the SMS is coded.
WARNING: If an image, video or
audio file is added to an SMS message,
it is automatically converted into an
MMS message and you are charged
accordingly.
Threaded box
Messages(SMS,MMS)exchanged
withanotherpartycanbedisplayed
inchronologicalordersothatyoucan
convenientlyseeanoverviewofyour
conversation.

77
Using Smilies
LivenupyourmessagesusingSmilies.
Whenwritinganewmessage,pressthe
Menukey,thenchooseInsert smiley.
Changing your message
settings
YourLGL96Gmessagesettingsare
predefined,soyoucansendmessages
immediately.Youcanchangethesettings
basedonyourpreferences.

78
Email
YoucanusetheEmailapplicationtoread
emailsfromservicesotherthanGoogleMail.
TheEmailapplicationsupportsthefollowing
accounttypes:POP3,IMAPandExchange.
Yourserviceproviderorsystemadministrator
canprovidetheaccountsettingsyouneed.
Managing an email account
ThefirsttimeyouopentheEmail
application,asetupwizardopenstohelpyou
tosetupanemailaccount.
To add another email account:
•Touch >Appstab>Email>inthe
accountscreen,touch >Settings>
ADD ACCOUNT
Aftertheinitialsetup,Emaildisplaysthe
contentsofyourinbox.Ifyouhaveadded
morethanoneaccount,youcanswitch
amongaccounts.
To change an email account's setting:
•Touch >Appstab>Email>inthe
accountscreen,touch >Settings

79
To delete an email account:
•Touch >Appstab>Email>inthe
accountscreen,touch >Settings
>touchanaccountyouwanttodelete>
Remove account
Email account screen
YoucantouchanaccounttoviewitsInbox.
Theaccountfromwhichyousendemailby
defaultisindicatedwithatick.
–Touchthefoldericontoopenthe
accountfolders.
Onlythemostrecentemailsinyouraccount
aredownloadedtoyourphone.
Working with account folders
EachaccounthasanInbox,Outbox,Sent
andDraftsfolder.Dependingonthefeatures
supportedbyyouraccount'sserviceprovider,
youmayhaveadditionalfolders.
Composing and sending email
To compose and send a message
1 WhileintheEmailapplication,touch
the .

80
2 Enteranaddressforthemessage's
intendedrecipient.Asyouentertext,
matchingaddressesareofferedfromyour
Contacts.Separatemultipleaddresses
withsemicolon.
3 AddCc/Bccandaddattachmentfilesif
required.
4 Enterthetextofthemessage.
5 Touchthe .
Ifyouaren'tconnectedtoanetwork,for
example,ifyou'reworkinginairplane
mode,themessagesthatyousend
arestoredinyourOutboxfolderuntil
you'reconnectedtoanetworkagain.If
itcontainsanypendingmessages,the
OutboxisdisplayedontheAccounts
screen.
TIP! When a new email arrives in the
inbox, you will receive a notification
by sound or vibration. Tap the email
notification to stop notifications.
Email

81
Camera
Getting to know the viewfinder
Switch lenses–Switchbetweentherear–facingcameralens
andthefront–facingcameralens.
Zoom–Zoominorzoomout.Alternativelyyoucanusethe
sidevolumekeys.
Brightness–Thisdefinesandcontrolstheamountofsunlight
enteringtheimage.
Shot mode–ChoosefromNormal,Panoramaor
Continuous shot.
Settings–TouchthisicontoopentheSettingsmenu.
Video mode–Touchthisicontoswitchtovideomode.
Taking a photo
Gallery–Touchtoviewthelastphotoyoucaptured.This
enablesyoutoaccessyourgalleryandviewsavedphotos
withincameramode.
82
Camera
Taking a quick photo
1 OpentheCameraapplication.
2 Holdthephone,pointthelenstowards
thesubjectyouwanttophotograph.
3 Touchthescreenandafocusboxwill
appearinthecentreoftheviewfinder
screen.
4 Whenthefocusboxturnsgreen,the
camerahasfocusedonyoursubject.
5 Takeyourfingeroffthe .
Once you've taken the photo
Touch toviewthelastphotoyou
captured.
Touchtoshareyourphotousing
Bluetooth,Messaging,Picasa,
Google+ or Gmail.
TIP! If you have an SNS account and
set it up on your phone, you can share
your photo with the SNS community.
83
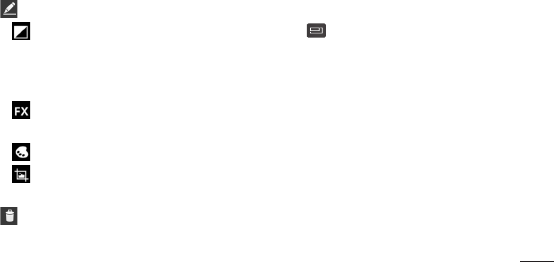
Viewandeditthepicture.
Selecttheimageresolution.Ifyou
choosethehighresolution,thefilesizewill
increase,whichmeansyouwillbeableto
storefewerphotosinthememory.
Improvescolourqualitiesindifferent
lightingconditions.
Appliesartisticeffectstothepictures.
Appliestheadditionaloptionsfor
pictures.
Touchtodeletetheimage.
Using the advanced settings
Touch toopenalladvancedoptions.
Set picture as–Touchtousetheimageas
aContactphoto,LockscreenWallpaperor
Wallpaper.
Move–Touchtomovetheimagetoother
place.
Rename–Touchtoeditthenameofthe
selectedpicture.
Rotate left/right–Rerotateleftorright.

84
Camera
Crop–Cropyourphoto.Moveyourfinger
acrossthescreentoselectthearea.
Slideshow–Autoreviewautomatically
showsyouthepictureyoujustrecorded.
Details–Showthepictureinformation.
TIP! When you exit the camera, some
settings return to their defaults, such as
white balance, colour tone, timer and
scene mode. Check these before you
take your next photo.
TIP! The Settings menu is
superimposed over the viewfinder
so, when you change elements of
the image colour or quality, you see a
preview of the image change behind the
Settings menu.

85
Video camera
Getting to know the viewfinder
Switch lenses–Switchbetweentherear–facingcameralens
andthefront-facingcameralens.
Zoom–Zoominorzoomout.Alternativelyyoucanusethe
sidevolumekeys.
Brightness–Thisdefinesandcontrolstheamountofsunlight
enteringthevideo.
Flash–Allowsyoutoturnontheflashwhentakingaphoto
inadarkplace.
Settings–Touchthisicontoopenthesettingsmenu.
Camera mode–Touchthisicontoswitchtocameramode.
Start recording
Gallery–Touchtoviewthelastvideoyourecorded.This
enablesyoutoaccessyourgalleryandviewyoursavedvideos
fromwithinvideomode.
86
Shooting a quick video
1 TouchtheCameramodebutton.
2 Thevideocameraviewfinderappearson
thescreen.
3 Holdingthephone,pointthelenstowards
thesubjectyouwanttocaptureinyour
video.
4 PresstheRecord buttononcetostart
recording.
5 Aredlightappearsatthetopcornerof
theviewfinderwithatimershowingthe
lengthofthevideo.
6 Touch onthescreentostop
recording.
After shooting a video
Yourcapturedvideowillappearonthe
Gallery.Touch toviewthelastvideoyou
captured.
Touchtoplaythevideo.
TouchtosharethevideoBluetooth,
Messaging,YouTubeorGmail.
Touchtodeletethevideoyoujustmade.
ConfirmbytouchingOK.Theviewfinder
reappears.
Video camera

87
Using the advanced settings
Touch toopenalltheadvancedoptions.
Move–Touchtomovethevideotoother
place.
Rename–Taptoeditthenameofthe
selectedvideo.
Detail–Taptoseeadetailedinformation,
suchasthename,date,time,sizeandtype.
Adjusting the volume when
viewing a video
Toadjustthevolumeofavideowhileitis
playing,usethevolumekeysontheleft-
handsideofthephone.

88
Youcanstoremultimediafilesonamemory
cardforeasyaccesstoallyourimageand
videofiles.
Gallery
Touch >Appstab>Gallery.Open
alistofcataloguebarsthatstoreallyour
multimediafiles.
Music Player
YourLGL96Ghasabuilt-inmusicplayer
thatletsyouplayallyourfavouritetracks.To
accessthemusicplayer,Touch >Apps
tab>Music Player.
Transferring music files using
USB mass storage devices
1 ConnecttheLGL96GtoaPCusinga
USBcable.
2 Ifyouhaven'tinstalledLGAndroid
PlatformDriveronyourPC,youneedto
changethesettingsmanually.Choose
Settings>Connectivity>USB
Connectiontype,thenselectMedia sync.
3 Youcanviewthemassstoragecontent
onyourPCandtransferthefiles.
Multimedia
89
NOTE: You need to install an SD card
first. Without an SD card, you cannot
use USB mass storage.
NOTE: If you installed LG Android
Platform Driver, you will immediately see
a pop-up saying Turn on USB storage.
Playing a song
1 IntheHomescreen,touch >Apps
tab>Music Player.
2 TouchSongs.
3 Selectthesongyouwanttoplay.
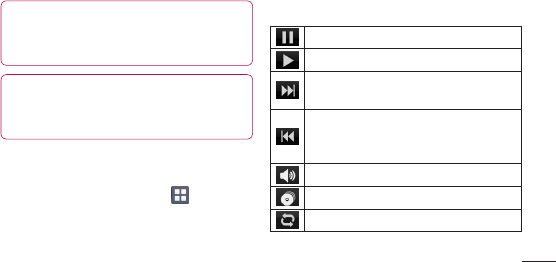
Touchtopauseplayback.
Touchtoresumeplayback.
Touchtoskiptothenexttrackinthe
album,playlistorshuffle.
Touchtogobacktothebeginningof
thesong.Touchtwicetoreturntothe
previoussong.
Touchtomanagethemusicvolume.
Touchtoseemusiclibraryscreen.
Touchtosetrepeatmode.
90
Multimedia
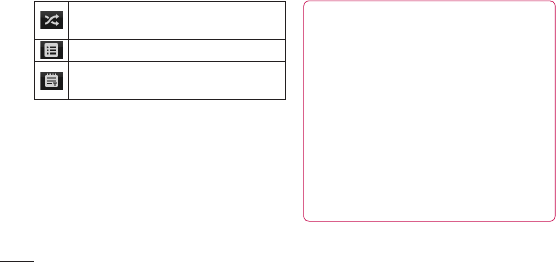
Touchtoplaythecurrentplaylistin
shufflemode.
Touchtoseethecurrentplaylist.
Touchtoseelyrics.Thisoptionisononly
ifthesongincludesthelyrics.
Tochangethevolumewhilelisteningto
music,presstheupanddownvolumekeys
ontheleft-handsideofthephone.
Touchandholdanysonginthelist.It
displaysPlay,Add to playlist,Set as
ringtone,Delete,Share,Searchand
Detailsasoptions.
NOTE: Music file copyrights may be
protected by international treaties and
national copyright laws.
Therefore, it may be necessary to obtain
permission or a licence to reproduce or
copy music.
In some countries, national laws prohibit
private copying of copyrighted material.
Before downloading or copying the file,
check the national laws of the relevant
country concerning the use of such
material.

91
FM Radio
YourLGL96Ghasabuilt-inFMRadiosoyou
cantuneintoyourfavouritestationsand
listenonthego.
NOTE: You need to use your
headphones to listen to the radio. Insert
it into the headphone jack.
Searching for stations
Youcantuneintoradiostations
bysearchingforthemmanuallyor
automatically.Theyarethensavedto
specificchannelnumbers,soyoudon'thave
tofindthemagain.
Youcanstoreupto48channelsonyour
phone.
Tuning in automatically
1 IntheHomescreen,touch >Apps
tab>FM Radio.
92
Multimedia
2 Touch ,thenselectAuto scan.
3 Duringautoscanning,touchStopifyou
wanttostopscanning.Onlyscanned
channelsaresavedbeforeyoustop
scanning.
NOTE: You can also manually tune in to
a station using the on-screen wheel.
TIP! To improve radio reception, extend
the headset cord as this also functions
as the radio antenna.
If you connect a headset not specifically
made for radio reception, radio
reception may be poor.
93
LGSmartWorldoffersanassortmentof
excitingcontent-games,applications,
wallpaperandringtones-givingLGphone
usersthechancetoenjoyricher"Mobile
Life"experiences.
How to Get to LG SmartWorld
from Your Phone
1 Tapthe icontoaccessLG
SmartWorld.
2 TapSigninandenterID/PWforLG
SmartWorld.Ifyouhavenotyetsigned
up,tapRegisterandgetaLGSmartWorld
membership.
3 Downloadthecontentyouwant.
NOTE: What if there is no icon?
1 Using a mobile Web browser, access
LG SmartWorld (www.lgworld.com)
and select your country.
2 Download LG SmartWorld App.
3 Execute and install the downloaded
file.
4 Access LG SmartWorld by tapping
the icon.
LG SmartWorld

94
How to use LG SmartWorld
•ParticipateinmonthlyLGSmartWorld
promotions.
•Trytheeasy"Menu"buttonstofindwhat
you’relookingforfast.
Categories –Findcontentsbycategory
(e.g.Education,Entertainment,Games,
etc).
Search –SearchContent.
Apps for you –Recommendedcontent
basedonyourpreviouschoices.
My Apps –Listofdownloaded/to-be
updatedcontents.
Settings –SetProfileandDisplay.
Sign in–SetyourIDandPassword.
•Tryotherusefulfunctionsaswell.(Content
Detailscreen)
NOTE: LG SmartWorld may not be
available in all carriers or countries.
LG SmartWorld
95
Utilities
Setting your alarm
1 Touch >Appstab>Alarm/Clock
>
2 Afteryousetthetime,theLGL96Glets
youknowhowmuchtimeisleftbefore
thealarmwillsound.
3 SetSnooze duration,Vibration,Alarm
tone,Puzzle lock and Memo.Touch
Save.
Using your calculator
1 Touch >Appstab>Calculator
2 Touchthenumberkeystoenternumbers.
3 Forsimplecalculations,touchthe
functionyouwant(+,–,xor÷)followed
by=.
4 Formorecomplexcalculations,touch
,selecttheAdvancedpanel,then
choosesin,cos,tan,logandsoon.
Adding an event to your
calendar
1 Touch >Appstab>Calendar
2 Onthemiddleofthescreen,youcanfind
thedifferentviewtypesoftheCalendar
(Day,Week,Agenda).

96
3 Taponthedateyouwanttoaddevent
on.
4 Dragtheviewscreenupwardsandtapon
thetimeslotyouwanttoaddeventin.
5 TouchEvent namethenentertheevent
name.
6 TouchLocationandenterthelocation.
Checkthedateandenterthetimeyou
wantyoureventtostartandfinish.
7 Ifyouwanttoaddanotetoyourevent,
touchDescriptionandenterthedetails.
8 Ifyouwanttorepeatthealarm,set
Repetition,andsetReminders,if
necessary.
9 TouchDonetosavetheeventinthe
calendar.
Polaris Office
PolarisOfficeisaprofessionalmobileoffice
solutionthatletsusersconvenientlyview
varioustypesofofficedocuments,including
Word,ExcelandPowerPointfiles,anywhere,
anytime,usingtheirmobiledevices.
Touch >Appstab>Polaris Office
Utilities

97
Managing files
PolarisOfficeprovidesmobileuserswith
convenientfilemanagementfeatures,
includingcopying,movingandpasting,and
deletingfilesandfoldersrightonthedevice.
Viewing files
Mobileuserscannoweasilyviewawide
varietyoffiletypes,includingMicrosoft
OfficedocumentsandAdobePDF,right
ontheirmobiledevices.Whenviewing
documentsusingPolarisOffice,theobjects
andlayoutremainthesameasintheir
originaldocuments.
98
Browser
Browsergivesyouafast,full-colourworld
ofgames,music,news,sport,entertainment
andmuchmore,rightonyourmobilephone.
Whereveryouareandwhateveryouenjoy.
NOTE: Additional charges apply when
connecting to these services and
downloading content. Check data
charges with your network provider.
Using the web toolbar
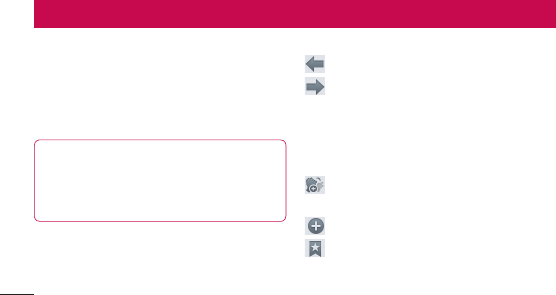
Touchtogobackapage.
Touchtogoforwardsapage,tothe
pageyouconnectedtoafterthecurrent
one.Thisistheoppositeofwhat
happenswhenyoupresstheBackkey,
whichgoestothepreviouspage.
Touchandhold,upanddowntozoom
inoroutofbrowser.
Touchtoaddanewwindow.
Touchtoaddafavouritebookmarks.
The web

99
Using options
Press toviewoptions.
Refresh–Updatethecurrentwebpage.
Save to bookmarks–Addthecurrentweb
pageasbookmark.
Share page–Allowsyoutosharetheweb
pagewithothers.
Find on page–Allowsyoutofindlettersor
wordsonthecurrentwebpage.
Request desktop site–Allowsyoutoview
thewebpageasdesktop.
Save for offline reading–Youcanviewthe
savedwebpage.
Settings–DisplaysBrowsersettings.
100
LG On-Screen Phone 2.0
LGOn-ScreenPhone2.0allowsyoutoview
yourmobilephonescreenfromaPCviaa
USB,Bluetooth,orWi-Ficonnection.
Youcanalsocontrolyourmobilephonefrom
yourPCusingthemouseorkeyboard.
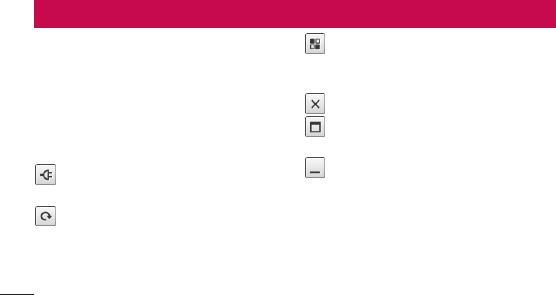
On-Screen Phone 2.0 icons
ConnectsyourmobilephonetoyourPC,
ordisconnectsit.
RotatestheOn-ScreenPhonewindow
(onlyavailableatapplicationsthat
supportrotation).
LaunchesLGHomePanoramaor
changestheOn-ScreenPhone
preferences.
ExitstheOn-ScreenPhoneprogram.
MaximisestheOn-ScreenPhone
window.
MinimisestheOn-ScreenPhone
window.
On-Screen Phone 2.0 features
•Real-time transfer and control:Displays
andcontrolsyourmobilephonescreen
whenconnectedtoyourPC.

101
•Mouse control:Allowsyoutocontrolyour
mobilephonebyusingthemousetoclick
anddragonyourPCscreen.
•Text input with keyboard: Allowsyouto
composeatextmessageornoteusing
yourcomputerkeyboard.
•File transfer (mobile phone to PC):
Sendsafilefromyourmobilephone(e.g.
Gallery,VideoPlayer,MusicPlayerand
PolarisOffice)toyourPC.Simplyright-
clickanddragtosendafiletoyourPC.
•File transfer (PC to mobile phone):
SendsfilesfromyourPCtoyourmobile
phone.Simplyselectthefilesyouwish
totransferanddraganddropintothe
On-ScreenPhonewindow.Thefilesyou
sendarestoredonOSPfolder.
•Real-time event notifications:Prompts
apop-uptoinformyouofanyincoming
callsortext,aswellasalarmandevent
notifications.
•LG Home Panorama:Showsthewhole
workspacesofLGHome.Youcaneasily
organiseiconsorwidgetsandrunan
applicationbydouble-clickingtheshortcut.
102
LG On-Screen Phone 2.0
NOTE: Please make sure LG Home is a
default launcher.
Installing On-Screen Phone on
your PC
1 VisitLGHome(www.lg.com)andselecta
countryofyourchoice.
2 GotoSupport>Mobile Phone Support
>SearchtheModel(LGL96G)>Click
OSP(On-ScreenPhone)todownload.
YoucaninstalltheOn-ScreenPhoneon
yourPC.
Connecting your phone to your
PC
On-ScreenPhone2.0providesUSB,
BluetoothandWi-Ficonnection.
PleasefollowtheinstructiononConnection
WizardofOSPprogram.
NOTE: Please make sure USB
connection type is a PC software.

103
NOTE: Please make sure that
On-Screen Phone check box in
Settings > Connectivity > On-Screen
Phone settings.
Please make sure that the battery may
run out more quickly due to the current
consumption if On-Screen Phone is
connected via Wi-Fi.
Checking the On-Screen Phone
connection
Oncethedeviceshavebeenconnected,
dragdownthestatusbaratthetopofthe
homescreentochecktheOn-ScreenPhone
connectionstatus.
Disconnecting your phone from
your PC
1 Touchandslidethenotificationdrawer
downandtouchtheOn-ScreenPhone
connected.
2 TouchDisconnectOn-ScreenPhone>
Disconnect.
104
IntheHomescreen,touch >Appstab
>Settings.
WIRELESS & NETWORKS
< Wi-Fi >
TurnonWi-FitoconnecttoavailableWi-Fi
networks.
Here,youcanmanageWi-FiandBluetooth.
Youcanalsosetupmobilenetworksand
switchtoairplanemode.
TIP! How to obtain the MAC address
To set up a connection in some wireless
networks with MAC filters, you may
need to enter the MAC address of your
LGL96G into the router.
You can find the MAC address in the
following user interface: Touch Apps
tab > Settings > Wi-Fi > >
Advanced > MAC Address.
< Bluetooth >
TurnsonBluetoothtoconnecttoBluetooth
devices.
Settings

108
Settings
Dial pad touch tones–Allowsyoutoset
thephonetoplaytoneswhenusingthe
dialpadtodialnumbers.
Touch sounds–Allowsyoutosetyour
phonetoplayasoundwhenyoutouch
buttons,iconsandotheronscreenitemsthat
reacttoyourtouch.
Screen lock sound–Allowsyoutosetyour
phonetoplayasoundwhenlockingand
unlockingthescreen.
< Display >
Brightness–Adjustthescreenbrightness.
Auto-rotate screen–Settoswitch
orientationautomaticallywhenyourotate
thephone.
Screen timeout–Setthetimeforscreen
timeout.
Font–Changethedisplayfont.
Front Key light–SetthefrontkeyLED
time.
< Home screen >
SettheAnimation,Screeneffector
Wallpaper.

109
< Lock screen >
Select screen lock–Setanunlockpattern
tosecureyourphone.Opensasetof
screensthatguideyouthroughdrawinga
screenunlockpattern.YoucansetaSwipe,
Face Unlock,Pattern,PINinsteadofa
PasswordorleaveitasNone.
Whenyouturnonyourphoneorwakeup
thescreen,you'reaskedtodrawyourunlock
patterntounlockthescreen.
Wallpaper–Youcanselectthewallpaper
lockfromWallpapersorGallery.
Owner info–Showownerinfoonlock
screen.
< Storage >
INTERNAL STORAGE–Viewtheinternal
storageusage.
SD CARD–ChecktotalavailableSDcard
space.TouchUnmountSDcardforsafe
removal.EraseSDcardifyouwanttodelete
alldatafromtheSDcard.

110
< Power Saver >
Here,youcanmanagethebatteryandcheck
thepowersavingitems.Also,youcancheck
thebatteryuse.
< Apps >
Youcanviewandmanagetheapplications.
PERSONAL
< Accounts & sync >
Permitsapplicationstosynchronisedata
inthebackground,whetherornotyouare
activelyworkinginthem.Deselectingthis
settingcansavebatterypowerandlowers
(butdoesnoteliminate)datausage.
< Location services >
Google's location service–Ifyouselect
Google'slocationservice,yourphone
determinesyourapproximatelocationusing
Wi-Fiandmobilenetworks.Whenyou
selectthisoption,you'reaskedwhether
youconsenttoallowingGoogletouseyour
locationwhenprovidingtheseservices.
GPS satellites–IfyouselectGPSsatellites,
yourphonedeterminesyourlocationto
streetlevelaccuracy.
Settings

111
Location & Google search–Ifyouselect
googleuseyourlocationtoimprovesearch
resultsandotherservices.
< Security >
Encrypt phone–RequireanumericPINor
passwordtodecryptyourphoneeachtime
youpoweriton.
Set up SIM card lock–SetupSIMcard
lockorchangetheSIMPIN.
Make passwords visible–Showpassword
asyoutype.
Device administrators–Viewordeactivate
deviceadministrators.
Unknown sources–Defaultsettingto
installnon-Marketapplications.
Trusted credentials–DisplaytrustedCA
certificates.
Install from SD card–Choosetoinstall
encryptedcertificatesfromyourSDcard.
Clear credentials–Remoceallcertificates.

112
< Language & input >
UsetheLanguage&inputsettingsto
selectthelanguageforthetextonyour
phoneandforconfiguringtheon-screen
keyboard,includingwordsyou'veaddedto
itsdictionary.
< Backup & reset >
Changethesettingsformanagingyour
settingsanddata.
Back up my data–Settobackupyour
settingsandapplicationdatatotheGoogle
server.
Backup account–Settobackupyour
account.
Automatic restore–Settorestoreyour
settingsandapplicationdatawhenthe
applicationsarereinstalledonyourdevice.
Factory data reset–Resetyoursettings
tothefactorydefaultvaluesanddelete
allyourdata.Ifyouresetthephonein
thisway,youarepromptedtoreenterthe
sameinformationaswhenyoufirststarted
Android.
Settings

113
SYSTEM
< Date & time >
UseDate & timesettingstosethowdates
aredisplayed.Youcanalsousethese
settingstosetyourowntimeandtimezone
ratherthanobtainingthecurrenttimefrom
themobilenetwork.
< Accessibility >
UsetheAccessibilitysettingstoconfigure
accessibilityplug-insyouhaveinstalledon
yourphone.
NOTE: Requires additional plug-ins.
< Connectivity >
USB connection type–Youcansetthe
desiredmode(Charge only,Media sync,
USB tetheringorPC software).
Ask on connection–AskUSBconnection
modewhenconnectingtoacomputer.
On-Screen Phone settings–Displaying
screenandcontrollingphonefromPCare
availablethroughUSB,BluetoothorWi-Fi
connection.

114
Wi-Fi connection–Checkmarkthistouse
LG PC SuitewithWi-Ficonnection.
PleasenotethatWi-Finetworkshould
beconnectedforLGPCSuiteviaWi-Fi
connectionfromtheWIRELESS&
NETWORKS.
< About phone >
Viewlegalinformationandcheckphone
statusandsoftwareversion.
Phone software update
LG Mobile phone software update from
the Internet
Formoreinformationaboutusingthis
function,pleasevisithttp://update.lgmobile.
comorhttp://www.lg.com/common/index.
jsp selectcountryandlanguage.
Thisfeatureallowsyoutoupdatethe
firmwareonyourphonetoanewerversion
convenientlyfromtheInternetwithout
needingtovisitaservicecentre.Thisfeature
willonlybeavailableifandwhenLGmakes
anewerfirmwareversionavailableforyour
Settings

115
device.
Asthemobilephonefirmwareupdate
requirestheuser'sfullattentionforthe
durationoftheupdateprocess,pleasemake
sureyoucheckallinstructionsandnotes
thatappearateachstepbeforeproceeding.
PleasenotethatremovingtheUSBdata
cableorbatteryduringtheupgrademay
seriouslydamageyourmobilephone.
NOTE: LG reserves the right to make
firmware updates available only for
selected models at its own discretion
and does not guarantee the availability
of the newer version of the firmware for
all handset models.
LG Mobile Phone software update via
Over-the-Air (OTA)
Thisfeatureallowsyoutoupdateyour
phone'ssoftwaretoanewerversion
convenientlyviaOTA,withoutconnecting
withaUSBdatacable.Thisfeaturewillonly

116
Settings
beavailableifandwhenLGmakesanewer
firmwareversionavailableforyourdevice.
First,youcancheckthesoftwareversion
onyourmobilephone:Settings>About
phone>Software update>Check now
for update.
Youcanalsodelaytheupdateby1hour,
4hours,8hoursorOneday.Inthiscase,
theapplicationwillnotifyyoutoupdatewhen
thetimeisup.Youcanalsorearrangean
updatemanually.
NOTE: This feature is dependent on
your network service provider, region
and country.
DivX Mobile
ABOUT DIVX VIDEO:DivX
®
isadigitalvideo
formatcreatedbyDivX,LLC,asubsidiary
ofRoviCorporation.ThisisanofficialDivX
Certified
®
devicethatplaysDivXvideo.Visit
divx.comformoreinformationandsoftware
toolstoconvertyourfilesintoDivXvideos.

117
ABOUT DIVX VIDEO-ON-DEMAND:This
DivXCertified
®
devicemustberegistered
inordertoplaypurchasedDivXVideo-
on-Demand(VOD)movies.Toobtainyour
registrationcode,locatetheDivXVOD
sectioninyourdevicesetupmenu.Goto
vod.divx.comformoreinformationonhowto
completeyourregistration.
DivX Certified
®
to play DivX
®
video up to
640x480, including premium content
DivX
®
, DivX Certified
®
and associated
logos are trademarks of Rovi Corporation
or its subsidiaries and are used under
license.

118
TheseaccessoriesareavailableforusewiththeLGL96G.(Items described below may be optional.)
Travel adaptor Battery Stereo
headset
Data cable
Connectyour
LGL96Gand
PC.
User Guide
Learnmore
aboutyour
LGL96G.
NFC Tag
Accessories
NOTE:
• Always use genuine LG accessories.
• Failure to do this may void your warranty.
• Accessories may vary in different regions.

119
Troubleshooting
Thischapterlistssomeproblemsyoumightencounterwhileusingyourphone.Some
problemsrequireyoutocallyourserviceprovider,butmostareeasytofixyourself.
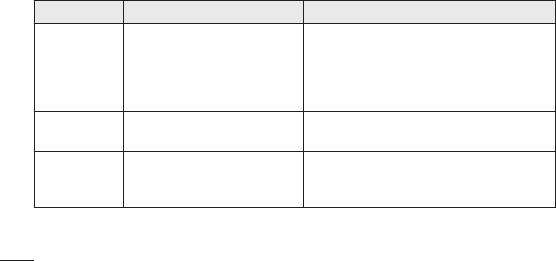
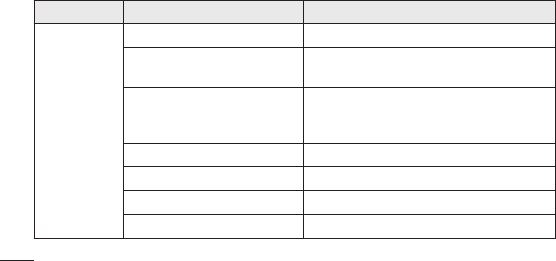
Message Possible causes Possible corrective measures
SIMerror ThereisnoSIMcardinthephone
oritisinsertedincorrectly.
MakesurethattheSIMcardiscorrectly
inserted.
Nonetwork
connection/
Losingnetwork
Signalisweakoryou'reoutside
thecarriernetwork.
Operatorappliednewservices.
Movetowardsawindoworintoanopenarea.
Checkthenetworkoperatorcoveragemap.
CheckwhethertheSIMcardismorethan6~12
monthsold.Ifso,changeyourSIMatyour
networkprovider'snearestbranch.Contactyour
serviceprovider.
120
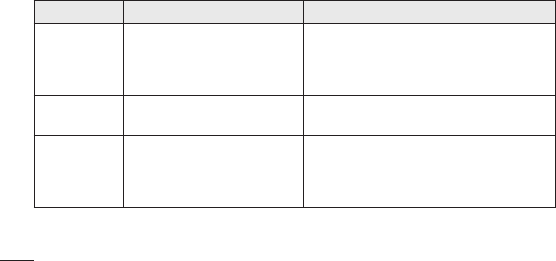
Message Possible causes Possible corrective measures
Codesdonot
match
Tochangeasecuritycode,you
willneedtoconfirmthenewcode
byre-enteringit.
Thetwocodesyouhaveentered
donotmatch.
Ifyouforgetthecode,contactyourservice
provider.
Anyapplication
cannotbeset
Notsupportedbyserviceprovider
orregistrationrequired. Contactyourserviceprovider.
Callsnot
available
Diallingerror
NewSIMcardinserted.
Pre-paidchargelimitreached.
Newnetworknotauthorised.
Checkfornewrestrictions.
ContactserviceproviderorresetlimitwithPIN2.
Troubleshooting
121
Message Possible causes Possible corrective measures
Phonecannot
beswitchedon
On/Offkeypressedtoobriefly.
Batteryisnotcharged.
Batterycontactsaredirty.
PresstheOn/Offkeydownforatleasttwo
seconds.
Chargebattery.Checkchargingindicatoron
thedisplay.
Cleanthebatterycontacts.
122
Troubleshooting
Message Possible causes Possible corrective measures
Chargingerror
Batteryisnotcharged. Chargebattery.
Outsidetemperatureistoohot
orcold.
Makesurephoneischargingatanormal
temperature.
Contactproblem
Checkthechargerandconnectiontothephone.
Checkthebatterycontactsandcleanthemif
necessary.
Novoltage Plugthechargerintoadifferentsocket.
Chargerdefective Replacecharger.
Wrongcharger OnlyuseoriginalLGaccessories.
Batterydefective Replacebattery.

123
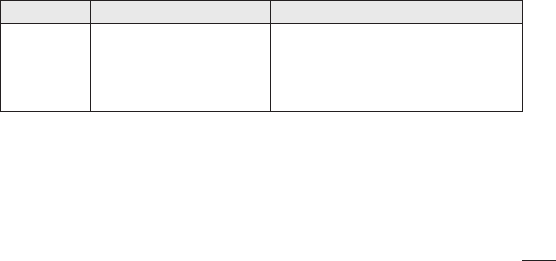
Message Possible causes Possible corrective measures
Numbernot
permitted
TheFixeddiallingnumber
functionison.
ChecktheSettingsmenuandturnthefunction
off.
Impossibleto
receive/send
SMS&picture
Memoryfull Deletesomemessagesfromthephone.
Filesnot
opening Unsupportedfileformat Checkthefileformatsthatcanbesupported.
SDcardnot
working
FAT16,FAT32filesystem
supported
CheckSDcardfilesystemviacardreader,or
formatSDcardusingthephone.
124
Message Possible causes Possible corrective measures
Thescreen
doesnotturn
onwhenI
receiveacall.
Proximitysensorproblem
Ifyouuseanyprotectiontapeorcase,check
toseeifithascoveredtheareaaroundthe
proximitysensor.Makesurethatthearea
aroundtheproximitysensorisclean.
Nosound Vibrationmode Checkthesettingsstatusofthesoundmenuto
makesureyouarenotinvibrateorsilentmode.
Hangupor
freeze Intermittentsoftwareproblem
Removethebattery,insertitagainandswitch
onthephone.
Trytoperformasoftwareupdateviathe
website.
Troubleshooting