LG Electronics USA LG800G Cellular/PCS GSM Phone with Bluetooth User Manual
LG Electronics USA Cellular/PCS GSM Phone with Bluetooth Users Manual
Users Manual
LG800G User Guide - English
Some of the contents in this manual may differ from your phone
depending on the software of the phone or your service provider.
Disposal of your old appliance
1

Part 15.21 statement
" Change or Modifications that are not expressly approved by the manufacturer could void
the user's authority to operate the equipment. “
Part 15.105 statement
This equipment has been tested and found to comply with the limits for a class B digital
device, pursuant to Part 15 of the FCC Rules.
These limits are designed to provide reasonable protection against harmful interference in
a residential installation. This equipment generates uses and can radiate radio frequency
energy and, if not installed and used in accordance with the instructions, may cause harmful
interference to radio communications. However, there is no guarantee that interference will
not occur in a particular installation. If this equipment does cause harmful interference or
television reception, which can be determined by turning the equipment off and on, the user
is encouraged to try to correct the interference by one or more of the following measures:
- Reorient or relocate the receiving antenna.
- Increase the separation between the equipment and receiver.
- Connect the equipment into an outlet on a circuit different from that to
which the receiver is connected.
- Consult the dealer or an experienced radio/TV technician for help.
This device is not intended for sale in the USA.

Part 15 Class B Compliance
This device and its accessories comply with part15 of FCC rules.
Operation is subject to the following two conditions:
(1) This device & its accessories may not cause harmful interference.
(2) This device & its accessories must accept any interference received,
including interference that may cause undesired operation.
Body-worn Operation
This device has been tested for typical body-worn operations
with the distance of 0.79inches (2.0cm) from the user’s body.
To comply with FCC RF exposure requirements, a minimum separation distance
of 0.79inches(2.0cm) must be maintained from the user's body.
For example, this device must be maintained from the user's body with
an appropriatebelt-clip accessory.[More than 0.79inches(2.0cm)]
Additionally, Belt clips, holsters & other body-worn accessories may not contain
metallic components.

9
Phone Components
Earpiece
Call key
Dials a phone number and
answers incoming calls.
End key
Clear key
Go back to a previous screen.
Volume keys
• When the screen
is at the Home
screen: Ring tone
and touch tone
volume.
• During a call:
Earpiece volume.
• Down volume key:
Press and hold to
activate/ deactivate
Silent mode.
Handsfree or Stereo
earphone connector
Power/Lock key
• Short press to turn on/off the
screen.
• Long press for power on/off.
10
Using your touch screen
Touch screen tips
• To select an item, touch the
centre of the icon.
• Do not press too hard. The
touchscreen is sensitive
enough to pick up a light, firm
touch.
• Use the tip of your finger to
touch the option you require.
Be careful not to touch any
other keys.
• Whenever your LG800G is not
in use, it will return to the lock
screen.
Control the touch screen
The controls on the LG800G
touch screen change
dynamically depending on the
task you are carrying out.
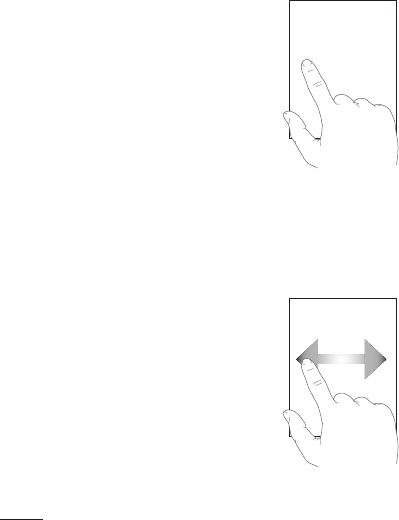
Opening Applications
To open any application, simply
touch its icon.
Scrolling
Drag from side to side to scroll.
On some screens, such as the
Logs list, you can also scroll up
or down.
11
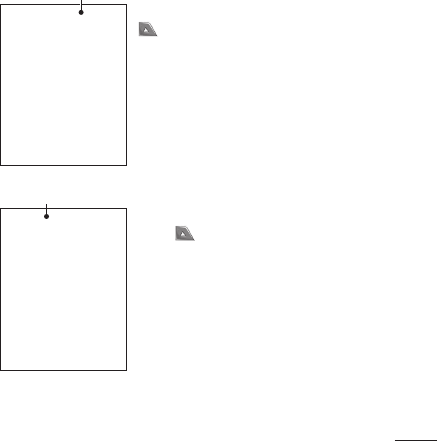
You can drag and click what you need right away in all home
screen types.
Your home screen
Widget home screen - When you touch
on the bottom left of the screen, the
mobile widget panel appears. When you
register widget by dragging it, the widget is
created in the spot.
Active
Speed dial home screen - When you
touch , the speed dial list appears.
You can call, send a message or edit the
contact directly in this home screen.
Active

12
Calls
Making a Call
1 Touch to open the
keypad.
2 Key in the number using the
keypad.
3 Touch to initiate the call.
TIP! To enter + for making
an international call, press
and hold 0 +.
Press the power key to lock the
touchscreen to prevent calls
being made by mistake.
Making a call from your
contacts
1 From the home screen touch
to open the Contacts.
2 Tap the Name field box on
the top of the screen and
enter the first few letters of
the contact you would like to
call using the keypad.
3 From the filtered list, touch
the Call icon next to the
contact you want to call.
The call will use the default
number if there is more than
one for that contact.
4 Or, you can touch the contact
name and select the number
to use if there is more than
one for that contact to use.
You can also touch to
initiate the call to the default
number.
Answering and rejecting
a call
When your phone rings, press
key to answer the call.
To mute the ringing, touch on
Silent tab in alerting screen.
This is useful if you forgot to
change your profile to Silent
for a meeting. Touch on Reject
tab to reject an incoming call in
alerting screen.

13
Changing the common
call setting
1 Touch Call settings in the
Settings menu.
2 Scroll and touch Common
settings.
• Call reject - Slide the switch
left for ON. You can touch
the Reject list to choose
All calls, Contacts, Groups,
All unknown callers and All
unknown numbers.
• Send my number - Choose
whether to display your
number on an outgoing call.
• Auto-redial - Slide the switch
left for ON or right for OFF.
• Answer mode
Press send key: Allows you
to only answer an incoming
call by pressing the key.
Press any key: Allows you to
answer an incoming call by
pressing any key, except the
key.
• Minute minder - Slide the
switch left to ON to hear a
tone every minute during
a call.
• BT answer mode - Select
Handsfree to be able to
answer a call using a
Bluetooth headset, or select
Handset to press a handset
key to answer a call.
• Save new number - Select
ON or OFF to save a new
number.
Contacts
Searching for a contact
1 Touch Contacts.
2 You see a list of contacts.
Typing in the first letter of a
contact’s name in the Name
field will jump the menu to
that alphabetical area of
the list.

14
Adding a new contact
1 Touch Contacts and touch
Add.
2 Choose whether to save
the contact to your Internal
memory or SIM.
3 Enter your first and last name.
4 You can enter up to five
different numbers per
contact.
5 Add an email addresses. You
can enter up to two different
email addresses per contact.
6 Assign the contact to one or
more groups.
7 Touch Save to save the
contact.
Changing your contact
settings
You can adapt your contact
settings so that your Contacts
suits your own preferences.
Touch Options key and
touch Settings.
• Display name - Choose
whether to display the first or
last name of a contact first.
• Copy - Copy your contacts
from your SIM to Internal
memory, or vice versa.
•
Move - This works in the same
way as Copy, but the contact
is stored at the new location
only. Therefore, once a contact
is moved from the SIM to
the Internal memory it will be
deleted from the SIM memory.
• Send all contacts via
Bluetooth - Sends all contacts
to other handset via Bluetooth.
• Back up contacts/ Restore
contacts - Save or restore
the contacts data to the other
storage.
• Delete all contacts - Delete
all your contacts. Touch Yes
if you are sure you want to
delete all your contacts.
15
Messaging
Your LG800G combines SMS
and MMS into one intuitive and
easy-to-use menu.
Sending a message
1
Touch Messages in menu and
touch Write message to begin
composing a new message.
2 Touch Insert to add an
image, video, sound,
template and so on.
3 Touch To at the top of
the screen to enter the
recipients. Then enter the
number or touch to
select a contact. You can
even add multiple contacts.
4 Touch Send when ready.
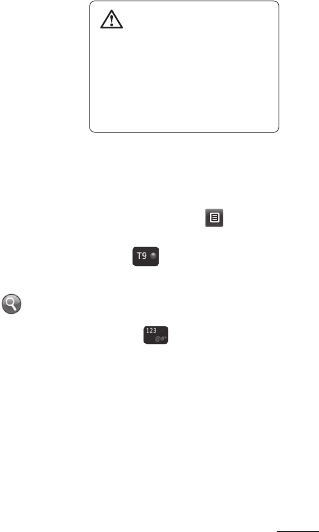
WARNING: If an
image, video or sound is
added to an SMS it will be
automatically converted to
an MMS and you will be
charged accordingly.
Entering Text
You can choose your input
method by tapping and
Input method.
Touch to turn on T9
mode. This icon is only shown
when you choose Keypad as
the input method.
Touch to change between
numbers, symbols and text
input.
U
se Shift key to change between
capital or lowercase input.
Handwriting recognition
In Handwriting mode you
simply write on the screen and
your LG800G will convert your

16
handwriting into your message.
Setting up your email
Touch E-mail in Application
screen.
If the email account is not set
up, start the email set up wizard
and finish it.
You can check and edit
settings also you can check the
additional settings that were
filled in automatically when you
created the account.
Changing your text
message settings
Touch Messages and
touch Settings. Select Text
message.
Text message centre - Enter
the details of your message
centre.
Delivery report - Slide
the switch left to receive
confirmation that your
messages have been delivered.
Validity period - Choose how
long your messages are stored
at the message centre.
Message types - Convert
your text into Text, Voice, Fax,
X.400 or E-mail.
Character encoding - Choose
how your characters are
encoded. This impacts the size
of your messages and therefore
data charges.
Send long text as - Choose
to send long messages as
Multiple SMS or as an MMS.
Changing your
multimedia message
settings
Touch Messages and, touch
Settings and Multimedia
message.
Retrieval mode - Choose
between Home network or
Roaming network. If you then
choose Manual you will receive
only notifications of MMS and
17
you can then decide whether to
download them in full.
Delivery report - Choose to
request and/or allow a delivery
report.
Read receipt - Choose to
request and/or allow a reply.
Priority - Choose the priority
level of your MMS.
Validity period - Choose how
long your message is stored at
the message centre.
Slide duration - Choose how long
your slides appear on the screen.
Unsupported attachment -
Choose whether the
unsupported attachment is
restricted or not.
Delivery time - Choose how
long to wait before a message
is delivered.
MMS centre - Choose one
from the list or add a new
message centre.
Camera
Taking a quick photo
1 Touch Camera menu.
2 When the camera has
focused on your subject,
touch the on the right-
center of the screen to take
a photo.
TIP: To switch to the camera
mode or video mode, slide
up/down the camera or
video icon on the centre-
right of the viewfinder.
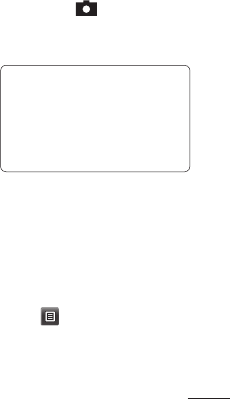
After taking a photo
Your captured photo will appear
on the screen.
The following options are
available.
Touch .
Send - Touch to send the photo
as a Message, Email or via
Bluetooth.

18
Use as - Touch to set as
Homescreen wallpaper,
Lockscreen wallpager, Contacts
image, Incoming call image,
Outgoing call image, Startup
image and Shut down image.
Rename - Touch to rename
the photo.
Edit - Touch to edit the photo.
Touch to delete the image.
Touch to take another
photo immediately.
Touch to view a gallery of
your saved photos.
Using the advanced
settings
From the viewfinder, touch
to open all advanced settings
options.
After selecting the option, touch
the OK button.
Size - Change the size of the
photo to save memory
White balance - Choose
between Auto, Incandescent,
Sunny, Fluorescent, and
Cloudy.
Colour effect - Choose a color
tone for your new photo.
Continuous shot - Position the
subject in the viewfinder, then
press the capture button as
if taking a normal photo. The
camera will take shots in quick
succession.
Self-timer - The self-timer
allows you to set a delay after
the shutter is pressed. Select
Off, 3 seconds, 5 seconds, or
10 seconds. This is ideal if you
want to be included in a photo.
Night mode - Useful to user in
dark places.
Image quality - Choose
between Super fine, Fine, and
Normal. The finer the quality,
the sharper the photo. However,
the file size will increase as a
result, which means you’ll be
19
able to store fewer photos in
the memory.
Select storage - Choose
whether to save your photos to
the Handset memory or to the
External memory.
Hide icons - Choose the
camera setting icons to hide
manually or automatically.
Show captured image -
Choose On to check the picture
you took right away.
Shutter sound - Select one of
the three shutter sounds.
Grid screen - Choose
between Off, Simple cross, or
Trisection.
Reset settings - Restore all
camera default settings.
Video camera
Making a quick video
To switch to the camera mode
or video mode, slide up/down
the camera or video icon on the
right centre of the viewfinder.
1 Holding the phone
horizontally, point the lens
towards the subject of the
video.
2 Press the red dot .
3 Rec will appear at the
bottom of the viewfinder
with a timer at the bottom
showing the length of the
video.
4 To pause the video, touch
and resume by selecting
.
5 Touch on screen to stop
video recording.
20
After making a video
A still image representing your
captured video will appear on
the screen. The name of the
video runs along the bottom of
the screen together with icons
down the left and right sides .
Touch to play the video.
The following options are
available.
Touch .
Send - Touch to send the video
as a Message, Email or via
Bluetooth.
Rename - Touch to rename
the video.
Touch to delete the video
you have just made and
confirm by touching
Yes. The viewfinder will
reappear.
Touch to shoot another
video immediately. Your
current video will be saved.
Touch to view a gallery of
saved videos and images.
Using the advanced
settings
From the viewfinder, touch
to open all advanced settings
options. You can change the
video camera setting after
selecting the option, touch the
OK button.
Colour Effect - Choose a color
tone to use for your new view.
White balance - The white
balance ensures any the white
areas in your video are realistic.
To enable your camera to adjust
the white balance correctly, you
may need to determine the light
conditions. Choose between
Auto, Incandescent, Sunny,
Fluorescent, and Cloudy.

21
Quality - Choose between
Super fine, Fine and Normal.
The finer the quality, the
sharper a video will be, but
the file size will increase. As a
result, you will be able to store
fewer videos in the phone’s
memory.
Duration - Set a duration limit
for your video. Choose between
Normal and MMS to limit the
maximum size to send as an
MMS message.
Select storage - Choose
whether to save your videos to
the Handset memory or to the
External memory.
Audio recording - Choose
Mute to record a video without
sound.
Hide icons - Select whether
to hide the icons in the camera
menu automatically or manually.
Reset settings - Reset all the
video camera settings.
Music
To access the music player,
touch Music. From here, you
can access a number of folders:
Recently played - Plays the
songs you have played recently.
All tracks - Contains the songs
you have on your phone except
the pre-loaded default music.
Artists - Browse through your
music collection by artist.
Albums - Browse through your
music collection by album.
Genres - Browse through your
music collection by genre.
Playlists - Contains all the
playlists you have created.
Shuffle tracks - Play your
tracks in a random order.

22
Transferring music onto
your phone
The easiest way to transfer
music onto your phone is via
Bluetooth or the data cable.
To transfer music using
Bluetooth:
1 Make sure both devices have
Bluetooth switched on and
are connected to each other.
2 Select the music file on the
other device and select send
via Bluetooth.
3 When the file is sent, you
will have to accept it on your
phone by touching Yes.
4 The file should appear in
Music > All tracks.
Managing files
You can store multimedia files
in your phone’s memory so you
have easy access to all your
pictures, sounds, videos and
games. You can also save your
files to a memory card. Using
a memory card allows you to
free up space in your phone’s
memory.
By touching My stuff, you can
open a list of the folders that
store all your multimedia files.
Games and Applications
You can download new games
and applications to your phone
to keep you enjoy.

23
Application
Adding an event to your
calendar
1 Touch Calendar.
2 Select the date you would
like to add an event to.
3 Touch Add.
Setting your alarm
1 Touch Alarms.
2 Touch Add, then you can set
and save your alarm in this
menu.
Voice recorder
Use your voice recorder to
record voice memos or other
audio files.
Using your calculator
1 Touch Calculator.
2 Touch the number keys to
enter numbers.
Converting a unit
1 Touch Unit converter.
2 Choose whether you want
to convert Currency, Area,
Length, Weight, Temperature,
Volume or Velocity.
3 Then select the unit and
enter the value you would
like to convert from.
The web
Browser gives you a fast, full-
colour world of games, music,
news, sport, entertainment and
loads more, straight to your
mobile phone. Wherever you
are and whatever you’re into.
24
Accessing the web
1 Touch the Browser.
2 To go straight to the browser
home page, select Home.
Alternately, select Enter
address and type in the
URL, followed by Connect.
NOTE: You will incur extra
cost by connecting to these
services and downloading
content. Check data
charges with your network
provider.
Settings
Personalising your
profiles
You can personalise each profile
setting using the settings menu.
1 Touch Profiles.
2 Choose the profile you want
to edit.
3
You can then change all the
sounds and alert options
available in the list, including your
Ringtone and Volume, Message
tone settings and more.
Changing your phone
settings
Use the freedom of adapting
the LG800G to your own
preferences.
From the home screen, select
and touch Settings then
scroll to Device settings.
Changing your
connectivity settings
Your connectivity settings
have already been set up by
your network operator, so you
can enjoy your new phone
immediately. To change any
settings, use this menu:
Touch Connectivity.

25
Sending and receiving
your files using
Bluetooth
To send a file:
1 Open the file you want to
send, typically this will be a
photo, video or music file.
2 Choose Send via. Choose
Bluetooth.
3 If you have already paired
the Bluetooth device,
your LG800G will not
automatically search for
other Bluetooth devices. If
not, your LG800G will search
for other Bluetooth enabled
devices within range.
4 Choose the device you want
to send the file to.
5 Your file will be sent.
To receive a file:
1 To receive files, your
Bluetooth must be both ON
and Visible. See Changing
your Bluetooth settings
below for more information.
2 A message will prompt you
to accept the file from the
sender. Touch Yes to receive
the file.
3 You will see where the file
has been saved. For image
files, you can choose to View
the file. Files will usually be
saved to the appropriate
folder in My stuff.
Changing your Bluetooth
settings:
Touch Bluetooth then select
Options and choose
Settings.

26
Pairing with another
Bluetooth device
By pairing your LG800G and
another device, you can set
up a passcode protected
connection.
1 Check that your Bluetooth
is ON and Visible. You can
change your visibility in the
Settings menu.
2 Touch Search.
3 Your LG800G will search for
devices. When the search
is completed, Refresh will
appear on screen.
4 Choose the device you want
to pair with and enter the
passcode, then touch OK.
5 Your phone will then connect
to the other device, on which
you will need to enter the
same passcode.
6 Your passcode protected
Bluetooth connection is now
ready.