LG Electronics USA LG910G Cellular/PCS GSM Phone with Bluetooth User Manual LG910G Tracefone EN 101207 indd
LG Electronics USA Cellular/PCS GSM Phone with Bluetooth LG910G Tracefone EN 101207 indd
UserManual.wiki
>
LG Electronics USA
>
LG910G User Manual
Users Manual
Navigation menu
Upload a User Manual
Namespaces
Wiki Guide
HTML
PDF
Info
Views
User Manual
Discussion / Help
Navigation
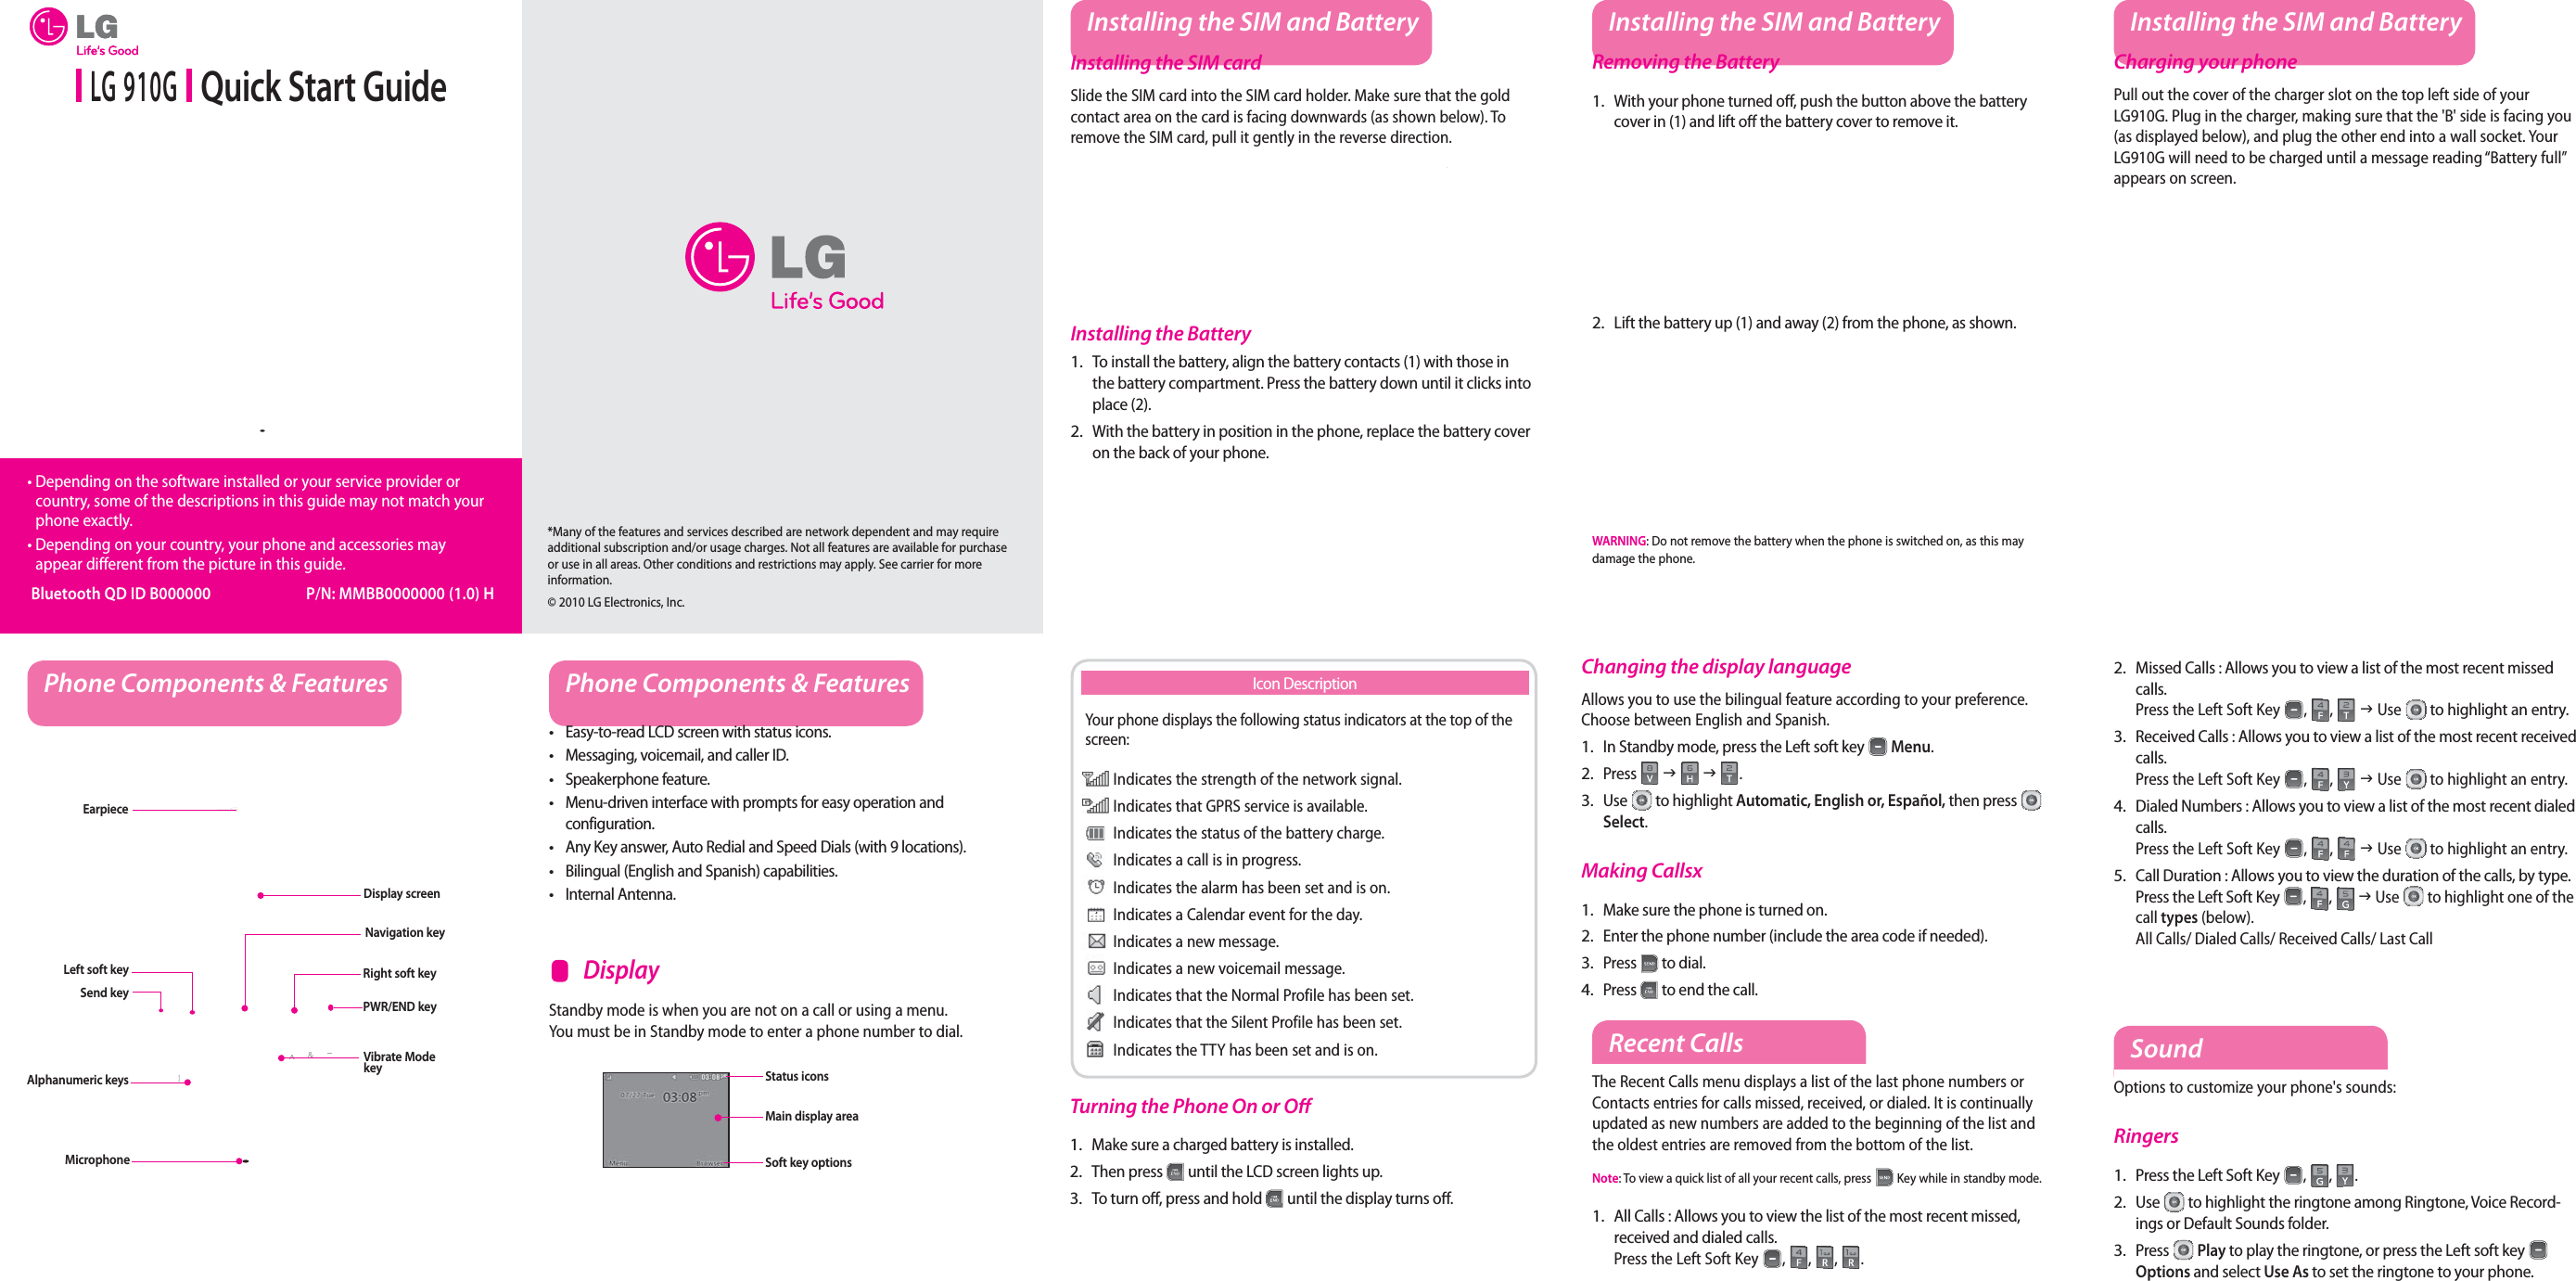
![Part 15 Class B ComplianceThis device and its accessories comply with part15 of FCC rules.Operation is subject to the following two conditions:(1) This device & its accessories may not cause harmful interference.(2) This device & its accessories must accept any interference received, including interference that may cause undesired operation.Body-worn OperationThis USB modem has been tested for typical body-worn operations with the distance of 0.79inches (2.0cm) from the user’s body. To comply with FCC RF exposure requirements, a minimum separation distance of 0.79inches(2.0cm) must be maintained from the user's body.For example, this device must be maintained from the user's body with an appropriatebelt-clip accessory.[More than 0.79inches(2.0cm)] Additionally, Belt clips, holsters & other body-worn accessories may not contain metallic components.](https://usermanual.wiki/LG-Electronics-USA/LG910G/User-Guide-1525583-Page-4.png)