LG Electronics USA LI561N LCD Monitor User Manual users manual
LG Electronics USA LCD Monitor users manual
UserManual.wiki
>
LG Electronics USA
>
LI561N User Manual
users manual
Navigation menu
Upload a User Manual
Namespaces
Wiki Guide
HTML
PDF
Info
Views
User Manual
Discussion / Help
Navigation

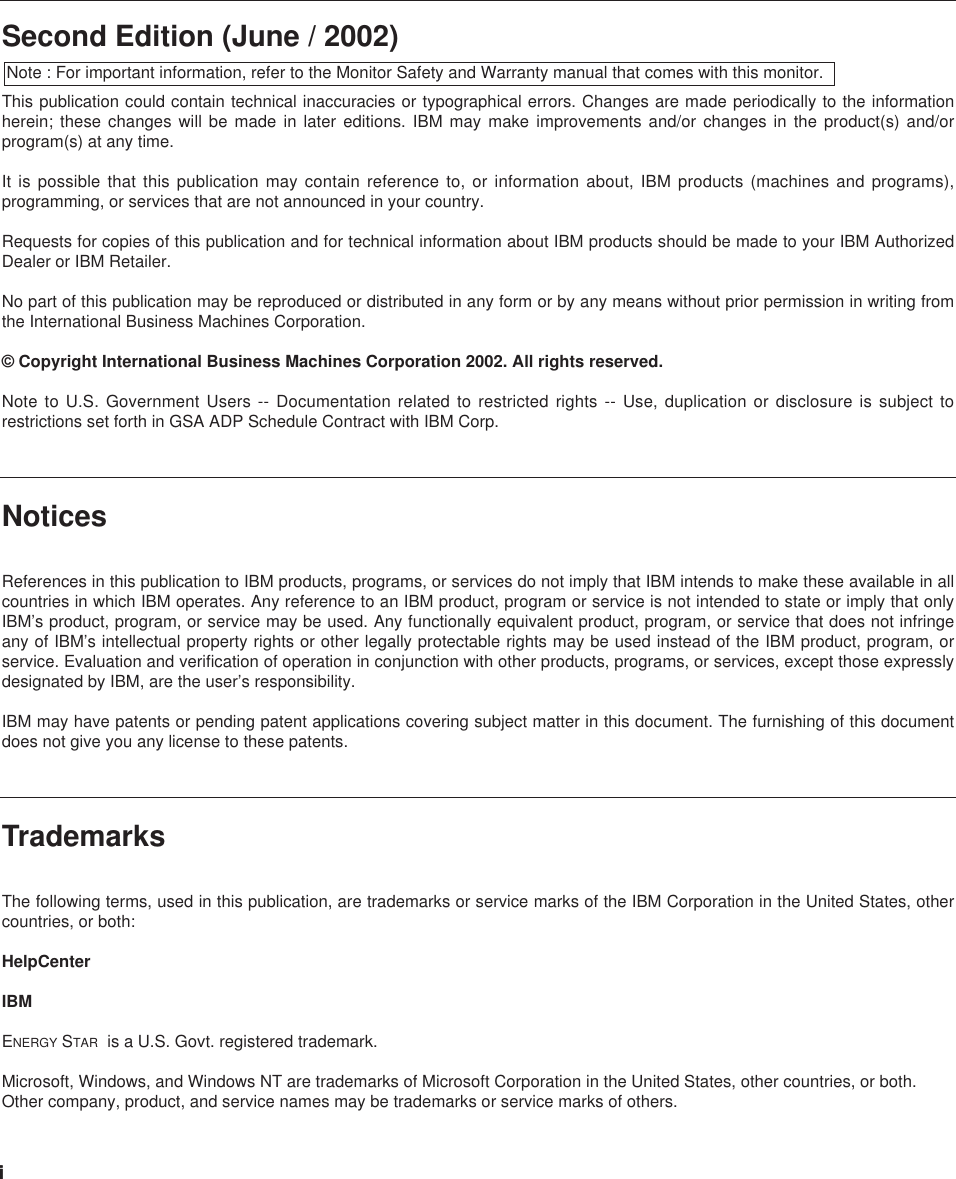
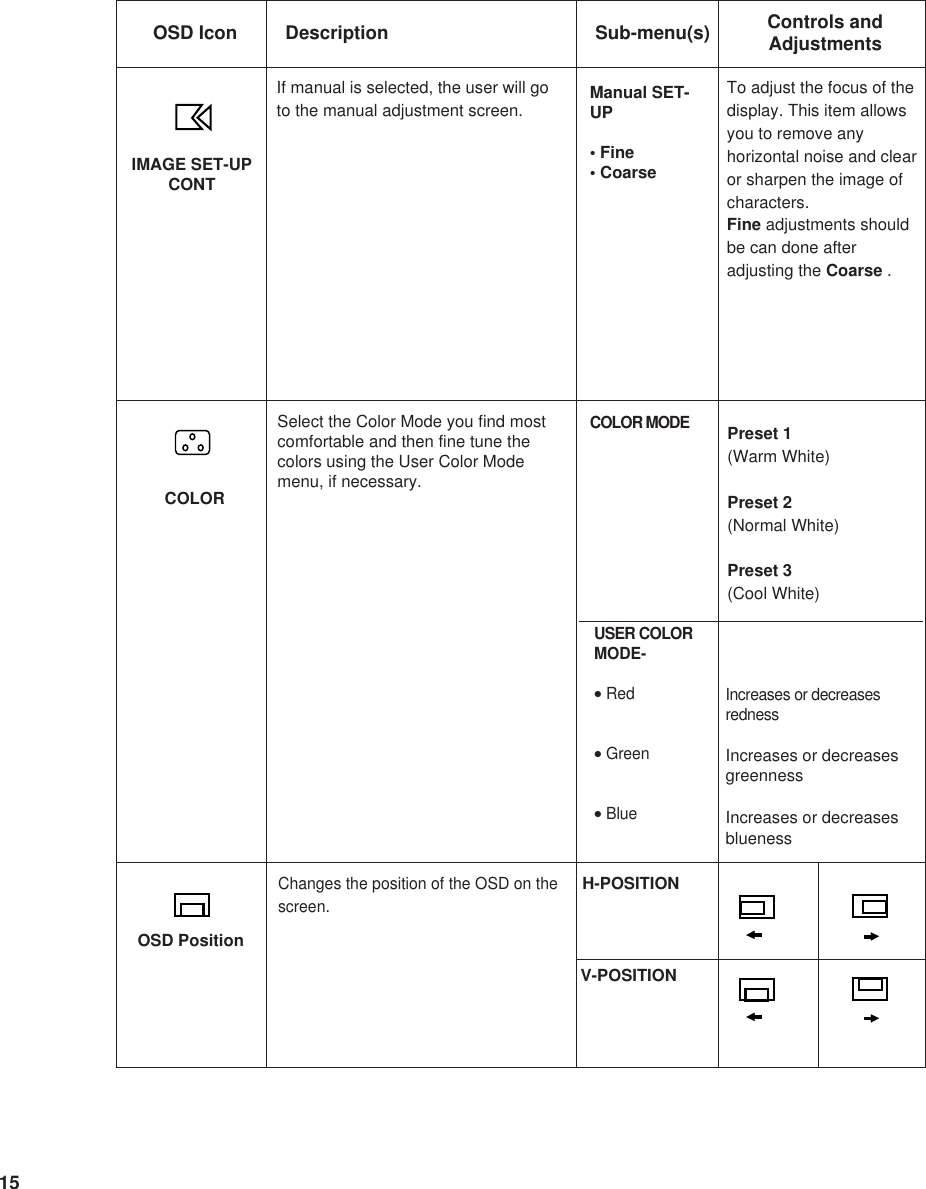
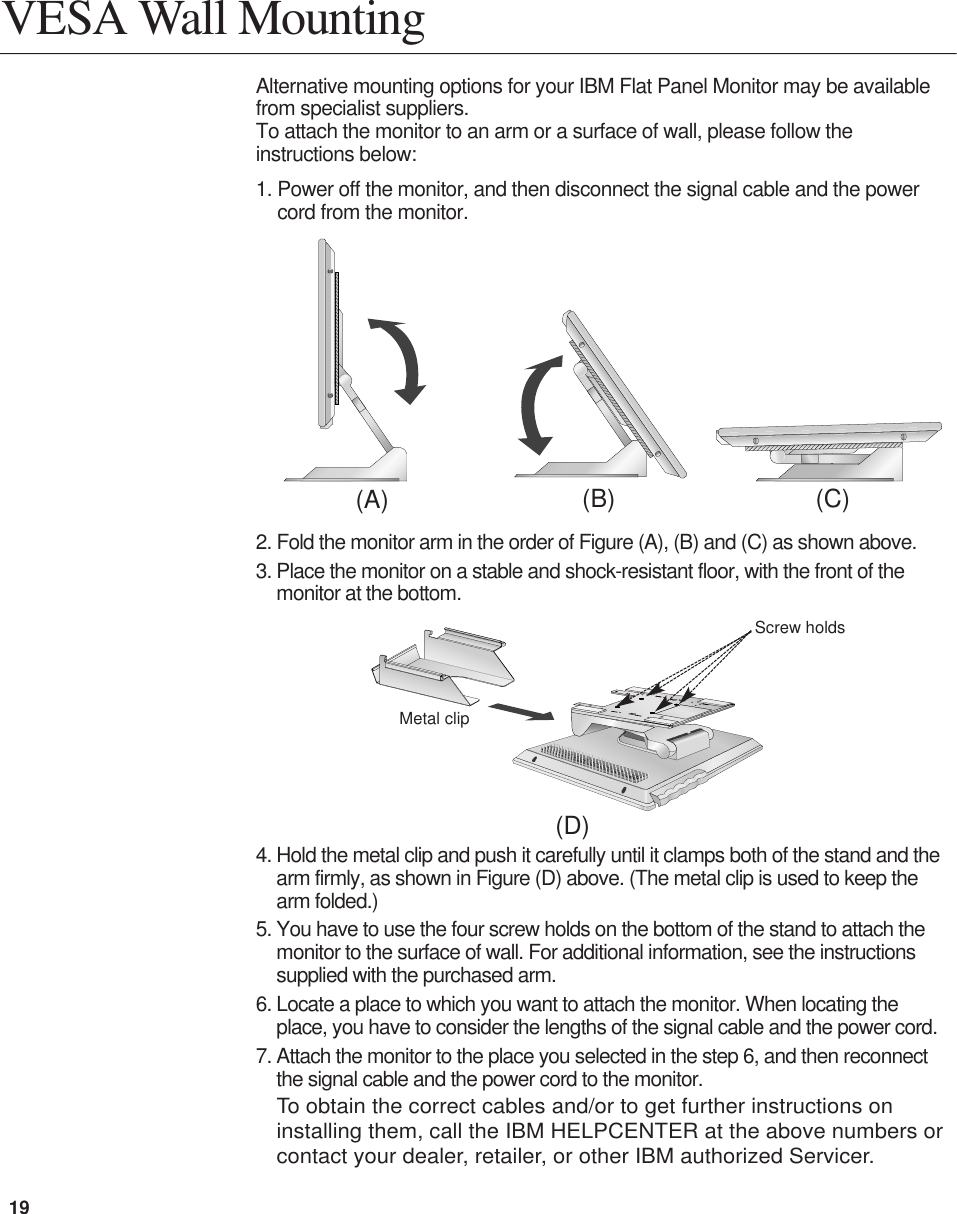
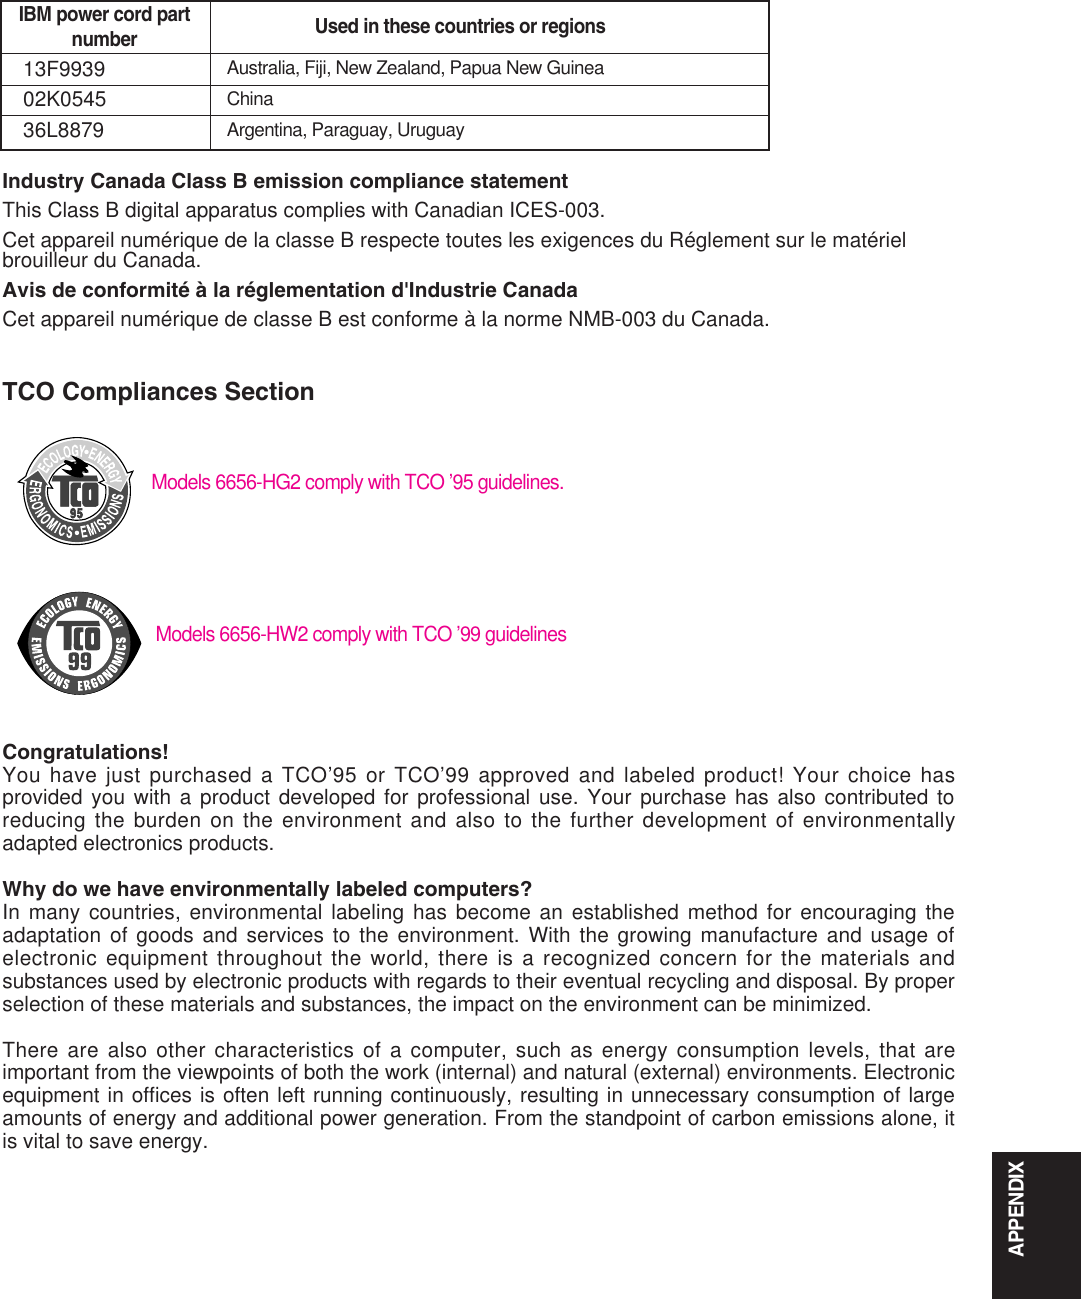
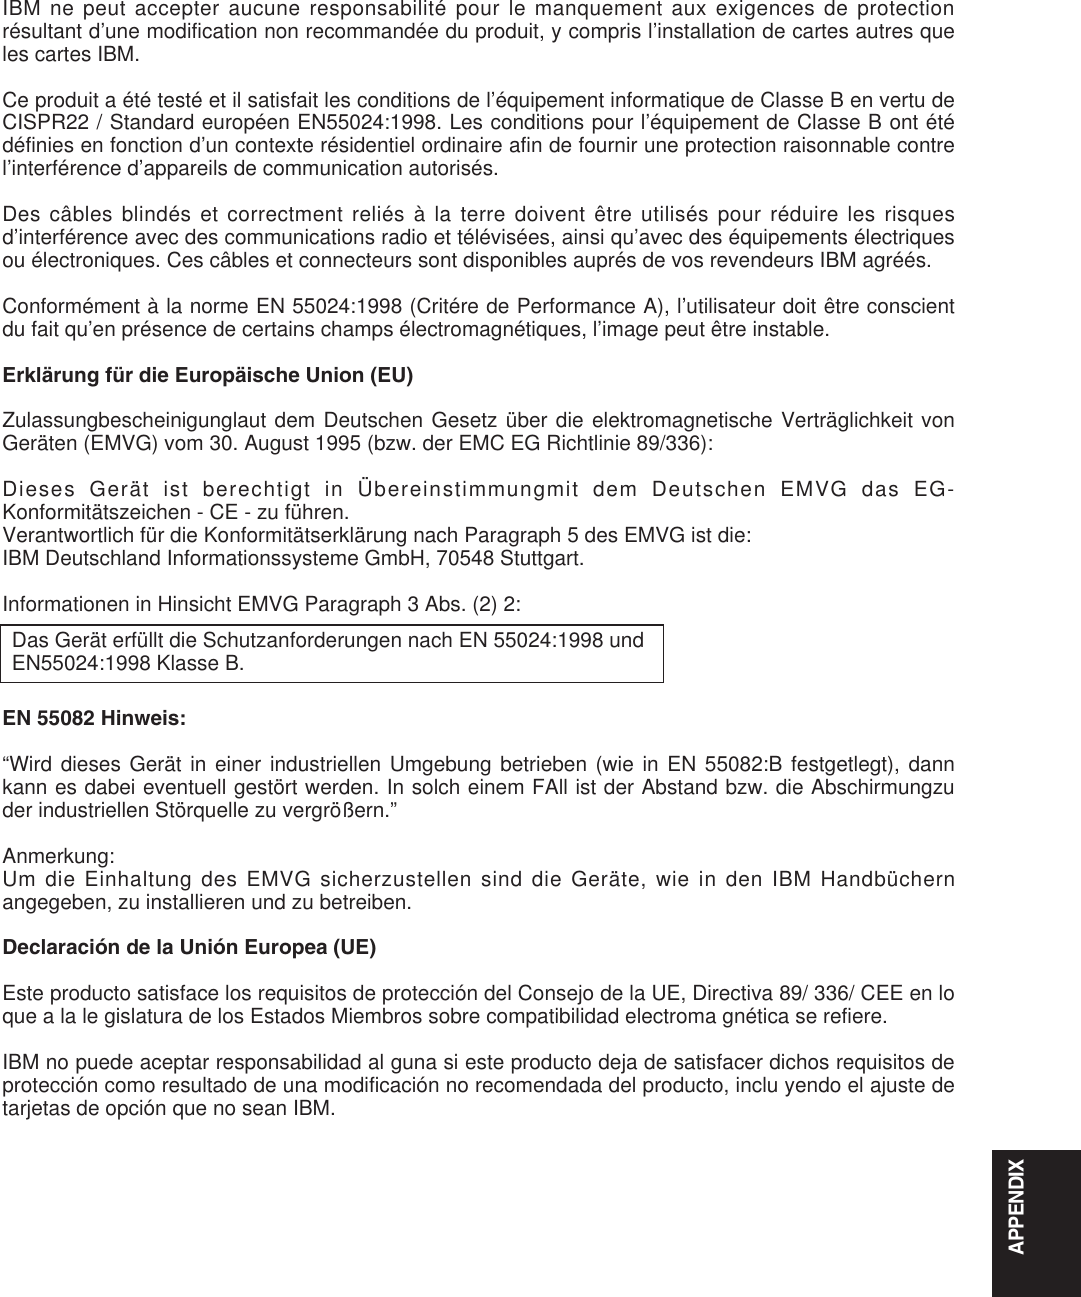
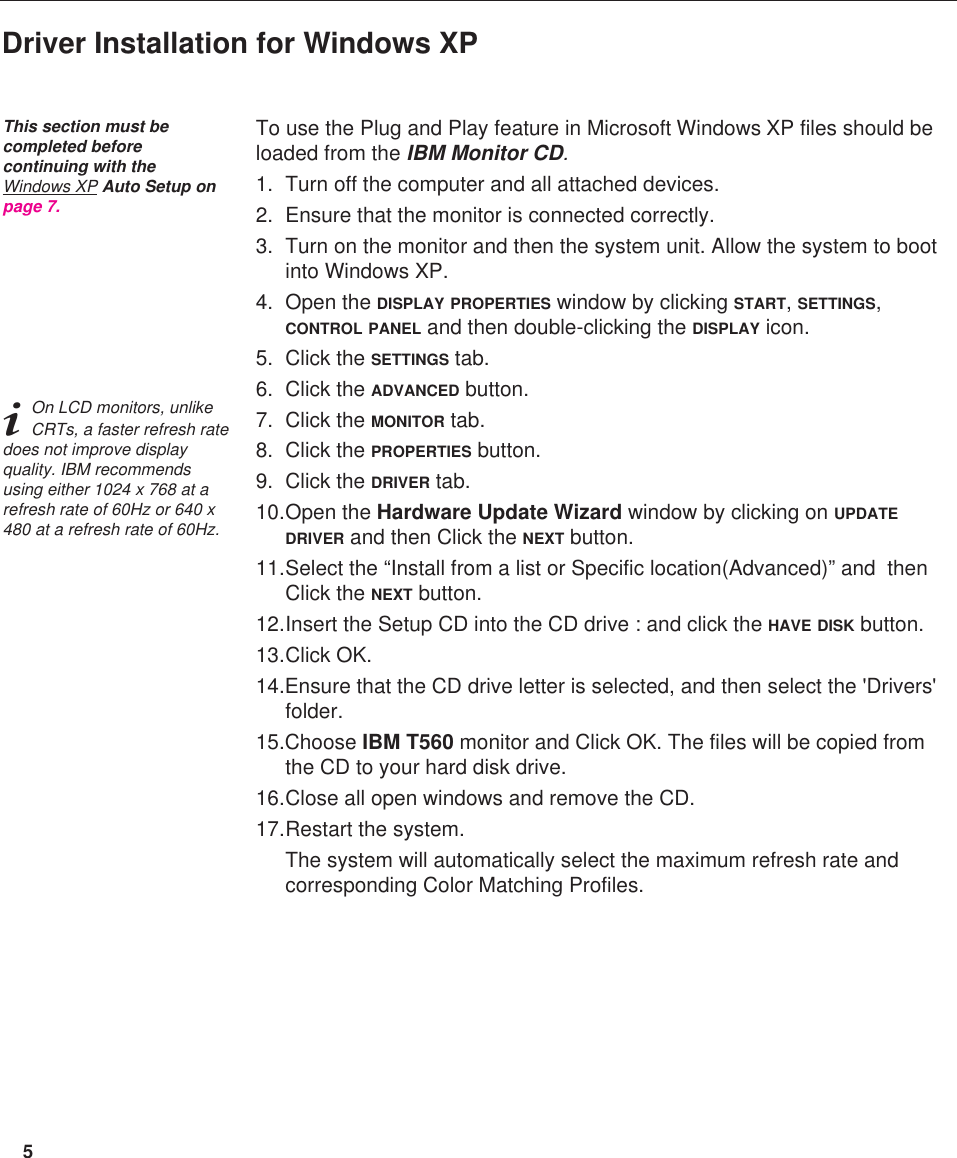
![ENGLISH21. Turn off your computer and all attached devices.2. Connect the signal cable.The AC adapter and the analog signal cable are already connected toyour monitorWhen connecting the analog signal cable (Figure A)Connect free end of the attached signal cable to the Dsub connector on thecomputer and tighten the screws. When connecting the DVI signal cable (Figure B)Connect one end of the monitor signal cable to the DVI connector on the rearpanel of the monitor. Connect the other end to the DVI port on the rear panelof the computer and tighten the screws.3. Connect the power cord to the power adapter and then plug the powercord into a properly grounded outlet. 1. Switch on the power source to your monitor.2. Switch on your monitor by pushing and releasing the power switchmarked [ ].[To switch off your monitor, push and release the power switch again.]3. Switch on your computer.4. Run AUTO SETUP by following the instructions in the Auto Setupsection on page 6.Connecting your MonitorSwitching on your Monitor(Figure A) (Figure B)Monitor InstallationENGLISH](https://usermanual.wiki/LG-Electronics-USA/LI561N/User-Guide-249089-Page-6.png)

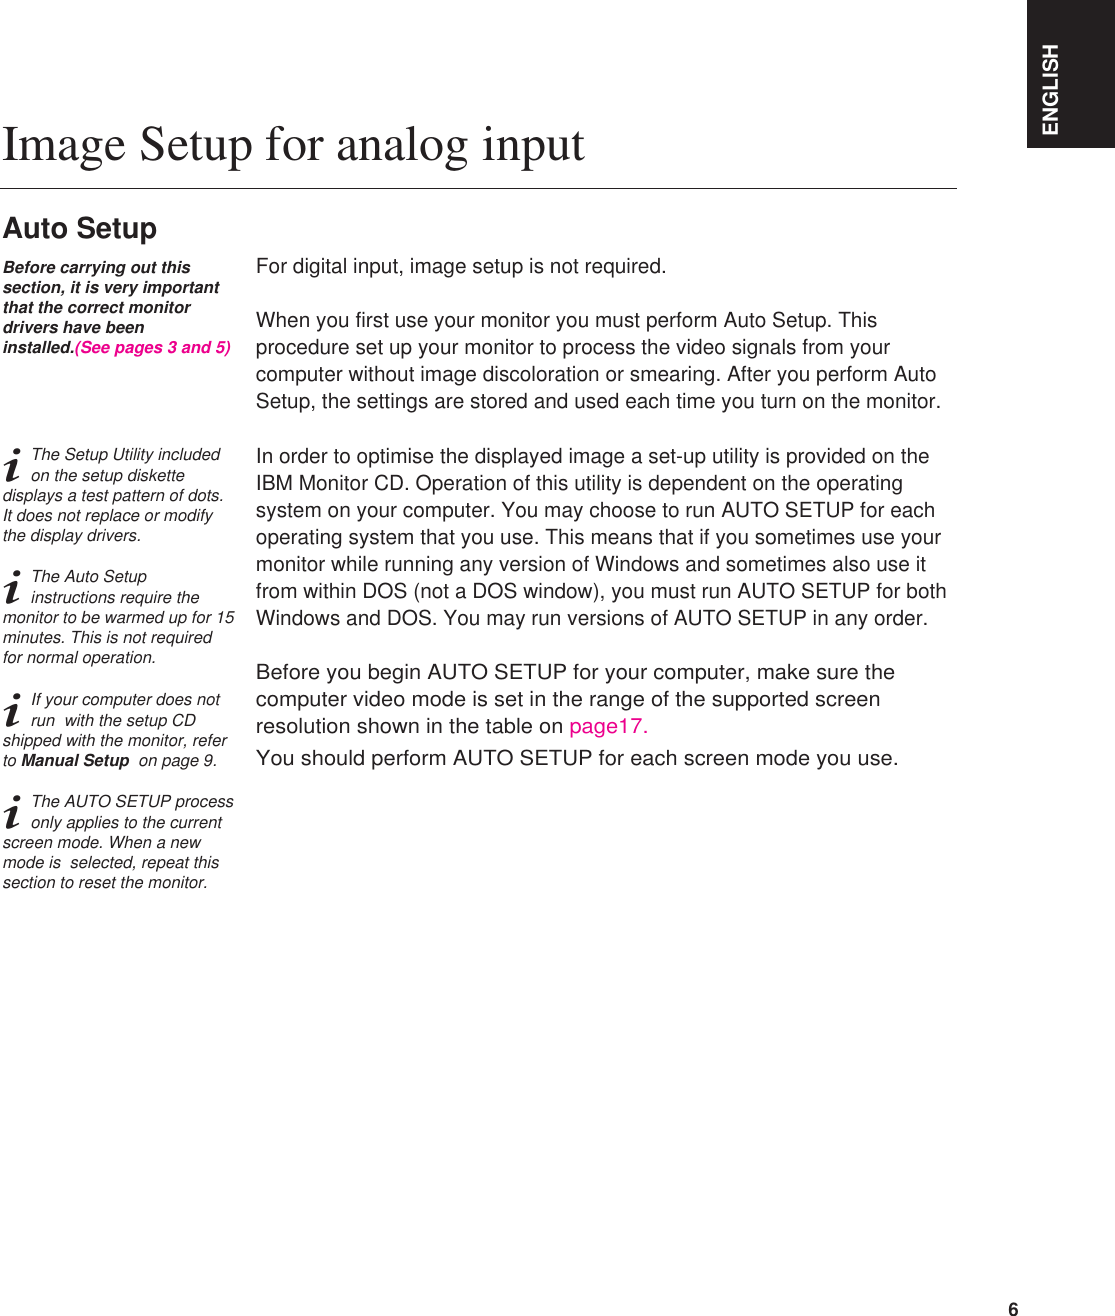
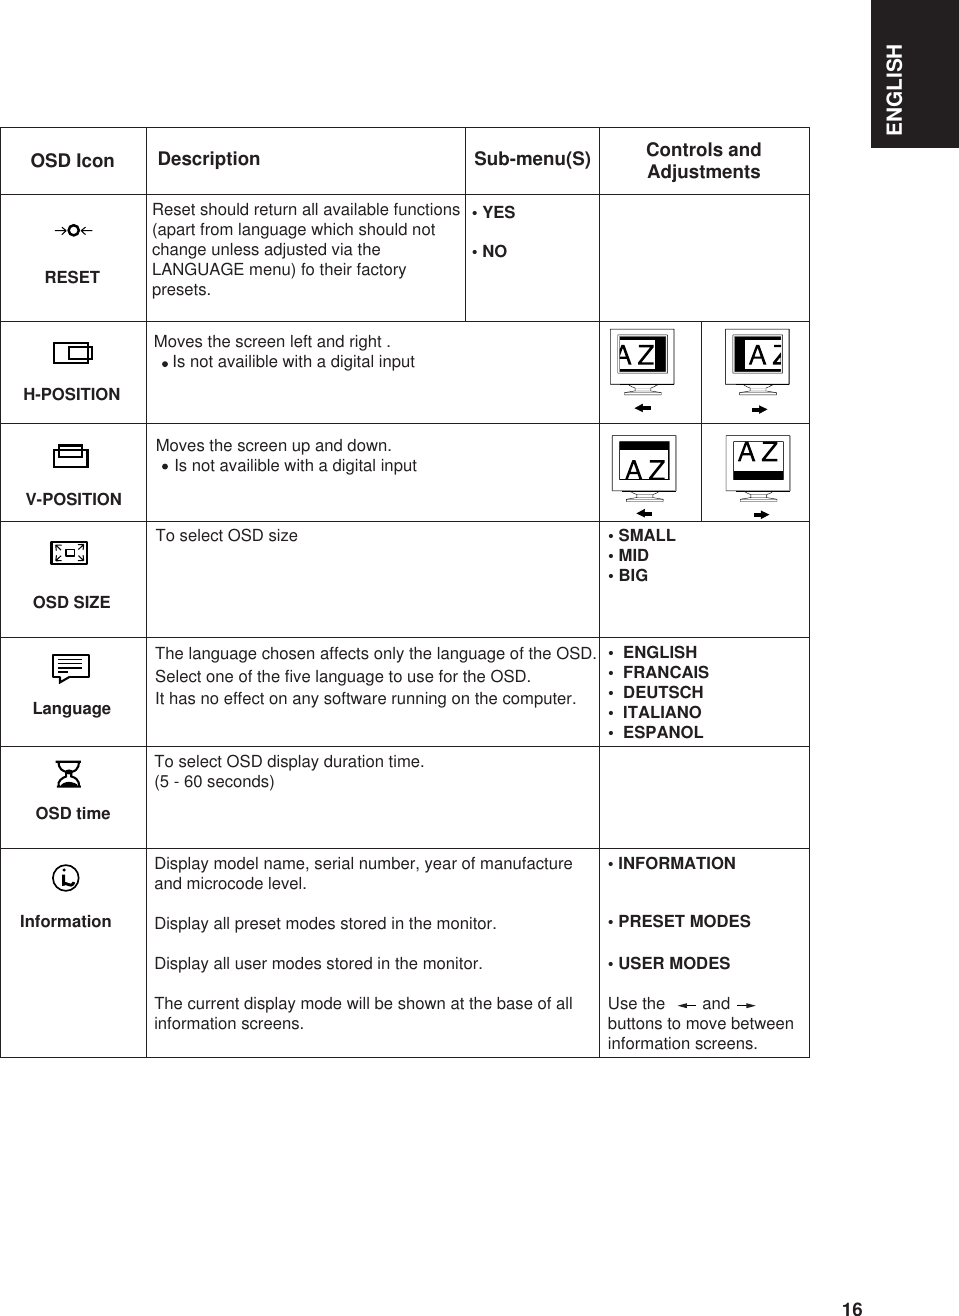
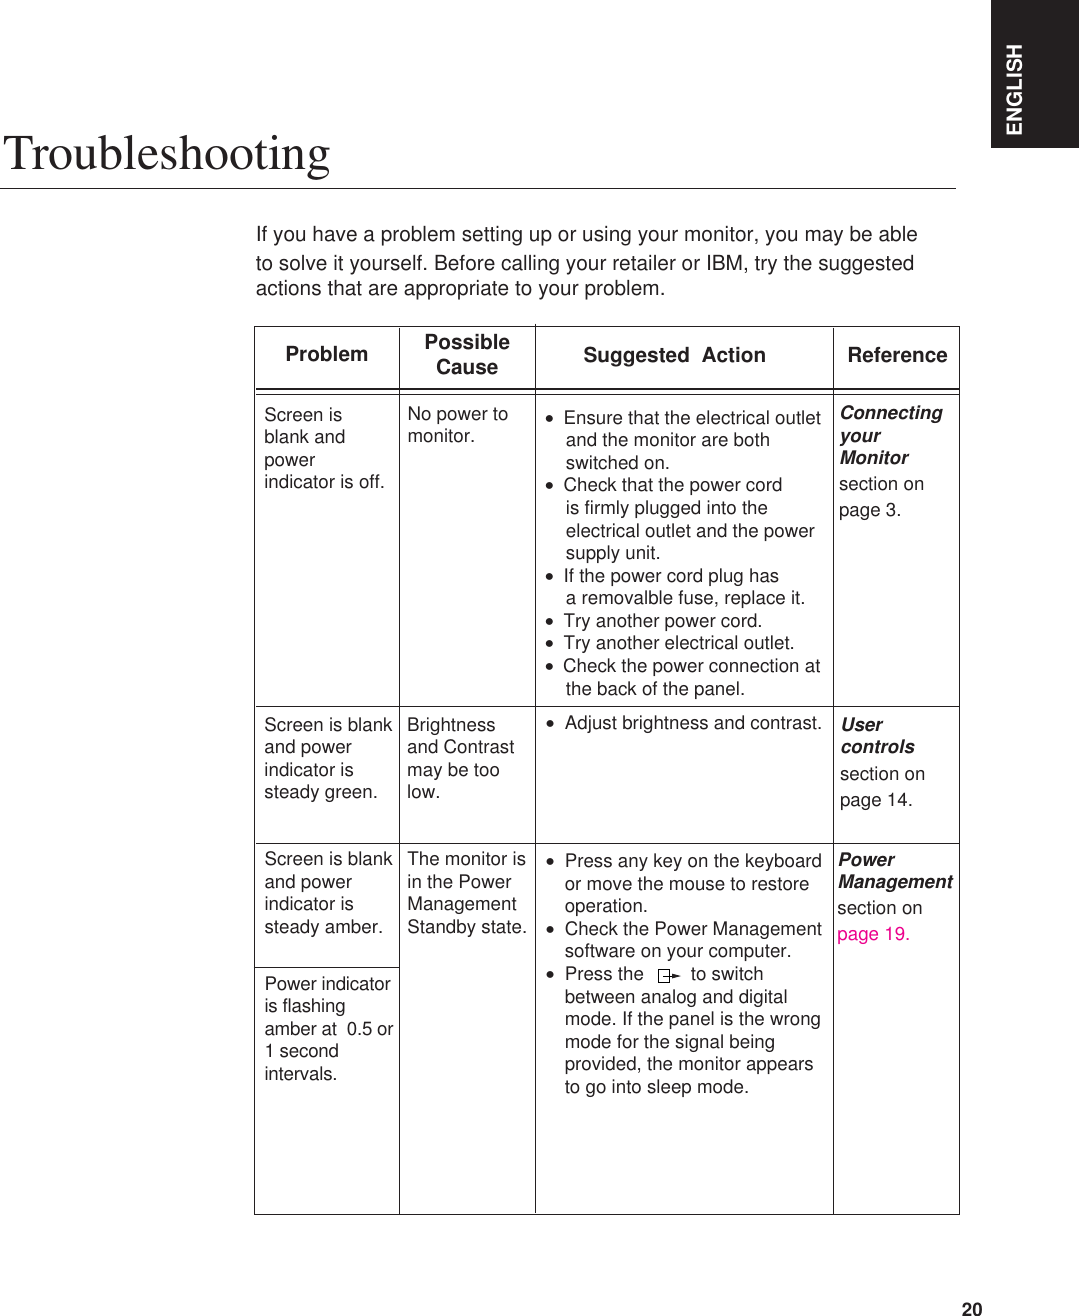
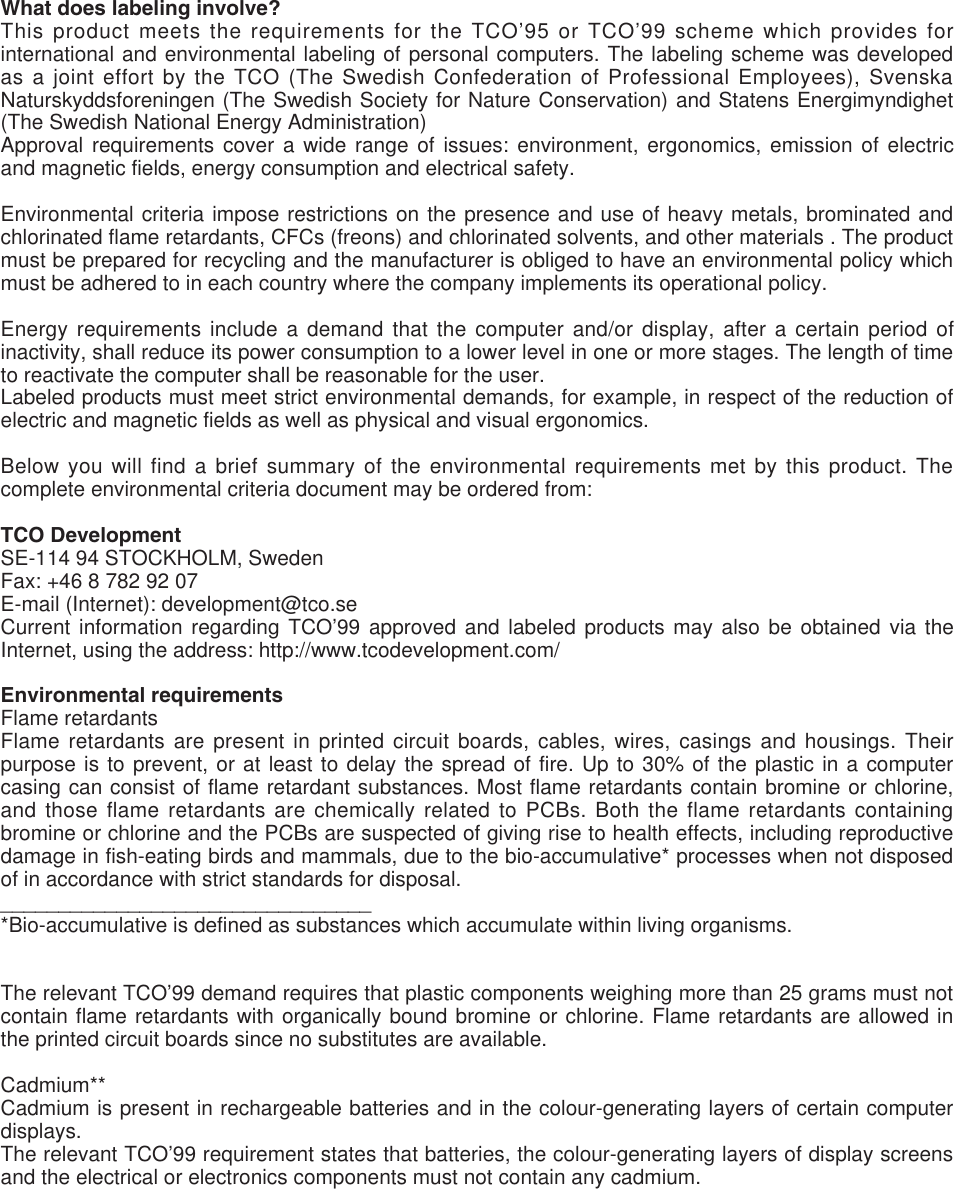
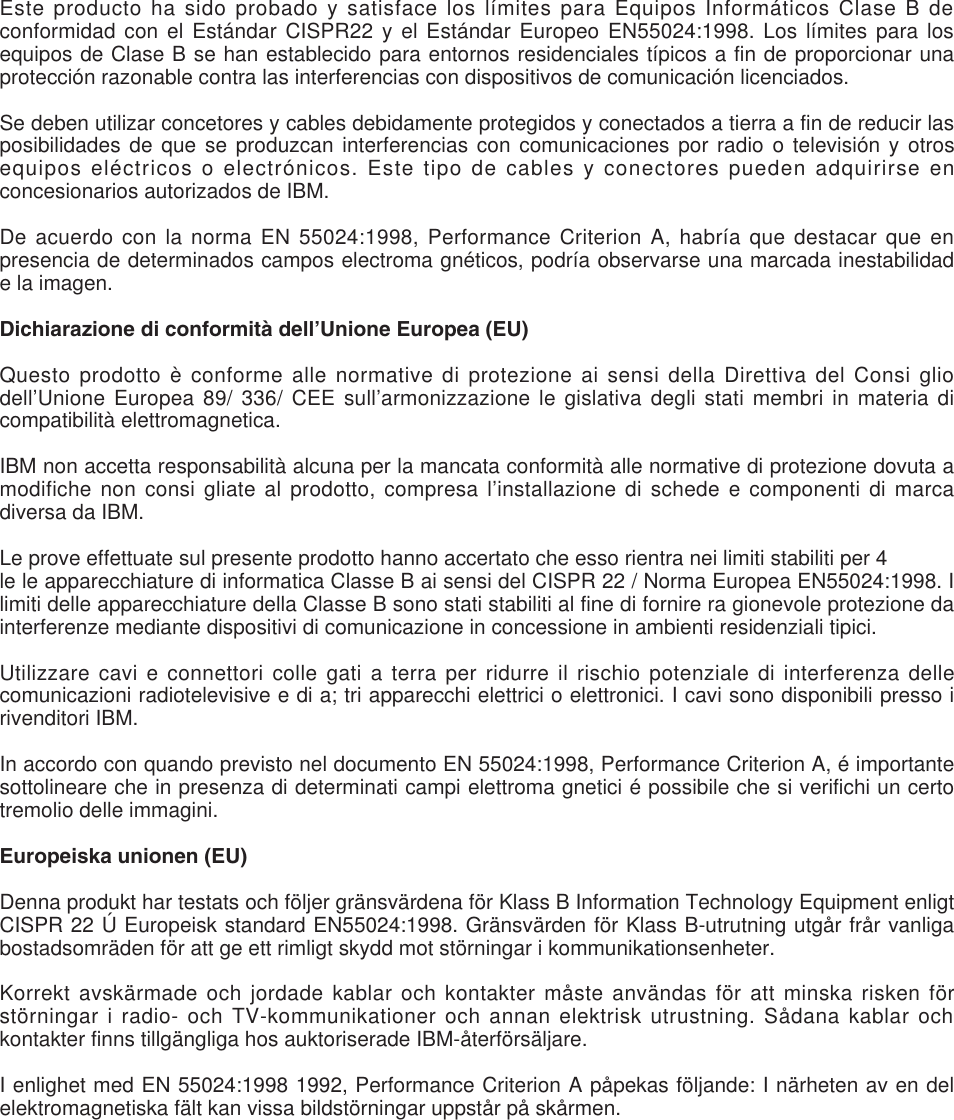
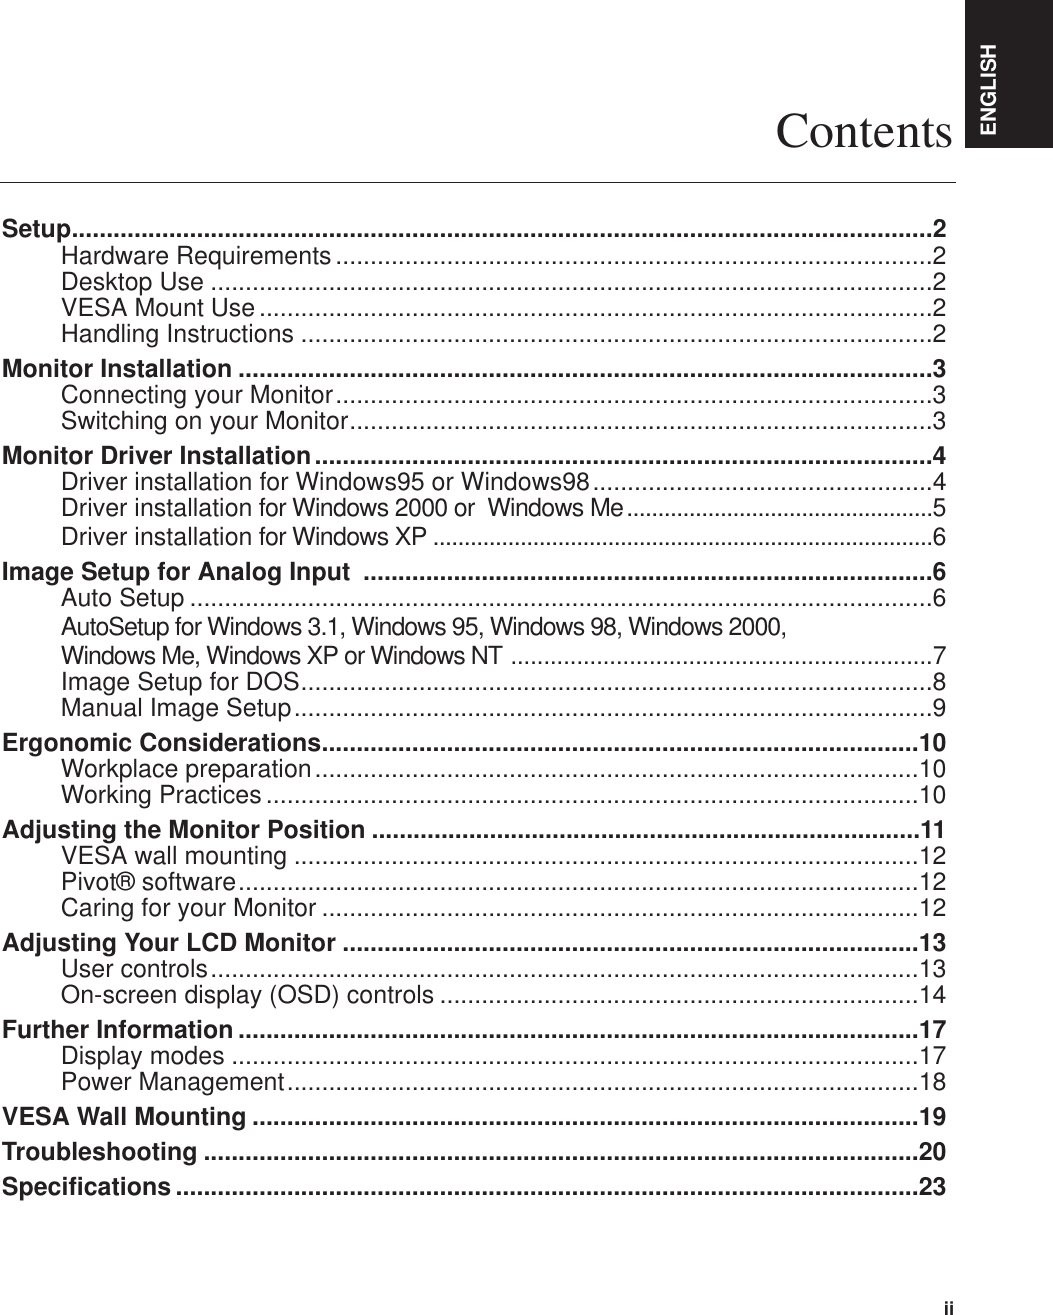
![13Adjusting Your LCD MonitorUser controlsUser control featuresiThe image is alreadyoptimized for many displaymodes, however the usercontrols can be used to adjustthe image to your liking.iThe settings are savedafter adjustment andwhen exiting the OSD andwill be effective thereafter.Switches the monitors on and offIcon Monitor controlsandDisplay main OSD menu and selects highlighted menu item.Moved the cursor to highlight icons or make adjustments.Exits from current OSD menu.Icon Direct Access FunctionsBring up Brightness adjustment.Bring up auto image setup.Switch between input signals.CONTROLS LOCK / UNLOCKThis feature allows you to secure the current control settings,while allowing the user to adjust Brightness or Contrast, so thatthey cannot be inadvertently changed. Push and hold the enterbutton[ ] for 10 seconds; the message “Controls Locked”appears.You can unlock the OSD controls at any time by pushing the enterbutton[ ] for 10 seconds; the message “Controls Unlocked” willappear.](https://usermanual.wiki/LG-Electronics-USA/LI561N/User-Guide-249089-Page-17.png)
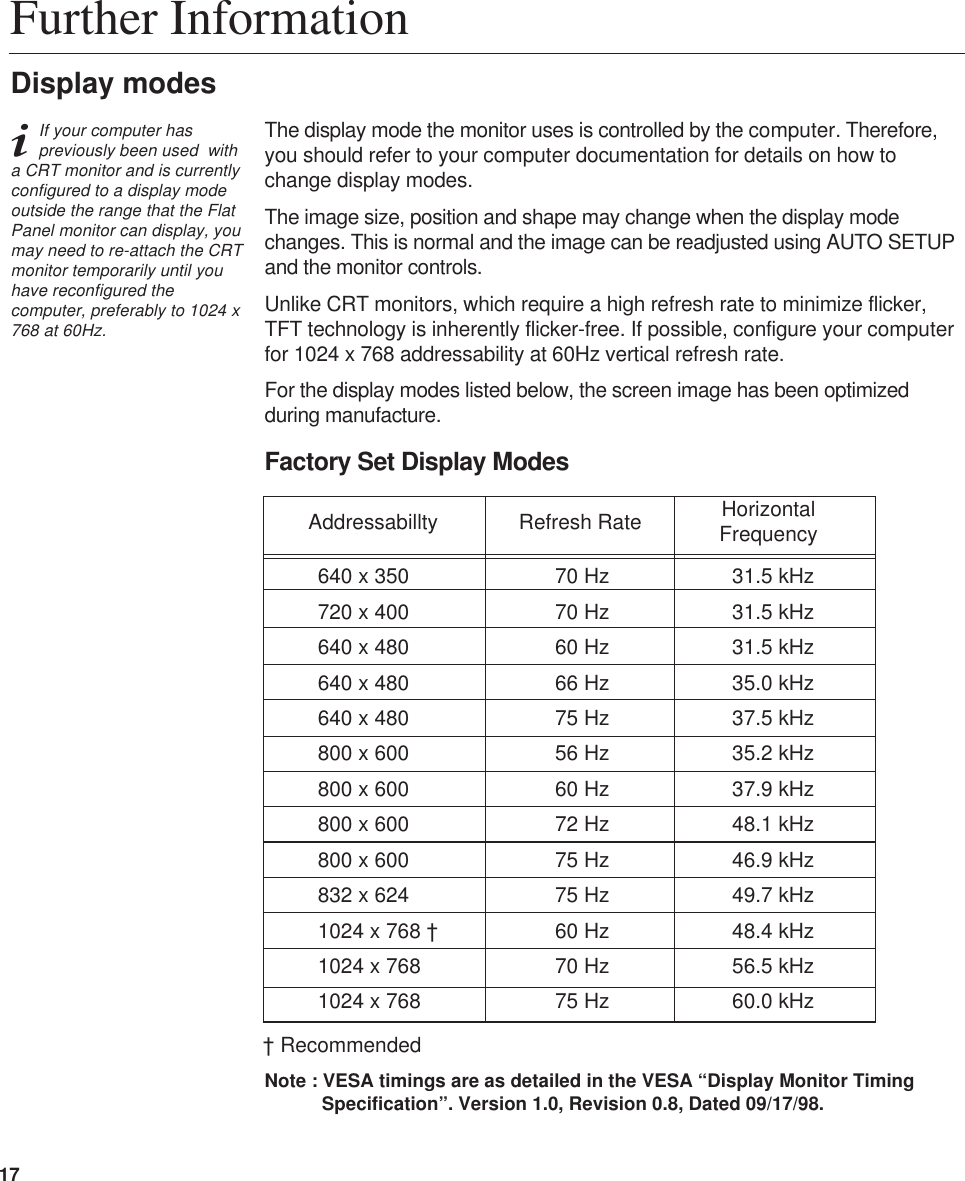
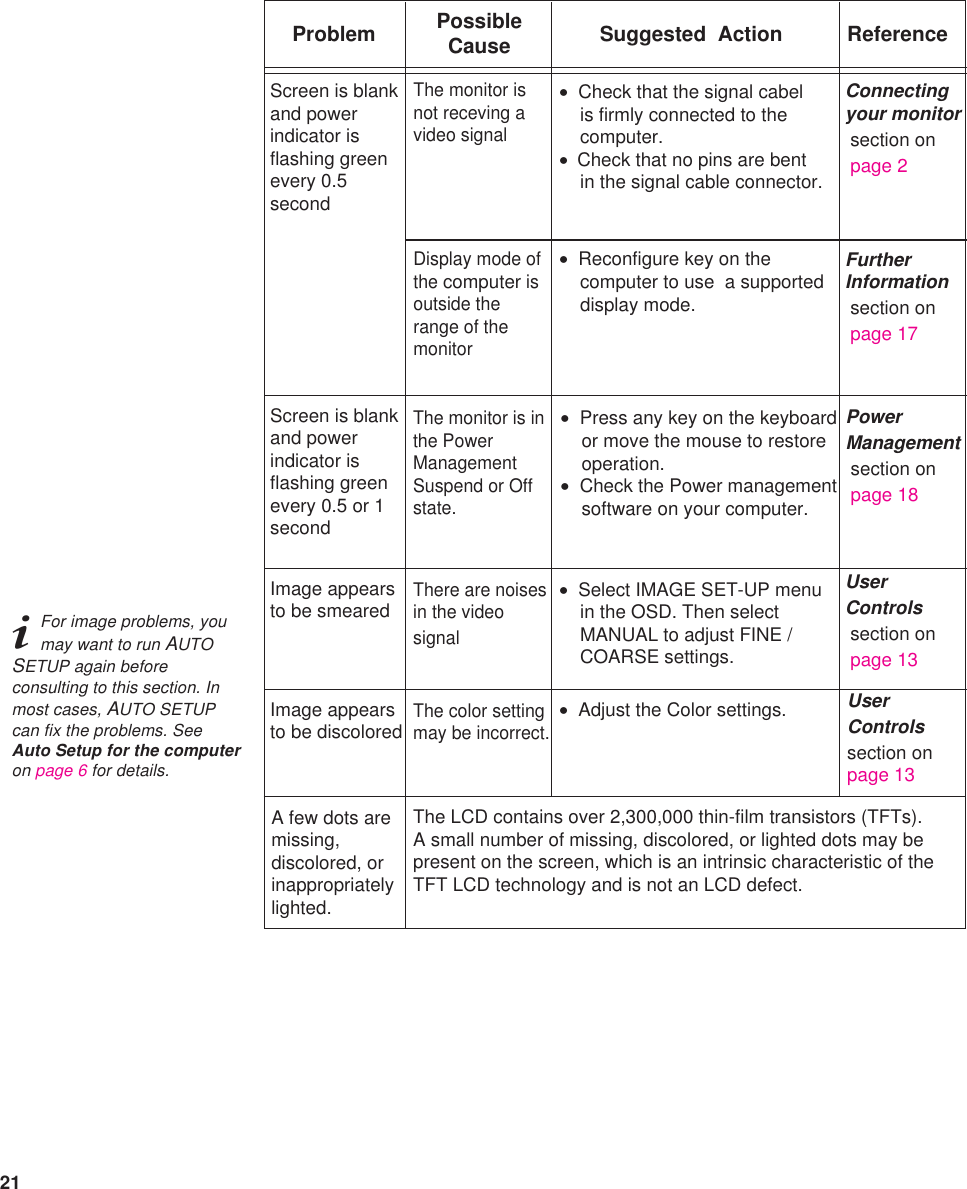
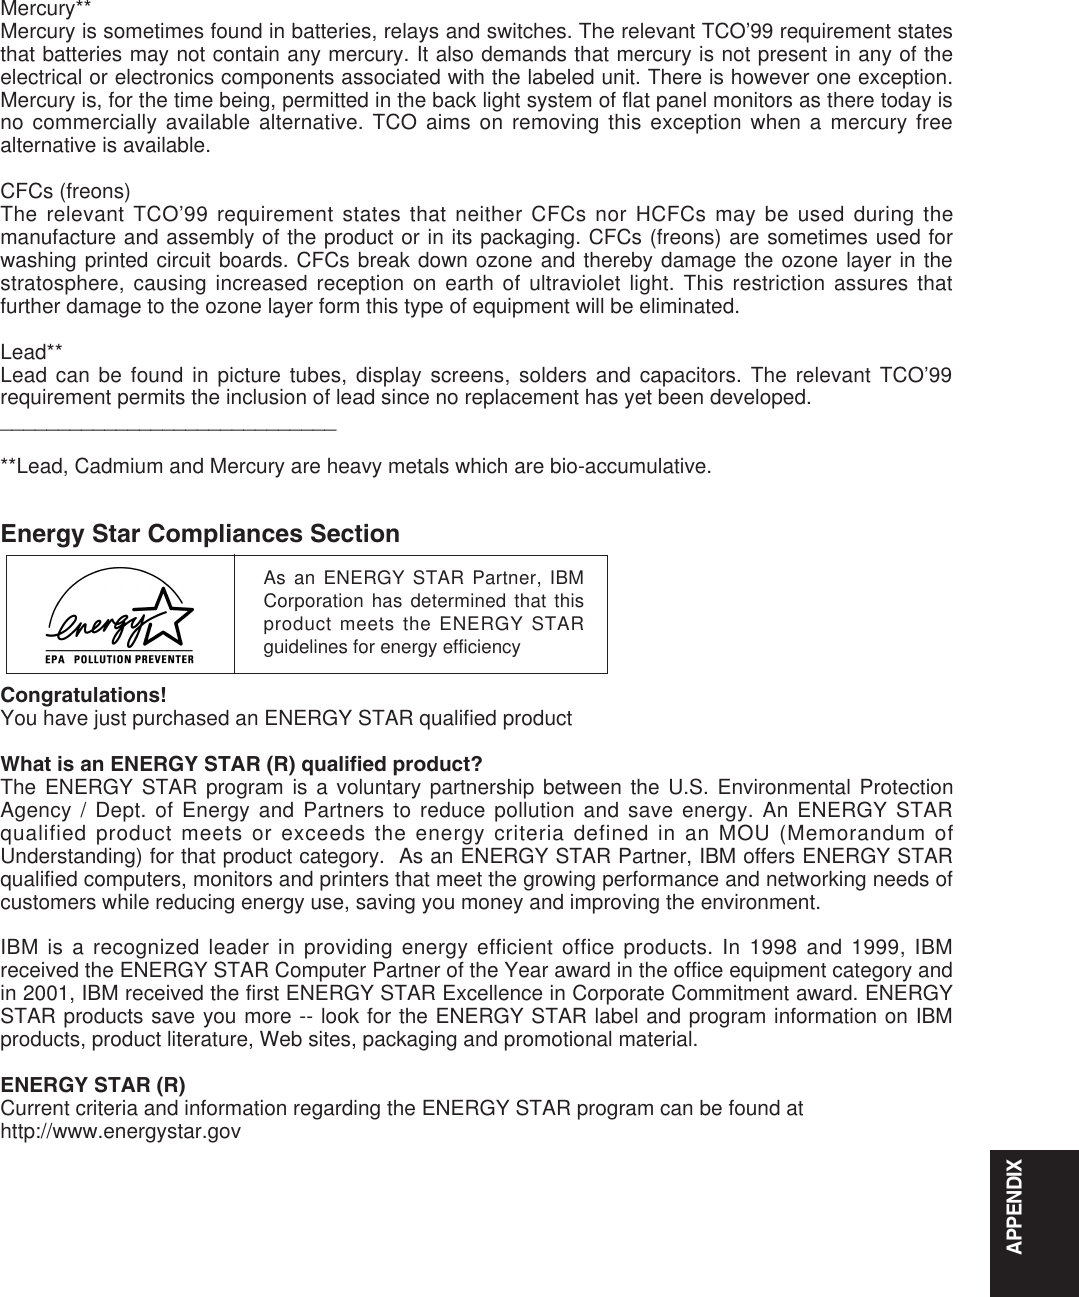
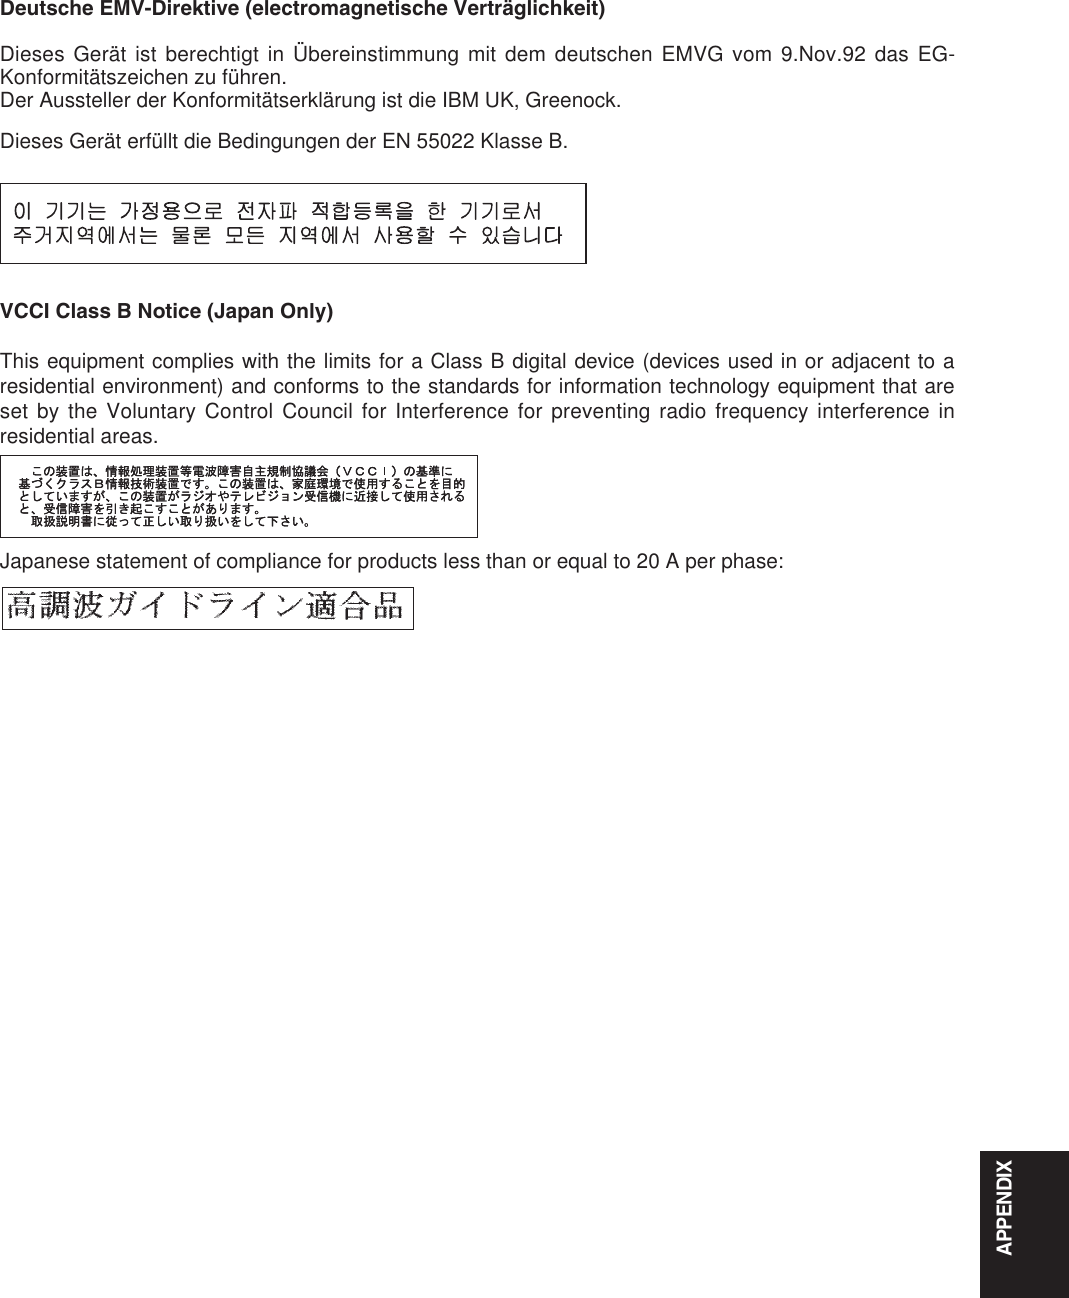
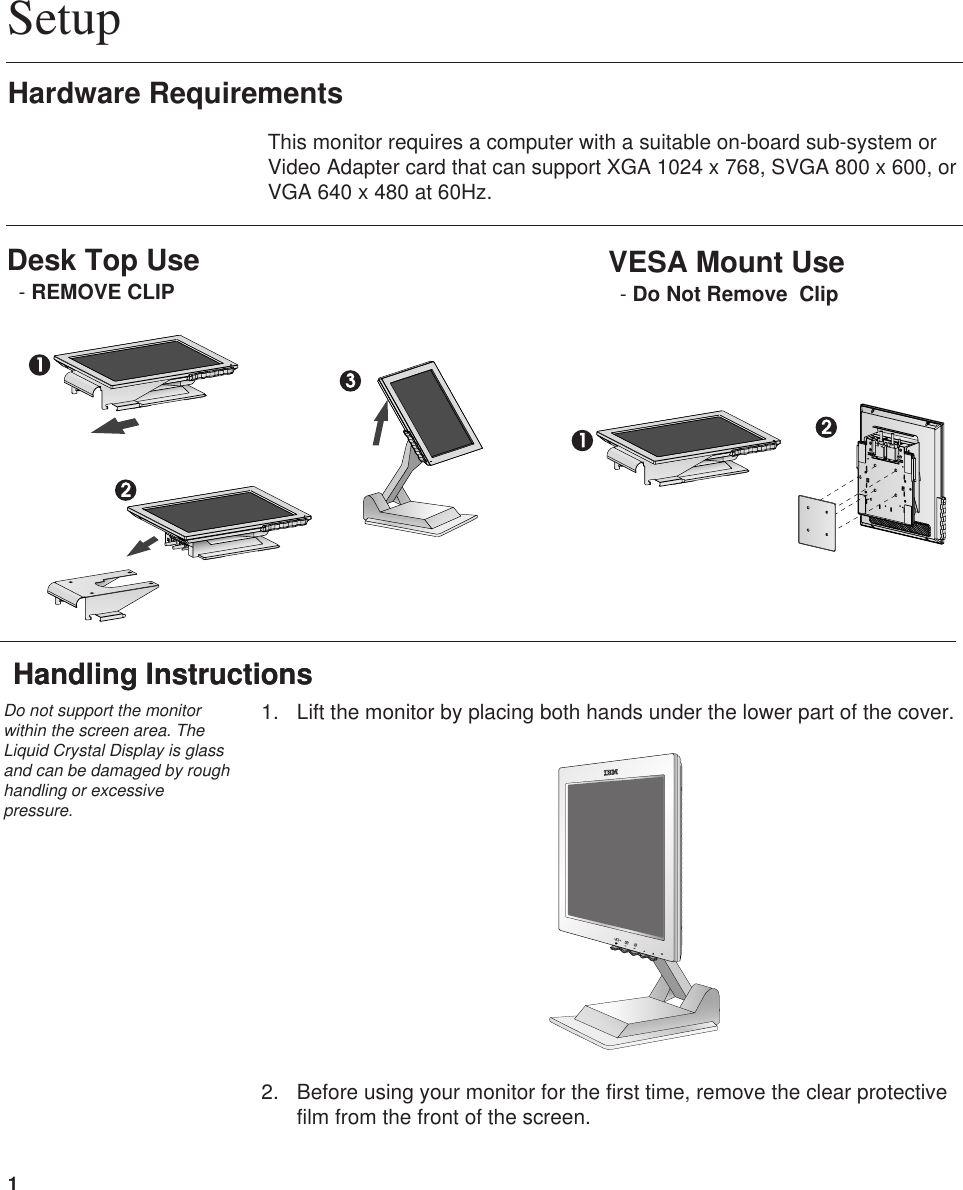
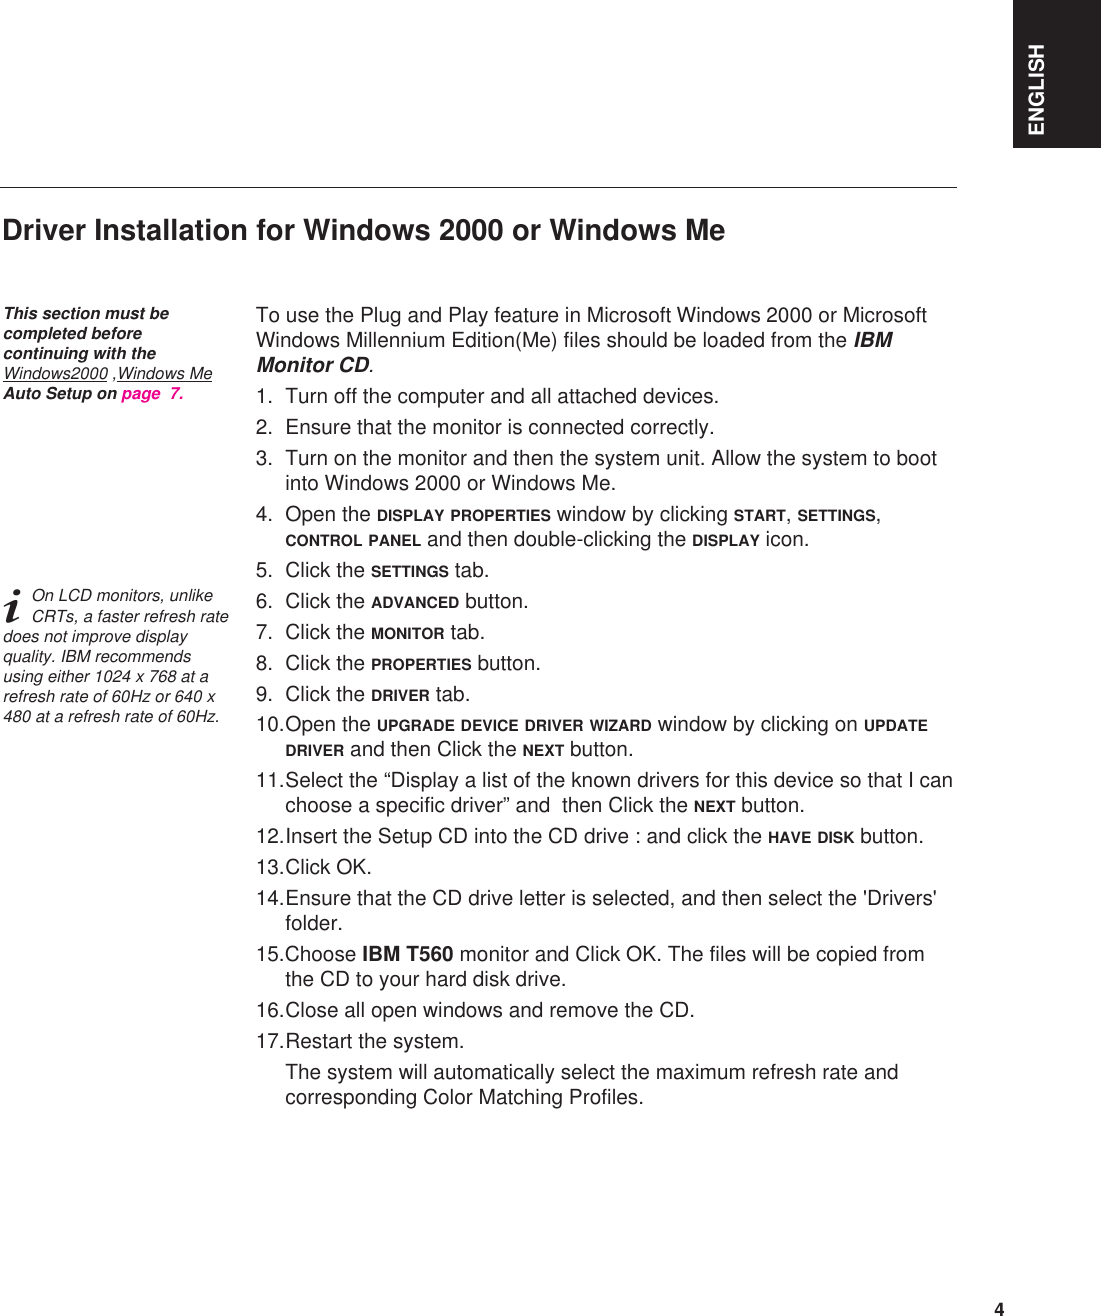
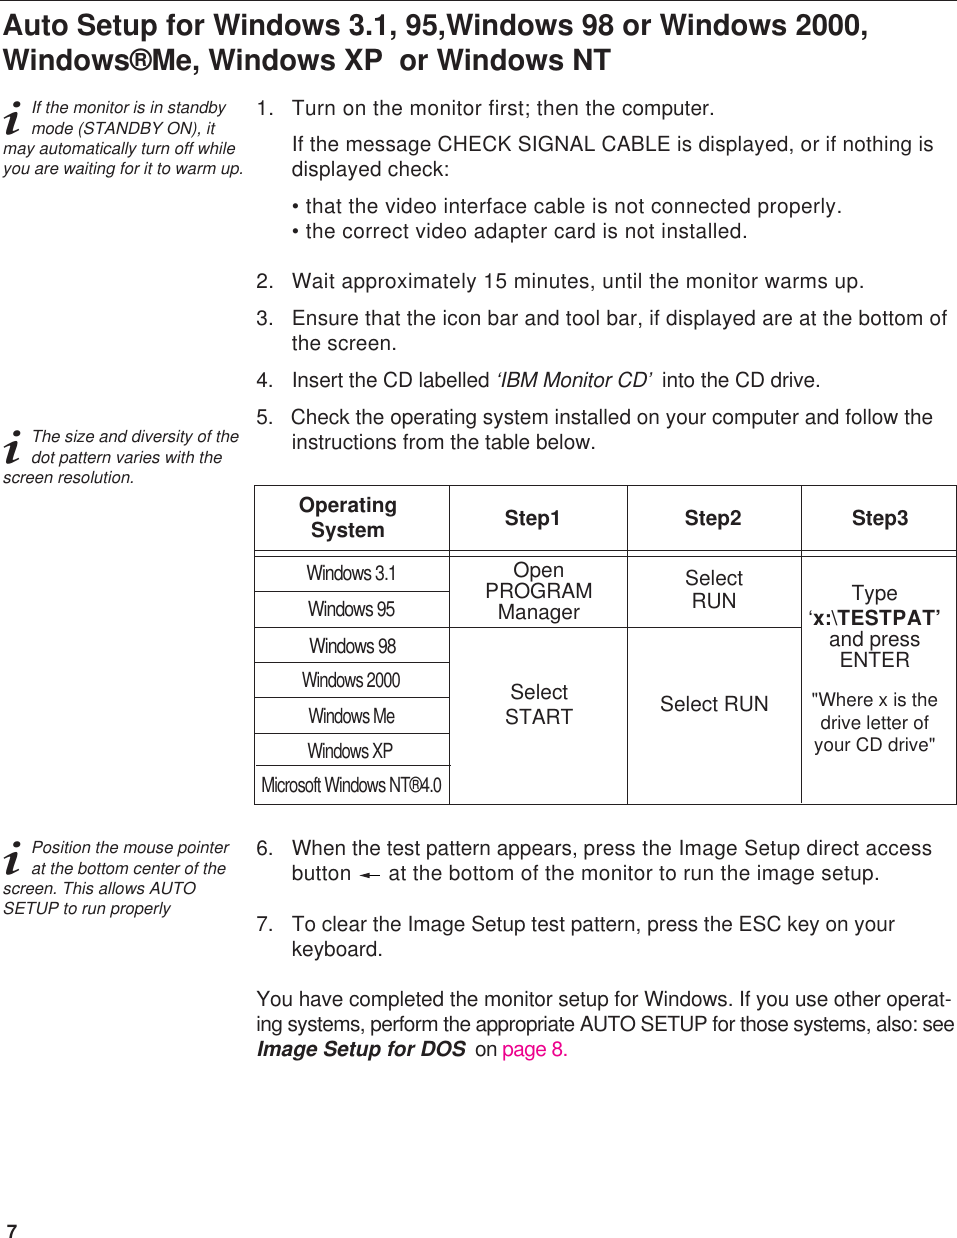
![ENGLISH14The settings adjustable with the user controls are viewed through the On -Screen Display (OSD). Press the enter button [ ] to display the main OSDmenu.Initial appearance of OSDmain menu; On-screen display (OSD) controlsiThe LCD monitor needstime to become thermallystable the first time you turn iton each day. Thus, to achievemore accurate adjustments forparameters, allow the LCDmonitor to warm up (be On) forat least 15 minutes beforemaking any screen adjustment.MAIN MENUDigital InputBRIGHTNESSMAIN MENUAnalog InputBRIGHTNESSBRIGHTNESS75OSD functionsOSD Icon Description sub-menu(s)Auto If AUTO is selected theimage will automaticallyadjust Control andAdjustmentsAdjusts brightnessAdjusts contrastThe IMAGE SET-UP function is usedto adjust the level of noise in the videosignal which causes horizontal lines orareas on the screen where the imageappears to be unstable and jitters orshimmers. This can be doneautomatically or manually. It is not availible when the digital inputBRIGHTNESSCONTRASTIMAGE SET-UPsub menu; When the Analog Signal input When the Digital Signal input](https://usermanual.wiki/LG-Electronics-USA/LI561N/User-Guide-249089-Page-18.png)