LG Electronics USA LNM1880NNBD Car NAVIGATION User Manual
LG Electronics USA Car NAVIGATION
UserManual.wiki
>
LG Electronics USA
>
LNM1880NNBD User Manual
User Manual
Navigation menu
Upload a User Manual
Namespaces
Wiki Guide
HTML
PDF
Info
Views
User Manual
Discussion / Help
Navigation
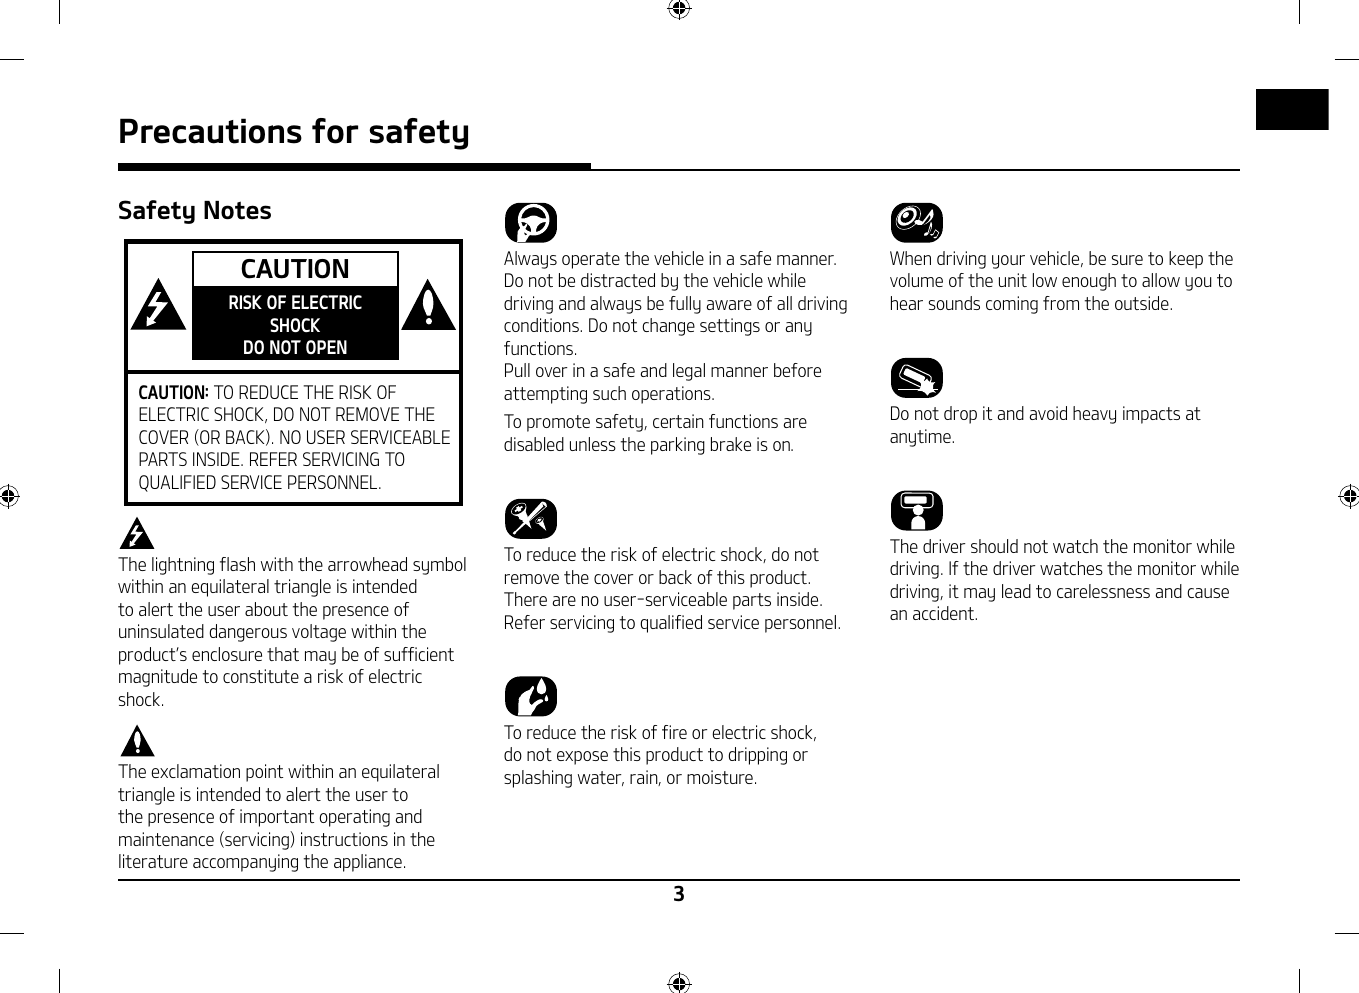
![6Precautions for safety 3Safety Notes . . . . . . . . . . . . . . . . . . . . . . . . . . . .3Table of contents 6General information 9About USB . . . . . . . . . . . . . . . . . . . . . . . . . . . . . .9Music file information . . . . . . . . . . . . . . . . . . . . .9Using iPod Devices . . . . . . . . . . . . . . . . . . . . . .10Precautions upon using iPod................................10Supported iPod devices .........................................10Cautions upon using SD cards . . . . . . . . . . . . .10Ejecting and Inserting SD cards ...........................10Usage of SD cards ..................................................10Name of each component 11Head unit . . . . . . . . . . . . . . . . . . . . . . . . . . . . . .11Steering wheel remote control . . . . . . . . . . . .13Basic operation 14Starting the system for the first time . . . . . .14Turning the system on . . . . . . . . . . . . . . . . . . .14Turning the system off . . . . . . . . . . . . . . . . . .14AV OFF . . . . . . . . . . . . . . . . . . . . . . . . . . . . . . . .14AV ON . . . . . . . . . . . . . . . . . . . . . . . . . . . . . . . . .14Adjusting the volume . . . . . . . . . . . . . . . . . . . .14Resetting the system . . . . . . . . . . . . . . . . . . . .15[Home] screen . . . . . . . . . . . . . . . . . . . . . . . . . .15Configuration for Home screen ...........................15Basic operation for [Home] screen .....................16Editing the [All menus] .........................................16Adding your favourite menu items to [My Menu] ...17Rearranging your favourite menu in [My Menu] . . 1 8Deleting your favourite menu items in [My Menu] ....18Playing last media source ....................................18Radio operation 19Listening to AM . . . . . . . . . . . . . . . . . . . . . . . . .19Opening the station list sorted in numerical order .........................................................................19Auto search .............................................................19Saving AM favourites ............................................19Listening to DAB/FM . . . . . . . . . . . . . . . . . . . . .20Opening the station list ........................................21Saving DAB/FM favourites....................................21Program guide - DAB only ...................................21SLS (Slide Show) - DAB only ................................22Scan . . . . . . . . . . . . . . . . . . . . . . . . . . . . . . . . . .22Sound settings . . . . . . . . . . . . . . . . . . . . . . . . . .22USB Operation 23Playing USB music . . . . . . . . . . . . . . . . . . . . . . .23Pause ........................................................................23Skip ...........................................................................23Search ......................................................................23Seek ..........................................................................23Delete current file ..................................................24Sound settings ........................................................24List ............................................................................24Repeat ......................................................................25Shuffle......................................................................25iPod Operation 26Playing iPod . . . . . . . . . . . . . . . . . . . . . . . . . . . .26Pause ........................................................................26Skip ...........................................................................26Search ......................................................................26Seek ..........................................................................26List ............................................................................26Repeat ......................................................................26Shuffle......................................................................26Sound settings ........................................................26Auxiliary device operation 27Playing an AUX source . . . . . . . . . . . . . . . . . . .27Sound settings ........................................................27Bluetooth® audio 28Playing Bluetooth audio . . . . . . . . . . . . . . . . . .28Starting the Bluetooth audio ...............................28Pause ........................................................................28Skip ...........................................................................28Repeat ......................................................................28Shuffle......................................................................28Connection settings ...............................................28Sound settings ........................................................28Table of contentsTable of contents](https://usermanual.wiki/LG-Electronics-USA/LNM1880NNBD/User-Guide-3729357-Page-6.png)
![8Table of contentsSettings 60[Settings] menu overview . . . . . . . . . . . . . . . .60Navigation . . . . . . . . . . . . . . . . . . . . . . . . . . . . .60Display ......................................................................60Guidance ..................................................................60My data ....................................................................61Default .....................................................................61Sound . . . . . . . . . . . . . . . . . . . . . . . . . . . . . . . . .61Display . . . . . . . . . . . . . . . . . . . . . . . . . . . . . . . .62Bluetooth . . . . . . . . . . . . . . . . . . . . . . . . . . . . . .63Bluetooth connections ..........................................63Auto connection priority .......................................63System Bluetooth info ..........................................63Vehicle name ...........................................................63Passkey ....................................................................64Default .....................................................................64Phone projection . . . . . . . . . . . . . . . . . . . . . . . .64Custom button . . . . . . . . . . . . . . . . . . . . . . . . .64Date/Time . . . . . . . . . . . . . . . . . . . . . . . . . . . . .65Language . . . . . . . . . . . . . . . . . . . . . . . . . . . . . .65Keyboard . . . . . . . . . . . . . . . . . . . . . . . . . . . . . .65Screen saver . . . . . . . . . . . . . . . . . . . . . . . . . . .66Advanced . . . . . . . . . . . . . . . . . . . . . . . . . . . . . .66System info . . . . . . . . . . . . . . . . . . . . . . . . . . . .67Version info .............................................................67Update......................................................................67Memory ...................................................................67Default .....................................................................68Using rear camera - Option 69About Rear Camera . . . . . . . . . . . . . . . . . . . . .69Turning on the rear camera .................................69Before thinking there is a product defect 70Troubleshooting 72Trademarks and Licenses 74Bluetooth® Wireless Technology .........................74iPod® ........................................................................74Open Source Software Notice Information .......74Specification 75](https://usermanual.wiki/LG-Electronics-USA/LNM1880NNBD/User-Guide-3729357-Page-8.png)
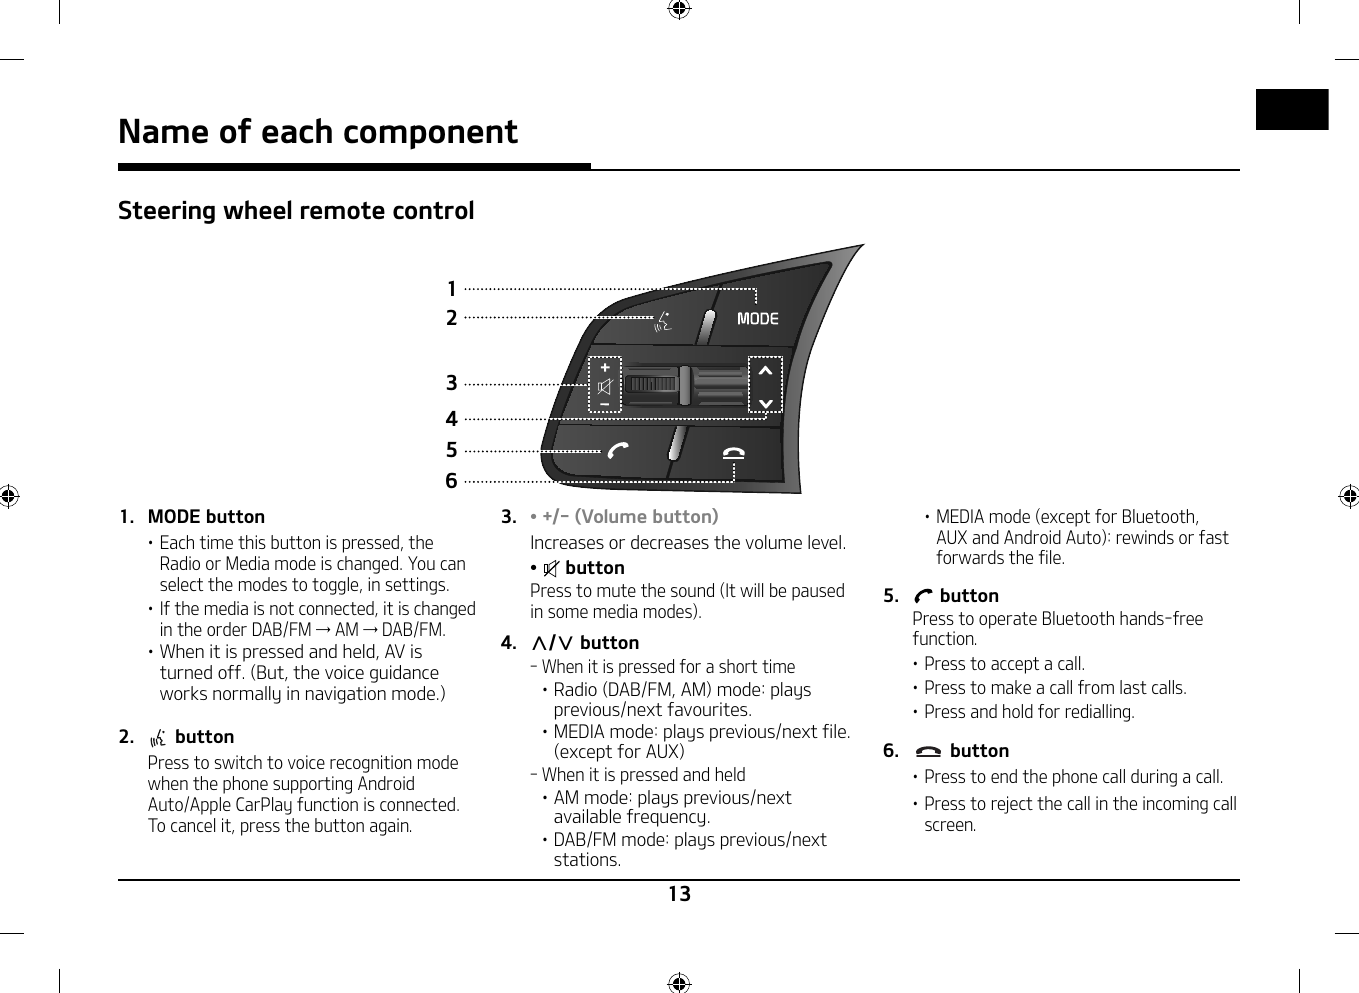
![11Name of each componentHead unitaebdc1. 䳜 POWER PUSH button ‐ Power on Press this button in system OFF status. ‐ Power offPress and hold this button in power ON status. 䳜 Volume control knob (VOL) Turn anticlockwise or clockwise to control volume. 䳜 AV on/off Press this button to turn AV on or off in power ON status.2. RADIO button Converts to the last played radio mode (DAB/FM, AM).3. MEDIA button If the playable media source is one, it moves to the corresponding screen. If the playable media sources are more than two, it moves to the [Media] screen. You can select a media source ([USB Music]/ [iPod]/ [Apple CarPlay]/ [AUX]/[Bluetooth Audio]/[Android Auto]).4. (Custom button) Press to go to the [Custom button settings] menu. After setting, press to use desired function. Before setting, press and hold to go to the [Custom button settings] menu.5. SSEEK/TRACKW button ‐ When it is pressed for a short time 䳜 AM mode: plays previous/next available frequency.䳜 DAB/FM mode: plays previous/next available station existing within [List] menu. If there is no or one station in the [List] menu, the 䳖Auto tuning䳗 function is executed.䳜 MEDIA mode: plays previous/next file. (except for AUX) ‐ When it is pressed and held 䳜 AM mode: plays previous/next available frequency.䳜 DAB/FM mode: plays previous/next available station existing within [List] menu.䳜 MEDIA mode (except for Bluetooth, AUX and Android Auto): rewinds or fast forwards the file. Name of each component](https://usermanual.wiki/LG-Electronics-USA/LNM1880NNBD/User-Guide-3729357-Page-11.png)
![12Name of each component6. MAP button ‐ Press to display the map screen of the current location. ‐ Press to repeat the voice guidance on the map screen (Voice guidance for road names and numbers is not supported in some countries).7. NAV button Press to move to the navigation menu screen.8. SETUP button Press to go to the [Settings] menu. 9. FILE/ENTER/TUNE button ‐ AM mode: turn left/right to tune manually. ‐ DAB/FM mode: turn left/right to search for a desired station and then press. ‐ MEDIA mode (except for Bluetooth, AUX, Apple CarPlay and Android Auto): turn left/right to search for the desired file and press. ‐ Navigation mode: turn to the left/right to change the map scale on the map screen.10. Reset hole Press with a thin object to reset the unit when it does not operate normally.11. Cover for protecting SD card (SD card insert slot) Insert the SD card into the slot.fghijk](https://usermanual.wiki/LG-Electronics-USA/LNM1880NNBD/User-Guide-3729357-Page-12.png)
![14Basic operationStarting the system for the first time1. Press the engine start button or set the ignition key to On or ACC. Once the system is turned on, the booting process will start and the safety warning page is displayed.2. Press [Confirm]. If you want to change the system language, press [Language]. For more details, refer to 䳖Language䳗 on page 65.Notes䳜 You cannot operate the system while it is booting up. It may take some time for all of the features to be ready.䳜 The safety warning page is displayed every time the ignition is turned on. The displayed warnings are related to safety. Please read carefully and comply with the safety warnings.䳜 If there is no operation for 10 seconds in the safety warning screen the system automatically switches to the last played mode.Turning the system onPress [POWER PUSH] on the head unit in system OFF status.NotePay attention to the volume setting when turning the system on. A sudden output of extreme volume upon turning the system on could lead to hearing impairment. Adjust the volume to a suitable level before turning the system off or set the start up volume in the sound [Settings] menu.Turning the system offPress and hold [POWER PUSH] on the head unit in system ON status.AV OFFPress [POWER PUSH] on the head unit to turn AV off in power ON status.AV ONPress [POWER PUSH] on the head unit to turn AV on in AV OFF status.Adjusting the volumeTurn the volume control knob (VOL) on the head unit to the left/right.Mode DescriptionRadio or media During radio or media playback, turn to the left/right.Bluetooth call During a Bluetooth call, turn to the left/right.Bluetooth bell During an incoming call, turn to the left/right.NoteWhen you turn the system off, the current volume level is automatically memorised. Whenever you turn the system on, it operates at the memorised volume level if you do not set the start up volume in sound [Settings] menu. Basic operation](https://usermanual.wiki/LG-Electronics-USA/LNM1880NNBD/User-Guide-3729357-Page-14.png)
![15Resetting the systemThis feature is used to reset the system in the occurrence of an unforeseen error or problem. Press 䳖RESET䳗 button. The use of a clip or pin is recommended when resetting the system.[Home] screenConfiguration for Home screen142531. Navigation widget䳜 Provides a brief view of the navigation map and the route screen.䳜 Press the area on the widget to move to the navigation screen.2. AV widget䳜 Shows brief information on the radio or media currently playing.䳜 Press the area to move to the mode for what you are listening to.3. All menus Press [All menus] to move to all of the items of the system menu.䳜 [Phone]: Operates Bluetooth hands-free function.䳜 [Information]: Moves to the [Information] menu.䳜 [Android Auto]: Runs [Android Auto] function.䳜 [Apple CarPlay]: Runs [Apple CarPlay] function.䳜 [Quick guide]: Moves to the quick guide menu, ([Using the touch screen], [Home], [Bluetooth], [Navigation], [Phone projection]).䳜 [Radio]: Converts to the last played radio mode.䳜 [Media]: Converts to the last played media mode.䳜 [Current position]: Displays the map screen of the current position.䳜 [Navigation]: Moves to the [Navigation] menu.䳜 [Settings]: Moves to the [Settings] menu.䳜 [Voice memo]: Moves to the [Voice memo] menu.4. Navigation Moves to the [Navigation] menu.5. My Menu䳜 You can add and save up to 24 menu items.䳜 You can add your favourite menu items to have quick and easy access.Basic operation](https://usermanual.wiki/LG-Electronics-USA/LNM1880NNBD/User-Guide-3729357-Page-15.png)
![16Basic operation for [Home] screen1. Press [ ] on the screen.2. Select a desired item and it moves to the corresponding screen. Editing the [All menus]1. Press [All menus] on the [Home] screen.2. Press [Edit] on the [All menus] screen.3. Select the desired menu item from the list, then drag and drop it to a desired place.NotePress [ ] to move to the previous screen.Basic operation](https://usermanual.wiki/LG-Electronics-USA/LNM1880NNBD/User-Guide-3729357-Page-16.png)
![17Adding your favourite menu items to [My Menu]1. Press [My Menu] on the [Home] screen.2. Press [Add to My Menu]. If your favourite menu items are already added, press [Menu] > [Add].3. Select one of the [Navigation favourites], [Radio favourites] or [Menu Shortcuts].<For example: the [Menu shortcuts] screen>4. Select one of the categories.5. Mark the subcategories.6. Press [Add] > [Yes].䳜 [Mark all]: Marks all items. 䳜 [Unmark all]: Unmarks all items. Notes䳜 Press [ ] to move to the previous screen.䳜 Up to 24 menu items can be added to [My Menu]. 䳜 If you select the menu item added to [My Menu], it moves to the corresponding screen. Basic operation](https://usermanual.wiki/LG-Electronics-USA/LNM1880NNBD/User-Guide-3729357-Page-17.png)
![18Basic operationRearranging your favourite menu in [My Menu]1. Press [My Menu] on the [Home] screen.2. Press [Menu] > [Rearrange].3. Select the desired menu item from the list, then drag and drop it to a desired place.4. Press [ ].Deleting your favourite menu items in [My Menu]1. Press [My Menu] on the [Home] screen.2. Press [Menu] > [Delete].3. Select the desired menu items, then press [Delete] > [Yes] 䳜 [Mark all]: Marks all items.䳜 [Unmark all]: Unmarks all items.NotePress [ ] to move to the previous screen.Playing last media sourceWhen you press the Engine Start button or set the ignition key to ON/ACC ON, the media source played the last time will play automatically.But, the message 䳖Reconnect last media source to play.䳗 is displayed on the home screen if you set the ignition key to ON/ACC ON with the existing media source disconnected or removed.](https://usermanual.wiki/LG-Electronics-USA/LNM1880NNBD/User-Guide-3729357-Page-18.png)
![19Radio operationListening to AM1. Press [RADIO] on the head unit.2. Press [AM] on the screen. The AM screen of the most recently listened to station is displayed.NoteEach time the [RADIO] button on the head unit is pressed, the mode is changed in the order AM → DAB/FM → AM.3. Auto tuning: 䳜 Press [SSEEK/TRACKW] on the head unit. ‐ Plays previous/next available station. Manual tuning: Turn [FILE/ENTER/TUNE] (anti)clockwise. ‐ The frequency moves up and down accordingly. Favourites tuning: Press [Favourites]. Press the favourites numbers of the desired broadcast station.Opening the station list sorted in numerical orderYou can see the station list with the best reception.1. Press [AM] on the screen.2. Press [List].Auto searchThis function lets you automatically search the broadcast stations with the best reception.1. Press [AM] on the screen.2. Press [List].3. Press [ ].NoteIf you want to save the stations to the [Favourites] menu, press [ ] and then press the desired favourites number. Saving AM favouritesManually saves the listening frequency to the desired favourites list.1. Press [AM] on the screen.2. Select the frequency to save. 3. Press [Favourites].Radio operation](https://usermanual.wiki/LG-Electronics-USA/LNM1880NNBD/User-Guide-3729357-Page-19.png)
![20Radio operation4. Press the desired favourites number. If you want to overwrite an existing favourites, press and hold the respective favourites number.Listening to DAB/FM1. Press [RADIO] on the head unit.2. Press [DAB/FM] on the screen. The DAB/FM screen of the most recently listened to station is displayed.NoteEach time the [RADIO] button on the head unit is pressed, the mode is changed in the order DAB/FM → AM → DAB/FM.3. Auto tuning (when there are none or one station in the [List] menu):䳜 Press [SSEEK/TRACKW] on the head unit. ‐ Plays previous/next available station. List tuning (when there are two or more stations in the [List] menu):䳜 Press [SSEEK/TRACKW] on the head unit. ‐ Plays previous/next available station existing within [List] menu. Manual tuning: 䳜 In the DAB/FM mode, press [Menu] > [Manual tune FM].Station bar ‐ Drag the station bar to the left/right to find the radio station that you want. ‐ Press [C/V]. 䳜 Turn [FILE/ENTER/TUNE] to the left/right, then press when the desired station is displayed in a highlighted colour. Favourites: 䳜 Press [Favourites]. Press the favourites numbers of the desired broadcast station.䳜 Press [W/S] on the steering wheel remote control.Notes䳜 FM broadcasts are transmitted at high frequencies and do not bend to follow the earth䳓s surface. Because of this, FM broadcasts generally begin to fade at short distances from the station. Also, FM signals are easily affected by buildings, mountains, or other obstructions. These can result in undesirable listening conditions and show wrong information (ex. RDS PS NAME, etc.), which might lead you to believe a problem exists with your radio. The following conditions are normal and do not indicate radio trouble.䳜 When the signal is weak, FM noise is generated and DAB sound is muted.](https://usermanual.wiki/LG-Electronics-USA/LNM1880NNBD/User-Guide-3729357-Page-20.png)
![21Radio operationOpening the station listYou can see the station list with superior reception.1. Press [DAB/FM] on the screen.2. Press [List].䳜 If you want to save the stations to the [Favourites] menu, press [ ] and then press the desired favourites number.䳜 Press [Station] or [Program type] to arrange the list in station or program type order.Saving DAB/FM favouritesIt saves the listening station to the desired favourites list.1. Press [DAB/FM] or [FM] on the screen.2. Select the desired station. 3. Press [Favourites].4. Press the desired favourites number. If you want to overwrite an existing favourites, press and hold the respective favourites number.Program guide - DAB onlyYou can view the program information and the broadcasting station schedule provided by DAB.1. Press [DAB/FM] on the screen.2. Press [Menu] > [Program guide].A BACDA Broadcast station name: Displays the broadcast station name.B [ ]: Moves to the previous screen.C Program name: Displays the program title.D Program time: Displays the program time and duration.](https://usermanual.wiki/LG-Electronics-USA/LNM1880NNBD/User-Guide-3729357-Page-21.png)
![22Radio operationSLS (Slide Show) - DAB onlyYou can view the slide show image information when image information is available from the broadcasting station in the DAB mode.1. Press [DAB/FM] on the screen.2. Press [ ].NoteThe [ ] icon may not be displayed if there is no information being transmitted by the broadcasting station.ScanThis function scans all stations and plays only stations with good signal strength for 5 seconds each.Press [d Scan]. Press [Z Stop] to stop the scan function.Sound settings1. Press [Menu] > [Sound settings]. 2. For details refer to page 61 (䳖Sound䳗).](https://usermanual.wiki/LG-Electronics-USA/LNM1880NNBD/User-Guide-3729357-Page-22.png)
![23USB OperationPlaying USB musicYou can play music files stored on a USB memory device.Connect a USB device to the USB port and playback starts automatically.NoteTo play USB music while a different source is playing, press [MEDIA] > [USB Music].PauseYou can pause the playing file.Press [M] during playback.Press [d] to play it again.SkipYou can play the previous or next file.Position DescriptionScreen 䳜 Press [C/V].䳜 Pressing [C] after 3 seconds of playback time plays the current file from the beginning.Head unit 䳜 Press [SSEEK/TRACKW].䳜 Pressing [SSEEK] after 3 seconds of playback time plays the current file from the beginning.SearchYou can fast rewind/forward to a specific point of a file.Position DescriptionScreen Press and hold [C/V] and then release at the point you want.Head unit Press and hold [SSEEK/TRACKW] and then release at the point you want.NoteWhen you drag or touch the desired part on the progress bar, the music of the selected part plays. SeekYou can play the file directly by searching for the desired file.1. Turn [FILE/ENTER/TUNE] to search for a desired file. 2. If the desired file is displayed, press the [FILE/ENTER/TUNE] to play the file.USB Operation](https://usermanual.wiki/LG-Electronics-USA/LNM1880NNBD/User-Guide-3729357-Page-23.png)
![24USB OperationDelete current fileYou can delete the currently playing file in the USB.1. Press [Menu] > [Delete current file].2. Press [Yes].Notes䳜 The deleted file(s) can be found in the 䳖to_delete䳗 folder.䳜 It is not available on exFAT or NTFS file format USB devices.Sound settings1. Press [Menu] > [Sound settings].2. For details refer to page 61 (䳖Sound䳗).ListYou can search for a desired file using the music list of the USB Menu.Playing the desired file by searching in the music list1. Press [List].2. Press the desired file after searching for a category. The category can be sorted by [File], [Artist], [Song], [Album], or [Recently added].NotePress [ ] to move up a folder.Using the list menu1. Press [Menu] in list screen.2. Press [Show current track]. The screen moves to the file list currently playing.](https://usermanual.wiki/LG-Electronics-USA/LNM1880NNBD/User-Guide-3729357-Page-24.png)
![25USB Operation RepeatYou can play a set of files repeatedly.1. Press [ ].2. Select the desired mode by pressing [ ] repeatedly.䳜 [ ]: Plays all files sequentially.䳜 [ ]: Repeats all files within the current folder.䳜 [ ]: Repeats the current file, only.䳜 [ ]: Plays the files sequentially within the [Artist], [Song], [Album], or [Recently added].ShuffleYou can play files in random order.1. Press [ ].2. Press [ ] again to turn shuffle off.](https://usermanual.wiki/LG-Electronics-USA/LNM1880NNBD/User-Guide-3729357-Page-25.png)
![26iPod OperationPlaying iPod1. Use an iPod exclusive cable to connect an iPod to the USB connector.2. Press [MEDIA]. To play an iPod while a different source is playing, press [MEDIA] > [iPod].PauseYou can pause the playing file. For details refer to page 23 (䳖Pause䳗).SkipYou can play the previous or next file. For details refer to page 23 (䳖Skip䳗).SearchYou can fast rewind/forward to a specific point of a file. For details refer to page 23 (䳖Search䳗).SeekYou can play the file directly by searching for the desired file. For details refer to page 23 (䳖Seek䳗). ListYou can play the desired file by searching in the files list in the iPod Menu.1. Press [List].2. Press the desired file after searching for [Playlist], [Artist], [Album], [Song], or [Other]. RepeatYou can play a set of files repeatedly.1. Press [ ].2. Select the desired mode by pressing [] repeatedly.䳜 [ ]: Plays all files sequentially.䳜 [ ]: Repeats the current file, only.ShuffleYou can play files in random order.1. Press [ ].2. Press [ ] again to turn shuffle off.Sound settings1. Press [Menu] > [Sound settings].2. For details refer to page 61 (䳖Sound䳗).iPod Operation](https://usermanual.wiki/LG-Electronics-USA/LNM1880NNBD/User-Guide-3729357-Page-26.png)
![27Auxiliary device operationPlaying an AUX source1. Connect an auxiliary device to the AUX terminal.2. Play the auxiliary device.NoteTo play an auxiliary device while a different source is playing, press [MEDIA] > [AUX].Sound settings1. Press [Menu] > [Sound settings].2. For details refer to page 61 (䳖Sound䳗).Auxiliary device operation](https://usermanual.wiki/LG-Electronics-USA/LNM1880NNBD/User-Guide-3729357-Page-27.png)
![28Bluetooth® audioPlaying Bluetooth audio䳜 Music stored on the mobile phone can be played in the vehicle through Bluetooth audio streaming. 䳜 Bluetooth audio can be played only when a Bluetooth phone or Bluetooth audio device has been connected. To play Bluetooth audio, connect the Bluetooth phone to the vehicle system. For more information on connecting Bluetooth, please refer to the owner䳓s manual [Pairing and connecting the unit and a Bluetooth phone] on page 53.䳜 If Bluetooth is disconnected while playing Bluetooth audio, the audio stream will be interrupted.䳜 The audio streaming function may not be supported on some mobile phones. Only one function can be used at a time, You can not use the Bluetooth hands-free and the Bluetooth audio function at the same time. For example, if you convert to the Bluetooth hands-free while playing Bluetooth audio, the music stream is paused.䳜 Playing music from the vehicle is not possible when there are no music files saved on the mobile phone.Starting the Bluetooth audio1. Connect your Bluetooth device to the head unit. 2. Press [MEDIA]. The Bluetooth audio screen is displayed.NoteTo play Bluetooth audio while a different source is playing, press [MEDIA] > [Bluetooth Audio]. PausePress [ ] during playback.Press [ ] to play it again.SkipYou can play the previous or next file.For details refer to page 23 (䳖Skip䳗).RepeatYou can play a set of files repeatedly.Select the desired mode by pressing [ ]repeatedly.ShuffleYou can play files in random order.Select the desired mode by pressing [ ]repeatedly.NoteThese features may not be supported in some Bluetooth devices.Connection settings1. Press [Menu] > [Connection settings].2. For details refer to page 63 (䳖Bluetooth connections䳗).Sound settings1. Press [Menu] > [Sound settings].2. For details refer to page 61 (䳖Sound䳗).Bluetooth® audio](https://usermanual.wiki/LG-Electronics-USA/LNM1880NNBD/User-Guide-3729357-Page-28.png)
![29Making a voice memoPress [All menus] >[Voice memo] on the menu.Start/Pause/Stop the voice memo.Position DescriptionScreen䳜 To run voice memo, touch [].䳜 To pause voice memo, touch [M] during recording. If you want to restart the voice memo, touch [].䳜 To stop voice memo, touch [Z] during recording.Notes䳜 All sounds from the unit are muted when playing voice memo.䳜 A voice memo pauses when receiving a phone call via Bluetooth during the voice memo.䳜 The latest voice memo is placed on the top of voice memo list, and it is automatically saved as a 䳒YYYYMMDD_HHMMSS䳓 in the list.䳜 When the storage space is full during recording the voice memo, the voice memo ends after saving.Playing a voice memoTo play voice memo, select a voice memo in the voice memo list.Press [All menus] >[Voice memo] on the menu.Pause/PlayPosition DescriptionScreen 䳜 To pause voice memo, touch [M] during playing.䳜 Touch [d] during pause, to play voice memo.Skip You can play the previous or next voice memo.Position DescriptionScreen 䳜 Touch [C/V].䳜 If you touch [C] after 3 second of the playback time, The voice memo is played from the beginning.Head unit 䳜 Press [SSEEK/TRACKW]SearchYou can fast rewind/forward to a specific point of a voice memo.Position DescriptionScreen If you touch and hold [C/V] and release at the desired part, that part is played.Head unit 䳜 If you press and hold [SSEEK/TRACKW] and release at the desired part, that part is played.Voice memoVoice memo](https://usermanual.wiki/LG-Electronics-USA/LNM1880NNBD/User-Guide-3729357-Page-29.png)
![30Deleting voice memo1. Press [Menu] on the voice memo screen.2. Press [Delete].3. Select the voice memo to delete and press [Delete] > [Yes].䳜 To select the entire list, press [Mark all]. 䳜 To uncheck the entire list, press [Unmark all].Saving voice memo on a USB1. Press [Menu] on the voice memo screen.2. Press [Save to USB].3. Select the voice memo to save and press [Save] > [Yes].䳜 To select the entire list, press [Mark all]. 䳜 To uncheck the entire list, press [Unmark all].Notes䳜 You can save in the USB device formatted as FAT 16/32.䳜 When saving to USB, the voice memo is saved in the voice memo folder.䳜 To cancel the voice memo being recorded, press [Cancel]→[Yes].䳜 Press [Voice memo] on the menu.Checking memory space information1. Press [Menu] on voice memo screen.2. Press [Memory].3. Check the memory space of USB.For details, refer to "Memory" on page 67.Voice memo](https://usermanual.wiki/LG-Electronics-USA/LNM1880NNBD/User-Guide-3729357-Page-30.png)
![32Getting started with navigationOperating Navigation ScreenThe navigation system displays various information on the screen.Map screen1234568971012111. Clock display Displays current time.2. [ ] button Moves to the home menu screen.3. Map view button Changes the map view perspective. Press [ ], [ ] or [ ]. ‐ (Heading up (2D)): The map always displays the vehicle䳓s direction as proceeding towards the top of the screen. ‐ (Bird view (3D)): The map always displays the basic outline and details of the surrounding roads and general area. ‐ (North up (2D)): The map always point north, regardless of the direction that the vehicle is moving.4. [ / ] button Adjusts the navigation volume. For details refer to page 33 (䳖Navigation volume䳗).5. Map scale ‐ [ ]: Changes the map scale automatically depending on the speed and guidance distance. ‐[ / ]: Changes the map scale.6. [ ] button Show quick menu. For details refer to page 35 (䳖Quick menu䳗).7. Current position display Displays the current position.8. Remaining distance, Arriving or Remaining time display Displays the remaining distance and the expected time of arrival or the remaining time until the arrival.9. Stop route/Resume route Stop or restart the route guidance to the destination.10. [ ] button Displays distance and direction information for the upcoming TBT (Turn By Turn) when the route is activated.11. Vehicle position mark Displays current vehicle position and direction.12. Route lane Displays the route to the destination when a route is set.](https://usermanual.wiki/LG-Electronics-USA/LNM1880NNBD/User-Guide-3729357-Page-32.png)
![33Getting started with navigation Zoom In / Zoom Out䳜 Turn [FILE/ENTER/TUNE] left/right to set the zoom level on the map screen.䳜 Press [/] to set the zoom level on the map screen.Map scaleThis function sets the zoom level automatically according to the speed and guidance distance.Press [ ] on the map screen.Name Description Scale Fix (inactive - "Grey")Fix the displayed scale. Auto Scale (active - "Colour")Change the map scale automatically depending on the speed and guidance distance.Navigation volumePress [ ] or [ ] to adjust the volume.A CB BDA / : Press the button to mute or unmute.B / : Press the buttons to adjust the volume.C : Drag the volume control bar to adjust the volume.D [Navigation priority]: If the box is checked, the navigation guidance volume is louder than the audio volume.Scrolling mapPress the desired map area. The selected point will be centred on the screen and the scroll mark will be displayed.Information about the marked point and straight line distance from the current position will be displayed at the centre of the screen.NoteIf a map area on the map screen is pressed, the map will continuously scroll in the corresponding direction until it is released.](https://usermanual.wiki/LG-Electronics-USA/LNM1880NNBD/User-Guide-3729357-Page-33.png)
![34Getting started with navigation Making a call to POIAfter searching for a POI, the POI phone number information can be used to make a call to the POI facility.1. Use various search methods, such as the map scroll function, destination search function and so on. For details refer to individual search function sections.2. Press [ ] on the map screen.3. Bluetooth phone is used to make call.Notes䳜 Making a call is not possible if there is no telephone information for a POI or if there is no mobile phone connected through Bluetooth.䳜 For more information on mobile phone authentication through Bluetooth or detailed information on conducting searches, refer to [Pairing and connecting the unit and a Bluetooth phone], on page 53.Guidance to previous destinationsWhen starting the navigation, the 䳖Previous destinations䳗 pop-up appears for about 10 seconds. The pop-up is displayed only when the navigation is started without the route planned. Select from the list.NoteIf the box of [Deactivate this pop-up] is checked, previous destinations pop-up is not activated.Press [SETUP] > [Navigation] > [Display] > [Show previous destinations after navigation start-up] to reactivate this pop-up.](https://usermanual.wiki/LG-Electronics-USA/LNM1880NNBD/User-Guide-3729357-Page-34.png)
![35Getting started with navigationQuick menu1. Press [ ] on the map screen. 2. Press the desired menu.䳜 [ / ]: Shows or hides the quick menu.䳜 [Route]: Changes the route conditions by using the [Reroute], [Route options] or [Detour] menu when the route is activated.䳜 [Map display]: Changes the map view perspective.䳜 [POI]: Displays the desired POI icons or finds a destination by searching for POI.䳜 [Traffic]: Shows the traffic information list.䳜 [Save]: Adds the current position to the address book.RerouteThis function is used to redefine the route to the currently set destination.1. Press [ ] > [Route].2. Press [Reroute].Route optionsThis function is used to modify various route options according to your needs.1. Press [ ] > [Route].2. Press [Route options].3. Set the route options. For details, refer to page 45.4. Press [Recalculate] > [Start guidance].DetourThis function is used to redefine the route by setting a detour to a certain distance from the current position.1. Press [ ] > [Route].2. Press [Detour].3. Select the desired option for the detour.4. Press [Start guidance].Map displayThis function is used to set the map display.1. Press [ ] > [Map display].2. Select the desired option.䳜 [North up]: Map always points north.䳜 [Heading up]: Map always points vehicle䳓s direction.䳜 [3D]: Map displays contents in three dimensions.䳜 [3D buildings]: Map draws buildings in three dimensions.](https://usermanual.wiki/LG-Electronics-USA/LNM1880NNBD/User-Guide-3729357-Page-35.png)
![36POIThis function is used to display the desired POI icons or find a destination by searching for a POI.POI icon display1. Press [ ] > [POI].2. Press [On] or [Off] to set the POI icon display on the map.Edit POI1. Press [ ] > [POI] > [Edit].2. Press the desired POI to change.3. Select the desired POI to replace.POI categories1. Press [ ] > [POI] > [POI categories].2. Find a destination by searching for a POI. For details, refer to page 39. TrafficYou can obtain traffic information for a selected category.1. Press [ ] > [Traffic].䳜 [On route]: If the route is set, you can only check traffic information on the route.䳜 [Category]: Select categories of traffic information you want to see.2. Press the desired traffic information for details.䳜 [Detour]: Detour the traffic event.䳜 [Previous/Next]: Show the previous or next traffic event.Getting started with navigation](https://usermanual.wiki/LG-Electronics-USA/LNM1880NNBD/User-Guide-3729357-Page-36.png)
![37SaveThis function is used to add the current position to the address book.1. Press [ ] > [Save].2. Edit the desired item.䳜 [Name]: Change the name.䳜 [Phone Number]: Enter the phone number.䳜 [Display on Map]: Set how to be displayed on the map screen.䳜 [Favourite]: Save into favourite items.3. Press [Save].Navigation menu1. Press [NAV] on the head unit.2. Press the desired option.䳜 [Destination]: Finds a destination by using the [Destination] menu, refer to pages 38-44.䳜 [Route]: Changes the route conditions by using the [Route] menu when the route is activated, refer to pages 45-47.Getting started with navigation](https://usermanual.wiki/LG-Electronics-USA/LNM1880NNBD/User-Guide-3729357-Page-37.png)
![38Searching for destinationPlaces SearchYou can find the destination by searching for a place.1. Press [NAV] > [Place or address].2. Enter POI name, address or coordinates, then press [OK]. 䳜 If you want to search only in a specific state, press 䳖State button䳗 on the top right and select the desired state.3. Press the preferred item from the list.䳜 [Filter by city or suburb]: Filters the list by entering the city or suburb.䳜 [Filter by category]: Filters the list by selecting the category.4. Press [Set as destination]. When a route has been set, press [Yes] to change the destination.䳜 If you want to add a waypoint when a route has been set, press [Add waypoint]. For more details, refer to 䳖Edit route䳗 on page 46.䳜 If you want to add the position to [Address book] menu, press [Save]. For more details, refer to 䳖Adding the position to address book䳗 on page 41.5. Press [Start guidance].NoteThe destination is saved in the [Previous destinations] menu automatically, refer to page 39.Address SearchYou can find the destination by searching for an address.1. Press [NAV] > [Address].2. Enter the Street no., Street, City or Suburb and select State corresponding to the desired destination.Searching for destination](https://usermanual.wiki/LG-Electronics-USA/LNM1880NNBD/User-Guide-3729357-Page-38.png)
![39Searching for destination3. Follow steps 4-5 of 䳖Places Search䳗 on page 38.NoteThe destination is saved in the [Previous destinations] menu automatically, refer to page 39.Previous destinationsYou can select one of the locations you have previously searched for as a destination, waypoint and start point.1. Press [NAV] > [Previous destinations].䳜 Press [Date] or [Name] to arrange the list in date or name order.䳜 Press [Delete items] to delete the previous destinations. Select the desired item, then press [Delete] > [Yes]. ‐ [Mark all]: Marks all items. ‐ [Unmark all]: Unmarks all items.2. Press the preferred item from the list. 3. Follow steps 4-5 of 䳖Places Search䳗 on page 38.POI categoriesYou can set a POI as destination using different search methods.1. Press [NAV] > [POI categories].䳜 Press [History] to see POI categories you searched for.䳜 Press [Search] to search POI category name.2. Select one of the categories.3. Select one of the search options.䳜 [Near current position]: Finds POI near current vehicle position. 䳜 [Near destination]: Finds POI near selected destination. 䳜 [Along route]: Finds POI along route.䳜 [Near scroll mark]: Finds POI around the current cursor when the map is scrolled.](https://usermanual.wiki/LG-Electronics-USA/LNM1880NNBD/User-Guide-3729357-Page-39.png)
![40Searching for destination䳜 [Near city center]: Finds POI located in a specific city or suburb.4. Press the preferred item from the list.5. Follow steps 4-5 of 䳖Places Search䳗 on page 38.Service stationsYou can find a destination for a service station.1. Press [NAV] > [Service stations].2. Select one of the search option.䳜 [Near current position]: Finds service stations near current vehicle position. 䳜 [Near destination]: Finds service stations near selected destination. 䳜 [Along route]: Finds service stations along route.䳜 [Near scroll mark]: Finds service stations around the current cursor when the map is scrolled.䳜 [Near city center]: Finds service stations located in a specific city or suburb.3. Press the preferred item from the list.4. Follow steps 4-5 of 䳖Places Search䳗 on page 38.RestaurantsYou can find a destination for a restaurant.1. Press [NAV] > [Restaurants].2. Select one of the search option.䳜 [Near current position]: Finds restaurants near current vehicle position. 䳜 [Near destination]: Finds restaurants near selected destination. 䳜 [Along route]: Finds restaurants along route.䳜 [Near scroll mark]: Finds restaurants around the current cursor when the map is scrolled.䳜 [Near city center]: Finds restaurants located in a specific city or suburb.3. Press the preferred item from the list.4. Follow steps 4-5 of 䳖Places Search䳗 on page 38.](https://usermanual.wiki/LG-Electronics-USA/LNM1880NNBD/User-Guide-3729357-Page-40.png)
![41Searching for destinationEmergencyYou can find the emergency in order of proximity from your current location.1. Press [NAV] > [Emergency].2. Select the desired emergency (Police stations, Hospitals, Kia dealerships or Roadside assistance).3. Press the preferred item from the list.4. Follow steps 4-5 of 䳖Places Search䳗 on page 38.Address bookYou can select a destination from a location saved in the [Address book] menu. To utilise this function more effectively, destinations that you often travel to should be saved in advance.First of all, store in the [Address book] menu through the destination search function. 1. Press [NAV] > [Address book].2. Press the preferred item from the list.3. Follow steps 4-5 of 䳖Places Search䳗 on page 38.Adding the position to address bookYou can add the current position or the selected place to the address book.1. To add the current position, press [ ] > [Save] on the map screen. To add the selected place, press [Save] after searching for a destination or scrolling on the map.2. Enter the desired name and press [Save].NotePress [NAV] > [Address book] to check the added position.](https://usermanual.wiki/LG-Electronics-USA/LNM1880NNBD/User-Guide-3729357-Page-41.png)
![42Searching for destinationExporting address book to USBThis function is used to export the address book to a USB memory device.1. Connect a USB device to the USB port.2. Press [SETUP] > [Navigation] > [My data] > [Export address book to USB].3. Press [Yes].4. Press [OK].Notes䳜 The export function may not always be supported due to the USB format type.䳜 Exporting is not available from exFAT or NTFS file formats.Importing address book from USBThis function is used to import the address book saved on a USB memory device.1. Connect a USB device to the USB port.2. Press [SETUP] > [Navigation] > [My data] > [Import address book from USB].3. Press [Yes].4. Press [OK]. Press [View] to view the imported address book.Notes䳜 The amount of data available for importing to a USB device is limited based on the number of address book items supported by the navigation system.䳜 If the data stored on the USB device uses different coordinates from your navigation system, the importing location may change.䳜 The import function can update the favourite list as well as the address book previously saved.䳜 Using the function after successfully importing is recommended.](https://usermanual.wiki/LG-Electronics-USA/LNM1880NNBD/User-Guide-3729357-Page-42.png)
![43Searching for destinationEditing address book1. Press [Edit] in address book list.2. Edit the desired item.䳜 [Name]: Change the name.䳜 [Address]: Change the location.䳜 [Phone Number]: Enter the phone number.䳜 [Display on Map]: Set how to be displayed on the map screen.䳜 [Favourite]: Save in the favourite items.3. Press [Save].Deleting address book1. Press [Delete items] in address book list.2. Select the desired item, then press [Delete] > [Yes].䳜 [Mark all]: Marks all items.䳜 [Unmark all]: Unmarks all items.CoordinatesYou can find a destination by entering the coordinates of latitude and longitude.There are two ways to search by coordinates ([D.M.S] or [Decimal degrees]).1. Press [NAV] > [Coordinates].2. Press [D.M.S] or [Decimal degrees].3. Enter the coordinates and press [OK].4. Follow steps 4-5 of 䳖Places Search䳗 on page 38.](https://usermanual.wiki/LG-Electronics-USA/LNM1880NNBD/User-Guide-3729357-Page-43.png)
![44Searching for destination Home, Office, FavouritesIf your home location, office location, and favourite locations are already in the [Favourite] menu they can be easily retrieved by tapping on them. First of all, store home, office or favourites in the [Favourite] menu through the destination search function.Registering Home, Office or Favourites1. Press [NAV].2. Press [Go home], [Office], or [Favourite (1~3)].3. Select the desired position through the destination search function.4. Press [OK] when the destination search is completed. It is saved in the [Favourite] menu automatically.Finding your Home, Office, or Favourite place1. Press [Go home], [Office], or [Favourite (1~3)].2. Follow steps 4-5 of 䳖Places Search䳗 on page 38.](https://usermanual.wiki/LG-Electronics-USA/LNM1880NNBD/User-Guide-3729357-Page-44.png)
![45Using the route menuStop guidance/ Resume guidanceIf you want to stop the route guidance when a route is active, press [NAV] > [Route] > [Stop]. If you want to start the route guidance, press [NAV] > [Route] > [Resume].Route optionsYou can set route options according to your needs.1. Press [NAV] > [Route] > [Options].2. Set the desired options.䳜 [Route] ‐ [Route 1]: Calculates the optimised route based on arrival time. ‐ [Route 2]: Calculates the optimised route based on distance.䳜 [Traffic information] ‐ [On]/[Off]: Route calculation whether real time traffic or not.䳜 [Highway], [Toll roads], [Ferry], [Time restriction], [Private/Gated roads], [Unsealed roads], [Tunnel] ‐ [Use]: Calculates the route including the Highway, Toll roads, Ferry, Time restriction, Private/Gated roads, Unsealed roads, or Tunnel. ‐ [Minimise]: Calculates the route minimising the use of Highways, Toll roads, Ferries, Time restricted roads, Private/Gated roads, Unsealed roads, or Tunnels.3. Press [Recalculate] to apply the route option settings.NoteNot all options may be supported.OverviewYou can check the entire route between your current location and your destination. 1. Press [NAV] > [Route] > [Overview]. 2. Press the desired items. 䳜 [Start guidance]: Starts the guidance.䳜 [Route options]: Changes the route options.䳜 [Route info.]: Displays the route information.䳜 [Edit route]: Edits the route.Using the route menu](https://usermanual.wiki/LG-Electronics-USA/LNM1880NNBD/User-Guide-3729357-Page-45.png)
![46Using the route menuPreviewThis allows you to check the detailed route by section. 1. Press [NAV] > [Route] > [Preview].2. Press the desired items.䳜 [ ]: Moves to the departure section.䳜 [ ]: Moves to the previous section.䳜 [ ]: Moves to the next section.䳜 [ ]: Moves to the destination section.䳜 [ ]: Displays the progress bar.Edit routeThis allows you to edit the current route.1. Press [NAV] > [Route] > [Edit].2. Press [Add waypoint].3. Add the waypoint through destination search function.4. If you want to add a waypoint, follow steps 2~3.5. If you want to reorder the route, drag it to the desired position, or press [ ]/[ ].䳜 [Optimise]: Sorts waypoints by closest distance from the current position.6. Press [OK] > [Start guidance].](https://usermanual.wiki/LG-Electronics-USA/LNM1880NNBD/User-Guide-3729357-Page-46.png)
![47Using the route menuRoute informationThis allows you to view the distance to the next guide point and the turning direction at that guide point.1. Press [NAV] > [Route] > [Information]. 2. Select the desired item to check the map information. Avoid streetThis allows you to modify and recalculate a set route by avoiding specific streets.This allows you to avoid certain streets. You can calculate an alternative route from the vehicle location to the destination. 1. Press [NAV] > [Route] > [Avoid street].2. Press the street(s) that you want to avoid.3. Press [OK]. If you want to cancel it, press [Unmark all].4. Press [Detour] > [Start guidance].](https://usermanual.wiki/LG-Electronics-USA/LNM1880NNBD/User-Guide-3729357-Page-47.png)
![48END-USER Terms The data (䳖Data䳗) is provided for your personal, internal use only and not for resale. It is protected by copyright, and is subject to the following terms and conditions which are agreed to by you, on the one hand, and [CLIENT] (䳖[CLIENT]䳗) and its licensors (including their licensors and suppliers) on the other hand. 1987 䳍 2013 HERE [Insert any applicable copyright notices as required for the country-specific Data being used]. All rights reserved.The Data for areas of Canada includes information taken with permission from Canadian authorities, including: Her Majesty the Queen in Right of Canada, Queen䳓s Printer for Ontario, Canada Post Corporation, GeoBase, Department of Natural Resources Canada.HERE holds a non-exclusive license from the United States Postal Service to publish and sell ZIP+4 information.United States Postal Service 20XX. Prices are not established, controlled or approved by the United States Postal Service. The following trademarks and registrations are owned by the USPS: United States Postal Service, USPS, and ZIP+4. The Data for Mexico includes certain data from Instituto Nacional de Estadstica y Geografa.](https://usermanual.wiki/LG-Electronics-USA/LNM1880NNBD/User-Guide-3729357-Page-48.png)
![49Terms and Conditions Personal Use Only. You agree to use this Data together with [insert name of CLIENT䳓s authorized Application] for the solely personal, non-commercial purposes for which you were licensed, and not for service bureau, time-sharing or other similar purposes. Accordingly, but subject to the restrictions set forth in the following paragraphs, you agree not to otherwise reproduce, copy, modify, decompile, disassemble, create any derivative works of, or reverse engineer any portion of this Data, and may not transfer or distribute it in any form, for any purpose, except to the extent permitted by mandatory laws. You agree that your right to use this Data together with [CLIENT䳓s authorized Application] may be terminated in the event of your breach of this clause.Restrictions. Except where you have been specifically licensed to do so by [CLIENT], and without limiting the preceding paragraph, you may not (a) use this Data with any products, systems, or applications installed or otherwise connected to or in communication with vehicles, capable of vehicle navigation, positioning, dispatch, real time route guidance, fleet management or similar applications; or (b) with or in communication with any positioning devices or any mobile or wireless-connected electronic or computer devices, including without limitation cellular phones, palmtop and handheld computers, pagers, and personal digital assistants or PDAs.Warning. The Data may contain inaccurate or incomplete information due to the passage of time, changing circumstances, sources used and the nature of collecting comprehensive geographic data, any of which may lead to incorrect results.No Warranty. This Data is provided to you 䳖as is,䳗 and you agree to use it at your own risk. [CLIENT] and its licensors (and their licensors and suppliers) make no guarantees, representations or warranties of any kind, express or implied, arising by law or otherwise, including but not limited to, content, quality, accuracy, completeness, effectiveness, reliability, fitness for a particular purpose, usefulness, use or results to be obtained from this Data, or that the Data or server will be uninterrupted or error-free.](https://usermanual.wiki/LG-Electronics-USA/LNM1880NNBD/User-Guide-3729357-Page-49.png)
![50Disclaimer of Warranty: [CLIENT] AND ITS LICENSORS (INCLUDING THEIR LICENSORS AND SUPPLIERS) DISCLAIM ANY WARRANTIES, EXPRESS OR IMPLIED, OF QUALITY, PERFORMANCE, MERCHANTABILITY, FITNESS FOR A PARTICULAR PURPOSE OR NON-INFRINGEMENT. Some States, Territories and Countries do not allow certain warranty exclusions, so to that extent the above exclusion may not apply to you.Disclaimer of Liability: [CLIENT] AND ITS LICENSORS (INCLUDING THEIR LICENSORS AND SUPPLIERS) SHALL NOT BE LIABLE TO YOU: IN RESPECT OF ANY CLAIM, DEMAND OR ACTION, IRRESPECTIVE OF THE NATURE OF THE CAUSE OF THE CLAIM, DEMAND OR ACTION ALLEGING ANY LOSS, INJURY OR DAMAGES, DIRECT OR INDIRECT, WHICH MAY RESULT FROM THE USE OR POSSESSION OF THE INFORMATION; OR FOR ANY LOSS OF PROFIT, REVENUE, CONTRACTS OR SAVINGS, OR ANY OTHER DIRECT, INDIRECT, INCIDENTAL, SPECIAL OR CONSEQUENTIAL DAMAGES ARISING OUT OF YOUR USE OF OR INABILITY TO USE THIS INFORMATION, ANY DEFECT IN THE INFORMATION, OR THE BREACH OF THESE TERMS OR CONDITIONS, WHETHER IN AN ACTION IN CONTRACT OR TORT OR BASED ON A WARRANTY, EVEN IF [CLIENT] OR ITS LICENSORS HAVE BEEN ADVISED OF THE POSSIBILITY OF SUCH DAMAGES. Some States, Territories and Countries do not allow certain liability exclusions or damages limitations, so to that extent the above may not apply to you.Export Control. [CLIENT] shall not export from anywhere any part of the Data or any direct product thereof except in compliance with, and with all licenses and approvals required under, applicable export laws, rules and regulations, including but not limited to the laws, rules and regulations administered by the Office of Foreign Assets Control of the U.S. Department of Commerce and the Bureau of Industry and Security of the U.S. Department of Commerce. To the extent that any such export laws, rules or regulations prohibit HERE from complying with any of its obligations hereunder to deliver or distribute Data, such failure shall be excused and shall not constitute a breach of this Agreement.Entire Agreement. These terms and conditions constitute the entire agreement between [CLIENT] (and its licensors, including their licensors and suppliers) and you pertaining to the subject matter hereof, and supersedes in their entirety any and all written or oral agreements previously existing between us with respect to such subject matter.](https://usermanual.wiki/LG-Electronics-USA/LNM1880NNBD/User-Guide-3729357-Page-50.png)
![53Bluetooth® Wireless TechnologyBefore using the Bluetooth hands-freeWhat is Bluetooth Wireless Technology?䳜 Bluetooth Wireless Technology refers to a short-distance wireless networking technology which uses a 2.45 GHz frequency to connect various devices within a certain distance.䳜 Supported within PCs, external devices, Bluetooth phones, PDAs, various electronic devices, and automotive environments, Bluetooth Wireless Technology is transmitted at high speeds without having to use a connector cable.䳜 Bluetooth hands-free refers to a device which allows the user to conveniently make phone calls with Bluetooth mobile phones through the system.䳜 The Bluetooth hands-free feature may not be supported on some mobile phones.Precautions for safe driving䳜 Bluetooth hands-free is a feature that enables drivers to practice safe driving. Connecting the head unit with a Bluetooth phone allows the user to conveniently make calls, receive calls, and manage the phone book. Before using Bluetooth Wireless Technology, carefully read the contents of this owner䳓s manual.䳜 Excessive use or operations while driving may lead to negligent driving practices and be the cause of accidents. Do not operate the device excessively while driving.䳜 Viewing the screen for prolonged periods of time is dangerous and may lead to accidents. When driving, view the screen only for short periods of time.Cautions upon connecting Bluetooth phone䳜 Before connecting the head unit with the mobile phone, check to see that the mobile phone supports Bluetooth features.䳜 If you do not want automatic connection with your Bluetooth device, turn the Bluetooth feature off on the Bluetooth device.䳜 Park the vehicle when pairing the head unit with the mobile phone.䳜 Some Bluetooth features may occasionally not operate properly depending on the firmware version of your mobile phone. If such features can be operated after receiving a S/W upgrade from your mobile phone manufacturer, unpair all devices and pair again before use. Pairing and connecting the unit and a Bluetooth phoneTo use the Bluetooth feature, make sure the Bluetooth on your phone is turned on. Refer to your phone䳓s user guide.When no phones have been paired1. Press [ ] > [All menus] > [Phone]. Or press [ ] on the steering wheel remote control.䳜 [Cancel]: Cancels Bluetooth connection.2. In your phone, initiate a search for Bluetooth devices (The default vehicle name is KIA MOTORS).3. 1) If the SSP (Secure Simple Pairing) is not supported, enter the passkey on your Bluetooth device (The default passkey is 0000). 2) If the SSP (Secure Simple Pairing) is supported, press [Yes] on the pop-up screen of your Bluetooth device. (The pop-up screen may differ from the actual information on the Bluetooth device.)Bluetooth® Wireless Technology](https://usermanual.wiki/LG-Electronics-USA/LNM1880NNBD/User-Guide-3729357-Page-53.png)
![54Bluetooth® Wireless Technology4. Bluetooth device is connected. The mobile phone contacts and the calling list are downloaded. When the connection fails, a failure message is displayed on the screen.When a phone is already paired1. Press [ ] > [All menus] > [Phone]. Or press [ ] on the steering wheel remote control.2. Press the device from the Bluetooth device list pop-up screen. If you want to pair additional device, press [Add new]. Follow steps 3-4 䳖When no phones have been paired䳗.When pairing additional device1. 1) When using [SETUP] button, press [SETUP] > [Bluetooth] > [Bluetooth connections]. 2) When using [ ] button, press [ ].2. 1) Select the device you want to connect. 2) If there is no device you want to connect, press [Add new].3. In your phone, initiate a search for Bluetooth devices (The default vehicle name is KIA MOTORS).4. 1) If the SSP (Secure Simple Pairing) is not supported, enter the passkey on your Bluetooth device (The default passkey is 0000). 2) If the SSP (Secure Simple Pairing) is supported, press [Yes] on the pop-up screen of your Bluetooth device. (The pop-up screen may differ from the actual information on the Bluetooth device.)5. Bluetooth device is connected. The mobile phone contacts and the calling list are downloaded. When the connection fails, a failure message is displayed on the screen.Notes䳜 For safety reasons, pairing a Bluetooth phone is not possible when the vehicle is in motion. Park the vehicle in a safe location to pair a Bluetooth phone. In order to pair a new phone, you must first delete one of the previously paired phones.䳜 Some functions may not be supported due to limited Bluetooth compatibility.䳜 When a Bluetooth device is connected, a new device cannot be paired.](https://usermanual.wiki/LG-Electronics-USA/LNM1880NNBD/User-Guide-3729357-Page-54.png)
![55Bluetooth® Wireless TechnologyDisconnecting the connected phone1. Press [SETUP] > [Bluetooth] > [Bluetooth connections].2. Select the connected phone. 3. Press [Yes].NoteIf you want to connect the disconnected phone again, select the disconnected phone.Deleting Bluetooth DevicesIf you do not need to use a phone any longer, you can delete it. Note that deleting a Bluetooth device will delete all calling lists and contact entries.1. Press [SETUP] > [Bluetooth] > [Bluetooth connections].2. Press [Delete devices]. 3. Select the desired devices, then press [Delete] > [Yes].䳜 [Mark all]: Marks all items.䳜 [Unmark all]: Unmarks all items.Making a call by entering phone numberConnect your unit and Bluetooth phone before making a call.1. Enter the phone number using the keypad on the phone screen.2. Press [ ] on the phone screen or [ ] on the steering wheel remote control.NoteIf you press the wrong number, press [ ] to delete one digit of the entered number.Making a call by rediallingPress and hold [ ] on the phone screen or [ ] on the steering wheel remote control.NoteRedialling is not possible when there is no number in the dialled calls list.](https://usermanual.wiki/LG-Electronics-USA/LNM1880NNBD/User-Guide-3729357-Page-55.png)
![56Bluetooth® Wireless TechnologyAnswering/Rejecting a call1. If there is an incoming call, a pop-up message will appear.2. Press [Accept] in the pop-up message or [] on the steering wheel remote control. To reject a call, select [Reject] in the pop-up message or [ ] on the steering wheel remote control. Notes䳜 If the Call-ID service is available, the caller䳓s phone number is displayed.䳜 If the caller䳓s phone number is saved in the phone book, the caller䳓s name is displayed on the unit.䳜 Upon receiving a call, the [Reject] function may not be supported on some mobile phones.Switching call to the mobile phone1. If you want to switch the call to the mobile phone while talking on the vehicle hands-free, press [Use private] on the screen or press and hold [ ] on the steering wheel remote control. As shown below, the call is switched to the mobile phone.2. If you want to switch the call to the vehicle hands-free while talking on the mobile phone, press [Use hands-free] on the screen or press and hold [ ] on the steering wheel remote control. The call is switched to the vehicle hands-free.Ending a call1. To end a call, press [ ] on the phone screen or [ ] on the steering wheel remote control.2. The call is ended.Using the menu during a phone callWhen making a call, you can use the following menu items.ADCBEPosition DescriptionA Switches a voice call from the vehicle hands-free to the mobile phone. B Ends a call.C Changes to the screen for entering ARS numbers.D Sets the outgoing volume during a callE Touch the icon to set the outgoing volume mutely during a call. Touch it again to cancel the volume set mutely.](https://usermanual.wiki/LG-Electronics-USA/LNM1880NNBD/User-Guide-3729357-Page-56.png)
![57Bluetooth® Wireless TechnologyCalling listMaking a call from calling list1. Press [ ] on the phone screen.2. Press [All], [Dialled], [Received] or [Missed].䳜 [All]: Displays all calling list.䳜 [Dialled]: Displays the outgoing calling list.䳜 [Received]: Displays the incoming calling list.䳜 [Missed]: Displays the missed calling list.3. Press the entry you want to call.NoteThe calling list may not be saved in some mobile phones.Downloading call historyYou can download the call history information from your mobile phone.1. Press [ ] on the phone screen.2. Press [Menu] > [Download] > [Yes].Notes䳜 Up to 50 received, dialled, and missed call history lists can be downloaded. 䳜 The download feature may not be supported on some mobile phones. Check to see that the Bluetooth device supports the download feature.ContactsMaking a call from contacts1. Press [ ] on the phone screen. The contacts are displayed on the screen.2. Select the contact you want to call from the list of contacts.](https://usermanual.wiki/LG-Electronics-USA/LNM1880NNBD/User-Guide-3729357-Page-57.png)
![58Bluetooth® Wireless TechnologyDownloading mobile phone contactsYou can download contacts from your mobile phone.1. Press [ ] on the phone screen.2. Press [Menu] > [Download] > [Yes].Notes䳜 Upon updating mobile phone contacts, the previous data is deleted.䳜 This feature may not be supported on some mobile phones.䳜 Up to 5000 phone contacts lists can be downloaded.Searching by name or numberYou can search contacts for the name or number that you enter.1. Press [ ] > [Menu] > [Search] on the phone screen.2. Enter the name or number, press [OK].3. Select the contact you want to call.FavouritesCalling favouritesIf the phone number has already been stored in the Favourites, it can be easily called by tapping on it.First of all, add the phone number in the favourites. Refer to 䳖Adding as a favourite䳗 on page 59.1. Press [ ] on the phone screen. 2. Select the desired favourite.](https://usermanual.wiki/LG-Electronics-USA/LNM1880NNBD/User-Guide-3729357-Page-58.png)
![59Bluetooth® Wireless TechnologyAdding as a favouriteUp to 20 contacts can be added to favourites menu.1. Press [ ] > [Add new] on the phone screen. 2. Select one of the contacts. 3. Press [ ] > [Close] > [ ].NoteIf the phone numbers have already been stored in the favourites, you can add or delete them by pressing [Menu] > [Edit].Deleting favourites1. Press [ ] on the phone screen.2. Press [Menu] > [Delete items]. 3. Select the desired item, then press [Delete] > [Yes].䳜 [Mark all]: Marks all items.䳜 [Unmark all]: Unmarks all items.MessagesYou can check the text messages or send any message on the screen.1. Press [ ] on the phone screen. If any text message has already been in the [ ], it can be easily checked by tapping on it.First of all, connect a Bluetooth device by tapping [Connect]. Please turn On [Show Notifications] in the Bluetooth settings of your device.2. Select the desired message.Phone settingsThis menu describes phone settings.1. Press [ ] on the phone screen. 2. For details, refer to 䳖Bluetooth䳗 on page 63.](https://usermanual.wiki/LG-Electronics-USA/LNM1880NNBD/User-Guide-3729357-Page-59.png)
![60Settings[Settings] menu overview[Settings] menuNavigationSoundDisplayBluetoothPhone projectionCustom buttonDate/TimeLanguageKeyboardScreen saverAdvancedSystem infoNavigationThis menu describes navigation settings.DisplayThis menu is used to change display settings.1. Press [SETUP] > [Navigation] > [Display].2. Select the desired items.䳜 [Show previous destinations after navigation start-up]: When this box is checked and navigation is started without a route planned, the 䳖Previous destinations䳗 pop-up will be displayed.䳜 [Automatic return after scrolling]: Sets whether to return to the current position on the map automatically after scrolling or not.䳜 [Show traffic information]: Sets whether to show traffic information or not.䳜 [Route indicator line]: Selects the desired indicator line.GuidanceThis menu is used to change the guidance settings.1. Press [SETUP] > [Navigation] > [Guidance].2. Select the desired items.䳜 [Number of guidance prompts]: Sets the number of guidance prompts to fewer or more.䳜 [Camera alert]: Sets how to execute the camera alert. ‐ [Camera guidance when navigation is MUTE]: Sets the camera guidance when navigation is MUTE (None/ Use voice/ Use beeps).Settings](https://usermanual.wiki/LG-Electronics-USA/LNM1880NNBD/User-Guide-3729357-Page-60.png)
![61Settings ‐ [Surface road]: Sets the camera alert point for normal roads (100 m/ 300 m/ 500 m). ‐ [Highway]: Sets the camera alert point when on a highway (500 m/ 700 m/ 1 km).䳜 [Safety alert]: Selects the desired categories for safety alerts.䳜 [Traffic event popup]: Sets whether to show the traffic event pop-up or not.䳜 [Speed limit]: Sets whether to display the speed limit in map screen or not.My data1. Press [SETUP] > [Navigation] > [My data].2. Select the desired items.䳜 [Import address book from USB]: This function is used to import the address book from a USB memory device. For details, refer to 䳖Importing address book from USB䳗 on page 42.䳜 [Export address book to USB]: This function is used to export the address book to a USB memory device. For details, refer to 䳖Exporting address book to USB䳗 on page 42.DefaultThis menu is used to reset navigation settings to factory default.1. Press [SETUP] > [Navigation] > [Default].2. Press [Default] > [Yes].SoundThis menu is used to adjust the sound effects for the whole system (It may vary depending on the type of vehicle).1. Press [SETUP] > [Sound].2. Select the desired items.䳜 [Position]: This menu allows you to set the sound position. For example, you can set the sound close to the driver-seat so that the volume is relatively lower in the passenger or rear seats. ‐ Press [ ]/[ ]/[ ]/[ ] to control the sound positioning. ‐ Drag and drop the dot to a desired place to adjust the sound position. ‐ Press [ ] to concentrate the sound in the centre of the vehicle.](https://usermanual.wiki/LG-Electronics-USA/LNM1880NNBD/User-Guide-3729357-Page-61.png)
![62Settings䳜 [Volume]: This menu allows you to set the volume level for [Radio], [Media], [Navigation] and [Ringtone]. ‐ Press [-]/[+] to control volume settings. ‐ Drag the slide bar to control volume settings.䳜 [Equaliser]: This menu allows you to set the Bass [BASS]/ Middle [MID]/ Treble [TREBLE]. ‐ Press [-]/[+] to control bass/middle/treble settings. ‐ Drag the slide bar to control bass/middle/treble settings. ‐ Press [Centre] to initialise the settings.䳜 [Loudness]: ‐ [Navigation prioritised]: Lowering of all other audio volumes during playback of navigation prompts. ‐ [Reverse warning priority]: Lowering of audio volumes when the shift lever is set to reverse. ‐ [Navigation during phone calls]: Playback of route guidance prompts during phone calls. ‐ [Volume limitation on startup]: If the audio volume is exceeding the defined maximum upon vehicle start, it is lowered accordingly. After you turn the system on, audio volume would not be changed if previous volume was moderate (1~20). After you turn the system on, audio volume would be decreased to 20 if the previous volume was too high (more than 20).䳜 [Navigation volume]: ‐ [Use map screen volume buttons]: If this is selected, Navigation volume is adjusted with the volume buttons on the map screen. ‐ [Use map screen volume buttons or volume knob]: If this is selected, Navigation volume is adjusted with the volume buttons on the map screen or by turning the volume knob during navigation prompts.䳜 [Advanced]: If [SDVC] is selected, volume is automatically adjusted to vehicle speed.䳜 [Default]: Reset sound settings to factory default.䳜 [Beep]: This menu allows you to play a beep sound whenever you operate the touch screen. Press [Beep].DisplayThis menu is used to adjust the illumination and set the dimming mode for the whole system. 1. Press [SETUP] > [Display].2. Select the desired items.䳜 [Dimming]: Set display brightness according to mode changes. ‐ [Auto-illumination]: Display brightness is automatically adjusted according to lighting conditions. ‐ [Daylight]: Display brightness remains in daylight mode. ‐ [Night]: Display brightness remains in night mode.䳜 [Brightness]: Set display brightness for daylight or night mode. ‐ Press [-]/[+] to control display brightness settings. ‐ Drag the slide bar to control display brightness settings.](https://usermanual.wiki/LG-Electronics-USA/LNM1880NNBD/User-Guide-3729357-Page-62.png)
![63Settings ‐ Press [Centre] to initialise the settings.䳜 [Default]: Reset display settings to factory default.䳜 [Display Off]: Press [Display Off] to turn the screen off. Press the screen to turn the screen on. BluetoothThis menu describes Bluetooth phone settings.Bluetooth connectionsThis menu is used to pair and connect the head unit and a Bluetooth phone.Press [SETUP] > [Bluetooth] > [Bluetooth connections].ADCBEFA Paired device list: Displays the paired Bluetooth device list. When selecting from the list, the device is either connected or disconnected.B Bluetooth audio connection status: An icon appears when you make a Bluetooth audio connection.C Bluetooth hands-free connection status: An icon appears when you make a Bluetooth hands-free connection.D [Add new]: Registers a new Bluetooth device.E [Delete devices]: Switches to the delete devices screen.F [Help]: Moves to the Bluetooth connection help screen.Auto connection priorityIf auto connection priority is turned on, a Bluetooth device will automatically be connected according to the option setting when the vehicle ignition is turned on.1. Press [SETUP] > [Bluetooth] > [Auto connection priority].2. Select the desired items.NoteIf there is no phone selected, the previously connected phone will be automatically connected. If there are no previously connected phones, the system will try to connect to devices in the list in order.System Bluetooth infoVehicle nameYou can change the Bluetooth device name of the vehicle.1. Press [SETUP] > [Bluetooth] > [System Bluetooth info] > [Vehicle name].2. Enter the desired name using the keypad, then press [OK].NoteThe default vehicle name is set to KIA MOTORS.](https://usermanual.wiki/LG-Electronics-USA/LNM1880NNBD/User-Guide-3729357-Page-63.png)
![64SettingsPasskeyYou can change the passkey used for Bluetooth device authentication. 1. Press [SETUP] > [Bluetooth] > [System Bluetooth info] > [Passkey].2. Enter the passkey using the keypad, then press [OK]. NoteThe passkey is a 4-digit authentication code used for a Bluetooth connection between the mobile phone and the vehicle system. The default passkey is set to 0000.DefaultThis menu is used to reset the Bluetooth settings to factory default.1. Press [SETUP] > [Bluetooth] > [Default].2. Press [Yes].Phone projectionThis menu describes phone projection settings.1. Press [SETUP] > [Phone projection].2. Press the desired items.䳜 [Android Auto]: If Android Auto is checked, you can use the functions of your Android device with a USB cable connected.䳜 [Apple CarPlay]: If Apple CarPlay is checked, you can use the functions of your iPhone with a USB cable connected.NoteThis [Phone projection] menu cannot be operated if any USB device, iPod or Android Auto/Apple CarPlay device has been connected to the system.Custom buttonYou can assign a function to the custom button.1. Press [SETUP] > [Custom button].2. Select the desired function.](https://usermanual.wiki/LG-Electronics-USA/LNM1880NNBD/User-Guide-3729357-Page-64.png)
![65SettingsDate/TimeThis menu describes date and clock settings. 1. Press [SETUP] > [Date/Time].2. Select the desired items.䳜 [GPS time]: Displays time according to the received GNSS time.䳜 [24-hour]: Switches to 12 hour or 24 hour.䳜 [Daylight savings time]: Turns the daylight savings time on or off. When daylight savings time is turned on, the clock is moved forward one hour.䳜 [Time Zone]: Selects the region for clock setting. It is only available when there is no SD card or SD card error.NoteTime is displayed when the GNSS signal is received after connecting the battery again. LanguageThis menu is used to set the language of the system.1. Press [SETUP] > [Language].2. Select the desired language.KeyboardThis menu is used to configure the keyboard layout for each language.Configured keyboard layouts are applied to all input modes.1. Press [SETUP] > [Keyboard].2. Select the keyboard type.䳜 [Default keyboard]: Select [English] or [Korean].䳜 [Keyboard type]: Select [QWERTY] or [ABCD].](https://usermanual.wiki/LG-Electronics-USA/LNM1880NNBD/User-Guide-3729357-Page-65.png)
![66Screen saverThis menu is used to select the screen displayed when the system power is turned off.1. Press [SETUP] > [Screen saver].2. Select the desired items.䳜 [Digital]: The digital clock and date are displayed.䳜 [Analogue]: The analogue clock and date are displayed.䳜 [None]: Nothing is displayed.NoteThe screen saver is operated in [Display Off] state also. AdvancedThis menu describes advanced settings.1. Press [SETUP] > [Advanced].2. Select the desired items.䳜 [Return to map]: Select the desired time to switch automatically from Radio/Media to map screen.䳜 [TUNE knob function]: Select the desired TUNE knob function on the map screen.䳜 [Steering whl mode button]: The media selected by you can be accessed using the steering wheel mode button (only active/available media).䳜 [Media change notifications]: If the box is checked, the notification pop-up for media information will be shown on the top of the screen, whenever content changes.Settings](https://usermanual.wiki/LG-Electronics-USA/LNM1880NNBD/User-Guide-3729357-Page-66.png)
![67SettingsSystem infoVersion infoYou can view software, firmware, navigation application, and map versions.Press [SETUP] > [System info] > [Version info].UpdateFor system䳓s software security, new function addition, and map update, you need an update.1. Insert the SD card with the latest file downloaded into the SD card slot.2. Press [SETUP] > [System info] > [Version info].3. Press [Update] > [OK]. Once updating is complete, the system will automatically restart.MemoryYou can check a memory space for voice memo (Total memory space, used memory space, remaining memory space).1. Press [SETUP] button.2. Press [System info] > [Memory].NoteWhen The memory is full, refer to 䳖Deleting voice memo䳗 on page 30.Notes䳜 This product requires regular updates for software corrections, new functions and map updates. Updating may require up to 1 hour depending on the data size.䳜 Turning off the power or ejecting the SD card during the update process may result in data loss. Make sure to keep the ignition on and wait until updating is completed. 䳜 Please use only the SD card that was included with the vehicle purchase.䳜 The use of a separately purchased SD card may result in damage due to heat related deformation.䳜 Product malfunctions caused by the use of separately purchased SD cards shall not be covered within the product warranty.䳜 Repeatedly connecting/disconnecting the SD card in a short period of time may cause damage to the device.](https://usermanual.wiki/LG-Electronics-USA/LNM1880NNBD/User-Guide-3729357-Page-67.png)
![68SettingsDefaultThis menu is used to reset all settings specified by the user.1. Press [SETUP] > [System info] > [Default].2. Press [Default] > [Yes].NoteThis [Default] menu cannot be operated if any USB device, iPod or Android Auto/Apple CarPlay device has been connected to the system.](https://usermanual.wiki/LG-Electronics-USA/LNM1880NNBD/User-Guide-3729357-Page-68.png)
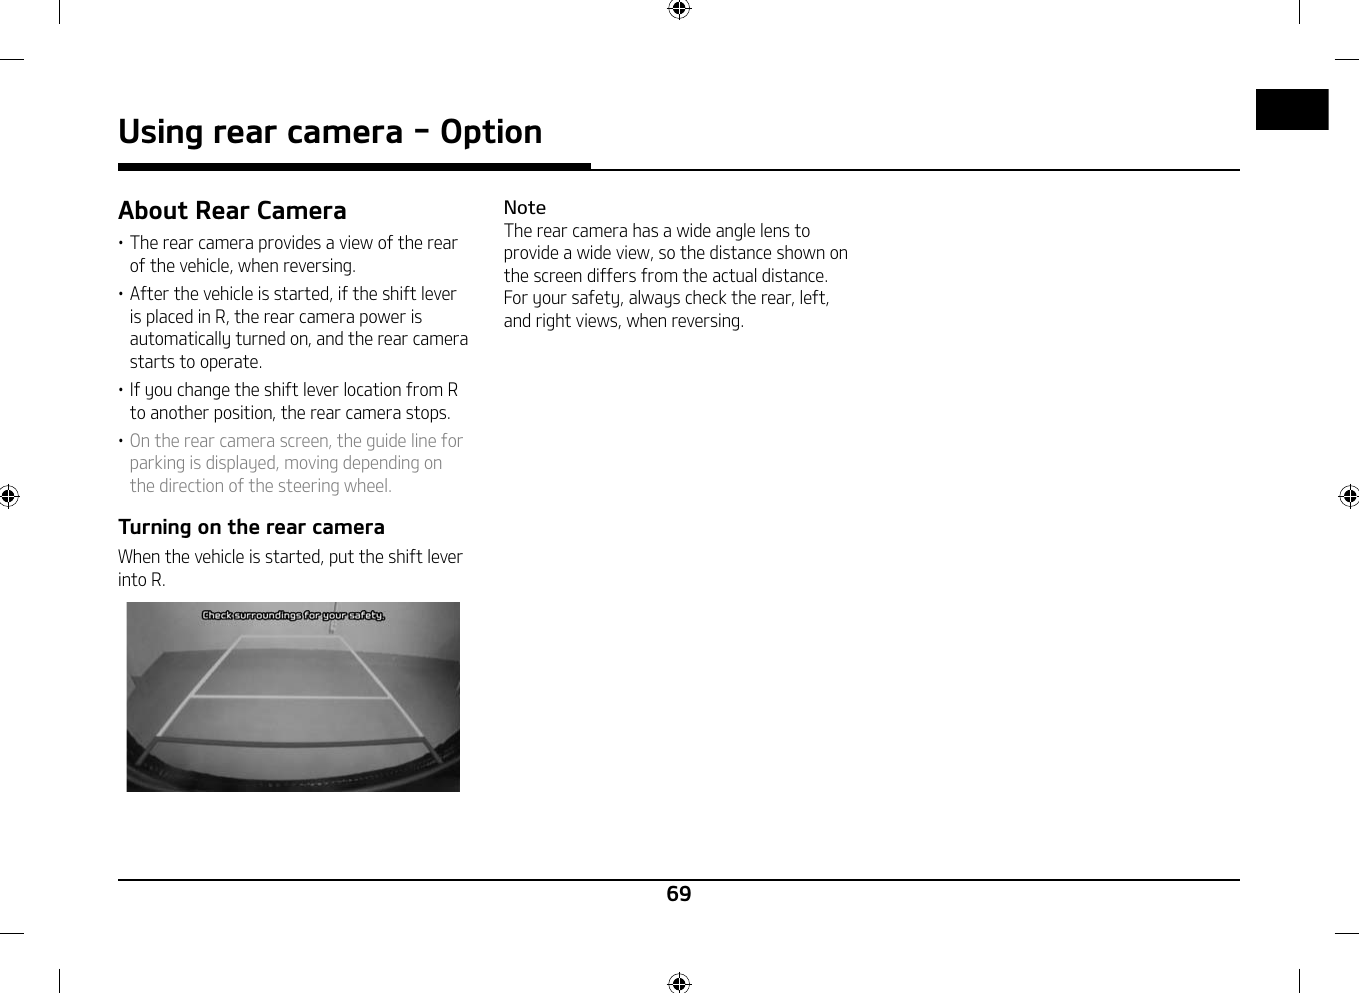
![71Before thinking there is a product defect1. Errors which occur during the operation or installation of the device may be mistaken as a malfunction of the actual device.2. If you are having problems with the device, try the suggestions listed below.3. If the problems persist, contact your authorised Kia dealer.Problem Possible CauseThere are small red, blue, or green dots on the screenBecause the LCD is manufactured with technology requiring high point density, a pixel or lighting deficiency may occur within 0.01% of total pixels.The sound or image is not working 䳜 Has the ignition switch for the vehicle been turned to [ACC] or [ON]?䳜 Has the SYSTEM been turned OFF?The screen is being displayed but sound is not working䳜 Has the volume been set to a low level?䳜 Has the volume been muted?When the power is turned on, the corners of the screen are dark䳜 The display appearing somewhat dark after prolonged periods of use is normal with LCD panels. It is not a malfunction.䳜 If the screen is very dark, contact your nearest authorised Kia dealer for assistance.Sound is working from only one speaker Are the positions of Fader or Balance sound controls adjusted to only one side?Sound does not work in AUX mode Are the audio connector jacks fully inserted into the AUX terminal?The external device is not working Is the external device connected with a standard connector cable?When turning power on, the most recent mode screen is not displayedWithin modes that play files by reading external sources, such as USB, iPod, or Bluetooth® streaming mode, the most recently played mode screen prior to turning off power may not properly load.䳜 If the corresponding device is not connected, the mode operated prior to the most recent mode will operate.䳜 If the previous mode still cannot be properly played, the mode operated prior to that will operate.](https://usermanual.wiki/LG-Electronics-USA/LNM1880NNBD/User-Guide-3729357-Page-71.png)