LG Electronics USA LST260 Wireless Local Loop Telephone (CDMA) User Manual BEJLST260 User Guide
LG Electronics USA Wireless Local Loop Telephone (CDMA) BEJLST260 User Guide
UserManual.wiki
>
LG Electronics USA
>
LST260 User Manual
Users manaul
Navigation menu
Upload a User Manual
Namespaces
Wiki Guide
HTML
PDF
Info
Views
User Manual
Discussion / Help
Navigation

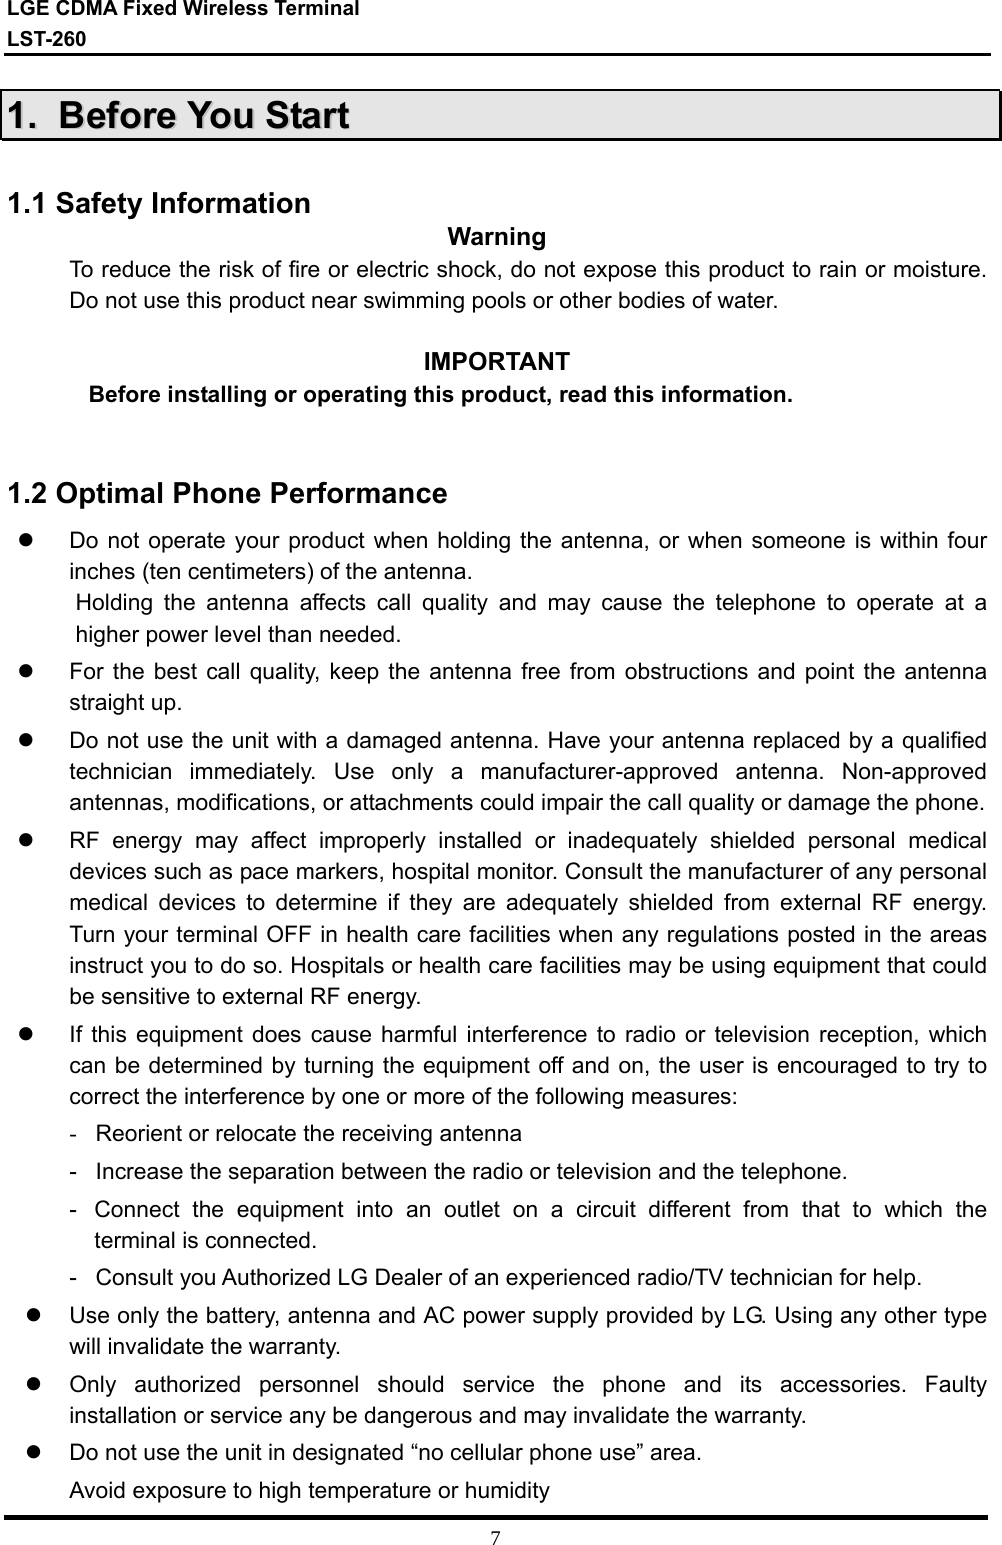

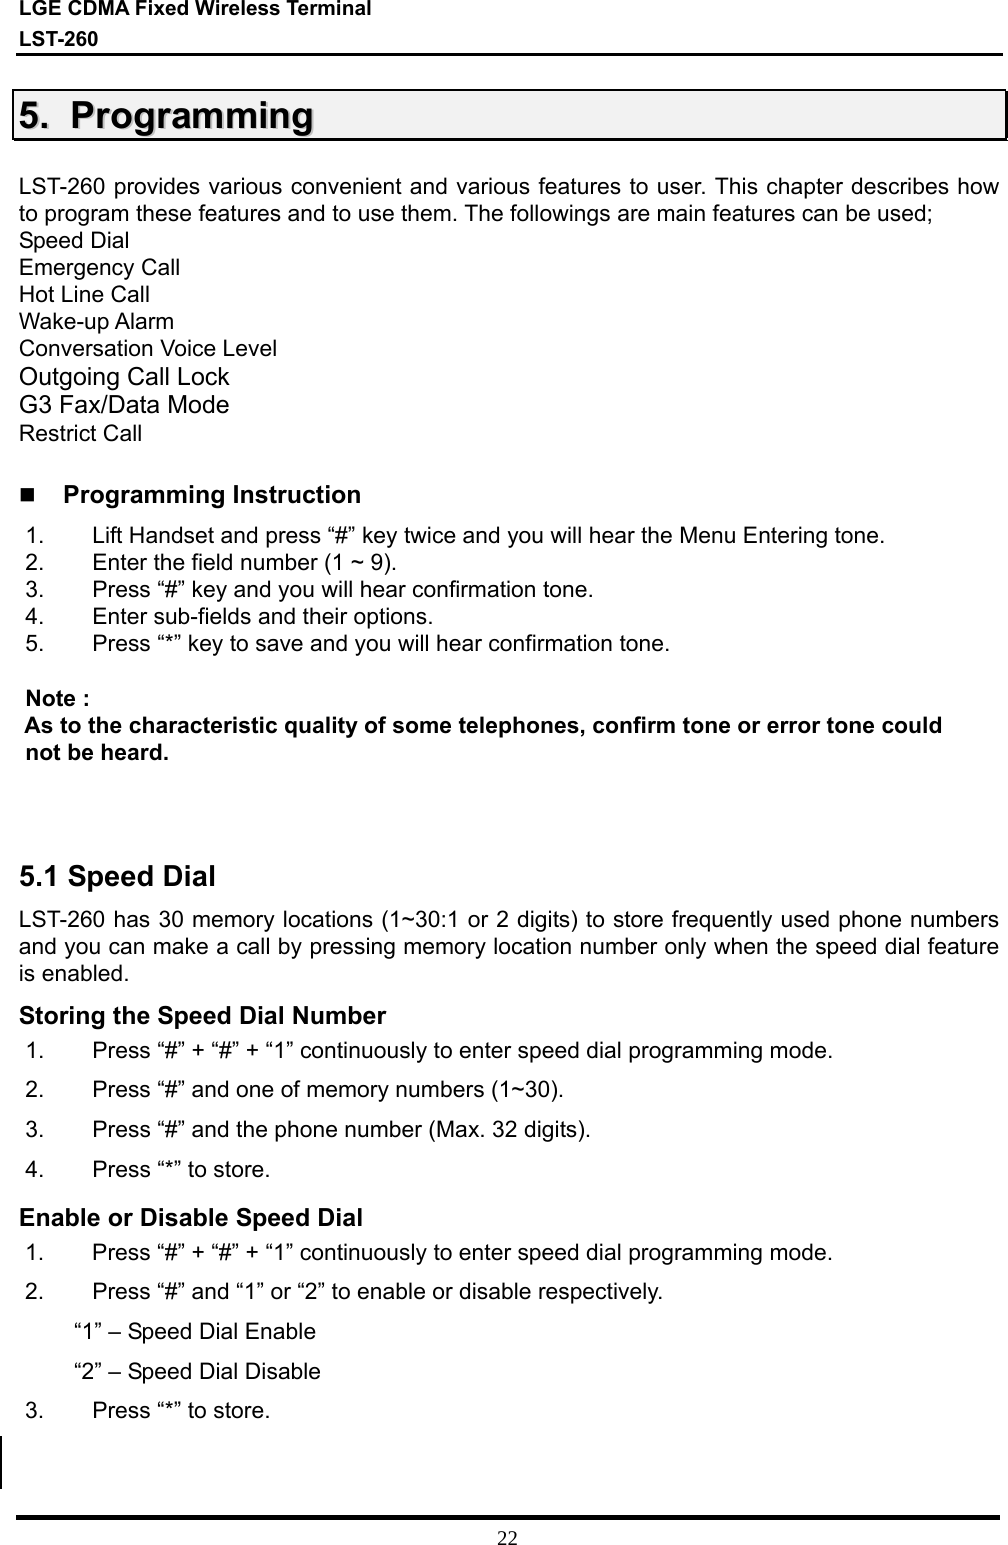
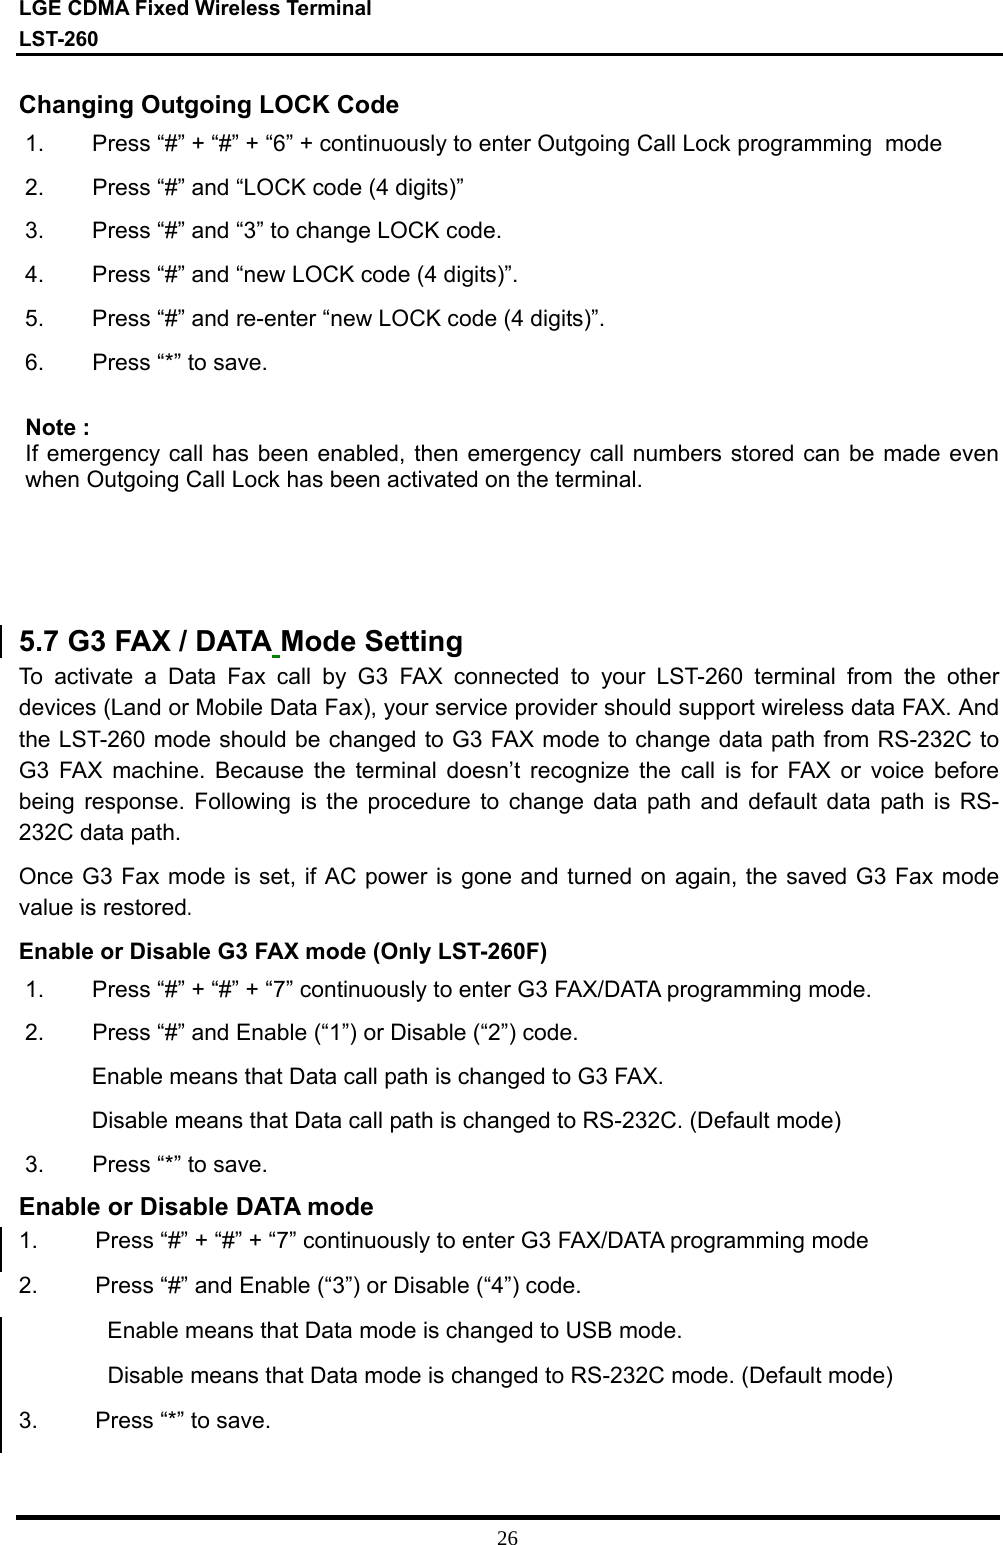
![LGE CDMA Fixed Wireless Terminal LST-260 14 2.2 3 LEDs Indicators [ Table 1] 2.3 Installation You should follow each step carefully as shown below in order to guarantee proper operation of CDMA Fixed Wireless Telephone. STEP 1. Check Components z Fixed Wireless Terminal is supplied with the following standard unit and accessories; 1. LST-260 Unit - 1 EA 2. Dipole Antenna - 1 EA 3. Backup Battery - 1 EA 4. User Guide - 1 EA 5. AC/DC Power Adapter - 1 EA LED COLOR Operating Condition GREEN-solid DC Power is applied RED-solid Battery Power is applied POWER LED ORANGE -solid Low Battery GREEN-solid Good Signal ORANGE-solid Poor Signal SIGNAL LED RED-solid No Service Area GREEN – blink (0.5sec On / 0.5sec Off) Voice Message is received GREEN – blink (1 sec On / 1 sec Off) Data Service or G3 Fax Service is working MODE LED GREEN - solid G3 FAX receive mode is enabled](https://usermanual.wiki/LG-Electronics-USA/LST260/User-Guide-555600-Page-13.png)
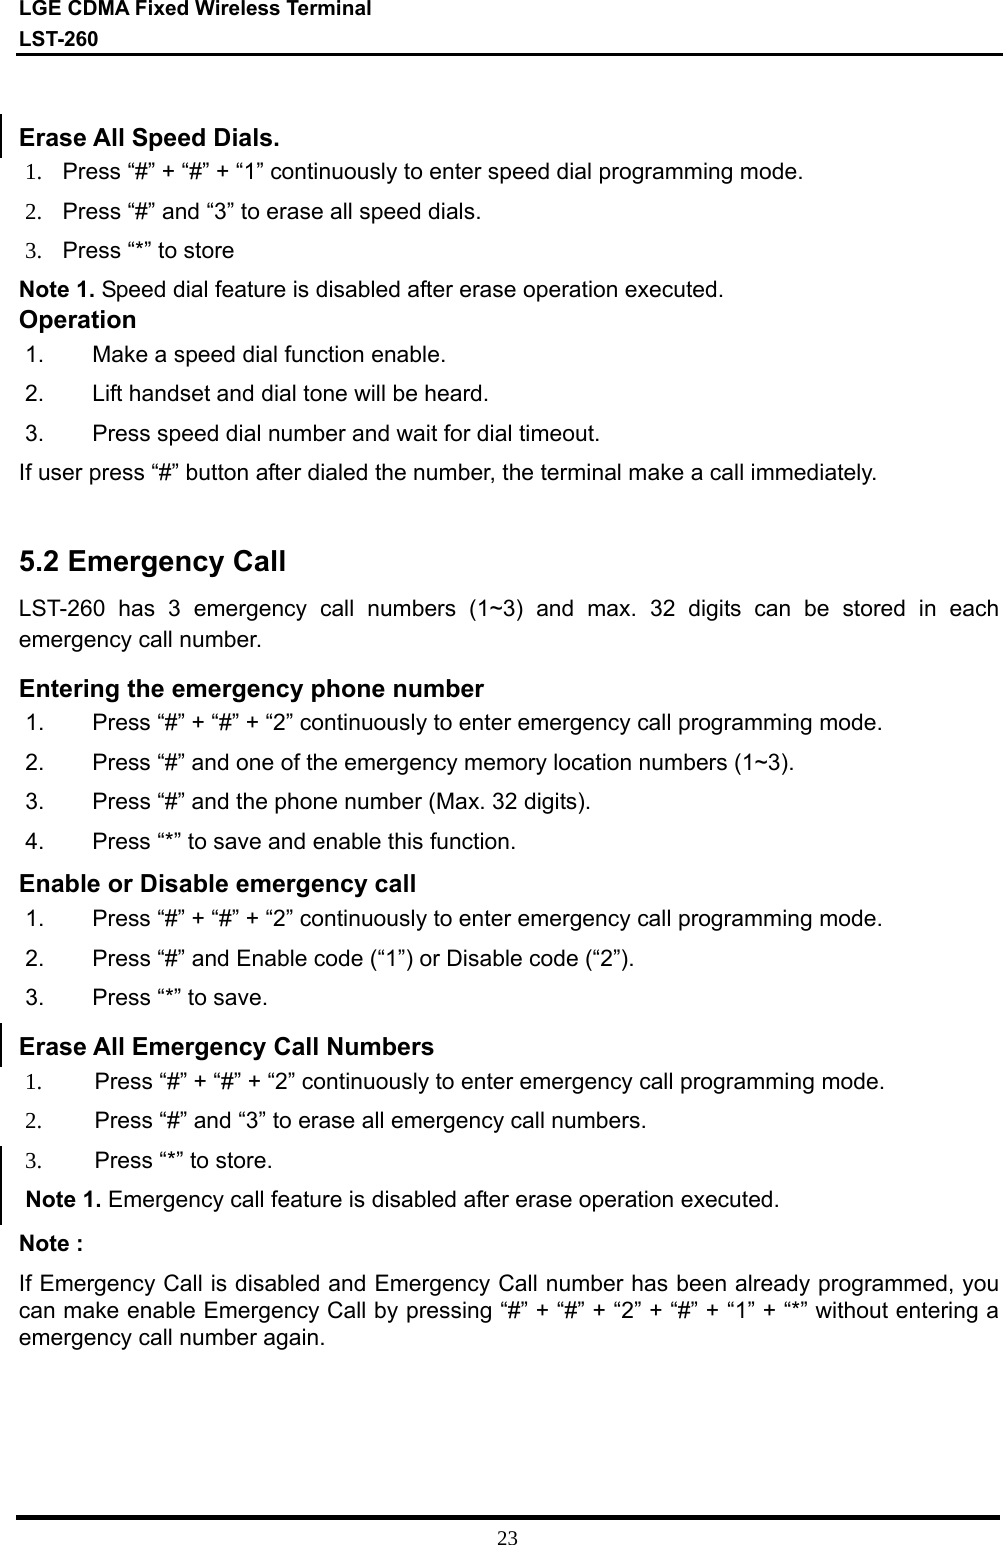
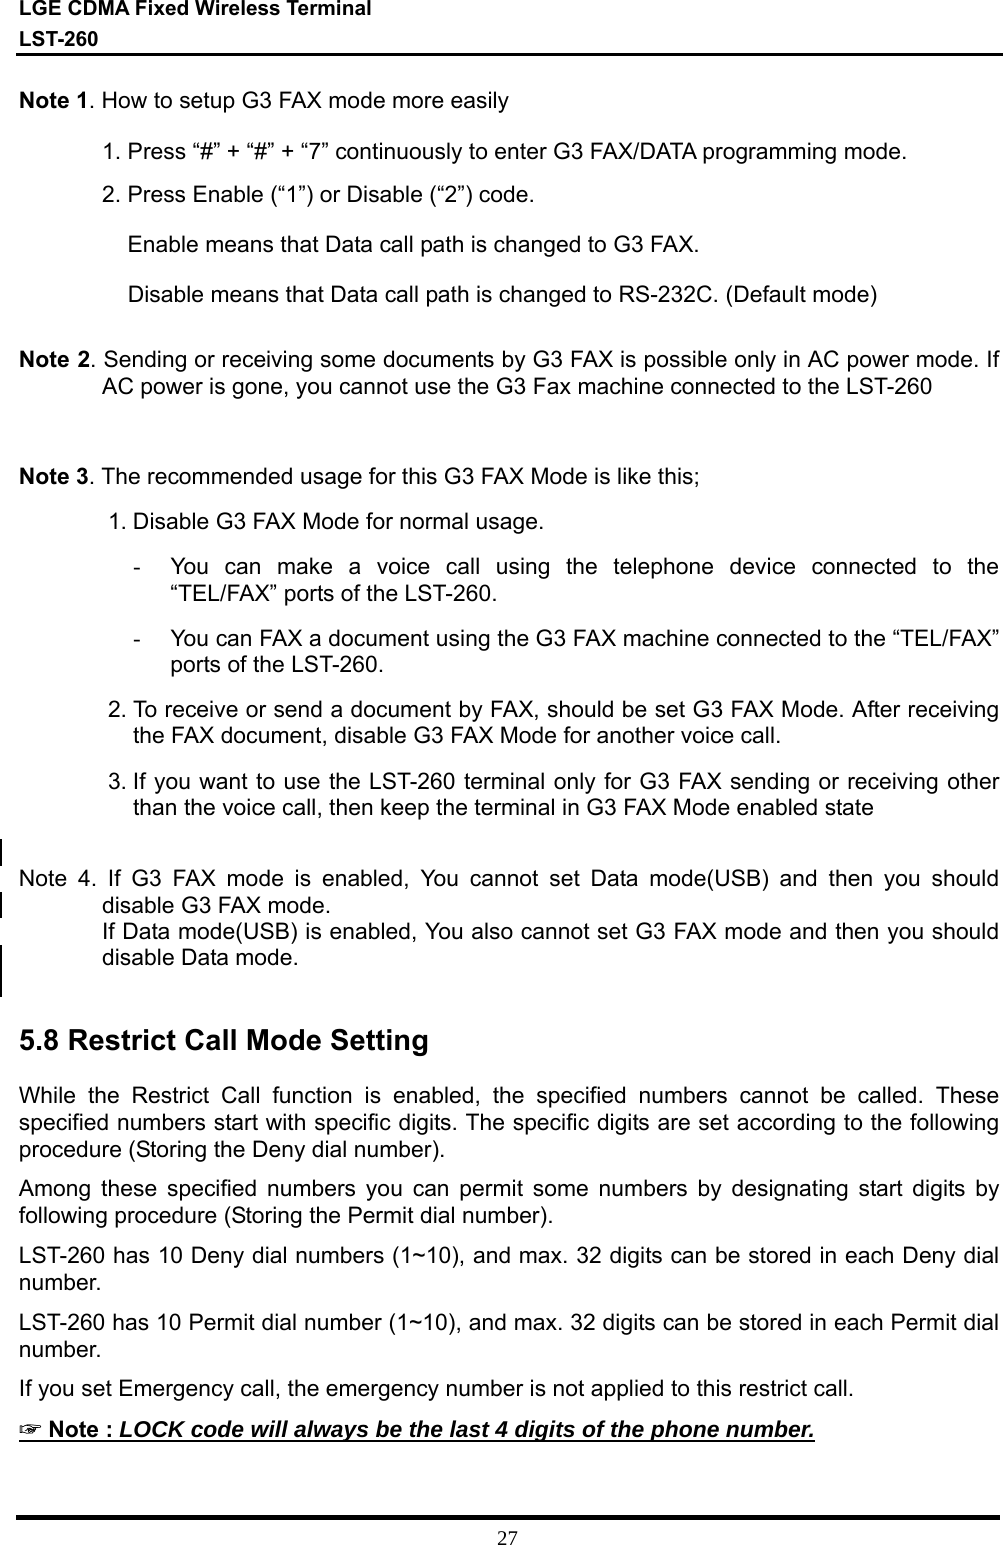
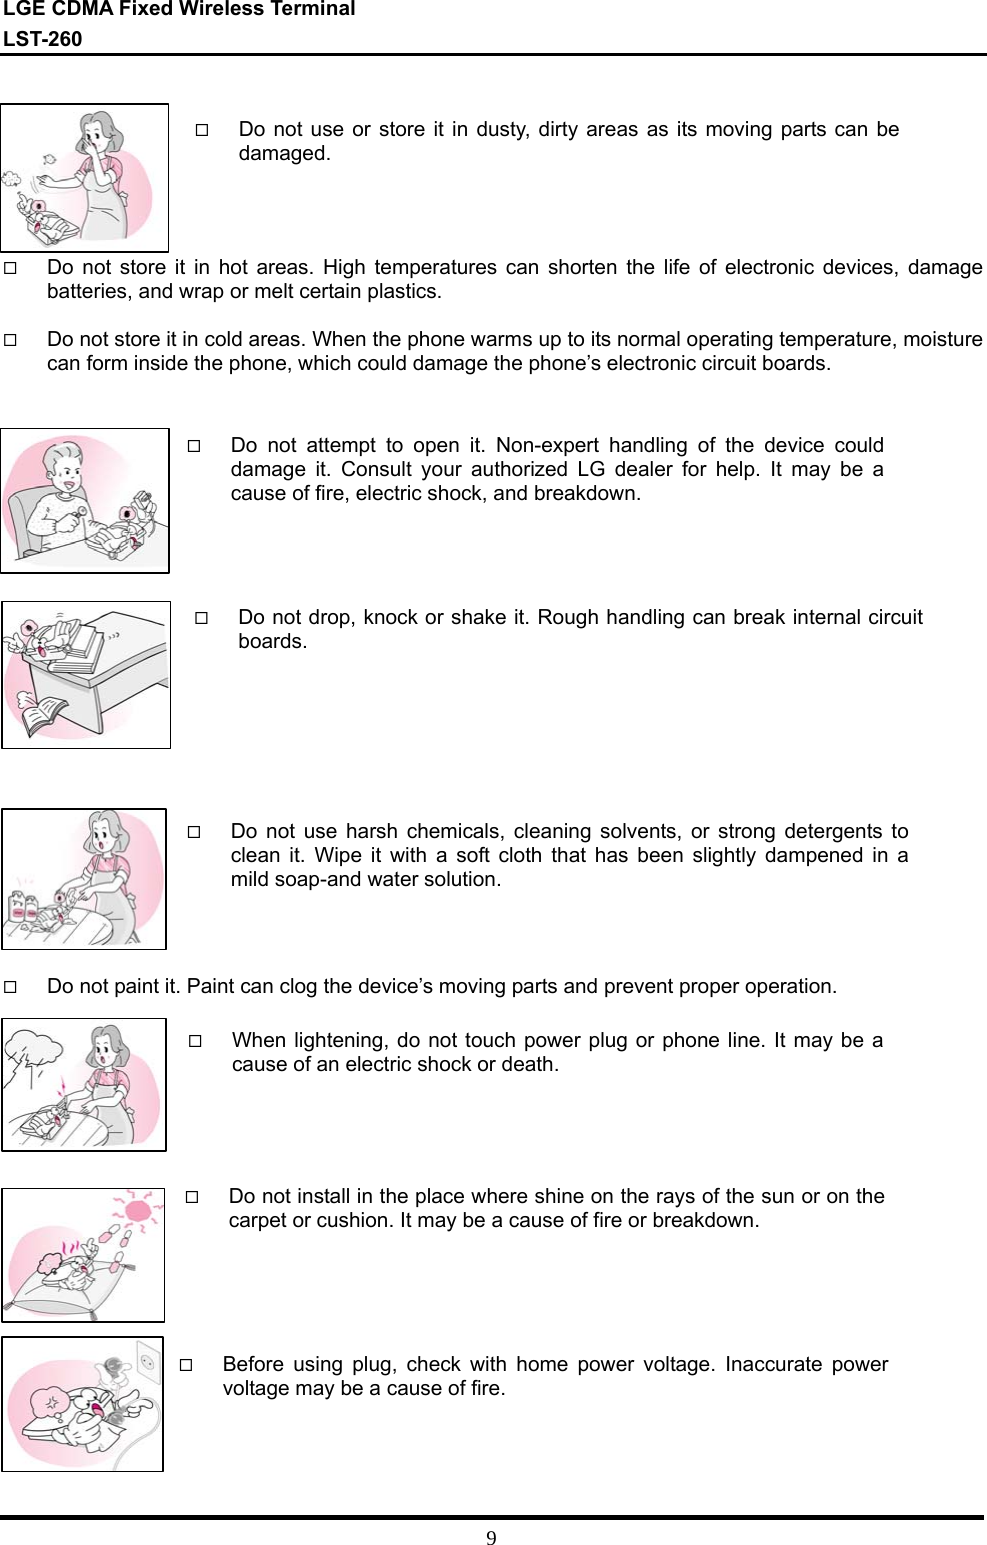
![LGE CDMA Fixed Wireless Terminal LST-260 16 [LST-260] [ Figure 2. Connection Diagram with External Equipment ] * Note : - G3 FAX can not connected to your LST-260 terminal. - Length between LST-260 and Telephone : over 1m. The adapter type(with power cord) may be different from country to country. ! Connection telephone jack to data port will cause malfunction of data service 1 [Battery Switch] NoticeBefore using the terminal, please check battery switch is on. After switching on it, use the phone. When charging the battery, check that battery switch is “on”. Battery is charged only when battery switch is on.](https://usermanual.wiki/LG-Electronics-USA/LST260/User-Guide-555600-Page-15.png)