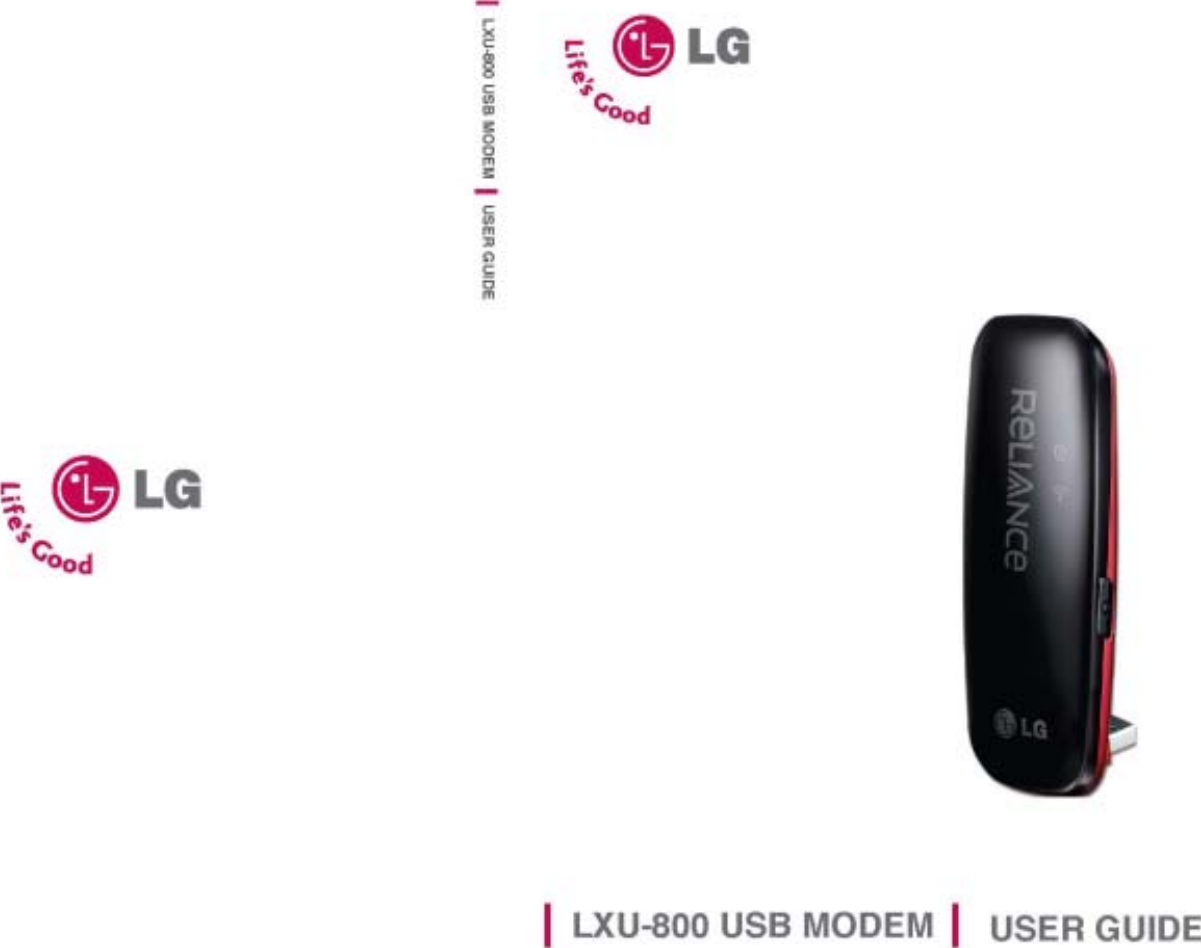
LG Electronics USA LXU-800 Cellular CDMA USB Modem User Manual
LG Electronics USA Cellular CDMA USB Modem Users Manual
UserManual.wiki
>
LG Electronics USA
>
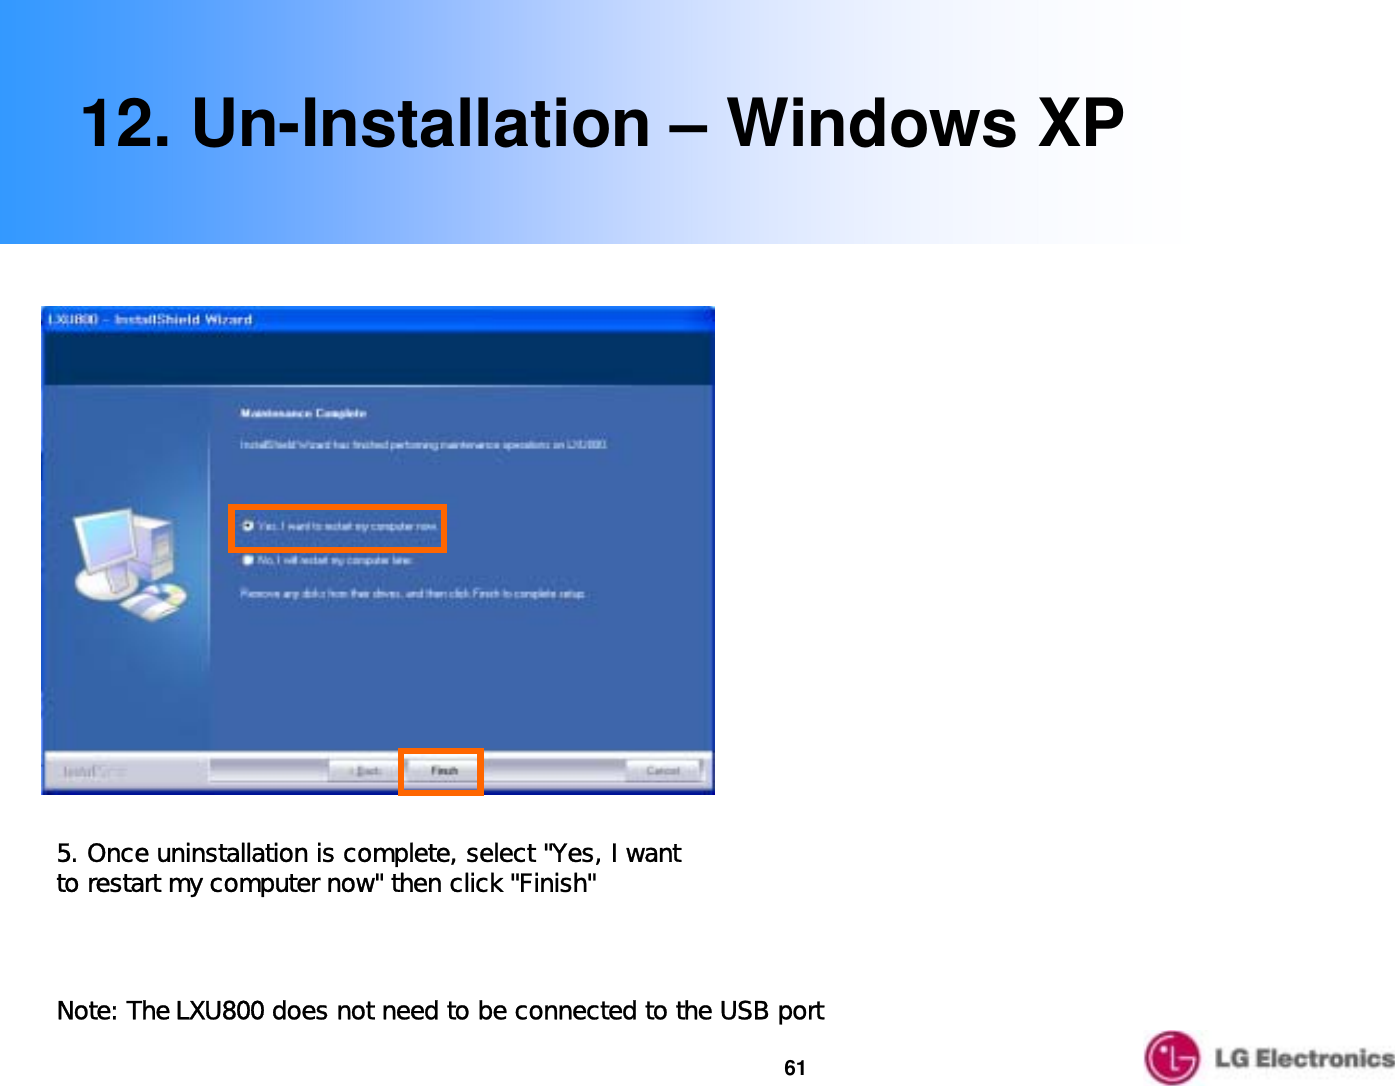
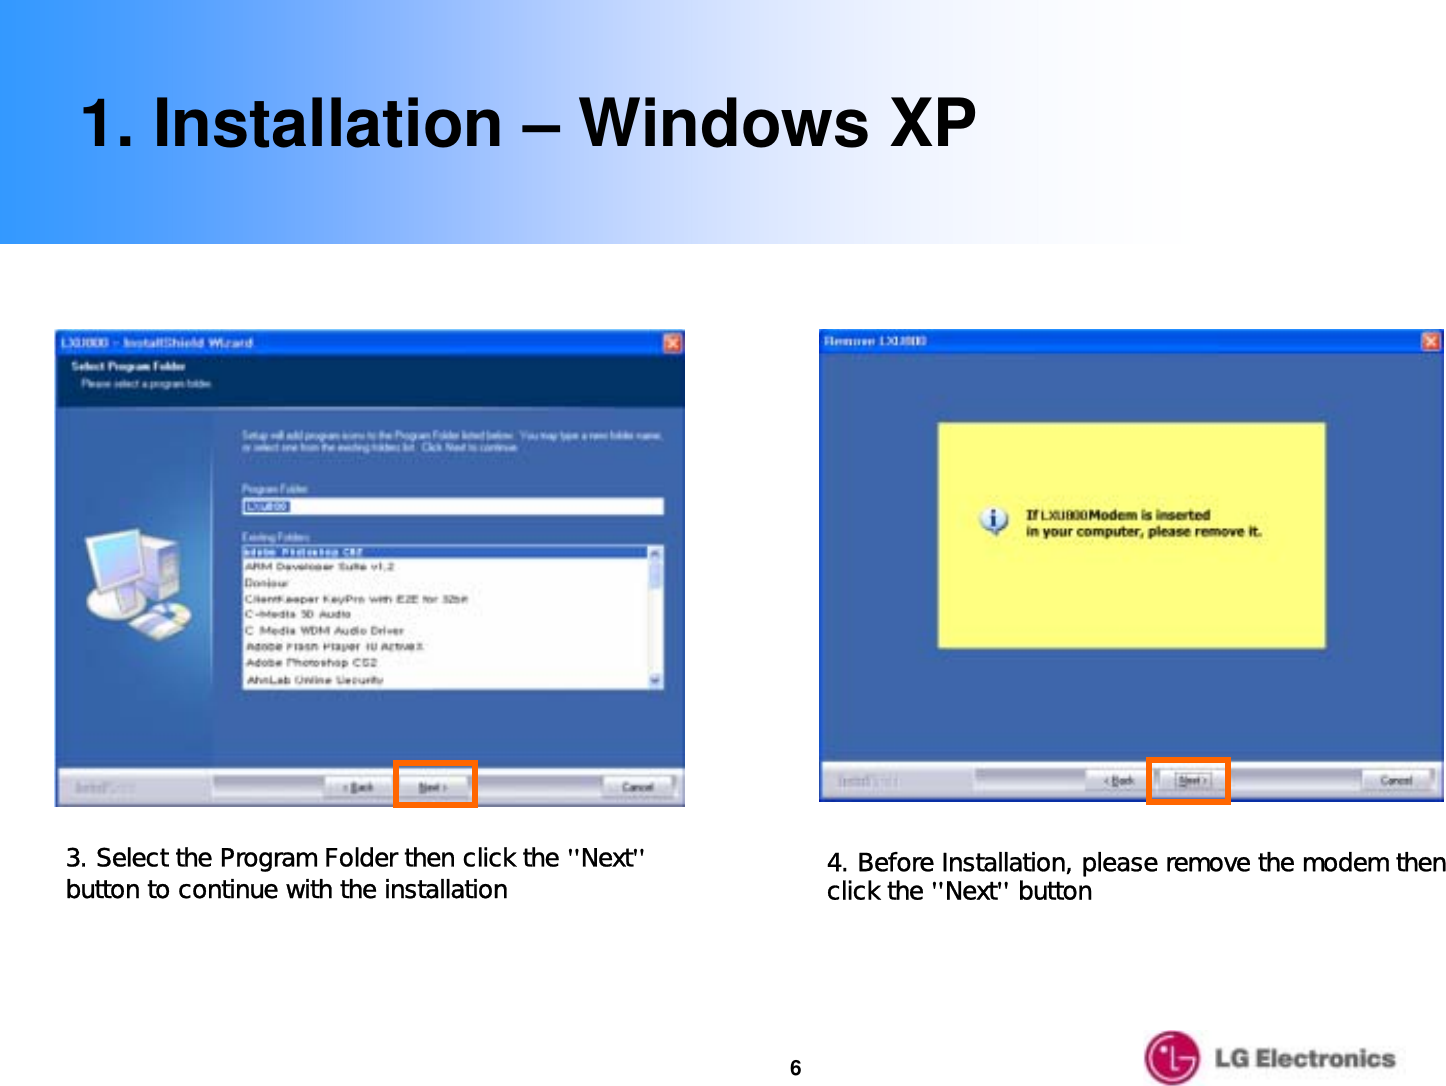
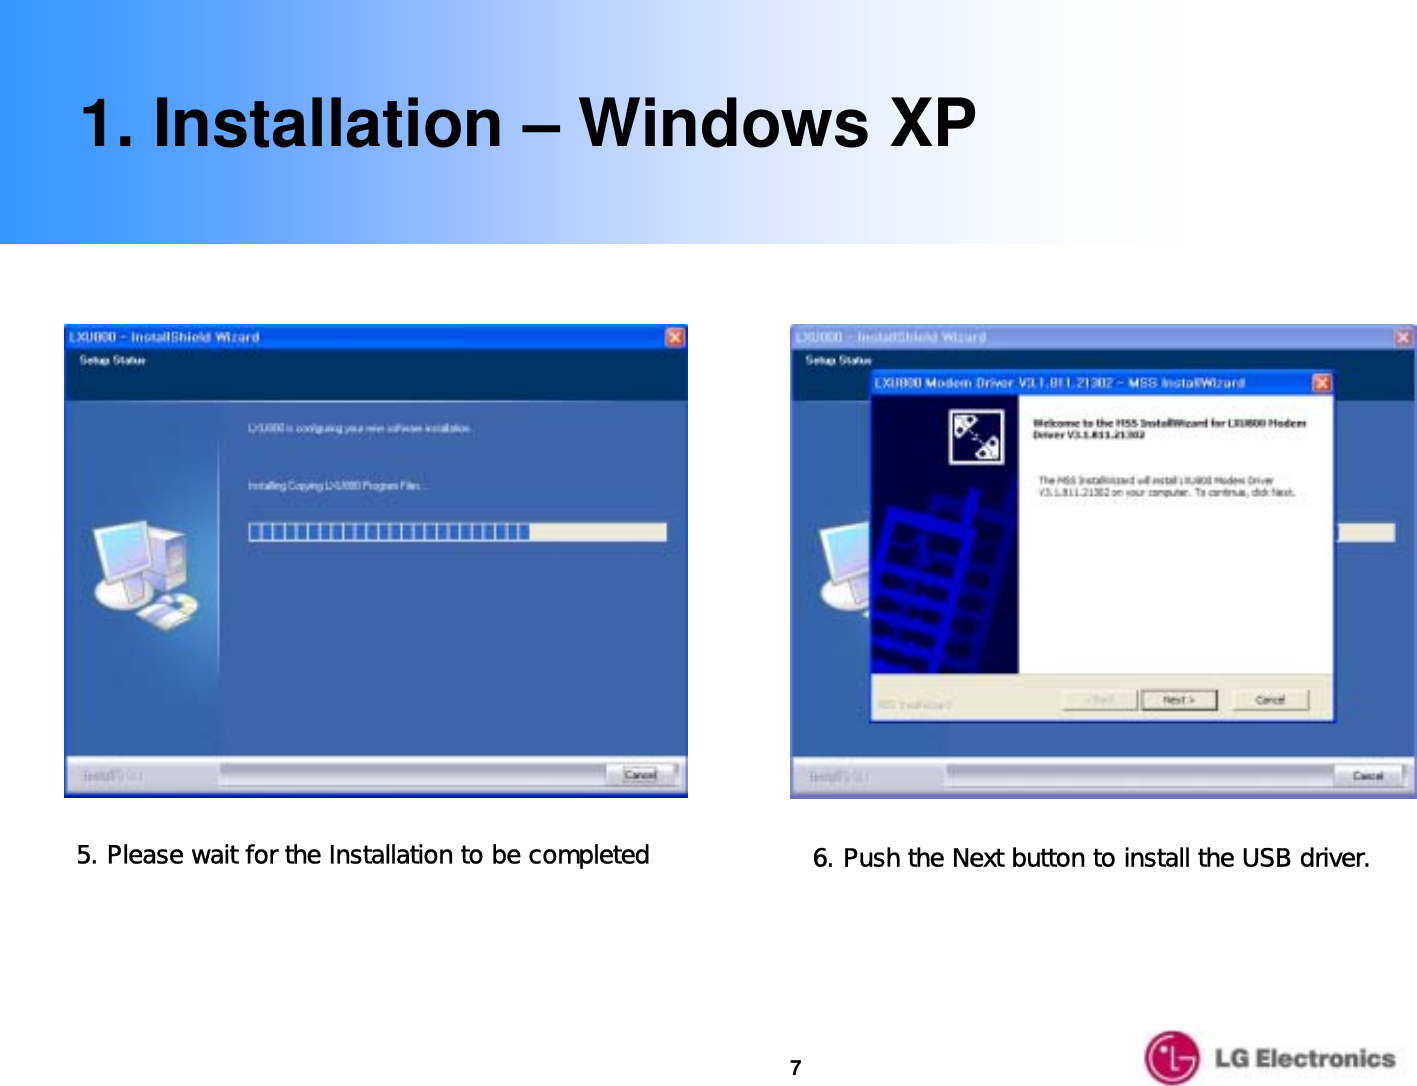
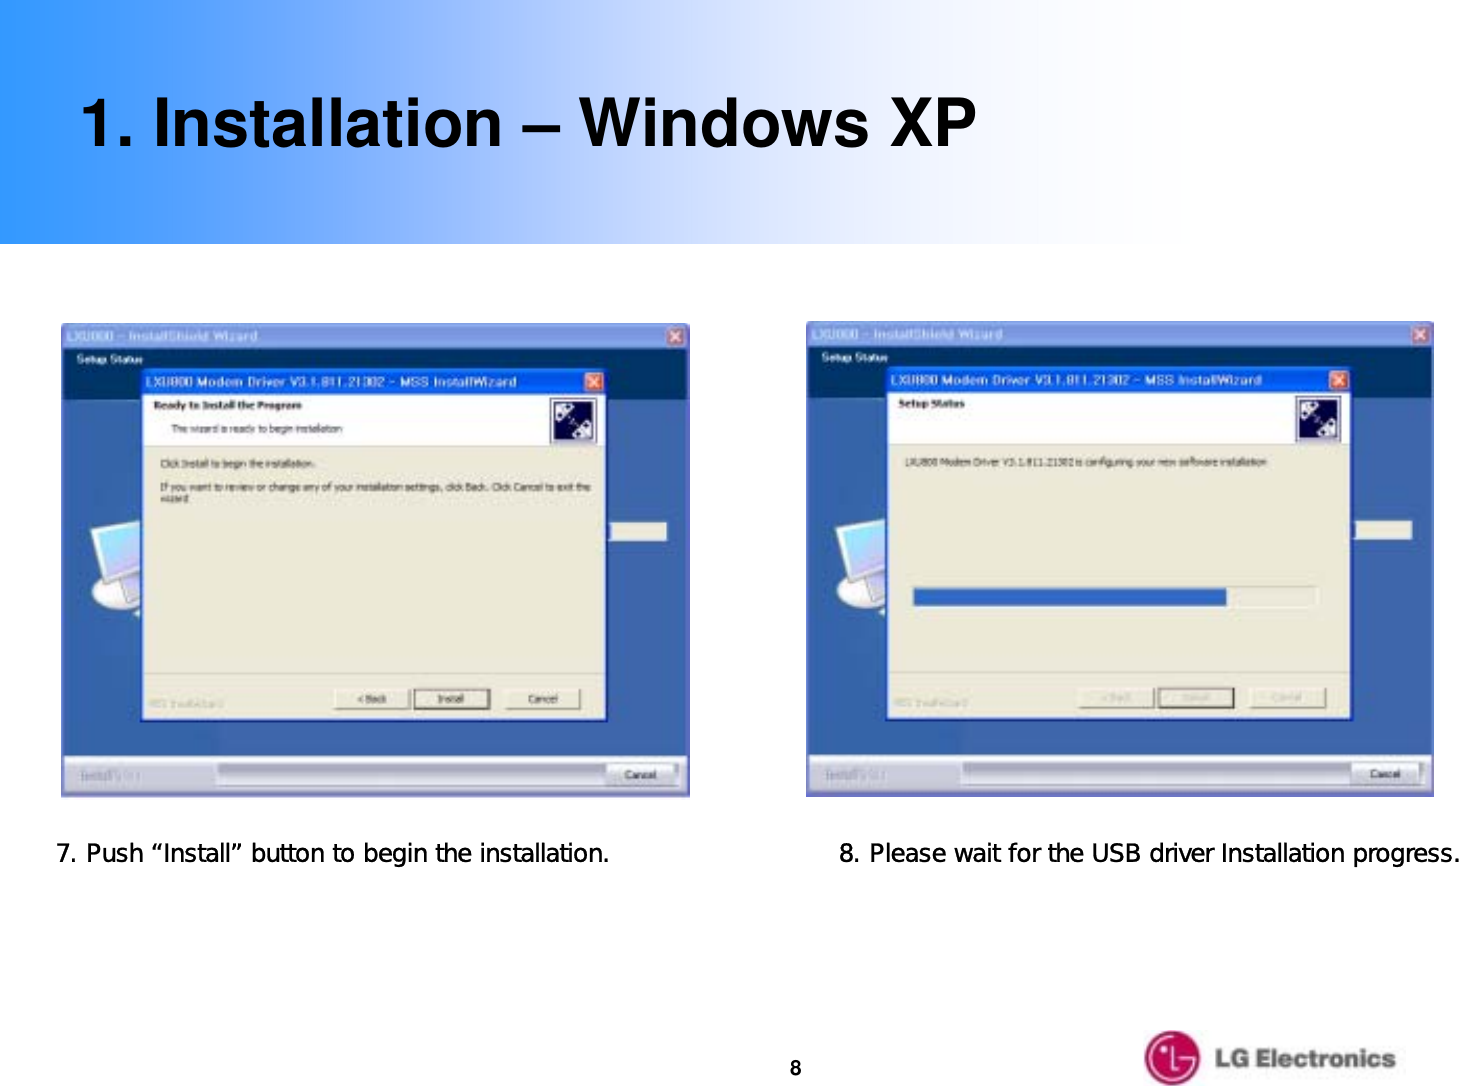
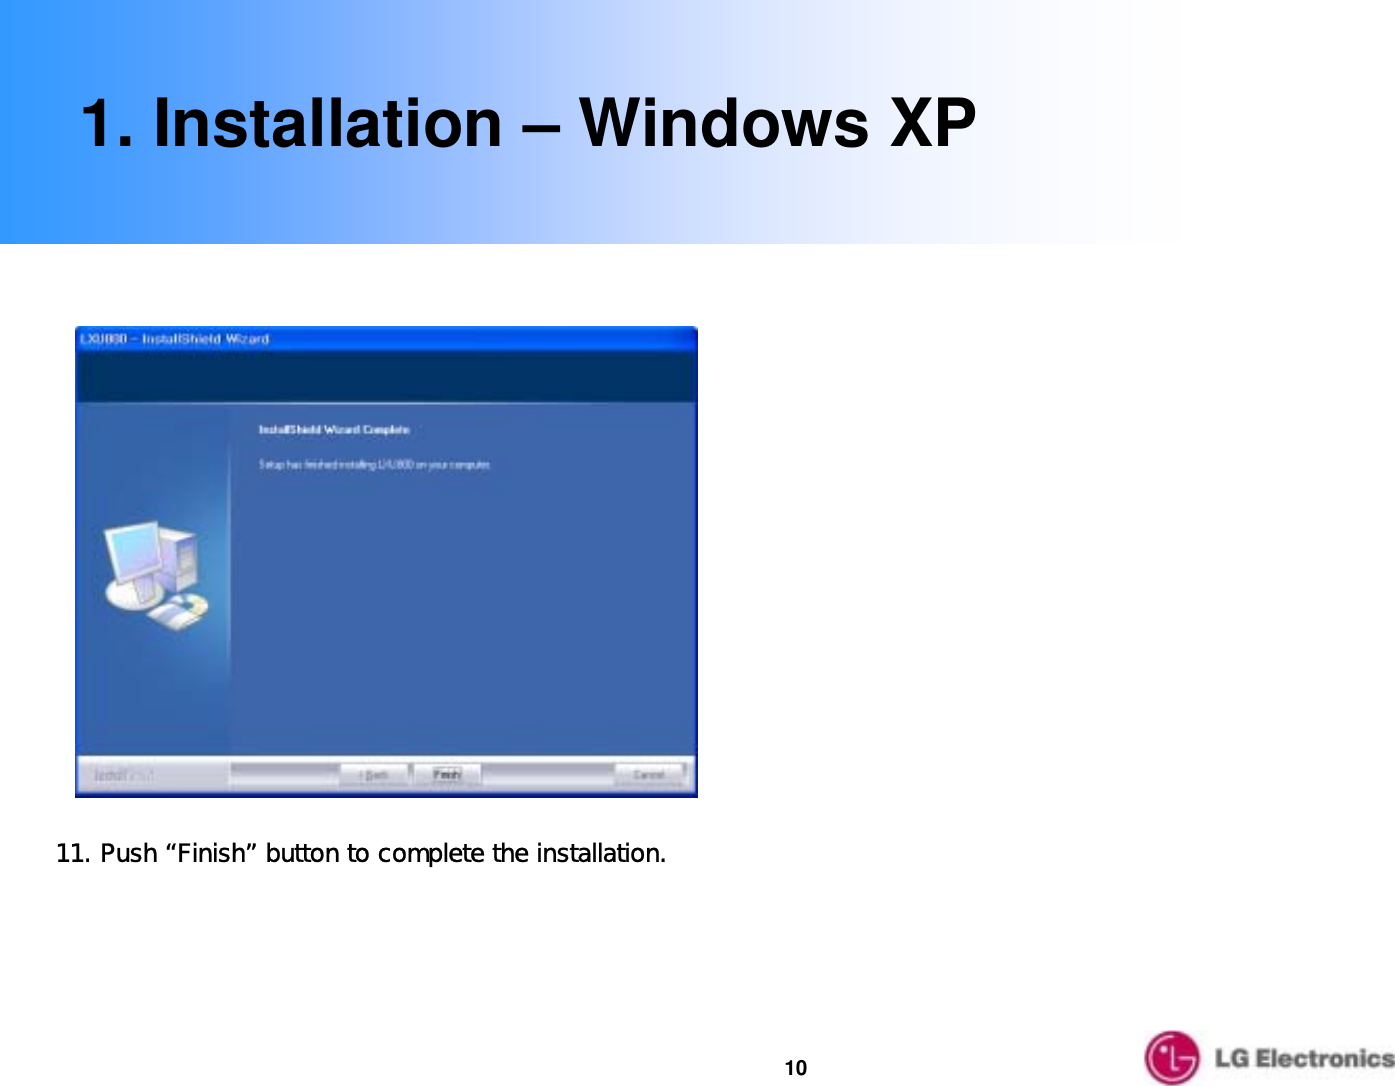
LXU 800 User Manual
Users Manual
Navigation menu
Upload a User Manual
Namespaces
Wiki Guide
HTML
PDF
Info
Views
User Manual
Discussion / Help
Navigation


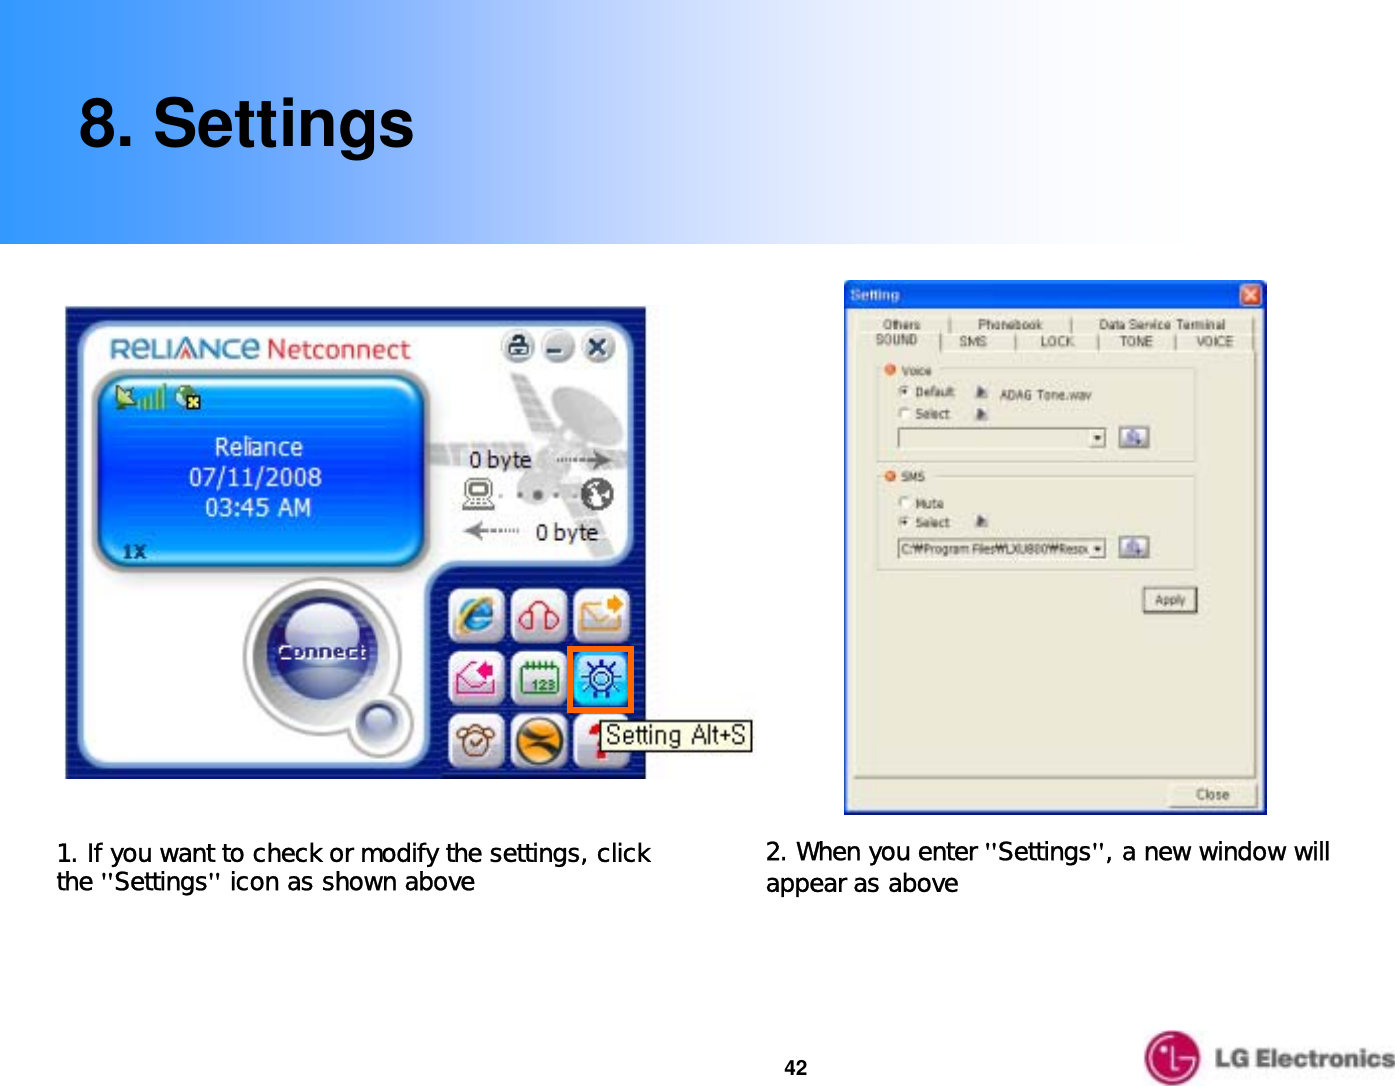
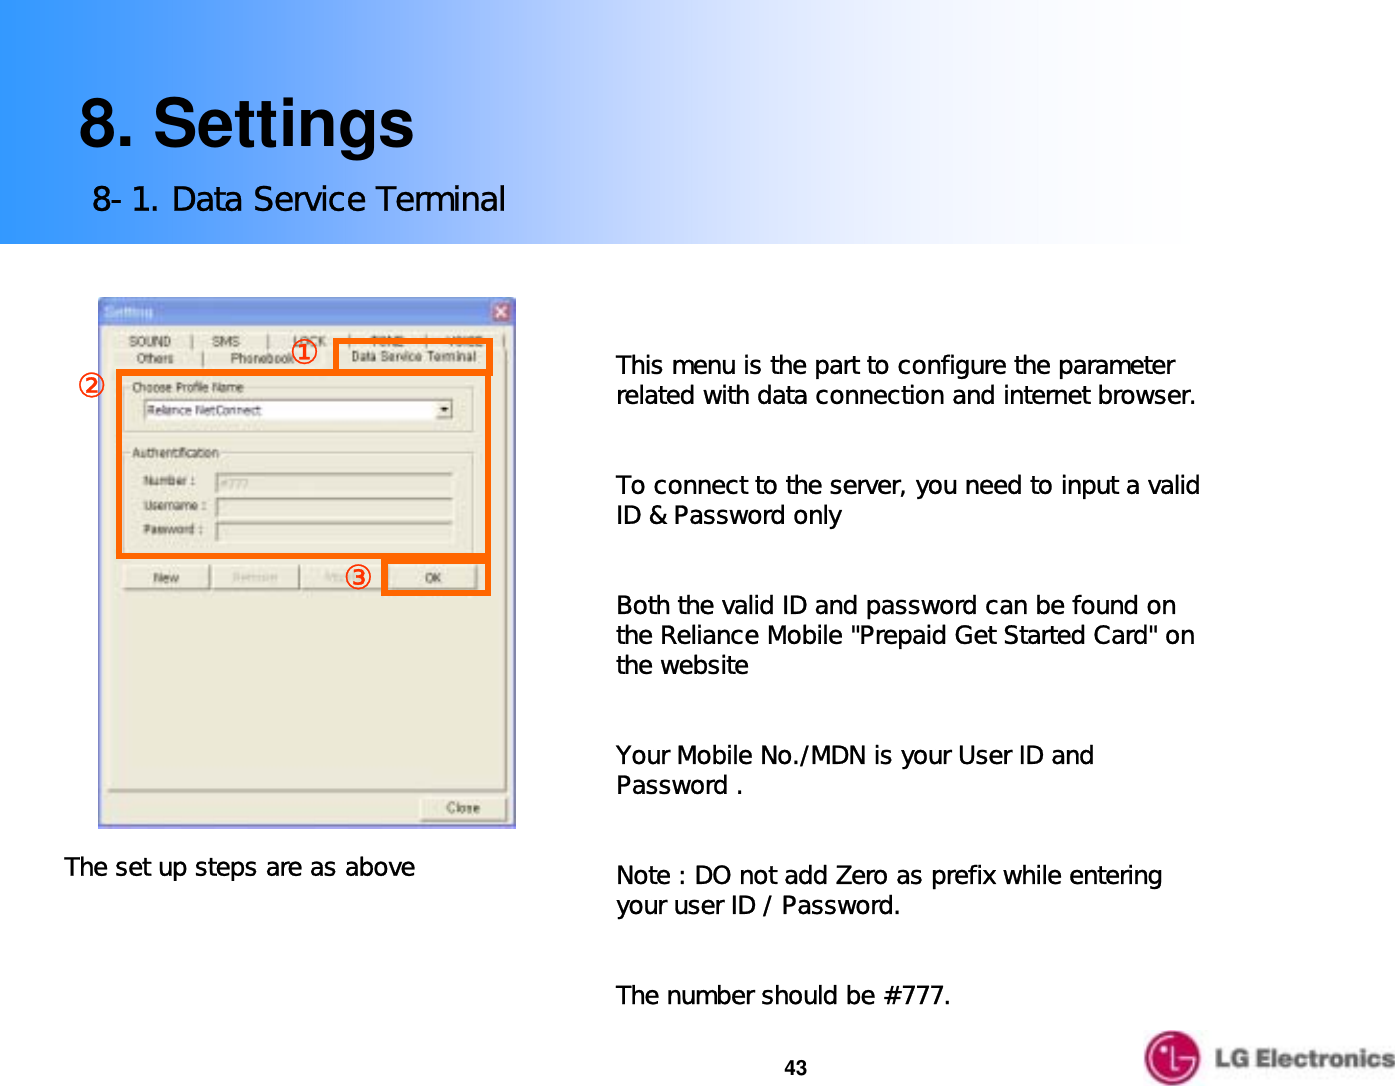
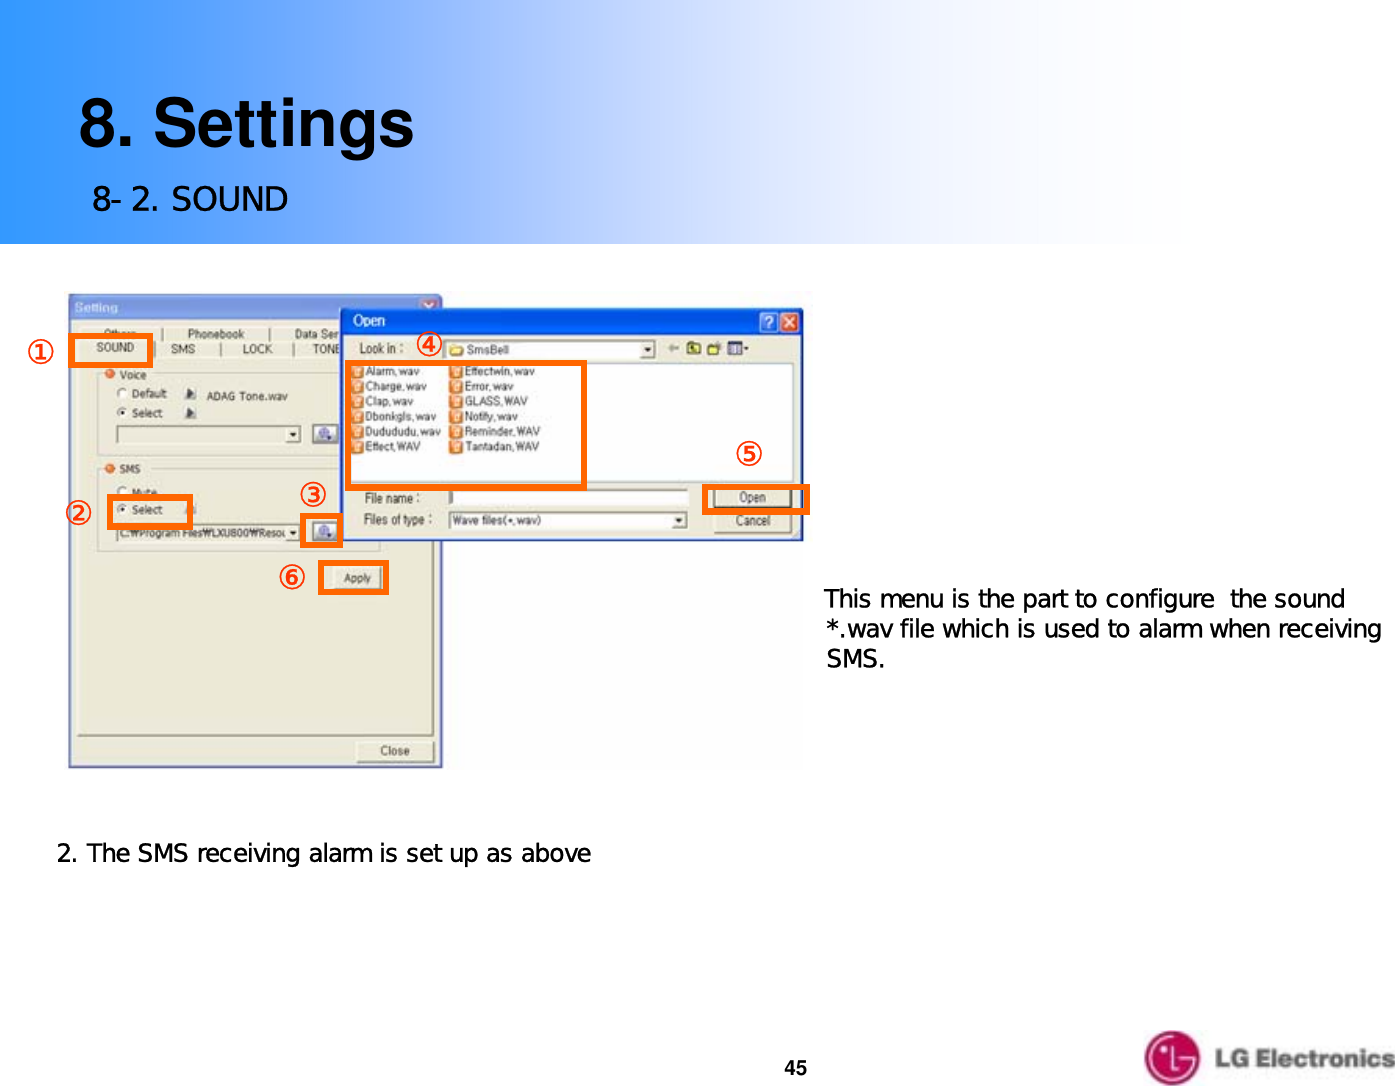
![448. Settings8-2. SOUNDOpenOpen⑤③⑥①②④Open1. From the "Settings" menu, you can set the ringtone [Voice menu] & SMS received alarm [SMS menu] on the "Sound" tab The set up steps are as aboveThis menu is the part to configure the sound *.wav file which is used to alarm when terminating the call.](https://usermanual.wiki/LG-Electronics-USA/LXU-800/User-Guide-1046487-Page-44.png)