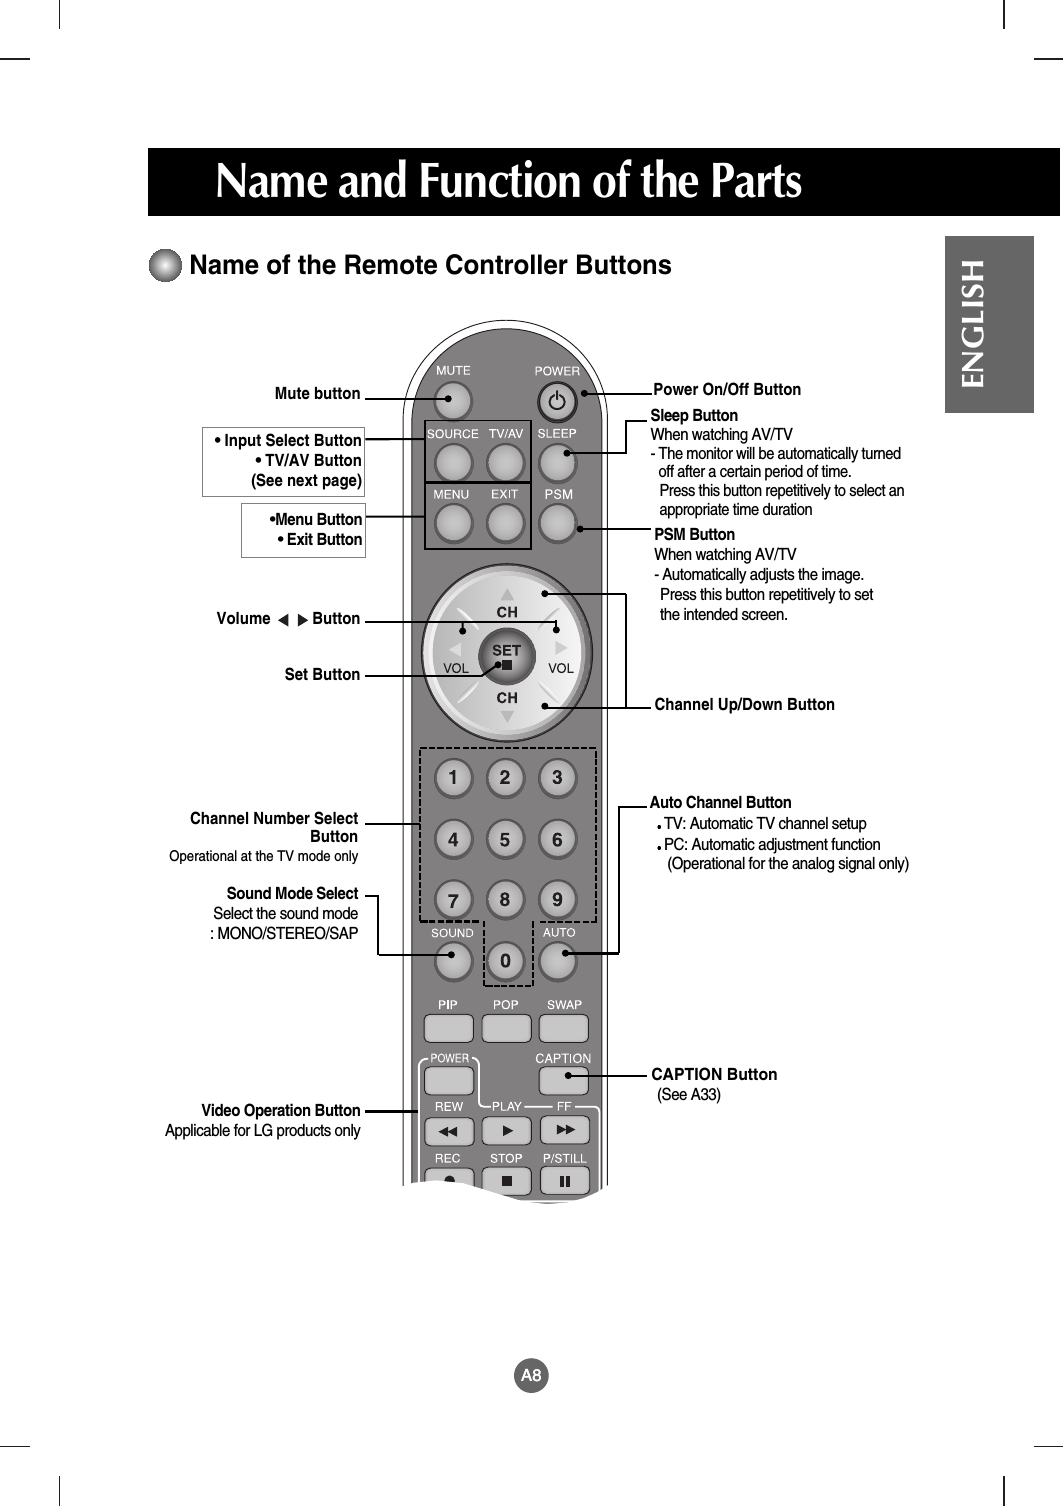
LG Electronics USA M1910AB 19 inch LCD Monitor User Manual Microsoft PowerPoint F User s Manual
LG Electronics USA 19 inch LCD Monitor Microsoft PowerPoint F User s Manual
UserManual.wiki
>
LG Electronics USA
>
M1910AB User Manual
Users Manual
Navigation menu
Upload a User Manual
Namespaces
Wiki Guide
HTML
PDF
Info
Views
User Manual
Discussion / Help
Navigation

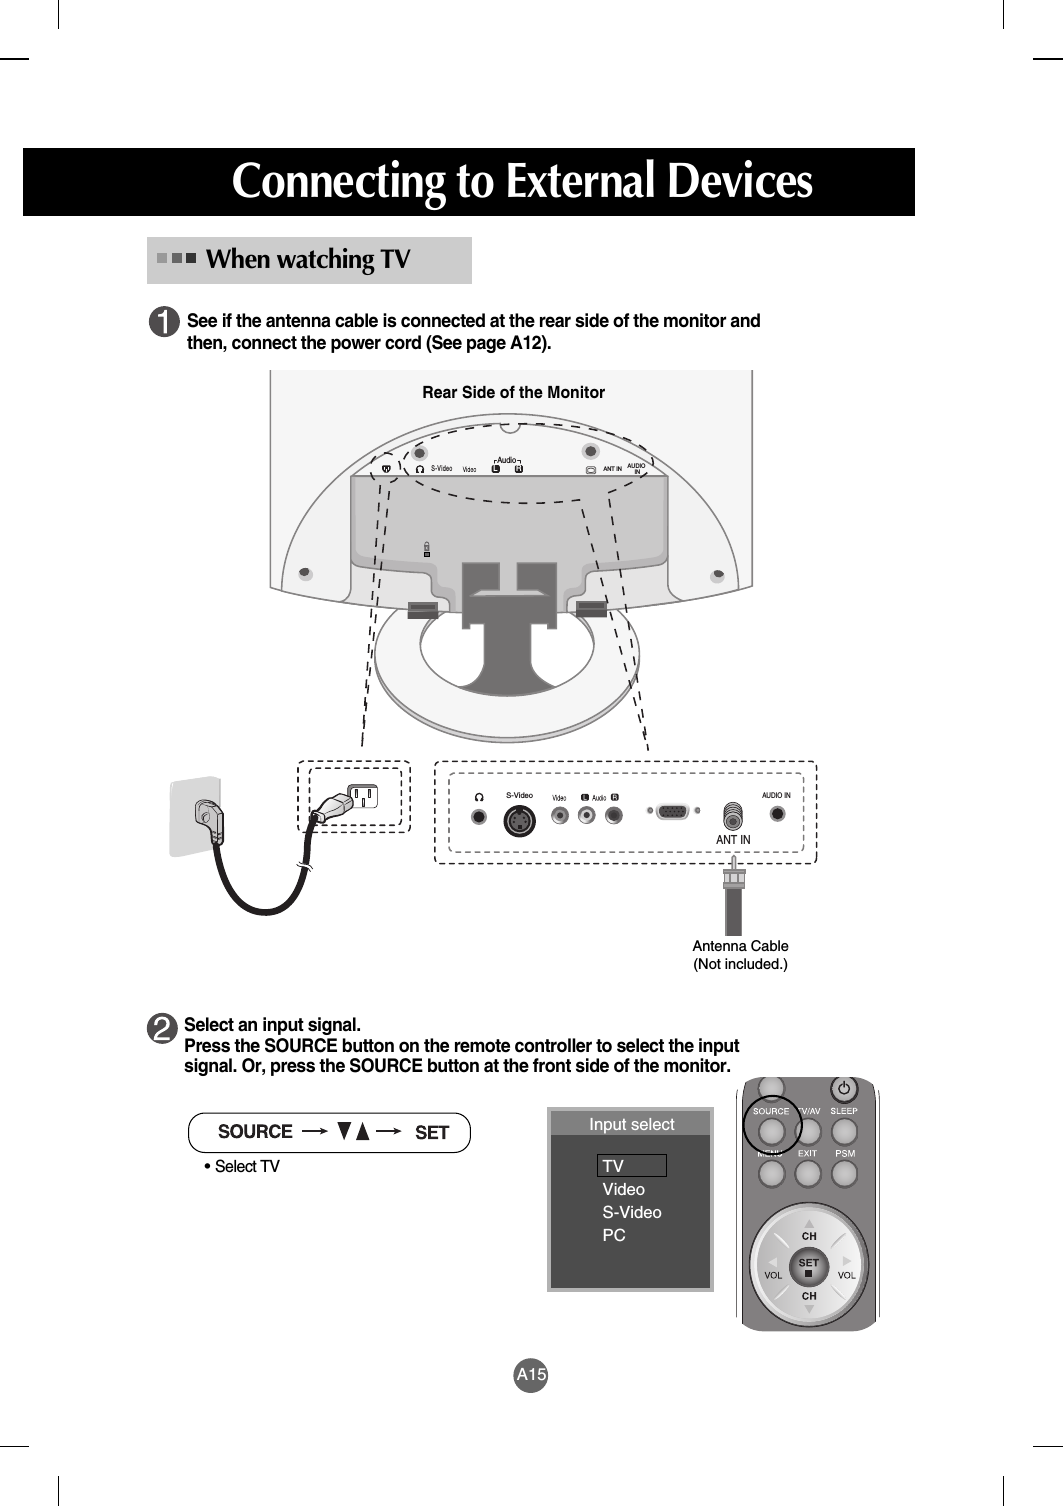
![A6ENGLISHTo arrange the cables Neatly connect the signal input cable and audio cable, as shown in Figure 2.insert the cable holder into the grooves on both sides of the cable cab, as shown in Figure 3.Back Cap- Open the back cap beforeyou install the monitor.[ Figure 2 ] [ Figure 3 ][ Figure 4 ]Cable Holder](https://usermanual.wiki/LG-Electronics-USA/M1910AB/User-Guide-494683-Page-12.png)
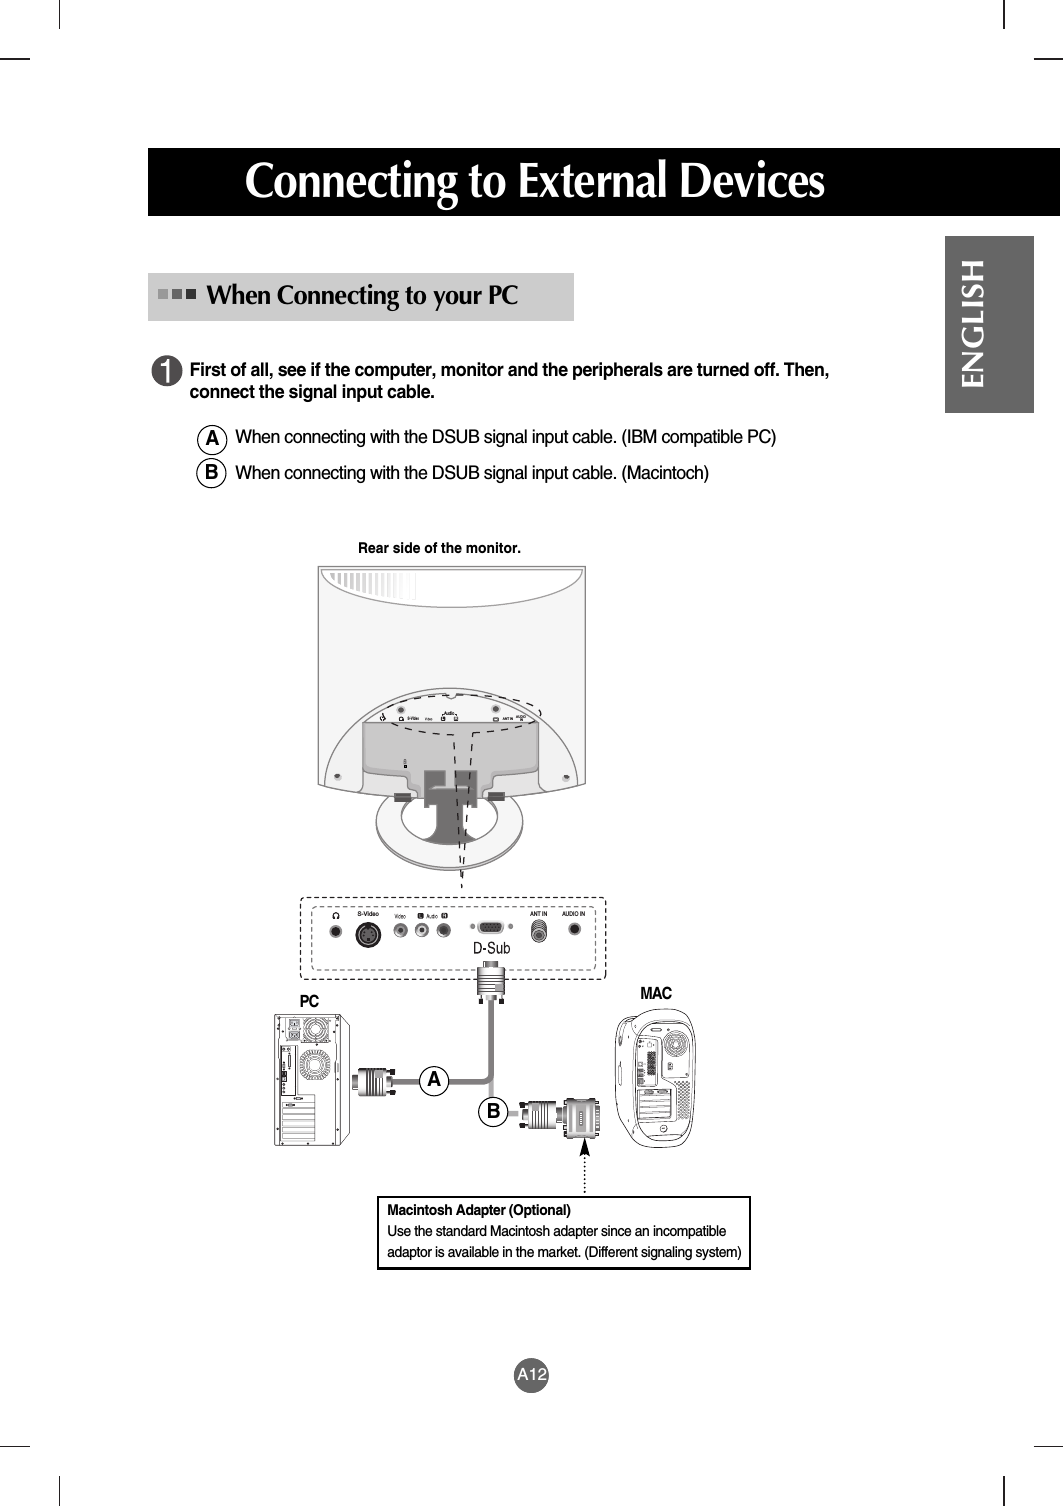
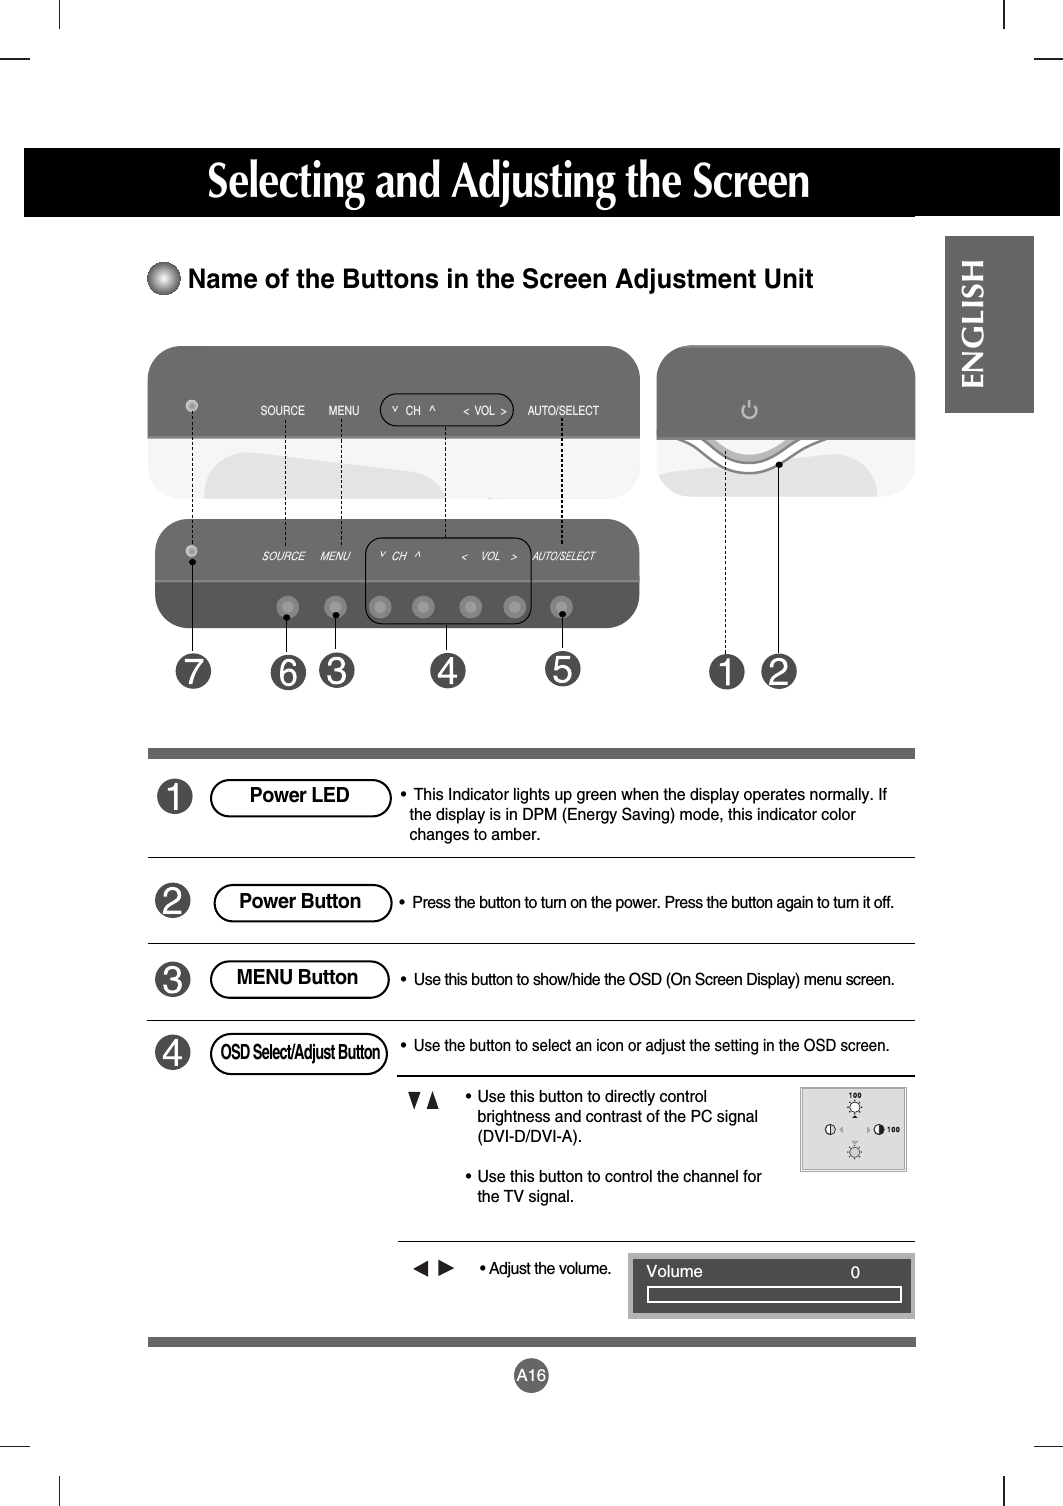
![A10ENGLISHAudioRLS-VideoAUDIO INANT INRear ViewBack Cap- Open the back cap beforeyou install the monitor.Connect the power cord.AV Input TerminalDSUB Analog Signal Connector Connent to the jack in the PC sound card.TV Tuner Jack: Connect the antenna.AudioRLS-VideoAUDIO INANT IN[17inch/19inch][15inch]](https://usermanual.wiki/LG-Electronics-USA/M1910AB/User-Guide-494683-Page-16.png)


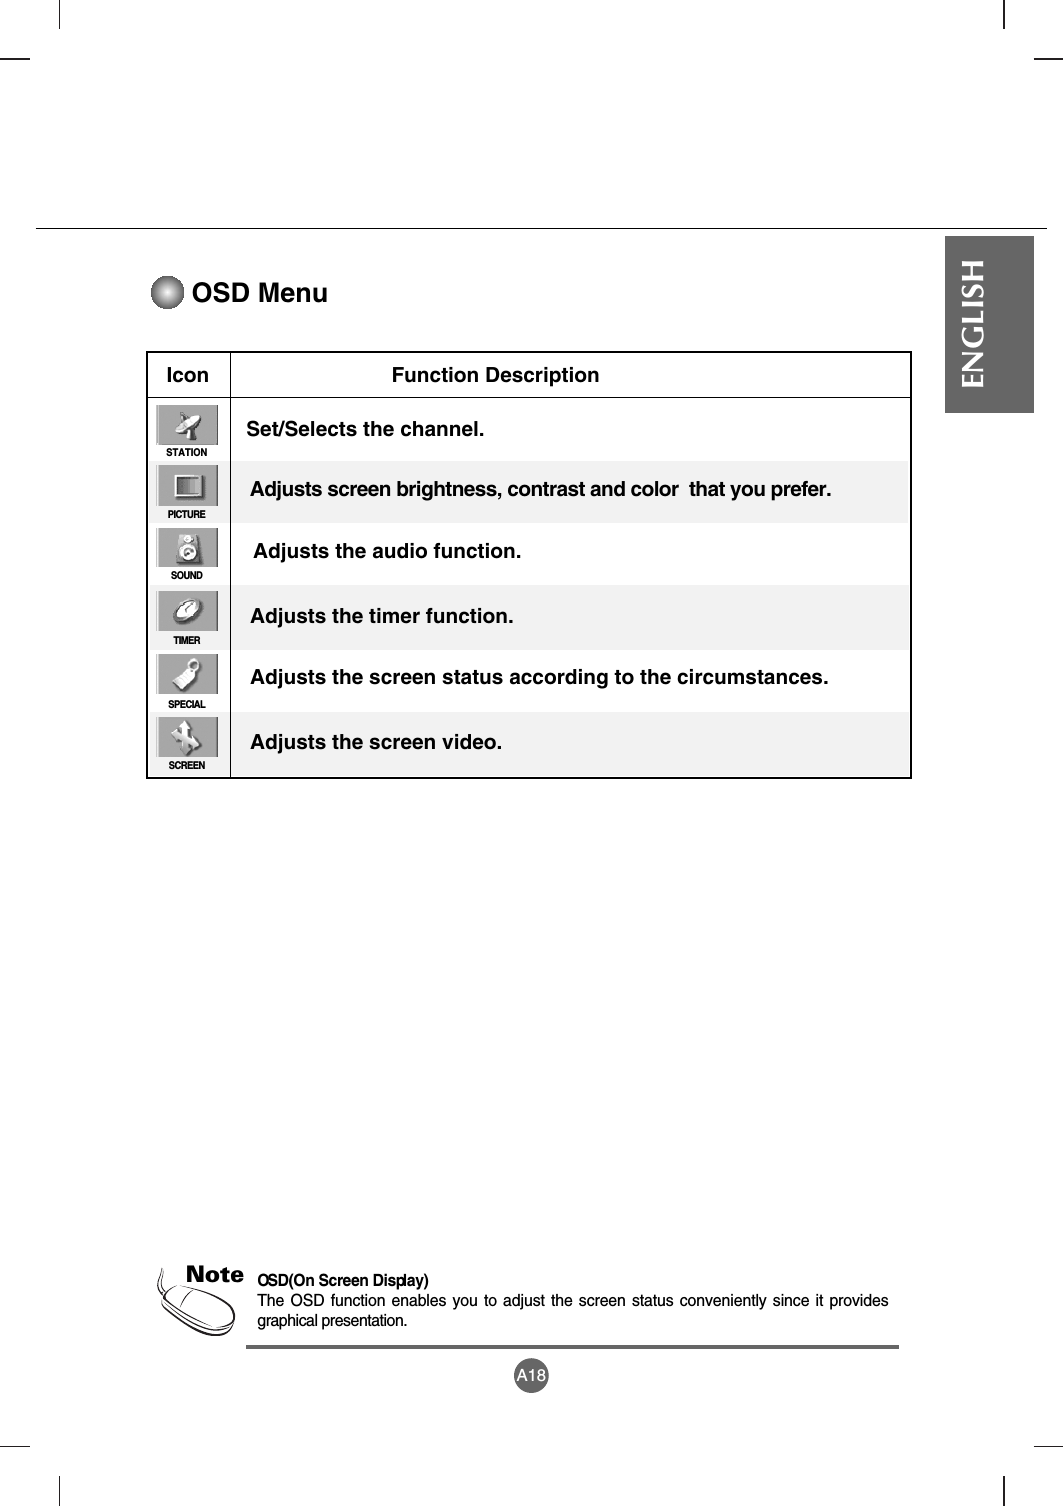
![A17Selecting and Adjusting the ScreenName of the Buttons in the Screen Adjustment Unit[For PC Analog signal]•Select the icon to adjust on the OSD screen.•If you press the [AUTO/SELECT] button, automatic screenadjustment will be started.AUTO/SELECT ButtonTV TelevisionVideo Composite videoS-Video S-VideoPC DSUB analog signal• Select the input signal SOURCE Button•The unit that receives the signal from the remote controller.Processing...Input selectTVVideoS-VideoPC](https://usermanual.wiki/LG-Electronics-USA/M1910AB/User-Guide-494683-Page-23.png)

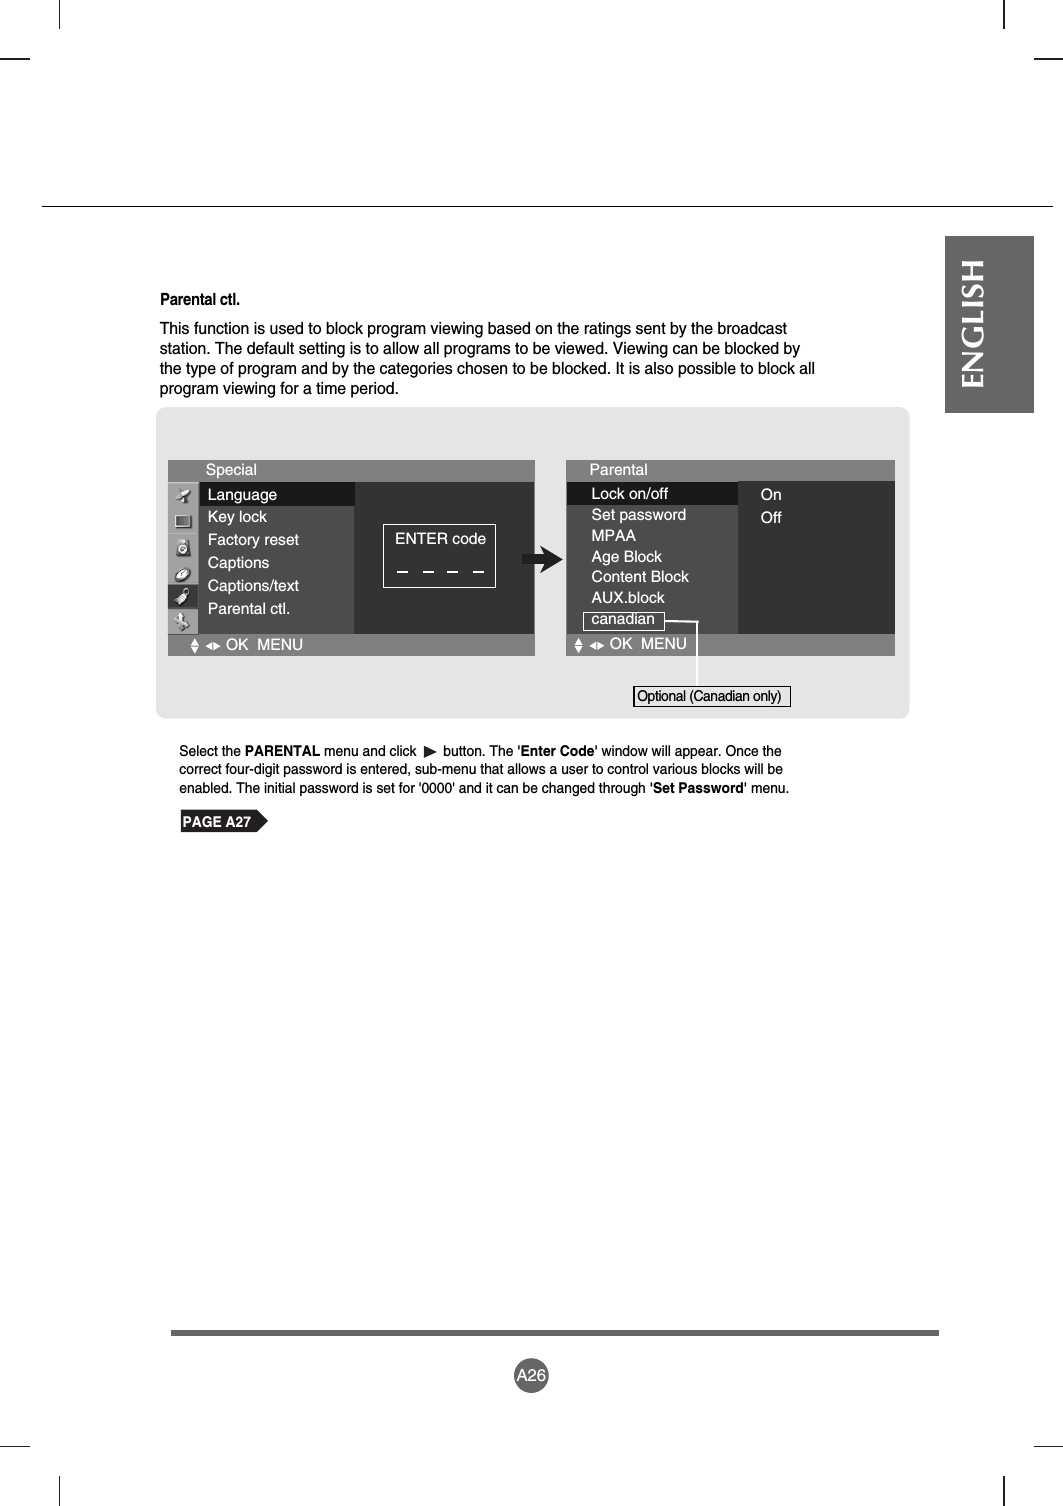
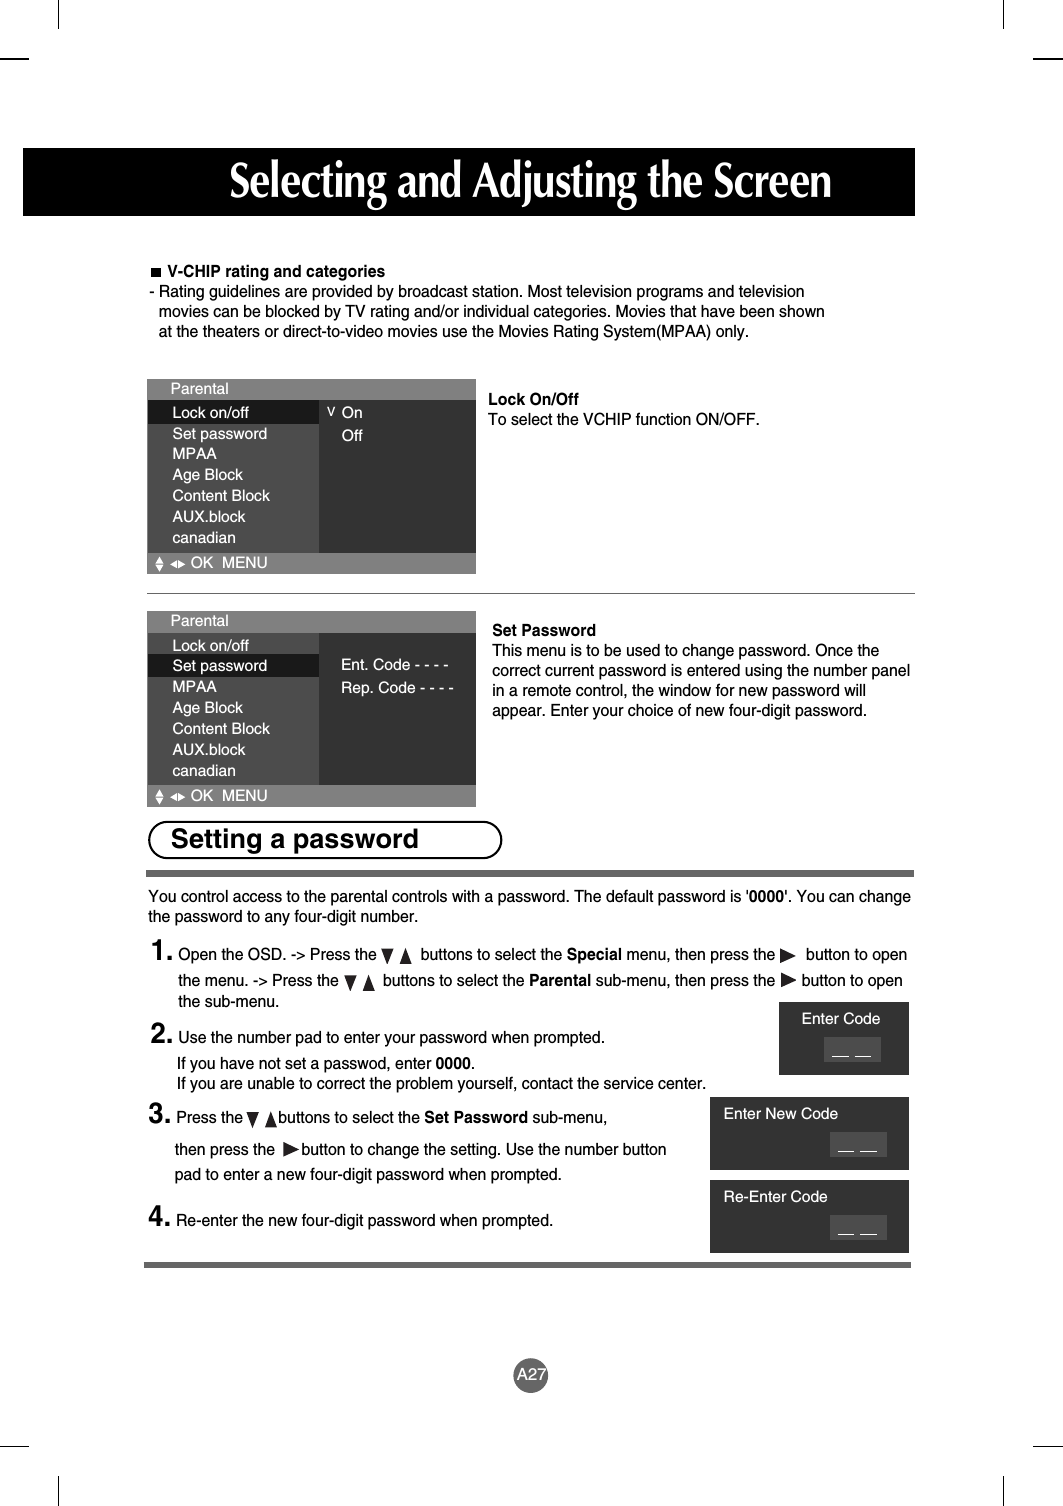
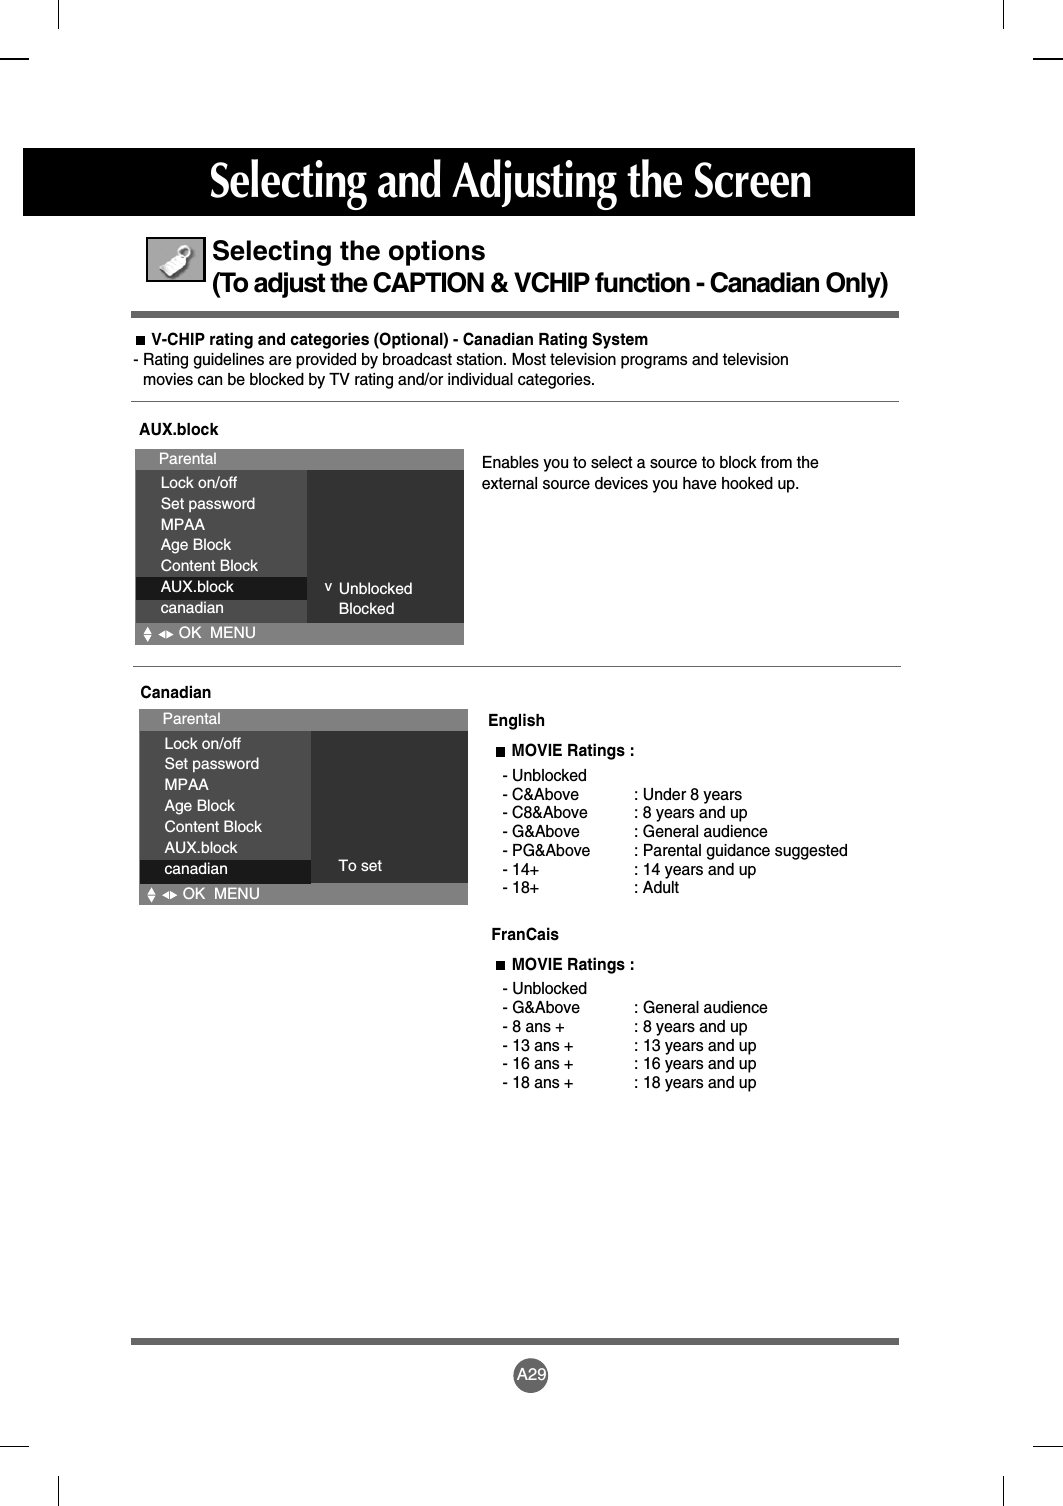
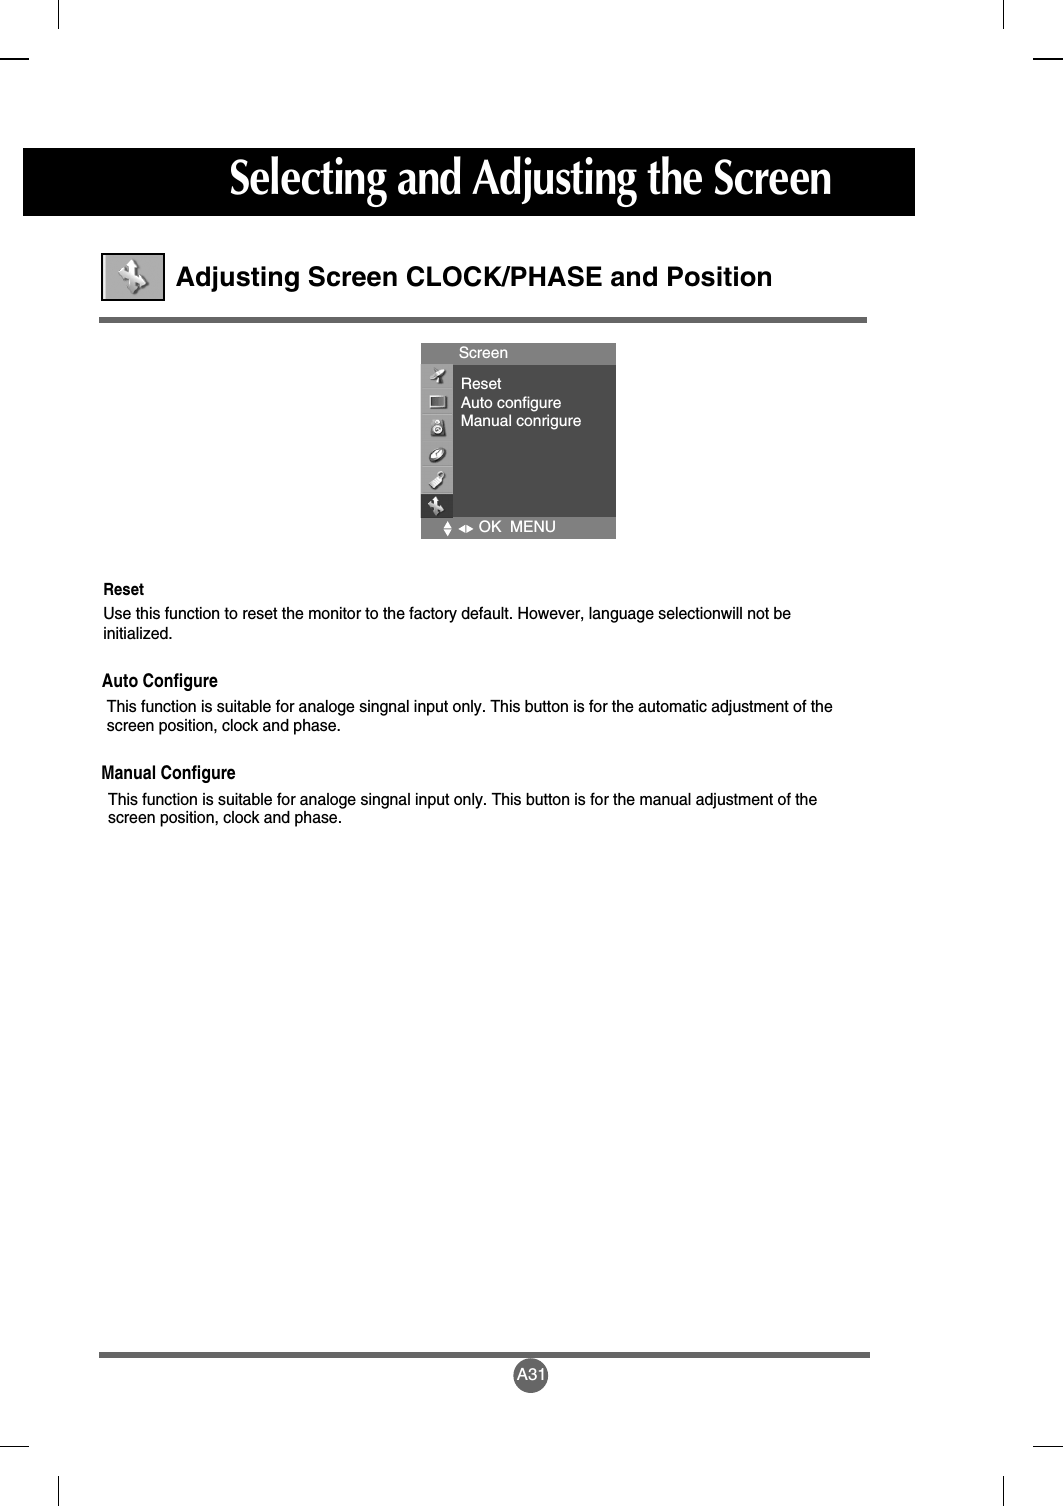
![A25Selecting the options LanguageTo choose the language in which the control names are displayed.Use this function to reset the monitor to the factory default. However, language selection will not be initialized.Factory resetUse the buttons to select ON or OFF. The TV can be set up so that it can only be used with theremote control. This feature can prevent unauthorized viewing.In order to lock the OSD screen adjustment, set the Key lock tab to the 'on' position.In order to unlock it, do the following :1) Push the MENU button on the remote control and set Key lock to the 'off' position. key lockIf you press the button once, the following Input Signal Window will appear.Select the signal type you want using the button.SpecialLanguageKey lockFactory resetCaptionsCaptions/textParental ctl.OK MENUCaptionsUse the buttons to select caption mode.Text services give a wide variety of information on all kind of subjects(ex. captioned program lists, weatherforecasts, stock exchange topics, news for hearing-impaired....) on up to half of the TV screen. But not allstations offer text services, even though they might offer captioning.In the event you are receiving a poor signal, an empty black box may appear and disappear, even whenthe text mode is selected. This is a normal when receiving a poor signal.This TV is programmed to remember the CAPTION / TEXT mode it was last set to, when you turn thepower off.Caption / TextUse the buttons to select captions. * EZ Mute: If sound is on, the caption will be off. On the contrary, if sound is off, the caption will be on.Off On EZ Mute[Remote Control]Press the CAPTION button repeatedly to display the caption option as shown below. Press theSET button to select the caption option.Selecting and Adjusting the Screen](https://usermanual.wiki/LG-Electronics-USA/M1910AB/User-Guide-494683-Page-31.png)

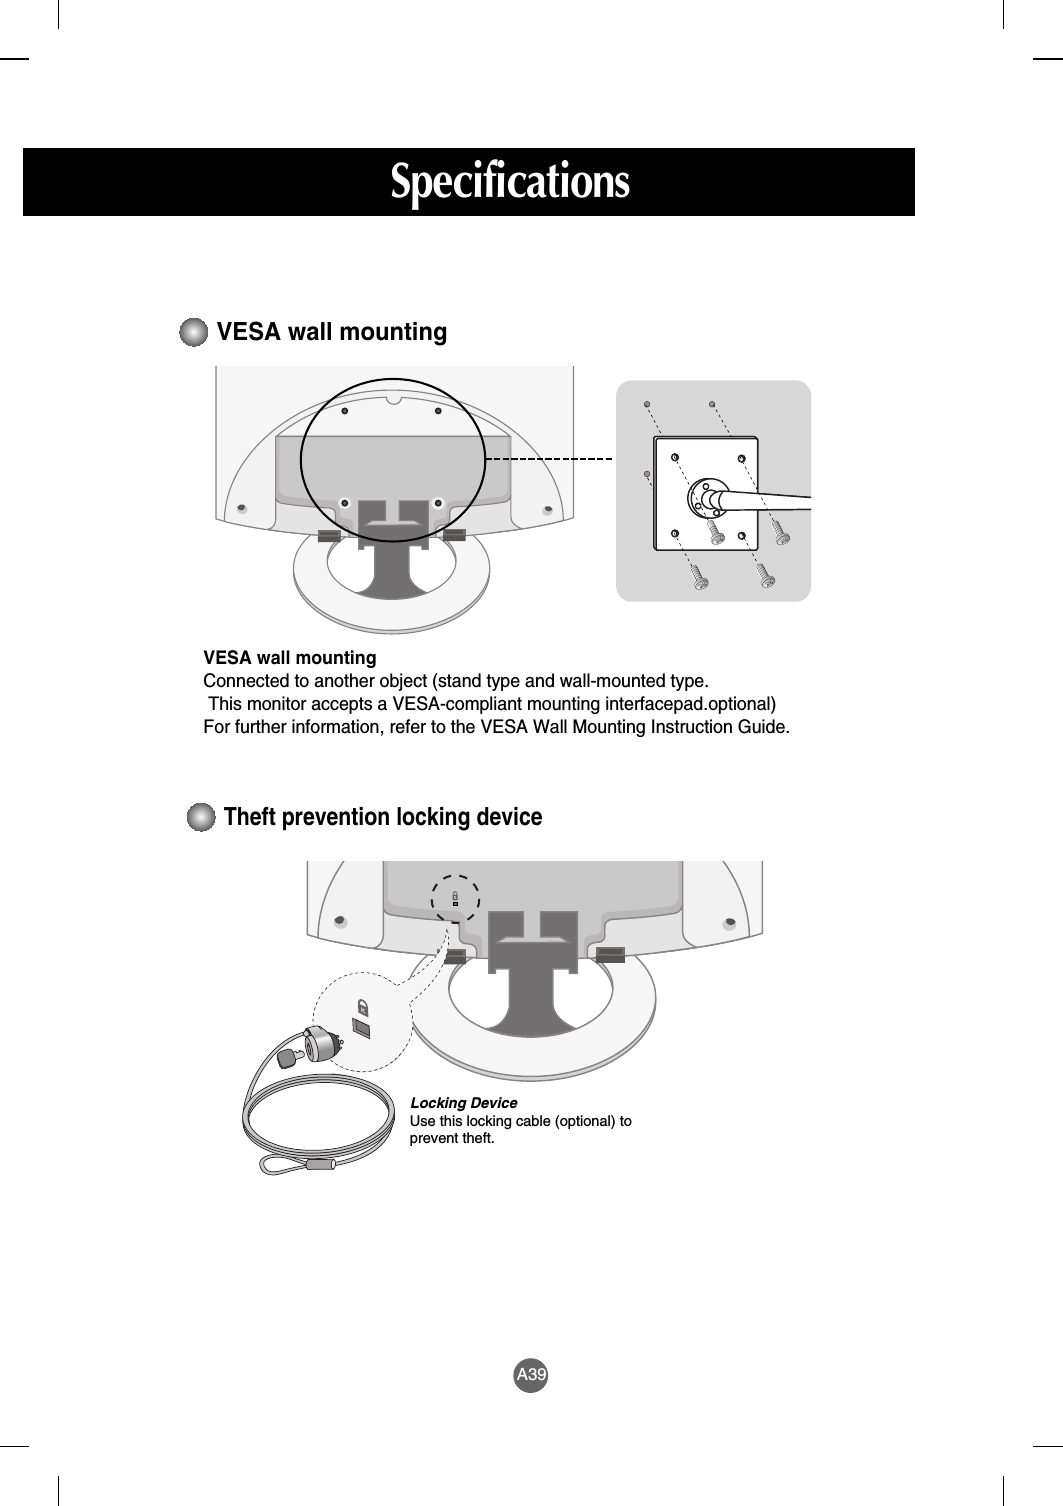
![A35SpecificationsScreen Type 15 inches (43.438cm) TFT (Thin Film Transistor) LCD (Liquid Crystal Display) PanelVisible diagonal size: 43.438cmPixel Pitch 0.291mmMax. Resolution DSUB : 1024 X 768 @75Hz Recommended ResolutionDSUB : XGA 1024 X 768 @60Hz Horizontal Frequency DSUB : 30 - 63 kHzVertical Frequency 56 - 75 HzSynchronization Type Separate/Composite/SOG (Sync On Green)/DigitalS-Video, Composite video, TVRated Voltage AC 100-240V~ 50/60Hz 0.6APower Consumption On Mode: 30W Sleep Mode : ≤4WOff Mode : ≤2W Tilt Range -5 ~25 Tilt Stand AttachedSize (WxLxH) 375.4mm x 221.8mm x 370.3 mm Weight (excl. package) 4.4 kg (9.7 Ibs)Operational Condition Temperature: 10˚C ~ 35˚C , Humidity: 10% ~ 80% Storage Condition Temperature: -20˚C ~ 60˚C , Humidity: 5% ~ 95% The product specifications can change without prior notice for product improvement.LCD PanelVideo SignalInput ConnectorPowerTiltDimension/WeightEnvironmental Conditions[15inch]](https://usermanual.wiki/LG-Electronics-USA/M1910AB/User-Guide-494683-Page-41.png)
![A36ENGLISHThe product specifications can change without prior notice for product improvement.[17inch]Screen Type 17 inches (43.438cm) TFT (Thin Film Transistor) LCD (Liquid Crystal Display) PanelVisible diagonal size: 43.438cmPixel Pitch 0.291mmMax. Resolution DSUB : 1280 X 1024 @75Hz Recommended ResolutionDSUB : XGA 1280 X 1024 @60Hz Horizontal Frequency DSUB : 30 - 83 kHzVertical Frequency 56 - 75 HzSynchronization Type Separate/Composite/SOG (Sync On Green)/DigitalS-Video, Composite video, TVRated Voltage AC 100-240V~ 50/60Hz 1.0APower Consumption On Mode: 50W Sleep Mode : ≤4WOff Mode : ≤2W Tilt Range -5 ~25 Tilt Stand AttachedSize (WxLxH) 419.9mm x 221.8mmx 423.5 mm Weight (excl. package) 5.9 kg (13.0Ibs)Operational Condition Temperature: 10˚C ~ 35˚C , Humidity: 10% ~ 80% Storage Condition Temperature: -20˚C ~ 60˚C , Humidity: 5% ~ 95% LCD PanelVideo SignalInput ConnectorPowerTiltDimension/WeightEnvironmental Conditions](https://usermanual.wiki/LG-Electronics-USA/M1910AB/User-Guide-494683-Page-42.png)
![A37SpecificationsThe product specifications can change without prior notice for product improvement.[19inch]Screen Type 19 inches (48.18cm) TFT (Thin Film Transistor) LCD (Liquid Crystal Display) PanelVisible diagonal size: 43.438cmPixel Pitch 0.291mmMax. Resolution DSUB : 1280 X 1024 @75Hz Recommended ResolutionDSUB : XGA 1280 X 1024 @60Hz Horizontal Frequency DSUB : 30 - 83 kHzVertical Frequency 56 - 75 HzSynchronization Type Separate/Composite/SOG (Sync On Green)/DigitalS-Video, Composite video, TVRated Voltage AC 100-240V~ 50/60Hz 1.0APower Consumption On Mode : 55W Sleep Mode : ≤4WOff Mode : ≤2W Tilt Range -5 ~25 Tilt Stand AttachedSize (WxLxH) 458.7mm x 242.0mm x 457.7 mm Weight (excl. package) 7.0 kg (15.4Ibs)Operational Condition Temperature: 10˚C ~ 35˚C , Humidity: 10% ~ 80% Storage Condition Temperature: -20˚C ~ 60˚C , Humidity: 5% ~ 95% LCD PanelVideo SignalInput ConnectorPowerTiltDimension/WeightEnvironmental Conditions](https://usermanual.wiki/LG-Electronics-USA/M1910AB/User-Guide-494683-Page-43.png)
![A38ENGLISHPreset modeHorizontalFrequency(kHz)VerticalFrequency(kHz)PC Mode – Preset ModePreset modeHorizontalFrequency(kHz)VerticalFrequency(kHz)1234567640 x 350720 x 400640 x 480640 x 480640 x 480640 x 480800 x 60031.46831.46831.46935.00037.86137.50035.15670706066727556VGAVGAVGAVESAVESAVESAVESA891011121314800 x 600800 x 600800 x 600832 x 6241024 x 7681024 x 7681024 x 76837.87948.07746.87549.72548.36356.47660.023VESAMACVESAMACVESAVESAVESA60727574607075Preset modeHorizontalFrequency(kHz)VerticalFrequency(kHz)Preset modeHorizontalFrequency(kHz)VerticalFrequency(kHz)1234567640 x 350720 x 400640 x 480640 x 480800 x 600800 x 600832 x 62431.46931.46831.46937.50037.87946.87549.72570706075607574VGAVGAVGAVESAVESAVESAVESA89101112131024 x 7681024 x 7681152 x 8701152 x 9001280 x 10241280 x 102448.36360.12368.68161.80563.98179.976VESAMACVESAVESAVESAVESA607575656075Preset modeHorizontalFrequency(kHz)VerticalFrequency(kHz)Preset modeHorizontalFrequency(kHz)VerticalFrequency(kHz)1234567640 x 350720 x 400640 x 480640 x 480800 x 600800 x 600832 x 62431.46931.46831.46937.50037.87946.87549.72570706075607574VGAVGAVGAVESAVESAVESAVESA89101112131024 x 7681024 x 7681152x8701152x9001280 x 10241280 x 102448.36360.12368.68161.80563.98179.976VESAMACVESAVESAVESAVESA607575656075[15inch][17inch][19inch]Power LEDMode MonitorOn ModeSleep ModeOff ModeBlueAmberOff](https://usermanual.wiki/LG-Electronics-USA/M1910AB/User-Guide-494683-Page-44.png)