LG Electronics USA M4300 Tri Band PCS GSM Phone with Bluetooth User Manual Tom eng M4300 050318 indd
LG Electronics USA Tri Band PCS GSM Phone with Bluetooth Tom eng M4300 050318 indd
UserManual.wiki
>
LG Electronics USA
>
M4300 User Manual
>
Manual 1
Contents
1.
Manual 1
2.
Manual 2
Manual 1
Navigation menu
Upload a User Manual
Namespaces
Wiki Guide
HTML
PDF
Info
Views
User Manual
Discussion / Help
Navigation
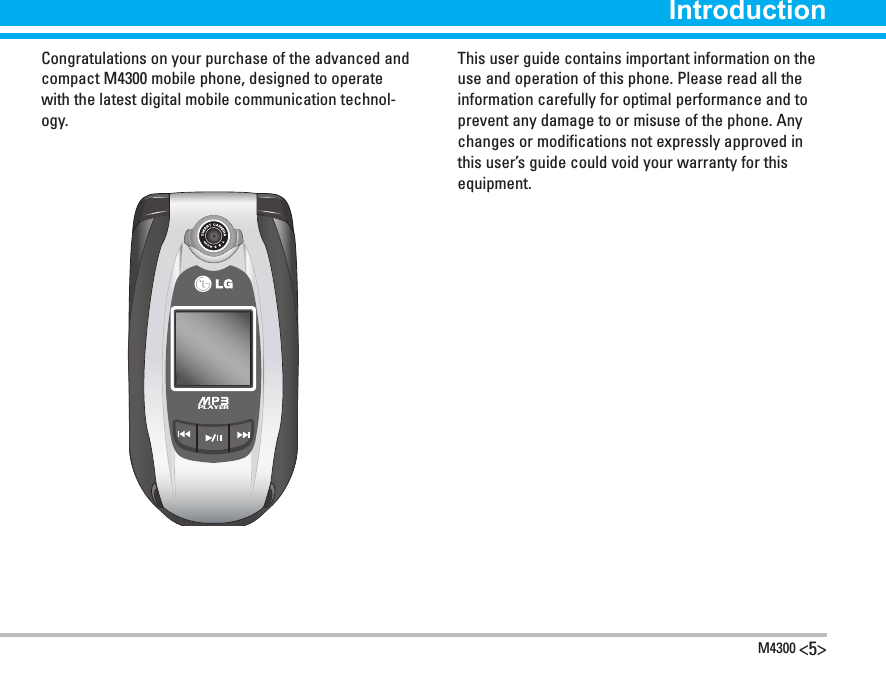


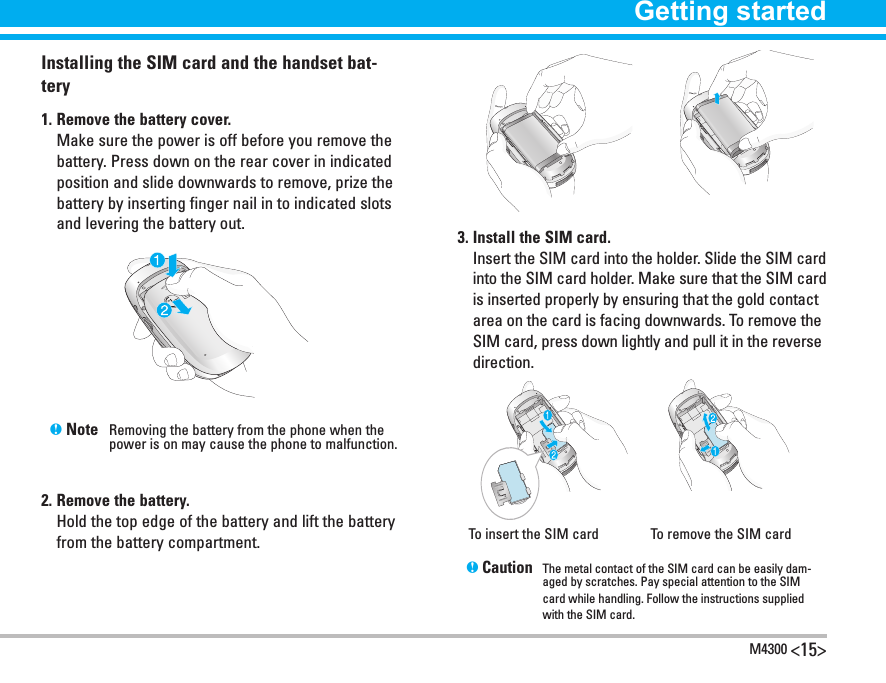
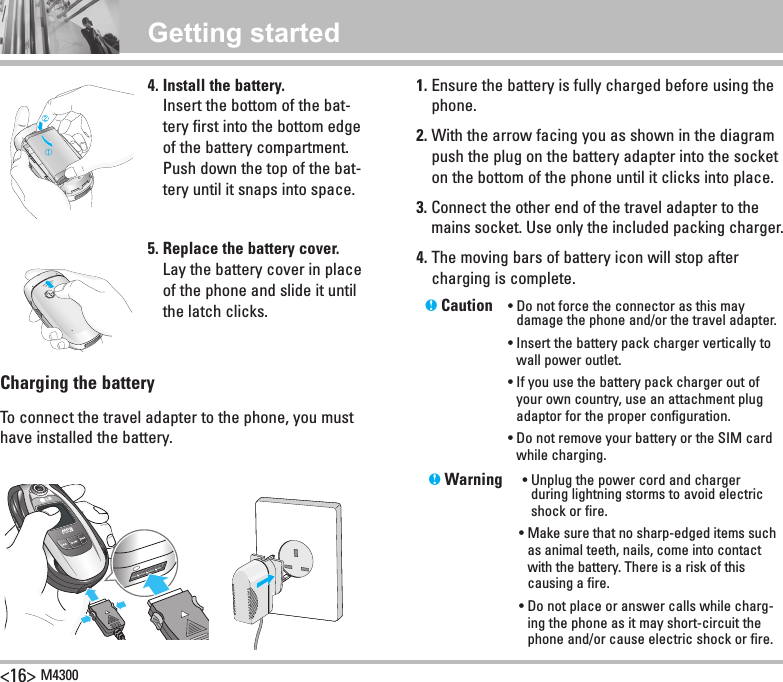
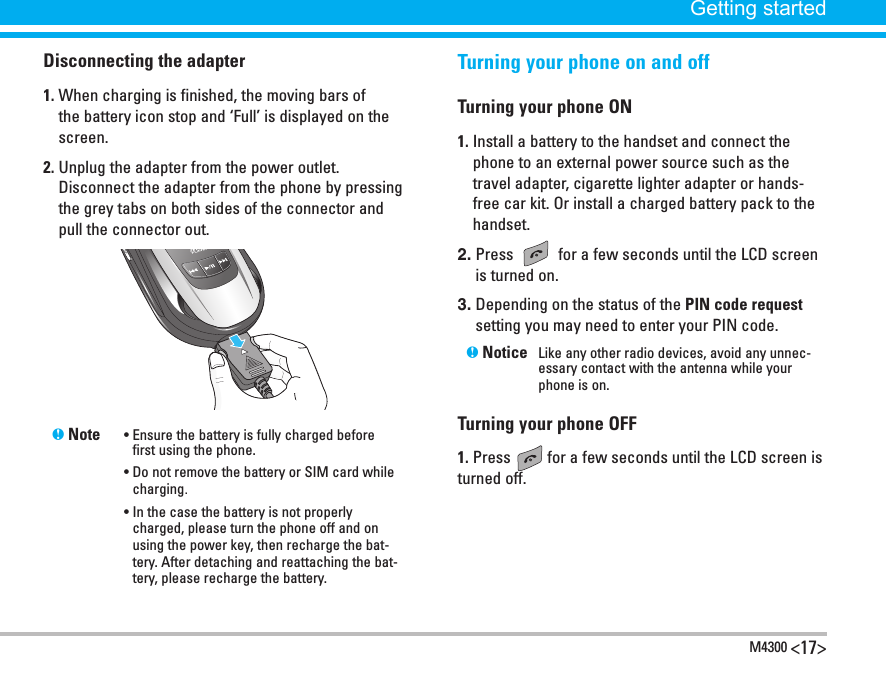
![<18> M4300Access codesYou can use the access codes described in this section to avoid unauthorised use of your phone. The access codes (except PUK and PUK2 codes) can be changed by using the Change codes feature [Menu-9-5-5]. See page 86.PIN code (4 to 8 digits)The PIN (Personal Identification Number) code pro-tects your SIM card against unauthorised use. The PIN code is usually supplied with the SIM card. When the PIN code request is set to On, your phone will request the PIN code every time the phone is switched on. When the PIN code request is set to Off, your phone connects to the network directly without the PIN code.PIN2 code (4 to 8 digits)The PIN2 code, supplied with some SIM cards, is required to access functions such as Advice of Call Charge and Fixed Dial Number. These functions are only available if supported by your SIM card.PUK code (4 to 8 digits)The PUK (PIN Unblocking Key) code is required to change a blocked PIN code. The PUK code may be supplied with the SIM card. If not, contact your net-work operator for the code. If you lose the code, also contact your network operator.PUK2 code (4 to 8 digits)The PUK2 code, supplied with some SIM cards, is required to change a blocked PIN2 code. If you lose the code, also contact your network operator.Security code (4 to 8 digits)The security code protects the unauthorised use of your phone. The default security code is set to ‘0000’ and the secu-rity code is required to delete all phone entries and to activate the Reset Settings menu. Also, the security code is required to enable or disable the phone lock function to prevent unauthorised use of the phone. The security code default setting can be modified from the Security Settings menu. Getting started](https://usermanual.wiki/LG-Electronics-USA/M4300.Manual-1/User-Guide-584933-Page-18.png)
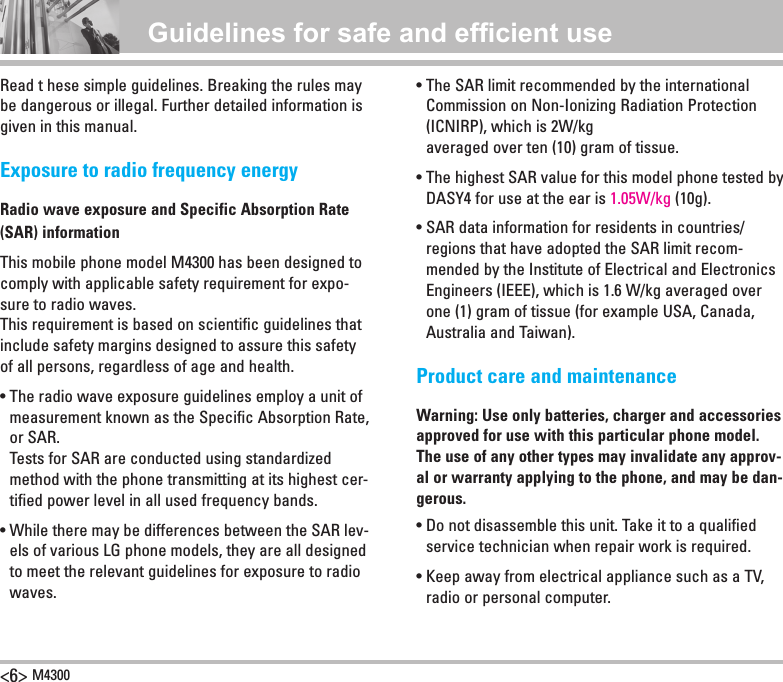
![M4300 <19>Barring passwordThe barring password is required when you use the Call Barring function. You obtain the password from your network operator when you subscribe to this function. See [Menu-9-5-3] page 85 for further details.Making and answering calls Making a call 1. Make sure your phone is switched on.2. Enter a phone number, including the area code. When you entered a wrong number, press the clear key ( ) to erase one digit at a time.] Press and hold the clear key ( ) to erase the dig-its in succession.3. Press the send key ( ) to call the number.4. To end the call, press the end key ( ) or the right soft key ( ). You can also end the call by clos-ing the folder.Making a call using the send key1. In standby mode, press the send key ( ), and the latest incoming, outgoing and missed phone num-bers will be displayed.2. Select the desired number by using the up/down navigation key.3. Press .Making an international call 1. Press and hold the key for the international prefix. The ‘+’ character automatically selects the international access code.2. Enter the country code, area code, and the phone number.3. Press .Ending a callWhen you have finished your call, press the end ( )key.Getting started](https://usermanual.wiki/LG-Electronics-USA/M4300.Manual-1/User-Guide-584933-Page-19.png)
![<20> M4300Making a call from the phonebook (Contacts)You can save the names and phone numbers dialled regularly in the SIM card and/or phone memory, which is called Contacts.You can dial a number by simply looking up the desired name in Contacts. For further details on the Contacts feature, please refer to page 62 through 66. Adjusting the volumeIf you want to adjust the earpiece volume during a call, use the side keys ( ). Press the up side key to increase and down side key to decrease the volume.n Note In standby mode pressing the side keys adjusts the key tone volume.Answering a callWhen you receive a call, the phone rings. If the caller can be identified, the caller’s phone number (or name if saved in the Contacts) is displayed.1. To answer an incoming call, open the phone and press the send key. Alternatively, please see page 82 for other answer modes.n Note If Press any key has been set as the answer mode (see page 82), any key press will answer a call except for the or the right soft key.] To reject an incoming call, press and hold one of the side keys on the left side of the phone without open-ing the folder.] You can answer a call while using the Contacts or other menu features.2. To end the call, close the folder or press the key.Switching quickly to Vibrate only modeYou can switch your phone quickly to the Vibrate only mode by pressing and holding down the left navigation key ( ) after opening the phone. To go back to the previous profile, press and hold down the left naviga-tion key ( ) again.General functions](https://usermanual.wiki/LG-Electronics-USA/M4300.Manual-1/User-Guide-584933-Page-20.png)
![M4300 <21>Signal strengthYou can check the strength of your signal by the sig-nal indicator ( ) on the LCD screen of your phone. Signal strength can vary, particularly inside buildings. Moving near to a window may improve reception.Entering textYou can enter alphanumeric characters by using the phone’s keypad. For example, storing names in the Contacts, writing a message, creating a personal greeting or scheduling events in the calendar all require entering text.The following text input methods are available in the phone.T9 modeThis mode lets you enter words with only one key-stroke per letter. Each key on the keypad has more than one letter. The T9 mode automatically com-pares your keystrokes with an internal dictionary to determine the correct word, thus requiring far fewer keystrokes than the traditional ABC mode. This is sometimes known as predictive text.ABC modeThis mode lets you enter letters by pressing the key labelled with the required letter once, twice, three or four times until the letter is displayed.123 mode (Number mode)Type numbers using one keystroke per number. To change to 123 mode in a text entry field, press the key until 123 mode is displayed. Changing the text input mode1. When you are in a field that allows characters to be entered, you will notice the text input mode indicator in the upper right corner of the LCD screen. - You can select the language of the T9 mode. Press the left soft key [Options], then select T9 languag-es. You can also go to T9 languages menu by hold-ing down the key. Select the desired language of T9 mode. You can also turn off the T9 mode by selecting T9 off. The default setting on the phone is T9 enabled mode.General functions](https://usermanual.wiki/LG-Electronics-USA/M4300.Manual-1/User-Guide-584933-Page-21.png)
![<22> M43002. Change the text input mode by pressing . You can check the current text input mode in the upper right corner of the LCD screen.] Using the T9 modeThe T9 predictive text input mode lets you enter words easily with a minimum number of key presses. As you press each key, the phone begins to display the char-acters that it thinks you are typing based on the built-in dictionary. You can also add new words in the diction-ary. As new words are added, the word changes to reflect the most likely candidate from the dictionary.1. When you are in the T9 predictive text input mode, start entering a word by pressing keys to . Press one key per letter. - The word changes as letters are typed. Ignore what’s on the screen until the word is typed com-pletely. - If the word is still incorrect after typing completely, press the up/ down navigation key once or more to cycle through the other word options. Example: Press to type Good Press [Down naviga-tion key] to type Home - If the desired word is missing from the word choice list, add it using the ABC mode.2. Enter the whole word before editing or deleting any keystrokes.3. Complete each word with a space by pressing the key.To delete letters, press the key. Press and hold down the key to erase entire words in succes-sion.n Notice To exit from the text input mode without saving your input, press . The phone goes back to standby mode.text input modeOptions InsertGeneral functions](https://usermanual.wiki/LG-Electronics-USA/M4300.Manual-1/User-Guide-584933-Page-22.png)
![M4300 <23>] Using the ABC modeUse the to keys to enter your text.1. Press the key labelled with the required letter: - Once for the first letter - Twice for the second letter - And so on2. To insert a space, press the key once. To delete letters, press the key. Press and hold down the key to erase the entire words in suc-cession.n Notice Refer to the table below for more information on the characters available using the alphanu-meric keys.M N O 6 Ñ Ö Ø Ò Ó Ô Õ ŒP Q R S 7 ß ŞT U V 8 Ü Ù Ú ÛW X Y Z 9Space key, 0 (Press twice)m n o 6 ñ ö ø ò ó ô õ œp q r s 7 ß şt u v 8 ü ù ú ûw x y z 9Space key, 0 (Press twice)Characters in the order displayKeyUpper case. , / ? ! - : ' '' 1A B C 2 Ä À Á Â Ã Å Æ ÇD E F 3 Ë È É ÊG H I 4 Ï Ì Í Î ĞJ K L 5Lower case. , / ? ! - : ' '' 1a b c 2 ä à á â ã å æ çd e f 3 ë è é êg h i 4 ï ì í î ğj k l 5General functions](https://usermanual.wiki/LG-Electronics-USA/M4300.Manual-1/User-Guide-584933-Page-23.png)
![<24> M4300ContactsYou can save phone numbers and their corresponding names in the memory of your SIM card.In addition, you can save up to 200 numbers and names in the phone memory.The SIM card and phone are both used in the same way in the Contacts menu. (Refer to page 62 through 66 for details.)] Using the 123 (Number) modeThe 123 mode enables you to enter numbers in a text message (a telephone number, for example).Press the keys corresponding to the required digits before manually switching back to the appropriate text entry mode.In call menuYour phone provides a number of control functions that you can use during a call. To access these functions during a call, press the left soft key [Options].During a callThe menu displayed on the handset screen during a call is different to the default main menu displayed when in standby mode, and the options are described below.Making a second callYou can get a number you wish to dial from Contacts to make a second call. Press the right soft key then select Search. To save the dialled number into Contacts dur-ing a call, press the right soft key then select Add new.Switching between two callsTo switch between two calls, press the left soft key [Options], then select Swap or just press the key. You can select one of two calls using up/down navigation keys. To end a call, highlight the phone number using up/down navigation keys then press the key.Answering an incoming callTo answer an incoming call when the handset is ring-ing, simply press the key. The handset is also able to warn you of an incoming call while you are already on a call. A tone sounds in the earpiece, and the display will show that a second call is waiting. This feature, known as Call waiting, is only available if your network supports it. For details of how to activate and deactivate it see Call waiting on page 82.If Call waiting is activated, you can put the first call on hold and answer the second, by pressing General functions](https://usermanual.wiki/LG-Electronics-USA/M4300.Manual-1/User-Guide-584933-Page-24.png)
![M4300 <25> or by selecting left soft key, then Hold & Answer. You can end the current call and answer the waiting call by selecting left soft key and then End & Answer.Rejecting an incoming callYou can reject an incoming call without answering by simply pressing the key.During a call, you can reject an incoming call by pressing the left soft key [Menu] and selecting the Multiparty/Reject or by pressing the key.Muting the microphoneYou can mute the microphone during a call by pressing the left soft key [Options], then selecting Mute. When the handset is muted, the caller cannot hear you, but you can still hear them. The handset can be unmuted by pressing the [Unmute].Switching DTMF tones on during a callTo turn DTMF tones on during a call, press the left soft key, and then select DTMF on. DTMF tones can be turned off the same way. DTMF tones allow your phone to make use of an automated switchboard.Multiparty or conference calls The multiparty or conference service provides you with the ability to have a simultaneous conversation with more than one caller, if your network operator supports this feature. A multiparty call can only be set up when you have one active call and one call on hold, both calls having been answered. Once a multiparty call is set up, calls can be added, disconnected or separated (that is, removed from the multiparty call but still con-nected to you) by the person who set up the multiparty call. These options are all available from the In-Call menu. The maximum callers in a multiparty call are five. Once started, you are in control of the multiparty call, and only you can add callers to the multiparty call.Making a second callYou can make a second call while currently on a call. Enter the phone number and press the key. When the second call is connected, the first call is automatically placed on hold. You can swap between two calls by pressing the left soft key then selecting Swap.General functions](https://usermanual.wiki/LG-Electronics-USA/M4300.Manual-1/User-Guide-584933-Page-25.png)
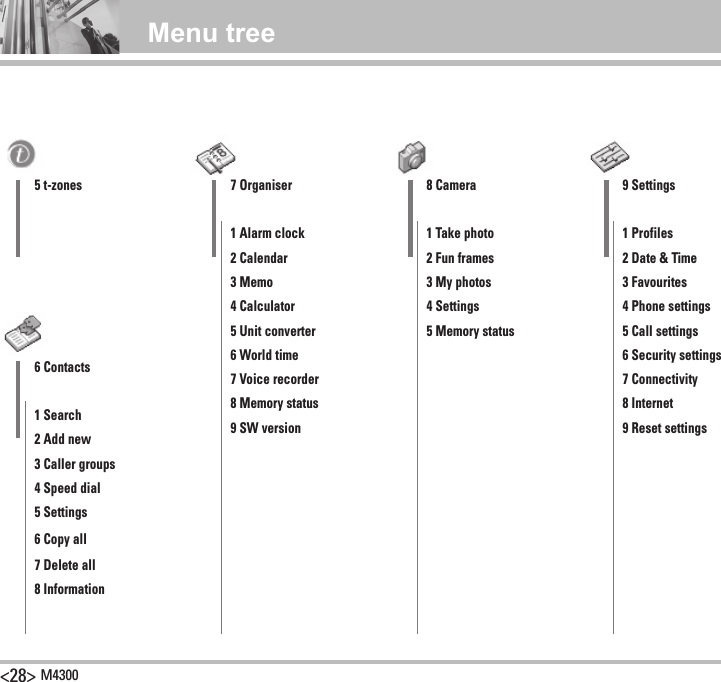
![M4300 <27>This menu is supported by only SAT (SIM Appplication Tool kit) SIM.This menu is supported by non-SAT SIM.Special 16:35Select BackProfiles 16:35Select BackMenu treeThe following illustration shows the available menu structure and indicates the:] Number assigned to each menu option.] Page where you can find the feature description.You can go to the desired menu using the left soft key [Menu], navigation keys and the [OK] key. 1 Special1 Mail & Fax 2 MyMoney3 Extras2 My Media1 Photos2 Pictures3 Sounds4 Music5 Games & more 6 Others 7 External Memory 3 Call register1 Missed calls2 Received calls3 Dialled calls4 Delete recent calls5 Call charges6 GPRS information4 Messages1 New message 2 Inbox 3 Mailbox4 Outbox5 Sent6 Drafts7 Listen to voice mail8 Info message9 Templates0 Settings](https://usermanual.wiki/LG-Electronics-USA/M4300.Manual-1/User-Guide-584933-Page-27.png)
![M4300 <31>Photos Menu-2-1 Opens the My photos. The photos taken with M4300 are stored here. (For more details, refer to page 75.)Pictures Menu-2-2• More pictures: • My pictures: Selects a picture from the list by press-ing the left soft key [View]. Then, you can set it as wallpaper or send the multimedia message with it by pressing the left soft key [Options].Sounds Menu-2-3• t-music: Connects to the t-zones. You can download various ringtones and caller tunes using the WAP. And they are stored in My sounds.• My sounds: You can select a sound from the list. After selecting the desired sound, you can set it as the ring tone, send the sound via SMS or MMS, using the left soft key [Options].Music Menu-2-4The M4300 has a digital music player built-in. You can enjoy listening to MP3 or AAC music files on a memory in your phone using a compatible headset or via the internal loudspeaker.n Note Because of the small dimension of the speaker, in some cases the audio could be distorted, espe-cially at maximum volume and when there are lots of bass sounds. Therefore, we recommend you to use the stereo headset in order to appreci-ate the high quality of your music.• The music player supports] MPEG-1 Layer III: Sampling frequency up to 48KHz, Bit rate up to 192Kbps, stereo] MPEG-2 Layer III: Sampling frequency up to 24KHz, Bit rate up to 160Kbps, stereo] AAC: ADIF, ADTS formats (Sampling frequency up to 48KHz) • Transferring music files to the M4300 You can use the connected mobile phone as a removable disk. When the phone is connected to the computer using the USB data cable, the mobile phone memory is represent-ed by “Removable Disk” in “My Computer” in the Windows application.My Media](https://usermanual.wiki/LG-Electronics-USA/M4300.Manual-1/User-Guide-584933-Page-31.png)
![<32> M4300] You can use the phone as a removable disk if the operating system is Windows 98SE, Windows 2000 or Windows XP.n Note • You may need to install the USB device driver supplied on the CD-ROM depending the operat-ing system. • In case that it does not work properly, please reinstall the driver from the CD-ROM.] The data saved in the phone memory may be lost due to an external impact, lightening, a power fail-ure, static electricity, carelessness on the part of the user or a product defect. In addition, the repair or initialisation of the product may permanently delete the data. Please make sure to backup your important data (MP3 files and other information).• Opening the removable disk1. Select Menu > 7. My Stuff > 4. Removable disk in sequence.2. Enter the security code.3. Click 1. Data transfer.4. Connect the phone and the computer with the data cable (supplied in the sales package).5. Double-click the Removable Disk in My Computer.6. When you have finished using the phone memory, click Exit and take the following steps. (in Caution: Before you remove the cable, it is necessary that you click Exit. Or, the integrity of transferred data is not guaranteed.) - Click on the notification area. - Select USB High-Capacity Storage Device. The fol-lowing message will appear: “Now, you can safely remove the USB high-capacity storage device from the system”. - Then remove the cable.n Note When you are using the phone memory as a removable disk, you cannot make a call, answer a call, use message function or use PC Sync fea-ture.• Formatting the removable disk1. Select Menu > 7. My Stuff > 4. Removable disk in sequence.2. Enter the security code.3. Click 2. Format disk.4. Click Yes and then the OK button.5. Format the removable disk.n Note Format operation will delete all data saved on the removable disk. Do not format in the PC. If the mobile phone is connected to the PC with the data cable, although you can format the disk, the stability of the removable disk operation is not guaranteedMy Media](https://usermanual.wiki/LG-Electronics-USA/M4300.Manual-1/User-Guide-584933-Page-32.png)
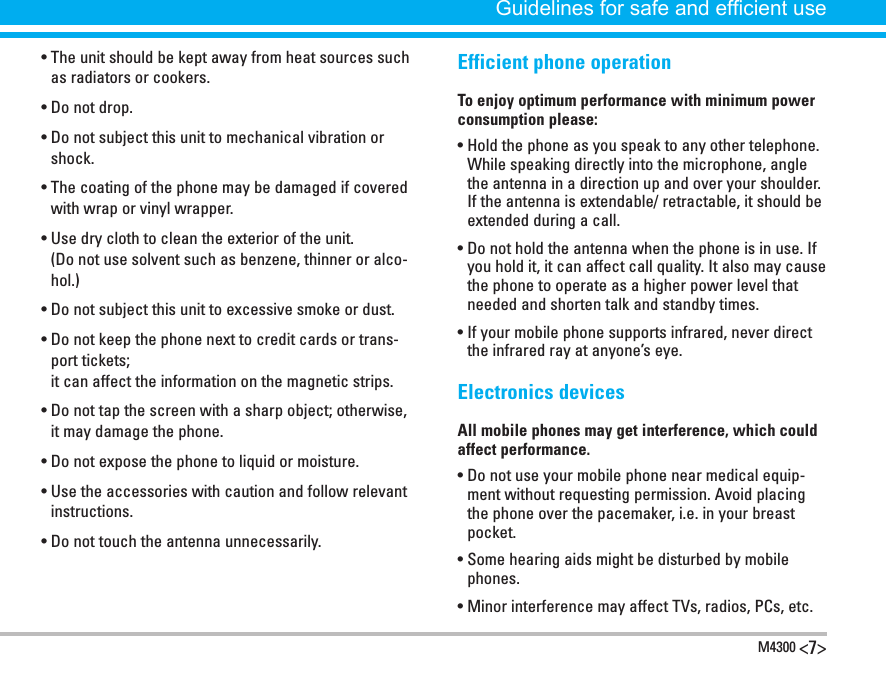
![M4300 <33>• Checking the free space of the removable disk1. Select Menu > 7. My Stuff > 4. Removable disk in sequence.2. Enter the security code.3. Click 3. Memory Status.4. You can check the free space of the removable disk. n Note With the removable disk feature, you can store more than 20 music files onto the phone. But the Playlist on the phone displays up to 20 files.• Audio player Plays the music. Press the and select Audio player. The follow-ing screen is shown up.n Note In case that any invalid file is included in the playlist, an error message will be popped up and go back to the prior screen.• Music controller keysThe following options are available by pressing the left soft key [Options].PlaymodeRunning timeStatus of the music controllerProgressive bar Player skinEqualizer setting valueFile name with the file extensionVolume level6 volume levels including muteRepeat LoopPlay allRepeat allPlay oneRepeat oneA�BMUSIC PHONEVolume UpVolume DownIcon Description- Press this key to start the playback.- Press this key to pause.- (Short press) Skips to the previous track.- (Long press) Rewinds the current track dur-ingthe playback.- (Short press) Skips to the next track.- (Long press) Fast forwards the current track during the playback.Increases/decreases the volume.( )( )( )( )( )( )( )( )( )My Media](https://usermanual.wiki/LG-Electronics-USA/M4300.Manual-1/User-Guide-584933-Page-33.png)
![<34> M4300] View playlist: Select this to view the playlist during the playback.] Equalizer: Select the desired sound style with left/right navigation keys and press the left soft key [Select].] Playmode: Select the desired play mode with up/down navigation keys and press the left soft key [Select]. - Play all: Plays all the tracks. - Repeat all: Repeats all the tracks in the phone in order. - Play one: Plays the current track and stops play-ing. - Repeat one: Keeps playing the current track.You can use the loop feature with the right soft key [Loop]. Press the right soft key [Loop] to set the begin-ning point (A) of the loop. And press the right soft key [A>B] again to set the ending point (B).• Playlist Displays the playlist. The following options are available.] Set as ring tone: After selecting a desired track, press the left soft key [Options] and select this. Sets the selected track as a ring tone.] Delete: Deletes the track from the list.] View details: You can check the file name, size, length and date.] Delete all: Clears out the playlist.• Settings ] Player skin: You can select the desired player skin on the main screen.] Flip setting: Select whether the playback will con-tinue or stop when you open/close the phone.• Memory status You can check the current memory status of the phone.Games & more Menu-2-5• t-games (Menu-2-5-1) Connects to the t-games. You can download games using the WAP. And they are stored in My games & more.• My games & more (Menu-2-5-2) In this menu, you can manage the Java applications installed in your phone. You can play or delete down-loaded applications, or set the connecting option. The downloaded applications are stored in folders. Press the left soft key [Select] to open the selected My Media](https://usermanual.wiki/LG-Electronics-USA/M4300.Manual-1/User-Guide-584933-Page-34.png)
![M4300 <35>folder or launch the selected midlet. Using the right soft key [Menu], the following menus are available. ] New folder: Creates a new folder. ] Move: Moves the selected folder or application to a destination folder. ] Launch: Starts new game. ] Remove: Removes a folder or an application. ] Rename: You can rename the folder or the applica-tion.n Note You cannot remove or rename the preinstalled folder or a game in the folder. Profiles (Menu-2-5-3)• Activate• Settings• Rename Java™ is a technology developed by Sun Microsystems. Similar to the way you would download the Java Applet using the standard Netscape or MS Internet Explorer browsers, Java MIDlet can be download-ed using the WAP enabled phone. Depending on the service provider, all Java based programs such as Java games can be downloaded and run on a phone. Once downloaded, the Java program can be viewed in the My games & more menu where you can select, execute, or delete. The Java pro-gram files saved in the phone are in .JAD or .JAR format.n Note The JAR file is a compressed format of the Java program and the JAD file is a description file that includes all detailed information. From the network, prior to down-load, you can view all detailed file descrip-tions from the JAD file.n Caution Only J2ME (Java 2 Micro Edition) based programs will run in a phone environment. The J2SE (Java 2 Standard Edition) based programs will only run in a PC environ-ment.n Option Some Java applications may require a data connection to be made. Select this to set the connecting options.My Media](https://usermanual.wiki/LG-Electronics-USA/M4300.Manual-1/User-Guide-584933-Page-35.png)
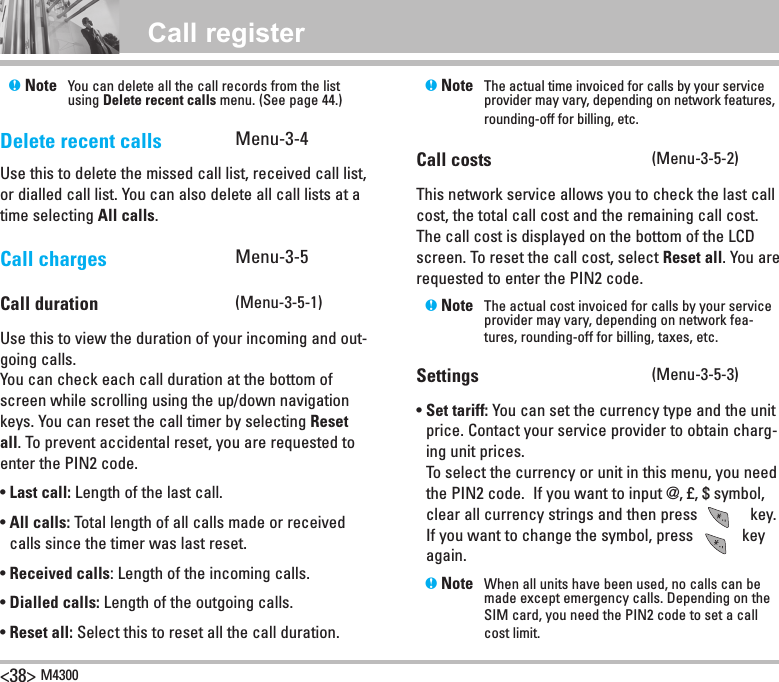
![M4300 <37>My MediaYou can check the record of missed, received, and dialled calls only if the network supports Calling Line Identification (CLI) within the service area.The number and name (if available) are displayed together. You can also view call times and costs.Press the menu key ( ) and select Call register using navigation keys.Missed calls Menu-3-1This option lets you view unanswered calls. After pressing the left soft key [Options], you can also:• View the date and time at which the call was made.• Save the number in Contacts. Enter a name for the number and save it in Contacts.• Send a message to this number.• Delete the call from the list.n Note You can delete all the call records from the list using the Delete recent calls menu. (See page 44.)Received calls Menu-3-2This option lets you view incoming calls. After pressing the left soft key [Options], you can also:• View the date and time at which the call was made.• Save the number in Contacts. Enter a name for the number and save it in Contacts.• Send a message to this number.• Delete the call from the list.n Note You can delete all the call records from the list using the Delete recent calls menu. (See page 44.)Dialled calls Menu-3-3This option lets you view outgoing calls (called or attempted). Using the [Options] key, you can also:• View the date and time at which the call was made.• Save the number in Contacts. Enter a name for the number and save it in Contacts.• Send a message to this number.• Delete the call from the list.](https://usermanual.wiki/LG-Electronics-USA/M4300.Manual-1/User-Guide-584933-Page-37.png)
![M4300 <39>Call register• Set credit: This network service allows you to limit the cost of your calls to the selected charging units. You can make or receive a call up to the specified cost limit. ] Read: You can check the remaining units. ] Change: You can change your charging limit.• Auto display: This network service allows you to see automatically the cost of your last call. If you select On, you can see the cost of the last call when the call is released.GPRS information Menu-3-6You can check the amount of data transferred over the network through the GPRS information option. In addi-tion, you can also view how much time you are online. (GPRS stands for General Packet Radio Service.)Call duration (Menu-3-6-1)You can check the duration of the last call and all calls. You can also reset the call timers by selecting Reset all. Data volume (Menu-3-6-2)You can check the sent data volume, received data volume, and all data volume. You can also reset the counter by selecting Reset all.](https://usermanual.wiki/LG-Electronics-USA/M4300.Manual-1/User-Guide-584933-Page-39.png)
![<40> M4300Press the menu key ( ) and select Messages using navigation keys.New message Menu-4-1Write text message (Menu-4-1-1)Your phone receives voice mail notification messages, and Short Message Service (SMS) messages. Voice mail and SMS are network services. Please con-tact your network operator for more information.When the icon appears, you have received voice mail. When the icon appears, you have received a new text message. If the message memory is full, a message is displayed, the icon flashes and you cannot receive any new messages. Use the Delete option in the Inbox menu to delete obsolete messages. Once there is space in the message memory, any undelivered SMS messages will be received (provided sufficient space is available). You can write and edit text messages up to 10 pages. (approximately 1530 characters)1. Key in your message. For details on how to enter text, refer to pages 28 through 31 (Entering text).2. After you complete the message, to select the required option, press the left soft key [Options]. The following options are available. ] Send: Enter the phone number. Or select the number from the recent numbers or the Contacts after pressing the left soft key [Options]. You can send a message up to 6 phone numbers at a time. Before sending the message, you can set the following options by pressing the right soft key [Settings]. 1) Validity period: Set the length of time for which your text messages will be saved at the SMS center while attempts are made to deliver them to the recipient. Possible values are 1 hour, 12 hours, 1 day, 1 week and the maximum authorized by your network operator. 2) Delivery report: Select whether activate or deac-tivate the report function. When this function is activated, the network informs you whether your message has been delivered or not. 3) Reply charging: Allows the recipients of your text message to send you a reply via your message centre, if the service is provided by the network. ] Save to drafts: Saves the message so that it can be sent later.Call register](https://usermanual.wiki/LG-Electronics-USA/M4300.Manual-1/User-Guide-584933-Page-40.png)
![M4300 <41>Messages ] Font & Alignment: Select the desired font size and style for the message using the left/right naviga-tion keys. Select where to align text. ] Colour: Select the desired foreground colour using the left/right navigation key. Then, press the down navigation key and select the background colour using the left/right navigation key. ] T9 dictionary: Select the language for T9 input mode. You can also deactivate T9 input mode by selecting T9 off. ] Exit: Exits from the New message menu.3. You can also send attachments with the message by pressing the right soft key [Insert], while you’re entering a message. ] Picture: Sends and receives text messages that contain pictures, known as ‘picture messages’. Several preset pictures are available in the phone and they can be replaced with new ones received from other sources. ] Sound: If available, you can attach a sound to a short message. ] Text templates: You can select a text template already set in the phone. ] Phonebook: You can add phone numbers to the message. ] Symbol: You can attach special characters.Write multimedia message (Menu-4-1-2)A multimedia message can contain text, images, and/or sound clips. This feature can be used only if it is sup-ported by your network operator or service provider. Only the devices that offer compatible multimedia mes-sage or e-mail features can receive and send multime-dia messages. You can create a multimedia message up to 10 slides. (approximately 100 KB)1. After entering the subject of the message, press the OK key.2. Key in the text message. Using the right soft key [Insert], you can insert a symbol, a picture, a sound, a voice memo, text templates, phone numbers stored in the phonebook or a signature.3. Press the left soft key [Options]. The following options are available. ] Send: You can send the multimedia message up to 6 recipients at the same time. 1) Key in the phone number. You can also search the following options: - Priority: Set the priority of the MMS.](https://usermanual.wiki/LG-Electronics-USA/M4300.Manual-1/User-Guide-584933-Page-41.png)
![<42> M4300Messages - Validity period: Set the duration for keeping the multimedia messages on the network server. Possible values are 1 hour, 12 hours, 1 day, 1 week and the maximum authorized by the network oper-ator. - Delivery report: Select Yes to activate the report function. When this function is activated, the net-work informs you whether or not your message has been delivered. 3) Press the left soft key [Send]. ] Preview: Select this option to check out the mul-timedia message you've created. Each slide is sequentially played back automatically. You can also move to another slide from the currently played slide using the left/right navigation keys. To replay the message, press the left soft key [Replay]. ] Save: Saves the message in drafts or as a template. ] Add slide: Add a slide before or after the current slide. ] Move to slide: Select this option to move to anoth-er slide from the current slide. ] Delete slide: Deletes the current slide. ] Set slide format: You can set the following slide format. - Set timer: Enter the timer in each field using the numeric keypad. - Set color: ] T9 dictionary: Select the T9 language for T9 input mode. You can also deactivate the T9 input mode by selecting T9 off. ] Exit: Exits from the Write multimedia message menu. Write email (Menu-4-1-3) ] Account: ] Access point: ] Signature:Inbox Menu-4-2You will be alerted when you have received messages. And they will be stored in the Inbox.Press the left soft key [Menu] and select Inbox. Or, you can take a shortcut by pressing the right navi-gation key ( ) in standby mode.In the Inbox, you can identify each message by icons. For detail, see the icon description below.](https://usermanual.wiki/LG-Electronics-USA/M4300.Manual-1/User-Guide-584933-Page-42.png)
![M4300 <43>MessagesEach received message has the following options available. Press the left soft key [Options].] View: You can view the selected message. ] Reply: You can reply to the sender with a text mes-sage or a multimedia message. ] Forward: You can forward the selected message to other recipients.] Return call: You can call back to the sender.] Delete: Deletes the selected message from inbox.] Extract: You can extract picture, sound, sender’s number, URL, email address and so on from the mes-sage. They will be saved in My folder, Contacts, or Bookmarks.] View information: You can view the information of the message: the sender's address, subject (only for multimedia message), the date and time when the message has arrived, message type and size, and the priority (only for multimedia message).] Replay: You can replay the selected multimedia mes-sage. (Only for multimedia message)] Delete all: Deletes all the messages in the inbox folder.] Receive: When you receive a multimedia notification message, you need to select this option to download the multimedia message. (Only for multimedia notifi-cation message)] Cancel: You can cancel downloading the multimedia message. (Only for multimedia notification message)Mailbox Menu-4-31. Select Mailbox.2. Select 3mail to retrieve messages from the Server List.3. To retrieve new messages in the Mail Header screen, select Retrieve to retrieve the new Mail Header List.4. Select your desired message from the retrieved mail headers to retrieve the mail contents from the server. Icon DescriptionMultimedia messageShort messageSIM messageReadNotified multimedia message](https://usermanual.wiki/LG-Electronics-USA/M4300.Manual-1/User-Guide-584933-Page-43.png)
![<44> M4300You can use the following functions by using the left soft key [Options]. ] New message: You can write a new message.] Reply with: You can reply a selected message.] Retrieve: You can retrieve a selected message.] Delete: You can delete a selected message.] Open: You can view the selected message.] Forward: You can forward the selected message.] Save to contact: You can save the sender’s address to the contacts.] Mark / Unmark: You can mark or unmark the select-ed message.Outbox Menu-4-4All the messages you have sent are stored in the Outbox folder. You can view the list and contents of messages. In the outbox message list, you can verify if the trans-mission was successful. If the transmission was failed, “(Failed)” is displayed before the recipient. You can also check whether you have received the delivery report through the following icons. Icon DescriptionMultimedia messageShort messageDelivery reported messageMessagesIn each message, the following options are available by pressing the left soft key [Options]. The messages of which transmission was com-pleted has the following options.] View: You can view the selected message.] Forward: You can forward the selected message to other recipients.] Delete: Deletes the selected message from outbox.] View information: You can view the information of selected message: subject (only for multimedia mes-sage), the date and time when you sent it, message type and size, the priority (only for multimedia mes-sage), and recipients.] Delete all : Deletes all the messages in the outbox folder. The messages of which transmission is in progress has the following options.] View : You can view the selected message.] Send: Select this to send it again.](https://usermanual.wiki/LG-Electronics-USA/M4300.Manual-1/User-Guide-584933-Page-44.png)
![M4300 <45>Messages] Delete: Cancels transmitting the message and deletes the message.] View information: You can view the information of selected message: subject (only for multimedia mes-sage), the date and time when you sent it, message type and size, the priority (only for multimedia mes-sage), and recipients.] Send all: Sends all the messages of which transmis-sion is in progress again.] Cancel all: Cancels all the message transmission.] Delete all: Deletes all the messages from drafts folder.Icon DescriptionMultimedia messageText messageSent Menu-4-5Drafts Menu-4-6You can view the messages saved as a draft. The draft messages are listed with the date and time when they were saved. Scroll through the list using up/down navi-gation keys.Each draft has the following options. Press the left soft key [Options].] View: You can view the selected message.] Edit: You can edit the selected message.] Delete: Deletes the selected message from the drafts folder.] Information: You can view the information of select-ed message: subject (only for multimedia message), the date and time when saved, message type and size and the priority (only for multimedia message).](https://usermanual.wiki/LG-Electronics-USA/M4300.Manual-1/User-Guide-584933-Page-45.png)