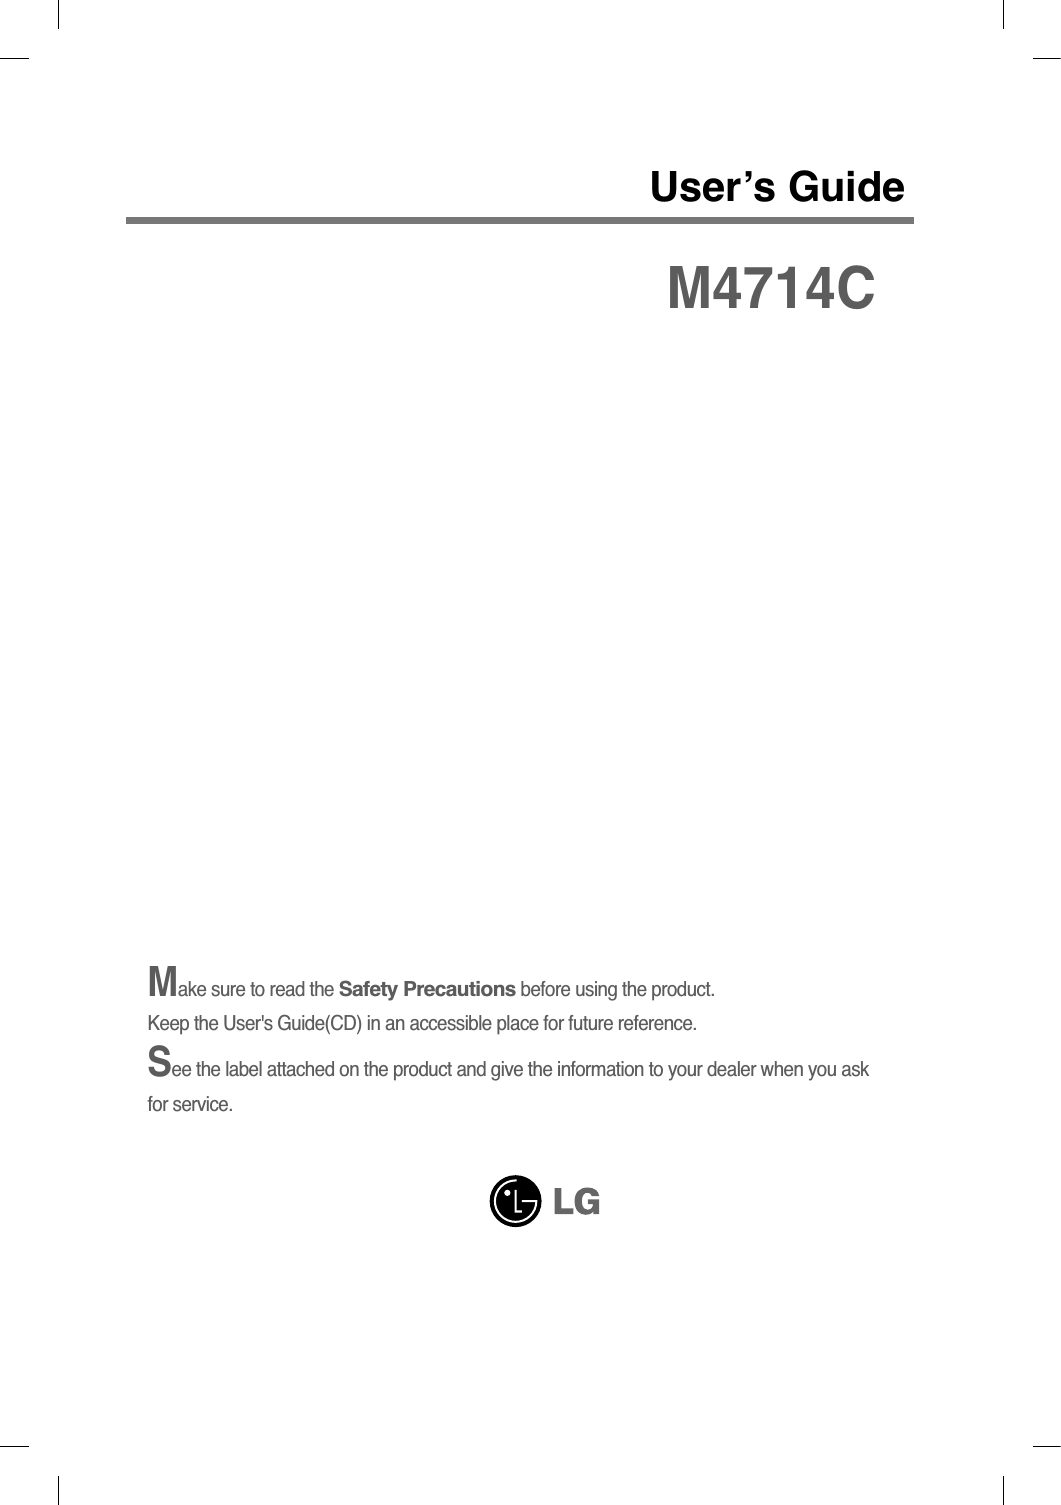
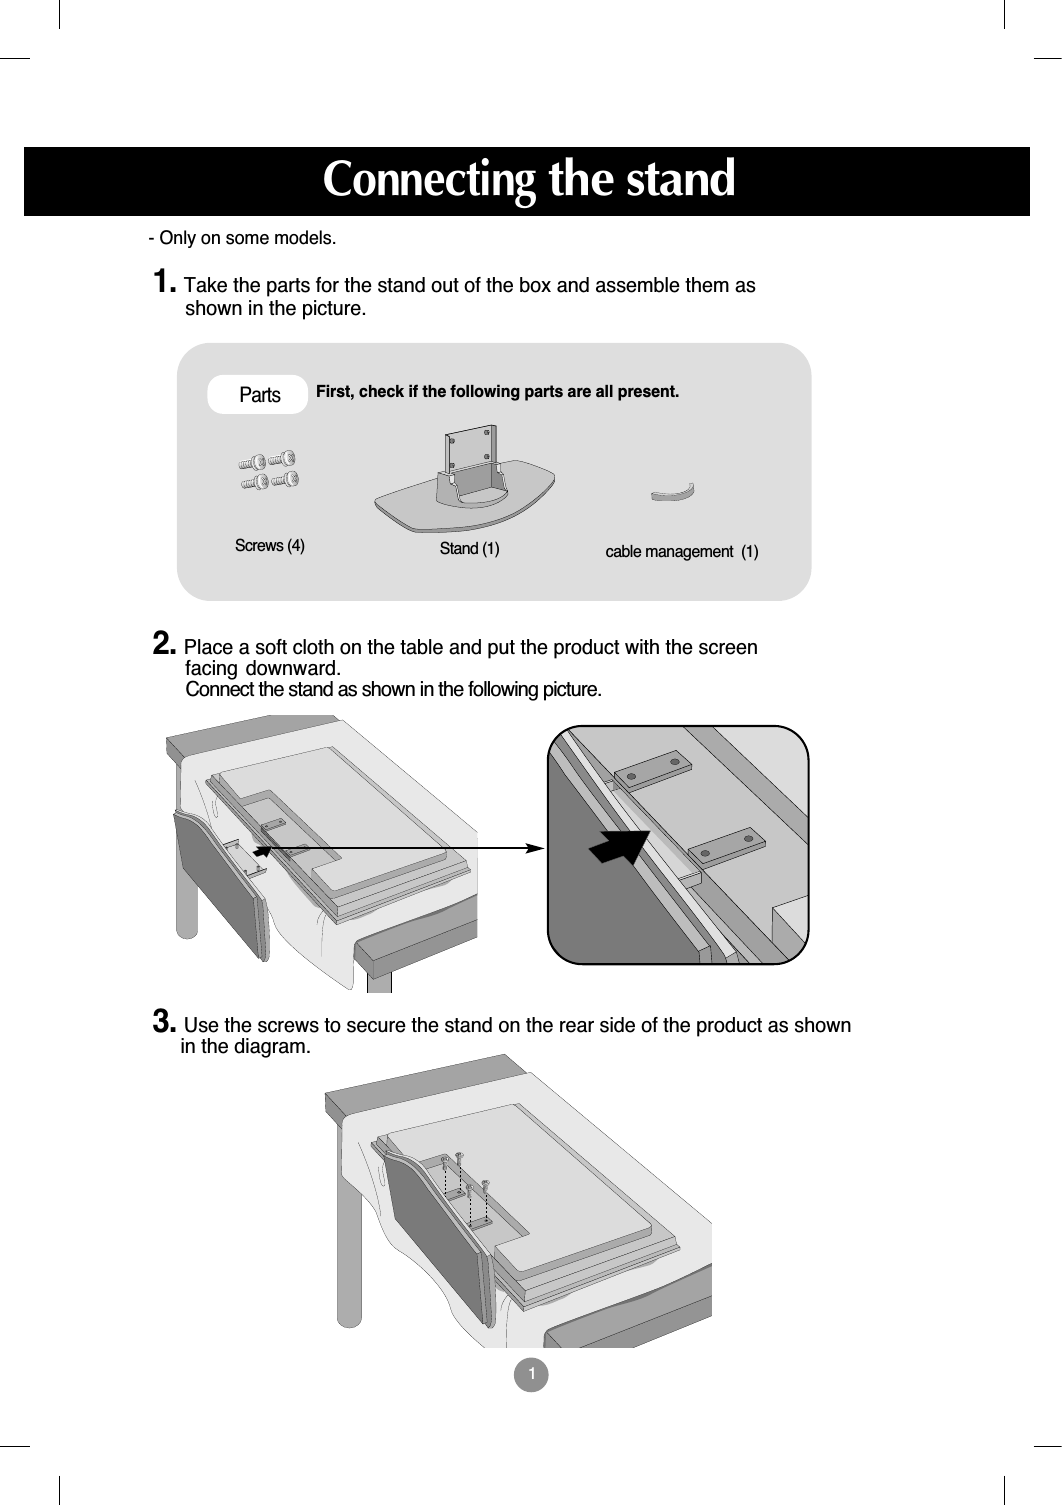
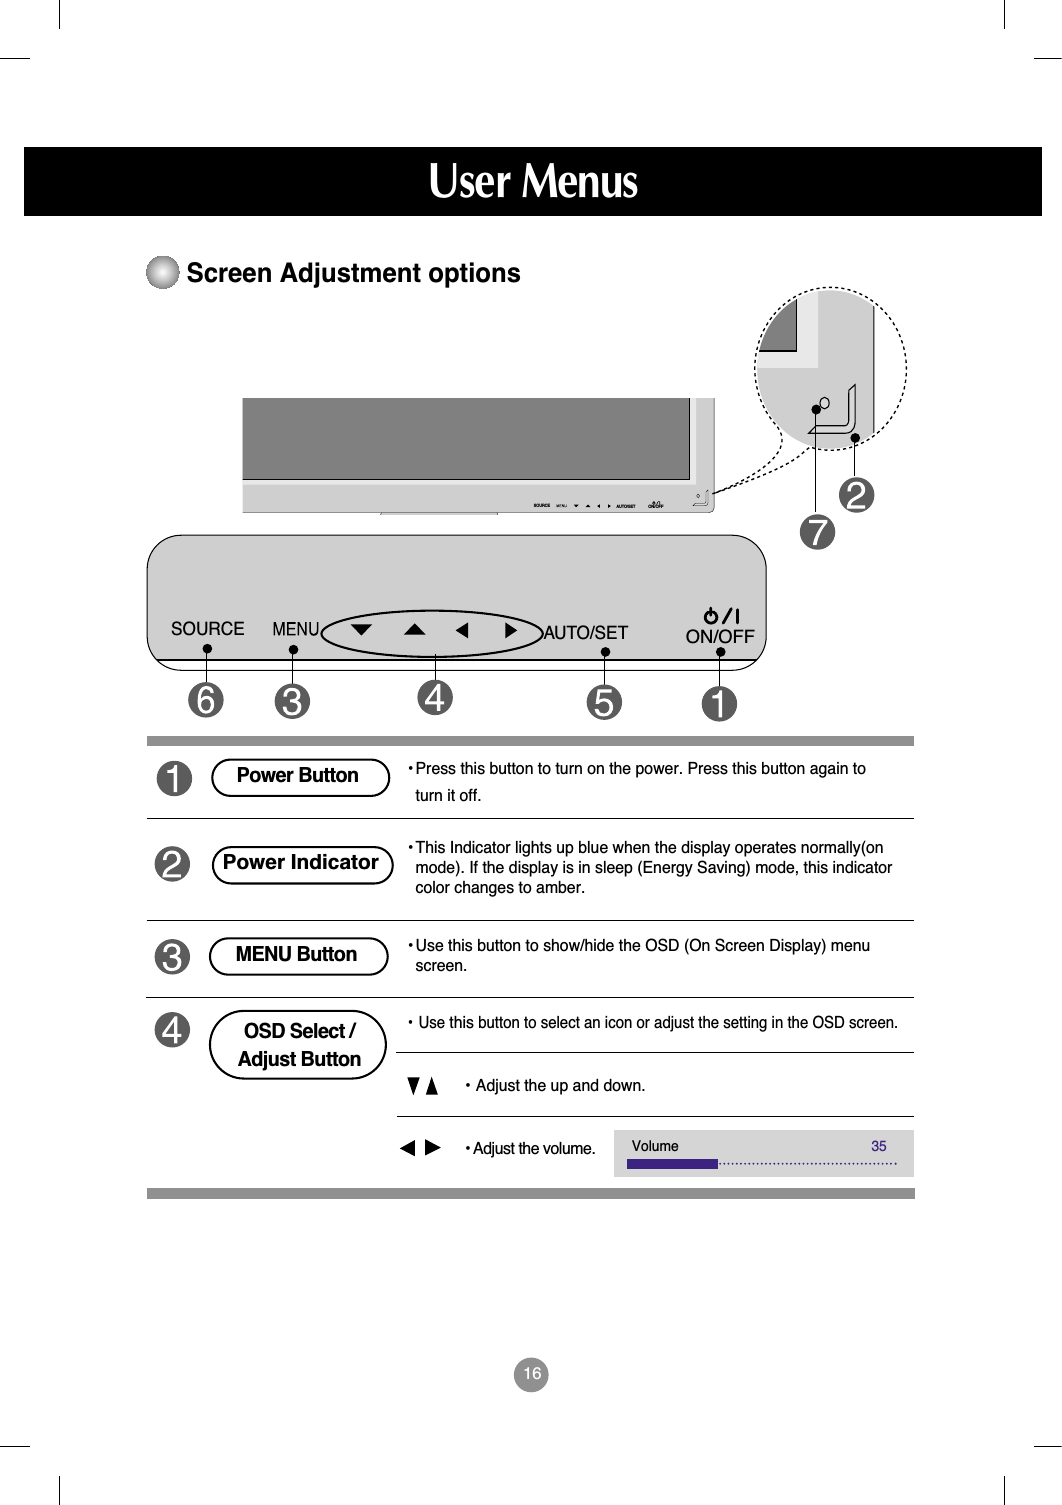
LG Electronics USA M4714CG LCD MONITOR User Manual User s Manual H ok
LG Electronics USA LCD MONITOR User s Manual H ok
UserManual.wiki
>
LG Electronics USA
>
M4714CG User Manual
USERS MANUAL
Navigation menu
Upload a User Manual
Namespaces
Wiki Guide
HTML
PDF
Info
Views
User Manual
Discussion / Help
Navigation

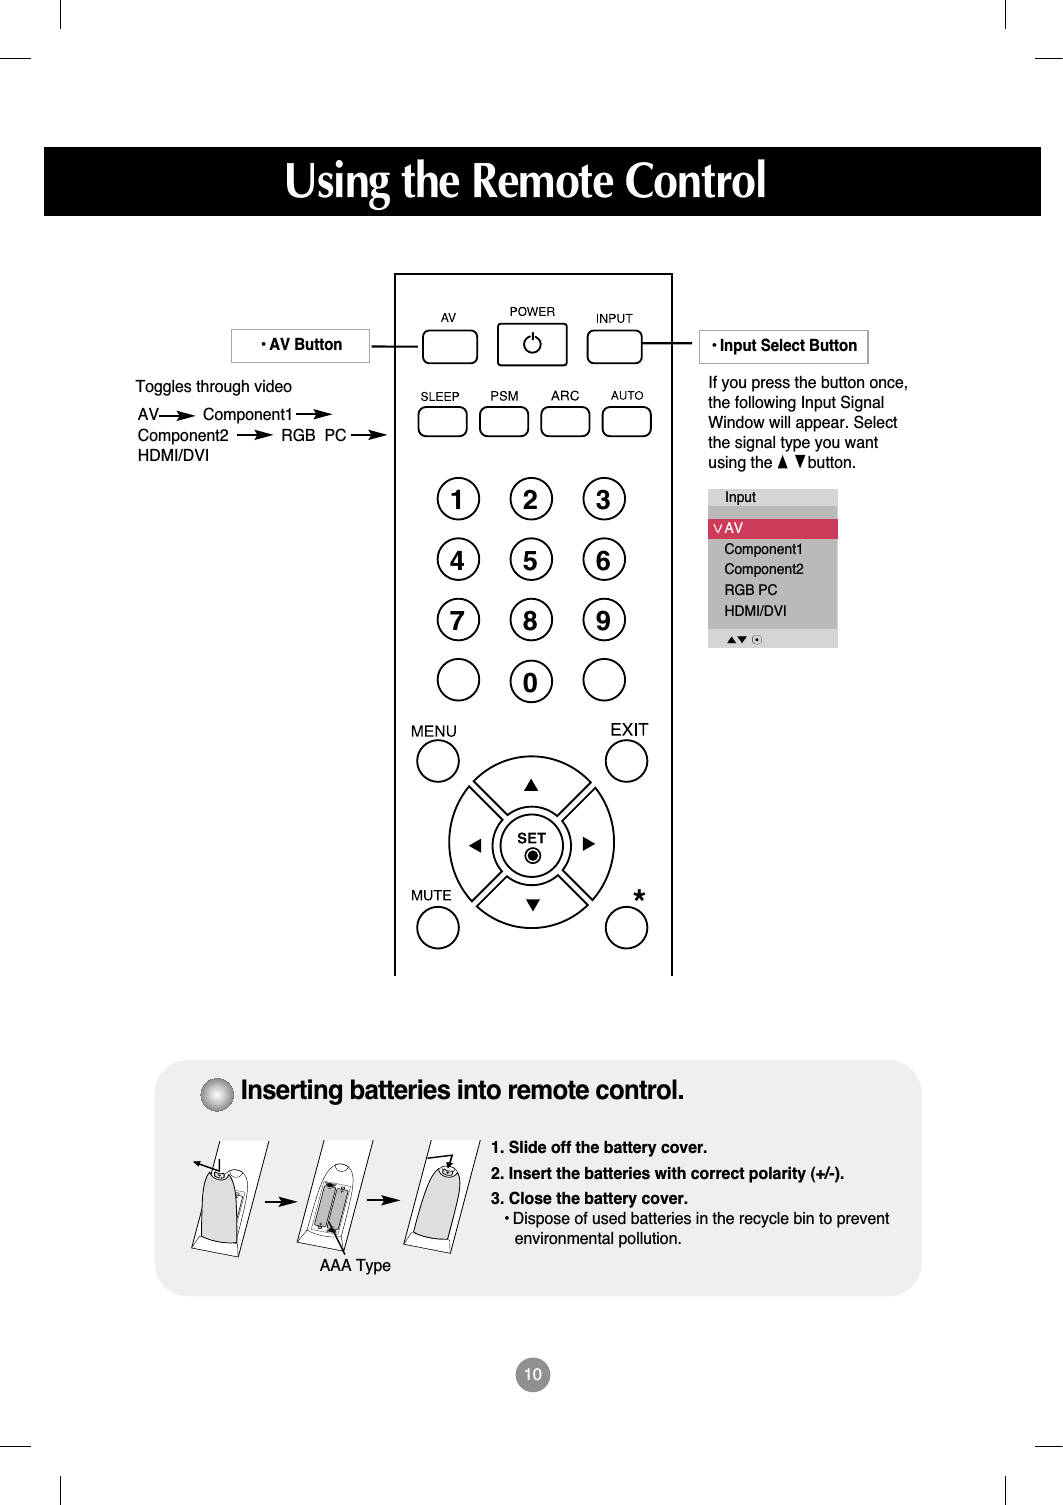
![17• This is where the unit receives signals from the remote control.Screen Adjustment options[For PC Analog signal]AUTO/SET ButtonAV Composite Video, Separate VideoComponent 1 HDTV, DVDComponent 2 HDTV, DVDRGB PC 15-pin D-Sub analog signalHDMI/DVI Digital signal- Toggles between inputsSOURCE ButtonSOURCE AUTO/SETIR ReceiverUser Menus[When 1920 X1080 is selected]InputAVComponent1Component2RGB PCHDMI/DVI](https://usermanual.wiki/LG-Electronics-USA/M4714CG/User-Guide-977043-Page-19.png)
![19How to adjust the OSD (On Screen Display) screen• Use the remote control to adjust the OSD screen.How to adjust the screen automaticallyPress the AUTO/SET button (AUTO button on a remote Control) in thePC analog signal. Then optimal screen settings will be selected that fitinto the current mode. If adjustment is not satisfactory, you can adjustthe screen manually.Press the MENU Button, then the main menu of the OSD appears.To access a control, use the Buttons. When the icon you want becomes highlighted, press the SET Button.Use the Buttons to adjust the item to the desired level.Accept the changes by pressing the SET Button.Exit the OSD by pressing the EXIT Button.123456Pops upthe menuscreenMove whereyou want toadjustMove whereyou want toadjustSelect amenu iconSelect amenu icon Adjust the status SaveadjustmentExit from themenu screen.User Menus[When 1920 X1080 is selected]](https://usermanual.wiki/LG-Electronics-USA/M4714CG/User-Guide-977043-Page-21.png)
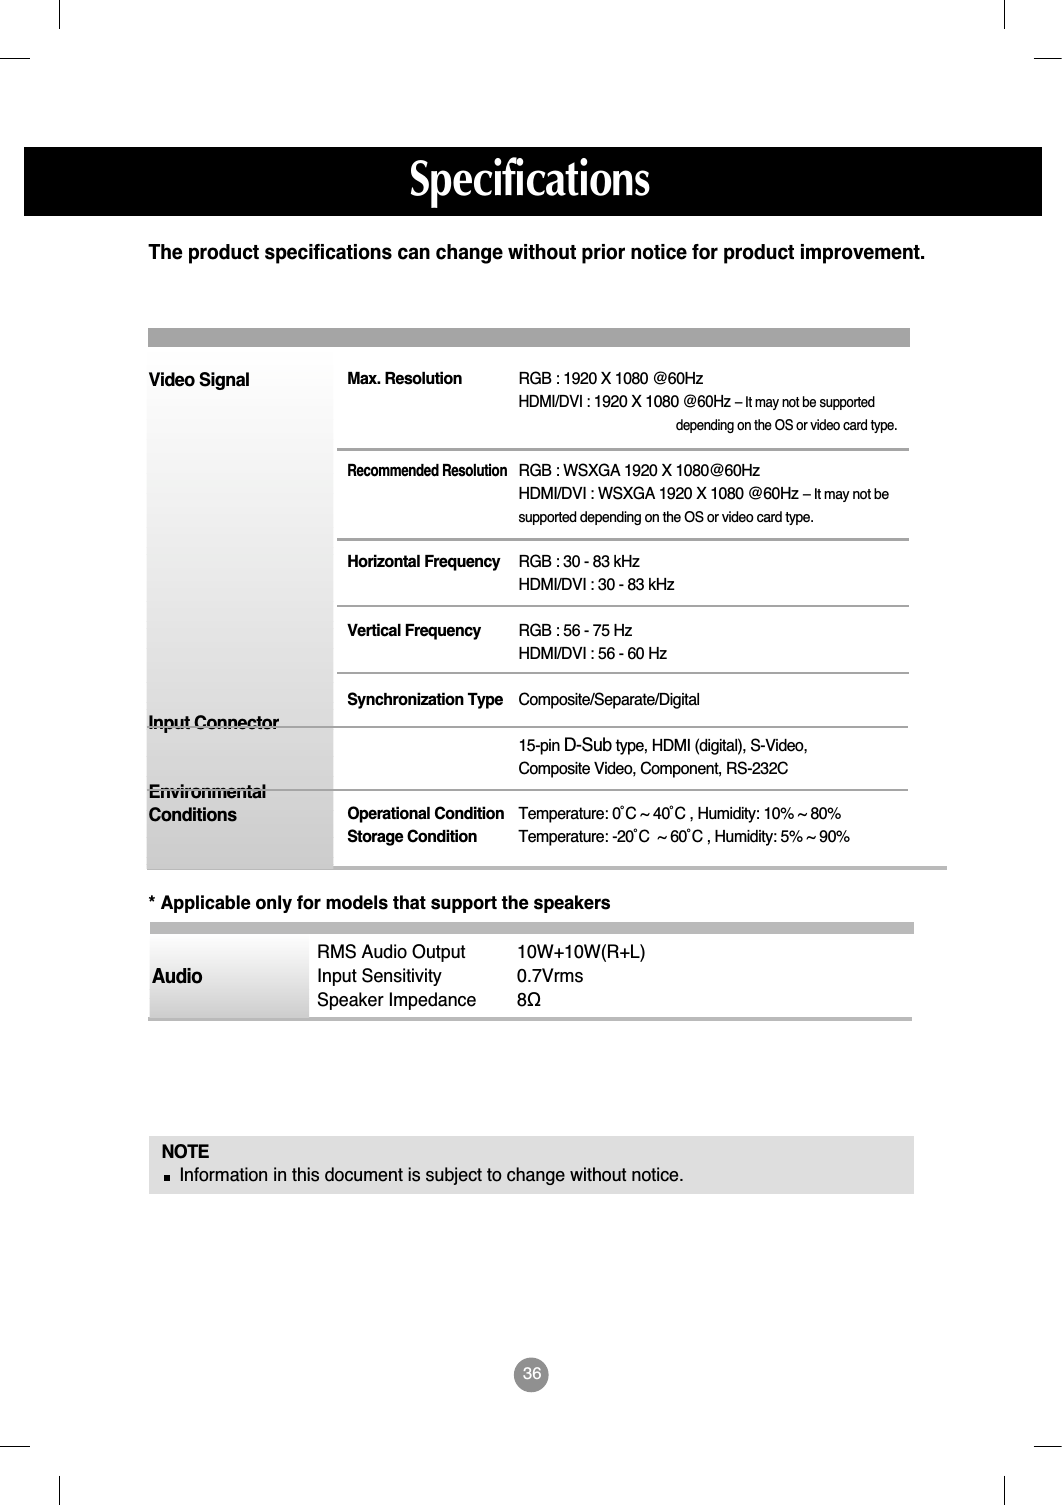
![35LCD PanelPower Dimensions&WeightNOTEInformation in this document is subject to change without notice.47 inches (119.28 cm) TFT (Thin Film Transistor) LCD (Liquid Crystal Display) PanelVisible diagonal size: 119.28 cm0.5415 mm (Pixel Pitch)Rated Voltage AC 100-240V~ 50/60Hz 3.0APower Consumption On Mode : 300W Typ.Sleep Mode : ≤ 1W (RGB) / 4W(HDMI)Off Mode : ≤ 1W The product specifications can change without prior notice for product improvement.Specifications M4714CWidth x Height x Depth[1] 111.70 cm (43.98 inches) x 75.78 cm (29.83 inches) x 30.26 cm (11.91 inches)[2] 111.70 cm (43.98 inches) x 66.10 cm (26.02 inches) x 11.87 cm (4.67 inches)[1] 111.70 cm (43.98 inches) x 75.78 cm (29.83 inches) x 30.26 cm (11.91 inches)[2] 111.70 cm (43.98 inches) x 66.10 cm (26.02 inches) x 11.87 cm (4.67 inches)Net[1] 32.82 kg (72.35 lbs) [2] 28.80 kg (63.5 lbs)[3] 33.56 kg (74 lbs) [4] 29.55 kg (65.15 lbs)[1] WH[2] WHDD[3] WHDD[4] WH](https://usermanual.wiki/LG-Electronics-USA/M4714CG/User-Guide-977043-Page-37.png)