LG Electronics USA ME770 Cellular/PCS GSM/EDGE Phone with Bluetooth User Manual
LG Electronics USA Cellular/PCS GSM/EDGE Phone with Bluetooth
UserManual.wiki
>
LG Electronics USA
>
ME770 User Manual
Users Manual
Navigation menu
Upload a User Manual
Namespaces
Wiki Guide
HTML
PDF
Info
Views
User Manual
Discussion / Help
Navigation
![8For Your SafetyImportant InformationThis user guide contains important information on the use andoperation of this phone. Please read all the informationcarefully for optimal performance and to prevent any damageto or misuse of the phone. Any changes or modifications notexpressly approved in this user guide could void your warrantyfor this equipment.Before You StartSafety InstructionsWARNING! To reduce the possibility of electric shock, do notexpose your phone to high humidity areas, such as thebathroom, swimming pool, etc.Always store your phone away from heat. Never store yourphone in settings that may expose it to temperatures less than32°F or greater than 104°F, such as outside during extremeweather conditions or in your car on a hot day. Exposure toexcessive cold or heat will result in malfunction, damageand/or catastrophic failure.Be careful when using your phone near other electronicdevices. RF emissions from your mobile phone may affectnearby in adequately shielded electronic equipment. Youshould consult with manufacturers of any personal medicaldevices such as pacemakers and hearing aides to determine ifthey are susceptible to interference from your mobile phone.Turn off your phone in a medical facility or at a gas station.Never place your phone in a microwave oven as this willcause the battery to explode.IMPORTANT! Please read the TIA SAFETY INFORMATION onpage 78 before using your phone.Safety InformationRead these simple guidelines. Breaking the rules may bedangerous or illegal. Further detailed information is given in thisuser guide.]Never use an unapproved battery since this could damagethe phone and/or battery and could cause the battery toexplode.]Never place your phone in a microwave oven as it willcause the battery to explode.]Do not dispose of your battery by fire or with hazardous orflammable materials.]Make sure that no sharp-edged items come into contactwith the battery. There is a risk of this causing a fire.]Store the battery in a place out of reach of children.]Be careful that children do not swallow any parts such asrubber plugs (earphone, connection parts of the phone,etc.). This could cause asphyxiation or suffocation.](https://usermanual.wiki/LG-Electronics-USA/ME770/User-Guide-775020-Page-8.png)
![9For Your Safety]Unplug the power cord and charger during lightning stormsto avoid electric shock or fire.]When riding in a car, do not leave your phone or set up thehands-free kit near to the air bag. If wireless equipment isimproperly installed and the air bag is activated, you may beseriously injured.]Do not use a hand-held phone while driving.]Do not use the phone in areas where its use is prohibited.(For example: aircraft).]Do not expose the battery charger or adapter to directsunlight or use it in places with high humidity, such as abathroom.]Never store your phone in temperatures less than- 4°F orgreater than 122°F.]Do not use harsh chemicals (such as alcohol, benzene,thinners, etc.) or detergents to clean your phone. There is arisk of this causing a fire.]Do not drop, strike, or shake your phone severely. Suchactions may harm the internal circuit boards of the phone.]Do not use your phone in high explosive areas as the phonemay generate sparks.]Do not damage the power cord by bending, twisting, pulling,or heating. Do not use the plug if it is loose as it may causea fire or electric shock.]Do not place any heavy items on the power cord. Do notallow the power cord to be crimped as it may cause fire orelectric shock.]Do not handle the phone with wet hands while it is beingcharged. It may cause an electric shock or seriouslydamage your phone.]Do not disassemble the phone.]Do not place or answer calls while charging the phone as itmay short-circuit the phone and/or cause electric shock orfire.]Only use the batteries, antennas, and chargers provided byLG. The warranty will not be applied to products provided byother suppliers.]Only authorized personnel should service the phone and itsaccessories. Faulty installation or service may result inaccidents and consequently invalidate the warranty.]Do not hold or let the antenna come in contact with yourbody during a call.]An emergency call can be made only within a service area.For an emergency call, make sure that you are within aservice area and that the phone is turned on.](https://usermanual.wiki/LG-Electronics-USA/ME770/User-Guide-775020-Page-9.png)
![11For Your SafetyVehicle Mounted External Antenna(optional, if available)A minimum separation distance of 8 inches (20cm) must bemaintained between the user/bystander and the vehiclemounted external antenna to satisfy FCC RF exposurerequirements. For more information about RF exposure, visitthe FCC website at www.fcc.govFCC Part 15 Class B ComplianceThis device and its accessories comply with part 15 of FCCrules. Operation is subject to the following two conditions: (1) This device and its accessories may not cause harmfulinterference, and (2) this device and its accessories mustaccept any interference received, including interference thatmay cause undesired operation.Cautions for Battery]Do not disassemble.]Do not short-circuit.]Do not expose to high temperature: 60°C (140°F).]]Do not incinerate.Battery Disposal]Please dispose of your battery properly or bring to yourlocal wireless carrier for recycling.]Do not dispose in fire or with hazardous or flammablematerials.Adapter (Charger) Cautions]Using the wrong battery charger could damage your phoneand void your warranty.]The adapter or battery charger is intended for indoor useonly.Do not expose the adapter or battery charger to direct sunlightor use it in places with high humidity, such as the bathroom.](https://usermanual.wiki/LG-Electronics-USA/ME770/User-Guide-775020-Page-11.png)
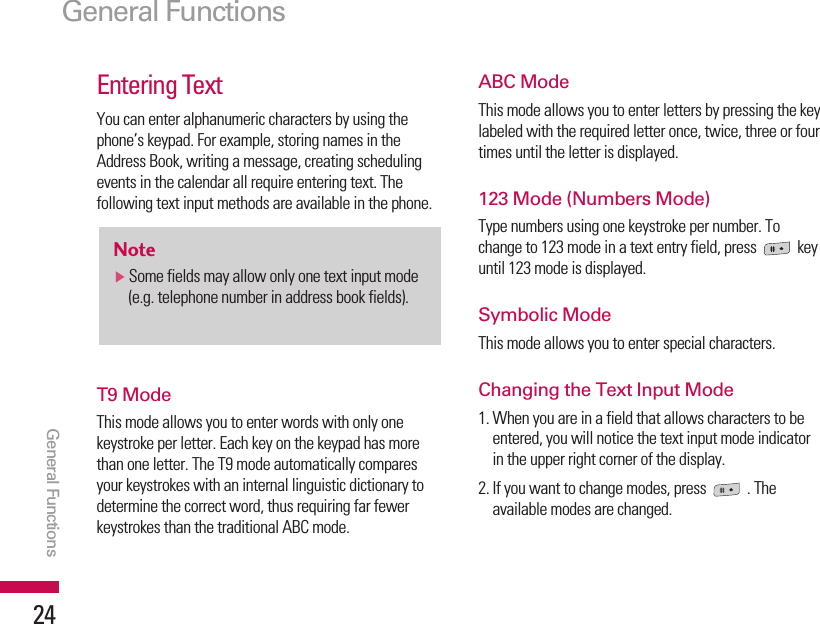

![Using the 123 (Numbers) ModeThe 123 Mode enables you to enter numbers in a textmessage (a telephone number, for example).Press the keys corresponding to the required digits beforemanually switching back to the appropriate text entrymode.Using the Symbol ModeThe Symbol Mode enables you to enter various symbolsor special characters.To enter a symbol, press the key. Use thenavigation keys to select the desired symbol and pressthe [OK] key.General Functions27](https://usermanual.wiki/LG-Electronics-USA/ME770/User-Guide-775020-Page-26.png)
![Your phone provides a number of control functions thatyou can use during a call. To access these functionsduring a call, press the left soft key [Options].During a CallThe menu displayed on the handset screen during a callis different than the default main menu displayed whenin idle screen, and the options are described below.Speaker phoneDuring call you can activate speaker phone selectingOptions/Speaker phone on, or by pressing OK button. Tomute speaker phone, select Options/Speaker phone off,or press OK button one more time.Making a Second Call (Network Dependent)You can get a number you wish to dial from the AddressBook to make a second call. Press the Right soft key thenselect Contacts.Swapping Between Two CallsTo switch between two calls, press key or the leftsoft key, and then select Swap.Answering an Incoming CallTo answer an incoming call when the handset is ringing,simply press the key. The handset is also able towarn you of an incoming call while you are already on acall.A tone sounds in the earpiece, and the display will showthat a second call is waiting.In-Call MenuIn-Call Menu29](https://usermanual.wiki/LG-Electronics-USA/ME770/User-Guide-775020-Page-28.png)
![This feature, known as Call waiting, is only available ifyour network supports it. For details of how to activateand deactivate it see Call waiting (Menu 9.5.4)If Call waiting is on, you can put the first call on hold andanswer the second, by pressing .Rejecting an Incoming CallYou can reject an incoming call without answering bysimply pressing the key.During a call, you can reject an incoming call by pressingthe key.Muting the MicrophoneYou can mute the microphone during a call by pressingthe [Options] key then selecting [Mute]. The handset canbe unmuted by pressing the [Unmute]. When the handsetis muted, the caller cannot hear you, but you can stillhear them.DTMF tones while callingTo switch on DTMF tones while calling (e.g. to use thephone with an automatic switchboard) press the key[Options] followed by Send DTMF - DTMF on. SelectDTMF off to disable DTMF tones. DTMF tones arenormally on.Conference CallsThe conference service provides you with the ability tohave a simultaneous conversation with more than onecaller, if your network service provider supports thisfeature. A conference call can only be set up when youhave one active call and one call on hold, both callshaving been answered. Once a conference call is set up,calls may be added, disconnected or separated (that is,removed from the conference call but still connected toyou) by the person who set up the conference call. Theseoptions are all available from the In-Call menu. Themaximum callers in a conference call are five. Oncestarted, you are in control of the conference call, and onlyyou can add calls to the conference call.In-Call MenuIn-Call Menu30](https://usermanual.wiki/LG-Electronics-USA/ME770/User-Guide-775020-Page-29.png)
![Making a Second CallYou can make a second call while currently on a call.Enter the second number and press the . When thesecond call is connected, the first call is automaticallyplaced on hold. You can swap between calls, by pressingthe key.Setting Up a Conference CallTo set up a conference call, place one call on hold andwhile the active call is on, press the left soft key and thenselect the Join menu of Conference call.Activate the Conference Call on HoldTo activate a conference call on hold, press the key. Alternatively press the left soft key [Options] andselect Conference/Hold all calls. Other users on hold willstay connected. To return to conference call mode, pressthe left soft key [Options] followed by Conferencecall.Adding Calls to the Conference CallTo add a call to an existing conference call, press the leftsoft key, and then select the Join menu of Conferencecall.Private Call in a Conference CallTo have a private call with one caller from a conferencecall, display the number of the caller you wish to talk toon the screen, then press the left soft key. Select thePrivate menu of Conference call to put all the othercallers on hold.Ending a Conference CallCurrently displayed caller from a conference call can bedisconnected by pressing the key.In-Call Menu31](https://usermanual.wiki/LG-Electronics-USA/ME770/User-Guide-775020-Page-30.png)
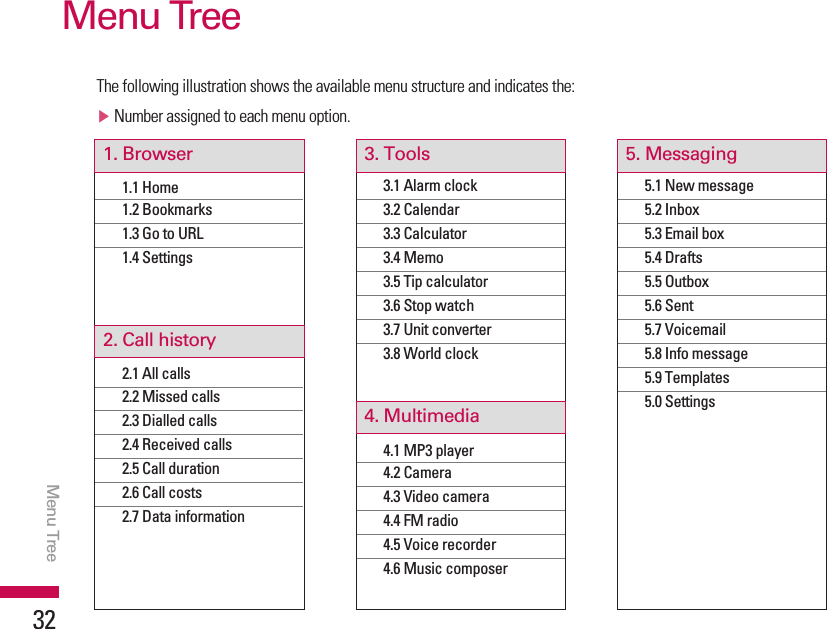
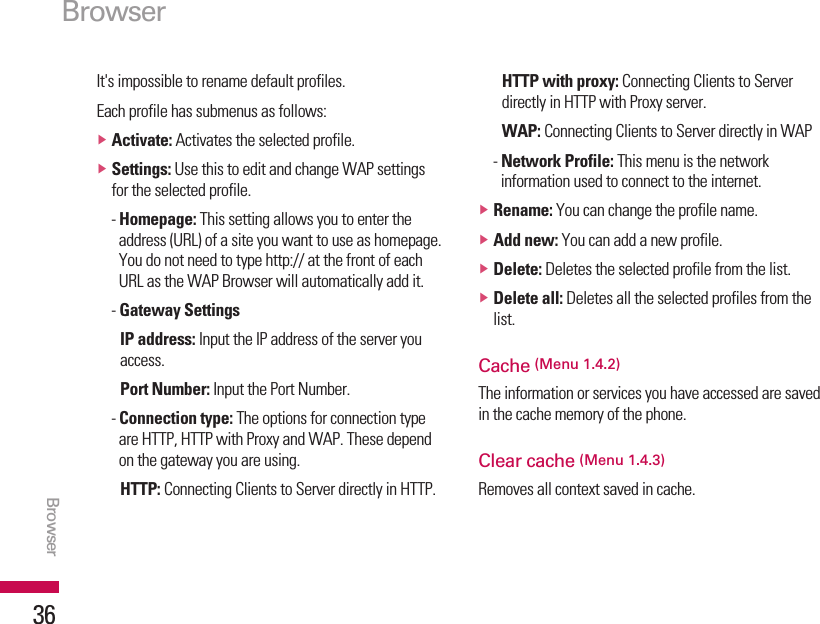
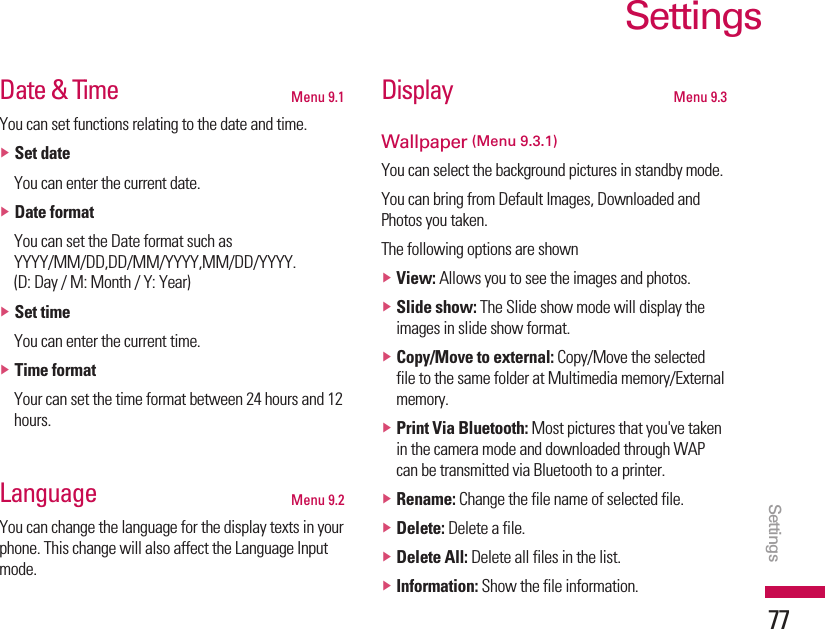
![Home Menu 1.1Connects to a homepage. The homepage will be the sitewhich is defined in the activated profile. It will be definedby the service provider if you have not defined it in theactivated profile.Bookmarks Menu 1.2This menu allows you to store the URL of favourite webpages for easy access at a later time.To create a bookmark1. Press the left soft key [Add].2. After entering the desired URL and title, press the OKkey.After selecting a desired bookmark, the following optionsare available.vConnect: Connects to the selected bookmark.vAdd new: Select this to create a new bookmark.vEdit: You can edit the URL and/or the title of theselected bookmark.vDelete: Deletes the selected bookmark.vDelete all: Deletes all the bookmarks.Go to URL Menu 1.3You can connect directly to the site you want. Afterentering a specific URL, press the OK key.Settings Menu 1.4You can set the profile, cache, cookie and securityrelated to internet service.Profiles (Menu 1.4.1)A profile is the network information used to connect tothe Internet.There are default profiles for some operators, stored inphone memory.Browser35](https://usermanual.wiki/LG-Electronics-USA/ME770/User-Guide-775020-Page-34.png)

![Alarm clock Menu 3.1You can set an alarm clock to go off at a specified time.1. Select On and enter the alarm time you want.2. Select the repeat period: Once, Mon-Fri, Mon-Sat,Sat-Wed, Sat-Thr, Everyday.3. Select the alarm tone you want and press [Set].Calendar Menu 3.2When you enter this menu a calendar will show up. Ontop of the screen there are sections for date. Wheneveryou change the date, the calendar will be updatedaccording to the date. And square cursor will be used tolocate the certain day. If you see marked date in thecalendar, it means that there is a schedule or memo thatday. This function helps to remind you of your schedule andmemo. The phone will sound an alarm tone if you set thisfor the note.To change the day, month and year.Key DescriptionYearlyMonthlyWeeklyDaily In the scheduler mode, press left soft key [Options]as follows;vView: View all schedules and memo for the chosenday. Use , to browse through the note lists.If you want to view the note in detail, press [OK]. Pressleft soft key [Options] to delete, edit the note youselected.ToolsTools41](https://usermanual.wiki/LG-Electronics-USA/ME770/User-Guide-775020-Page-40.png)
![vNew schedule: Allows you to add new schedule andmemo for the chosen day. Input the subject and then press left soft key [Save]. You enter the appropriate information in thefollow section; Time,Repeat and Alarm.vAlert tone: You can set the alarm tone of each chosendate.vView all schedules: Shows the notes that are setfor all days. Use , to browse through thenote lists. If you want to view the note in detail, pressleft soft key [Options].vGo to date: You can go the chosen date directly.vDelete past: You can delete the past schedule thathas been already notified you.vDelete all: You can delete for the all notes.Calculator Menu 3.3This contains the standard functions such as +, -, x, ÷ :Addition, Subtraction, Multiplication, and Division.Furthermore, you can use the various function ofcalculator such as +/-, sin, cos, tan, log, ln, exp, sqrt,deg, rad.1. Input the numbers by pressing numeric keys.2. Use a navigation key to select a sign for calculation.3. Then input the numbers.4. Press key to view the result.5. To input the decimal number, press key. If youpress key, you can enter ( ).6. To end Calculator, press the right soft key [Back].ToolsTools42](https://usermanual.wiki/LG-Electronics-USA/ME770/User-Guide-775020-Page-41.png)
![Memo Menu 3.41. Select the Memo by pressing the left soft key [OK].2. If the entry is empty, press the left soft key [New].3. Input the memo and then press left soft key [OK].Tip calculator Menu 3.5This feature allows you to quickly and easily calculatethe tip amount based on the total bill as well as the splitof the total bill based on the number of people.Stop watch Menu 3.6A Stop watch function is provided.1. Select Stop watch menu.2. Press the left soft key to start the stopwatch.3. Press the left soft key [Stop] to stop thestopwatch and view the measuredduration of time.4. Press the left soft key [Continue] to resume thestopwatch.5. Press the right soft key [Lap] during operation to recordthe duration of time at the moment, and continue thestopwatch.6. You can save up to 20 time records by pressing theright soft key [Lap]. It will not record if the number ofrecored time exceeds 20. 7. Press the right soft key [Reset] to reset the stopwatch.Tools43NotevIf you want to change the text input mode, pressthe in order.](https://usermanual.wiki/LG-Electronics-USA/ME770/User-Guide-775020-Page-42.png)
![Unit converter Menu 3.7This converts any measurement into a unit you want.There are 4 types that can be converted into units: Area,Length, Weight and Volume.1. You can select one of four unit types by pressing [OK] key.2. Select the standard value by using , .3. Select the unit you want to convert by pressing and . It's impossible to input "-" symbol in unitconverter.World clock Menu 3.8You can view clocks of the world’s major cities.1. Select the city belonged to the time zone by pressing, key.2. You can set the current time to the city time you selectby pressing the left soft key [Options] and select[Set].ToolsTools44](https://usermanual.wiki/LG-Electronics-USA/ME770/User-Guide-775020-Page-43.png)

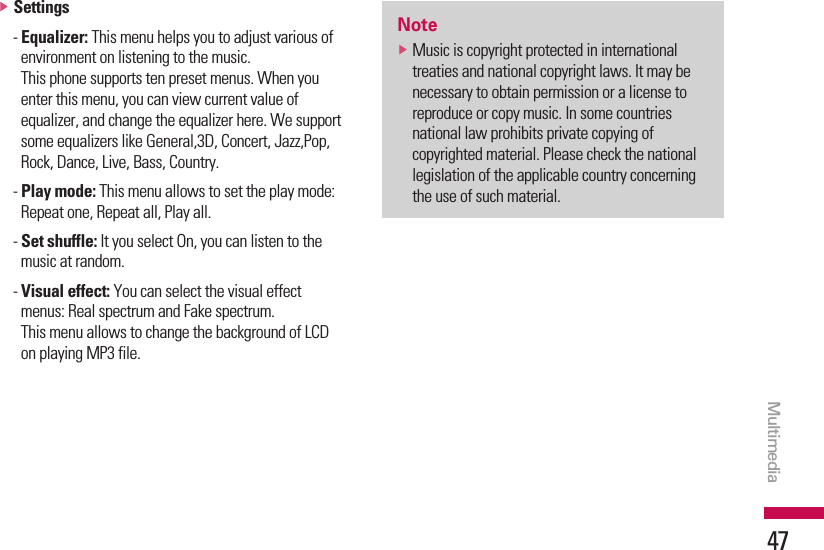
![• WMA: Sampling frequency up from 8KHz to 48KHz,Bit rate up to 320Kbps, stereo.You can transfer MP3 files from a compatible PC to thememory in your phone using the Mass Storage.When you connect the phone to a PC using the USBcable (supplied in the same package), you can seeremovable disk through windows explorer. After youcopy songs in removable disk, you should execute saferemove from your system.1. Press the left soft key [Options] to access thefollowing menus in the playing mode.vPause: You can stop playing MP3 file.vView playlist: You can select another music youwant on playing MP3 file.vSet as ringtone: You can set the current music onplaying MP3 file as a ringtone. NotevYou should copy MP3 to Sounds\Mp3 folder. Ifyou copy another folder, you can't see MP3 files.vThe PC should run Windows 98 SE, WindowsME, Windows 2000, Windows XP operatingsystem.NotevKE770 doesn't support the variable bit rate of allmentioned file types. Therefore, you can'tchange the file from MP3 format to AAC.MultimediaMultimedia46](https://usermanual.wiki/LG-Electronics-USA/ME770/User-Guide-775020-Page-45.png)
![Camera Menu 4.21. Select Camera, and then press the left soft key [OK]. If you want to reach this menu directly, press thekey.2. Focus on the subject to capture the image, and thenpress the key.3. If you want to save it, press the left soft key orthe key.vSize: 320l240/640l480/1280l960vQuality: Super Fine/Fine/NormalvFlash: On/OffvDelay timer: 10 seconds/5 seconds/3 seconds/OffvSave to: External/PhonevSelf Time: Video/Multi Shot/Single ShotvImage Effect: Negation/Mono/Sepia/ColorvWhite Balance: Night/Fluorescent/Cloudy/Incandescent/Daylight/AutovShutter tone: Off/Tone 3/Tone 2/Tone 1MultimediaMultimedia48NotevYou can control brightness and zooming bypressing the navigation key. ( , , or ).](https://usermanual.wiki/LG-Electronics-USA/ME770/User-Guide-775020-Page-47.png)
![Video camera Menu 4.31. Select Video camera menu.vMode: You can choose General mode of unlimitedrecording or MMS mode of recording up to 30seconds.vResolution: 128l96/176l144vQuality: Allows you to set the image quality fromSuper Fine/Fine and Normal.vFlash: Determines the flash operation. You can usethis function by key in the viewfinder. vSave to: External/PhonevColour Effect: 4 settings are available; Negation,Mono, Sepia, Off.vWhite Balance: Allows you to change the settingsaccording to the environment.FM radio Menu 4.4You can search radio stations and enjoy listening to theradio.2. Press the corresponding number key of a channel tostore the currently selected radio station into.3. After presetting radio channels, you can listen to otherchannel by pressing the corresponding number key(short press).4. You can access the following option menus bypressing the left soft key [Options].NotevTo improve the radio reception, extend theheadset cord which functions as the FMantenna.Multimedia49](https://usermanual.wiki/LG-Electronics-USA/ME770/User-Guide-775020-Page-48.png)
![vEdit freq: You can adjust frequency and change theradio station in the selected channel. You can changethe frequency 0.1 MHz at a time with Left/Rightnavigation keys and number keys.vAuto scan: If you select "Auto Scan Now?" On,automatically set the radio channel.And When "Save this Station?" message will bepopped up, if you select Yes, the selected frequencywill be stored.vListen via speaker: Select this to listen to the radiothrough the built-in speaker. To turn off the speaker,select "Listen via headset" in the [Options]vStation info on/off: Select on, you can view the radiostation information.Voice recorder Menu 4.5You can record voice memo.The following [Options] menus are available.• StorageYou can choose Phone or External memory.• Recording modeYou can choose General mode of unlimited recordingor MMS mode of recording up to 30 seconds.Record1. Once recording is started, the message Recording andthe remaining time is displayed.2. If you want to finish recording, press right soft key.3. After finishing the recording, press the left soft key[Options], and then the following sub menus areavailable.vNew voice record: Allows you to record a memo.vSend via Multimedia message/Bluetooth/Email:Sends the selected voice memo byMMS/Bluetooth/Email.vAlbum: Allows you to check the recorded message inthe Voice recoreds folder.MultimediaMultimedia50](https://usermanual.wiki/LG-Electronics-USA/ME770/User-Guide-775020-Page-49.png)

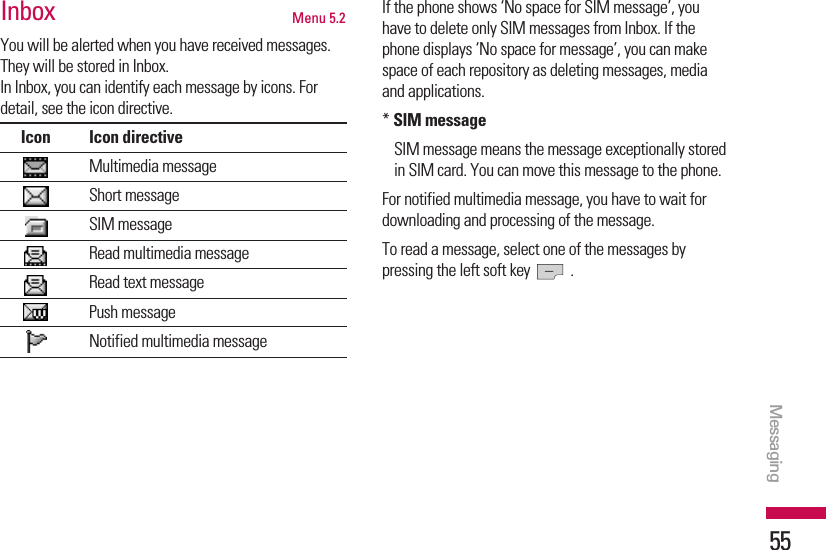
![New message Menu 5.1This menu includes functions related to SMS (ShortMessage Service), MMS (Multimedia Message Service),Email, as well as the network’s service messages.Text (Menu 5.1.1)You can write and edit text message, checking thenumber of message pages.1. Enter the New message menu by pressing the leftsoft key [OK].2. If you want to write a new message, select Text.3. To make text input easier, use T9.4. After completing the message select the requiredoption by pressing the left soft key [Options].vSend to: Enter the phone number or select the numberfrom the address book.vInsert: Symbol/Image/Sound/Default Image/ DefaultSound/Text template/Contact/Business Card.vSave to Drafts: Stores messages in Drafts.vT9 languages: Select the language for T9 inputmode. You can also deactivate T9 input mode byselecting ‘T9 off’.vClear text: You can remove all written messages.vExit: If you press Exit while writing a message, youcan end the writing message and back to the Messagemenu. The message you have written is not saved.MessagingMessaging52](https://usermanual.wiki/LG-Electronics-USA/ME770/User-Guide-775020-Page-51.png)
![Multimedia (Menu 5.1.2)You can write and edit multimedia messages, checkingmessage size.1. Enter the New message menu by pressing the leftsoft key [OK].2. If you want to write a new message, selectMultimedia.3. You can create a new message or choose one of themultimedia message templates already made.OptionsvSend to: Enter the phone number or select the numberfrom the address book.vInsert: You can add Symbol/Image/Video/Sound/Newphoto/New video/New sound/New slide/Texttemplate/Contact/Business card and Others.vPreview: You can preview multimedia messages youwrote.vSave: You can save multimedia messages To drafts orAs templates.vEdit subject: Modifies multimedia messages youchose.vSlide Duration: Display the duration of each pagewhen writing the message.vT9 languages: Select the language for T9 inputmode. You can also deactivate T9 input mode byselecting ‘T9 off’.vExit: You can get back to the Message menu.NotevAll messages will be automatically saved in theoutbox folder, even after a sending failure.Messaging53](https://usermanual.wiki/LG-Electronics-USA/ME770/User-Guide-775020-Page-52.png)
![Email (Menu 5.1.3)To send/receive an email, you should set up the emailaccount. Refer to Email(Menu 5.0.3).1. Key in the subject of the mail and press OK.2. After writing an email message, press the left soft key[Options]. You can access the following optionmenus.vSend to: Enter the phone number or select the numberfrom the address book.vInsert: You can add Symbol/Text template/Contacts/Business card.vAttachments: You can add Images, videos, andsounds files.vPreview: You can preview Email messages youwrote.vSave to drafts: Select this to save the message inDrafts.vEdit subject: You can edit the subject. vT9 languages: Select the language for T9 inputmode. You can also deactivate T9 input mode byselecting ‘T9 off’.vClear text: You can remove all written messages.vExit: If you press Exit while writing a message, youcan end the writing message and back to the Messagemenu. The message you have written is not saved.NotevIf you select the picture (50K) on writingmultimedia message, loading duration will takearound 10 seconds at least. Furthermore, youcan’t activate any key during loading time. After10 seconds, it is available to write multimediamessage.MessagingMessaging54](https://usermanual.wiki/LG-Electronics-USA/ME770/User-Guide-775020-Page-53.png)
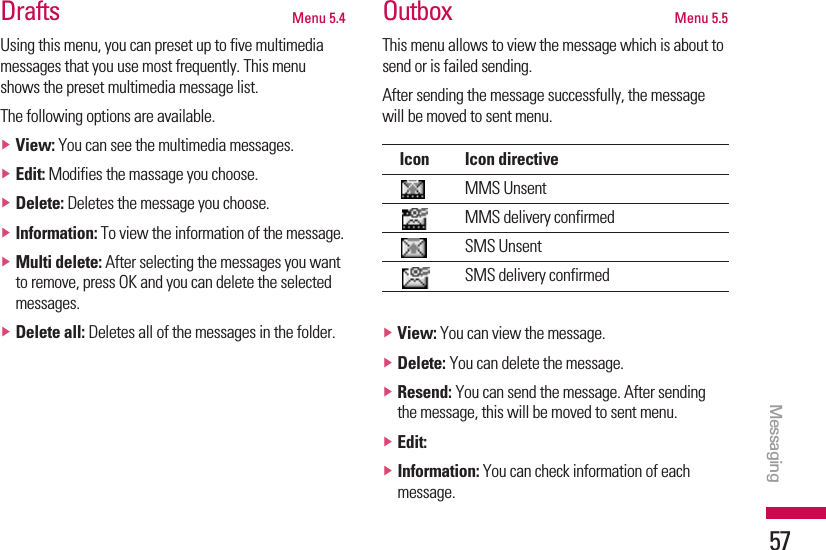
![vMulti delete:vDelete all: You can delete all messages in outbox.Sent Menu 5.6This menu allows you to view the messages which arealready sent. You can check the time and the contents ofmessage.Voicemail Menu 5.7Once this menu has been selected, simply press the leftsoft key [OK] to listen to voice mail. You can alsohold down the key in standby mode to listen tovoice mail.Info message Menu 5.8(Dependent to network and subscription)Info messages are text messages delivered by thenetwork to GSM. They provide general information suchas weather reports, traffic news, taxis, pharmacies, andstock prices. Each type of has the number; therefore, youcan contact service provider as long as you input thecertain number for the information. When you havereceived an info message, you can see the popupmessage to show you that you have received a messageor the info message is directly displayed. To view themessage again or not in standby mode, follow thesequence shown below;NotevWhen you receive a voice mail, your phonedisplays the icon and you hear an alert. Pleasecheck with your network provider for details oftheir service in order to configure the handsetcorrectly.MessagingMessaging58](https://usermanual.wiki/LG-Electronics-USA/ME770/User-Guide-775020-Page-57.png)
![Read (Menu 5.8.1)1. When you have received an info service message andselect Read to view the message, it will be displayedon the screen. You can read another message byscrolling , or [Next].2. The message will be shown until another message isreached.Topics (Menu 5.8.2)(Dependent to network and subscription)vView list: You can see Info message numbers whichyou added. If you press [Options], you can add aNew topic, Edit and Delete info message categorywhich you added.vActive list: You can select info service messagenumbers in the active list. if you activate an infonumber, you can receive messages sent from thenumber.Templates Menu 5.9Text (Menu 5.9.1)You have 6 text templates as below;• Please call me back.• I'm late. I will be there at• Where are you now?• I'm on the way.• Urgent! Please contact.• I love you.You can use the following options.vView: You can see text templates.vEdit: You can edit text templates.vSend via: You can send text messages.vDelete: You can delete text templates.vNew template: Allows you to add new texttemplates.vDelete all: Allows you to delete all text messages.Messaging59](https://usermanual.wiki/LG-Electronics-USA/ME770/User-Guide-775020-Page-58.png)
![Mulitimedia message (Menu 5.0.2)vSubject: You can enter multimedia messages subjectwhen this menu is on.vSlide duration: Display the duration of each pagewhen writing the message.vPriority: You can set the priority of the message youchoose.vValidity period: This network service allows you toset how long your text messages will be stored at themessage centre.vDelivery report: If it is set to Yes in this menu, youcan check whether your message is sent successfully.vRead report: This menu allows you to request a readconfirmation mail from the message recipient.vAuto download: If you select On, you can receivemultimedia messages automatically. If you selectHome network only, you can receive multimediamessages depending on Home network.vNetwork profile: If you select multimedia messageserver, you can set URL for multimedia messageserver.vPermitted message typePersonal: Personal message.Advertisement: Commercial message.Information: Necessary information.Email (Menu 5.0.3)This menu allows you to edit, delete or add an emailaccount.Email account (Menu 5.0.3.1)You can set up email accounts by selecting New. Using[Options] you can set the following values.vView: You can see the information about the accountselected.vSet as default: You can select a mail account asdefault.Messaging61](https://usermanual.wiki/LG-Electronics-USA/ME770/User-Guide-775020-Page-60.png)
![vPrint Via Bluetooth: Most pictures that you've takenin the camera mode and downloaded through WAPcan be transmitted via Bluetooth to a printer.vRename: Changes the file name of selected file. AndYou can not change the extension of file.vDelete: Delete a file.vDelete all: Delete all files in the listvInformation: Show the file information.vView by list/grid: Sets to view the file depending oneach type.Sounds Menu 6.2Show the list of MP3, MP4, AAC, M4A, WMA files atMy melody/Default Sounds/Voice records/MP3/Downloaded. The following [Options] are available:vPlay: You can play the sound file when pressing OKkey or selecting Play menu of Option menus.vPurchase right: ?vSend via- Send as MMS: You can send a sound throughMMS.- Email: Allows you to send a sound through Email.My stuff65](https://usermanual.wiki/LG-Electronics-USA/ME770/User-Guide-775020-Page-64.png)
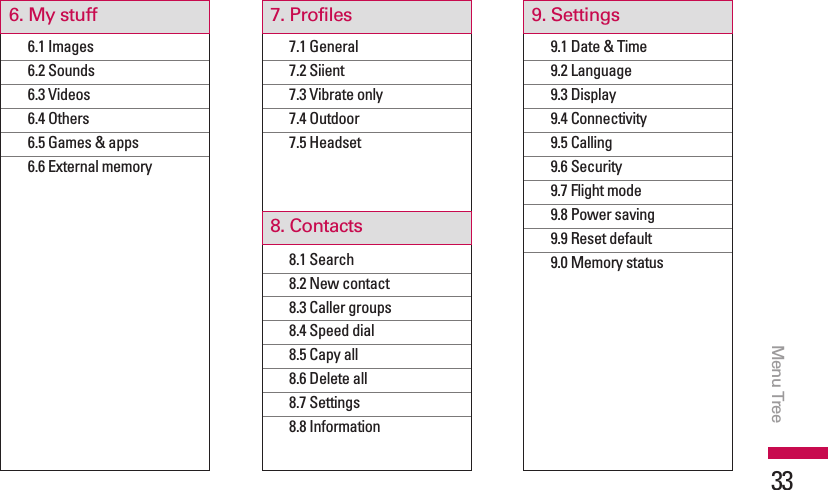
![In Profiles, you can adjust and customise the phone tonesfor different events, environments, or caller groups.There are five preset profiles: General, Silent, Vibrateonly, Outdoor and Headset. Each profile can bepersonalised(Except Vibrate, Silent menu). Press the leftsoft key [Menu] and select Profiles using up/downnavigation keys.Activate (Menu 7.X.1)1. A list of profiles is displayed.2. In the Profiles list, scroll to the profile you want toactivate and press the left soft key [OK] or OKkey.3. Then, select Activate.Personalise (Menu 7.X.2)Scroll to the desired profile in the Profile list. Afterpressing the left soft key or the OK key, selectPersonalise. The profile setting option opens. Set theoption as required.vCall alert type: Set the alert type for incoming calls.vRing tone: Allows you to select the desired ring tonefrom the list.vRing volume: Set the volume of the ringing tone.vMessage alert type: Set the alert type for messages.vMessage tone: Allows you to select the alert tone formessages.vKeypad tone: Allows you to select the desired keypadtone.vKeypad volume: Set the volume of keypad tone.vEffect sound volume: Set the volume of effectsound.vPower on/off volume: Set the volume of the ringingtone when switching the phone on/off.ProfilesProfiles71](https://usermanual.wiki/LG-Electronics-USA/ME770/User-Guide-775020-Page-70.png)
![Search Menu 8.11. Select Search by pressing the left soft key [OK].2. Enter the name that you want to search.3. If you want to edit, delete, copy an entry, select leftsoft key [Options]. The following menu will bedisplayed.vView: You can view each entry in details.vEdit: You can edit the name, number, group, characterand picture by using the navigation key.vSend via bluetooth: You can send the data of phonebook to devices which is compatible with bluetooththrough Bluetooth.vNew message: After you have found the number youwant, you can send a text/multimedia message to theselected number.vCopy to handset: You can copy an entry from SIM tophone or from phone to SIM.vCaller groups: For further details see (Menu 8.3).vDelete: You can delete an entry.New contact Menu 8.2You can add phonebook entry by using this function.Phone memory capacity is 1000 entries. SIM cardmemory capacity depends on the cellular serviceprovider. The number of character is SIM dependent feature.NotevMaximum stored name and number lengthdepends on SIM-card type.NotevInstant searching is available by inputting theinitial letter of the name or number you want tosearch.ContactsContacts73](https://usermanual.wiki/LG-Electronics-USA/ME770/User-Guide-775020-Page-72.png)
![1. Select Add new by press left soft key [OK] or[OK].2. Select the memory you want to save: SIM or Phone.If you set to Phone, you need to select which numberyou want as a main number.a. Press [OK] to input a name.b. After you can input a number, press [OK]number.Caller groups Menu 8.3You can list up to the members per each group. There are7 groups you can make lists to.vMember list: Shows the group members you haveselected.vGroup ringtone: Allows you to specify ring tone forthe group members’ call.vGroup icon: Allows you to select the icon dependenton Group.vAdd member: You can add group members. Eachgroup member shouldn’t be exceeded 20.vRemove member: You can remove the member fromthe Group member list. But the name and the numberwill be remained in phonebook.vRename: You can change a group name.vRemove all: Allows you to delete all the members inthe group.Speed dial Menu 8.4You can assign any of the keys to with aName list entry. You can call directly by pressing this key.1. Open the phonebook first by pressing the right soft key[Contacts] in standby mode.2. Scroll to Speed dial, then press the left soft key [OK].3. If you want to add speed dial, select <empty>. Then,you can search the name in phonebook.4. After assigning the number as speed dial, you canchange and delete the entry. You can also make a callor send a message by this number.ContactsContacts74](https://usermanual.wiki/LG-Electronics-USA/ME770/User-Guide-775020-Page-73.png)
![Copy all Menu 8.5You can copy entries from SIM card memory to Handsetmemory and vice versa.1. Open the Phonebook first by pressing the right soft key[Contact] in standby mode.2. Scroll to Copy all, and then press the left soft key [OK] to enter this menu.- SIM to handset: You can copy the entry from SIMCard to Phone memory.- Handset to SIM: You can copy the entry from Phonememory to SIM Card.Delete all Menu 8.6You can delete entries from SIM card memory toHandset memory and vice versa.1. Open the Phonebook first by pressing the right soft key[Contact] in standby mode.2. Scroll to delete all, and then press the left soft key[OK] to enter this menu.- SIM: You can delete the entry from SIM Card to Phonememory.- Handset: You can delete the entry from Phone memoryto SIM Card.Settings Menu 8.71. Press the right soft [Contacts] in standby mode.2. Scroll to Settings, then press the left soft key [OK].Contacts75](https://usermanual.wiki/LG-Electronics-USA/ME770/User-Guide-775020-Page-74.png)
![Default memory (Menu 8.7.1)Scroll to highlight Default memory, and then press theleft soft key [OK].- If you select Always ask, when adding entry, the phonewill ask where to store.- If you select SIM or Handset, the phone will store anentry to SIM or phone.View options (Menu 8.7.2)Scroll to highlight View options, and then press the leftsoft key [OK].vName only: Set the phonebook list with displayingonly name.vWith photo: Set the phonebook list with theinformation of character and picture.Move all (Menu 8.7.3)You can move entries from SIM card memory to Handsetmemory and vice versa.1. Open the Phonebook first by pressing the right soft key[Contact] in standby mode.2. Scroll to Move all, and then press the left soft key[OK] to enter this menu.- SIM to handset: You can move the entry from SIMCard to Phone memory.- Handset to SIM: You can move the entry from Phonememory to SIM Card.Information Menu 8.8?ContactsContacts76](https://usermanual.wiki/LG-Electronics-USA/ME770/User-Guide-775020-Page-75.png)
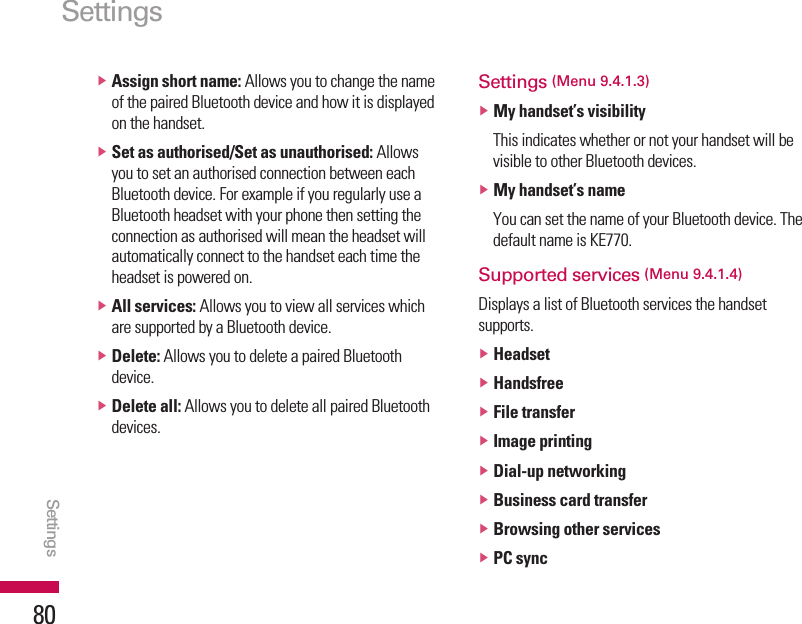
![vView by list/grid: You can change the format ofImages mode(Folder/List).Menu Style (Menu 9.3.2)Your phone provides you with Grid and Wheel menuthemes. Set the menu colour by scrolling and pressingthe left soft key [OK].Standby text (Menu 9.3.3)If you select On, you can edit the text which is displayedin standby mode.Backlight time (Menu 9.3.4)You can set the light-up duration of the display(Off/10secs/20 secs/30 secs/60 secs)Brightness (Menu 9.3.5)You can set the brightness of LCD: 100%, 80%, 60%,40%Network name (Menu 9.3.6)If this function is activated, network name will bedisplayed on main LCD.Home screen shortcut (Menu 9.3.7)Selecting On displays the functionalities of 4 Navigationkeys and Menu key as pictures on the middle of the idlewindow. (Profiles/Messaging/Favourites/Contacts)Connectivity Menu 9.4Bluetooth (Menu 9.4.1)Bluetooth enables compatible mobile devices,peripherals and computers that are in close proximity tocommunicate directly with each other without wires. Thishandset supports built-in Bluetooth connectivity, whichmakes it possible to connect them with compatibleBluetooth headsets, computer applications and so on.SettingsSettings78](https://usermanual.wiki/LG-Electronics-USA/ME770/User-Guide-775020-Page-77.png)
![Set Bluetooth (Menu 9.4.1.1)You can activate or cancel the Bluetooth function.Paired devices (Menu 9.4.1.2)You can view all devices which your KE770 is alreadypaired to.If you have entered Paired devices or Handsfree devices,you will see the following options in both those menus.vAdd new: Allows you to search for new Bluetoothdevices and add them to your phone's list of paireddevices. When you select Add new your handset willstart to search for Bluetooth devices within range.Once the device you wish to pair appears on the listpress the right soft key [Quit].Scroll to the desired device and press the left soft key[Pair]. You will then be asked to enter a passcode. Thepasscode can be any code you wish to use (the samepasscode must be used by both devices) or is pre-determined by the manufacturer of the device you aretrying to pair with. Please check the User Manual ofthe device you are initiating the pair with to see if italready has a predetermined passcode in place.NotevIf you use LG PC Sync via Bluetooth, you canexchange data only within the phonebook.vWhen you receive data from another Bluetoothdevice, the phone requests confirmation. Afterconfirming the transfer, the file will be copied onto your phone.vThe handset normally operates with WIDCOMMdriver(version 1.4.3.4) or WIDCOMMdriver(version 1.4.2.10). And it does not supportthe LG Contents Bank with Bluetooth.Settings79](https://usermanual.wiki/LG-Electronics-USA/ME770/User-Guide-775020-Page-78.png)
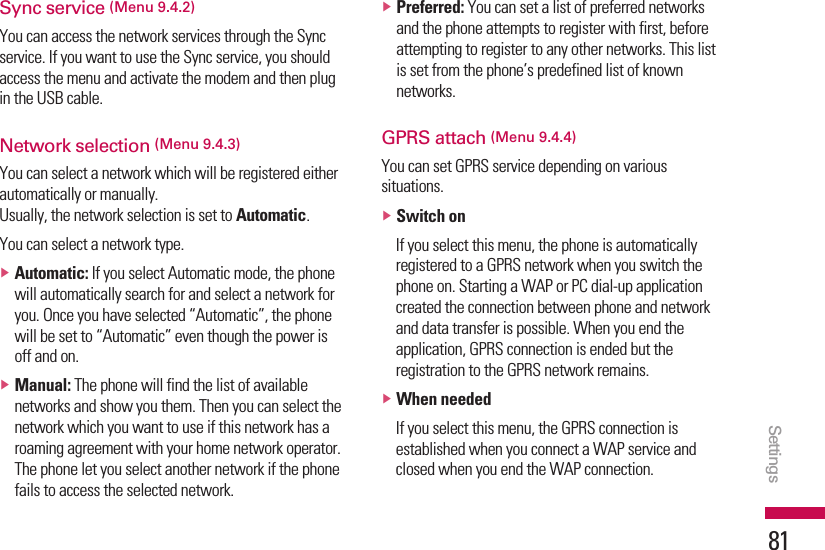
![Network profile (Menu 9.4.5)A profile is the network information used to connect tothe Internet.There are default profiles for some operators, stored inphone memory. It's impossible to rename default profiles.USB connection mode (Menu 9.4.6)You can choose one mode of Data service and Massstorage.Calling Menu 9.5You can set the menu relevant to a call by pressing [OK]in the Setting menu.Call divert (Menu 9.5.1)The Call divert service allows you to divert incoming Allvoice calls, All data calls and All fax calls to anothernumber. For details, contact your service provider.vAll voice calls: Diverts voice calls unconditionally.vIf busy: Diverts voice calls when the phone is in use.vIf no reply: Diverts voice calls which you do notanswer.vIf out of reach: Diverts voice calls when the phone isswitched off or out of coverage.vAll data calls: Diverts to a number with a PCconnection unconditionally.vAll fax calls: Diverts to a number with a faxconnection unconditionally.vCancel all: Cancels all call divert service.SettingsSettings82](https://usermanual.wiki/LG-Electronics-USA/ME770/User-Guide-775020-Page-81.png)
![The submenusCall divert menus have the submenus shown below.- ActivateActivate the corresponding service.To voice mail centreForwards to message centre. This function is not shownat All data calls and All fax calls menus.To other numberInputs the number for diverting.To favourite numberYou can check back to last five diverted numbers.- CancelDeactivate the corresponding service.- View statusView the status of the corresponding service.Answer mode (Menu 9.5.2)vAny key: If you select this menu, you can receive acall by pressing any key except [End] key.vSend key only: If you select this menu, you canreceive a call by only pressing [Send] key.Send my number (Menu 9.5.3)(network and subscription dependent)vSet by network: If you select this, you can send yourphone number depending on two line service such asline 1 or line 2.vOn: You can send your phone number to another party.Your phone number will be shown on the receiver’sphone.vOff: Your phone number will not be shown.Settings83](https://usermanual.wiki/LG-Electronics-USA/ME770/User-Guide-775020-Page-82.png)
![1. Select PIN code request in the security menu, andthen press [OK].2. Set Enable/Disable.3. If you want to change the setting, you need to enterPIN code when you switch on the phone.4. If you enter wrong PIN code more than 3 times, thephone will lock out. If the PIN is blocked, you will needto key in PUK code.5. You can enter your PUK code up to 10 times. If you putwrong PUK code more than 10 times, you can notunlock your phone. You will need to contact yourservice provider.Handset lock (Menu 9.6.2)When the Handset lock feature is enabled, the phoneis locked and you must enter the phone password eachtime the phone is switched on. The password is factoryset to 0000. To change the phone password, refer to theChange codes - Security code menu option (Menu9.6.6). Once the correct password has been entered, youcan use the phone until you switch it off.Auto key lock (Menu 9.6.3)When Auto key lock feature is enabled, the phone islocked.Call barring (Menu 9.6.4)The Call barring service prevents your phone from makingor receiving certain category of calls. This functionrequires the call barring password. You can view thefollowing submenus.vAll outgoing calls: The barring service for alloutgoing calls.vOutgoing international: The barring service for alloutgoing international calls.vOutgoing international when roaming: The barringservice for all international outgoing calls except homenetwork.vAll incoming: The barring service for all incomingcalls.Settings85](https://usermanual.wiki/LG-Electronics-USA/ME770/User-Guide-775020-Page-84.png)
![Change codes (Menu 9.6.6)PIN is an abbreviation of Personal Identification Numberto prevent use by unauthorized person. You can changethe access codes: Security code, PIN code, PIN2code.1. If you want to change the Security code/PIN1/ PIN2code input your original code, and then press [OK].2. Input new Security code/PIN/PIN2 code and verifythem.Flight mode Menu 9.7If you set On, Wireless will be turned off.Power saving Menu 9.8If you set On, you can save the power when you don'tuse the phone.Reset default Menu 9.9You can initialize all factory defaults. You need Securitycode to activate this function.Memory status Menu 9.0You can check free space and memory usage of eachrepository, Internal memory and Multimedia memory.You can go to each repository menu(Common,Reserved, SIM card, External Memory).Settings87](https://usermanual.wiki/LG-Electronics-USA/ME770/User-Guide-775020-Page-86.png)