LG Electronics USA ME970D Cellular/PCS GSM/EDGE Phone with Bluetooth User Manual
LG Electronics USA Cellular/PCS GSM/EDGE Phone with Bluetooth
UserManual.wiki
>
LG Electronics USA
>
ME970D User Manual
Users Manual
Navigation menu
Upload a User Manual
Namespaces
Wiki Guide
HTML
PDF
Info
Views
User Manual
Discussion / Help
Navigation


![8For Your SafetyImportant InformationThis user guide contains important information on the use andoperation of this phone. Please read all the informationcarefully for optimal performance and to prevent any damageto or misuse of the phone. Any changes or modifications notexpressly approved in this user guide could void your warrantyfor this equipment.Before You StartSafety InstructionsWARNING! To reduce the possibility of electric shock, do notexpose your phone to high humidity areas, such as thebathroom, swimming pool, etc.Always store your phone away from heat. Never store yourphone in settings that may expose it to temperatures less than32°F or greater than 104°F, such as outside during extremeweather conditions or in your car on a hot day. Exposure toexcessive cold or heat will result in malfunction, damageand/or catastrophic failure.Be careful when using your phone near other electronicdevices. RF emissions from your mobile phone may affectnearby in adequately shielded electronic equipment. Youshould consult with manufacturers of any personal medicaldevices such as pacemakers and hearing aides to determine ifthey are susceptible to interference from your mobile phone.Turn off your phone in a medical facility or at a gas station.Never place your phone in a microwave oven as this willcause the battery to explode.IMPORTANT! Please read the TIA SAFETY INFORMATION onpage 78 before using your phone.Safety InformationRead these simple guidelines. Breaking the rules may bedangerous or illegal. Further detailed information is given in thisuser guide.]Never use an unapproved battery since this could damagethe phone and/or battery and could cause the battery toexplode.]Never place your phone in a microwave oven as it willcause the battery to explode.]Do not dispose of your battery by fire or with hazardous orflammable materials.]Make sure that no sharp-edged items come into contactwith the battery. There is a risk of this causing a fire.]Store the battery in a place out of reach of children.]Be careful that children do not swallow any parts such asrubber plugs (earphone, connection parts of the phone,etc.). This could cause asphyxiation or suffocation.](https://usermanual.wiki/LG-Electronics-USA/ME970D/User-Guide-766845-Page-8.png)
![9For Your Safety]Unplug the power cord and charger during lightning stormsto avoid electric shock or fire.]When riding in a car, do not leave your phone or set up thehands-free kit near to the air bag. If wireless equipment isimproperly installed and the air bag is activated, you may beseriously injured.]Do not use a hand-held phone while driving.]Do not use the phone in areas where its use is prohibited.(For example: aircraft).]Do not expose the battery charger or adapter to directsunlight or use it in places with high humidity, such as abathroom.]Never store your phone in temperatures less than- 4°F orgreater than 122°F.]Do not use harsh chemicals (such as alcohol, benzene,thinners, etc.) or detergents to clean your phone. There is arisk of this causing a fire.]Do not drop, strike, or shake your phone severely. Suchactions may harm the internal circuit boards of the phone.]Do not use your phone in high explosive areas as the phonemay generate sparks.]Do not damage the power cord by bending, twisting, pulling,or heating. Do not use the plug if it is loose as it may causea fire or electric shock.]Do not place any heavy items on the power cord. Do notallow the power cord to be crimped as it may cause fire orelectric shock.]Do not handle the phone with wet hands while it is beingcharged. It may cause an electric shock or seriouslydamage your phone.]Do not disassemble the phone.]Do not place or answer calls while charging the phone as itmay short-circuit the phone and/or cause electric shock orfire.]Only use the batteries, antennas, and chargers provided byLG. The warranty will not be applied to products provided byother suppliers.]Only authorized personnel should service the phone and itsaccessories. Faulty installation or service may result inaccidents and consequently invalidate the warranty.]Do not hold or let the antenna come in contact with yourbody during a call.]An emergency call can be made only within a service area.For an emergency call, make sure that you are within aservice area and that the phone is turned on.](https://usermanual.wiki/LG-Electronics-USA/ME970D/User-Guide-766845-Page-9.png)
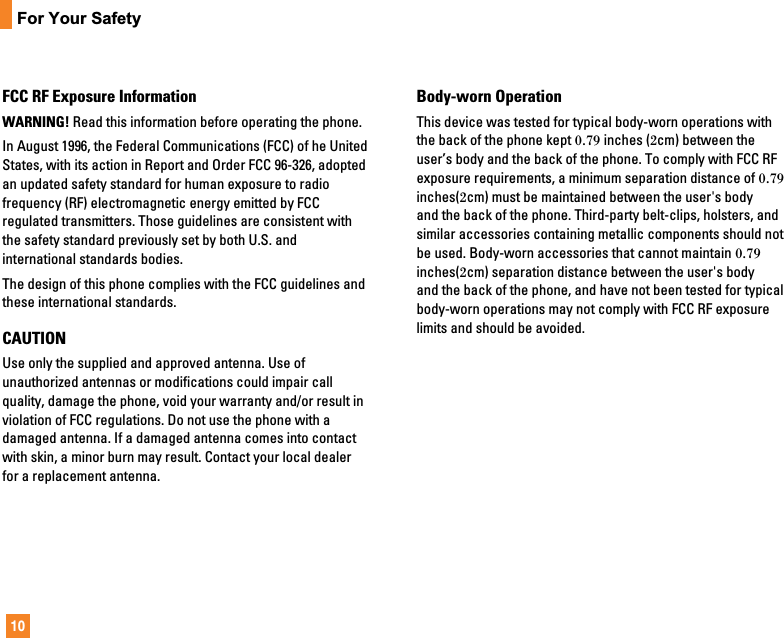
![11For Your SafetyVehicle Mounted External Antenna(optional, if available)A minimum separation distance of 8 inches (20cm) must bemaintained between the user/bystander and the vehiclemounted external antenna to satisfy FCC RF exposurerequirements. For more information about RF exposure, visitthe FCC website at www.fcc.govFCC Part 15 Class B ComplianceThis device and its accessories comply with part 15 of FCCrules. Operation is subject to the following two conditions: (1) This device and its accessories may not cause harmfulinterference, and (2) this device and its accessories mustaccept any interference received, including interference thatmay cause undesired operation.Cautions for Battery]Do not disassemble.]Do not short-circuit.]Do not expose to high temperature: 60°C (140°F).]]Do not incinerate.Battery Disposal]Please dispose of your battery properly or bring to yourlocal wireless carrier for recycling.]Do not dispose in fire or with hazardous or flammablematerials.Adapter (Charger) Cautions]Using the wrong battery charger could damage your phoneand void your warranty.]The adapter or battery charger is intended for indoor useonly.Do not expose the adapter or battery charger to direct sunlightor use it in places with high humidity, such as the bathroom.](https://usermanual.wiki/LG-Electronics-USA/ME970D/User-Guide-766845-Page-11.png)
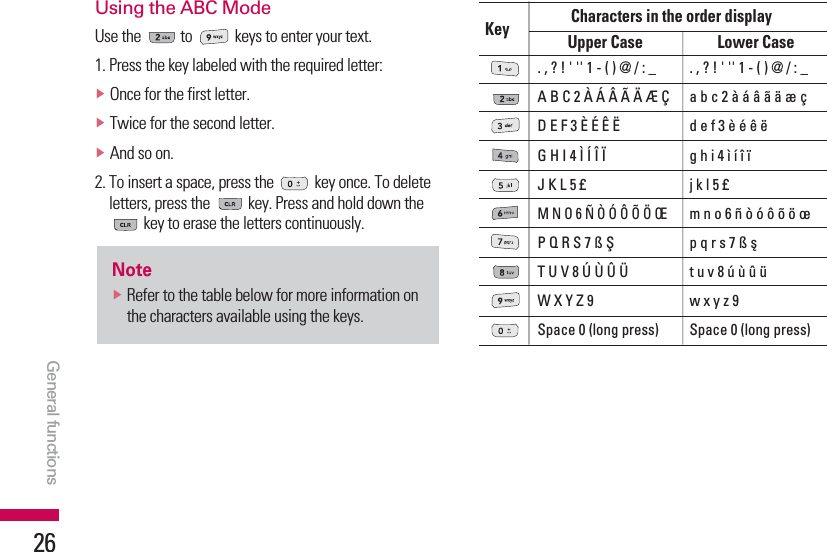
![General functions27Using the 123 (Numbers) ModeThe 123 Mode enables you to enter numbers in a textmessage (a telephone number, for example).Press the keys corresponding to the required digits beforemanually switching back to the appropriate text entrymode.Using the Symbol ModeThe Symbol Mode enables you to enter various symbolsor special characters.To enter a symbol, press the key. Use thenavigation keys to select the desired symbol and pressthe [OK] key.](https://usermanual.wiki/LG-Electronics-USA/ME970D/User-Guide-766845-Page-26.png)
![In-call menuIn-call menu29Your phone provides a number of control functions thatyou can use during a call. To access these functionsduring a call, press the left soft key [Options].During a CallThe menu displayed on the handset screen during a callis different than the default main menu displayed whenin idle screen, and the options are described below.Making a Second Call (Network Dependent)You can get a number you wish to dial from the AddressBook to make a second call.Swapping Between Two CallsTo switch between two calls, press key or the leftsoft key, and then select Swap Call.Answering an Incoming CallTo answer an incoming call when the handset is ringing,simply press the key. The handset is also able towarn you of an incoming call while you are already on acall. A tone sounds in the earpiece, and the display willshow that a second call is waiting.This feature, known as Call waiting, is only available ifyour network supports it. For details of how to activateand deactivate it see Call waiting (Menu 9.5.4).If Call Waiting is on, you can put the first call on hold andanswer the second, by pressing the left soft key .Rejecting an Incoming CallYou can reject an incoming call without answering bysimply pressing the key.During a call, you can reject an incoming call by pressingthe key.](https://usermanual.wiki/LG-Electronics-USA/ME970D/User-Guide-766845-Page-28.png)
![In-call menu30Muting the MicrophoneYou can mute the microphone during a call by pressingthe [Mute] key. The handset can be unmuted by pressingthe [Unmute]. When the handset is muted, the callercannot hear you, but you can still hear them.DTMF tones while callingTo switch on DTMF tones while calling (e.g. to use thephone with an automatic switchboard) press the key[Options] followed by Send DTMF on. Select DTMF off todisable DTMF tones. DTMF tones are normally on.Conference CallsThe conference service provides you with the ability tohave a simultaneous conversation with more than onecaller, if your network service provider supports thisfeature. A conference call can only be set up when youhave one active call and one call on hold, both callshaving been answered.Once a conference call is set up, calls may be added,disconnected or separated (that is, removed from theconference call but still connected to you) by the personwho set up the conference call. These options are allavailable from the In-Call menu. The maximum callers ina conference call are five. Once started, you are in controlof the conference call, and only you can add calls to theconference call.Making a Second CallYou can make a second call while currently on a call.Enter the second number and press the .When the second call is connected, the first call isautomatically placed on hold. You can swap betweencalls, by pressing the key.Setting Up a Conference CallTo set up a conference call, place one call on hold andwhile the active call is on, press the left soft key and thenselect the Join menu of Conference call.In-call menu](https://usermanual.wiki/LG-Electronics-USA/ME970D/User-Guide-766845-Page-29.png)
![In-call menu31Activate the Conference Call on HoldTo activate a conference call on hold, press the key.Alternatively press the left soft key [Options] and selectJoin all/Hold all calls. Other users on hold will stayconnected. To return to conference call mode, press theleft soft key [Options] followed by Conference call.Adding Calls to the Conference CallTo add a call to an existing conference call, press the leftsoft key, and then select the Join menu of Conferencecall.Private Call in a Conference CallTo have a private call with one caller from a conferencecall, display the number of the caller you wish to talk toon the screen, then press the left soft key. Select thePrivate menu of Conference call to put all the othercallers on hold.Ending a Conference CallCurrently displayed caller from a conference call can bedisconnected by pressing the key.](https://usermanual.wiki/LG-Electronics-USA/ME970D/User-Guide-766845-Page-30.png)
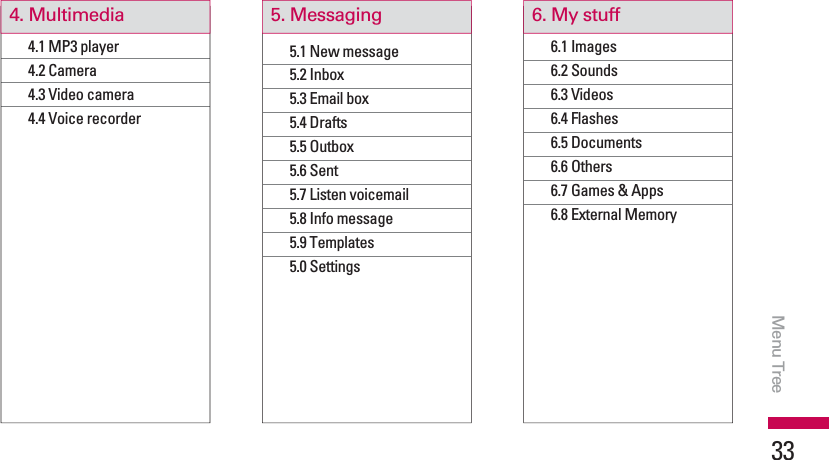
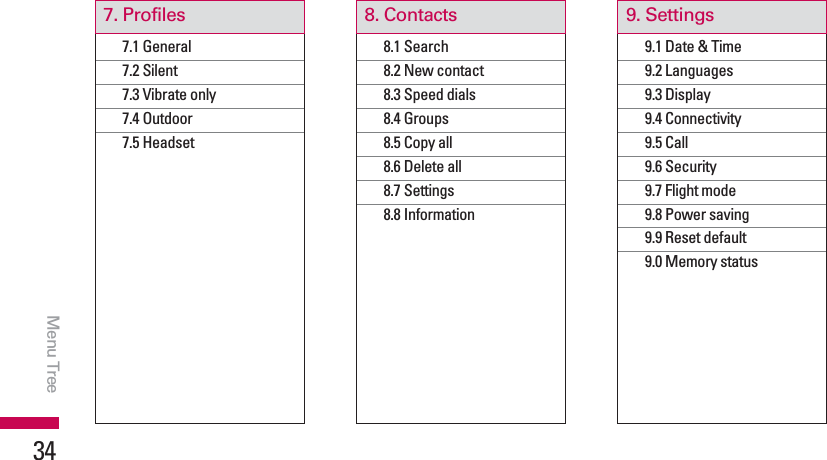
![Menu Tree32The following illustration shows the available menu structure and indicates the:vNumber assigned to each menu option.vPage where you can find the feature description.You can go to the desired menu using the left soft key [Menu], navigation keys and the [OK] key. And you can also take ashortcut by pressing the corresponding number key of desired menu after pressing the left soft key [Menu].1.1 Home1.2 Bookmarks1.3 Go to URL1.4 History1.5 Settings1.6 Information1. Browser2.1 All calls2.2 Missed calls2.3 Dialled calls2.4 Received calls2.5 Call duration2.6 Call costs2.7 Data information2. Call history3.1 Alarm clock3.2 Calendar3.3 Calculator3.4 Memo3.5 Stop watch3.6 Unit converter3.7 World clock3.8 SIM services3. ToolsMenu Tree](https://usermanual.wiki/LG-Electronics-USA/ME970D/User-Guide-766845-Page-31.png)
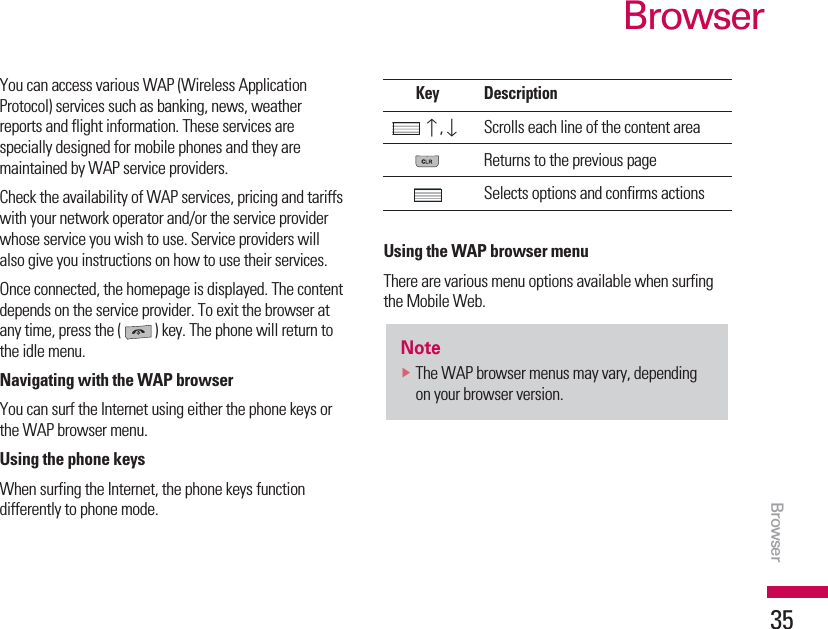
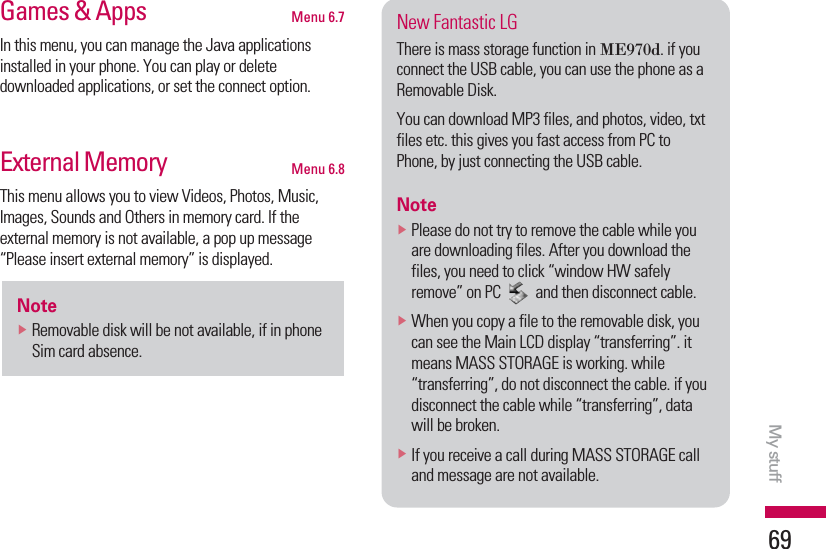
![Browser36Home Menu 1.1Connects to a homepage. The homepage will be the sitewhich is defined in the activated profile. It will be definedby the service provider if you have not defined it in theactivated profile.Bookmarks Menu 1.2This menu allows you to store the URL of favourite webpages for easy access at a later time.To create a bookmark1. Press the left soft key [Options].2. Select Add new and press the OK key.3. After entering the desired URL and title, press the OKkey.After selecting a desired bookmark, the following optionsare available.vConnect: Connects to the selected bookmark.vAdd new: Select this to create a new bookmark.vEdit: You can edit the URL and/or the title of theselected bookmark.vDelete: Deletes the selected bookmark.vDelete all: Deletes all the bookmarks.Go to URL Menu 1.3You can connect directly to the site you want. Afterentering a specific URL, press the OK key.History Menu 1.4This menu will shows the recent browsing pages.Browser](https://usermanual.wiki/LG-Electronics-USA/ME970D/User-Guide-766845-Page-35.png)
![ToolsTools41Alarm clock Menu 3.1You can set up to 5 alarm clocks to go off at a specifiedtime.1. Select On and enter the alarm time you want.2. Select the repeat period: Once, Mon-Fri, Mon-Sat, Sat-Wed, Sat-Thu, Everyday.3. Select the alarm tone you want and press [Set].Calendar Menu 3.2When you enter this menu a calendar will show up. Ontop of the screen there are sections for date. Wheneveryou change the date, the calendar will be updatedaccording to the date. And square cursor will be used tolocate the certain day. If you see marked date in thecalendar, it means that there is a schedule or memo thatday. This function helps to remind you of your scheduleand memo. The phone will sound an alarm tone if you setthis for the note.To change the day, month, and year.Key Description, Yearly, Monthlyq,rWeekly, DailyIn the scheduler mode, press left soft key [Options]as follows;vViewView all schedules and memo for the chosen day.Use q,rto browse through the note lists.If you want to view the note in detail, press left softkey [Select]. Press left soft key [Options] toView, Edit, Send via bluetooth, Delete and Calendar.](https://usermanual.wiki/LG-Electronics-USA/ME970D/User-Guide-766845-Page-40.png)
![Tools42vNew scheduleAllows you to add new schedule and memo for thechosen day. You can store up to 100 notes.Input the subject and then press left soft key [OK].You enter the appropriate information in the followsection; Time, Repeat and Alarm.vSchedular toneYou can set the alarm tone of each chosen date.vAll schedulesView all schedules and memo for the chosen day. Use q,rto browse through the note lists. Ifyou set alarm for the note, the alarm icon is displayed.If you want to view the note in detail, press left softkey [Select]. Press left soft key [Options] todelete, edit the note you selected.vGo to dateYou can go the chosen date directly.vDelete allYou can delete for the all notes.Calculator Menu 3.3This contains the standard functions such as +, -, x, n:Addition, Subtraction, Multiplication, and Division.Furthermore, you can use the various function ofcalculator such as +/-, sin, cos, tan, log, ln, exp, sqrt, deg,rad.1. Input the numbers by pressing numeric keys.2. Use a navigation key to select a sign for calculation.3. Then input the numbers.4. Press key to view the result.5. To input the decimal number, press key.6. To end Calculator, press the right soft key [Back].Tools](https://usermanual.wiki/LG-Electronics-USA/ME970D/User-Guide-766845-Page-41.png)
![Tools43Memo Menu 3.41. Select the Memo by pressing the left soft key [View].2. If the entry is empty, press the left soft key [New].3. Input the memo and then press left soft key [OK].Stop watch Menu 3.51. Press [Start] to take time and record the lap time bypressing [Lap].2. Press [Stop] to ascertain the record of lap time.3. Press [Reset] to default condition.Unit converter Menu 3.6This converts any measurement into a unit you want.There are 7 types that can be converted into units:Currency, Area, Length, Weight, Temperature, Volumeand Velocity.1. You can select one of four unit types by pressing [OK] key.2. Select the unit you want to convert by pressing q,r. It’s impossible to input “-” symbol in unitconverter.3. Select the standard value by using , .NotevIf you want to change the text input mode, pressthe in order.](https://usermanual.wiki/LG-Electronics-USA/ME970D/User-Guide-766845-Page-42.png)
![Tools44World clock Menu 3.7You can view clocks of the world°Øs major cities.1. Select the city belonged to the time zone by pressing, key.2. You can set the current time to the city time you selectby pressing the left soft key [Set].vSet: Allows you to set your current location.vZoom in/out: Home time/current area time.SIM services Menu 3.8This menu depends on SIM and the network services.Tools](https://usermanual.wiki/LG-Electronics-USA/ME970D/User-Guide-766845-Page-43.png)
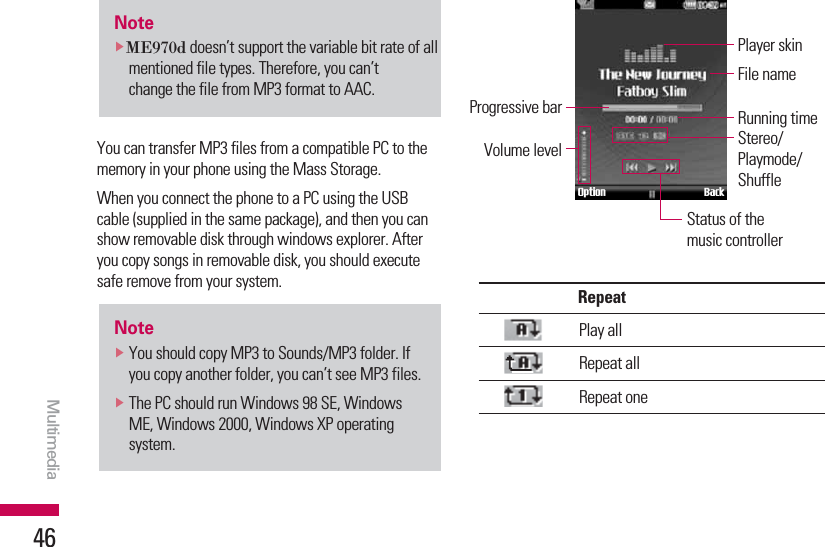
![Multimedia471. Press Multimedia menu, and then select MP3 player.2. Press the left soft key [Options] to access thefollowing menus.vPause: You can stop playing MP3 file.vView playlist: You can select another music youwant on playing MP3 file.vSet as ringtone: You can set the current music onplaying MP3 file as a ringtonevSettings-Equalizer: This menu helps you to adjust various ofenvironment on listening to the music.-Play mode: This menu allows to set the play mode:Repeat one, Repeat all,Play all.-Set shuffle: It you select On, you can listen to themusic at random.-Visual effect: You can select the visual effectmenus: Real spectrum, Fake. This menu allows tochange the background of main LCD on playing MP3file.NotevMusic is copyright protected in internationaltreaties and national copyright laws. It may benecessary to obtain permission or a license toreproduce or copy music. In some countriesnational law prohibits private copying ofcopyrighted material. Please check the nationallegislation of the applicable country concerningthe use of such material.NotevIn case that any invalid file is included in theplaylist, an error message will be popped up andgo back to the prior screen.](https://usermanual.wiki/LG-Electronics-USA/ME970D/User-Guide-766845-Page-46.png)
![Multimedia48Camera Menu 4.21. Select Camera. If you want to reach this menu directly,press .2. Focus on the subject to capture the image, and thenpress the key.3. If you want to save it, press the left soft key orthe key.vMode [ ]: Allows to take multishot photossuccessively.-Single shot: 320x240, 640x480, 1280x960,1600x1200-Multishot: 320x240, 640x480vNight mode [ ]: Allows you to take a picture byusing this menu at night.vImage effect [ ]: 4 settings are available.(Negation/Mono/Sepia/Color)vFlash [ ]: Allow you to set the flash when youtake a photo in dark place.vSave to [ ]: You can set the space after taking apicture. (External/Phone)vShutter tone [ ]: You can set the sound whentaking a picture.vSize [ ]: Allows you to set the imagesize.(1600x1200), (1280x960) (640x480) and (320x240).Multishot is only available with the (320x240),(640x480) pixel resolution.NotevYou can control the image size, brightness,colour and other setting by pressing the left softkey .Multimedia](https://usermanual.wiki/LG-Electronics-USA/ME970D/User-Guide-766845-Page-47.png)
![Multimedia49vDelay timer [ ]: Allows you to select the delaytime (Off, 3 Seconds, 5 Seconds, 10 seconds). Then thephone takes a photo after the specified time.vQuality [ ]: Allows you to set the image qualityfrom Normal, Fine and Superfine.vWhite balance [ ]: Allows you to change thesettings according to the enviroment.(Fluorescent/Cloudy/Incandescent/Daylight/Auto)vAuto focus [ ]: Automatically adjusts the focusfor a clear, sharp with a single press of a button.vMetering [ ]: determines the lighting based on alittle part of the subject. You can select the Centred,pot and combined which is to be exposed correctly.Video camera Menu 4.31. Select Video camera menu.2. You can also amend the brightness, size, quality andother settings by pressing left soft key [Options].Video camera settings menu is the same with Photocamera settings, except following items:vSize: You may select following resolution: 128x96, 176x144 .vRecording time: You may select recording time fromthe list: 1 minute, 5 minutes, 30 minutes, 90 minutesand unlimited.](https://usermanual.wiki/LG-Electronics-USA/ME970D/User-Guide-766845-Page-48.png)
![Multimedia50Voice recorder Menu 4.4You can record voice memo.The following [Options] menus are available.vStorageYou can choose Phone or External memory.vRecording modeYou can choose General mode of unlimited recordingor MMS mode of recording up to 30 seconds.Record1. Once recording is started, the message Recording andthe remaining time is displayed.2. If you want to pause or resume recording, press leftsoft key or OK key.3. If you want to finish recording, press right soft key.AlbumYou can display Sounds which have been saved in thememory. Sound files are stored each folder of Defaultsounds, My melody, Voice records, MP3 andDownloaded.Multimedia](https://usermanual.wiki/LG-Electronics-USA/ME970D/User-Guide-766845-Page-49.png)
![MessagingMessaging51New message Menu 5.1This menu includes functions related to SMS (ShortMessage Service), MMS (Multimedia Message Service),Email, voice mail, as well as the network’s servicemessages.Text (Menu 5.1.1)You can write and edit text message, checking thenumber of message pages.1. Enter the New messages menu by pressing the leftsoft key [OK].2. If you want to write a new message, select Text.3. To make text input easier, use T9.4. Press [Options] to attach the followings.OptionsvSend to: Sends text messages.1. Enter numbers of recipient.2. Press rkey to add more recipients.3. You can add phone numbers in the address book.4. Press the [Option] and then press send afterentering numbers. All messages will be automaticallysaved in the outbox folder, even after a sending failure.vInsert-Symbol: You add special characters.-Image: You can insert the Default graphics orgraphics in My pictures that are available for shortmessages.-Sound: You can insert sounds that are available forshort messages.-Default images: You can insert Animations stored.-Default sounds: You can insert Sounds stored.-Text template: You can use Text templates alreadyset in the phone.-Contacts: You can add phone numbers or e-mailaddresses in address book.-My business card: You can add your Business cardto the message.](https://usermanual.wiki/LG-Electronics-USA/ME970D/User-Guide-766845-Page-50.png)
![Messaging52vSave to drafts: Stores messages in Drafts.vT9 languages: Select the language for T9 input mode.You can also deactivate T9 input mode by selecting ‘T9 off’.vClear text: You can clear text while writing SMS.vExit: If you press Exit while writing a message, youcan end the writing message and back to the Messagemenu. The message you have written is not saved.Multimedia (Menu 5.1.2)You can write and edit multimedia messages, checkingmessage size.1. Enter the New message menu by pressing the left softkey [OK].2. If you want to write a new message, selectMultimedia.3. You can create a new message or choose one of themultimedia message templates already made.Maximum available file size, that can be inserted toMMS-message, is 300 kb.OptionsvSend to: You can send multimedia messages tomultiple recipients, priorities your message, and makeit sent later as well.vInsert: You can add Symbol, Image, Video, Sound,New slide, Text template, Contact, Business card,OthersNotevThe phone which supports EMS release 5 isavailable to send colour pictures, sounds, textstyles, etc.. The other party may not receivepictures, sounds or text styles you sent properlyif the phone does not support such options.Messaging](https://usermanual.wiki/LG-Electronics-USA/ME970D/User-Guide-766845-Page-51.png)
![Messaging53vPreview: You can preview multimedia messages youhave created.vSave: You can save multimedia messages To drafts orAs templatesvEdit subject: Allows you to modify the multimediamessage you have chosen.vSlide duration: You can set the duration of slide ofmultimedia message.vT9 languages: Select the language for T9 inputmode. You can also deactivate T9 input mode byselecting ‘T9 off’.vExit: You can get back to the Message menu.Email (Menu 5.1.3)To send/receive an email, you should set up the emailaccount.1. You can input up to 20 email addresses in the To andCc field.Tip: To input “@”, press the and select “@”.2. Key in the subject of the mail and press OK.3. After writing an email message, press the left soft key[Options]. You can access the following optionmenus.NotevIf you select the picture (200K) on writingmultimedia message, loading duration will takearound 10 seconds at least. Furthermore, youcan’t activate any key during loading time. After10 seconds, it is available to write multimediamessage.NotevAll messages will be automatically saved in theoutbox folder, even after a sending failure.](https://usermanual.wiki/LG-Electronics-USA/ME970D/User-Guide-766845-Page-52.png)

![Messaging57Outbox Menu 5.5This menu allows to view the message which is about tosend or is failed sending.After sending the message successfully, the messagewill be moved to sent box.vView: You can view the message.vDelete: You can delete the message.vResend: You can resend the selected message.vEdit: Modifies the massage you choose.vInformation: You can check information of eachmessage.vMulti delete: Select and delete the selectedmessages.vDelete all: You can delete all messages in outbox.Sent Menu 5.6This menu allows you to view the messages which arealready sent. You can check the time and the contents ofmessage.Listen voicemail Menu 5.7Once this menu has been selected, simply press the leftsoft key [OK] to listen to voice mail. You can alsohold down the key in standby mode to listen tovoice mail.NotevWhen you receive a voice mail, your phonedisplays the icon and you hear an alert. Pleasecheck with your network provider for details oftheir service in order to configure the handsetcorrectly.](https://usermanual.wiki/LG-Electronics-USA/ME970D/User-Guide-766845-Page-56.png)
![Messaging58Info message Menu 5.8(Dependent to network and subscription)Info service messages are text messages delivered bythe network to GSM. They provide general informationsuch as weather reports, traffic news, taxis, pharmacies,and stock prices.Each type of has the number; therefore, you can contactservice provider as long as you have input the certainnumber for the information.When you have received an info service message, youcan see the popup message to show you that you havereceived a message or the info service message isdirectly displayed.To view the message again or not in standby mode,follow the sequence shown below;Read (Menu 5.8.1)1. When you have received an info service message andselect Read to view the message, it will be displayedon the screen. You can read another message byscrolling , or [Next].2. The message will be shown until another message isreached.Topics (Menu 5.8.2)(Dependent to network and subscription)vView list: You can see Info service message numberswhich you added. If you press [Options], you canedit and delete info message category which youadded.vActive list: You can select info service messagenumbers in the active list. if you activate an infoservice number, you can receive messages sent fromthe number.Messaging](https://usermanual.wiki/LG-Electronics-USA/ME970D/User-Guide-766845-Page-57.png)
![Messaging63Info message (Menu 5.0.5)vReceiveYes: If you select this menu, your phone will receiveInfo service messages.No: If you select this menu, your phone will notreceive Info service messages any more.vAlertsYes: Your phone will beep when you have receivedInfo service message numbers.No: Your phone will not beep even though you havereceived info service messages.vLanguageYou can select the language you want by pressing[On/Off]. Then, the info service message will be shownin the language that you selected.](https://usermanual.wiki/LG-Electronics-USA/ME970D/User-Guide-766845-Page-62.png)

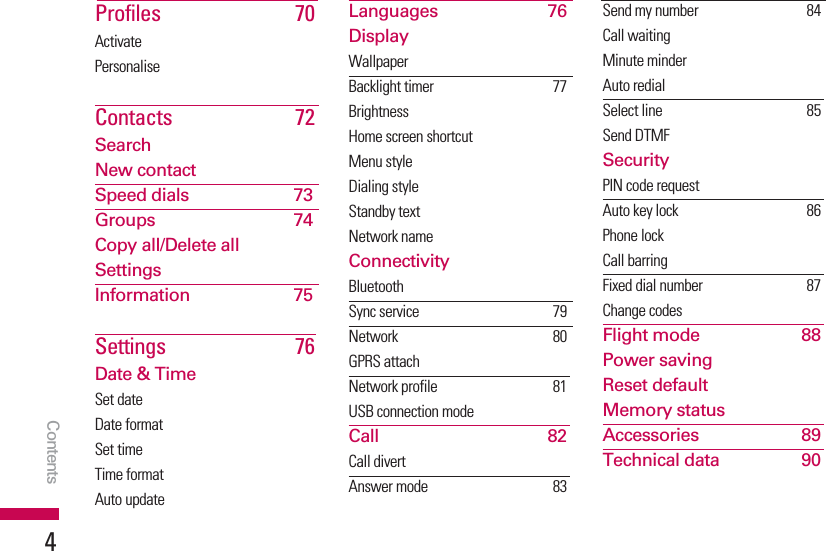
![Profiles70In Profiles, you can adjust and customise the phone tonesfor different events, environments, or caller groups.There are six preset profiles: General, Silent, Vibrateonly, Outdoor and Headset.Each profile can be personalised. Press the left soft key[Menu] and select Profiles using up/down navigationkeys.Activate (Menu 7.X.1)1. A list of profiles is displayed.2. In the Profiles list, scroll to the profile you want toactivate and press the left soft key [OK] or OKkey.3. Then, select Activate.Personalise (Menu 7.X.2)Scroll to the desired profile in the Profile list. Afterpressing the left soft key or the OK key, selectPersonalise.The profile setting option opens. Set the option asrequired.vCall alert type: Set the alert type for incoming calls.vRing tones: Select the desired ring tone from the list.vRing volume: Set the volume of the ringing tone.vMessage alert type: Set the alert type for messages.vMessage tones: Select the alert tone for messages.vKeypad tones: Select the desired keypad tone.vKeypad volume: Set the volume of keypad tone.vSlide tones: Allows to set the flip tone for adjustingenvironment.vEffect sound volume: Set the volume of effectsound.vPower on/off volume: Set the volume of the ringingtone when switching the phone on/off.Profiles](https://usermanual.wiki/LG-Electronics-USA/ME970D/User-Guide-766845-Page-69.png)
![Contacts72Search Menu 8.11. Select Search by press the left soft key [OK].2. Enter the name that you want to search.3. If you want to edit, delete, copy an entry, or to add thevoice to one, select left soft key [Options].The following menu will be displayed.vView: You can view each entry in details.vEdit: You can edit the name, number, group, ringtoneand picture by using the navigation key.vNew message: After you have found the number youwant, you can send a text/multimedia message to theselected number.vSend via: You can send the data of phone book todevices which is compatible with bluetooth throughbluetooth.vDelete: You can delete an entry.vNew contact: After selecting the place (SIM/Phone)you want to save, you can add to the phonebook list.vMulti delete: Allows you to remove a number of filesselected.vCopy to SIM: You can copy an entry from SIM tophone or from phone to SIM.New contact Menu 8.2You can add phonebook entry by using this function.Phone memory capacity is 1000 entries. SIM cardmemory capacity depends on the cellular serviceprovider. The number of character is SIM dependentfeature.NotevMaximum stored name and number lengthdepends on SIM-card type.NotevInstant searching is available by inputting theinitial letter of the name.Contacts](https://usermanual.wiki/LG-Electronics-USA/ME970D/User-Guide-766845-Page-71.png)
![Contacts731. Select Add new by press left soft key [OK].2. Select the memory you want to save: SIM or Phone.a. Input a name.b. Press r, then you can input a number.c. You can set a group for the entry by pressing , .d. You can set a ringtone and a photo for the entry byress left soft key [Option].Speed dials Menu 8.3You can assign any of the keys to with aName list entry. You can call directly by pressing this key.1. Open the phonebook first by pressing the right soft key[Contacts] in standby mode.2. Scroll to Speed dial, then press the left soft key [OK].3. If you want to add speed dial, select <empty> bypressing the left soft key [Add]. Then, you cansearch the name in phonebook.4. After assigning the number as speed dial, you canchange and delete the entry. You can also make a callor send a message by this number.NotevAccording to default memory, if you select SIMor Handset, the phone will not requests thememory to save an entry.](https://usermanual.wiki/LG-Electronics-USA/ME970D/User-Guide-766845-Page-72.png)
![Contacts74Groups Menu 8.4You can list up to the members per each group. There are6 groups you can make lists to.vView members: Shows the group members you haveselected.vGroup ringtone: Allows you to specify ring tone forthe group members’ call.vGroup icon: Allows you to select the icon dependenton Group.vAdd member: You can add group members.vRemove member: You can remove the member fromthe Group member list. But the name and the numberwill be remained in phonebook.vRename: You can change a group name.vReset all: Allows you to delete all the members in thegroup.Copy all/Delete all Menu 8.5/8.6You can copy/move entries from SIM card memory toPhone memory and vice versa.vSIM: You can copy the entry from SIM Card to Phonememory.vPhone: You can copy the entry from Phone memory toSIM Card.Settings Menu 8.71. Press the right soft [Contacts] in standby mode.2. Scroll to Settings, then press the left soft key [OK].vView optionsScroll to highlight View options, and then press the leftsoft key [Select].-Name only: Set the phonebook list with displayingonly name.-With photo: Set the phonebook list with theinformation of character and picture.Contacts](https://usermanual.wiki/LG-Electronics-USA/ME970D/User-Guide-766845-Page-73.png)
![Contacts75Information Menu 8.8vService dial numbersUse this function to access a particular list of servicesprovided by your network operator (if supported by theSIM card).vOwn numbers (SIM dependent)You can save and check your own number in SIM card.vBusiness cardThis option allows you to create your own businesscard featuring Name and an mobile phone number.To create a new business card, press the left soft key[Add] and enter the information into the fields.If you want to edit, delete or to send a business card,select left soft key [option].](https://usermanual.wiki/LG-Electronics-USA/ME970D/User-Guide-766845-Page-74.png)
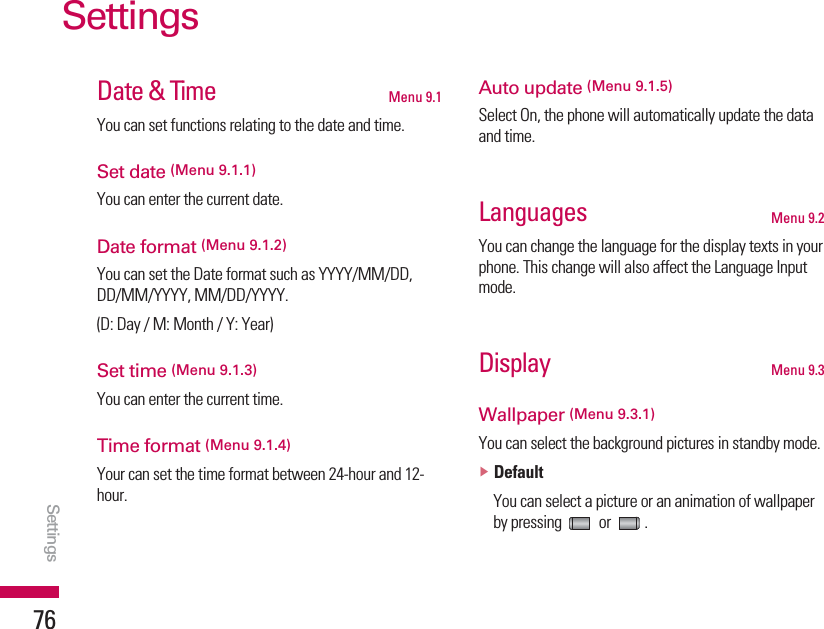
![Settings77Backlight timer (Menu 9.3.2)You can set the light-up duration of the display.(Off/10 secs/20 secs/30 secs/60 secs)Brightness (Menu 9.3.3)You can set the brightness of LCD: 100%, 80%, 60%,40%Home screen shortcut (Menu 9.3.4)Selecting On displays the functionalities of 4 Navigationkeys and Menu key as pictures on the middle of the idlewindow. (Profiles/Messaging/ Favourites/Contacts)Menu style (Menu 9.3.5)Your phone provides you with Grid and Arch menuthemes. Set the menu colour by scrolling and pressingthe left soft key [OK].Dialing style (Menu 9.3.6)Your phone provides you with three dialing styles. (Color style/Beads style/Digital style)Standby text (Menu 9.3.7)If you select On, you can edit the text which is displayedin standby mode.Network name (Menu 9.3.8)If this function is activated, network name will bedisplayed on LCD.Connectivity Menu 9.4Bluetooth (Menu 9.4.1)Bluetooth enables compatible mobile devices,peripherals and computers that are in close proximity tocommunicate directly with each other without wires. This handset supports built-in Bluetooth connectivity,which makes it possible to connect them withcompatible Bluetooth headsets, computer applicationsand so on.](https://usermanual.wiki/LG-Electronics-USA/ME970D/User-Guide-766845-Page-76.png)
![Settings78vBluetooth on/offYou can activate or cancel the bluetooth function.vDevice listYou can view all devices which your ME970d is alreadypaired to. If you enter Paired devices, you access theoptions-Connect: After pairing with headset or stereoheadset, you should connect with those devices.Then you can use those devices.-Add new: Allows to search new bluetooth devicesand add them to your phone’s list of paired devices.When you select Add new your handset will start tosearch for Bluetooth devices within range. Once thedevice you wish to pair appears on the list press theright soft key [Stop]. Scroll to the desired device and press the left soft key[Pair]. You will then be asked to enter a passcode.The passcode can be any code you wish to use (thesame passcode must be used by both devices) or isone that is pre-determined by the manufacturer of thedevice you are trying to pair with. Please check theUser Manual of the device you are initiating the pairwith to see if it already has a predeterminedpasscode in place.NotevIf you use LG PC Sync via bluetooth, you canexchange the data only within phonebookvWhen you receive data from another Bluetoothdevice, the phone requests confirmation. Afterconfirming the transfer, the file will be copied onto your phone.vDepending on the file type, it will be stored inthe following folders:-Video (.3gp, mp4):Videos folder-Image (.bmp, gif, jpg, png):Images folder-Sound (.amr, wav, aac):Sounds folder-MP3 (.mp3):Sounds/MP3 folder-Other files (.txt, html):Others folderSettings](https://usermanual.wiki/LG-Electronics-USA/ME970D/User-Guide-766845-Page-77.png)
![Settings821. Click on the notification area.[Unplug or Eject Hardware]2. Select USB Mass Storage Device, click on Stop. The following message will appear: “The ‘USB MassStorage Device’ device can now be safely removedfrom the system”3. Then remove the cable.Call Menu 9.5You can set the menu relevant to a call by pressing [Select] in the Setting menu.Call divert (Menu 9.5.1)The Call divert service allows you to divert incomingvoice calls, fax calls, and data calls to another number.For details, contact your service provider.vAll voice callsDiverts voice calls unconditionally.vIf busyDiverts voice calls when the phone is in use.vIf no replyDiverts voice calls which you do not answer.vIf out of reachDiverts voice calls when the phone is switched off orout of coverage.vAll data callsDiverts to a number with a PC connectionunconditionally.CautionvBefore you remove the cable, it is necessary thatyou click Exit. Or, the integrity of transferred datais not guaranteed.Settings](https://usermanual.wiki/LG-Electronics-USA/ME970D/User-Guide-766845-Page-81.png)
![Settings83vAll fax callsDiverts to a number with a fax connectionunconditionally.vCancel allCancels all call divert service.The submenusCall divert menus have the submenus shown below.-ActivateActivate the corresponding service.To voice mailboxForwards to message centre. This function is not shownat All data calls and All fax calls menus.To other numberInputs the number for diverting.To favourite numberYou can check recent 5 diverted numbers.-CancelDeactivate the corresponding service.-View statusView the status of the corresponding service.Answer mode (Menu 9.5.2)vSlide openIf you select this menu, you can receive an incomingcall when you open the slide.vAny keyIf you select this menu, you can receive a call bypressing any key except [End] key.vSend key onlyIf you select this menu, you can receive a call by onlypressing [Send] key.](https://usermanual.wiki/LG-Electronics-USA/ME970D/User-Guide-766845-Page-82.png)
![Select line (Menu 9.5.7)(SIM dependent)This menu is shown only if the SIM supports twosubscriber numbers, that is, two phone lines. Selectwhich phone line (between Line 1 and Line 2) you want touse for making calls and sending short messages. Calls on both lines can be answered irrespective of theselected line.Send DTMF (Menu 9.5.8)You can send touch tones during an active call to controlyour voice mailbox or other automated phone services.vInformationDTMF tone: Dual Tones Multiple Frequency.Security Menu 9.6PIN code request (Menu 9.6.1)In this menu, you can set the phone to ask for the PINcode of your SIM card when the phone is switched on.If this function is activated, you°Øll be requested to enterthe PIN code.1. Select PIN code request in the security settings menu,and then press [OK].2. Set Enable/Disable.3. If you want to change the setting, you need to enterPIN code when you switch on the phone.4. If you enter wrong PIN code more than 3 times, thephone will lock out. If the PIN is blocked, you will needto key in PUK code.5. You can enter your PUK code up to 10 times. If you putwrong PUK code more than 10 times, you can notunlock your phone. You will need to contact yourservice provider.Settings85](https://usermanual.wiki/LG-Electronics-USA/ME970D/User-Guide-766845-Page-84.png)
![The submenus:-ActivateAllows to request the network to set call restriction on.-CancelSet the selected call restriction off.-View statusView the status whether the calls are barred or not.Fixed dial number (Menu 9.6.5)(SIM dependent)You can restrict your outgoing calls to selected phonenumbers. The numbers are protected by your PIN2 code.vOnYou can restrict your outgoing calls to selected phonenumbers.vOffYou can cancel fixed dialling function.vNumber listYou can view the number list saved as Fixed dialnumber.Change codes (Menu 9.6.6)PIN is an abbreviation of Personal Identification Numberto prevent use by unauthorized person.You can change the access codes: Security code,PIN1 code,PIN2 code.1. If you want to change the Security code/PIN1/ PIN2code input your original code, and then press [OK].2. Input new Security code/PIN/PIN2 code and verifythem.Settings87](https://usermanual.wiki/LG-Electronics-USA/ME970D/User-Guide-766845-Page-86.png)
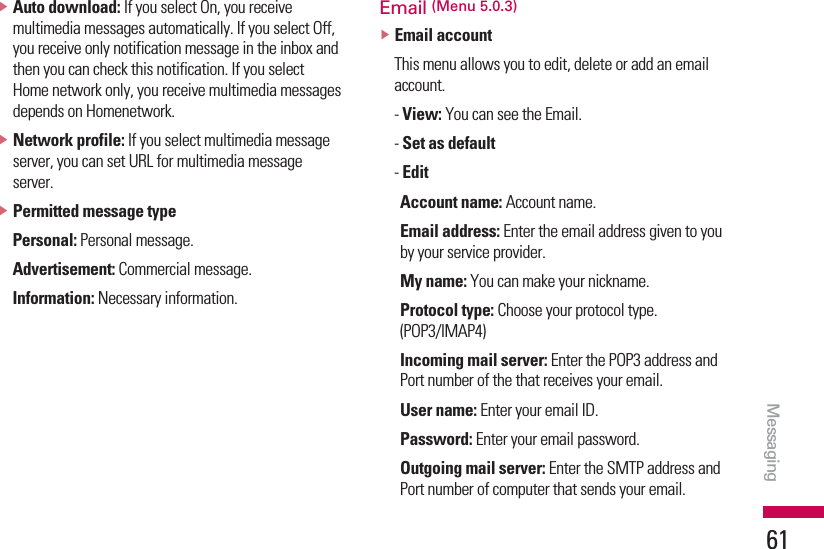
![AccessoriesAccessories89Standard BatteryTravel AdapterThis charger allows you tocharge the battery while awayfrom home or your office.Data cable/CDYou can connect your phoneto PC to exchange the databetween them.Hands free earmicrophoneand music player controllercombovStereo headsetvController: Answer & Endbutton, music player control, volume control, Holdbutton and microphone.Note]Always use genuine LG accessories.]Failure to do this may invalidate your warranty.]Accessories may be different in different regions;please check with our regional service companyor agent for further inquires.There are various accessories for your mobile phone. You can select these options according to yourpersonal communication requirements.](https://usermanual.wiki/LG-Electronics-USA/ME970D/User-Guide-766845-Page-88.png)