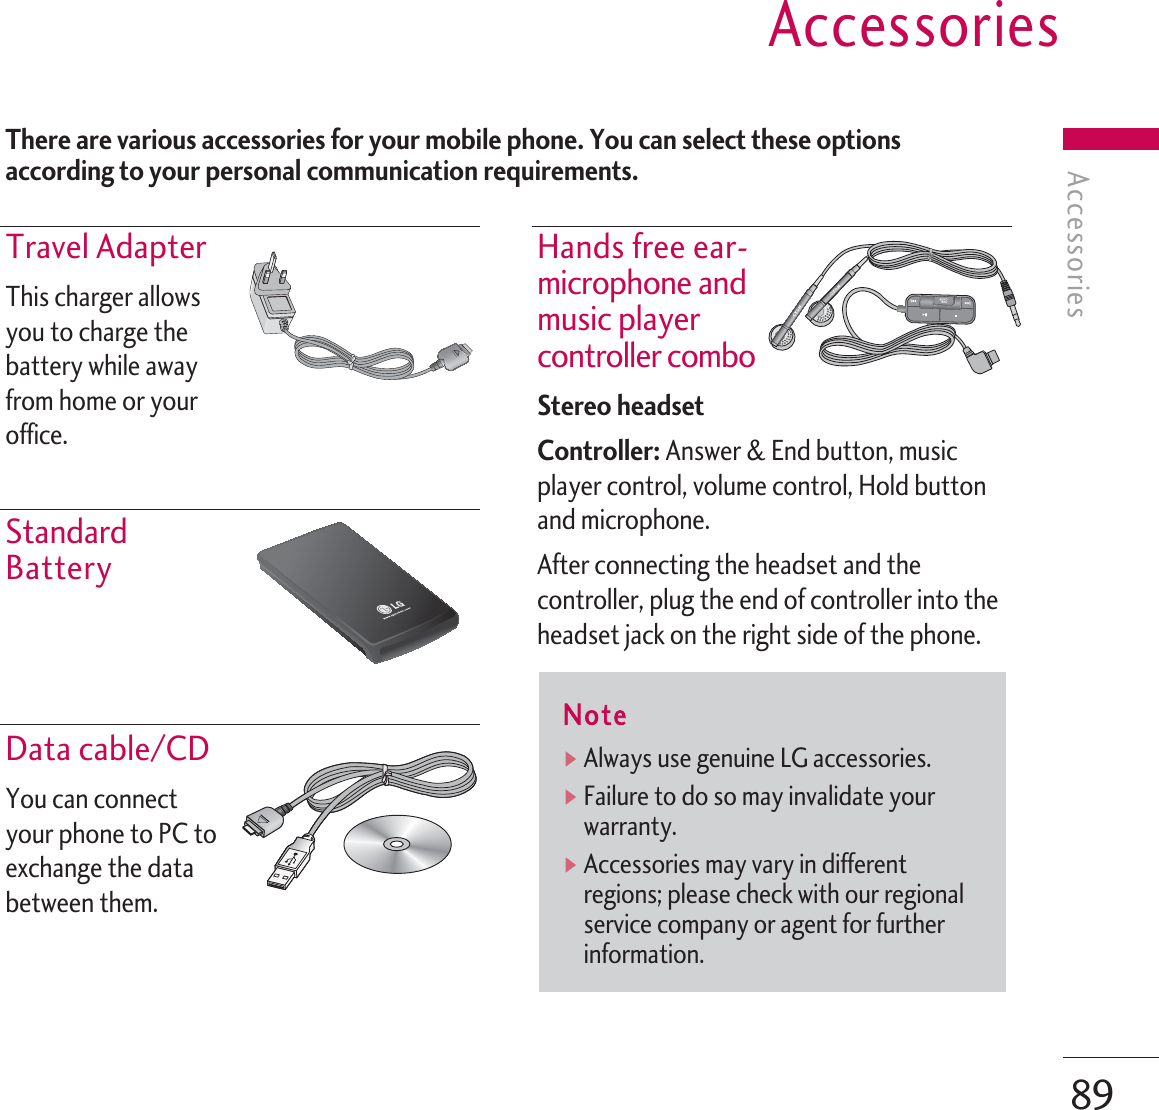
LG Electronics USA MG800D GSM Phone with Bluetooth User Manual
LG Electronics USA GSM Phone with Bluetooth
UserManual.wiki
>
LG Electronics USA
>
MG800D User Manual
>
Revised Manual
Contents
1.
Revised Manual
2.
Manual
3.
Revised manual
Revised Manual
Navigation menu
Upload a User Manual
Namespaces
Wiki Guide
HTML
PDF
Info
Views
User Manual
Discussion / Help
Navigation
![] Do not disassemble this unit. Take it to aqualified service technician when repairwork is required.] Keep away from electrical appliances suchas a TV's, radios and personal computers.] The unit should be kept away from heatsources such as radiators or cookers.] Do not drop.] Do not subject this unit to mechanicalvibration or shock.] The coating of the phone may be damagedif covered with wrap or vinyl wrapper.] Do not use harsh chemicals (such asalcohol, benzene, thinners, etc.) ordetergents to clean your phone. There is arisk of this causing a fire.] Do not subject this unit to excessivesmoke or dust.] Do not keep the phone next to creditcards or transport tickets; it can affect theinformation on the magnetic strips.] Do not tap the screen with sharp objectsas, it may damage the phone.] Do not expose the phone to liquid ormoisture.] Use the accessories like an earphonecautiously.] If you put your phone in a pocket or bagwithout covering the receptacle of thephone (power plug pin), metallic articles(such as a coin, paperclip or pen) mayshort-circuit the phone. Always cover thereceptacle when not in use.] Never place your phone in a microwaveoven as it will cause the battery toexplode.] Only authorised personnel should servicethe phone and its accessories. Faultyinstallation or service may result inaccidents and consequently invalidate thewarranty.] Do not use the phone if the antenna isdamaged. If a damaged antenna contactsskin, it may cause a slight burn. Pleasecontact an LG Authorised Service Centreto replace the damaged antenna.] The label on the phone contains importantinformation for customer supportpurposes. Do not remove it.Guidelines for safe and efficient useGuidelines for safe and efficient use10](https://usermanual.wiki/LG-Electronics-USA/MG800D.Revised-Manual/User-Guide-702493-Page-3.png)
![] Use accessories, such as earphones andheadsets, with caution. Ensure that cablesare tucked away safely and do not touchthe antenna unnecessarily.Efficient phoneoperationTo enjoy optimum performance withminimum power consumption please:] Hold the phone as you speak to any othertelephone. While speaking directly into themicrophone, angle the antenna in adirection up and over your shoulder. If theantenna is extendable/retractable, itshould be extended during a call.] Do not hold the antenna when the phoneis in use. If you hold it, it can affect call quality, italso may cause the phone to operate as ahigher power level that needed andshorten talk and standby times.] If your mobile phone supports infrared,never direct the infrared ray at anyone’seyes.Electronics devicesAll mobile phones may get interference,which could affect performance.] Do not use your mobile phone nearmedical equipment without requestingpermission. Avoid placing the phone overpacemakers, (i.e. in your breast pocket).] Some hearing aids might be disturbed bymobile phones.] Minor interference may affect TVs, radios,PCs, etc.] Do not bend, scratch, or expose to staticelectricity.Road safetyCheck the laws and regulations on the use ofmobile phones in the areas when you drive.] Do not use a hand-held phone whiledriving.] Give full attention to driving.] Use a hands-free kit, if available.Guidelines for safe and efficient use11](https://usermanual.wiki/LG-Electronics-USA/MG800D.Revised-Manual/User-Guide-702493-Page-4.png)
![Guidelines for safe and efficient useGuidelines for safe and efficient use12] Pull off the road and park before making oranswering a call if driving conditions sorequire.] RF energy may affect some electronicsystems in your motor vehicle such as a carstereo or safety equipment.] When riding in a car, do not leave yourphone or set up the hands-free kit near tothe air bag. If wireless equipment isimproperly installed and the air bag isactivated, you may be seriously injured.Blasting areaDo not use the phone where blasting is inprogress. Observe restrictions, and followany regulations or rules.Potentially explosiveatmospheres] Do not use the phone at a refueling point.Don’t use near fuel or chemicals.] Do not transport or store flammable gas,liquid, or explosives in the compartment ofyour vehicle, which contains your mobilephone and accessories.In aircraftWireless devices can cause interference inaircraft.] Turn off your mobile phone beforeboarding any aircraft.] Do not use it on the ground without crewpermission.Battery information andcare] You do not need to completely dischargethe battery before recharging. Unlike otherbattery systems, there is no memory effectthat could compromise the battery’sperformance.](https://usermanual.wiki/LG-Electronics-USA/MG800D.Revised-Manual/User-Guide-702493-Page-5.png)
![] Use only LG batteries and chargers. LGchargers are designed to maximize thebattery life.] Do not disassemble or short-circuit thebattery pack.] Keep the metal contacts of the batterypack clean.] Replace the battery when it no longerprovides acceptable performance. Thebattery pack may be recharged hundredsof times until it needs replacing.] Recharge the battery if it has not beenused for a long time to maximize usability.] Do not expose the battery charger todirect sunlight or use it in high humidity,such as the bathroom.] Do not leave the battery in hot or coldplaces, this may deteriorate the batteryperformance.Network service] Some services and functions described inthis user's guide are dependent onnetwork or subscription. Therefore, allmenus may not be available in your phone.Please consult your network operator formore information about your subscription. Avoid damage to yourhearing ] Damage to your hearing can occur if youare exposed to loud sound for long periodsof time. We therefore recommend that youdo not turn the handset on or off close toyour ear. We also recommend that musicand call volumes are set to a reasonablelevel.]If you are listening to music whilst out andabout, please ensure that the volume is ata reasonable level so that you are aware ofyour surroundings.This is particularly imperative whenattempting to cross the street.Guidelines for safe and efficient use13](https://usermanual.wiki/LG-Electronics-USA/MG800D.Revised-Manual/User-Guide-702493-Page-6.png)
![Making and answeringcallsMaking a call1. Make sure your phone is switched on.2. Enter a phone number, including the areacode. ]Press and hold the clear key btoerase the entire number.3. Press the send key ato call thenumber.4. To end the call, press the end key .Making a call from the callhistory list1. In standby mode, press the send key a,and the latest incoming, outgoing andmissed phone numbers will be displayed.2. Select the desired number by using theup/down navigation keys.3. Press ato call the number.Making an international call 1. Press and hold the key for theinternational prefix. The ‘+’ characterautomatically selects the internationalaccess code.2. Enter the country code, area code, and thephone number.3. Press ato call the number.Ending a Call When you have finished your call, press theend key.Making a call from thephonebook You can save the names and phone numbersdialled regularly in Contacts. You can savethem to the SIM card and/or phone memory.You can dial a number by simply looking upthe desired name in the phonebook andpressing the akey.General FunctionsGeneral Functions23](https://usermanual.wiki/LG-Electronics-USA/MG800D.Revised-Manual/User-Guide-702493-Page-7.png)
![Adjusting the volume If you want to adjust the earpiece volumeduring a call, use the side keyso. Press theup side key to increase and down side key todecrease the volume.Answering a call When you receive a call, the phone rings andthe flashing phone icon appears on thescreen. If the caller can be identified, thecaller’s phone number (or name/photo ifsaved in the phonebook) is displayed.1. To answer an incoming call, open thephone. (When Slide open has been set asthe answer mode. (Menu 9.6.2).)]You can answer a call while using theaddress book or other menu features.2. To end the call, close the phone or pressthe key.Manner mode (Quick) You can activate the manner mode bypressing and holding down the k key afteropening the phone.NotevIn standby mode with the phone open,pressing the side keys adjusts the keytone volume.General FunctionsGeneral Functions24NotevIf Press any key has been set as theanswer mode any key press will answer acall except for the or the right softkey.](https://usermanual.wiki/LG-Electronics-USA/MG800D.Revised-Manual/User-Guide-702493-Page-8.png)
![2. Change the text input mode by pressingYou can check the current textinput mode in the top right corner of theLCD screen.Using the T9 mode The T9 predictive text input mode lets youenter words easily with a minimum number ofkey presses. As you press each key, thephone begins to display the characters that itthinks you are typing based on the built-indictionary.You can also add new words in the dictionary.As new words are added, the word changesto reflect the most likely candidate from thedictionary. You can turn the T9 mode on oroff, and change the T9 language by holdingdown the ( ) key.1. When you are in the T9 predictive textinput mode, start entering a word bypressing keys to . Press onekey per letter.]The word changes as letters are typed.Ignore what’s on the screen until the wordis typed completely.]If the word is still incorrect after typingcompletely, press the down navigation keyonce or more to cycle through the otherword options.Example: Press totype Good. Press [down navigation key] to type Home.]If the desired word is missing from the wordchoice list, add it using the ABC mode.]You can select the language of the T9mode. Press the left soft key [Option],then select T9 languages. Select thedesired language of T9 mode. You can alsoturn off the T9 mode by selecting T9 off.The default setting on the phone is T9enabled mode.2. Enter the whole word before editing ordeleting any keystrokes.3. Complete each word with a space bypressing the key. To delete letters,press b. Press and hold down btoerase entire words.General FunctionsGeneral Functions26](https://usermanual.wiki/LG-Electronics-USA/MG800D.Revised-Manual/User-Guide-702493-Page-10.png)
![Using the ABC mode Use the to keys to enter yourtext.1. Press the key labelled with the requiredletter:]Once for the first letter.]Twice for the second letter.]And so on.2. To insert a space, press the keyonce. To delete letters, press the bkey.Press and hold down the bkey to clearthe whole display.Key Characters in the order display Upper Case Lower Case. , / ? ! - : ' " 1 . , / ? ! - : ' " 1A B C 2 a b c 2D E F 3 d e f 3G H I 4 g h i 4J K L 5 j k l 5 M N O 6 m n o 6P Q R S 7 p q r s 7 T U V 8 t u v 8W X Y Z 9 w x y z 9 Space 0 Space 0NotevRefer to the table below for moreinformation on the characters availableusing the alphanumeric keys.General Functions27NotevTo exit from the text input modewithout saving your input, press .The phone goes back to standby mode.](https://usermanual.wiki/LG-Electronics-USA/MG800D.Revised-Manual/User-Guide-702493-Page-11.png)
![Using the 123 (Number) mode The 123 mode enables you to enternumbers in a text message (a telephonenumber, for example).Press the keys corresponding to the requireddigits before manually switching back to theappropriate text entry mode. You can quicklyswitch from letters to numbers by pressingand holding down the ( ) key.Using the Symbol ModeUsing the Symbol Mode The Symbol Modeenables you to enter various symbols orspecial characters.To enter a symbol, press the key. Usethe navigation keys to scroll through thesymbols and press the corresponding keyand then press the [OK] key.Contacts You can store phone numbers and theircorresponding names in the memory of yourSIM card.In addition, you can store up to 1000numbers and names in the phone memory. The SIM card and phone are both used in thesame way in the Contacts menu.General FunctionsGeneral Functions28](https://usermanual.wiki/LG-Electronics-USA/MG800D.Revised-Manual/User-Guide-702493-Page-12.png)
![Your phone provides a number of controlfunctions that you can use during a call. Toaccess these functions during a call, initiallypress the MP3 key to unlock the touchscreen and then press the left soft key[Options].During a callThe menu displayed on the handset screenduring a call is different to the default mainmenu displayed when in standby mode, andthe options are described below.Making a second callYou can get a number you wish to dial fromthe phonebook to make a second call. Pressthe right soft key selecting Contacts. Tosave the dialled number into the phonebookduring a call, press the right soft key thenselect Add new.Switching between two callsTo switch between two calls, press the leftsoft key then select Swap.Answering an incoming call To answer an incoming call when the handsetis ringing, slide open the phone then pressthe a key. The handset is also able towarn you of an incoming call while you arealready on a call. A tone sounds in theearpiece, and the display will show that asecond call is waiting.This feature, known as Call waiting, is onlyavailable if your network supports it. Fordetails of how to activate and deactivate itsee Call waiting (Menu 9.6.4)If Call waiting is activated, you can put thefirst call on hold and answer the second, bypressing or by selecting the left soft key, thenHold & Answer. You can end the current calland answer the waiting call by selecting theRight soft key and then End & Answer.Rejecting an incoming callYou can reject an incoming call withoutanswering by simply pressing the key.During a call, you can reject an incoming callby pressing the Right soft key [Menu] keyand selecting the Conference/Reject or bypressing the .In-call menuIn-call menu30](https://usermanual.wiki/LG-Electronics-USA/MG800D.Revised-Manual/User-Guide-702493-Page-13.png)
![Muting the microphoneYou can mute the microphone during a callby pressing the [Options] key then selectingMute on. The handset can be unmuted byselecting Mute off. When the handset ismuted, the caller cannot hear you, but youcan still hear them.Switching DTMF tones on duringa callTo turn DTMF tones on during a call, pressthe left soft key, and then select DTMF on.DTMF tones can be turned off the same way.DTMF tones allow your phone to make use ofan automated switchboard.Multiparty or conferencecallsThe multiparty or conference serviceprovides you with the ability to have asimultaneous conversation with more thanone caller, if your network operator supportsthis feature. A multiparty call can only be setup when you have one active call and one callon hold, both calls having been answered.Once a multiparty call is set up, calls can beadded, disconnected or separated (that is,removed from the multiparty call but stillconnected to you) by the person who set upthe multiparty call. These options are allavailable from the In-Call menu. Themaximum callers in a multiparty call are five.Once started, you are in control of themultiparty call, and only you can add callersto the multiparty call.Making a second callYou can make a second call while currently ona call. Enter the second number and press theakey. When the second call isconnected, the first call is automaticallyplaced on hold. You can swap between callsby pressing the left soft key then selectingSwap.Setting up a conference callPlace one call on hold and while the active callis on, press the left soft key and then selectthe Conference/Join all.In-call menu31](https://usermanual.wiki/LG-Electronics-USA/MG800D.Revised-Manual/User-Guide-702493-Page-14.png)
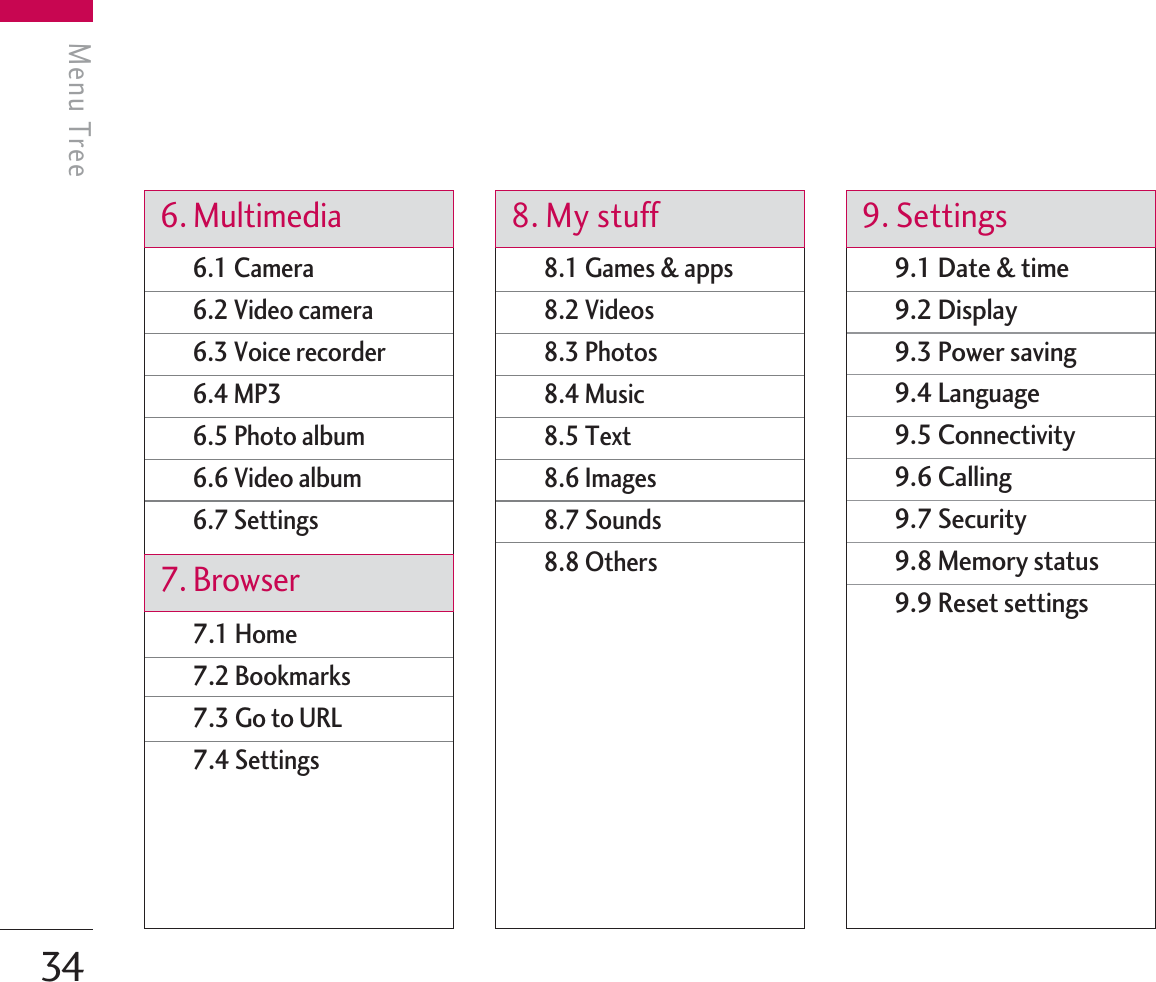
![The following illustration shows the available menu structure and indicates the:]Number assigned to each menu option. 33Menu TreeMenu Tree 5.1 New message5.2 Inbox5.3 Mailbox5.4 Drafts5.5 Outbox5.6 Listen to voice mail5.7 Info message5.8 Templates5.9 Settings3.1 Favourites3.2 Alarm clock3.3Calculator3.4 Unit converter3.5 World time3.6 SIM-Menu4.1 Contacts4.2 Calendar4.3 Memo1.X.1 Activate 1.X.2 Personalise 1.X.3 Rename 2.1 Missed calls2.2 Received calls2.3 Dialled calls2.4 All calls2.5 Delete recent calls2.6 Call charges2.7 GPRS information1. Profiles3. Tools 5. Messages4. Organiser2. Call register](https://usermanual.wiki/LG-Electronics-USA/MG800D.Revised-Manual/User-Guide-702493-Page-16.png)
![In Profiles, you can adjust and customise thephone tones for different events,environments, or caller groups.There are five preset profiles: General,Silent, Vibrate only, Loud and Headset.Each profile can be personalised. Press theleft soft key [Menu] and select Profiles usingup/down navigation keys.Activate (Menu 1.X.1)1. A list of profiles is displayed.2. In the Profiles list, scroll to the profile youwant to activate and press the left soft keydOK key.3. Then, select Activate.Personalise (Menu 1.X.2)Scroll to the desired profile in the Profile list.After pressing the left soft key dor theOK key, select Personalise. The profilesetting option opens. Set the option asrequired.]Call alert type: Set the alert type forincoming calls. ]Ring tone: Select the desired ring tonefrom the list. ]Ring volume: Set the volume of the ringingtone.]Message alert type: Set the alert type formessages.]Message tone: Select the alert tone formessages.]Keypad tone: Select the desired keypadtone.]Keypad volume: Set the volume of keypadtone.]Slide tone: Allows you to set the slidetone.]Effect sound volume: Set the volume ofeffect sound.]Power on/off volume: Set the volume ofthe ringing tone when switching the phoneon/off.]Auto answer: This function will beactivated only when your phone isconnected to the handsfree kit.• Off: The phone will not answerautomatically.Profiles Profiles 35](https://usermanual.wiki/LG-Electronics-USA/MG800D.Revised-Manual/User-Guide-702493-Page-18.png)
![• After 5 secs: After 5 seconds, the phonewill answer automatically.• After 10 secs: After 10 seconds, thephone will answer automatically.Rename (Menu 1.X.3)You can rename a profile and give it any nameyou choose to.1. To change the name of a profile, scroll tothe profile in the profile list and afterpressing the left soft key dor the OKkey, select Rename.2. Key in the desired name and press the OKkey or the left soft key d[OK].NotevVibrate only, Silent and Headset profilescannot be renamed.Profiles Profiles 36](https://usermanual.wiki/LG-Electronics-USA/MG800D.Revised-Manual/User-Guide-702493-Page-19.png)
![You can check the record of missed, received,and dialled calls only if the network supportsthe Calling Line Identification (CLI) within theservice area.The number and name (if available) aredisplayed together with the date and time atwhich the call was made. You can also view calltimes.Missed calls Menu 2.1This option lets you view the last 10unanswered calls. You can also:]View the number if available and call it, orsave it in the Address Book]Enter a new name for the number and saveboth in the Address Book]Send a message to this number]Delete the call from the listReceived calls Menu 2.2This option lets you view the last 10 incomingcalls. You can also:]View the number if available and call it orsave it in the Address Book]Enter new name for the number and saveboth in the Address Book]Send a message to this number]Delete the call from the listDialled calls Menu 2.3This option lets you view the last 20 outgoingcalls (called or attempted).You can also:]View the number if available and call it orsave it in the Address Book]Enter new name for the number and saveboth in the Address Book]Send a message to this number]Delete the call from the listCall registerCall register37](https://usermanual.wiki/LG-Electronics-USA/MG800D.Revised-Manual/User-Guide-702493-Page-20.png)
![All calls Menu 2.4You can view all lists of outgoing or incomingcalls.Delete recent calls Menu 2.5Allows you to delete Missed calls andReceived calls lists. You can delete Dialledcalls and All calls lists at one time.Call charges Menu 2.6Call duration (Menu 2.6.1) Allows you to view the duration of yourincoming and outgoing calls. You can alsoreset the call times.The following timers are available:]Last call: Length of the last call.]All calls: Total length of all calls made andincoming calls since the timer was lastreset.]Received calls: Length of the incomingcalls.]Dialled calls: Length of the outgoing calls.]Reset all: Allows you to reset the timers ofall calls by pressing the left soft key d[Yes].Call costs (Menu 2.6.2)Allows you to check the cost of your last call,all calls, remaining and reset the cost. Toreset the cost, you need to know your PIN2code.Settings (Menu 2.6.3) (SIM Dependent)]Set tariff: You can set the currency typeand the unit price. Contact your serviceproviders to obtain charging unit prices.To select the currency or unit in this menu,you need the PIN2 code.]Set credit: This network service allows youto limit the cost of your calls by selectedcharging units. If you select Read, thenumber of remaining unit is shown. If youselect Change, you can change yourchange limit.Call registerCall register38](https://usermanual.wiki/LG-Electronics-USA/MG800D.Revised-Manual/User-Guide-702493-Page-21.png)
![]Auto display: This network service allowsyou to automatically see the cost of yourlast calls. If set to On, you can see the lastcost when the call is released.GPRS information Menu 2.7You can check the amount of datatransferred over the network through theGPRS information option. In addition, youcan also view how much time you are online.Call duration (Menu 2.7.1)You can check the duration of Last call andAll calls. You can also reset the call timers.Data volume (Menu 2.7.2) You can check The Sent, Received or Alldata volumes and Reset all.Call register39](https://usermanual.wiki/LG-Electronics-USA/MG800D.Revised-Manual/User-Guide-702493-Page-22.png)
![Favourites Menu 3.1This option allows you to add your ownfavourites to the list already provided. Onceyou create your own menu, you can accessthe desired function quickly in the idle screenby pressing the up navigation key.Alarm clock Menu 3.2You can set up to 5 alarm clocks to go off ata specified time.1. Select On and enter the alarm time youwant.2. Select the repeat period: Once, Mon Fri,Mon Sat, Everyday.3. Select the alarm tone you want and pressd[OK].4. Edit the alarm name and press d[OK].Calculator Menu 3.3This contains the standard functions such as+, _, x, ÷ : Addition, Subtraction,Multiplication, and Division.Furthermore, you can use the variousfunction of calculator such as +/_, sin, cos,tan, log, IN, exp, sqrt.1. Input the numbers by pressing numerickeys.2. Use a navigation key to select a sign forcalculation.3. Then input the numbers.4. Press hkey to view the result.5. To input the decimal number, press key. If youpress key, you can enter ( ).6. To end Calculator, press the right soft keye[Back].NotevThe menu of SMS, MMS, Games &apps, Connectivity, Alarm clock, MP3and Camera is already provided in yourown favourites.Tools Tools 40](https://usermanual.wiki/LG-Electronics-USA/MG800D.Revised-Manual/User-Guide-702493-Page-23.png)
![Unit converter Menu 3.4This converts any measurement into a unityou want. There are 9 types that can beconverted into units:Currency, Area, Length, Weight,Temperature, Volume, Velocity, Shoes andClothes.1. You can select one of nine unit types bypressing d[OK] key.2. Select the unit you want to convert bypressing iand j. It’s impossible toinput “-” symbol inunit converter.3. Select the standard value by using k, l.World time Menu 3.5You can check the current time of GreenwichMean Time (GMT) and major cities aroundthe world, using the left/right navigationkeys.The screen shows the city name, current dateand time.To select the time zone in which you arelocated, proceed as follows:1. Select the city corresponding to your timezone by pressing the left/right navigationkeys one or more times. The local date andtime are displayed.2. If you want to change the time display instandby mode to the selected time, pressthe left soft key and select Set.SIM-Menu Menu 3.6This menu depends on SIM and the networkservices.Note]In case the SIM card supportSAT(i.e. SIM Application Toolkit)services, this menu will be theoperator specific service namestored on the SIM card.]In case the SIM card does notsupport SAT services, this menuwill be Profiles.Tools 41](https://usermanual.wiki/LG-Electronics-USA/MG800D.Revised-Manual/User-Guide-702493-Page-24.png)
![Contacts Menu 4.1Search contacts (Menu 4.1.1) 1. Select Search by pressing the right softkey e[Contacts] or [OK].2. Enter the name that you want to search.3. If you want to edit, delete or copy anentry, select the left soft key d[Options]. The following menuwill bedisplayed.]Edit: You can edit the name, number,group, character and picture by using thenavigation key.]Write messages: After you have found thenumber you want, you can send atext/multimedia message to the selectednumber.]Send via Bluetooth: You can send thedata of phone book to devices which iscompatible with Bluetooth throughBluetooth.]Copy to handset: You can copy an entryfrom SIM to phone or from phone to SIM.]Assign speed dial: You can assign theentry as a speed dial.]View caller groups: For further details see(Menu 4.1.3).]Delete: You can delete an entry.Add new (Menu 4.1.2) You can add a phonebook entry by using thisfunction. Phone memory capacity is 1000NotevTo use the Photo Caller ID feature,contacts must exist within the PhoneBook and photos must be taken in72x72 resolution. For moreinformation about associating a phototo a contact please refer to the Camerasection.NotevInstant searching is available byinputting the initial letter of the nameor number you want to search.OrganiserOrganiser42](https://usermanual.wiki/LG-Electronics-USA/MG800D.Revised-Manual/User-Guide-702493-Page-25.png)
![entries. SIM card memory capacity dependson the mobile service provider. You can alsosave 40 characters of name in The Phonememory, and save characters in the SIM card.The number of characters is a SIM dependentfeature.1. Select Add new by pressing the left softkey d[OK] or [OK].2. Select the memory you want to save: SIMor Phone. If you set to Phone, you need toselect which number you want as a mainnumber.a. Press d[OK] to input a name.b. Press d[Save], then you can input anumber.c. You can set a group for the entry bypressing k, l.d. You can set a picture for the entry bypressing k, l.Caller groups (Menu 4.1.3) You can add up to 20 members per group,with up to a maximum of 7 groups in total.]Member list: Shows the group membersyou have selected.]Group ring tone: Allows you to specifyring tone for the group members’ call.]Group icon: Allows you to select the icondependent on Group.]Add member: You can add groupmembers. Each group should not exceed20 members.]Remove member: You can remove themember from the Group member list. Butthe name and the number will remain in thephonebook.]Rename: You can change a group name.]Remove all: Allows you to delete all themembers in the group.NotevMaximum stored name and numberlength depends on SIM-card type.Organiser43](https://usermanual.wiki/LG-Electronics-USA/MG800D.Revised-Manual/User-Guide-702493-Page-26.png)
![Speed dial (Menu 4.1.4) Assign contacts to any of the keys to.You can then call that contact by pressingthe corresponding number key.1. Open the phonebook first by pressing theright soft key e[Contacts] in standbymode.2. Scroll to Speed dial, then press the leftsoft key d[OK].3. If you want to add speed dial, select(empty). Then, you can search the name inphonebook.4. After assigning the number as speed dial,you can change and delete the entry. Youcan also make a call or send a message tothis number.Own number (Menu 4.1.5) (Sim dependent) You can save and check your own number inSIM card.My business card (Menu 4.1.6) This option allows you to create your ownbusiness card featuring Name and a mobilephone number. To create a new businesscard, press the left soft key d[Add] andenter the information into the fields.Settings (Menu 4.1.7) 1. Press the right soft e[Contacts] instandby mode.2. Scroll to Settings, then press the left softkey d[OK].]Default memory Scroll to highlight Default memory, andthen press the left soft key d[OK].- If you select Always ask, when adding anentry, the phone will ask where to storeit.- If you select SIM or Handset, the phonewill store an entry to the SIM or phone.]View options Scroll to highlight View options, and thenpress the left soft key d[OK].OrganiserOrganiser44](https://usermanual.wiki/LG-Electronics-USA/MG800D.Revised-Manual/User-Guide-702493-Page-27.png)
![- Name only: Set the phonebook list bydisplaying the name only.- Name & number: Set the phonebooklist by displaying the name and number.- With pictures: Set the phonebook listwith the information and picture ofcontact.]Copy/Move allYou can copy/move entries from SIM cardmemory to Phone memory and vice versa.1. Open the Phonebook first by pressing theright soft key e[Contacts] in standbymode.2. Scroll to Copy/Move all, and then pressthe left soft key d[OK] to enter thismenu.•SIM to Handset: You can copy/movethe entries from SIM Card to Phonememory.•Handset to SIM: You can copy/movethe entries from Phone memory to SIMCard.]Memory in use: This feature allows you tosee how many entries are in use, or free inyour phonebook.]Clear contacts You can delete all the entries in the SIMand Phone. This function requires theSecurity code.1. Scroll to highlight Clear contacts, and thenpress the left soft key d[OK].2. Highlight the memory you wish to erase,and then press the left soft key d[OK].3. Enter the security code and press the leftsoft key d[OK] or the right soft keye[Back].]Service dial number Use this function to access a particular listof services provided by your networkoperator (if supported by the SIM card).Organiser45](https://usermanual.wiki/LG-Electronics-USA/MG800D.Revised-Manual/User-Guide-702493-Page-28.png)
![Calendar Menu 4.2When you enter this menu a calendar will bedisplayed. The month and year are shown atthe top of the screen. Whenever you thechange the date under the Settings menu,the calender will update automatically. Thecurrent date will be highlighted in green andany schedule or memos will be indicated witha red triangle at the top left hand corner ofthe corresponding square. An audible alarmcan be set for memo’s and reminders.To change the day, month and year.Key Description Key DescriptionYearly ijWeeklyMonthly klDailyIn calendar mode, press the left soft key d[Options] as follows;Add new(Menu 4.2.1) Allows you to add a new schedule and memofor the chosen day. You can store up to 20notes. Input the subject and then press leftsoft key d[OK]. You enter theappropriate information in the followingsection; Time, Repeat and Alarm.View daily schedules (Menu 4.2.2) View all schedules and memo for the chosenday. Use i, jto browse through thenote lists. If you set the alarm for a note, thealarm icon is displayed.If you want to view the note in detail, pressthe left soft key d[OK]. Press the left softkey d[Options] to delete or edit the noteyou have selected.Delete past(Menu 4.2.3) You can delete the past schedule that youhave already been notified of.Delete all (Menu 4.2.4) You can delete all the notes.OrganiserOrganiser46](https://usermanual.wiki/LG-Electronics-USA/MG800D.Revised-Manual/User-Guide-702493-Page-29.png)
![Go to date(Menu 4.2.5) You can go the chosen date directly.Set alarm tone (Menu 4.2.6)You can set the alarm tone of each chosendate.Memo Menu 4.31. Select the Memo by pressing the left softkey d[OK].2. If the entry is empty, press the left soft keyd[Write].3. Input the memo and then press the leftsoft key d[OK].Organiser47NotevIf you want to change the text inputmode, press the in order.](https://usermanual.wiki/LG-Electronics-USA/MG800D.Revised-Manual/User-Guide-702493-Page-30.png)
![New message Menu 5.1This menu includes functions related to SMS(Short Message Service), MMS (MultimediaMessage Service), Email, voice mail, as well asthe network’s service messages.Write text message (Menu 5.1.1) You can write and edit text message,checking the number of message pages.1. Enter the New messages menu bypressing the left soft key d[OK].2. If you want to write a new message, selectWrite text message. 3. To make text input easier, use T9.4. Press [Insert] to attach the following;Insert ]Images: You can insert the Defaultgraphics or graphics in My pictures thatare available for short messages.]Sounds: You can insert sounds that areavailable for short messages. ]Text templates: You can use Texttemplates already set in the phone.]Contacts: You can add phone numbers ore-mail addresses in the address book.]Symbol: You can add special characters.]My business card: You can add yourBusiness card to the message.5. After you complete the message, to selectthe required option, press the left soft keyd[Options].Options ]Send: Sends text messages.1. Enter numbers of recipient.2. Press jkey to add more recipients.3. You can add phone numbers in theaddress book.4. Once the numbers have been entered,press the left soft key dto send themessage. All messages will automatically besaved in the outbox slide, even after asending failure.]Save to drafts: Stores messages in theDrafts slide.]Font & Alignment: You can select theSize and Style of font, and the Alignmentof text.Messages Messages 48](https://usermanual.wiki/LG-Electronics-USA/MG800D.Revised-Manual/User-Guide-702493-Page-31.png)
![]Colour: You can also set the Colour of thetext (foreground) and the background.]Add T9 dictionary: You can add your ownwords. This menu will only be shown whenthe edit mode has been set toT9ABC/T9Abc/T9abc.]T9 languages: Select the desired languagefor T9 input mode. You can also deactivatethe T9 input mode by selecting ‘T9 off ’.]Exit: If you press Exit whilst writing amessage, you will be taken back to themessage menu. Also the written messagewill not have been saved.Write multimedia message (Menu 5.1.2)A multimedia message can contain text,images, and/or sound clips. This feature canbe used only if it is supported by yournetwork operator or service provider. Onlydevices that offer compatible multimediamessage or e-mail features can receive andsend multimedia messages.1. Enter the New message menu by pressingthe left soft key d[OK].2. If you want to write a new message, selectWrite multimedia message. 3. You can create a new message or chooseone of the multimedia message templatesalready made.4. Press Insert to add Image, Sound,Contacts, Symbol, New photo, New sound,Text templates, My business card.Maximum available file size, that can beinserted to MMS-message, is 100 kb.NotevThis phone supports EMS release 5, sois available to send colour pictures,sounds, text styles, etc.. If the otherparties handsets do not support suchoptions, the pictures, sounds or textssent may not be displayed correctly ontheir phones.Messages 49](https://usermanual.wiki/LG-Electronics-USA/MG800D.Revised-Manual/User-Guide-702493-Page-32.png)
![Options ]Send: You can send multimedia messagesto multiple recipients, as well as save it tosend at a later time.]Preview: You can preview multimediamessages you have created.]Save: You can save multimedia messagesTo drafts or As template.]Edit subject: Allows you to modify themultimedia message you have chosen.]Add slide: You can add a slide before orafter current slide.]Move to slide: You can move to theprevious or the next slide.]Delete slide: You can delete currentfolders.]Set slide format- Set timer: You can set a timer for slide,text, picture and sound.- Swap text and picture: You can switchthe position of picture and text of themessage.]Remove media: You can remove a pictureor sound in the slide. This option can beshown only when any media file has beenadded.]Add T9 dictionary: You can add your ownwords. This menu will only be shown whenthe edit mode has been set toT9ABC/T9Abc/T9abc.]T9 languages: Select the desired languagefor T9 input mode. You can also deactivateT9 input mode by selecting ‘T9 off ’.]Exit: Will take you back to the Messagemenu. NotevAll messages will be automatically savedin the outbox slide, even after a sendingfailure.Messages Messages 50](https://usermanual.wiki/LG-Electronics-USA/MG800D.Revised-Manual/User-Guide-702493-Page-33.png)
![Write email message (Menu 5.1.3) To send/receive an email, you should set upthe email account. 1. You can input up to 12 email addresses inthe To and Cc field.Tip: To input “ @”, press the andselect “ @”.2. Key in the subject of the mail and press OK.3. After writing an email message, press theleft soft key d[Options]. You can accessthe following option menus. ]Send: Sends the email message. ]Edit recipients: You can edit recipients.]Edit subject: You can edit the subject. ]Save to drafts: Select this to save themessage in Drafts.]T9 languages: Select the language for T9input mode. You can also deactivate the T9input mode by selecting ‘T9 off ’.]Exit: If you select Exit whilst writing amessage, you will be taken back to themessage menu. Also the written messagewill not have been saved.NotevWhen creating a multimedia message, ifyou upload a picture (50K) you mayfind that whilst the picture is loadingyou will not be able to carry out anyother actions until the picture hascompeted loading.Messages 51](https://usermanual.wiki/LG-Electronics-USA/MG800D.Revised-Manual/User-Guide-702493-Page-34.png)
![* SIM messageSIM message means that the message isexceptionally stored in the SIM card. Youcan move this message to the phone.When you are notified that you have receiveda multimedia message, you have to wait forthe message to be downloaded before youcan view it.To read a message, select one of themessages by pressing the left soft key d[Options].]View: You can view the received messages.]Reply: You can reply to the sender.]Forward: You can forward the selectedmessage to another party. ]Delete: You can delete the currentmessage.]Return call: You can call back the sender. ]Information: You can view informationabout received messages; Sender’saddress, Subject (only for Multimediamessage), Message date & time, Messagetype, Message size.]Delete all: You can delete all messages.Mailbox Menu 5.3When you access this menu, you can eitherconnect to your remote mailbox to retrieveyour new email messages, or you can view thepreviously retrieved email messages withoutlogging in to the email server.You can check the saved emails, drafts,outbox, and sent emails. In the Inbox, up to30 emails are stored.Messages 53](https://usermanual.wiki/LG-Electronics-USA/MG800D.Revised-Manual/User-Guide-702493-Page-36.png)
![Drafts Menu 5.4Using this menu, you can preset up to fivemultimedia messages that you use mostfrequently. This menu shows the presetmultimedia message list.The following options are available.]View: You can see the multimediamessages.]Edit: Allows you to modify the chosenmessage.]Delete: Deletes the message you choose.]Information: To view the information ofthe message. ]Delete all: Deletes all of the messages inthe slide.Outbox Menu 5.5This menu allows you to view the messageswhich you have sent, those that are currentlysending or messages that have failed sendingpreviously.Icon Icon directiveMMS UnsentMMS sentMMS delivery confirmedSMS unsentSMS sentSMS delivery confirmed]View: You can view the message.]Forward: You can forward the selectedmessage to another party.]Delete: You can delete the message.]Information: You can check theinformation of each message.]Delete all: You can delete all the messagesin the outbox.Messages Messages 54](https://usermanual.wiki/LG-Electronics-USA/MG800D.Revised-Manual/User-Guide-702493-Page-37.png)
![Listen to voice mail Menu 5.6Once this menu has been selected, simplypress the left soft key d[OK] to listen tovoice mail. You can also hold down the key in standby mode to listen to voice mail.Info message Menu 5.7(Dependent to network andsubscription) Info service messages are text messagesdelivered by the network to your handset.They provide general information such asweather reports, traffic news, taxis,pharmacies, and stock prices. When youreceive an info service message, you will see apopup message show you that or the infoservice message is directly displayed. To viewthe message again follow the sequenceshown below;Read(Menu 5.7.1)1. When you have received an info servicemessage and select Read to view themessage, it will be displayed on the screen.You can read another message by scrollingi, jord[OK].2. The message will be shown until anothermessage is selected.Topics (Menu 5.7.2)(Dependent to network andsubscription)]Add new: You can add Info servicemessage numbers in the Phone memorywith its nickname.]View list: You can see Info service messagenumbers which you have added. If youpress d[Options], you can edit anddelete info message categories which youhave added.NotevWhen you receive a voice mail, yourphone will display an icon and you willhear an alert. Please check with yournetwork provider for details of theirservice in order to configure thehandset correctly.Messages 55](https://usermanual.wiki/LG-Electronics-USA/MG800D.Revised-Manual/User-Guide-702493-Page-38.png)
![]Active list: You can select info servicemessage numbers in the active list. if youactivate an info service number, you canreceive messages sent from the number.Tem p lates Menu 5.8Tex t templates (Menu 5.8.1) You have 6 text templates as below;• Please call me back. • I’m late. I will be there at •Where are you now? •I am on the way. • Top urgent. Please contact. • I love you. Multimedia templates (Menu 5.8.2)After you have saved a new template, you canuse the following options.]View: You can see multimedia templates.]Delete: You can delete multimediatemplates.]Add new: Allows you to add newmultimedia templates.]Write messages: You can write and sendmultimedia messages.]Edit: You can edit multimedia templates.]Delete all: Allows you to delete allmultimedia messages.Settings Menu 5.9Text message (Menu 5.9.1)]Message types:Text, Voice, Fax, Natl. paging, X.400,Email, ERMESUsually, the type of message is set to Text.You can convert your text into alternativeformats. Contact your service provider forthe availability of this function.]Validity period: This network serviceallows you to set how long your textmessages will be stored at the messagecentre.Messages Messages 56](https://usermanual.wiki/LG-Electronics-USA/MG800D.Revised-Manual/User-Guide-702493-Page-39.png)
![]Delivery report: If you set to Yes, you cancheck whether your message is sentsuccessfully.]Reply charging: When a message is sent, itallows the recipients to reply and chargethe cost of the reply to your telephone bill.]SMS centre: If you want to send the textmessage, you can receive the address ofSMS centre through this menu.Mulitimedia message (Menu 5.9.2) ]Priority: You can set the priority of themessage you choose.]Validity period: This network serviceallows you to set how long your textmessages will be stored at the messagecentre.]Subject: You can enter multimediamessages subject when this menu is on.]Delivery report: If it is set to Yes in thismenu, you can check whether yourmessage is sent successfully.]Auto retrieve: If you select On, youreceive multimedia messagesautomatically. If you select Off, you receiveonly notification message in the inbox andthen you can check this notification. If youselect Home network only, you receivemultimedia messages depends onHomenetwork.]Network settings: If you select multimediamessage server, you can set URL formultimedia message server.]Permitted message types Personal: Personal message. Advertisements: Commercial message. Information: Necessary information.Email (Menu 5.9.3)This menu allows you to edit, delete or addan email account.]Account You can set up to 3 email accounts byselecting Add new. Using the Edit menu,you can set the following values.Set as defaultEdit - Title: Account name.Messages 57](https://usermanual.wiki/LG-Electronics-USA/MG800D.Revised-Manual/User-Guide-702493-Page-40.png)
![- User ID: Enter your email ID.- Password: Enter your email password.- Email address: Enter the email addressgiven to you by your service provider.- Outgoing server: Enter the SMTPaddress and Port number of computerthat sends your email.- Incoming server: Enter the POP3address and Port number of the thatreceives your email.- Leave msg on server: Select Yes toleave the messages on the server.- Insert signature: Select Yes to attachyour signature to your email messages.- Access point: Allow you to select theaccess point from the list.- SMTP port number: Allow you to editSMTP port number.- POP3 port number: Allow you to editPOP3 port number.- Outgoing server ID/PW: Enter the IDand password for sending your email.Delete: Deletes the selected account fromthe list.]Access point You can edit the access points.There are default access points for someopera tors, stored in phone memory.Title: Access point name.APN: Input the APN of Access point.User ID: Enter the User ID of your accesspoint.Password: Enter the Password of youraccess point.DNS address: Set DNS address.]SignatureYou can make your signature.Voice mailbox number (Menu 5.9.4)You can receive voicemail if your networkservice provider supports this feature. Whena new voicemail has arrived, the symbol willbe displayed on the screen. Please check withyour network service provider for details oftheir service in order to configure the phoneaccordingly.Messages Messages 58](https://usermanual.wiki/LG-Electronics-USA/MG800D.Revised-Manual/User-Guide-702493-Page-41.png)
![]Home: You can listen to voice mails byselecting Home. ]Roaming: Even when you are abroad, youcan listen to voice mails if a roaming serviceis supported.Info message (Menu 5.9.5) ]Receive Yes: If you select this menu, your phonewill receive Info service messages. No: If you select this menu, your phonewill not receive Info service messages anymore.]Alert Yes: Your phone will beep when you havereceived Info service message numbers.No: Your phone will not beep even thoughyou have received info service messages.]Languages You can select the language you want bypressing [On/Off]. Then, the info servicemessage will be shown in the language thatyou selected.Push message (Menu 5.9.6) You can set the option whether you willreceive the message or not.Messages 59](https://usermanual.wiki/LG-Electronics-USA/MG800D.Revised-Manual/User-Guide-702493-Page-42.png)
![Camera Menu 6.1This application enables you to take a stillpicture. You can take a picture in yourdesired size, and use it for the contactsphoto, home screen and other more generalpurposes. Once taken, a still image can besent via Multimedia msg or Email.Press the left soft key dto display thefollowing popup menu items.]Brightness: Determines the brightness.]Size: Determines the size of an image.]Timer: Determines the delay time.]Quality: Determines the quality of animage.]White Balance : Allows you to change thesettings according to the environment.]Album: Shows the still images taken.]Exit: To exit the Camera.]Mode: Determines whether to take asingle , multishot or frame shot photo.]Effect: Determines the special effect to thepicture.]Flash: Determines the flash operation.]Zoom: Determines the zoom rate.NotevFrame shots are only available with thepixel resolution set to 176 x 220.vMulti shots are only available when thepixel resolution is set to 320 x 240 or 640 x 480. vTo use the Photo Caller ID feature, youmust take photos you wish to associatewith your contacts in 72x72 resolution. vOnce the photo has been taken andsaved, go to Contacts and select thecontact you wish to associate thephoto to or select Add new to create anew contact(please note that a photocan only be associated with a contactstored in the phone's memory and noton the SIM).vSelectEdit. Unless you wish to edit thename, press OK and then use thenavigation keys to highlight the picturetab.MultimediaMultimedia60](https://usermanual.wiki/LG-Electronics-USA/MG800D.Revised-Manual/User-Guide-702493-Page-43.png)
![Video camera Menu 6.2This application enables you to record avideo clip. You can play and watch a savedvideo file while using this function. Press the left soft key dto display thefollowing popup menu items.]Brightness: Determines the brightness.]Size: Determines the size of an image.]Timer: Determines the delay time.]Quality: Determines the quality of a videoclip.]White Balance : Allows you to change thesettings according to the environment.]Record Time: Determines the recordingtime.]Exit: To exit the Video camera.]Effect: Determines the special effect to thevideo clip.]Flash: Determines the flash operation.]Zoom: Determines the zoom rate.Voice recorder Menu 6.3With the voice memo feature you can recordup to 20 voice messages and each memo canbe up to 20 seconds long.Record (Menu 6.3.1)You can record a voice memo in the Voicerecorder menu. NotevUse the k, lkeys to scroll throughthe photos (please note that onlypictures taken in 72l72 resolutionwill be listed here). vOnce you have selected the photo youwish to use press the left soft key tosave this in the contacts profile.vThe photo will be shown when thisparticular contact calls you (as long asthe contact does not have theirtelephone number set to hidden).Multimedia61](https://usermanual.wiki/LG-Electronics-USA/MG800D.Revised-Manual/User-Guide-702493-Page-44.png)
![1. Once recording has started, the messageRecording and the remaining time isdisplayed.2. If you want to finish recording, press theleft soft key d[Save].3. Key in Voice memo title, press the left softkey d [OK]. View list (Menu 6.3.2) The list of voice memos are displayed. Youcan playback and delete the recorded voicememo. The following [Options] menus areavailableMP3 Menu 6.4The MG800d has an integrated MP3 playerbuilt-in. You can enjoy listening to MP3music files on your phone memory using acompatible headset or via the internalloudspeaker. The music player supports:• MPEG-1 Layer III, MPEG-2 Layer III, MPEG-2.5 Layer III Sampling frequency up from8KHz to 48KHz. Bit rate up to 320Kbps,stereo.• AAC: ADIF, ADTS formats (Samplingfrequency from 8KHz to 48KHz)• AAC+: V1 : (Bit rate 16-128Kbps) V2 : (Bit rate 16-48Kbps) (Sampling frequency from 8KHzto 48KHz)• MP4, M4A: Sampling frequency up from8KHz to 48KHz, Bit rate up to 320Kbps,stereo.• WMA: Sampling frequency up from 8KHzto 48KHz, Bit rate up to 320Kbps, stereo.NotevBecause of the small dimension of thespeaker, in some cases the audio couldbe distorted, especially at maximumvolume and when there are lots of basssounds. Therefore, we recommend youto use the stereo headset in order toappreciate the high quality of yourmusic.MultimediaMultimedia62](https://usermanual.wiki/LG-Electronics-USA/MG800D.Revised-Manual/User-Guide-702493-Page-45.png)
![You can transfer MP3 files from a compatiblePC to the memory in your phone using theMass Storage. When you connect the phoneto a PC using the USB cable(supplied in thesame package), this will be displayed as aremovable disk through Windows Explorer. Ifyou are using Win98 SE, you will have toinstall the Mass storage driver for Windows98 on CD-ROM.This menu allows you to view the whole playlist. You can move through the tracks bypressing the navigation key. In addition, onceyou have selected the track, you can deletethe file or view its information via the optionsmenu.1. Go to MP3 player : Move to MP3 player.Press the left soft key d[Options] toaccess the following menus.]View play list: You can view the play list onlistening to the music.]Area repeat: The special area part of thecurrent music is repeated when you selectON of the menu.]Set as ring tone: This menu allows to setthe MP3 file as a ring tone. You can alsoset it as a ring tone in Profile.]Setting- EqualizerThis menu helps you to adjust to avariety of environments when listening tomusic. This phone supports four presetmenus. When you enter this menu, youcan view current value of equalizer.NotevYou should copy MP3 to mymedia\Music folder. If you copy toanother folder, you will not be able toview the MP3 files.vThe PC should run Windows 98 SE,Windows ME, Windows 2000,Windows XP operating system.NotevMG800d doesn't support the variablerate of MP3 and AAC file. Therefore,you can't change the file from VBR MP3format to AAC.Multimedia63](https://usermanual.wiki/LG-Electronics-USA/MG800D.Revised-Manual/User-Guide-702493-Page-46.png)
![MultimediaMultimedia64- PlaymodeThis menu allows to set the play mode.- Set shuffleYou can listen to your MP3 musicrandomly.- Visual effect You can select the visual effect menus:Rainbow, Basic and Blue. This menuallows to change the backgroud of mainLCD and sub LCD on playing MP3 file.2. Delete: Deletes the file selected. 3. View details: To view the information ofthe file you selected. 4. Delete all: Deletes all of the files.Photo album Menu 6.5You can view and send a picture. In addition,you can set the picture as a wallpaper.]Multi view: You can view the maximum of 9thumbnails in a screen.]Send via email:Send the selected file toanother device via email if the file size isless than 300Kbytes.]Send via Bluetooth: You can send apicture by Bluetooth.]Write multimedia message: You can writeand edit multimedia messages, checkingmessage size.]Set as wallpaper: You can set a picture asa wallpaper.]Slide show: You can view the pictures in aslide show.]Delete: You can delete a picture.]Edit title: You can edit the title of picture.]Information: Displays information aboutthe saved picture.NotevMusic is copyright protected ininternational treaties and nationalcopyright laws. It may be necessary toobtain permission or a license toreproduce or copy music. In somecountries national law prohibits privatecopying of copyrighted material. Pleasecheck the national legislation of theapplicable country concerning the useof such material.](https://usermanual.wiki/LG-Electronics-USA/MG800D.Revised-Manual/User-Guide-702493-Page-47.png)
![Video album Menu 6.6You can view videos which have been saved inthe memory.]Play: You can play the video file whenpressing the OK key or selecting Play menuof the Options menu. ]Send via Bluetooth: Send the selected fileto another device via Bluetooth.]Rename: Change the file name of selectedfile. ]Delete: Delete a file.]Delete all: Delete all files in the list]Information: Show the file information.Settings Menu 6.7 Camera (Menu 6.7.1)]Auto save: If you set this feature to On,the images will be saved automaticallywithout displaying the menu bar to save.]Delete all photos: You can delete all thephotos which have been saved in thememory.Video camera (Menu 6.7.2) ]Delete all videos: Allows you to delete allthe videos which have been saved in thememory.NotevThe Photo Album will only displaypictures taken by the handsets camera.Multimedia65](https://usermanual.wiki/LG-Electronics-USA/MG800D.Revised-Manual/User-Guide-702493-Page-48.png)
![Home Menu 7.1Connects to a homepage. The homepage willbe the site which is defined in the activatedprofile. It will be defined by the serviceprovider if you have not defined it in theactivated profile.Bookmarks Menu 7.2This menu allows you to store the URL offavourite web pages for easy access at a latertime.To create a bookmark 1. Press the left soft key d[Options].2. Select Add new and press the OK key.3. After entering the desired URL and title,press the OK key.After selecting a desired bookmark, thefollowing options are available. ]Connect: Connects to the selectedbookmark. ]Add new: Select this to create a newbookmark. ]Edit: You can edit the URL and/or the titleof the selected bookmark. ]Delete: Deletes the selected bookmark. ]Delete all: Deletes all the bookmarks.Go to URL Menu 7.3 You can connect directly to the site youwant. After entering a specific URL, press theOK key.Settings Menu 7.4You can set the profile, cache, cookie andsecurity related to internet service.Profiles (Menu 7.4.1) A profile is the network information used toconnect to the Internet. There are default profiles for some operators,stored in phone memory. It’s impossible torename default profiles.Browser67](https://usermanual.wiki/LG-Electronics-USA/MG800D.Revised-Manual/User-Guide-702493-Page-50.png)
![Each profile has submenus as follows:]Activate: Activates the selected profile.]Settings: Use this to edit and change WAPsettings for the selected profile.- Homepage: This setting allows you toenter the address (URL) of a site youwant to use as homepage. You do notneed to type http:// at the front of eachURL as the WAP Browser willautomatically add it.- Bearer: You can set the bearer dataservice. 1 Data/2 GPRS- Data settings: Appears only if you selectData Settings as a Bearer/service.Dial number: Enter the telephonenumber to dial to access your WAPgateway.User ID: The users identity for your dial-up server (and NOT the WAP gateway).Password: The password required byyour dial-up server (and NOT the WAPgateway) to identify you.Call type: Select the type of data call :Analogue of Digital (ISDN). Linger time: You need to enter timeoutperiod. After entering that, the WAPnavigation service will be unavailable ifany data is not input or transferred.- GPRS settings: The service settings areonly available when GPRS is chosen as abearer service.APN: Input the APN of the GPRS.User ID: The users identify for your APNserver.Password: The password required byyour APN server.- Proxy settings Proxy: Activates or cancels proxy. IP address: Input the IP address of theProxy server you access.Port number: Input the Proxy Port.- DNS settings Primary server: Input the IP address ofthe primary DNS server you access.Secondary server: Input the IP addressof the secondary DNS server you access. BrowserBrowser68](https://usermanual.wiki/LG-Electronics-USA/MG800D.Revised-Manual/User-Guide-702493-Page-51.png)
![]Rename: You can change the profile name. ]Add new: You can add a new profile.]Delete: Deletes the selected profile fromthe list.Cache (Menu 7.4.2) The information or services you haveaccessed are saved in the cache memory ofthe phone.Cookie (Menu 7.4.3) Check whether a cookie is used or not.Clear cache (Menu 7.4.4) Removes all context saved in cache.Clear cookie (Menu 7.4.5) Removes all context saved in cookie.Security (Menu 7.4.6) A list of the available certification is shown. ]Authority: You can see the list ofauthority certificates that have beenstored in your phone. ]Personal: You can see the list of personalcertificates that have been stored in yourphone.Note]A cache is a buffer memory, which isused to save data temporarily.Browser69](https://usermanual.wiki/LG-Electronics-USA/MG800D.Revised-Manual/User-Guide-702493-Page-52.png)
![Games & apps Menu 8.1Games & apps (Menu 8.1.1) •Default Games: In this menu, you canmanage the Java applications installed inyour phone. You can play or deletedownloaded applications, or set theconnect option. The downloadedapplications are organised in folders. Press the left soft key d[OK] to openthe selected slide or launch the selectedmidlet. After selecting a folder, press [Options] andthen sub menus available to several optionsare displayed.]Open: You can see the stored games.]New folder: Create a new slide.Profiles(Menu 8.1.2)A profile is the network information used toconnect to the Internet.If you want to see the details of a profile,please refer to Menu 7.4.1. My stuffMy stuff70JavaTM, is a technology developed by SunMicrosystems. Similar to the way youwould download the Java Applet usingthe standard MS Internet Explorerbrowsers, Java MIDlet can bedownloaded using a WAP enabledphone. Depending on the serviceprovider, all Java based programs such asJava games can be downloaded and runon a phone. Once downloaded, the Javaprogram can be viewed in the Games &Appsmenu where you can select,execute, or delete. The Java programfiles saved in the phone are in .JAD or.JAR format.](https://usermanual.wiki/LG-Electronics-USA/MG800D.Revised-Manual/User-Guide-702493-Page-53.png)
![Videos Menu 8.2Show the list of 3GP and MP4 files .]Play: You can play the video file bypressing the OK key or selecting Play fromthe Option menu. ]Send via Bluetooth: Send the selected fileto another device via Bluetooth. ]Rename: change the file name of theselected file. The maximum length ofcharacters is 200. And You can not changethe extension of file.]Delete: Delete a file.]Delete all: Deletes all the files in the list]Information: Shows the file information.Photos Menu 8.3Shows the list of JPG files.]View: You can see the JPG file by pressingthe OK key or selecting View from theOption menu.]Send via multimedia message: You canwrite and send multimedia messages.]Send via email: Send the selected file toanother device via email if the file size isless than 300Kbytes.]Send via Bluetooth: Send the selected fileto another device via Bluetooth.NotevTo setup .JPG (.JPEG) file from Photoslide as wallpaper, go to Menu-Multimedia-Photo album and thenplease select Set as wallpaper inOptions menu.NotevThe maximum size of JPG file you cansee is 460Kbytes.WARNING! The following characters, \ / : * ? < > | can not beused.My stuffMy stuff74](https://usermanual.wiki/LG-Electronics-USA/MG800D.Revised-Manual/User-Guide-702493-Page-57.png)
![]Rename: change the file name of selectedfile. The maximum length of characters is200. And You can not change theextension of file.]Delete: Delete a file.]Delete all: Deletes all the files in the list]Information: Shows the file information.Music Menu 8.4Shows the list of MP3, MP4, AAC, M4A andWMA files. ]Play: You can play the MP3 file by pressingthe OK key or selecting Play from theOption menu. ]Send via Bluetooth: Send the selected fileto another device via Bluetooth ]Rename: change the file name of selectedfile. The maximum length of characters is100. And You can not change theextension of file.]Delete: Delete a file.]Delete all: Deletes all files in the list]Information: Shows the file information.Tex t Menu 8.5Show the list of TXT files. ]View: You can see the TXT file by pressingthe OK key or selecting View from theOption menu. ]Send via email: Send the selected file toanother device via email if the file size isless than 300Kbytes]Send via Bluetooth: Send the selected fileto another device via Bluetooth. ]Rename: change the file name of selectedfile. The maximum length of characters is100. And You can not change theextension of file.NotevThe maximum size of TXT file you cansee is 460Kbytes.My stuff75](https://usermanual.wiki/LG-Electronics-USA/MG800D.Revised-Manual/User-Guide-702493-Page-58.png)
![]Delete: Delete a file.]Delete all: Delete all files in the list]Information: Show the file information.Images Menu 8.6After selecting a image, press the left keyd[View] and then you can check theoptions as follow:]Set as wallpaper: Currently selectedimage can be set as a wallpaper.]Write messages: The images downloadedfrom the network can be sent byMultimedia or Email service. Maximummessage size is 100 kb for MMS messageand 300 kb for E-mail message.]Send via Bluetooth: The sounddownloaded from network can be sent byBluetooth. Sounds Menu 8.7 After selecting a sound, press the left key[Options].You can check the options as follow:]Set as ringtone: Currently selected soundcan be set as a ringtone.]Write messages: The sound downloadedfrom network can be sent by SMS or MMS,Email service. Maximum MMS message is100 kb, and for e-mail is 300 kb.]Send via Bluetooth: The sounddownloaded from network can be sent byBluetooth.My stuffMy stuff76](https://usermanual.wiki/LG-Electronics-USA/MG800D.Revised-Manual/User-Guide-702493-Page-59.png)
![Others Menu 8.8Any type of file can be stored here. Thisfolder is mainly used for transporting filesfrom one PC to another.]View: You can view a file if it is one of thefollowing types; JPG, GIF, WBMP, PNG andTXT. The handset can preview JPG (Max460K), GIF (Max 100K).]Send via Bluetooth: Send the selected fileto another device via BluetoothMy stuff77](https://usermanual.wiki/LG-Electronics-USA/MG800D.Revised-Manual/User-Guide-702493-Page-60.png)
![Date & time Menu 9.1 You can set functions relating to the dateand time.Date (Menu 9.1.1)Set date You can enter the current date.Date format You can set the Date format such asDD/MM/YYYY, MM/DD/YYYY,YYYY/MM/DD.(D: Day / M: Month / Y: Year)Time(Menu 9.1.2)Set time You can enter the current time.Time format Your can set the time format between 24-hour and 12-hour.Display MENU 9.2Wallpaper (Menu 9.2.1)You can select the background pictures instandby mode.]Default: You can select a picture or ananimation of wallpaper by pressing korl.]My folder: You can select a picture or ananimation as wallpaper.Menu colour (Menu 9.2.2)Your phone provides you with 4 menu colourthemes. Set the menu colour by scrolling andpressing the left soft key d[OK].Standby text (Menu 9.2.3)If you select On, you can edit the text whichis displayed in standby mode.SettingsSettings78](https://usermanual.wiki/LG-Electronics-USA/MG800D.Revised-Manual/User-Guide-702493-Page-61.png)
![Set BluetoothYou can activate or cancel the Bluetoothfunction.Paired devices/Handsfree devicesYou can view all devices which your MG800dis already paired to.If you have entered Paired devices orHandsfree devices, you will see the followingoptions in both those menus.]Connect/Disconnect: Allows you toconnect to your paired Bluetooth devices.] Add new: Allows you to search for newBluetooth devices and add them to yourphone's list of paired devices. When youselect Add new your handset will start tosearch for Bluetooth devices within range.Once the device you wish to pair appearson the list press the right soft key [Stop].Scroll to the desired device and press theleft soft key [Pair]. You will then be askedto enter a passcode. The passcode can beany code you wish to use (the samepasscode must be used by both devices) oris one that is pre-determined by theNotevIf you use LG PC Sync via Bluetooth,you can exchange data only within thephonebook.vWhen you receive data from anotherBluetooth device, the phone requestsconfirmation. After confirming thetransfer, the file will be copied on toyour phone.vDepending on the file type, it will bestored in the following folders:-MP3 (.mp3, mp4, aac, m4a, wma):Music folder.-Video (.3GP, MP4): video folder.-Phonebook contacts (.VCF):Phonebook.-Text (.txt): Text folder.-Other files (.*.*): File storage folder.vThe handset normally operates withWIDCOMM driver(version 1.4.3.4) orWIDCOMM driver(version 1.4.2.10).And it does not support the LGContents Bank with Bluetooth.SettingsSettings80](https://usermanual.wiki/LG-Electronics-USA/MG800D.Revised-Manual/User-Guide-702493-Page-63.png)
![manufacturer of the device you are tryingto pair with. Please check the User Manualof the device you are initiating the pair withto see if it already has a predeterminedpasscode in place.]Assign name: Allows you to change thename of the paired Bluetooth device andhow it is displayed on the handset.]Set as authorised/Set as unauthorised:Allows you to set an authorised connectionbetween each Bluetooth device. Forexample if you regularly use a Bluetoothheadset with your phone then setting theconnection as authorised will mean theheadset will automatically connect to thehandset each time the headset is poweredon.]All services: Allows you to view all serviceswhich are supported by a Bluetoothdevice.]Delete: Allows you to delete a pairedBluetooth device.]Delete all: Allows you to delete all pairedBluetooth devices.Settings ]My handset’s visibilityThis indicates whether or not your handsetwill be visible to other Bluetooth devices.]My handset’s nameYou can set the name of your Bluetoothdevice. The default name is LG MG800d.Supported services Displays a list of Bluetooth services thehandset supports.]Headset]Handsfree kit]File transfer]Image printing]Dial-up networking]Business card transfer]Browsing other device]Serial Port ProfileSettings81](https://usermanual.wiki/LG-Electronics-USA/MG800D.Revised-Manual/User-Guide-702493-Page-64.png)
![Modem (Menu 9.5.2)You can access the network services throughthe Modem. If you want to use the LG PCSync, Contents bank or Internet Cube, youshould access the menu and activate themodem and then plug in the USB cable.Network (Menu 9.5.3)You can select a network which will beregistered either automatically or manually.Usually, the network selection is set toAutomatic.Network selectionYou can select a network type.]Automatic: If you select Automaticmode, the phone will automatically searchfor and select a network for you. Once youhave selected “Automatic”, the phone willbe set to “Automatic” even though thepower is off and on.]Manual: The phone will find the list ofavailable networks and show you them.Then you can select the network which youwant to use if this network has a roamingagreement with your home networkoperator. The phone let you select anothernetwork if the phone fails to access theselected network.]Preferred: You can set a list of preferrednetworks and the phone attempts toregister with first, before attempting toregister to any other networks. This list isset from the phone’s predefined list ofknown networks.Band selection]DCS: Depending on Network situation, youcan select DCS.]GSM850/PCS: Depending on Networksituation, you can select GSM850/PCS.SettingsSettings82](https://usermanual.wiki/LG-Electronics-USA/MG800D.Revised-Manual/User-Guide-702493-Page-65.png)
![GPRS attach (Menu 9.5.4)You can set GPRS service depending onvarious situations.Switch on If you select this menu, the phone isautomatically registered to a GPRS networkwhen you switch the phone on. Starting aWAP or PC dial-up application created theconnection between phone and network anddata transfer is possible. When you end theapplication, GPRS connection is ended butthe registration to the GPRS networkremains.When neededIf you select this menu, the GPRS connectionis established when you connect a WAPservice and closed when you end the WAPconnection.Calling Menu 9.6Call divert (Menu 9.6.1) The Call divert service allows you to divertincoming voice calls, fax calls, and data callsto another number. For details, contact yourservice provider.]All voice calls Diverts voice calls unconditionally.]If busy Diverts voice calls when the phone is inuse.]If no reply Diverts voice calls which you do notanswer.]If out of reach Diverts voice calls when the phone isswitched off or out of coverage.]All data callsDiverts to a number with a PC connectionunconditionally.Settings83](https://usermanual.wiki/LG-Electronics-USA/MG800D.Revised-Manual/User-Guide-702493-Page-66.png)
![]All fax callsDiverts to a number with a fax connectionunconditionally.]Cancel allCancels all call divert service.The submenus Call divert menus have the submenus shownbelow.• Activate Activate the corresponding service.To voice mail centre Forwards to message centre. This functionis not shown at All data calls and All fax callsmenus.To other number Inputs the number for diverting.To favourite number You can check back to last five divertednumbers.• Cancel Deactivate the corresponding service.• View status View the status of the correspondingservice.Answer mode (Menu 9.6.2)]Slide up If you select this menu, you can receive anincoming call when you open the slide.]Any key If you select this menu, you can receive acall by pressing any key except [End]key.]Send key only If you select this menu, you can receive acall by only pressing a[Send] key.Send my number (Menu 9.6.3) (network and subscription dependent)]Set by network If you select this, you can send your phonenumber depending on two line service suchas line 1 or line 2.SettingsSettings84](https://usermanual.wiki/LG-Electronics-USA/MG800D.Revised-Manual/User-Guide-702493-Page-67.png)
![]OnYou can send your phone number toanother party. Your phone number will beshown on the receiver’s phone.]Off Your phone number will not be shown.Call waiting(Menu 9.6.4) (network dependent)]Activate If you select Activate, you can accept awaiting (receiving) call.]Cancel If you select Cancel, you cannot recognizethe waiting (receiving) call.]View status Shows the status of Call waiting.Minute minder (Menu 9.6.5) If you select On, you can check the callduration by a beep sound given every minuteduring a call.Auto redial (Menu 9.6.6) ]OnWhen this function is activated, the phonewill automatically try to redial in the caseof failure to connect a call.]Off Your phone will not make any attempts toredial when the original call has notconnected.Security Menu 9.7PIN code request (Menu 9.7.1)In this menu, you can set the phone to ask forthe PIN code of your SIM card when thephone is switched on.If this function is activated, you’ll berequested to enter the PIN code.1. Select PIN code request in the securitysettings menu, and then press d[OK].2. Set Enable/Disable Settings85](https://usermanual.wiki/LG-Electronics-USA/MG800D.Revised-Manual/User-Guide-702493-Page-68.png)
![3. If you want to change the setting, youneed to enter PIN code when you switchon the phone.4. If you enter wrong PIN code more than 3times, the phone will lock out. If the PIN isblocked, you will need to key in PUK code.5. You can enter your PUK code up to 10times. If you put wrong PUK code morethan 10 times, you can not unlock yourphone. You will need to contact yourservice provider.Handset lock (Menu 9.7.2) You can use a security code to avoidunauthorised use of the phone. Wheneveryou switch on the phone, the phone willrequest security code if you set phone lockto When switch on. If you set phone lock to When SIM changed,your phone will request security code onlywhen you change your SIM card.Call barring (Menu 9.7.3) The Call barring service prevents your phonefrom making or receiving certain category ofcalls. This function requires the call barringpassword. You can view the followingsubmenus.]All outgoing callsThe barring service for all outgoing calls.]Outgoing international The barring service for all outgoinginternational calls.]Outgoing international when roaming The barring service for all internationaloutgoing calls except home network.]All incomingThe barring service for all incoming calls.]Incoming when roamingThe barring service for all incoming callswhen roaming.]Cancel all You can cancel all barring services.]Change password You can change the password for CallBarring Service.SettingsSettings86](https://usermanual.wiki/LG-Electronics-USA/MG800D.Revised-Manual/User-Guide-702493-Page-69.png)
![The submenus: • Activate Allows to request the network to set callrestriction on.• Cancel Set the selected call restriction off.• View statusView the status whether the calls are barredor not.Fixed dial number(Menu 9.7.4)(SIM dependent)You can restrict your outgoing calls toselected phone numbers. The numbers areprotected by your PIN2 code. The numbersyou wish to allow access to once this servicehas been enabled, must be added to thecontacts after enabling Fixed dial number.]Enable You can restrict your outgoing calls toselected phone numbers.]Disable You can cancel fixed dialling function.]Number list You can view the number list saved asFixed dial number.Change codes (Menu 9.7.5) PIN is an abbreviation of PersonalIdentification Number to prevent use byunauthorised person. You can change theaccess codes: Security code, PIN code,PIN2 code.1. If you want to change the Securitycode/PIN1/ PIN2 code input your originalcode, and then press d[OK].2. Input new Security code/PIN1/PIN2 codeand verify them.Touchpad lock (Menu 9.7.6)Sets whether to use the touch pad whenclosing a slide.On: It is impossible to activate the touch padwith slide closed. (You can use the touchpad only when slide opens.) Off: It is possible to activate the touch padusing the Volume key even with slideclosed.Settings87](https://usermanual.wiki/LG-Electronics-USA/MG800D.Revised-Manual/User-Guide-702493-Page-70.png)
![Memory status Menu 9.8You can check free space and memory usageof each repository, Internal memory,Multimedia memory. You can go to eachrepository menu.Reset settings Menu 9.9You can initialise all factory defaults. You willneed the Security code to activate thisfunction. ]Restore default settings: Allows you torestore the phone back to its defaultsettings. ]Clear multimedia memory: Allows you toformat the multimedia memory and createa default directory. SettingsSettings88](https://usermanual.wiki/LG-Electronics-USA/MG800D.Revised-Manual/User-Guide-702493-Page-71.png)