LG Electronics USA MS695 Cellular/AWS/PCS CDMA Phone with WLAN and Bluetooth User Manual
LG Electronics MobileComm USA, Inc. Cellular/AWS/PCS CDMA Phone with WLAN and Bluetooth Users Manual
Users Manual

Technical
De
t
ails
9
FCC
RF Exposure
Inf
ormation
WARNING!
Read
this
information before operating the
phone.
In
August 1996,
the
Federal Communications Commission
(FCC) of
the
United
States,
with its action in
Report
and Order FCC
96-326,
adopted
an
updated safety standard
for
human exposure
to Radio
Frequency
(RF)
electromagnetic energy emitted
by FCC
regulated transmitters.
T
hose
guidelines
are
consistent
with the
safety standard previously set
by both
U
.S.
and
international standards
bodies.
The
design
of this
phone complies
with
the FCC
guidelines
and
those international
st
andards.
Bodily Contact During
Oper
ation
This
device was tested
for typical
use
with the back of the
phone
k
ept
0.59
inches
(1.5 cm) from the body. To comply with FCC RF
e
xposure
requirements,
a
minimum separation distance
of 0.59
inches
(1.5
cm)
must
be
maintained between
the
user
’
s
body and the back of
the
phone,
including the
antenna.
Third-party
belt-clips, holsters,
and
similar
accessories containing metallic components should
not be
used.
A
v
oid
the
use
of
accessories
that
cannot maintain
0.59
inches
(1.5 cm)
dist
ance
between
the
user
’
s
body and the back of the
phone
and
have
not
been
tested
for
compliance
with FCC RF
exposure
limits.
HAC
This phone has been tested and rated for use with hearing aids for some of
the wireless technologies that it uses. However, there may be some newer
wireless technologies used in this phone that have not been tested yet for use
with hearing aids. It is important to try the different features of this phone
thoroughly and in different locations, using your hearing aid or cochlear implant,
to determine if you hear any interfering noise. Consult your service provider or
the manufacturer of this phone for information on hearing aid compatibility.
If you have questions about return or exchange policies,
consult your service provider or phone retailer.

10
T
echnical
De
t
ails
FCC Notice and Cautions
This device and its accessories comply with part 15 of FCC rules.
Operation is subject to the following two conditions: (1) This device and
its accessories may not cause harmful interference, and (2) this device and
its accessories must accept any interference received, including
interference that causes undesired operation.
Any changes or modifcations not expressly approved in this user guide
could void your warranty for this equipment. Use only the supplied
antenna. Use of unauthorized antennas (or modifcations to the antenna)
could
impair call quality, damage the phone, void your warranty and/or violate
FCC
regulations.
Don’t use the phone with a damaged antenna. A damaged antenna could
cause a minor skin burn. Contact your local dealer for a replacement
antenna.
Part 15.19
stat
ement
This
device
and its
accessories comply
with
part15
of FCC
rules. Operation
is
subject
to the
following two
conditions:
(1) This
device
& its
accessories
may not
cause harmful
interf
erence.
(2) This
device
& its
accessories must accept
any
interference received,
including
interference
that may
cause undesired
operation
Part
15
.
2
1
stat
ement
Changes
or
modifcations
that are not
expressly approved
by the
manufacturer
could
void the
user
’
s
authority
to
operate
the
equipment.

Technical
De
t
ails
11
Part 15.105
stat
ement
This
equipment
has
been tested
and
found
to
comply
with the limits for a
class B
digital
device, pursuant
to Part 15 of the FCC
rules.
T
hese
limits are
designed
to
provide reasonable protection against harmful interference
in a
residential inst
allation.
This
equipment generates, uses,
and can
radiate
radio
frequency energy
and, if
not
installed
and
used
in
accordance
with the
instructions,
may
cause harmful
interf
erence
to radio
communications. However, there
is no
guarantee
that
interference
will
not
occur
in a
particular installation.
If you
experience interference
with
reception
(e.g
.,
television), determine
if this
equipment
is
causing
the
harmful interference
by
t
urning
the
equipment
off and
then
back on to
see
if the
interference
is
affected.
If
necessar
y
,
try
correcting
the
interference
by
one
or
more
of the
following
measures:
-
Reorient
or
relocate
the
receiving
antenna.
-
Increase
the
separation between
the
equipment
and
receiv
er
.
-
Connect
the
equipment
into an
outlet
on a circuit
different
from that to
which
the
receiver
is
connected.
-
Consult
the
dealer
or an
experienced
radio/TV
technician
for
help.

12
The
B
Phone
FrontVi
e
NOTES
1. Proxim
head)
s
NOTE
S
2. Quick
‐
Pho
n
log,
C
‐
Cont
-
Mes
s
‐
App
s
insta
l
B
asics
Ov
er
view
e
w
A
ll
screen shots
in this
Instructions
to perform
may
change dependin
g
itySensors
Sense
s
s
o that
touch co
m
S
O
Do not block the
s
e
O
The use of a flm c
o
disturbance
in
tou
c
Keys
n
e
Key
Opens
the
C
ontacts,
and
Gr
o
a
cts
Key
Opens
t
h
s
aging
Key
Open
s
Key
Opens
the
A
l
led applications.
guide are
simulated.
A
c
tasks in this guide are
g
on the
software
versio
n
s
proximity
towar
d
m
man
d
s
are not
a
c
e
nsor
or near
sensor
to
ov
er
produced
by
man
u
c
h operation, the displ
a
Phone
applicati
o
o
ups.
h
e
Contacts
appl
i
s
the
Messaging
A
pps
screen, whe
r
c
tual
displays
may
v
a
ry
.
based
on the default
ph
n
on your
phone.
d
s other objects
(
s
c
cide
n
tally activat
e
avoid
problems
with t
h
u
facturers
other than L
G
a
y,
etc.
o
n
for
access
to t
h
i
cation.
application.
r
e
you can view a
l
h
o
n
e
settings
and
su
ch as
y
our
e
d
during a
call.
h
e touch
operations.
G
can
cause a
e dialpad, Call
l
l
y
our

3. Menu
K
scree
n
4. H
o
th
e
s
c
5. P
o
to
A
i
6.Ea
r
7. T
o
s
u
st
r
8. S
e
s
e
9. B
a
suc
h
RearVie
w
K
ey
Opens
an
op
t
n
or
application.
o
meKey
Returns
t
e
Home screen
e
c
reen
pane.
Touch
o
wer/LockKey Loc
k
open
the
phone
i
rplane
mode,
and
r
piece
L
ets
you h
e
o
uchscreen
Displa
y
u
ch
as
application
r
ength.
e
archKey
Opens
t
h
e
a
r
ch
the
phone
a
n
a
ckKey
Returns
to
h
as
menus
and di
a
w
t
ions menu
with
o
t
o the
Home scre
e
e
xtension panes,
i
and hold to view
k
s the
screen
wit
h
options menu
for
d
Power
of
f
.
e
ar callers and
au
t
y
s
all the
informat
n
s,
call
status, dat
e
h
e Quick
Search
B
n
d the
web.
the
previous scr
e
alog
bo
x
es.
o
ptions
that
affec
t
e
n.
If you’re alrea
d
i
t
navigates
you t
o
the
most recentl
y
h
a single
press.
P
the following
op
t
t
omated
prompts
ion needed
to
op
e
e
, time,
signal
sta
t
B
oxTM from the
H
o
e
en.
Also
closes
p
The Basic
s
the
cur
rent
d
y
viewing
one
o
f
o
the
central Ho
m
y
used
applicatio
n
P
ress
and
hold
t
ions:
Silent
mod
e
e
ra
t
e
your
phone,
t
us,
and
bat
ter
y
o
me screen to
p
op-up
displa
y
ite
m
s13
f
m
e
n
s.
e
,
m
s,

14 The
B
10. Acces
s
USB
c
11. Micro
p
activa
t
12. 3.5m
m
conve
n
to list
e
13. Came
r
for
o
p
14. Back
C
SideVie
w
15. Volum
in- ca
l
B
asics
s
ory/ChargerPort
A
c
able,
or
other co
p
hone
T
ransmits
y
o
t
ed functions.
m
HeadsetJack
All
o
n
ient, hands-free
e
n to
music.
r
aLens
Use for ta
k
p
timal
perf
orman
c
C
over
Encloses
th
e
w
eKeys Allow you
l
l
volume
during
a
A
llows you to
co
n
mpatible
access
o
ou
r voice to the
o
t
o
ws you to plug i
n
conversations.
Y
o
k
ing
pictures
and
r
c
e.
e
battery compar
t
to
adjust
the ring
e
a
call.
n
nect
the
phone c
h
o
ries.
t
her
caller and for
n
an optional
hea
d
o
u can also plug i
n
r
ecording videos.
t
ment.
e
r,
media volum
e
h
arger,
V
oice-
d
set
f
or
n
headphones
Keep
clean
s,
or the

Install
i
NOTE
Installin
g
The
p
ho
n
while not
battery c
h
1 Use the
cutout
a
of the
ph
remove
c
ove
r
.
i
ng the Bat
t
It is
important
to fully
c
h
g
the
batt
er
y
n
e comes
with a
r
in
use
in order to
h
arge
level is
sho
w
fngertip
a
t the bottom
h
one
to
the battery
t
ery and mi
c
h
arge the battery befo
r
r
echargeable batt
e
maximize
talk,
u
s
w
n
at the top righ
t
2 Align the
b
atter
y
contacts
with
t
h
terminals
in the
battery
compartment.
T
c
roSD Card
r
e
initial
use
of
the
p
ho
n
e
ry.
Keep the
b
atte
r
s
e,
and
standby t
i
t
corner
of the scr
e
y
h
e
3
Push
t
down
into
p
l
4 Place
cover
o
comp
a
press i
t
until it
p
lace.
T
he Basics15
n
e.
r
y
charged
me.
T
he
e
en
.
t
he battery
u
ntil it
clic
ks
l
ace.
t
he
bat
ter
y
ov
er the
bat
ter
y
a
rtmen
t
,
then
t
do
wnw
ard
clicks into
16 The
B
Re
m
Tu r n
instr
u
cuto
u
Inse
Tu r n
batt
e
L
oc
a
near
with
until
NOTE
To
remo
v
Tu r n t h e
p
take
the
b
Gently
pu
t
release
To
unm
o
It is
imp
o
saved
on
1. Touch
2. Touch
3. Touch
B
asics
m
oving
the
batt
e
the power off.
Re
m
u
ctions).
Then fip
t
u
t at the top left co
r
rting
a microSD
the
power
off.
R
e
e
ry
(as
demonstr
a
at
e
the
microSD
c
a
the slot
opening)
the label side fac
i
it
is
fully
inserte
d
The microSD card
can
b
inserting, removing
or
h
v
e
the microSD
p
ower
off.
Remo
v
b
attery
out.
L
oca
t
u
sh
the
exposed
e
it. Then gently
p
u
l
o
unt
the microS
D
or
tant
to
unmount
the
card.
the
Apps
Key
Settings
> S
D
Unmount Exter
n
e
r
y
m
ove
the battery c
o
t
he phone to its no
r
r
ner of the battery
car
d
em
ove
the
batter
y
a
ted
in the
previo
u
ar
d slot (microSD
. Position
the
mi
c
i
ng up and slide i
t
d
and locked in
pl
a
b
e easily damaged
by
i
m
h
andling
it.
car
d
v
e
the
battery
cov
e
t
e
the
microSD
ca
r
e
dge
of the
micro
l
l it out to
remov
e
D
car
d
the card to avoid
.
D
card
&
phone
n
al
SD
card
.
o
ver (as
demonst
r
r
mal position and
u
compartment
to li
y
cover and
the
u
s instructions).
is
inscribed
c
roSD
card
t
into place
a
ce.
m
proper operation. Ple
a
e
r
and
r
d
slot.
SD
card
e
it.
damage
to the c
a
storage
.
r
ated
in the
pre
vio
u
u
se the
fngertip
f
t the battery out
.
a
se be careful
when
ar
d or
data
u
s
Charg
i
Your
MS
6
connect
t
NOTIC
E
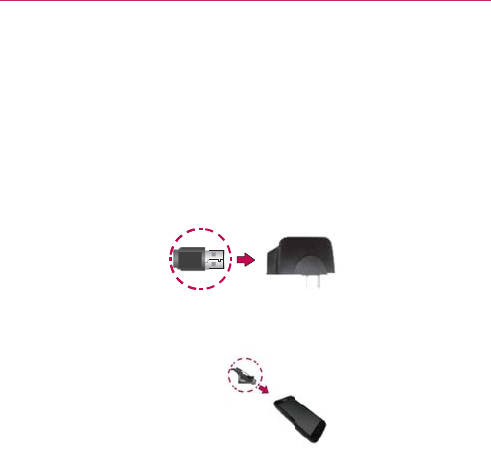
1.
Conn
e
show
n
2. Plug t
h
port.
NOTE
Make sure t
h
facing towar
d
inserting the
the
phone.
Chargin
g
You can
u
the USB
c
your
PC
f
phone
an
d
the rear
U
powered
i
ng the
Ph
o
6
95 comes
with
a
t
ogether
to
charg
e
E
Please use
only an
app
r
Improper handling
of
t
h
charger, may cause da
m
e
ct
the USB cable
n
below,
the LG l
o
USB Cable
h
e USB cable (as
s
h
e 'B' side
is
d
you
when
USB cable
into
g
with
USB
u
se
your
compute
r
c
able, you
need
t
o
f
rst.
Connect
one
d
connect
the
ot
h
U
SB port
when c
o
by an
external po
o
ne
a
wall/USB
charge
r
e
your
phone.
To
c
r
oved charging accesso
r
h
e accessory/charger
po
m
age
to your
phone
an
d
into the wall/US
B
o
go on the USB c
a
s
h
own below)
int
o
r
to
charge
your
p
o
have
the
neces
s
end of the USB
c
h
er
end to a USB
p
o
nnecting
to a
des
o
wer
source.
T
r
and a USB cable
c
harge
your
phon
e
r
y
to
charge
your LG
ph
o
rt, as
well
as the use
o
d
void
the
w
a
r
rant
y
.
B
charger. When
c
a
ble
should
face
t
o
W
all/US
B
Charger
o
the
phone
’
s
ac
c
p
hone.
To b e a b l e
t
s
ary
USB drivers
i
n
c
able to the
charg
e
p
o
r
t on your PC. I
t
ktop
PC. The US
B
T
he Basics17
whic
h
e
:
h
one.
f an
incompatible
onnecting,
as
o
ward
y
ou.
B
c
essor
y/c
harger
t
o
charge
with
n
stalled
on
e
r
port on
y
our
t
is
best
to
use
B
hub
should
be
18 The
B
Opti
m
You can
e
that run i
n
system r
e
Tips
to
e
z Tu r
n
Wi-
F
(No
t
app
l
z Tu
r
z Tur
n
app
l
z
Us
e
GP
S
act
i
To c h e c
k
z
To
u
The
of f
u
To
moni
t
The
Batt
e
the
most
downloa
d
you can
g
z
To
u
The
co
n
ho
w
The
in o
r
B
asics
izing Batte
r
e
xtend
your
batte
r
n
the
background
.
e
sources consu
m
e
xtend
the life
o
n
off radio
comm
u
F
i,
Bluetooth,
or
G
t
e that the GPS
r
e
l
ication
that
mak
e
r
n down screen brig
h
n
off automatic syn
c
l
ications if you don’
e
the Power Co
n
S
connection, Bl
u
vity.
k
the
batt
er
y
ch
a
u
ch the Apps Ke
y
battery status
(C
u
lly
charged)
will
b
t
or
and
control
w
e
ry use screen al
l
battery power. I
n
d
ed applications
y
g
et the
most
out
o
u
ch the Apps
Key
screen
will displ
a
n
nected
to a
pow
e
w
long you
were
l
a
list of
applicatio
n
r
der of
energy us
e
r
y
Lif
e
r
y’s
lif
e
between
c
.
You can also
mo
n
m
e battery
po
w
e
r
.
o
f your
batt
er
y
u
nications
that yo
u
G
PS,
use
the
Sett
i
e
ceiver
is only
tur
n
e
s use
of it).
h
tness and set a sho
r
c
ing for Gmail, Cal
e
t need it.
n
trol widget to c
o
u
etooth power, di
s
a
rge
lev
e
l
y
>
Settings
C
harging or
Discha
r
b
e
displayed
at th
e
w
hat
uses
the
b
l
ows
you to
see
w
n
formation
on this
y
ou may
want
to t
u
o
f your
battery
po
w
>
Settings
a
y battery
usage ti
m
e
r source,
if
conn
e
a
st
running
on
bat
t
n
s
or
services
usi
n
ed
,
from
greatest
c
harges
by turning
n
itor
how
applica
t
u
aren’t
using.
If
y
i
ngs menu
to turn
n
ed
on
when
you
’
r
ter screen timeout.
e
ndar, Contacts, an
d
o
ntrol the wireles
s
play brightness
,
>
About
p
ho
n
r
ging)
and level (a
e
top of the screen
b
a
t
t
er
y
w
hich
applications
screen allows
y
o
ur
n off
when
not
b
w
e
r
.
>
About phone
m
e.
Either how lo
n
e
cted
to a
power
s
t
ery
po
w
e
r
.
n
g battery
power
i
s
amount
to
least.
off
f
eat
ures
t
ions
and
y
ou
aren
’
t
using
them
off
’
re using
an
d
other
s connections,
,
and syncing
n
e
>
Status
.
s
a
percentage
.
are
consuming
u to
identify
b
eing
used,
so
>
Battery
use
.
n
g
since last
s
ource,
and
s
displayed

z Touch a
n
its
powe
Dif
f
ma
y
po
w
Setup
W
The frst
t
signing i
n
Setup
Wi
NOTE
1.
Press
edge
o
2.
Selec
t
3. Follow
creati
n
NOTE
n
application
in th
e
r
consumption.
f
erent application
s
y
even
include
op
t
w
er consumption
b
W
izar
d
t
i
m
e you turn on
y
n
to your Google
A
z
a
r
d will help you
This phone
supports
se
v
purchase
a data plan th
a
a
nd hold the
Po
w
o
f your
phone
to t
u
a
language
and
t
o
the
Setup
Wizar
d
n
g
or logging in to
If you have an existing
G
y
our
phone.
e
Battery use scr
e
s
offer
different
ki
n
t
ions
to modify th
e
b
y that
applicatio
n
y
our
phone,
the
S
A
ccount.
If you do
n
create one.
v
eral applications and
s
at
meets
your
needs.
C
w
er/Lock
Key
o
ur
n it
on.
ou
ch Next
.
d
to
confgure
you
your Gmail
A
cco
u
G
oogle Account, your
c
T
e
en
to
see
the
de
t
nd
s of
informatio
n
e
settings
so you
n
.
S
etup
Wizard
guid
n
’t
have one,
don
’
s
ervices.
It is
recomme
n
C
o
n
tact your service pr
o
o
n the
top
r
phone set
up
i
n
u
nt.
c
ontacts
from that
acco
u
T
he Basics19
t
ails
about
n
,
and
the
y
can
reduce
e
s
you
through
t worry,
the
n
ded
that
y
ou
o
vider for
det
ails.
n
cluding
u
nt
are
synced to

20 The
B
Tu r n i
n
Tu r n i n g
z
Pre
s
the
Tu r n i n g
1.
Press
2. Touch
3. Touch
To unloc
k
If you do
n
to
conse
r
1.
Press
t
Your L
2. Slide t
h
The la
s
NOTE
To t u r n
t
If you’re
i
disturb o
t
the
Hom
e
1.
Press
t
2.
Press
a
OR
Press
t
sound
NOTE
B
asics
n
g the Phon
e
the
phone
on
s
s
and hold the
P
o
screen turns
on.
the
phone
off
a
nd hold the
Po
w
Power
off in the
p
OK to
confrm
th
a
k
the
phone
n
’t
use
the
phone
r
ve battery powe
r
t
he
Power/Lock
K
o
ck
Screen
will
a
p
h
e
screen
up to
u
s
t
screen
you
we
r
This is the default Lock
Pattern,
use your fnger
t
t
he
phone soun
d
i
n a place
where
y
t
hers,
you can qui
e
screen.
t
he
Power/Lock
K
a
nd hold the
Pow
t
he
down
V
olum
e
s
are
turned
off o
r
The Vibration
setting
in
set
to
Only when not
i
sounds
off. If
the Vibr
a
V
olume
Key will set th
e
e
On and
O
f
o
wer/Lock
Key
w
er/Lock
Key
u
p
op-up
menu.
a
t you
want
to tur
n
for a while, the
s
r
.
To unlock the
p
h
K
ey
.
p
pear
.
u
nloc
k.
r
e working
on
op
e
Screen.
If you've set u
p
t
ip to draw the
pattern.
d
s
off
y
our
phone soun
d
ckly
silence
your
p
K
ey ,
then
unl
o
er/Lock
Key ,
e
Key on the side
r
vibration is
set.
the Sound menu affec
t
i
n
Silent mode
(or
Ne
v
a
tion
setting
is
set
to
O
n
e
phone to
vibrate.
f
f
for a
couple
of
s
e
u
ntil the
pop-up
m
n
off the
phone.
creen
and
backli
g
h
one:
e
ns.
p
an
Unloc
k
d
s
ma
y
p
hone
from
o
ck the
screen.
then touch Silen
t
of the
phone
t
s
this
mode.
If
the Vib
r
v
er), then the down
V
o
l
n
ly
in
Silent mode
(or
A
e
con
d
s
until
m
e
n
u
appears.
g
ht
will
shut
of
f
t
mode
.
until all
ation
setting
is
l
ume
Key
turns
all
A
lways), the do
wn

The Basics
21
Setting Up
Your
Device
When
you turn on your
wireless device
for the frst
time,
you
have
the
option to quickly
set
up
various accounts.
Simply follow the
on-screen
instructions
to
complete
the initial
setup
of your
wireless
de
vice.
To set up your device, follow the steps
below
:
1.
Select
your
language
and
touch Next
.
2.
Select whether
to Skip or
Start
the
Backup
A
ssist
ant
application.
3.
Select whether
to Skip or
Start
the Google
Account setup.
With
a
Google
Account,
Google
applications
are
automatically synced
bet
w
een
your
phone
and
computer regardless
of
where
you
make
an
update.
4.
Select
the
other accounts
you
want
to
set
up.
(
Email,
etc.).
5.
Select
the
Location Consent
(
Location
Services/ Standalone
GPS
Services/ Google Location
Services
).
NOTE A
successful
set up
message
is displayed.
Yo u
can
choose
to view options that
teac
h
you about your new phone including
Watch
& Learn / My
Mobile
/
Guided
T
ours
.
These options can be viewed later by
accessing
the Tools
section
of the Apps
screen.
7. Touch
Done
to
start
using the
phone.
For
more information
on how to
set
up your email, visit
smartphones.

22
The Basics
Setting
up your Google
A
ccount
1. At the
setup screen, touch Create
or
Sign
in
.
2. Enter your
username
and
passw
ord.
NOTE
Touch the Back
Key to
close the
k
e
yboard.
3. Touch
Sign
in
.
Now your Gmail, Google
Contacts,
and Google
Calendar events
will all
be
loaded
to your
phone
automatically
.
You can
use
the area
below
to
record
your Google
Account information
f
or
future
ref
erence.
Username:
@gmail.com
Password:
Y
our
Google
A
ccount
Yo u
must
sign into a Google
Account
to
use
Gmail, Google Talk,
Google
Calendar,
and
other
Google Apps; to
download applications
from
Android
Market;
to back up your
settings
to Google
servers;
and to
take
adv
ant
age
of
other
Google
services
on your
phone.
IMPORTANT
O If you want to
restore
your
settings
to this phone, from
another
phone that
w
as
running Android
release
2.0 or later, you must sign into your Google Account
no
w
,
during
setup.
If you wait until after
setup
is
complete,
your
settings
are not
restored.
O If you
don
’
t
have a Google Account, you’re
prompted
to
create
one.
O If you have an
enterprise account
through your
company
or other organization, your
I
T
department
may have special
instructions
on how to sign into that
account.
O When you sign in, your
contacts,
Gmail
messages,
Calendar
events,
and
other
information from
these
applications and
services
on the web are
synchronized with
your
phone.
O If you
don
’
t
sign into a Google Account during
setup,
you are
prompted
to sign in or
to
create
a Google Account the frst time you start an application that
requires
one,
suc
h
as
Gmail or
Android
Mark
et.
O
When
you sign in,
you’re prompted
to
enter
your
username
and
password, using
the
on-screen
k
e
yboard.
Phon
e
The
Stat
u
indicatin
g
the
phon
If you
ha
v
pro
m
The follo
w
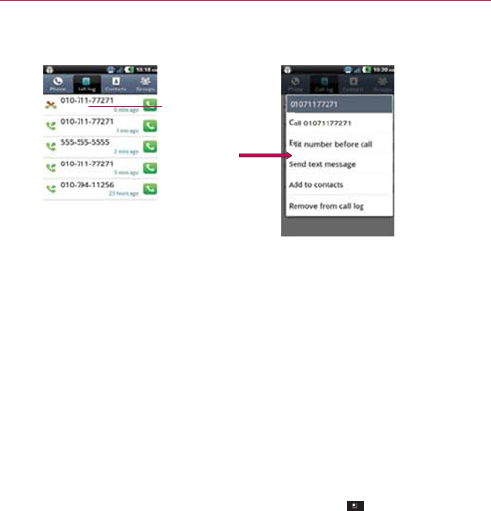
Call
ico
n
M
ca
l
In
S
p
Calend
a
C
a
e
’
s
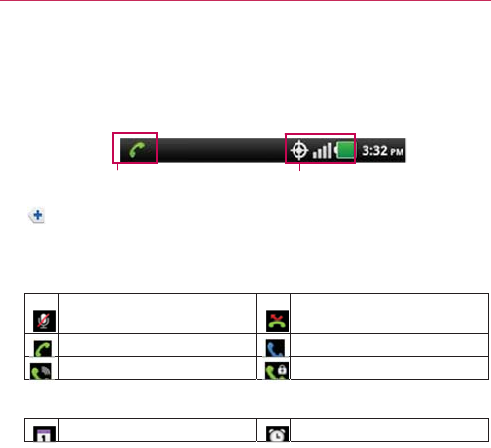
Status
Ic
u
s
Bar
appears
at
g
that
you’ve rece
i
e
’
s
status
(on the
Notifcation ico
n
v
e more notifcati
m
pts
you to
open
t
h
w
ing icons
indica
t
n
s
icropho
n
e muted
l
l
call
p
eaker
on
a
r
& Alarm
icon
s
a
lendar event
noti
f
ons
the top of
every
s
i
ved notifcations
right), along with
n
s
S
ons
than can ft i
n
h
e
Notifcations
p
t
e
the
status
of y
o
during
a
s
f
cation
T
s
creen.
It
display
s
(on the left) and i
the
current
time.
S
tatus
icons
n
the
Status
Bar, a
p
anel to view
the
m
ou
r
phone.
Missed
call
noti
f
In call using
Blu
e
Privacy
call
Alarm
set
T
he Basics23
s
icons
c
ons
indicating
plus
icon
m
all.
f
cation
e
tooth
de
vice

24 The
B
Email a
n
E
m
N
e
Hi
re
c
G
o
Sound
i
c
M
u
Vi
b
Network
C
o
D
o
G
P
A
c
Ai
r
R
o
L
o
B
asics
n
d
Messaging i
c
m
ail
receiv
ed
e
w
message
rece
i
g
h priority
messa
c
eiv
ed
o
ogle Talk
messag
c
ons
u
sic
currently
pla
y
b
rate
mode
icons
o
nnected
to a 3G
n
o
wnloading
data
P
S
on
c
quiring GPS
acc
e
r
plane
mode
is
o
n
o
aming
o
cation service
of
f
c
ons
i
v
ed
ge
e
receiv
ed
y
ing
n
et
w
ork
e
ss
n
f
Email
sending
f
a
i
Sending messag
e
New Gmail
mes
s
New voice mail
r
Silent
mode
Wired
headset
c
o
3G
network
is in
Uploading
data
No
ser
vice
Strong network
s
Weak
network
s
i
Location service
i
le
d
e
f
ailed
s
age
receiv
ed
r
eceiv
ed
o
nnected
use
s
ignal
i
gnal
on
Connect
i
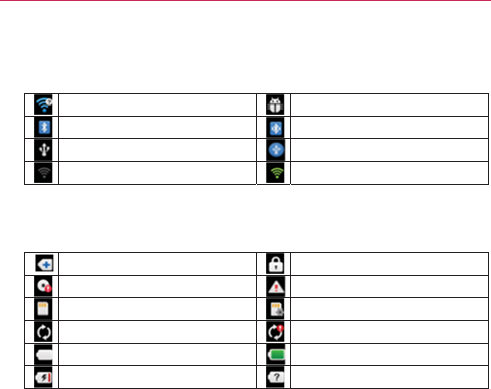
The follo
w
W
i
B
l
U
S
N
o
S
y
s
t
em
The follo
w
M
o
In
t
S
D
G
o
B
a
B
a
i
vity
icons
w
ing icons
indica
t
i
-Fi
connection
d
e
l
uetooth on
S
B
connected
o
Wi-Fi
signal
i
cons
w
ing icons
indica
t
or
e
notifcations
t
ernal memory
fu
l
D
card
inserted
o
ogle sync
st
arte
d
a
tter y
empt
y
a
tter y
c
harging
t
e
the
status
of y
o
e
tecte
d
t
e
the
status
of y
o
l
l
d
T
ou
r
phone.
Android
debugg
e
Bluetooth devic
e
USB
tethering
o
n
Strong
Wi-Fi
sig
n
ou
r
phone.
System
secure
System
alert
No SD card
inse
r
Error during Goo
g
Battery
full
Battery status
u
n
T
he Basics25
e
r
connected
e
connected
n
n
al
r
te
d
g
le
sync
n
known(er
ror)
26 The
B
Gettin
g
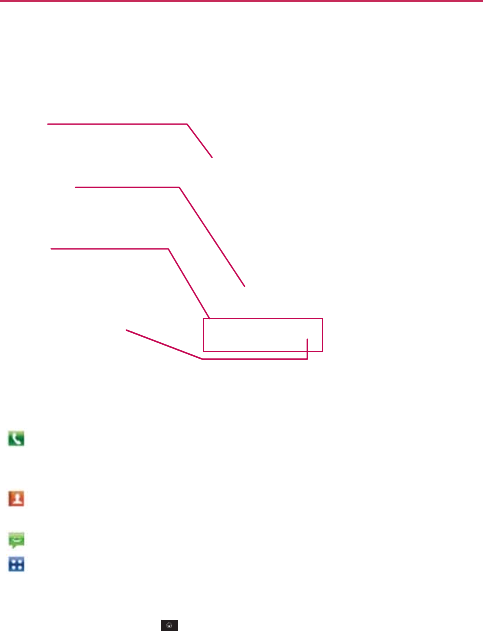
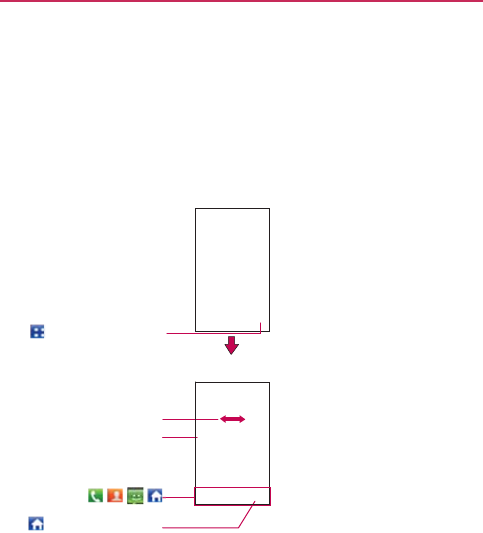
The
Ho
m
phone.
It
Status
Bar
Shows devi
c
including
th
e
status,
and
n
Applicatio
n
Touch
an ico
n
open the ap
p
Quick
Keys
Provide eas
y
functions yo
Apps
Key
Touch to op
e
of your insta
l
Quick
K
e
The Quic
k
screen.
:
O
p
di
a
C
a
:
O
p
lo
g
:
O
p
:
O
p
To
retur
n
z
To
u
To v i e w
o
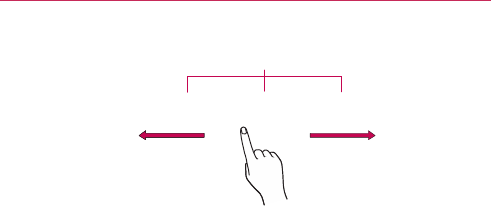
z Slid
scr
e
wi
d
B
asics
g
to Know
t
m
e screen
is your
s
displays applicat
i
c
e status
inf
ormation,
e
time, signal strength,
n
otifcation
icons.
n
Icon
n
(application, folder, e
t
p
lication
and
use
it.
y
, one-touch access
to
t
u use the
most.
e
n the Apps
screen
to
v
l
led
applications.
e
ys
k
Keys are
locate
d
p
ens
the
Phone
a
a
l an
unsaved nu
m
a
ll log,
Contacts,
a
p
ens
your
Contact
s
g
, and your Groups
p
ens
the
Messag
i
p
ens
the Apps
sc
r
n
to
the Home
s
u
ch
the
Home
Ke
y
o
ther
Home
scr
e
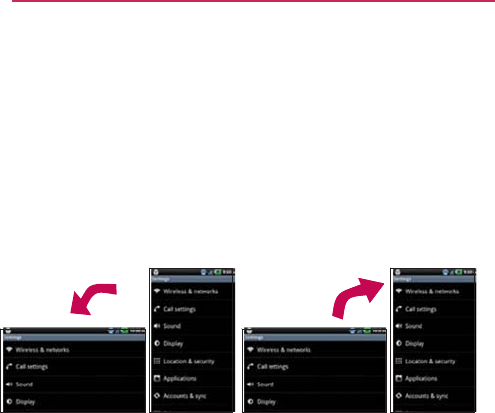
e your fnger left
o
e
en spans seven
s
d
gets, shortcuts,
a
t
he Home
S
c
s
tarting
point to
a
i
on shortcuts, ico
n
bat
ter
y
t
c.)
to
t
he
v
iew all
d
at the
bottom
o
f
a
pplication
which
d
m
ber.
It also
provi
d
a
nd your
Groups.
s
list.
Yo u
can also
a
by touching the t
a
in
g
application.
r
een
and
displays
s
cr
een
y
at any
tim
e
e
en
panes
o
r right
across
th
e
s
creen widths,
al
l
a
nd
other
items.
c
r
een
ccess
all the
feat
u
n
s, widgets,
and
o
f
the
Home scree
n
d
isplays
the dialp
a
d
es additional tab
s
a
ccess
the
Phone
a
bs across the top
phone options
a
n
e
,
from any
applic
a
e
Home screen.
T
l
owing
more spa
c
u
res
on
y
our
o
ther
f
eat
ures.
n
and
Apps
a
d so you
can
s
to
access
the
application, Call
o
f the
screen.
n
d
applications.
a
tion.
h
e
Home
e
for
icons,
T
ouch
s
Your
tou
c
Android
p
available
phone.
The follo
w
using the
Touch
applicat
i
onscre
e
Tou ch
a
not lifti
n
up
men
u
Home
s
Drag
T
o
fnger,
m
You can
Swipe
o
surface
don’t dr
a
up or
d
o
by
swip
i
The
d
o
s
cr
een
c
hscreen provide
s
p
hone.
With the
t
o
a
pplications, mak
e
w
ing
terms
are
u
s
touc
hscreen:
A single fnger
to
u
i
on
or
menu
item
)
e
n question),
or
t
o
a
nd hold Tou ch a
n
n
g your fnger unti
l
u
for
customizing
creen
until the
m
ou
ch and hold an
m
ove
your fnger
o
drag
items
on th
e
o
r
slide
To
swip
e
of the
screen, w
i
a
g an item
instea
d
o
wn
to scroll a lis
t
i
ng
from left to ri
g
Home Screen Pane
In
d
ot
s indicate which Home
s
s
an
excellent
way
ou
ch
of your
fng
e
e
menu selection
s
s
ed
for
describing
u
ch selects items
.
)
,
touch words
(e
ou
ch letters
and
n
u
n
d hold an item o
l
an action
occur
s
g
the
Home scree
n
m
enu pops
up.
item for a
mome
n
o
n the
screen
un
t
e
Home screen
t
o
e
or slide, quickly
m
i
tho
u
t pausing w
h
d
).
For
example,
y
t
, or
browse thro
u
g
ht (and vice
v
ers
a
T
d
icato
r
s
creen pane
you are
vie
wi
n
to
interact
with
a
e
r,
you can
downl
o
s
,
and
access
dat
a
the
different
avai
l
.
For
example, to
u
.g.,
menu selecti
o
u
mbe
r
s
to
t
ype.
n the
screen
by
t
o
s
.
For
example,
to
n
, touch
an
empt
y
n
t
and
then, with
o
t
il you
reach
the
t
a
o
reposition
them
m
ove
your fnger
a
h
en
you frst
touc
h
y
ou can drag or sl
i
u
gh
the
different
H
a
).
T
he Basics27
n
g
.
a
nd
use
y
our
o
ad
and
use
a
saved
to
y
our
l
able
actions
u
ch
an icon
(e.g
.,
o
n
or to
answ
er
o
uching
it
and
open
a
pop-
y
area on
the
ou
t
lifting
y
our
a
rget
position.
.
a
cross
the
h
it (so
y
ou
d
e the
screen
H
o
m
e
screens
28 The
B
Double
-
quickly
d
width o
f
and in
o
Pinch-
t
motion
Rotate
rotates
again.
Rotate
th
for
lands
c
B
asics
-
tap
Double-tap
t
d
ouble-tap
a
sect
i
f
the
screen.
Yo u
c
o
ther
applications.
o-Zoom
Use yo
u
to zoom in or out
the
screen
From
with the
phone
a
s
e
phone counter
-
c
ape
orientation.
t
o zoom a
web
pa
i
on
of a
web pag
e
c
an also
double-t
a
u
r index fnger an
d
when
using the
b
m
many
applicatio
n
s
you turn it from
cloc
kwise Rot
a
p
ortr
a
a
ge
or a
map.
For
e
to zoom that
se
c
a
p
to
control
the
z
d
thumb
in a pinc
h
br
owser,
a
map,
o
r
n
s,
the
orientatio
n
upright to
sidew
a
a
te
the
phone clo
c
a
it
orientation.
e
xample,
c
tion
to ft
the
z
oom in
Maps
h
or
spread
r
pict
ures.
n
of the
screen
ay
s
and
bac
k
c
kwise
f
or

The Basics
29
Te x t I n p u t
Methods
Android keyboard: The Android keyboard can also be used to enter
text. To switch to the Android keyboard, touch and hold a text field,
then touch Input method > Android keyboard.
Using the Android
k
eyboar
d
You enter text using the onscreen keyboard. Some applications open
the keyboard automatically. In others, you touch a text field where
you want to enter text to open the keyboard.
You can also enter text by speaking instead of by typing.

30
The Basics
To e n t e r
t
ext
1. Touch a text
field.
The
onscreen
keyboard
opens.
2. Touch the keys on the keyboard to
t
ype.
The
characters
you’ve
entered
appear in
a
predictive word
box above the keyboard,
with
suggestions
for the word you
are typing.
T
ouc
h
the arrow to view more
suggestions.
3. Enter text into the text
field.
▶
Touch the word you want as soon as it
appears
in
the predictive word
bo
x.
▶
Touch the
Space
Key or a punctuation key
to
enter the
predicted
w
ord.
▶
Touch another word in the predictive word
bo
x.
▶
Continue touching letters until the
w
ord
appears
in
the
predicti
v
e
w
ord
b
o
x.
▶
T
o
of
t
NOT
E
4. Whe
n
close
To e n t e r n u
m
▶
Touc
h
and s
y
Touch
additi
o
▶
Touc
h
symb
o
Whe
n
chara
c
▶
Touc
h
a sm
a
▶
Touc
h
additi
o
To change
t
▶
Tu r n
o
uch the
Delete
t
he
cursor.
E
Words that do not
completely
are
aut
o
manually add a w
o
then
touch Add to
d
n
you're finishe
d
the
k
e
yboard.
m
bers, symbol
s
h
the
Symbols
y
mbols
k
e
yboar
d
the Alt Key
o
nal symbols; t
o
h
and hold any
o
ls.
Initially,
the
n
the menu
p
c
ters or
symbol
s
h
and hold the
P
a
ll window to
c
h
h
and hold a nu
m
o
nal
symbols.
t
he keyboard
o
r
the phone
side
w
Key to
er
a
appear in the
p
redi
c
o
maticall
y
added to
o
rd,
touc
h
and hold
d
ictionary
.
d
typing,
press
t
s
, and other
c
h
Key to s
w
d
.
on the symbol
s
o
uch it again
to
of the letter k
e
symbol at
the
p
ops
up, touc
h
s
displa
y
ed.
P
erio
d
Key (.)
f
h
oose
from
v
ari
o
m
ber or symbol
r
ien
ta
tion
w
a
y
s
or
upright.
You
can co
n
changes
o
when you
t
u
T
a
se characters
t
o
c
tiv
e
word box befor
e
your dictionary
f
or
f
the word to open
a
t
he
Back
Key
h
ar
act
er
s
w
i
t
ch to
the
n
u
s
keyboard
to
a
swi
t
ch
bac
k.
ey
s to
access
a
top
of the key
p
h
any of the
a
f
ro
m
abc
mode
o
us
symbols.
key to
open
a
w
n
trol
whether t
h
o
rient
ation
aut
o
u
rn
the
phone.
T
he Basics31
o
the
left
e
you enter it
fu
ture use. To
a
dialog
bo
x,
to
u
mbers
ccess
a
lternate
p
ops up.
a
lternate
to open
w
in
d
ow of
h
e
screen
o
matically
32 The
B
Appli
c
All
of the
downloa
d
grouped
t
screen.
I
f
can slide
Touch
Slide
br
Touch a
n
Qui
Touch
t
B
asics
c
ations: Ho
w
applications
on y
o
d
ed
and
installed
f
t
ogether
on the
A
f
you
have more
a
the
screen
up or
to open the Apps
scre
e
the
screen
left or right
t
i
n
g more icons into
vie
w
n
application icon to
op
e
the
applicatio
n
ck Keys
(
, , ,
t
o
close the Apps
scre
e
w
to View, O
p
o
u
r
phone,
includ
i
f
rom Android
Ma
r
A
pps
screen,
whic
h
a
pplicatio
n
s
than
c
down
to view
m
o
Home
scree
n
e
n.
Apps
scree
n
to
w
.
e
n
n
.
)
e
n.
p
en and
Sw
i
i
ng any
applicati
o
r
ket
TM
or
other so
u
h
you
access
fro
m
c
an ft on the App
s
o
re.
n
n
i
t
ch
o
ns
that
y
ou
u
rces, are
m
your
Home
s
screen,
y
ou
Openin
g
Openin
g
With yo
u
feature
y
Closing
To
man
u
Home
NOTE
Custom
i
The
item
applicati
o
position
o
access
t
h
categori
e
Moving
a
1. Fr o m t
h
2. Touch
3. Touch
then
li
accor
d
Adding
a
1. Fr o m
t
2. Touch
3. Enter
t
g
and Closing t
h
g
the Apps
scr
e
e
u
r
MS695, it’s
eas
y
y
ou’re currently u
s
the Apps
scr
ee
n
u
ally close
the Ap
p
.
The Apps screen close
s
Dragging
an icon
onto
y
i
zing
the Apps
s
s
on the Apps
sc
r
o
n category.
Yo u c
a
o
f
applications
so
h
e
applications
yo
u
e
s
to the
screen
t
o
a
pplication
pos
i
h
e Home
screen,
the
Menu
Key
and hold the
appl
ft your
fnger.
Ap
p
d
ingly
.
a
category (in c
a
h
e
Home screen,
the
Menu
Key
t
he
category na
m
h
e Apps
scr
een
e
n
y
to
access
the
A
s
ing. Simply touch
n
p
s
screen, touch
s
automatically when
y
o
y
our
Home screen also
s
cr
een
r
een
are listed
alp
a
n
customize
the
that you don’t
ha
v
u
use most often
.
o
organize
your
f
l
i
tions
touch the
Apps
K
>
Manage
app
ication
icon and
d
p
lication icons to t
h
a
se of category
touch
the
Apps
K
>
Manage cat
e
m
e, then touch
Sa
v
T
A
pps
screen
no
m
a
the
Apps
Key
the
Home
Key
o
u
touch
an icon to
op
e
closes the Apps scree
n
habetically
within
Apps
screen
by
m
v
e
to scroll the
sc
.
You can also add
l
es.
K
ey
.
.
d
rag it to the
p
osit
i
h
e right of the
p
o
layout
mode
)
K
ey
.
e
go
r
y
>
Add.
v
e
.
T
he Basics33
a
tter what
.
or
touc
h
n
its
application.
n
automatically
.
eac
h
m
oving
the
r
een
up
to
additional
i
on
you
w
ant,
sition
shif
t

34 The
B
Openin
g
Multi-tas
k
running
e
applicati
o
open ap
p
them
as
n
unnecess
Openin
g
Op
e
TIP!
Openin
g
1. Touch
2. Touch
NOTE
3. Touch
4. Touch
Switchi
n
1. Touch
A
scr
e
appea
r
2. Touch
to
ret
u
B
asics
g
and
Switching
k
ing
is
easy
with
A
ev
en when
you
o
p
o
n before openin
g
p
lications.
Android
n
eede
d
,
to
ensur
e
arily.
g
an
application
e
n
an
application
s
You can
customize
you
r
Applications are locate
d
your
Home
screen
for
f
y
our Home
screen,
jus
t
g
multiple
appli
c
an
application
ico
n
the
Home
Key
If the application icon
y
and use
it.
the
Apps
Key
the icon for the
o
t
n
g between mul
t
and hold the
Ho
m
e
en
with the icons
r
.
the
application
ic
o
ur
n
to the
current
s
Applications
A
ndroi
d
TM
becaus
e
p
en another appli
c
g
another.
You can
manages each a
p
e
that idle
applic
a
s
imply by
touchin
g
r
Home screen with th
e
d
on the Apps
screen,
b
f
aster
access.
No
matt
e
t
touch it to open and u
s
c
ations
n
to
open
it.
.
y
ou want is on your Ho
m
.
t
her application
y
o
t
ip
l
e
applicatio
n
m
e
Key
.
of
applications
t
h
o
n you
want
to
o
p
s
creen.
e
open applicati
o
c
atio
n
.
T
here
’
s
no
n
use
and
switch
a
p
plication, stoppi
n
a
tions
don’t
consu
m
g
its icon on the
s
e
application icons
you
u
bu
t you can copy any ap
p
e
r where
the icon is, on
s
e
it.
m
e
screen,
simply touch
o
u
want
to
open.
n
s
h
at
you’ve used r
e
p
en
or
touch
the
B
on
s
k
eep
n
eed
to quit
an
mong
se
v
eral
n
g
and
st
arting
m
e resources
s
creen.
u
se most
of
ten.
p
lication icon
to
the Apps
screen
or
the icon to
open
e
cently
will
B
ack
Key

Adding
a
Customi
z
1.
Open
t
2. Touch
scree
n
Home
3. Lift yo
u
scree
n
a
pplication
icon
z
e
your
Home scr
e
t
he Apps
screen.
and hold the
appl
n
.
Your Apps
scre
e
screen.
u
r fnger to place
n
, then
lift your
f
n
Touch
an icon t
o
you’ve
used re
c
s
to
the Home
s
e
en
with the
app
l
ication
icon you
w
e
n
will
close
so th
a
it or drag the icon
n
ger
.
T
o
open
an
application
c
ently.
s
cr
een
l
ications
you
use
m
w
ant
to add to yo
u
a
t you can place
t
to
where
you
w
a
T
he Basics35
m
ost
of
ten.
r
Home
t
he icon on
the
a
nt
it on
the
36 The
B
Worki
n
There are
Options
Options
m
screen
o
r
available
Options
m
Options
m
Some ap
p
options
m
Context
Context
m
To
open
a
items ha
v
Context
m
B
asics
n
g with
Me
n
two kinds of An
d
menus
m
en
u
s contain
to
o
r
application,
not
t
options menu, to
u
m
enus;
if you
tou
c
m
en
u
, nothing
wi
l
p
licatio
n
s have
m
m
en
u
.
To v i e w t h e
Touch
menus
m
en
u
s contain o
p
a
Context menu,
t
v
e Context menu
s
m
en
u
, nothing
wi
l
n
us
d
roid
menus: Opt
i
o
ls that apply to t
h
t
o any
specifc
ite
m
u
ch
the
Menu
K
e
c
h
the
Menu
Key
l
l
happen.
m
o
r
e Options men
u
additional menu
More to view addition
a
p
tions
that apply t
o
t
o
u
ch
and hold an
s
.
If you
touch
an
d
l
l
happen.
i
ons menus
and
C
h
e
activities
of th
e
m
on the
screen.
e
y
. Not all
app
l
on a
screen
t
u
items
than can
f
items, touch
Mo
r
a
l menu
items.
o
a
specifc
item
o
item on the
scre
e
d
hold an item tha
t
C
ontext
menus.
e
cur
rent
To
open
the
l
ications
ha
v
e
t
hat has
no
f
t in
the
r
e
.
o
n the
screen.
en
.
Not all
t
has
no
Mana
g
Notifcati
alarms,
a
s
When
yo
u
Status
B
a
notifcati
o
and/or th
e
To open
To u
c
OR
Fro
m
The
you
r
not
i
Whe
n
hold
c
a
scr
e
men
u
g
ing
Notif c
a
on
icons
report
th
e
s
well as
ongoin
g
u
receive
a
notif
c
a
r. You can
open
t
h
o
ns. Depending
o
n
e
phone
may
vib
r
the
Notifcatio
n
c
h and drag the
S
m
the
Home scre
e
Notifcations
p
a
n
r
current notifca
t
i
fcations.
n
you
touch
and
c
e
r
tain items on
e
en,
a
Conte
xt
u
opens.
a
tions
e arrival of
new
m
g
events, such
as
w
c
atio
n
,
the
notif c
a
h
e
Notifcations
pa
n
your
settings,
y
o
r
ate.
n
s
panel
S
tatus
Bar to the
b
e
n, touch
the
Me
n
el
displays
your
w
t
ions, organized
i
n
T
m
essages, calend
w
hen
you are in a
a
tion
icon will be
d
a
nel to view a list
o
u may hear a
no
t
b
ottom
of the
scr
e
n
u
Key >
No
t
w
ireless provider
n
to
ongoing
and
e
T
he Basics37
a
r
e
v
ents,
call.
d
isplayed
in
the
of all
recent
t
if cation
sound
e
en.
t
if cations
.
and a list
of
e
v
ent-based

38 The
B
To
resp
o
1.
Open
t
panel,
2. Touch
a
The
N
o
your
r
e
your
v
o
you ca
n
To clear
1.
Open
t
2. Touch
All
ev
e
remai
n
To c l o s e
Touch an
d
the
scre
e
The pane
l
B
asics
o
nd to
a
no
tifca
t
t
he
Notifcations
p
each
with a brief
a
notifcation
to v
i
o
tifcatio
n
s
panel
w
e
sponse
will
ope
n
o
icemail
box, and
n
read your
new
m
all
notifcations
t
he
Notifcations
p
the
Clear button.
e
nt-based notifca
t
n
in the
list.
the
Notifcatio
n
d
drag the tab at
t
e
n
or just
press
th
e
l
will also
close
w
t
ion
p
anel.
Your
curre
n
description.
i
ew
it.
will
close
and the
n
.
For
example, n
e
Gmail
notifcatio
n
m
essages.
p
anel.
t
io
n
s
will be
clear
e
n
s
panel
t
he
bottom
of the
e
Back Key
.
w
hen
you
touch
a
n
Touch
a
notifcati
to
open
i
n
t notifcations
are
application
that
c
e
w voicemail noti
f
n
s open
the Gmai
l
ed
; ongoing noti
f
Notifcations
p
an
e
n
otifcation.
o
n
i
t.
listed in
the
c
orresponds to
f
cations
dial
l
application
so
f
cations
will
e
l to the top
of

Searc
h
You can
s
Google
s
e
Some ap
p
to
searc
h
You can
c
you’re lo
o
provide s
u
request.
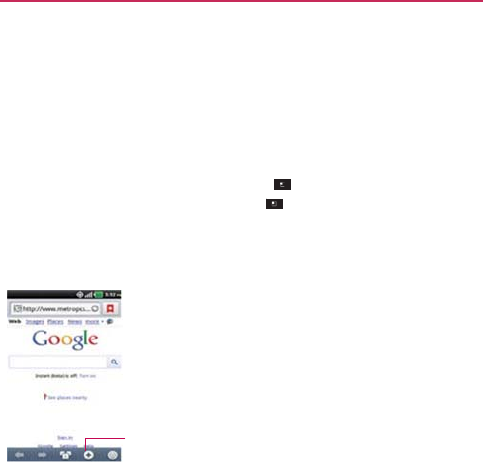
Phone
a
n
1. Touch
When
other
a
autom
a
In
so
m
applic
a
This is
No
m
a
touchi
n
h
ing
You r
P
h
s
ea
r
ch
for
inform
a
e
a
r
ch
application.
p
lications, such
a
s
h
contents
within
t
c
onduct
the
searc
h
o
king for. Typing c
a
u
ggestio
n
s
so yo
u
n
d Web
search
the
Search
Key
you
touch
the
S
e
a
pplicatio
n
s
that
s
a
tically
.
Vo
i
To
u
Pr
o
m
a
se
a
m
e applications,
su
c
a
tion
’
s
own
searc
h
indicated
by the
a
a
tter what applica
t
n
g
the
Search
Ke
h
one and th
e
a
tion
on your
pho
n
s
Gmail,
Contact
s
t
hose specifc
ap
p
h
by typing in the
a
n be
useful
b
ec
a
u
don’t
necessaril
y
using
text entr
y
.
e
arch
Key on
t
s
uppo
r
t
this, the
Q
i
ce
Search
u
ch to
search
by
v
oice.
o
vides one-touch sho
r
a
tchi
n
g search items
a
a
rches.
c
h as Gmail,
Con
t
h
box
opens when
a
pplication
’
s
icon
o
t
ion
you’re workin
g
e
y will
open
th
e
T
e
W
e
b
n
e
and on the
we
b
s
,
and
Browser h
a
p
lications.
search terms
or
s
a
use
the
search a
p
y
have
to type ou
t
y
t
he
Home screen
Q
uick
Search
Box
w
r
tc
u
t
to
an
d
past
t
acts,
and
Browse
r
you touch the
Se
a
o
n the left side of
t
g
in
(except
for
C
a
e
Quick
Search
B
o
T
he Basics39
b
by using
the
av
e
the
abilit
y
s
aying
what
p
plication
can
t
your full
or
in
w
ill
open
r
,
the
a
rch
Key
.
t
he
search
bo
x.
a
mera),
o
x
.

40 The
B
2. Enter
t
Yo u c a
n
searc
h
Searc
h
searc
h
Key
3. Touch
B
asics
t
he
text
you’re
se
a
As
y
pre
v
sug
tha
t
n
use
the
Search
h
(for
example, w
h
h
Box as you type)
h
es.
To
access set
t
>
Settings
.
to
search
for
t
ar
ching
for in the
y
ou
type, search result
s
v
ious search terms,
and
gestions appear.
Touch
t
search
result.
preferences
to
c
o
h
ether
it
makes s
u
, and
what phon
e
t
ings, open
the
a
p
t
he
entered term
s
Quick
Search
B
o
x
s
from
your
phone,
web search
an
item
to
activ
ate
o
nf gu
r
e some as
p
u
ggestions below
e
features
you
w
a
p
plication
and
tou
c
s
.
x
.
p
ects
of
w
eb
the
Quic
k
n
t
to include
in
c
h
the
Menu
Locki
n
You can l
o
access
y
o
Setting
a
1. Touch
2. Touch
set
tin
g
3. Touch
Patter
n
with
i
n
(twice)
Then
r
PIN:
E
and
to
u
Pass
w
Reent
e
From
t
scree
n
passw
Changi
n
1. Touch
2. Touch
3. Draw
y
4. Touch
5. You’re
n
g the
Scr
e
e
o
ck your
screen
s
o
ou
r
data,
buy
app
l
a
n Unlock
Patt
e
the
Apps
Key
Set
up
screen
lo
c
g
s).
Pattern,
PIN, or
P
n
:
The frst time
y
n
structions
on ho
w
. Draw your
patt
e
r
ed
r
aw
your
patte
r
nter a PIN (at
lea
s
u
ch
OK to
conf r
m
w
or
d
:
Enter a
pas
s
e
r
your
password
t
hen
on, any time
n
,
you will
need
to
or
d
to unlock the
n
g
Y
our
Unlock
P
the
Apps
Key
Change screen
l
o
y
our
current
unloc
k
Pattern
to
chang
e
prompted
to dra
w
e
n
o
that only you c
a
l
ications,
and so
o
e
rn,
PIN, or
Pas
s
>
Settings
>
c
k (under the
Sc
r
P
asswor
d
.
y
ou
set
an unlock
p
w
to
create
it. Rea
er
n (connect
at
le
a
r
n
and
touch
Con
f
s
t
4 digits) and
to
u
m
it.
s
word
(at
least
4
c
and
touch
OK to
you wish to turn
t
o
draw your unloc
k
screen.
P
a
t
t
ern
>
Settings
>
ock (under the
S
c
k
pattern.
e
it (or
touch No
n
w
and
redraw
you
r
T
a
n unlock it to
ma
k
o
n.
s
word
for the Fi
r
>
Location
&
sec
u
r
een unlock secti
o
p
attern,
you will
s
d the tutorial and
a
st
4 dots) and
to
u
f
r
m
.
u
ch Continue. R
e
c
haracters)
and
to
confrm
it.
t
he
phone
on or
u
k
pattern
or
enter
>
Location
&
sec
u
c
reen unlock
sec
t
n
e
to
remove
it).
r
new
pattern.
T
he Basics41
k
e
calls,
r
st T
ime
u
rit
y
.
o
n
of
the
s
ee
a
t
utorial
touch Next
u
ch
Continue
.
e
enter
your
PIN
u
ch
Continue
.
u
nlock
the
your PIN
or
u
rit
y
.
t
ion).

42 The
B
Using a
1. Touch
2. Touch
3. Touch
Pass
w
4. You’re
From
t
unlock
NOTE
S
B
asics
PIN or
Passwo
r
the
Apps
Key
Set
up
screen
lo
c
PIN to lock the
s
c
w
o
r
d
for an
alpha
n
prompted
to
ent
e
t
hen
on, you will
n
the
screen.
S
O
You
have
5
opport
u
all
the
5
opportun
i
O
When
you
can
’
t
re
c
-
If you’ve
created
you are required
-
If you
ha
v
e
n
’
t
c
r
factory
reset
(C
user
data will b
e
performing a fa
c
1. Tu r n t h e p o w e r
o
2.
Press
and hold
t
Power/Lock
Ke
3.
Release
only th
e
It may take aro
u
3.
Release
the vol
u
User Data &
R
e
to cancel." The
f
4.
Press
the
Powe
When you
pres
s
you
sure
you
w
a
5.
Press
the
Powe
settings.
To can
c
r
d to
Lock the
S
c
>
Settings
>
c
k (under the
Sc
r
c
reen
with a
num
b
n
umeric
lock
seq
u
e
r
and
reenter
the
n
eed
to
enter
the
u
nities
to
enter
your
un
l
i
ties,
you can try
again
a
c
all your
unlock
pat
ter
n
a Google Account on t
h
to sign in with your Go
o
r
eated
a Google Accou
n
autio
n
: If you perform
a
e
deleted. Please reme
m
c
tory
reset).
o
f
f
.
th
e following keys at th
e
e
y + the down
V
olume
K
e
Power/Lock
Key just
un
d 3
seconds.
um
e keys when you
se
e
set Settings? Press
the
f
rst
message
will be di
s
e
r/Lock
Key to confrm
s
the
Power/Lock
Key
t
a
nt
to
continue with er
a
e
r/Lock
Key and your
ph
c
el,
press
any other
k
e
y
c
r
een
>
Location
&
sec
u
r
een
unlock
secti
o
b
er sequence
or
t
u
ence.
lock
sequence.
sequence
and
to
u
l
ock pattern,
PIN or
p
a
s
a
fter
30
seconds.
n
:
h
e phone, touch
Forgo
t
o
gle Account to unlock
y
n
t on the phone, you ne
e
a
factory
reset,
all user
a
m
ber
to back up any i
m
e
same
time:
K
ey + the up
V
olume
K
right after the phone
v
i
e
the
screen message
Power key to confrm
a
s
played in 10 to 12
sec
o
(or
press
any other key
t
o confrm, a pop-up
ap
a
se?".
h
o
n
e will be
restored
to
y
.
u
rit
y
.
o
n).
t
o
u
c
h
u
ch
OK
to
sword.
If you
used
t
pattern?.
T
hen
y
our
phone.
e
d to perform
a
a
pplicatio
n
s
and
mp
o
r
tant data
before
K
e
y
.
i
brates.
"
Permanently
Erase
an
d any other
k
e
y
o
nds.
to
cancel).
p
ea
r
s
asking "Are
the
f
actor
y

The Basics
43
Customizing
the Home
Scr
een
You can
personalize
your
Home screen
by adding
application
icons,
shortcuts, widgets,
and
other items
to any
Home screen pane.
You can
also
change
the
w
allpaper
.
To add an item
to
the Home
scr
een
1. Go to the
Home screen pane where
you
want
to add the
item.
2. Touch the
Menu
Key and
touch Add.
Or, just
touch
and hold
an
empty spot
on the
Home screen pane.
NOTE If
there
is no
available space
on a
particular Home screen pane, Add
will not
be
a
v
ailable;
you
must delete
or
remove
an
item before
you can add
another item.
In this
case,
y
ou
have the option of
switching
to
another
Home
screen
pane.
3. In the
menu
that
opens, touch
the type of item to
add.
You can add the following
types
of
items
to the
Home
screen:
Widgets
Add any of a variety of
widget applications
to your
Home
screen,
including a clock, a
music player,
a
picture frame,
Google
search
bar
,
a
power manager,
a
calendar
of
upcoming appointments,
a
News
and
Weather widget,
and
more.
Note that
more widgets
can also be found
on
Android
Mark
et
TM
.
Shortcuts
Add
shortcuts
to
applications,
a
bookmarked
web page, a
favorite contact,
a
destination
in
Maps,
a Gmail label, a
music
playlist,
and
more.
The
shortcuts
available
depend
on the
applications
you
have
inst
alled.
Folders
Add a folder
where
you can
organize other Home screen
shortcuts
and
icons,
or
folders
that
contain
all your
contacts, contacts
with
phone
numbers,
or
starred contacts.
Your folders’
contents
are kept
up-to-date
automatically
.

44
The Basics
To move an item on the Home
scr
een
1. Touch and hold the
item.
2. Drag the item to a
new location
on the
screen.
Pause
at the left or right
edge
of the
screen
to drag the item onto
the
next available
Home screen pane.
3.
When
the item is
where
you
want
it, lift your
fnger
.
To
remove
an item from the Home
scr
een
1. Touch and hold the item (note that the Q uick Keys
change
to an icon of
a
trash
can).
2. Drag the item to the trash can
icon.
3. When the icon turns red, lift your
fnger
.
To
change
the Home
screen
wallpaper
1. From the
Home screen, touch
the
Menu
Key >
W
allpaper
.
You can also
touch
and hold an
empty spot
on the
Home screen
and
then touch Wallpapers
in the
menu
that
opens.
2. Touch
Wallpapers
or any
wallpaper
that is
displa
y
ed.
Touch
Gallery
to
use
a
picture you’ve taken
with your
camera
as
a
w
allpaper
.
You can crop the
picture before setting
it as your
w
allpaper
.
Touch Live
Wallpapers
to
open
a list of
animated wallpapers inst
alled
on
your
phone.
Liv
e
wallpapers
can
change according
to the time of day,
respond to
touching
the
screen,
tell the
time,
or offer
other
inf
ormation.
Touch any available
wallpaper
and it will
automatically
be applied
to
your
phone.
3. Touch
Set wallpaper
or
Save
(if
necessar
y).
To
rename
a
folder
1. Touch the folder icon to
open
it.
2. Touch and hold the folder
window’s
title
bar
.
3. Enter the
new
folder
name.
4. Touch
OK
.

Conn
e
As
you
bu
Contact
f
locate
yo
u
you can
u
Op
e
op
e
Co
n
avai
To u
c
De
p
op
e
If you ad
d
use
it to
o
e
cting
Quic
k
u
ild up your list o
f
f
or Android to qui
c
u
r
contacts.
Quic
k
u
se
to quickly and
e
n
your
Contacts
l
e
n
with the availab
n
tact bubble. Dep
e
lable
actions
will
c
h a Quick
Conta
c
p
endi
n
g
on the ic
o
e
n.
d
a
shortcut
for a
c
o
pen
Quick
Cont
a
k
ly With
You
r
f
contacts
on your
c
kly
chat,
email,
t
e
k
Contact
for And
r
easily
connect
to
l
ist and
touch
the
le
options, displ
a
e
ndi
n
g
on the
co
n
be
displayed abo
v
c
t
icon to
commu
n
o
n
you’ve touche
d
contact
to your
H
a
ct
for that
conta
c
T
r
Contacts
phone,
you can
u
e
xt message,
p
la
c
r
oid is a
special s
e
a
contact.
contact’s picture
.
ay
ed
as
icons.
This
n
tact information
v
e
the
name.
n
icate
with the
c
o
d
,
a
different appl
i
H
ome screen,
you
c
t.
T
he Basics45
u
se
Quic
k
e a call, or
to
e
t
of icons
that
.
A
bubble
will
is the
Quic
k
s
aved,
the
o
ntact.
cation
will
will be able
to
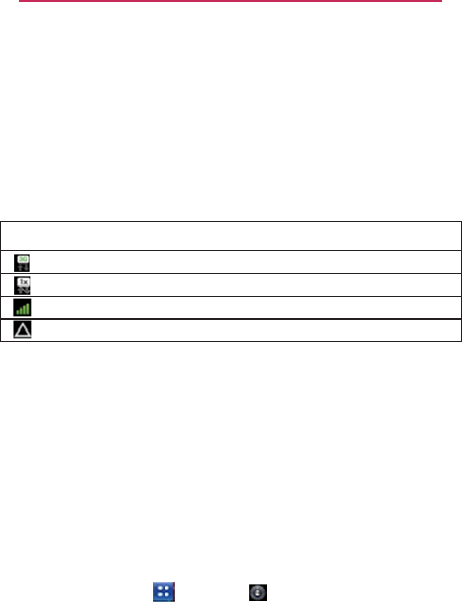
45
Di
Conn
e
When
yo
u
to
use
yo
data.
Different
your
pho
n
data.
Yo u
network
s
C
o
C
o
Th
e
C
o
The icons
connect
e
When c
o
your
pho
n
network
a
To
disa
b
You can
p
mobile n
e
network
s
include d
a
1. Touch
Mobil
2. Touch
Data
r
conne
c
e
cting
to M
o
u
buy your
phon
e
u
r
pro
vider
’
s
mo
b
locations
may
ha
v
n
e
is
confgured
t
o
can also
confgu
r
s
entirely,
or to
b
e
h
nnected
to the 3
G
nnected
to a 2G
n
e
more
bars that
a
nnected
to
anoth
e
in the
Status
Ba
r
e
d
to and the
net
w
nnected
to
slowe
n
e
for
data-intens
a
gain or fnd a Wi
-
b
le data
when
r
o
pr
event
your
pho
n
e
tworks when
yo
u
s
.
This is
useful
fo
r
a
ta
roaming
.
the
Apps
Key
e
networks
>
Da
t
Data roaming
to
r
oaming uncheck
m
c
tion.
Connecti
n
o
bile
Net
w
o
r
e
and sign up for
s
b
ile networks
for
v
v
e different mobi
l
o
use
the
f
astest
r
e
your
phone
to
a
h
ave
in
specifc
w
G
network
(EVDO
n
etwork
(1x)
ar
e lit, the
strong
e
e
r wireless servic
e
r
indicate
which
k
w
ork
signal
stren
g
e
r networks,
you
m
s
ive tasks
until yo
u
-
Fi
network
to
co
n
aming
n
e
from
transmitti
n
u
leave
an area th
a
r
controlling
expe
>
Settings
>
t
a
roaming
.
remove
the
chec
k
m
a
r
ked,
you can
s
n
g to Netwo
r
r
ks
ervice,
your
pho
n
v
oice calls and for
l
e networks avail
a
mobile network
a
a
ccess
a
differen
t
w
a
y
s when
roami
n
re
vA)
e
r
the
wireless
si
g
e
pro
vider
’
s
netw
o
k
ind of data
netw
o
g
th.
m
ay
want
to
p
ost
p
u
are
connected
t
o
n
nect to.
n
g
data over
othe
r
a
t is
covered
by
y
nses
if your cell
p
>
Wireless
&
net
w
k
ma
r
k
from the b
s
till
transmit
data
ks and
n
e
is
confgured
transmit
ting
a
ble.
Initially
,
av
ailable
f
or
set
of
n
g
.
g
nal
or
k
(roaming)
r
k
y
ou’
re
p
one
using
o
a
f
aster
r
carriers
’
y
our
car
rier
’
s
lan
doesn
’
t
w
or
k
s
>
o
x.
W
ith
with a Wi-Fi
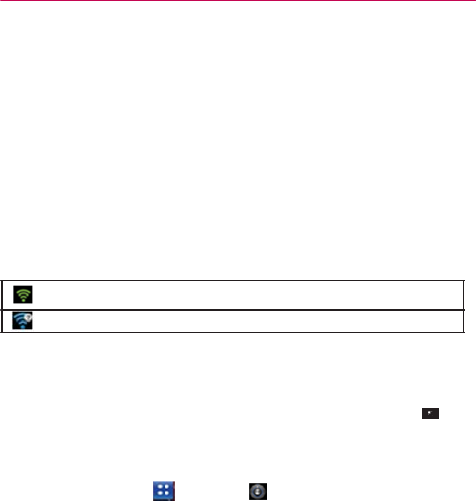
Conne
c
Conn
e
Wi-Fi is
a
at
distan
c
sur
round
i
To
use
W
Some ac
c
are
hidd
e
your
pho
n
Tu r n o ff
W
The follo
w
C
o
N
o
When
yo
u
address
a
DHCP
p
r
o
other ad
v
Advanc
e
To t u r n
W
1. Touch
Fi
set
t
2. If the
W
for ava
3. Touch
O If t
h
to
c
O If t
h
(As
k
O
W
h
na
m
ad
d
c
tin
g
to Net
w
e
cting
to Wi
-
wireless networ
k
c
es
of up to 100
m
i
ngs.
i-Fi on your
phon
e
c
ess points
are
o
p
e
n
or
implement
o
n
e
so it can
conn
e
W
i-Fi
when
you’re
w
ing
Status
Bar i
c
o
nnected
to a Wi-
F
o
tifcation
that an
o
u
connect
to a W
i
a
nd
other inform
a
o
tocol.
To
conf g
u
v
anced settings,
f
r
ed
.
W
i-Fi on and
c
o
the
Apps
Key
ings
.
W
i-Fi box is not
c
h
i
lable Wi-Fi
net
w
o
a
network
to
con
n
h
e
network
is
ope
n
c
onnect
to that
ne
t
h
e
network
is
sec
u
k
your
network a
d
h
en
you’re
connec
m
e
in the Wi-Fi
se
t
t
d
ress,
and
related
w
orks and D
e
-
Fi
Net
w
or
k
k
i
n
g technology
t
h
m
eters, dependin
g
e
,
you
must conn
p
en
and you can
s
o
ther security feat
u
e
ct
to
them.
not using it, to
e
x
c
ons
indicate
your
F
i
network
(
w
a
v
e
s
o
pen
Wi-Fi
netwo
r
i
-Fi
network,
the
p
a
tion
it
needs
fro
m
ur
e
the
phone
wit
h
r
om Wi-Fi
settin
g
o
nnect to
a Wi-
F
>
Settings
>
h
eckmarked, touc
h
o
rks.
n
ect
to
it.
n
,
you will be
pro
m
t
work
by
touchin
g
u
red,
you will be
p
d
ministrator
for
d
e
ted
to a
network,
t
t
ings screen
for
d
set
tings.
e
vices
k
s
h
at can
provide I
n
g
on the Wi-Fi
ro
u
ect
to a
wireless
a
s
imply
connect
to
u
res,
so you
mus
x
tend
the
lif
e
of y
o
Wi-Fi
st
at
us.
s
indicate connec
t
r
k
is in
range
p
hone obtains
a
n
m
the
network,
u
s
h
a
static
IP
addr
e
g
s touch
the
Men
u
F
i
net
w
ork
>
Wireless
&
net
w
h
Wi-Fi to turn it
o
m
pted
to
conf r
m
g
Connect
.
p
rompted
to
ente
r
e
t
ails).
you can
touch
th
e
d
etails about
the
s
46
n
ternet
access
u
ter
and
y
our
a
ccess
point.
them.
Others
t
confgure
ou
r
bat
ter
y
.
ion
strength)
n
et
w
ork
s
ing
the
e
ss
and
u
Key
>
w
or
k
s
>
Wi-
o
n and
scan
m
that you
w
ant
r
a
passw
ord
e
net
w
ork
p
ee
d
,
securit
y
,

47
Connecting to Networks and
Di
To r e c e i v e
notifcations
when open
networks
are in
range
By
default, when
Wi-Fi is on, you
receive notifcations
in the
Status
B
ar
when
your
phone detects
an
open
Wi-Fi
net
w
ork.
1. Turn on Wi-Fi, if
it’s
not already
on.
2. From the Wi-Fi
settings screen, touch Network notifcation
to
checkmark
the box. Touch again to
remove
the
checkmark
and
stop
receiving
notifcations.
To a d d a W i - F i
net
w
ork
You can add a Wi-Fi
network
so the
phone
will
remember
it, along with
an
y
security credentials,
and
connect
to it
automatically when
it is in
range.
Y
ou
can also add a Wi-Fi
network manually
if it
does
not
broadcast
its
name
(SSID) or if you
want
to add a Wi-Fi
network when
you are out of its
range.
To a d d a
secured network,
you
need
to
contact
the
network’s
administrator
to obtain the
password
or
other required security credentials.
1. Turn on Wi-Fi, if
it’s
not already
on.
2. From the Wi-Fi
settings screen, touch
Add Wi-Fi
network
.
3. Enter the
Network
SSID
(name)
of the
net
w
ork.
If the
network
is
secured, touch Security
and
touch
the type of
securit
y
deployed
on the
net
w
ork.
4. Enter the
required passwords
and
security credentials.
5.Touch
Save
.
The
phone
will
connect
to the
wireless network.
Any
credentials
that
y
ou
entered
are
saved,
so you are
connected automatically
the next time
y
ou
come
within
range
of this
net
w
ork.
To
forget
a Wi-Fi
net
w
ork
You can
make
the
phone forget about
the
details
of a Wi-Fi
network
that
you
added.
For
example,
if you don’t
want
the
phone
to
connect
to
it
automatically
or if
it’s
a
network
that you no longer
use.
1. Turn on Wi-Fi, if
it’s
not already
on.

Conne
c
2. In the
W
that y
o
3. Touch
F
USB A
u
USB
Aut
o
USB cabl
e
Auto
m
Allows
p
rese
n
phone
NOTE
To
selec
1. Touch
Defau
2. Touch
3. Touch
functi
o
NOTES
Autorun
a
c
tin
g
to Net
w
W
i-Fi
settings scr
e
o
u
want
to
f
orget.
F
orget
network.
u
torun
o
run
is a
feature
t
h
e
and
set
it up on
m
atically
installs th
e
the
phone
to be
n
t
in the
MS695.
I
to the PC and vi
c
The MS695 has an inte
r
content,
such as
p
hoto
s
If the USB
connection
m
via USB cable, two
re
m
internal
memory
and
a
n
from both disk
driv
es.
t
USB
mode
fo
r
the
Apps
Key
l
t
connection
m
o
Mass Storage
to
Charge
Only to
u
o
n.
O
USB Autorun only wo
r
sy
stems.
O
Log on to the PC as
A
privilege to install the
O
Do not unplug the U
S
O
If Autorun
doesn't
fu
n
Storage
mode.
a
utomatically
inst
a
w
orks and D
e
e
en, touch
and h
o
h
at
allows
your
M
a PC
without
a
p
e
LG USB
Mode
m
used
as
Mass St
o
I
t
allows transfer
o
c
e
v
ersa.
r
nal
memory
and can
u
s,
videos, and voice
rec
m
o
d
e is set to Mass
St
m
ovable
disk drives will
b
n
other
for the microSD
r
A
u
t
orun
>
Settings
>
C
o
o
de
.
connect
to the P
u
se
only the
char
g
rk
s with
Windows
®
XP,
A
dministrator. Non-Ad
m
USB
Modem
driver an
d
S
B cable during
A
utor
u
n
n
ction properly, unplug
a
a
lls the USB
devi
c
e
vices
o
ld the
name
of t
h
M
S695
to
connect
p
hysical CD-ROM
m
driv
er
.
o
rage when
a
mi
c
o
f
unprotected c
o
u
se a
removable
microS
D
ordings.
orage
when
connectin
g
b
e displayed on your P
C
card
(if
installed).
Yo u
c
a
o
nnectivity
>
C for
A
utorun.
g
ing function
and
n
Windows 7, and
V
ista
T
M
m
inistrator
accounts
hav
e
d
don
’
t
run the Autorun
n
.
an
d plug the USB cable
c
e
driver for
ever
y
48
h
e
net
w
ork
to a PC using
a
.
c
roSD
card
is
o
ntent
from
the
D
card to store
user
g
the phone to a
PC
C
, one for
the
a
n copy fles to
and
n
ot the
USB
M
operating
e
insuffcient
f
eat
ure.
to set
Mass
y
USB
mode.

49
Di
Internet
Autorun
m
circumst
a
Autor
u
conne
c
Always
a
You can
c
connecti
n
When A
l
Autoru
n
Phon
e
PC
op
e
To
chan
g
You can
c
>
Se
t
NOTE
Using t
h
The
Stat
u
open
the
When c
o
on the
N
o
where
y
o
NOTE
Connection
M
o
m
ay
automaticall
y
a
nces.
u
n automatically s
w
c
tion
fails while
s
y
a
s
k
c
hoose
to be
ask
e
n
g
to a
computer
.
l
wa
y
s
ask is
chec
k
n
is
not
available
is
booting (powe
r
e
rating system
is
g
e
the
setting
w
c
hange
the
setting
t
ings
>
Connecti
v
Be sure to
checkmark
t
connection
mode whe
n
h
e
Status
Bar
to
u
s
Bar
shows
the
Status
Bar and
c
h
o
nnected
via USB,
o
tifcatio
n
s
panel.
o
u can
change
the
If the
Always
ask
chec
k
connection,
but is not
p
Connecti
n
o
de
y
use Internet Co
n
w
i
t
ches
to
Intern
e
y
ncing
or
connec
t
e
d
to
confrm
the
U
k
ma
r
ked,
the US
B
when:
r
ing
up).
not
set
to Autoru
n
w
hile
Autorun
is
s
while Autorun i
s
v
ity
>
Default co
n
th
e box
Always
ask if
y
n
the phone is
connect
e
change
the
se
t
current
USB
con
n
h
ange
the
setting
s
the
current
USB
Touch the
conne
c
USB
connection
k
box
is marked, the
sc
r
pr
ovided in the notifcati
n
g to Netwo
r
n
nection mode
in
e
t Connection m
o
t
i
n
g.
U
SB
connection
w
B
selection wind
o
n
(automatic exec
u
running:
s
running. Touch th
e
n
nection mode
>
y
ou want to be asked to
e
d
to a
computer
.
t
tings
n
ection mode
so
y
s
as
needed.
connection mod
e
c
tion setting
to di
mode.
r
een
is only provided d
u
on
area.
ks and
cert
ain
od
e
if
the
w
hen
o
w
is
displa
y
ed.
u
te
command).
e
Apps
Key
Mass
Storage
.
confrm the
USB
y
ou can
easily
e
also
appears
splay a
screen
u
ri
n
g
USB
micro
S
50
micro
S
Unmou
n
To s a fe l y
unmoun
t
WARN
I
1. Touch
t
Unmo
2. Turn o
f
3. Gently
to
rel
e
4. Carefu
l
NOTE
microS
D
Viewing
1. Touch
2.
Revie
w
O The
Int
e
S
D Card
S
D Card
n
ting and remo
v
remove
the
micr
o
the
microSD
car
d
I
NG!
On
the Android
OS 2.2,
store
them
on
the mic
r
unmount procedure
ca
n
In
the worst case, the
m
t
he Apps Key
unt External
SD
c
f
f the
phone, rem
push
the
expos
e
e
ase
it from the
sl
o
l
ly pull the
micro
S
You
can easily
damage
be careful when inserti
n
D
Card
Settin
g
Memory in the
the
Apps
Key
w
the available
in
f
o
storage capacit
y
e
rnal Memory,
an
d
v
ing the microS
D
o
SD
card from y o
u
d
before removin
g
you can
download ap
p
r
oSD card as
well
as
on
n
cause
a
serious error
m
icroSD card
can
b
eco
m
>
Settings
>
c
ar
d
.
Now you ca
n
o
v
e
the back
cov
e
e
d edge
of the
mi
c
o
t.
S
D
card out of th
e
the microSD card and
i
n
g, removing, or handli
n
g
s
microSD
Car
d
>
Settings
>
f
o
rmation.
y
page
is divided i
n
d
Internal phone
s
D
Card
u
r
device,
frst yo
u
g
it from the
pho
n
p
lications from Android
the device.
T
heref
ore,
s
between the
microSD
m
e corrupted
or
dama
g
SD card &
phon
e
n
safely
remove
th
e
e
r,
and
remove
th
e
c
roSD
card in wit
h
e
slot.
i
ts
adapter
by improper
n
g
them.
>
SD
card
&
ph
o
n
to
three section
s
s
torage.
u
need
to
n
e.
M
arket
and
can
s
kipping
the
c
a
r
d
and
the de
vice.
g
ed.
e
storage >
e
microSD
card.
e
bat
ter
y
.
h
your
fngertip
operation.
Please
o
ne storage
.
s
:
SD
card,

Form
a
Forma
t
card.
1. To u
c
stora
g
2. Touch
U
device
an
un
m
3.
On
c
>
Erase
O
O
n
NOTE The
for
m
be
retrie
v
the
card.
Conn
e
Befor
e
prepa
r
laptop
you
ca
n
To c o
n
1. U s e
to
a
USB
po
2.
Op
e
3. Tou
c
Cho
o
Intern
e
To re
m
WARNI
N
or
discon
n
a
tting
the micro
S
t
ting
a microSD c
a
c
h the
Apps
Key
g
e
.
U
nmou
n
t Exter
n
use.
The icon
ap
p
m
ounted microS
D
c
e released, touc
h
everything
.
n
ce completely f
o
(reco
n
m
atting procedure erase
s
v
ed.
To
prevent
the los
s
e
cting
Y
our
Dev
i
e
using your
de
vic
e
your
de
vice
’
s
d
a
computer. Once
n
transfer
your da
t
n
nect your devi
c
the USB cable t
h
or
t on your
comp
u
e
n
the
Notifcatio
n
c
h the
connectio
n
o
se
from the follo
w
e
t Connection
.
m
ove the conne
c
N
G!
Carefullyfollo
w
n
ectanyremovabl
e
S
D
Car
d
ar
d
permanently r
>
Settings
n
al
SD
card
to
re
l
p
ea
r
s
within the
N
D
card.
h
Format Extern
a
o
rmatted,
the car
d
n
nected
for
use
b
y
s
all the data on the m
i
s
of important data,
p
l
e
i
ce
to
Y
our
C
o
m
e
’
s
mass storage
a
ta
services
to
sy
n
you
have connec
t
a
ta to or from the
c
e to a compute
r
h
at
came
with yo
u
u
ter
.
n
s
panel and
then
n
mode
you
want
t
w
ing
options: Ch
c
tion:
w
yourcomputer'si
n
e
USBdevicesordis
micr
o
e
m
oves
all fles
s
t
> SD
card
&
p
l
ease
the
microS
D
N
otifcatio
n
s
panel
a
l
SD
card
>
For
m
d
is
automatically
y
the
de
vice).
i
croSD card, after which
e
ase
check the
content
s
m
puter
capabilities,
you
n
n
chronize
with yo
u
t
ed
the
device
to
device
memor
y
.
r
via USB:
u
r
phone
to
conn
e
touch
USB
con
n
t
o
use
to
connec
t
arge Only, Mass
n
structionstounm
o
ks,toavoidlosingi
o
SD Card
5
t
ored
on the
h
one
D
card
from
to
indicate
m
at
SD
card
re-mounted
the
fles
CANNOT
s
before you format
n
eed
to
u
r
desktop
or
the
computer,
e
ct
the
phone
ected.
t
to the
PC.
Storage
or
o
unt,remove,
nformation
5
1

microSD Card
52
onthemicroSDcardwhendisconnectingyourphonefromyourcomputer.
1.On your computer, complete the process to safely Stop, or Remove,
the USB device (in this case, the phone). For example, use the Safely
Remove Hardware option to Stop the USB device, on Windows XP.
2.If using Windows Media Sync, make sure you disconnected Windows
by opening the Notifications panel and touching Windows media sync
3.Carefully remove the USB cable from the phone.
Important Connection Information
¾
Toavoidlossofdata,DONOTremovetheUSBcable,themicroSD
card,orthebatterywhileaccessingortransferringfiles
.
¾
DONOTuseyourcomputertochangeoreditfolderorfilenameson
themicroSDcard,anddonotattempttotransferlargeamountsofdata
fromthecomputertothemicroSDcard.DoingsomaycausethemicroSD
cardtofail.
¾
DONOTturnofforrestartyourcomputer,orputitintostandby
mode,whileusingamassstoragedevice.Doingwillresultinlossordamage
ofdata.
¾
TheinternalmicroSDcardcanonlybemountedforusebyeitherthe
deviceoraconnectedcomputer.Priortoaccessingthecardviaadifferent
method,itmustfirstbeunmountedfromitscurrentdevice(phoneor
computer‐USB).
Using Mass Storage
mode
When
you
connect
the
phone
and PC using a USB cable and
set
y
our
de
vice
’
s
USB
connection mode
to
Mass Storage,
you will
see
t
w
o
removable
disks on the PC. You can copy fles
to/from
both the
internal
memory
and the
removable
SD
card.
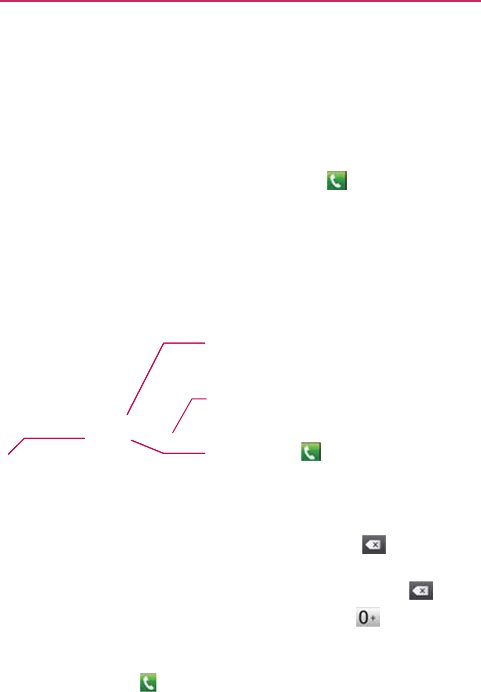
Placin
g
You can
p
dialed us
i
using the
To open
Fro
m
bar
.
To p l a c e
1.
Open
t
Touch the
M
to send the
m
2. Touch
O If y
o
dig
i
O To
e
O To
d
the
co
u
3. Touch
g
and Endi
n
p
lace calls using t
h
i
ng the
Phone
ta
b
Call log tab, the
the
Phone
app
l
m
the
Home scre
e
a call by
dialin
g
t
he
Phone
applic
a
M
essage
K
e
y
m
essage
the keys on the d
o
u
enter
a
wrong
i
ts
one
by
one.
e
rase
the
entire n
u
d
ial an
internation
a
plus
( + )
symbol.
ntr
y;
followed
by
the Call Key t
o
n
g
Calls
h
e
Phone
applica
t
b
. You can also di
a
Contacts
tab, or
l
ication
e
n, touch
the
Ph
o
g
a
tion.
To d i al a n i nte
0 key to enter
international
p
full phone
nu
m
Touch to
eras
e
entire
numbe
r
Touch the Cal
l
y
ou
entered.
ialpad to
manuall
y
number, touch
th
e
u
mber, touch
and
a
l number, touch
a
.
Then,
enter
the
i
the full
phone nu
m
o
dial the
number
t
io
n
.
Calls can be
a
l from your
phon
e
the
Groups t
ab.
o
ne
Key in the
rnational
number,
touc
h
the plus
(
+
)
symbol.
T
p
refx for the country;
f
m
ber.
e
a digit. Touch and ho
r
.
l
Key to dial the
n
u
y
enter
a
phone
n
e
Delete
Key
hold the
Delete
K
a
nd hold the
k
nternational
pref
x
m
ber
.
that you
entered
Calls
manually
e
’
s
memor
y
Quick
Keys
h
and hold
the
T
hen, enter
the
f
ollowed by
the
l
d to
erase
the
u
mber
that
n
umber
.
to
erase
K
ey
.
k
ey
to
enter
x
for the
.
53

Calls
54
O You
ope
n
the
O
Pre
O Use
call
spe
a
NOTE
Airplane
Some lo
c
connecti
o
1.
Press
a
2. Touch
A
NOTE
can
use other
ph
n
another applic
a
duration
of the
c
a
ss
the
V
olume
K
e
the
on-screen
bu
on hold and
take
a
kerphone,
end t
h
If you
opened other ap
p
to
end the
call. You can
N
otifcations panel do
w
mode
c
ations
may
requi
r
o
ns
by placing yo
u
a
nd hold the
Pow
e
A
irplane
mode
.
The
Wireless
&
netwo
rk
mode.
h
one features
wh
i
a
tion,
the Call ico
n
a
ll.
ey
s to
adjust
the
c
u
ttons
to
enter a
d
an
incoming
call,
h
e call, and
other
p
licatio
n
s while
on a cal
touch the Home
Key
w
n
and
touch the
Call
ic
o
r
e
you to turn off
y
u
r
phone
in Airpla
n
e
r/Lock
Key
.
rk
s setting
also has a
c
h
i
le the call is
und
e
n
appears
in the
S
c
all
v
olume.
d
ditional numbers,
add
another
call,
options.
l, you'll
need
to
return
t
,
then the Phone
Ke
y
o
n.
y
our
phone
’
s
wir
e
n
e
mode.
h
eckbox
to enable or dis
a
e
rway.
If
y
ou
S
tatus
Bar
f
or
place
the
u
se
the
t
o
the
Call
screen
y
or
drag
the
e
less
a
ble
Airplane

Answ
e
When
yo
u
caller ID
a
in the
C
o
To a n s w
e
If t
h
If t
h
If y
o
ans
w
To
s
Touch
the
Answer
Ke
y
to
answ
er
the
call.
Touch
the
Send msg
key to
send
a
quic
k
message
to the
calle
r
and
f
o
r
w
ar
d
them
to
y
our
v
oicemail.
e
ring or Rej
e
u
receive
a
phon
e
a
nd any
additiona
l
o
ntacts
list.
All
inc
o
e
r a
call
h
e
screen
is
unlo
c
h
e
screen
is
locke
d
o
u
were
already o
n
w
er
the
new
call.
s
ilence
the
incom
i
Unlocked Scre
e
y
r
d
e
cting
Calls
e
call, the
Incomi
n
l
information abo
u
o
mi
n
g
calls are
re
c
ked,
simply
touc
h
d
,
drag right to
a
n
n
a call, the frst
c
in
g
call ringer,
p
r
e
e
n
Lo
c
Touch
the
Decline
Key
to send
the
caller
directly
to
y
our
v
oicemail.
n
g
call
screen op
e
u
t
the caller that
y
corded
in the Cal
l
h
the
Answer
Ke
y
n
sw
er
.
c
all is
placed
on h
o
e
ss
the
V
olume
K
c
ked
Screen
Calls
en
s
with
the
y
ou
have
sa
v
ed
l
log
.
y
.
o
ld while
y
ou
K
eys.
55
Calls
56
To
decli
n
If t
h
If t
h
The
To
s
Worki
n
The Call
l
offers
a
c
your
Co
n
To open
To u
c
Cal
l
the
n
e
a call and di
v
h
e
screen
is
unlo
c
h
e
screen
is
locke
d
caller is
sent
dir
e
Unlocked Scr
e
s
ilence
the ringer,
n
g with the
l
og is a list of all t
h
c
onvenient
way to
n
t
acts.
the Call
log
c
h the
Phone
Ke
y
at
the
top of the
s
l
s are listed in the
top of the list. Sc
r
v
ert it
to
v
oicem
a
c
ked,
simply
touc
h
d
,
slide the
Decli
n
e
ctly to your
voice
e
en
Touch the
Declin
Key to
decline
the
call and
send
the caller directly
to your
v
oicemail
box to leave
a
message.
press
the
V
olu
m
Call
L
o
g
h
e calls
you’ve
di
a
redial a
number,
y
(from the Q
u
s
creen.
Call log tab. The
r
oll
down
to
see
o
a
il
h
the
Decline
Key
n
e
Key to th
e
mail
box to
leave
Locked
Scre
e
e
m
e
Keys.
a
le
d
,
received,
or
m
return
a call, or a
d
u
ick Keys bar) > t
h
most recent
call
s
o
lder
entries.
.
e
lef
t.
a
message.
n
m
issed.
It
d
d a
number to
h
e Call log tab
are
located
at

To d i a l a
Fro
m
Yo u
opt
i
To a d d
a
1. Touch
a
2. Touch
A
3. Touch
C
existi
n
To t a k e
o
To u
c
the
Co
n
To u
c
co
n
and
number
in the
m
the Call log,
to
u
can also
touch
a
n
i
o
n
s
to
communi
c
a
n
entr
y
’
s
numb
a
nd hold the call
e
Ad
d to
contacts
.
C
rea
t
e new cont
a
n
g contact
to add
t
o
ther actions
o
n
c
h a Call log entry
contact, send
the
n
tacts
list, and lea
r
c
h and hold a Cal
l
n
tact,
view
contac
t
more.
Call
log
u
ch
the Call Key
n
d hold the entry
t
c
ate
with that
co
n
er to
your
C
o
nt
a
ntr
y
.
a
ct
or
touch
Add
t
he
new number
t
n
a Call log
entr
y
to
open
a
scree
n
contact
a
mess
a
r
n
more about
th
e
l
log entry to
ope
n
t
information,
edi
t
at the right of
t
o
open
a
menu
w
n
tact
in
other way
s
a
cts
to
the existing
a
n
t
o.
y
n
from
where
you
a
ge,
add the
num
b
e
original
call.
n
a
menu where
y
t
the
number bef
o
Calls
the call
entr
y
.
w
ith
more
s
.
n
d
choose
an
can
call
b
er
to
y
our
y
ou can call
the
or
e
you
redial,
57
Calls
58
To clear
To u
c
a
tou
c
tou
c
Yo u
op
e
Callin
g
Instead
o
your
Co
n
You can
a
If you
ha
v
when
yo
u
To c a l l a
1. Touch
2. Touch
3. Touch
t
To c a l l a
1. Touch
Grou
p
2. Touch
3. Touch
the Call
log
c
h the
Phone
Ke
y
a
t
the
top of the
s
c
h Multiselect, c
h
c
h Delete
>
OK
.
can also
touch
a
n
e
ns, touch Remo
v
g
You r
Cont
a
f
manually
dialing
n
tacts
list to dial q
u
a
lso quickly call a
c
v
e contacts
on th
e
u
f rst
synchroniz
e
contact
the
Contacts
Ke
y
the
contact
you
w
t
he
contact’s pho
n
favorite
contac
the
Contacts
Ke
y
p
s t
ab.
Favorites
and
th
e
the
contact’s ph
o
y
(from the Q
u
s
cree
n
.
Touch the
M
h
oose
the call
ent
r
n
d hold an entry i
n
v
e from
call log
>
a
cts
g
phone numbers
u
ickly and
easily
.
c
ontact
by using
Q
e
web, they’re sy
n
e
to your
Google
T
M
y
from the Q
u
w
ish to
call.
n
e number
you
w
t
y
from the Q
u
e
n touch
the
cont
a
o
ne number
you
w
u
ick Keys bar) > t
h
M
e
n
u
Key >
D
r
ies
you wish to
d
n
the log. In the
m
>
OK
.
using the dialpad,
Q
uick
Cont
act.
n
chronized
with y
o
M
A
ccount.
u
ick Keys
b
a
r
.
w
ant
to
call.
u
ick Keys bar,
the
n
a
ct
you wish to
c
a
w
ant
to
call.
h
e Call log tab
D
ele
t
e
all.
Or
d
elete, then
m
enu that
you can
use
ou
r
phone
n
touch
the
a
ll.

Voice
D
You can
u
the
nam
e
To p l a c e
1. Touch
If you
h
“voice
heads
e
your
h
heads
e
2. Say “
C
a
pho
n
Optio
n
D
ialer
u
se
the Voice Dial
e
e
of a
contact
or a
a call by
speak
i
Voice
Dialer
i
h
ave
a
Bluetooth
dialing,”
you may
et
’s
main
button
o
eadse
t
.
For
detai
l
e
t.
C
all”
followed
by t
h
n
e number
.
n
s During a
e
r
application
to
p
phone number
.
i
ng
i
n the Apps
scree
n
headset
that
sup
p
be able to
open
V
o
r in
some other
w
l
s, see
the
docu
m
t
he
name
of the
c
Call
Touch to turn
K
e
y
lights up
speakerphon
e
W
ARNING!
To a voi d
dam
against your
e
Touch to mut
K
e
y
lights up
Touch to swi
t
phone.
p
lace a
phone
call
n
or on the
Hom
e
p
orts “voice-reco
g
V
oice Dialer by
p
r
w
ay, and dial by v
o
m
entation
that
ca
m
ontact
or say “Di
a
the
speakerphone
on
o
to indicate that
the
e
is
on.
age
to your hearing, do
e
ar when the
speakerp
h
e the
microphone
dur
i
to indicate that the
mi
c
t
ch
between
a
Blueto
o
Calls
by
speaking
e
screen.
g
nition”
or
essing
y
our
o
ice
using
m
e
with
y
our
a
l”
followed
b
y
o
r off. The
Speak
er
not hold the
phone
h
one
is turned
on.
in
g a call. The
Mute
c
rophone
is
muted.
ot
h headset
and
the
59

Calls
60
To
mute
the
microphone
during a
call
Touch the
Mute
Key
.
The
Mute
Key lights up to
indicate
that the
microphone
is
muted.
The
Mute icon
will
appear
in the
Status
Bar to
remind
you that
the
microphone
is
turned
of
f
.
When viewing
the in-call
screen,
you can
unmute
the
microphone b
y
touching
the
Mute
Key
again.
The
microphone
is
unmuted automatically when
the call
ends.
To turn the
speakerphone
on or
off
Touch the
Speaker
Key
.
The
Speaker
Key lights up to
indicate
that the
speakerphone
is
on.
The
Speaker
icon will
appear
in the
Status
Bar and the
sound
from
your call is played
through
the
phone
’
s
speak
er
.
When viewing
the in-call
screen,
you can turn the
speakerphone
of
f
by
touching
the
Speaker
Key
again.
The
speaker
is
turned
off
automatically when
the call
ends.
WARNING!
To a voi d
damage
to your hearing, do not hold the phone against your ear when
the
speakerphone
is turned
on.
To switch
bet
w
een
a
Bluetooth headset
and the
phone
When
a
Bluetooth headset
is paired and
connected
to your
phone,
you
can
conduct
calls on the
headset
for
hands-free conversation.
During a call,
y
ou
can opt to
use
the
Bluetooth headset
or just the
phone.
When
using the
Bluetooth headset
during a call, the
Ongoing
Call
notifcation
icon is blue in the
Status
Bar (the icon is
green when
using the
phone).
Touch the
Bluetooth
Key to
switch
the call from the
headset
to
the
phone,
or vice
v
ersa.
Mana
g
Contact
y
conferen
c
To switc
h
To u
c
The
the
To s e t u
p
Contact
y
conferen
c
1. Place
a
2.
When
3.
Choo
s
the
di
a
4. After
y
is
add
e
g
ing Multipl
e
y
our
wireless ser
v
c
e
calls and how
m
h
bet
w
een
curr
e
c
h
the
Swap
Key
current
call will
b
other
call.
p
a
conference
c
y
our
wireless ser
v
c
e
calls and how
m
a
call to the frst
p
you’re
connecte
d
s
e
a
contact
to cal
l
a
lpad.
y
ou’re
connected,
e
d
to the
confere
n
e
Calls
v
ice provider
to le
a
m
any
participant
s
e
nt
calls
.
b
e
placed
on hold
c
all
v
ice provider
to le
a
m
any
participant
s
p
articipant.
d
, touch Contacts
l
from your
Cont
a
touch
the
Merg
e
n
ce
call.
ar
n
whether
they
s
you can
include.
and you will be
c
o
Touch to
The
curr
e
placed o
n
will be
c
o
other cal
ar
n
whether
they
s
you can
include.
or
Dialpad
a
ct
list or
enter
th
e
e
calls
Key .
T
Calls
support
o
nnected
with
swap
calls.
en
t call will
be
n
hold and
y
ou
o
nnected
with
the
l
.
support
.
e
number
on
T
he
participant
61

Calls
62
Listen
i
When
yo
u
appe
a
or
if you
n
To listen
Op
e
OR
To u
c
i
ng to
You r
V
u
have
a
new voi
ar
s
in the
Status
B
n
eed
to
change
it
,
to
your
V
oicem
e
n
the
Notifcatio
n
c
h the to liste
n
V
oicemail
cemail
message,
B
ar. If you
have
n
o
,
you can do that
i
ail
n
s
panel and
touc
h
n
or
manage
your
the
V
oicemail
n
o
o
t
set
up your
voi
i
n the Call
set
ting
h
New voicemai
l
v
oicemail.
o
tifcation
icon
c
email number,
s
.
l
.

We
b
63
Browser
The Browser feature allows you to access the internet from your device.
Access and selections within this feature are dependent upon your
service provider.
Internet
Learn to access and bookmark your favorite web pages.
NOTE
You may incur additional charges for accessing the web and downloading media. For
details, contact your service provider.
Available icons may vary depending on your region.
Browse web pages
1.
Press the Home Key, then touch the Applications Launcher Key >
Browser to launch the Browser and open your homepage. To
access a specific web page, touch the URL input field, enter the
web address (URL) of the web page, and select Go.
2.
Navigate web pages using the following:
While browsing the web page, use the following options:
▶
To zoom in or out, double-tap the screen. You can also use the
two finger zoom. Place your two fingers on the screen and slowly
pinch or spread apart.
▶
To open a new window, press the Menu Key, then touch
Windows.
▶
To view the list of bookmarks, press the Menu Key, ten touch
Bookmarks. You can also add, edit, or delete a bookmark.
▶
To view the currently active windows, press the Menu Key,
then touch Windows. You can open multiple pages and switch
back and forth between them.
▶
To reload the current web page, press the Menu Key, then
touch Refresh.
Refresh menu appear after being finished loading of web page.
▶
To stop loading web page, press the Menu Key, then touch
Stop.
Stop menu appear when web page is loading.
▶
To go to previous page, press the Back Key.
▶
To go to a next page in history, press the Menu Key, then touch
Forward.

64
Web
▶
To bookmark the current web page, press the Menu Key, then
touch More > add bookmark.
▶
To search for text on the web page, press the Menu Key, then
touch More > Find on page.
▶
To select text on the web page, press the Menu Key, then touch
More > Select text. Highlight the text you want with your finger.
The highlighted text is copied to the phone’s memory and you can
paste it anywhere that allows text to be entered.
▶
To view the web page details, press the Menu Key, then touch
More > Page info.
▶
To send the web address (URL) of the web page to others, press
the Menu Key, then touch More > share page.
▶
To view the download history, press the Menu Key, then touch
More > Downloads.
▶
To customize the Browser settings, press the Menu Key, then
touch More > settings.
Bookmark your favorite web pages
If you know the web address of the web pages, you can manually add a
bookmark. To add a bookmark,
1.
Press the Home Key, then touch the Applications Launcher key >
Browser
2.
Press the Menu Key, then touch Bookmarks.
3.
Touch Add. Enter a page title and a web address (URL)
4.
Touch OK
From the bookmark list, touch and hold a bookmark and use the following
options:
▶
To open the web page in the current window, touch Open.
▶
To open the web page in a new window, touch Open in new
window.
▶
To edit the bookmark details, touch Edit bookmark.
▶
To add the bookmark shortcut to the one of the Home screen
panes, touch Add shortcut to Home.
▶
To send the web address (URL) of the web page to others,
touch Share link.

We
b
65
▶
To copy the web address (URL) of the web page, touch Copy
link URL.
▶
To delete the bookmark, touch Delete bookmark.
▶
To use the web page as your Browser homepage, touch Set as
homepage.
66
Web
Maps
To
searc
1. Touch
2. Touch
3. In the
addre
s
“thea
t
4. Touch
Oran
g
Yo u c a
n
balloo
n
well a
s
To g e t
d
i
1. Touch
2. Touch
3. Enter
a
secon
d
conta
c
To
rev
e
4. Touch
f
or
wa
l
5. Touch
6.
Choo
s
menu
Your
r
o
7. T o v i e
w
To
sw
i
>
M
h
for a
location
the
Apps
Key
the
search
box at
search
box,
ente
r
s
s,
a city, or a t yp
e
t
er
in New
Y
ork
”
.
the
Search
Key
e markers indica
t
n
touch
a
marker
n
to
open
a
scree
n
s
options
for
obta
i
i
r
ections
the
Apps
Key
the
Menu
Key
a
starting
point in
d
text
box. You ca
n
ct
s
or
histor
y
.
e
rse directions, t
o
the Car icon
f
l
king
directions.
Go
.
s
e
how to view
di
r
that is
displa
y
ed.
o
ute
is
displayed
o
w
the
directions
in
i
tch
back to your
m
M
ap
view
.
>
Maps
.
the top of the
sc
r
r
the place you’re
e
of
business
or
e
.
t
e search matches
to
open
a balloon
n
with
more info
r
i
ni
n
g
directions.
>
Maps
.
>
Directions
.
the frst
text
box
n
also
select
an
a
ou
ch
the
Reverse
f
or driving
directi
o
r
ectio
n
s
on
Maps
o
n a
map.
a list format, touc
h
m
ap
route
from L
i
r
een.
looking for. You c
a
e
stablishment.
F
o
on the
map.
that
contains
a l
a
r
mation about
the
and your
destinat
i
ddress
from your
icon
.
on
s
or the
Walkin
from the
Directi
o
h
the
Menu
Key
i
st view,
touch
the
a
n
enter
an
o
r
e
xample,
a
bel. Touch
the
location,
as
i
on
in
the
F
a
v
orites,
g
icon
o
ns pop-up
> List
view
.
Menu
Key
Conta
The
Con
t
other inf
o
Using
Y
Use the
C
friends
a
n
To open
To u
c
OR
Touch
All of
y
new
ph
will di
s
To open
Op
e
of
t
h
Fa
v
of
y
c
ts
t
ac
t
s
application
a
o
rmation
in your
p
Y
our
Contacts
C
ontac
t
s
applicat
i
n
d
acquaint
ances
your
Contacts
a
c
h the
Apps
Key
the
Home
Key
y
our
contacts
are
h
one
and
ha
v
e
n
’
t
s
play hints on ho
w
a list of your fa
v
e
n
your
Contacts
h
e
screen.
Then
t
o
v
orites
lists the
c
o
y
our
most freque
n
a
llows
you to
stor
e
p
hone
’
s
memor
y
.
i
on
to add, view,
a
.
a
pplication
> the
Contac
t
> the
Contact
s
displayed alphab
e
added
any
conta
c
w
to
start
adding
c
v
orite
contacts
application
and
t
o
o
uch Favorites.
on
tacts you’ve ad
d
n
tly
called
cont
ac
t
Co
m
e
names, phone
n
a
nd
communicat
e
t
s icon .
s
Key in the Q
u
e
tically
in a list. If
ct
s
yet, the
Cont
a
c
ontacts
to your
p
ou
ch
the
Groups
t
d
ed
to the list,
fol
t
s.
m
munication
6
n
umbe
r
s
and
e
with
y
our
u
ick Keys bar.
you
have a
a
c
t
s
application
p
hone.
t
ab at the
top
l
owed
by a
list
6
9
Comm
70
To v i e w
d
1.
Open
y
2. Touch
Touch an
The
The
The
The
Touch
Share
,
and
S
p
Adding
You can
a
contacts
accounts
The
Con
t
to
create
unication
d
etails about
a
c
y
our
Contacts
ap
p
the
contact who
s
icon to call,
mes
s
Dial
icon pla
Message icon
Mail
icon st
a
Chat icon st
a
t
he
Menu
Key
,
Delete contact,
A
p
eed
dials
).
Contacts
ad
d
contacts
on y
o
in your
Google
TM
A
that
support syn
c
t
ac
t
s
application
t
r
a single
entry.
Yo
u
c
ontac
t
p
lication.
s
e details
you
wa
n
s
age,
or
open oth
e
a
ces
a call to the
n
starts
a
messa
g
a
r
t
s
an
email.
a
r
t
s
a
chat.
for the following
Ad
d to
home sc
r
ou
r
phone
and
sy
n
A
ccount, Micros
o
c
i
n
g
cont
acts.
r
ies to join
new a
u
can also
mana
g
n
t
to
vie
w
.
e
r
applications.
n
umber
.
g
e.
menu options:
E
r
ee
n
, Options,
an
d
n
chronize them
w
o
ft Exchange acco
u
ddresses
with
ex
i
g
e
that
process
m
a
d
it
contact,
d
More
(
Export
w
ith
the
u
n
t
,
or
other
i
sting
cont
acts,
a
nually
.
To a d d
a
1. O p e n
t
2. Touch
3. If you
h
the to
p
the
co
n
4. Enter
t
5. Touch
email
a
6. Touch
categ
o
numb
e
entry
i
exam
p
7. Touch
the
n
a
8.
When
Import
i
If you
ha
v
import
t
h
export c
o
Export to
contact
v
To
impo
You can
c
import
t
h
1.
Insert
2.
Open
t
3. Touch
a
new
contact
t
he
Contacts
appli
c
the the
Menu
Ke
y
h
ave more
than o
n
p
of the
screen
a
n
n
tact.
t
he
contact’s
na
m
a
category
of
co
n
a
ddress,
to
enter
a
category’s
plus
o
ry.
For
example,
i
e
r
and a
home nu
m
i
tem
information
t
p
le, Mobile
and
W
the
Picture Fra
m
am
e
in your list of
you’re
fnished, t
o
i
n
g
, Exporting,
v
e contacts store
h
em
into your
Co
n
o
ntacts
in vCard
f
o
back
them
up to
v
ia
email.
r
t contacts
fro
m
c
opy
contacts,
in
v
h
em
into your
pho
the
memory
card
t
he
Contacts
app
l
the
Menu
Key
c
ation.
y >
New
con
t
n
e
account
with
c
n
d
choose
the
ac
c
m
e.
n
tact information,
that kind of
infor
m
button
to add
i
n the
phone nu
m
m
ber.
Touch the l
a
t
o
open
a
drop-d
o
W
ork for a
phone
n
m
e
icon to
sele
contacts
and in
o
t
ou
ch
Save
.
and Sharing
C
d
in vCard
forma
t
n
tacts application
o
rmat
onto a
mic
r
a
computer
or
ot
h
m
your microSD
v
Ca
r
d
format,
ont
o
ne.
(that
contains
th
e
l
ication.
>
More
>
Imp
o
Co
m
t
ac
t
.
c
ontacts, touch
C
c
ount
to which yo
u
such
as
phone n
u
m
ation about
your
more
than one e
n
m
ber category,
ad
d
a
bel
button
to the
o
wn menu
of
pres
e
n
umber
.
ct
a
picture
to dis
p
t
her
applications.
C
ontacts
t
on a
microSD
c
a
on your
phone.
Y
o
r
oSD
card.
h
er device
or so
y
car
d
o
your
microSD
c
a
e
vCard fles) into
o
rt/Export
.
m
munication
7
ontact type at
u
want
to
add
u
mber
and
contact.
n
try for
that
a
w
ork
left of
the
e
t labels.
F
or
p
lay next to
ar
d you
can
o
u can
also
y
ou can
send a
ar
d
then
your
phone.
7
1

Communication
72
4. Touch
Import from
SD
card
.
5.
When
the
pop-up appears, select
the
storage
t
ype.
6. If you
have more
than one
account
on your
phone, touch
the
account
into which you
want
to import the
cont
acts.
7. Touch the
contacts
you
want
to import to the
microSD
card. Then
touc
h
Done
and OK to
confrm.
To
export contacts to
your microSD
car
d
You can
export
all of the
contacts
on your
phone
to your
microSD
card,
as
vCard fles. You can
then
copy this fle to a
computer
or
another device
that
is
compatible
with this
format, such
as an
address
book
application.
1.
Open
the
Contacts
application.
2. Touch the
Menu
Key >
More
>
Import/Export
.
3. Touch
Export
to SD
card
.
4.
When
the
pop-up appears, select
the
storage
t
ype.
5. Touch the
contacts
you wish to
export
to the SD card. To
export
all
contacts, touch Select
All in the top left
corner
of the
screen.
Then
touch Export
and
OK
.
To
share
a
contact
Yo u
can share a
contact
with
someone
by
sending
it to them as a vCard
fle.
1.
Open
the
Contacts
application.
2. Touch the
contact
you
want
to
share
to view the
contact
det
ails.
3. Touch the
Menu
Key >
Share
.
4.
Choose
the
method
for
sending.
5. Enter the
necessary
information and share
it.

Communication
73
Adding a Contact to
Your
F
a
v
orit
es
The
Favorites section contains
a
short
list of the
contacts
you
communicate
with
most
of
ten.
To a d d a
contact to
your
favorites
list
1.
Open
the
Contacts
application.
2. Touch a
contact
to view its
det
ails.
3. Touch the gold
star
to the right of the
contact’s
name.
When
the
contact
is
added
to your
favorites
list, the
star
will
be
gold-colored.
To
remove
a
contact
from your
favorites
list
1.
Open
the
Contacts
application
and
touch
the
Groups t
ab.
2. Touch
Favorites then touch
a
contact
entry to view its
det
ails.
3. Touch the gold
star
to the right of the
contact’s
name.
The
grey-colored star
will
indicate
that the
contact was removed
from
your
Favorites
list.
Searching for a
Contact
It’s easy
to
search
for a
contact
by
name.
To
search
for a
contact
1.
Open
the
Contacts
application.
2. Touch the
search
box or
touch
the
Search
Key
.
3. Start
entering
the
name
of the
contact
you’re
searching
for.
As
you
t
ype,
contacts
with
matching names
will
appear below
the
search
bo
x.
4. Touch a
matching contact
in the list to view its
det
ails.
You can also
search
by
nickname,
email,
organization
and
number
.

Communication
74
Editing Contact
Details
You can
change
or add
details saved
in your
contact entries.
You can
also
set specifc ringtones
to
specifc contacts
or
determine whether
calls
from
specifc contacts
are
diverted
to your
v
oicemail.
Some contact entries contain information
from multiple
sources:
information
that you
added manually, information
that
Contacts
joined
from
multiple
accounts
to
consolidate duplicates,
etc.
If you fnd
duplicate entries
in
Contacts,
you can join
them
into a single
entr
y
.
Changes made
to
information
from one
source
do not
automatically
change
the
information
on the
other sources.
For
example,
if you
have
inf
ormation
about
a
contact
from a Google
Account
and an
Exchange account
and
both
are
confgured
to sync
contacts, changes
to the
contact
from the
Google
Account
are
synced
to that
account
on the
web,
but the
information
from
the Exchange account
will
remain unc
hanged.
To e d i t
contact
details
1.
Open
the
Contacts
application.
2. Touch and hold the
contact whose details
you
want
to edit. In the
menu
that
opens, touch
Edit
contact
.
3. Edit the
contact
inf
ormation.
4. Touch
Save
to
save
the
c
hanges.
To
change
a
contact
’
s
default phone number
The
default phone number
is
used when
you initiate a call or
send
a
te
xt
message
using the
context menu
(by
touching
and holding a
cont
act).
1.
Open
the
Contacts
application.
2. Touch the
name
of a
contact
in the list to view its
det
ails.
3. Touch and hold the
phone number
to
use
as the
contact’s default
phone
number
.
4. Touch
Make default number
in the
menu
that
opens.
The
default phone number
is
indicated
by a
c
hec
kmark.

Communication
75
To divert calls from a
contact to
your
v
oicemail
1.
Open
the
Contacts
application.
2. Touch the
name
of a
contact
in the list to view its
det
ails.
3. Touch the
Menu
Key >
Options
.
4. Touch
Incoming calls
to
checkmark
the option and
enable
it.
5. Touch the Back Key
.
When
this
contact
calls you, your
phone
will not ring and the caller will
be
forwarded
directly to your
v
oicemail.
To s e t a
ringtone
for a
contact
1.
Open
the
Contacts
application.
2. Touch the
name
of a
contact
in the list to view its
det
ails.
3. Touch the
Menu
Key >
Options
.
4. Touch
Ringtone then touch
a
ringtone
to
select
it.
5. Touch OK to
save
the
ringtone
to the
contact.
To
delete
a
contact
1.
Open
your
Contacts
list or
Favorites
list.
2. Touch the
name
of a
contact
in the list to view its
det
ails.
3. Touch the
Menu
Key >
Delete
contact
.
If you
delete
a
contact
from Google
Contacts
(or
another account
with
editable contacts),
the
contact
is also
deleted
from
Contacts
on
the
web
the next time you sync your
phone.
You can’t
delete contacts
from a
read-only account, such
as
F
acebook.
Instead,
a dialog box
informs
you that the
contact
will be
hidden.
If the
contact contains information
from both
editable accounts
(such
as
Contacts)
and from a
read-only account
(such as
Facebook),
a
dialog box
informs
you that the
information
from the
read-only
account
will be
hidden,
not
deleted.
4. Touch OK to
confrm
that you
want
to
delete
the
contact.

Comm
76
Commu
n
From the
or
multi
m
can
also
o
This
sect
i
list of
co
n
other ap
p
To
conn
e
1. Touch
T
2. Touch
st
art.
The
c
o
you
s
a
unication
n
icating
with
Y
o
Contacts
or
Gr
o
m
edia
message
(
M
o
pen
a list of all t
h
i
on describes wa
y
n
tacts.
The
Cont
a
p
lications, such
as
e
ct
by using Qu
i
a
contact’s pictur
e
T
ouch a
contact's
pict
ur
e
the icon
correspo
n
o
mmunication
ico
n
av
ed
in the
contac
ou
r
C
o
ntacts
o
ups
tab, you can
M
MS) to a
contac
t
h
e
ways
you can
c
y
s
to initiate
com
m
a
c
t
s
application s
h
GmailTM and
Me
s
i
ck
Contact
for
e
to
open
Quick
C
e
.
ndi
n
g
to the type
n
s
displayed dep
e
t
inf
ormation.
quickly call or
se
n
t
’s default phone
n
c
ommunicate
wit
h
m
unication when
h
ares
your
conta
c
s
saging
.
Android
TM
C
o
n
tact
for
Androi
of
communicati
o
e
nd
on the
types
o
n
d
a
text
(SMS)
n
umber.
Y
ou
h
that
contact.
viewing
y
our
ct
s
with
man
y
d.
o
n
you
want to
o
f
inf
ormation

To
com
m
1.
Open
t
2. Touch
3. In the
with t
h
The
The
The
The
NOTE
To c a l l a
1.
Open
t
2. Touch
3. Touch
To s e n d
1.
Open
t
2. Touch
3. Touch
m
unicate
with a
t
he
Contacts
app
l
the
contact
with
w
contact’s details
s
h
e
contact.
Dial
icon pla
Message icon
Mail
icon st
a
Chat icon st
a
Anytime you
see
the D
log
, just
touch it to call
contact
’
s
defa
u
t
he
Contacts
app
l
and hold the
con
t
Call
contact
in th
a text or
multi
m
t
he
Contacts
app
l
and hold the
con
t
Tex t
contact
in t
h
contact
l
ication.
w
hom
you
want
t
s
creen, touch
the
a
ces
a call to the
n
starts
a
messa
g
a
r
t
s
an
email.
a
r
t
s
a
chat.
D
ial icon next to a
n
u
that
number.
u
lt number
l
ication.
t
act
you wish to
c
e
menu
that
ope
n
m
edia message
t
l
ication.
t
act
you wish to
m
h
e
menu
that
ope
Co
m
t
o
communicate.
way to
start
co
m
n
umber
.
g
e.
u
mber,
such as in your
F
all.
n
s.
t
o a
contact
’
s
d
e
m
essage.
ns.
m
munication
7
m
unicating
F
a
v
orites or Call
e
fault number
7
7

Comm
78
Selecti
n
You can
h
confgur
e
To s e t
w
If you
us
e
that don’t
1.
Open
t
2. Touch
3. Touch
When
4. Touch
A
NOT
E
To
chan
g
1.
Open
t
2. Touch
3. Touch
4. Touch
applic
a
list. Th
i
settin
g
5. Touch
A
unication
n
g
Which Con
t
h
i
d
e
contacts
that
e
which
groups
of
w
hether contacts
e
your list of
cont
a
have phone nu
m
t
he
Contacts
app
l
the
Menu
Key
Only
contacts w
selected,
a
chec
k
A
pply
to
save
the
E
S
s
9
OUCANSORTTHE#O
N
s
9
OUCANALSOVIE
WCONT
A
g
e
which
group
s
t
he
Contacts
app
l
the
Menu
Key
an
account
to
op
e
each
group
whos
a
tion. Contact typ
e
i
s action
affects
o
g
s
will not be
af
f
e
c
A
pply
to
save
yo
u
t
ac
t
s are Disp
l
don’t
have phon
e
contacts
you
wa
n
without
phone
a
c
t
s
only to call
p
e
m
bers.
l
ication.
>
More
>
Disp
l
i
t
h phones
to
se
l
k
ma
r
k
will
appear
.
set
tings.
N
T
ACTLISTB
Y'IV
ENNAMEOR
&
A
CTNAMESAS'IV
ENNAMEl
R
s
are
display
e
d
l
ication.
>
More
>
Disp
l
e
n
its list of availa
b
e contacts
you
w
a
es
with a
checkm
nly which
contac
t
c
ted.
u
r
set
tings.
la
y
ed
e
numbers.
Yo u c
a
n
t
to display in th
e
numbers
are
d
i
e
ople,
you can hi
d
l
ay
options
.
l
ect
or
deselect
t
h
&
AMILYNAME
R
STOR&
AMILYNA
MElRST
l
ay
options
.
b
le
groups.
a
nt
to view in yo
u
a
r
k
will
appear
in
t
s
are
displayed.
Y
a
n
also
e
Contacts
list.
splay
e
d
d
e any
cont
acts
h
is
option.
r
Cont
acts
your
cont
acts
Y
our
sync

Communication
79
Joining
Contacts
When you add an
account
or add
contacts
in other
ways,
such as
b
y
exchanging emails,
the
Contacts
application
attempts
to avoid duplication
b
y
joining
contact information automatically.
You can also join
contacts
manually
.
To join
contacts
1.
Open
the
Contacts
application.
2. Touch the
contact
entry to which you
want
to add
information.
T
he
contact name
for this entry will
remain unchanged
after you join
with
another contact.
3. Touch the
Menu
Key > Edit
contact
.
4. Touch the
Menu
Key >
Join
.
5. Touch the
contact whose information
you
want
to join with the
frst
contact.
The
information
from the two
contacts
will be
merged
and
displayed under
the
name
from the frst
contact.
6. Touch
Save
to
confrm
you
want
to join the
entries.
The
contact
information
will be
displayed
in one
contact entr
y
.
Separating Contact
Inf
ormation
Each
contact
entry on your
phone
may
contain
‘joined’
information
from
a
variety of
sources.
If
contact information
from
different sources was
joined in error, you
can
separate
the
information
back into individual
contact entries
on your
phone.
To
separate contact
inf
ormation
1.
Open
the
Contacts
application.
2. Touch the
contact
entry
whose information
you
want
to
separate.
3. Touch the
Menu
Key > Edit
contact
.
4. Touch the
Menu
Key >
Separate
.
5. Touch the OK
button
to
confrm
you
want
to
separate
the
entries.
T
he
contact information
will
separated
into individual
contact entries
in
the
Contacts
list.
Comm
80
Email
Openin
g
You can
u
GmailTM.
T
Microso
f
t
and
othe
r
To open
To u
c
The frst
t
you add
a
After the
The
Ac
c
The
Ac
c
Op
e
tou
c
Eac
h
of
u
in
S
Yo u
The
c
he
c
unication
g
Email and t
h
u
se
the
Email ap
p
T
he
Email applic
a
f
t
Exchange, Win
d
r
accounts.
the Email
appli
c
h the
Apps
Key
t
i
m
e you
open
th
e
a
n email
account.
initial
setup,
Ema
i
c
oun
t
s
screen
c
ounts screen
list
s
e
n
the
Email app
l
c
h
the
Menu
Key
h
folder and
acco
u
u
nread messages
S
tarred, Drafts
and
can
touch
an
acc
account
from w
h
c
kmark.
h
e Accounts
S
c
p
lication
to read e
m
a
tion supports
the
d
ows
Liv
e
Hotmail,
i
cation
>
Email .
e
Email applicati
o
i
l
displays
the
co
n
s
all your
account
l
ication.
If you’re
n
>
Accounts
.
u
nt
on the
Accou
n
in
green,
or will
d
Outbox
in
gra
y
.
c
ount
to view its
I
n
h
ich you
send
em
a
c
r
een
m
ail from
servic
e
following
accou
n
Yahoo! Mail, G
m
o
n,
a
setup
wizard
n
ten
t
s
of your
In
b
s.
n
ot on the
Accou
n
n
ts screen displa
y
d
isplay the
numb
e
n
bo
x.
a
il by
default
is
in
d
s other than
n
t
t
ypes:
m
ail, AOL
Mail,
opens
to
help
o
x.
n
t
screen,
y
s
the
number
e
r
of
messages
d
icated
with
a

Communication
81
Reading
You r
Messages
You can read
messages
from the Inbox, or from
other folders
from
the
individual
accounts.
To read a
message
From the
Accounts screen,
simply
touch
any
account
to display
it.
You can also go to the folder list of the
account
by
touching
the
Menu
Key
>
Folders
from the
Inbo
x.
NOTE
When new email arrives,
a
notifcation appears
in
the Status
Bar. Drag
the
Notifcations
panel downward
and
touch the email
notifcation.
Responding to a
Message
There are many
options
how you can
respond
to a
received
email
message.
You can reply to it,
forward
it, or
even
just
delete
it.
To r e p l y
to
or forward a
message
While
reading
a
message, touch Reply
or
Reply
all (available at
the
bottom
of the
screen).
While
reading
a
message, touch
the
Menu
Key >
Forward
to
forward
the
message.
To m a r k a
message
as
unr
ead
You can
set
a
message
to
appear
as
though
it has not
been
read –
f
or
example,
to
remind yourself
to read it again
later
.
From the Inbox,
touch
and hold the
desired message, then
touc
h
Mark
as unread
in the dialog box that
opens.
To
delete
a
message
There are a
few easy ways
to
delete
a
message.
While
reading
a
message, touch Delete
at the
bottom
of the
screen.
From the Inbox,
touch
the
checkbox
next to one or
more
messages,
then touch Delete
at the
bottom
of the
screen.

Comm
82
For many
so you c
a
Gmail
Openin
g
When
yo
u
displaye
d
To open
Touch t
h
.
All
of y
o
archive,
The
cur
r
you
ha
v
messa
g
Conver
s
To read
>
ind
i
>>
ind
i
No
ind
i
unication
types
of
accoun
t
a
n
retrieve them
i
n
g
Gmail and
Y
o
u
open
the
Gmai
l
d
in your
Inbo
x.
the Gmail
appl
i
h
e
Apps
Key
ou
r
conversations
or flter
them.
r
e
n
t
Google
Acc
o
v
e more
than one
g
es
in
each
Inbo
x.
s
atio
n
s
with
new
m
a
message
in a
c
o
i
cates
that this
m
e
i
cates
that you
w
e
cator indicates
t
h
includes
y
o
t
s, deleted mess
a
n
case
they
were
Y
o
ur
Inbox
l
application,
the
m
i
cation
>
Gmail
are
displayed
in
y
o
u
n
t
is
displayed
a
account,
you ca
n
messages
are
di
s
o
nversation, touc
h
e
ssage was sent
d
er
e
CC’d on this
m
h
at this
message
o
u.
a
ges
are
moved
t
o
deleted
by
mist
a
k
m
ost recent con
v
y
our Inbox
unless
a
t the top right of
t
n
switch accounts
s
played
with bold
h
its
subject
line
t
d
irectly to
y
ou.
m
essage.
was sent
to a gr
o
o
a Trash
f
older
,
k
e.
v
ersations are
you
delete,
t
he Inbox. If
to view
the
subject
lines.
t
e
xt.
ou
p
that

To open
If you are
you
retur
n
OR
W
h
OR
Wh
e
>
M
To switc
h
Gmail
di
s
a
time.
I
f
screen
t
o
to
switc
h
1. Fr o m
y
2. Touch
your Inbox whe
n
viewing
a
mess
a
n
to your
Inbo
x.
en reading
a
mes
s
e
n viewing a list
o
M
o
r
e
> Go to
Inb
o
h
accounts
s
plays conversati
o
f
you
have more
t
h
o
view how many
h
accounts.
y
our Gmail Inbox,
the
account
that
c
n
Gmail is
runn
i
a
ge
or
another
lab
sage, touch
the
M
o
f labeled
convers
a
o
x
.
on
s
and
message
s
h
an one
account,
y
unread message
s
touch
the
Menu
K
c
o
n
tains
the emai
l
Co
m
i
ng
el,
touch
the Bac
k
M
e
n
u
Key >
G
a
tions,
touch the
M
s
from one Googl
e
y
ou can
open
the
s
you
have
in
eac
h
K
ey >
Acco
u
l
you
want
to
rea
d
m
munication
8
k
Key
until
G
o to
Inbox
.
M
e
n
u
Key
e
Account
at
A
ccounts
h
account
and
n
ts
.
d
.
8
3

Comm
84
Readin
g
When vi
e
conversa
t
To read
a
To u
c
A
c
o
frst
co
n
v
The
sen
the
W
h
the
it.
A
bar
res
t
Yo u
me
s
you
’
To u
c
or
f
o
unication
g
You r
Messa
g
e
wing
a list of
co
n
t
ions,
you can
op
e
a
message
c
h a
conversation
o
nversation open
s
starred messag
e
v
ersation.
Google Talk onlin
d
er
of
each mess
contact’s picture
h
en reading
mess
a
bottom
of the
sc
r
A
fter you
delete
a
that
appears
at t
h
t
o
r
e
the
message
can also
touch
th
s
sage
in a
conver
s
’
re
working
in).
c
h on the
me
s
f
o
rwarding
the
m
e
g
es
nv
ersations
in you
r
e
n
a
conversatio
n
that
contains
the
s
to the frst
new
e
,
if
you’ve previo
u
e
status
will
app
e
age
if the
sender
to
open
Quick
C
o
a
ges
in a
convers
a
r
een
to
archive
th
e
conversation,
yo
u
h
e top of the
scr
e
to its
previous
lo
h
e arrow
buttons
t
s
ation
in your Inb
o
s
sage header
to
a
e
ssage.
r
Inbox or in any l
i
n
to read its
mess
a
message
you
w
a
(unread)
messag
e
u
sly starred
a
me
s
e
ar
next to the
na
m
has a Google
Ac
c
o
nt
act.
a
tio
n
,
you can
us
e
e
entire conversa
t
u
can
touch Und
o
e
en
to undo the l
a
cation.
t
o read the
next,
o
o
x (or the
conver
s
a
ccess options
fo
r
i
st of
labeled
a
ges.
a
nt
to
read.
e
,
or to
the
s
sage
in
the
m
e
of
the
c
oun
t
.
T
ouch
e
the
buttons at
t
ion
or
delete
in the
green
a
st action
and
o
ldest, unread
s
ation
list
r
replying
To
rerea
d
When
y
minimi
z
1. Touch
you
w
a
2. Touch
When r
e
unread
remind
d
a
message
y
ou
open
a
conve
r
z
ed
into a tab that
the
Apps
Key
a
nt
to view and t
h
the
contact nam
e
e
adi
n
g
a
messag
e
to
return
a read
m
y
ourself
to read i
t
r
satio
n
,
message
s
indicates
the
nu
m
>
Gmail
. T
h
h
e tab
indicating
m
e
to
open
that
me
e
you can
touch
t
h
m
essage
to the
u
n
t
again
later
.
Co
m
s
that
you’ve
alrea
d
m
ber
of
hidden
m
h
en
touch
the
con
v
m
inimized
messa
g
ssage.
h
e
Menu
Key
n
read state.
For
e
x
m
munication
8
d
y read
are
essages.
v
ersation
g
es.
>
Mark
x
ample,
to
8
5
Comm
86
Compo
s
You can
c
address
e
To
com
p
1. Touch
2. Enter
a
As
yo
u
list.
Yo
u
a
new
3. Touch
neces
s
4. Enter
a
5.
Conti
n
6. Touch
7. Touch
If you
’
mess
a
the
D
r
To
era
s
saved
If you
Airpla
n
with t
h
unication
s
ing and Send
i
c
ompose
and
sen
d
e
s
or
other
email
a
p
ose
and
send
a
the
Apps
Key
a
recipient’s
addr
e
u
enter text, matc
h
u
can
touch
a
su
g
one.
the
Menu
Key
s
ar
y
.
a
subject
for the
m
n
ue
into the next
f
the
Menu
Key
Send
to
sen
d
’
re not ready t
o
a
ge as
a Draft. Yo
u
ra
f
t
label.
s
e
the
message,
t
draf
ts).
aren’t
connected
n
e
mode
-
the
m
h
e
Outbox
label u
n
i
ng a
Messag
e
d
a
message
to
p
a
ddresses.
a
message
>
Gmail
>
t
e
ss.
h
ing addresses
a
r
g
gested address
o
> Add Cc/Bcc t
m
essage
in the
S
u
f
eld to
enter
your
>
Attach
to ad
d
d
your
message.
o
send
the
me
u
can read your
d
r
t
ouch
the
Menu
K
to a
network
-
f
o
m
essages
that you
n
til you
connect
t
o
e
p
eople
or
groups
w
t
he
Menu
Key
>
r
e
offered
from y
o
o
r
continue enteri
n
o Cc or Bcc
recip
u
bject
feld.
email
message.
d
an
attachment
t
o
ssage, touch
r
afts
by
opening
m
K
ey >
Discar
d
f
o
r
example,
if yo
u
send
are
stored
o
o
a
network
agai
n
w
ith
Gmail
>
Compose
.
ou
r
Cont
acts
n
g text
to
enter
ients,
if
o
the
email.
to
save
the
m
essages
with
d
(including
an
y
u
’re
working
in
o
n your
phone
n
.
Replyi
n
You can
c
forwardi
n
To r e p l y
1. Touch
or for
w
2. Touch
Replyi
n
your r
e
Chang
The
m
addre
s
Yo u c a
n
to all
a
Note t
h
in you
r
3. Touch
n
g to or
Forwa
r
c
ontin
u
e
an email
n
g
it.
to
or forward a
on the
mess
a
w
arding
the
mess
a
Reply, Reply
all,
n
g to or
forwardi
n
e
ply to the
curren
t
i
n
g
the
subject s
t
m
essage
will
open
s
ses,
edit the
sub
j
n
add one or
mo
r
n
d
then
adding t
h
h
at the
conversat
i
r
reply (or
f
o
r
w
ar
d
Send
to
sen
d
r
ding
a
Messa
g
conversation
by
r
message
a
ge header
to
acc
a
ge.
or
Forward
.
n
g
messages
wit
h
t
con
v
ersation.
t
arts
a
new
con
v
e
r
in a
new screen
w
j
ect,
and add or
r
e
r
e people
to an
o
n
h
e
new
person
’
s
a
ion text
and
prev
i
d
).
d
your
message.
Co
m
g
e
r
eplying to a
mes
s
ess options
for re
p
h
out changing
the
r
sation.
w
he
r
e
you can ad
d
e
move text
or
at
t
a
n
going conversati
o
a
ddress(es)
to the
i
ous
messages
ar
e
m
munication
s
age
or
b
y
p
lying
subject
adds
d
or
remove
a
c
hments.
o
n
by
replying
reply
.
e
also
included

Comm
Workin
You can
a
conversat
1. Fr o m t
the
me
When
button
2. Touch
star, R
Your ac
If you
a
in the
screen
locatio
spam.
Labelin
As menti
several d
web.
unication
ng with Convers
archive,
label,
dele
tions
at
once,
in y
the Inbox, or a fold
essages
you
want
you
checkmark
a
ns appear
at the
bo
Archive, Delete,
Report spam, Mu
ction
affects
the
s
accidentally delete
green
bar (that
ap
n
to undo the actio
on.
You can also
us
g a
Con
v
e
rsati
oned previously,
default labels,
but
sations in
Bat
c
ete,
or
perform oth
your Inbox or in
an
der with
another
l
t
to include in the
conversation,
the
ottom
of the
scree
or
Labels
or
touc
ute,
Mark
unread,
selected batch
of
m
e
a
batch
of
conve
ppears
briefy after
on and
restore
the
se
Undo after
mut
ion
conversations
are
you can also add
ches
her actions
on a
b
nother
label.
label,
touch
the
ch
batc
h.
Archive, Labels
en.
ch
the
Menu
Key
,
or
Deselect
all.
messages.
ersations,
you can
r the action) at the
e
message(s)
to th
ting, archiving,
and
organized
by
lab
your own
through
batch
of
heckbox
for all
,
and
Delete
>
Add
n
touch
Undo
e top of
the
he
pre
vious
d
reporting
bels.
Gmail
has
h
Gmail on
the

To l a b e l
1.
When
Chan
g
2. In the
conve
r
To l a b e l
You can
a
1. Fr o m
y
conve
r
2. Touch
3. In the
con
v
e
r
4. Touch
Starrin
g
You can
s
locate
ag
To s t a r
a
W
h
OR
Wh
the
To
unst
a
To u
c
To s t a r
o
Wh
a
con
v
ersation
reading
a
con
v
er
s
g
e
labels
.
dialog box that
o
p
r
sation
and
touch
a
batch
of
con
v
a
ssign
or
change
t
y
our Inbox, or a fo
r
sations
to
select
Labels
at the
bo
t
t
dialog box that
o
p
r
sation.
OK
.
g
a
Message
s
tar
an
important
m
ain.
a
message
en reading
a
mes
s
en viewing
a list
o
newest messag
e
a
r
a
message
c
h its
star
again.
o
r
unstar
all
me
s
en viewing
the In
b
s
ation
’
s
message
s
p
ens, check
the la
b
OK
.
v
ersations
at
on
c
t
he labels of one
o
o
lder with
anothe
r
a
batc
h.
t
t
om
of the
scree
n
p
ens, check
the la
b
m
essage
or
conv
e
sage, touch
the
s
t
o
f
conversations,
e
in the
con
v
ersat
i
s
sages
in a
con
v
b
ox, or
another
l
a
Co
m
s
, touch
the
Men
u
b
els you
want
to
c
e
o
r
more conversa
t
r
label,
checkmar
k
n
.
b
els you
want
to
e
rsation
to
make
i
t
ar
in its
hea
d
to
u
ch
its
star
i
on.
v
ersation
a
bel,
touch
a
con
v
e
m
munication
u
Key
>
a
ssign
to
the
t
ions
at
once.
the
a
ssign
to
the
i
t
easy
to
d
er
.
to
star
e
rsation
’
s
st
ar
.

Comm
Viewin
g
You can
v
conversa
t
1.
When
Key
2. Touch
NOTE
Report
i
The Gma
i
reaching
improve
t
To
repo
r
W
h
sp
a
OR
Fro
m
wa
n
W
h
me
s
yo
u
unication
g
Conversation
v
iew a list of the
c
t
ions
with
starre
d
viewing
your Inb
o
> Go to
labels
.
a label to view a
l
The
conversation
list w
i
y
our Inbox will also be
a
i
ng
Spam
i
l
service
is quite
y
our Inbox. But
w
t
he Gmail
service
r
t
a
con
v
ersatio
n
en reading
the e
m
am
.
m
the Inbox,
touc
h
n
t
to
report
as
sp
a
h
en
you
report
a
c
o
s
sages)
are
remo
v
u
’ve marked
as
sp
a
n
s by Label
c
onversations
that
d
messages.
o
x, or a folder wit
h
.
l
ist of
conversatio
n
i
ll
resemble
your Inbox.
av
ailable while viewing
effective
at
prev
e
w
hen spam does
m
by
reporting
the
n
as
spam
m
ail,
touch
the
M
e
h
the
checkmark
b
a
m
>
Menu
Key
o
nversation
as
s
p
v
ed
from your In
b
a
m
by
viewing
m
e
have
the
same
l
a
h
another
label,
t
o
n
s
with that
label
.
Most of the options a
v
these
lists of labeled
m
e
nting spam
(junk
m
ake
it
through,
y
conversation
as
s
p
en
u
Key >
M
o
b
ox to
select
the
m
>
Report
spa
m
p
a
m
,
the
convers
a
b
ox. You can view
e
ssages
with the
a
bel,
including
ou
ch
the
Menu
.
v
ailable while
using
m
essages.
mail)
from
y
ou can
help
p
am.
or
e
>
Report
m
essages
y
ou
m
.
a
tion
(and all
its
the
messages
Spam
label.
Synchr
o
The Gma
i
sent
or
r
e
only
so
m
control
h
o
To
selec
1. Touch
2. Touch
The
S
y
Below
Sync
a
labele
d
3. Touch
chang
e
A dial
o
O
Sy
n
O
Sy
n
set)
O
Sy
n
To s e t h
o
1. Touch
2. Touch
3. Touch
4. Enter
t
o
nizing
Your
M
i
l
service
has the
e
ceived;
your
p
ho
m
e
of your
messa
g
o
w and
when ap
p
t
which
con
v
ers
a
the
Apps
Key
the
Menu
Key
y
nchronization scr
e
each
label is its
c
a
ll,
Sync
4
days,
d
conversation
is
n
a
conversation
la
b
e
.
o
g box for that
co
n
n
c none
Don
’
t
do
w
n
c
4
days Downl
of
con
v
ersations
n
c
all
Download
a
o
w many days o
the
Apps
Key
the
Menu
Key
Number
of
days
t
he
number
of
da
y
M
essages
resources
to
sto
r
ne does
not. To
s
a
g
es
to your
phone
p
licatio
n
s synchro
n
a
tions
to
synch
r
>
Gmail .
>
More
>
Sett
i
een opens, displ
a
c
urrent synchroni
z
or
Sync none
(I
f
n
ot
sync
hroniz
ed
)
b
el
whose synchr
o
nv
ersation
label
o
p
w
nload
any
conv
e
oad
the
previous
4
.
a
ll
conversations
w
f
con
v
ersations
>
Gmail .
>
More
>
Sett
i
s
to
Sync
.
y
s
and
touch
OK
.
Co
m
r
e
all the
messag
e
av
e space,
Gmail
.
Use the
Settin
g
n
ize
their
data.
r
oniz
e
i
ngs
>
Labels
.
a
ying
a list of your
z
ation
set
ting:
f
Sync
none
is
sel
e
)
.
o
nization settings
p
ens,
with
three
o
e
rsations
that
hav
e
4
days
(or
numbe
r
w
ith this
label.
to
synchr
oniz
e
i
ngs
>
Labels
.
m
munication
e
s
you’ve
e
v
er
d
ownloads
g
s
application
to
Gmail
labels.
e
cte
d
, the
you
want to
o
ptions:
e
only this
label.
r
of
days
y
ou
Comm
Append
You can a
contact in
1. Touch
2. Touch
3. Enter a
4. Touch
Changi
n
You can
c
own
sett
i
volumes
Settings
To u
c
Set
t
unication
ding a Signatur
add
information
to
nformation,
or
eve
the
Apps
Key
the
Menu
Key
a
signature
or
othe
OK
.
n
g Gmail
Sett
i
c
hange
a
number
o
i
ngs,
so your
cha
n
and
some synchr
o
application.
c
h the
Apps
Key
t
ings
.
re to
You r
Mes
every
email you
en “Sent
from my
>
Gmail .
>
More
>
Setti
er
inf
ormation.
i
ngs
o
f
settings
for G
m
n
ges affect
only t
h
o
nization settings
>
Gmail
ssages
send, such
as you
Android
TM
phone
ings
>
Signature
.
m
ail. Each Google
A
h
e
current accou
n
can also be
cha
n
> the
Menu
Key
ur
name,
e
”
.
.
A
ccount
has
its
t
.
Notifcation
n
ged
in
the
>
More >

Mess
a
Openin
g
To open
To u
c
Key
The
me
s
To u
c
To u
c
To
delet
e
1. Touch
2. Touch
3. Touch
Exchan
You can
s
mobile p
h
to
MMS
.
Multime
d
voice, an
as
pictu
r
The
Mes
multime
d
a
ging
g
Messaging
Mes
saging
c
h the
Home
Ke
y
s
b
a
r
.
Messaging scre
e
s
sage
or
open
an
c
h
New messag
e
c
h an
existing me
e
a
message th
r
and hold the
me
s
Delete thread
in
OK to
confrm
yo
u
g
ing
Message
s
s
end text messag
h
one.
If you
keep
d
ia
messages
(M
M
audio fle, a vide
o
r
e
and
audio.
sagi
n
g
applicatio
d
ia
message
if yo
u
y
,
then touch
M
e
n
will
open, wh
e
ongoing
messag
e
e
to
start
a
new t
e
ssage thread
to
o
r
ead
from the
M
s
sage
thread.
the
menu
that
o
p
u
want
to
delete
t
s
es
(SMS) of up t
o
typing after the l
i
M
S) can
contain t
e
o
, or
slideshow
w
h
o
n automatically c
o
u
add a
subject,
o
r
Co
m
M
essaging
Key
er
e
you can
creat
e
e
thread.
e
xt
or
multimedia
o
pen
it.
M
essaging
wind
o
p
ens.
t
he
message
thr
e
o
160
characters
t
o
i
mit, your
messa
g
e
xt
and a
picture,
h
ich can
attach
m
o
nverts
a
messa
g
r
attach
a
media
f
m
munication
in the
Quic
k
e
a
ne
w
message.
o
w
e
ad.
o
another
g
e
is
con
v
erted
a
recorded
edia
fle
suc
h
e
into
a
f
le.

Comm
To
send
1. O n t h e
2. Enter a
As
you
can
tou
3. Touch
A
coun
how m
If you
t
as a dr
compo
4. Touch
Your
m
creatin
unication
a
text
message
Messaging scree
a
mobile phone nu
u
enter
the
mobile
uch
a
suggested r
the
text
feld to
st
nter
is
displayed
in
many
characters
ar
touch
the Back Ke
raft in your
Messa
osing
it.
Send
to
send
the
message
is
display
ng
a
message thre
en, touch New
m
umber
in the To
f
e phone number, m
recipient
or
contin
tart entering
your
n the top right
cor
re
lef
t.
ey while
comp
aging
application.
message.
yed
and
responses
ead
with that
cont
message
.
feld.
matching contacts
nue entering
the
p
message.
Character
count
Displays number
characters entere
amount
remainin
rner
of the
text
f e
posing
a
message
To u ch t h e
messa
s appear
in the
sa
tact.
s appear.
Y
ou
phone number
.
ter
of
ed
and
ng
.
eld to tell
y
ou
, it’s
sa
v
ed
ge
to
resume
ame
windo
w
,

To
creat
e
1. O n t h
e
2. Enter
a
type,
m
contin
u
3. Touch
4. Touch
5. Touch
to
atta
If y
o
Gal
l
If y
o
can
If y
o
If y
o
can
If y
o
mic
If y
o
allo
w
If y
o
ph
o
Use
me
s
fni
s
6. Touch
To
resp
o
If you’re
w
from that
notifcati
o
e
and
send
a
m
u
Messaging scre
e
a
mobile phone
n
m
atching contact
s
u
e
t
yping
.
the
text
feld to
s
t
the
Menu
Key
to
open
a
me
n
c
h
to the
messag
o
u
touch Pictures
,
l
er
y
.
o
u
touch Capture
take
a
picture
an
d
o
u touch
V
ideos
,
y
o
u
touch Capture
record
a video a
n
o
u
touch Audio,
y
r
oSD
card.
o
u
touch Record
a
w
s
you to
record
o
u
touch Slidesh
o
o
tos
into a
slidesh
o
the
buttons
in th
e
s
sage, replace
a
p
s
h
editing
the
sli
d
Send
MMS to
s
e
o
nd to message
s
w
orking
in a
mes
s
contact
are
disp
l
o
n
and a
new me
s
u
ltimedia
mess
a
e
n, touch New
m
n
umber
or email
a
s
appear.
Yo u c a n
t
art entering
your
> Add
subject
n
u where
you can
g
e.
,
you’re
prompte
d
picture,
the
Ca
m
d
attach
it.
y
ou’re
prompted
t
o
video,
the
Cam
c
n
d
attach
it.
y
ou’re
prompted
t
o
a
udio,
the voice
r
a
spoken messa
g
o
w,
a
menu ope
n
o
w
(up to 10 slide
e
Compose Mes
s
p
icture,
or
remov
e
d
esho
w
.
en
d
the
message.
s
you
r
e
ceiv
e
s
age window, m
e
l
ayed. Otherwise,
s
sage
icon
appea
r
Co
m
a
ge
m
essage
.
a
ddress
in the To
f
touch
a
suggeste
message.
to add a
messag
e
choose
the type
d
to
select
a
pict
u
m
e
r
a
application
o
o
select
a video fr
o
c
order
applicatio
n
o
select
an audio
r
ecording functio
n
g
e
and
attach
it to
n
s
and
allows
you
s) to
attach
to the
s
age screen
to
p
r
e
a slide. Touch
D
o
e
ssages
that you
r
you
receive
a
ne
w
r
s
in the
Status
B
a
m
munication
f
eld.
As
y
ou
d
contact
or
e
subject.
of
media
fle
r
e
from
y
our
o
pens
so
y
ou
o
m your
Galler
y
.
n
opens
so
y
ou
fle from
y
our
n
opens and
your
message.
t
o
assemble
message.
eview
the
o
ne when
y
ou
r
eceiv
e
w
message
a
r.
When
y
ou

Comm
touch
the
can reply
If
Auto-r
e
messag
e
If the
me
it. Touch
a
To v i e w
d
1. Touch
2. Touch
Changi
n
You can
c
To
c
tou
c
How
to
s
1. Touch
a
2. Touch
I
3.
Choo
s
Yo u w
i
Touch
a
n
compo
s
unication
new message
n
o
to the
message.
e
trieve
is
uncheck
m
e
.
ssage contains
a
a
nd hold the
med
i
d
etails about
a
m
and hold a
mess
a
View
message
d
n
g Messaging
c
hange
a
number
c
hange Messagin
g
c
h
the
Menu
Key
s
elect
the
type
o
a
nd hold a
text
f e
l
I
nput
method
.
s
e between Swy
p
i
ll now be able to
n
d hold
the
s
ing
area
Touch
I
o
tifcatio
n
,
the
M
m
a
r
ked,
you
mus
t
media
fle,
touch
i
a
fle to
open
a
m
m
essage
a
ge
in a
message
d
etails
in the
me
n
Settings
of
Messaging
se
t
g
settings, open
t
h
>
Settings
.
o
f
keyboard
you
l
d.
p
e
and LG
Keybo
a
enter text
using t
h
I
np
u
t
method
Cho
o
keyb
o
essage screen o
p
t
touch Downloa
d
Play to view,
wa
t
m
enu
with
additio
n
windo
w
.
n
u
that
opens.
t
tings.
h
e
Messaging
a
p
want
a
r
d
.
h
e
new
k
e
yboar
d
o
se the type
of
o
a
r
d
you
want.
p
e
n
s where
y
ou
d
to view
the
t
ch,
or listen
to
n
al
options.
p
plication,
d
.

Ta l k
To o p e
n
To u
c
W
h
Thi
s
on
t
To
retur
n
You can
r
can invit
e
To u
c
To s i g n
o
You can
s
conversa
t
lif
e.
Fro
m
Yo u
sta
t
n
Google Talk
a
c
h the
Apps
Key
h
en
you frst
open
s
list
includes
all
o
t
he
web
or on the
n
to
your
Friend
s
r
eturn
to your
Frie
another
friend t
o
c
h the
Menu
Key
ou
t of Google T
a
s
ign out of Google
t
ions
to your
co
m
m
your
Friends
lis
t
will no longer
re
c
t
us
in
other appli
c
a
nd sign in
> Talk
.
Google Talk, your
o
f the
friends you
’
phone.
s
list
n
d
s
list while
cha
t
o
chat,
add a frien
d
>
Friends
li
s
a
l
k
Tal k. For
exampl
e
m
puter.
Also, signi
n
t
,
touch
the
Men
u
c
eive
chat
notif c
a
c
ations, such
as
G
m
Co
m
Friends
list will b
e
’
ve added
by usin
g
t
ting
with a friend
d
,
etc.
s
t
.
e
,
if you
want
to li
m
n
g out can
exten
d
u
Key >
Sign
a
tions
or
see
othe
r
m
ail
TM
.
m
munication
e
displa
y
ed.
g
Google Talk
so that
y
ou
m
it Google Talk
d
your
bat
ter
y
out
.
r
s
’
Google Talk
Comm
Chatti
n
To chat
w
1. Touch
If you’
r
>
F
2. Touch
3. Enter
y
The
m
infor
m
mess
a
To
ent
e
Insert
Your c
h
Friend
with t
h
unication
g with
F
riends
w
i
t
h a
friend
the
Apps
Key
r
e already
chattin
g
F
rien
d
s
list to
ret
u
the friend you
w
a
y
our
message th
e
m
essages
that you
m
ation about
the c
h
a
ge was sent
(if
t
h
e
r
an
emoticon
(s
m
smiley
to
open
a
h
at
session
will
r
e
s
you’re
chatting
w
h
e
most recent
m
s
> Talk
.
g
with
someone,
y
ur
n
to the
Friend
s
a
nt
to chat
with.
e
n touch
Send
.
exchange
are
dis
p
h
at,
such
as
whet
h
h
e
r
e
’
s
no
respons
e
m
iley), just
touch
a
list of
emoticon
s
e
main open
until
y
w
ith are
displaye
d
m
essage displaye
d
y
ou can
touch
the
s
list.
p
layed
on the
scr
e
h
er it’s on-the-rec
o
e
after a short whi
l
the
Menu
Key
s
.
y
ou end
it.
d
at the top of yo
u
d
in a
black-on-wh
i
Menu
Key
e
en
and
include
o
r
d
,
the time
a
l
e),
etc.
>
More >
r
Friends
list,
it
e balloon.

Communication
To
accept
an invitation
to
chat
When
a friend
sends
you a Google Talk
message,
you will
receive a
notifcation.
The
friend’s name
in the
Friends
list
turns white
and
displa
y
s
the
message.
Touch the friend in your
Friends
list.
OR
Open
the
Notifcations
panel
then touch
the chat
notifcation.
A chat
window
will
open where
you can
exchange messages
with
your
friend.
To switch
bet
w
een
active
chats
If you
have more
than one chat going, you can
switch between
c
hats.
From the
Friends
list,
touch
the
name
of the
person
you
want
to
chat
with.
OR
From a chat
screen, touch
the
Menu
Key >
Switch chats
and
then
the friend you
want
to chat
with.
OR
While
chatting
with a friend,
swipe
left or right
across
the
screen.
To invite a friend
to
join a
group
chat
While you’re
chatting,
you can invite
additional friends
to join a group
chat.
1. O n a ch a t
screen, touch
the
Menu
Key > Add to
chat
.
2. Touch the
name
of the friend to
in
vite.
The friend you invited and the
current participants
will
receive
an
invitation to a group
chat.
Each one who
accepts
the invitation will
join the group
chat.
In a group
chat, everyone
can
see everyone
else
’
s
messages.
Group
chats appear
at the top of your
Friends
list, with
a
group chat
icon.
Comm
To chat o
Your Goog
even sea
r
the
mes
s
Wh
i
To
r
on
r
To e n d
a
When y
o
Fro
m
cha
t
OR
Fro
m
Changi
n
Google T
a
change
y
o
appears
n
To
chan
g
1. Touch
2. Touch
3. In the
an
opt
i
unication
on or
off
-
the
-r
e
gle Talk
message
r
ch
for
them,
in t
h
s
ages
in a
chat,
y
o
i
le
chatting, touc
h
r
eturn
to
on-the-r
e
r
ecor
d
.
a
chat
u’ve fnished
you
r
m
your
Friends
lis
t
t
ting
with. In the
m
m
a chat
screen,
t
n
g and Monit
o
a
lk
allows
you to
c
ou
r online
status
a
n
ext to your
nam
e
g
e
your online
s
the
Apps
Key
your email
addre
s
screen
that
open
s
i
on.
ecor
d
s
are
stored,
so yo
h
e
Chats
folder in
o
u can chat
of
f-th
e
h
the
Menu
Key
e
co
r
d chatting, to
u
r
conversation, it’
s
t
,
touch
and hold
m
enu
that
opens,
t
o
u
ch
the
Menu
K
o
ring Online
S
t
c
hange
how you
a
a
nd
status mess
a
e
on your
friends
’
tatus
> Talk
.
s
s
at the top of y
o
s
, touch
the
drop
-
ou can
review the
Gmail. If you’d
ra
t
e
-record.
>
Chat
off
rec
o
u
ch
the
Menu
Ke
y
s
easy
to end a ch
the friend you
w
a
touch
End
chat
.
K
ey > End
ch
a
t
atus
a
ppear
to
others;
y
a
ges,
as well as t
h
list.
ou
r
Friends
list.
-
down status me
n
em
later
and
t
her
not
store
o
r
d
.
y
>
Chat
a
t
session.
a
nt
to
stop
at
.
y
ou
can
h
e
picture
that
n
u
and
c
hoose
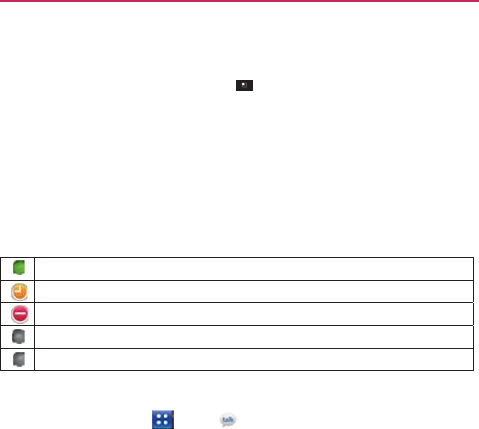
In addi
t
the fol
previo
u
erase
t
Your
s
t
lists a
n
displa
y
Status
I
c
Icons in
G
friends
’
G
A
v
A
w
B
u
Si
g
In
v
To
chan
g
1. Touch
2. Touch
3. Enter
a
4. Touch
To
chan
g
1. Touch
2. Touch
3. Touch
4.
Choo
s
5. Crop t
h
t
ion to the
stand
a
l
owing
page,
you
u
sly
or
touch
the
M
t
hem
and
start
o
v
t
atus
and any
me
n
d in
other locati
o
y
ed.
c
ons
G
oogle Talk, Gmai
l
G
oogle Talk
st
at
us
.
v
ailable:
Signed
in
t
w
ay:
Signed
into
G
u
s
y
:
Signed
into
G
g
ned
out of Goog
l
v
isible:
Signed
int
o
g
e
your
status
m
the
Apps
Key
your email
addre
s
a
new status me
s
Done
to
save
yo
u
g
e
your
pictur
e
your email
addre
s
your
picture
at th
e
Remove
to
rem
o
s
e
an
image
from
y
h
e
picture
and
to
u
ar
d status setting
s
can also
select
a
M
e
n
u
Key >
C
v
e
r
.
ssage
you’ve en
t
o
ns where
your
s
t
l
, and
other appli
c
.
t
o Google Talk an
d
G
oogle Talk but no
t
G
oogle Talk but to
o
l
e Talk
o
Google Talk but
m
essage
> Talk
.
s
s
at the top of y
o
s
sage
in the
Stat
u
u
r
status messag
e
s
s
the top of your
e
top left of the
s
c
ov
e
your
picture
o
r
y
our
Galler
y
.
u
ch
Save
.
Co
m
s
described
in the
message
that
yo
u
C
lear custom m
e
t
ered appear
in y
o
t
atus
or
status m
e
c
atio
n
s indicate
y
o
d
available to
cha
t
t
activ
e
o
busy to
chat
appear signed
o
u
ou
r
Friends
list.
u
s message
feld.
e
.
Friends
list.
c
reen.
r
Change
to
chan
g
m
munication
table
on
u
’ve
entered
e
ssages
to
u
r
friends
’
e
ssage
are
ou
r and
y
our
t
to
others
g
e
it.

Communication
Managing
Y
our
Friends
List
Your Google Talk
Friends
list
contains
the
friends you’ve
invited to
become
friends
or
whose invitations you’ve accepted
in Google Talk.
Friends
can
invite
each other
to chat in Google Talk and
see each
others
’
online
st
at
us
in Google Talk and
other applications, such
as in
Gmail.
The Google Talk
Friends
list is
sorted
by your
friends
’
online
status:
activ
e
chats,
online, busy,
away,
and offine. Within
each grouping, friends
are
listed
alphabetically
.
To a d d a f r i e n d
to
your
Friends
list
You can invite
anyone
with a Google
Account
to
become
your friend
in
Google Talk, so you can chat with
each other
and
stay up-to-date
with
eac
h
others
’
online
st
at
us.
1. From the
Friends
list,
touch
the
Menu
Key > Add
friend
.
2. Enter your
friend’s
Gmail
address
and
touch Send
invitation
.
To v i e w a n d
accept
an invitation
to become
a
friend
When
a
contact
invites you to
become
a friend in Google Talk, you
receive a
notifcation
in the
Status
Bar and the invitation
appears
in your
Friends
list.
1. Touch the invitation from
either
the
Status
Bar or the
Friends
list.
2. Touch
Accept
to chat with the
contact
or
Cancel,
if you don’t
want to
chat with and
share
your Google Talk
status
with the
sender
.
To view a list of
pending invitations to friends
From the
Friends
list,
touch
the
Menu
Key >
More
>
Invites
.
All
the
friends
to
whom you’ve extended invitations
to
become
friends
on Google Talk
appear
in the list until they
accept
or
cancel
y
our
invit
ation.
To v i e w a l l
friends
or only
those most popular
with
y
o
u
By
default,
only the
friends
that you
frequently
chat with (the
most
popular)
are
shown
in the
Friends
list. But you can view all
friends
instead.

Communication
In the
Friends
list,
touch
the
Menu
Key > All
friends
.
To
switch
back to just the
friends
with
whom
you chat
most
frequently, touch Most popular
in the
menu.
To a d d a f r i e n d
to
the ‘Most
popular
’
gr
oup
You can
set
a friend to
always appear
in your
Most popular Friends
list.
1. From the
Friends
list,
touch
and hold a
friend’s
name.
If you don’t
see
the
friend’s name, touch
the
Menu
Key >
All
friends
.
2. Touch
Always show friend
in the
menu
that
opens.
To
remove
a friend from this list,
touch
and hold the
friend’s name
from
the
Friends
list. In the
menu
that
opens, touch
Hide
friend
.
To block a
friend
You can block a friend from
sending
you
messages.
When blocked,
y
our
friend will be
removed
from your
Friends
list.
1. From the
Friends
list,
touch
and hold the
friend’s
name.
If you don’t
see
the friend,
touch
the
Menu
Key > All
friends
.
2. Touch Block
friend
in the
menu
that
opens.
You can view a list of your
blocked friends
by
opening
your
Friends
list
and
touching
the
Menu
Key >
More
>
Blocked
.
You can
unblock
a
friend by
touching
the
friend’s name
in the
blocked
list
then touching
OK
in the dialog box that
opens.
Changing Google Talk
Settings
You can
confgure
Google Talk to
send
you a
notifcation
with the
contents
of
each message
that you
receive
in a
chat,
and also to
sound
a
ringtone
or
vibrate
the
phone.
You can also
confgure
Google Talk to sign you in
automatically
when
you turn on your
phone,
and you can
set whether
the
mobile indicator
is
displayed
next to your
name
in
other people
’
s
Friends
lists.

Communication
To
confgure notifcations
for new Google Talk
mes
sages
1. From the
Friends
list,
touch
the
Menu
Key >
Settings
.
2.
Checkmark
IM
notifcations
to
receive
a
notifcation
in the
Status
B
ar
when
a
new
chat
message
ar
riv
es.
3. Touch
Select ringtone
to
open
a list of the
ringtones
that will ring
to
notify you of a
new
chat.
4. Touch
V
ibrate
to
choose
the vibration
setting when
you
receiv
e
notifcation
of a
new
chat.
To show or hide the mobile
indicator to friends
1. From the
Friends
list,
touch
the
Menu
Key >
Settings
.
2.
Checkmark
or
uncheckmark Mobile
indicator
.
If
Mobile indicator
is
checkmarked,
your
friends see
an
outline
of
an
Android
TM
next to your
name
in their
Friends
list
when
you’re
signed
into
Google Talk on an Android
phone.
To s e t
whether
you sign into Google Talk
aut
omatically
1. From the
Friends
list,
touch
the
Menu
Key >
Settings
.
2.
Checkmark
or
uncheckmark Automatically sign in
.
When Automatically sign
in is
checkmarked,
you are
signed
into
Google Talk
when
you turn on your
phone.
To set Google Talk
to change
your
status
1. From the
Friends
list,
touch
the
Menu
Key >
Settings
.
2.
Checkmark
or
uncheckmark Automatic
away-status
.
When Automatic away-status
is
checkmarked,
your
status
will
automatically
be
changed
to Away
when
the
screen
is
turned
of
f
.

The P
h
The
p
ho
n
To u
c
Key
The
Ph
o
dial
sto
r
Phone
This tab
a
voicemai
l
Call
lo
g
This tab
d
contact
a
then tou
c
Key
>
Contac
t
This tab
d
of the
en
t
list. Touc
h
Back up
Export,
M
Groups
This tab
d
set
up,
s
t
From
he
r
informati
o
to
se
l
h
one
applic
a
n
e features
of you
r
c
h the
Home
Ke
y
s bar at the
botto
m
Phone
applicati
o
o
ne,
Call log,
Co
n
manually
or
mak
e
r
ed
in your
phone
.
a
llows
you to dial
l
using this
k
e
ypa
d
g
d
isplays
the histor
y
n
y of the
entries.
c
h Remove from
>
Delete
all or
M
u
t
s
d
isplays
your
Co
n
t
ries based
on th
e
the
Menu
Key
now,
or
More
(
D
M
y
profle
).
d
isplays
your
con
t
t
arting
with
Favo
r
r
e
you can call or
c
o
n
or
manage
yo
u
l
ect New group,
ation
r
device
include
m
y
and
then
the
m
of the
screen.
o
n
has four
tabs a
c
n
tacts,
and
Grou
p
e
calls
automatica
l
.
a
phone number
d
.
y
of all your calls.
To
delete
an
ent
r
call log. To
delet
e
u
ltiselect
>
Dele
t
n
tacts
list. From
h
e
e
saved informati
o
to
select New
D
isplay
options,
S
t
acts
by group for
r
ites, followed
by
a
c
ontact
any of the
u
r list. For
additio
n
Sen
d
, Share,
or
D
Co
m
m
any
ways
to
ma
k
Phone
Key i
n
c
ross
the top of t
h
p
s.
Using
these t
a
l
ly
from
informat
i
manually.
You can
From
here
you c
a
r
y, to uch
and hold
e
your Call log,
to
u
t
e
.
er
e
you can call o
r
o
n
or
manage
yo
u
contact, Delete
,
S
peed dials, Acc
each account
typ
e
a
list of
recent fr
e
entries based
o
n
n
al options, touch
D
elete
.
m
munication
k
e
calls.
n
the
Quic
k
h
e
screen:
a
bs,
you
can
i
on
y
ou’
v
e
also
call
a
n call
or
the entry
and
u
ch
the
Menu
contact an
y
r
Cont
acts
Send,
Share
,
o
unts,
Import/
e
you
ha
v
e
quent contact.
n
the
sa
v
ed
the
Menu
Key
Comm
To
add a
1. Touch
your
F
a
2. Touch
the en
t
To
re
m
Favori
t
F
a
v
ori
t
Voice
D
Call a
C
You can
c
1. Touch
2. Say “
C
Or, yo
u
3. If a lis
t
Open a
1. Touch
2. Say
“
O
3.
If
a
lis
t
The d
e
unication
a Contact
to
you
the
Contacts
tab
a
v
orites.
the grey
star
next
t
ry is
added
to yo
u
m
ove
a
Favorite, t
o
t
es
list. The
star t
u
t
es.
D
ialer
C
ontact by Voi
c
c
all
numbers
direc
t
the
Apps
Key
C
all” or “Dial”
the
n
u
can say
“Redial
”
t
of
results
is
disp
n
Application
u
the
Apps
Key
O
pen” and then
a
t
of
results
is
di
e
vice opens
the
ur
list of
favorite
and
then
the
Co
n
to the
Contact’s
u
r
F
a
v
orites.
o
uch
the blue
sta
r
u
rns
grey and the
c
e Dialing
t
ly by saying the
> Voice
Dialer
n
a
name
or a
ph
o
”
to redial the last
p
layed, touch
the
o
u
sing Voice D
i
> Voice
Dialer
a
n application
n
a
splayed, touch t
h
corresponding
ap
p
es:
n
tact
entry you
w
a
name.
The
star t
u
r
in
either
the
Co
n
entry is
remove
d
contact’s name
o
r
.
o
ne number
.
number
dialed.
o
ne you
want
to
u
i
aler
.
a
me.
h
e one you wa
n
p
lication.
a
nt
to add
to
u
rns
blue
and
n
tacts
list
or
d
from
y
our
r
number
.
u
se.
n
t to
use.
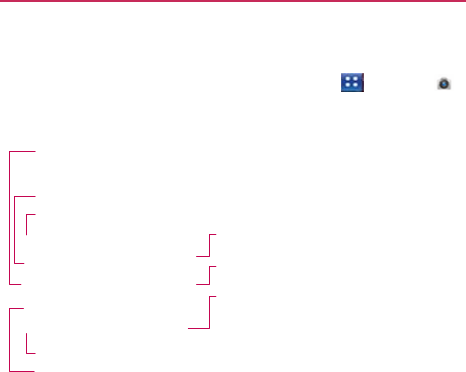
Camer
To
open
t
Getting
Brig
brigh
a
hig
Zoom
Swa
Settin
Flash
NOTE
Photo
op
You can
m
a
v
ailable:
O
Image
1M(12
O
Scene
Choos
O ISO:
C
200,
10
O
White
Choos
O
Color
Negati
O
Timer:
r
a
the
Camera
appli
to
know the
view
ghtness
–
Defnes
and
htness indicator along t
gher brightness image.
m
– Zoom in or zoom out.
p Camera
– Allows you
ngs – Opens the settings
h Mode –
Allows
you to s
Default resolution is
5M
ptions
make adjustments
e
size:
5M(2592X1
80X960),
VGA(640
e mode:
Adjust for
se
from Auto,
Port
Controls
the
camer
00.
balance: Improve
e
from Auto,
Incan
effect:
Applies art
ive, Solarize, Sepi
:
Off, 3
secs.,
5
se
cation, touch
the
A
wf nder
controls
of
the amou
the
bar,
toward
“-” for a
The
V
olume
Keys will al
to
swap between
the ba
V
ideo
mod
video
mode
Capture
–
T
Gallery
–
A
c
camera
mod
will appear o
menu. See “Photo optio
et the fash
mode.
M(2592X1944)
.
s
to
optimize
your
1944), 3M(2048X1
0X480),
QV
G
A(32
r
better image cap
trait, Landscape, S
ra’s sensitivity
to
es
color
qualities
u
ndescent,
Sunny,
F
tistic
effects
to
pi
a,
or
Blue.
ecs.,
or 10
secs.
Ente
Apps
Key >
C
unt
of
sunlight entering
a
lower brightness imag
lso adjust the
z
oom.
ack
camera
and the
fron
e
– Slide this icon to
do
e.
T
a
k
es
a
photo.
ccesses
your saved
pho
de. Simply touch this ico
on the
screen.
ons
”
.
shot.
The followin
1536), 2M(1
60
0X1
20X240).
pture
in
different
e
Sports,
Night, and
light.
Choose
from
under
different
ligh
Fluorescent,
and
C
ictures. Choose
fro
ertainment
Camera .
g the lens.
Slide
the
ge,
or
toward “+”
f
o
r
nt-facing
camera.
own
to
switch to
otos
from
within
on and your Gallery
ng
options
are
1
20
0),
en
vironments.
Sunset.
m Auto,
400,
hting
conditions.
Cloudy
.
om Off,
Mono,

Entert
O
Shot m
Panora
O
Focus
O
Image
O
Auto r
O
Shutte
O
Tag l o
O SD
car
from
In
TIP!
Using th
You can
s
Auto Se
Macro S
trying to
t
Macro
m
Face trac
automatic
Manual
Taking a
1.
Open
t
2. Holding
want
to
3. Touch
the
cen
4.
Positio
5.
When
subjec
6.
Take
yo
ainment
mode:
Normal,
Co
ama,
Face
effect,
:
Auto,
Macro,
Fac
e Quality: Super
f
review:
On or
Of
f
er sound:
Tone 1~
cation:
Off or
On
rd
&
phone stora
nternal memory
o
You can
close
all
the se
center
of the viewfnder
he
focus mode
select
from the fol
ts
the
camera
to
f
Sets
the
camera
to
take
a
close-up sh
mode
on.
cking Sets
the
ca
cally
.
Sets
the
camera
quick
pho
t
o
the
Camera
appli
g the
phone horiz
o
photograph.
and hold the
Cap
nter
of the
viewf n
on
the
phone
so yo
the
focus
box
tur
ct.
our fnger off the
ontinuous shot,
Sm
or
Cartoon.
ce
tracking,
or
Ma
fne, Fine, or
Norm
f
.
~ 4,
Of
f
.
n.
age
:
Determines w
or SD
card.
tting icons
to
give
a
cle
r once. To recall the opt
llowing
focus
opti
focus
automatical
o be able to
take e
hot
but the
focus
amera
to
detect
an
to
focus
manually
ication.
zontally,
point the
ture button
lightly
nder
screen.
ou can
see
the
su
rns green,
the
cam
Capture button
mile
shot, Beauty
anual.
mal.
where
the fle is
s
earer viewfnder screen.
tions, touch the
screen
ions:
ly
.
extreme close-up
box
remains
red,
nd
focus
on
huma
y
.
lens
toward
the
s
y and a
focus
box
ubject
in the
focus
mera
has
focused
.
y shot,
Art
shot,
saved. Choose
Just touch
the
again.
s.
If you
are
try turning
the
an
f
aces
subject
y
ou
will
appear
in
s
bo
x.
on
y
our

Once y
o
Your
cap
t
icon to
p
r
NOTE
The follo
w
Share
Set as
Rename
Edit
Touch
Touch
saved
Touch
Viewing
1. Yo u c a
n
Galle
r
TIP!
While
vi
e
Slidesh
o
Menu
T
o
More pr
o
Details
T
type,
fle
Set as
S
phone
w
a
Crop
Al
l
resize
th
e
to
see, t
h
Rotate
T
o
u’ve
taken
the
p
t
ured photo
will
a
p
r
oceed.
Simply touch the scree
n
w
ing
options
are
a
Touch to
share
Messaging, P
i
downloaded
th
a
Touch to
use
t
h
Touch to edit t
h
Touch to edit t
h
to
delete
the
ima
to
take another
ph
to your
Galler
y
.
to view the Galle
r
your saved
pho
n
access
your
sa
v
r
y
,
then touch
Slide your fnger left or
e
wing
a
photo, to
u
o
w
Touch to
see
y
ou
ch to
open
a
m
e
o
vides
the followi
n
T
ouch to display
i
n
size,
etc.).
S
e
t
s
the
photo
as
t
a
llpaper
.
l
ows you to
manu
a
e
cropping
box to
h
en touch
Save
.
T
ou
ch one of the
r
o
p
ho
t
o
p
pear
on the
scre
n
to
redisplay photo op
t
av
ailable after taki
n
your
photo
using
B
i
casa,
or
an
y
othe
at
supports
this
f
e
h
e
image
as a
Co
n
h
e
name
of the
s
e
h
e
photos
you
ha
v
a
ge, then touch
O
K
h
o
t
o immediatel
y
r
y of your
saved
p
t
o
s
v
ed photos
from
c
a
photo
to displa
y
right to view other
p
h
o
u
ch
the
screen
to
y
our
photos
playe
d
e
nu
of
options
inc
l
n
g
additional
opti
o
n
formation about
t
t
he icon
identifyi
n
a
lly
crop the
pho
t
encompass
only
o
tation
icons to
r
o
Ente
en
until you
touc
h
t
ions
if
they recede fro
m
n
g a
photo:
B
luetooth
,
Emai
l
r application you
’
f
e
at
ure.
n
tact icon
or
W
al
l
e
lected
pict
ure.
v
e
t
a
k
en.
K
to
confrm.
y
.
Your
current ph
o
p
hotos.
c
ame
r
a mode. Ju
s
y
it.
o
tos
or
videos.
access
the follo
w
d
in a
slidesho
w
.
l
uding
Share, D
e
o
ns:
t
he
selected phot
n
g
a
contact
or
se
t
t
o.
Use your fnge
r
the part of the
p
h
o
tate
the
photo cl
o
ertainment
h
an option
or
m
the
screen.
l
, Gmail,
ve
l
pape
r
.
o
to
will
be
s
t
touc
h
w
ing
options:
lete,
or
More.
o
(e.g.,
fle
t
s
it as
y
our
r
to
move
or
h
oto
you
w
ant
o
ckwise
or
Entert
counter
-
c
Edit Tou
c
various
t
o
Video
To
open
t
Camera
m
Getting
Bri
g
b
rig
h
a hi
g
Zoo
m
start
i
Sw
a
Setti
n
Flas
h
ainment
c
loc
kwise.
c
h to
access Imag
e
o
ols.
Camer
a
t
he Video
Camer
a
m
o
d
e
icon
down
f
to
know the
vie
w
g
htness
–
Defnes
and
c
h
tness
indicator along t
h
g
her
brightness
V
ideo.
m
– Zoom in or zoom o
u
in
g a video.
Yo u
cannot
a
p Camera
– Allows yo
u
ng
s – Opens settings op
t
h
Mode –
Allows
you to
s
e
Editor,
which allo
w
a
, touch
the
Apps
f
or Video
mode.
w
fnde
r
c
ontrols
of
the amount
o
h
e bar, toward “-” for a
u
t. The
V
olume
Keys
w
change
the zoom
setti
n
u
to swap
between
the
Camera m
o
V
ideo.
Slide
Video
mod
e
Capture
–
S
Gallery
–
A
c
video
came
r
t
ions.
s
et the fash
mode.
w
s you to edit the
Key >
Cam
e
o
f
sunlight entering the
lower
brightness
video,
w
ill also set the zoom. S
n
g
during
recording
.
back
camera
and the f
r
od
e
–
Switches betwee
n
up for Camera mode a
n
e
.
S
tarts video
recording
.
c
cesses
your saved
p
h
o
r
a mode.
image
using
r
a
. Slide
the
lens.
Slide
the
or toward “+”
f
o
r
e
t the zoom
before
r
ont-facing
camera.
n
Camera
and
n
d slide down
f
o
r
o
tos
and videos
from
Recordi
n
1.
Open
t
2. Slide t
h
Came
r
3. The Vi
4. Holdin
g
5. Touch
6. REC
w
the
le
n
7. Touch
After re
c
A still
im
a
touch
an
NOTE
The follo
w
Play Tou
c
h
Share
T
o
Messagi
n
downloa
d
NOTE
Rename
Touch
The
v
i
Touch
save
d
Touc
h
Watchi
n
1. I n t h e
2. Your
G
3. Touch
n
g
a quick
vide
o
t
he
Camera
appl
i
h
e
Camera mode
r
a mode
icon
cha
n
deo
camera’s vie
w
g
the phone horizo
the
Capture butt
o
w
ill
appear
at the
b
n
gth
of the
video.
on the
scree
n
c
ording
a
video
a
ge representing
y
option or icon to
p
Simply touch the
scree
n
w
ing
options
are
a
h
to play the vide
o
ou
ch to
share
you
r
n
g
,
Y
ouT
ube,
or a
n
d
ed.
Additional
charges
may
Touch to edit the
to
delete
the vid
e
i
ewfnder
will
rea
p
to
shoot anothe
r
d
in your
Galler
y
.
h
to view the Gall
e
n
g
your saved
vi
d
viewfnder, touch
G
allery will
appear
a video to play it
a
o
i
cation.
icon
down
to
n
ges
to and th
e
w
fnder
will
appe
a
o
ntally, point the le
n
o
n once
to
st
a
b
ottom
of the
vie
w
n
to
stop
recordin
g
y
our video will
ap
p
roceed.
n
to redisplay video opt
i
a
v
ailable:
o
you just
record
e
r
video using
Blu
e
n
y
other compati
b
apply when MMS
me
s
name
of the
sele
c
e
o you just
made
,
p
pear
.
r
video right
away.
e
ry of your
saved
d
eos
Gallery .
on the
screen.
a
utomatically
.
change
to Video
m
e
Capture button
a
r
on the
screen.
n
s toward the subj
e
ar
t
recording
.
w
fnder
with a tim
g
.
pear
on the
scre
e
i
o
n
s if they
recede
fro
m
e
d.
e
toot
h
,
Email,
Gm
a
b
le applications
yo
u
s
sages
are
downloade
d
c
ted
video.
,
and
confrm
by
t
Your
current
vide
o
videos.
e
m
ode.
T
he
c
hanges
to
.
e
ct of the
video.
e
r
sho
wing
e
n
until
y
ou
m
the
screen.
a
il,
u
ha
v
e
d
while
roaming
.
o
uching
OK
.
o
will
be

Entert
Yo ur
Ph
Adjustin
To
adjust
the right
Setting
a
1. Touch
2. Touch
Menu
3. Touch
4. Crop t
h
Galler
y
Openin
g
Open
the
To open
To u
c
OR
Op
e
The
ph
o
wit
h
or
o
If y
o
Go
o
ainment
hotos and
Vide
ng
the volume w
the
volume
of a
v
si
d
e of the
phon
e
a
photo
as
wall
p
the
photo
you
w
a
Menu
at the
bott
o
disappears, touc
h
More
>
Set as
>
h
e
photo,
if
nece
s
y
g
Gallery
and
V
Gallery applicat
i
Gallery and vie
w
c
h the
Apps
Key
e
n Gallery from th
e
Gallery applicati
o
on
e
(internal and
e
x
h
the
Camera ap
p
o
ther
locations.
o
u
have
a
Picasa
T
M
o
gle
TM
A
ccounts,
y
eos
when viewing a
vi
v
ideo while it is
pl
e
.
p
ape
r
a
nt
to
set
as
wall
p
o
m
of the
screen
h
the
screen
to
r
e
W
allpaper
.
s
sary, then touch
V
iewing
Your
A
i
on
to view
albu
m
w
your
albums
>
Gallery
e
Camera applic
a
o
n
presents
the
p
i
x
ternal memory),
i
p
lication
and
thos
e
M
account synchro
n
y
ou’ll also
see
you
r
ideo
l
aying,
use
the
V
o
p
aper
to
open
it.
to
open
the
Opti
e
display
it.
Save
.
A
lbums
m
s
of your
picture
s
.
a
tion
by
touching
G
i
ctures
and videos
i
ncluding
those y
o
e
you
downloaded
n
ized
with one of
r
Picasa web
albu
m
o
lume
Keys
on
o
ns menu.
If
s
and
videos.
G
alle
r
y .
saved
in y
our
o
u’ve
t
a
k
en
from the
w
eb
y
our
phone
’
s
m
s
in
Galler
y
.
To u
c
The
ord
e
To u
c
Ret
u
top
Worki
n
Albums
a
and
inter
n
To open
To u
c
wh
o
Use
thr
o
c
h an album to
o
p
pictures
and
vid
e
e
r
(except
from
C
c
h a
picture
or vi
d
ur
n
to the main
G
left of the
scree
n
n
g with Album
s
ar
e
groups
of
ima
g
n
al memory
or in
an album and
v
c
h the
Apps
Key
o
se conten
t
s
you
the slider bar at
t
o
ugh
your
picture
s
p
en
it and view its
e
os
in the album
a
amera).
d
eo in an album to
G
allery
screen
at a
n
n
.
s
g
es
and
videos
in
Picasa web
albu
m
v
iew its
cont
ent
s
>
Gallery
want
to
vie
w
.
t
he
bottom
of the
s
and
videos.
contents.
ar
e
displayed
in
c
h
view
it.
n
y time by
touchi
n
folders
on your
m
m
s.
s
and
touch
the a
l
screen
to scroll
h
h
ronological
n
g
at the
m
icroSD
card
bu
m
h
oriz
ont
ally
Entert
The
Yo u
To
chang
You can v
(except
fr
where
the
switch
Drag
of
th
Drag
con
Pinch
pe
When bro
open
up t
are
then s
ainment
date
of the
imag
can also scroll
thr
ge
how the
cont
view the
images
a
rom
Camera)
or in
ey
were taken.
Yo
at the top righ
g the Album
V
i
e
w
he
album in
st
ack
g the Album
V
i
e
w
ntents
in a
chronolo
eek
owsing
your
imag
the
contents
of an
smoothly cycled b
ges
in view is
displ
rough
an album by
tents
of an album
and
videos
in your
n
stacks, sorted
by
ou
switch
album
v
ht of the
screen.
w
switch
to th
ks.
w
switc
h
to th
ogical
grid
(excep
ges
in
stacks,
you
n
image stack. Ph
between
your two
layed,
so you can
y
swiping
the
scre
m are
display
e
d
albums
in a
chron
y the
date
and the
views
with the Alb
he right to view th
he left to view the
pt
from
Camera) ag
can
use
a
spread
hotos contained
w
o
fngertips.
scroll by
date.
een
left or
right.
d
nological
grid
location
bum
V
i
e
w
he
contents
album
gain.
gesture
to
ithin that
st
ac
k
To
Wor
k
In additio
n
select
on
e
For exam
p
1. Touch
.
2.
Open
t
with a
s
3. Touch
4. Touch
check
m
Yo u c a
n
Selec
t
5. Use t
h
on the
mix o
f
To
shar
e
You can
s
images
o
1. Touch
.
2. Touch
3.
Check
m
4. Touch
you w
o
5. Enter
t
To g e t
d
1. Touch
.
2. Touch
3.
Check
m
k
with Batches
n
to working with
w
e
or more pictures
p
le, to send a few
p
the
Apps
Key
t
he album that
c
o
s
a
batc
h.
the
Menu
Key
the
pictures
you
w
m
a
r
ked
item to
re
m
n
checkmark
all
i
t
t
All or
Deselect
A
h
e
control button
s
checkmarked
ite
m
items you’ve
sel
e
e
an
album
s
ha
r
e
the
entire c
o
r
videos
from an
a
the
Apps
Key
the
Menu
Key
m
a
r
k
or
uncheck
m
Share
at the
bot
t
o
uld
lik
e
to
use
to
t
he
necessary in
f
o
etails about
an
the
Apps
Key
the
Menu
Key
m
a
r
k
or
uncheck
m
of Pictures o
r
w
hole albums and
or videos in an al
b
p
ictures from an a
l
>
Gallery
on
tains
the
pictur
e
.
want
to work wit
h
m
ove
the
c
hec
k
m
t
e
m
s
or
remove
a
l
A
ll at the top of t
h
s
at the
bottom
o
f
ms.
The
control
b
e
cted.
o
ntents
of one or
a
lbum.
>
Gallery
.
m
a
r
k
the
album(s)
t
om
left of the
sc
r
share
the
select
e
f
ormation
and
sha
r
album
>
Gallery
.
m
a
r
k
the album(s)
y
r
Videos
with individual
p
i
c
bu
m to work on th
e
l
b
u
m to a
friend.
e
s
and
videos
you
h
to
checkmark
t
h
m
ark.
l
l
checkmarks,
by
h
e
screen.
f
the
screen
to
p
e
bu
ttons
available
d
more albums
or
i
you
want
to
sha
r
r
een
and
touch
th
e
e
d
albums.
r
e
it.
y
ou want to
see
d
e
c
tures, you
can
e
m in
batc
hes.
want
to
w
ork
h
e
m
.
Touch
a
touc
hing
er
form
actions
d
epend
on
the
i
ndividual
r
e.
e
application
e
tails
about.

Entertainment
4. Touch More at the bottom right of the
screen,
then touch Details from
the
pop-up
menu.
To
delet
e
You can
d
internal
m
1. Touch
2. Touch
3.
Check
m
4. Touch
in the
p
Worki
n
Use Gall
e
downloa
d
are
store
d
To v i e w
a
1. Touch
Tu r
n
(la
n
ne
w
To u
c
To
z
jus
t
W
h
not
e
an
album
d
ele
t
e
an album a
n
m
emor
y
.
the
Apps
Key
the
Menu
Key
m
a
r
k
or
uncheck
m
Delete
at the
bot
t
p
op-up
menu.
n
g with Pictur
e
s
e
ry to view
pictur
e
d
e
d
, copied
onto
y
d
in
Picasa web
a
a
nd browse
pict
u
the
Apps
Key
n
the
phone
to vi
e
n
dscape) orientati
o
w
orientation.
c
h the
picture
to
v
z
oom, touch
a zoo
m
double-tap
the
s
c
h
en
the
picture
is
z
in
vie
w
.
n
d its
contents
fr
o
>
Gallery .
.
m
a
r
k
the
album(s)
t
om center
of the
s
e
s
that
you’ve ta
k
y
our
microSD
car
d
a
lbums.
u
r
es
>
Gallery
>
e
w the
picture
in
v
o
n.
The
picture
is
d
v
iew
navigation,
z
m
icon (+ or -),
u
s
c
reen.
z
oomed
in, drag t
h
o
m your
microS
D
you
want
to
del
e
screen.
Touch
C
o
k
en
with the
Cam
e
d
and
internal me
m
touch
a
pict
ure.
v
ertical (portrait) o
r
d
isplayed
(but not
z
oom,
and
other c
o
s
e
the
pinch-to-z
o
h
e
picture
to view
card
and
te.
o
nf
r
m Delete
er
a
application,
m
ory,
or
that
r
horiz
ont
al
saved)
in
the
o
ntrol
but
tons.
o
om method,
or
parts
that
are

Entert
Wh
view
To watch
Wh
then
To u c
To
rotate
1. Touch
2. Touch
3. Touch
The
pi
To use a
1. Touch
2. Touch
3. Touch
4. Touch
Wallp
5. If you
c
Touch
to
set
ainment
hen
the
picture
is
z
w the next or
prev
a
slideshow
of
en viewing
a
pictu
n touch
Slideshow
ch the
screen,
or
e
a
pictur
e
a
picture
you
wan
More.
A
menu op
Rotate
Left or
Ro
cture
is
saved
with
picture
as a
co
the
picture
you
w
More
.
Set
as
.
Contact icon
to
s
aper
to
set
the
pi
choose
to
set
as a
the
contact
that y
the
picture
as you
zoomed
to ft in th
vious picture
in the
your
pictur
es
ure, touch
the
scr
w
.
touch
the Back K
nt
to
rotate then to
pens
with tools fo
otate
Right
.
h the
new
orienta
ntact
icon or as
want
to
use then to
set
the
picture
to i
icture
as your
w
all
a
contact
icon, the
you
want
to identify
ur
wallpaper,
crop
he
window,
drag le
e
album.
reen
to view the
c
Key , to end the
ouch
Menu
.
or
working
with the
ation.
Home
screen
w
ouch
Menu
.
identify a
Contact
lpaper
.
e
Contacts
applica
fy with the
picture
it, if
necessary th
eft or right
to
ontrol
but
tons
slidesho
w
.
e
pict
ure.
wallpaper
t
entry or
touc
h
ation
will
open.
e.
If you
decide
en touch
Save
.

To c r o p
a
You can
c
internal
m
1. Touch
2. Touch
3. Touch
The
c
r
4. Use t
h
rest
o
f
Dra
g
Dra
g
Dra
g
5. Touch
uncro
p
To g e t
d
1. Touch
2. Touch
3. Touch
a
pictur
e
c
rop and
save pic
t
m
emor
y
.
the
picture
you
w
More
.
Crop
.
opping
box
appe
a
h
e
cropping
box t
o
f
the
photo
will be
g
from the inside
g
an
edge
of the
c
g
a
corner
of the
c
Save
to
save
a c
o
p
ped version rem
a
etails about
a
p
the
picture
you
w
More
.
Details
.
t
ures
that are
sto
r
w
ant
to crop
then
t
ar
s
on top of the
p
o
select
the portio
n
discarded.
of the
cropping
b
c
ropping
box to
r
e
c
ropping
box to
r
e
o
py of the
picture
a
ins
in your
phon
e
ict
u
r
e
w
ant then touch
M
r
ed
on your
micro
S
t
o
u
ch
Menu
.
p
ict
ure.
n
of the
picture
t
o
ox to
move
it.
e
size
it to any
p
ro
p
e
size
it with fxed
as you
cropped
i
t
e
’
s
memor
y
.
M
enu
.
S
D
card
and
o
keep;
the
p
ortion.
proportions.
t
. The
original

Entert
To
share
You can
s
album.
1. Touch
2. Touch
3. In the
select
e
4. Enter
t
To
delet
e
You can
d
1. Touch
2. Touch
Worki
n
Use the
G
Camera
To p l a y
v
Op
e
The
To u
c
co
n
ainment
e
a
pictur
e
s
ha
r
e
a
picture
by
the
picture
you
w
Share
.
menu
that
opens
,
e
d
pict
ure.
t
he
necessary inf
o
e
a
pictur
e
d
ele
t
e
a
picture
fr
o
the
picture
you
w
Delete, then tou
c
n
g with
Videos
G
alle
r
y applicati
o
a
pplication
and to
v
ideos
e
n
a Gallery albu
m
video
plays
in th
e
c
h the
screen
wh
i
trols.
sending
it to
frie
n
w
ant
to
share then
,
touch
the
applic
a
o
rmation
and
sha
r
o
m your
microSD
w
ant
to
delete the
n
c
h Confrm Delet
o
n
to play
videos
t
h
share them
with
m
then touch
a
vi
d
e
orientation
you
r
i
le the video is pl
a
nd
s
or
posting
it i
n
touch
Menu
.
a
tion
to
use
to
sh
a
r
e
it.
card and
internal
n
touch
Menu
.
e
in the dialog bo
x
h
at
you’ve taken
w
friends.
d
eo.
r
ecorded
it
in.
a
ying to view the
p
n
a
Picasa
w
eb
ar
e
the
memor
y
.
x
that
opens.
w
ith
the
p
la
ybac
k

To
shar
e
You can
s
or
multi
m
the optio
n
website.
1. Touch
2. While
3. Touch
4. Touch
5. In the
share
t
6. Enter
t
To
delet
e
1. Touch
2. While
3. Touch
4. Touch
5. Touch
e
a
video
s
ha
r
e
your
videos
m
edia
message
(
M
n
to
share
your
v
i
the
Apps
Key
viewing
an
albu
m
to
checkmark
the
Share
.
menu
that
opens
,
t
he
selected
vide
t
he
necessary in
f
o
e
a
video
the
Apps
Key
viewing
an
albu
m
to
checkmark
the
Delete
.
Confrm Delete
.
in a variety of
wa
y
M
MS), or via a
Bl
u
i
deos
publicly by
u
>
Gallery
,
t
m
, touch
the
Men
u
videos
you wish
,
touch
the
applic
a
os.
f
ormation
and
sha
r
>
Gallery
,
t
m
, touch
the
Men
u
videos
you
want
y
s,
including
sen
d
u
etooth device.
Yo
u
u
ploading
it to the
t
hen touch
an
alb
u
u
Key
.
to
share.
a
tion
you would
l
i
r
e
it.
t
hen select
an
alb
u
u
Key
.
to
delete.
d
ing
it by
email
u
even
ha
v
e
Y
ouT
ube
TM
u
m.
i
k
e
to
use
to
u
m.
Entert
Marke
Opening
Open
And
To open
To u c
Wh
mus
To g e t h e
Android
M
screens.
To u
c
The
link
s
ainment
et
g Android Mar
droid
Market
to
br
the Android Ma
ch the
Apps
Key
hen
you
open Andr
st
read and
accep
elp with Android
Market
Help
webp
c
h the
Menu
Key
Browser applic
a
s
to many help
to
p
rket and Findin
rowse
and
search
arket
application
>
Market
droid Market appl
pt
the
terms
of
ser
d
Mark
et
pages
are available
>
Help.
a
tion opens
to the
p
ics.
ng
Application
h
for free and paid
n
.
lication
for the frst
rvice
to
continue.
e from all Android
Android
Market
H
ns
applications.
t
time,
y
ou
Mark
et
H
elp
page,
with

To b r o w
s
You can
b
1. O n t h
e
are
di
s
and
G
2. Scroll
t
3. Touch
subca
t
s
e for
applicati
o
br
owse applicatio
Android
Market
s
played
as tab
bu
t
a
mes
.
t
o view
subcateg
o
an
application
to
o
t
egory
by
touchin
g
o
ns
n
s
by
category
an
d
home page, touc
h
t
tons
near the top
o
ries
and
touch
t
h
o
pen
its
details s
c
g
Top
paid,
Top
f
d
sort
them
in
di
f
h
a
top-level cate
g
of the
screen
an
d
h
e one you
want
t
o
c
reen,
or
further
s
f
ree,
or
Just
in
.
f
ferent
ways
.
g
ory.
T
hese
d
include
Apps
o
e
xplore.
o
r
t
the
Entert
To open
At a
ope
The
co
m
scr
e
and
To
searc
1. Touch
2. Enter
a
name
y
3. Touch
To
retur
n
You can
r
screens
i
To u
c
OR
To u
c
Downl
o
When
yo
u
To
dow
n
NOTE
1. F i n d a
n
In the
applic
a
Scroll
d
this
d
e
email
m
ainment
a
screen
with
d
any time while
bro
en
its
details
scree
Application
deta
i
m
ments,
and
relat
e
e
e
n
,
you can
dow
n
more.
h
for
applicatio
n
at the top rig
h
a
ll or part of an
ap
p
y
ou
want
to
sear
c
a
search result
to
n
to
the Android
r
eturn
directly to t
h
i
n Android
Mark
e
t
c
h the
Market
ic
o
c
h the
Menu
Key
o
ading and Ins
t
u
f nd an
applicat
i
n
load
and install
Before you can downlo
a
n
application
you
w
application
’
s
deta
i
a
tio
n
,
including its
d
own
to the
Dev
e
ev
eloper,
visit the
m
essage.
details about
an
owsing
Android
M
en.
i
ls screens
includ
e
e
d information a
b
n
loa
d
,
install,
uni
n
n
s
h
t of the
screen
o
p
lication
’
s
name
o
c
h
for
then touch
open
that
applic
a
Market
home
s
h
e Android
Mark
e
t
.
o
n at the top l
e
>
Home
.
t
alling
Applic
a
i
on
you
want,
you
an
application
a
d a paid application, y
o
w
ant
and
open
it
s
i
ls screen,
you ca
n
cost,
overall rati
n
e
loper
Info
sectio
n
de
v
eloper
’
s
web
s
application
Market, touch
an
ap
e
a
description, r
a
b
out
the
applicati
o
n
stall,
and rate th
e
r
touch
the
Sear
c
o
r
description,
or
th
or on th
e
a
tion
’
s
details
scr
e
s
cr
een
e
t home screen
f
r
e
ft of the
screen.
a
tions
can install it on
y
o
u must set up a
billing
s
details
screen.
n
read
more abo
u
n
g, and
comment
n
to view
more a
p
s
ite,
or
send
the
d
pplication
to
a
tings,
on
.
From
this
e
application,
c
h
Key
.
h
e
de
v
e
loper
’
s
e
k
e
ypad.
e
en.
r
om
most
other
y
our
phone.
ar
rangement.
u
t
the
s
by
users.
p
plicatio
n
s b
y
d
eveloper
an

2. Touch
the
ap
p
If you’
r
contin
u
3. Touch
If the
a
on yo
u
WAR
N
4. If you
a
If y
o
Ch
e
you
r
If y
o
Ch
e
do
w
W
h
op
e
Yo u
don
’
the
Menu
Key
p
lication
can
acc
e
r
e not
comfortabl
u
e.
Free
(for free
ap
p
a
pplication requir
e
u
r
phone, Market
t
N
ING!
Read this
screen
caref
u
to
many functions or t
o
screen,
you are
respon
s
a
gree
to the
appl
i
o
u
selected
a pai
d
e
ckout screen
to
p
r
phone.
o
u
selected
a free
e
ckout),
you
recei
v
w
nloaded
and
the
n
h
en
the
applicatio
n
e
n
the
application
have
24
hours
to
’
t
want
it, to
unin
s
>
Security
to
p
e
ss
on your
phon
e
l
e
with the
acces
s
p
lications)
or Buy
(
e
s
access
to your
t
ells you
what
the
u
lly. Be especially cauti
o
o
a signifcant
amount
o
s
ible
for the
results
of
u
i
cation
’
s
access r
e
d
application,
you’
r
p
ay for the
applic
a
application
(or a
f
t
v
e
a
series
of
not
i
n
installed
on you
r
n
is
installed,
you
c
or
open
it by
tou
c
try out an
applic
a
s
tall
it for a
refun
d
r
eview
the
functi
o
e
if you install
it.
s
the
application r
e
(
for paid
applicati
o
data or
control
o
f
application
can
a
ou
s with applications th
a
f your data. Once you t
o
u
si
n
g this item on your
p
e
quirements, tou
c
r
e
redirected
to t
h
a
tion before it’s d
o
f
t
er
touching
Buy
i
fcations
as the
a
p
r
phone.
c
an
touch
the
not
i
c
hing
its icon in th
e
a
tion
and, if you
d
d
.
on
s
and
data
e
quires,
don
’
t
o
ns).
f
any
functions
a
ccess.
a
t have
access
ou
ch OK on
this
p
hone.
c
h
OK
.
h
e
Google
TM
o
wnloaded
to
now
in
Google
p
plication
is
i
fcation
to
e
Apps
screen.
eci
d
e
y
ou

Entertainment
If you
have another Android
TM
phone,
you can
download
a
paid
application
to that
phone
using the
same
Android
Market account,
at
no
additional
charge.
To
create
a Google
Checkout
account
Yo u
must have
a Google
Checkout account associated
with your
Google
Account
to
purchase items
from Android
Mark
et.
On your
computer,
go to
http://checkout.google.com
to
establish a
Google
Checkout
account.
OR
The frst time you
use
your
phone
to buy an item from
Android
Mark
et,
you’re
prompted
to
enter
your billing
information
to
set
up
a
Google
Checkout
account.
WARNING!
When you’ve used Google
Checkout
once to
purchase
an application from
Android
Market, the phone
remembers
your
password,
so you
don
’
t
need to enter it the
ne
xt
time. For this
reason,
you should
secure
your phone to
prevent others
from using it
without your
permission.

Music
Transferring
Music Files to
Your
Phone
The
Music application plays
audio fles that are
stored
on your
phone
’
s
microSD
card. Copy audio fles from your
computer
onto the
microSD
card
before
you
open
the
Music application.
The
Music application
supports
audio fles in
numerous formats,
including MP3, M4A (DRM-free AAC
fles,
from
iT
unes
®
),
AMR, MIDI, and OGG
V
orbis.
NOTE
The
LG USB
driver needs
to
be installed
on your PC
before connecting
your
phone to
transfer
music.
To copy music fles onto the
phone
’
s
microSD
car
d
1.
Connect
the
phone
to your
computer
with a USB
cable.
If the
def
ault
connection mode
is not
set
to
Mass Storage, open
the
Notifcations
panel and
touch
USB
connected
>
Mass Storage.
Your
computer
will
prompt
you with
different actions
to
take. Choose
to
open
the folder
to
view
fles.
Use the
computer
to
organize
your audio fles
then create
a
music
folder at the top level of the
microSD
card.
NOTE The MS695 has an internal
memory
and can use a
removable
microSD card to store
user
content,
such as
photos,
videos, and voice
recordings.
If the USB
connection
mode is set to Mass
Storage
when
connecting
the phone to a
PC
via USB cable, two
removable
disk drives will be displayed on your PC, one for
the
internal
memory
and
another
for the microSD card
(if
installed).
Yo u
can copy fles to
and
from both disk
driv
es
.
”
2. Use the
computer
to copy
music
and
other
audio fles into the folder
that
you
created
on the
microSD
card.
You can
use subfolders
on the
microSD
card to
organize
your
music
fles or you can simply copy the audio fles to the top level of
the
microSD
card.
3.
Open
the
Notifcations
panel and
touch
USB
connected
>
Charge
Only.
Then
disconnect
the USB cable from the
phone.
Entert
Opening
After
you
Music a
p
ways
.
To open
To u
c
The
cop
inf
o
sec
o
cop
W
h
tab
s
Al
b
You can
Music
a
To
searc
1.
Open
t
2. Start t
y
Matc
h
3. Touch
view
a
ainment
g Music and W
u’ve copied some m
p
plication
and
see
Music and vie
w
c
h the
Apps
Key
Music applicati
o
ied
to your card,
t
o
rmation containe
d
o
n
d
s
to
several
m
ied
onto the
micr
o
h
en
the
catalog
is
c
s
that you can
to
u
b
ums, Songs,
or
P
l
return
to the mai
n
a
pplication
by
tou
c
h
for music in
y
t
he main Library
s
y
ping the
name
o
f
h
ing songs
are
dis
p
a
matching song
t
list of
associate
d
Working with
Yo
music
onto your
m
your library of
m
u
w
your music
lib
r
>
Music .
o
n
searches
the
m
t
hen
builds a
cata
l
d
in
each music
f
m
inutes, dependi
n
o
SD
card.
c
omplete,
the M
u
u
ch
to view your
m
l
a
ylists.
n
Library
screen
f
c
hing
the
Menu
K
y
our
librar
y
s
creen then touc
h
f
the
artist, albu
m
p
layed
in the list
b
t
o play it or
touch
d
songs.
our
Library
microSD
card you
u
sic
fles,
sorted
i
r
ar
y
icroSD
card for
m
l
og
of your
music
le. This can
take
fr
n
g
on how may f l
e
u
sic library
scree
n
m
usic
library
orga
n
f
rom
most other
s
K
ey >
Library
.
h
the
Search
Key
m
,
or track you’re l
o
b
elow
the
search
b
a
matching
albu
m
can
open
the
n
one of
f
our
m
usic
fles
y
ou
based
on
the
fr
om a
f
e
w
e
s you
ha
v
e
n
opens
with
n
ized
by
Artists,
s
creens
in
the
.
.
o
oking
f
o
r
.
b
o
x.
m
or artist
to

To
delete
a song from the microSD
car
d
You can
delete music
from the
storage
card.
Touch and hold a
song
in a library list. In the
menu
that
opens,
touc
h
Delete
.
OR
On the
Playback screen, touch
the
Menu
Key >
Delete
.
You can also
delete music
fles from the
microSD
card
when
y
our
phone
is
connected
to the
computer.
To do this,
browse
for the
music
fles you wish to
delete
and
delete them
from the
f
older
.
Playing Music
You can listen to
music
using the
phone
’
s
built-in
speaker, through
a
wired
headset,
or
through
a
wireless Bluetooth stereo headset
that
supports
the
A2DP
profle.
To p l a y
music
Touch a
song
in your library to listen to
it.
OR
While
viewing
a list of
tracks
in an
album, touch
the
Menu
Key
>
Play
all.
The
Playback screen opens
and the
song
you
touched
or the
frst
song
in the album or
other
playlist
starts
to play. Your
music
continues
to play
even when
you
switch applications
or
receive
a
phone
call.
T
he
tracks
in the
current
playlist play in order until it
reaches
the
end, then
stops.
If you
choose
a
repeat option, playback
only
stops when
y
ou
stop
it.
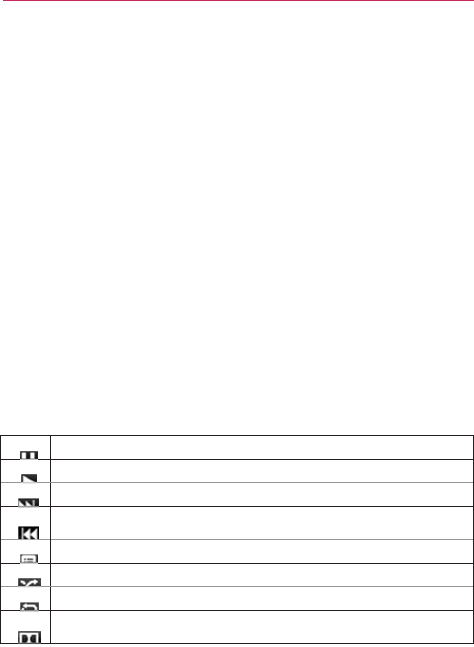
Entert
Yo u
Mus
of t
h
Yo u
by
o
not
i
To
contr
o
The
Play
b
the
play
b
T
T
T
T
s
T
T
T
T
l
i
ainment
can
return
to the
sic application
by
h
e
screen.
can
return
to the
o
peni
n
g
the
Noti
f
i
fcation.
o
l
playback
b
ack screen cont
a
b
ack
of
songs, alb
u
T
ouch to
pause
pla
ybac
k
T
ouch to
resume
pla
yba
c
T
ouch to skip to the nex
t
T
ouch to
restart
the curr
e
huffe.
T
ouch to open the curre
n
T
ouch to play the current
T
ouch to set
repeat
mod
e
T
ouch to activate or
dea
c
i
steni
n
g
.
Playback screen
touching
the
curr
Playback screen
f
catio
n
s
panel and
a
ins several
icons
u
ms,
and
pla
ylist
s
k
.
c
k.
t
track in the album, pla
y
en
t track or skip to the
p
n
t
playlist.
t
playlist in shuffe mod
e
e to
repeating
all
song
s
c
tivate
the Dolby Mobil
e
from
most other
rently
playing
song
from any
other
a
p
touching
the
on
g
that you can
tou
c
s
:
y
list, or
shuffe.
pr
evious track in the al
b
e
(tracks are played in
r
s
, repeat
current song,
o
e
setting,
which
enhan
c
screens
in
the
g
at the
bottom
p
plicatio
n
g
oing
music
c
h
to
control
b
u
m
, playlist,
or
a
ndom
order).
o
r
repeat
of
f
.
c
es
your
music
To
contr
o
In additio
n
volume
o
Pre
A
pa
So
m
and
To p l a y
y
When
yo
u
your
mic
r
In a
The
fro
m
V
i
e
w
Pla
y
Ad
d
hol
d
tou
c
Sto
p
To
cust
o
Touch the
Sh
o
Sle
e
opt
i
Aft
e
Do
l
Off,
o
l playback
v
ol
u
n
to the
techniqu
e
f
music
in the
M
u
ss
the
phone
’
s
u
p
a
nel
opens
to
sh
o
m
e headsets
incl
u
resume playbac
k
y
our
tracks
in a
p
u
turn on Party
S
h
r
oSD
card in
rand
o
Library
screen, t
o
Music applicati
o
m
your
microSD
c
a
w
the
current
pla
y
y
list icon
on
t
d
a track to the en
d
d
ing the
name
of
c
h
Add to
p
laylis
p
Party
Shuffe
b
y
o
mize settings
i
n
Menu
Key
>
o
w notifcation
S
e
p timer
Tu r n s o
f
i
o
n
s
to apply
slee
p
e
r 30
minutes,
A
f
l
by Mobile
Appli
e
Neutral, Expan
s
u
me
es
for
setting me
d
u
sic
application.
p
/
d
own
V
olume
K
o
w
the
current m
e
ud
e their own
vol
u
k
or to skip
trac
ks.
p
a
r
ty
shuff e
h
uffe,
the
Music
o
m
order until Pa
r
ou
ch
the
Menu
K
o
n creates
a playli
s
ar
d and
starts
pla
y
y
list that Party
Sh
u
t
he
Playback
scre
e
d
of the Party
S
h
a track in your lib
r
s
t
>
Current
p
lay
l
y
touching
the
M
e
n
the
Playback
o
>
Settings
.
S
hows
the
contro
l
f
f the player
auto
m
p
timer: Off, After
f
ter 1
hour,
After
e
s the following
s
s
ive, Bass Boost
,
d
ia volume,
you c
a
K
eys.
e
dia
v
olume.
um
e controls
or
w
application plays
t
r
ty
Shuff e
is
turn
e
K
ey >
Party
s
h
s
t of
tracks select
e
y
ing
them.
u
ff e
is playing by
e
n.
h
uffe
playlist by
t
o
r
ary. In the
menu
l
is
t
.
en
u
Key >
Pa
r
o
r a Library
scr
e
l
ler
on the
notif c
a
m
atically.
Touch th
e
10
minutes,
Aft
e
2
hours
s
ound effect
(Dol
b
,
Treble Boost,
V
o
a
n
control
the
w
a
y
s
to
pause
t
racks from
e
d
of
f
.
h
uff e
.
e
d
randomly
touching
the
o
uching
and
that
opens,
rt
y shuff e
off
.
en
a
tion
bar
.
e
follo
wing
e
r 20
minutes
,
y)
options:
o
cal
Boost

Entert
Landsca
When
hol
screen ch
To use a
You can
u
that
com
To u c
Use
OR
On
ring
Workin
You can
c
which you
To
create
1.
When
you
wa
2. Touch
3. Touch
4. Enter a
The
ne
ainment
ape
view
lding the
phone
in
hanges
to ft the
s
Pl
song as a
ringt
use
a
song
as your
e
with the
phone.
ch and hold a
son
e as
ringtone
.
the
Playback scree
gtone
.
ng with
Playlists
create playlists
to
u can play in the o
e
a
playlist
viewing
a list of
s
ant
to add to the
n
Add to
playlist.
New
.
a
name
for the pla
ew
playlist is
adde
n
landscape orien
screen
as
shown
b
la
y
Album
t
one
r
phone ringtone,
.
ng
in a Library list.
en, touch
the
Me
s
organize
your
mu
order you
set
or in
songs
in the Librar
new
playlist.
aylist and
touch
Sa
ed
to the Playlist
li
ntation,
the
Music
below:
Flick
left
or
view
music
lists
,
in place of one of
In the
menu
that
enu
Key >
Mo
usic
fles into
sets
n a
shuffe.
ry,
touch
and hold
ave
.
ibrary
.
application
right
to
c
f the
ringtones
opens,
touc
h
ore
>
Use
as
of
songs,
d the frst
song

You can also add the
song
that is playing in the
Playback screen
as
the
frst
song
in a playlist by
touching
the
Menu
Key > Add to
playlist
or
touching Save as playlist
to
save
all the
songs
in the
current
playlist as
a
playlist.
To add a song
to
a
playlist
1. While
viewing
a list of
tracks
in the Library,
touch
and hold a
song
to
display an
Options
menu.
2. Touch Add to
playlist.
3. Touch the
name
of the playlist to add the
song
to.
You can also add the
song
that is playing in the
Playback screen
to
a
playlist by
pressing
the
Menu
Key > Add to
playlist.
To
remove
a song from a
playlist
1.
Open
a
playlist.
2. Touch and hold the song you want to
remove
then touch
Remove
from
list
.
To
delete
or
rename
a
playlist
1.
Open
the Playlist
library
.
2. Touch and hold the playlist to display the
Options menu then touc
h
Delete
or
Rename
.
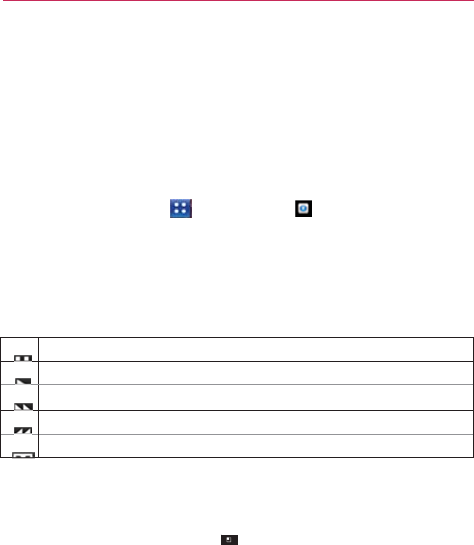
Entert
Video
You can p
player
su
p
(Codec:
M
Supporte
d
To open
1. To u
c
2. Tou
c
Playbac
k
Touch the
allow yo
u
Pa
u
Pla
y
Tou
Tou
Tou
Video pl
The follo
w
De
l
del
e
De
l
ainment
play
er
play a wide variety
p
por
t
s
the followi
n
M
PEG4, H.263,
S
o
d
file formats are de
p
the Video playe
r
c
h the
Apps
Key
c
h the video you
w
k
contr
ols
screen
to displa
y
u
to
control
the vi
d
u
se
pla
ybac
k.
y
a video
fle.
ch and hold to
fast-for
w
ch to start playing the
v
ch to activate or deactiv
a
ayer list
option
s
w
ing
options
are
a
l
e
t
e
Touch the
M
e
e
te. When
all fles
l
e
t
e
> OK to
con
f
y of
videos
using t
n
g fle
formats:
3
g
o
renson
H.263,
H
p
endent on the soft
w
r
application
>
Video pla
y
w
ant
to
pla
y
.
y
the
playback co
n
d
eo
pla
ybac
k:
w
ard
pla
ybac
k.
v
ideo from the beginnin
g
a
te the Dolby Mobile set
t
s
av
ailable from the
en
u
Key >
D
e
to be
deleted ha
v
f
rm.
the Video
player.
T
g
p,
mp4,
avi,
wm
v
H
.264, VC-1, DivX/
X
w
are version of the
p
y
er .
n
trols.
The followi
n
g
. Touch and hold to re
w
t
i
n
g, which
enhances
y
o
Video player list
s
e
lete, then touch
e
v
e been checkma
The
video
v
,
mov,
mkv
X
viD).
p
hone.
n
g
options
w
i
n
d
pla
ybac
k.
ou
r music
listening
.
s
creen:
e
ach
video
to
r
ked, touc
h

Y
ou
T
u
b
Openin
g
You can
b
phone
w
i
To open
To u
c
To u
c
To watc
h
To u
c
To u
c
pla
y
w
a
t
To u
c
b
e
TM
g
Y
ou
T
ube
an
d
br
owse, search
fo
r
i
th the
Y
ouT
ube
a
the
Y
ou
T
ube
a
p
c
h the
Apps
Key
c
h a video to
wat
c
and
interact
w
i
c
h a video to play
c
h the
screen
to
v
y
the video or dra
g
t
c
h.
c
h the Back Key
d
Watching
Vi
d
r
, view,
upload,
a
n
a
pplication.
p
plication
>
Y
ouT
ube
c
h
it or
touch
to
t
a
it
h
Y
ou
T
ube
vid
e
it.
v
iew the
Playbac
k
g
the slider to the
to
stop playb
a
d
eos
n
d rank YouTube
v
.
a
ke other actions
o
e
os
k
controls.
Yo u c a n
point in the video
a
ck
and
return
to t
h
ideos
on
y
our
o
n the
video.
pause
and
you
want to
h
e
videos
list.
Entert
To u c
Sea
For
To
searc
1. A t t h e
2. Enter t
searc
h
3. Touch
4. Scroll
t
To
share
You can
r
must cre
You can a
uploading
1. Touch
2. If you
w
the vid
3. Point th
4. Touch
5. Touch
6. Touch
The Yo
7. Touch
8. If you
w
touch
P
9. Touch
ainment
ch the
Menu
Key
arch,
My
Channe
details about thes
h
for
videos
top of the main Y
the
text
to
search
h
by
v
oice.
a
suggestion belo
through
the
searc
e
your videos on
record
and
share
a
ate
a YouTube
acc
also
share
the
vide
g them
to
Y
ouT
ube
at the top righ
want
to
set
any
co
deo
camera
set
tin
he lens to
frame
t
to
start
record
to
stop
record
.
ouTu b e U p l o a d
det
More details
to
e
want
to
share
the
Private
.
Upload
.
y for the follow
l, Upload,
and
Se
se features,
visit t
YouTube
screen, to
for or
touch
the
M
ow
the
search
box
ch results
and
touc
Y
ou
T
ube
a video using the
count
and sign into
eos
you
record
wi
e.
ht of main YouTube
onf gurations man
ngs.
the
scene where
ding
.
ding
.
tails screen
is
disp
enter
a title,
descr
video with
every
wing
options: Hom
ettings
.
the YouTube
webs
ouch
or the
Se
Microphone icon
x or
touch
the
Sea
ch
a video to
watc
Y
ouT
ube
applicat
o it on your
phone
ith the
Camera
ap
e
screen.
nually, touch
the
s
you
want
to
st
art
pla
y
ed.
ription,
and
tags
fo
yone, checkmark P
me,
Browse
,
site.
earch
Key
.
n
to
arch icon .
ch
it.
tion.
First,
y
ou
e.
pplication
b
y
screen
to
open
.
for your
video.
Public.
If
not
Voice
R
The Voic
e
variety o
f
don’t
wa
n
attach
to
Record
a
1. Touch
2. Touch
3.
Speak
4.
When
The
re
To u
c
To u
c
To u
c
Play a
V
1. Touch
2. Touch
3. Touch
NOTE
Managi
n
1. Touch
2. Touch
3. Touch
To u
c
co
m
To u
c
na
m
R
ecor
der
e
Recorder
appli
c
f
ways.
Use
them
n
t
to
forget
(lik
e
a
a
message
or
se
t
a
Voice
Memo
the
Apps
Key
to
start
recor
d
into the
microph
o
you’re
fnished, t
o
cording
is
autom
a
c
h to listen to
c
h to
record
a
c
h to view yo
u
V
o
ice
Memo
the
Apps
Key
.
the voice
memo
y
You
can send the voice
touching
Share
.
n
g
your Voice
M
the
Apps
Key
.
the
Menu
Key
c
h
Share
to
send
m
patible applicati
o
c
h
Sort
by to
ch
o
m
e.
c
ation records
au
d
simply to
remin
d
grocery
list) or
r
e
t
as a
ringtone
for
> Voice
Recor
d
d
ing
.
o
ne.
ou
ch .
a
tically saved
to y
o
your
recording
.
new
voice
mem
o
u
r list of
recordin
g
> Voice
Recor
d
y
ou wish to
pla
y
.
memo
to
others
by to
u
M
emos
> Voice
Recor
d
>
Share
or
Sor
t
via
Bluetooth,
E
m
o
ns
you
have
dow
n
o
ose
how to displ
a
d
ible fles for you
t
d
you
about some
t
e
co
r
d sound effec
t
calls.
d
er .
ou
r
recordings
lis
t
o
.
g
s.
d
er .
u
ching and holding a vo
i
d
er .
t
by
.
m
ail, Gmail,
Mess
a
n
loaded.
a
y the list,
either
b
t
o
use
in
a
t
hing
y
ou
t
s
that you
can
t
.
i
ce
memo
and
a
ging,
or
other
b
y
date
or
b
y

Calen
d
Viewin
g
Open
the
have
invi
t
When
yo
u
Google
A
Calenda
r
from you
r
You can
a
calendar
s
When
yo
u
includes
e
Subsequ
e
between
your cale
n
To open
To u
c
Ev
e
to
s
Ev
e
To
chan
g
To u
c
Eac
h
spe
c
To
v
vie
w
To
v
be
d
d
ar
g
Your
Calend
a
Calendar
applic
a
t
ed you
to.
u
f rst
set
up you
r
A
ccount
or you
cr
e
r
application
on y
o
r
Google
Account
ad
d additional
acc
o
s
to your
phone,
a
n
u
f rst
set
up
Cal
e
ev
ents
from the
p
e
ntly, Calendar k
e
your
phone
and
t
n
dar
using
Calen
d
the
Calendar
a
p
c
h the
Apps
Key
e
nts
from
each ac
c
yn
chronize calen
d
e
nts
from
each ca
l
g
e
your
calenda
r
c
h the
Agenda,
D
h
view
displays
t
h
c
if ed.
v
iew
more inform
a
w
,
touch
the
e
v
en
t
v
iew the
events
o
f
d
isplayed below
t
h
a
r and
Events
a
tion
to view
eve
n
r
phone,
you
con
f
e
ated
a
new acco
u
ou
r
phone,
it
disp
l
on the
web.
o
unts
with Google
n
d
confgure the
m
e
ndar
to
synchron
i
pr
evious month t
h
e
eps
a
y
ear
’
s
wort
h
t
he
web,
plus any
d
ar
on your
phon
e
p
plication
>
Calendar
c
ou
n
t you’ve add
e
d
a
r
s
is
displayed
i
l
endar
are
display
a
r
view
D
a
y
,
Week,
or
M
o
h
e
events
in your
c
ation about
an
ev
e
t
.
f
a day in
Month
v
h
e
calendar.
Touc
h
n
ts you’ve create
d
f
gured
it to
use
a
n
u
nt.
The frst time
l
ays
any
existing
c
Calendar
or
Micr
m
to display in
Cal
i
ze events
on you
r
h
rough
one year i
n
h
of
future event
s
later
events
that
e
.
.
e
d
to your
phone
a
n
Calendar
.
ed
in a
different
c
o
o
nth tabs above
t
h
c
alendar
for the
p
e
nt
in
Agenda,
D
a
v
iew,
touch
a day.
h
the
event
to vie
w
d
or that
others
n
e
xisting
you
open
the
c
alendar
e
v
ents
o
soft
Ex
c
hange
e
ndar
.
r
phone,
it
n
the
fut
ure.
s
sync
hroniz
ed
you add
to
a
nd
confgured
o
lor
.
h
e
calendar.
e
riod of
time
a
y
, or
W
eek
The
event
will
w
its
det
ails.

Tools
Workin
Agenda
v
multi-day
To switc
h
To u
c
To l e a r n
To u
c
A
s
c
ng in Agenda V
view is a list of you
events
are listed
h
to Agenda
vie
w
c
h the
Agenda
ta
b
more
about ev
e
c
h an
e
v
ent.
c
reen
with
detail
s
View
ur
events
in
chron
at the
start
of
ea
c
w
a
b
above
the
cale
n
e
nts
in
Agenda
v
s
about
the
event
nological order.
All
c
h
da
y
.
n
dar.
v
iew
opens.
l-day
and

Worki
n
Day view
rows.
Th
e
displaye
d
that
corr
e
To switc
h
To u
c
To learn
To u
c
To u
c
del
e
sa
m
To a d d
a
To u
c
opt
i
tim
e
n
g in Day View
displays
a chart
o
e
current
time wil
l
d
at the top. Part
o
e
spond
to
when
i
t
h
to
Day view
c
h the Day tab
a
b
more
about ev
e
c
h an
event
to vie
w
c
h and hold an
e
v
et
e
the
event.
Als
o
m
e
time slot for ju
g
a
n event in Day
v
c
h and hold an
e
m
i
ons menu then t
o
e
.
o
f the
events
of o
n
l
be
highlighted.
A
o
f the title of
each
t
occurs.
b
ove
the
calendar.
e
nts
in Day view
w its
det
ails.
v
ent
to
open
an
O
p
o
allows
you to
c
r
g
gling multiple
e
v
v
iew
m
pty spot
or an
e
v
ou
ch New event
t
n
e day, in a table
o
A
ll-day and multi-d
a
event
is
displaye
d
p
tions menu
to vi
r
ea
t
e another ne
w
v
ents.
v
ent
in the day to
t
o
create
a
new e
v
o
f
one-hour
a
y
events
are
d
in the
ro
ws
e
w, edit,
or
w
event
in
the
open an
v

Tools
Workin
Week
vie
multi-day
To switc
h
To u
c
To learn
To u
c
To u
c
del
e
sa
m
To a d d
a
To u
c
opt
i
tim
e
ng in Week View
ew
displays
a chart
events
are
displ
a
h
to
Week view
c
h the
Week
tab
a
more
about ev
e
c
h an
event
to vie
w
c
h and hold an
e
v
et
e
the
event.
Als
o
m
e
time slot for ju
g
a
n event in Wee
k
c
h and hold an
e
m
i
ons menu then t
o
e
.
w
t of the
events
of
ay
ed
at the
top.
a
bove
the
calend
a
e
nts
in Week vie
w
e
w its
det
ails.
v
ent
to
open
an
o
p
o
allows
you to
c
r
g
gling multiple
e
v
k
view
m
pty spot
or an
e
v
ou
ch New event
t
fone
week.
All-da
a
r.
w
p
tions menu
to vi
e
r
ea
t
e another ne
w
v
ents.
v
ent
in the
week
t
t
o
create
a
new e
v
ay
and
e
w, edit,
or
w
event
in
the
t
o
open an
v
ent
at
that

Worki
n
Month
vi
day with
To switc
h
To u
c
To v i e w
m
To u
c
tou
c
n
g in Month Vi
e
ew
displays
a cha
r
scheduled event
s
h
to
Month vie
w
c
h the
Month
tab
m
ore
informati
o
c
h a day to displa
y
c
h
the
event
to vi
e
e
w
r
t of the
events
o
f
s
are
green
in the
w
above
the
calen
d
o
n about events
y
the
events belo
w
e
w
more informa
t
f
the
month. Seg
m
day’s
vertical
bar
.
d
ar.
in Month view
w
the
calendar.
Y
o
t
ion about
it.
m
en
t
s
of
eac
h
o

Tools
Viewing
You can v
dependi
n
To v i e w
i
In
A
In
M
The
n
Touch the
Other
at
t
e
Touch the
a
remind
e
If you
ha
v
to edit or
g Event
Details
view
more inform
n
g
on the
current
v
i
nformation ab
o
A
genda,
Day, or
W
M
onth
view,
touc
h
n
touch
an
event
Attending
feld
e
ndees
’
status
is
Reminders
fel
d
e
r.
v
e permission
to
c
delete
the
e
v
ent
.
s
ation about
an
eve
v
ie
w
.
ou
t
an
ev
ent
W
eek
view,
touch
a
h
a day to display
t
to view its
det
ail
s
to
set
or
change
w
displayed below
y
d
to
change remi
n
c
hange events,
y
o
.
ent
in a
number
o
a
n
event
to view i
t
t
he
events below
s
.
w
hether
you’ll
att
e
y
our
o
wn.
n
der settings,
or
t
o
o
u can
touch
the
M
f
ways
,
t
s
det
ails.
the
calendar.
e
nd
the
e
v
ent.
ou
ch
to
add
M
e
n
u
Key

Creatin
You can
u
appear
o
n
To
creat
e
1. I n a n y
Event
Yo u c a
n
menu
with t
h
2. Add
d
e
Enter
a
If you
h
which
Touch
3. Invite
g
In the
invite
t
peopl
e
an inv
i
4. Touch
about
t
5. Touch
The
e
v
g an
E
v
ent
u
se
the
Calendar
n
your
phone
and
e
an
ev
ent
Calendar
view,
t
o
details screen
for
n
also
touch
and
h
that
opens, touc
h
h
at day and time
a
e
tails about
the
e
v
a
name, time,
an
d
h
ave more
than o
n
to add the
e
v
ent.
to add
more
r
g
ues
t
s
to the
e
v
e
n
Guests
feld,
ent
e
t
o the
event. Sep
a
e
to
whom
you
se
n
tation in
Calenda
r
the
Menu
Key
t
he
e
v
ent.
Save
to
save
the
v
ent
is
added
to y
o
application
on yo
u
in Google
Calen
d
ou
ch
the
Menu
K
e
a
new
e
v
ent.
h
old a
spot
in Da
y
h
New event
to
o
p
a
lready
entered.
v
ent.
d
optional
additio
n
n
e
calendar,
you
c
r
eminders.
n
t.
e
r
the email
addr
e
a
ra
t
e
multiple
ad
d
n
d invitations use
r
and by
email.
>
Show extra
o
e
v
ent.
ou
r
calendar.
u
r
phone
to
crea
t
d
ar
on the
web.
e
y >
New ev
e
y
,
Week,
or
Mont
h
p
en
the Event
de
t
n
al details about
t
h
c
an
choose
the
c
a
e
sses
of
everyon
e
d
resses
with
com
m
Google
Calendar
,
o
ptio
n
s
to ad
d
t
e events
that
en
t
to
open an
h
view. In
the
t
ails
screen
h
e
e
v
ent.
a
lendar
to
e
you
want to
m
as
( , ). If
the
,
they’ll
receiv
e
d
Tools
Editing
You can e
web.
Yo u
given you
To e d i t
a
1. Touch
2. Touch
The E
v
Touch
edit
a
d
3.
Make
y
4. Touch
To
delet
e
There are
In
A
Me
n
In
D
If t
h
that
occ
or deleting an
edit or
delete
an
e
can also edit or
d
u
permission.
a
n
ev
ent
an
event
to view
i
the
Menu
Key
v
ent Details
scre
e
the
Menu
Key
d
ditional event
de
t
y
our
changes
to t
h
Save
to
save
the
e
an
ev
ent
a
number
of
wa
y
A
genda
view,
touc
h
n
u
Key >
Del
D
ay or
Week
view,
h
e
event repeats,
y
occurrence,
this
u
rrences
in your
C
n
ev
ent
event
that you
crea
delete events crea
its
det
ails.
> Edit
event
.
e
n
opens.
>
Show extra
o
t
ails.
h
e
e
v
ent.
e
v
ent.
y
s
to
delete
an
e
v
h
an
event
to vie
w
l
e
t
e event
>
OK
.
touch
and hold t
h
you’re
asked wh
e
and all
future oc
c
C
alendar
.
ated
on the
phone
ated
by
others,
if th
o
ptio
n
s
to ad
d
ent.
w
its
details.
Then
h
e
event
>
Delet
e
e
ther
you
want
to
cu
rrences,
or all
pa
e
or on
the
hey
ha
v
e
d
or
touch
the
e
event
>
OK
.
delete
just
a
st
and
fut
ure

Setting
You can
s
created
t
h
To s e t a
n
1. Touch
2. If no
r
e
10
mi
n
If a
re
m
touchi
n
3. Touch
length
When
Yo u c a
n
remin
d
To
delet
e
1. Touch
2. Touch
an Event
R
e
m
s
et
one or
more r
e
h
e
event
or
have
p
n
event
r
emind
e
an
event
to view
i
e
minder
is
set, to
u
n
utes before
the
e
m
inder
is already
s
n
g
.
the
reminder
fel
d
of time
before
th
e
the time
comes,
n
use
Google
Ca
l
d
er
set
tings.
e
an event
r
emi
n
an
event
to view
i
.
m
inder
e
minde
r
s
for an
e
v
p
ermission
to edi
t
er
its
det
ails.
u
ch
to
autom
a
e
v
ent.
se
t
,
you can add
a
d
and, in the dialo
g
e
event
that you
w
you
receive
a
not
l
endar
on the
we
b
n
de
r
its
det
ails.
v
ent, whether
or
n
t
its
other
det
ails.
a
tically
add a
rem
i
a
n
additional rem
i
g
box that
opens,
w
ant
to be
remin
d
if cation about
th
e
b
to
confgure
add
i
n
ot
y
ou
i
nder
for
nder
b
y
touch
the
d
ed
of
it.
e
e
v
ent.
i

Tools
Calcul
Allows y
o
To open
To u
c
Ent
e
Dra
g
To u
c
cop
y
To u
c
and
lat
o
r
o
u to
perform si
m
and use the
C
a
c
h the
Apps
Key
e
r
numbers
and
a
g
the Basic panel
c
h and hold the
C
y
what you’ve en
t
c
h
Clear
to
delet
e
hold
Clear
to
de
l
m
ple mathematica
l
a
lculato
r
>
Calculator
a
rithmetic operato
r
to the left to
ope
n
C
alculator
’
s
display
t
ered
and
access
e
the last
number
l
e
t
e
all of the
ent
e
l
calculations.
.
r
s
on the Basic
p
a
n
the
Advanced
p
to
open
a
menu
other
tools.
or
operator
you
e
e
red
inf
ormation.
a
nel.
anel.
where
you
can
e
ntere
d
.
T
ouch

Alar
m
Yo u
use
t
Stopwat
c
To open
To u
c
Setting
You can
s
To s e t a
n
1. Touch
other
a
2. Touch
Ent
e
Scr
o
3. Touch
If you
d
you
s
e
4. Touch
S
to wai
t
5. Touch
additio
n
m
/
Clock
t
he Clock
applica
t
c
h
functions.
the Clock
appl
i
c
h the
Apps
Key
Alarms
s
et
an alarm by m
o
n
alarm
New alarm
or
to
u
a
ttributes
to modi
f
the time to
set
th
e
e
r the alarm time
o
ll to AM or PM t
o
the day(s)
when
y
d
on’t
touch
the
R
e
e
t
it
to.
S
nooze duration
t
before soundin
g
V
ibrate
to
check
m
n
to playing the
r
i
t
ion
to
access
the
i
cation
>
Alarm/Clo
c
o
difying an
existi
n
u
ch
an
existing
al
a
f
y
it.
e alarm time
the
n
manually
by scrol
l
o
set
for
morning
y
ou
want
the alar
m
R
epeat setting,
the
to
open
a dialog
b
g
the alarm again i
m
a
r
k
the
setting
a
i
ngtone.
Alarm, Timer, Wo
c
k .
n
g
alarm or by add
i
ar
m to
change
its
n
touch
Set
.
l
ing the hour (or
m
or
af
ternoon.
m
to
sound
in the
alarm
sounds
on
l
b
ox to
set
the
a
m
f it is not
dismiss
e
a
nd
have
the
pho
n
r
ld Clock
and
i
ng a
new
one.
time
and
m
inutes)
feld.
Repeat
feld.
l
y the one
da
y
m
ount
of
time
e
d.
n

Tools
6. Touch
Alarm tone
to
select
a
ringtone
for the alarm,
then touch
OK
.
The
ringtone plays
briefy
when
you
select
it.
7. Touch
Puzzle
lock on to
checkmark
the
setting,
which
requires
you
to
wake
up
enough
to
solve
a
simple
puzzle to
dismiss
the
alarm.
8. Touch
Label
to
enter
a
name
for the
alarm.
9.
When
you’re
fnished, touch
Save
.
Setting Timer
The Timer can be
used
to alert you with an audible signal
when
a
set
amount
of time has
passed.
1.
Open
the Clock
application
and
touch
the
Timer
t
ab.
2. Set the time by scrolling Hour,
Minute
or
Second
felds.
3. Touch
V
ibrate
to
checkmark
the
setting
and
have
the
phone
vibrate
when
the
set
time
e
xpires.
4. Touch Alert
To ne
to
select
an alert
tone
for the
timer, then touch
OK
.
5. Touch
Start
to begin the time
countdown.
Setting World
clock
Allows you to
determine
the
current
time in
another
time zone or
cit
y
.
1.
Open
the Clock
application
and
touch
the
World
Clock
t
ab.
2. Touch
New
City and
search through
the available cities for the one
y
ou
w
ant.
Using
St
opw
a
t
c
h
This
feature allows
you to
use
your
phone
as a
Stopwatc
h.
1.
Open
the Clock
application
and
touch
the
Stopwatch t
ab.
2. Touch
Start
to
start
timing and
touch Stop
to
stop
the
time.
You can
use
the Lap
function
by
touching
Lap to
record
lap
times.
3. Touch
Reset
or
Resume
.

Polaris
O
ff ce
Polaris Offce 3.0 is a
professional
Mobile Offce
Solution
which
enables
users
to
conveniently
view or edit
various types
of offce
documents
including Word, Excel, and
PowerPoint
fle
extensions anywhere, an
ytime,
using their
mobile
de
vice.
Managing
Files
Polaris Offce 3.0
provides mobile users
with the
convenience
of
managing
fles including
copying, moving,
and
deleting
fles and
folders
right on
the
de
vice.
Viewing
Files
Mobile
users
now
have
the
convenience
of being able to view a
wide
variety of fle
types
including
Microsoft
Offce
documents,
Adobe
PDF
right
on their
mobile device. When viewing these documents
using
P
olaris
Offce 3.0, the
objects
and layout
remain unchanged
from their
original
documents.
Editing
Microsoft Offce
Files
Mobile
users
also
have
the
convenience
of being able to
create,
edit,
and
save
Word, Excel and
PowerPoint documents
on their
mobile device.
Sa
v
ed
Documents generated
or
modifed
using Polaris Offce 3.0, are not
distorted
from the
originals.
Settin
g
Openi
n
The
Set
t
and con
applicati
o
To ope
n
▶
F
S
O
▶
L
Changi
n
Yo u
can
that you
▶
T
f
r
Page c
o
Te x t s i
z
size o
f
Defau
l
the m
a
w
ebp
a
Open
their t
o
zoome
d
g
s
n
n
g
Se
ttings
t
ings
applicatio
n
figuring your p
h
o
n are
describe
d
n
Se
ttings
F
rom the Home
S
ettings
.
O
R
Touch
Settings
L
aunch
screen.
n
g Browser
s
configure a nu
m
can use to
ma
n
T
o open the Bro
w
r
o
m
the Browse
r
o
ntent
se
ttings
z
e Opens a dia
l
f
the text that B
r
l
t zoom
Opens
a
gnification leve
l
a
ge.
p
ages
in
overv
i
o
p-left corners
d
out, in
an
o
v
e
r
n
contains most
hone.
All
of
t
h
d
in
this
sectio
n
screen, press
t
h
on the
H
e
ttings
m
ber of Bro wse
r
n
age
y
our
priv
a
c
w
ser
settings
s
c
r
and touch
M
o
l
og where you
c
r
owser
uses
w
h
a dialog where
y
l
that Browser
i
ew
Uncheck to
at
10
0%
size.
r
vie
w
.
of the tools
f
o
h
e
settings
in
n
.
h
e
Menu
Key
H
ome
screen
o
r
r
set
tings,
incl
u
c
y
.
c
reen, press
M
e
o
re
>
Settings
.
c
an
increase or
h
en
displaying
w
y
ou can
increas
uses
when fi
r
open
webpage
s
Check to open
r
customizing
t
he
Settings
and
touc
h
r
in
the
u
ding several
e
nu
Key
d
ecrease
the
ebpages.
e
or
decrease
r
s
t
opening a
s
displaying
webpages

Te x t
encoding
Opens a dialog where you
can
change
the
character-encoding
standard
that
Browser
uses
when displaying
text on a
w
ebpage.
Block
pop-up windows
Check to prevent
w
ebsites
from opening
windows unless you
request
it.
Load
images
Uncheck to omit images
when
Bro
wser
displays a
webpage.
This
speeds
w
ebpage
display, which can be useful if
you have a
slo
w
connection.
Auto-fit
pages
Check to have Browser optimize
the
presentation
of text and other
elements
of
w
ebpages
to fit your
phone
’
s
screen.
Checking
this
option also
causes
the
browser
to reflow a
column
of
text to fit the
screen
if you double-tap the
screen
directly after zooming with your fingers. Uncheck
to
view pages as
designed
for a
computer screen,
and
to
cause
double-tapping to
simply switch
bet
w
een
zoomed-in and default
vie
w
.
Landscape-only display
Check to displa y pages in
landscape
(horizontal) orientation on your
screen,
regardless
of how you are
holding the
phone.
Enable JavaScript
Uncheck to prevent JavaScript
from
running on
webpages.
Many
webpages function
correctly only if they can run
JavaScript
features on
your
phone.
Enable plug-ins
Uncheck to disable plug-ins
from
w
ebpages.
Open
in
background
Check to open new windows in the
background when you touch & hold a link
and
touch
Open
in
new
window
.
This is useful when
y
ou
are working with windows that
take a long time
to
download and display. Press
Menu
, touch
Windows
,
and
then touch the new window to view it.
Unc
hec
k
if
you prefer new windows that you open in this
w
a
y
to open in
place of the current
windo
w
.

Settings
Set
home page
Opens a dialog where you can
enter
the URL of a
page that you want to
access
whene
v
er
you open a new Browser
window. If you prefer
to
open new Browser windows
more
quickly, by not opening any page by default, leave
the
dialog
blank.
Privacy
se
ttings
Clear
cache
Allows you to clear locally
cac
hed
content
and
dat
abases.
Clear
history
Allows you to clear the
browser
histor
y
.
Accept cookies
Allows
websites
to save and
read
cookie data.
Clear all
cookie data
Allows you to
clear
all
browser
cookie data.
Remember form data
Allo
ws
the
browser
to
remember data
entered
into forms for later
use.
Clear
form data
Allows you to clear all saved form
dat
a.
Enable location
Allows sites to
request access
to
y
our
location.
Clear
location access
Allows you to clear
location
access
for all
w
ebsites.
Security
se
ttings
Remember passwords
Allows the
browser
to
sa
v
e
user
names
and
passwords
for
w
ebsites.
Clear
passwords
Allows you to clear all
sa
v
ed
passw
ords.
Show security warnings
Shows a warning if
there
is a problem
with a
site's
securit
y
.

Settings
Advanced
se
ttings
Set
search engine
Allows you to select the default
searc
h
engine.
Website settings
Allows you to configure
set
tings
for individual
w
ebsites.
Reset
to
default
Allows you to
restore the
default
browser
set
tings.
Wireless &
ne
t
w
ork
s
Wireless &
networks settings
allows you to
configure
and
manage
wireless
radio
communications.
T
hese
settings
include Airplane
mode.
Airplane mode
Checkmark indicates all
wireless
radio
communications
are
t
urned
of
f
.
Wi-Fi Checkmark to turn on
Wi-Fi
functionality to
connect to
a
v
ailable
Wi-Fi
net
w
orks.
Wi-Fi
settings
▶
Wi-Fi
settings
screen
The
Wi-Fi
settings
menu allows you to set
up
and
manage
wireless access points.
Wi-Fi Checkmark to turn on
Wi-Fi
so you
can
connect
to
Wi-Fi
net
w
orks.
Network notification
Checkmark to receive
a
notification when
an open
Wi-Fi
network
becomes
a
v
ailable.
Wi-Fi
networks
Displays a list of
Wi-Fi
net
w
orks
you’ve
previously configured and
those detected
when the phone last
scanned
for
Wi-Fi
net
w
orks.
Add Wi-Fi
network
Allows you to add a Wi-Fi network
by entering its Network SSID
(the
name it
broadcasts)
and
security
t
ype.

Settings
▶
Advanced
Wi-Fi
settings
screen
The Advanced
Wi-Fi
settings screen
is
accessed
from the
Wi-Fi
settings screen.
Press the
Menu Key
and
touc
h
Advanced
.
Regulatory domain
Set the number of channels
to
use.
Wi-Fi
sleep policy
Allows you to specify when
to
switch
from
Wi-Fi
to mobile data. Disabling sleep
uses more
battery
po
wer
.
MAC
address
Displays the Media Access
Control
(MAC)
address
of your phone when
connecting
to Wi-Fi
net
w
orks.
IP
settings
If you checkmark Use
static
IP,
y
ou
can
use IP
settings
to enter an IP
address and
other network
settings
for
your phone
manually
,
rather than using the DHCP protocol to
obt
ain
network
settings
from the W-Fi network
itself
.
Bluetooth
Checkmark to turn Bluetooth
functionalit
y
to connect
to Bluetooth
de
vices.
Bluetooth settings
▶
Bluetooth
settings
scr
een
Bluetooth
Checkmark to turn on Bluetooth so
y
ou
can
connect
to Bluetooth
de
vices.
Device name
Allows you to view and edit
the
name
your
phone displays to other
Bluetooth
devices when trying to
pair.
Discoverable
Checkmark to make your
phone
discoverable to
other Bluetooth devices for
120
seconds.
Scan
for
devices
Touch to search for and
displa
y
information
about nearby Bluetooth
de
vices.
Bluetooth devices
Displays a list of
Bluetooth
devices that
you’ve previously configured
and
those detected
when the
phone last
scanned
for Bluetooth
de
vices.

Settings
Tethering
Share your
phone's
mobile data
connection
via
USB
.
©
USB
tethering
Touch to enable or disable this
f
eat
ure.
VPN
settings
©
VPN
settings
screen
Add VPN Allows you to add different types of
V
irt
ual
P
riv
ate
Networks (VPNs).
VPNs Displays the list of VPNs that
y
ou’
v
e
previously
configured.
Mobile networks
▶
Mobile networks
settings
screen
Data
enabled
Uncheck to prevent your phone
from
transmitting
data on any mobile network. This
is
useful if you are
tra
v
eling
in an area where you do not have a mobile
data
plan and want
to avoid
charges
for data use
on
local
carriers
’
mobile
networks.
Unchecking this setting does not
pre
v
ent
your phone
transmitting
data on other
wireless
networks,
such as
Wi-Fi
or
Bluetooth.
Global data roaming
Check to allow the device
to
connect
to
data services while
roaming
.
Network Mode
Allows you to select
the
pref
er
red
network
mode.
System select
Allows you to change CDMA roaming mode
between
Home only/
A
utomatic.
ERI Allows you to enable or disable ERI Alert
sound.

Settings
Call
se
ttings
Use Call
settings
to configure phone call
set
tings.
Assisted Dial
Assisted
Dialing
A
ssisted
Dialing allows you
to
easily dial
international calls while roaming in another
countr
y
.
Show Dialpad
Display dialpad automatically on
the
selected calls.
V
oicemail
V
oicemail
service
Allows you to select
y
our
car
rier
’
s
voicemail
service or another service,
suc
h
as Google
V
oice
TM
.
Voicemail
settings
If
you are using your
car
rier
’
s
voicemail
service, this
option allows you to enter
the
phone number to use for listening to and
managing your
voicemail. You
can enter a comma
(,)
to insert a
pause
into
the number. For example, to add a password
af
ter
the
phone
number.
If
you are using
Google
V
oice,
this opens a screen where you
can view the
Google
V
oice
number or sign out of
Google
V
oice.
Other call
settings
Call
forwarding
Allows incoming
telephone
calls
to
be routed to
another point of termination that it allows you to not miss
important
telephone
calls
.
Quick text Allows you to add or edit the Quick
te
xt
messages
that
are available when you receive a call.
You
can ignore the call and
send the
message.
Auto Retry Allows you to enable or disable
A
uto
R
etr
y
mode.
Yo u
can configure the phone
to
automatically redial a number after a
certain
amount
of
time.
TTY
mode
Allows you to set
TTY
mode
to
communicate
with
other
TTY
de
vices.
DTMF
Tones
Allows you to set the lengh of DTMF
tones.

Settings
Voice
Privacy
Allows you to enable or
disable
enhanced
privacy
mode.
Auto
Answer
Allows you to enable or disable Auto
Answ
er
with
Handsfree.
Sound
Use the Sound
settings
to configure how and at
what
volume the
phone rings and vibrates when
the
phone
rings, you receive a
notification, an
alarm
sounds,
or when you play music or other
media
with
audio, as well as
some
related
set
tings.
General
Silent mode
Check to silence a ll
sounds
(including call and
notification ringtones) except the
audio
from
music, videos, and
other media and
an
y
alarms
you have
set.
(You
must silence media and alarms in their
o
wn
applications.)
V
ibrate
Opens a dialog where you can configure
when
you want
the phone to vibrate when you receive
a
phone call or notification:
Always, Never, Only in
Silent
mode, or Only when not in Silent
mode.
V
olume
Opens a dialog where you can set the volume
of
ringtones that sound when you receive a phone call
or
notification,
media (music, videos, an so on),
and
alarms. If you uncheck the
option to use the
same
volume for both calls and notifications, you
can
set
the
notification ringtone volume
independently.
Incoming
calls
Phone ringtone
Opens a dialog where you can select
the
ringtone to
sound when you receive a phone
call.
Touch a ringtone to listen to it.

Settings
Notifications
Notification ringtone
Opens a dialog where you
can
select
the ringtone to sound when you receive
a
notification. Touch a
ringtone to listen to it.
Feedback
Audible touch tones
Check to hear
tones
when
y
ou
use the dial
pad to dial a
number
.
Audible selection
Check to play a sound when
y
ou
touch
buttons,
icons, and other
onscreen
items
that
react to your
touc
h.
Screen
lock
sounds
Check to pla y a sound
when
the
screen
is
locked or
unloc
k
ed.
Haptic feedback
Check to have the phone
vibrate
briefly
when you
touch soft
buttons
and perform
other
actions.
Emergency tone
Opens a dialog where you
can
configure how the
phone reacts when you place
an
emergency
call.
Display
Use the Display
settings
to configure
brightness and
other
screen
set
tings.
Brightness
Opens a dialog for adjusting
the
brightness
of the
screen.
For the best
battery
performance,
use the
dimmest
comfortable
brightness.
Auto-rotate screen
Check to auto matically switch
the
orientation
of the
screen
as you turn the
phone
sidew
a
y
s.
Animation
Opens a dialog where you can set
whether
you want
to enjoy animated transitions for
some
effects
(such as opening
menus), for all
supported
effects
(including when navigating from
screen to
screen),
or to enjoy a phone without any
optional
animation
effects
(this setting does not
control
animation in all
applications).
Screen timeout
Opens a dialog where you can
set
how long to

Settings
wait after you touch the
screen or
press
a button before the
screen darkens. For
the
best battery
performance,
use the
shortest
convenient timeout.

Settings
Location &
sec
urit
y
Use the Location & security
settings
to set
y
our
preferences
for
using and sharing your
location
when
your search for information
and
use
location-aware applications, such as Bing Maps.
Y
ou
can
also configure
settings
that help
secure
y
our
phone and its
dat
a.
Location
Settings
E911 E911 Location cannot be turned off on any
mobile
phone that
you are not allo wed to change any
set
tings
and it would only be
used as urgent
sit
uation.
Standalone
GPS
Services
Allows you to use
y
our
phone
’
s
Stand-
alone global positioning
system
(GPS) satellite receiver to pinpoint
your location to within
an
accuracy as close as several
meters
(“street
le
v
el”).
Actual GPS accuracy
depends
on a clear view of
the
sky and other
f
actors.
Google Location Services
Allows you to
use
information from
Wi-
Fi and mobile
networks to
determine
your approximate location,
for use in Google Maps, when you search, and
others. When
you
checkmark this option, you’re asked
whether
y
ou
consent
to
sharing your location anonymously
with
Google
’
s
location
ser
vice.
Screen
unlock
Set up
screen
lock Opens a set of
screens
that
guide
you through
drawing a
screen
unlock pattern
or
set
ting
a PIN or
password.
Security
lock
timer
Adjust the delay before
the
security lock
automatically turns
on.

Settings
Passwords
Visible
passwords
Check to briefly show
eac
h
character of
passwords
as you enter them,
so
that
you can see what you
enter
.
Device
administration
Select device administrators
Add
or
remove d evice
administrators.
Credential
storage
Use
secure credentials
Check to allow applications
to
access
your
phone
’
s
encrypted store of
secure
certificates
and related
passwords
and
other
credentials.
You
use credential
storage
to
est
ablish
some
kinds of VPN and
Wi-Fi
connections.
If
y
ou
ha
v
e
not set a
password
for the credential
storage,
this setting is
dimmed.
Install from
SD
card
Touch to install a
secure certificate
from
an
SD
card.
Set
password
Opens a dialog where you can set
or
change the
password for your
secure credential
storage.
Your
password
must
have at least
8
c
haracters.
Clear
storage
Deletes
all
secure certificates and
related
credentials
and
erases
the
secure
storage
’
s
own
password,
after
prompting you to confirm
that
you want to do
this.

Settings
Applica
tions
You
use the Applications
settings
to view details
about
the
applications installed on your phone,
manage their
data, force them
to stop, and to set
whether
you
want
to permit installation of
applications that you
obt
ain
from
websites
and
email.
Unknown sources
Permits installation of
applications
that you
obtain from
websites,
email, or
other
locations other than Android
Mark
et
TM
.
WARNING!
To protect your phone and personal
dat
a,
download
applications only from
tr
usted
sources,
such as Android
Mark
et.
Manage applications
Opens a list of all
the
applications
and other
software installed on
y
our
phone, along with their sizes. Touch the
tabs at
the
top
of the
screen
to view applications by type.
P
ress
the
Menu
Key and touch
Sort
by size to
displa
y
applications
in order by size. Touch an application to open
its
Application Info
screen.
Running services
Allows you to view and
control
currently
running services and applications. This option displays what
processes
each running
ser
vice
needs
and how much memory it
is
using.
Development
Allows you to set options
f
or
application
de
v
elopment.
▶
Development
screen
The
Development screen
contains
settings
that
are
useful for
developing AndroidTM applications. For full information,
including
documentation
of
the
Android
APIs and
development
tools, see
the
Android developer
w
ebsite
(ht
tp://de
v
eloper
.android.com).
USB
debugging
Permits debugging tools on
a
computer
to
communicate
with your phone
via
a
USB
connection.

Settings
Stay awake
Allows you to set the phone to
pre
v
ent
the
screen
from dimming and locking when it
is
connected
to a charger or
to a USB device
that
provides power.
Don
’
t
use this
set
ting
with a static image on the phone for long
periods
of time, or
the
screen
may be marked with
that
image.
Allow
mock locations
Permits a
de
v
elopment
tool on a
computer
to control where the
phone
believes it is located,
rather than using
the
phone
’
s
own internal tools for this
purpose.
Accounts &
sync
Use the Accounts & sync
settings
to add, remove,
and
manage
your
GoogleTM and other
supported accounts.
Yo u
also use
these settings
to control how
and
whether
all applications send, receive, and sync
dat
a
on
their own
schedules
and
whether
all
applications
can
synchronize user data
automatically
.
GmailTM, Calendar, and other applications may also
ha
v
e
their own
settings
to control how they
sync
hroniz
e
data; see the
sections
on
those
applications
f
or
det
ails.
General sync
settings
Background data
Permits applications to
sync
hroniz
e
data in the
background,
whether
or not you
are
actively working in them.
Unchecking this setting
can
save battery power and lo wers (but
does
not
eliminate) data
use.
Auto-sync
Permits applications to synchronize,
send,
and receive
data on their own
schedule.
If
y
ou
uncheck this setting, you must
touch an account in
the
list on this
screen
or
press
the
Menu Key
and touch
Sync now
to synchronize data for
that
account.
Synchronizing data automatically is
disabled
if
Background data
is
unc
hec
k
ed.

Settings
Manage
accounts
List of all Google Accounts and other
accounts
you’ve added to
the
phone.
If you touch an account in this
screen,
its account
screen
opens.
▶
Account
screen
This
screen
contains different options,
depending
on the kind
of
account.
For Google Accounts, it lists the kinds of data
y
ou
can
synchronize to the phone, with
checkboxes
so
you can turn
synchronizing on and off for each
kind.
Yo u
can also
press
the
Menu
Key
and touch
Sync
now
to synchronize data. Touch
Remove Account
to
remove the account along with all its
dat
a
(contacts,
mail,
settings,
and so on).
Yo u
can
’
t
remove the first
Google Account you added to
y
our
phone except by
resetting
your phone to
the
f
actor
y
defaults and erasing all of your user
dat
a.
P
riv
acy
Personal
data
Factory data reset
Erases all of your personal
dat
a
from
internal
phone
storage,
including
inf
ormation
about your Google Account,
any other
accounts,
y
our
system
and application data and
settings,
and
an
y
downloaded
applications.
Resetting
the phone
does
not
erase
any
system software updates
y
ou’
v
e
downloaded
or
an
y
files on your microSD card, such as music or
photos.
If you
reset
the phone in this way, you’re
prompted
to
reenter
the
same
kind
of information as
when
y
ou
first started Android.

Safety
SD card & phone
s
t
or
age
Use the SD card & phone
storage settings
to
monitor
the used and
available
space
on your phone and
on
your microSD card, to
manage
your microSD
card,
and
if
necessary,
to
reset
the phone,
erasing all
of
y
our
personal
inf
ormation.
SD
card
Total
space and Available space
Lists
the
amount
of
space
on
any microSD card installed in your phone and the amount you
have used to
store
photos, videos, music, and other
files.
Unmount
SD
card
Unmounts
the microSD card
from
your phone
so that you can format the car d or
saf
ely
remove it when the
phone is on. This setting
is
dimmed if there is no microSD
card
installed, if you have already
unmounted
it, or if
y
ou
have
mounted
the microSD card on your
computer
.
Format
SD
card
Permanently erases
everything on
a
microSD
card and
prepares
it for use with
y
our
phone.
Yo u
must
unmount
a
microSD card before
y
ou
can format it.
Internal phone
storage
Available space
Lists the amount of internal
phone
storage
used
by the operating
system, its
components,
applications (including
those
y
ou
downloaded),
and their
permanent
and
temporar
y
dat
a.

Settings
Sear
ch
You
use the Search
settings
to configure Bing
Searc
h,
Quick Search
Box, and the data on the phone that
y
ou
want to include in
searc
hes.
Searchable items
Allows you to set what kinds of
data
to include
in phone
searc
hes.
Clear
shortcuts
Clear
shortcuts
to
recently
chosen
search
suggestions.
Language &
k
eyboar
d
Use the Language & keyboard
settings
to select
the
language for
the text on your phone and
f
or
configuring the
onscreen
keyboard,
including
w
ords
that you’ve added to its
dictionar
y
.
Select language
Allows you to
choose
a language
to
use on your
phone.
Te x t
settings
Swype
Swype is a
word-based
text entry
method on
a standard
keyboard. Touch this setting and
scroll
down to read the User
Manual for
S
w
ype.
Android keyboard
Allows you to use
the
onscreen
touch
keyboard and adjust
its
set
tings.
The Android
K
e
yboard
settings apply to the
onscreen
keyboard
that is included with your phone.
T
he
correction and capitalization
features affect only
the
English version of the
k
e
yboard.
V
ibrate
on
keypress
Allows you to set
the
phone to vibrate
briefly each time you touch
a
key
on the
onscreen
k
e
yboard.
Sound
on
keypress
Allows you to set the phone
to
play a
brief sound each time you touch a key on
the
onscreen
k
e
yboard.

Safety
Auto-capitalization
Allows you to set the
onscreen
keyboard to
automatically capitalize the first letter of the first word after a
period, the first word in a
te
xt
field, and each word in name fields.
Voice
input
Allows you to enable or disable
v
oice
input.
Input language
Opens the Input
Languages
screen,
where
you can check the
languages
y
ou
want to have available when
using the
onscreen
k
e
yboard.
▶
Wo r d
suggestion
settings
Quick fixes Allows the phone to
automatically
correct
some
common
misspellings as you
t
ype.
Show suggestions
Allows the phone to
sho
w
suggested
words as you
t
ype.
Auto-complete
Allows the phone to
automatically
enter
a
suggested
word when you enter
a
space
or
punct
uation.
User dictionary
Allows you to view, add, and
remo
v
e
words f rom
your user dictionary. Touch a w ord to
edit
or
delete
it. Press the
Menu
Key
and touch Add to add
a
w
ord.
Voice input &
output
Voice
input
Voice
recognizer
settings
▶
Voice Recognition
settings
screen
Language
Opens a
screen
where you can set
the
language
you use when entering text
b
y
speaking.
SafeSearch
Opens a dialog where you can
set
whether
you
want
SafeSearch
filtering to
bloc
k
some
results when you use
search by
v
oice:
Block no search results (Off), only explicit
or
offensive images
(Moderate), or both explicit
or
offensive text and images
(Strict).

Settings
Block
offensive words
When
unchecked,
v
oice
recognition
will
recognize and
transcribe
w
ords
many people consider offensive,
when you
enter
text by speaking. When checked, voice
recognition
replaces those
words in
transcriptions
with
a
placeholder
comprised
of hash symbols
(
# ).
Personalized recognition
Check this option
to
improve
speech
recognition
accuracy.
Google Account dashboard
Allows you
to
manage
your
collected
dat
a.
Vo i c e
output
Text-to-speech
settings
▶
Text-to-speech
settings
You
use the
Text-to-Speech settings
to
configure
the Android
text-to-speech synthesizer
f
or
applications that can take
advantage of it,
suc
h
as
Ta l k B a c k .
If you
don
’
t
have
speech synthesizer
data installed, only
the
Install voice data
setting is
a
v
ailable.
Listen
to an
example
Plays a brief sample
of
the
speech
synthesizer,
using your
cur
rent
set
tings.
Always use
my
settings
Allows the phone to
use
your default
settings and override the
application
set
tings.
Default
Engine
Allows you to set the default
speec
h
synthesis
engine to be used for spoken
te
xt.
Install voice data
If your phone does not
ha
v
e
speech
synthesizer
data installed, this
option
connects
to Android
Market and guides
y
ou
through
the
process
of downloading
and
inst
alling
the data. This setting is not available if the data
is
already
inst
alled.
Speech rate
Allows you to select how
quic
kly
y
ou
want the
synthesizer
to
speak.

Safety
Language
Allows you to select the language of
the
text you
want the
synthesizer
to read. This
is
particularly useful in
combination with the
Alw
a
y
s
Use My Settings setting, to
ensure
that text
is
spoken correctly in a variety of
applications.
Engines
Displays the installed
engines and
allows you to
configure their
set
tings.
C
onnectivit
y
Default connection mode
Allows you to
choose the
default
connection
mode when
connecting
y
our
phone to a PC via USB.
Choose from
Windo
ws
Media Sync, Modem mode, or Mass
storage
mode
Always
ask Check to have the phone ask you to
c
hoose
what USB
connection
mode it should
connect
with to a
PC.
Accessibility
Yo u
use the Accessibility
settings
to configure
an
y
accessibility plug-
ins you have installed on your
phone.
Accessibility
Allows you to enable all
inst
alled
accessibility
plug-ins.
Power button ends
call During a call,
pressing
Power
ends the
call instead of turning off
the
screen.

Settings
Date &
time
Use Date & time
settings
to set your
preferences
f
or
how
dates
are displayed.
Yo u
can also use
these
settings
to set
your own time and time zone,
rather
than obtaining the
current time from the
mobile
net
w
ork.
Use
24-hour format
Check to dis play the time
using
24-hour
time format—for example, 13:00 rather
than
1:00
pm.
Select date format
Opens a dialog where you
can
select
the format for displaying
dates.
About
phone
About phone includes information about y our
phone.
System updates
Allows you to check
f
or
Android
system software updates.
Status
Allows to view a list of information
about
your
battery, mobile network
connection, and
other
det
ails.
Battery use
Opens a list of the applications
and
operating
system components
that have used and
are
currently using
battery power. Touch an application in the list to view details
about its power use and, if available, touch a button to open a
settings or
information
screen
for that
component
or
application.
Legal
information
Allows you to view
legal
information
about the
software
included with
y
our
phone.
DivX VOD
registration
Displays information
to
register
your device to play
DivX
protected
videos.
V
ersion
information
Lists details about the
model
numbers
and versions of your
phone
’
s
hardware
and
operating
system
software.
This information is
useful
if you need to work with
your
car
rier
’
s
support
team.
HAC statement
This phone has been tested and rated for use with hearing aids for some of the wireless technologies that
it uses. However, there may be some newer wireless technologies used in this phone that have not been
tested yet for use with hearing aids. It is important to try the different features of this phone thoroughly
and in different locations, using your hearing aid or cochlear implant, to determine if you hear any
interfering noise. Consult your service provider or the manufacturer of this phone for information on
hearing aid compatibility. If you have questions about return or exchange policies, consult your service
provider or phone retailer.
FCC Hearing-Aid Compatibility (HAC) Regulations for Wireless Devices
On July 10, 2003, the U.S. Federal Communications Commission (FCC) Report and Order in WT Docket
01-309 modified the exception of wireless phones under the Hearing Aid Compatibility Act of 1988
(HAC Act) to require digital wireless phones be compatible with hearing-aids. The intent of the HAC Act
is to ensure reasonable access to telecommunications services for persons with hearing disabilities.
While some wireless phones are used near some hearing devices (hearing aids and cochlear implants),
users may detect a buzzing, humming, or whining noise. Some hearing devices are more immune than
others to this interference noise, and phones also vary in the amount of interference they generate.
The wireless telephone industry has developed a rating system for wireless phones, to assist hearing
device users to find phones that may be compatible with their hearing devices. Not all phones have been
rated. Phones that are rated have the rating on their box or a label located on the box.
The ratings are not guarantees. Results will vary depending on the user's hearing device and hearing loss.
If your hearing device happens to be vulnerable to interference, you may not be able to use a rated phone
successfully. Trying out the phone with your hearing device is the best way to evaluate it for your
personal needs.
M-Ratings: Phones rated M3 or M4 meet FCC requirements and are likely to generate less interference to
hearing devices than phones that are not labeled. M4 is the better/higher of the two ratings.
T-Ratings: Phones rated T3 or T4 meet FCC requirements and are likely to generate less interference to
hearing devices than phones that are not labeled. T4 is the better/ higher of the two ratings.
Hearing devices may also be rated. Your hearing device manufacturer or hearing health professional may
help you find this rating. Higher ratings mean that the hearing device is relatively immune to interference
noise. The hearing aid and wireless phone rating values are then added together. A sum of 5 is considered
acceptable for normal use. A sum of 6 is considered for best use. In the example to the left, if a hearing

aid meets the M2 level rating and the wireless phone meets the M3 level rating, the sum of the two values
equal M5. This should provide the hearing aid user with “normal usage” while using their hearing aid
with the particular wireless phone. “Normal usage” in this context is defined as a signal quality that’s
acceptable for normal operation. The M mark is intended to be synonymous with the U mark. The T mark
is intended to be synonymous with the UT mark. The M and T marks are recommended by the Alliance
for Telecommunications Industries Solutions (ATIS). The U and UT marks are referenced in Section
20.19 of the FCC Rules. The HAC rating and measurement procedure are described in the American
National Standards Institute (ANSI) C63.19 standard. When you're talking on a cell phone,
it's recommended that you turn the BT (Bluetooth) mode off for HAC.
For information about hearing aids and digital wireless phones
Wireless Phones and Hearing Aid Accessibility
http://www.accesswireless.org/hearingaid/
FCC Hearing Aid Compatibility and Volume Control
http://www.fcc.gov/cgb/consumerfacts/hac_wireless.html