LG Electronics USA P500 Cellular/PCS GSM/EDGE Phone with WLAN and Bluetooth User Manual
LG Electronics USA Cellular/PCS GSM/EDGE Phone with WLAN and Bluetooth Users Manual
UserManual.wiki
>
LG Electronics USA
>
P500 User Manual
Users Manual
Navigation menu
Upload a User Manual
Namespaces
Wiki Guide
HTML
PDF
Info
Views
User Manual
Discussion / Help
Navigation

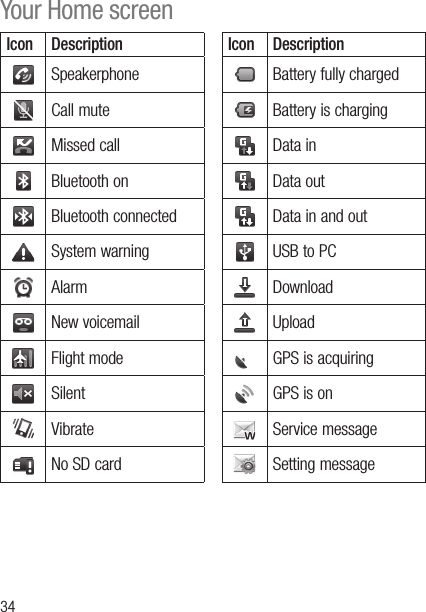
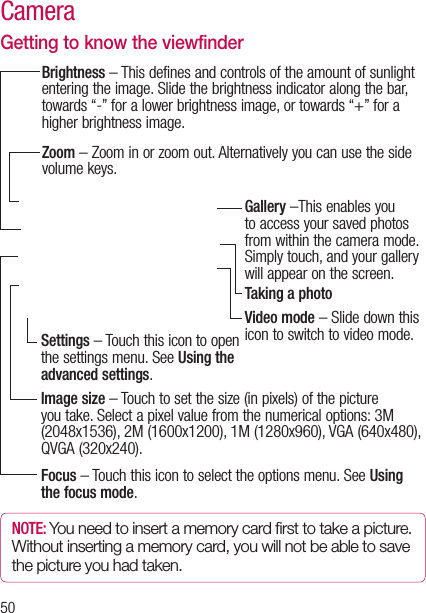
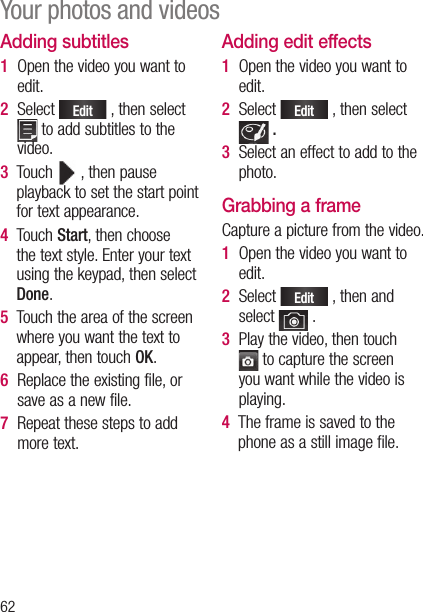
![33Notification drawerThe notification drawer runs across the top of your screen. Touch and slide the notification drawer down with your finger. Or, on the home screen, touch Menu key and select Notifications. Here, you can check Wi-Fi and Bluetooth status as well as other notifications.Viewing the status barThe status bar uses different icons to display phone information, such as signal strength, new messages, battery life, and active Bluetooth and data connections.Below is a table explaining the meaning of icons you’re likely to see in the status bar.[Status bar]Icon DescriptionNo SIM cardNo signalWi-Fi is on and connected to an AP Wired headsetCall forwardCall hold](https://usermanual.wiki/LG-Electronics-USA/P500/User-Guide-1319791-Page-17.png)