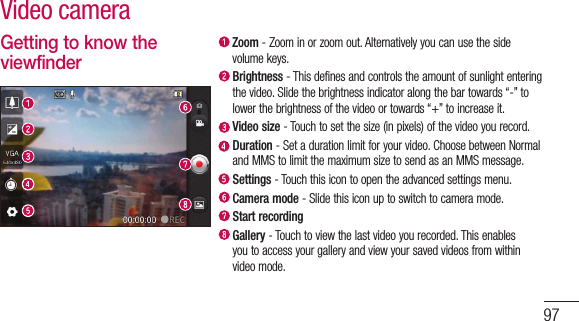
LG Electronics USA P700 Cellular/PCS GSM Phone with WLAN, Bluetooth and RFID User Manual LG P700 ENG FCC 111219 indd
LG Electronics MobileComm USA, Inc. Cellular/PCS GSM Phone with WLAN, Bluetooth and RFID LG P700 ENG FCC 111219 indd
UserManual.wiki
>
LG Electronics USA
>
P700 User Manual
Users Manual
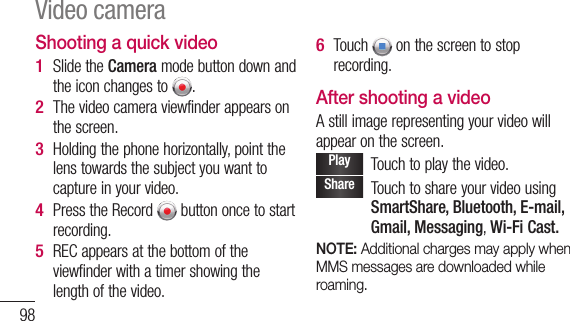
Navigation menu
Upload a User Manual
Namespaces
Wiki Guide
HTML
PDF
Info
Views
User Manual
Discussion / Help
Navigation
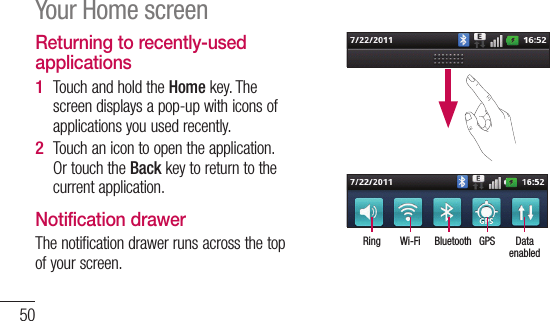
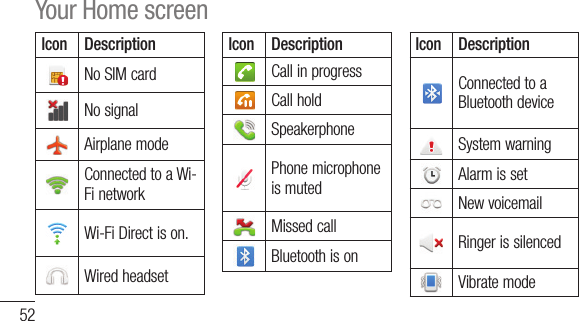
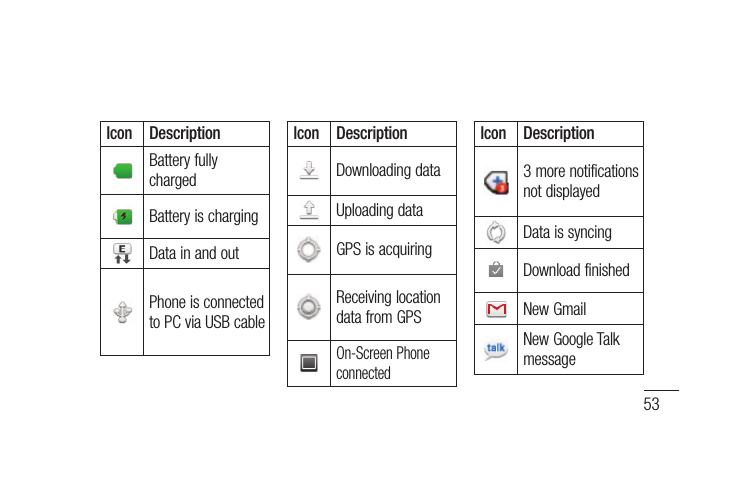
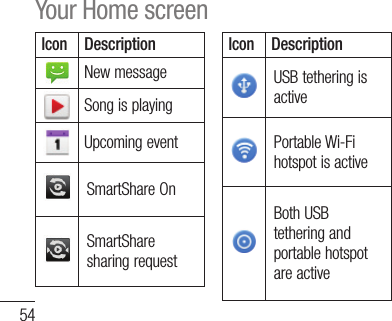
![51Touch and slide the notification drawer down with your finger. Or, in the Home screen, press the Menu key and select Notifications. Here you can check and manage sound, Wi-Fi, Bluetooth and GPS as well as other notifications.Viewing the status barThe status bar uses different icons to display phone information such as signal strength, new messages, battery life and active Bluetooth and data connections.Below is a table explaining the meaning of icons you’re likely to see in the status bar.[Status bar]](https://usermanual.wiki/LG-Electronics-USA/P700/User-Guide-1657695-Page-18.png)


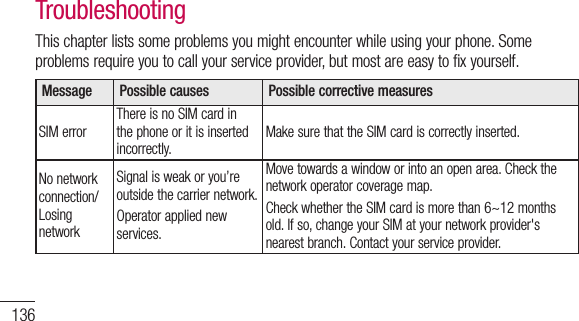
![137Message Possible causes Possible corrective measuresCodes do not matchTo change a security code, you will need to confirm the new code by re-entering it.The two codes you have entered do not match.The default code is [0000]. If you forget the code, contact your service provider.Any application cannot be setNot supported by service provider or registration required.Contact your service provider.Calls not availableDialling error New SIM card inserted. Pre-paid charge limit reached.New network not authorised.Check for new restrictions.Contact service provider or reset limit with PIN2.](https://usermanual.wiki/LG-Electronics-USA/P700/User-Guide-1657695-Page-104.png)