LG Electronics USA P720 Cellular/PCS GSM/EDGE and PCS WCDMA Phone with WLAN, RFID and Bluetooth User Manual LG P720 OPEN UK Cover 63 indd
LG Electronics MobileComm USA, Inc. Cellular/PCS GSM/EDGE and PCS WCDMA Phone with WLAN, RFID and Bluetooth LG P720 OPEN UK Cover 63 indd
Users Manual


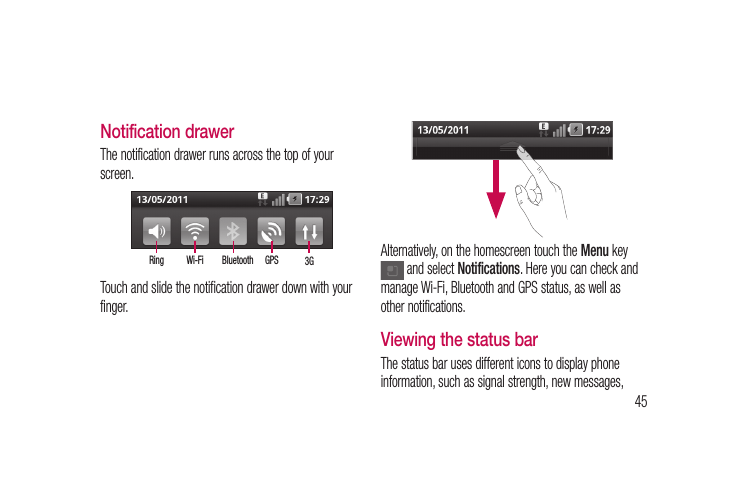
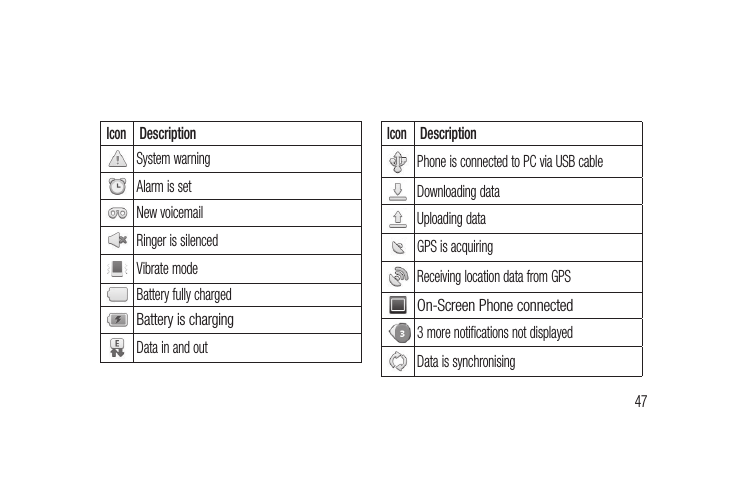
![46battery life and Bluetooth and data connections.The table below explains the meaning of the icons you are likely to see in the status bar.[Status bar]IconDescriptionNo SIM cardNo signalAirplane modeConnected to a Wi-Fi networkIconDescriptionWired headsetCall in progressCall on holdSpeakerphonePhone microphone is mutedMissed callBluetooth is onConnected to a Bluetooth deviceYour Home screenIco](https://usermanual.wiki/LG-Electronics-USA/P720/User-Guide-1640801-Page-20.png)