LG Electronics USA P875 Cellular/PCS GSM/EDGE Phone with WLAN, Bluetooth and RFID User Manual LG P870 UG EN 130306 indd
LG Electronics MobileComm USA, Inc. Cellular/PCS GSM/EDGE Phone with WLAN, Bluetooth and RFID LG P870 UG EN 130306 indd
Contents
- 1. Users Manual 1
- 2. Users Manual 2
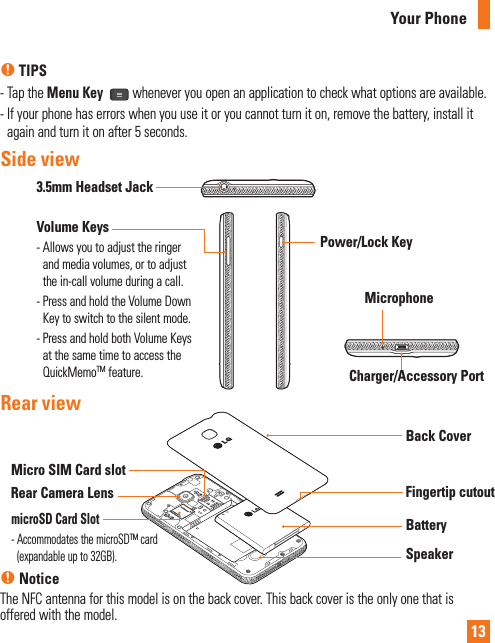
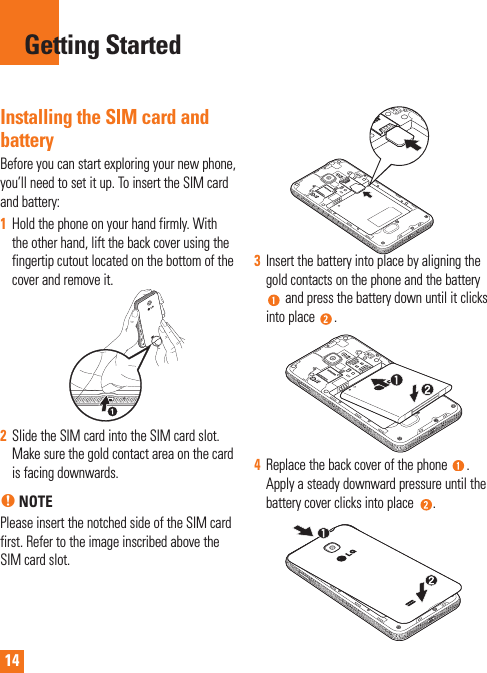
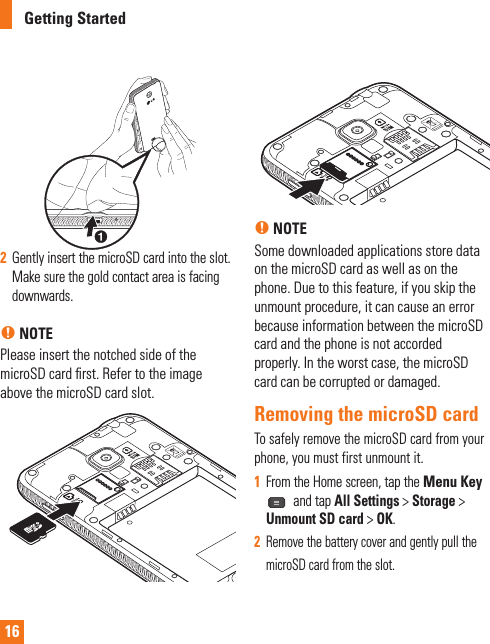
Users Manual 1


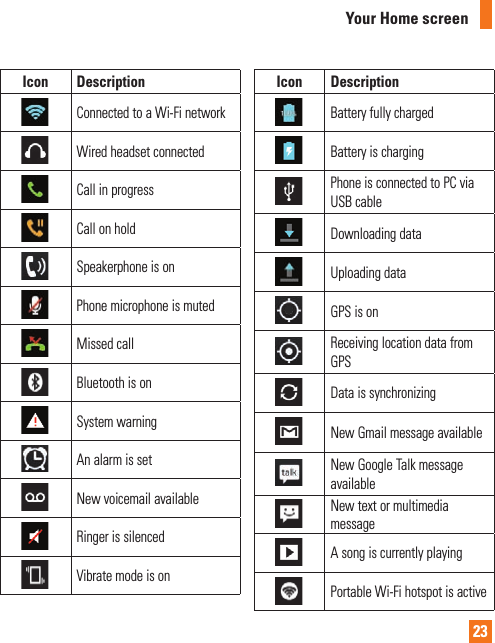
![22Home screen clean viewYou can see the wallpaper without items on the Home screen by pinching out. Pinch in or tap the Back Key to see applications and widgets again.Notifications PanelNotification icons on the Status Bar report the arrival of new messages, calendar events, alarms, as well as ongoing events, such as when you are in a call. You can view a list of all recent notifications.The Status Bar runs across the top of your screen. Touch and hold the Status Bar and slide it down with your finger to open the Notifications Panel. From here, you can check and quickly turn on and off Sound, Wi-Fi, Bluetooth, GPS, and any other options you add. You can also quickly adjust the screen brightness.Viewing the Status BarThe Status Bar uses different icons to display phone information, such as signal strength, new messages, battery life, and activate Bluetooth and data connections.Below is a table explaining the meaning of icons you are likely to see in the Status Bar.[Status Bar]Icon DescriptionNo SIM card insertedNo network signal availableAirplane mode is onYour Home screen](https://usermanual.wiki/LG-Electronics-USA/P875.Users-Manual-1/User-Guide-1912078-Page-22.png)