LG Electronics USA PA72GJE DLP PROJECTOR User Manual EMISSION TEST REPORT
LG Electronics USA DLP PROJECTOR EMISSION TEST REPORT
UserManual.wiki
>
LG Electronics USA
>
PA72GJE User Manual
User Manual
Navigation menu
Upload a User Manual
Namespaces
Wiki Guide
HTML
PDF
Info
Views
User Manual
Discussion / Help
Navigation


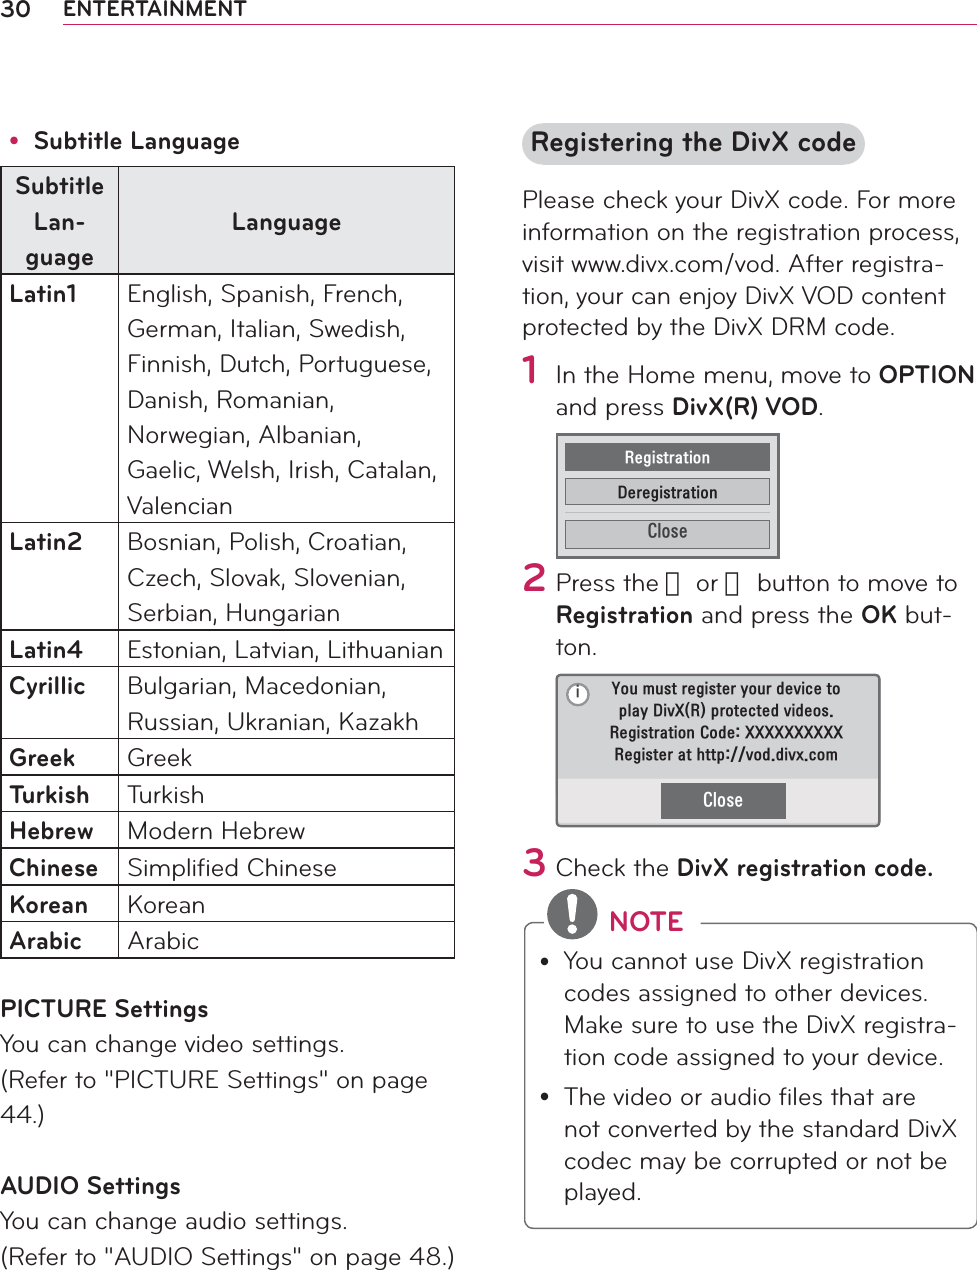
![31ENTERTAINMENTTo deregister the DivX codeUse the DivX deregistration code to deactivate the DivX DRM function.1 In the Home menu, move to OPTION and press DivX(R) VOD.2 Use the or button to go to Deregistration and press the OK button.<HV 1R<RXUGHYLFHLVDOUHDG\UHJLVWHUHG$UH\RXVXUH\RXZLVKWRGHUHJLVWHU" ➡<HV 1R'HUHJLVWUDWLRQFRGH'HUHJLVWHUDWKWWSYRGGLY[FRP&RQWLQXHZLWKUHJLVWUDWLRQ"L3 Select Yes . NOTEy What is DRM [Digital Rights Management]? This is a technology and service that prevents the illegal use of digital contents to protect the benefits and rights of the copyright owner. Files can be played after the license is veri-fied through an online method, etc.](https://usermanual.wiki/LG-Electronics-USA/PA72GJE/User-Guide-1763006-Page-32.png)