LG Electronics USA RD6250 Single-Band CDMA Phone with Bluetooth User Manual
LG Electronics USA Single-Band CDMA Phone with Bluetooth Users Manual
Users Manual
User Manual
LG-RD6250
Ver. 0.1
2006. 7. 27
LIMITED WARRANTY STATEMENT
1. WHAT THIS WARRANTY COVERS:
LG offers you a limited warranty that the enclosed subscriber unit and its enclosed accessories will be
free from defects in material and workmanship, according to the following terms and conditions:
(1) The limited warranty for the product extends for ONE (1) year beginning on the data of purchase
of the product.
(2) The limited warranty extends on to the original purchaser of the product and is not assignable or
transferable to any subsequent purchaser/end user.
(3) This warranty is good only to the original purchaser of the product during the warranty period as
long as it is in the U.S., including Alaska, Hawaii, U.S. Territories and Canada.
(4) The external housing and cosmetic parts shall not be covered under these limited warranty terms.
(5) Upon request from LG, the consumer must provide information to reasonably prove the date of
purchase.
(6) The customer shall bear the cost of shipping the product to the Customer Service Department of
LG. LG shall bear the cost of shipping the product back to the consumer after the completion of
service under this limited warranty.
2. WHAT THIS WARRANTY DOES NOT COVER:
(1) Defects or damages resulting from use of the product in other than its normal and customary
manner.
(2) Defects or damages from abnormal use, abnormal conditions, improper storage, exposure to
moisture or dampness, unauthorized modifications, unauthorized connections, unauthorized repair,
misuse, neglect, abuse, accident, alteration, improper installation, or other acts which are not the
fault of LG, including damage caused by shipping blown fuses spills of food or liquid.
(3) Breakage or damage to antennas unless caused directly by defects in material or workmanship.
(4) That the Customer Service Department at LG was net notified by consumer of the alleged defect
or malfunction of the product during the applicable limited warranty period.
(5) Products which have had the serial number removed or made illegible.
(6) The limited warranty is in lieu of all other warranties, express or implied either in fact or by
operations law, statutory or otherwise, including, but limited to any implied warranty of
marketability or fitness for a particular use.
(7) Damage resulting from use of non-LG approved accessories.
(8) All plastic surfaces and all other externally exposed parts that are scratched or damaged due to
normal customer use.
(9) Products operated outside published maximum ratings.
3
(10) Products used or obtained in a rental program.
(11) Consumables (such as fuses).
3. STATE LAW RIGHTS:
No other express warranty is applicable to this product. THE DURATION OF ANY IMPLIED
WARRANTIES, INCLUDING THE IMPLIED WARRANTY OF MARKETABILITY, IS LIMITED
TO THE DURATION OF THE EXPRESS WARRANTY HEREIN. LG INFOCOMM INC. SHALL
NOT BE LIABLE FOR THE LOSS OF THE USE OF THE PRODUCT, INCONVENIENCE, LOSS
OR ANY OTHER DAMAGES, DIRECT OR CONSEQUENTIAL, RISING OUT OF THE USE OF,
OR INABILITY TO USE, THIS PRODUCT OR FOR ANY BREACH OF ANY EXPRESS OR
IMPLIED WARRANTY, INCLUDING THE IMPLIED WARRANTY OF MARKETABILITY
APPLICABLE TO THIS PRODUCT. Some states do not allow the exclusive of imitation of incidental
or consequential damages or limitations on how long an implied warranty lasts; so these limitations or
exclusions may not apply to you. This warranty gives you specific legal rights and you may also have
other rights which vary from state to state.
4. HOW TO GET WARRANTY SERVICE:
To obtain warranty service, please call the following web address:
www.lgeservice.com
Contents
Limited Warranty Statement
Important Information
Check Accessories
Before You Start
Safety Instructions
FCC RF EXPOSURE INFORMATION
Chapter 1. Getting Started
Cautions
Phone Overview
On screen Icons
Chapter 2. Basic Functions
Turning the Phone On and Off
Making a Call
Correcting Dialing Mistakes
Receiving Calls
Emergency Dialing
Speed Dialing
Phone Book Features
Chapter 3. Menu Features
General Guidelines to MENU Access and Settings
Names
Messages
Call History
Display
R-World
Profiles
Organizer & Tools
Multimedia
Settings
Chapter 4. Names Features
Names
Chapter 5. Message Features
Write
Inbox
1234 Services
Outbox
Voice Mail
Archive In UIM
Drafts
Templates
Erase Msgs
Msg Settings
Chapter 6. Functions used during a call
Send my number
Search contact
Add new contact
Search scheduler
Mute
DTMF
Voice Privacy
Chapter 7. Accessories
Chapter8. Safety Guideline
Consumer Information on SAR (Specific Absorption Rate)
Important Information
This user’s guide provides important information on the use and operation of the phone. Please
read all the information carefully prior to using the phone for the best performance and to
prevent any anticipated damage to or misuse of the phone. Any unapproved change or
modification will void your warranty.
Check Accessories
Your mobile phone comes with standard accessories of a one-slot desktop charger and a
rechargeable battery. Please make sure that those accessories are all included.
Before You Start
8
Safety Instructions
WARNING! To reduce the electric shock, do not expose your phone in high humidity areas,
such as the bathroom, swimming pool.
IMPORTANT! Please read the SAFETY AND GENERAL INFORMATION prior to
using your phone.
FCC RF Exposure Information
WARNING! Read this information before operating the phone
In August 1996 the Federal Communications (FCC) of the United States with its action in Report
and Order FCC 96-326 adopted an updated safety standard for human exposure to radio
frequency (RF) electromagnetic energy emitted by FCC regulated transmitters. Those
guidelines are consistent with the safety standard previously set by both U.S. and international
standards bodies. The design of this phone complies with the FCC guidelines and these
international standards.
CAUTION
Use only the supplied or and approved antenna. Use of unauthorized antennas, modifications
could impair call quality, damage the phone or result in violation of FCC regulations. Do not use
the phone with the damaged antenna. If the damaged antenna comes into contact with the skin,
a minor burn may result. Please contact your local dealer for replacement of the antenna.
Body-worn Operation
This device was tested for typical body-worn operations with the back of the phone kept 0.6
inches (1.5cm ) from the body. To comply with FCC RF exposure requirements, a minimum
separation distance of 0.6 inches (1.5cm ) must be maintained between the user’s body and the
back of the phone, including the antenna, whether extended or retracted. Third-party belt-clips,
holsters and similar accessories containing metallic components should not be used. Body-worn
accessories that cannot maintain 0.6 inch (1.5cm) separation distance between the user’s body
and the back of the phone, and have not been tested for typical body-worn operations may not
comply with FCC RF exposure limits and should be avoided.
Vehicle Mounted External Antenna (optional, if available.)
A minimum separation distance of 7.9 inches (20cm ) must be maintained between the
user/bystander and the vehicle mounted external antenna to satisfy FCC RF exposure
requirements.
For more information about RF exposure, please visit the FCC website

FCC Part 15 Class B Compliance
This device and its accessories comply with part 15 of FCC rules. Operation is subject to the
following two conditions: (1) This device and its accessories may not cause harmful interference,
and (2) this device and its accessories must accept any interference received, including
interference that cause undesired operation.
Caution For Battery Use
Do not disassemble.
Do not short-circuit.
Do not exposure to high temperature : 60 (140 )
Do not incinerate.
Caution For Adapter (Charger) Use
Using the wrong battery charger could cause damage to your phone and void your
warranty may burst causing injury to person and damage.
The charger or adapter is intended for indoor use only.
The charger or adapter is intended for indoor use only.
Do not expose the battery charger or adapter to direct sunlight nor use it in any place of high
humidity, such as the bathroom.
Chapter 1. Getting Started
Cautions
z Using the phone in proximity to receiving equipment (i.e., TV or radio) may cause interference.
z Keep your phone in a safe place when not in use.
z Only use the batteries, antennas, and chargers provided by LG. Using the wrong accessories could
void your warranty.
z Only authorized personnel should service the phone and its accessories. Faulty installation or
service may result in accidents and consequently invalidate the warranty.
z Do not hold the antenna while the phone is in use.
z Do not use the phone in designated “no cellular phone use” areas.
z Do not expose the phone to high temperature or humidity.
z Avoid getting your phone wet. If the phone gets wet, turn the power off immediately and remove
the battery pack. If the phone is mal-functional, return it to the dealer for service.
z Avoid shock or impact on the phone.
Phone Overview
Function Key Descriptions
Lamp The light goes on when you use the power key to turn on the phone and when there are incoming calls
and messages.
LCD screen Displays messages & indicator icons.
END/PWR Used to turn power on/off. This key disconnects a call. Using this key, you can also exit out of a menu
back to the phone’s standby display without changing the setting.
SEND Allows user to place or answer calls.
Mouse Key
This mouse key allows quick access to text and voice mail notification messages. Profiles, R-World, and
RingTone menu.
And these keys are used to scroll through the memory locations and menu items.
Alphanumeric
Keypad These keys enable you to enter numbers and characters and choose menu items.
Soft Keys The current operation of a soft key is defined by the word at the bottom of the display.
Soft Keys 2 :
If you press this key once in a menu, you can go back one level and if you press and hold the key in a
menu, you can go back to the standby display.
OK Key This key enables you to choose one item in the menu list.
If you press this key in idle, mobile will show you the ‘My menu’ selection window.
Star/Pound Key - In the standby status, set the manner mode by pressing the [ * ]button. (for 2 seconds)
- In the standby status, set the lock function by pressing the [ # ]button. (for 2 seconds)
Clear Key This key enables you to move previous menu or delete on a character in editor
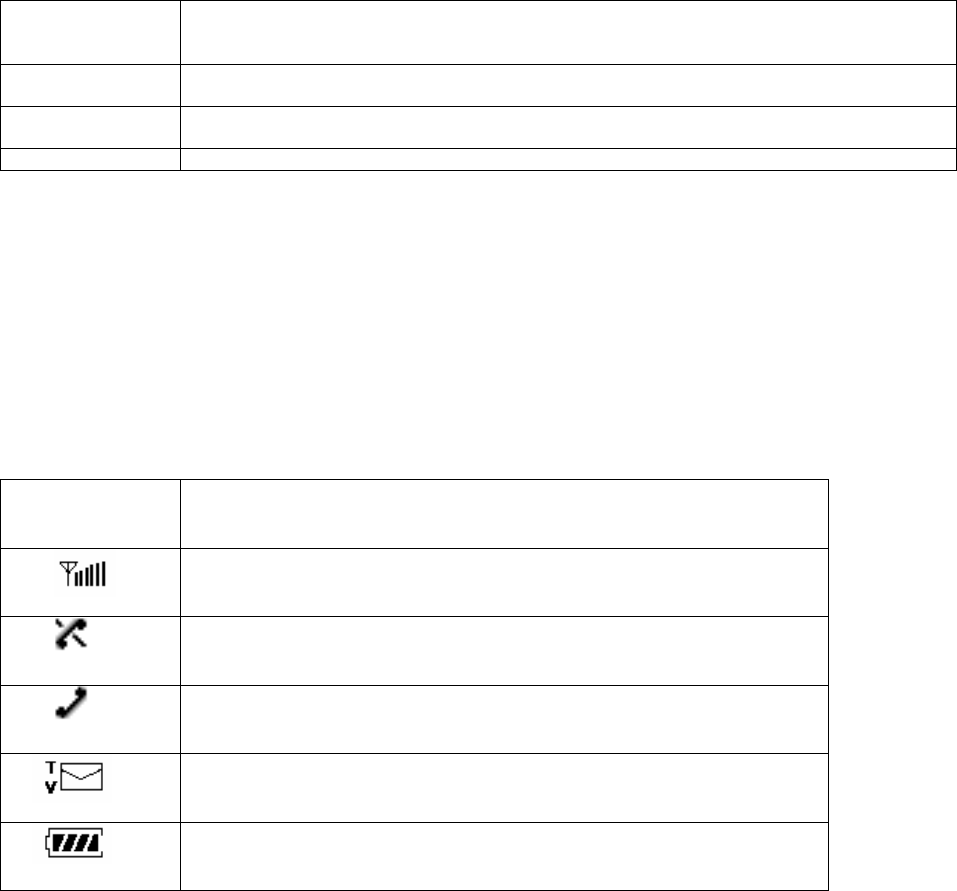
On screen Icons
The phone screen displays several onscreen icons and onscreen icons appears when the phone is power on.
Icons Descriptions
Displays the strength of the signal received by the phone and current signal strength is
indicated as the number of bars displayed on the screen.
No service
The phone is not receiving a system signal.
In use
A call is in progress.
No icon indicates the phone is in standby mode.
Indicates that a text message or voice mail has been received
Charge level
Indicates battery charge level.
Chapter 2. Basic Functions
Turning the Phone On and Off
Turning the Phone On
1. Install a charged battery pack or connect the phone to an external power source such as the cigarette
lighter adapter or car kit.
2. Press [END/PWR] for a few seconds until the red light on the top of the phone flashes.
z Fully extend the antenna for the best performance.
<Note> Like any other radio device, avoid any unnecessary contact with the antenna while your phone is on.
Turning the Phone Off
1. Press and hold until display screen will be turned off, and then release the key.
2. Protect the antenna by pushing it back into the phone, if extended.
Making a Call
When you make a call, follow these simple steps:
1. Make sure the phone is turned on.
z If not, press [END/PWR].
2. Enter the phone number with area code, if needed.
3. Press [SEND].
z If the phone is locked, enter the lock code.
z “Call Failed” indicates that the call did not go through.
4. Press [END/PWR] to disconnect the call.
Correcting Dialing Mistakes
If you make mistakes in dialing a number, press [CLR] key once to erase the last entered digit or hold down
[CLR] for at least two second to delete all digits, or simply press END Key to exit dialing state.
Receiving Calls
1. When the phone rings, press any key (except [END/PWR], [5][6][3][4]) to answer.
z If you press the key [END/PWR] once when you receive a call, you can hold the present call and
ring sound or vibration stops. If you press the [END/PWR] key twice, the present call is terminated.
2. Press [END/PWR] to disconnect the call.
In call waiting mode, the present call is on hold as you answer another incoming call.
This service is provided by your service provider.
When the call waiting function is activated, your phone will beep to let you know if you have an incoming
call. Your phone may also display the incoming caller’s identification.
Dialing a call from Phone Book
You can place a call from any memory location either by speed dialing or by pressing [SEND] while looking
up the memory location.
One-Touch Dialing : One-touch dialing is a convenient feature which enables you to dial frequently used
numbers in your speed-dial data by pressing a key .
z Entry 9 is designated to Emergency Call.
z For locations 1 to 8, you can use one-touch dialing (if enabled, see “One-Touch” on page 6.) by
pressing and holding down the key corresponding to the memory location.
OR
z Press digit, then press [SEND].
Two-Touch Dialing (Speed Dialing) : This dialing feature enables you to dial numbers in your phone book
through two keys (for locations 10 to 99).
1) Press the first digit.
2) Press and hold the key of the second digit.
OR
1) Press the first and second digits, then press [SEND].
Dialing from a Memory List
1) From a memory list, press the scroll keys to go to the memory location you want.
2) Press [SEND].
Dialing from a Memory Location.
On viewing and checking the memory location to call, press [SEND].
Chapter 3. Menu Features
General Guidelines to MENU Access and Settings
1. Press Soft Key 1 [Menu]. The animation of menu category will appear on the display screen.
2. Press Soft key 1 [Ok]. The menu items will appear on the display screen.
3. Press[v] to go through the list of menu features, or use the side keys.
4. Press the corresponding number to the menu item that you want to select. Then the sub-menu list will
appear on the screen.
5. Press the appropriate key to select the sub-menu you want to access.
6. Select preferred settings, using the [v] keys. Press CLR [Back] to go one step backward while
accessing menu or selecting settings.
7. Press Soft Key 1 [Ok] to save the settings or CLR [Back] to cancel without saving.
Names ([Menu]+[1])
see “Names Feature” on page 12.
Messages ([Menu]+[2])
see “Message Feature” on page 14.
Call History([Menu]+[3])
Allows you to view the 120 most recently dialed phone numbers. Once you exceed the 120-number storage
limit, the oldest call history record is overwritten. These calls are divided into 4 types of calls
Missed Calls([Menu]+[3]+ [1])
Allows you to view list of all missed calls and you may place a call by pressing [Send].
Received Calls([Menu]+[3]+ [2])
Allows you to view list of all incoming calls and you may place a call by pressing [Send].
Dialled Calls ([Menu]+[3]+ [3])
Allows you to view list of all outgoing calls you made and you may place a call by pressing the [Send].
In Call Memo ([Menu]+[3]+ [4])
Allows you to view memo saved in use In Call Meno
Call Duration ([Menu]+[3]+ [5])
Allows you to view total time of calls(last dialled call, all dialled calls and all calls) and allow you to
erase Call Duration informations (Reset Call Duration)
1. Last Dialled Call – Displays the time of last dialed call made.
2. All Dialled Calls - Displays the time of all dialed(outgoing) calls made.
3. All Calls - Displays the time of all calls made.
Erase History ([Menu]+[3]+ [6])
Allows you to erase call infomations(missed, received, dialed and erase all)
Display ([Menu]+[4])
Allows to control your handset’s display settings. There are Language, Service Area, Clock, Time & Date,
etc..
Language ( [Menu]+[4]+[1] ) You can select English or Hindi
Service Area( [Menu]+[4]+[2] ) N/A for CDG Test
Clock ( [Menu]+[4]+[3] ) You can determine that clock display or not in standby and time, date type if
clock display.
Time & Date( [Menu]+[4]+[4] ) You can select a display format of Time & Date
Wallpaper ( [Menu]+[4]+[5] ) You can set up the screen displayed on the LCD screen in the
standby mode.
Menu Style ( [Menu]+[4]+[6] )
Grid : LCD will display animation menu and you can select menu with [34] key.
List : LCD will display listed menu and you can select menu with [5] [6] or [v] key.
Color Scheme ( [Menu]+[4]+[7] ) You can change the color theme of handset.
Rhythmic Lighting ( [Menu]+[4]+[8] ) You can turn on or off the lighting
Backlight ( [Menu]+[4]+[9] )
Allows you to select how long or when the display screen and keypad are backlit. The backlight is turned off
10 seconds/20 seconds/30 seconds/1min after the last key is pushed.
. R World ( [Menu]+[5])
R-Menu ( [Menu]+[5]+[1] )
Movies N Shop( [Menu]+[5]+[2] )
Play N shop ( [Menu]+[5]+[3] )
Dial 1234( [Menu]+[5]+[4] )
Write MMS( [Menu]+[5]+[5] )
MMS Inbox( [Menu]+[5]+[6] )
Reset R-Menu ( [Menu]+[5]+[7] )
UIM toolkit ( [Menu]+[5]+[8] )
Games ( [Menu]+[5]+[9] )
Profiles ([Menu]+[6])
You can change the profile(sound) setting at this menu.
Vibrate Only ( [Menu]+[6]+[1] )
Silent ( [Menu]+[6]+[2] )
General ( [Menu]+[6]+[3] )
Outdoor ( [Menu]+[6]+[4] )
Headset ( [Menu]+[6]+[5] )
Carkit ( [Menu]+[6]+[6] )
Organizer & Tools ([Menu]+[7])
There are Organizer utils and tools.
Scheduler ( [Menu]+[7]+[1] )
Memo ( [Menu]+[7]+[2] )
Reserved Call ( [Menu]+[7]+[3] )
Alarm ( [Menu]+[7]+[4] )
Voice Tools ( [Menu]+[7]+[5] )There are Voice Recoder, Answering machine, Etc
Bluetooth ( [Menu]+[7]+[6] )
Stopwatch ( [Menu]+[7]+[7] )
Calculator ( [Menu]+[7]+[8] )
Unit Converter ( [Menu]+[7]+[9] )
World Clock ( [Menu]+[7]+[0] )
Multimedia ([Menu]+[8])
There are multimedia utils.
Camera ( [Menu]+[8]+[1] ) You can take pictures or videos, and also see them.
FM Radio ( [Menu]+[8]+[2] ) You can enjoy the FM Radio
MP3 ( [Menu]+[8]+[3] ) You can enjoy MP3 Player
My Stuff ( [Menu]+[8]+[4] ) You can manage all contents in your handset at here.
Settings ([Menu]+[9])
My Menu ([Menu]+[9]+ [1])
Call Settings ([Menu]+[9]+ [2])
Call Forward ([Menu]+[9]+ [2]+[1])
LCD will display follow sub menu list
1 Immediate : Enable / Disable / Edit Feature Code(To Enable / To Disable)
2 When busy : Enable / Disable / Edit Feature Code(To Enable / To Disable)
3 No Reply/Not Rechable : Enable / Disable / Edit Feature Code(To Enable / To
Disable)
4 Disable All: Yes / No / Edit Feature Code(To Disable)
Call Waiting ([Menu]+[9]+ [2]+[2])
Set Call Waiting options Enable / Disable / Edit Feature Code(To Enable / To Disable)
Any Key Answer ([Menu]+[9]+ [2]+[3])
If Incomming call, enabled to call pressing any key or press send key.
Auto Redial ([Menu]+[9]+ [2]+[4])
Voice Privacy ([Menu]+[9]+ [2]+[5])
Set the voice privacy feature for CDMA calls as “Standard” or “Enhanced”: CDMA offers inherent voice
privacy. Check with your service provider for availability of the enhanced voice privacy mode
Clear Voice ([Menu]+[9]+ [2]+[6])
Call Timer ([Menu]+[9]+ [2]+[7])
Call Connect Alert ([Menu]+[9]+ [2]+[8])
When this menu selected option ON and some times later phone connected call, that time phone
beep the alert sound.
Edit SMS on Call Reject ([Menu]+[9]+ [2]+[9])
Int’l Call Prefix ([Menu]+[9]+ [2]+[0])
Phone Settings ([Menu]+[9]+ [3])
Key Guard ([Menu]+[9]+ [3]+[1]) Enable/Disable
Airplane Mode ([Menu]+[9]+ [3]+[2]) On/Off
Data Settings ([Menu]+[9]+ [3]+[3])
Data In/Data Baud
Service Alert ([Menu]+[9]+ [3]+[4]) On/Off
Version ([Menu]+[9]+ [3]+[5])
Security ( [Menu]+ [9]+[4] )
1. PIN code request ( [Menu]+[9]+[4]+[1] )
2. Lock Mode ( [Menu]+[9]+[4]+[2] )
Helps you to protect your phone from unauthorized use and once the phone is locked, the phone is
restricted from making calls until the lock code is entered.
However you can still receive phone calls and make emergency calls while your phone is locked.
“Never” means that the phone is never locked (Lock mode can be used). When locked, you can only
make emergency calls or receive incoming calls. “On power up” means that locked the phone when the
phone is turned on. “Always” means that the phone is always locked.
3. Emergency numbers ( [Menu]+[9]+[4]+[3] )
To enter 3 emergency numbers ([Edit] → enter → number → [Save] → [Left/Right] → ). You can call
these numbers and 911 even when the phone is locked or restricted.
4. Change lock code ( [Menu]+[9]+[4]+[4] )
New Lock Code allows you to enter a new four-digit lock code number. For confirmation, it will ask
you to enter the new lock code twice. This is the same number as the pin code
5. Clear Memory ( [Menu]+[8]+[4]+[5] )
Reset default or clear memory or names
6. Reset Default ( [Menu]+[8]+[4]+[6] )
Reset default or clear memory or names
Chapter 4. Names Features
Names ([Menu]+[1])
Add name ([Menu]+[1]+[1])
1. Press Soft Key [Menu]
2. Press [1]
3. Press [1]
4. Select number’s destination (UIM or Phone)
5. Enter name
6. Enter the phone number you want to add.
7. Press okey Key [Save]
Find ([Menu]+[1]+[2])
1. Press Soft Key [Menu]
2. Press [1]
3. Press [2]
4. Enter the name you want to find.
5. You can go another find menu using with [v]]
Groups ([Menu]+[1]+[3])
In this menu, you can view group members, and set ring tone, edit group’s title.
1. Press Soft Key [Menu]
2. Press [1]
3. Press [3]
4. Select group you wand with [v] key.
5. Press Soft 2 key to edit.
6. You can change gourp name
7. or Press Soft 1 Key to options
8. You can view all members of selected group or set ringtone and message tone
Speed dial ([Menu]+[1]+[4])
1. Press Soft Key 1 [Menu]
2. Press [1]
3. Press [4]
4. LCD will display matrix, and you can select a address with [Navigation] key.
5. If a address you selected is empty, press Soft Key 1 [Assign]
6. In Assign menu, you can select a name saved in phonebook data.
7. In Replace menu, you can replace another name saved in phonebook data.
8. In Remove menu, you can erase name selected.
Storage Control ([Menu]+[1]+ [5])
COPY phonebook data phone to UIM or UIM to phone.
Erase Names ([Menu]+[1]+ [6])
Delete the contacts.
My Profile ([Menu]+[1]+ [7]) N/A for CDG test
Web Dir ([Menu]+[1]+ [8]) N/A for CDG test
Memory Info ([Menu]+[1]+ [9])
Display the capacity about phonebook ( phone and UIM.)
Chapter 5. Message Features
Text message, page and voice mailbox become available as soon as the power is on. You can access the
above types of messages pressing the message key ([5]) long. In addition, you can make a call to the call
back number by pressing the [Send] during a message check.
The phone can store up to 201 messages (Voice message : 1, Text messages 200) with 140 characters per
message. However, you should check whether your carrier provides the above features.
The information that is stored on the message is determined by phone mode and service capability. You can
check types of messages by pressing the message key ([5]).
Massage Service
This service supports reception of the text message, alerting, and the voice mailbox. It is possible to access
the above functions with the text message key .
It is possible to store up to total 201(new+old+voice) messages. It is recommended to check the number of
character receivable because the capacity depends on the system service provider.
<Type of Menu>
- Write message: Menu to send message.
- Inbox : Menu to check a new incoming, stored text message
- 1234 Services : Exciting SMS-based infotainment services.
- Outbox : Menu to check the message user have sent and was saved.
- Voice Mail : Menu to check the number of voice messages in the voice mailbox
- Archive in UIM : Saved message in Inbox
- Drafts : Saved message in Write message
- Templates : Predefined Messages by user.
- Msg Groups : Menu to compose some groups, easy to send msg to people.
- Erase Msgs : Menu to erase all the stored messages
- Msg Settings : Menu to set the SMS priority or Delivery ack and so on.
- Move the cursor with the upside and downside keys [v], and press Okey Key [Select] for the menu
requested..
1. Write Message ( [5]+[1])
A. Press [ok] twice
B. Enter Message and press OK
C. Enter Phone Number. If you want to send to number saved in book, press[ 4 Find name of
Options]
2. Inbox ([5]+[2])
A. Press [ok] twice
B. Press [ok] : you can view the received message
C. You can choose below function using soft 1 key [option]
• Erase : Delete a received msg
• Forward : Forward received msg
• Move to archive : Move received msg to UIM
• Save Address : Save the number to the phonebook.
• Reserved Call : N/A for CDG test
• Reply w Copy : N/A for CDG test
• Add to template
3. 1234 Services ([5]+[3])
1. News
2. Cricket
3. Joke of the Day
4. Thought of the Day
5. Contest
6. Beauty Tips
7. Health
8. Horoscope
9. Bill Info
10. Unbilled Info
11. Help
4. Outbox ([5]+[4])
A . Press [ok] twice
B . select Sent or Unsent
C Press [view] : you can view the outbox message
D You can choose below function using soft 1 key [option]
• Erase : Delete sent/unsent msg
• Forward : Forward sent/unsent msg
• To archive
5. Voice Mail ([5]+[5])
1) Press [ok]
6. Archive in UIM ([5]+[6])
A Press [ok]
B Press [view] : you can view the saved message in UIM
C You can choose below function using soft 1 key [option]
• Erase : Delete saved msg
• Forward : Forward saved msg
• Reply w copy : N/A for CDG test
• To Inbox/To Outbox
• Save Address
7. Draft ([5]+[7])
A Press [ok]
B Press [view] : you can view the draft message
C You can choose below function using soft 1 key [option]
• Send : Send draft msg
• Template : Go to template to select a string
• Save : Save draft msg
• Erase : Delete draft msg
• Add Signature : Append your signature end of the draft msg
• Insert number : Insert a phone number what you select from phonebook data
8. Templates ([5]+[9])
1) Press [OK]
2) Press [Send]
3) Add string
4) From this state the same with Write Message
9. Msg Groups ([5]+[9])
You can compose some Msg Groups
10. Erase Message ([5]+[0])
1) Press [ok] twice
2) Choose the deleting type ( all in box, all outbox, all archive load )
3) Press [ok]
11.Msg Settings ([5]+[*])
1) Press [ok] twice
2) Choose menu item, Press [Select]
• Priority : You can select Priority (Normal/Hurry/Urgent)
• Delivery Ack : You can select Delivery ack (Enable/Disable)
• Deferred Delivery : You can select Deferred delievery (Immediate, After 30 mins etc)
• Validity Peroid : You can select Validity Period (Default, 1 Hour, 2 Hours Etc)
• Save Sent Msg : You can select Save Sent Msg(On/ Off)
==========================================
<SMS SERVICE PROGRAM>
####->[2. Field Menu]->[3. SMS MO]
Select <SMS MO >
1. SO : Select 8K or 13K
2. L3ACK : Select ON/OFF
Chapter 6. Functions used during a call
In Call Memo (During a call : [Menu]+[1] )
Write some memo in call
Mute / Unmute (During a call : [Menu]+[2] )
Sometimes it is necessary to mute a call so that caller does not hear you or certain background noise.
Voice Privacy On / Off (During a call : [Menu]+[3] )
Set the voice privacy feature for CDMA calls as “Enhanced” or “Standard” :
CDMA offers inherent voice privacy. Check with your service provider for availability of the enhanced
voice privacy mode.
Send My Number (During a call : [Menu]+[4] )
Short DTMF / Long DTMF (During a call : [Menu]+[5] )
Set short, long DTMF tone
Voice Memo (During a call : [Menu]+[6] )
Find (During a call : [Find:Soft 2 Key] )
Chapter 7. Accessories
There are a variety of accessories available for the phone. You can select these options according to your
personal communication requirements. Consult your local dealer for availability.
Travel Charger
This charger, model TC-10W, allows you to charge the battery pack. It supports standard U.S. 120Volt 60Hz
outlets. While an orange light indicates that it is charging, a green light indicates charging is complete. It
takes 5 hours to charge a completely discharged battery.
Battery (LGLi-AAEM)
Standard battery are available.
Desktop Charger
The desktop charger, model DC-41W, allows you to place the phone for charging the stand. It can charge a
completely discharged battery in 3 hours.
Cigar Lighter Charger
You can operate the phone and trickle charge the phone’s battery from your vehicle by using the cigarette
lighter charger, model CLC-11W. It takes 5 hours to charge a completely discharged battery.
Hands-Free Car Kit (Portable)
The hands-free car kit, model PHF-30W, enables you to attach the phone to the car providing you with
hands-free operation. It will also charge a completely discharged battery in 5 hours.
Hands-Free Car kit(Install)
The installed hands-free car kit model IHF-51W is permanently installed in your car, and provides you with
hands-free operation. It will also charge a completely discharged battery is shows.
Data Cable Kit
Connects your phone to your PC.(Model KW-a)
Headset
Connects to your phone, allowing hands free operation. Includes earpiece, microphone and mute key.
(Model Headset 1000)
Hand strap AC Adaptor
Safety Guideline
Consumer Information on SAR (Specific Absorption Rate)
THIS MODEL PHONE MEETS THE GOVERNMENT’S REQUIREMENTS FOR EXPOSURE
TO RADIO WAVES.
Your wireless phone is a radio transmitter and receiver. It is designed and manufactured not to exceed
the emission limits for exposure to radiofrequency (RF) energy set by the Federal Communications
‘Commission of the U.S. Government. These limits are part of comprehensive guidelines and establish
permitted levels of RF energy for the general population. The guidelines are based on standards that were
developed by independent scientific organizations through periodic and thorough evaluation of scientific
studies. The standards include a substantial safety margin designed to assure the safety of all persons,
regardless of age and health.
The exposure standard for wireless mobile phones employs a unit of measurement known as the
Specific Absorption Rate, or SAR. The SAR limit set by the FCC is 1.6W/kg. * Tests for SAR are
conducted using standard operating positions specified by the FCC with the phone transmitting at its
highest certified power level, the actual SAR level of the phone while operating can be well below the
maximum value. This is because the phone is designed to operate at multiple power levels so as to use
only the power required to reach the network. In general, the closer you are to a wireless base station
antenna, the lower the power output.
Before a phone model is available for sale to the public, it must be tested and certified to the FCC that
ist does not exceed the limit established by the government-adopted requirement for safe exposure. The
tests are performed in positions and locations (e.g., at the ear and worn on the body)as required by the
FCC for each model. The highest SAR value for this model phone when tested for use at the ear is
1.31W/kg and when worn on the body, as described in this user guide, is 1.01W/kg, (Body-worn
measurements differ among phone models, depending upon available accessories and FCC requirements).
[Labeling Committee note : if applicable, if body-worn SARs are required]. While there may be
differences between the SAR levels of various phones and at various positions, they all meet the
government requirement for safe exposure.
The FCC has granted an Equipment Authorization for this model phone with all reported SAR levels
evaluated as in compliance with the FCC RF emission guidelines. SAR information on this model phone
is on file with the FCC and can be found under the Display Gant section of http://www.fcc.gov/oet/fccid
after searching on FCC ID BEJRD6250.
42
Additional information about Specific Absorption Rates (SAR) can be found on the Cellular
Telecommunications Industry Association (CTIA) web-site at http://www.wow-com.com.
___________________________________________________________________________________
* In the United States and Canada, the SAR limit for mobile phones used by the public is 1.6 watts/kg
(W/kg) averaged over one gram of tissue. The standard incorporates a substantial margin of safety to give
additional protection for the public and to account for any variations in measurements.