LG Electronics USA S120ZKA Microwave Oven User Manual
LG Electronics USA Microwave Oven Users Manual
UserManual.wiki
>
LG Electronics USA
>
S120ZKA User Manual
Users Manual
Navigation menu
Upload a User Manual
Namespaces
Wiki Guide
HTML
PDF
Info
Views
User Manual
Discussion / Help
Navigation
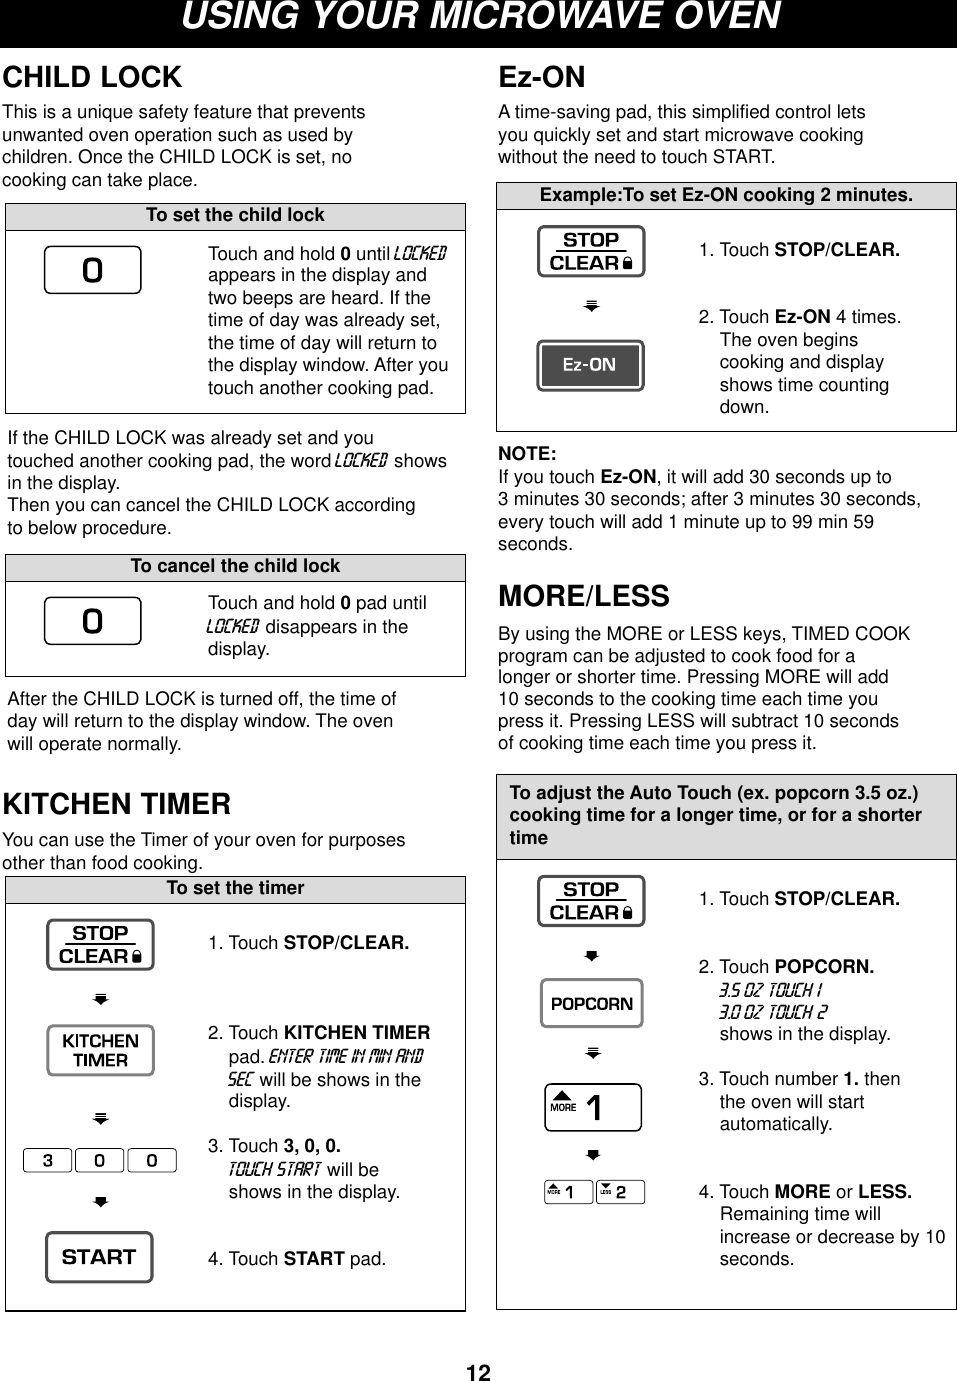
![11USING YOUR MICROWAVE OVENTIMED COOKINGThis function allows you to cook food for adesired time. And in order to give you the bestresults, there are 10 power level settings inaddition to HI-POWER because many food needslower cooking (at less than HI-POWER).When cooking is complete, four short tones willsound. The word end shows in the display window.Then the oven shuts itself off.NOTE:If you do not select the power level, the oven willoperate at power HIGH. To set HI-POWERcooking, skip steps 4 & 5 above.2 STAGE TIMED COOKINGFor Two Stage cooking, repeat timed cookingsteps 2 through 5 on the previous page beforetouching the START pad for additional Time andPower program you want to add.Auto Weight Defrost can be programmed beforethe first stage to defrost first and then cook.MICROWAVE POWER LEVELSYour microwave oven is equipped with ten powerlevels to give you maximum flexibility and controlover cooking. The table below will give you someidea of which foods are prepared at each of thevarious power levels.*The table below shows the power level settings foryour oven.MICROWAVE POWER LEVEL TABLEPowerLevel10(High)* Standing time.* Independent.*Boiling water.*Making candy.*Cooking poultry pieces, fish, & vegetables.*Cooking tender cuts of meat.*Whole poultry.9*Reheating rice, pasta, & vegetables.Use4*Thawing meat, poultry and seafood.8*Reheating prepared foods quickly.*Reheating sandwiches.5*Cooking ham, whole poultry, lamb.*Cooking rib roast, sirloin tip.3*Cooking less tender cuts of meat.*Cooking pork chops, roast.2*Taking chill out of fruit.*Softening butter.10*Keeping casseroles and main dishes warm.*Softening butter and cream cheese.7*Cooking egg, milk and cheese dishes.*Cooking cakes, breads.*Melting chocolate.6*Cooking veal.*Cooking whole fish.*Cooking puddings and custard.Example:To cook food on 80% Power (Power8) for 5 minutes 30 seconds1. Touch STOP/CLEAR.2. Touch TIME.enter cooking time showsin the display.3. Enter 5 minutes 30seconds by touching [5],[3], and [0]. touch startor power shows in thedisplay.4. Touch POWER.enter power level i to 1 0shows in the display.5. Touch 8. To select powerlevel 80%.p-80 touch start showsin the display.6. Touch START.](https://usermanual.wiki/LG-Electronics-USA/S120ZKA/User-Guide-529947-Page-11.png)
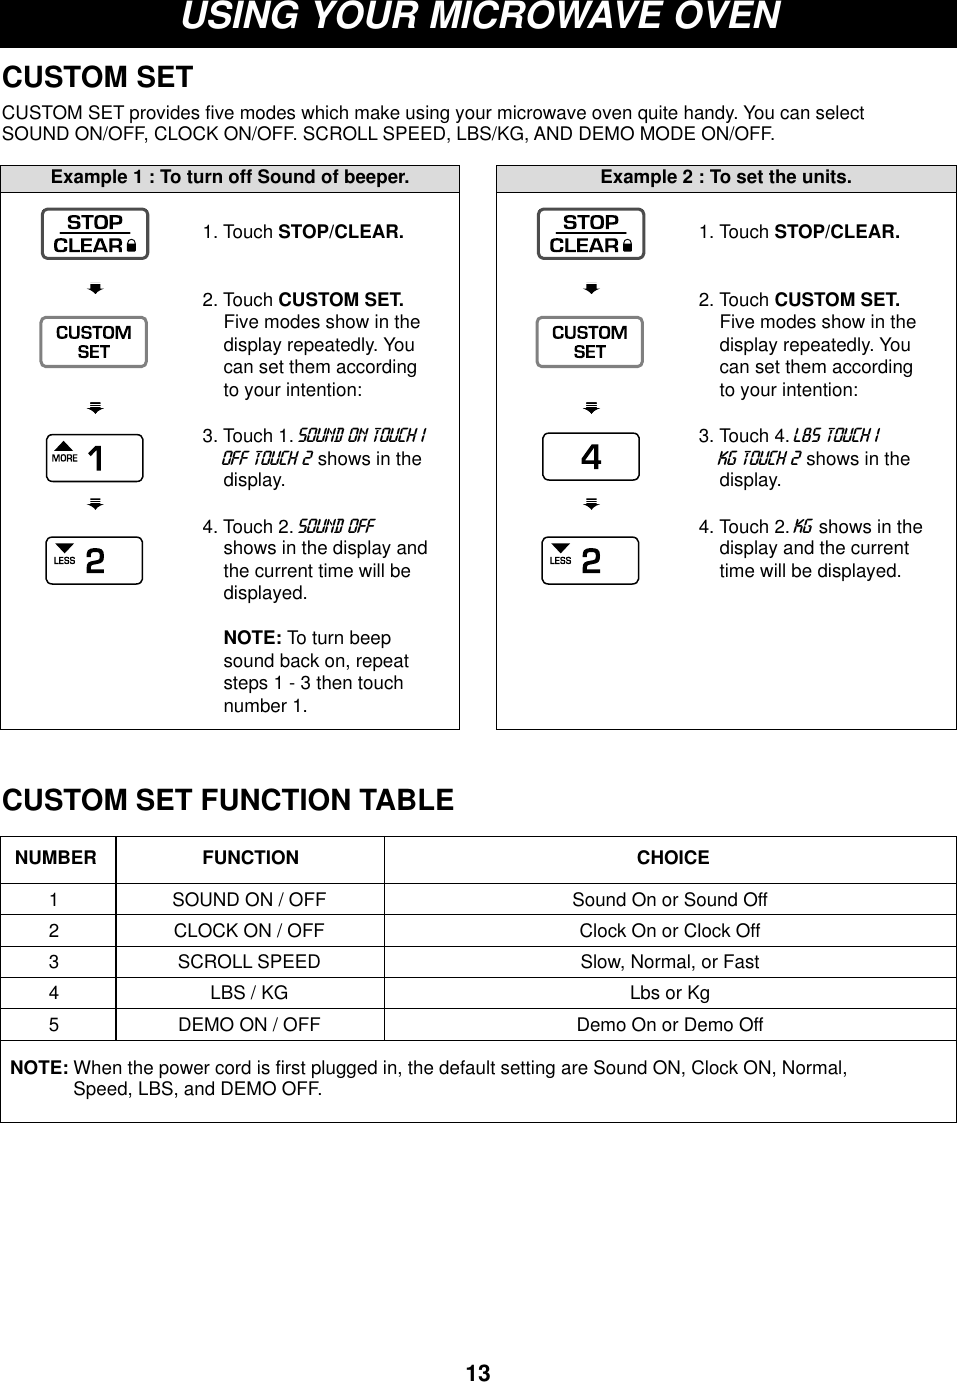

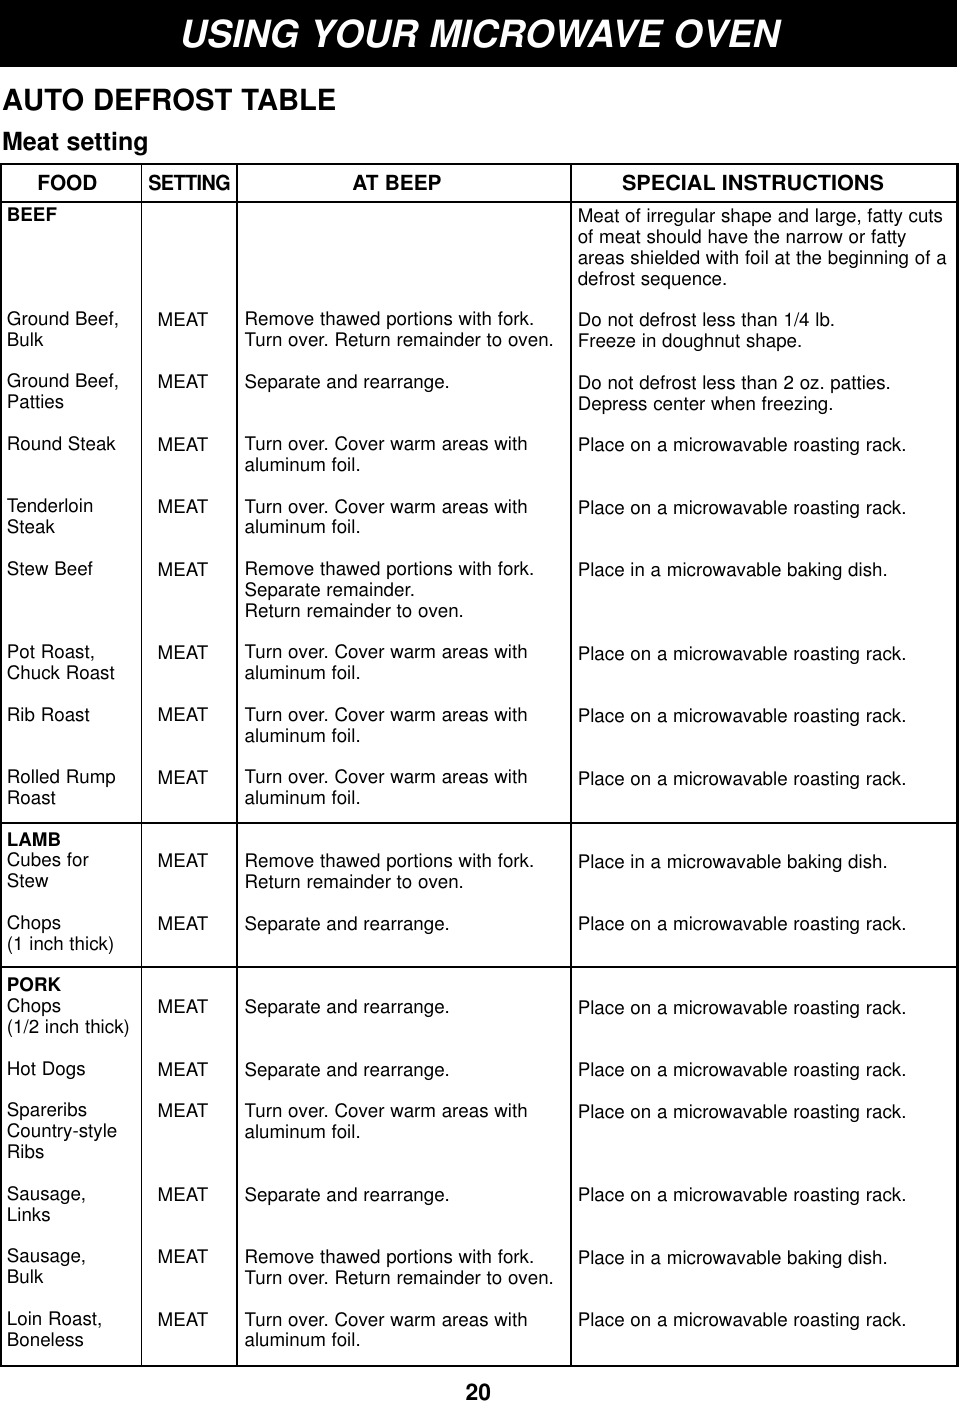
![19USING YOUR MICROWAVE OVENAUTO DEFROSTFour defrost sequences are preset in the oven.The defrost feature provides you with the bestdefrosting method for frozen foods. The cookingguide will show you which defrost sequence isrecommended for the food you are defrosting.With the Auto Defrost feature, the ovenautomatically sets the defrosting time and powerlevels for you.The oven automatically determines requireddefrosting times for each food item according tothe weight you enter.For added convenience, the Auto Defrostincludes a built-in beep mechanism that remindsyou to check, turn over, separate, or rearrange.1 MEAT2 POULTRY3 FISH 4 BREAD * Available weight is 0.1~1.01 lbs.(Bread weight is 0.1~6.0 lbs.)*For best results, remove fish, shellfish, meat, andpoultry from its original closed paper or plasticpackage (wrapper). Otherwise, the wrap will holdsteam and juice close to the foods,which can cause the outer surface of the foods tocook.*For best results, shape your ground meat into theform of a doughnut before freezing. When defrosting,scrape off thawed meat when the beep sounds andcontinue defrosting.*Place foods in a shallow container or on a microwaveroasting rack to catch drippings.*Food should still be somewhat icy in the center whenremoved from the oven.NOTE:When you touch the START pad, the display changesto defrost time count down. The oven will beep onceduring the DEFROST cycle. At beep, open the door and turn, separate, orrearrange the food.Remove any portions that have thawed.Return frozen portions to the oven and touchSTART to resume the defrost cycle.AUTO DEFROST SEQUENCE LISTSequence1MEAT2POULTRY3FISH4BREADBEEFGround beef, Round steak, Cubes forstew, Tenderloin steak, Pot roast, Rib roast, Rump roast, Chuck roast,Hamburger patty.LAMBChops (1 inch thick), Rolled roastPORKChops (1/2inch thick), Hot dogs,Spareribs, Country-style ribs. Rolled roast, Sausage.VEALCutlets (1 lbs,1/2inch thick)POULTRYWhole (under 4 lbs.), Cut-up, Breasts(boneless)CORNISH HENSWholeTURKEYBreast( under 6 lbs.)STEAKS/CHOPSRound beef steak, Tenderloin steak Lambchops (1 inch thick) Pork chops (1/2inch thick) Veal cutlets (1 lbs, 1/2inch thick)FISHFillets, Whole SteaksSHELLFISHCrab meat, Lobster tails, Shrimp,ScallopsBagelDinner RollMuffinHamburgerHot Dog BunSlices of BreadLoaf of BreadFoodExample: To defrost 1.2 lbs of meat1. Touch STOP/CLEAR.2. Touch AUTO DEFROST.def-1 touch 1 def-2 touch 2def-3 touch 3 def-4 touch 4will be shows in thedisplay.3. Touch 1. enter weightshows in the display.4. Enter the weight bytouching [1] and [2]. 1.2 lbs touch start showsin the display.5. Touch START pad.Defrosting starts.](https://usermanual.wiki/LG-Electronics-USA/S120ZKA/User-Guide-529947-Page-19.png)