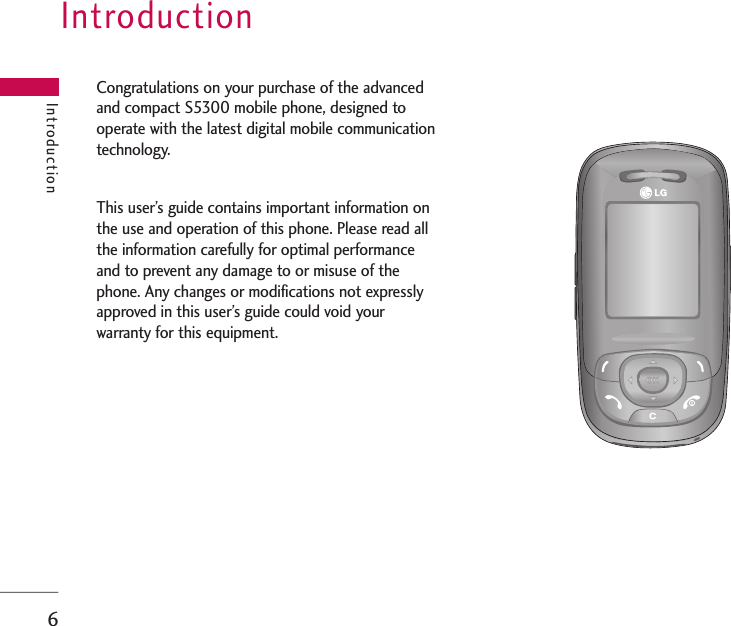
LG Electronics USA S5300 GSM 900/1800/1900 PCS phone with Bluetooth User Manual S5300 1203
LG Electronics USA GSM 900/1800/1900 PCS phone with Bluetooth S5300 1203
UserManual.wiki
>
LG Electronics USA
>
S5300 User Manual
Manual
Navigation menu
Upload a User Manual
Namespaces
Wiki Guide
HTML
PDF
Info
Views
User Manual
Discussion / Help
Navigation
![Guidelines for safe and efficient use8]The coating of the phone may be damaged ifcovered with wrap or vinyl wrapper.]Use dry cloth to clean the exterior of the unit. (Do not use solvent such as benzene, thinner oralcohol.)]Do not subject this unit to excessive smoke ordust.]Do not keep the phone next to credit cards ortransport tickets; it can affect the information onthe magnetic strips.]Do not tap the screen with a sharp object as itmay damage the phone.]Do not expose the phone to liquid or moisture.]Use the accessories like an earphone cautiously. Electronics devicesAll mobile phones may get interference, which couldaffect performance.]Do not use your mobile phone near medicalequipment without requesting permission. Avoidplacing the phone over pacemakers (i.e. in yourbreast pocket.)]Some hearing aids might be disturbed by mobilephones.]Minor interference may affect TVs, radios, PCs, etc.Road safetyCheck the laws and regulations on the use of mobilephones in the areas when you drive.]Do not use a hand-held phone while driving.]Give full attention to driving.]Use a hands-free kit, if available.]Pull off the road and park before making oranswering a call if driving conditions so require.Guidelines for safe and efficient use](https://usermanual.wiki/LG-Electronics-USA/S5300/User-Guide-625092-Page-8.png)
![9]RF energy may affect some electronic systems inyour motor vehicle such as car stereo or safetyequipment.]When your vehicle is equipped with an air bag, donot obstruct with installed or portable wirelessequipment. It can cause serious injury due toimproper performance.Blasting areaDo not use the phone where blasting is in progress.Observe restrictions, and follow any regulations orrules.Potentially explosive atmospheres]Do not use the phone at a refueling point. Don’tuse near fuel or chemicals.]Do not transport or store flammable gas, liquid, orexplosives in the compartment of your vehicle,which contains your mobile phone and accessories.In aircraftWireless devices can cause interference in aircraft.]Turn off your mobile phone before boarding anyaircraft.]Do not use it on the ground without crewpermission.ChildrenKeep the phone in a safe place out of small children’sreach. It includes small parts which if detached maycause a choking hazard.Emergency callsEmergency calls may not be available under allcellular networks. Therefore, you should neverdepend solely on the phone for emergency calls.Check with your local service provider.Guidelines for safe and efficient use](https://usermanual.wiki/LG-Electronics-USA/S5300/User-Guide-625092-Page-9.png)
![Guidelines for safe and efficient use10Battery information and care]You do not need to completely discharge thebattery before recharging. Unlike other batterysystems, there is no memory effect that couldcompromise the battery’s performance.]Use only LG batteries and chargers. LG chargers aredesigned to maximize the battery life.]Do not disassemble or short-circuit the battery pack.]Keep the metal contacts of the battery pack clean.]Replace the battery when it no longer providesacceptable performance. The battery pack may berecharged hundreds of times until it needsreplacing.]Recharge the battery if it has not been used for along time to maximize usability.]Do not expose the battery charger to directsunlight or use it in high humidity, such as thebathroom.]Do not leave the battery in hot or cold places, thismay deteriorate the battery performance.Guidelines for safe and efficient use](https://usermanual.wiki/LG-Electronics-USA/S5300/User-Guide-625092-Page-10.png)
![S5300 features11Parts of the phoneFront view1. Headset jack]Connect a headset here.2. Up/down side keys]Controls the volume of keypad tone in standbymode with the phone open.]Controls the earpiece volume during a phonecall.3. Front screenS5300 featuresUp/downside keysHeadset jackFront screen!@#](https://usermanual.wiki/LG-Electronics-USA/S5300/User-Guide-625092-Page-11.png)
![S5300 features12Right side view Rear viewS5300 featuresCamera/MP3 key]Open the slide to reveal thecamera lens. Press and hold downthis key to activate the cameramode. Also use this key to take ashot. Use the front screen as aviewfinder.Holes for a carrying strapSIM cardsocketBattery terminalsSIM card terminalsBattery latch]Press this button to remove the battery cover.Camera lens]Dirt on the camera lenscould affect the image quality.Battery packCharger connector/Cable connectorFlash](https://usermanual.wiki/LG-Electronics-USA/S5300/User-Guide-625092-Page-12.png)
![13Open viewS5300 features!@$Menu ContactsEarpieceLeft soft keySend keyAlphanumeric keys%MicrophoneMain screen^&Navigation keysRight soft key*(Clear keySpecial function keysEnd/Power key)Confirm key# Note]To prevent the difficulty in hearing of the other side, slide open while using phone.](https://usermanual.wiki/LG-Electronics-USA/S5300/User-Guide-625092-Page-13.png)
![1. Earpiece2. Left soft key: Performs the function indicated bythe text on the screen immediately above it.3. Send key: Dials a phone number and answersincoming calls. You can also quickly access thelatest incoming, outgoing and missed calls bypressing the key in standby mode.4. Alphanumeric keys: Enter numbers, letters andsome special characters.5. Microphone: Can be muted during a call forprivacy.6. Main screen: Displays phone status icons, menuitems, Web information, pictures and more in fullcolour.7. Navigation keys: Use to scroll through menus andmove the cursor.8. Right soft key: Performs the function indicated bythe text on the screen immediately above it.9. Confirm key: Selects menu options and confirmsactions.10. End/Power key: Used to end a call or reject acall and also to go back to standby mode. Holdthis key down to turn the phone on/off.11. Clear key: Deletes a character with each press.Hold the key down to clear all input. Use this keyto go back to a previous screen.12. Special function keys]: A lon A long press of this key enters theinternational call character “+”.]: While While keying in a phone number,a long press of this key enters a pause.S5300 features14S5300 features](https://usermanual.wiki/LG-Electronics-USA/S5300/User-Guide-625092-Page-14.png)
![Display InformationThe table below describes various display indicatorsor icons that appear on the phone’s display screen.On-Screen Icons15Icon DescriptionIndicates the strength of thenetwork signal. *Indicates a call is in progress.Indicates that you are roaming onanother network.S5300 featuresIcon DescriptionIndicates that GPRS service isavailable.Indicates the alarm has been setand is on.Indicates the status of the batterycharge.Indicates the receipt of a message.Indicates the receipt of a voicemessage.Indicates that the vibration ringerhas been set.Indicates the Loud profile isactivated.Indicates the Silent profile isactivated. Indicates the Headset profile isactivated.Indicates the General profile isactivated.Note]*The quality of the conversation may changedepending on network coverage. When the signalstrength is below 2 bars, you may experiencemuting, call drop and bad audio. Please take thenetwork bars as indicator for your calls. Whenthere are no bars, that means that there is nonetwork coverage: in this case, you won’t be ableto access the network for any service (call,messages and so on).](https://usermanual.wiki/LG-Electronics-USA/S5300/User-Guide-625092-Page-15.png)
![S5300 features16Icon DescriptionIndicates that you can use thepush message service.Indicates that the phone isaccessing the WAP.Indicates that you are using GPRS.Agenda event setCall divert service activeBluetooth enabledS5300 featuresNote]When the status of the battery indicates low,you may not use Camera or Multimediafunction.]While using Multimedia function, the status ofthe battery is changeable.](https://usermanual.wiki/LG-Electronics-USA/S5300/User-Guide-625092-Page-16.png)
![Getting started17Installing the SIM card andbatteryMake sure the power is off before you remove thebattery.1. Remove the battery.Press the button to release the battery, then slidethe battery down till it stops. Now lift the batteryfrom its compartment.2. Install the SIM card.Insert the SIM card into the holder. Slide the SIMcard into the SIM card holder. Make sure that theSIM card is inserted properly and that the goldcontact area on the card is facing downwards. Toremove the SIM card, press down lightly and pull itin the reverse direction.Note]Removing the battery from the phone when thepower is on may cause the phone tomalfunction.Getting startedTo insert the SIM card To remove the SIM cardCaution!]The metal contact of the SIM card can be easilydamaged by scratches. Pay special attention tothe SIM card while handling. Follow the instructions supplied with the SIMcard.](https://usermanual.wiki/LG-Electronics-USA/S5300/User-Guide-625092-Page-17.png)
![Getting started183. Install the battery.Charging the BatteryTo connect the mains adapter to the phone, youmust have installed the battery.1. With the arrow facing you as shown in the diagrampush the plug on the battery adapter into thesocket on the bottom of the phone until it clicksinto place. 2. Connect the other end of the mains adapter tothe mains socket. Only use the charger included inthe box.3. The moving bars of battery icon will stop aftercharging is complete.Caution!]Do not force the connector as this may damagethe phone and/or the charger.]If you use the battery pack charger out of yourown country, use an attachment plug adapterfor the proper configuration.]Do not remove your battery or the SIM cardwhile charging.Getting started](https://usermanual.wiki/LG-Electronics-USA/S5300/User-Guide-625092-Page-18.png)
![19Disconnecting the adapterDisconnect the travel adapter from the phone bypressing its side buttons as shown in the diagram.1. When charging is finished, the moving bars of thebattery icon stop and ‘Full’ is displayed on thescreen.2. Unplug the adapter from the power outlet.Disconnect the adapter from the phone bypressing the grey tabs on both sides of theconnector and pull the connector out.Warning!]Unplug the power cord and charger duringlightning storms to avoid electric shock or fire.]Make sure that no sharp-edged items such asanimal teeth or nails come into contact with thebattery. There is a risk of this causing a fire.]Do not place or answer calls while charging thephone as it may short-circuit the phone and/orcause electric shock or fire.Note] Ensure the battery is fully charged before usingthe phone for the first time.] Do not remove the battery or SIM card whilecharging.] In the case the battery is not properly charged,please turn the phone off and on using thepower key. Then detach and reattach thebattery, and recharge the phone.Getting started](https://usermanual.wiki/LG-Electronics-USA/S5300/User-Guide-625092-Page-19.png)
![Getting started20Turning your phone on and offTurning your phone ON1. Install a battery to the handset and connect thephone to an external power source such as thetravel adapter, cigarette lighter adapter or hands-free car kit. Or install a charged battery pack tothe handset.2. Press and hold for a few seconds until theLCD screen is turned on. 3. Depending on the status of the PIN code requestsetting you may need to enter your PIN code. Turning your phone OFF1. Press and hold for a few seconds until theLCD screen is turned off.Access codesYou can use the access codes described in thissection to avoid unauthorised use of your phone.The access codes (except PUK and PUK2 codes) canbe changed by using the Change codes feature[Menu 7-4-6]. PIN code (4 to 8 digits)The PIN (Personal Identification Number) codeprotects your SIM card against unauthorised use.The PIN code is usually supplied with the SIM card.When the PIN code request is set to Enable, yourphone will request the PIN code every time thephone is switched on. When the PIN code request isset to Disable, your phone connects to the networkdirectly without the PIN code.PIN2 code (4 to 8 digits)The PIN2 code, supplied with some SIM cards, isrequired to access functions such as Advice of CallCharge and Fixed dial number. These functions areonly available if supported by your SIM card. Checkwith your network operator for further information.Getting started](https://usermanual.wiki/LG-Electronics-USA/S5300/User-Guide-625092-Page-20.png)
![General Functions22Making and answering callsMaking a call1. Make sure your phone is switched on.2. Enter a phone number, including the area code.]Press and hold the clear key ( ) to erasethe entire number.3. Press the send key ( ) to call the number.4. To end the call, press the end key ( ) or theright soft key.Making a call from the call history list1. In standby mode, press the send key ( ), andthe latest incoming, outgoing andmissed phone numbers will be displayed.2. Select the desired number by using the up/downnavigation keys.3. Press to call the number. Making an international call1. Press and hold the key for the internationalprefix. The ‘+’ character automatically selects theinternational access code.2. Enter the country code, area code, and the phonenumber.3. Press to call the number.Ending a callWhen you have finished your call, press the end() key.Making a call from the phonebookYou can save the names and phone numbers dialledregularly in Contacts. You can save them to the SIMcard and/or phone memory. You can dial a numberby simply looking up the desired name in thephonebook and pressing the ( ) key.General Functions](https://usermanual.wiki/LG-Electronics-USA/S5300/User-Guide-625092-Page-22.png)
![23Adjusting the VolumeIf you want to adjust the earpiece volume during acall, use the side keys ( ) . Press the up side key toincrease and down side key to decrease the volume.Answering a CallWhen you receive a call, the phone rings and theflashing phone icon appears on the screen. If thecaller can be identified, the caller’s phone number (or name/photo if saved in the phonebook) isdisplayed.1. To answer an incoming call, open the phone.(When Slide open has been set as the answermode. [Menu 7-3-2].)]You can answer a call while using the addressbook or other menu features.2. To end the call, close the phone or press thekey.Using the SpeakerphoneYou can use the integrated Speakerphone during acall by pressing the key. The loudspeaker isautomatically deactivated when you end the call.Manner mode (Quick)You can activate the manner mode by pressing andholding down the key after opening the phone.Signal strengthYou can check the strength of your signal by thesignal indicator ( ) on the LCD screen of yourphone. Signal strength can vary, particularly insidebuildings. Moving near to a window may improvereception.Note]In standby mode with the phone open/closed,pressing the side keys adjusts the key tonevolume.Note]If Press any key has been set as the answermode any key press will answer a call except forthe or the right soft key.General FunctionsWarning!]Due to higher volume levels, don't place thephone near your ear while the speakerphone isenabled.](https://usermanual.wiki/LG-Electronics-USA/S5300/User-Guide-625092-Page-23.png)
![25You can also add new words in the dictionary. As newwords are added, the word changes to reflect themost likely candidate from the dictionary. You canturn the T9 mode on or off, and change the T9language by holding down the ( ) key.1. When you are in the T9 predictive text inputmode, start entering a word by pressing keys to . Press one key per letter.]The word changes as letters are typed. Ignorewhat’s on the screen until the word is typedcompletely.]If the word is still incorrect after typingcompletely, press the down navigation key onceor more to cycle through the other wordoptions.Example: Press to typeGood.Press [down navigation key] to type Home.]If the desired word is missing from the wordchoice list, add it using the ABC mode.]You can select the language of the T9 mode.Press the left soft key [Option], then select T9languages. Select the desired language of T9mode. You can also turn off the T9 mode byselecting T9 off. The default setting on thephone is T9 enabled mode.2. Enter the whole word before editing or deletingany keystrokes. 3. Complete each word with a space by pressing thekey. To delete letters, press . Press andhold down to erase entire words.Using the ABC modeUse the to keys to enter your text.1. Press the key labelled with the required letter:]Once for the first letter.]Twice for the second letter.]And so on.Note]To exit from the text input mode without savingyour input, press . The phone goes backto standby mode.General Functions](https://usermanual.wiki/LG-Electronics-USA/S5300/User-Guide-625092-Page-25.png)
![262. To insert a space, press the key once. Todelete letters, press the key. Press and holddown the key to clear the whole display.Using the 123 (Number) modeThe 123 mode enables you to enter numbers in atext message (a telephone number, for example). Press the keys corresponding to the required digitsbefore manually switching back to the appropriate textentry mode. You can quickly switch from letters tonumbers by pressing and holding down the ( ) key.ContactsYou can store phone numbers and theircorresponding names in the memory of your SIMcard. In addition, you can store up to 1000 numbers andnames in the phone memory. The SIM card and phone are both used in the sameway in the Contacts menu.In-call menuYour phone provides a number of control functionsthat you can use during a call. To access thesefunctions during a call, press the left soft key[Options].Note]Refer to the table below for more informationon the characters available using thealphanumeric keys.Key Upper Case Lower Case. , / ? ! - : ' '' 1 . , / ? ! - : ' '' 1 A B C 2 a b c 2 D E F 3 d e f 3 G H I 4 g h i 4 J K L 5 j k l 5M N O 6 m n o 6 P Q R S 7 p q r s 7 T U V 8 t u v 8 W X Y Z 9 w x y z 9Space 0 Space 0Characters in the order displayGeneral FunctionsGeneral Functions](https://usermanual.wiki/LG-Electronics-USA/S5300/User-Guide-625092-Page-26.png)
![27During a callThe menu displayed on the handset screen during acall is different to the default main menu displayedwhen in standby mode, and the options aredescribed below.Making a second callYou can get a number you wish to dial from thephonebook to make a second call. Press the rightsoft key then select Search. To save the diallednumber into the phonebook during a call, press theright soft key then select Add new.Switching between two callsTo switch between two calls, press the left soft keythen select Swap.Answering an incoming callTo answer an incoming call when the handset isringing, simply press the key. The handset isalso able to warn you of an incoming call while youare already on a call. A tone sounds in the earpiece,and the display will show that a second call is waiting. This feature, known as Call waiting, is only availableif your network supports it. For details of how toactivate and deactivate it see Call waiting[Menu 7-3-4].If Call waiting is activated, you can put the first callon hold and answer the second, by pressing orby selecting the left soft key, then Hold & Answer.You can end the current call and answer the waitingcall by selecting the left soft key and then End &Answer.Rejecting an incoming callYou can reject an incoming call without answering bysimply pressing the key. During a call, you can reject an incoming call bypressing the left soft key [Menu] key and selectingthe Conference/Reject or by pressing the .Muting the microphoneYou can mute the microphone during a call bypressing the [Menu] key then selecting Mute on. Thehandset can be unmuted by selecting Mute off.When the handset is muted, the caller cannot hearyou, but you can still hear them.General Functions](https://usermanual.wiki/LG-Electronics-USA/S5300/User-Guide-625092-Page-27.png)

![Selecting Functions and Options33Selecting Functions and OptionsYour phone offers a set of functions that allow you tocustomise the phone. These functions are arranged inthe menus and sub-menus, accessed via the two softkeys marked [ ] and [ ]. Each menu andsub-menu lets you view and alter the settings of aparticular function. The role of the soft keys vary according to thecurrent context or the label on the bottom line of thescreen just above each key indicates its current role.Press the left soft keyto access the availablemenu.Press the right softkey to access theavailable Contacts.Menu Contacts](https://usermanual.wiki/LG-Electronics-USA/S5300/User-Guide-625092-Page-33.png)
![Call register34You can check the record of missed, received, anddialled calls only if the network supports the CallingLine Identification (CLI) within the service area.The number and name (if available) are displayedtogether with the date and time at which the call wasmade. You can also view call times.Missed calls Menu 1.1This option lets you view the last 10 unansweredcalls. You can also:]View the number if available and call it, or save it inthe Address Book.]Enter a new name for the number and save both inthe Address Book.Received calls Menu 1.2This option lets you view the last 10 incoming calls.You can also.Dialled calls Menu 1.3This option lets you view the last 20 outgoing calls(called or attempted). You can also.All calls Menu 1.4You can view all lists of outgoing or incoming calls.Delete recent calls Menu 1.5Allows you to delete Missed calls and Received callslists. You can delete Dialled calls and All calls lists atone time.Call charges Menu 1.6Call duration (Menu 1.6.1)Allows you to view the duration of your incoming andoutgoing calls. You can also reset the call times. Thefollowing timers are available:] Last call: Length of the last call.] All calls: Total length of all calls made andincoming calls since the timer was last reset.Call register](https://usermanual.wiki/LG-Electronics-USA/S5300/User-Guide-625092-Page-34.png)
![35] Received calls: Length of the incoming calls.] Dialled calls: Length of the outgoing calls.] Reset all: Allows you to reset the timers of all callsby pressing the left soft key [Yes ].Call costs (Menu 1.6.2)Allows you to check the cost of your last call, all calls,remaining and reset the cost. To reset the cost, youneed to know your PIN2 code.GPRS information Menu 1.7You can check the amount of data transferred overthe network through the GPRS information option. Inaddition, you can also view how much time you areonline.Call duration (Menu 1.7.1)You can check the duration of Last call and All calls.You can also reset the call timers.Data volumes (Menu 1.7.2)You can check the Sent(Last/All), Received(Last/All)or All data volumes and Reset all.Call register](https://usermanual.wiki/LG-Electronics-USA/S5300/User-Guide-625092-Page-35.png)
![Address book36You can store phone numbers and theircorresponding names in the memory of your SIMcard. In addition, you can store up to 250 numbersand names in the phone memory. The SIM card andphone memories, although physically separate, areused as if they were a single entity, called theContact.Contact list Menu 2.11. In menu mode, select Contact >Contact List.2. Press the left soft key [Select].3. If you want to edit, delete, copy an entry, or toadd the voice to one, select [Options].4. Once you have found the required entry, press theto dial the number.]View detail: To view in detail the selected name.]Delete: You can delete an entry.]Write messages: You can write a short messageand a multimedia message. For further details, seepage 67.]Edit: You can edit the name, mobile number, homenumber, office number, E-mail, group, picture bypress the left soft key [Select].]Copy to handset: You can copy an entry from SIMto phone.]Assign speed dial: You can call directly to setspeed dials in this opton. For further details, seepage 96.]View caller groups: For further details, see page97.Address bookNote]You can also scroll through the Contact fromthe beginning, in idle mode with slide open, bypressing the down navigation key directly.Note]When a contact with several numbers is copiedfrom the phone memory to the SIM memory,only the number entered as the main numberwill be copied.](https://usermanual.wiki/LG-Electronics-USA/S5300/User-Guide-625092-Page-36.png)
![37New contact Menu 2.2You can add a address book entry by using thisfunction. Phone memory capacity is 250 entries. SIMcard memory capacity depends on the cellularservice provider. You can also save 40 characters ofname in the phone memory, and save characters inthe SIM card. The number of characters is dependenton the SIM.1. In menu mode, select Contact >New.2. You can add new contact entries to the SIMmemory or the phone memory. To select thememory, go to Set memory [Menu-8-7-1].]Adding new entries into SIM memory: You canenter a name and number, and select the requiredgroup. (Depends on the SIM).]Adding new entries into handset memory: Youcan enter a name, numbers, E-mail address andmemo, and select the required group.Caller groups Menu 2.3There are 7 predefined groups as well as oneadditional group labeled Others where you cancreate your own lists.1. Every Group list will be displayed: Family,Friends, Colleague, VIP, Group 1, Group 2,Group 3.2. Select the Group name that you want to manageby pressing the left soft key [Options].]Member list: Allows you to see the member list inthe group.]Group ringtone: Allows you to select the ring toneto be used when you receive a voice phone callfrom a person in the group.]Group icon: Allows you to select the graphic iconto be displayed when you receive a call from aperson in the group.]Add member: Allows you to add the member tothe group.]Remove member: Allows you to delete themember in the group.Address book](https://usermanual.wiki/LG-Electronics-USA/S5300/User-Guide-625092-Page-37.png)
![Address book38]Rename: Allows you to assign a name to thegroup.]Remove all: Allows you to delete all the member inthe group.Speed dial Menu 2.4You can assign any of the keys, to with aname list entry.You can call directly by pressing this key for 2-3seconds.1. In menu mode, select Contact >Speed dial listOr, in standby mode, hold down in thestandby mode.2. If you want to add a number to speed dial, select<Empty>. Then, you can search the name from theAddress Book.3. Select the name from the speed dial. You canchange and delete the name. In addition, you cancall by this number, write text message, andmultimedia message.Own number Menu 2.5You can save and check your own number in SIMcard.Business card Menu 2.6This option allows you to create your own businesscard featuring Name and an mobile phone number.To create a new business card, press the left soft key[Edit] and enter the information into the fields.Settings Menu 2.71. Press the right soft [Contacts] in standbymode.2. Scroll to Settings, then press the left soft key[Select].]Default memoryScroll to highlight Default memory, and thenpress the left soft key [Select].- If you select Always ask, when adding entry, thephone will ask where to store.Address book](https://usermanual.wiki/LG-Electronics-USA/S5300/User-Guide-625092-Page-38.png)
![39- If you select SIM or Phone, the phone will storean entry to SIM or phone.]View optionsScroll to highlight View options, and then pressthe left soft key [Select].- Name only: Set the phonebook list withdisplaying only name.- Name & number: Set the phonebook list withdisplaying name and number.- With pictures: Set the phonebook list with theinformation of character and picture.]Copy/Move allYou can copy/move entries from SIM card memoryto Phone memory and vice versa.1. Open the Phonebook first by pressing the rightsoft key [Contacts] in standby mode.2. Scroll to Copy/Move all, and then press the leftsoft key [Select] to enter this menu.• SIM to Phone: You can copy the entry from SIMCard to Phone memory.• Phone to SIM: You can copy the entry fromPhone memory to SIM Card.]Memory in use: This feature allows you to see howmany free and in-use are in your phonebook.]Clear contactsYou can delete all entries in SIM and Phone. Thisfunction requires Security code.1. Press the right soft key [Contacts] instandby mode and select Delete all, press [Select].2. Then select a memory to erase.3. Enter security code and Press the left soft key[OK] or the right soft key [Back].]Service dial numberUse this function to access a particular list ofservices provided by your network operator (ifsupported by the SIM card).Address book](https://usermanual.wiki/LG-Electronics-USA/S5300/User-Guide-625092-Page-39.png)
![Settings40Date & Time Menu 3.1You can set functions relating to the date and time.Set date (Menu 3.1.1)You can enter the current date.Date format (Menu 3.1.2)You can set the Date format such as YYYY/MM/DD,DD/MM/YYYY, MM/DD/YYYY. (D: Day / M: Month/ Y: Year).Set time (Menu 3.1.3)You can enter the current time.Time format (Menu 3.1.4)Your can set the time format between 24-hour and12-hour.Phone settings Menu 3.2Display (Menu 3.2.1)Wallpaper (Menu 3.2.1.1)You can select the background pictures in standbymode. There are 2 folders that include graphics andpictures originated from built-in camera or web sites.No Wallpaper make the background be white.Handset scheme (Menu 3.2.1.2)You can choose 4 kinds of color schemes, Metalicstyle, Clean style, Clear style and Paper style.Greeting note (Menu 3.2.1.3)If you select On, you can edit the text which isdisplayed in standby mode.SettingsNote]If Info messages are enabled on Channel 50, thestandby text is shown alternatively with thelocation name. See [Menu 5-8] for moreinformation about Info messages.](https://usermanual.wiki/LG-Electronics-USA/S5300/User-Guide-625092-Page-40.png)
![41Backlight timeout (Menu 3.2.1.4)You can set the light-up duration of the internaldisplay. There are 3 lightup durations, 10, 20, 30seconds.Information window (Menu 3.2.1.5)You can preview the current state of the selectedmenu before open the menu. The state is shown atbottom of the display.Languages (Menu 3.2.2)You can change the language for the display texts inyour phone. This change will also affect the LanguageInput mode. S5300 supports English, French,Spanish.Call Menu 3.3To change the settings for call diverting:Call forwarding (Menu 3.3.1)When this network service is activated, you can directyour incoming calls to another number, for example,to your voice mailbox number. For details, contactyour service provider. Select one of the divertoptions, for example, select If busy to divert voicecalls when your number is busy or when you rejectincoming calls.]All voice calls: Diverts voice calls unconditionally.]If busy: Diverts voice calls when the phone is inuse.]If no reply: Diverts voice calls which you do notanswer.]If out of reach: Diverts voice calls when the phoneis switched off or out of coverage.]All data calls: Diverts to a number with a PCconnection unconditionally.]All fax calls: Diverts to a number with a faxconnection unconditionally.The following menu corresponds to each option:• Activate: Activates the corresponding service.- To other number: Inputs the number fordiverting.- To favourite number: You can check recent fivediverted numbers.Settings](https://usermanual.wiki/LG-Electronics-USA/S5300/User-Guide-625092-Page-41.png)
![Settings42• Cancel: Cancels the corresponding service.• View status: Checks the status of the service.]Cancel All: Cancels all call divert service.Answer mode (Menu 3.3.2)Allows you to determine when to answer the phone.]Slide open: When the phone rings, you can answera call simply by sliding up the keypad.]Any key: You can answer an incoming call bypressing any key, except the key.]Send only: You can answer an incoming call byonly pressing the key.Send my number (Menu 3.3.3)This network service allows you to set your phonenumber to be displayed On or hidden Off from theperson to whom you are calling. Select Set bynetwork to reset the phone to the setting that youhave agreed upon with your service provider.Call waiting (Menu 3.3.4)The network will notify you of a new incoming callwhile you have a call in progress. Select Activate torequest the network to activate call waiting, Cancel torequest the network to deactivate call waiting, orView status, to check if the function is active or not. Minute minder (Menu 3.3.5)This option allows you to specify whether the phonemust beep every minute during an outgoing call tokeep you informed of the length of the call.Auto redial (Menu 3.3.6)Select On, and your phone will make a maximum ofthree attempts to connect the call after anunsuccessful call attempt. Select line (Menu 3.3.7)You can send the DTMF (dual tone multi-frequency)tones of the number on the display during a call.This option is helpful for entering a password oraccount number when you call an automated system,like a banking service.Settings](https://usermanual.wiki/LG-Electronics-USA/S5300/User-Guide-625092-Page-42.png)
![43Security settings Menu 3.4Various codes and passwords are used to protect thefeatures of your phone. They are described in thefollowing sections (see pages 24).PIN Code request (Menu 3.4.1)When the PIN code request feature is enabled, youmust enter your PIN each time you switch the phoneon. Consequently, any person who does not haveyour PIN cannot use your phone without yourapproval.The following options are available:]Enable: You must enter the PIN each time thephone is switched on.]Disable: The phone connects directly to thenetwork when you switch it on.Phone lock (Menu 3.4.2)You can use security code to avoid unauthorized useof the phone. If you set phone lock to When SIMChanged, your phone will request security code onlywhen you change your SIM card. If you want to lockyour phone after power on, set Phone Lock toImmediately.]When switch on- Off: No security code needs to be entered whenswitching on the phone.- Always on: The security code is requestedwhenever the phone is switched on.SettingsNote]Before disabling the PIN code request feature,you must enter your PIN.Warning]If you enter the wrong PIN code more thanthree times on switching on the phone, the SIMcard blocks itself. If the PIN is blocked you mustenter the PUK code. The PUK code can beentered up to 10 times. If you enter the wrongPUK code more than 10 times, it will beimpossible to unblock the SIM card. In this casecontact your network operator.](https://usermanual.wiki/LG-Electronics-USA/S5300/User-Guide-625092-Page-43.png)
![Settings44- When SIM changed: The security code is onlyrequested if the SIM card is changed.]ImmediatelyAfter entering the correct security code, thetelephone becomes inactive and locks. If you wishto disable the telephone lock feature, the correctsecurity code must be entered after pressing theright ‘Unlock’ key. If your telephone is locked whenswitched off, it will still be locked when switchedback on.Call barring (Menu 3.4.3)Call barring allows you to restrict from making andreceiving calls with your phone. For this function, youneed the barring password, which you can obtainfrom your service provider.The following options are available:]All outgoing calls: Calls cannot be made.]Outgoing international: International calls cannotbe made.]O/G (Outgoing) international except homecountry: When abroad, calls can be made only tonumbers within the current country and to yourhome country, which is where your home networkprovider is located.]All incoming: Calls cannot be received.]Incoming when abroad: Calls cannot be receivedwhen you are using your phone outside your homeservice area.]Cancel all: All call barring settings are deactivated;calls can be made and received normally.]Change password: You can set and change thecall barring password obtained from your serviceprovider using this option. You must enter thecurrent password before you can specify a newone. Once you have entered a new password, youare asked to confirm it by entering it again.SettingsNote]To use Call Barring service, you must input thenetwork password. When calls are barred, callsmay be possible to certain emergency numbersin some networks.](https://usermanual.wiki/LG-Electronics-USA/S5300/User-Guide-625092-Page-44.png)
![45Fixed dial number (Menu 3.4.4)Allows you to restrict your outgoing calls to selectedphone numbers, if this function is supported by yourSIM card. The PIN2 code is required.The following options are available:]Enable: You can only call phone numbers stored inthe Contact. You must enter your PIN2.]Disable: You can call any number.]Number List: You can view the number list savedas fixed dial number.Change codes (Menu 3.4.5)The Change codes feature allows you to change yourcurrent password to a new one. You must enter thecurrent password before you can specify a new one.You can change the access codes: Security code,PIN1 Code, PIN2 Code.Network Menu 3.5You can select a network which will be registeredeither automatically or manually. Usually, the networkselection is set to Automatic.]AutomaticIf you select Automatic mode, the phone willautomatically search for and select a network foryou. Once you have selected “Automatic”, thephone will be set to “Automatic” even though thepower is off and on.]ManualThe phone will find the list of available networksand show you them. Then you can select theSettingsNote]Not all SIM cards have a PIN2. If your SIM carddoes not, this menu option is not displayed.Note]PIN: Personal Identification Number.Note]A different network other than the local networkcan only be selected if the roaming contractwith the national network provider offers saidservice.](https://usermanual.wiki/LG-Electronics-USA/S5300/User-Guide-625092-Page-45.png)
![Settings46network which you want to use if this network hasa roaming agreement with your home networkoperator. The phone let you select anothernetwork if the phone fails to access the selectednetwork.]PreferredYou can set a list of preferred networks and thephone attempts to register with first, beforeattempting to register to any other networks. Thislist is set from the phone’s predefined list of knownnetworks.GPRS attach Menu 3.6If you select Switch on and you are in a network thatsupports packet data, the phone registers to theGPRS network and sending short messages will bedone via GPRS. Also, starting an active packet dataconnection, for example, to send and receive e-mail,is quicker. If you select When Needed, the phone willuse a packet data connection only if you start anapplication or action that needs it. The GPRSconnection is closed after it is not used by anyapplication.Reset settings Menu 3.7You can easily reset your phone to its defaultconfiguration. To do so, proceed, as follows.1. Select the Reset Settings menu option.2. Enter the 4-digit phone password.Memory status Menu 3.8Handset memory (Menu 3.8.1)]This function shows the status of the user memoryof the handset.SettingsNote]If there is no GPRS coverage and you havechosen Switch on, the phone will periodicallytry to establish a packet data connection.Note]The password is preset to 0000.](https://usermanual.wiki/LG-Electronics-USA/S5300/User-Guide-625092-Page-46.png)
![47Media memory (Menu 3.8.2)]This function shows the status of the multimediamemory of the handset.Aide Orange Menu 3.9Communiquer (Menu 3.9.1)Orange World (Menu 3.9.2)Jeux (Menu 3.9.3)Astuces (Menu 3.9.4)Settings](https://usermanual.wiki/LG-Electronics-USA/S5300/User-Guide-625092-Page-47.png)
![Camera48The S5300 phone features a built-in digital camerawhich allows you to take photos with a maximumresolution of 640x480 pixel (also called VGA). TheCMOS sensor also lets you take high qualityphotographs thanks to extra features such as digitalzoom up to 4x (depending on resolution), lightcontrol, white balance, change of colour, etc. Lastlythe built-in flash also lets you take photographs inpoor lighting conditions. The camera lets you takephotos at any time, capturing charming images to besent via MMS. You can also record videos toimmortalise the funniest situations and have themwith you at all times.The camera is fitted to the top part of the phone andcan be turned around by 180°. This allows you toeasily focus on objects in front of you or behind thetelephone.Take photo Menu 4.1Press the Menu key and select Camera. Takepicture. Or, press the camera hot key in standbymode. You can see the viewfinder. Before taking ashot, press the right soft key [options] to set thefollowing values. Select the desired value and pressthe OK key to confirm it.]Resolution: Allows you to set the image size toone of Hi (640x480), Med (320x240) and Low(128x160).]Quality: Allows you to set the image quality fromEconomy, Normal and High.]White Balance: 5 settings are available: Auto,Daylight, Incandescent, Cloudy, and Fluorescent.]Self Timer: Allows you to select the delay time(off, 3 Seconds and 10 Seconds). Then the phonetakes a photo after the specified time.CameraNote]In Take photo mode, You can change thecapture mode to press the left soft key [Video].Note]The Photo Camera feature cannot be used if thebattery is almost flat.](https://usermanual.wiki/LG-Electronics-USA/S5300/User-Guide-625092-Page-48.png)
![49]Flash: Allow you to set the flash when you you takea photo in dark place.]Reverse view: Allows you to reverse the imagevertically.]Colour effect: 3 settings are available: Color,Sepia, Mono.]Fun frames: Allows you to use a fun frame from thelist.]Multishot: Allows you to take photos insuccession.]Shutter tones: Allows you to change the Shuttertones from Sound1, Sound2 and Sound3.]Default settings: Set to default setting.Taking a photoAfter selecting the settings you want on the camera,focus on the subject you wish to take and press theCamera or OK key to take the photo. The photo willbe automatically saved in the Photo Album. Thephoto can be sent via MMS by pressing the left softkey [Send] while the following menu is accessed bypressing the right soft key [Options]:- Delete: Deletes the photo just taken.- Set as wallpaper: Uses the photo taken as thephone's wallpaper.- Set as photo ID: Allows you to link the photo to acontact in the address book in order to use thephoto address book feature. When you receive acall from the contact in question, his/her photo willappear on the display screen.When a photo with a higher resolution than128x160 pixel is linked, the photo can be trimmedby pressing the right soft key Zoom. The left softkey " + " enlarges the photo, the right soft key " - "reduces it and you can choose the area to betrimmed using the arrow keys.CameraNote]Zoom and Lighting can be adjusted using thenavigation keys.](https://usermanual.wiki/LG-Electronics-USA/S5300/User-Guide-625092-Page-49.png)
![Camera50- Photo gallery: Accesses Album where all photos arestored.- Rename: Changes the name of the photo taken.Taking multiple shots in successionSet the camera, select Multishot mode and thenumber of shots you want (1, 3 or 6). Focus on thesubject you wish to take and press the Camera key.The phone will shoot all the photos with an intervalof less than 0.5 seconds between each shot. All thephotos taken will be automatically saved in the Photogallery.Record video Menu 4.2You can record the video up to 60 minutes. But itdepends on the resolution, the available memorycapacity, and the quantity of data to be compressed.Press Record video You can record a video clip inthis menu by pressing the Camera key. Before takinga shot, press the right soft key [options] to set thefollowing values. Select the desired value and pressthe OK key to confirm it.]Recording mode- General: Allows you to record the video as muchtime as you want.- MMS video: Allows you to record the video clipfor sending via MMS.* When you select MMS video mode, the Icon appears on the bottom line. The maximumcapacity of MMS video is 100kb at once.]Resolution: Allows you to set the image size fromLow (128x96) and Hi (176x144).]Quality: Allows you to set the image quality fromEconomy, Normal and High.]White Balance: 5 settings are available: Auto,Daylight, Incandescent, Cloudy, and Fluorescent.]Flash: Allow you to set the flash when you you takea photo in dark place.CameraNote]In Record video mode, You can change thecapture mode to press the left soft key [Photo].](https://usermanual.wiki/LG-Electronics-USA/S5300/User-Guide-625092-Page-50.png)
![51]Reverse view: Allows you to reverse the imagevertically.]Colour effect: 3 settings are available: Color,Sepia, Mono.]Default settings: Set to default setting.Press the Camera key to start recording a video clip.REC time is updated on the LCD screen.To stop recording, press the Camera key again. It isautomatically saved in Video gallery. And you cankeep recording another video clip by pressing theCamera key.Memory status Menu 4.3Press the Menu key and select Camera, Memorystatus. You can check the current memory status onthe phone. Images and Video share the memory.Camera](https://usermanual.wiki/LG-Electronics-USA/S5300/User-Guide-625092-Page-51.png)
![Messages52Create new massage Menu 5.1S5300 telephones allow you to write short textmessages which can be linked to create messagescontaining up to approx. 1530 characters (a standardtext message contains a maximum of 160 characters),corresponding to 10 pages. EMS (EnhancedMessaging Service) can also be used to attach icons,sounds and simple animation to the message. Inparticular this telephone model supports EMS 5.0which allows you to send and receive colour graphicsand to customise the text message layout and font. Ifthe message recipient’s phone does not support thisversion, he/she will receive the compatible featuresonly and receipt of the written message is normallyguaranteed.The length of an enhanced or long message can bechecked while writing using the indicators found tothe top left of the screen. The first number refers tothe number of characters left to complete theindividual text message while the second shows thenumber of messages written. The cost of a longmessage depends on the number of short textmessages linked together. All the available options forwriting short messages are shown below.Text (Menu 5.1.1)You can write and edit text message, checking thenumber of message pages.1. Enter the Messages menu by pressing the left softkey [Select].2. If you want to write a new message, select Createnew message.3. To make text input easier, use T9.4. Press [Insert] to attach the followings.5. If you want to set option for your text, or to finishyour writing, press the left soft key [Options].Insert]Symbol: You can add special characters.MessagesNote]The phone which supports EMS release 5 isavailable to send colour pictures, sounds, textstyles, etc. The other party may not receivepictures, sounds or text styles you sent properlyif the phone does not support such options.](https://usermanual.wiki/LG-Electronics-USA/S5300/User-Guide-625092-Page-52.png)
![53]Graphic: You can insert the Default graphics orgraphics in My pictures that are available for shortmessages.]Sound: You can insert sounds that are available forshort messages.]Text templates: You can use Text templatesalready set in the phone.]Phonebook: You can add phone numbers or e-mail addresses in address book.]Business card: You can add your Business card tothe message.Options]Send To: Sends text messages.1. Enter numbers of recipient.2. Press key to add more recipients.3. You can add phone numbers in the addressbook.4. Press the left soft key after entering numbers.]Save to drafts: Stores messages in Drafts.]Font: You can select Size and Style of fonts.]Colour: You can select Colour of foreground andbackground.]Alignment: You can make the message contentsaligned Left, Center or Right.]Add T9 dictionary: You can add your own word.This menu can be shown only when edit mode isPredictive (T9Abc/T9abc/T9ABC).]T9 language: Select a T9 input mode.]Exit: If you press Exit while writing a message, youcan end the writing message and back to theMessage menu. The message you have written isnot saved.Multimedia (Menu 5.1.2)A multimedia message may contain text, pictures andsounds. This feature can only be used if supportedby your network operator or service provider. Onlyhandsets offering features that are compatible withmultimedia messaging or emails can receive and sendmultimedia messages. Multimedia messages can beformed of a maximum of 10 slides which do notexceed 100 KB.Messages](https://usermanual.wiki/LG-Electronics-USA/S5300/User-Guide-625092-Page-53.png)
![Messages541. Enter the Message menu by pressing the left softkey [Select].2. If you want to write a new message, select Writemultimedia message.3. You can create a new message or choose one ofthe multimedia message templates already made.4. Press Insert to add Symbol, Graphic, Photo,Sound, Video, New Slide, Text templates, addressbook or Business card.] Symbol: You can add special characters. Note: thelist of symbols can be accessed while writingmessages by pressing the " * " key.]Graphic: Attach predefined pictures and picturesdownloaded from WAP to your multimediamessage.]Photo: Attach a photo taken with the built-incamera to your multimedia message.]Take photo: Set the camera to take a photo toattach to your multimedia message.]Sound: Attach a predefined audio file or a filedownloaded from WAP to your multimediamessage.]New sound: Set record voice to save a new audiofile to attach to your multimedia message.]Video: Attach a video recorded using the built-invideo camera to your multimedia message. Videosrecorded in MMS Video mode (see [Menu 6-2])can be attached.]New video: Record a new video to attach to yourmultimedia message.]New slide: A multimedia message can be formed ofseveral pages which are viewed according to presettime intervals just like the frames of a film. Thismenu can be used to add a page - Next orPrevious - to the multimedia message you arecomposing. New sounds and pictures can beentered into each page (one per page) in thestandard manner.]Text templates: Preset text templates may be usedto speed up writing of multimedia messages.Consult the Templates section [Menu 5-9] formore information.]Phonebook: Allows you to add telephone numberor email addresses to your multimedia message bytaking them from the Address book.Messages](https://usermanual.wiki/LG-Electronics-USA/S5300/User-Guide-625092-Page-54.png)
![55]Business Card: Your own personal information canbe added to messages if entered and savedpreviously [Menu 5-9-3].Options]Send to: You can send multimedia messages tomultiple recipients, prioritise your message, andmake it send later as well.]Preview: You can preview multimedia messages youwrote.]Save: You can save multimedia messages To draftsor As template.]Edit Subject: Modifies multimedia messages youchose.]Move to: You can move to previous or next slide.]Delete slide: You can delete current slides.]Set slide format: Sets the format of the currentpage by editing the following options.* Set timer: Set the timer for the frames forming themultimedia message and for individual componentssuch as text, sounds and pictures. The start andfinish time can be set for each of thesecomponents to allow you to put together themessage in the way you want.* Swap text and photo: Inverts the order of the textand picture in the current page. This option is onlyavailable if the message contains photos.]Add T9 dictionary: Use this option to add a wordto the dictionary when the word you want is notavailable. After entering a word, press the left softkey [Save]. This menu is only shown when theinput mode is predictive (T9Abc / T9abc /T9ABC).]T9 language: Allows you to select the T9dictionary language or disable the T9 input modeby selecting T9 off. For more information aboutthe T9 mode, see pages 32.]Exit: You can back to the Message menu.MessagesNote]Try to put together your multimedia messageand see the result by selecting Preview!](https://usermanual.wiki/LG-Electronics-USA/S5300/User-Guide-625092-Page-55.png)
![Messages56Write email message (Menu 5.1.3)To send/receive an email, you should set up theemail account. Refer to Email on page 72 first.1. You can input up to 20 email addresses in the Toand Cc field.2. Key in the subject of the mail and press OK.3. After writing an email message, press the left softkey [Options]. You can access the followingoption menus.]Send: Sends the email message.]Insert: You can insert text templates, phonenumbers, symbols and/or the signature.]Edit recipients: You can edit recipients.]Edit subject: You can edit the subject.]Save: Select this to save the message in Drafts.]T9 languages: Select the language for T9 inputmode. You can also deactivate the T9 input modeby selecting 'T9 off'.]Exit: If you select this while writing the message,you can exit from writing message and go back tothe previous screen. The message you have writtenis not stored.4. You can attach files by pressing the right soft key[Attach].5. Press the right soft key [Attach] to attach files.Inbox Menu 5.2You will be alerted when you have received messages.They will be stored in Inbox.In Inbox, you can identify each message by icons. Fordetail, see the icon directive.MessagesNote]If you select the photo (15K) on writingmultimedia message, loading duration will takearound 5 seconds at least. Furthermore, youcan't activate any key during loading time. After5 seconds, it is available to write multimediamessage.Tip]To input "@", press the and select "@".](https://usermanual.wiki/LG-Electronics-USA/S5300/User-Guide-625092-Page-56.png)
![57If the phone shows 'No space for SIM message', youhave to delete only SIM messages from Inbox. If thephone displays 'No space for message', you can makespace of each repository as deleting messages, mediaand applications.Instead, when the telephone's internal memory is full,the message "Message memory full" is shown. In thesame way you must delete some messages in order tosave others.When notification of multimedia messages isreceived, these messages must be downloaded fromthe server. See (Menu 5.0.2) for information abouttelephone configuration.To read a message, select the message and press[OK]. The following menu can be accessed bypressing the key [Options]:]View: You can view the received messages.]Delete: You can delete the current message.]Reply: You can reply to the sender.]Forward: You can forward the selected message toanother party.]Return call: You can call back to the sender.]View information: Lists information related to themessage shown such as sender's address, subject,time and day of the message, message type andsize.]Delete all read messages: Deletes all readmessages.]Delete all: Deletes all messages.* Specific MMS optionsMessagesIcon Icon directiveMultimedia messageShort messageSIM messageRead multimedia messageRead text messagePush messageNotified multimedia message](https://usermanual.wiki/LG-Electronics-USA/S5300/User-Guide-625092-Page-57.png)
![Messages58]Repeat: Allows you to repeat reproduction of theselected multimedia message.]Receive: (for multimedia message notificationonly). Multimedia messages, unlike text messages,must be downloaded from the server automaticallyor manually (see (Menu 5.0.2.5)). The networkinitially sends multimedia message notification: Ifthe Auto Download option (Menu 5.0.2.5) is offor an error has occurred, receipt must beconfirmed by selecting [Receive]. If the AutoDownload option is on, the message isautomatically downloaded after receipt ofnotification.]Cancel: Interrupts multimedia message download(only when multimedia messages are beingreceived).* Specific download message options]Information: Shows the content of downloadmessages.]Load: Launches the WAP connection to the URLcontained in the download message. Thetelephone must be configured for WAP services(Menu 4.1.4) to use download messages.Orange Messenger Menu 5.3For Instant Messaging users, a valid User ID andPassword will be required in order to login andexchange messages as well as checking the onlinestatus.Offline MenuLoginThis allows users to login by filling in the User ID andPassword.Saved ConversationsThis is where a user can view saved conversations.Settings]Screen Name: You may select the Screen Name tobe used while in the Group chat service.MessagesNote]There is no need to type the User ID andPassword all the time if only Login process issuccessful and they are saved. This feature isoptional.](https://usermanual.wiki/LG-Electronics-USA/S5300/User-Guide-625092-Page-58.png)
![59]Availability: You may select your availability status(Available to Not Available, vice versa).]Status Text: You may set your current status infree text format.]Save Password: You may save your password inLogin input.]Power-on Login: You may start login automaticallyafter 20 seconds or so on power-on if you save avalid password and then reset your mobile.]Connection: You may set your IM connectioninformation. But, please check with your Networkprovider before changing this information.When you select Binding Protocol as HTTP- WV Server: You can change the WV Serveraddress.- Internet Profiles: You can change internetconnection settings.IM InformationInstant Messaging Client Information (Client Name,Version Number) is displayed.Online Menu / 1 to 1 conversationAfter successful Login, a contact list with contactswill appear on screen.Depending on the cursor location in the contact list,following menu options will be available.When cursor is located on a Conversations List]View/Hide Conversations: This provides theoption to view or hide contacts from the selectedlist. ]Saved Conversations: You may view or delete thestored conversation session.MessagesNote]Conversations List contains not only contactwhich conversation is already opened but alsounknown contact.Note]When you select left/right navigation Key orConfirm Key on the Contact List, it offers theability to view or hide conversations.](https://usermanual.wiki/LG-Electronics-USA/S5300/User-Guide-625092-Page-59.png)
![Messages60]Settings- Screen Name: You may select the Screen Nameto be used while in the Group chat service.- Availability: You may select your availabilitystatus (Available to Not Available).- Status Text: You may set your current status infree text format.- View Options: You may offer the ability to showall contacts or only online contacts.]Logout: This begins the Logout process.When cursor is located on a Conversation]View/Hide Conversation: View allows you toconverse with the selected Unknown Contact andcontact which conversation is already started. Itshows conversation of the contact whichconversation is already started.]End Conversation: This close the selectedconversation. If an unknown contact was selected,that contact is deleted also.]Block contact: This blocks the selected Contact.]View Information: This allows you to viewinformation. It provides User ID, Mood, StatusText.]Refresh Contact: This refreshes the presenceinformation of the selected contact.]Settings: Please refer to the previous SettingsMenu.]Logout: This begins the Logout process.When cursor is located on a Contact List]View/Hide Contact: This provides the option toview or hide contacts from the selected list.]Add List: This adds a new contact list.]Add Contact: This adds a new contact to theselected contact list, in the meantime this searchescontact on the basis of E-mail Address, First Name,Last Name.MessagesNote]The device only can support a maximum of 30contacts and therefore not all their contacts willbe visible on the phone if they have more than30.](https://usermanual.wiki/LG-Electronics-USA/S5300/User-Guide-625092-Page-60.png)
![61]Send to Other: You can send the contactinformation to others.]Delete List: This deletes the selected contact list.]Refresh List: This refreshes the presenceinformation of the contacts within the contact list.]Settings: Please refer to the previous SettingsMenu.]Logout: This begins the Logout process. When cursor is located on a Contact]Chat/View: Chat will display a screen whereconversation with selected Contact can take place / View shows conversation of the contact whichconversation is already started.]Rename Contact: You can change a selected namewithin the contact list.]Block Contact: This blocks the selected Contact.]Add Contact: This adds a new contact to theselected contact list, in the meantime this searchescontact on the basis of E-mail Address, First Name,Last Name.]Delete Contact: This deletes the selectedContact.]View Information: This allows you to viewinformation. It provides User ID, Mood, StatusText.]Refresh Contact: This refreshes the presenceinformation of the selected contact.]Settings: Please refer to the previous SettingsMenu.]Logout: This begins the Logout process.Menu options available in the Conversation screen]Send: Typed message can be sent.]Back To List: This brings the screen back to thecontact list.]End Conversation: This ends the activeconversation and clears the conversation buffer.]Save Conversation: Stores currently activeconversation.]Add T9 dictionary: You can add your own word. This menu can be shown only when the edit modeis Predictive.Messages](https://usermanual.wiki/LG-Electronics-USA/S5300/User-Guide-625092-Page-61.png)
![Messages62]T9 Languages: Select the language for T9 inputmode.Drafts Menu 5.4You can view the messages saved as a draft. The draftmessages are listed with the date and time when theywere saved.The following options are available.]View: Shows the selected message.]Delete: Deletes the message you choose.]Edit: Modifies the massage you choose.]View information: To view the information of themessage.]Delete all: Deletes all of the messages in thefolder.Mailbox Menu 5.5You can check the saved emails, drafts, outbox, andsent emails. In the Inbox, up to 20 emails are stored.Outbox Menu 5.6You can see sent and unsent messages here. For sentmessage, you can see the delivery status.The browsing is same as that for the inbox message.MessagesNote]Within the conversation screen, you can insertSymbol, Emoticon and Text Template by usingthe right soft key.]In the conversation window, you can use a sidekey or up/down navigation key for scrollingconversation.]Maximum number of characters supported by amessage is 500 characters for receiving and160 characters for sending.]The presence information might not update inreal time so the “Refresh List”/”RefreshContact” option can be used for most up todate status.](https://usermanual.wiki/LG-Electronics-USA/S5300/User-Guide-625092-Page-62.png)
![63Messages sent correctly feature the followingoptions.]View: Shows the selected message.]Delete: Deletes the selected message from theSent folder.]Edit: Modifies message you chose]Send: Allows you to send the message again]View information: Allows you to view informationabout the sent message such as sender°Øsaddress, attachments (for multimedia messagesonly), date and time of message transmission,message type and size.]Delete all: Deletes all messages in the Sent folder.Messages being sent feature the followingicons.Listen to voice mail Menu 5.7This menu provides you with a quick way of accessingyour voice mailbox (if provided by your network).Before using this feature, you must enter the voiceserver number obtained from your network operator. When new voice message is received, the symbolwill be displayed on the screen. Please check withyour network provider for details of their service inorder to configure the handset correctly.Info message Menu 5.8(Dependent to network and subscription)Info service messages are text messages delivered bythe network to GSM. They provide generalinformation such as weather reports, traffic news,taxis, pharmacies, and stock prices. Each type ofinformation has the number; therefore, you cancontact service provider as long as you have inputthe certain number for the information. When youMessagesIcon Icon directiveMMS SentMMS UnsentMMS delivery confirmedSMS sentSMS unsentSMS delivery confirmed](https://usermanual.wiki/LG-Electronics-USA/S5300/User-Guide-625092-Page-63.png)
![Messages64have received an info service message, you can seethe popup message to show you that you havereceived a message or the info service message isdirectly displayed. To view the message again or not in standby mode,follow the sequence shown below;Read (Menu 5.8.1)1. When you have received an info service messageand select Read to view the message, it will bedisplayed on the screen. You can read anothermessage by scrolling , or [Next].2. The message will be shown until another messageis reached.Topics (Menu 5.8.2)(Dependent to network and subscription)]Add new: You can add Info service messagenumbers in the Phone memory with its nickname.]View list: You can see Info service messagenumbers which you added. If you press [Options], you can edit and delete info messagecategory which you added.]Active list: You can select info service messagenumbers in the active list. if you activate an infoservice number, you can receive messages sentfrom the number.Templates Menu 5.9Templates are preset messages used to speed up thewriting of common messages. The available templatesand options are listed below.Text (Menu 5.9.1)Some text templates are available for which thefollowing options can be accessed.]View: Shows selected template.MessagesNote]Enablement of info messages may cause areduction in the duration of the battery instand-by mode.](https://usermanual.wiki/LG-Electronics-USA/S5300/User-Guide-625092-Page-64.png)
![65]Delete: Deletes selected template.]Add new: Allows you to create a new template.]Send via: Allows you to send selected template viaSMS or MMS.]Edit: Edits selected template.]Delete all: Deletes all text templates.Multimedia (Menu 5.9.2)You can use the following options.]View: You can see multimedia templates.]Delete: You can delete multimedia templates.]Add new: Allows you to add new multimediatemplates.]Send via multimedia message: You can write andsend multimedia messages.]Edit: You can edit multimedia templates.]Delete all: Allows you to delete all multimediamessages.Business card (Menu 5.9.3)This option allows you to create your own businesscard featuring Name, 4 numbers and an emailaddress. To create a new business card, press the leftsoft key [Add] and enter the information into thefields. If a business card is already available, thefollowing menu can be accessed by pressing the leftsoft key [Options]:]Edit: Edits business card.]Send via: Allows you to send business card viaSMS or MMS.]Delete: Deletes business card.Settings Menu 5.0Text messages (Menu 5.0.1)This menu allows you to configure preset informationof text messages.]Message centre number: If you want to send thetext message, you can receive the address of SMScentre through this menu.Messages](https://usermanual.wiki/LG-Electronics-USA/S5300/User-Guide-625092-Page-65.png)
![Messages66]Message typesText, Voice, Fax, Natl. Paging, X.400, E-mail,ERMES Usually, the type of message is set to Tex t .You can convert your text into alternative formats.Contact your service provider for the availability ofthis function.]Validity period: This network service allows you toset how long your text messages will be stored atthe message centre.]Delivery report: If you set to Yes, you can checkwhether your message is sent successfully.]Reply via same message centre: When a messageis sent, it allows the recipients to reply and chargethe cost of the reply to your telephone bill.Multimedia messages (Menu 5.0.2)Use this menu to configure preset information ofmultimedia messages.]Priority: You can set the priority of the messageyou choose.]Message subject: You can enter multimediamessages subject when this menu is on.]Validity period: This network service allows you toset how long your text messages will be stored atthe message centre.]Delivery report: If it is set to Yes in this menu, youcan check whether your message is sentsuccessfully.]Auto download- Always on: Multimedia messages areautomatically downloaded upon receipt ofnotification if this option is selected.- Manual: The telephone asks whether or not togo ahead with the download when notification ofa new multimedia message is received.- Home network only: Messages are onlydownloaded automatically when with your ownoperator if this option is selected. If in roamingmode, confirmation will be requested if you wishto download the message.- Off: Notification only will be received if thisoption is selected.Messages](https://usermanual.wiki/LG-Electronics-USA/S5300/User-Guide-625092-Page-66.png)
![67]Access point: A data connection via data call(CSD) using the GPRS or the even faster EDGEservice (see the Internet section for moreinformation about EDGE) is needed to downloadmultimedia messages from the server. Up to 5connection profiles can be set for multimediamessages.The following menu can be accessed by pressingthe left soft key [Options] on the profile of yourchoice:]Activate: Enable the selected profile and makes itready for use.]Settings: Enter the MMS server connection dataprovided by your operator or service provider.- HomepageSet the multimedia message service centre(MMSC).- BearerDataGPRS- Data settingsThis is only shown if you select Data as theconnection service.IP address: Enter the multimedia service centre IP.Dial number: Enter the telephone number to beused for the connection.User id: User id for own server connection (NOTWAP gateway user ID).Password: Password requested by own serverconnection (NOT by WAP gateway) foridentification purposes.Call type: Select the type of data call - analogicalor digital (ISDN).Call speed: Set the connection speed for data -9600 or 14400.Linger time: Set the length of time after whichthe phone must disconnect itself if no data havebeen transferred.- GPRS settingThis menu is only shown if you select GPRS asthe connection service.IP address: Enter the multimedia service centre IP.APN: Enter the APN (Access Point Name) of theGPRS.Messages](https://usermanual.wiki/LG-Electronics-USA/S5300/User-Guide-625092-Page-67.png)
![Messages68User id: Enter User id for server connection.Password: Enter the password requested by theserver.- Connection typeSelect whether the connection must bePermanent or Temporary.- Secure settingsDecide whether or not the telephone must have asecure connection.] Rename: Changes the name of the selectedprofile.]Permitted message types- Personal: Personal message.- Advertisements: Commercial message.- Information: Necessary information.Email (Menu 5.0.3)This menu allows you to edit, delete or add and emailaccount.You can set up to 3 email accounts. To create yourown email account, you will need to enter an ID andpassword.1. Select an account.2. Select Edit and scroll to Incoming ID/PWD.3. Enter your ID and password.Voice mailbox number (Menu 5.0.4)You can input and set the voice mailbox number.The following submenus are available:]Home: Enter the message answering number to beused when on the national network.]Roaming: Enter the message answering number tobe used when in international roaming mode.Info message (Menu 5.0.5)]ReceiveYesIf you select this menu, your phone will receive Infoservice messages.NoIf you select this menu, your phone will not receiveInfo service messages any more.Messages](https://usermanual.wiki/LG-Electronics-USA/S5300/User-Guide-625092-Page-68.png)
![69]AlertYesYour phone will beep when you have received Infoservice message numbers.NoYour phone will not beep even though you havereceived info service messages.]LanguagesYou can select the language you want by pressing[On/Off]. Then, the info service message will beshown in the language that you selected.Download messages (Menu 5.0.6)You can order push messages from WAP serviceproviders. Push messages are notifications of, forexample, news headlines and they can contain a textmessage or the address of a WAP service. Foravailability and subscription, contact your WAPservice provider.]Service: You can set on/off the reception of thepush messages.]Automatic download: If you set on, reception of anew push message starts the connection to WAPatomatically.After selecting a push message, the following menusare available.- Information: Shows the information of the currentpush message.- Load: Connects to a specific site using theinformation in the current push message.MessagesNote]Service providers can update an existing pushmessage with a new incoming push message.(Old one will be replaced with new one.) When push messages expire, they are deletedautomatically.Icon DescriptionRead Push MessageUnread Push Message](https://usermanual.wiki/LG-Electronics-USA/S5300/User-Guide-625092-Page-69.png)
![Music player73MP3 player Menu 7.11. Press MP3 menu, and then select MP3 player.2. Press the left soft key [Options] to accessthe following menus.]View play list: You can view the play list onlistening to the music.]Area repeat: The special area part of the currentmusic is repeated when you select ON of themenu.]Set as ring tone: This menu allows to set the MP3file as a ring tone. You can also set it as a ring tonein Profile.]Setting- EqualizerThis menu helps you to adjust a varity ofenvironment on listening to the music. Thisphone supports four preset menus. When youenter this menu, you can view current value ofequalizer.- PlaymodeThis menu allows to set the play mode.- Set shuffleYou can listen to MP3 music all randomly.- Visual effectYou can select the visual effect menus: Wave,Guitarist,.Aqua. This menu allows to changethebackgroud of main LCD and sub LCD on playingMP3 file.Playlist (Menu 7.1.1)This menu allows to view the whole play list. You canmove the track by pressing the navigation key. In addition, if you select option menu, you can deletethe file or view its information .Music playerNote]The copyright of music files can be protected ininternational treaties and national copyrightlaws. Therefore, it may be necessary to obtain apermission or a license to reproduce or copymusic. In some countries national law prohibitsprivate copying of copyrighted material. Beforedownloading or copying the file, please checkthe national legislation of the applicablecountry concerning the use of such material.](https://usermanual.wiki/LG-Electronics-USA/S5300/User-Guide-625092-Page-73.png)
![My folder75Photo gallery Menu 8.1All the still images taken in the Take Photo menu arestored in this menu. You can view, organise and sendthe pictures saved in your phone.Select the picture you want press the left soft key[Options] to access the following submenus.]Open: You can view one image at a time.]Delete: Delete the selected image.]Set as wallpaper: You can set the selected imageas the LCD wallpaper.]Set as Photo ID: You can add the selected imageto a address book contact to use the Photo CallerID feature.]Send via multimedia message: You can send theselected image via a multimedia message.]Edit: (Shown in the normal view) After selectingthe normal view of an image, you can edit it asfollows. After editing, the changed image can besaved by pressing the left soft key [Save]. And theoriginal image is retained.- Effect filters: You can give various effects to theimage. After selecting the desired effect from 12effect filters using the left/right navigation key,press the left soft key [Save]. The changed imageis stored.]Rotate: You can rotate your picture.]Rename: You can change the name of the selectedimage.]Delete all: Deletes all the images in your phone.]Information: You can check the title, resolution,size, and date and time of the selected image.Video gallery Menu 8.2Select the desired video clip using left / right / up /down navigation keys, you can access the followingsubmenu using the left soft key [Options].]Open: Plays the selected video clip.]Delete: Deletes the selected video clip.]Rename: You can change the title of the selectedvideo clip.My folder](https://usermanual.wiki/LG-Electronics-USA/S5300/User-Guide-625092-Page-75.png)
![My folder76]Playback: You can play video clip with belowoption.- Once: play the selected video clip only one time.- Repeat: play the selected video clip repeatedly.- Continuous: play the all the video clip in yourphone continuously.]Delete all: Deletes all the video clips in yourphone.]Information: You can check the title, size, playingtime and date and time of the selected image.Music Menu 8.3Show the list of MP3, MP4, AAC, M4A, WMA files atMy media\Music in Multimedia memory.] Play: You can play the MP3 file when pressing OKkey or selecting Play menu of Option menu.]Delete: Delete a file.]View details: Show the file information.]Delete all: Delete all files in the list.Graphics Menu 8.4The left soft key [Options] will bring up thefollowing options.]View: You can see the animated graphics one byone.]Send Via: Downloaded Picture can be sent via SMSand MMS.]Set as wallpaper: Currently selected Picture canbe set as a Wallpaper.Ringtones / Audio Menu 8.5The left soft key [Options] will bring up thefollowing options.]Delete: Delete the selected sound.]Send Via: Melody Sound can be sent via SMS andMMS.]Record voice: Set record voice to save a new audiofile to attach to your multimedia message.]Rename: You can change the name of the selectedsound.My folder](https://usermanual.wiki/LG-Electronics-USA/S5300/User-Guide-625092-Page-76.png)
![Calendar78Scheduler Menu 9.1When you enter this menu, a calendar appears. Asquare cursor is located on the current date. You canmove the cursor to another date using navigationkeys. On the calendar, you can use the following keys.You can enter a schedule or memo in the schedulerby pressing the left soft key [Options].Visible menus on Calendar]View daily schedules: Shows the note for thechosen day. Use the up/down navigation keys tobrowse through the note lists. If you set alarm forthe note, Alarm watch is displayed. At that time, ifyou press the left soft key [Select], you can seethe note in detail. Press the left soft key[Options]to delete, edit the note you selected. With yourLeft or Right Navigation keys, you go to previousor next day.]Add new: Allows you to enter up to 20 new eventsor memos in the calendar. A subject, time andrepetition can be entered for each note and analarm set (for details see [Menu 7-1]. After linkinga note to a date, the date is underlined and markedwith an icon in the bottom right of the screen.]View all schedules: Shows the notes that are setfor all days. Use up/down navigation keys tobrowse through the note lists. You can use thesame menu as "Day view" by select key pressingthe right soft key [Options].]Delete past: You can delete the past schedule thathas been already notified you.]Delete all: You can delete for the all note(s).]Go to date: Typing a date, you can go to the datedirectly.CalendarIcon Descriptionskips back a year.skips forward a year.skips back a month.skips forward a month.Note]The alarm feature only works if the telephone isswitched on.](https://usermanual.wiki/LG-Electronics-USA/S5300/User-Guide-625092-Page-78.png)
![79]Set alarm tone: You choose a scheduler alarmtone on the list showing.Memo Menu 9.21. Select a memo pad you would edit.2. If being a (Empty), Write by pressing the left softkey [Select].3. Input the memo and then press the left soft key[OK].Calendar](https://usermanual.wiki/LG-Electronics-USA/S5300/User-Guide-625092-Page-79.png)
![Games & Apps80Java is a technology developed by Sun Microsystems.Similar to the way you would download the JavaApplet using the standard Netscape or MS InternetExplorer browsers, Java MIDIet can be downloadedusing the WAP enabled phone. Depending on theservice provider, all Java based programs such as Javagames can be downloaded and run on a phone.Once downloaded, the Java program can be viewedwithin the Games & Apps menu where you canselect, execute or delete. The Java program files savedin the phone are in .JAD and .JAR formats.Games & Apps Menu 10.1Main Screen, Java' main menu, has a Preinstalledfolder already created, and adds it to the list when anew folder is created or downloaded games arestored.After selecting a downloaded game, and then pressOptions, sub menus available to several options(Open, Information, Send Information, Update,Rename, Permissions, Authentication, New folder andMove) are displayed.]Open: Launch the game.]Delete: Remove the game.]Rename: Rename the game.]New folder: Create a new folder.Games & AppsNote]The JAR file is a compressed format of the Javaprogram and the JAD file is a description file thatincludes all detailed information. From the network,prior to download, you can view all detailed filedescriptions from the JAD file.]While being based on a standard language (J2ME),not all Java applications are compatible with allhandsets on sale insofar as specific libraries may beused for a telephone model. The software may beblocked or switch itself on when Java applicationsnot specifically developed for the phone thismanual refers to are downloaded, making itnecessary to "restart" the handset. We would liketo point out that these problems are caused byincompatible applications and are not a productfault.Warning]Only J2ME (Java 2 Micro Edition) based programswill run in a phone environment.]The J2SE (Java 2 Standard Edition) based programswill only run in a PC environment.](https://usermanual.wiki/LG-Electronics-USA/S5300/User-Guide-625092-Page-80.png)
![Profiles82In Profiles, you can adjust and customise the phonetones for different events, environments, or callergroups. There are five preset profiles: Vibrate only,Quiet, General, Loud and Headset. Each profile canbe personalised. Press the left soft key [Menu] andselect Profiles using up/down navigation keys.Activate Menu 11.11. A list of profiles is displayed.2. In the Profiles list, scroll to the profile you want toactivate and press the left soft key [OK] orOK key.3. Then, select Activate.Personalise Menu 11.2Scroll to the desired profile in the Profile list. Afterpressing the left soft key or the OK key, selectPersonalise. The profile setting option opens. Setthe options as required.]Call alert type: Set the alert type for incomingcalls.]Ring tone: Select the desired ring tone from thelist.]Ring volume: Set the volume of the ringing tone.]Message alert type: Set the alert type formessages.]Message tone: Select the alert tone for messages.]Keypad tone: Select the desired keypad tone.]Keypad volume: Set the volume of keypad tone.]Slide tone: Allows to set the slide tone foradjusting environment.]Effect sound volume: Set the volume of effectsound.]Power on/off volume: Set the volume of theringing tone when switching the phone on/off.ProfilesNote]To protect the sense of hearing while Slideopen, maximum volume level is 3.](https://usermanual.wiki/LG-Electronics-USA/S5300/User-Guide-625092-Page-82.png)
![83]Auto answer: This function will be activated onlywhen your phone is connected to the headset.• Off: The phone will not answer automatically.• After 5 secs: After 5 seconds, the phone willanswer automatically.• After 10 secs: After 10 seconds, the phone willanswer automatically.Rename Menu 11.3You can rename a profile and give it any name youwant. 1. To change the name of a profile, scroll to the profile in the profile list and after pressing the leftsoft key or the OK key, select Rename.2. Key in the desired name and press the OK key orthe left soft key [OK].ProfilesNote]Vibrate only, Silent and Headset profiles cannot be renamed.](https://usermanual.wiki/LG-Electronics-USA/S5300/User-Guide-625092-Page-83.png)
![Extras84Bluetooth Menu 12.1Bluetooth enables compatible mobile devices,peripherals and computers that are in close proximityto communicate directly with each other withoutwires. This handset supports built-in Bluetoothconnectivity, which makes it possible to connectthem with compatible Bluetooth headsets, computerapplications and so on.When you receive data from another Bluetoothdevice, the phone requests for a confirmation. Afterconfirming the transfer, the file will be copied in yourphone.Depending on the file type, it will be stored in thefollowing folders:]MP3: MP3 folder (Menu 6.5.2)]Video (.3GP): video folder (Menu 6.4)]Phonebook contacts (.VCF): Phonebook (Menu 4.1.1)]Other files: File storage folder (Menu 9.4)My devices (Menu 12.1.1)You can view all devices which are compatible withyour Bluetooth phone.Handsfree devices (Menu 12.1.2)You can view the list of handsfree devices which arecompatible with your Bluetooth phone.Settings (Menu 12.1.3)You can register a new device which is compatiblewith Bluetooth. If you already have added the device,you can connect to it after entering a password(usually 0000).ExtrasNote]Due to a compatibility problem, some devicesmay not support this function.]Supported Bluetooth software (Bluetoothstacks) for DUN : - WIDCOMM Bluetooth for Windows 1.4 and3.0](https://usermanual.wiki/LG-Electronics-USA/S5300/User-Guide-625092-Page-84.png)
![85Alarm clock Menu 12.2You can set up to 5 alarm clocks to go off at aspecified time.After selecting an alarm clock using the left soft key[Select],1. Alarm on/off: Select On using the left/rightnavigation key. To deactivate the alarm function,select Off.2. Alarm time: Enter the alarm time using thenumeric keys.3. Repeat: Select the desired one from Once,Mon~Fri, Mon~Sat, and Everyday using theleft/right navigation key.4. Alarm melody: Select the desired alarmmelody using the left/right navigation key.5. Press the left soft key [OK].6. You can edit the alarm clock name. After keying inthe name, press the left soft key [OK].When an alarm function is activated, “ ” is shownin standby mode.When the alarm time is reached, it sounds the alarmmelody.]To turn off the alarm, press the right soft key[Quit].1. Select On and enter the alarm time you want.2. Select the repeat period : Once, Mon~Fri,Mon~Sat, Everyday.3. Select the alarm tone you want and press the leftsoft key [OK].4. Edit the alarm name and press the left soft key[OK].ExtrasNote]Wake up alarm works only when the phone ison.](https://usermanual.wiki/LG-Electronics-USA/S5300/User-Guide-625092-Page-85.png)
![Extras86Voice recorder Menu 12.3The voice memo feature you to record up to 10 voicemessages and each memo is up to 20 Seconds.Record (Menu 12.3.1)1. Once recording is started, the message Recordingand the remaining time is displayed.2. If you want to finish recording, press the left softkey [Save].3. Key in Voice memo title, press the left soft key[OK].View list (Menu 12.3.2)The phone shows voice memo list. You can Play andDelete the recorded voice memo.]Play: Select this menu to listen to the selectedmemo.]Delete: Deletes the recorded memo.]Record new: Launches recording of new memo.]Rename: Changes the title of the selected voicememo.]Send via multimedia message: Creates a newmultimedia message and attaches the selectedvoice memo as an audio file.]Delete all: Deletes all memos. Press the left softkey [Yes] to confirm.Calculator Menu 12.4This feature allows you to use the telephone as acalculator able to perform standard arithmeticalfunctions: addition, subtraction, multiplication anddivision (numbers with a maximum of two decimalsmay be entered).Using the calculator1. Enter the first number of the operation using thenumerical keys.2. Use the navigation keys to select the function.ExtrasNote]In standby mode, hold down the ‘ # ’ key todirectly access recording of a new memo.](https://usermanual.wiki/LG-Electronics-USA/S5300/User-Guide-625092-Page-86.png)
![873. Enter the second number and press the left softkey [Result] or the OK key to calculate the result.4. After performing the calculation, press the left softkey [Reset] to reset the calculator.World time Menu 12.5This allows you to check GMT (Greenwich MeanTime) and the time in some of the world’s majorcities by using the left/right navigation keys.The name of the city, date and local time are shownon the display screen.To select the time zone:1. Select the city corresponding to the time zone bypressing one or more times the left/rightnavigation keys. The date and local time will beshown.2. To set the selected time as the time shown on thedisplay screen when in standby mode, press theleft soft key [Set].Unit converter Menu 12.6This converts any measurement into a unit you want.There are 4 types that can be converted into units:Length, Area, Weight, and Volume.1. You can select one of four unit types by pressingleft soft key [Unit].2. Select the standard value by using left/rightnavigation key.3. Select the unit you want to convert by pressing upand down navigation.4. You can check the converted value for the unityou want. Also, you can input a decimal numberby pressing .ExtrasNote]To cancel any errors or data on the displayscreen press the key. To enter a decimalpoint, press the key. To enter a negativenumber, press the key.Note]A decimal number can be entered by pressingthe ‘ # ’ key.](https://usermanual.wiki/LG-Electronics-USA/S5300/User-Guide-625092-Page-87.png)