LG Electronics USA T23HLVA 23" LCD TV/ Monitor User Manual User s Manual H
LG Electronics USA 23" LCD TV/ Monitor User s Manual H
UserManual.wiki
>
LG Electronics USA
>
T23HLVA User Manual
users manual
Navigation menu
Upload a User Manual
Namespaces
Wiki Guide
HTML
PDF
Info
Views
User Manual
Discussion / Help
Navigation
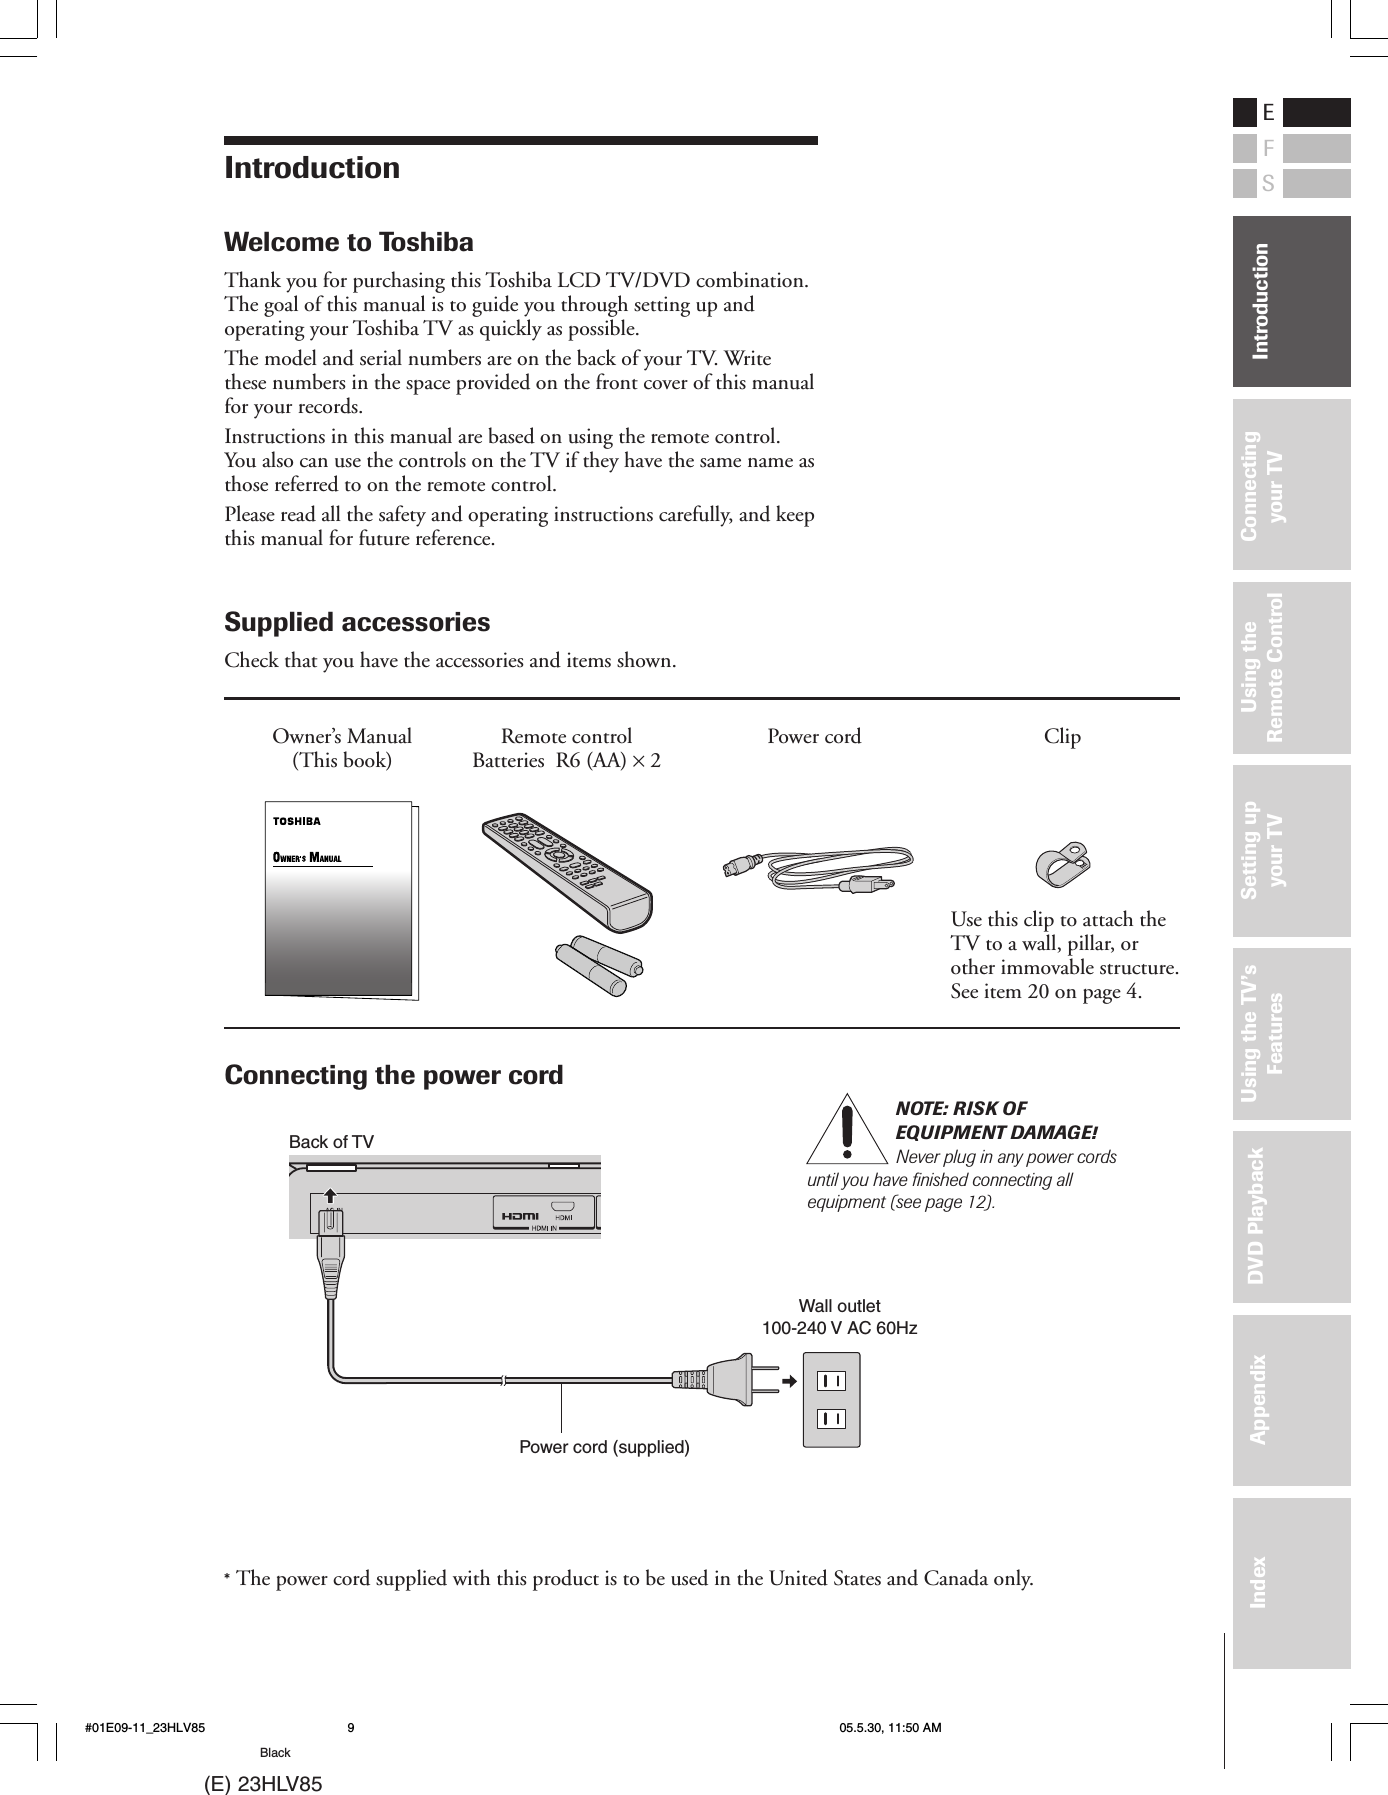
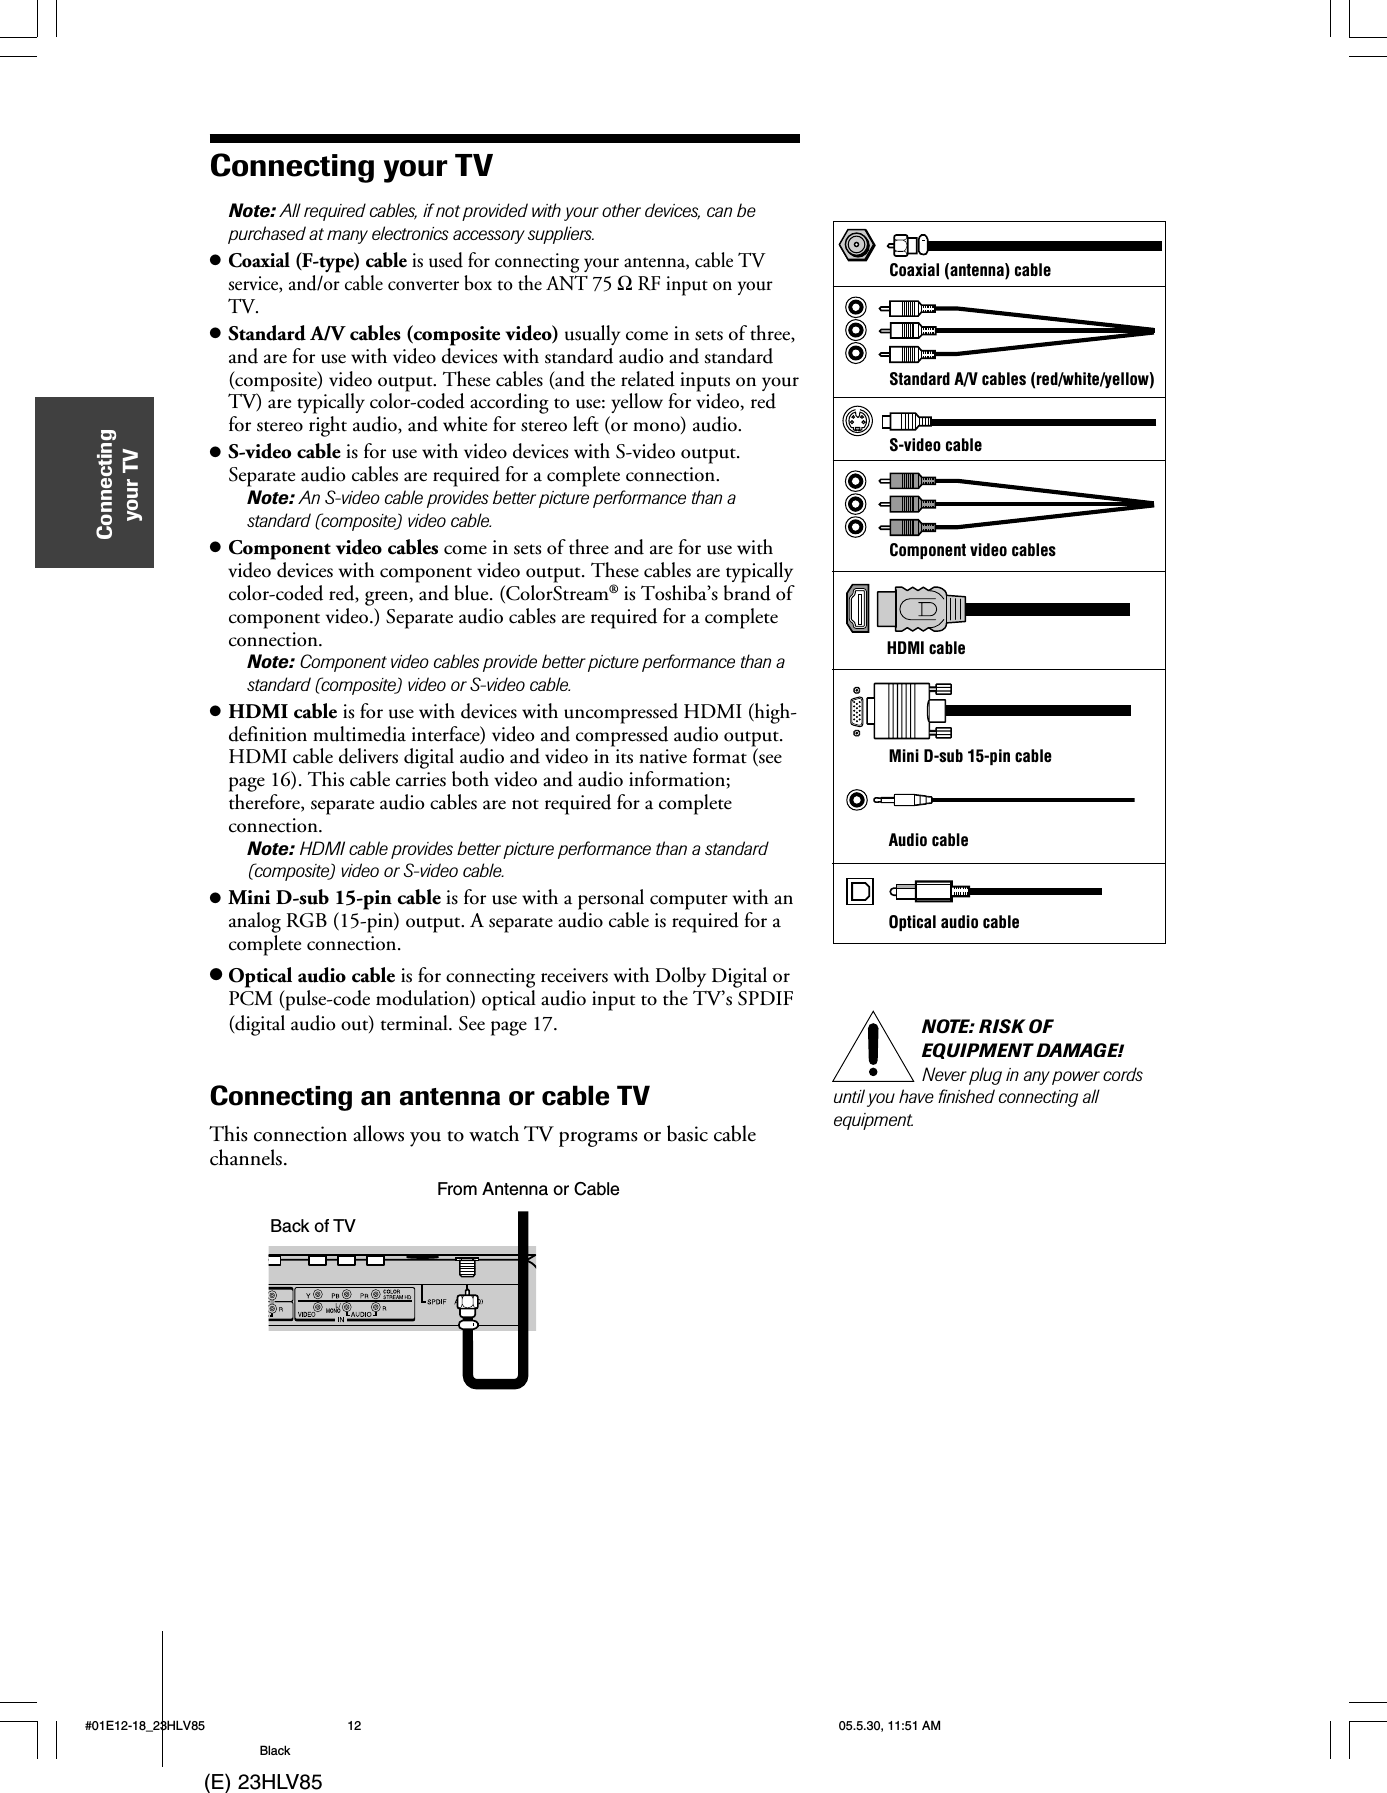
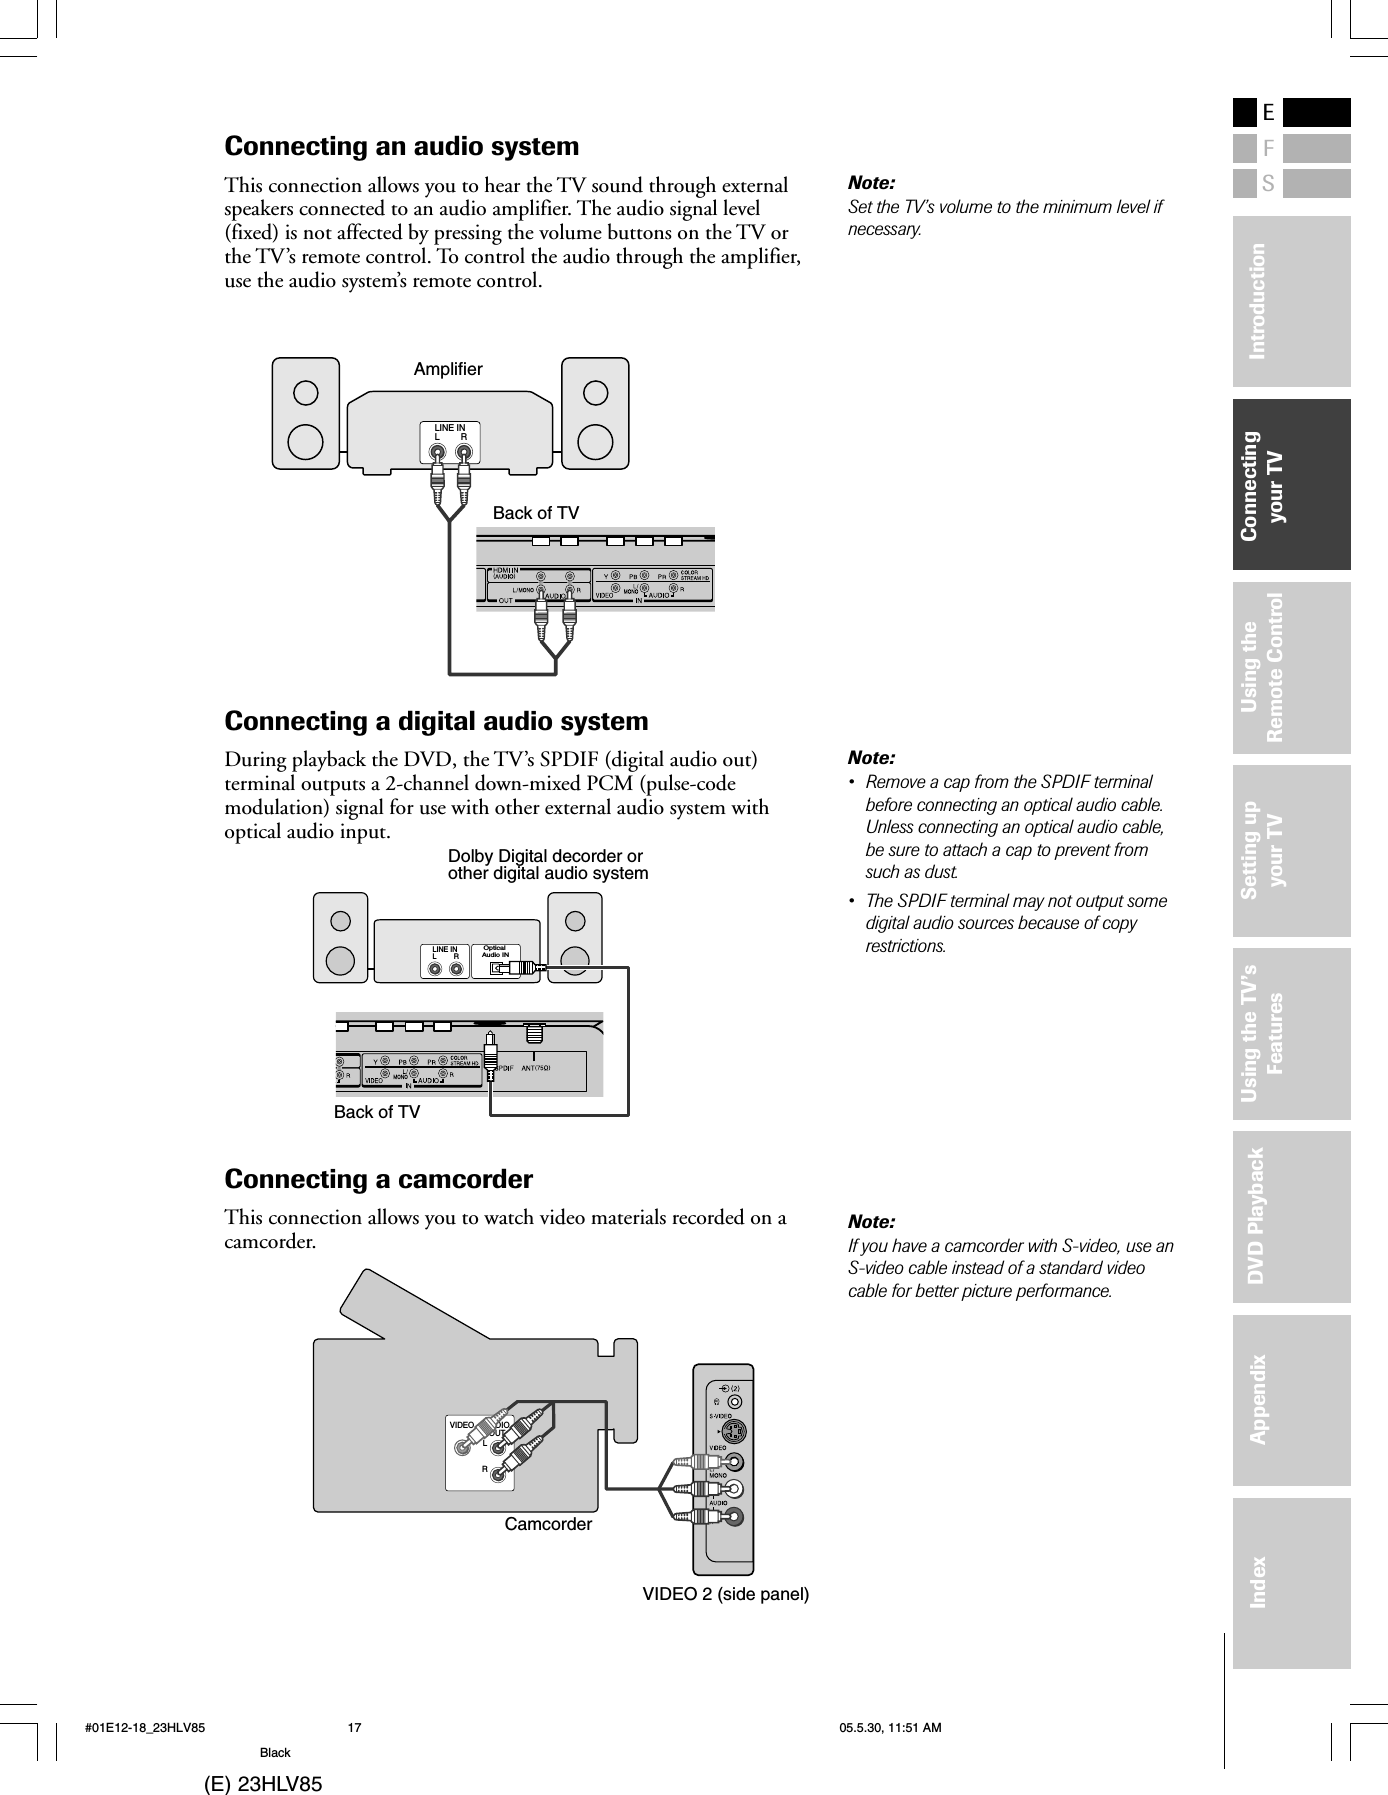
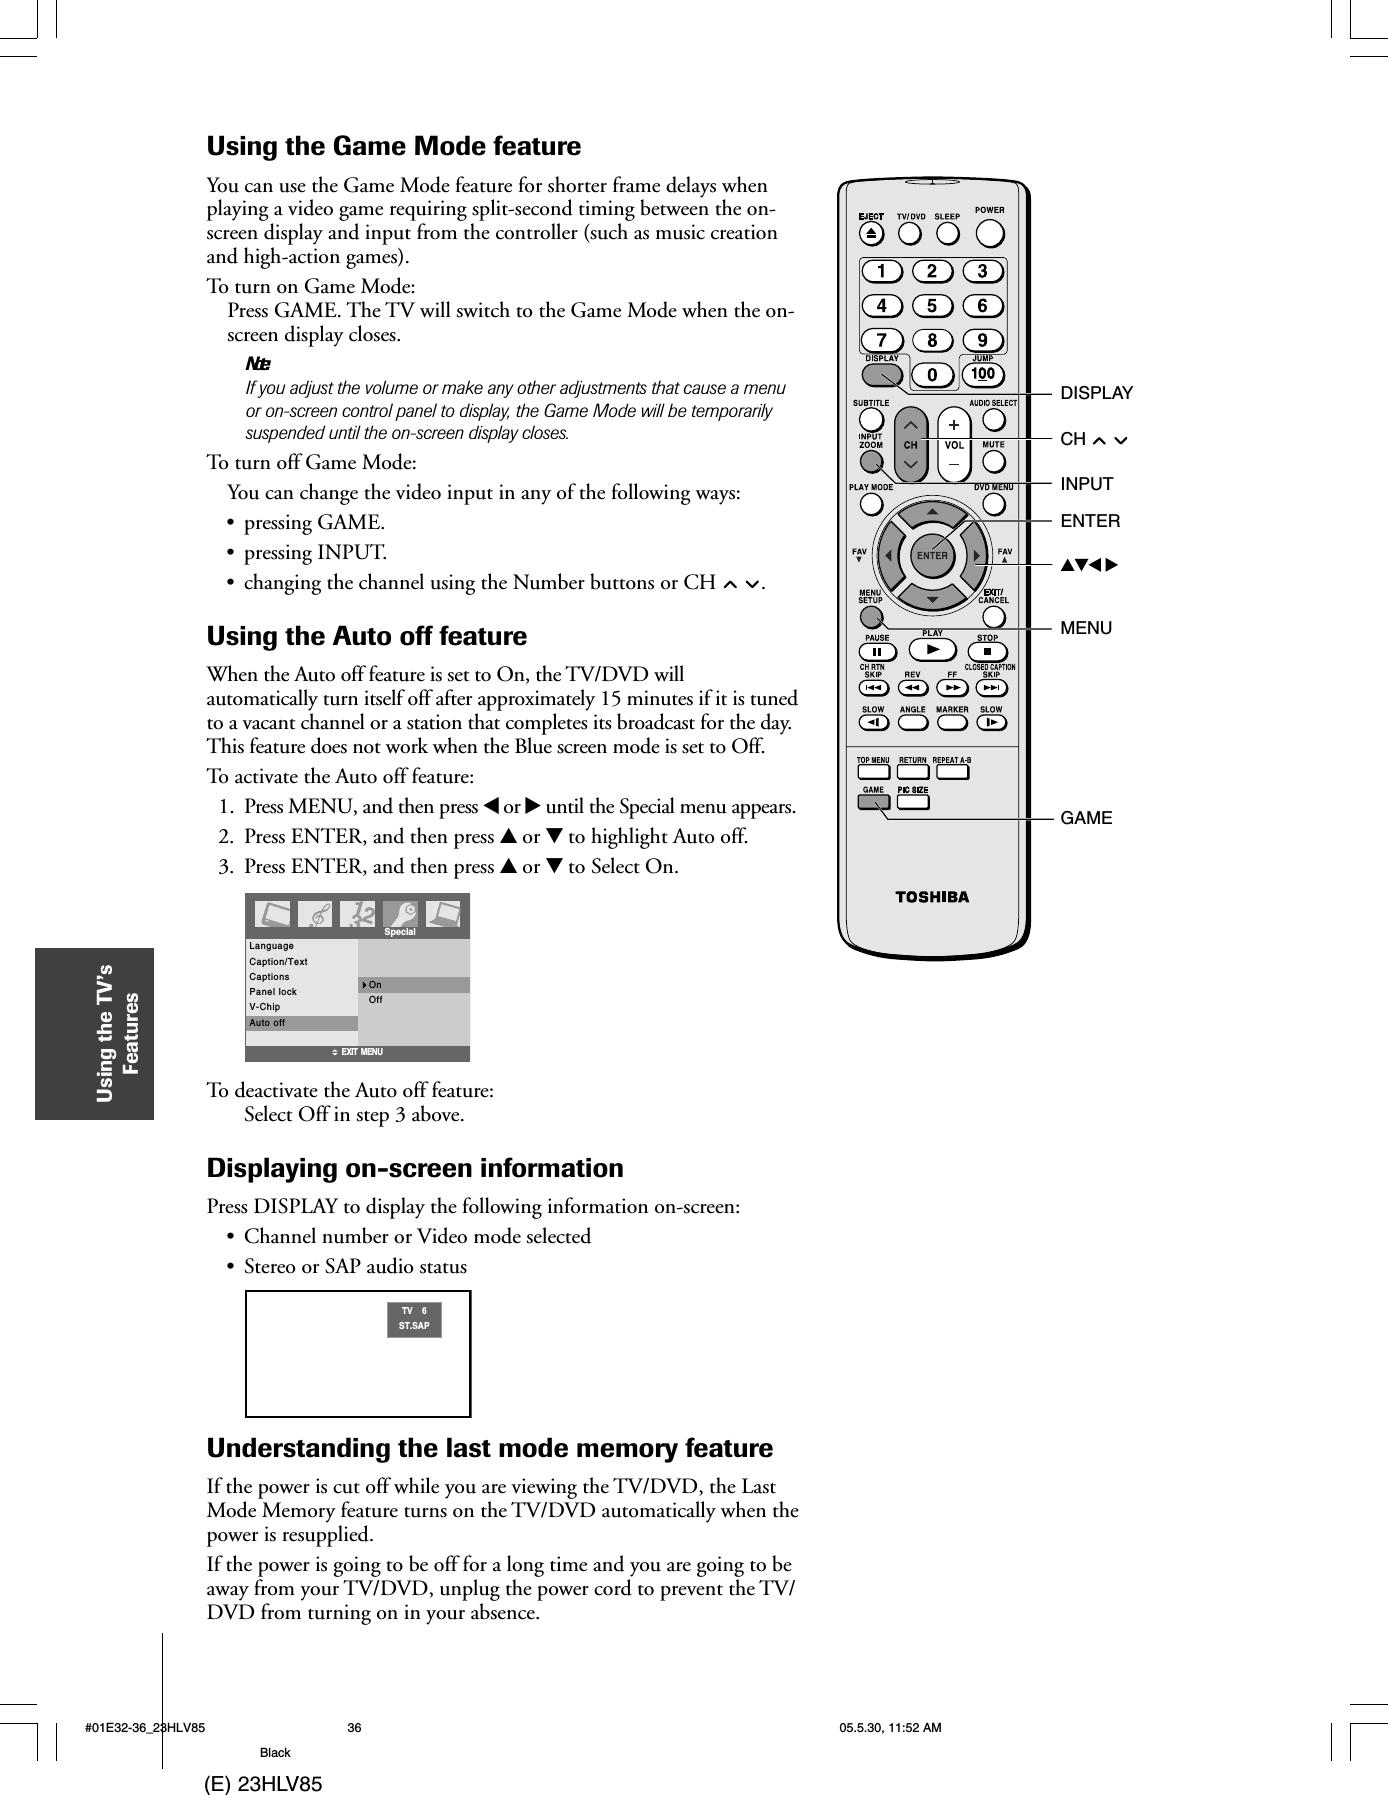
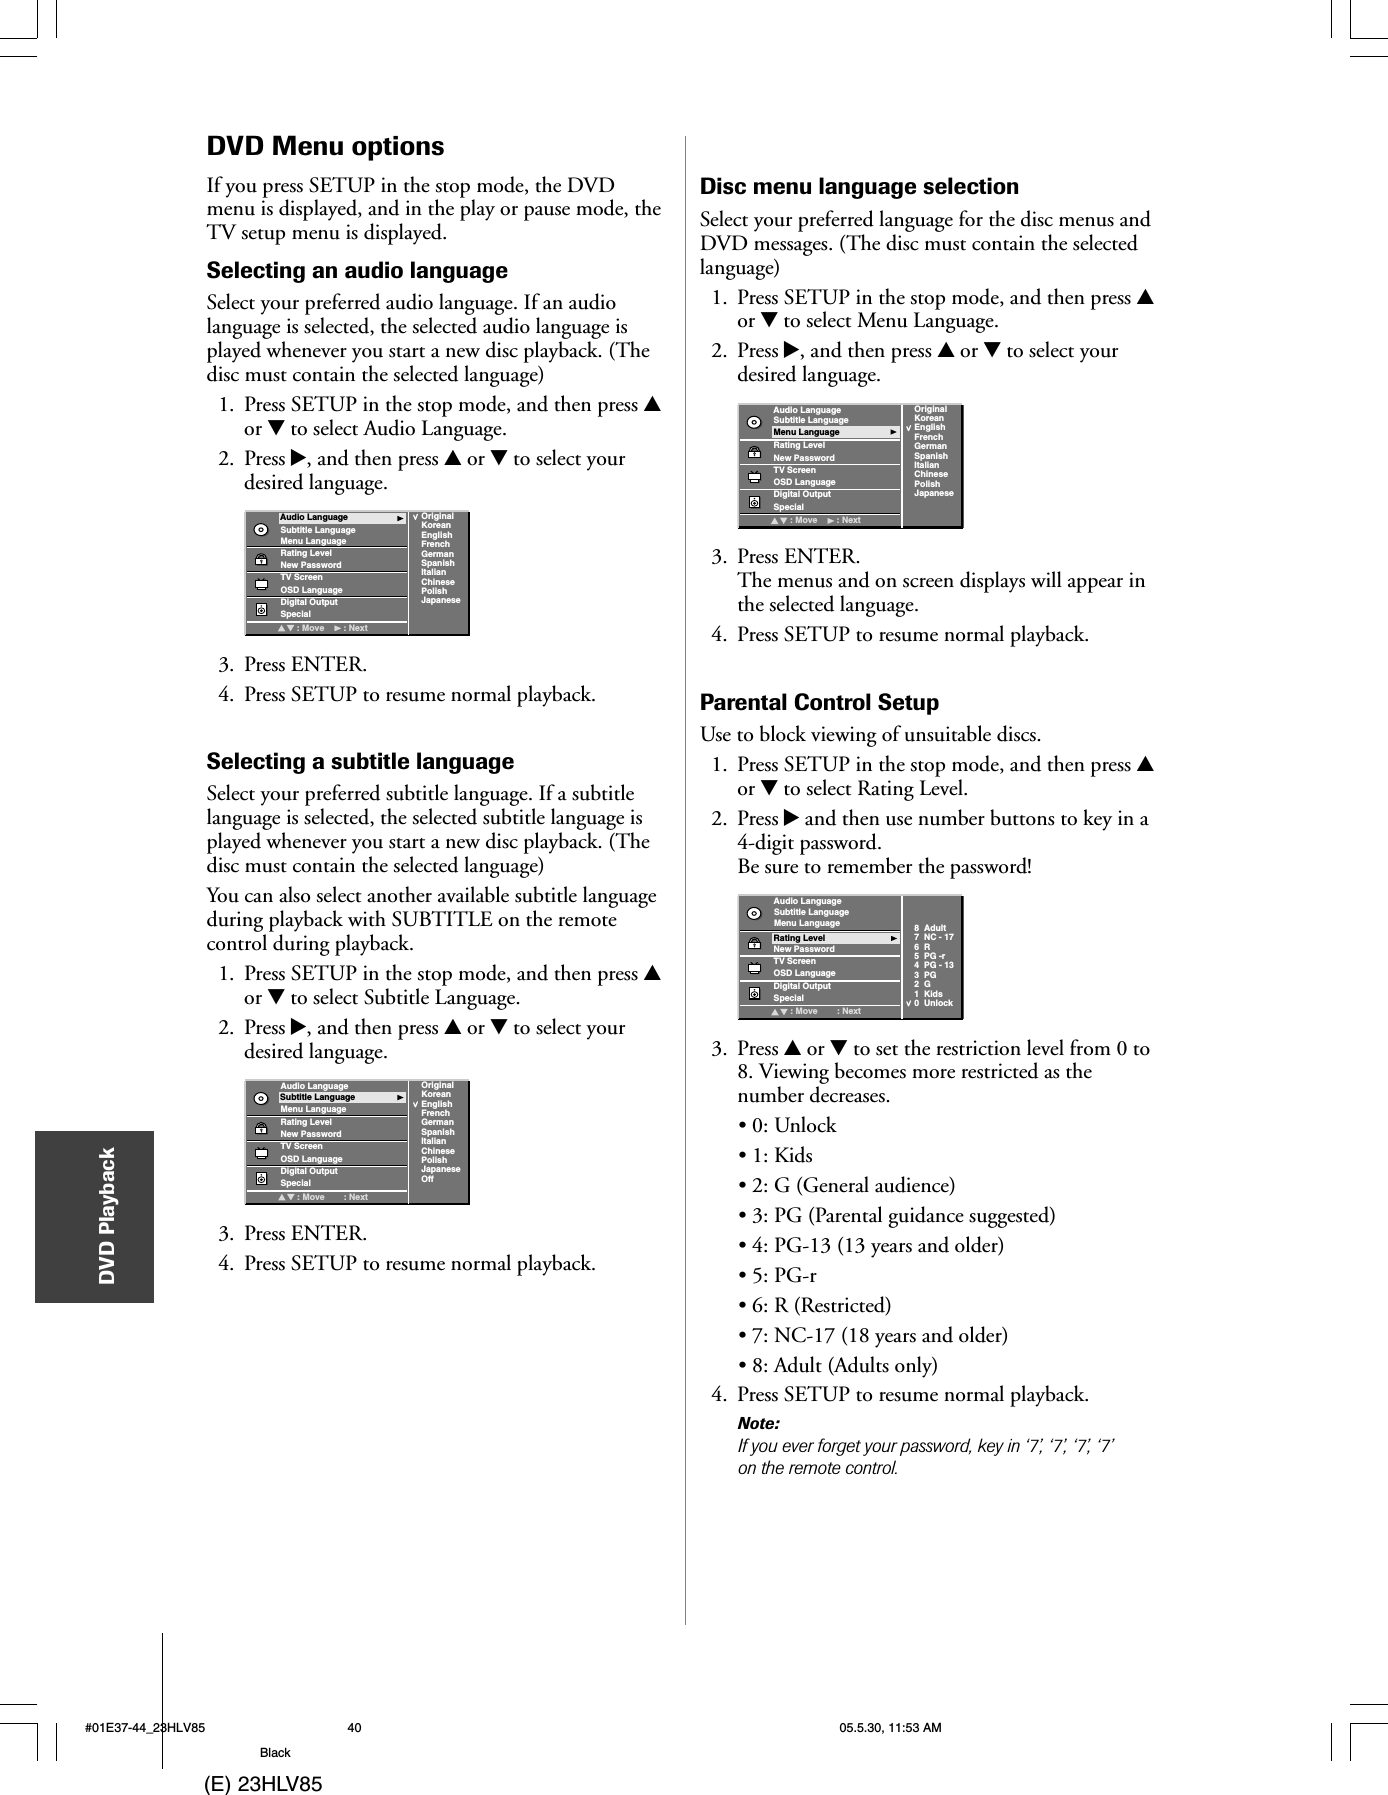
![(E) 23HLV85Connectingyour TV[1] HDMI = High-Definition Multimedia Interface.[2] DVI = Digital Video Interface.[3] HDCP = High-bandwidth Digital Content Protection.[4] EIA/CEA-861/861B compliance covers the transmission ofuncompressed digital video with high-bandwidth digitalcontent protection, the technology of which is beingstandardized for reception of high-definition video signals.Because this is an evolving technology, it is possible thatsome devices may not operate properly with the TV.Connecting an HDMI™ or a DVI device to the HDMI inputHDMI, the HDMI logo and High-Definition Multimedia Interface aretrademarks or registered trademarks of HDMI Licensing LLC.To connect a DVI device, you will need:•one HDMI–to–DVI adapter cable(HDMI type A connector)For proper operation, the length of an HDMI-to-DVIadapter cable should not exceed 9.8 ft (3m). Therecommended length is 6.6 ft (2m).•one pair of standard analog audio cablesAn HDMI-to-DVI adapter cable transfers only video.Separate analog audio cables are required (seeillustration below).VIDEO AUDIOLRINOUTDVIOUTTo ensure that the HDMI or DVI device is resetproperly, it is recommended that you followthese procedures:•When turning on your electronic components,turn on the TV first, and then the HDMI orDVI device.•When turning off your electronic components,turn off the HDMI or DVI device first, andthen the TV.The HDMI[1] input on your TV receives digital audioand uncompressed digital video from an HDMIdevice or uncompressed digital video from a DVI[2]device.This input is designed to accept HDCP[3] programmaterial in digital form from EIA/CEA-861/861B–compliant[4] consumer electronic devices (such as a set-top box or DVD player with HDMI or DVI output).The HDMI input is designed for best performancewith 1080i high-definition video signals, but will alsoaccept and display 480i, 480p, and 720p signals.To connect an HDMI device, you will need:• one HDMI cable (type A connector)For proper operation, it is recommended that youuse a short HDMI cable.HDMI cable transfers both video and audio. Separateanalog audio cables are not required (see illustrationbelow). Some CDVs (Video CDs) may not outputdigital audio signals, in which case you may be ableto hear sound by connecting analog audio cables.However, if you connect analog audio cables with thisconnection, the HDMI terminal on the TV will notreceive the HDMI digital audio signal and you willhear analog audio only.VIDEO AUDIOLRINOUTHDMI OUTTV lower back panelHDMI deviceTV lower back panelDVI device#01E12-18_23HLV85 05.5.30, 11:51 AM16Black](https://usermanual.wiki/LG-Electronics-USA/T23HLVA/User-Guide-553434-Page-11.png)

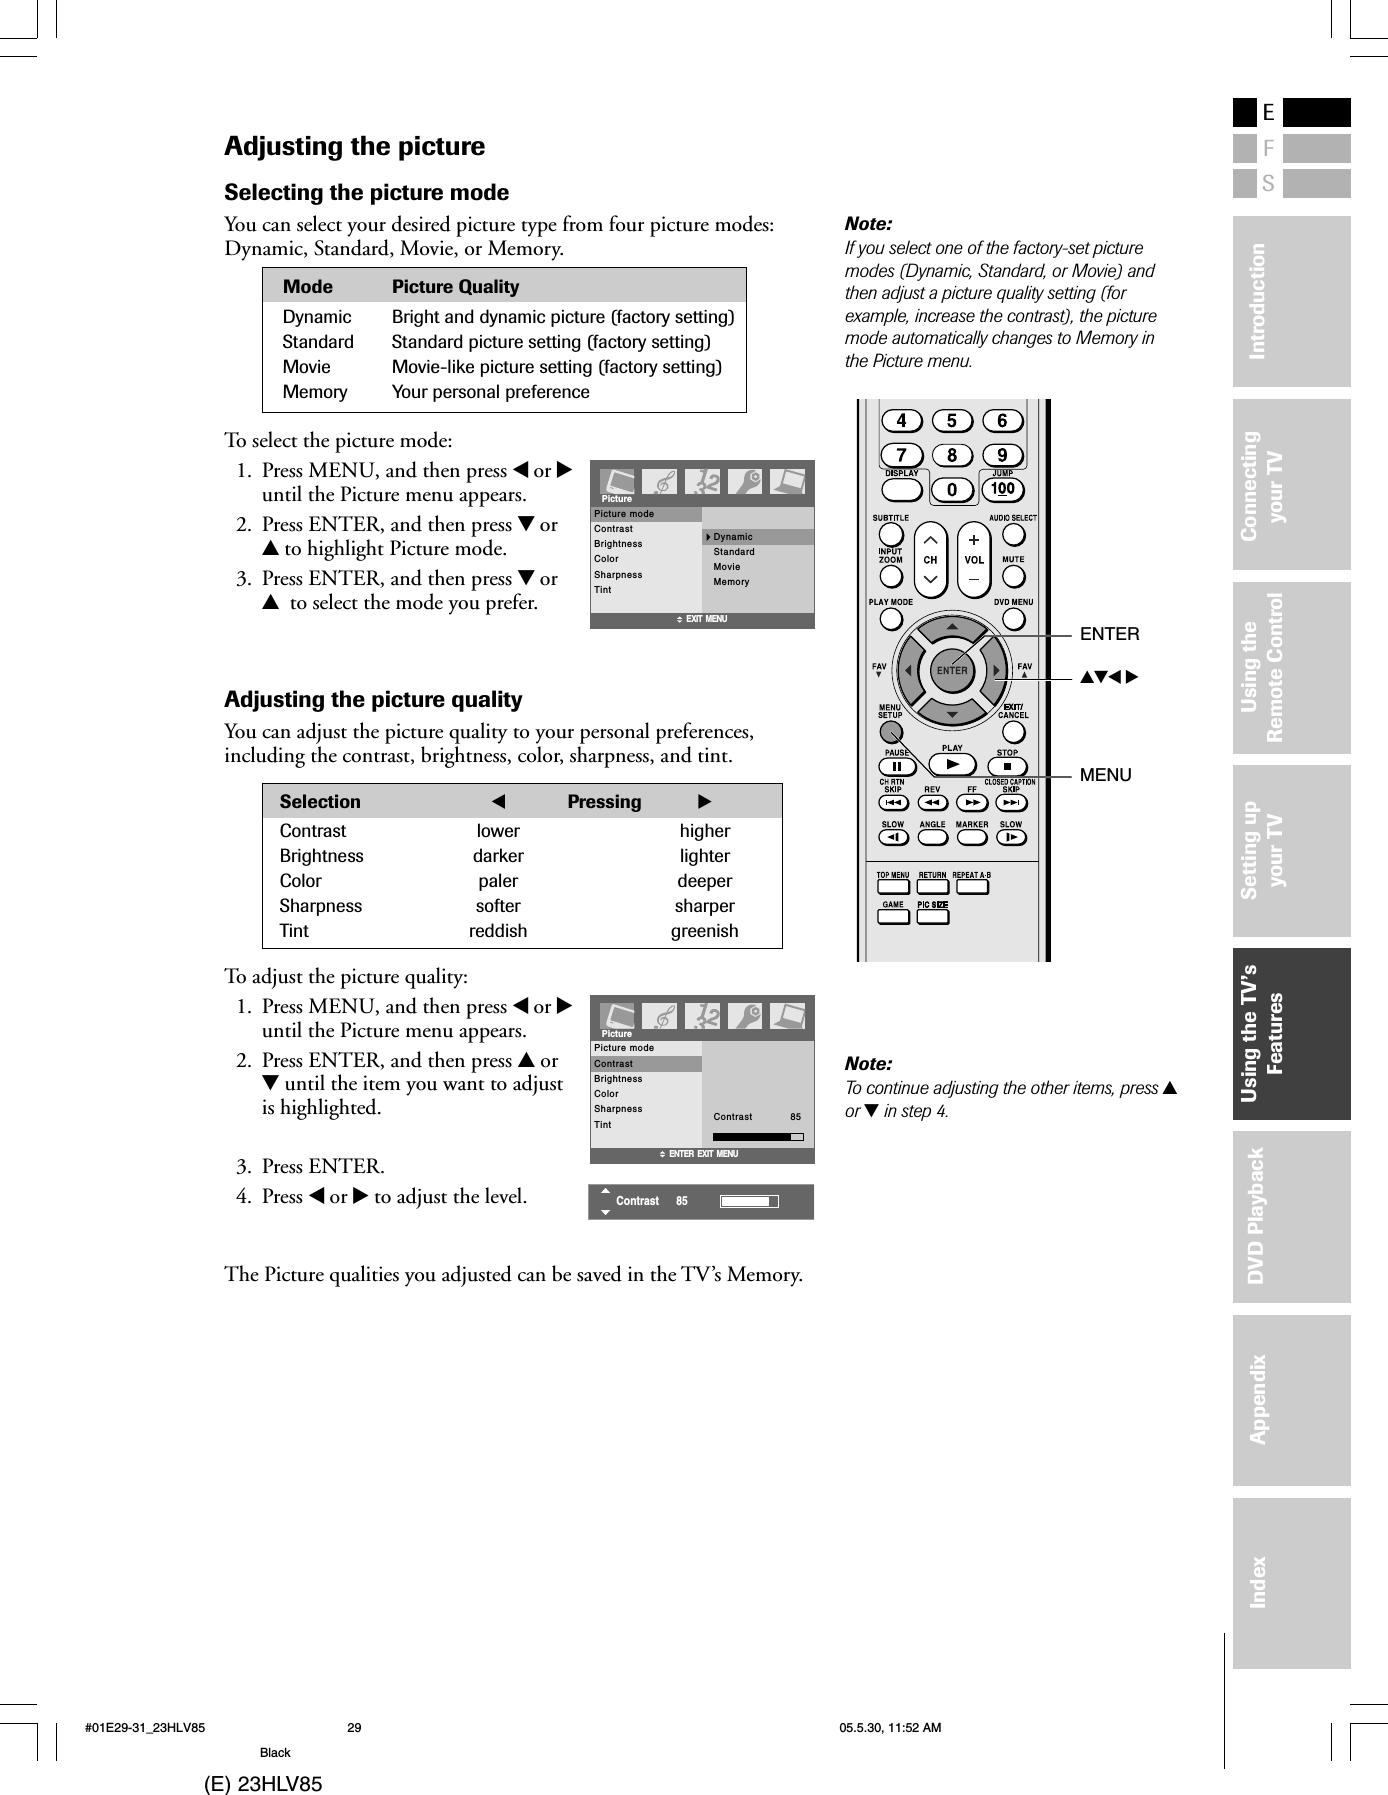
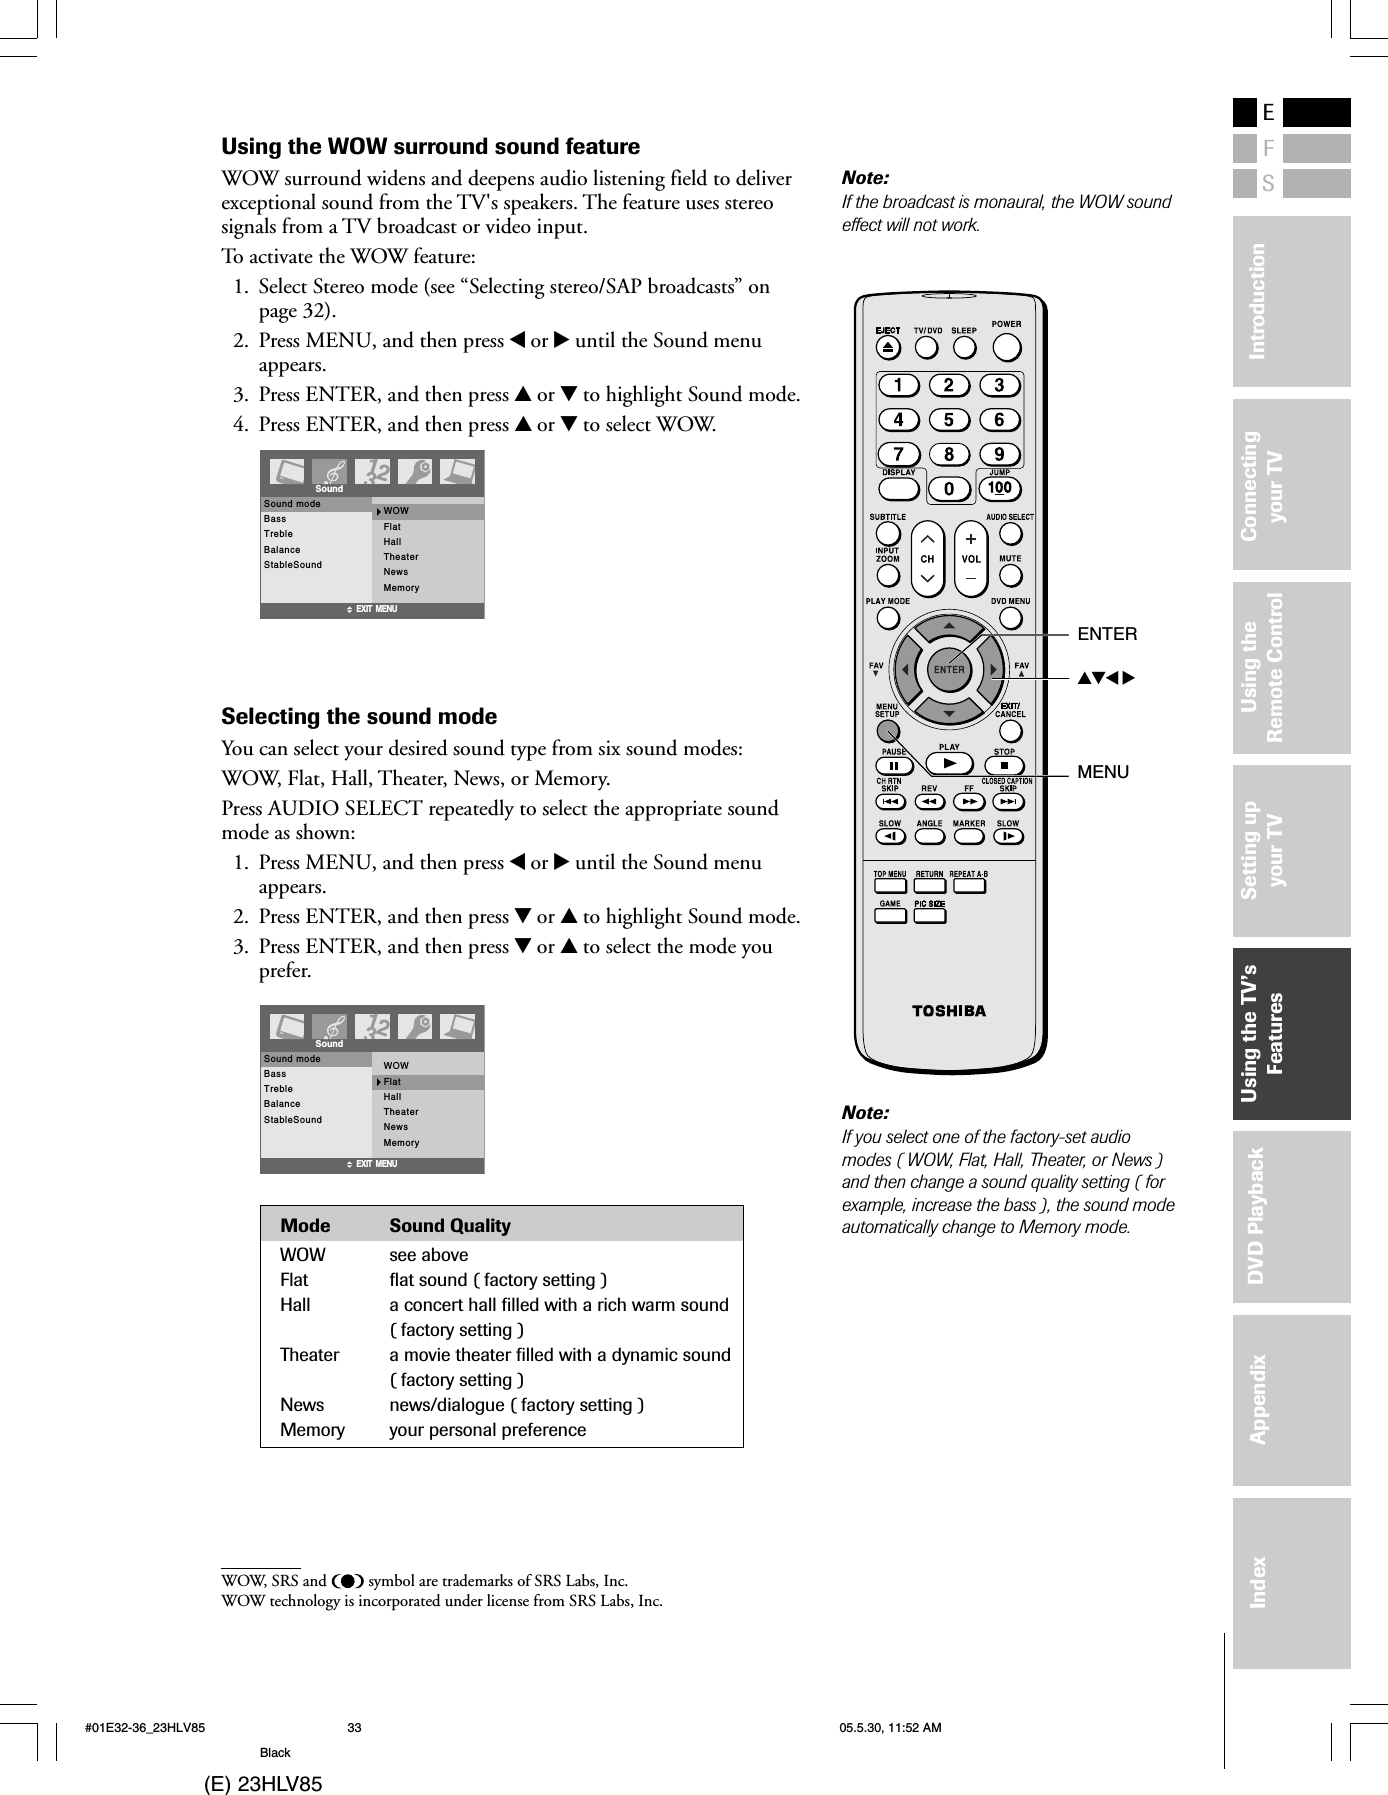
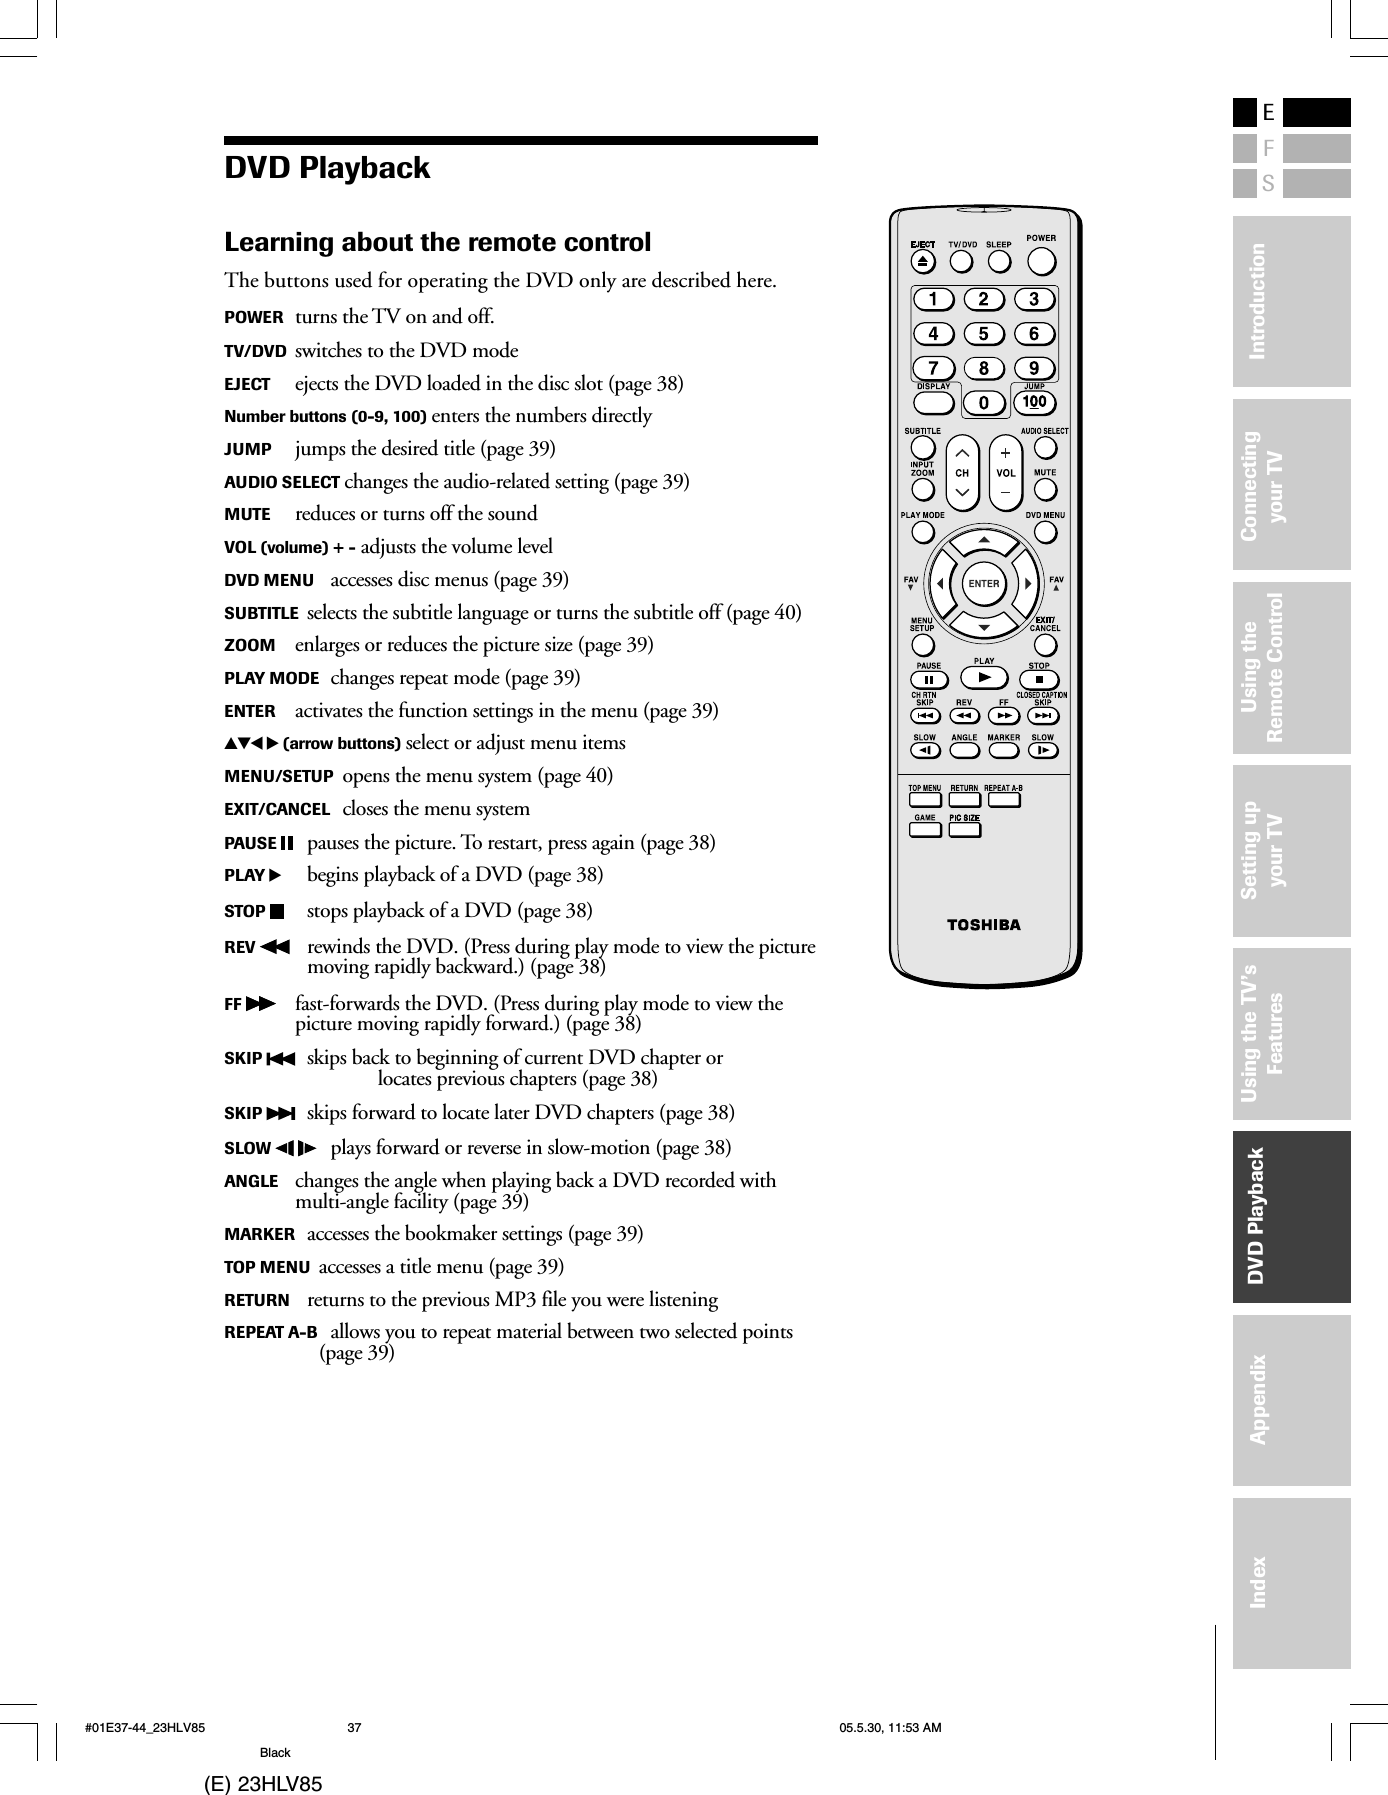
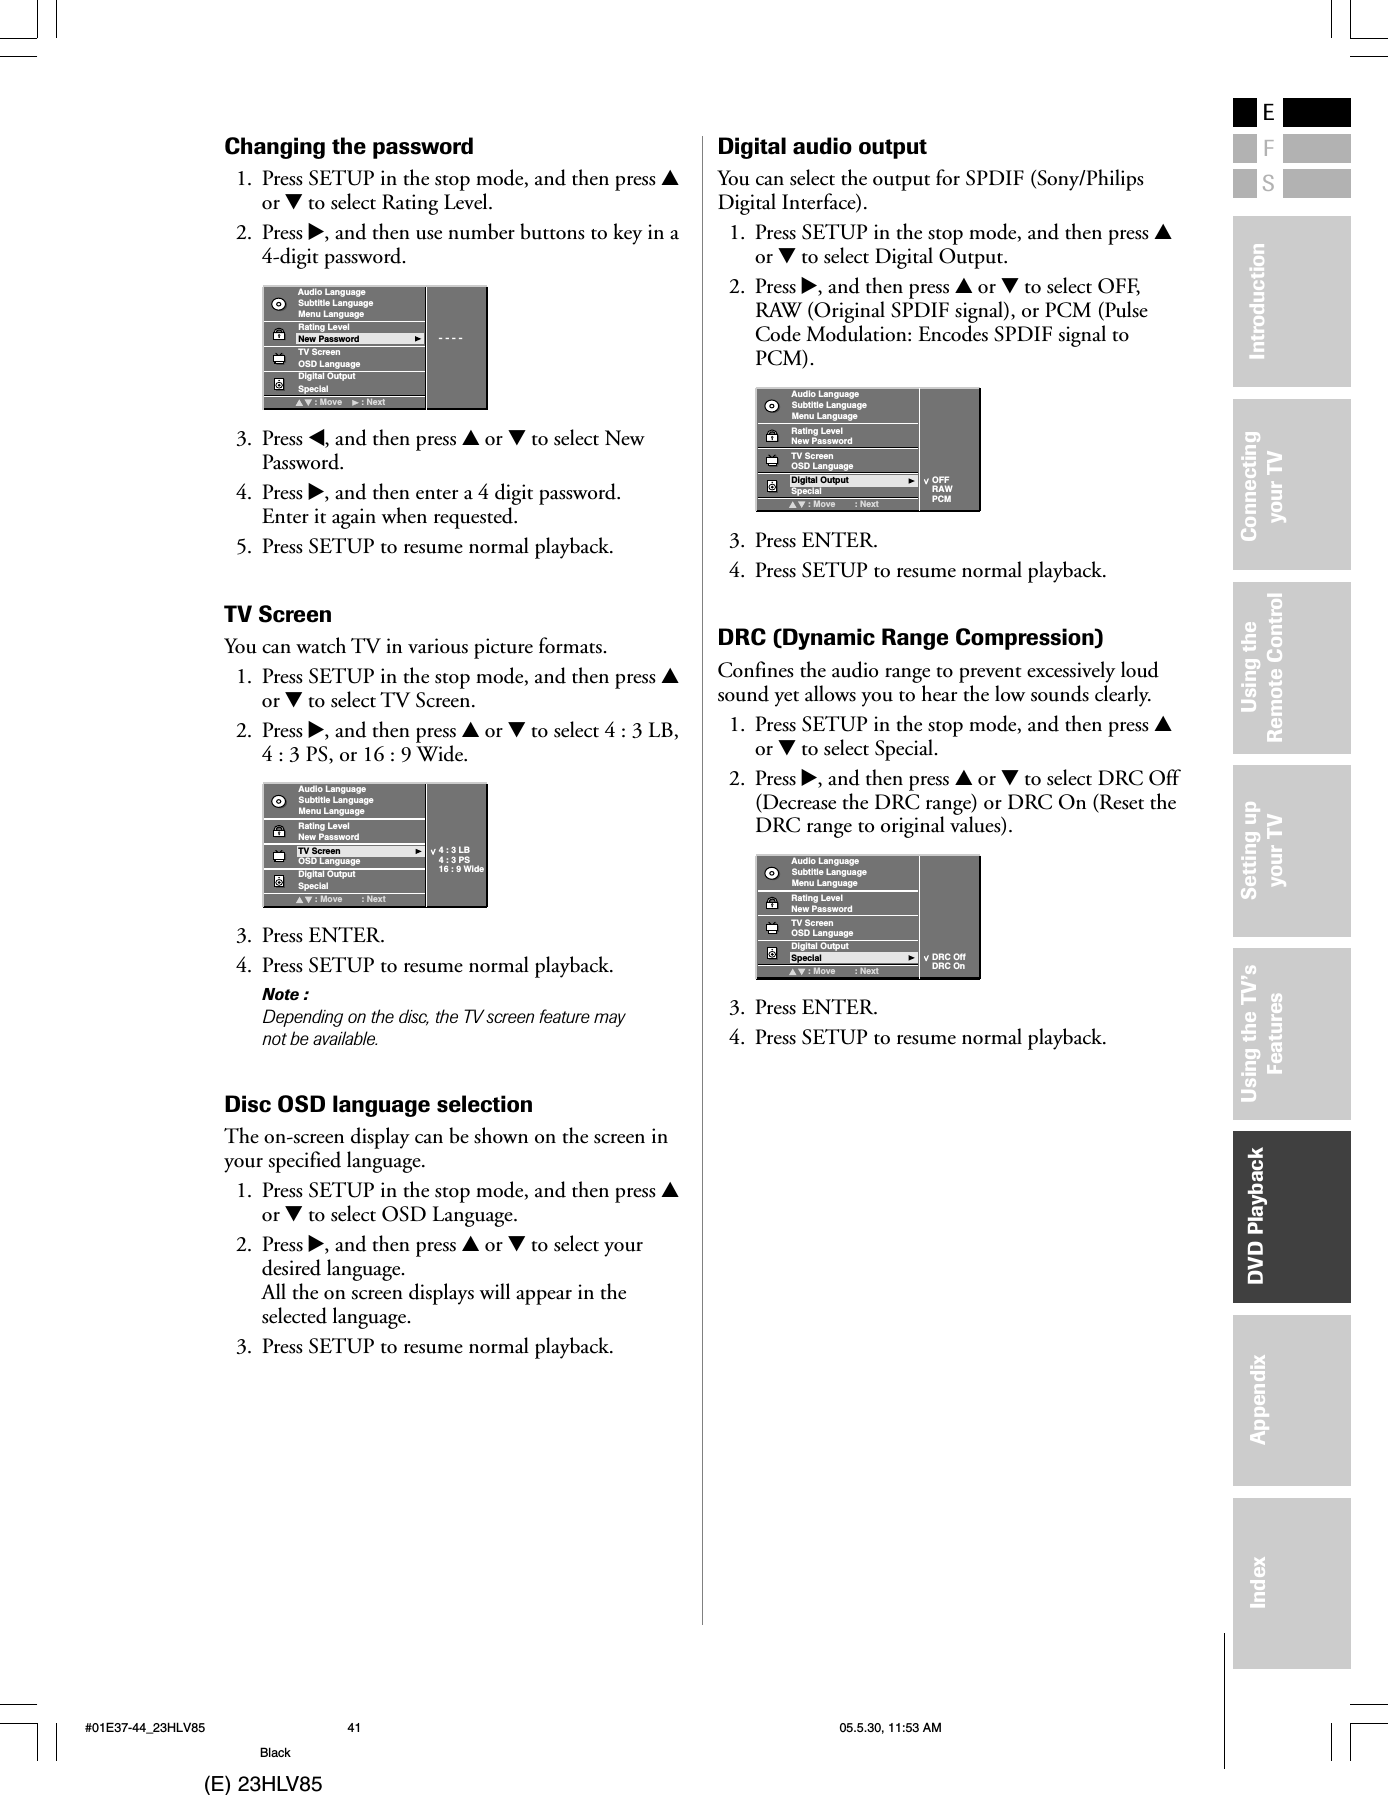
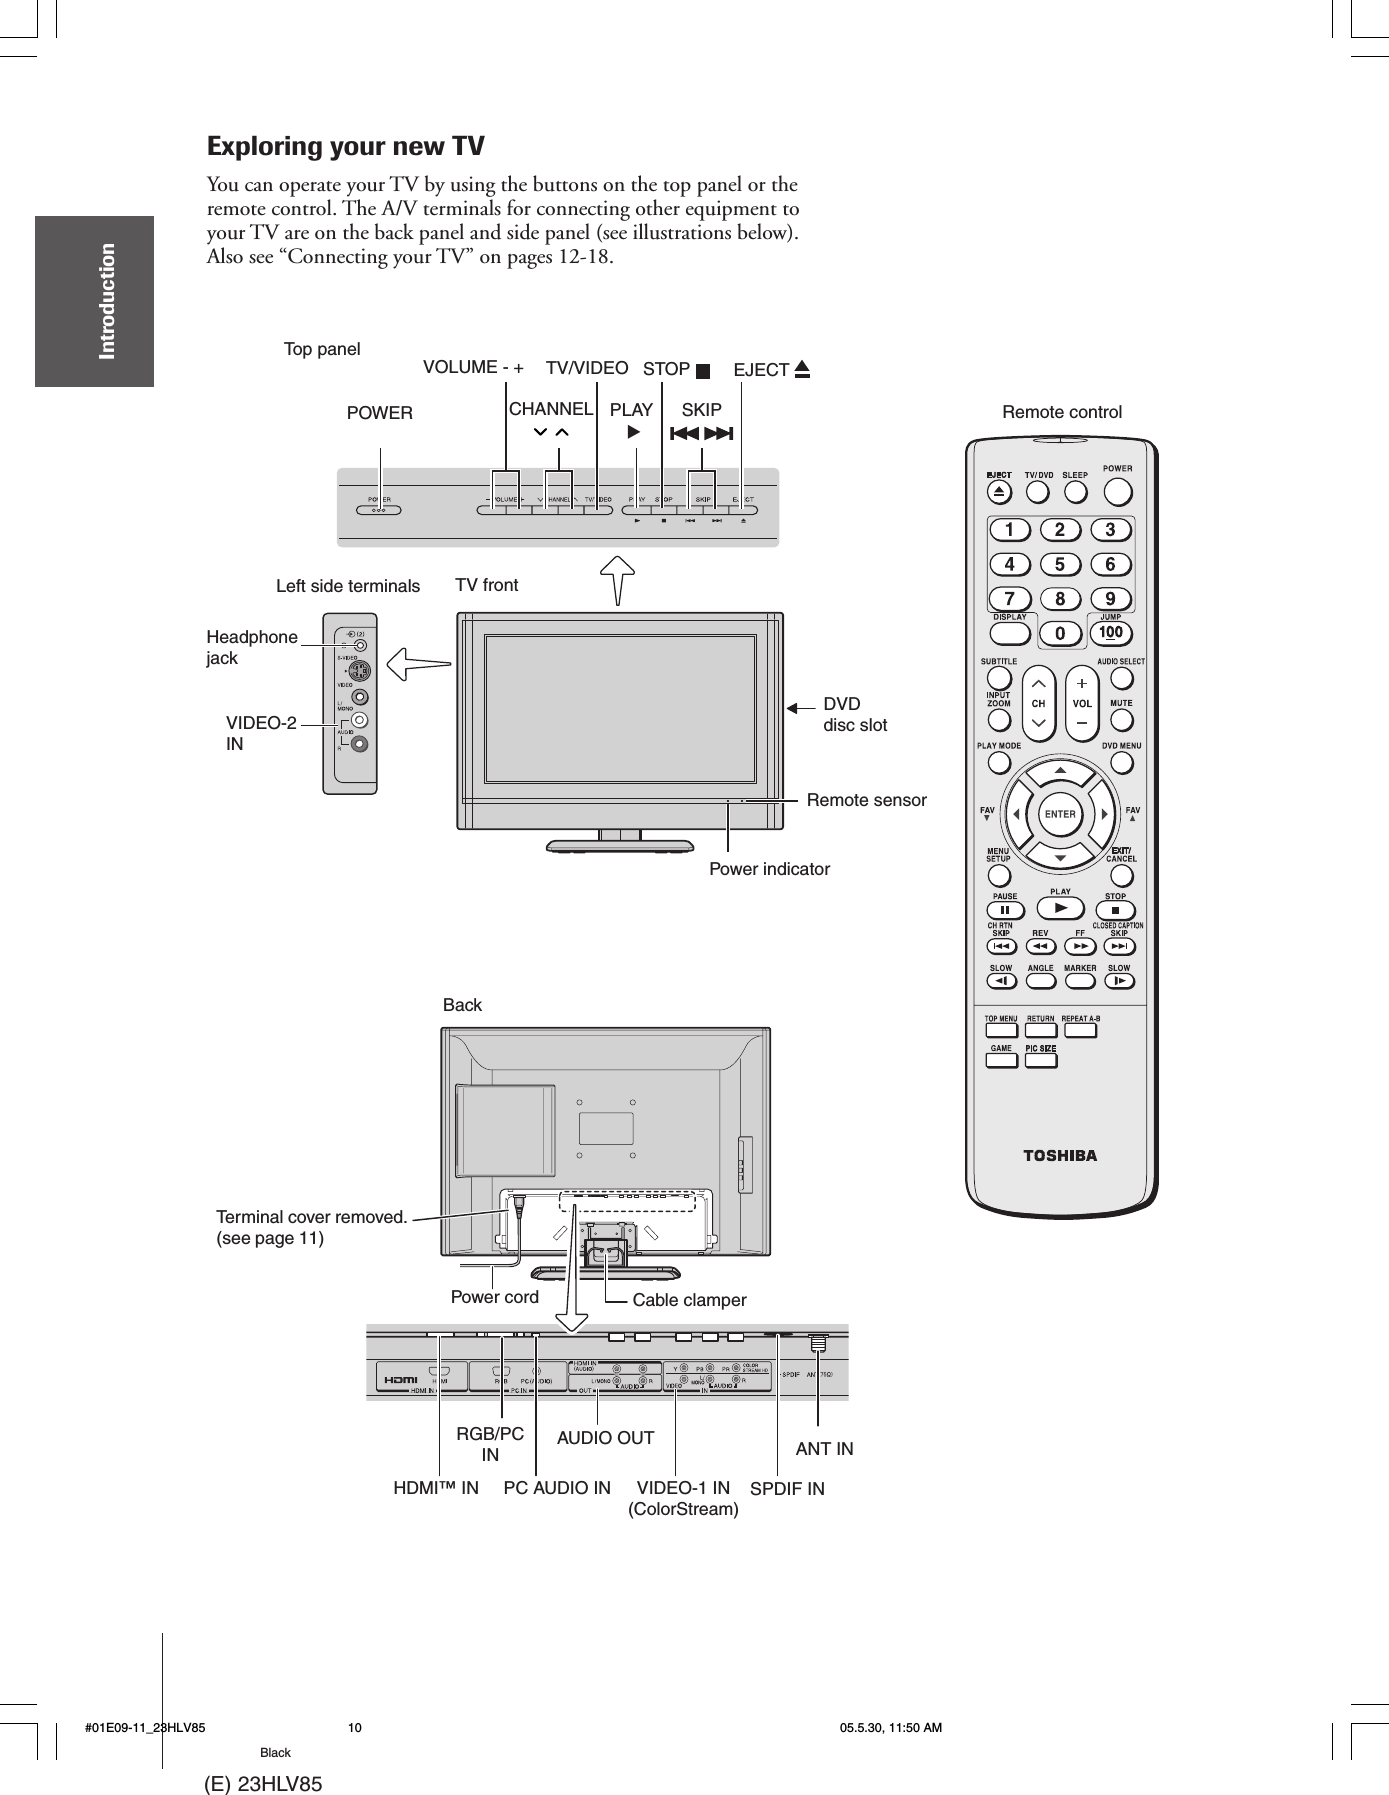
![(E) 23HLV85DVD PlaybackMP3/WMA files Playback optionsMP3/WMA Files Playback1. When inserted, the MP3 menu screen appearsautomatically depending on the MP3 disc’s folder(directory) structure as shown to the below.2. Press y or z to find desired folder and then pressENTER.3. Press y or z to find the desired MP3 title andthen press ENTER.Stop/Pause PlaybackStop PlaybackPress STOP to stop playback.Pause Playback1. Press PAUSE during playback.2. Press PLAY again to return to normalplayback.Repeat playbackYou can play a specific track repeatedly.1. Press PLAY MODE during playback.Each time you press PLAY MODE, the repeatmode changes in the following order: Track Repeat Track Repeat Directory OffA-B repeat playbackA-B repeat playback allows you to repeat materialbetween two selected points.1. Press REPEAT A-B to select the start pointduring playback. “ A” is displayed on TVscreen and the starting point of your selectedsegment is set up.2. Press REPEAT A-B again to select the end point.“AB” is displayed on TV screen and theending point is set up.Playback starts at the point that you selected.Playback stops at the end point, returns to PointA automatically, then starts again.3. Repeatedly press REPEAT A-B until “Off”appears on the screen to resume normal playback.Playable filesMP3/WMA disc compatibility with this player islimited as follows:• Playable discs: CD-ROM, CD-R, CD-RW• Sampling Frequency: 32 kHz, 44,1 kHz, 48 kHz• Bit rate: WMA: 48 kbps - 192 kbps(CBR)MP3: 32 kbps - 320 kbps (CBR)• CD physical format: Mode 1• File system: ISO9660, UDF without interleave• File name: File names are limited to eight charactersor less and must incorporate “MP3” or“WMA” extension.e.g.“********.MP3”, “********.WMA”File names cannot contain specialcharacters such as “?!><+*}{`[@]:;\ /.,” etc.• File size: Less than 50 bytes• Total number of files: Less than 650• WMA codec version: V2, V7, V8, V9 (Stereo soundonly)#01E37-44_23HLV85 05.5.30, 11:53 AM42Black](https://usermanual.wiki/LG-Electronics-USA/T23HLVA/User-Guide-553434-Page-27.png)
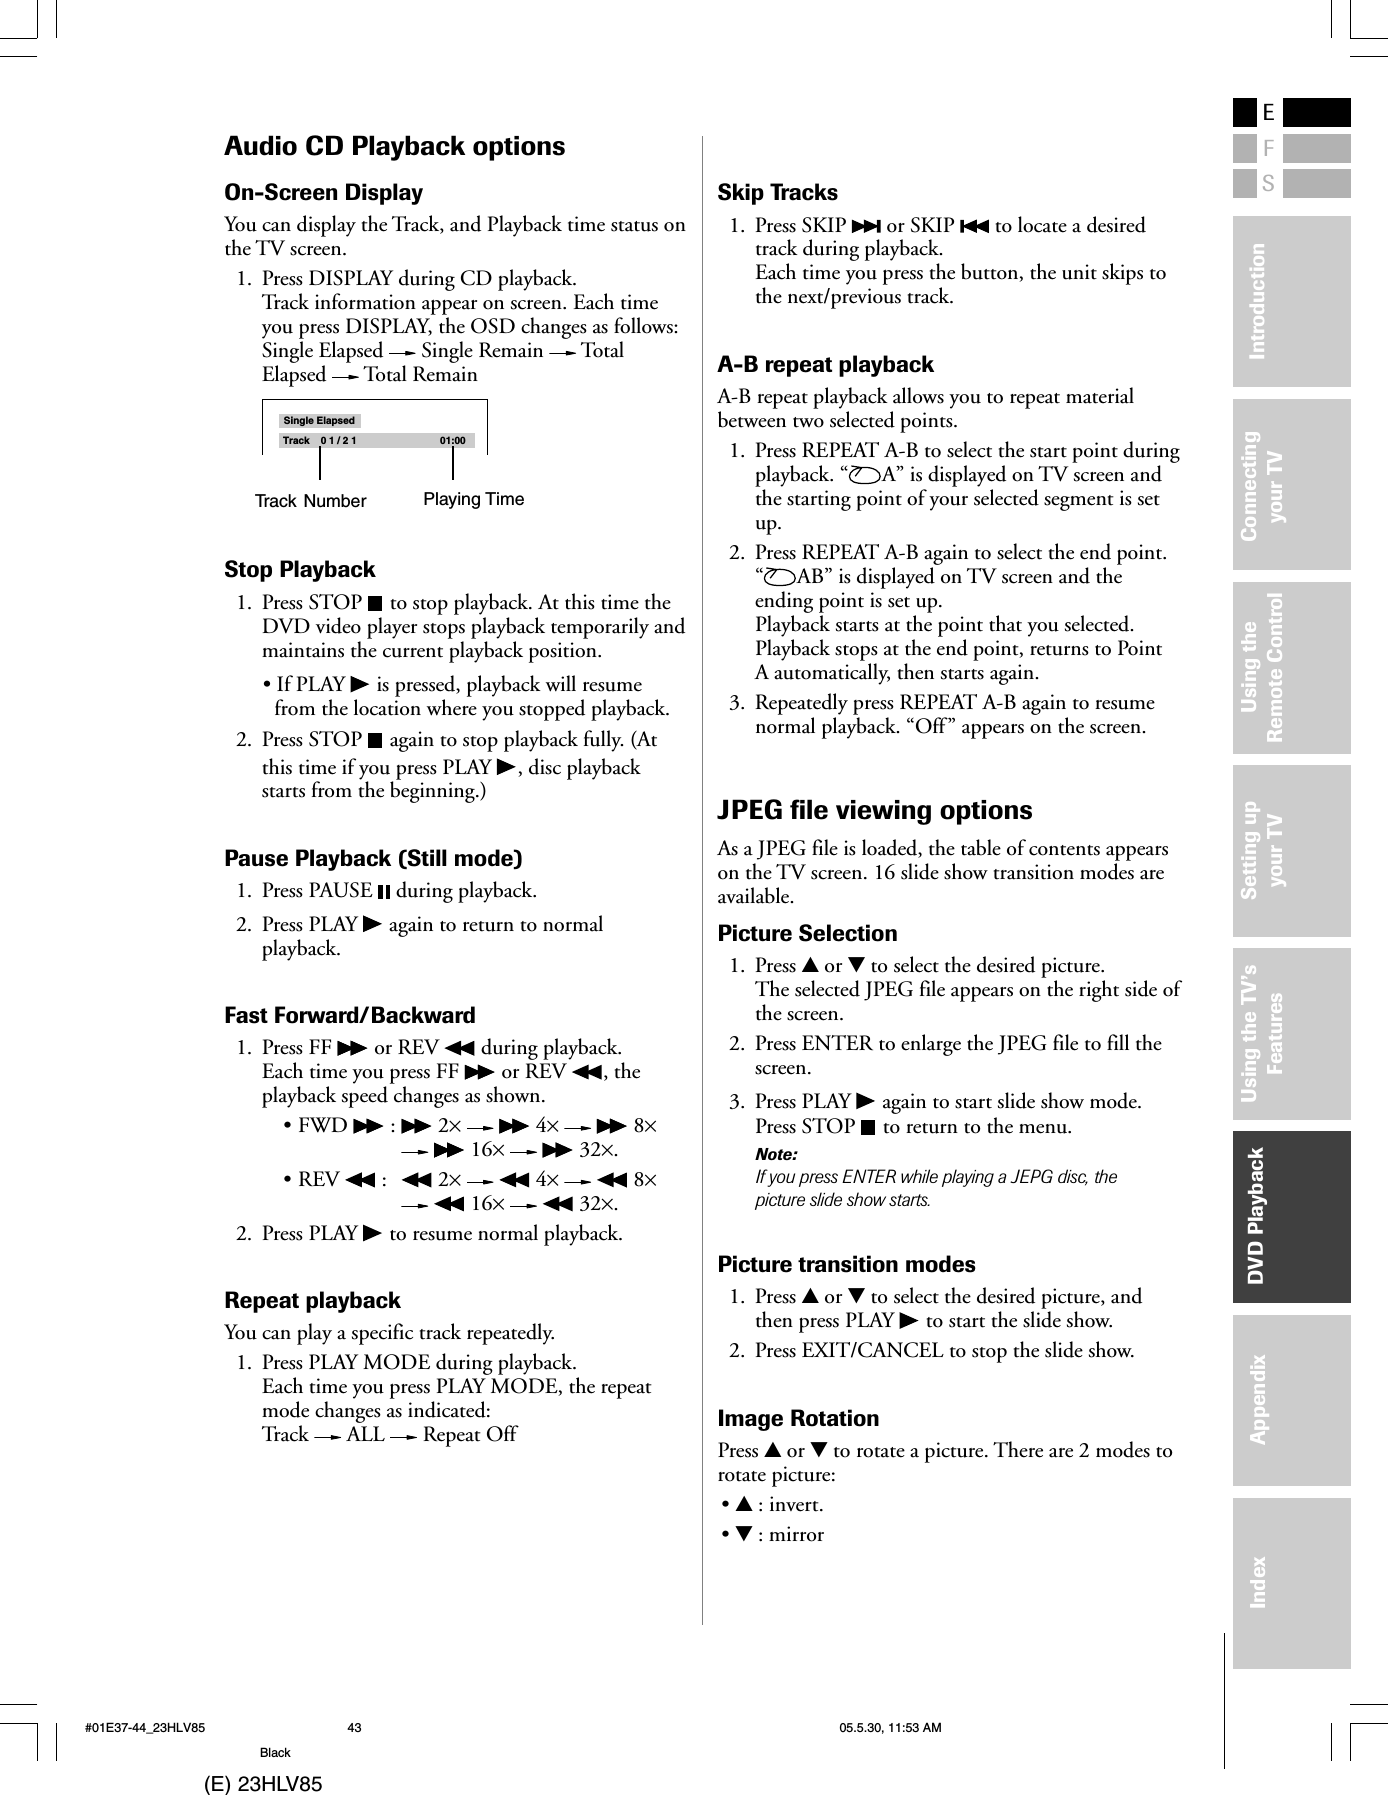
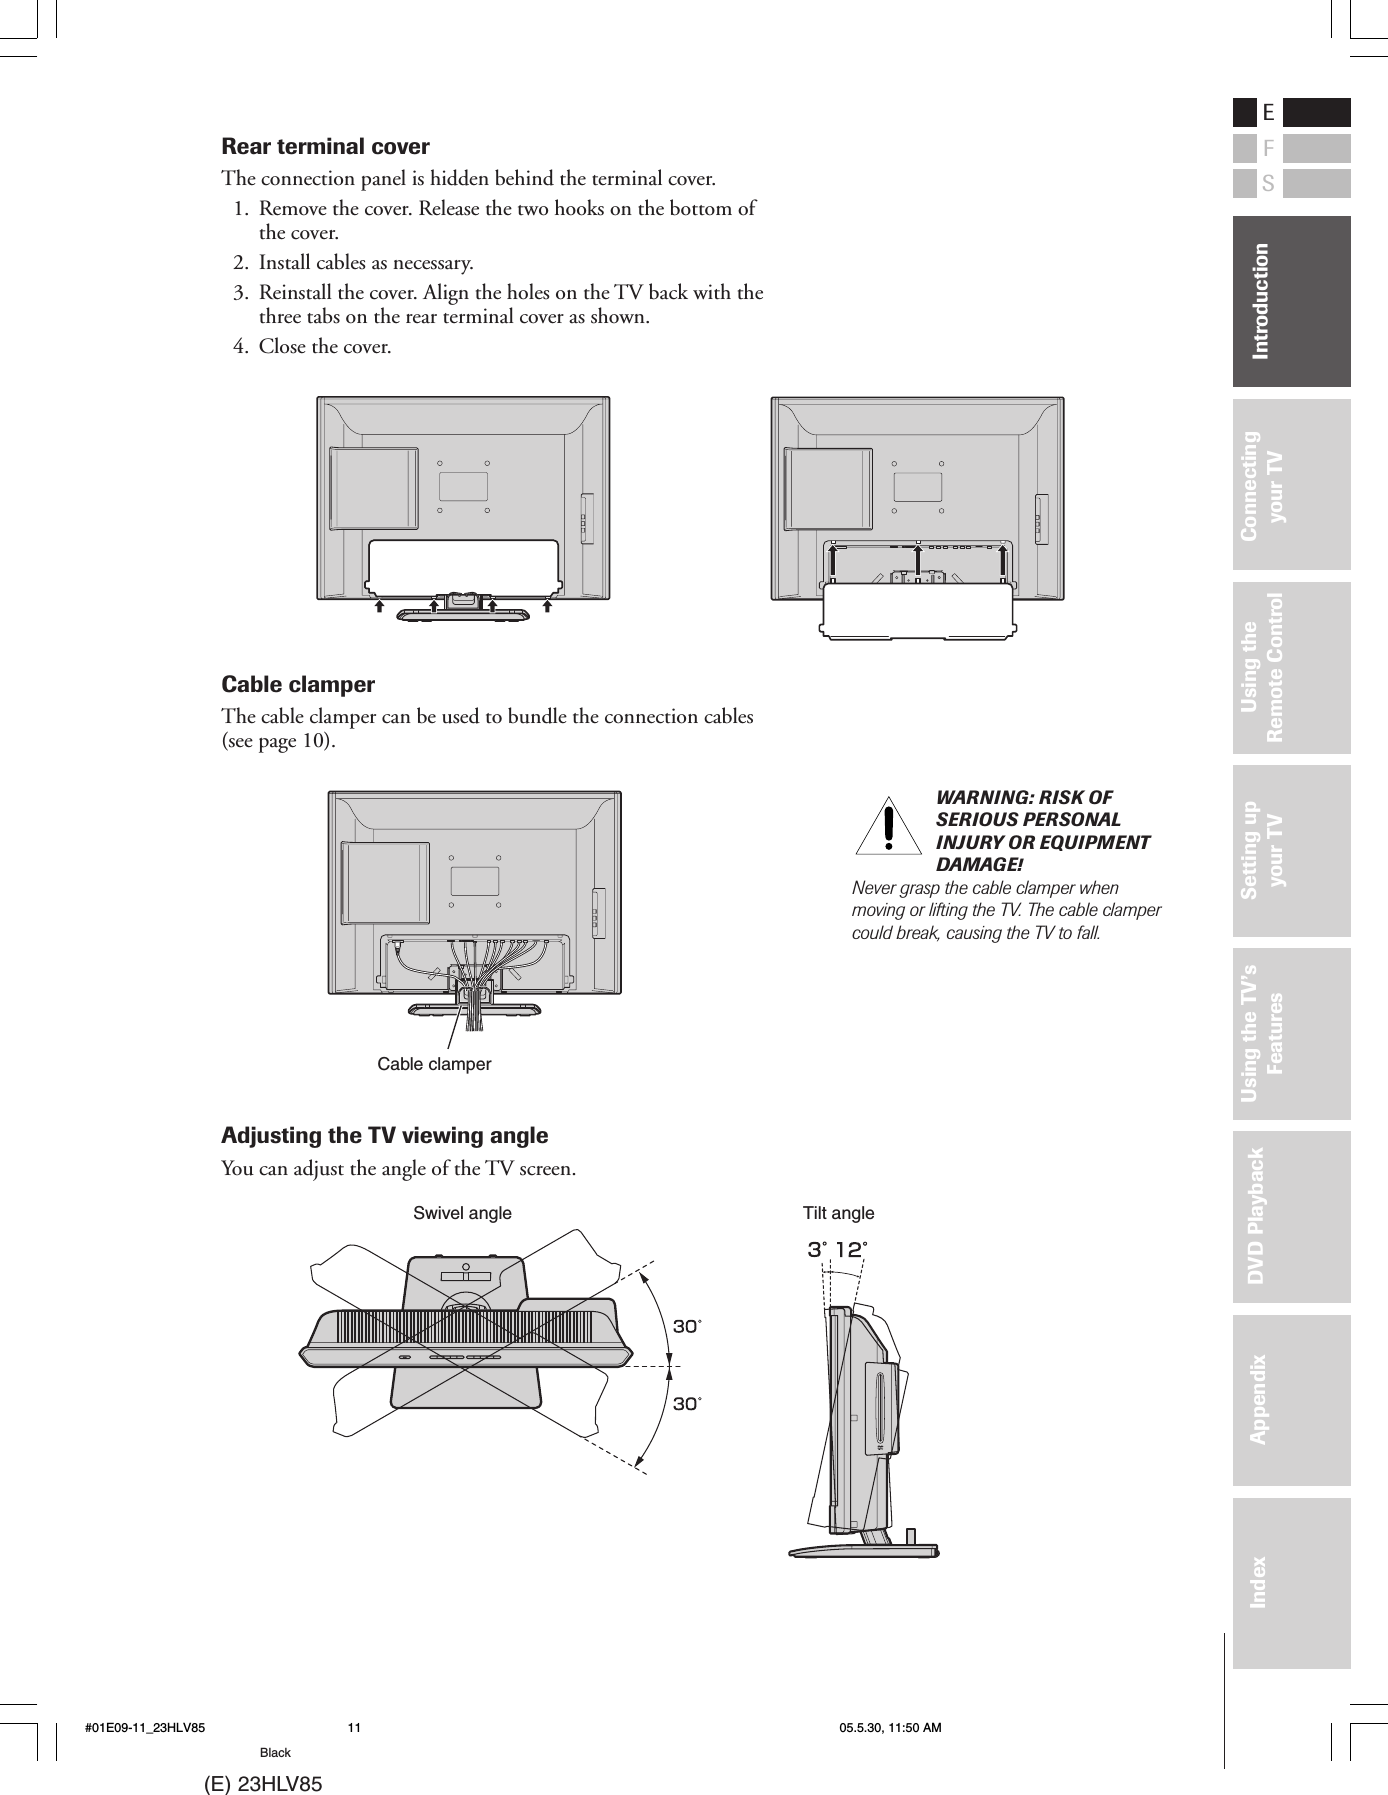
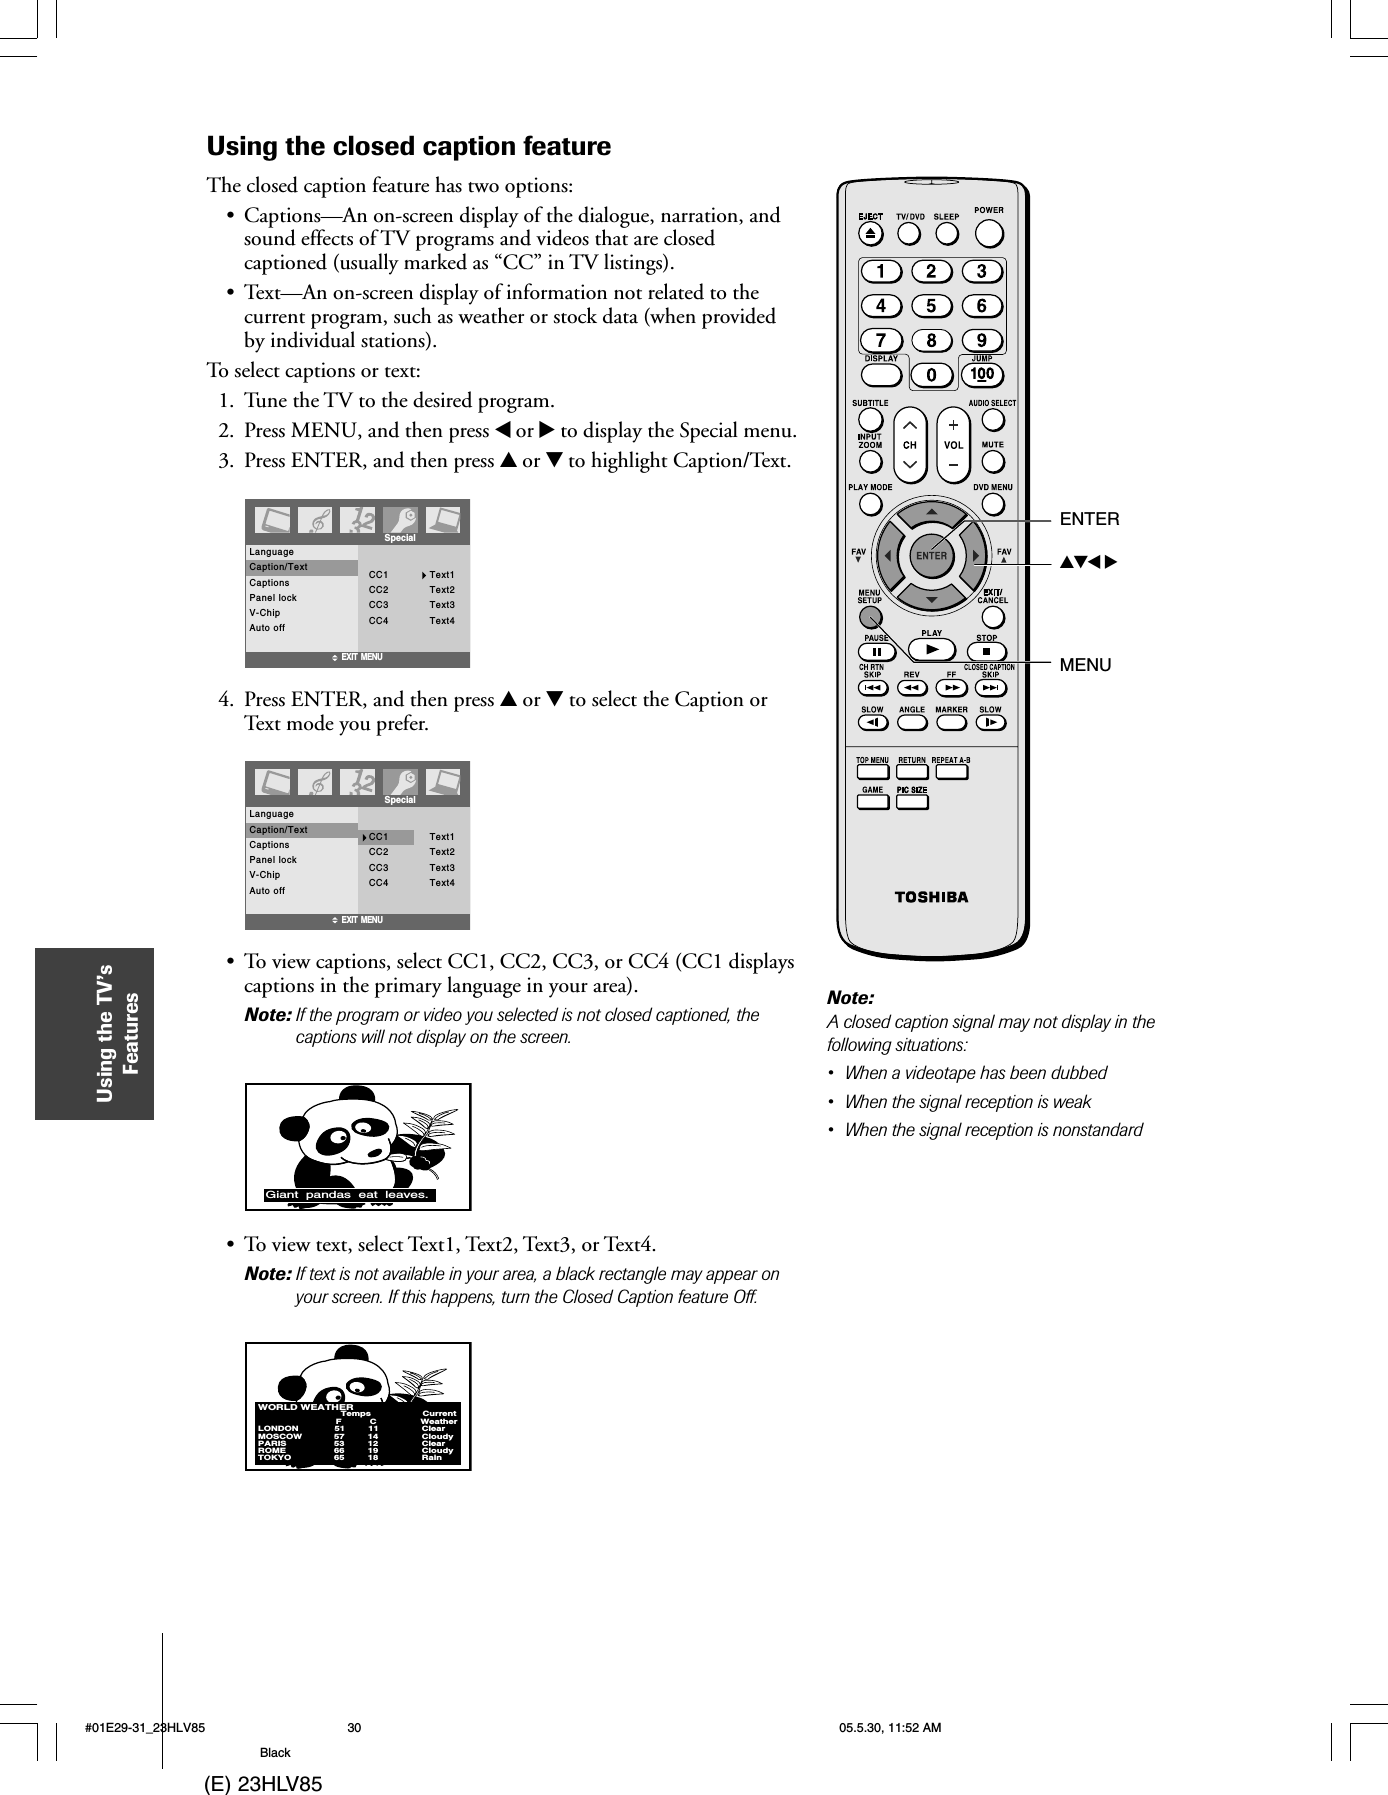
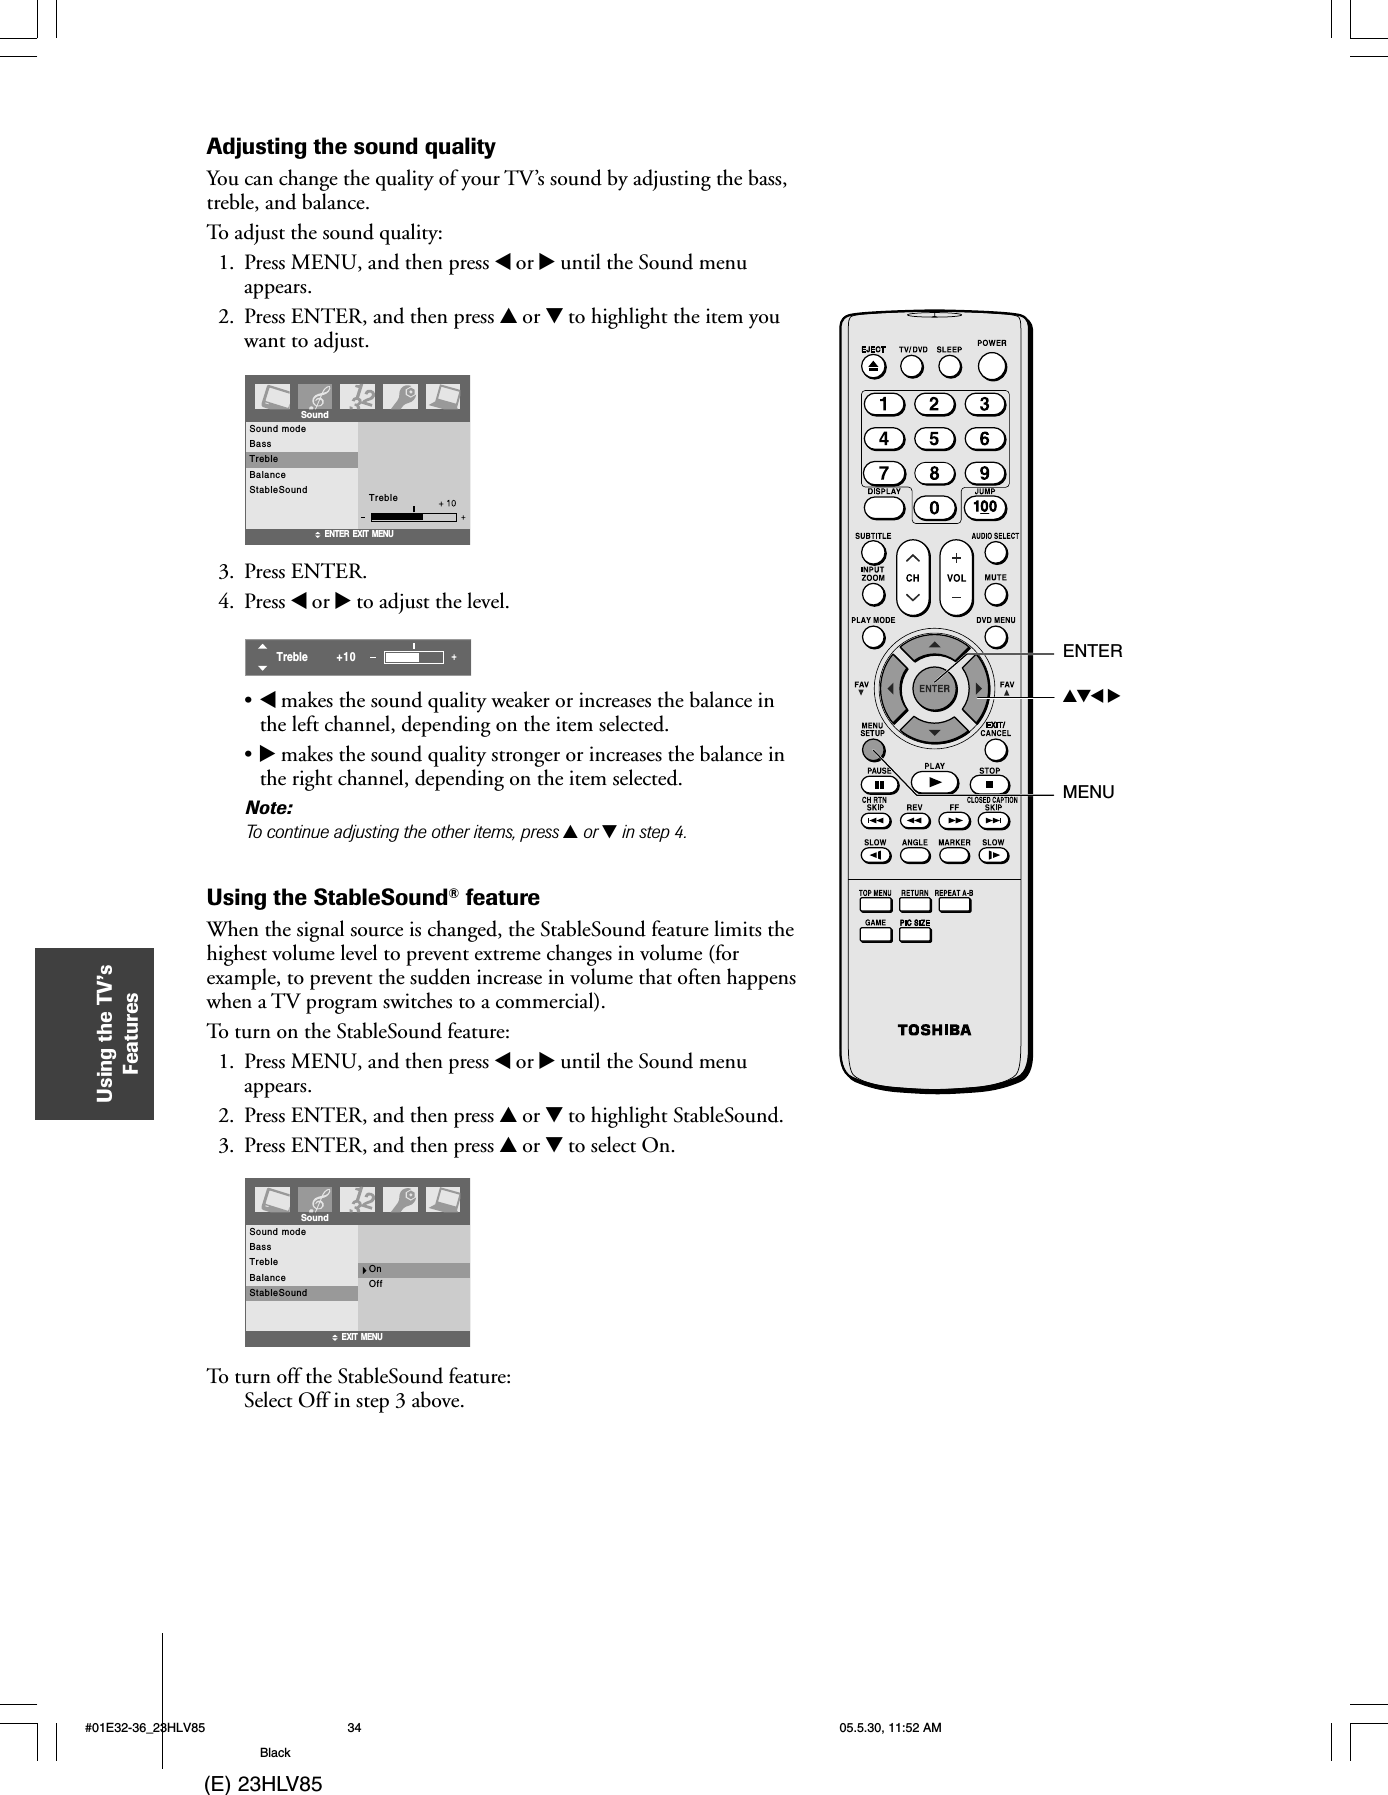
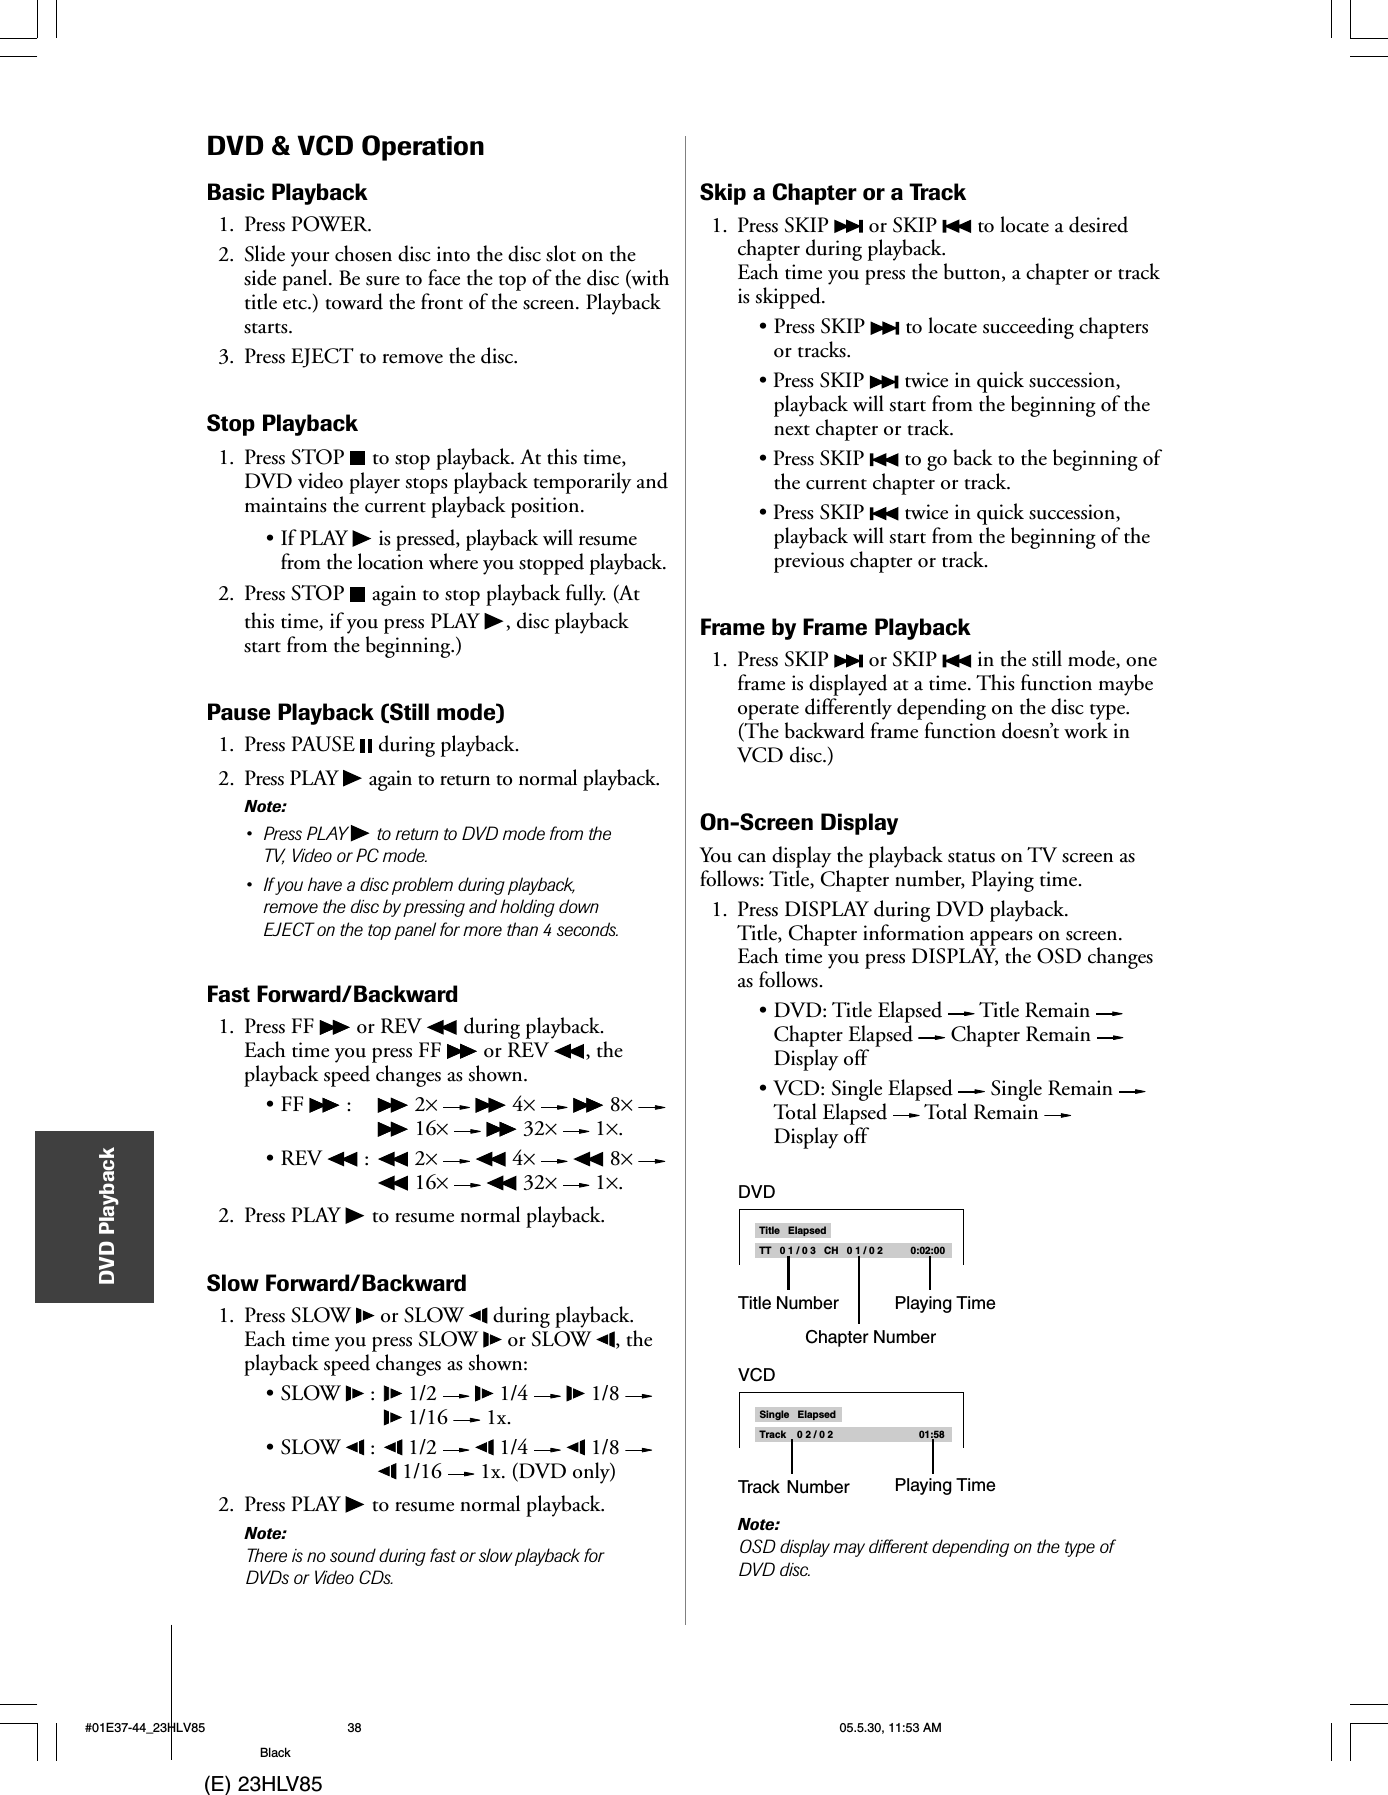
![(E) 23HLV85DVD PlaybackImage Zoom1. Press ZOOM and use FF or REV to seethe zoom mode at 50% ~ 200%.2. Adjust the picture position using yzx • whilein the enlarged picture mode.To exit Zoom mode, press ZOOM one moretime.3. Press STOP to return to the menu.Repeat playback You can show JPEG files repeatedly.1. Press PLAY MODE during playback. Each timeyou press PLAY MODE, the repeat mode changesas indicated:Repeat One Repeat All Repeat OffJPEG files compatibilityDiscs and pixels whose compatibility with this playerhas been confirmed by TOSHIBA are as follows.Kodak Picture CDJPEG disc compatibility with this player is limited asfollows:• Playable discs: CD-ROM, CD-R, CD-RW• File system: ISO9660, UDF without interleave• File name: File names are limited to eight charactersor less and must incorporate “JPG”extension.e.g.“********.JPG”File names cannot contain specialcharacters such as “?!><+*}{`[@]:;\ /.,” etc.• File size: Less than 10M bytes• File format: BASELINE, PROGRESSIVE• Resolution: Baseline JPG: 3072 × 2048Progressive JPG:width*(height + 128) < 3300000Files with size < 20M bytes.#01E37-44_23HLV85 05.5.30, 11:53 AM44Black](https://usermanual.wiki/LG-Electronics-USA/T23HLVA/User-Guide-553434-Page-29.png)
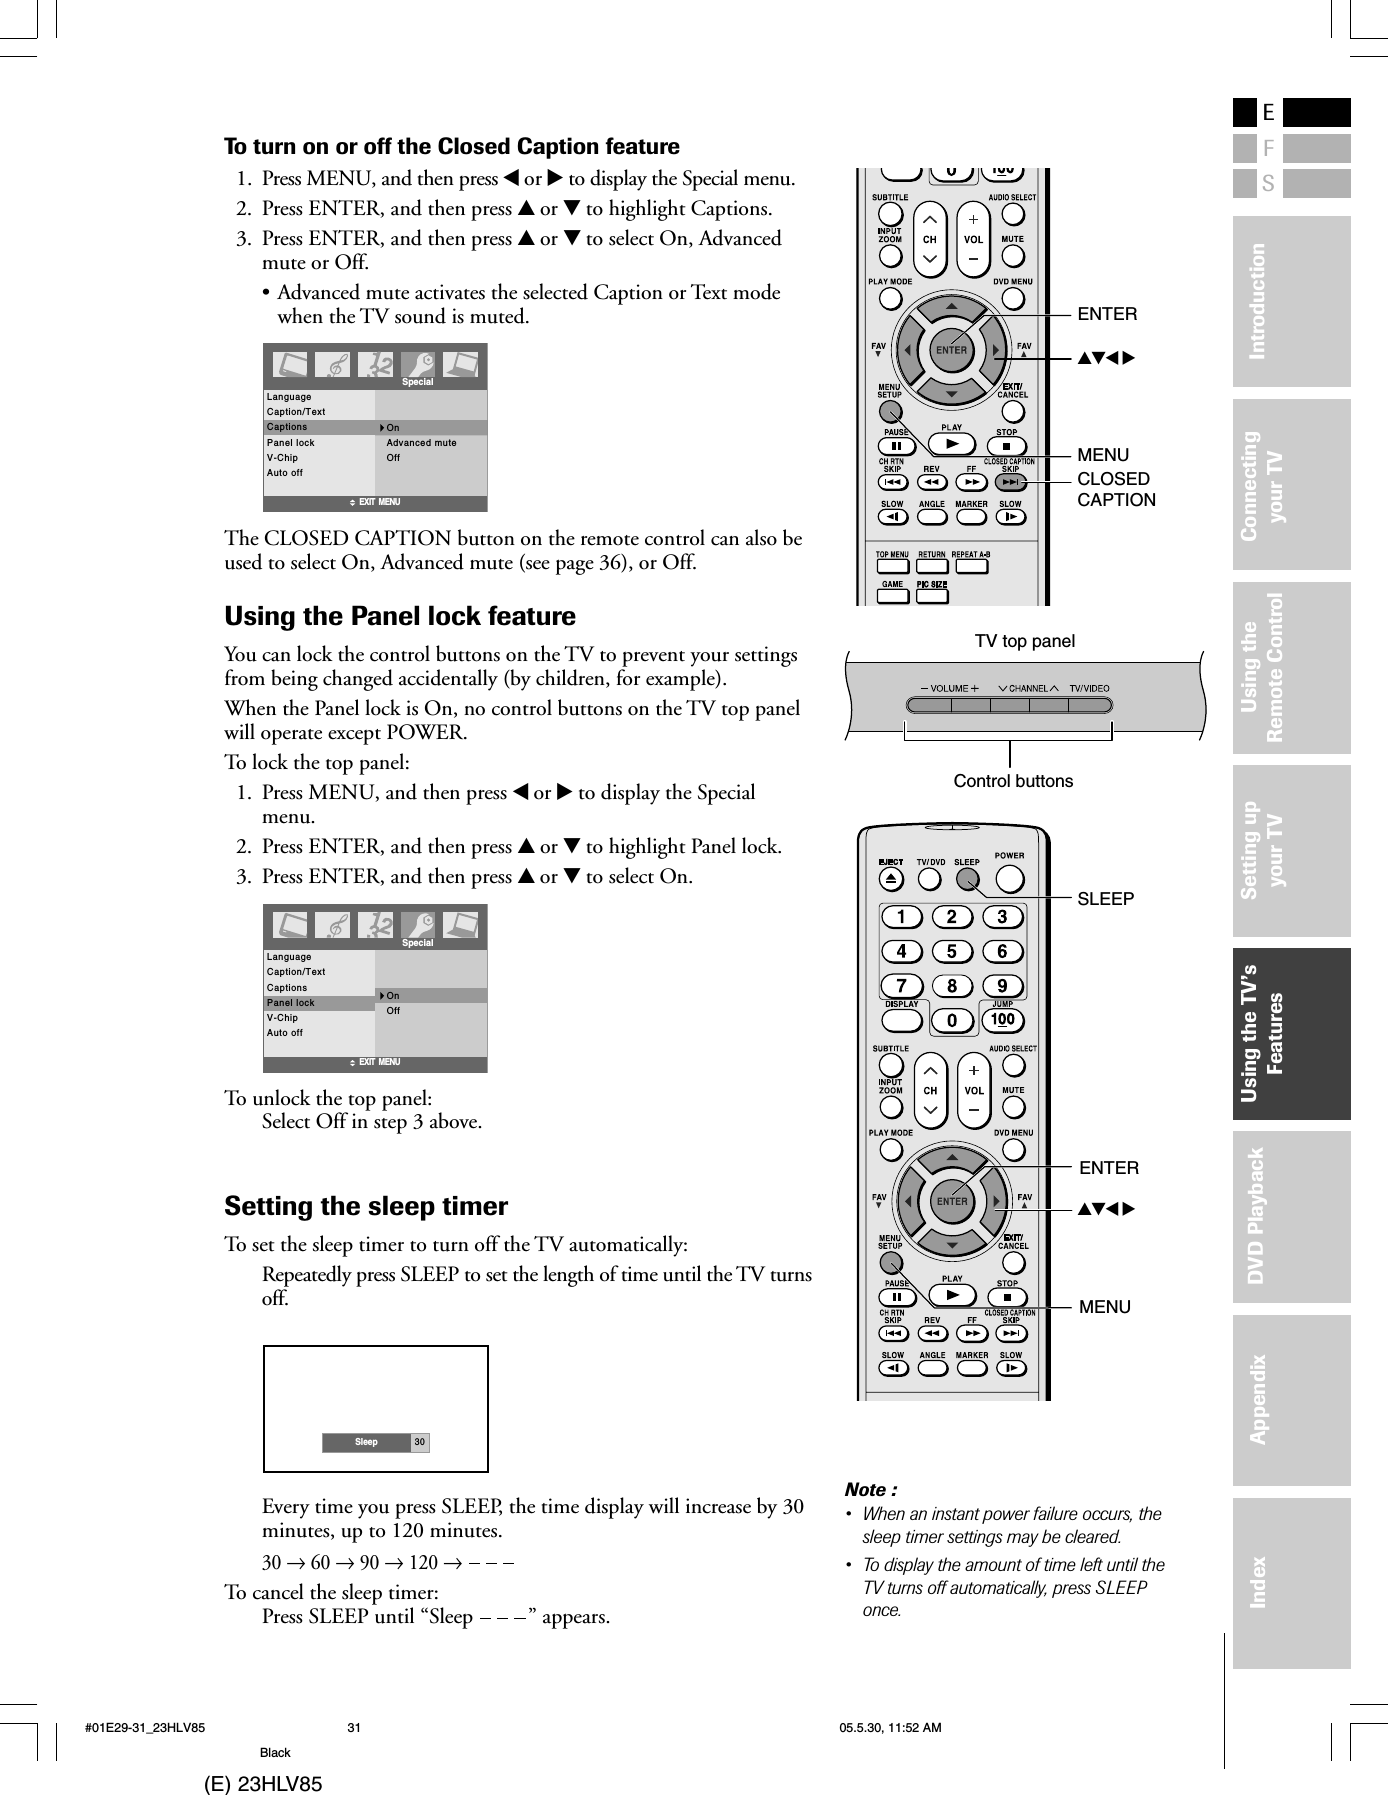
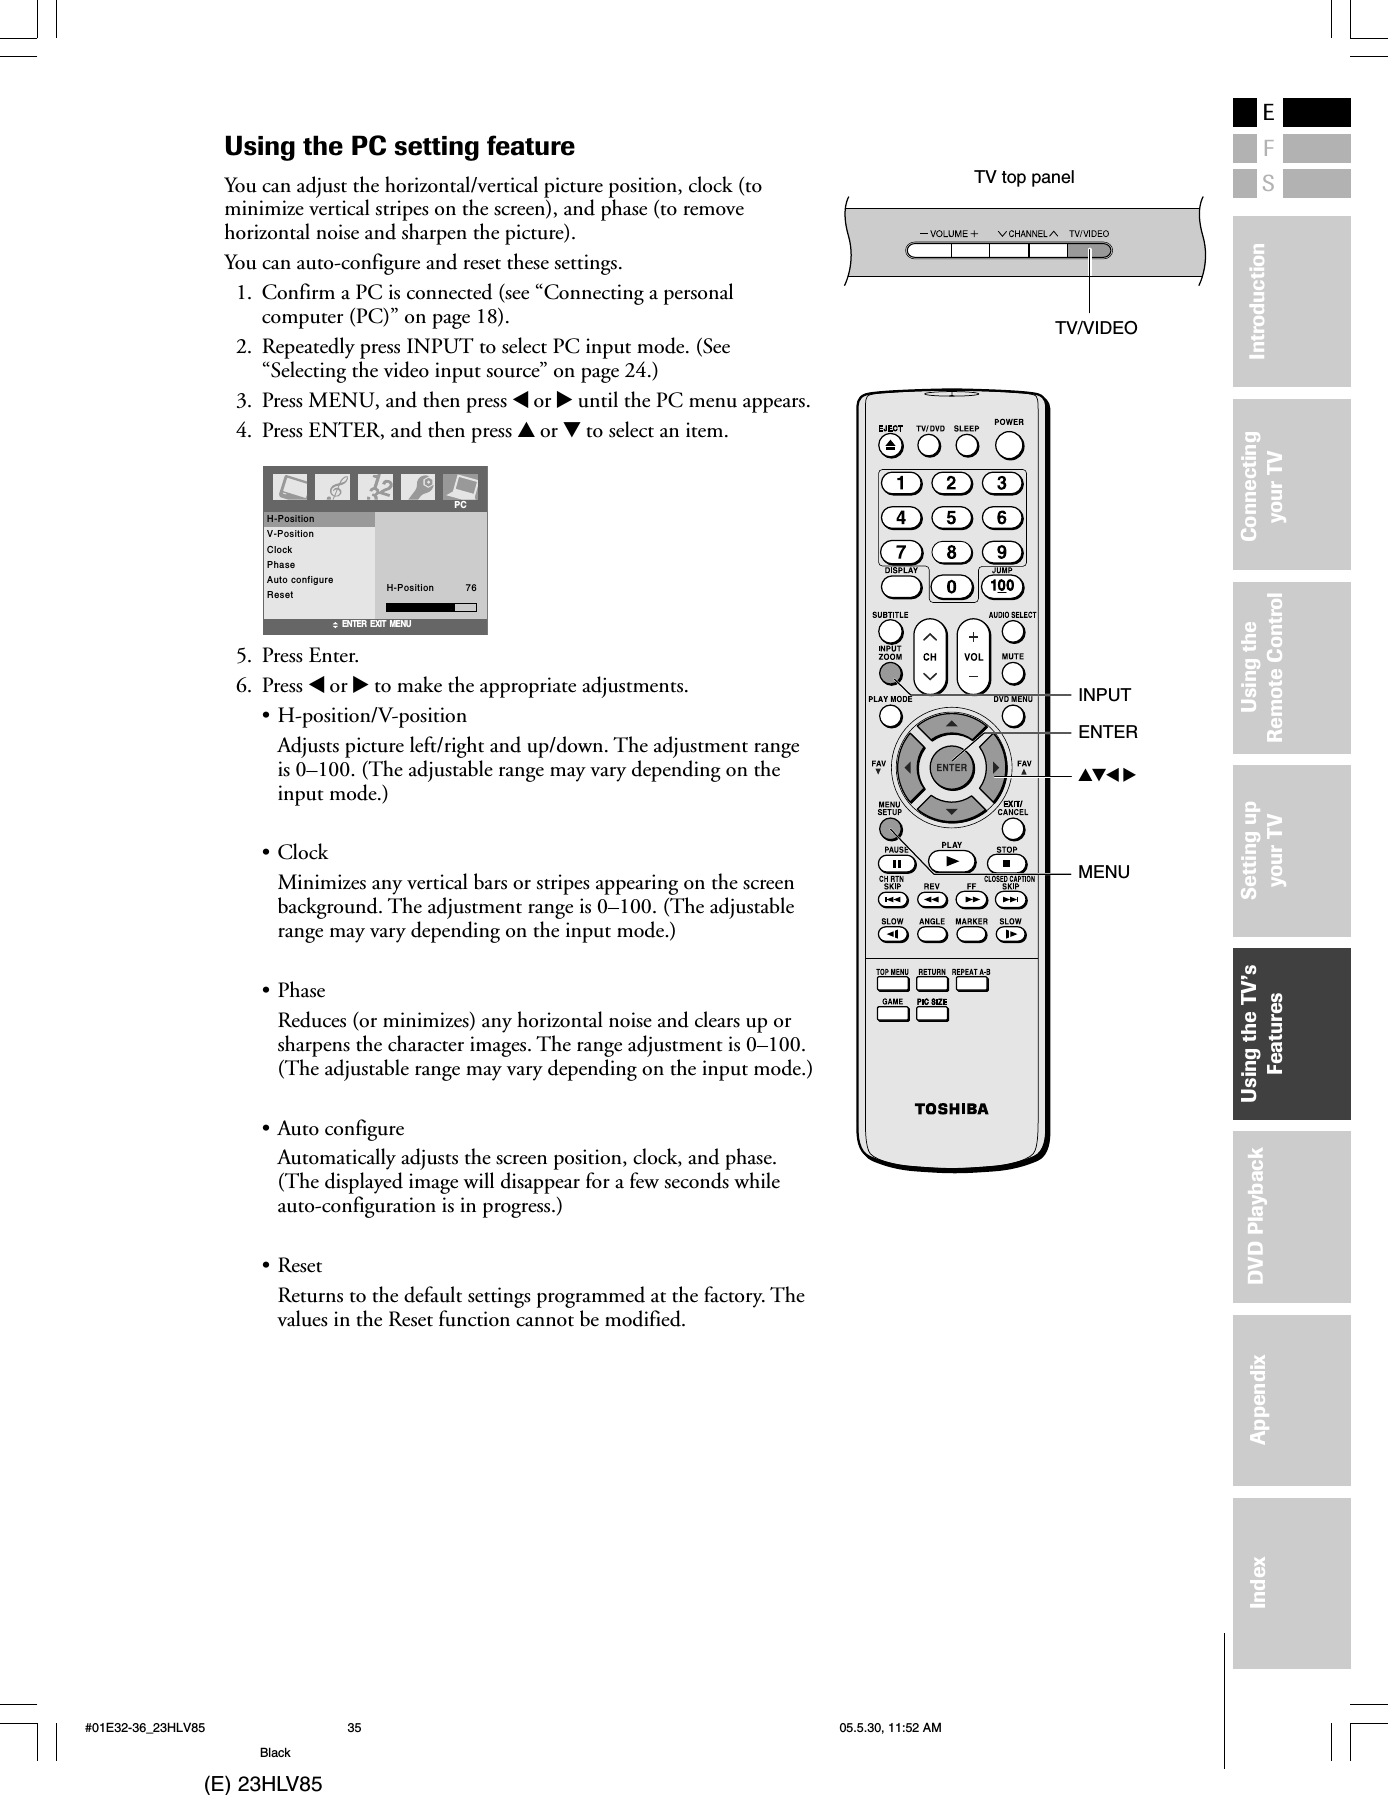
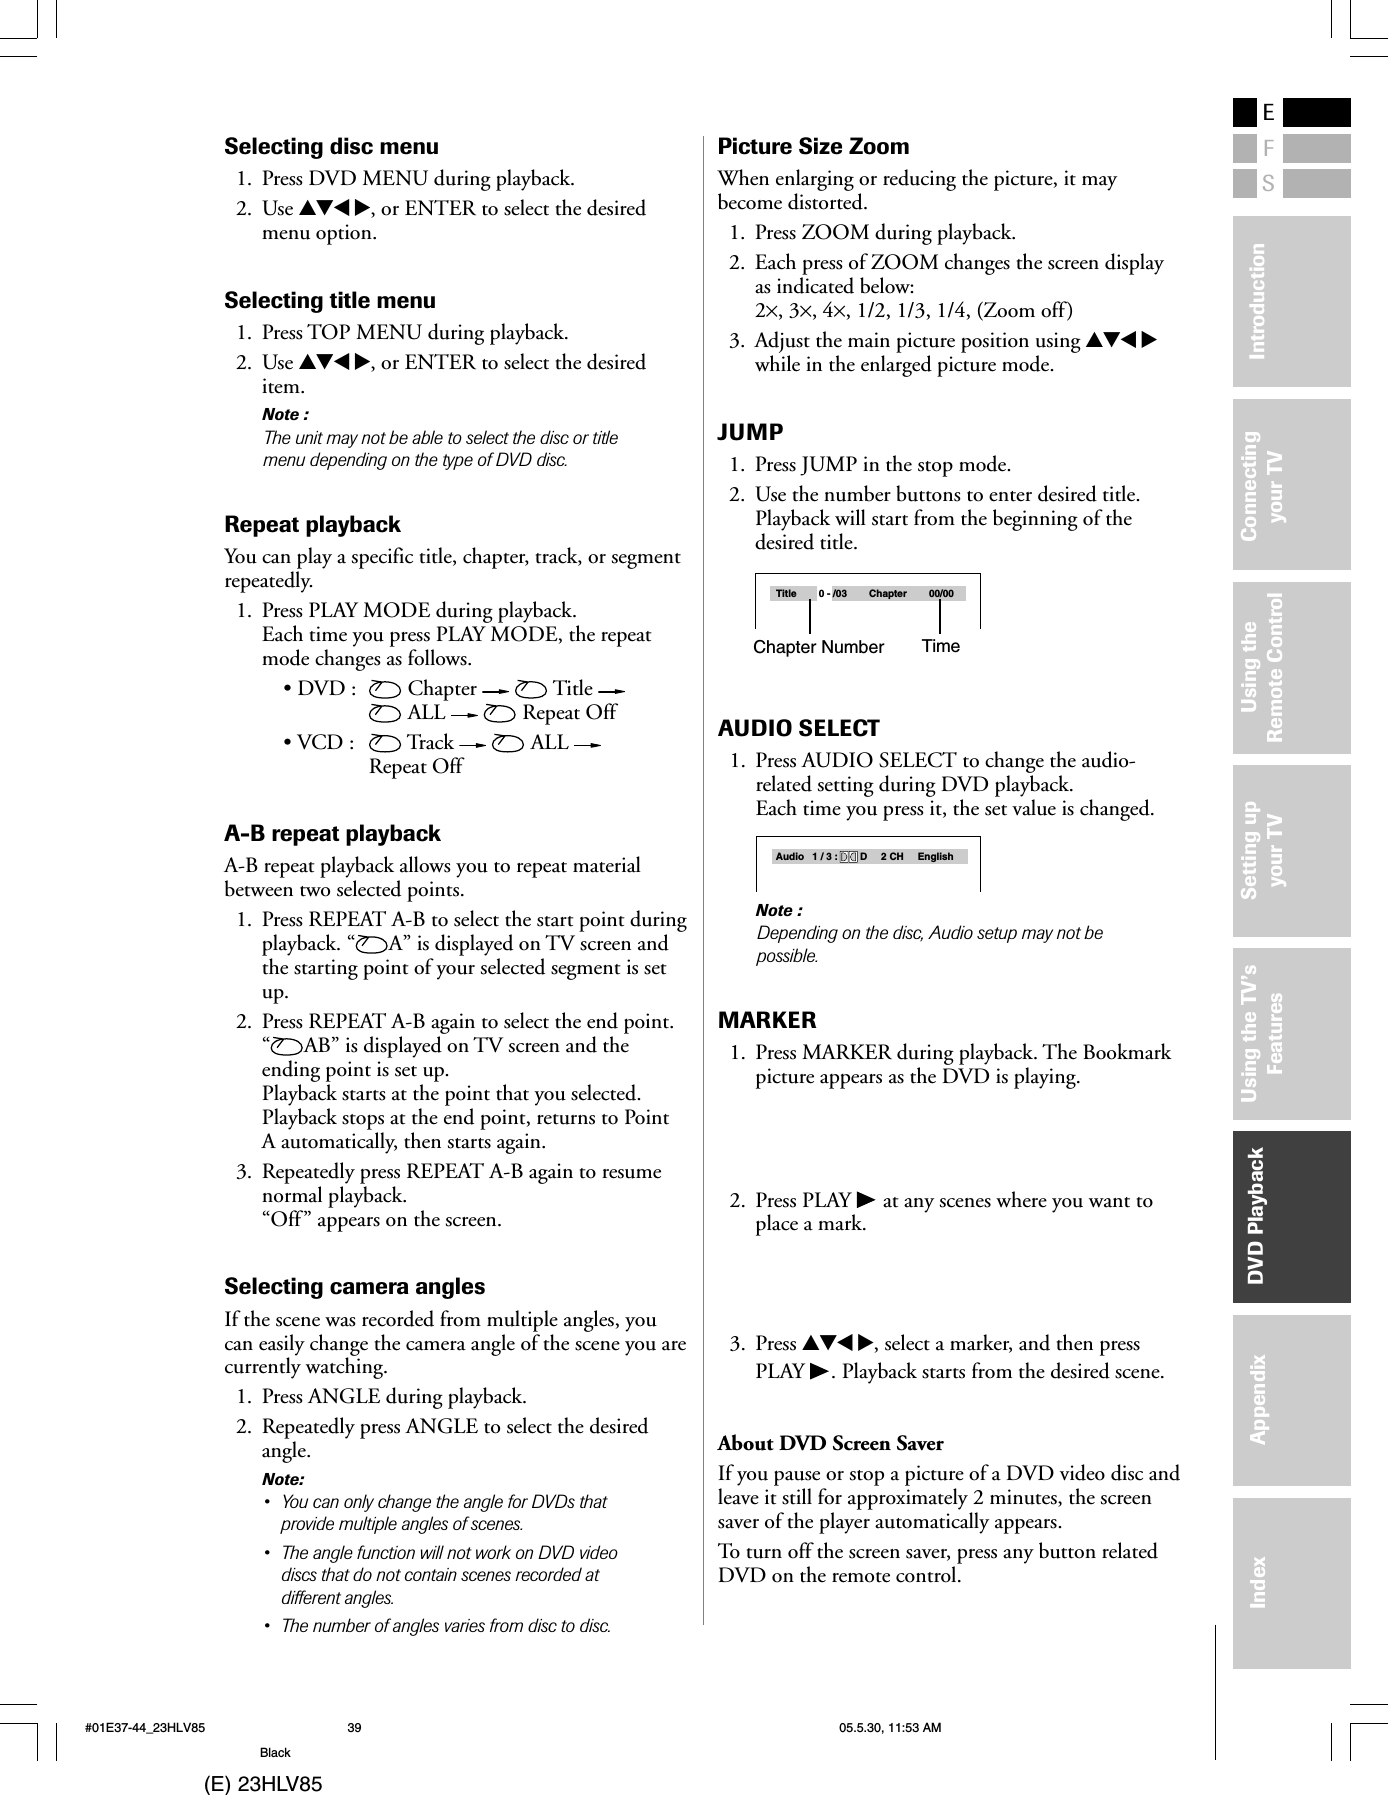
![(E) 23HLV85ESFConnectingyour TVUsing theRemote ControlSetting upyour TVIndex IntroductionUsing the TV’sFeaturesAppendix DVD PlaybackTelevision SystemNTSC standardChannel CoverageVHF: 2 through 13UHF: 14 through 69Cable TV: Mid band (A-8 through A-1, A through I)Super band (J through W)Hyper band (AA through ZZ, AAA, BBB)Ultra band (65 through 94, 100 through 125)Power Source100-240 V AC, 60 HzPower ConsumptionXX W0.8 W in standby modeAudio Power5 W + 5 WVideo/Audio TerminalsS-VIDEO INPUTY: 1 V(p-p), 75 ohms, negative sync.C: 0.286 V(p-p) (burst signal), 75 ohmsVIDEO/AUDIO INPUTVIDEO: 1 V(p-p), 75 ohms, negative sync.AUDIO: 400 mV(rms) (30% modulation equivalent, 22k ohms or greater)ColorStream® (Component video) INPUTY : 1V(p-p), 75 ohmsPR: 0.7 V(p-p), 75 ohmsPB: 0.7 V(p-p), 75 ohmsAUDIO: 400 mV(rms), 22k ohms or greaterSuggested resolutions: 1080:, 480p, 480i, 720pAUDIO OUTPUT400 mV(rms) (30% modulation equivalent,2.2k ohms or less)AppendixSpecifications•This model complies with the specifications listed below.•Designs and specifications are subject to change without notice.HEADPHONE jack3.5 mm stereo mini jackPC INPUT15-pin D-sub Analog RGBPC AUDIO INPUT3.5 mm stereo mini jackHDMI™ INPUT:HDMI compliant (type A connector)HDCP compliantE-EDID** compliantSuggested scan rates: 1080i, 480p, 480i, 720pHDMI Audio:2-channel PCM;32/44.1/48 kHz sampling frequency;16/20/24 bits per sampleNote: This TV does not provide HDMI OUTPUT.SPDIF (digital audio output):Optical typeDimensions (Including TV stand)Width : XX inches (XXX mm)Height : XX-X/X inches (XXX mm)Depth : X inches (XXX mm)Mass (weight)XX.X lbs (X.X kg)Operating conditionsTemperature: 32°F – 95°F (0°C – 35°C)Humidity: 20 – 80% (no moisture condensation)DVD/CD PlayerSignal system NTSCApplicable disc 1. DVD (12cm, 8cm [with Disc adapter])2. CD (12cm, 8cm [with Disc adapter])Pickup 1-Lens, 2-Beams systemWARNING: RISK OF ELECTRIC SHOCK !Never attempt to service the TV yourself. Opening and removing the covers may expose you todangerous voltage or other hazards. Refer all servicing to a Toshiba Authorized Service Center.#01E45-49_23HLV85 05.5.30, 11:53 AM45Black](https://usermanual.wiki/LG-Electronics-USA/T23HLVA/User-Guide-553434-Page-30.png)