LG Electronics USA U8500 Multi-Band GSM/GPRS Camera Phone User Manual U8500 SFR En
LG Electronics USA Multi-Band GSM/GPRS Camera Phone U8500 SFR En
UserManual.wiki
>
LG Electronics USA
>
U8500 User Manual
Manual
Navigation menu
Upload a User Manual
Namespaces
Wiki Guide
HTML
PDF
Info
Views
User Manual
Discussion / Help
Navigation
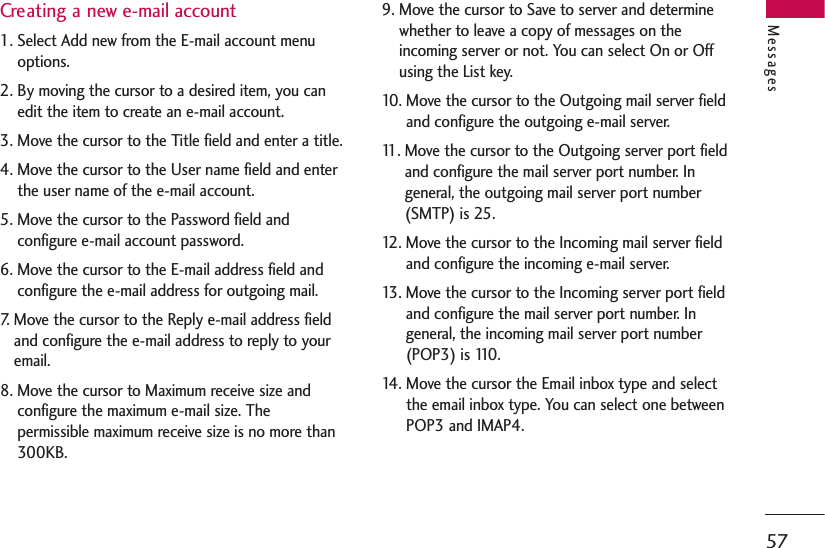
![Guidelines for safe and efficient use6Read these simple guidelines. Breaking the rules maybe dangerous or illegal. Further detailed informationis given in this manual.Exposure to radio frequencyenergyRadio wave exposure and Specific Absorption Rate(SAR) informationThis mobile phone model U8500 has been designedto comply with applicable safety requirement forexposure to radio waves. This requirement is basedon scientific guidelines that include safety marginsdesigned to assure this safety of all persons,regardless of age and health.]The radio wave exposure guidelines employ a unitof measurement known as the Specific AbsorptionRate, or SAR. Tests for SAR are conducted usingstandardized method with the phone transmittingat its highest certified power level in all usedfrequency bands.]While there may be differences between the SARlevels of various LG phone models, they are alldesigned to meet the relevant guidelines forexposure to radio waves.]The SAR limit recommended by the internationalCommission on Non-Ionizing Radiation Protection(ICNIRP), which is 2W/kg averaged over ten (10)gram of tissue.]The highest SAR value for this model phone testedby DASY3 for use at the ear is 0.883 W/kg (10g).]SAR data information for residents incountries/regions that have adopted the SAR limitrecommended by the Institute of Electrical andElectronics Engineers (IEEE), which is 1.6 W/kgaveraged over one (1) gram of tissue (for exampleUSA, Canada, Australia and Taiwan).Product care and maintenanceWARNING! Use only batteries, charger andaccessories approved for use with this particular phonemodel. The use of any other types may invalidate anyapproval or warranty applying to the phone, and may bedangerous.]Do not disassemble this unit. Take it to a qualifiedservice technician when repair work is required.Guidelines for safe and efficient use](https://usermanual.wiki/LG-Electronics-USA/U8500/User-Guide-631001-Page-6.png)
![7]Keep away from electrical appliances such as a TV,radio or personal computer.]The unit should be kept away from heat sourcessuch as radiators or cookers.]Do not drop.]Do not subject this unit to mechanical vibration orshock.]The coating of the phone may be damaged ifcovered with wrap or vinyl wrapper.]Use dry cloth to clean the exterior of the unit. (Donot use solvent such as benzene, thinner oralcohol.)]Do not subject this unit to excessive smoke ordust.]Do not keep the phone next to credit cards ortransport tickets; it can affect the information onthe magnetic strips.]Do not tap the screen with a sharp object;otherwise, it may damage the phone.]Do not expose the phone to liquid or moisture.]Use the accessories like an earphone cautiously.Do not touch the antenna unnecessarily.]Please remove the data cable before power on thehandset.Efficient phone operationTo enjoy optimum performance with minimum powerconsumption please:]Hold the phone as you speak to any othertelephone. While speaking directly into themicrophone, angle the antenna in a direction upand over your shoulder.]Do not hold the antenna when the phone is in use.If you hold it, it can affect call quality, it also maycause the phone to operate as a higher power levelthat needed and shorten talk and standby times.Guidelines for safe and efficient use](https://usermanual.wiki/LG-Electronics-USA/U8500/User-Guide-631001-Page-7.png)
![Guidelines for safe and efficient use8Electronics devicesAll mobile phones may get interference, whichcould affect performance.]Do not use your mobile phone near medicalequipment without requesting permission. Avoidplacing the phone over the pacemaker, i.e. in yourbreast pocket.]Some hearing aids might be disturbed by mobilephones.]Minor interference may affect TVs, radios, PCs, etc.Road safetyCheck the laws and regulations on the use ofmobile phones in the areas when you drive.]Do not use a hand-held phone while driving.]Give full attention to driving.]Use a hands-free kit, if available.]Pull off the road and park before making oranswering a call if driving conditions so require.]RF energy may affect some electronic systems inyour motor vehicle such as car stereos and safetyequipment.]If your vehicle is equipped with an air bag, do notobstruct with installed or portable wirelessequipment. It can cause serious injury due toimproper performance.Blasting areaDo not use the phone where blasting is in progress.Observe restrictions, and follow any regulations orrules.Potentially explosive atmospheres]Do not use the phone at a refueIling point. Don'tuse near fuel or chemicals.]Do not transport or store flammable gas, liquid, orexplosives in the compartment of your vehicle,which contains your mobile phone and accessories.Guidelines for safe and efficient use](https://usermanual.wiki/LG-Electronics-USA/U8500/User-Guide-631001-Page-8.png)
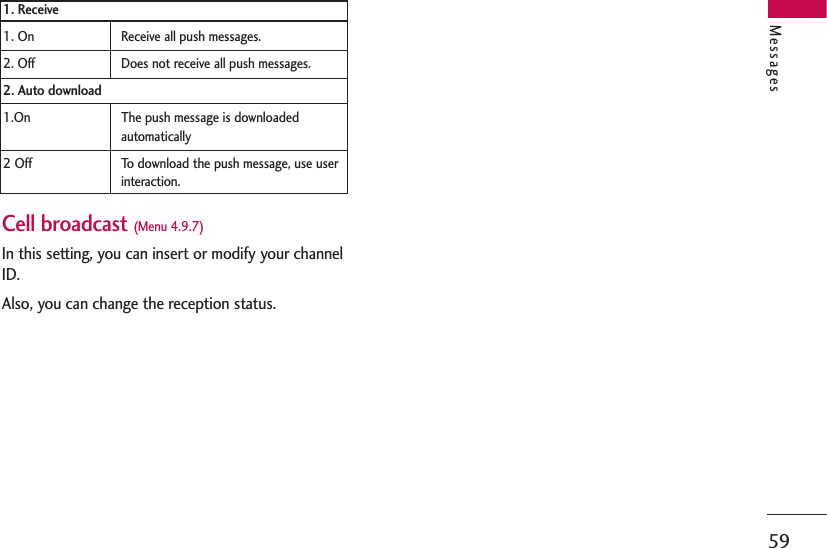
![9In aircraftWireless devices can cause interference in aircraft.]Turn off your mobile phone before boarding anyaircraft.]Do not use it on the ground without crewpermission.ChildrenKeep the phone in a safe place out of small children'sreach. It includes small parts which if detached maycause a choking hazard.Emergency callsEmergency calls may not be available under allcellular networks. Therefore, you should neverdepend solely on your mobile phone for emergencycalls. Check with your local service provider.Battery information and care]You do not need to completely discharge thebattery before recharging. Unlike other batterysystems, there is no memory effect that couldcompromise the battery's performance.]Use only LG batteries and chargers. LG chargers aredesigned to maximize the battery life.]Do not disassemble or short-circuit the batterypack.]Keep the metal contacts of the battery pack clean.]Replace the battery when it no longer providesacceptable performance. The battery pack may berecharged hundreds of times until it needsreplacing.]Recharge the battery if it has not been used for along time to maximize usability.]Do not expose the battery charger to directsunlight or use it in high humidity, such as thebathroom.]Do not leave the battery in hot or cold places, thismay deteriorate the battery performance.Guidelines for safe and efficient use](https://usermanual.wiki/LG-Electronics-USA/U8500/User-Guide-631001-Page-9.png)
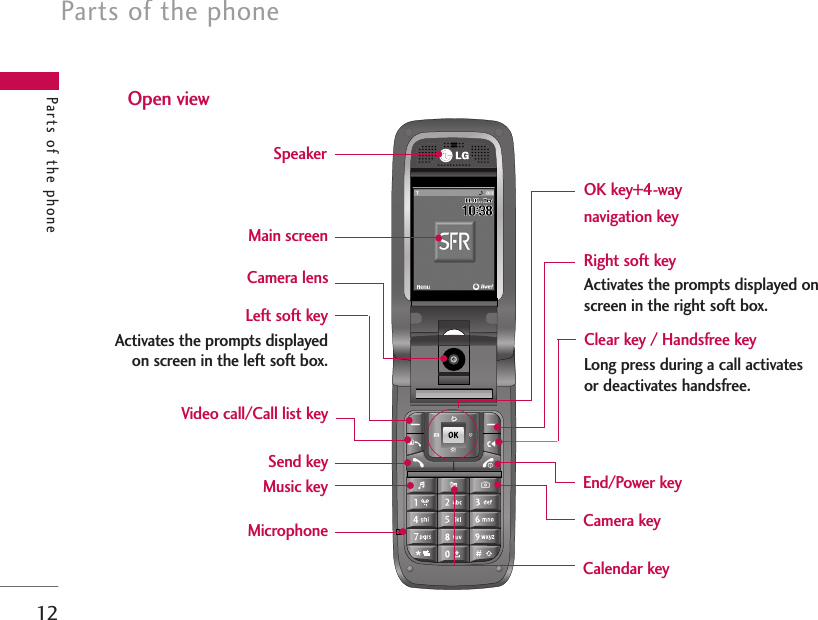
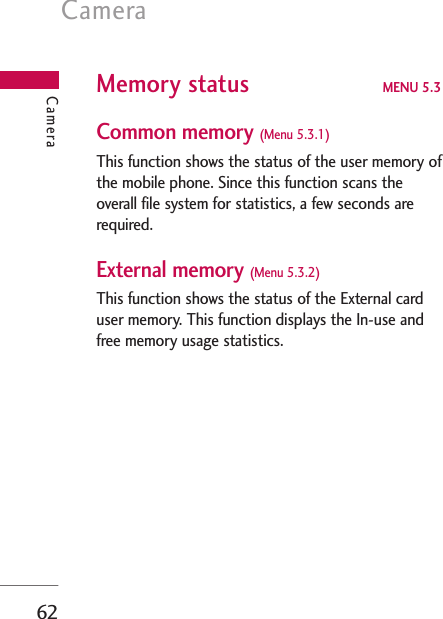
![Parts of the phone10Parts of the phoneCamera lensFront view Rear viewBattery terminalsSIM card socketBatteryHoles for acarrying strapMusic player hot keys: (Long press) Launches the music player. (Short press) Plays the music in the music player.: Previous track/ Rewind: Next track/ Fast forwaIntennaFront screenBattery release latchNote]Never touch the antenna during a calland using a Bluetooth connection. Itmay degrade speech quality.](https://usermanual.wiki/LG-Electronics-USA/U8500/User-Guide-631001-Page-10.png)
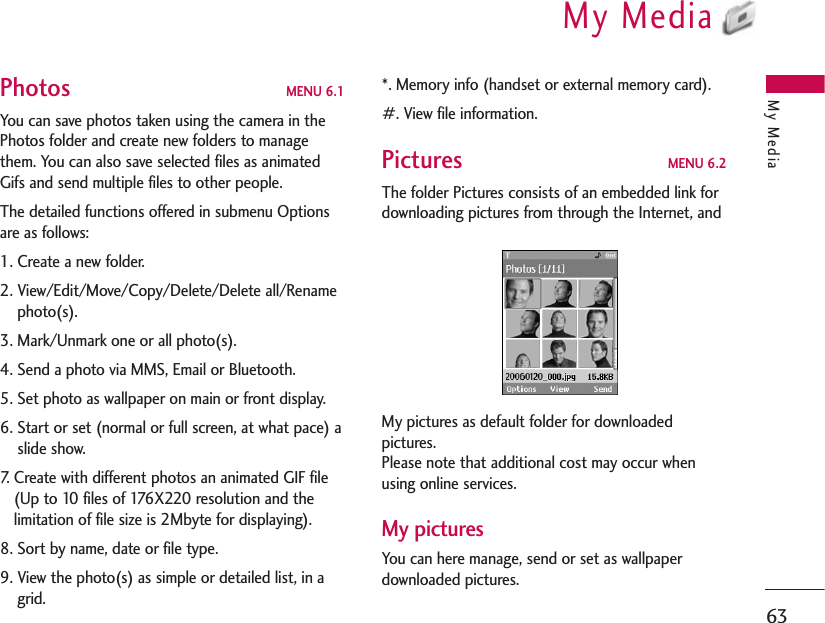
![11Parts of the phoneRigh side viewLeft side viewSlot for external memory cardCharger connector/Cable connectorMulti-tasking keyYou can directly access the followingmenus: Internet, My games & more,My music, Call, E-mail, Text messageand Multimedia message.Volume keysStereo headset connectorNote]Connect jack to fit the shapeof terminal. Otherwise,product can be damaged.](https://usermanual.wiki/LG-Electronics-USA/U8500/User-Guide-631001-Page-11.png)
![Getting started13Installing the SIM card and battery1. Install the SIM card.Your SIM card contains your phone number, servicedetails and contacts and must be inserted intoyour handset.If your SIM card is removed then your handsetbecomes unusable (except emergency calls) until avalid one is inserted. Always disconnect the chargerand other accessories from your handset beforeinserting and removing your SIM card.Slide the SIM card into the SIM card holder. Makesure that the SIM card is properly inserted and thegold contact area on the card is facing downwards.To remove the SIM card, press down lightly andpull it in the reverse direction.Getting startedTo insert the SIM card To remove the SIM cardNotice]Before installing always make sure that thephone is switched off and remove the battery.The metal contact of the SIM card can be easilydamaged by scratches. Pay special attention tothe SIM card while handling and installing.Follow the instructions supplied with the SIMcard.](https://usermanual.wiki/LG-Electronics-USA/U8500/User-Guide-631001-Page-13.png)
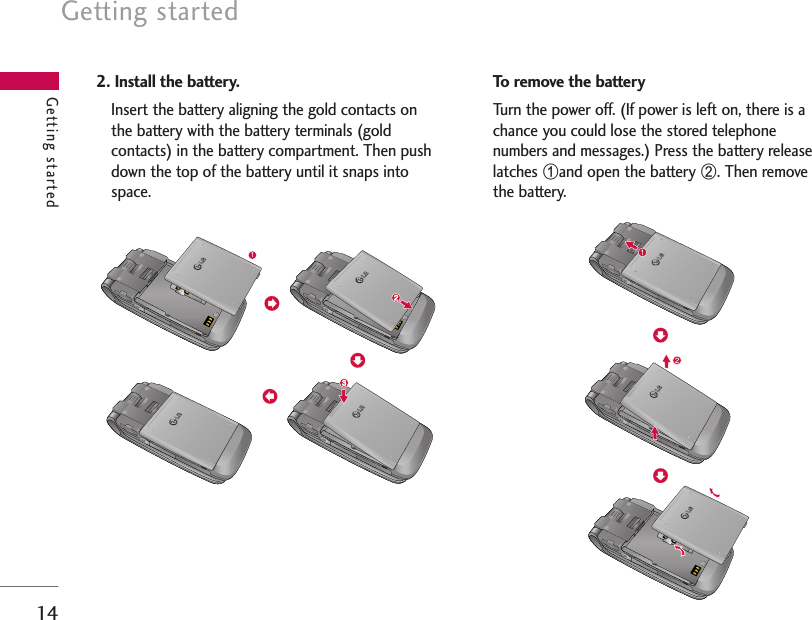
![15Charging the batteryTo connect the travel adapter to the phone, youmust first install the battery.1. With the arrow facing you as shown in the diagrampush the plug on the battery adapter into thesocket on the right side of the phone until it clicksinto place.2. Connect the other end of the travel adapter tothe mains socket. Use only the charger included inthe box.Please notice the unusual Start time that can take upto 35 seconds at a first power on or when removingthe battery.Getting startedWarning!]Do not force the connector as this may damagethe phone and/or the travel adapter.](https://usermanual.wiki/LG-Electronics-USA/U8500/User-Guide-631001-Page-15.png)
![Getting started16Disconnecting the chargerDisconnect the travel adapter from the phone bypressing its side buttons as shown in the diagram.Getting startedNote]Ensure the battery is fully charged before usingthe phone.]Do not remove your battery or the SIM cardwhile charging.]The moving bars of the battery icon will stopafter charging is complete.]If the battery is completely discharged, thecharge could take some minutes before starting.NoteIf the battery does not charge,]switch the phone off.]ensure the battery is correctly fit.](https://usermanual.wiki/LG-Electronics-USA/U8500/User-Guide-631001-Page-16.png)
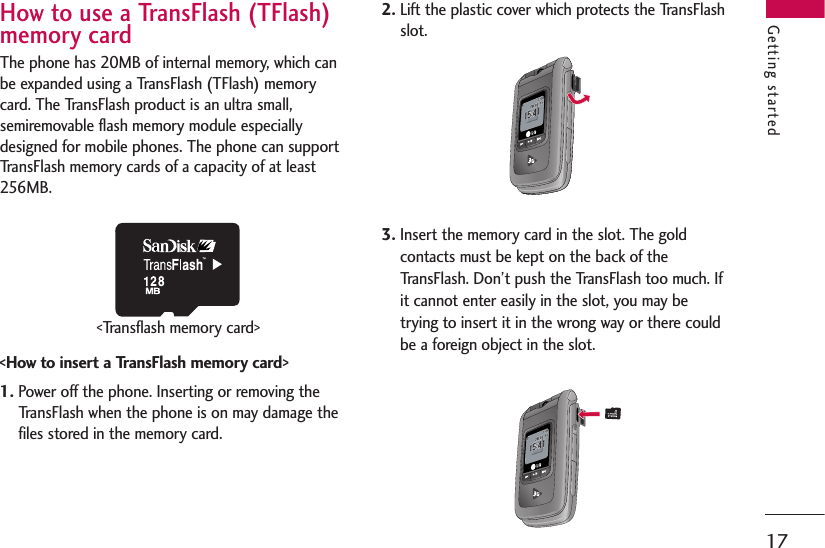
![Getting started184. Once inserted, push the memory card until youhear a “click”, meaning that the TransFlash hasbeen correctly blocked.5. Close the slot plastic protection.6. To remove the memory card, power off the phone,open the slot protection and push the TransFlashto unlock it. Carefully extract the memory card.Attention:]Avoid using the Flash Memory Card when thebattery is low.]When writing to the card, wait for the operation tocomplete before removing the card.]The card is designed to fit easily into the systemone way only.]Do not bend the card or force it into the slot.]Do not insert any other kind of memory cardsdifferent from TransFlash.For more information on the TransFlash, please referto the instructions manual of the memory card.Memory card formattingBefore start using memory card it's necessary toformat it. After you insert memory card, select Menu-Settings - Reset settings - Clear memory - Externalmemory, then press OK. This operation should bedone only when you insert memory card for the firsttime. During formatting various folders will be createdfor different data types.Getting started](https://usermanual.wiki/LG-Electronics-USA/U8500/User-Guide-631001-Page-18.png)
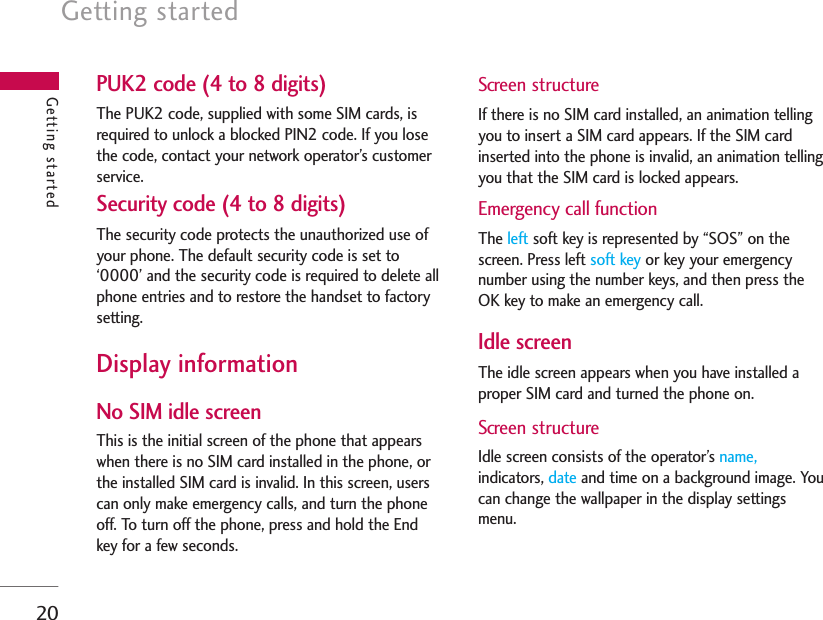
![19Turning your handset onEnsure that your SIM card is in your handset and thebattery is charged. Press and hold the key untilpower is on. Enter the SIM PIN code that wassupplied with your SIM card if PIN code setting is on.After a few seconds you will be registered on thenetwork.Turning your handset offPress and hold the key until power is off. Theremay be a few seconds delay while the handsetpowers down.Do not re-power the handset during this time.Access codesYou can use the access codes described in thissection to avoid unauthorized use of your phone.The access codes (except PUK and PUK2 codes) canbe changed by using the Change codes feature[Menu 9.7.5].PIN code (4 to 8 digits)The PIN (Personal Identification Number) codeprotects your SIM card against unauthorized use.The PIN code is usually supplied with the SIM card.When the PIN Code Request is set to Enable, yourphone will request the PIN code every time it isswitched on. When the PIN Code Request is set toDisable, your phone connects to the network directlywithout the PIN code.PIN2 code (4 to 8 digits)The PIN2 code, supplied with some SIM cards, isrequired to access functions such as Fixed DialNumber. These functions are only available ifsupported by your SIM card.PUK code (4 to 8 digits)The PUK (PIN Unblocking Key) code is required tounlock a blocked PIN code. The PUK code may besupplied with the SIM card. If not, contact yournetwork operator’s customer service for the code. Ifyou lose the code, contact your network operator’scustomer service.Getting started](https://usermanual.wiki/LG-Electronics-USA/U8500/User-Guide-631001-Page-19.png)
![General functions24Making and answering callsEnsure you tell the other party before recording avoice call.Making and answering avideo callYou can make a video call in 3Gcovered service area. If called userhave a 3G video phone in 3Gcovered service area, the call will beestablished. You can also answer avideo call for video incoming call.To make/answer a video call, do thefollowing.1. Input the phone number usingthe keypad, or select the phonenumber from the callsmade/received lists.]To correct mistakes, press the key briefly todelete the last number, or press and hold the key to delete all numbers.2. If you do not want to use the speakerphone,ensure you have the headset plugged in.3. To start the video function, press .]You will be notified that you will need to closeother applications to make the video call.4. Adjust the camera position if necessary.5. Press the end key to finish the call, or close thehandset.Making a voice call1. Enter the number including the full area code.]To delete a digit press the key.To delete all digits press and hold the key.General functionsNote]The video call may take some time to connect.Please be patient. The connection time will alsodepend on how quickly the other party answersthe call. While the video call is connecting, youwill see your own images; after the other partyhas answered, their image will be displayed onscreen.](https://usermanual.wiki/LG-Electronics-USA/U8500/User-Guide-631001-Page-24.png)
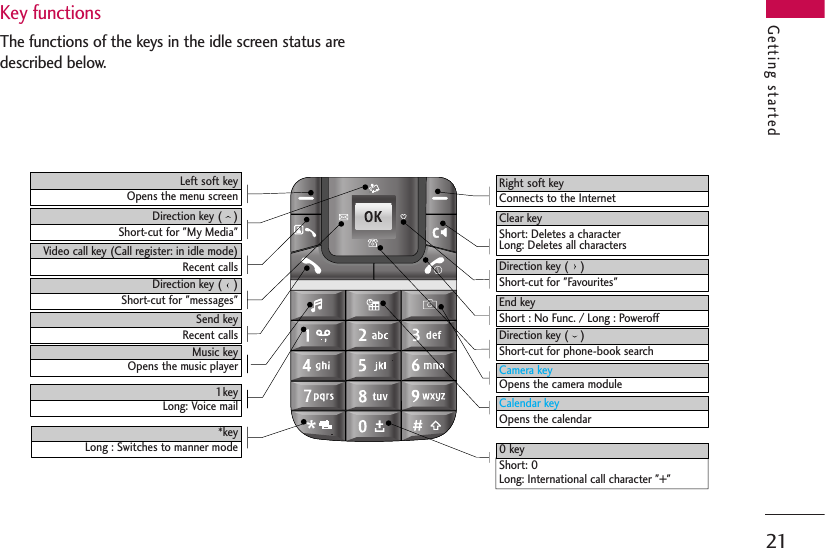
![252. Press the key to make the call.3. Press the key to finish the call, or close thehandset.Making a voice/video callfrom ContactsIt is easy to call anyone whosenumber you have stored in yourContacts.Press the down navigation key toaccess the contacts list. Scroll toyour chosen contact. Press thekey to make a voice call, orkey to make a video call. Pressthe key to finish the call.Making international calls1. Press and hold the key for the internationalprefix. The ‘+’ character can be replaced with theinternational access code.2. Enter the country code, area code, and the phonenumber.3. Press the key.Adjusting the volumeDuring a call, if you want to adjust the earpiecevolume, use the side keys of the handset. In idlemode with the flip cover open, you can adjust thekey volume using the side keys.Answering a callWhen you receive a call, the phone rings and theflashing phone icon appears on the screen. If thecaller can be identified, the caller’s phone number (orname if stored in your Contacts) is displayed.1. Open the flip and press the key to answeran incoming call. If the answer mode is set to Pressany key, any key will answer a call except for thekey.General functionsNote]To activate the speakerphone during a call,press and hold the key for at least 2 secs.](https://usermanual.wiki/LG-Electronics-USA/U8500/User-Guide-631001-Page-25.png)
![General functions26General functionsNote]To reject an incoming call, press the keyor the right soft key twice.]If you set “Answer mode” as “Open flip” (Menu9.5.8), you can answer the call simply byopening the flip.2. End the call by closing the handset or pressing thekey.Signal strengthIf you are inside a building, being near a window maygive you better reception. You can see the strengthof your signal by the signal indicator see the strength( ) on your handset's display screen.Entering textYou can enter alphanumeric characters using thekeypad.For example, storing names in the Contacts, writing amessage, creating a personal greeting or schedulingevents in the calendar all require entering text.Following text input methods are available in thehandset.T9 modeThis mode lets you enter words with only onekeystroke per letter. Each key on the keypad hasmore than one letter. The T9 mode automaticallycompares your keystrokes with an internaldictionary to determine the correct word, thusrequiring far fewer keystrokes than the traditionalABC mode. This is sometimes known as predictivetext.ABC modeThis mode lets you enter letters by pressing thekey labeled with the required letter once, twice,three times or more until the letter is displayed.Note]You can answer a call while using the Contactsor other menu features.](https://usermanual.wiki/LG-Electronics-USA/U8500/User-Guide-631001-Page-26.png)
![27General functions123 mode (Number mode)Type numbers using one keystroke per number. Tochange to 123 mode in a text entry field, pressand hold the key until 123 mode isdisplayed.Changing the text input mode1. When you are in a field that allows characters tobe entered, you will notice the text input modeindicator in the upper right corner of the display.2. Short pressing the key cycles between ,, and . A long press changes modeto .Using the T9 ModeThe T9 predictive text input mode allows you toenter words easily with a minimum number of keypresses. As you press each key, the handset begins todisplay the characters that it thinks you are typingbased on a built-in dictionary. As new letters areadded, the word changes to reflect the most likelycandidate from the dictionary.1. When you are in the T9 predictive text inputmode, start entering a word by pressing keys to . Press one key per letter.]The word changes as letters are typed. Ignorewhat’s on the screen until the word is typedcompletely. ]If the word is still incorrect after typingcompletely, press the key once or more tocycle through the other word options.ExamplePress to type Good.Press the key to get Home.]If the desired word is missing from the wordchoices list, add it by using the ABC mode.2. Enter the whole word before editing or deletingany keystrokes.3. Complete each word with a space by pressing thekey.To delete letters, press the key. Press and holddown the key to erase entire words.](https://usermanual.wiki/LG-Electronics-USA/U8500/User-Guide-631001-Page-27.png)
![General functions28General functionsUsing the ABC ModeUse the to keys to enter your text.1. Press the key labelled with the required letter:]Once for the first letter]Twice for the second letter]And so on2. To insert a space, press the key once. Todelete letters, press the key. Press and holddown the key to clear the display. Refor to thefollowing table for more information on thecharacters available using the alphanumeric keys.Key Lower case Upper case. , ? ! 1 . , ? ! 1a b c 2 à á â ã ä å æ ç A B C 2 À Á Â Ã Ä Å ÆÇd e f 3 è é ê ë D E F 3 È É Ê Ëg h i 4 ì í î ï G H I 4 Ì Í Î Ïj k l 5 £ J K L5 £m n o 6 ñ ò ó ô õ ö ø oe M N O 6 Ñ Ò Ó Ô Õ Ö Ø OEp q r s 7 ß $ P Q R S 7 ß $t u v 8 ù ú û ü T U V 8 Ù Ú Û Üw x y z 9 W X Y Z 9Space, 0 Space, 0Characters in the order display](https://usermanual.wiki/LG-Electronics-USA/U8500/User-Guide-631001-Page-28.png)
![29Using the 123 (Number) modeThe 123 Mode enables you to enter numbers in atext message (a telephone number, for example).Press the keys corresponding to the required digitsbefore manually switching back to the appropriatetext entry mode.Using the symbol modeThe symbol mode enables you to enter varioussymbols or special characters. To enter a symbol,select [Options] >[Insert] >[Symbol]. Use thenavigation and numeric keys to select the desiredsymbol and press the key.Using the hands-freeDuring a call, press and hold down the key toactivate or deactivate it.General functions](https://usermanual.wiki/LG-Electronics-USA/U8500/User-Guide-631001-Page-29.png)
![Profiles33Depending on the support or not of SAT (i.e. SIMApplication Toolkit) services on the SIM card, themenu 1 may be different. In case the SIM card supports SAT services, thismenu will be the operator specific service namestored on the SIM card, for instance “Special”. Pleaserefer in that case to the information provided withyour SIM card for further information on how to usethe related options.In case the SIM card does not support SAT services,menu 1 will be “Profiles” and allows you to select orcustomize some of the alert profiles. The followingdescribes this menu Profiles. You can select ring tone or vibration for an incomingcall and configure the sound and volume of the ringtone, button sound, and sound effect, according to aprofile. The profiles provided include [General],[Silent], [Outdoor], [Vibrate only], [Headset], [Car],[User defined 1], and [User defined 2]. Select aprofile, and press the OK button to activate theprofile. The [Silent], [Vibrate only], [Headset], and[Car] profiles do not have an Option menu. Move thecursor to the corresponding profile. Then menusavailable are displayed on the softbar below thescreen. Select the Edit menu for [General],[Outdoor], [Headset], [Car], [User defined 1] &[User defined 2] profile to change the configuration.The different list of options available when eachprofile has been selected for editing.1. Alert type2. Ringtones3. Effect tonesAlert typeThis option determines the incoming call notificationmode. You can select from [Ringing], [Vibration],[Light only], [Ring & vibration], [Vibration after ring],[Ring after vibration], [Max. ring & vibration].RingtonesVoice call tone: This option determines the incomingVoice telephony call.Video call tone: This option determines theincoming Video telephony call.Volume: This option determines the ring tone volumefor incoming call notification.Profiles](https://usermanual.wiki/LG-Electronics-USA/U8500/User-Guide-631001-Page-33.png)
![Profils34ProfilesEffect tonesKey tone: This option determines the key tone thatis played when a key is pressed.Feedback tone: This option determines the warningtone that is played for: [Feedback popup], [Nonetwork], [No battery], [When Delete all execute],[Factory default press], [Memory full], [Warningpopup].Effect tone volume: This option determines thevolume at which the key tones & Feedback tone needto be played.To change effect tones and their volume:1. Select Effect tones and press Select.2. Choose from the list of Options Key tone,Feedback tone, Effect tone volume.3. Change the settings and press Done to save thechanges.](https://usermanual.wiki/LG-Electronics-USA/U8500/User-Guide-631001-Page-34.png)
![Vodafone live!35Vodafone live!How to access Vodafone live!You can use your phone for so much more than justtexting and talking. Vodafone live! providesinformation such as news, weather forecast,information on sports or traffic whenever you need it.In addition, Vodafone live! provides superiormultimedia services such as the latest music or ringtones, wallpapers or games for your entertainmentand device personalisation.Press OK key from idle mode and select Vodafonelive! using navigation keys. You can also accessVodafone live! by pressing the right soft key in idlemode.Note]Additional cost may occur when using onlineservices.](https://usermanual.wiki/LG-Electronics-USA/U8500/User-Guide-631001-Page-35.png)
![Call register36You can view missed, received, dialled and entire callrecords. Each call record menu provides the followingfunctions.]You can make a voice or video call to the numberin the call record.]You can save the number in the call record in theContacts.]You can send a message to the number in the callrecord.]You can view detailed information of the callrecords such as the date, time and call time.]You can clear call records.Missed calls MENU 3.1Allows you to view missed call records, make a call,send a message, and save the number in the Contacts.Received calls MENU 3.2Allows you to view received call records, make a call,send a message, and save the number in the ContactsDialled calls MENU 3.3Allows you to view dialled call records, make a call,send a message, and save the number in the Contacts.All calls MENU 3.4Allows you to view all of the missed, received, anddialled call records. You can make a call, or send amessage to the number you have selected from therecords. You can also save the number in the Contacts.Call register](https://usermanual.wiki/LG-Electronics-USA/U8500/User-Guide-631001-Page-36.png)
![39the OK key to send the message.5. Press the popup menu 4 Save to draft and pressthe OK key to save the message.6. Press the popup menu 5 Exit and press the OKkey to exit the Message window.Multimedia message (Menu 4.1.2)To send a video you have stored on your phone:1. Press the OK key from idle and select Messages.2. Select New message and press the OK key.3. Select Multimedia message and press the OK key.4. Enter phone numbers in the To and CC fields.Select Options >Search >Contacts or press OKin the TO or CC fields to select a phone numberfrom the Contacts.5. Enter the subject of the message in the Subjectfield.6. Enter your message in the Message field.7. Select Options >Insert. 1. Photos]The photos saved on the phone are displayed.]After selecting a photo, press the OK key[Select].]The selected photo is inserted into theMessage window (One photo per slide).2. Pictures]The pictures saved on the phone are displayed.]After selecting a picture, press the OK key[Select].]The selected picture is inserted into theMessage window (One picture per slide).3. Sounds]The sounds saved on the phone are displayed.]After selecting a sound, press the OK key[Select].]The selected sound is inserted to the Messagewindow (One sound per slide).MessagesNote]In Text Message,If you insert an image, a sound, a video clip, CCor subject, the screen is changed to MultimediaMessage screen.](https://usermanual.wiki/LG-Electronics-USA/U8500/User-Guide-631001-Page-39.png)
![Messages404. Videos]The video clips saved on the phone aredisplayed.]After selecting a video clip, press the OK key[Select].]The selected video clip is inserted into theMessage window (One video clip per slide).5. New photo]Camera module opens and you can take apicture.]Select Image to be taken immediately and tobe inserted to the message. It is inserted to theMessage window (One photo clip per slide).6. New sound]Voice recorder opens and you can record asound.]Select sound to be taken immediately and tobe inserted to the message. It is inserted tothe Message window (One sound clip perslide)7. New video]Video recorder module opens and you canrecord a video clip.]Recording]Select video to be taken immediately and tobe inserted to the message. It is inserted tothe Message window (One video clip perslide)8. Select Send Message from the Options Menu orpress the right soft key. The message istransmitted.< Option Menus >1.1 Search1.1.1 Message log: Select and enter a phone number from thelist of phone numbers to which you haverecently sent a message.1.1.2 Call log: Select and enter a phone number from thelist of phone numbers to which you haverecently made a call.1.1.3 Contacts: Phonebook screen appears >You canselect and enter a phone number.1.2 Send message: Select this menu to send the created message. Messages](https://usermanual.wiki/LG-Electronics-USA/U8500/User-Guide-631001-Page-40.png)
![41Messages1.3 Save to draft: Select this menu to save a draft of the message.1.4 Save to multimedia template: Select this menu to save the created message asa template.1.5 Preview: Select this menu to preview the createdmessage before transmission.1.6 View objects: Select this menu to view all the files attached toall slides of the current message.1.7 Set slide: Select this menu to configure the play time andthe background and foreground colour of eachof the slides.1.8 Remove: Select this menu to remove the current slide oran object included in the current slide(represented by Image/Video/Sound).1.9 Move to slide: Select this menu to move to the previous or thenext slide.1.* Exit: Select this menu to stop creating the currentmessage and return to the previous screen.Note]You can send a multimedia message straightfrom your camera, camcorder or sound recorder.1. After taking a picture with the camera,recording a video with the camcorder orrecording sound with the Sound Recorder.2. Select Send.3. Select Via Multimedia msg.4. The selected image, video, or sound isinserted into the Multimedia msg.5. Select Send Message from the Options Menuor press the right soft key >The message istransmitted.](https://usermanual.wiki/LG-Electronics-USA/U8500/User-Guide-631001-Page-41.png)
![Messages42Viewing MMS messagesTo preview MMS message1. Select Preview from the Options Menu to previewa created MMS.2. Press any key to pause playback of the message,and press the Play key to resume playing themessage. 3. Once the MMS player enters pause status, thesoft menus are assigned to slide movingfunctions.( left soft menu >previous slide, rightsoft menu >next slide) You can catch up with slide switching by slidenumbers in orange colour of title bar.When the message has finished playing, thedetailed view screen appears. If you want to playthe message again, click Play soft key.You can use the following functions using theOptions key from the Play screen.]Play/Pause: Plays the message or pauses messageplayback.]Edit: Displays the Message edit screen.]Send message: Sends the message.]Save to draft: Saves the message in the Outbox.]View objects: Displays the screen (Object ViewScreen) in which you can view the audio, image,and video files included in the message. You canalso save those files in different names to thespecified location.]Mute(or Unmute): This menu allows you todetermine whether to mute the sound when thereis an audio or a video file included in the message.]Move to Slide: Move to the selected Slide.]View detail: Displays the Detailed View screen. Itshows you detailed information of messages.Viewing multimedia messages in the Inbox,Outbox and Sentbox1. Select an MMS message to view its contents.2. Press any key to pause playback of the message,and press the Play key to resume playing themessage.3. Move to a desired message by using the left andright direction keys. (in play status) Move to a desired slide by using the left and rightdirection keys. (in pause status)If you play an MMS message, detailed view screenappears after message playing.Messages](https://usermanual.wiki/LG-Electronics-USA/U8500/User-Guide-631001-Page-42.png)
![43- Press the Play key to play the message.- You can use the following functions using theOptions key.[Inbox / Detailed View Screen Menus]]Play/Pause: Plays the message or pauses messageplayback.]Reply: Creates a reply to the selected message.]Reply all: Creates a reply to all recipients (copy oforiginator and CC addresses) of the selectedmessage.]Forward: Forwards the selected message.]Call: Call back to the originator.]Add to Contacts: Saves the sender’s number tothe phonebook.]New message: Displays the Edit screen where youcan create a new message.]Get: Displays a screen (Get number/e-mailaddress/web address screen) that shows thenumber/e-mail address/web address included inthe message.]View object: Displays the screen (Object ViewScreen) in which you can view the audio, image,and video files included in the message.]Delete: Deletes the selected message.[Inbox / Play Screen Menus]]Play/Pause: Plays the message or pauses messageplayback.]Reply: Creates reply to the selected message.]Reply to all: Creates reply to all recipients (copy oforiginator and CC addresses) of the selectedmessage.]Forward: Forwards the selected message.]Call: Call back to the originator.]Add to Contacts: Saves the sender’s number tothe phonebook.]New message: Displays the Edit screen in whichyou can create a new message.]Get: Displays a screen (Get number/e-mailaddress/web address screen) that shows thenumber/e-mail address/web address included inthe message.]View object: Displays the screen (Object ViewScreen)in which you can view the audio, image, andvideo files included in the message. You can alsosave those files in different names to the specifiedMessages](https://usermanual.wiki/LG-Electronics-USA/U8500/User-Guide-631001-Page-43.png)
![Messages44location.]Delete: Deletes the selected message.]Move to slide: Move to the selected Slide.]View detail: Displays the Detailed View screen. Itshows you detailed information of messages.[Outbox / Detailed View Screen Menus]]Resend: Resends the message.]Edit: Edits the selected message.]Play/Pause: Plays the message or pauses messageplayback.]Forward: Forwards the selected message.]Add to Contacts: Saves the recipient’s number tothe phonebook.]New message: Displays the Edit screen in whichyou can create a new message.]Get: Displays a screen (Get number/e-mailaddress/web address screen) that shows thenumber/e-mail address/web address included inthe message.]View object: Displays the screen (Object ViewScreen)in which you can view the audio, image, andvideo files included in the message.]Delete: Deletes the selected message.[Outbox / Play Screen Menus]]Resend: Resends the message.]Edit: Edits the selected message.]Play/Pause: Plays the message or pauses messageplayback.]Forward: Forwards the selected message.]Add to Contacts: Saves the recipient’s number tothe phonebook.]New message: Displays the Edit screen in whichyou can create a new message.]Get: Displays a screen (Get number/e-mailaddress/web address screen) that shows thenumber/e-mail address/web address included inthe message.]View object: Displays the screen (Object ViewScreen) in which you can view the audio, image,and video files included in the message. You canalso save those files in different names to thespecified location.]Delete: Deletes the selected message.Messages](https://usermanual.wiki/LG-Electronics-USA/U8500/User-Guide-631001-Page-44.png)
![45]Move to slide: Move to the selected Slide.]View detail: Displays the Detailed View screen.Itshows you detailed information of messages.[Sent / Detailed View Screen Menus]]Edit: Edits the selected message.]Play/Pause: Plays the message or pauses messageplayback.]Forward: Forwards the selected message.]Add to Contacts: Saves the recipient’s number tothe phonebook.]New message: Displays the Edit screen in whichyou can create a new message.]Get: Displays a screen (Get number/e-mailaddress/web address screen) that shows thenumber/e-mail address/web address included inthe message.]View object: Displays the screen (Object ViewScreen) in which you can view the audio, image,and video files included in the message.]Delete: Deletes the selected message.[Sent / play screen menus]]Edit: Edits the selected message.]Play/Pause: Plays the message or pauses messageplayback.]Forward: Forwards the selected message.]Add to Contacts: Saves the recipient’s number tothe phonebook.]New message: Displays the Edit screen where youcan create a new message.]Get: Displays a screen (Get number/e-mailaddress/web address screen) that shows thenumber/e-mail address/web address included inthe message.]View object: Displays the screen (Object ViewScreen) in which you can view the audio, image,and video files included in the message. You canalso save those files in different names to thespecified location.]Delete: Deletes the selected message.]Move to slide: Move to the selected Slide.]View detail: Displays the Detailed View screen. Itshows you detailed information of messages.Messages](https://usermanual.wiki/LG-Electronics-USA/U8500/User-Guide-631001-Page-45.png)
![Messages46E-mail (Menu 4.1.3)Create e-mail1. You can create a new e-mail (Electronic mail).2. Select E-mail from New message, and press theSelect key.3. You can edit the items necessary to create an e-mail message by using the cursor.4. Move the cursor to To field, and enter the e-mailaddress of the recipient of the e-mail.5. Move the cursor to CC (Carbon Copy) field, andenter the reference e-mail address to forward thee-mail.6. Move the cursor to BCC (Blind Carbon Copy),and enter a hidden reference e-mail address toforward the e-mail without forwarding information.7. For the recipient (To), reference address (CC) andhidden reference address (BCC) fields only validemail addresses are allowed. When an e-mailaddress has been specified, another field whereyou can specify another address appears. You canspecify up to 20 recipients for To and CC addressfields and 10 recipients for BCC address field.8. To enter data in the recipient (To), referenceaddress (CC) and hidden reference address (BCC)fields, you can search the Contacts by using theSearch key and use the following functions byusing the [Option] key.]Search: Select this menu to insert the addressin recent message log or a name saved inContacts.]Send message: Send the created e-mail.]Save to drafts: Select this menu to save themessage in Drafts.]View object: Show the attached file.]Remove: Remove the attached file.]Exit: Exit the e-mail composer.9. Move the cursor to the Subject field and createthe subject. Use the following functions by usingthe [Option] key.]Insert: Select this menu to insert the symbol,templates and contacts.]Dictionary: Select this menu to use dictionary.]Send message: Send the created e-mail.Messages](https://usermanual.wiki/LG-Electronics-USA/U8500/User-Guide-631001-Page-46.png)
![47]Save to drafts: Select this menu to save themessage in the draftbox.]View object: Show the attached file.]Remove: Remove the attached file.]Exit: Exit the e-mail composer.10. You can enter the message contents by movingthe cursor to the Message field. Use the followingfunctions by using the [Option] key.]Insert: Select this menu to insert specialcharacters, templates, and contacts. It’s alsopossible to attach multimedia files.]Preview: You can preview the created e-mailbefore sending it.]Dictionary: Select this menu to use dictionary.]Send message: Send the created e-mail.]Send settings: Select this menu to configure thesettings of the e-mail that you wish to send.]Save to drafts: Select this menu to save themessage in Drafts.]View object: Show the attached file.]Remove: Remove the attached file.]Exit: Exit the e-mail composer.11. You can attach files by using the [Insert] key inthe message field. In the Attach menu, move thecursor to the Video, Audio or Image item, andpress the Select key to attach a file. You canattach up to 4 files, and the size of total attachedfiles should be 300K or less. You can change theattached file for another by selecting the attachedfile name. You can cancel the attached file byusing the [Option] key.12. When you have finished writing an e-mail, pressthe Send key to send the e-mail. Send settings1. PriorityYou can configure the priority of the e-mailyou wish to send.You can select either Low, Normal or High.2. Read replyYou can set whether you want to request aread receipt for a sent e-mail.Messages](https://usermanual.wiki/LG-Electronics-USA/U8500/User-Guide-631001-Page-47.png)
![Messages48MMS Postcard (Menu 4.1.4)1. Select Options >Insert.1. Photos]The photos saved on the phone are displayed.]After selecting a photo, press the OK key[Select].2. Pictures]The pictures saved on the phone aredisplayed.]After selecting a picture, press the OK key[Select].3. New photos]Camera module opens and you can take apicture.2. Enter the greeting in the Greeting field.3. Enter the recipient's name in Name field.4. Enter the recipient's additional information (e.g.company name) in Additional info. field.5. Enter the recipient's address in Address field.6. Enter the recipient's postal code in Postal codefield.7. Enter the recipient's city in City field.8. Enter the recipient's state code in State field.9. Enter the recipient's country code in Countryfield.<Option Menus>In the Image field1 Insert : Select this menu to insert image.2 Remove image : Select this menu to remove theinserted image.3 Send : Select this menu to send the createdpostcard.4 Save to draft : Select this menu to save a draft ofthe postcard.In Name/Additional info./Address/City /State/Country fields1 Send : Select this menu to send the createdpostcard.2 Save to draft : Select this menu to save a draft ofMessages](https://usermanual.wiki/LG-Electronics-USA/U8500/User-Guide-631001-Page-48.png)
![493 Get from address book : Phonebook screenappears. You can select and enter a phone number.4 Dictionary : Select this menu to use the dictionary.Inbox MENU 4.21. You can view saved messages. Select a messageand then press the Select key to view the message.2. You can view the previous or next message byusing the left and right keys.3. To view an MMS(Notification) message, selectRetrieve in the message view screen. Then the fileis transmitted, and you can view the file when thetransmission is complete.4. You can use the following functions by using[Options] key.]Reply: You can create a reply to the selectedmessage.]Forward: Forwards the selected message. (Notsupported for MMS(Notification) and WAP pushmessages.)]Call: You can call back to the sender.]Open: You can view current message.]New message: You can write a new message.]Mark/Unmark: You can select one or moremessages for multiple deletion.]Filter: Displays messages by desired messagetypes.]Delete: Deletes the current message.E-mail inbox MENU 4.3Viewing e-mail message list 1. Select an e-mail account and then press the OKkey to view the received e-mail list.2. Using the Retrieve key, you can retrieve a newemail list from the e-mail server of the selectedaccount.3. In e-mail list, you can use the following functionsby using the [Options] key.]Reply: Creates a reply to the selected e-mail.You can write a reply using SMS, MMS or E-mail.]Reply all: Creates a reply to all the recipients.Messages](https://usermanual.wiki/LG-Electronics-USA/U8500/User-Guide-631001-Page-49.png)
![Messages50]Forward: Forwards the selected e-mail messageto another e-mail address.]Open: Opens selected e-mail.]Retrieve: Retrieves new e-mail messages.]New message: Creates new message.]Mark/Unmark: Use mark/unmark option.]Delete: Deletes an e-mail. Deleted e-mails aretemporarily saved in Trash. ]Delete from phone and server: Delete aselected e-mail from phone and server. Viewing an e-mail message 1. Select one of the received e-mails and press theOK key to receive the contents of the e-mail.2. The contents of the received e-mail areautomatically displayed in the View screen.3. You can view the contents of the previous or nextemail by using the left/right soft keys.4. In the e-mail View screen, you can select thefollowing functions by using the [Option] key.]Reply: Creates a reply to the selected e-mailmessage.]Reply all: Creates a reply to all the recipients.]Forward: Forwards the selected e-mail messageto another e-mail address.]Add to Contacts: Save or update the address ofsender.]New message: Write a new SMS, MMS, MMSPostcard, or e-mail.]Get: Extract the number, email address or URLfrom e-mail message.]View objects: Show the attached file.]Delete: Deletes the selected e-mail message.Trash 1. You can restore or permanently delete deleted e-mails in Trash.2. Select Trash in the mailbox and press the OK keyto view the deleted e-mail list.3. Press the Delete key to delete a deleted e-mailpermanently.Messages](https://usermanual.wiki/LG-Electronics-USA/U8500/User-Guide-631001-Page-50.png)
![514. Press the Restore key to restore a deleted e-mail.5. Using the Option key, you can select the followingfunctions.]Restore: Restores a deleted e-mail.]Delete: Deletes an e-mail permanently.]Mark/Unmark: uses mark/unmark option.]Exit: Exit this popup menu.]Delete from phone and server: Delete aselected e-mail from phone and server. Drafts MENU 4.41. You can view saved messages. Select a messageand then press the OK key to view the message.2. You can use the following functions by using the[Options] key.]Edit: You can edit messages.]New message: You can write a new message.]Mark/Unmark: You can select one or moremessages for multiple deletion.]Filter: Displays messages by desired messagetypes.]Delete: Deletes the current message.Outbox MENU 4.51. You can view saved messages. Select a messageand then press the OK key to view the message.2. You can view the previous or next message byusing the left and right keys.3. You can use the following functions by using[Options] key.[For sending / waiting messages]]New message: You can write a new message.]Cancel: You can stop sending/waiting status.[For sending a failed message]]View error status: Shows the reason fortransmission failure.]Resend: Resends the selected message.MessagesNote]The e-mails in Trash will not be received again.](https://usermanual.wiki/LG-Electronics-USA/U8500/User-Guide-631001-Page-51.png)
![Messages52]Forward: Forwards the selected message.]Edit: You can edit messages.]New message: You can write a new message.]View error status: Shows the reason fortransmission failure.]Mark/Unmark: You can select one or moremessages for multiple deletion.]Filter: Displays messages by desired messagetypes.]Delete: Deletes the current message.Sent MENU 4.6Shows the messages you sent (Text message /Multimedia message / E-mail).[Options]]Forward: Forwards the selected message.]Open: Open the selected message.]Edit: You can edit messages.]New message: You can write a new message.]Mark/Unmark: You can select one or moremessages for multiple deletion.]Filter: Displays messages by desired messagetypes.]Delete: Deletes the current message. Voice mail MENU 4.7You can connect to the voice mail centre. If there isno selected voice mail centre address, you can inserta new voice mail centre.Templates MENU 4.8Text templates (Menu 4.8.1)You can add, edit, and delete frequently-used usefulphrases.You can save frequently-used phrases in the inputwindow in advance. You can save these useful phrasesusing the Options menu.]Depending on your service provider, the usefulphrases such as the following examples are saved asa default.• I'm at home. Please callMessages](https://usermanual.wiki/LG-Electronics-USA/U8500/User-Guide-631001-Page-52.png)
![55sending a read confirmation mail for a readconfirmation mail request.4. Message size: Configures the size of a message formultimedia message transmission. You can make amessage up to message size.5. Delivery report: Determines whether to request adelivery confirmation mail for an multimediamessage.6. Read report: Determines whether to request aread confirmation mail for an multimedia message.Receiving options1. Retrieval mode: Allows you to determine whetherto automatically download an multimedia messagewhen an MMS notification message arrives.2. Delivery report: Determines whether to allowsending a delivery confirmation mail for a deliveryconfirmation mail request.3. Read report: Determines whether to allowsending a read confirmation mail for a readconfirmation mail request.MMS centresThis menu allows you to configure networkinformation such as MMSC, and WAP gateway, tosend an MMS message.In the Option menu, you can add or delete a profileby using the left soft key. You can finish theconfiguration by pressing “Done” key.A profile name selected by a checkmark is the currentconfigured value. You can view and edit the contentsof the profile in the edit mode by pressing the Editkey. The edit screen also appears when creating anew profile under Options. The meanings of theitems are given below.]Title: Profile name.]MMSC URL: Enter the MMS centre URL.]IP address: Enter the WAP gateway IP address.]Port number: Enter the WAP gateway portnumber.]Connection mode: Specify the UDP(CO/CL), theTCP with proxy, the TCP without proxy.]Access point: Specify the access point name (seeWAP connection settings.) Messages](https://usermanual.wiki/LG-Electronics-USA/U8500/User-Guide-631001-Page-55.png)
![Messages56Press the Done key(Options) to save the changesand complete MMS setting.If you have made changes, press the Done key tosave the changes and exit.E-mail (Menu 4.9.4)You can configure settings for receiving andtransmitting e-mails such as Read reply, Signaturetext, Auto retrieve, and E-mail account.Read replyYou can determine whether to allow sending a readconfirmation mail for a read confirmation mail request.Text signatureYou can configure a text signature to be attached tothe end of an e-mail. The configured signature text isautomatically or manually attached to the end of thee-mail when it is sent and can be attached differentlyaccording to the account which is using as a default.Auto retrieveYou can configure Auto retrieve to retrieve e-mailsautomatically from the incoming mail server. When anew mail arrives, an icon appears at the top of theidle screen. You can select that auto receiving timeslot have Off, 1, 3, 6 and 12 hours. Please note thatadditional charges may occur using [Auto retrieve]feature.E-mail account1. You can create or configure an e-mail accountincluding the e-mail server and user ID.2. You can edit a selected e-mail account by pressingthe Set key.3. You can select an e-mail account to be used tosend an e-mail using the Set key.4. You can select the following functions using theOption key.]Add new: Create a new e-mail account.]Delete: Deletes a selected e-mail account.Messages](https://usermanual.wiki/LG-Electronics-USA/U8500/User-Guide-631001-Page-56.png)
![Messages5815. Move the cursor to the Access point field toselect an access point to connect to the Internet.You can select a configured access point usingthe List key.16. Move the cursor to the auto retrieve item anddecide a auto receiving E-mail message as a fixedtime slot, You can select on/off using the List key.If you want to utilize this function, there isselected auto retrieve in E-mail setting. But autoretrieve is not selected, you can select autoretrieve in Option.17. Move the cursor to the SMTP authentication fieldand decide whether the outgoing mail serverrequires authentication. You can select On or Offusing the List key.18. Press the Option key and select [Advancedsetting]. You can change APOP setting. And youcan also change username and password forSMTP authentication.Editing an e-mail account1. Select a desired e-mail account from the e-mailaccount list and press the Edit key.2. You can edit desired fields by moving the cursorup and down.3. When configuration is complete, press the Donekey to complete the e-mail account configuration.Voice mail (Menu 4.9.5)You can insert or modify voice mail centre.Push message (Menu 4.9.6)You can configure method for downloading pushmessage.]To receive push message, you can select “On” or“Off”.]To use or not use auto download option, you canselect “On” or “Off ”.Messages](https://usermanual.wiki/LG-Electronics-USA/U8500/User-Guide-631001-Page-58.png)
![Camera60Take photo MENU 5.11. Press the Menu key and select 8. Camera >1.Take photo. Or, press the Camera key in idle mode.2. Environment settingSelect the [Options] key.]Size: Select ‘Size’ and choose one from1280x1024, 640x480, 320x240, wallpaper sizeand Phonebook size.]Quality: You can select the desired quality ofphoto from super fine, fine or normal.]Multishot: You can take 3/6/9 photosconsecutively (Multishot is available in case of320x240 size).]Zoom: You can select zoom level according tothe photo size and preview size, and the rangeof zoom level is 1 to 10. For photos with1280x1024, only zoom level 1(1:1) issupported.]Brightness: You can select a level from –2.0 to2.0 with step size 0.5. The higher the level, themore brighter the screen.]White balance: Using this function you canadjust the tone of the background photoaccording to the weather by selecting eitherAuto, Daylight, Cloudy, Shade or Fluorescent.]Night mode: You can take better photos atnight.]Frame shot: You can apply 10 kinds of frameeffects when taking a picture.(Frame shot isavailable in case of wallpaper size)]Delay timer: Using this function you can delaythe camera shutter time by selecting either Off,3 seconds, 5 seconds or 10 seconds.]Effect: Using this menu you can select specialcamera effect by selecting either Off, Black &White, Negative, Sepia.]Shutter sound: You can select the camerashutter sound by selecting either No sound,Sound 1 or Sound 2.]Storage: You can store a photo taken in theinternal (Phone) flash memory or the externalflash memory.Camera](https://usermanual.wiki/LG-Electronics-USA/U8500/User-Guide-631001-Page-60.png)
![613. Taking a photoAdjust the camera position so that object is in thecentre of the screen, and then press the Take keyto take a photo of the object. A taken photo issaved in the internal (phone)flash memory or theexternal flash memory. To view existing takenphotos, select the right soft key ( ). Then thePhoto album is launched, and displays existingphotos as thumbnails. Move to a desired photo toview, and select [View] to view the photo. You canalso send a selected photo to the other partythrough the MMS or E-mail (Bluetooth) service bypressing the Send key in the thumbnail list screen.Take video MENU 5.21. This function is selected when you select 2. Takevideo from the Camera menu.2. Environment settingSelect the [Options] key.]Size: You can select the size between 176x144and 128x96.]Quality: You can select the desired quality ofvideo by selecting either Super fine, Fine orNormal.]Zoom: Same as Take photo.]Brightness: Same as Take photo.]White balance: Same as Take photo.]Night mode: Same as Take photo.]Effect: Same as Take photo.]Recording time: You can select recording timesof 30 seconds, 1 minute, 2 minutes, 5 minutes,60 minutes.]Storage: You can store a photo taken in theinternal (Phone) flash memory or the externalflash memory.3. Recording a videoPut the camcorder where you want it and pressthe “Record” key to start recording. Press the“Stop” key again to stop recording.The recorded video is saved in the gallery. To viewthe recorded video, select the right soft key ( ),select a desired video thumbnail from the videolist and press “Play”.Camera](https://usermanual.wiki/LG-Electronics-USA/U8500/User-Guide-631001-Page-61.png)
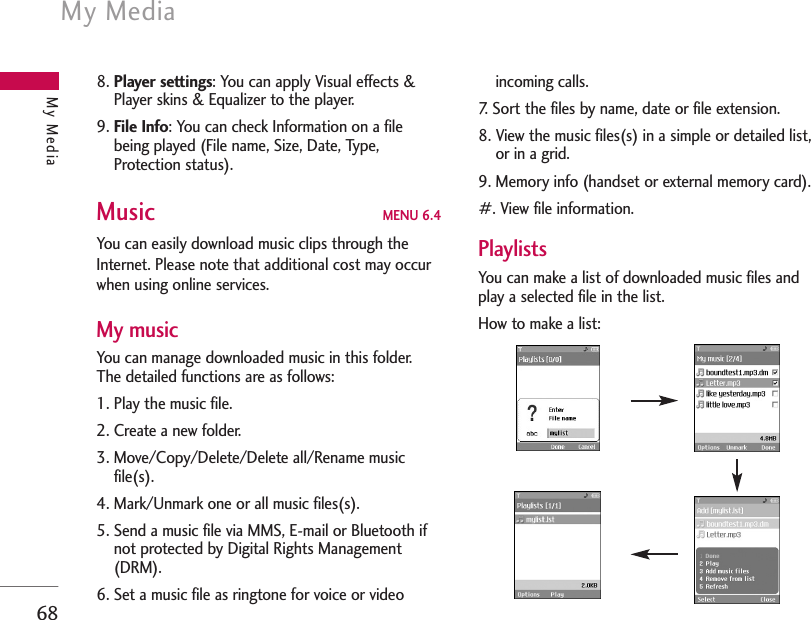
![My Media64The detailed functions are as follow:1. Create a new folder.2. View/Edit/Move/Copy/Delete/Delete all/Renamepicture(s).3. Mark/Unmark one or all picture(s).4. Send a picture via MMS, E-mail or Bluetooth if notprotected by Digital Rights Management (DRM).5. Set a picture as wallpaper for the main or frontdisplay.6. Start or set (normal or full screen, at what pace) aslide show.7. Create with different pictures an animated GIF file.8. Sort the files by name, date or file type.9. View the picture(s) in a simple or detailed list, orin a grid.*. Memory info (handset or external memory card).#. View file information.You can view JPEG, GIF, PNG, BMP and WBMP imageswith the Image Viewer. The images are displayed inthumbnail images. 9 thumbnail images are displayedon a screen at a time. You can use various functionsby using the [Option] key.When a file is selected the following Option keys willbe displayed.]New Folder: You can create a new folder within thefolder currently selected.]Files: You can view, edit, move, copy, delete, deleteall and rename a file.]Mark/Unmark: Using the Mark function, you cansend, delete, move and copy multiple files.]Send via: You can send a file via E-mail, MMS andBluetooth.]Set as wallpaper: You can set a selected file aswallpaper, i.e. background image on the main orfront display.My Media](https://usermanual.wiki/LG-Electronics-USA/U8500/User-Guide-631001-Page-64.png)
![65]Slide show: You can run the slide show. ]Make animated GIF: You can create a GIFanimation.]Sort by(Name, Date, Type): You can list files bysort.]View by(Simple list/Detailed list/Grid): You canselect a view type.]Memory info.: You can view the current phonememory and external memory status.]File info.: You can view the file information. Press the right soft key to execute [Send] functionimmediately.Select a thumbnail in the Thumbnail list screen, andselect [View] to view the image enlarged.In the large image screen, you can view in full screenmode by clicking [Full] at the centre, and you canexecute the [Send] function using the right soft key.Using the Options menu, you can use the followingfunctions.Using [Files] menu, you can delete, rename and edit afile and you can view the file information. Using theEdit menu, you can rotate, resize and crop an imageand you can insert text or an effect.Select [Files] and select Edit option to enter the Editwindow.In the Edit window, you can use the followingdifferent functions using the Option key.• Select [Save] to save the edited image.• Select [Rotate] to rotate the image by 90°, 180°or 270°.• Select [Resize] to resize the image to smallersize.• Select [Insert] to add Text, Frame, Element.• Select [Edit object] to use the Defect &Clipping functions.• Select [Effect] to apply the desired effect to theimage.• Select [Mirror] to reverse as a mirror image(right><left).• Select [Undo/Redo] to undo or redo the lastoperation on the image.]Send via: You can send a file via E-mail, MMS andMy Media](https://usermanual.wiki/LG-Electronics-USA/U8500/User-Guide-631001-Page-65.png)
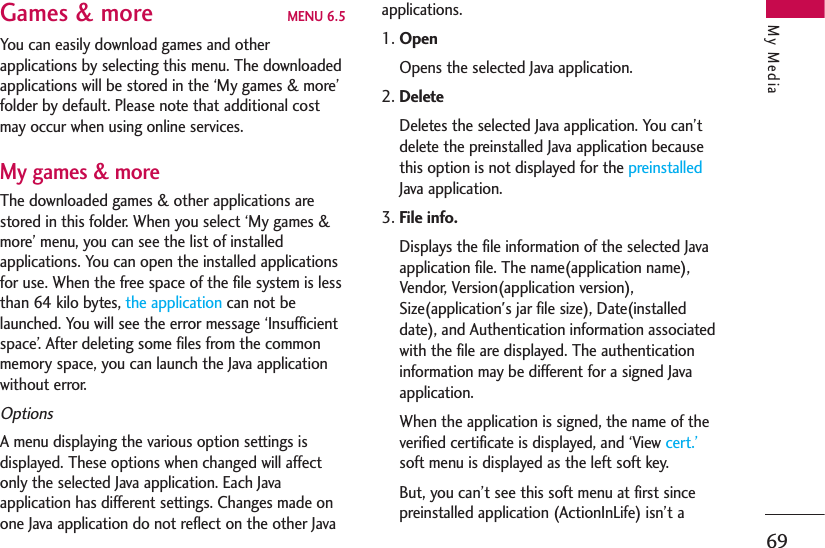
![My Media66Bluetooth.]Full: You can view in full screen mode.]Zoom: You can select zoom level, 2X, 4X, or 8X,Original size.]Set as wallpaper: You can set a selected file as aswallpaper, i.e. background image on the main orfront display.]Slide Show: You can run the slide show.]Go to list]File info: You can view the file Information.[ ] Copyright protected media contents.(DRM(Digital Rights Management)) You can't render this picture.[ ] Expired copyright protected picture. You renderuse this picture. You can updates some mediacontents at File manager >Options >2. Files >2. ActivateSounds MENU 6.3The folder Sounds consists of an embedded link fordownloading sounds through the Internet, and Mysounds as default folder for recorded or downloadedsounds. Please note that additional cost may occurwhen using online services.My sounds You can here manage, send or set as ringtonesdownloaded sounds.The detailed functions are as follow:1. Play the sound.2. Create a new folder.3. Move/Copy/Delete/Delete all/Rename sound(s).4. Mark/Unmark one or all sound(s).5. Send a sound via MMS, E-mail or Bluetooth if notprotected by Digital Rights Management (DRM).6. Set a sound as ringtone for voice or videoincoming calls.7. Sort the files by name, date or file type.8. View the sound files(s) in a simple or detailed list,or in a grid.9. Memory info (handset or external memory card)#. View file information.My Media](https://usermanual.wiki/LG-Electronics-USA/U8500/User-Guide-631001-Page-66.png)
![67When option 1. Play is selected, the sound will beplayed with the Media Player. To pause playback,press the OK key during the playback. To resume thepaused playback, press the OK key once again.To set an area to repeat continuously, press the rightsoft key (A >B) to mark the point where you want tothe area to start and then press the right soft key(A>B) again to mark the point where you want thearea to end. The selected area will then repeatcontinuously.Press the right soft key (A>B) once again, whileplaying the selected area to release Area Repeatmode.You can enter the Option menu by pressing the leftsoft key where you use the various utility functionsusing the up and down keys.Move to the desired menu using the up and downkey and press the OK key.1. Background Play: You can play a file asBackground music.2. Play/Pause: You can play, or pause playing a file.3. Send Via: You can send a file via MMS, E-mail andBluetooth if not protected by Digital RightsManagement (DRM).]Multimedia msg: You can send a file beingplayed via MMS.]E-mail: You can send a file being played via E-mail.]Bluetooth: You can send a file being played viaBluetooth.4. Ringtone: A sound can also be set as a ring tonefor incoming voice or video calls.5. Mute/Unmute: If the Volume is set at more than0, the Unmute mode goes active, and if theVolume is at 0, the Mute mode is activated.6. Set repeat: You can set the Repeat mode.]None: You can release the Repeat mode.]Current file: You can repeat the current file.]All files: You can play all files in the currentdirectory.]Shuffle: You can play a file randomly.7. Area Repeat(A >B): You can set the Area Repeatmode.My Media](https://usermanual.wiki/LG-Electronics-USA/U8500/User-Guide-631001-Page-67.png)
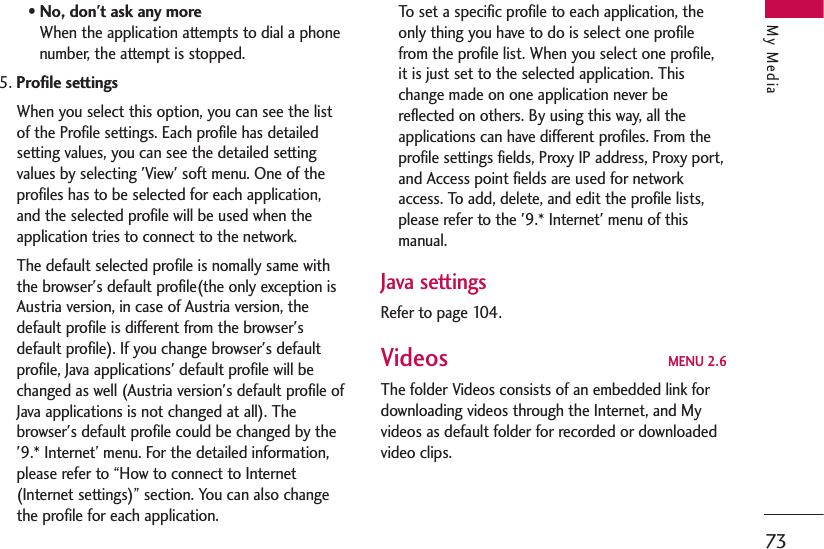
![My Media70signed Java application.If you download and install a signed application,you can see the name and details of certificate inFile info.]View cert. (only in case of signed application)If the selected application is a signed by atrusted party then the detailed certificateinformation will be displayed.4. Permission settingsA Java application downloaded from the Internethas a set of default permissions that the user canmodify. Such modifications performed on one JavaApplication are not reflected on the other ones.Please note that the availability of thesepermission settings may depend on the type andauthentication of the Java application. In case of apre-installed Java application, Permission settingscan not be changed, all permissions are grantedwithout any prompt. In case of signed JavaApplications, the permissions settings are pre-defined and can not be changed. For each optionbelow, you can change the permission settings.]Net accessThis menu is used to select the behaviour of theJava application when it tries to connect to theInternet.Note• Prompt each timeIf this option is selected, the application willprompt the user each time the Java applicationtries to access the Internet.• No, don't ask any moreWhen the application attempts to make anetwork access connection, the attempt willnot be successful without prompt.]Local connectivityThis menu is used to select the behaviour of theapplication when it tries to make a localconnection.Note• Prompt each timeIf this option is selected, the application willprompt the user each time the application triesto a local connection.My Media](https://usermanual.wiki/LG-Electronics-USA/U8500/User-Guide-631001-Page-70.png)
![71• No, don't ask any moreWhen the application attempts to make a localconnection, the attempt will not be successfulwithout prompt.]Application auto invocationA registered special SMS or Event may try toinvoke an already residing Java application in thephone. The user can define the action to be taken whenthis type of event occurs.Note• Prompt each timeIf this option is selected, the application willprompt the user each time some special eventtries to invoke a java application.• No, don't ask any moreIf some other specially registered event tries toopen a Java application, the attempt will not besuccessful.]MessagingThis menu is used to select the behaviour of theJava application if it tries send message(SMS).The user can define the settings when this typeof action is performed.Note• Prompt each timeIf this option is selected, the application willprompt the user each time the Java applicationtries to send the message.• No, don't ask any moreWhen the application attempts to send amessage, the attempt will not be successful.]Multimedia recordingThis menu is used to select the behaviour of theJava application if it tries to capture a still imagewith a camera.Note• Prompt each timeIf this option is selected, this application willprompt the user each time it tries to capture astill image with a camera.• No, don't ask any moreWhen the application attempts to capture astill image with a camera, the attempt will notbe successful.]Read user data accessThis menu is used to select the behaviour of theMy Media](https://usermanual.wiki/LG-Electronics-USA/U8500/User-Guide-631001-Page-71.png)
![My Media72My MediaJava application if it tries to read data fromPersonal Information of the mobile.Note• Prompt each timeIf this option is selected, the application willprompt the user each time the Java applicationtries to read from the personal information ofthe phone.• No, don't ask any moreWhen the application attempts to read PIMdata, the attempt will not be successful.]Write user data accessThis menu is used to select the behaviour of theJava application if it tries to write in the personalInformation of the phone.Note• Prompt each timeIf this option is selected, the application willprompt the user each time the Java applicationtries to write in the personal information of thephone.• No, don't ask any moreWhen the application attempts to write PIMdata, the attempt will not be successful.]File connectionThis menu is used to select the behaviour of theJava application if it tries to connect to a file.The user can define the settings when this typeof action is performed.Note• Prompt each timeIf this option is selected, the application willprompt the user each time the Java applicationtries to connect to a file.• No, don't ask any moreWhen the application attempts to make a fileconnection, the attempt will not be successful.]Phone callThis menu is used to select the behaviour of theJava application when it tries to dial a phonenumber.Note• Prompt each timeIf this option is selected, the application willprompt the user each time the Java applicationtries to dial to a phone number.](https://usermanual.wiki/LG-Electronics-USA/U8500/User-Guide-631001-Page-72.png)
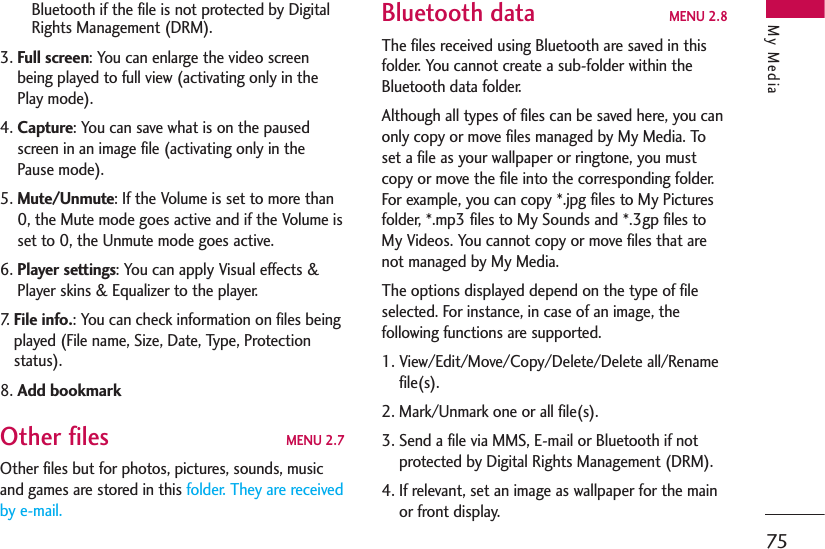
![My Media74My videos You can here manage or send downloaded orcaptured videos clips.The detailed functions are as follow:1. Play the video clip.2. Create a new folder.3. Move/Copy/Delete/Delete all/Rename videoclip(s).4. Mark/Unmark one or all video clip(s).5. Send a video clip via MMS, E-mail or Bluetooth ifnot protected by Digital Rights Management(DRM).6. Sort the files by name, date or file type.7. View the video files(s) in a simple or detailed list,or in a grid.8. Memory info (handset or external memory card).9. View file information.You can view a video using the video player. Videofiles are displayed in the list as thumbnails. You canselect a desired video by using the Up, Down, Left,and Right keys. Select a desired video and select Playto view the recorded video.Select [Send Via] to attach the selected video to anMMS message and an Bluetooth service.When option 1. Play is selected, the video clip will beplayed with the Media Player. To pause the playback,press the OK key during the playback. To resume thepaused playback, press the OK key once again.To capture the screen shot, press the right soft keywhen the playback is paused.To view the current playback in full screen, press theright soft key during the playback.To return to the previous screen size, press the rightsoft key once again in the full screen mode.1. Pause/Play: You can play or pause playing a filefor a moment.2. Send via: You can send a file.]Multimedia msg.: You can send a file beingplayed via MMS.]E-mail: You can send a file being played via E-mail.]Bluetooth: You can send a file being played viaMy Media](https://usermanual.wiki/LG-Electronics-USA/U8500/User-Guide-631001-Page-74.png)
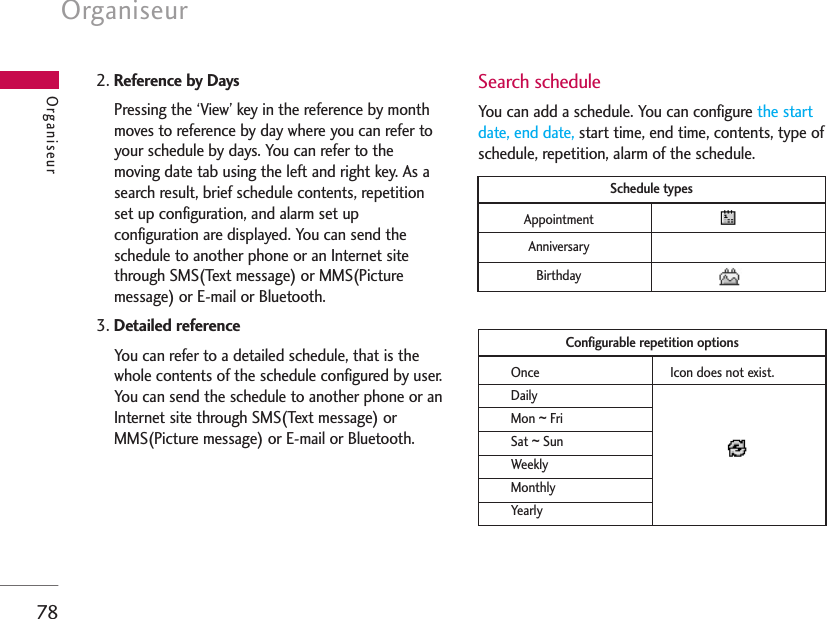
![Organiser77Alarm clock MENU 7.1If you set the alarm, [Alarm icon] appears on theIndicator bar. The specified alarm sounds at thescheduled time. Press the [OK] key to stop thealarm, and the alarm is released. Press the the rightsoft key [Snooze] and choose the snooze interval.The alarm sound is stopped and resumed afterselected Snooze duration. You can configure up to 5alarms.1. Select your desired alarm to configure in the alarmlist. If there is no alarm, press the right soft key[Add] to add a new alarm.2. Set/Cancel alarm: Set or cancel the alarm usingthe options for specifying the alarm off or bychoosing the alarm time.3. Input alarm time: Input your desired alarm timeby specifying Hour and Minute. Choose either‘AM’ or ‘PM’ visible if 12 hour format is specifiedfor the phone.4. Select repeat mode: Select desired repeat modeusing the left and right direction keys or from thelist pressing the centre key.5. Select bell: Select the bell to ring at the alarmtime, using the left add right direction keys orfrom the pressing the centre key.6. Input memo: Input alarm name. 7. Snooze: Select to enable or disalbe snooze feature.8. When you have completed alarm clock setting,press the right soft key [Done].Calendar MENU 7.2Schedule inquiry and search1. Reference by MonthsYou can refer to your schedule by months. Thecursor is on the current date, and the registereddate is underlined.The schedule saved for the date where the cursoris located is represented by an icon. Pressing theshortcut key 1 moves to the previous year andpressing key 3 move to the next year and pressingkey 5 moves to today. Pressing key 7 moves to theprevious month, and key 9 moves to the nextmonth. You can move the date using the up, down,left, and right direction keys.Organiseur](https://usermanual.wiki/LG-Electronics-USA/U8500/User-Guide-631001-Page-77.png)
![81Edit and delete memo Locate the cursor on your desired memo, and pressthe key to view all the contents of the memo. Thisfunction shows all the memo contents. You can editor delete the contents of a memo using the ’Option’key. You can return to the memo management screenby pressing the Clear key. You can select Multiple orAll memos using Mark/Unmark option and thendelete a memo by pressing the ’Delete’ key.Date counter MENU 7.51. Select Date counter menu.2. Press [Add] and input text in [Notes] field.3. Input desired date in the date field and press[Done].4. To view detailed job contents, locate the cursor onthe desired item in the Date counter List and press[OK]. Details of the selected item With day onwhich the event occurs is dispalyedin View detailpage.5. Details of the selected item on which the eventoccurs is displayed in View detail.6. You can edit and delete a Date counter item usingOptions.7. You can also delete multiple Date counter itemMarking multiple items and Delete.Date counter MENU 7.6Press the left soft key to display the option pop upmenu before recording. Move to the desired menu item using the up anddown key and press the OK key.1. Quality: You can select a recording quality fromSuper Fine, Fine and Normal.2. Duration: You can set the recording duration toMultimedia size, 30 secs, or 1 min.3. New Recording: Select this menu to startrecording to a new file.4. Press the right soft key to close the sub-menupopup window.Pressing the OK key starts recording. When arecording is started, the recording time and thecurrent recording file name appear on the LCD. ToOrganiseur](https://usermanual.wiki/LG-Electronics-USA/U8500/User-Guide-631001-Page-81.png)
![Organiseur82cancel the recording, press the right soft key.Pressing the left soft key during recording allows youto select either Stop Recording or Cancel Recording.Select the desired function by using the up and downkey and press the OK key.When you finish the recording, press the OK key toexit. The recorded file is automatically saved inSounds >My sounds folder(My Media-Sounds-Mysounds)When no recording is in progress, pressing the OKkey starts recording on a new file.When no recording is in progress, press the right softkey to send a recorded file.Select one from Via Multimedia Msg, Via E-mail, andVia Bluetooth using the up and down keys and pressthe OK key.Press the left soft key to select various options afterthe voice recording.Select the desired menu using the up and down keyand press the OK key.1. Record new: Select this menu to start a new voicerecording.2. Send via:Select this menu to send therecordedfile. Select one from Via Multimedia Msg, Via E-mail, and Via Bluetooth using the up and downkeys and press the OK key.3. Ringtone: You can select a ring tone for a voiceand for a video call using the up and down keys.4. Album: Opens the My sounds.5. Delete: Select this menu to delete a recorded file.6. Press the right soft key to close the sub-menupopup window.Calculator MENU 7.7You have a calculator that provides 4 calculations ofaddition, subtraction, multiplication and division aswell as scientific functions.1. Press [Func].2. Select appropriate function.3. Select Calculator.You can input numbers using the number keys, andoperators using the up, down, left, and right directionOrganiseur](https://usermanual.wiki/LG-Electronics-USA/U8500/User-Guide-631001-Page-82.png)
![83key. You can input a decimal point by pressing the #key. Whenever you press the Clear key, characters aresequentially deleted in reverse direction. Wheneveryou long press the clear key, all the characters aredeleted in reverse in one shot.When calculation is completed and the result isdisplayed on the screen, pressing a number clears theprevious result and the calculator waits for new input,even if you did not press AC key. When calculation iscompleted and the result is displayed on the screen,pressing a symbol saves the result into the symbol,and continues calculation.Unit converter MENU 7.8Using this menu, users can convert Currency, Surface,Length, Weight, Temperature, Volume & Velocity.1. Press [Menu].2. Select appropriate function.3. Select Unit converter.Currency (Menu 7.8.1)1. Select the Currency menu.2. Users can set a currency exchange rate using[Rate].3. Input currency rates for up to 5 currenciesequivalent to GBP and then press [Save]. Thenyou can convert to one currency to another.4. You can view the value of between 5 currencyunits.5. Press [Reset] to clear the current input Field.6. To exit currency conversion function, press the[Back] key.Organiseur](https://usermanual.wiki/LG-Electronics-USA/U8500/User-Guide-631001-Page-83.png)
![Organiseur84Surface (Menu 7.8.2)1. Select Surface menu.2. Select desired unit to convert using [Unit].3. Input standard unit and view converted value.4. Press [Reset] to clear the current input Field, andlocate the cursor in the input field.5. To exit Surface conversion function, press [Back]key.Length (Menu 7.8.3)1. Select length menu.2. Select the desired unit to convert using [Unit].3. Input the standard unit and view your convertedvalue.4. Press [Reset] to clear the current input field andlocate the cursor in the input field.5. To exit length conversion function, press [Back]key.Weight (Menu 7.8.4)1. Select Weight menu.2. Select desired unit to convert using [Unit].3. Input standard unit and view converted value.4. Press [Reset] to clear the current input Field, andlocate the cursor in the input field.5. To exit Mass conversion function, press [Back] keyTemperature (Menu 7.8.5)1. Select Temperature menu.2. Position the cursor in desired unit by using up ordown arrow key.3. Input standard unit and view converted value.4. Press [Reset] to clear the current input field andlocate the cursor in the input field.5. To exit Temperature conversion function, press[Back] key.Organiser](https://usermanual.wiki/LG-Electronics-USA/U8500/User-Guide-631001-Page-84.png)
![85Volume (Menu 7.8.6)1. Select Volume menu.2. Select desired unit to convert using [Unit].3. Input standard unit and view converted value.4. Press [Reset] to clear the current input field andlocate the cursor in the input field.5. To exit volume conversion function, press [Back]key.Velocity (Menu 7.8.7)1. Select Velocity menu.2. Select desired unit to convert using [Unit].3. Input standard unit and view converted value.4. Press [Reset] to clear the current input field andlocate the cursor in the input field.5. To exit Velocity conversion function, press [Back]key.World time MENU 7.9The World time function provides time information ofmajor cities worldwide.1. Press [Menu].2. Select Useful functions.3. Select world time.4. You can view the time of desired country or cityusing the left and right key.5. You can select a desired city as a base using[Home].6. The home city selected in world time is the basefor daylight saving calculation for time.Organiser](https://usermanual.wiki/LG-Electronics-USA/U8500/User-Guide-631001-Page-85.png)
![Organiseur86Stop watch MENU 7.*1. Select Stop watch menu.2. Press [Go] to start the stop watch.3. Press [Stop] to stop the stop watch and view themeasured duration of time.4. Press [Go] to resume the stop watch.5. Press [Lap] during operation to record theduration of time at the moment, and continue thestop watch.6. Users can save up to 20 time records by pressing[Lap]. If the number of recorded time exceeds 20,the oldest one is deleted.7. Press Details to see recorded Lap timings. Press[Reset] to initialise the stop watch.Organiseur](https://usermanual.wiki/LG-Electronics-USA/U8500/User-Guide-631001-Page-86.png)
![Settings89Profiles (for SAT SIM) MENU 9.1In case a SAT capable SIM card is in use Profiles islisted here and should provide the same features asdescribed in chapter Profiles on pages 31-32.Date & Time MENU 9.2Although the current time is automatically configuredwhen the phone is registered to the network, userscan configure time and date directly using this menu.The time configured by user is valid only while thephone is turned on.Time (Menu 9.2.1)1. Select the ‘Time’ item from the Date & Time list,and then press [Select].2. Move to your desired field, ‘Hour’, ‘Minute’, or‘AM’/‘PM’ field using the navigation keys.3. Input ‘Hour’, and ‘Minutes’ using the number keys.4. Select time format using Left and Right navigationkeys.5. Scroll down to select the hour indicator format i.e.Off, Cuckoo clock or Chime bell.6. Press the Done key to set the time with thespecified value.Date (Menu 9.2.2)1. Select ‘Date’ item from the Date & Time list, andthen press [Select].2. Select date format using Left and Right navigationkeys.3. Input 'Day', 'Month' and 'Year' using the numberkeys.4. Press the Done key to set the date with thespecified value.Daylight saving (Menu 9.2.3)Select whether to activate the daylight savingfunction or not. If the home city does not supportdaylight saving, Daylight saving can not be set to On.Settings](https://usermanual.wiki/LG-Electronics-USA/U8500/User-Guide-631001-Page-89.png)
![Settings90Favourites MENU 9.3Favourites allows you to add your own favourites tothe list already provided. Once you create your ownmenu, you can access the desired function quickly inthe idle screen by pressing the up navigation key. Tomove to your desired menu directly, select yourdesired menu from the Favourites menu press the upand down navigation keys.]Add new: In the [Empty] list, press the left softkey [Add]. Select the item from the menu and savethe desired menu item.]Edit: In the added menu items list, press the leftsoft key [Options]. Select Edit from the menu toedit a saved menu item.]Delete: In the added menu items list, press the leftsoft key [Options]. Select Delete from the menu todelete a saved menu item.]Delete all: In the added menu items, press the leftsoft key [Options]. Select Delete all from the menuitem.]View infomation: In the added menu item list,press the left soft key [Options]. Select Viewinfomation from the menu to view the informationabout the actual location of the added menu item.Phone settings MENU 9.4Language (Menu 9.4.1)You can select the display language. When thelanguage option is set to Automatic, the language isautomatically selected according to the language ofthe SIM card used. English will be set if the languageon the SIM card is not supported by the phone.Display (Menu 9.4.2)In this menu, you can configure screen displayoptions including LCD settings and theme.WallpaperYou can configure the Main LCD background bytheme selection.Main displayYou can select an Main display background to displayin idle mode. You can also select the clock andcalendar type to appear in idle mode. You can alsoconfigure the font size and colour of the clockSettings](https://usermanual.wiki/LG-Electronics-USA/U8500/User-Guide-631001-Page-90.png)
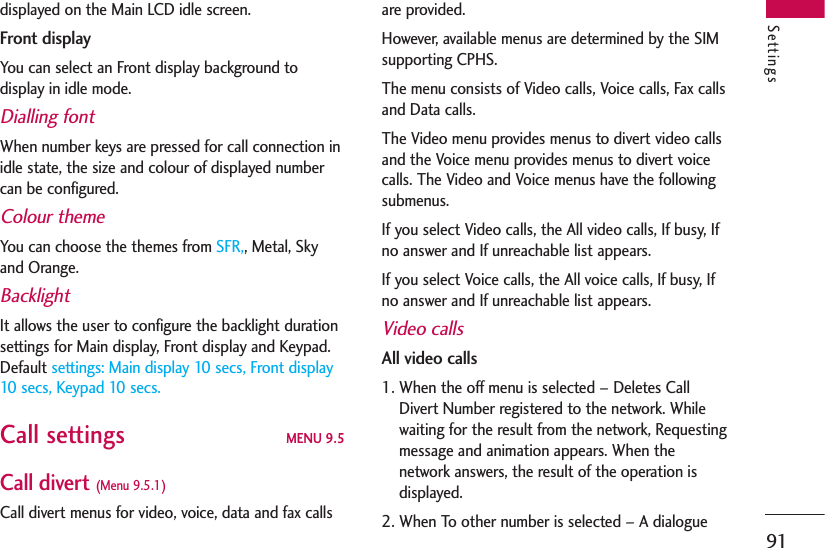
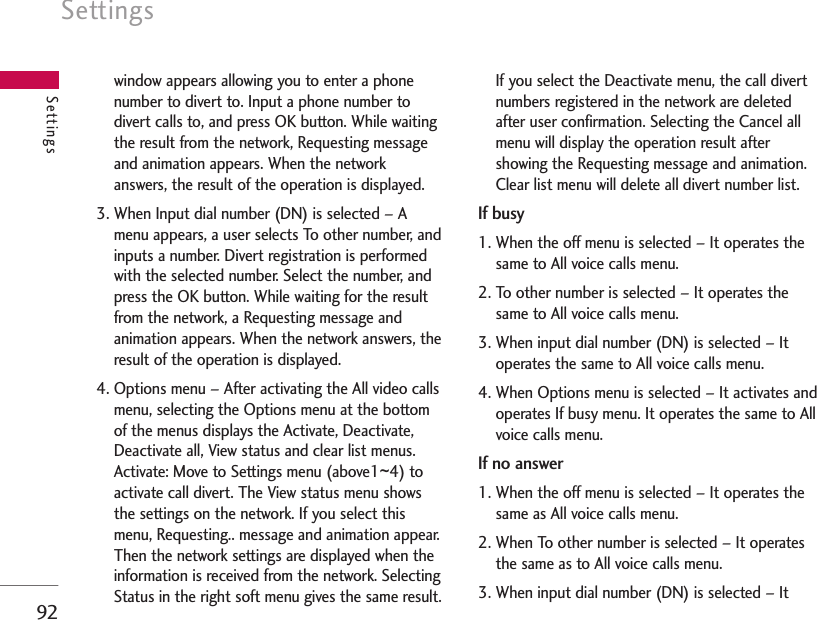
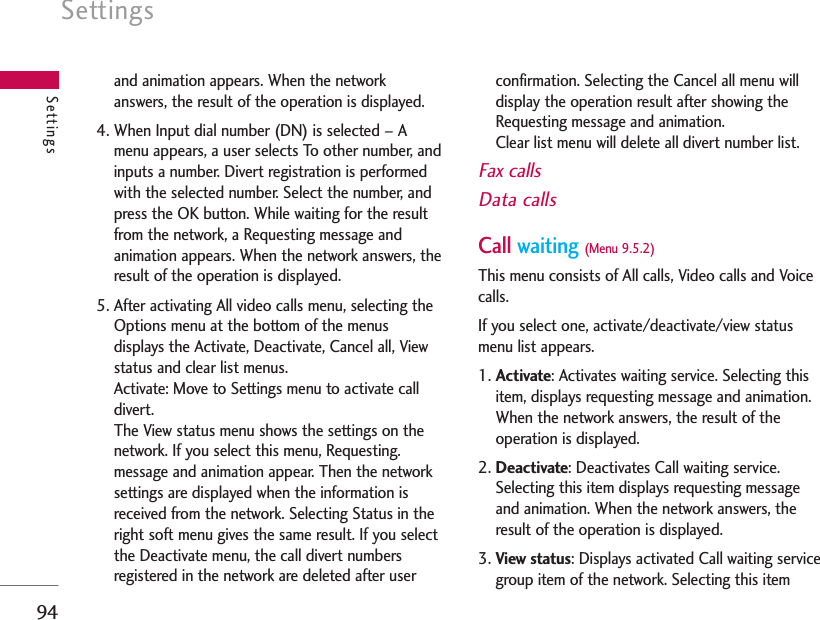
![95displays requesting message and animation. Whenthe network answers, the result of the operation isdisplayed.Call reject (Menu 9.5.3)Automatic menu: Users can configure to reject all ora specific number calls by selecting Deactivate, Rejecton list, or Reject all calls menu. Selecting Deactivatedisables Automatic call reject. Selecting Reject on listrejects only reject target numbers in the list you set.After pressing the right soft key [Setup], you can setthe reject list. Selecting Reject all calls rejects allarriving calls unconditionally by silent ordisconnecting. When you configuring Reject on listmode, you can add number to reject by using ‘List’menu. When you adding a number to the list, youcan select either ‘Silent’, or ‘Disconnect’. You caninput number directly or by searching Contacts using‘Search’ key.Manual menu: When On is selected, press and holdthe side key for a while to reject a call by silence, andpress and hold the side key for a while once again toreject a call by disconnecting. When Off is selected,side key does not work for call reject operation.Call costs (Menu 9.5.4)1. This function displays your call cost of the Lastcall and All calls.2. To initialise, press ‘Clear’ button, and input PINcode.3. Select Cost Setting to configure call cost settingsand call cost limit.4. You can select either Unit or Currency in call costsettings. According to your setting, call cost isdisplayed when a call is terminated.5. In the call cost limit configuration, select On toconfigure the cost limit. When cost limit isconfigured, and call cost reaches the limit, makinga call will not be allowed.Video call (Menu 9.5.5)1. Hide my picture: Option to determine whether tosend my picture during VT.• On: Do not send my picture.• Off: Send my picture.2. Substitute picture: Option to determine whetherSettings](https://usermanual.wiki/LG-Electronics-USA/U8500/User-Guide-631001-Page-95.png)
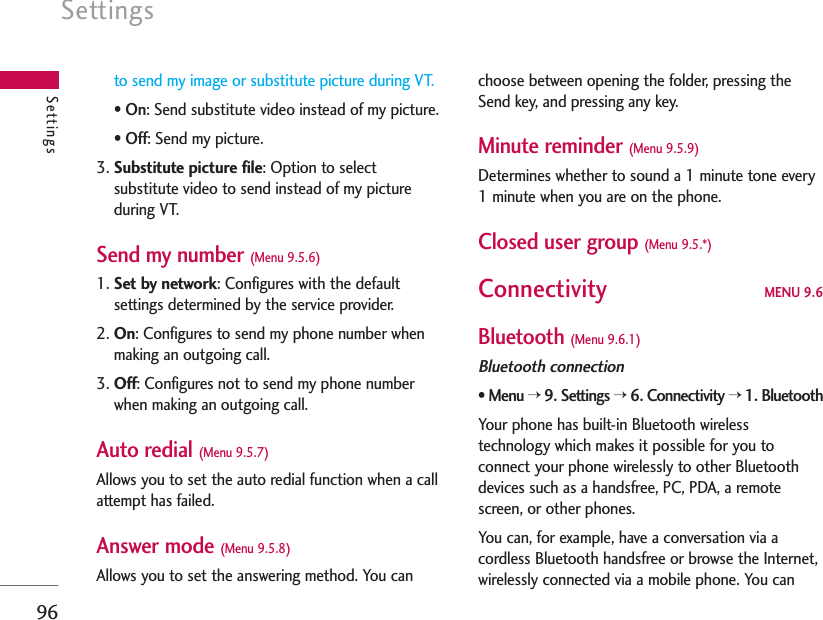
![97also exchange, for example, business cards, calendaritems and pictures.1. Getting started• Menu >9. Settings >6. Connectivity >1. Bluetooth >1. Paired devicesTo use the Bluetooth function, you must first setBluetooth to "On". Complete the above proceduresto set Bluetooth to "On".2. Configuring Bluetooth settings• Menu >9. Settings >6. Connectivity>1. Bluetooth >2. Settings- Bluetooth: To use the Bluetooth function, set it to[On]. Otherwise, set it to [Off].- My handset’s visibility: Set [My handset’s visibilitystatus] to [Shown to all] so that other devices candetect your phone when they are searching for aBluetooth device. If you select [Hidden], otherdevices will not be able to detect your phone whenthey are searching for a Bluetooth device.- My handset’s name: You can name or rename yourphone as it will appear on other devices. Yourphone's name will be shown on other devices onlywhen [My handset’s visibility] is set to [Shown toAll].- BD address: The BD address is set when yourphone is sold. You cannot change the BD address.3. Paired devicePairing Devices(Pairing with a device)If a paired Bluetooth device already exists,• Menu >9. Settings >6. Connectivity >1. Bluetooth >1. Paired devices >Options >Add newIf there is no paired Bluetooth device,• Menu >9. Settings >6. Connectivity >1. Bluetooth >1. Paired devices >AddSettingsNote]We recommend that your phone and theBluetooth device you are communicating withbe within a range of 10 meters. The connectionmay be improved if there are no solid objects inbetween your phone and the other Bluetoothdevice.](https://usermanual.wiki/LG-Electronics-USA/U8500/User-Guide-631001-Page-97.png)
![Settings98Options1. Add new: Using this menu, you can pair a newBluetooth device with your phone.2. Connect: Using this menu, you can connect anaudio device.A. This item is only enabled in the Option menuwhen you have selected Audio device. Ifanother device has been selected, this item isdisabled.B. Move to [Connect] and select [OK]. Yourphone is immediately connected to the audiodevice.3. View Detail: Using this menu, you can viewinformation about the paired device.4. Set as authorised: Using this menu, you canchoose to receive alerts when data arrives fromanother device.(Set as authorised <-> Set anunauthorised)5. Assign short name: Using this menu, you canrename a paired phone as required.6. Delete: Using this menu, you can delete thepaired Bluetooth device.7. Delete all: Using this menu, you can delete all ofthe paired Bluetooth devices.- To search for a Bluetooth device to connect,press the above key.- Screen shows“ Searching for Device”. Bluetoothdevices within a range of 10m will be found.- If Bluetooth devices are found, these devices arelisted on the screen. If no Bluetooth device isfound, you will be asked if you want to searchagain.- If you select a device from the listed devices,the device information (name, address, serviceclass) will appear on the screen.- Pairing procedure• Press the Bond key. A window will appear onthe screen asking you to enter your password.• After creating a password (of 1 to 16 digits),the user of the other device must enter thepassword for pairing. The user of the otherdevice must know the password in advance forauthentication.• If the other party authenticates theSettings](https://usermanual.wiki/LG-Electronics-USA/U8500/User-Guide-631001-Page-98.png)
![99connection, the Paired device list is displayedon the screen and you can use your phone tocommunicate with the other device.<Disconnecting devices>1. Select a device to disconnect from the Paireddevices screen.2. You can disconnect a device by pressing theDelete key or by selecting Options >Delete. Todisconnect all paired devices, select Options >Delete All.<Transmitting data using Bluetooth>1. To transmit data from your phone to anotherBluetooth device, first select the applicationwhere the target data is saved. For example, tosend data in the Media album to another device,select• Menu >2. My Media >1.Photos >Selectdata to transmit >Send via >3. Bluetooth2. Transmitting data- If a paired Bluetooth device exists,1) Select the desired device from the paireddevices listed on the screen.2) If the other party selects [Yes] for [BluetoothAuthorisation required], the data is transmitted.- If there is no paired Bluetooth device,1) Select Search to search for nearby Bluetoothdevices to connect.2) Select the device to which you want totransmit data from the devices on the screenand press the Push key.3) If the other party selects [Yes] for [BluetoothAuthorisation required], the data is transmitted.<Receiving data using Bluetooth>Menu >9. Settings >6. Connectivity >1.Bluetooth >1. Paired devices1. If you enable Bluetooth function as describedabove, you can connect your phone to otherBluetooth devices.2. If another party attempts to transmit data, the[Bluetooth Authorisation required] question willappear on the screen. If you select [Yes], thedata will be transmitted to your phone. Duringdata transmission, the Bluetooth icon flashes.Settings](https://usermanual.wiki/LG-Electronics-USA/U8500/User-Guide-631001-Page-99.png)
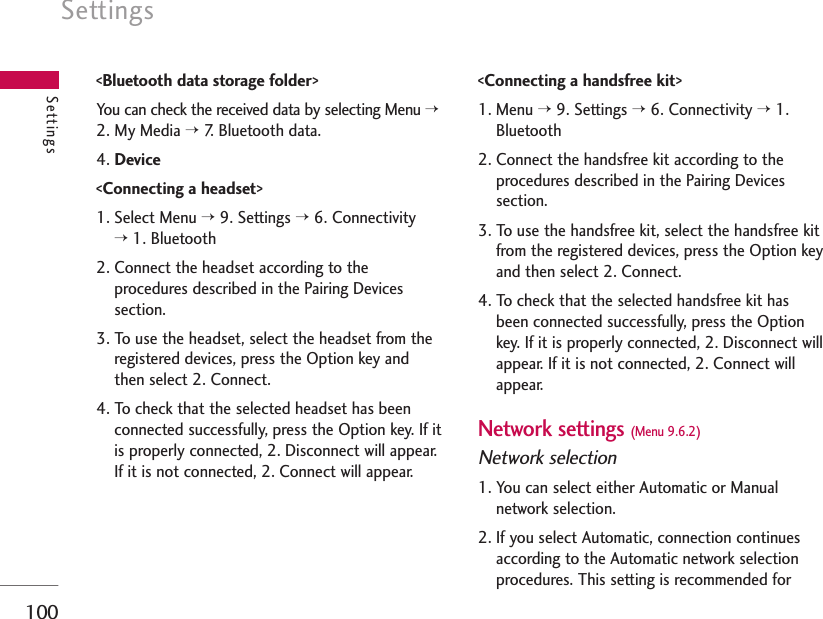
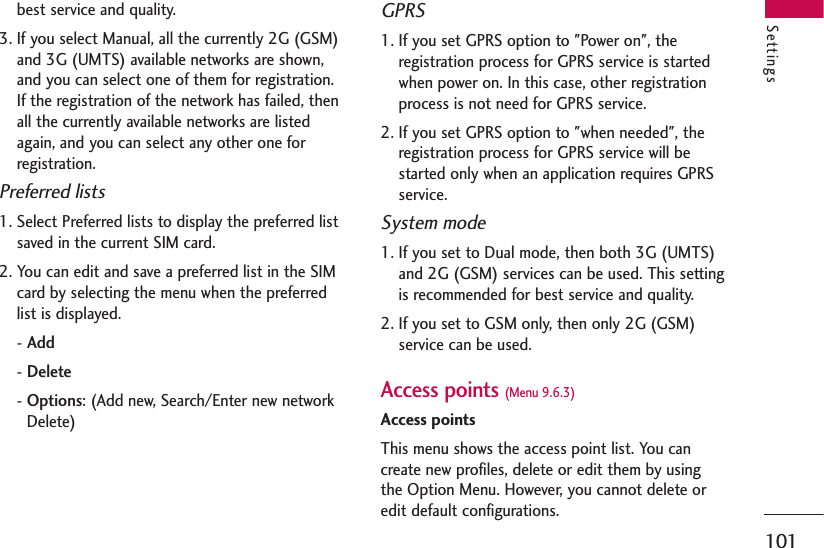
![Settings102You can edit the following configuration items byselecting the right soft key.]Press “Done” key to save any configurationchanges.Sync Service (Menu 9.6.4)If Sync service is supported by your networkoperator, that service function synchronizes thedata in a phone and the data on a server such ascontact address information and schedule items viaa wireless network.Connect• Menu >Settings >Connectivity >Sync service1. Select the Connect item and then press theSelect key.SettingsConnection title Access Point profile name.Bearer Choose the bearer from the list. (Defaultis “UMTS/GPRS”)Authentication Choose the authentication from the list.(Default is “No auth”)Username Information provided by service provider.Password Information provided by service provider.APN name to access network. Informationprovided by service provider.Choose the Reliability class from the list.(Default is "Subscribed")Choose the DNS server from the list.(Default is "Automatic")Traffic Class Choose the Traffic Class fromthe list. (Default is "Subscribed")Choose the Maximum Uplink Bitrate fromthe list. (Default is "Subscribed")Choose the Maximum Downlink Bitratefrom the list. (Default is "Subscribed")Required in case of Bearer is"UMTS/GPRS/CSD" or "CSD"Information provided by service provider.APNReliability classDNS serverTraffic classReq. max ULbitrateReq. max DLbitrateDial-up numberRequired in case of Bearer is "UMTS/GPRS/CSD"or "CSD" Choose the value from select list.(Default is "9600")Required in case of Bearer is "UMTS/GPRS/CSD"or "CSD" Choose Call type from the list. (Defaultis "ISDN")Required in case of Bearer is "UMTS/GPRS/CSD"or "CSD" Information provided by ServiceProvider.Required in case of Bearer is "UMTS/GPRS/CSD"or "CSD" Information provided by ServiceProvider.Baud rateCall typeCSD passwordCSD username](https://usermanual.wiki/LG-Electronics-USA/U8500/User-Guide-631001-Page-102.png)
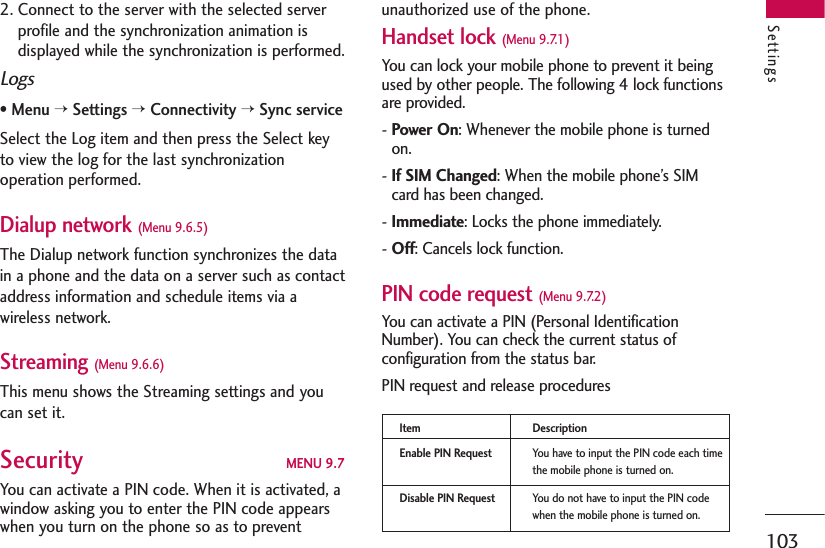
![Settings1041. Select ‘PIN Code Request’ item from the list, andpress [Select]. Then a window allowing you toselect ‘On’ or ‘Off’ appears.- Select ‘On’/‘Off’ from the list, press [Select], andinput the current PIN code to set the PINrequest. If ‘PIN Code Request’ is alreadyenabled/disabled, an “Already activated”/“Already cancelled” message will be displayed.2. 3 incorrect PIN code entries in the PIN code inputwindow would invalidate the PIN code. In this case,you have to input the PUK (PIN Unblock Key)code to configure the PIN code again.3. The maximum allowed number of attempts of PUKinput is 10 times. ATTENTION: after havingentered 10 times an incorrect PUK code, the SIMcard will be blocked and must be replaced.Press the C key in the PIN code input window toreturn to the previous step.Call barring (Menu 9.7.3)Call barring menus for All calls, Video, Voice areprovided.However, available menus are determined by the SIMsupporting CPHS.The menu consists of All calls, Video, Voice. The Allcalls menu provides menus to barring all calls and theVideo menu provides menus to barring video calls.the Voice menu provides menus to barring voice calls.The All call,Video and Voice menus have the followingsubmenus.If you select All calls, Outgoing calls, Internationalcalls, International except home country, Incomingcalls, and Incoming calls when abroad submenus.menu list appears.The Call barring menu consists of Outgoing calls,International calls, International except home country,Incoming calls, and Incoming calls when abroadsubmenus. However, the menus available depend onwhether the SIM suppors CPHS. The Outgoing callsmenu bars dialing outgoing calls, the Internationalcalls menu bars dialing outgoing international calls,the International except home country menu barsdialing outgoing international calls except for theHome PLMN country, Incoming calls rejects incomingcalls, and the Incoming calls when abroad menurejects incoming calls in roaming.Settings](https://usermanual.wiki/LG-Electronics-USA/U8500/User-Guide-631001-Page-104.png)

![Settings106and operates Incoming calls menu. It operatesthe same to Outgoing calls menu.Incoming calls when roaming1. OK button select. It operates the same toOutgoing calls menu.2. When Options menu is selected – It activatesand operates Incoming calls when abroad menu.It operates the same to Outgoing calls menu.Fixed dial number (Menu 9.7.4)1. To enter the menu allowing FDN configuration,PIN authentication is required.2. The first menu displays the current configurednumber. Enter configuration menu throughOption menu.3. For configuration, input name and phone number.The configuration information is saved in SIM.4. The information saved in SIM is used when FDNrestricts outgoing calls.Change password (Menu 9.7.5)You can change PIN, PIN2, the mobile phonepassword and the call barring password.PIN codePIN is the abbreviation of Personal IdentificationNumber, and is used to restrict the use of anunauthenticated user.PIN code change procedure1. Select ‘PIN code’ from the ‘Change password’ listand then press [OK].2. Input the current PIN code, and press [OK].3. Input the new PIN code, and press [OK].4. Input the new PIN code once again, and press[OK].- If the PIN code is different from that of step 3,the procedure is restarted from step 3.5. When the PIN code is properly changed, a “PINchanged” message is displayed. With an incorrectPIN code input in step 2, the procedure isrestarted from step 2, and the remaining allowednumber of input attempts is decreased by 1.Settings](https://usermanual.wiki/LG-Electronics-USA/U8500/User-Guide-631001-Page-106.png)
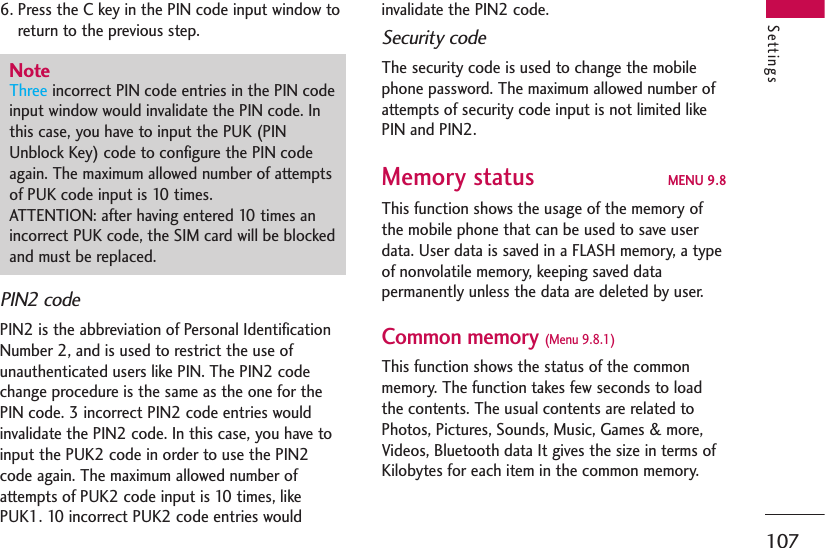
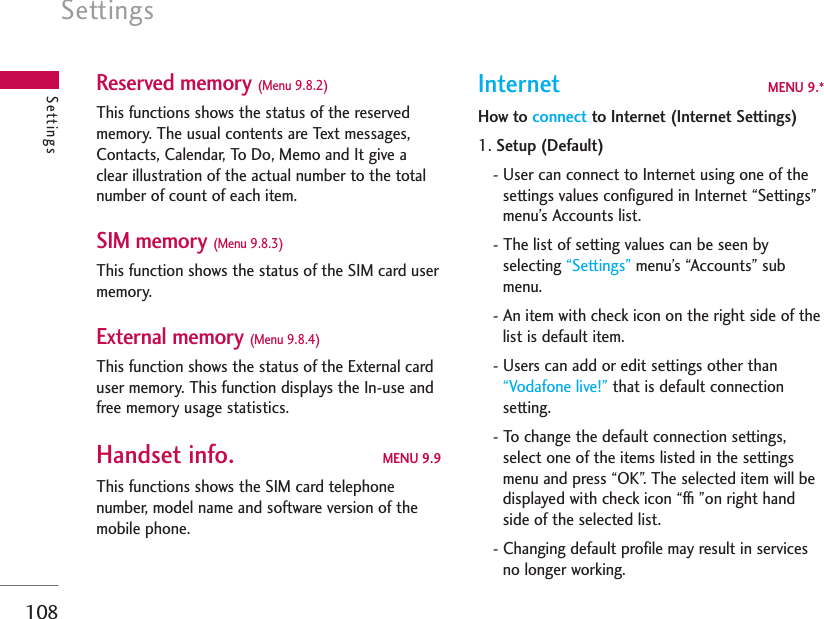
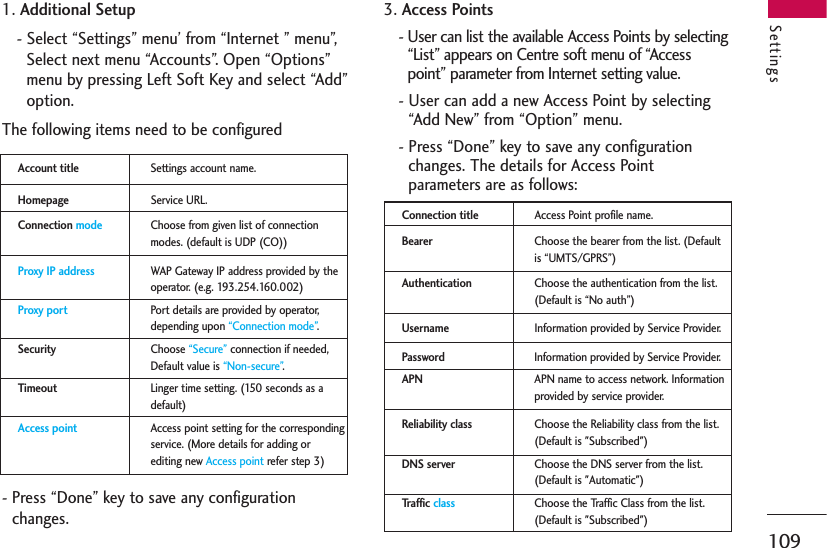
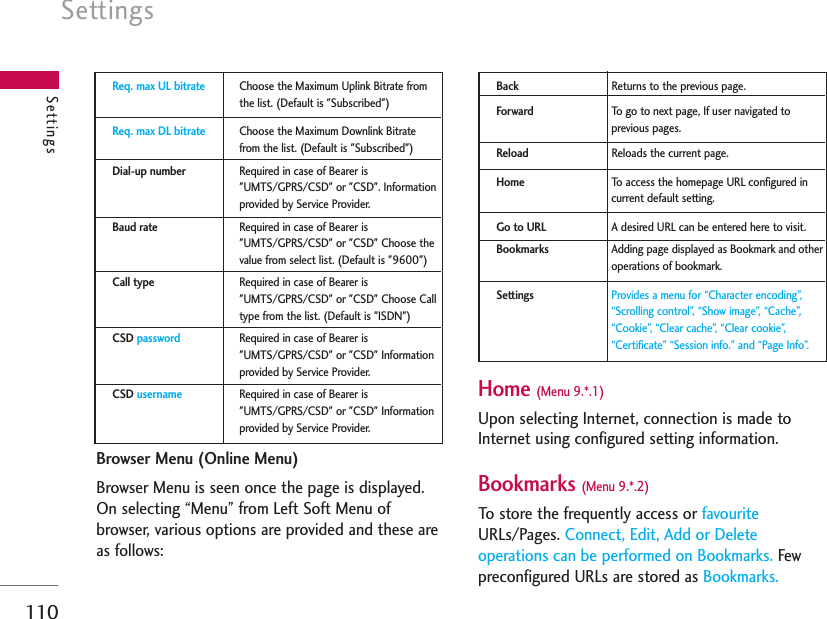
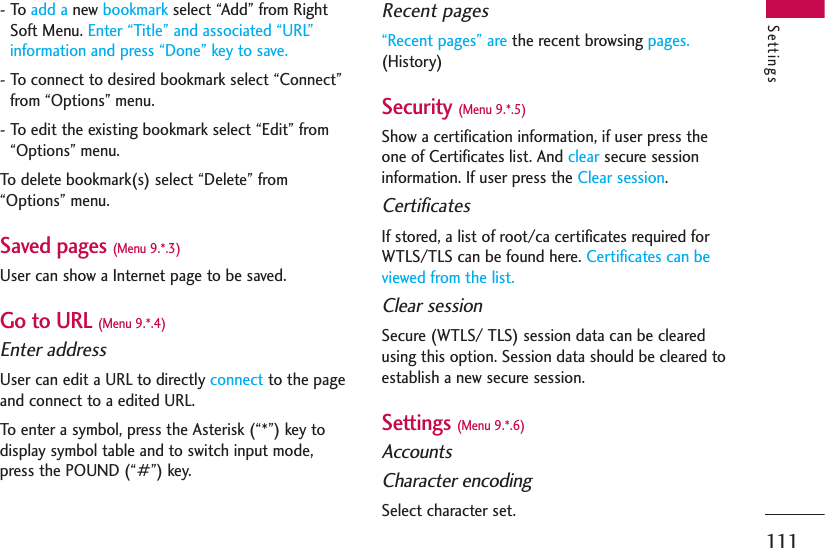
![Settings112Scrolling controlSelect scroll line.(1~3 line)Show imageShowing image[On] or Not Showing image [Off].CacheSupporting the “Cache” function [On] or NotSupporting the “Cache” [Off].CookieSupporting the “Cookie” function [On] or NotSupporting the “Cookie” [Off].Clear cacheClear all caches.Clear cookieClear all cookies.Reset settings MENU 9.#It resets the handset memory and Default settingsbrings all the phone settings to its default values.In Clear memory “Handset Contents” will reset Java,Bookmarks, Saved Internet pages, Recent Internetpages, Videos and Audios. “Handset personal info”will reset Contacts, Messages, Diary, Alarms, Calls.No SIM memory option. “External memory” willreset the external memory.Settings](https://usermanual.wiki/LG-Electronics-USA/U8500/User-Guide-631001-Page-112.png)