LG Electronics USA UK410 LTE Tablet with WLAN and Bluetooth User Manual LG UK410 USC UG EN V1 0 140812 1
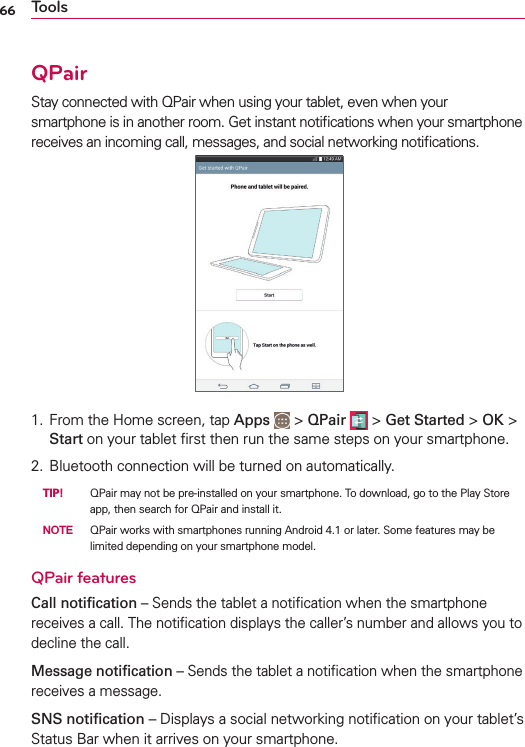
LG Electronics MobileComm USA, Inc. LTE Tablet with WLAN and Bluetooth LG UK410 USC UG EN V1 0 140812 1
UserManual.wiki
>
LG Electronics USA
>
UK410 User Manual
Users Manual
Navigation menu
Upload a User Manual
Namespaces
Wiki Guide
HTML
PDF
Info
Views
User Manual
Discussion / Help
Navigation


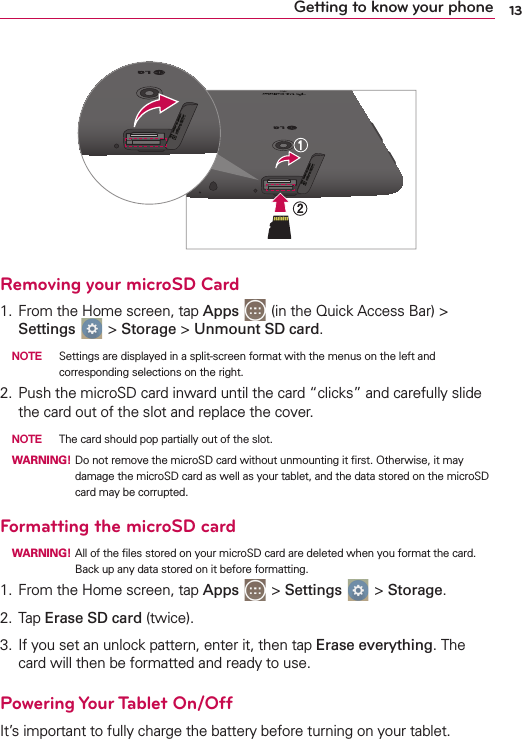


![118 SafetyFor more information about SARs, see the FCC’s OET Bulletins 56 and 65 at http://www.fcc.gov/Bureaus/Engineering_Technology/Documents/bulletins or visit the Cellular Telecommunications Industry Association website at http://www.ctia.org/consumer_info/index.cfm/AID/10371. You may also wish to contact the manufacturer of your device.Can I minimize my RF exposure? If you are concerned about RF, there are several simple steps you can take to minimize your RF exposure. You can, of course, reduce your talk time. You can place more distance between your body and the source of the RF, as the exposure level drops off dramatically with distance. The FDA/FCC website states that “hands-free kits can be used with wireless devices for convenience and comfort. These systems reduce the absorption of RF energy in the head because the device, which is the source of the RF emissions, will not be placed against the head. On the other hand, if the device is mounted against the waist or other part of the body during use, then that part of the body will absorb more RF energy. Wireless devices marketed in the U.S. are required to meet safety requirements regardless of whether they are used against the head or against the body. Either configuration should result in compliance with the safety limit.” Also, if you use your wireless device while in a car, you can use a device with an antenna on the outside of the vehicle. You should also read and follow your wireless device manufacturer’s instructions for the safe operation of your device. Do wireless devices pose any special risks to children?The FDA/FCC website states that “the scientific evidence does not show a danger to users of wireless communication devices, including children.” The FDA/FCC website further states that “some groups sponsored by other national governments have advised that children be discouraged from using wireless devices at all”. For example, the Stewart Report from the United Kingdom [“UK”] made such a recommendation in December 2000. In this report a group of independent experts noted that no evidence exists that using a device causes brain tumors or other ill effects. [The UK’s] recommendation to limit device use by children was strictly precautionary; it was not based on scientific evidence that any health hazard exists. A](https://usermanual.wiki/LG-Electronics-USA/UK410/User-Guide-2358453-Page-118.png)