LG Electronics USA UK495 Multi-band LTE Tablet with WLAN and Bluetooth User Manual 1
LG Electronics MobileComm USA, Inc. Multi-band LTE Tablet with WLAN and Bluetooth Users Manual 1
Contents
- 1. Users Manual 1
- 2. Users Manual 2
Users Manual 1
User Guide
This guide helps you to get started using your tablet.
ENGLISH
• Some of the contents of this manual
may not apply to your tablet,
depending on the software and your
service provider.
• Google™, Google Maps™, Gmail™,
YouTube™, Google Hangouts™ and
Google Play™ are trademarks of
Google, Inc.
XXXXXXXXXXX (1.0)
LG-UK495

• Copyright ©2015 LG Electronics, Inc. All rights reserved. LG and the LG
logo are registered trademarks of LG Group and its related entities. All
other trademarks are the property of their respective owners.
• U.S. Cellular® Customer Care 1-888-944-9400

3
Contents
Contents ..................................................................................................3
Getting to know your tablet ...................................................................6
Your Home screen ................................................................................ 16
Google account setup ..........................................................................37
Connecting to Networks and Devices ............................................... 38
Contacts ............................................................................................... 43
Email ..................................................................................................... 46
Camera and Video ............................................................................... 55
Multimedia ........................................................................................... 64
Utilities...................................................................................................74
The web ................................................................................................ 89
Settings ................................................................................................ 95
Tablet software update ......................................................................120
Troubleshooting ...................................................................................121
Safety ...................................................................................................122
Limited Warranty Statement .............................................................148
4
WARNING Violation of the instructions may cause serious injury or
death.
WARNING: This product contains chemicals known to the State of California to cause cancer and
birth defects or other reproductive harm. Wash hands after handling.
# Never use an unapproved battery since this could damage the tablet and/
or battery and could cause the battery to explode.
# Never place your tablet in a microwave oven as it will cause the battery to
explode.
# Do not dispose of your battery near fire or with hazardous or flammable
materials.
# When riding in a car, do not leave your tablet or set up the hands-free kit
near the air bag. If wireless equipment is improperly installed and the air
bag is deployed, you may be seriously injured.
# Do not use the tablet in areas where its use is prohibited. (For example:
aircraft)
# Do not expose the battery charger or adapter to direct sunlight or use it in
places with high humidity, such as a bathroom.
# Do not use harsh chemicals (such as alcohol, benzene, thinners, etc.) or
detergents to clean your tablet. This could cause a fire.
# Do not drop, strike, or shake your tablet severely. It may harm the internal
circuit boards of the tablet.
# Do not use your tablet in high explosive areas as the tablet may generate
sparks.
# Do not damage the power cord by bending, twisting, pulling, or heating.
Do not use the plug if it is loose as it may cause electric shock or fire.
# Do not place any heavy items on the power cord. Do not allow the power
cord to be crimped as it may cause electric shock or fire.
# Do not handle the tablet with wet hands while it is being charged. It may
cause an electric shock or seriously damage your tablet.
# Do not disassemble the tablet.
# Do not place or answer calls while charging the tablet as it may
short-circuit the tablet and/or cause electric shock or fire.
5
# Make sure that no sharp-edged items, such as animal’s teeth or nails,
come into contact with the battery. This could cause a fire.
# Store the battery out of reach of children.
# Be careful that children do not swallow any parts (such as earphone,
connection parts of the tablet, etc.) This could cause asphyxiation or
suffocation resulting in serious injury or death.
# Unplug the power cord and charger during lightning storms to avoid
electric shock or fire.
# Only use the batteries and chargers provided by LG. The warranty will not
be applied to products provided by other suppliers.
# Only authorized personnel should service the tablet and its accessories.
Faulty installation or service may result in accidents and consequently
invalidate the warranty.
# Your tablet is an electronic device that generates heat during normal
operation. Extremely prolonged, direct skin contact in the absence of
adequate ventilation may result in discomfort or minor burns. Therefore,
use care when handling your tablet during or immediately after operation.
# Use and store your tablet in temperatures between 0°C/32°F and
45°C/113°F, if possible. Exposing your tablet to extremely low or high
temperatures may result in damage, malfunction, or even explosion.

6Getting to know your tablet
Tablet Overview
Front View
Front Camera
NOTES • All screen shots in this guide are simulated. Actual displays may vary.
• Instructions to perform tasks in this guide are based on the default settings and may
change depending on the mode and software version on your tablet.
1. Front Camera Use to take pictures and record videos of yourself. You
can also use this for video chatting. Keep the lens clean for optimal
performance.
WARNING! Placing a heavy object on the tablet or sitting on it can damage the LCD and
touchscreen functions.

7
Getting to know your tablet
Rear View
Rear Camera
Speakers
2. Rear Camera Use to take photos and record videos. Keep the lens clean
for optimal performance.
3. Speakers Use to listen to the audio from the selected function (e.g.,
music, videos, sound clips, etc.).
NOTE Your tablet is designed to have two speaker openings on the back side for aesthetic
reasons. However, the actual sound comes from only one speaker. Please note that it’s
not a product defect.
Side Views
Volume Keys
Power/Lock Key
8Getting to know your tablet
4. Power/Lock Key Press to lock/unlock the screen. Press and hold to turn
the tablet on/off, restart it, activate/deactivate airplane mode, and change
the sound settings.
5. Volume Keys Press to adjust the media volumes. If the Shortcut setting
is enabled, you can press and hold both keys at the same time to access
the QuickMemo+ application. When the Shortcut key setting is enabled
and the screen is off, you can also press and hold the Volume Down
Key or Volume Up Key to access the Camera application.
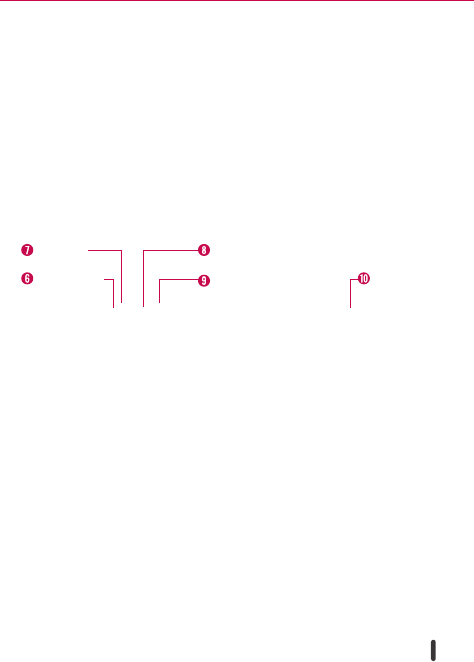
Top and Bottom Views
Infrared
(IR) LED
Card Slots
Headset
Jack
Microphone USB/Charging
Port
Top Bottom
6. Microphone Records your voice and is used for voice-activated
functions.
NOTE Make sure that the microphone is not blocked when recording a video or audio clip.
7. Headset Jack Use to plug in an optional listening accessory, such as
headphones to listen to music.
8. Infrared (IR) LED Used as a sensor for the Quick Remote application.
9. Card Slots Use to insert your SIM card and a microSD card. A valid SIM
card is required to have access to the mobile network. Insert a microSD
card to store your personal data files (e.g., music, videos, photos, etc.).
NOTE Make sure that the microphone is not blocked when recording a video or audio clip.
10. USB/Charging Port Use to connect the USB cable to the tablet for use
with the Charger power adapter, your PC, or other compatible
accessories.
TIP! If the tablet freezes up and stops working, press and hold the Power/Lock Key (on the
right side of the tablet) for about 8 seconds until the screen turns off. Wait a few
seconds, then turn the tablet back on.
9
Getting to know your tablet
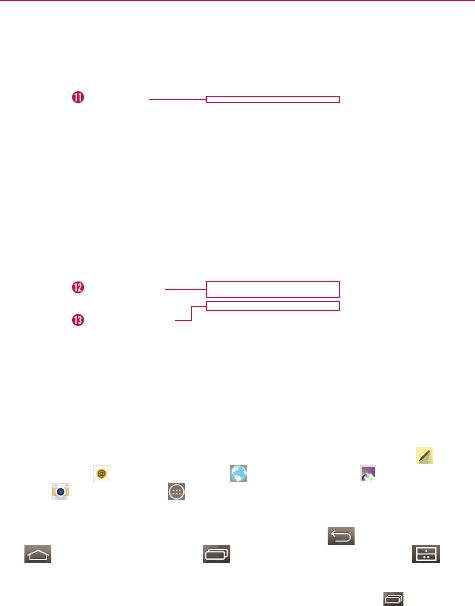
Home Screen Overview
QuickTap bar
Touch keys bar
Status bar
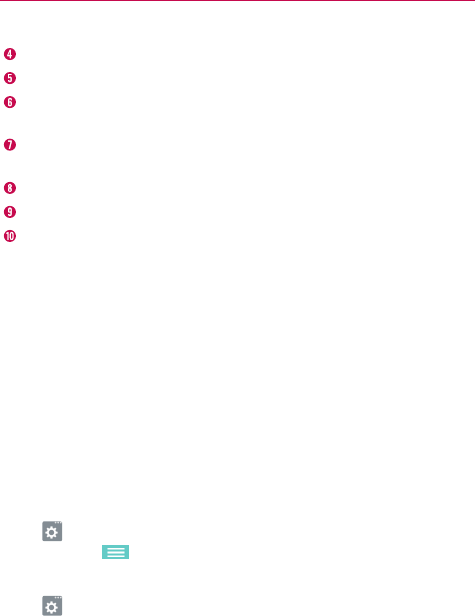
11. Status bar Shows device information, including the time, status icons
(such as signal strength, battery power, connections, etc.), and
notification icons. It also provides access to the Notifications panel.
12. QuickTap bar Provides icons for quick, one-touch access to the
functions used most often. This bar is displayed on all of the Home
screen canvases. The default icons are the QuickMemo+ icon , the
Email icon , the Browser icon , the Gallery icon , the Camera
icon , the Apps icon .
13. Touch keys bar Provides easy navigation anywhere you are in the
software. By default, the keys are the Back Key , the Home Key
, the Recent Apps Key , and the Dual window Key , but
you can change them (see the Display settings menu).
TIP! When you open an application, touch and hold the Recent Apps Key (in the Touch
keys bar at the bottom of the touchscreen) to check for the application's available
options.
10 Getting to know your tablet
The Battery and Power
Your tablet has an internal, rechargeable battery that is not removable. It
should only be replaced by LG or an authorized LG repair center. You should
never try to open or take apart this tablet yourself. Opening the tablet can
cause damage that will void your warranty.
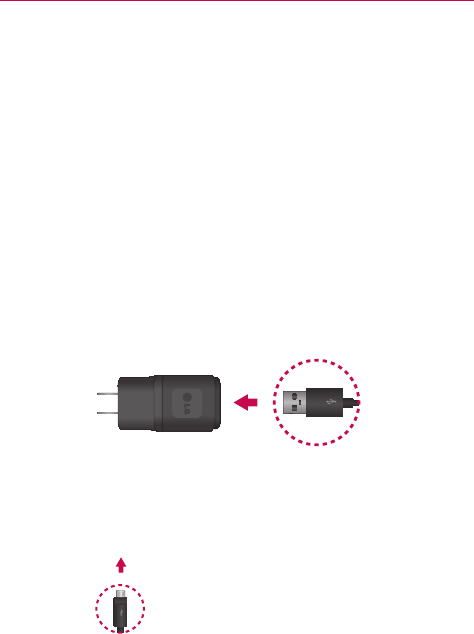
Charging Your Tablet
Your tablet is powered by an internal, rechargeable battery. Charge the
battery using the USB cable (power cord) and the Charger (power adapter)
included with your tablet. Fully charge the battery before using your tablet
for the first time to maximize its life cycle.
WARNING! If the touchscreen won't function while the tablet’s in the process of charging, this
may be due to an unstable power supply. If this occurs, disconnect the USB cable
from the tablet or unplug the Charger from the power outlet.
1. Connect the USB cable to the Charger.
USB cableCharger
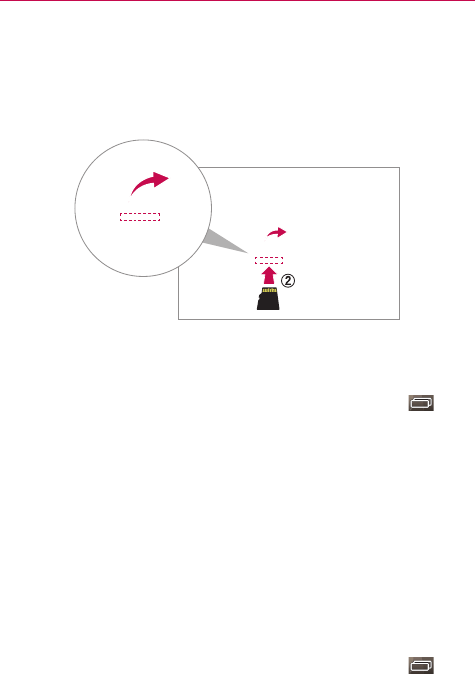
2. Insert the other end of the USB cable into the USB/Charging Port.
USB Cable
NOTE Correctly orient the cable's plug
with the USB/Charging Port. The
port and/or the plug can be
damaged if you attempt to insert it
incorrectly.
3. Plug the Charger into an electrical outlet.
NOTE Use only an approved charging accessory to charge your tablet. Improper handling of the
USB/Charging Port, as well as the use of an incompatible charger, may cause damage to
your tablet and void the warranty.
11
Getting to know your tablet
To View the Battery Charge Level
1. From the Home screen, touch and hold the Recent Apps Key (in
the Touch keys bar) > System settings > About tablet > Battery.
2. The right side of the screen displays the battery status (charging or
discharging) and percent of remaining charge.
Optimizing Battery Life
You can extend your battery’s life between charges by reducing the screen
brightness and screen timeout to conserve your battery’s energy. Also,
some features run constantly in the background whether or not you’re
using them. Turn off features until you need to use them. For example, you
can turn off radio communications (Wi-Fi, Bluetooth, GPS, etc.) and
automatic syncing (Gmail™, Calendar, etc.).
NOTE Allowing other devices to use your tablet's hotspot connection will also drain your
battery more quickly.
To monitor and control what uses the battery
Some applications you’ve downloaded may consume high amounts of
battery power. While using your downloaded apps, check the battery
charge level and monitor the battery usage by your applications.
1. From the Home screen, touch and hold the Recent Apps Key (in
the Touch keys bar) > System settings > About tablet > Battery >
Battery use.
2. The right side of the screen displays battery usage details and includes a
usage graph as well as a list of applications or services using battery
power from the greatest amount to the least.
Tablet Cards
Your tablet has two card slots located along the top edge. The slot toward
the back of the tablet is for your required SIM card and the slot toward the
front of the tablet accommodates an optional microSD card.
# A valid SIM card is required in order to use the mobile network.
# A microSD card is an optional accessory that provides additional,
portable storage space for your personal files.
12 Getting to know your tablet
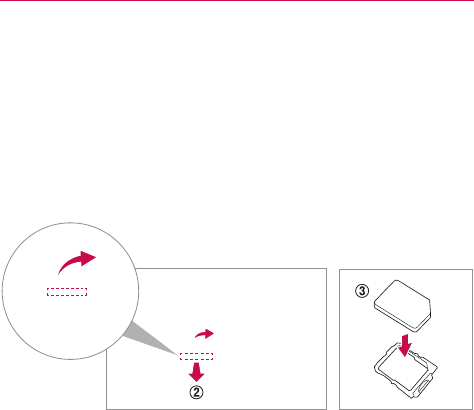
Installing and Removing the SIM Card
To install a SIM card:
1. Hold the tablet face down, then and open the card slot cover (located at
the top of the tablet) and gently pull out the SIM card tray.
NOTE When you open the cover, you'll see edge of the silver SIM card tray in the slot closest
to the back of the tablet.
2. Insert the SIM card into the tray with the logo face up. Push the tray
back into the slot until it's secured in the slot, then close the cover.
To remove the SIM card
1. Hold the tablet face down, then open the card slot cover (located at the
top of the tablet).
2. Gently pull the SIM card tray out of its slot, then remove the SIM card
from the tray.
NOTE If the tablet is held face up, the SIM card could fall out when the tray is removed from
the slot.
3. Carefully reinsert the SIM card tray into its slot and replace the slot
cover.
Installing and removing a microSD Card
Your tablet supports a removable memory card (sold separately).
To install a microSD card
1. Open the card slot cover (located at the top of the tablet).
13
Getting to know your tablet
NOTE The slot closest to the touchscreen is the microSD card slot (the slot with the silver tray
is for the SIM card).
2. Position the microSD card with the gold strips facing toward the back of
the tablet. Slide the microSD card into the slot until it clicks into place
and replace the cover.
Removing a microSD Card
To remove your microSD card
1. From the Home screen, touch and hold the Recent Apps Key (in
the Touch keys bar) > System settings > Storage > Unmount SD card.
NOTE Settings are displayed in a split-screen format with the menus on the left and
corresponding selections on the right.
2. Push the microSD card inward until you hear (and feel) a click, then
carefully slide the card out of the slot and replace the cover.
NOTE Pushing the card inward releases it from the slot and partially ejects it for easy removal.
WARNING! Do not remove the microSD card without unmounting it first. Otherwise, it may
damage the microSD card, as well as your tablet, and the data stored on the microSD
card may be corrupted.
Formatting the microSD Card
WARNING! All of the files stored on your microSD card are deleted when you format the card.
Back up any data stored on it before formatting.
1. From the Home screen, touch and hold the Recent Apps Key (in
the Touch keys bar) > System settings > Storage.
2. Tap Erase SD card (in the submenu), then tap the Erase SD card
button.

14 Getting to know your tablet
3. If you set an unlock pattern, enter it, then tap Erase everything. The
card will then be formatted and ready to use.
Powering Your Tablet On/Off
It’s important to fully charge the battery before turning on your tablet for the
first time to maximize its life cycle.
Turning the tablet on
# Press and hold the Power/Lock Key on the right side of the tablet for a
couple of seconds until the screen turns on.
The default Lock screen
If you don’t use the tablet for a while, your tablet will enter timeout to
conserve battery power. Timeout turns off the backlight and locks the
screen. The default Lock screen is Swipe. To unlock the tablet:
1. Turn the screen on.
# Press the Power/Lock Key on the right side of the tablet.
OR
# Quickly double-tap the center of the screen (KnockON).
NOTE If Knock Code is set as the screen lock, double-tapping the screen when it is off will
display the Knock Code entry screen.
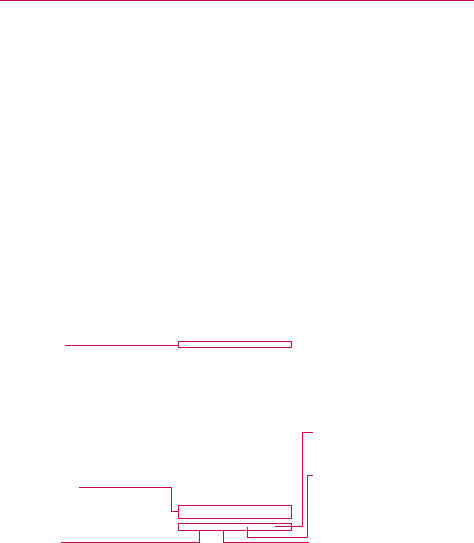
2. The Swipe Lock screen will appear. From the center
of the screen, swipe in any direction to unlock it.
# To use a Swipe Lock screen shortcut, swipe the
shortcut icon (at the bottom of the screen) in any
direction. The screen will unlock and launch the
application.
NOTE The Swipe Lock screen simply locks the screen to prevent
unintentional actions. For more security to guard against
unauthorized use, you can set an unlock requirement (such as
a Knock Code, a pattern, a PIN, a password, or use face
recognition) that will need to be entered to unlock it. Please
refer Setting a screen lock on page 23 for more information.
15
Getting to know your tablet
Unlocking the Screen Using the Knock Code Feature
You can unlock the screen when the screen is off by tapping the correct
area and sequence.
1. When the screen is off, tap the Knock Code sequence you created on
the screen.
2. The screen will turn on and unlock.
NOTE To activate Knock Code, tap Apps > Settings > Display > Lock screen >
Select screen lock > Knock Code. Then follow the instructions to create your Knock
Code, as well as a backup PIN in case you forget your Knock Code.
Turning the tablet off
1. Press and hold the Power/Lock Key (on the right side of the tablet)
until the Tablet options menu appears.
2. Tap Power off in the Tablet options menu.
3. Tap OK to confirm that you want to turn off the tablet.
The Tablet options menu
The Tablet options menu is accessed by pressing and holding the Power/
Lock Key (on the right side of the tablet). Choose from Power off, Power
off and restart, Turn on/off Airplane mode, and changing the sound
profile (Sounds off , Vibrate mode , and Sounds on .
16 Your Home screen
The Home Screen
The Home screen is comprised of multiple canvases. Simply swipe your
finger to the left or right to view them. You can set its background
wallpaper, add additional canvases, and customize the items on each Home
screen canvas.
# The QuickTap bar (located at the bottom of all of the Home screen
canvases) provides, one-touch access to the functions used most often.
# The Status bar (located at the top of all of the tablet’s screens) displays
status icons and allows access to the Notifications panel.
# The Touch keys bar (located at the bottom of all of the tablet’s screens)
has icons for easy tablet navigation.
NOTE The Status bar and the Touch keys bar are not displayed on the Camera application's
viewfinder screen.
Status bar
Shows device status
information, including the
time and icons for battery
power, Wi-Fi signal strength,
notifications, and more. It also
provides access to the
Notifications panel.
QuickTap bar
Provides easy, one-touch
access to the functions used
most often.
Back Key
Backs up one step. For example,
returns to the previous screen or
closes pop-up items (e.g., dialog
boxes, and the on-screen keyboard).
Touch and hold to access Dual
window.
Dual Window Key
Displays two application
windows at the same time.
Home Key
Returns to the Home screen (or
returns to your default Home
screen canvas from any of the
extension canvases). Touch and
hold it to access Google Now.
Recent Apps Key
Displays a list of your open
applications. Touch and hold it to
access the Options menu for
the current application or screen.
17
Your Home screen
Customizing the Home Screen
You can customize your Home screen to provide convenient access by
adding apps, widgets, and downloads to any of its canvases. You can also
personalize your Home screen to reflect your personal style by setting the
wallpaper background and setting customized images for its icons.
To add items on your Home screen:
To add apps and/or widgets:
1. Touch and hold an empty part of the Home screen.
2. Tap the Apps or Widgets tab (at the bottom of the screen).
3. Tap the item you want (to place it automatically) or manually drag it to
the desired canvas location and lift your finger.
4. You can continue adding items, then tap the Home screen when you've
finished.
NOTE To add an application icon to the Home screen from the Apps screen, touch and hold the
application you want to add and drag it to the desired location.
To remove an item from your Home screen:
Touch and hold the Home screen item you want to remove, drag it to the
Remove icon (at the top of the screen), then lift your finger.
To change the look of your Home screen
From the Home screen, touch and hold the Recent Apps Key (in the
Touch keys bar) > Home screen settings to access the following to
personalize your Home screen.
# Wallpaper: Sets the Home screen background. Choose from Gallery,
Live Wallpapers, Multi-photo, Photos, and Wallpaper gallery.
# Screen swipe effect: Sets how the items on the Home screen canvases
slide from one to the next. Choose from Slide, Breeze, Accordion,
Panorama, Carousel, Layer, and Domino.
18 Your Home screen
# Allow Home screen looping: Checkmark this setting so that the Home
screen canvases rotate continuously (loops back to the first canvas after
the last).
# Home backup & restore: Allows you to backup and restore your Home
screen app layout and wallpaper.
# Help: Tap to view help information about customizing the Home screen.
Customizing application icons on the Home screen
You can customize each application icon with images from your Gallery.
1. Touch and hold an application icon on the Home screen. The editing
icon will appear in the upper right corner of the icon.
2. Tap the application icon (while the editing icon is still displayed).
Icon gallery
Delete icon
New icon
19
Your Home screen
3. Choose your icon image.
# Tap an icon image from your Icon gallery, then tap OK.
OR
# Tap the New icon to create a custom icon image. When you create
an icon image, you customize its size and crop its image. Created
icons are displayed in your Icon gallery.
NOTE You can delete a custom icon image from your Icon gallery by tapping the Delete icon
(at the top right corner of the Icon change screen).
Organizing your Home screen
You can move the items on the Home screen canvases and create folders
to organize your Home screen.
# Drag an icon to move it.
# Drag one application icon over another icon to create a folder with both
of the applications in it. Drag additional icons on the folder to add more
items to the folder.
Home screen views
You can view your Home screen in different ways.
# Home screen dual view – Touch and hold an empty spot on the Home
screen to display your Home screen canvases on top and the
Applications screen on the bottom. This view can be used to add items
to your Home screen canvases.
# Home screen clean view – Pinch out on the Home screen to hide all of
the items on it. You can see your wallpaper with no obstructions.
# Home screen canvas mini view – Pinch in on the Home screen to
display a miniature view of all of your Home screen canvases. This view
can be used to manage your Home screen canvases.

20 Your Home screen
Using the touchscreen
Your touchscreen provides an excellent way to interact with and use your
Android™ device. With the touch of your finger, you can download and use
available applications, make menu selections, and access data saved to
your tablet.
The following terms are used for describing the different available gestures
using the touchscreen:
Tap or touch
A single finger tap selects items, links, shortcuts, and letters on the
on-screen keyboard.
NOTES • To select an item, tap the center of the icon, being careful not to touch any other icons.
• Use the tip of your finger to touch the option you want, but don't press too hard; the
touchscreen is sensitive enough to pick up a light, yet firm touch.
Touch and hold
Touch and hold an item on the screen by touching it and not lifting your
finger until an action occurs. For example, to open a contact’s available
options, touch and hold the contact in the Contacts list until the Context
menu opens.
Drag
Touch and hold an item for a moment and then, without lifting your finger,
move your finger on the screen until you reach the target position. For
example, you can drag items on the Home screen to reposition them.
Swipe, slide, or flick
Move your finger quickly across the surface of the screen, without pausing
when you first touch it (so you don’t drag an item instead). For example,
you can browse through the different Home screens by swiping to the left
or right, slide the screen up or down to scroll through a list, or remove an
application from the Recent Apps screen by flicking its graphic off the
screen.

21
Your Home screen
Double-tap
Tap the screen twice quickly to zoom, highlight text, or turn the screen on/
off. For example, quickly double-tap a section of a webpage to adjust that
section to fit the width of the screen and zoom in and out when viewing a
picture and when using Maps. Double-tap a word to highlight it. Double-tap
can also activate the KnockON feature to turn the touchscreen on or off.
NOTE A triple-tap gesture is used for certain enabled Accessibility features.
Pinch-to-zoom
Use your index finger and thumb in a pinching motion (to zoom out) or
spreading motion (to zoom in) when using Chrome, a map, photos, the rear
camera lens, the Contacts list, the Favorites list, the Groups list, a music
list, and ThinkFree Office documents. Spread apart to make screen
information or the image larger (easier to read and see), or pinch together
to view more area and information. The pinch gesture also changes the
Home screen. Pinch in on the Home screen to change to mini canvas view,
then spread apart to return to the normal Home screen view. Spread apart
on the normal Home screen to hide all of your Home screen items, then
pinch in to redisplay them.
Rotate the screen
From many applications and menus, the orientation of the touchscreen
adjusts to the tablet’s physical orientation. You can deactivate this function
in the Display settings menu.
Navigation and Access
Touch Keys Bar
The Touch keys bar (displayed at the bottom of all of the tablet’s screens)
allows allows quick and easy navigation throughout your tablet’s software
and is also the access point for the Quick Access feature.
NOTE The Touch keys bar is not displayed on the Camera’s viewfinder.
22 Your Home screen
Quick Access
The Quick access feature allows you to open the Google Now application
or the QuickMemo+ application instantly no matter where you are in the
tablet’s software. Sliding your fingertip up from below the Touch keys bar
displays the Google Now icon and the QuickMemo+ icon on a
white arc. Continue dragging your finger to place it over the icon you want,
then lift your finger to launch that application.
Returning to Recently-used Applications
1. Tap the Recent Apps Key (in the Touch keys bar). The screen
displays all of your open applications.
2. Tap an icon to open the application. You can also swipe an application off
of the screen to remove it from the list.
Manually Locking the screen
The Power/Lock Key (on the right side of the tablet) and the KnockON
feature allow you to turn off the screen which will also lock it.
# Press the Power/Lock Key to turn off (and lock) the screen.
# Quickly double-tap the Status bar, an empty spot on the Home screen, or
the Lock screen to turn off (and lock) the screen.
NOTE The screen turns off and locks automatically when the tablet enters timeout.
The Power/Lock Key and the KnockON feature will also turn the screen
back on, which displays the Lock screen.
The KnockON feature
The KnockON feature allows you to double-tap the screen to easily turn the
screen on or off.
For the best results, keep the tablet still when using KnockON.
# Quickly double-tap the center of the screen to turn the screen on.
# Quickly double-tap the Status bar, an empty area on the Home screen, or
the Lock screen to turn the screen off.
23
Your Home screen
Setting a screen lock
Set a screen lock type for the level of security you want to use to guard
against unauthorized access. Once set, you’ll need to perform its unlock
sequence to gain access to your tablet from timeout, and also when you
turn on the tablet.
# From the Home screen, touch and hold the Recent Apps Key (in the
Touch keys bar) > Lock screen settings > Select screen lock, select the
screen lock you want to use, then follow the on-screen instructions to
set it.
• Swipe: A swipe motion in any direction on the touchscreen unlocks
the screen. This is the default Lock screen that only guards against
unintentional use.
• Face Unlock: Face recognition unlocks the screen. The tablet captures
your image to identify you. Keep in mind that Face Unlock is less
secure than a Knock Code, pattern, PIN, or password because it uses a
generalized shape and dimension to verify your face.
• Knock Code: A knock pattern tapped on the screen unlocks the
screen. The first time you set a Knock Code, you’ll see a tutorial with
instructions on how to create it. Tap your code (at least 3 taps), then
tap Done. Tap your code again, then tap Confirm.
• Pattern: A pattern you draw with your finger unlocks the screen. The
first time you set an unlock pattern, you’ll see a tutorial with
instructions on how to create it. Read the tutorial, then tap Next. Draw
your pattern (connect at least 4 dots), then tap Continue. Draw your
pattern again, then tap Confirm.
• PIN: A number sequence unlocks the screen. Enter a PIN (at least 4
digits), then tap Continue. Enter your PIN again, then tap OK to
confirm it.
• Password: An alphanumeric sequence unlocks the screen. Enter a
password (at least 4 characters), then tap Continue. Enter your
password again, then tap OK to confirm it.
24 Your Home screen
Performing a Hard Reset (Factory Reset)
A hard reset will be initiated if you forget your unlock sequence and Backup
PIN. The System recovery function will allow you to perform a hard reset as
well, if necessary.
WARNING! Performing a hard reset deletes all of your user data, which includes pictures, videos,
and music saved to your internal memory. Please make sure to back up your
information prior to performing a hard reset.
1. Turn the tablet off.
2. Press and hold both the Power/Lock Key and the Volume Down Key
on the right side of the tablet at the same time.
3. When you see the LG logo, release the Power/Lock Key , then quickly
press and hold it again.
4. The Factory data reset screen is displayed. Press either of the Volume
Keys to highlight Yes then press the Power/Lock Key to continue.
5. Press either of the Volume Keys to highlight Yes, then press the
Power/Lock Key to confirm.
6. Your device will perform a hard reset if you select Yes.
NOTE Choose the No (Exit) option to exit the factory reset screen and reboot.
WARNING! If you perform a hard reset, all user applications, user data, and DRM licenses will be
deleted. Please remember to backup any important data before performing a hard
reset.
Multiple Users
Only one tablet owner ID can be created, but multiple user IDs can be
added so that others can log in and use the tablet independently. Each user
can configure their own tablet settings, use their own storage space, and
have their own application update privileges.
Tablet owner privileges
# Only the tablet owner ID can add a new user log in ID and remove user
IDs.
# Only the tablet owner ID can access and use the microSD card.
# The tablet owner ID can uninstall any of the users' applications.
25
Your Home screen
Multiple tablet user limitations
# All users share the same battery, internal memory, and data usage with
all of the other users.
# The language set for the tablet by one user applies to all of the other
users.
# Each user can configure and use only their own content and data (e.g.,
Home screen settings, Sound settings, etc.).
# Any user can accept updated application permissions on the behalf of all
of the other users.
# Messages and scheduled calendar events will be sent to notify the
specified user ID only.
# Once a user starts printing a document using Mobile Print, the print job
will continue even if the user ID is changed.
# Data transfer, download, multimedia play, and communication services
will stop if the user ID is changed.
To add a new user on your tablet
1. From the tablet owner's user ID Home screen, touch and hold the
Recent Apps Key (in the Touch keys bar) > System settings >
Users > Add user.
2. Tap User or Restricted profile.
# User allows full access to all of the tablet's functions and features.
# Restricted profile allows you to choose which functions and features
can be accessed on the tablet (a.k.a. "guest access").
3. Tap OK to confirm that you're ready to set up the profile, then tap Set
up now. The Setup wizard opens which allows the user to enter the
necessary information to create their new user profile.
4. After setup is completed, the new user is logged in. Switch users, if
necessary.
26 Your Home screen
To switch users
1. Press the Power/Lock Key (on the right side of the tablet) to lock the
tablet's screen.
2. Press the Power/Lock Key again to wake up the tablet's screen.
3. Tap one of the colored icons at the bottom of the Lock screen to switch
to that user.
To customize the User ID icons
A user can change their generic colored User ID icon (used to switch users)
to a personalized image.
1. From the Settings menu, tap Users.
2. Tap the user ID you want to change, then tap the Photo icon next to the
user name.
3. Follow the prompts to change it.
NOTE A Restricted profile user icon can only be personalized with text to identify it.
Touch Assistant Board
Using the Touch assistant feature
The Touch assistant feature allows you to use touch buttons on the Touch
assistant board instead of the tablet’s hardware keys.
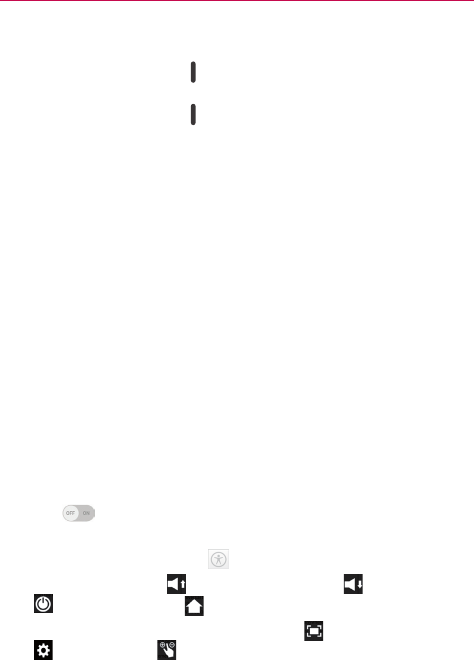
1. Turn the feature on in the Accessibility menu. Tap the Touch assistant
switch to toggle it on (blue) and display the Touch assistant board
on the screen.
2. Tap the Touch assistant board to display its touch icons.
# The Volume up icon , the Volume down icon , the Power icon
, and the Home icon are displayed.
# Tap 1/2 to access the Screen capture icon , the Accessibility icon
, and Pinch icon .
# Draw a “W” on the touch assistant board to launch the Chrome
application.

27
Your Home screen
# Draw an “S” on the touch assistant board to launch the Settings
application.
# Draw an “L” on the touch assistant board to lock the screen.
# Draw an “e” on the touch assistant board to launch the Email
application.
Restricting Touch Access
Using the Touch control areas feature
The Touch control areas feature allows you to restrict access from a
selected portion of the screen.
1. Turn the feature on in the Accessibilities menu. Tap the Touch control
areas switch to toggle it on (blue).
2. Access the application or function you want to use with restricted
access.
3. Press the Volume Down Key (on the right side of the tablet) and touch
and hold the Home icon (in the Touch keys bar) at the same time.
4. The current screen is captured. Use your finger to draw a rectangle to
enclose the area you don’t want to be able to activate touch access.
NOTE To deactivate the restricted access box, press the Volume Down Key and touch and
hold the Home icon again at the same time.
Notifications
Notifications alert you to the arrival of new messages, calendar events, and
alarms, as well as to ongoing events, such as downloads, music, etc.
The Status bar displays your tablet’s current status icons and pending
notification icons. When a notification arrives, its icon appears in the Status
bar at the top of the screen. Pending notification icons appear on the left
and system icons (that indicate things like Wi-Fi or battery strength) are
displayed on the right.
28 Your Home screen
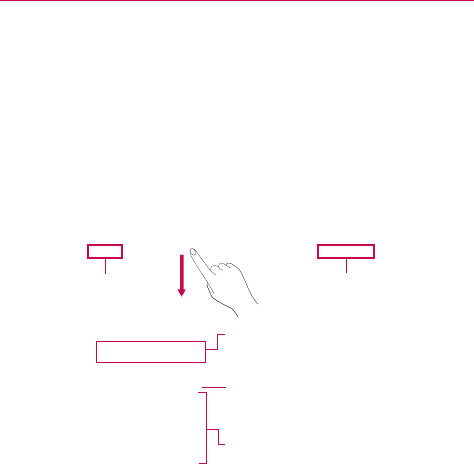
Accessing Your Notifications
Swipe the Status bar downward to open the Notifications panel to access
your notifications. To close the Notifications panel, swipe the bar at the
bottom of the screen upward.
The Notifications Panel
The Notifications panel includes your notifications and the Quick Settings
bar. You can choose to display the QSlide bar and/or the QuickRemote bar
as well.
Pending notifications System notifications
Quick Settings bar
Swipe to the right or left to scroll
through the list. Tap an icon to
activate/deactivate the feature.
Clear Button
Tap here to clear your list of
event-based notifications.
Notifications panel
Tap a notification to open it.
Notifications panel Quick Settings
The Quick Settings bar is located at the top of the Notifications panel. Use
the icons on the bar to easily toggle function settings on and off, such as
Wi-Fi, Silent mode, Airplane mode, etc.
NOTE Touch and hold an icon on the Quick Settings bar to view its settings menu.

29
Your Home screen
Rearranging the Quick Settings icons
Open the Notifications panel, swipe the Quick Settings to the left, and tap
the Edit icon to customize the Quick Settings bar. Checkmark icons to
display (or remove the checkmark to hide) it. Drag an icon’s handle (on
the right side of the screen) to move it to another position on the bar.
NOTE Changing the checkmarks also reorganizes the icons on the Quick Settings bar.
Notifications panel QSlide apps
QSlide app icons are displayed on a bar in the Notifications panel below the
Quick Settings bar. These icons provide a quick, convenient way to
multi-task on the same screen (similar to picture-in-picture on a TV). QSlide
displays a small window on the screen that can be moved, resized, or
made transparent.
NOTE The QSlide function can support up to two windows at the same time.
Status Bar Icons
The following icons may appear on the Status bar.
Notification icons Status icons
Airplane mode is on Downloading data
Connected to a Wi-Fi
network Uploading data
Wired headset connected An alarm is set
Bluetooth is on GPS is on
System warning Data is syncing
Vibrate mode is on New Gmail message
Silent mode is on New Hangouts message
Battery fully charged A song is currently playing
30 Your Home screen
Battery is charging Tablet is connected to PC via
USB cable
Content sharing is on Battery saver mode is on
NOTE The location of the icons in the Status Bar may differ depending on the features, apps,
and services being used.
Text Entry
Your tablet allows you to enter text manually using an on-screen keyboard
or automatically by selecting a voice input function.
The On-screen Keyboard
An on-screen keyboard appears automatically on the touchscreen when
you need to enter text. To manually display the keyboard, tap a text field
where you want to enter text.
Text Input Methods
The on-screen keyboard displays automatically on the screen when you
need to enter text. To manually display the on-screen keyboard, simply tap
a text field where you want to enter text.
Word suggestions
Displays the word you’ve entered.
Word suggestions
31
Your Home screen
Tap once to capitalize the next letter you type. Double-tap for all caps.
Tap to switch to the numbers and symbols keyboard.
Tap to select the keyboard language. Only available when multiple
languages are enabled.
Tap to access the LG keyboard settings. Touch and hold to access the
Clip Tray and Voice input.
Tap to enter a space.
Tap to create a new line in the text field.
Tap to delete the previous character.
Enter suggested word using gesture control
Enter text on the keyboard and the related word suggestions appear. Tap
the left-side or right-side suggestion to insert it.
Split keyboard using gesture
The split keyboard feature allows you to use both hands to type. Each half
of the keyboard withdraws to the left and right of the screen. To activate
the split keyboard, place both thumbs on the keyboard and slide them
apart.
To change the keyboard height
Adjust height of keyboard to show more of the screen and to control
keyboard more easily.
# Tap > Keyboard height and layout > Keyboard height > Tap and
drag the icon to adjust the keyboard height.
To change the bottom row keys
# Tap > Keyboard height and layout > Bottom row keys > Tap and
drag to add or delete keys or change the order.
NOTE Only QWERTY, QWERTZ, AZERTY keyboards can be customized. This function does not
support some languages.

32 Your Home screen
Using Clip Tray
Easily access the contents you stored in the Clip Tray whenever and
wherever you want. You can copy images or texts and keep them in the
Clip Tray. Then, you can paste them whenever and wherever you want.
1. Touch and hold text and images while viewing or editing them and tap
Clip Tray.
2. Touch and hold the text input field and select Clip Tray. You can also
access the Clip Tray by touching and holding > .
NOTES • You can save up to 10 items in the Clip Tray.
• Access Clip Tray and tap , select the items you want to delete, then tap Done.
• This function may not be supported in downloaded apps.
Entering special characters
The on-screen keyboard allows you to enter special characters (e.g. “á”).
Touch and hold the desired key (for example, the “a” key). A pop-up
appears with additional available characters. Slide your finger over the
character you want, then lift your finger to enter it.
NOTE A symbol at the top right of a key indicates that additional characters are available.
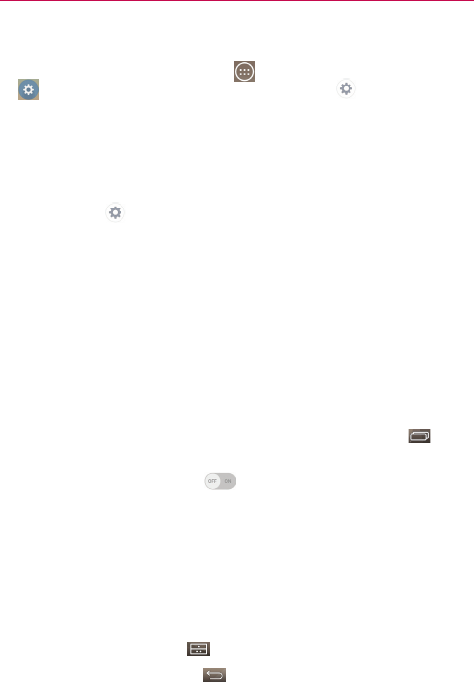
Text input settings
To change your text entry settings and see the dictionary of terms you’ve
used, from the Home screen, tap Apps (in the QuickTap bar) >
Settings > Language & input. The following options are available in
the KEYBOARD & INPUT METHODS section.
# Default – Allows you to choose the default keyboard to use when
entering text and set up your input methods.
# LG Keyboard – Tap the Settings icon to change the following
settings.
Input language and keyboard layout – Allows you to select the
keyboard language and type. This is where you can select multiple
languages for your keyboard input.

33
Your Home screen
Keyboard height and layout – Allows you to adjust the keyboard to
control it more easily.
Path input – Checkmark to enter a word by drawing a path through all of
the letters.
Show word suggestions – Checkmark to show words through text
prediction.
Auto-correction – Sets your level of automatic word correction. Choose
from Off, Mild, Moderate, and Aggressive.
Update word suggestions – Allows you to update your word
suggestions based on your selected language. You can also add your
synced Contacts to your word suggestion list
Additional settings – Allows you to set the additional settings that
include Vibrate on keypress, Sound on keypress, Auto-capitalization,
Auto-punctuation, Spell checker, Personalized data, Clear word
suggestion history and Personal dictionary.
Help – Displays text input settings information.
# Google voice typing – Checkmark to select Google voice typing to
enter text. Tap the Settings icon to change the Google voice typing
settings.
Choose input languages – Allows you to select the languages to
support with Google voice typing.
Block offensive words – Checkmark to hide recognized offensive text.
Offline speech recognition – Enables voice input while offline.
Languages
You can set only one default language for your tablet, but you can set
multiple languages used for the on-screen keyboard.
To change the default language
# From the Home screen, tap Apps (in the QuickTap bar) > Settings
> Language and input > Language > tap the language you want.
34 Your Home screen
To add additional languages for your keyboard
# From the Home screen, tap Apps (in the QuickTap bar) > Settings
> Language and input. Tap the Settings icon to the right of LG
Keyboard, tap Input language and keyboard layout, then checkmark
the languages you want the keyboard to be able to use.
OR
# Open the Notifications Panel (when an app that allows text input is
open), tap Choose input method > Setup input methods > the
Settings icon to the right of LG Keyboard > Input language and
keyboard layout, then checkmark the languages you want to be able to
use.
Other Screen Features
The Dual window feature
The Dual window feature allows you to split the screen to view two
applications at the same time.
Enabling the Dual window feature
1. From the Home screen, touch and hold the Recent Apps Key (in the
Touch keys bar) > System settings > Dual window.
2. Tap the Dual window switch (at the top right of the screen) to
toggle it on (blue).
# Tap Split view to automatically open Dual window when you tap a
link on the full screen or tap an email attachment (images only).
Dual window access
When enabled in the Settings menu, you can access the Dual window
feature.
# Tap the Dual window Key (in the Touch keys bar).
# Touch and hold the Back Key (in the Touch keys bar).
35
Your Home screen
# Tap the Recent Apps Key (in the Touch keys bar), then tap Dual
window (at the bottom of the screen).
NOTE If the Split view feature is activated, Dual window will automatically open when you tap
a link on the full screen or tap an image email attachment.
Using the Dual window feature
1. Tap the Dual window Key (in the Touch keys bar).
2. Tap (or drag) the icon for the application you want to open in the top
window.
3. Tap (or drag) the icon for the application you want to open in the bottom
window.
4. Tap a window to select and use it.
# A blue box appears around the selected window with a blue semi-circle
handle between the windows.
# Drag the blue handle to change the window sizes (one larger and one
smaller).
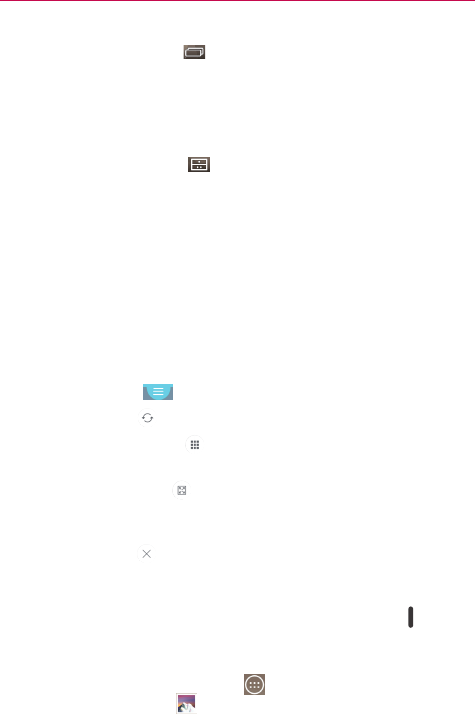
5. Tap the blue handle to access the Dual window options.
# Tap the Swap icon to switch (flip) the application positions.
# Tap the View app list icon to redisplay the applications list so you
can change the application for the selected window.
# Tap the Full screen icon to open the selected application in full
screen view. Drag the blue handle (up or down depending on the
selected window) to return to Dual window.
# Tap the Close icon to close the selected window.
Capturing a Screenshot
Press and hold the Volume Down Key and the Power/Lock Key (on the
right side of the tablet) at the same time for 2 seconds to capture a
screenshot of the current screen.
To view the captured image, tap Apps (in the QuickTap bar) > the Apps
tab (if necessary) > Gallery > Screenshots album.
36 Your Home screen
Using QuickMemo+ to capture a screenshot
1. On the screen you want to capture, drag the Status bar downward and
tap the QuickMemo+ icon (in the Quick Settings bar).
OR
Press and hold both of the Volume Keys (on the right side of the
tablet) at the same time.
2. Create your memo, tap the Save icon in the toolbar (at the top of the
screen), then select where to store the captured screenshot. Choose
Gallery or QuickMemo+.
The Smart screen feature
The Smart screen feature keeps the tablet from activating screen timeout
when it detects your eyes looking at the screen. When you turn this feature
on, you can set a shorter screen timeout setting to conserve your battery
power, but still allow you to view a screen for a longer period of time
without having to touch it to keep it activated.
To turn this feature on, from the Home screen, touch and hold the Recent
Apps Key (in the Touch keys bar) > System settings > Display >
checkmark the Smart screen checkbox.
NOTE The following situations may prevent this feature from functioning properly:
• When the tablet is in the dark or against bright light.
• When the front camera lens can't detect the location of your eyes.
• When the front camera is used at the same time with other applications.
37
Google account setup
Google Account Setup
When you first turn on your tablet, you have the opportunity to activate the
network, to sign into your Google Account and select how you want to use
certain Google services.
You must sign into a Google Account to use Gmail, Hangouts, Google
Calendar, and other Google applications; to download apps from the Play
Store; to back up your settings to Google servers; and to take advantage of
other Google services on your tablet.
To set up your Google Account
# Sign into your Google Account from the prompted Setup screen when
you first turn on your tablet.
OR
# If you skipped the Google Account set up when you first turned your
tablet on, from the Home screen, touch and hold the Recent Apps Key
(in the Touch keys bar) > System settings > Accounts & sync >
Add account > Google.
If you have a Google Account, tap Existing, enter your email address and
password, then tap the Continue icon and follow the prompts.
Otherwise, tap New and enter the necessary information to create a new
Google Account.
Once you’ve set up your Google Account on your tablet, your tablet
automatically synchronizes with your Google Account on the Web.
Your contacts, Gmail messages, Calendar events and other information
from these applications and services on the Web are synchronized with
your tablet. (This will depend on your synchronization settings.)
After signing in, you can use Gmail™ and take advantage of Google
services on your tablet.

38 Connecting to Networks and Devices
Connecting to Networks and Devices
Wi-Fi
With Wi-Fi, you can use high-speed Internet access within the coverage of
the wireless access point (AP). Enjoy wireless Internet using Wi-Fi, without
extra charges.
Connecting to Wi-Fi networks
To use Wi-Fi on your tablet, you need to access a wireless access point or
‘hotspot’. Some access points are open and you can simply connect to
them. Others are hidden or use security features; you must configure your
tablet to be able to connect to them. Turn off Wi-Fi when you’re not using it
to extend battery life.
Turning Wi-Fi on and connecting to a Wi-Fi network
1. From the Home screen, touch and hold the Recent Apps Key (in
the Touch keys bar) > System settings > Wi-Fi.
2. Tap the Wi-Fi switch to turn Wi-Fi on and start scanning for
available Wi-Fi networks.
3. Tap Search (at the bottom of the screen) to see a list of active and
in-range Wi-Fi networks.
# Secured networks are indicated by a lock icon.
4. Tap a network to connect to it.
# If the network is secured, you’re prompted to enter a password or
other credentials. (Ask your network administrator for details.)
5. The Status bar displays an icon that indicates your Wi-Fi status.
39
Connecting to Networks and Devices
Bluetooth
You can use Bluetooth to send data by running a corresponding application,
but not from the Bluetooth menu as on most other mobile phones or
tablets.
NOTES • LG is not responsible for the loss, interception or misuse of data sent or received via
the Bluetooth wireless feature.
• Always ensure that you share and receive data with devices that are trusted and
properly secured. If there are obstacles between the devices, the operating distance
may be reduced.
• Some devices, especially those that are not tested or approved by Bluetooth SIG, may
be incompatible with your tablet.
Turning on Bluetooth and pairing your tablet with a Bluetooth
device
You must pair your tablet with another device before you connect to it.
1. From the Home screen, touch and hold the Recent Apps Key (in
the Touch keys bar) > System settings > Bluetooth.
2. Tap the Bluetooth switch to turn Bluetooth on. Checkmark the
option to make your tablet visible, then tap Search for devices (at the
bottom of the screen) to view the devices that are in range.
3. Choose the device you want to pair with from the list.
Once pairing is successful, your tablet will connect to the device.
NOTE Your tablet doesn't support the Handsfree Profile. Therefore, the use of call features
with some of accessories, such as Bluetooth headsets or Bluetooth-enabled devices,
may not be available for this device.
Send data using the Bluetooth wireless feature
1. Open the item in an application that allows sending data, then tap the
Share icon (usually at the top of the screen).
OR
Touch and hold the item, then tap Share in the Context menu.
2. Tap Bluetooth to share via Bluetooth.
NOTE The method for selecting an option may vary by data type.
3. Search for and pair with a Bluetooth-enabled device.
40 Connecting to Networks and Devices
To receive data using the Bluetooth wireless feature
1. From the Home screen, touch and hold the Recent Apps Key (in
the Touch keys bar) > System settings > Bluetooth.
2. Tap the Bluetooth switch to turn Bluetooth on and mark the
checkbox next to the tablet name to make the tablet visible on other
devices.
NOTE To select the length of time that your tablet will be visible, from the Bluetooth menu,
touch the Menu icon > Visibility timeout.
3. Pair the devices and tap Accept when you receive a Bluetooth
Authorization Request to accept the file(s).
SmartShare
The SmartShare feature allows you to share content wirelessly between
nearby devices and quickly transfer your multimedia content through Wi-Fi
Direct. Content can be sent to Bluetooth devices or SmartShare Beam-
supported LG smartphones and tablets. You can share content from the
Gallery application and the Music application.
To send content from your tablet to other devices
1. Open the content you want to play or beam, then tap the SmartShare
icon .
2. Tap Play or Beam in the dialog box.
# Play: You can stream your content via TV, Bluetooth speaker, etc.
# Beam: You can send your content to Bluetooth devices or SmartShare
Beam*-supported LG smartphone or tablets.
* SmartShare Beam quickly transfers multimedia contents through Wi-Fi
Direct.
3. Tap the device to play or receive the content.

41
Connecting to Networks and Devices
# If the device isn’t on the list, verify on the device that the wireless
connection (Wi-Fi, Wi-Fi Direct, or Bluetooth) is turned on. Then tap
Rescan.
4. The file is automatically sent.
NOTE SmartShare Beam is accessed through selecting the Share option in some applications.
To enjoy content from nearby devices on your tablet
You can share content wirelessly between your tablet and nearby devices
(such as a computer or mobile device) from the Gallery applicationand the
Music application.
1. Open the content you want to share.
2. Tap the application's option menu icon (at the top left corner of the
screen), then tap Nearby devices.
# Ensure that your tablet and the nearby device(s) are connected to the
same Wi-Fi network.
# Make sure that the DLNA feature on the nearby device is turned on.
3. Tap the device to connect.
If the device isn't on the list, tap Search nearby devices.
After connection, you can enjoy the contents from the nearby device on
your tablet.
42 Connecting to Networks and Devices
PC connections with a USB cable
You can connect your tablet to your PC to charge it, transfer items to the
PC from the tablet and vice versa.
Transferring music, photos, and videos using the USB mass storage
mode
1. Connect your tablet to a PC using the USB cable (power cord) included
with your tablet.
2. If you haven't installed the LG Android Platform Driver on your PC, you'll
need to manually change the settings. From the Home screen, touch
and hold Recent Apps Key (in the Touch keys bar) > System
settings > Storage > the Menu icon > USB PC connection >
Media sync (MTP).
3. You can now view the mass storage content on your PC and transfer the
files.
Synchronize with Windows Media Player
Ensure that Windows Media Player is installed on your PC.
1. Use the USB cable to connect the tablet to a PC on which Windows
Media Player has been installed.
2. Open the Notifications panel, tap the displayed USB connection method
and select the Media sync (MTP) option.
3. When connected, a pop-up window will appear on the PC. Select the
Windows Media Player option to synchronize music files.
4. Edit or enter your device’s name in the pop-up window (if necessary).
5. Select and drag music files to the sync list.
6. Start synchronization.
# The following requirements must be satisfied to synchronize with
Windows Media Player.
Items Requirement
OS Microsoft Windows XP SP2, Vista or higher
Window Media Player version Windows Media Player 10 or higher

43
Contacts
Contacts
You can add contacts on your tablet and synchronize them with the
contacts in your Google Account(s) or other accounts that support syncing
contacts.
The Contacts application includes a navigation header at the top of the
screen. The Groups tab, the Contacts tab, and the Favorites tab are on
the left side, and the New icon and the Menu icon are on the right
side.
Your Contacts information is displayed in a split-screen layout which
displays a scrolling list of your contacts on the left and the currently
selected entry on the right side.
# The top of the left column has a search box.
# The right column displays the Contact entry header bar with the
contact’s name, an Edit icon , and the Favorite icon at the top, and
below it are the contact’s details.
Searching for a contact
1. From the Home screen, tap Apps (in the QuickTap bar) > the Apps
tab (if necessary) > Contacts to open your contacts.
2. Tap the Search contacts box (at the top of your Contacts list) and enter
the contact name using the on-screen keyboard. You can also tap a letter
along the left side of the screen to access names starting with the
chosen letter.
Adding a new contact
1. From the Home screen, tap Apps (in the QuickTap bar) > the Apps
tab (if necessary) > Contacts to open your contacts.
2. Tap the New icon (at the top right of the screen) to add a new
contact, then select the desired account from the drop-down menu at
the top of the screen (if applicable).
44 Contacts
3. If you want to add a picture to identify the contact, tap the Photo icon
. Choose Take photo (to take a picture using the camera) or Select
from Gallery (to browse for and select an image).
4. Enter the Contact's name. Tap the More icon to enter more specific
name information.
5. Enter all of the details for your contact.
6. Tap Save to save the contact entry.
Favorite Contacts
To add a contact to your favorites
1. From the Home screen, tap Apps (in the QuickTap bar) > the Apps
tab (if necessary) > Contacts to open your contacts.
2. Tap a contact entry (on the left) to view its details on the right side of the
screen.
3. Tap the Favorite icon (at the right side of the contact header). The
star turns gold and the contact is added to your favorites.
To remove a contact from your favorites list
1. From the Home screen, tap Apps (in the QuickTap bar) > the Apps
tab (if necessary) > Contacts to open your contacts.
2. Tap the Favorites tab (at the top of the screen) to view your favorite
contacts.
3. Tap a contact to view its details.
4. Tap the gold star in the top right corner of the screen. The star turns dark
and the contact is removed from your favorites.
Creating a group
1. From the Home screen, tap Apps (in the QuickTap bar) > the Apps
tab (if necessary) > Contacts to open your contacts.
2. Tap the Groups tab (at the top of the screen), then tap the New group
icon (at the top right of the screen).

45
Contacts
3. Select the account where you want to create the group and enter a
group name.
4. Tap the Add members icon and select the contacts you want to add,
then tap Add (at the bottom of the screen).
5. Tap Save to save the group.
NOTE If you delete a group, the contacts assigned to that group will not be lost. They'll remain
in your contacts without a group designation.
NOTE To add existing contact entries to a group after the group's been created, touch and hold
the group name to display a Context menu and tap Edit group, then add additional
entries as necessary.
46 Email
Email
You can use the Email application to read emails from services like Yahoo!,
MSN, and AOL. The Email application supports the following account
types: POP3, IMAP, and Exchange.
Your service provider or system administrator can provide you with the
account settings you need.
To open the Email application
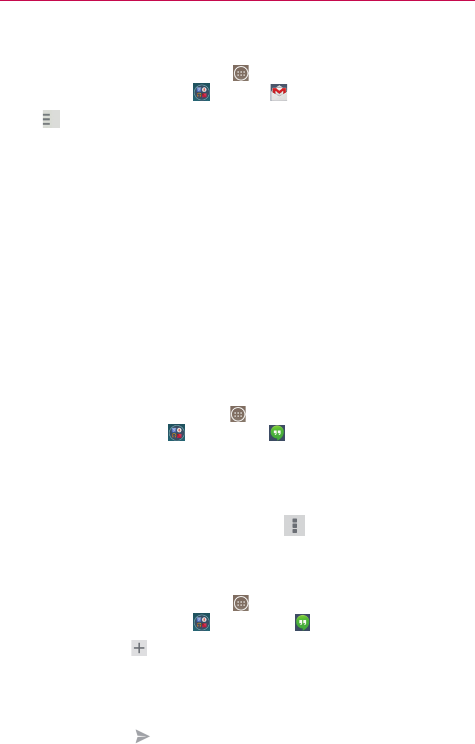
# From the Home screen, tap the Email icon in the QuickTap bar.
Managing an email account
The first time you open the Email application, a set-up wizard opens to help
you to set up an email account.
After the initial setup, the contents of your inbox are displayed. If you’ve
added more than one account, you can switch between your accounts.
To add another email account
From the Home screen, touch and hold the Recent Apps Key (in the
Touch keys bar) > System settings > Accounts & sync > Add account
icon > Email, select the email service provider, then enter the
information to add your other account.
To change an email account’s settings
From the Email application, tap the Menu icon > Settings > General
settings to adjust the settings that affect all of your email accounts. Or, tap
an individual account to adjust settings only for that email account.
To delete an email account
From the Email application, tap the Menu icon (in the top right corner of
the screen) > Settings > the Menu icon (in the top right corner of the
screen) > Remove account > tap the account you want to delete >
Remove > Yes.
47
Email
Working with email account folders
From the Email application, tap the Menu icon (in the top right corner of
the screen), then tap Folders. Each account has an Inbox, Outbox, Sent,
and Drafts folder. Depending on the features supported by your account’s
service provider, you may have additional folders.
Composing and sending email
To compose and send a message:
1. From the Email application, tap the Compose icon (at the top of the
screen in the Email header).
2. Enter an address for the message’s intended recipient. As you enter
text, matching addresses will be proposed from your Contacts.
Enter an address in the Cc/Bcc field, if necessary.
3. Enter the subject and your message.
4. Tap the Attach icon to attach files, if necessary.
5. Tap the Send button (at the top of the screen) to send the message.
If you aren’t connected to a network, for example, if you’re working in
airplane mode, the messages that you send will be stored in your
Outbox folder until you connect to a network again. If it contains any
pending messages, the Outbox will be displayed on the Accounts
screen.
TIP! When a new email arrives in your Inbox, you will be notified by a sound or vibration.
When you tap the email notification (in the Notifications panel) the notification will stop.
To respond to an email message
1. Tap the email you want to respond to.
2. Tap the Response icon (at the bottom left corner of the screen), then
tap Reply or Forward.
3. Complete your email response as necessary, then tap the Send button
(at the top of the screen).
48 Email
Email Options menus
NOTE The Options menus are opened by tapping Menu icon (in the top right corner of the
screen) or touching and holding the Recent Apps Key (in the Touch keys bar).
# From the Email Inbox, tap the Menu icon (in the top right corner of
the screen) to access QSlide, Refresh, Folders, Sort by, Downloads,
and Settings.
# From an Email message, tap the Menu icon (in the top right corner of
the screen) to access QSlide, Delete, Compose, Mark as unread, Find
in email, Save as task, Downloads, Capture plus, and Settings.
Gmail
When you open the Gmail application, your most recent conversations are
displayed at the top of your Inbox list. All of your conversations are
displayed in your Inbox unless you delete, archive, or filter them.
To open the Gmail application
From the Home screen, tap Apps (in the QuickTap bar) > the Apps tab
(if necessary) > Google > Gmail .
Your Gmail Inbox
The current Google Account is displayed at the top of the Inbox (in the
Inbox header). If you have more than one account, tap the current account
(at the top left of the screen) to access your Accounts & labels choices,
then select another account or label to display.
# Swipe the screen up and down to scroll through your list of messages.
# Conversations with new messages are displayed with bold subject lines.
# To read a message in a conversation, tap its subject text.
Gmail Inbox icons
Use the following icons (in the Inbox header at the top of the screen) while
viewing your Gmail Inbox:
Accounts and labels: Tap to change to another account or label.
49
Email
New message: Tap to begin a new Gmail message.
Menu: Tap to open the Options menu to access Refresh and Manage
labels.
Search: Tap to search within your Gmail messages.
Managing your Gmail messages
1. Tap the letter icon (or contact photo) next to one or more Gmail
messages.
2. Tap an icon in the Inbox header (at the top of the screen).
# Archive : Tap to send the message(s) to your archive folder.
# Delete : Tap to delete the message(s).
# Unread : Tap to return the message(s) to an unread state. If the
message hasn't been read, the Read icon appears and marks the
conversation as read.
# Move : Tap to move the message(s) to another label.
# Menu : Tap to open the Options menu to select Change labels,
Add star, Mark important (or not important), Mute, Report spam,
and Report phishing.
3. Tap Done (in the top left corner of the Inbox header) to apply the
selected action to the checkmarked message(s). If no icon is tapped,
tapping Done will deselect the messages.
In addition, while viewing your Inbox you can:
# Drag the screen downward to refresh and check for new email.
# Swipe a Gmail message off the screen to the left or right to quickly and
easily archive the message. Tap Undo to restore it to your Inbox.
# Tap the Favorites icon next to a Gmail message to designate it as a
favorite message and display it in your Gmail starred folder.
If you are viewing a message or another label, tap the Back Key (in
the Touch Keys Bar) until you return to your Inbox.
50 Email
Reading Your Messages
# Tap a conversation that contains the message you want to read.
The conversation opens to the first new (unread) message, or to the first
starred message, if you’ve previously starred a message in the
conversation.
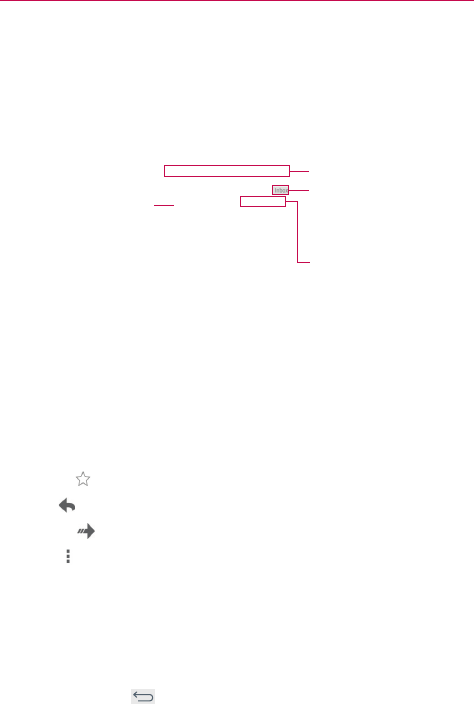
Tap the Contact's
picture to open
Quick Contact.
Label button
Tap to set labels
for the message to
help organize your
messages.
Message header
Inbox header
While viewing a message you can:
# You can swipe the screen left or right to scroll through your messages
sequentially.
# Tap a message action icon on the message header
Favorite : Tap to mark it as a favorite.
Reply : Tap to reply to the sender.
Forward : Tap to forward the message to another address.
Menu : Tap to open the Options menu for Reply all and Print.
# Tap a message action icon on the Inbox header (Archive, Delete, Mark
as unread, Move, and Menu).
# Tap the Label button (above the message header) to set labels for the
message to help you organize your Gmail messages.
# Tap the Contact's icon to open Quick Contact for that person.
# Tap the Back Key (in the Touch keys bar) to return to your Inbox.
51
Email
# Tap the Gmail icon (on the left side of the Inbox header) to return to
your Inbox.
To reread a message
When you open a conversation, messages that you’ve already read are
minimized into a tab that indicates the number of hidden messages.
1. From your Gmail Inbox, tap the conversation you want to view.
2. Tap the contact name to open that message (tap older messages to
view all of the messages in the conversation, if necessary).
While reading a message you can tap the Unread icon
(in the Inbox
header the top of the screen) to return a read message to the unread state.
For example, to remind yourself to read it again later.
Composing and Sending a Message
You can compose and send a message to people or groups with Gmail
addresses or other email addresses.
To compose and send a message
1. From the Home screen, tap Apps
(in the QuickTap bar) > the Apps
tab (if necessary)
> Google >
Gmail > the Compose icon (at
the top right of the Inbox header).
NOTE If you set up more than one Google Account on your tablet and want to send the
message from a different Google Account, tap the current Google Account (at the top of
the screen), then tap the account you want to use.
2. Enter a recipient’s address.
# As you enter text, matching addresses are offered from your Contacts
list. You can tap a suggested address or continue entering text to
enter a new one.
NOTE Tap +CC/BCC to the right of the recipient address bar to add normal copy or blind copy
recipients, if necessary.
3. Enter a subject for the message in the Subject field.
4. Enter your email text in the Compose email field.

52 Email
5. Tap the Attach icon (to the right of the Subject field) to add an
attachment to your message. Tap a file from the choices displayed or
search for the file you want (tap the top left corner of the screen to
access various locations where the files are stored), then tap the file to
send with the message.
NOTE You can also tap the Menu icon (in the top right corner of the screen), then tap
Attach file to send an attachment with your message
6. Tap the Send icon (at the top right corner of the screen) to send your
message.
NOTE If you aren't ready to send the message, tap the Menu icon (in the top right corner of
the screen), then tap Save draft.
Replying to or Forwarding a Message
Continue an email conversation by replying to a message or by forwarding
it without changing the Subject text. Change the Subject text to start a new
conversation.
NOTE The conversation text and previous messages are also included in your reply (or
forwarded) message.
To reply to or forward a message
1. Open the message you want to reply to or forward.
2. On the message header, tap the Reply icon , or the Forward icon .
Tap the Menu icon (in the Message header) to select Reply all.
# Add others to an ongoing conversation by replying to all and then
adding the new person’s address(es) to the reply.
3. Add your message text as necessary.
4. Tap the Send icon (at the top right corner of the Gmail header) to send
your Gmail message.
NOTE You can change the message action after you've started the message. Tap the current
action (at the top left of the Gmail header), then tap the one you want. For example, if
you chose Reply but decide you want to Reply all instead.
53
Email
Google Account settings
1. From the Home screen, tap Apps (in the QuickTap bar) > the Apps
tab (if necessary) > Google > Gmail .
2. Tap > Settings.
3. Tap General settings to change the settings for all accounts, including
Archive & delete actions, Swipe to archive, Sender image, Reply all,
Auto-fit messages, Auto-advance, Confirm before deleting, Confirm
before archiving, and Confirm before sending.
NOTE Tap each individual account to change its settings, including Inbox type, Inbox
categories, Notifications, Inbox sound & vibrate, Signature, Vacation responder,
Sync Gmail, Days of mail to sync, Manage labels, Download attachments, and
Images.
Hangouts
The Hangouts application lets you have real-time text conversations with
your friends.
To Open the Hangouts application
# From the Home screen, tap Apps (in the QuickTap bar) > the Apps tab
(if necessary) > Google > Hangouts .
NOTE When you have more than one Google Account on your tablet, tap the account(s) you
want to sign in to in the pop-up that appears.
To sign out of Hangouts
# From your chatting list, tap the Menu icon (in the top right corner of
the screen) > Settings > tap your account > Sign out.
Chatting with Friends
1. From the Home screen, tap Apps (in the QuickTap bar) > the Apps
tab (if necessary) > Google > Hangouts .
2. Tap the New icon (at the top right of the screen) to view your
Hangouts contacts list), then tap the contact you want to chat with.
3. Tap the Message field at the bottom of the conversation, then enter your
message.
4. Tap the Send icon (on the right side of the Message field).
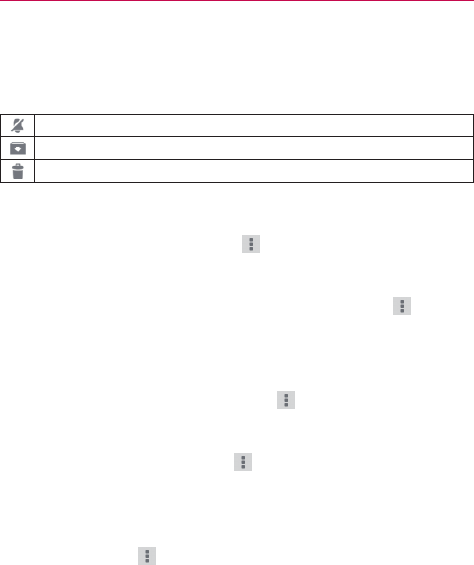
54 Email
Hangouts chatting list
Touch and hold a friend’s name in the chat screen to display the following
icons at the top of the screen. The icon(s) you tap are applied to that friend.
Tap to turn notifications off for this friend.
Tap to archive the conversation.
Tap to delete the conversation.
Blocking your Friends
# To block a friend from exchanging messages with you, tap the friend in
the chatting list. Tap the Menu icon (in the top right corner of the
screen) > People & options. Tap the block option, then tap the Block
button to confirm.
# To remove a friend from the blocked list, tap the Menu icon in the top
right corner of the chatting list. Tap Settings > tap your account >
Blocked people > Unblock next to the person’s name.
Hangouts Options menus
# From the chatting list, tap the Menu icon (in the top right corner of
the screen) to choose from Set mood, Invites, Snooze notifications,
Archived Hangouts, Settings, and Help & feedback.
# While chatting, tap the Menu icon (in the top right corner of the
screen) to choose from People & options, New group Hangout, Turn
history off, Archive, Delete, and Help & feedback.
Hangouts Settings
# Tap the Menu icon (in the top right corner of the chatting list) >
Settings > tap your account.
Settings provides access to Profile photo, Share your status, Hangouts
messages & invites, Video Calls, Customize invites, Google+ profile,
Blocked people, Hidden contacts, Sign out, and Improve Hangouts.
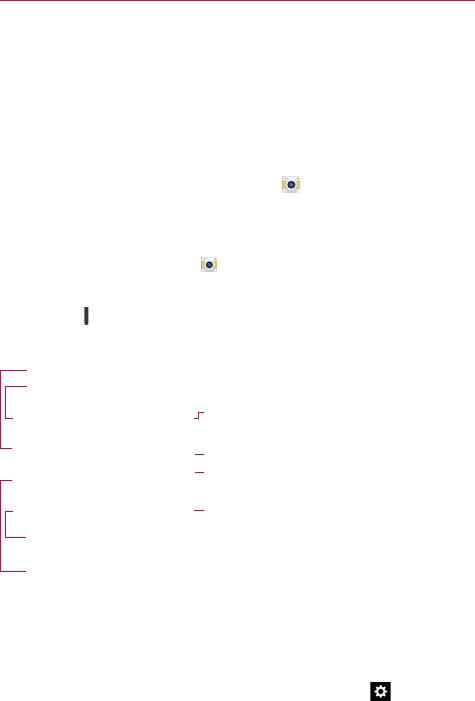
55
Camera and Video
Camera
The Camera application not only allows you to take high quality pictures and
share them, but also includes many specialized features eliminating the
need for any other camera. The video feature is also integrated on the
camera viewfinder so you can take a picture, then start recording video
with a single tap without changing camera modes.
To open the Camera application, tap Camera (in the QuickTap bar) on
the Home screen.
TIP! There are also shortcuts to open the Camera application:
• If you’ve set your tablet to use the Swipe unlock method, from the locked screen,
simply drag the Camera icon upward to open the Camera application.
• If you’ve enabled shortcuts in your tablet’s settings, you can open the Camera
application when your tablet is in timeout by pressing and holding the Volume Down
Key (on the right side of the tablet).
Getting to know the viewfinder
Lens swap icon – Switches between the rear camera and the front camera.
Gallery – Tap to view the last photo you captured. This
enables you to access your Gallery and view saved
photos while in camera mode.
Capture icon – Takes a picture.
Video mode icon – Tap to start recording a video.
Back icon – Closes the Settings or exits the Camera
application.
Menu icon – Displays the camera icons on the viewfinder. Tap it again to hide the icons.
Shot mode icon – Sets how the picture will be taken. Choose Auto or Panorama.
Settings icon – Opens the camera’s Settings. Tap it again to close the Settings.
See Additional Settings.
NOTE To take clear pictures, make sure the camera lens is clean.
Additional Settings
The camera is set to automatically take high quality photos and videos.
Additional settings are available for resolution, how photos and videos are
taken, as well as how to store them. Tap the Settings icon (at the
bottom left corner in the viewfinder) to open these additional settings. Tap
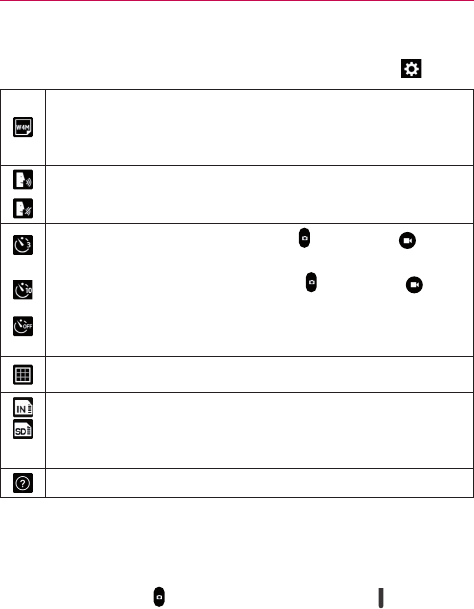
56 Camera and Video
a setting to toggle through its available settings.
After changing the setting(s) as you want, tap the Settings icon again.
Sets the resolution. For photos, choose from 5M, W4M, 3M, and 1M. For
videos, choose from FHD, HD, and WVGA.
NOTE If you choose a high resolution, the file size will increase which means you’ll be
able to store fewer media files in your tablet’s memory.
Allows you to take pictures by voice command.
Disables the voice command function.
Sets a 3 second delay after the Capture icon or Record icon is
tapped.
Sets a 10 second delay after the Capture icon or Record icon is
tapped.
Disables the delay capture function.
NOTE When you exit the Camera application the Delay capture setting returns to off.
Displays an overlay grid to help you align your photos and videos horizontally
and/or vertically for better composition.
Stores your captured photos and videos in the internal tablet memory or
microSD card memory.
NOTE The SD card storage setting is only displayed if an optional microSD card is
installed and activated in your tablet.
Displays additional information to help you use the camera.
Taking a photo with the rear camera
1. Open the Camera application and hold the tablet so that the viewfinder
displays the shot you want to photograph.
2. Tap the Capture icon (or press the Volume Down Key to take the
photo.
# Tap the Preview image to view the picture you just took.
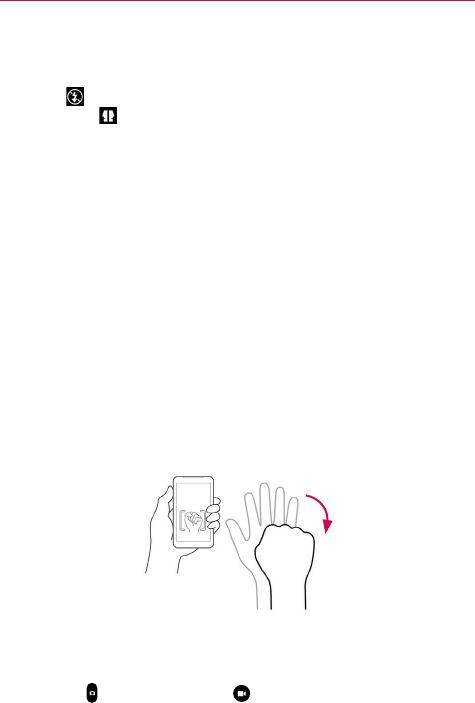
57
Camera and Video
Additional front camera lens icons
There are additional Settings icons specific to the front camera lens. The
Flash icon uses the light from the touchscreen to brighten your face.
The Mirror icon automatically mirrors the image viewed on the
viewfinder (flips the right side to the left).
Gesture shot using the front camera lens
The Gesture shot function allows you to take a picture with a simple hand
gesture.
This is ideal for taking selfies because there’s no awkward movement to
tap the Capture icon (or press the Volume Down Key) to take the shot.
To take a photo with a gesture
1. Open the Camera application and activate the front camera lens.
2. Hold an open palm in front of you until the front camera lens detects it (a
box appears on the screen).
3. Make a fist to start a countdown before the shot is taken (allowing you
time to position yourself).
# Tap the Preview image to view the picture you just took.
Recording a video
There’s no need to change modes to start recording video. Both the
Capture icon and the Record icon are displayed on the camera’s
viewfinder at the same time.
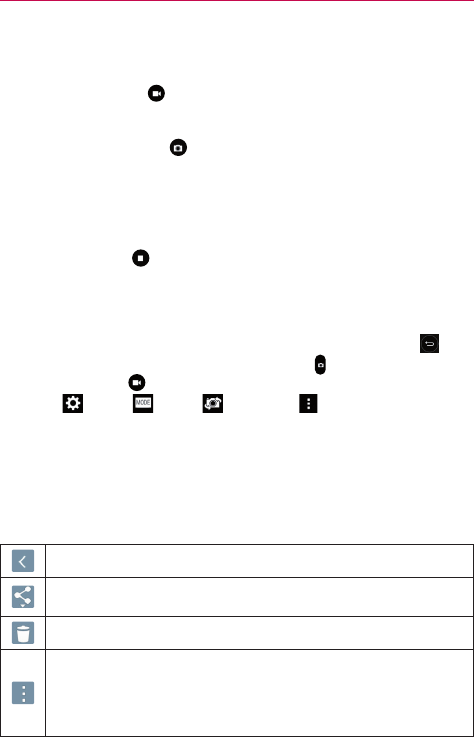
58 Camera and Video
1. Open the Camera application and point the lens toward the subject you
want to capture in your video.
2. Tap the Record icon to start recording.
# A timer showing the length of the video will appear.
# Tap the Capture icon to capture a still photo while you’re recording
video.
# While recording a video, place two fingers on the screen to use the
dynamic zoom function (spread your fingers apart to zoom in and
pinch them together to zoom back out).
3. Tap the Stop icon to stop recording.
NOTE Make sure that the microphone isn’t blocked when recording a video or audio clip.
After taking a photo or recording a video
After you take a photo or record a video, you can tap the Back icon to
exit the Camera application, tap the Capture icon to take another photo,
tap the Record icon to record another video, tap the Camera icons
(Settings , Mode , Swap , and Menu ), or tap the Preview
image to view the last photo you took or video you recorded.
Icons while viewing a photo you just took or video you
recorded
While viewing a photo you just took or a video you just recorded, tap the
screen to display the following icons:
Tap to return to the camera viewfinder.
Tap to send your photo or video to others or share it via social network
services.
Tap to delete the photo or video, then tap Yes to confirm.
Tap to access the Options menu.
For photos: SmartShare, Set image as, Move, Copy, Copy to Clip Tray,
Slideshow, Rotate left, Rotate right, Crop, Add location, Rename, Print,
and Details.
For videos: SmartShare, Move, Copy, Trim, Rename, and Details.
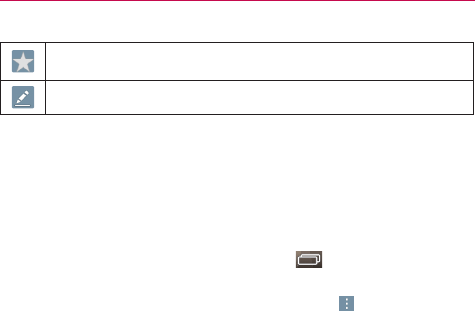
59
Camera and Video
Tap to set the photo or video as a favorite and display it in your Gallery
Favorites folder.
Tap to edit the photo. See Editing photos.
TIP! If you have a social networking account and set it up on your tablet, you can share your
photo with your social networking community.
NOTE All of your recent photos and videos are displayed in a thumbnail filmstrip at the bottom
of the screen. Tap a thumbnail image to view it on the screen.
Options menu
While viewing a photo or video, tap the screen to illuminate the Touch keys
bar, then touch and hold the Recent Apps Key to access the following
options.
NOTE These are the same options accessed when the Menu icon (at the top right corner of
the screen) is tapped. The options displayed depend on the media type (photo or video).
SmartShare – Tap to Play or Beam the photo or video using the
SmartShare feature.
Set image as – Tap to use the photo as a Contact photo, Home screen
wallpaper, Lock screen wallpaper, or Wallpaper.
Move – Tap to move the photo or video to another album.
Copy – Tap to copy the photo or video and save it to another album.
Copy to Clip Tray – Tap to copy the photo and store in the Clip Tray for use
in other applications.
Slideshow – Tap to automatically display a slideshow of all your photos.
Rotate left – Tap to rotate the photo to the left.
Rotate right – Tap to rotate the photo to the right.
Crop – Tap to crop your photo. Drag the crop box to enclose the photo area
you want to keep, then tap OK. Your cropped photo is saved as a copy of
the original.
Trim – Tap to remove segments from the beginning or end of your
recorded video.
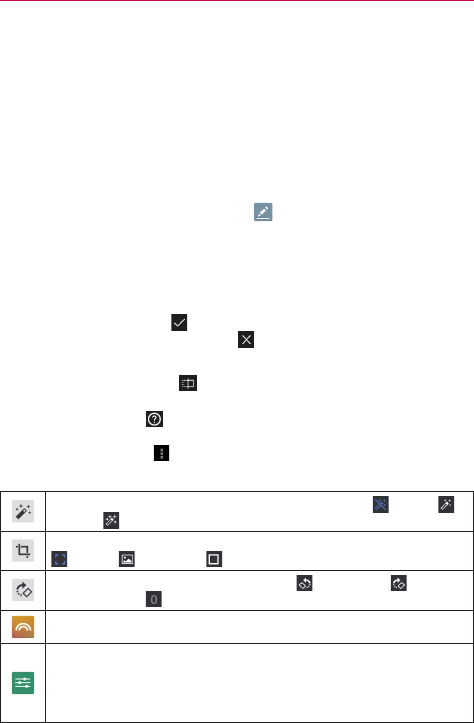
60 Camera and Video
Add location – Tap to add the photo’s location information using the map
provided.
Rename – Tap to rename the photo or video.
Print – Tap to select a printer via Cloud print to print the photo.
Details – Tap to view the photo or video file details.
Editing photos
While viewing a photo, tap the Edit icon (at the top of the screen) to
access the Edit photo screen to apply edits to the photo.
1. Tap an edit type from the scrolling list along the bottom edge of the
screen, then tap the edit setting (at the bottom of its screen) that you
want to use.
2. Tap the Checkmark icon (at the top right corner of the screen) to save
your changes or tap the Close icon (at the top left corner of the
screen) to exit the setting without saving your changes.
NOTES • Tap the toggle view icon (at the top of the screen, when available) to toggle
between the photo before edits and after edits.
• Tap the Help icon (at the top of the screen, when available) to access help for the
current setting.
• Tap the Menu icon (at the top right corner of the screen) to access Revert,
Feedback, and Help.
Sets the photo enhancement properties. Choose from Off , Normal ,
and High .
Allows you to crop the photo to change its composition. Choose from Free
, Original , and Square .
Rotates the photo. Choose from Rotate Left , Rotate Right , and
Straighten Angle .
Applies various effects to change the look of the photo.
Allows you to adjust the brightness, contrast, saturation, shadows, and
warmth.
Drag your finger vertically to select the tune type, then adjust it by dragging
your finger horizontally on the screen.
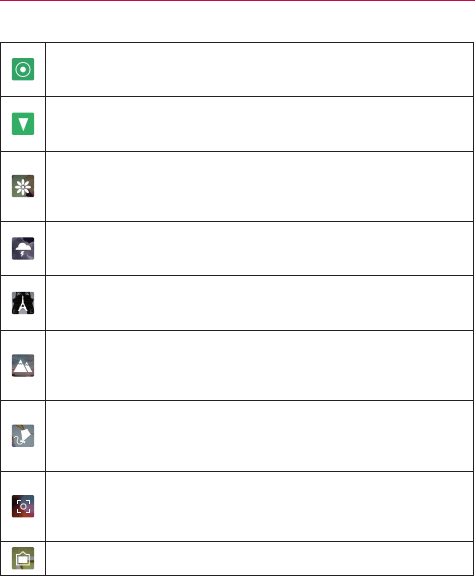
61
Camera and Video
Allows you to choose a spot on the photo to adjust the brightness,
saturation, contrast, and center size. Drag your finger vertically to select the
tune type, then adjust it by dragging your finger horizontally on the screen.
Allows you to adjust the structure and sharpening. Drag your finger
vertically to select the detail type, then adjust it by dragging horizontally
across the screen.
Allows you adjust the brightness, saturation, style strength, and vignette
strength for the Blur and Style applied to the photo. Drag your finger
vertically to select an adjustment, then adjust it by dragging horizontally
across the screen.
Allows you adjust the filter strength and saturation for the Drama style
applied to the photo. Drag your finger vertically to select an adjustment,
then adjust it by dragging horizontally across the screen.
Allows you adjust the brightness, contrast, and grain for the Color filter and
Style applied to the photo. Drag your finger vertically to select an
adjustment, then adjust it by dragging horizontally across the screen.
Allows you adjust the brightness, saturation, contrast, style strength,
scratches, and light leaks for the Shuffle and Style applied to the photo.
Drag your finger vertically to select an adjustment, then adjust it by dragging
horizontally across the screen.
Allows you adjust the blur strength, outer brightness, inner brightness, and
center size for the Blur and Style applied to the photo. Drag your finger
vertically to select an adjustment, then adjust it by dragging horizontally
across the screen.
Allows you adjust the transition, blur strength, brightness, saturation, and
contrast for the Style applied to the photo. Drag your finger vertically to
select an adjustment, then adjust it by dragging horizontally across the
screen.
Allows you to set a frame for the photo. Some frames can be customized.
Viewing your saved photos and videos
You can access your saved photos and videos from camera mode. Just tap
the Preview image.
While viewing a preview image of a photo or video
# Tap the screen to display the control icons.
62 Camera and Video
# To view more photos and videos, swipe horizontally to scroll through
them sequentially in full screen.
# To select another photo or video to view, tap its thumbnail image in the
scrolling list along the bottom edge of the screen.
# Tap the Back icon (in the top left corner of the screen) to display your
Camera folder in the Gallery application.
# To zoom in or out on a photo, double-tap the screen or place two fingers
on the screen and spread them apart (move your fingers closer together
to zoom out).
# To zoom in or out on a video using the Videos application, place two
fingers on the screen and spread them apart (move your fingers closer
together to zoom out).
Watching your saved videos
1. In the viewfinder, tap the image Preview image.
2. Thumbnail images from your Gallery files are displayed in a small,
film-like strip along the bottom of the screen.
3. Tap the video you want, then tap the Play icon to play it
automatically.
Live Zooming
Live Zooming allows you to zoom in or zoom out on a portion of a video
during playback to make the desired section appear larger or smaller. Live
Zooming is only available when the video is being played using the Video
application.
When viewing a video, use your index finger and thumb in a pinching or
spreading motion to zoom in or out.
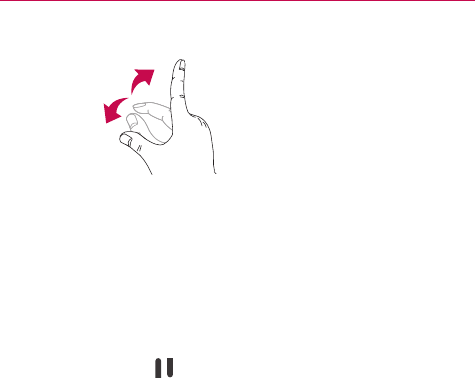
63
Camera and Video
TIPS! While a video is playing using the Video application:
• Slide your finger vertically along the left side of the screen to adjust the screen
brightness.
• Slide your finger vertically along the right side of the screen to adjust the video volume.
• Slide your finger horizontally across the screen to rewind or fast-forward.
NOTE Don’t press too hard on the touchscreen; it’s sensitive enough to pick up a firm, light
touch.
Adjusting the volume while viewing a video
Press the Volume Keys (on the right side of the tablet) to adjust the
volume of a video while it’s playing. If you selected the Video application to
play the video, you can also slide your finger vertically up along the right
side of the screen to increase the volume and slide your finger down to
decrease the volume during playback.
64 Multimedia
Gallery
Multimedia files (pictures and videos) are stored in your tablet’s internal
memory for easy access to all of your files. You can also install an optional
microSD card for additional portable storage. Use the Gallery application to
view your multimedia files.
# From the Home screen, tap Apps (in the QuickTap bar) > the Apps
tab (if necessary) > Gallery .
You can view, manage, and share all of your image and video files from the
Gallery application.
NOTES • Some file formats are not supported, depending on the software installed on your
tablet.
• Some files may not play properly, depending on how they’re encoded.
Your Gallery Photos and Videos
Opening the Gallery application displays all of your available albums and
folders. Each album and folder can contain both pictures and videos
displayed in order by creation date.
# Swipe left or right to view the next or previous image or video.
# Tap a photo to view it in full-screen.
# The Play icon is displayed on all video files. Tap it to select it to play.
Zooming in and out on a photo
When you tap a photo to view it in full-screen you can use one of the
following methods to zoom in on the image:
# Double-tap anywhere on the screen to zoom in. Double-tap again to
return to fullscreen view.
# Place two fingers on the screen and spread them apart to zoom in. Pinch
in to zoom back out.
Gallery albums and folders
When another application saves a picture, a corresponding download folder
is automatically created to contain the picture. For example, saving a
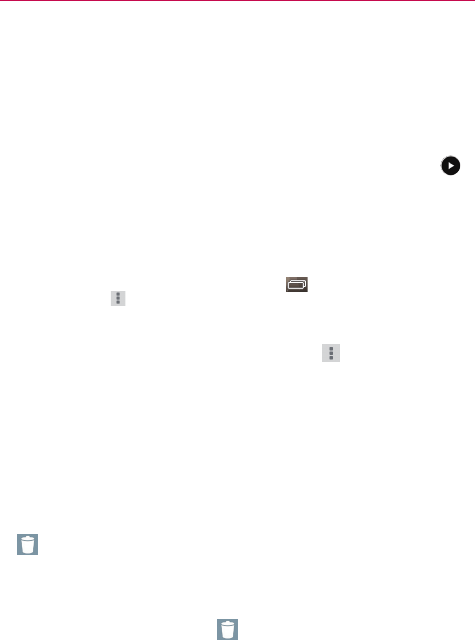
65
Multimedia
picture from the Email application creates an email folder and capturing a
screenshot creates a Screenshots folder. Tap a folder to open it. To view
additional folders and access (e.g., Favorites, Nearby devices, etc.) tap the
upper-left corner of the screen.
Playing Videos in Your Gallery
1. Select a video from the Gallery application by tapping the Play icon
in the center of its preview image.
2. Select the application to use. Choose Video or Photos to play it
automatically.
TIP! If you checkmark Use as default app, you won’t have to select the viewing application
each time you tap the Preview image. To redisplay the selection pop-up again, from the
Home screen, touch and hold Recent Apps Key > System settings > Apps > the
Menu icon > Reset default apps.
Viewing photo and video options
When viewing a photo or video, tap the Menu icon (in the top right
corner of the screen) to access and use the Options menu.
# For photos: SmartShare, Set image as, Move, Copy, Copy to Clip
Tray, Slideshow, Rotate left, Rotate right, Crop, Add location,
Rename, Print, and Details.
# For videos: SmartShare, Move, Copy, Trim, Rename, and Details.
Deleting images and videos
# While viewing your Gallery files in a folder or album, tap the Delete icon
(at the top right of the screen). Select the photos and videos you
want to delete, tap Delete (at the bottom of the screen), then tap Yes to
confirm.
# While viewing a photo or video, tap the screen (to display the control
icons), then tap the Delete icon (at the top right of the screen), then
tap Yes to confirm.
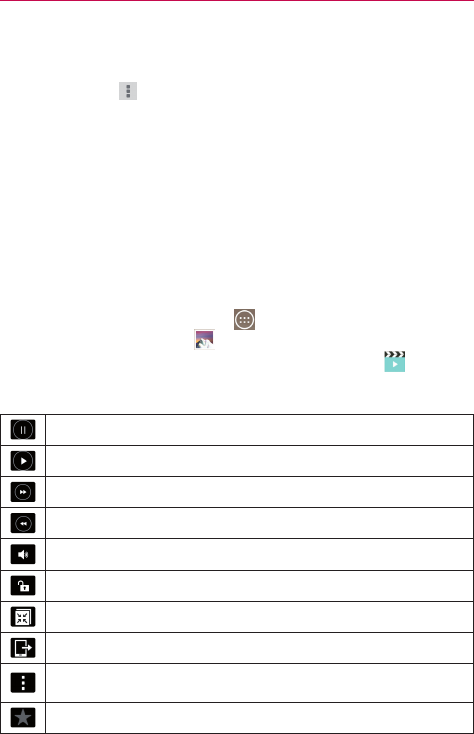
66 Multimedia
Setting an image as wallpaper
When viewing a photo, tap the screen (to display the control icons), then
tap the Menu icon (in the top right corner of the screen). Tap Set image
as and select Home screen wallpaper, Lock screen wallpaper, or
Wallpaper. Crop the photo as necessary, then tap Done or OK (depending
on the application used for cropping).
NOTES • Some file formats are not supported, depending on the tablet software.
• If the file size exceeds the available memory, an error can occur when you open files.
Video Player
Your tablet has a video player that lets you play your recorded videos.
Playing a video
1. From the Home screen, tap Apps (in the QuickTap bar) > the Apps
tab (if necessary) > Gallery .
2. Select the video you want to play, then tap the Video icon in the
pop-up that appears. Tap the screen to display and use the following
icons.
Tap to pause video playback.
Tap to resume video playback.
Tap to fast-forward 10 seconds. Touch and hold to fast-forward 3 seconds.
Tap to rewind 10 seconds. Touch and hold to rewind 3 seconds.
Tap to adjust the video volume.
Tap to lock the screen while the video is playing.
Tap to access QSlide and display the video in a small overlay window.
Tap to share your video via the SmartShare function.
Tap to access the Options menu for Screen ratio, Subtitles, Share, Trim,
Settings, and Details.
Tap to add the video to your Gallery Favorites folder.
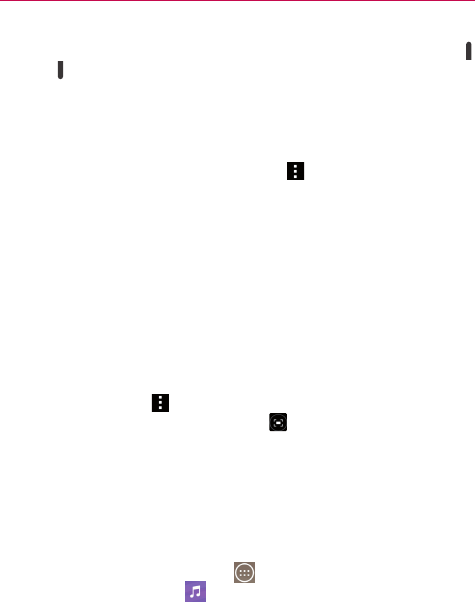
67
Multimedia
NOTE You can also change the volume while watching a video by pressing the Volume Keys
(on the right side of the tablet).
While a video is playing, slide your finger vertically along the right side of
the screen to adjust the video volume.
Video Options menu
While the video is playing, tap the Menu icon (in the top right corner of
the screen). The Video Options menu includes Screen ratio, Subtitles,
Share, Trim, Settings, and Details.
TIP! You can touch and hold a video in an album to access its Context menu to select Share,
Delete, Rename, and Details.
Video settings
The Video settings include After playing video, Play on Lock screen,
Screenshot, Audio effects, Video auto off, and Brightness.
To capture a screenshot during playback
While the video is playing, tap the screen to display the playback controls,
then tap the Menu icon (in the top right corner of the screen) > Settings
> Screenshot > On. The Screenshot icon is displayed on the lower left
side of the screen. Tap it to capture a screenshot during video playback.
Music
Your tablet has a music player that lets you play all of your favorite tracks.
To access the Music player
# From the Home screen, tap Apps (in the QuickTap bar) > the Apps
tab (if necessary) > Music .
Add music files to your tablet
Start by transferring music files to your tablet:
# Transfer music using Media sync (MTP).
# Download from the Web.
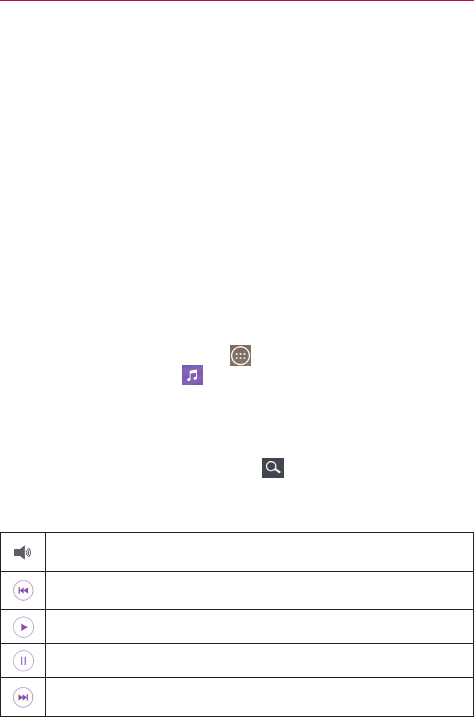
68 Multimedia
# Synchronize your tablet to a computer.
# Receive files via Bluetooth.
Transfer music using Media sync (MTP)
1. Connect the tablet to your PC using the USB cable included with your
tablet.
2. Open the Notifications panel, tap the displayed USB connection method
and select the Media device (MTP) option. Your tablet will appear as
another hard drive on your computer. Click on the drive to view it. Copy
the files from your PC to the drive folder.
3. When you’re finished transferring files, swipe the Status bar downward
and tap Media device (MTP) > Charge tablet. You may now safely
unplug your tablet.
Playing a song
1. From the Home screen, tap Apps (in the QuickTap bar) > the Apps
tab (if necessary) > Music .
2. Tap the Songs tab (the Music tabs are displayed along the top of the
screen).
3. Tap the song you want to play.
TIP! To find a song, you can tap the Search icon (at the top of the screen) or tap the
letter the song begins with using the alphabet listed along the right side of the screen.
Music player icons
Tap to adjust the music volume. You can also use the Volume Keys on the
right side of the tablet to adjust the volume.
Tap to go back to the beginning of the song. Tap 2 times to return to the
previous song. Touch and hold to rewind 3 seconds.
Tap to resume playback.
Tap to pause playback.
Tap to skip to the next track on the album or in the playlist. Touch and hold
to fast-forward 3 seconds.
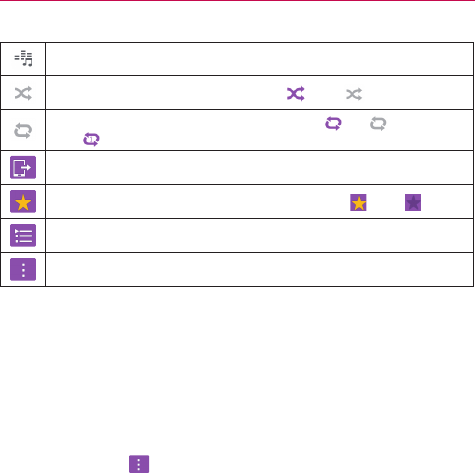
69
Multimedia
Tap to set the audio effect.
Sets the shuffle mode. Tap to toggle it On or Off .
Sets the repeat mode. Tap to toggle between On , Off , and same
song .
Tap to share your music via the SmartShare function.
Sets the current song as a favorite. Tap to toggle it On or Off .
Tap to view the current playlist.
Tap to open more options.
Other music player options
Touch and hold any song
# From the Music library: Play, Add to playlist, Delete, Share, Details,
and Search.
# From the Music playlist screen: Play, Add to playlist, Remove from
playlist, Delete, Share, Details, and Search.
Tap the Menu icon
# From the Music library: Select to play, Add to playlist, Delete, Share,
Settings, and Help.
# From a music playlist screen: Select to play, Remove from playlist,
Delete, Share, Settings, and Help.
# From the music player screen: Search, Add to playlist, Delete, Share,
Music video, Details, Settings, and Help.
Turning the music player off
To stop the music player, swipe the Status bar downward, then flick the
music entry to the right (or left) off of the screen.
NOTES • Some file formats are not supported, depending on the device software.
• If the file size exceeds the available memory, an error can occur when you open files.
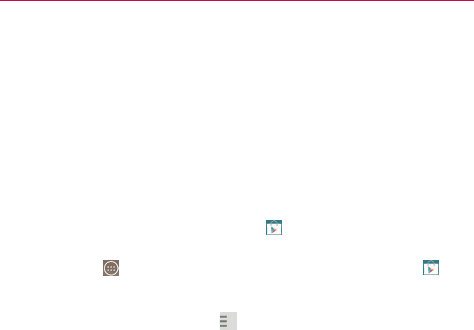
70 Multimedia
• Music file copyrights may be protected by international treaties and national copyright
laws. Therefore, it may be necessary to obtain permission or a license to reproduce or
copy music. In some countries, national laws prohibit private copying of copyrighted
material. Before downloading or copying the file, check the national laws of the relevant
country concerning the use of such material.
Play Store
Play Store allows you to browse and search for free and paid apps.
To open the Play Store app
# From the Home screen, tap Play Store (in the QuickTap bar).
NOTE You can also access Play Store from the Applications screen. From the Home screen,
tap Apps (in the QuickTap bar) > the Apps tab (if necessary) > Play Store .
To get help with Play Store
# Tap the Play Store Options icon (at the top left corner of the screen),
then tap Help.
The Chrome application opens to the Play Store Help page, with links to
many help topics.
To open a screen with details about an application
At any time while browsing in Play Store, tap an app to open its details
screen.
The App details screens include a description, ratings, reviews, comments,
and related information about the app. From this screen, you can download,
install, uninstall, rate the app, and more.
Downloading and Installing Apps
When you find an app you want, you can download and install it on your
tablet.
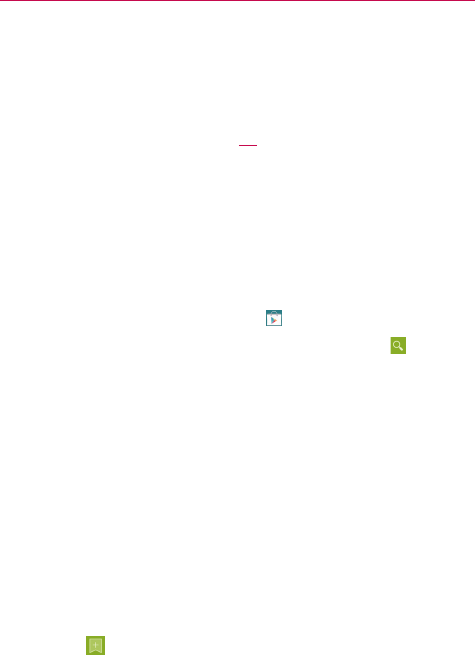
71
Multimedia
To download and install an app
NOTE Before you can download a paid app, you must set up a billing arrangement.
Price/Install button
Indicates the cost or
install for free apps.
1. From the Home screen, tap Play Store (in the QuickTap bar).
2. Tap a category from the Home page or tap the Search icon (in the top
right corner of the screen) to search for an app.
3. Tap the app you want to open its details screen.
4. Tap INSTALL or the Price button to download the selected app.
5. If you agree with the app's access requirements, tap ACCEPT.
6. The app will be downloaded and installed.
Play Store Options menu
On the Play Store Home page, drag the left edge of the screen to the right
to access the current Google Account, Store home, My apps,
My wishlist, People, Redeem, Settings, and Help.
Your Wishlist
While viewing an app Details screen (or music, games, etc.), tap the
Wishlist icon (at the top of the screen) to add it to your wishlist for
future reference.
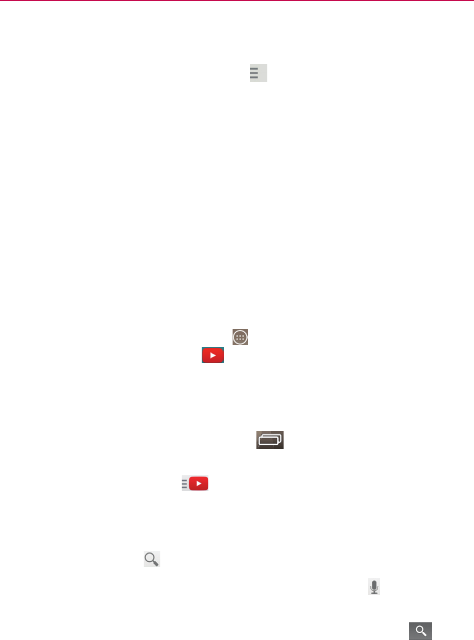
72 Multimedia
Play Store settings
Tap the Play Store Options menu icon (at the top left corner of the
screen) > Settings to access Notifications, Auto-update apps, Add icon
to Home screen, Clear search history, Content filtering, and Require
password for purchases. You can also view the open source licenses and
build versions.
YouTube™
Opening YouTube and Watching Videos
You can browse, search for, view, upload, and rank YouTube videos on your
tablet with the YouTube application.
To open the YouTube application
# From the Home screen, tap Apps (in the QuickTap bar) > the Apps
tab (if necessary) > YouTube .
Using the YouTube application
# Search for a video you want to watch, then tap the video to watch it.
# Touch and hold the Recent Apps Key (in the Touch keys bar) to
access Settings, Send feedback, Help, and Sign in/out.
# Tap the YouTube play icon (at the top left corner of the screen) to
access What to Watch and other YouTube options.
To search for videos
1. Tap the Search icon (at the top of the main YouTube screen).
2. Enter the text to search for or tap the Microphone icon to search by
voice.
3. Tap a suggestion below the search box or tap the Search icon on
the keyboard.
4. Scroll through the search results and tap a video to watch it.

73
Multimedia
YouTube settings
Touch and hold the Recent Apps Key (in the Touch keys bar) >
Settings to access YouTube’s settings.
General: Limit mobile data usage, Uploads, Content localization, Improve
YouTube, and Notifications.
Connected TVs: Add a TV and Edit TVs.
Search: Clear search history, Never remember history, and SafeSearch
filtering.
Captions: Text size and Subtitles style.
About: Help, Send feedback, Google Mobile Terms of Service, YouTube
Terms of Service, Google Mobile Privacy Policy, YouTube Privacy Policy,
Open source licenses, and App version.