LG Electronics USA VK410 Tablet Computer with LTE, Bluetooth and WLAN User Manual 1
LG Electronics MobileComm USA, Inc. Tablet Computer with LTE, Bluetooth and WLAN Users Manual 1
Contents
- 1. Users Manual 1
- 2. Users Manual 2
Users Manual 1
User GuideVK410 XXXXXXXXXX (1.0)
XX
This booklet is made from 98% post-consumer recycled paper.
This booklet is printed with soy ink. Printed in xxxxx
User Guide
VK410
VK410
Guía del
Usuario
Copyright©2014 LG Electronics, Inc. All rights reserved.
LG and the LG logo are registered trademarks of LG Corp.
All other trademarks are the property of their respective
owners.

1
Important Customer Information
Before you begin
Before reading this user guide and getting started, please review the
separate Product Safety and Warranty Information guide for important
product safety and warranty information about your device.

2
Important Customer Information...............................................1
Table of Contents .......................................................................2
The Basics ...................................................................................5
Tablet Overview .................................................................................................... 5
Help ....................................................................................................................... 8
Non-Removable Battery ...................................................................................... 9
Home Screen .......................................................................................................16
Notifications .......................................................................................................20
Plug & Pop ..........................................................................................................28
Capturing a Screenshot .....................................................................................28
Google Account Setup ......................................................................................29
Entering Text .......................................................................................................30
Connecting to Networks and Devices ................................... 33
Connecting to Networks and Devices ..............................................................33
Bluetooth .............................................................................................................34
SmartShare .........................................................................................................35
PC connections with a USB cable ....................................................................36
Web ........................................................................................... 38
Chrome ................................................................................................................38
Communication ....................................................................... 42
Contacts ..............................................................................................................42
Email ....................................................................................................................43
Gmail ...................................................................................................................45
Hangouts .............................................................................................................50
Entertainment .......................................................................... 52
Camera ................................................................................................................52
Video Camera ..................................................................................................... 57
Gallery .................................................................................................................60
Videos ...................................................................................................................61
Music ...................................................................................................................62
Play Store ............................................................................................................64
YouTube™ ............................................................................................................ 67
Table of Contents

3
Table of Contents
Tools .......................................................................................... 68
QPair ...................................................................................................................68
QSlide .................................................................................................................. 69
QuickMemo ......................................................................................................... 71
QuickRemote ...................................................................................................... 72
QuickTranslator .................................................................................................. 74
Voice Mate .......................................................................................................... 75
Alarm/Clock ........................................................................................................ 76
Calculator ............................................................................................................ 77
Calendar .............................................................................................................. 77
File Manager ....................................................................................................... 79
Maps ....................................................................................................................80
Weather ...............................................................................................................80
Voice Recorder ....................................................................................................81
Application Manager ..........................................................................................82
POLARIS Office 5 .............................................................................................83
Google+ ...............................................................................................................84
Voice Search .......................................................................................................84
Settings .................................................................................... 85
Specifications .........................................................................104
Safety Information ........................................................................................... 105
Safety .......................................................................................105
Care and Maintenance ..................................................................................... 108
Consumer Information on SAR ........................................................................117
Caution:
Avoid potential hearing loss ............................................................................. 118
TIA Safety Information .................................................................................... 120
FDA Consumer Update ................................................................................... 123
Driving ................................................................................................................ 131

4Table of Contents
Tablet software update ..........................................................132
Troubleshooting ......................................................................134
LIMITED WARRANTY STATEMENT ....................................135
Index ........................................................................................139
5
The Basics
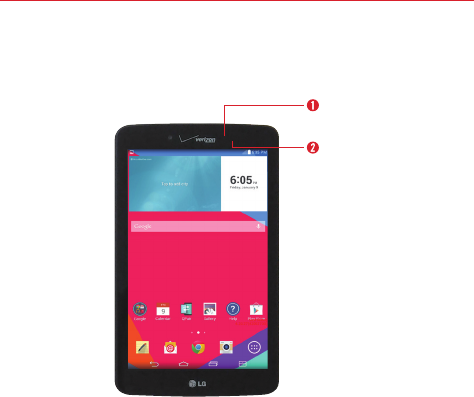
Tablet Overview
Front View
Ambient light
sensor
Front-facing camera
NOTES • All screen shots in this guide are simulated. Actual displays may vary.
• Instructions to perform tasks in this guide are based on the default settings and may
change depending on the mode and software version on your tablet.
1. Front-facing camera Use to take pictures and record videos of yourself.
You can also use this for video chatting. Keep it clean for optimal
performance.
2. Ambient light sensor Measures the surrounding light and adjusts the
LCD brightness to provide a vivid screen.
WARNING! Placing a heavy object on the tablet or sitting on it can damage the LCD and
touchscreen functions. Do not cover the ambient light sensor with a protective film.
This could cause the sensor to malfunction.
6The Basics
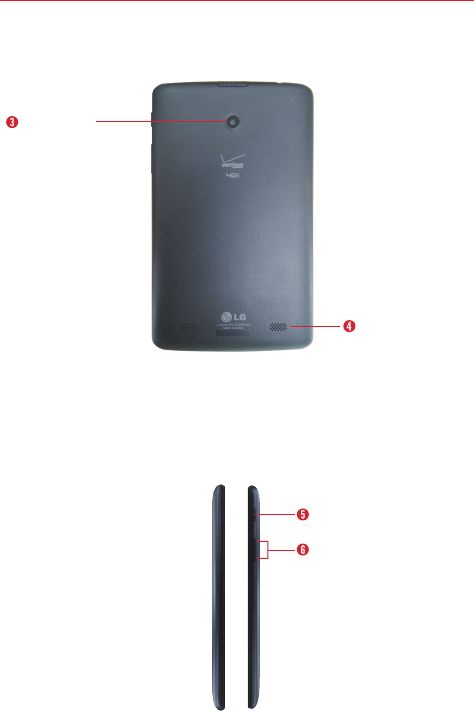
Rear View
Rear-facing
camera
Speakers
3. Rear-facing camera Use to take photos and record videos. Keep it clean
for optimal performance.
4. Speakers Use to listen to the audio from the selected function (e.g.,
music, videos, sound clips, etc.).
Side Views
Volume keys
Power/Lock key
7
The Basics
5. Power/Lock key Press to lock/unlock the screen. Press and hold to turn
the tablet on/off, restart it, activate/deactivate airplane mode, and change
the sound settings.
6. Volume keys Allow you to adjust the media volumes. Press and hold
both keys at the same time to access the QuickMemo feature.
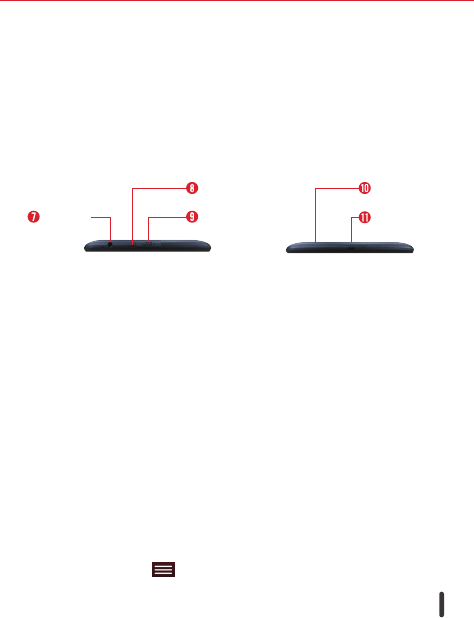
Top and Bottom Views
Infrared
(IR) LED
Microphone
SIM card /
microSD card slot
Headset
jack
Charging
port
Top Bottom
7. Headset jack Allows you to plug in an optional listening accessory, such
as headphones to listen to music.
8. Infrared (IR) LED Used as a sensor for the QuickRemote app.
9. SIM card / microSD card slot Allows you to insert your SIM card and a
microSD card. A valid SIM card is required to have access to the mobile
network. Insert a microSD card to store your personal data files (e.g.,
music, videos, photos, etc.).
10. Microphone Records your voice and is used for voice-activated
functions.
NOTE Make sure that the microphone is not blocked when recording a video or audio clip.
11. Charging port Allows you to connect the tablet and the USB Cable for
use with the Charger Adapter, your PC, or other compatible
accessories.
TIPS! • Tap the Menu key (touch key located at the bottom of the touchscreen)
whenever you open an application to check the options that are available for that app.
• If the device freezes up and stops working, press and hold the Power/Lock key (on
the right side of the tablet) for about 6 seconds until the screen turns off. Wait a few
seconds, then turn the tablet back on.
8The Basics
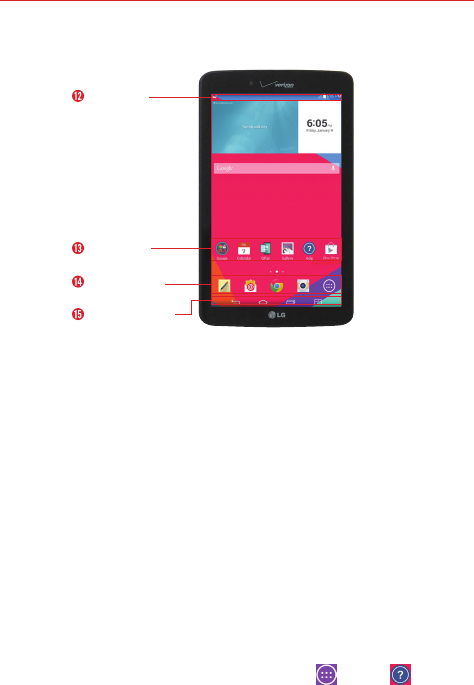
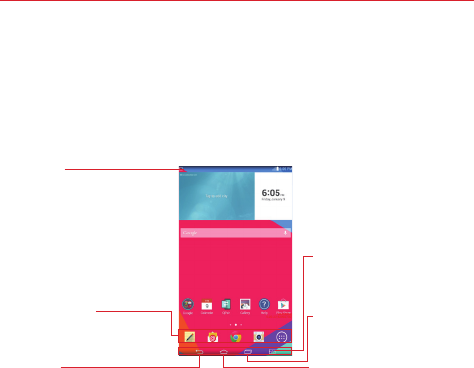
Home screen overview
Application
icons
Quick Access
Bar
Touch keys bar
Status Bar
12. Status bar Shows device status information, including the time, Wi-Fi
signal strength, battery status, and notification icons.
13. Application icon Tap an icon (application, widget, folder, etc.) to open
and use it.
14. Quick Access Bar Provides quick one-touch access to the functions you
use most often. The icons in this bar display on all of the Home screen
canvases.
15. Touch keys bar Provide easy navigation anywhere you are in the
software. They are the Back key, the Home key, and the Menu key. The
keys on this bar can be changed (see the Display settings menu).
Help
The Help application allows you to quickly and conveniently view
information about your tablet, including basic definitions, How-to videos,
icon glossary, user guide, and more.
To access Help, from the Home screen, tap Apps > Help .
9
The Basics
Non-Removable Battery
Your tablet has an internal, rechargeable battery that should be replaced
only by LG or an authorized LG repair center. You should never try to open
or take apart this tablet yourself. Opening the tablet can cause damage that
will void your warranty.
Charging your tablet
A rechargeable battery is used to power your tablet. Charge the battery
using the USB cable (power cord) and the charger (power outlet adapter)
included with your tablet. Make sure to fully charge the battery before
using your tablet for the first time.
WARNING! If the touchscreen won't function while the tablet’s in the process of charging, this
may be due to an unstable power supply. If this occurs, disconnect the USB Cable
from the tablet or unplug the Charger from the power outlet.
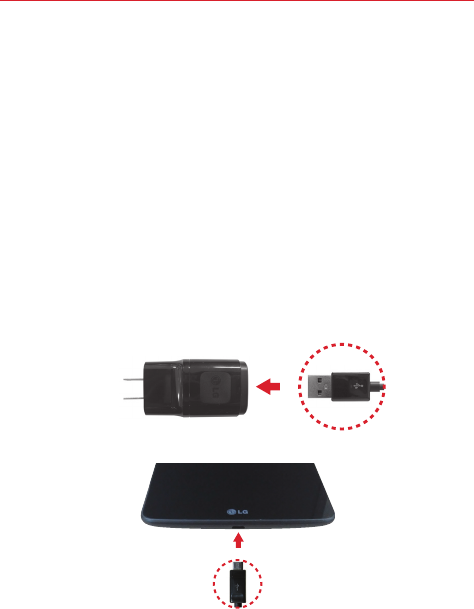
1. Connect the USB cable to the charging head.
USB CableCharging Head
2. Insert the other end of the USB cable into the charging port.
USB Cable
3. Plug the charger into an electrical outlet.
TIP! Use only an approved charging accessory to charge your tablet. Improper handling of the
charging port, as well as the use of an incompatible charger, may cause damage to your
tablet and void the warranty.
10 The Basics
Optimizing Battery Life
You can extend your battery’s life between charges by turning off features
that you don’t need to run constantly in the background. You can also
monitor how applications and system resources consume battery power.
To extend the life of your battery
4 Turn off radio communications that you aren’t using, such as Wi-Fi,
Bluetooth, or GPS.
4 Turn off automatic syncing for Gmail™, Calendar, Contacts, and other
apps.
4 Some apps you’ve downloaded may consume high amounts of battery
power. While using your downloaded apps, check the battery charge
level and monitor the battery usage.
4 Lower the screen brightness setting and set a shorter screen timeout.
NOTE Allowing other devices to use your tablet's hotspot connection will also drain your
battery more quickly.
To view the battery charge level
1. From the Home screen, tap Apps (in the Quick Access Bar) >
Settings > About tablet > Battery.
NOTE Settings are displayed in a split-screen format with the menus on the left and
corresponding selections on the right.
2. The battery status (charging or discharging) and percent of remaining
charge are displayed at the top right side of the screen.
To monitor and control what uses the battery
1. From the Home screen, tap Apps (in the Quick Access Bar) >
Settings > About tablet > Battery > Battery use.
2. The right side of the screen displays battery usage details and includes a
usage graph as well as a list of apps or services using battery power
from greatest amount to least.
11
The Basics
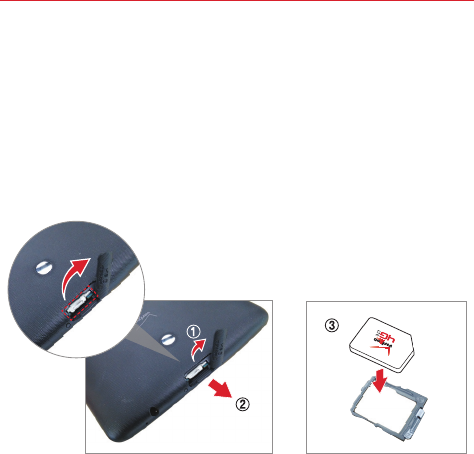
Installing the SIM card*
NOTE If not already inserted, follow the instructions below to insert your 4G LTE SIM card.
1. To install the SIM card, locate and open the cover to the slot and gently
pull out the SIM card tray.
NOTE There are two slots underneath the cover (the other slot is for a microSD card).
2. Insert the 4G LTE SIM card into the tray with the Verizon logo face up.
Push the tray back into the slot until it “clicks” into place and close the
cover.
* A Subscriber Identity Module (SIM Card) is a “smartcard” that houses personal
information, such as your mobile phone number, calling plan, and account
information, such as contacts, text messages, and call history. The Verizon Wireless
4G LTE SIM Card is compatible with any Verizon Wireless 4G LTE certified device.
The 4G LTE SIM Card can move from one device to another and your wireless
service will support the services that are compatible with your new device and
service plan. To see which devices are compatible with the Verizon Wireless 4G LTE
SIM Card, visit verizonwireless.com/certifieddevice.
12 The Basics
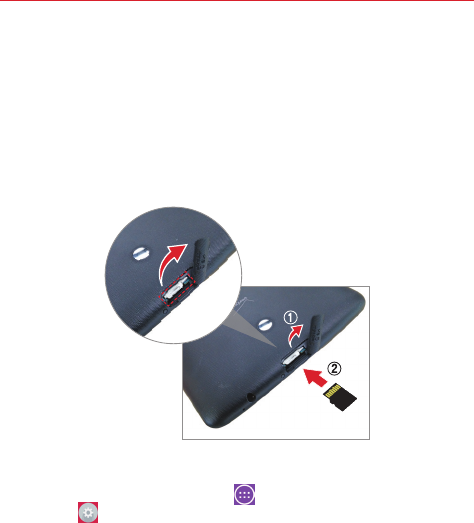
Installing & Removing the microSD Card
Your tablet supports a removable memory card (sold separately).
1. To install a microSD card, locate and open the cover to the slot.
NOTE There are two slots underneath the cover (the other slot is for a SIM card; note the tray).
2. Position the microSD card with the gold strips facing towards the back
of the tablet. Slide the microSD card into the slot until it “clicks” into
place and replace the cover.
Removing your microSD Card
1. From the Home screen, tap Apps (in the Quick Access Bar) >
Settings > Storage > Unmount SD card.
NOTE Settings are displayed in a split-screen format with the menus on the left and
corresponding selections on the right.
2. Push the microSD card inward until the card “clicks” and carefully slide
the card out of the slot and replace the cover.
NOTE The card should pop partially out of the slot.
WARNING! Do not remove the microSD card without unmounting it first. Otherwise, it may
damage the microSD card as well as your tablet, and the data stored on the microSD
card may be corrupted.
13
The Basics
Formatting the microSD card
WARNING! All of the files stored on your microSD card are deleted when you format the card.
Back up any data stored on it before formatting.
1. From the Home screen, tap Apps > Settings > Storage.
2. Tap Erase SD card (twice).
3. If you set an unlock pattern, enter it, then tap Erase everything. The
card will then be formatted and ready to use.
Powering Your Tablet On/Off
It’s important to fully charge the battery before turning on your tablet.
Turning the tablet on
4 Press and hold the Power/Lock key on the right side of the tablet for a
couple of seconds until the screen turns on.
Turning the tablet off
1. Press and hold the Power/Lock key on the right side of the tablet until
the Tablet options menu appears.
2. Tap Power off in the Tablet options menu.
3. Tap OK to confirm that you want to turn off the tablet.
NOTE When the screen is dark due to time-out, press and hold the Power/Lock key until an
advisory message is displayed. Keep pressing the key and the tablet will automatically
turn itself off without needing to use the Tablet options menu.
Touchscreen
Your touchscreen provides an excellent way to interact with and use your
Android™ device. With the touch of your finger, you can download and use
available applications, make menu selections, and access data saved to
your tablet.
The following terms are used for describing the different available actions
using the touchscreen:

14 The Basics
Tap or touch
A single finger tap selects items, links, shortcuts, and letters on the
on-screen keyboard.
NOTES • To select an item, tap the center of the icon.
• Don't press too hard; the touchscreen is sensitive enough to pick up a light, yet firm
touch.
• Use the tip of your finger to touch the option you want. Be careful not to touch any
other icons.
Touch and hold
Touch and hold an item on the screen by touching it and not lifting your
finger until an action occurs. For example, to open a contact’s available
options, touch and hold the contact in the Contacts list until the context
menu opens.
Drag
Touch and hold an item for a moment and then, without lifting your finger,
move your finger on the screen until you reach the target position. For
example, you can drag items on the Home screen to reposition them.
Swipe, slide, or flick
Move your finger quickly across the surface of the screen, without pausing
when you first touch it (so you don’t drag an item instead). For example,
you can browse through the different Home screens by swiping to the left
or right, slide the screen up or down to scroll through a list, or remove an
application from the Recent Apps screen by flicking its graphic off the
screen.
Double-tap
Tap the screen twice quickly to zoom, highlight text, or turn the screen on/
off. For example, quickly double-tap a section of a webpage to adjust that
section to fit the width of the screen and zoom in and out when viewing a
picture and when using Maps. Double-tap a word to highlight it. Double-tap
can also activate the KnockON feature to turn the touchscreen on or off.

15
The Basics
Pinch-to-zoom
Use your index finger and thumb in a pinching motion (to zoom out) or
spreading motion (to zoom in) when using Chrome, a map, photos, the rear
camera lens, the Contacts list, the Favorites list, the Groups list, a music
list, and Polaris Office 5 documents. Spread apart to make screen
information larger (easier to see and read), or pinch together to view more
area and information. The pinch gesture also changes the Home screen.
Pinch in on the Home screen to change to mini canvas view, then spread
apart to return to the normal Home screen view. Spread apart on the
normal Home screen to hide all of your Home screen items, then pinch in
to redisplay them.
Rotate the screen
From many apps and menus, the orientation of the screen adjusts to the
device’s physical orientation. You can deactivate this function in the Display
settings menu.
16 The Basics
Home Screen
Simply swipe your finger to the left or right to view the panels. You can
customize each panel with apps, downloads, widgets and wallpapers.
The Quick Access Bar available at the bottom part of the Home screen
provides easy, one-touch access to the functions you use the most.
Status Bar
Shows device status
information, including the
time, Wi-Fi signal strength,
battery status, and notification
icons.
Quick Access Bar
Provide easy, one-touch
access to the functions used
most often.
Back key
Returns to the previous
screen. Also closes pop-up
items such as menus, dialog
boxes, and the on-screen
keyboard.
Dual Window Key
Home Key
Returns to the Home screen (or
returns to your default Home
screen canvas from any of the
Home screen extension
canvases). Touch and hold it to
display recently used
applications with access to the
Task Manager application.
Recent Apps Key
Customizing the home screen
You can customize your Home screen by adding apps, downloads, widgets
or wallpapers. For more convenience using your tablet, add your favorite
apps and widgets to the Home screen.
To add items on your home screen:
1. Touch and hold the empty part of the Home screen.
2. Tap the Apps or Widgets tab.
3. Drag the desired item to the desired location and lift your finger.
TIP! To add an application icon to the Home screen from the Apps screen, touch and hold the
application you want to add and drag it to the desired location.
TIP! You can add several app icons in a folder. Drop one app icon over another one on a
Home screen, and a folder will be created.
17
The Basics
To remove an item from the home screen:
Touch and hold the icon you want to remove, drag it to , and lift your
finger.
To change the look of your home screen
From the Home screen, touch and hold the Recent Apps Key >
Home screen settings to access the following settings to personalize your
Home screen.
4 Theme: Sets the overall ambiance of the Home screen. Choose Basic or
Marshmallow.
4 Wallpaper: Sets the wallpaper. Choose Gallery, Live Wallpapers,
Multi-photo, Photos, and Wallpaper gallery.
4 Screen swipe effect: Sets how the items on the Home screen canvases
slide from one to the next. Choose from Basic, Breeze, Accordion,
Panorama, Carousel, Layer, and Domino.
4 Allow Home screen looping: Checkmark this setting so that the Home
screen canvases rotate continuously (does not stop at the far left or right
canvas).
4 Allow apps list looping: Checkmark this setting so that the Application
screen canvases rotate continuously (does not stop at the far left or right
right canvas).
4 Portrait view only: Checkmark this setting so that the Home screen is
always displayed in portrait view even though you rotate the tablet to
landscape view.
4 Help: Tap to view help information about customizing the Home screen.
18 The Basics
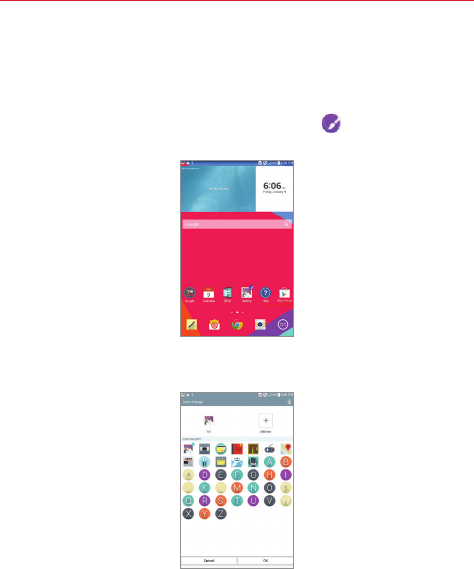
Customizing app icons on the Home screen
You can customize each application icon with images from your Gallery.
1. Touch and hold an application icon until it’s unlocked from its current
position. Then drop it on the screen. The editing icon will appear in
the upper right corner of the application.
2. Tap the application icon again and select the desired icon design and size
from the Theme icon tab. Or select a picture from the Gallery.
19
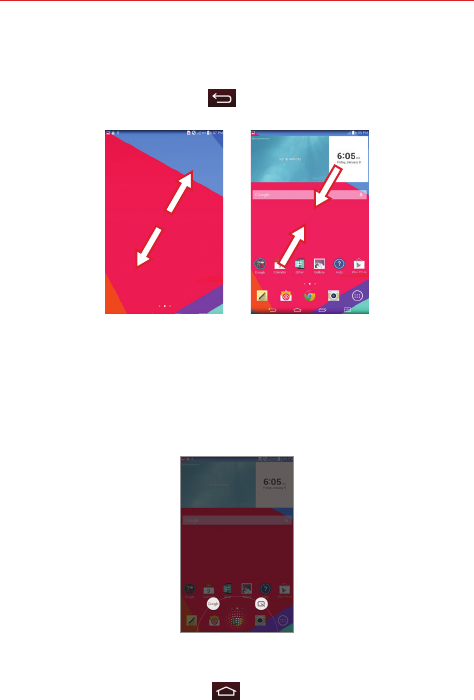
The Basics
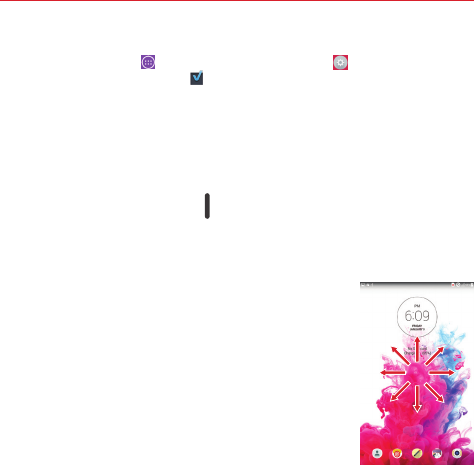
Home screen clean view
You can see the wallpaper without items on the Home screen by pinching
out. Pinch in or tap the Back key to see applications and widgets
again.
Quick access
To view the quick access items, swipe in any direction without releasing
your finger from the front key area and slide your finger to the desired
option. The following options are available: Voice Mate, Google Search, and
QuickMemo.
Returning to recently-used applications
1. Touch and hold the Home key . The screen displays a pop-up
containing the icons of applications you used recently.
20 The Basics
2. Touch an icon to open the application. Or touch the Back key to
return to your previous screen.
Notifications
Notifications alert you to the arrival of new messages, calendar events, and
alarms, as well as to ongoing events, such as downloads, music, etc.
The Status Bar displays your tablet’s current status and pending
notifications. When a notification arrives, its icon appears at the top of the
screen. Pending notification icons appear on the left and system icons (that
indicate things like Wi-Fi or battery strength) are displayed on the right.
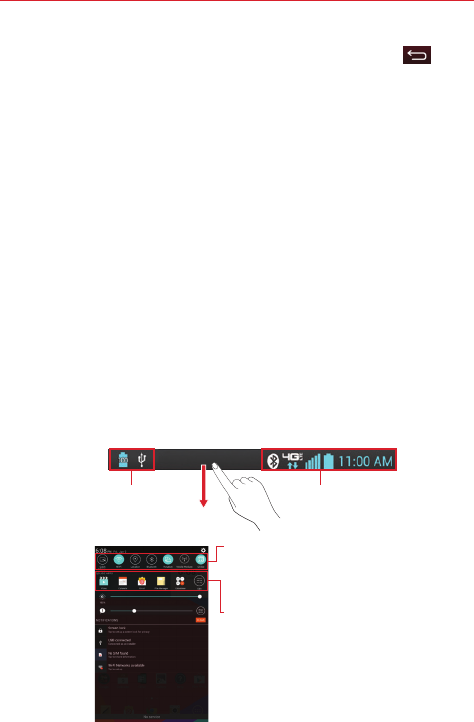
Accessing notifications
Swipe the Status Bar downward to open the Notifications Panel to access
your notifications. To close the Notifications Panel, swipe the bar at the
bottom of the screen upward.
Notifications Panel
The Notifications Panel includes your notifications, the Quick Settings bar,
the QSlide bar.
Pending notifications System notifications
Quick Settings Bar
Swipe to the right or left to scroll
through the list. Tap an icon to
activate/deactivate the feature.
QSlide Apps Bar
Tap to activate a QSlide
Function.
Notifications Panel
21
The Basics
Quick Settings on the Notifications Panel
The Quick Settings are located at the top of the Notifications Panel. Use
them to easily toggle function settings on and off, such as Wi-Fi, Silent
mode, Airplane mode, etc.
NOTE Touch and hold an icon in the Quick Settings Bar to view the function's settings menu.
To rearrange Quick Setting icons on the Notification Panel
Open the Notifications Panel, swipe the Quick Settings to the left, and tap
the Edit icon to customize the Quick Settings Bar. Checkmark icons to
display (or remove the checkmark to hide) it. Drag an icon’s handle to
move it to another position on the bar.
NOTE Changing the checkmarks also reorganizes the icons in the Quick Settings Bar.
QSlide apps on the Notifications Panel
QSlide apps are displayed in a bar on the Notifications Panel below the
Quick Settings Bar. These icons provide a quick, convenient way to
multi-task on the same screen (similar to picture-in-picture on a TV). QSlide
displays a small window on the screen that can be moved, resized, or
made transparent.
NOTE The QSlide function can support up to two windows at the same time.
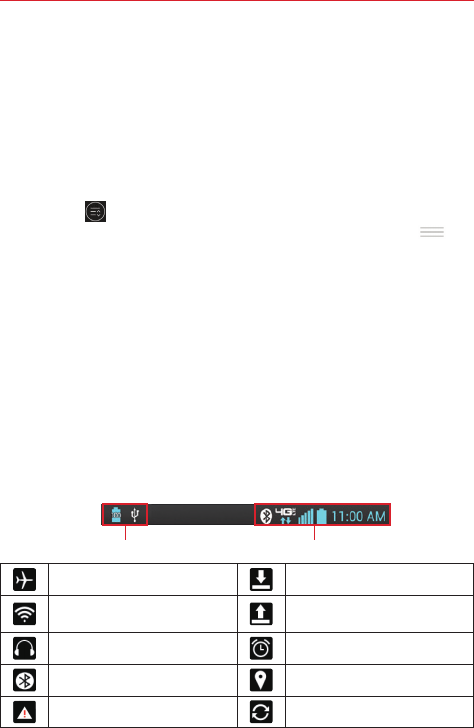
Status Bar Icons
The following icons may appear on the Status Bar.
Notification icons Status icons
Airplane mode is on Downloading data
Connected to a Wi-Fi
network Uploading data
Wired headset connected An alarm is set
Bluetooth is on GPS is on
System warning Data is syncing
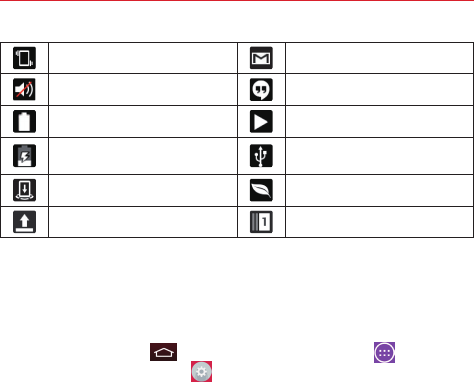
22 The Basics
Vibrate mode is on New Gmail message
Silent mode is on New Hangouts message
Battery fully charged A song is currently playing
Battery is charging Tablet is connected to PC via
USB cable
Content sharing is on Battery saver mode is on
Uploading data Slide Aside is active
NOTE The location of the icons in the Status Bar may differ depending on the features, apps,
and services being used.
Using a Screen Lock
Set a screen lock to secure your tablet from unauthorized (or unintentional)
use. Tap the Home key (in the Touch Key Bar) > Apps (in the
Quick Access Bar) > Settings > Display > Lock screen > Select
screen lock, then select the screen lock you want to use. You are
prompted to create a Backup PIN as a safety measure in case you forget
your screen unlock sequence.
None: No lock screen is enabled so the screen will never be locked from use.
Swipe: A swipe motion in any direction on the touchscreen unlocks the
screen. This is the default Lock screen.
Face Unlock: Face recognition unlocks the screen. The tablet captures your
image to identify you. Keep in mind that Face Unlock is less secure than a
pattern, PIN, or password because it uses generalized shape and dimension
to verify your face.
Pattern: A pattern you draw with your finger unlocks the screen. The first
time you set an unlock pattern, you’ll see a tutorial with instructions on how
to create it. Read the tutorial, then tap Next. Draw your pattern (connect at
least 4 dots), then tap Continue. Draw your pattern again, then tap
Confirm.

23
The Basics
PIN: A number sequence unlocks the screen. Enter a PIN (at least 4 digits),
then tap Continue. Enter your PIN again, then tap OK to confirm it.
Password: An alphanumeric sequence unlocks the screen. Enter a
password (at least 4 characters), then tap Continue. Enter your password
again, then tap OK to confirm it.
From then on, any time you want to unlock the screen, you will need to
perform the unlock action you set (swipe, face recognition, pattern, PIN, or
password) to gain access to it.
CAUTION Create a Google Account before setting a screen lock and remember the Backup PIN
you created so you minimize the risk of needing to perform a hard reset which will
delete your personal data.
When you can’t recall your Pattern, PIN, or Password
If you can’t remember your unlock sequence, tap Forgot pattern? at the
bottom of the screen, then you can unlock the tablet using your Google
Account (if you activated it on the tablet) or your Backup PIN that you
created when you set up the screen lock sequence.
4 Enter your Google Account username and password, then tap Sign in.
4 Enter your Backup PIN, then tap OK.
Unlock sequence attempts
You have 10 attempts to successfully enter your unlock sequence.
4 After 5 attempts, you are prompted to manually enter text to verify that
you are trying to unlock the screen (it's not just random movements
touching the screen).
4 After 10 attempts, the tablet will automatically perform a hard reset and
erase all of the user data stored on the tablet.
NOTE A warning message is displayed after the 9th attempt.
If you didn’t activate a Google Account on the tablet and you forgot your
Backup PIN, you have to perform a hard reset.
CAUTION If you perform a hard reset, all user applications and user data will be deleted from
your tablet's memory.

24 The Basics
Performing a Hard Reset (Factory Reset)
If you forget your lock sequence and your Backup PIN, and you didn’t
activate your Google Account on your device, you’ll have to perform a hard
reset to gain access to your tablet.
WARNING! Performing a hard reset deletes all of your user data, which includes pictures, videos,
and music saved to your internal memory. Please make sure to back up your
information prior to performing a hard reset.
1. Turn the tablet off.
2. Press and hold both the Power/Lock key and Volume Down on the
right side of the tablet at the same time.
3. When you see the System recovery screen, release the keys.
4. Four choices are displayed: Continue reboot, Factory data reset, Wipe
cache, and Safe mode boot. Press either of the Volume keys to
highlight Factory data reset, then press the Power/Lock key .
NOTE Highlight Continue reboot to simply restart your tablet without performing a hard reset.
5. The Factory data reset screen is displayed. Press either of the Volume
keys to highlight Yes or No (Exit), then press the Power/Lock key
to continue.
6. Your device will perform a hard reset.
WARNING! If you perform a hard reset, all user applications, user data, and DRM licenses will be
deleted. Please remember to backup any important data before performing a hard
reset.
Using the KnockON feature
The KnockON feature allows you to double-tap the screen to easily turn
the screen on or off. You can disable this feature in the Display settings.
For the best results, keep the tablet still when using KnockON.
4 Quickly double-tap the center of the screen to turn the screen on.
4 Quickly double-tap the Status Bar, an empty area on the Home screen,
or the Lock screen to turn the screen off.
25
The Basics
NOTE The KnockON feature can be turned off in the Display settings menu. From the Home
screen, tap Apps (in the Quick Access Bar) > Settings > Display > KnockON >
tap the KnockON checkbox .
To unlock the tablet
If you don’t use the tablet for a while, the screen and backlight will turn off
to conserve battery power. To unlock the tablet:
1. Turn the screen on.
4 Press the Power/Lock key on the right side of the tablet.
OR
4 Quickly double-tap the center of the screen (KnockON).
2. The default Lock screen will appear. From the center
of the screen, swipe in any direction to unlock it.
4 To use a Swipe Lock screen shortcut, swipe the
shortcut icon at the bottom of the screen in any
direction. The screen will unlock and launch the
app.
NOTE The default Lock screen simply locks the screen to prevent
unintentional actions. For more security to guard against
unauthorized use, you can set an unlock requirement (such as
a pattern, PIN, password, or face recognition) that will need to
be entered to unlock it. Please refer Using a Screen Lock on
page 22 for more information.
Multiple Users
Only one tablet owner ID can be created, but multiple user IDs can be
added so that others can log in and use the tablet independently. Each user
can configure their own tablet settings, use their own storage space, and
have their own app update privileges.
Tablet owner privileges
4 Only the tablet owner ID can add a new user log in ID and remove user
IDs.
4 Only the tablet owner ID can access and use the microSD card.
26 The Basics
4 The Tablet owner can uninstall any of the user's apps.
Multiple tablet user limitations
4 All users share the same battery, internal memory, and data usage with
all of the other users.
4 The language settings set by one user applies to all of the other users.
4 Each user can configure and use only their own content and data (e.g.,
Home screen settings, Sound settings, etc.).
4 Any user can accept updated app permissions on the behalf of all of the
other users.
4 Alarms will sound at the set time no matter which user activated the
alarm(s).
4 Messages and scheduled calendar events will be sent to notify the
specified user ID only.
4 Once a user starts printing a document using Mobile Print, the print job
will continue even if the user ID is changed.
4 Data transfer, download, multimedia play, and communication services
will stop if the user ID is changed.
To add a new user on your tablet
1. From the Home screen, tap Apps (in the Quick Access Bar) >
Settings > Users > Add user.
2. The set up wizard opens to allow the new user to enter their
information. Tap Set up now and swipe to unlock the screen. Then
follow the set-up steps.
3. After set-up is completed, the new user is logged in. Switch users, if
necessary.
To switch users
1. Press the Power/Lock key to lock the tablet's screen.
2. Press the Power/Lock key again to wake up the tablet's screen.
27
The Basics
3. Tap one of the colored icons at the bottom of the screen to switch to
that user.
NOTE You can change the generic colored icon to an image to identify the user instead. Tap
Users in the Settings menu, tap the users icon, tap the photo icon next to the name,
then follow the prompts to change it.
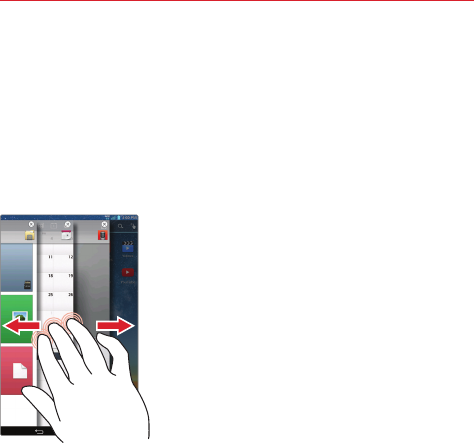
Slide Aside
Slide Aside allows you to quickly switch between three open apps (or
tasks) for convenient multi-tasking.
1. While an application is open, place three
fingers on the screen and slide to the left.
The current screen is saved and the Home
screen appears allowing you to open another
app (you can save up to three apps).
2. To re-open the saved apps, place three
fingers on the screen and slide to the right.
Tap the desired app you want to open.
TIP! The Slide Aside feature does not recognize fewer fingers, additional fingers, or your
palm.
TIP! You must be in an application, not on the Home screen, to use Slide Aside.
Using the Slide Aside feature
After activating the Slide Aside screens you want to use:
4 Place three fingers on the screen and slide them to the right. A
fanned-out portion of each screen is displayed. Tap one to open and
use it.
4 While viewing a Slide Aside screen, use three fingers to slide the
screens to the right or left to scroll through the screens one at a time.
NOTE Slide Aside screens do not scroll circularly. You cannot slide the far right screen to the
left. When you slide it to the right, the fanned-out portions are displayed.
28 The Basics
4 To close a Slide Aside screen, tap the Close icon displayed in the
upper-right corner of a Slide Aside screen in the fanned-out view.
Plug & Pop
The Plug & Pop function allows you to quickly choose apps to use when
plugging in an earphone or On-the-Go device, such as a mouse or
keyboard.
1. Plug an earphone or OTG (On-the-Go) in to the appropriate port on your
tablet.
2. The applications panel will display and you can select an app to run.
NOTE You can edit the apps to display on the panel and set not to show the applications panel.
4 From the Home screen, tap Apps (in the Quick Access Bar) >
Settings > Accessory.
Capturing a Screenshot
Press and hold the Volume Down and the Power/Lock key at the same
time for 2 seconds to capture a screenshot of the current screen.
To view the captured image, tap Apps (in the Quick Access Bar) >
Gallery > Screenshots folder.
TIP! You cannot capture a screen shot of the camera or video camera screens.
Using QuickMemo to capture a screenshot
On the screen you want to capture, drag the Status Bar downward and tap
the QuickMemo icon (in the Quick Settings Bar).
OR
Press and hold both of the Volume keys at the same time.
The Smart screen and Smart video features
The Smart screen and Smart video features keep the device from activating
screen timeout when it detects your eyes looking at the screen. When you
turn these features on, you can set a shorter screen timeout setting to
29
The Basics
conserve your battery power, but still allow you to view a screen for a
longer period of time without having to touch it to keep it activated.
To turn these features on, from the Home screen, tap the touch and hold
the Recent Apps Key (in the Touch Keys Bar) > Settings > Display >
checkmark the Smart screen checkbox and/or the Smart video checkbox.
NOTE The following situations may prevent these features from functioning properly:
• When the device is in the dark or against bright light.
• When the front camera lens cannot detect the location of your eyes.
• When the front camera is used at the same time with other apps.
Google Account Setup
When you first turn on your tablet, you have the opportunity to activate the
network, to sign into your Google Account and select how you want to use
certain Google services.
You must sign into a Google Account to use Gmail, Hangouts, Google
Calendar, and other Google apps; to download apps from the Play Store; to
back up your settings to Google servers; and to take advantage of other
Google services on your tablet.
To set up your Google Account
4 Sign into your Google Account from the prompted set-up screen.
OR
4 From the Home screen, tap Apps (in the Quick Access Bar) >
Settings > Add account > Google.
If you have a Google account, tap Existing, enter your email address and
password, then tap the Continue icon . Otherwise, tap New and enter
the necessary information to create a new Google Account.
Once you’ve set up your Google Account on your tablet, your tablet
automatically synchronizes with your Google Account on the Web.
Your contacts, Gmail messages, Calendar events and other information
from these apps and services on the Web are synchronized with your
tablet. (This will depend on your synchronization settings.)
30 The Basics
After signing in, you can use Gmail™ and take advantage of Google
services on your tablet.
Entering Text
Text is entered using the on-screen keyboard. The on-screen keyboard
appears automatically on the screen when you need to enter text. To
manually display the keyboard, simply tap a text field where you want to
enter text.
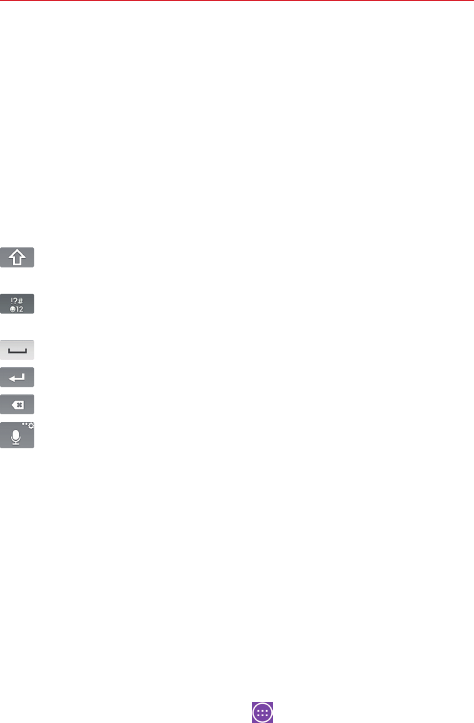
Using the keypad and entering text
Tap once to capitalize the next letter you type. Double-tap for all
caps.
Tap to switch to the numbers and symbols keyboard that also
includes graphics, such as faces and images.
Tap to enter a space.
Tap to create a new line in the message field.
Tap to delete the previous character.
Tap to use the voice input function. You can also touch and hold this
icon to enter text by handwriting, access Clip Tray, and access
Settings. The icon displayed changes depending on the function you
used last.
Entering special characters
The on-screen keyboard allows you to enter special characters (e.g. “á”).
Touch and hold the desired key (for example, the “a” key). A pop-up
appears with additional available characters. Slide your finger over the
character you want, then lift your finger to enter it.
NOTE A symbol at the top right of a key indicates that additional characters are available.
Text input settings
To change your text entry settings and see the dictionary of terms you’ve
used, from the Home screen, tap Apps (in the Quick Access Bar) >
31
The Basics
Settings > Language & input. The following options are available in
the KEYBOARD & INPUT METHODS section.
4 Default - Allows you to choose the default keyboard to use when
entering text and set up your input methods.
4 Google voice typing - Checkmark to select Google voice typing to enter
text. Tap the Settings icon to change the Google voice typing
settings.
Choose input languages: Allows you to select the languages to support
with Google voice typing.
Block offensive words: Checkmark to hide recognized offensive text.
Offline speech recognition: Enables voice input while offline.
4 LG Keyboard - Tap the Settings icon to change the following
settings.
Input language and type: Allows you to select the keyboard language
and type. This is where you can select multiple languages for your
keyboard input.
Word suggestion: Checkmark to enable the suggestion settings you set
which include Auto correction, Suggest next word, and Advanced word
suggestion. You can also clear the history.
Auto capitalization: Checkmark to automatically capitalize the first letter
of each new sentence.
Auto punctuation: Checkmark to automatically insert a period when you
double-tap the Space Key.
Voice input: Checkmark to show the Voice Input Key on the
keyboard.
Path input: Checkmark to enter a word by drawing a path through all of
the letters.
Handwriting: Allows you to set the handwriting style. Set the pen type
(width), color, delay time, and gestures used when your handwriting is
translated to text on your tablet.
32 The Basics
Keyboard gesture: Allows you to activate the Hide keyboard and Split
keyboard functions.
Additional settings: Allows you to set the additional settings that
include Extend keyboard, Vibrate on keypress, Sound on keypress, and
Preview on keypress.
Help: Displays text input settings information.
Languages
You can set only one default language for your tablet, but you can set
multiple languages used for the on-screen keyboard.
To change the default language
4 From the Home screen, tap Apps (in the Quick Access Bar) >
Settings > Language and input > Language > tap the language
you want.
To add additional languages for your keyboard
4 From the Home screen, tap Apps (in the Quick Access Bar) >
Settings > Language and input. Tap the Settings icon to the
right of LG Keyboard, tap Input language and type, then checkmark the
languages you want the keyboard to be able to use.
OR
4 Open the Notifications Panel (when an app that allows text input is
open), tap Choose input method > Setup input methods > the
Settings icon to the right of LG Keyboard > Input language and
type, then checkmark the languages you want to be able to use.
33
Connecting to Networks and Devices
Wi-Fi
With Wi-Fi, you can use high-speed Internet access within the coverage of
the wireless access point (AP). Enjoy wireless Internet using Wi-Fi, without
extra charges.
Connecting to Wi-Fi networks
To use Wi-Fi on your tablet, you need to access a wireless access point or
‘hotspot’. Some access points are open and you can simply connect to
them. Others are hidden or use security features; you must configure your
tablet to be able to connect to them. Turn off Wi-Fi when you’re not using it
to extend the life of your battery.
Turning Wi-Fi on and connecting to a Wi-Fi network
1. From the Home screen, tap Apps > Settings > Wi-Fi.
2. Tap to turn Wi-Fi on and start scanning for available Wi-Fi
networks.
3. Tap Search to see a list of active and in-range Wi-Fi networks.
4 Secured networks are indicated by a lock icon.
4. Touch a network to connect to it.
4 If the network is secured, you are prompted to enter a password or
other credentials. (Ask your network administrator for details)
5. The Status Bar displays icons that indicate your Wi-Fi status.
Connecting to Networks and Devices
34 Connecting to Networks and Devices
Bluetooth
You can use Bluetooth to send data by running a corresponding application,
but not from the Bluetooth menu as on most other mobile phones or
tablets.
NOTE • LG is not responsible for the loss, interception or misuse of data sent or received via
the Bluetooth wireless feature.
• Always ensure that you share and receive data with devices that are trusted and
properly secured. If there are obstacles between the devices, the operating distance
may be reduced.
• Some devices, especially those that are not tested or approved by Bluetooth SIG, may
be incompatible with your device.
Turning on Bluetooth and pairing up your tablet with a Bluetooth
device
You must pair your device with another device before you connect to it.
1. From the Home screen, tap Apps > Settings > Bluetooth.
2. Tap to turn Bluetooth on. You will see the option to make your
tablet visible. Then tap Search for devices to view the devices in range.
3. Choose the device you want to pair with from the list.
Once the paring is successful, your device will connect to the device.
NOTE Your tablet doesn't support Handsfree Profile. Therefore, the use of call features with
some of accessories, such as Bluetooth headsets or Bluetooth-enabled devices, may not
be available for this device.
Send data using the Bluetooth wireless feature
1. Open the item and tap .
OR
Touch and hold the item and select Share.
OR
Open the item and touch and hold the Recent Apps Key > Share.
2. Tap Bluetooth to share via Bluetooth.
NOTE The method for selecting an option may vary by data type.
3. Search for and pair with a Bluetooth-enabled device.
35
Connecting to Networks and Devices
Receive data using the Bluetooth wireless feature
1. From the Home screen, tap Apps > Settings > Bluetooth.
2. Tap to turn Bluetooth on and mark the checkbox next to the tablet
name to make the tablet visible on other devices.
NOTE To select the length of time that your device will be visible, tap the Menu key >
Visibility timeout.
3. Pair the devices and tap Accept when you receive a Bluetooth
Authorization Request to accept the file(s).
SmartShare
You can enjoy SmartShare feature on Gallery, Music, Video, and Polaris
Office.
To send content from your tablet to other devices
1. On the content you want to play or beam, tap .
2. Tap Play or Beam in the dialog box.
4 Play: You can stream your content via TV, Bluetooth speaker, etc.
4 Beam: You can send your content to Bluetooth devices or SmartShare
Beam*-supported LG smartphone or tablets.
* SmartShare Beam quickly transfers multimedia contents through Wi-Fi
Direct.
3. Tap the device to play or receive on the list.
4 If the device is not on the list, make sure on the device that Wi-Fi,
Wi-Fi Direct, or Bluetooth connection is turned on. Then tap Rescan.
4. Tap Send.
36 Connecting to Networks and Devices
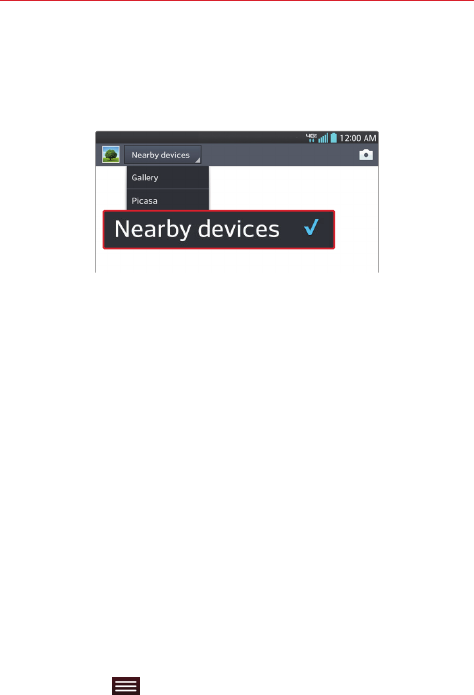
To enjoy content from nearby devices such as a computer or mobile
device on your tablet
1. To connect the nearby devices to your tablet, tap Nearby devices.
<Gallery>
4 Ensure that your tablet and nearby devices are connected to the same
Wi-Fi network.
4 Make sure that the DLNA feature on the nearby device is turned on.
2. Tap the device to connect.
If the device is not on the list, tap Search nearby devices.
After connection, you can enjoy the contents from the nearby device on
your tablet.
PC connections with a USB cable
You can connect your tablet to your PC to charge it, transfer items to the
PC from the tablet and vice versa.
Transferring music, photos and videos using the USB mass storage
mode
1. Connect your tablet to a PC using the USB cable (power cord) included
with your tablet.
2. If you haven't installed the LG Android Platform Driver on your PC, you
will need to manually change the settings. From the Home screen, tap
the Menu key > Settings > PC connection > Select USB
connection method > Media sync (MTP).

37
Connecting to Networks and Devices
3. You can now view the mass storage content on your PC and transfer the
files.
Synchronize with Windows Media Player
Ensure that Windows Media Player is installed on your PC.
1. Use the USB cable to connect the tablet to a PC on which Windows
Media Player has been installed.
2. Select the Media sync (MTP) option.
3. When connected, a pop-up window will appear on the PC. Select the
Windows Media Player option to synchronize music files.
4. Edit or enter your device’s name in the pop-up window (if necessary).
5. Select and drag music files to the sync list.
6. Start synchronization.
4 The following requirements must be satisfied to synchronize with
Windows Media Player.
Items Requirement
OS Microsoft Windows XP SP2, Vista or higher
Window Media Player version Windows Media Player 10 or higher
4 If the Windows Media Player version is older than 10, install version 10
or newer.
38
Chrome
The Chrome app allows you to access the Internet from your tablet.
Access and selections within this feature are dependent upon your service
provider. For specific information on Internet access through your tablet,
contact your service provider.
NOTES • You may incur additional charges for accessing the web and downloading media. For
details, contact your service provider.
• Chrome may differ from this user guide due to updates via Play Store.
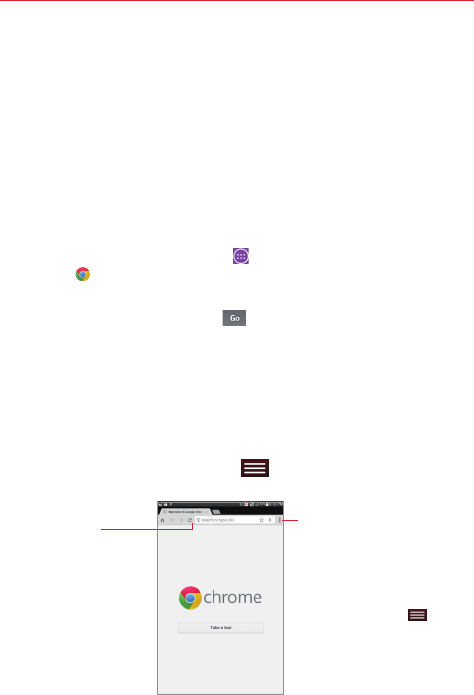
Viewing webpages
1. From the Home screen, tap Apps (in the Quick Access Bar) >
Chrome or tap the Chrome icon directly on the Quick Access Bar.
2. Tap the URL input field to access a webpage. Enter the web address
(URL) of the web page, then tap on the on-screen keyboard.
4 As you begin entering text, suggestions appear below the address bar
and can include your previous searches (search graphic), related
bookmarks (star graphic), related browsing history sites (clock graphic),
and related sites (globe graphic). Tap any of these to go directly to that
site.
4 You can change the search engine for your searches. Open Chrome
application, then tap the Menu key (in the Touch Keys Bar) >
Settings > Search engine. Tap the search engine you want to use.
URL Input Field
(address bar)
Tap here to enter a web
address for the web page
you want to access.
Chrome Menu Icon
Tap here to access New tab,
New incognito tab, Bookmarks,
Other devices, History, Find
in page, Request desktop,
Settings, and Help.
NOTE This is the same as
tapping the Menu key in
the Touch Keys Bar.
Web
39
Web
Search within a webpage
NOTE You can also tap the Chrome Menu options icon (in the upper-right corner of the tab),
then tap Find in page.
1. While viewing the page, tap the Menu key (in the Touch Keys Bar),
then tap Find in page.
2. Type the text you’re looking for in the find bar at the top of the screen.
Matches are highlighted on the page (current match in orange and other
found matches in yellow).
4 The find bar displays the total number of matches. Tap the up and
down arrows to the right of the find bar to go to each match.
4 Found matches are also indicated in the scroll column along the right
side of the screen. Tap any of the highlights to jump directly to that
match.
Searching the web by voice
Tap the address field, tap the Microphone icon , say a keyword, then
tap one of the search results that appear.
Syncing with other devices
When you are logged in with the same Google Account on other devices,
you can sync them to be able to access your open tabs and bookmarks on
your tablet.
To view tabs you opened on other devices, tap the Menu key (in the
Touch Keys Bar) > Other devices. You must be signed in to the same
Google Account on all of the devices. Select a webpage to open.
Adding and viewing bookmarks
To add bookmarks, while viewing the page you want to bookmark, tap the
Bookmark icon in the URL bar.
To open a bookmarked webpage, tap the Menu key (in the Touch
Keys Bar) > Bookmarks and select the desired page.
NOTE The Bookmark filepath is displayed at the top of the bookmark screen. If necessary tap
Mobile bookmarks to view your bookmarked pages.
40 Web
Browse with tabs
Your device displays webpages in a tab format (they look like file folder
tabs) allowing you to easily browse several webpages simultaneously.
Create multiple tabs for the sites you want, then tap the tabs (at the top of
the screen) to quickly and easily switch between them.
Create a new tab
From the Chrome app, tap the Menu key (in the Touch Keys Bar),
then tap New tab (or New incognito tab). OR, tap the New tab icon in
the upper-left corner of the browser.
The New Tab page
Use the three options (located at the bottom of the screen) to help you
open the page that you want quickly.
4 Most Visited Snapshots of the webpages that you visit the most are
shown here. Just tap a snapshot to visit the site using the new tab you
created. Touch and hold a snapshot to open a Context menu to access
Open in new tab, Open in incognito tab, and Remove.
4 Bookmarks Icons for sites that you’ve bookmarked are listed here. Tap a
bookmark icon to visit the site using the new tab you created. Touch and
hold a bookmark to open a Context menu to access Open in new tab,
Open in incognito tab, Edit bookmark, Delete bookmark, or Add to home
screen.
NOTE The Bookmark filepath is displayed at the top of the bookmark screen. If necessary tap
Mobile bookmarks to view your bookmarked pages.
4 Other devices Chrome tabs that are opened on other devices are shown
here. Tap a page icon to open the same tab on your tablet. You must be
signed in to Chrome to sync your open tabs across devices.
NOTE When you edit items in the Most Visited and Bookmarks options, it can take up to 15
seconds for open tabs to refresh on other devices.
41
Web
Download files
1. Touch and hold a download link.
2. In the Context menu that appears, tap Save link.
To view downloaded files:
From the Apps screen (or the Home screen), tap Downloads .
4 To open a downloaded file, tap it. To complete the open download
request, tap HTML Viewer or Print, then tap Always or Just once.
4 To view earlier downloads, tap the heading date you want to view.
4 To share downloads, tap the Share icon at the top of the screen,
checkmark the ones to share, then tap Share and choose a sharing
method from the list.
4 To delete downloads, tap the Delete icon at the top of the screen,
checkmark the ones to delete, tap Delete, then Yes to confirm.
4 Tap Size or Date, at the top left of the screen, to switch the download
file sort criteria.
Chrome Settings
To access the settings specific to the Chrome app:
1. From the Chrome app, tap the Menu key (in the Touch Keys Bar).
2. Tap Settings.
3. Tap the setting you want.
The Basics section includes your Google Account, Search engine, Autofill
forms, and Save passwords. The Advanced section includes Privacy,
Accessibility, Content settings, Bandwidth management, and About
Chrome.
42
Contacts
You can add contacts on your tablet and synchronize them with the
contacts in your Google Account or other accounts that support syncing
contacts.
Searching for a contact
1. From the Home screen, tap Apps (in the Quick Access Bar), >
Contacts to open your contacts.
2. Tap the Search contacts box and enter the contact name using the
on-screen keyboard. You can also tap a letter along the left side of the
screen to access names starting with the chosen letter.
Adding a new contact
1. From the Home screen, tap Apps (in the Quick Access Bar), >
Contacts .
2. Tap the New icon (in the upper-right corner of the screen) to add a
new contact and select the desired account (if applicable).
3. If you want to add a picture to identify the contact, tap the Photo icon
. Choose Take photo (to take a picture using the camera) or Select
from Gallery (to browse for and select an image).
4. Enter the Contact's name. Tap the More icon to enter more specific
name information.
5. Enter all of the details for your contact.
6. Tap Save to save the contact entry.
Favorite Contacts
To add a contact to your favorites
1. From the Home screen, tap Apps (in the Quick Access Bar), >
Contacts to open your contacts.
2. Tap a contact to view its details.
Communication
43
Communication
3. Tap the star icon to the right of the contact’s name. The star turns
gold and the contact is added to your favorites.
To remove a contact from your favorites list
1. From the Home screen, tap Apps (in the Quick Access Bar), >
Contacts to open your contacts.
2. Tap the Favorites tab (at the top of the screen) to view your favorite
contacts.
3. Tap a contact to view its details.
4. Tap the gold star in the upper-right corner of the screen. The star turns
grey and the contact is removed from your favorites.
Creating a group
1. From the Home screen, tap Apps (in the Quick Access Bar), >
Contacts to open your contacts.
2. Tap the Groups tab (at the top of the screen), then tap the Groups icon
.
3. Select the account where you want to create the group and enter a
group name.
4. Tap Add members and select the contacts you want to add, then tap
Add.
5. Tap Save to save the group.
NOTE If you delete a group, the contacts assigned to that group will not be lost. They will
remain in your contacts.
Email
You can use the Email app to read emails from services like Yahoo!, MSN,
and AOL. The Email app supports the following account types: POP3,
IMAP, and Exchange.
Your service provider or system administrator can provide you with the
account settings you need.
44 Communication
Managing an email account
The first time you open the Email app, a set-up wizard opens to help you to
set up an email account.
After the initial setup, the contents of your inbox are displayed. If you’ve
added more than one account, you can switch between your accounts.
To add another email account:
Open Email , then tap the Menu key (in the Touch Keys Bar) >
Settings > Add account icon .
To change an email account’s settings:
Open Email , then tap the Menu key (in the Touch Keys Bar) >
Settings > General settings to adjust the settings that affect all accounts.
Or tap an individual account to adjust settings only for that account.
To delete an email account:
Open Email , then tap the Menu key (in the Touch Keys Bar) >
Settings > Menu key (in the Touch Keys Bar) > Remove account >
tap the account you want to delete > Remove > Yes.
Working with account folders
Open Email tap the Menu key (in the Touch Keys Bar), then tap
Folders. Each account has an Inbox, Outbox, Sent, and Drafts folder.
Depending on the features supported by your account’s service provider,
you may have additional folders.
Composing and sending email
To compose and send a message:
1. While in the Email app, tap the Compose icon .
2. Enter an address for the message’s intended recipient. As you enter
text, matching addresses will be proposed from your Contacts. Separate
multiple addresses using semicolons.
45
Communication
3. Tap the Menu key (in the Touch Keys Bar) to Cc/Bcc a contact or
tap the Attach icon to attach files, if necessary.
4. Enter the subject and your message.
5. Tap the Send icon to send the message.
If you aren’t connected to a network, for example, if you’re working in
airplane mode, the messages that you send will be stored in your
Outbox folder until you connect to a network again. If it contains any
pending messages, the Outbox will be displayed on the Accounts
screen.
TIP! When a new email arrives in your Inbox, you will be notified by a sound or vibration. Tap
the email notification to stop receiving notifications.
Gmail
When you open the Gmail app, the most recent conversations are
displayed at the top of your Inbox list. All of your conversations are
displayed in your Inbox unless you delete, archive, or filter them.
To open the Gmail app
From the Home screen, tap Apps (in the Quick Access Bar) > Gmail .
Your Gmail Inbox
The current Google Account is displayed at the top of the Inbox. If you have
more than one account, you can switch accounts to view the messages in
each Inbox. Simply tap the Accounts & labels icon at the top left corner to
select another account or label to display.
Conversations with new messages are displayed with bold subject lines. To
read a message in a conversation, tap its subject line text.
indicates that you were copied on this message.
indicates that this message was sent directly to you.
Gmail Inbox icons
Use the following icons (at the top of the screen) while viewing your Gmail
Inbox:
46 Communication
New message Tap to begin a new Gmail message.
Search Tap to search within your Gmail messages.
Accounts and labels Tap to change to another account or label.
NOTE Drag the screen downward to refresh and check for new email.
Managing your Gmail messages
Tap the letter icon (or contact photo) next to a Gmail message, then you
can tap the Archive icon , Delete icon , Read/Unread icon , Move to
icon , or the Menu icon (Change labels, Add star, Mark important,
Mute, Report spam, and Report phishing) at the top of the screen.
NOTE You can also tap the Favorite icon next to a Gmail message to designate it as a
favorite message.
Navigating in the Gmail app
While viewing your Inbox, swipe the screen up and down to scroll through
the list of messages. The following icons are available at the top right of the
Gmail Inbox:
4 Compose : Tap to start a new Gmail message.
4 Search : Tap to search within the Gmail app.
In addition, while viewing your Inbox you can:
4 Swipe a Gmail message off the screen to the left or right to quickly
and easily archive the message. Tap Undo to restore it to your Inbox.
4 Tap the letter icon (or contact photo) to the left of one or more
messages, then tap the Delete icon to delete it/them. Tap Undo to
restore it/them to your Inbox.
While viewing a message, swipe the screen left and right to scroll through
all of your messages and use the following icons (at the top of the screen):
4 Archive : Tap to send the message to your archive folder.
4 Delete : Tap to delete the message.
4 Unread : Tap to return the message to an unread state.
47
Communication
4 Move to : Tap to move the email to another label.
If you are viewing a message or another label, tap the Back key (in
the Touch Keys Bar) until you return to your Inbox.
Reading Your Messages
4 Tap a conversation that contains the message you want to read.
The conversation opens to the first new (unread) message, or to the first
starred message, if you’ve previously starred a message in the
conversation.
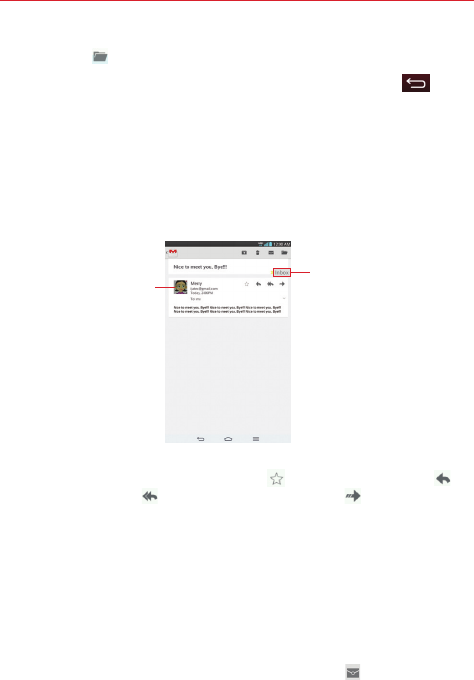
Tap the Contact's
picture to open
Quick Contact.
Tap to set labels
for the message to
help organize your
messages.
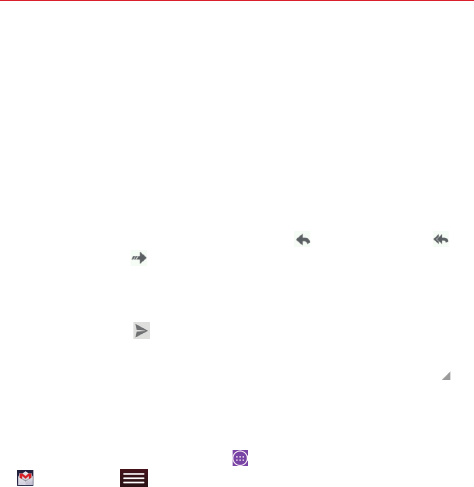
While viewing a message, tap the message action icons on the message
header to access options which include to mark it as a favorite, to
reply to the sender, to reply to all addresses, and to forward the
message to someone else.
To reread a message
When you open a conversation, messages that you’ve already read are
minimized into a tab that indicates the number of hidden messages.
1. From your Gmail Inbox, tap the conversation you want to view.
2. Tap the contact name to open that message.
While reading a message you can tap the Unread icon
(at the top of the
screen) to return a read message to the unread state. For example, to
remind yourself to read it again later.
48 Communication
Composing and Sending a Message
You can compose and send a message to people or groups with Gmail
addresses or other email addresses.
To compose and send a message
1.
From the Home screen, tap Apps
(in the Quick Access Bar) > Gmail
> Compose at the top right corner of the screen.
NOTE If you set up more than one Google Account on your tablet and want to send the
message from a different Google Account, tap the current Google Account, then tap the
account you want to use.
2. Enter a recipient’s address.
As you enter text, matching addresses are offered from your Contacts
list. You can tap a suggested address or continue entering text to enter a
new one.
NOTE Tap +CC/BCC to the right of the recipient address bar to add normal copy or blind copy
recipients, if necessary.
3. Enter a subject for the message in the Subject field.
4. Enter your email text in the Compose email field.
5. Tap the Menu key (in the Touch Keys Bar), then tap Attach picture
or Attach video if you want to add an attachment to your Gmail
message.
NOTE You can also tap to the right of the Subject field to add an attachment to your
message. Tap an attachment type (Drive, Gallery, or Photos), then search for and attach
the file to send with the message.
6. Tap the Send icon at the top right corner of the screen to send your
message.
NOTE If you aren't ready to send the message, tap the Menu key (in the Touch Keys
Bar), then tap Save draft.
49
Communication
Replying to or Forwarding a Message
Continue an email conversation by replying to a message or by forwarding
it without changing the Subject text. Change the Subject text to start a new
conversation.
NOTE The conversation text and previous messages are also included in your reply (or
forwarded) message.
To reply to or forward a message
1. Open the message you want to reply to or forward.
2. On the message header, tap the Reply icon , the Reply all icon , or
the Forward icon .
4 Add others to an ongoing conversation by replying to all and then
adding the new person’s address(es) to the reply.
3. Tap the Send icon at the top right corner of the screen to send your
Gmail message.
NOTE You can change the message action after you've started the message. Simply tap in
the upper-left corner (next to the current message action), then tap the one you want.
For example, if you chose Reply but decide you want to Reply all instead.
Google Account settings
1. From the Home screen, tap Apps (in the Quick Access Bar) > Gmail
> Menu key (in the Touch Keys Bar).
2. Tap Settings.
3. Tap General settings to change the settings for all accounts, including
Archive & delete actions, Swipe to archive, Sender image, Reply all,
Auto-fit messages, Auto-advance, Confirm before deleting, Confirm
before archiving, and Confirm before sending.
NOTE Tap each individual account to change its settings, including Inbox type, Inbox
categories, Notifications, Inbox sound & vibrate, Signature, Vacation responder,
Sync Gmail, Days of mail to sync, Manage labels, Download attachments, and
Images.
50 Communication
Hangouts
The Hangouts app lets you have real-time text conversations with your
friends.
To Open the Hangouts app
4 From the Home screen, tap Apps (in the Quick Access Bar) >
Hangouts .
To sign out of Hangouts
4 From your chatting list, tap Menu (in the Touch Keys Bar) >
Settings > tap your account > Sign out.
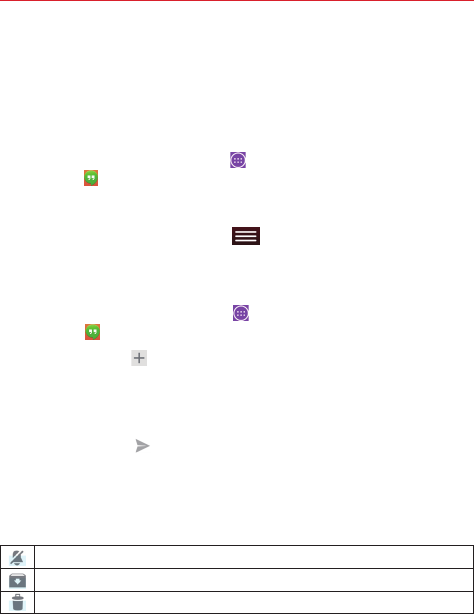
Chatting with Friends
1. From the Home screen, tap Apps (in the Quick Access Bar) >
Hangouts .
2. Tap the New icon to view your contacts list. It includes all of the
Google Accounts you’ve added.
3. Tap the Message field at the bottom of the screen then enter your
message.
4. Tap the Send icon .
Hangouts chatting list
Touch and hold a friend’s name in the chat screen. Use the following icons
at the top of the screen:
Tap to turn notifications off for this friend.
Tap to archive the conversation.
Tap to delete the conversation.
51
Communication
Blocking your Friends
4 To block a friend from exchanging messages with you, tap the friend in
the chatting list. Tap the Menu key (in the Touch Keys Bar) >
People & options. Tap the block option, then tap the Block button to
confirm.
4 To remove a friend from the blocked list, tap the Menu key (in the
Touch Keys Bar) from the chatting list. Tap Settings > tap your account >
Blocked people > Unblock next to the person’s name.
NOTE Once you block a friend, all of your chats with that friend are deleted from the chatting
list.
Hangouts Settings
4 From the chatting list, tap the Menu key (in the Touch Keys Bar) to
choose from Set mood, Invites, Snooze notifications, Archived
Hangouts, Settings, Send feedback, and Help.
4 While chatting, tap the Menu key (in the Touch Keys Bar) to
choose from People & options, New group Hangout, Turn history off,
Archive, Delete, Send feedback, and Help.
52
Camera
The Camera app not only allows you to take high quality pictures and share
them, but also includes many specialized features eliminating the need for
any other camera.
To open the Camera app, from the Home screen tap Apps (in the Quick
Access Bar) > Camera .
TIP! If you’ve set your tablet to use the Swipe unlock method, from the locked screen, simply
drag the Camera upward to automatically open the Camera app.
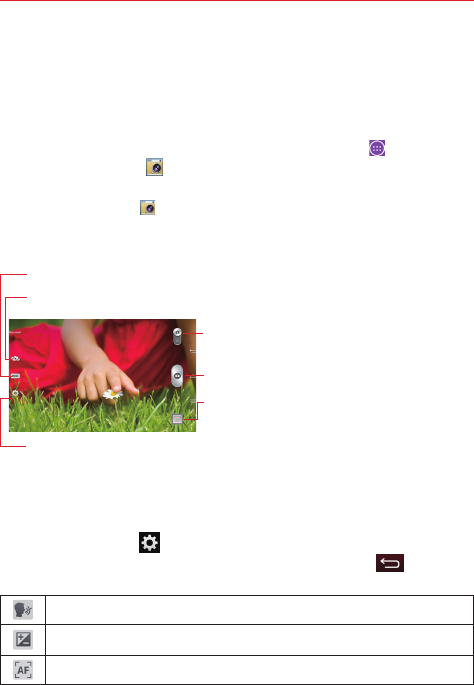
Getting to know the viewfinder
Shot mode – Allows you to choose a shot mode to define how the picture will be taken.
Mode switch – Slide this icon up or down to toggle
between Camera mode and Video mode.
Capture icon – Takes a picture.
Gallery – Tap to view the last photo you captured. This
enables you to access your Gallery and view saved
photos while in camera mode.
Lens swap – Switches between the rear-facing camera and the front–facing camera.
Settings – Opens the camera settings. See Using the advanced settings below.
NOTE Please ensure the camera lens is clean before taking pictures.
Using the advanced settings
Tap the Settings icon in the viewfinder to open the advanced settings.
After changing the setting(s) as you want, tap the Back key (in the
Touch Keys Bar).
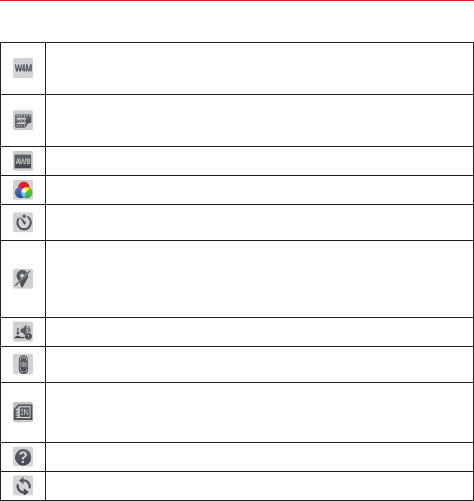
Allows you to take pictures by voice command.
Defines and controls the amount of light entering the lens.
Sets the focus mode. Choose from Auto, Manual, and Face tracking.
Entertainment
53
Entertainment
Sets the photo resolution. If you choose a high resolution, the file size will
increase, which means you will be able to store fewer photos in your
tablet’s memory.
Sets the sensitivity of the camera's light sensor (a higher setting provides
more sensitivity). This is useful in darker conditions when you cannot use
the flash.
Improves color quality in various lighting conditions.
Applies artistic effects to your photos.
Sets a delay after the Capture icon is tapped. This is ideal if you want to be
in the photo.
Activate this feature to use your tablet's location-based services which. tag
your photo(s) with the location. If you upload tagged pictures to a blog that
supports geo-tagging, you can see the pictures displayed on a map.
NOTE This function is only available when GPS is turned on.
Sets a sound to indicate shutter activation.
Sets how the Volume keys function while in Camera mode. Choose Zoom
or Capture.
Sets the storage location (Internal storage or SD card) for your pictures.
NOTE This setting is not available (greyed-out) to guest users signed in to the tablet
or when the SD card is not in the slot.
Opens the help guide to learn about the camera functions and features.
Restores all of the camera settings to their default values.
TIP! • When you exit the Camera app, some settings return to their defaults, such as white
balance, color effect, and timer. Check these before you take your next photo.
• The Settings menu is superimposed over the viewfinder, so when you change photo
color or quality elements, you will see a preview of the changed image behind the
Settings menu.
Taking a photo
1. Open the Camera app.
2. Hold the tablet horizontally and point the lens toward the subject you
want to photograph.
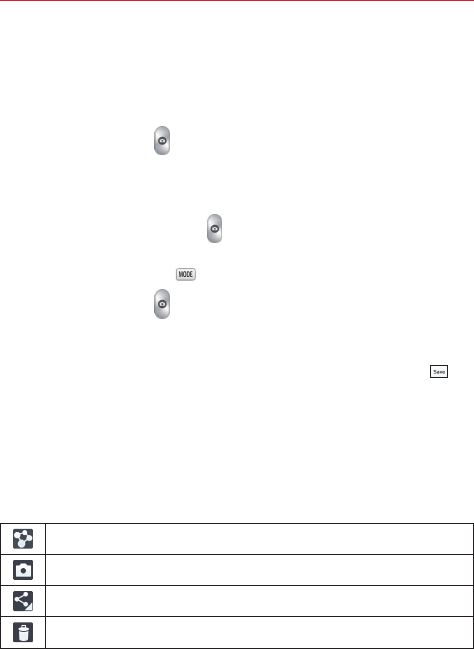
54 Entertainment
3. A focus box will appear in the center of the viewfinder screen. You can
also tap anywhere on the screen to focus on that spot.
4. When the focus box turns green, the camera has focused on your
subject.
5. Tap the Capture icon to take the photo.
Using the Time catch shot mode
Sets the camera to capture missing moments by taking five sequential
pictures before the Capture icon is tapped.
1. Open the Camera app.
2. Tap the Shot Mode icon > Time catch shot.
3. Tap the Capture icon to take a picture.
4. To view the moments just before the picture was taken, tap the image
thumbnail at the bottom of the Camera screen.
5. Select the pictures that you want to keep, then tap the Save icon at
the top of the screen.
Once you’ve taken a photo
Tap the image preview at the bottom of the screen to view the last photo
you took.
NOTE Complete the action by selecting the app to use to view the captured image(s). Tap
either Gallery or Photos, then tap Always or Just once.
Tap to share your photo using the SmartShare function.
Tap to take another photo immediately.
Tap to send your photo to others or share it via social network services.
Tap to delete the photo.
TIP! If you have a social networking account and set it up on your tablet, you can share your
photo with your social networking community.

55
Entertainment
While viewing a photo, tap the screen to illuminate the Touch Keys Bar,
then tap the Menu key to access the following options.
Set image as – Tap to use the photo as a Contact photo, Home screen
wallpaper, Lock screen wallpaper, or Wallpaper.
Move – Tap to move the photo to another album.
Copy – Tap to copy the photo and save it to another album.
Copy to Clip Tray – Tap to copy the photo and store in the Clip Tray.
Rename – Tap to edit the name of the selected photo.
Rotate left - Tap to rotate the picture to the left.
Rotate right - Tap to rotate the picture to the right.
Crop – Tap to crop your photo. Drag the crop box to enclose the photo area
you want to keep.
Edit – Tap to edit the photo. Select Photo studio or Photos to make your
photo edits.
Applies a brightness effect to your photo. (Photo studio)
Applies artistic effects to your photos. (Photo studio)
Applies color effects to your photos. (Photo studio)
Applies additional options to your photos. (Photo studio and Photos)
Rotates the photo. (Photos)
Applies filter effect(s) to your photo. (Photos)
Slideshow – Tap to automatically display a slideshow of all your pictures.
Add location – Tap to add the location information.
Print – Tap to print the picture. Choose to automatically find a printer on
your network, or manually enter one to use.
Details – Tap to view more information about the picture.

56 Entertainment
Viewing your saved photos
You can access your saved photos when in camera mode. Just tap the
image preview at the bottom of the screen. Select the app to use to view
your photos. Tap either Gallery or Photos, then tap Always or Just once.
4 To view more photos, scroll left or right.
4 To zoom in or out, double-tap the screen or place two fingers on the
screen and spread them apart (move your fingers closer together to
zoom out).
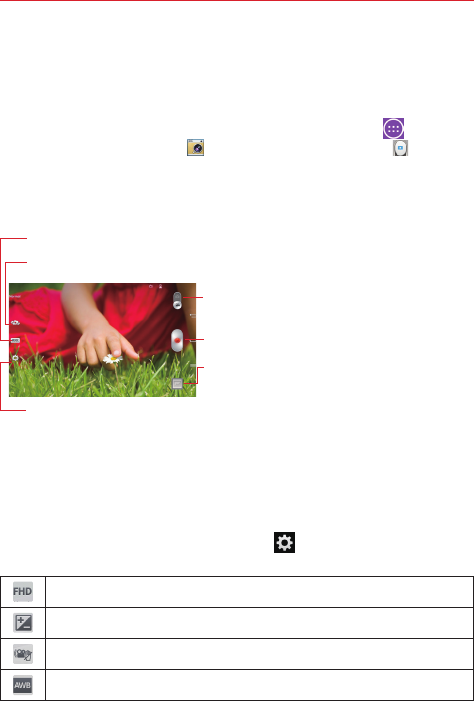
57
Entertainment
Video Camera
The Camera app allows you to change to video camera mode to record
videos.
To open the Video Camera, from the Home screen tap Apps (in the
Quick Access Bar) > Camera . Then slide the Mode switch to toggle
from Camera to Video camera mode.
Getting to know the viewfinder
Shot mode – Allows you to choose a shot mode to define how the picture will be taken.
Mode switch – Slide this icon up or down to toggle
between Camera mode and Video mode.
Capture icon – Takes a picture.
Gallery – Displays the last video you recorded.
Accesses your Gallery to view your saved videos while
in video mode.
Lens swap – Switches between the rear-facing camera and the front–facing camera.
Settings – Opens the camera settings. See Using the advanced settings below.
TIP! When recording a video, place two fingers on the screen and pinch to use the Zoom
function.
NOTE Make sure that the microphone is not blocked when recording a video or audio clip.
Using the advanced settings
Using the viewfinder, tap the Settings icon to open all of the advanced
options.
Sets the recording resolution (size in pixels) of the video you are recording.
Defines and controls the amount of light entering the lens.
Minimizes shaking while recording to improve the video quality.
Improves color quality in various lighting conditions.
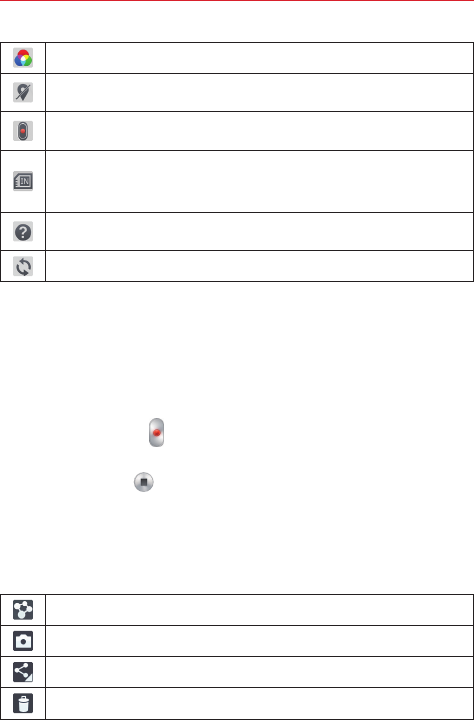
58 Entertainment
Sets a color tone to use for your video.
Activate this feature to use your tablet's location-based services which tag
your videos with their location.
Sets how the Volume keys function while in Video camera mode. Choose
Zoom or Record.
Sets the storage location (Internal storage or SD card) for your pictures.
NOTE This setting is not available (greyed-out) to guest users signed in to the
tablet or when the SD card is not in the slot.
Opens the help guide to learn about the video camera functions and
features.
Restores all of the camera settings to their default values.
Recording a video
1. Open the Camera app and slide the Video mode icon downward.
2. The video camera viewfinder appears on the screen.
3. Hold the tablet horizontally and point the lens toward the subject you
want to capture in your video.
4. Tap the Record icon once to start recording.
5. A timer showing the length of the video will appear.
6. Tap the Stop icon to stop recording.
After recording a video
Tap the video preview at the bottom of the screen to view the last video
you recorded. Tap the screen to display the following icons (at the top of
the screen).
Tap to share your video using the SmartShare function.
Tap to record another video immediately.
Tap to send your video to others or share it via social network services.
Tap to delete the video.
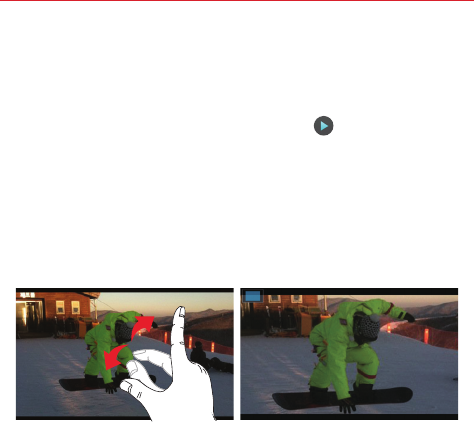
59
Entertainment
Watching your saved videos
1. In the viewfinder, tap the image preview at the bottom of the screen.
2. Your Gallery will appear at the bottom of the screen.
3. Tap the video you want, then tap the Play icon to play it
automatically.
Live Zooming
Live Zooming allows you to zoom in or zoom out on a portion of a video
that is being played to make the desired section appear larger or smaller.
When viewing a video, use your index finger and thumb in a pinching or
spreading motion to zoom in or out.
NOTES • While a video is playing, slide your finger vertically along the left side of the screen to
adjust the screen brightness.
• While a video is playing, slide your finger vertically along the right side of the screen to
adjust the video volume.
• While a video is playing, slide your finger horizontally across the screen to rewind or
fast-forward.
• Do not press too hard; the touchscreen is sensitive enough to pick up a light, but firm
touch.
Adjusting the volume while viewing a video
Use the Volume keys on the right side of the to adjust the volume of a
video while it’s playing.
60 Entertainment
Gallery
You can store multimedia files in your tablet’s internal memory for easy
access to all your multimedia files. Use this app to view multimedia files
like pictures and videos.
From the Home screen, tap Apps (in the Quick Access Bar) > Gallery
. You can also access the Gallery directly from the home screen.
You can manage and share all of your image and video files with the Gallery
app.
NOTES • Some file formats are not supported, depending on the software installed on your
tablet.
• Some files may not play properly, depending on how they are encoded.
Viewing pictures
Launching the Gallery app displays all of your available folders. When
another app, such as Email, saves a picture, the download folder is
automatically created to contain the picture. Likewise, capturing a
screenshot automatically creates the Screenshots folder. Tap a folder to
open it.
Pictures are displayed in order by creation date. Tap a picture to view it in
full-screen. Scroll left or right to view the next or previous image.
Zooming in and out
Use one of the following methods to zoom in on an image:
4 Double-tap anywhere on the screen to zoom in. Double-tap again to
return to full-screen view.
4 Place two finger on the screen and spread them apart to zoom in. Pinch
in to zoom back out.
Playing videos
The Play icon is displayed on all video files. Select a video from the
Gallery app. Select how you want to view it (Photos or Videos), then tap
Always or Just once. Tap the Play icon to play it.
61
Entertainment
Viewing photo and video options
When viewing a photo or video, tap the Menu key (in the Touch Keys
Bar) to access and use the advanced editing options.
Deleting images and videos
4 While viewing your Gallery folders, tap (in the upper-right corner of
the screen) and select the photos and videos you want to delete, then
tap Delete (at the bottom of the screen), then tap Yes to confirm.
4 While viewing a photo or video, tap the Delete icon (in the upper-right
corner of the screen), then tap Yes to confirm.
Setting as wallpaper
When viewing a photo, tap the Menu key (in the Touch Keys Bar) >
Set image as and select Home screen wallpaper, Lock screen wallpaper
or Wallpaper.
NOTES • Some file formats are not supported, depending on the tablet software.
• If the file size exceeds the available memory, an error can occur when you open files.
Videos
Your tablet has a video player that lets you play all of your favorite videos.
To access the video player, from the Home screen tap Apps (in the
Quick Access Bar) > Videos .
Using the Videos app
4 Tap the View type icon to access a drop-down list to set how to
display your video files. Choose from List, Grid, and Folder.
4 Tap the Sort by icon to access a drop-down list to set how to sort
your video files. Choose from Title, Date, Size, and Type.
4 Tap the Share icon to select video file(s) to share.
Playing a video
1. From the Home screen, tap Apps (in the Quick Access Bar) >
Videos .
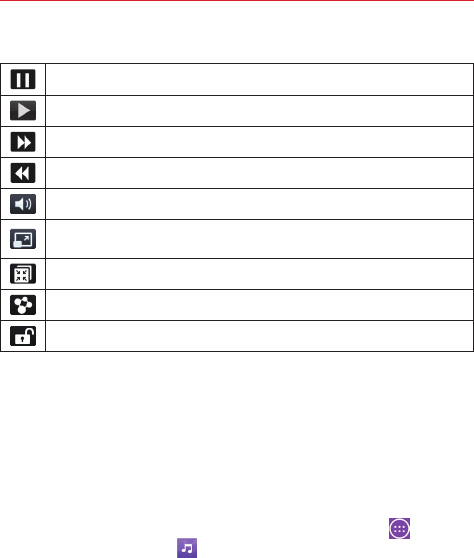
62 Entertainment
2. Select the video you want to play.
Tap to pause video playback.
Tap to resume video playback.
Tap to fast-forward 10 seconds. Touch and hold to fast-forward 3 seconds.
Tap to rewind 10 seconds. Touch and hold to rewind 3 seconds.
Tap to manage the video volume.
Tap to change the aspect ratio (Full screen, Original size, or Best fit) of the
video screen.
Tap to access QSlide and display the video in a small window.
Tap to share your video via the SmartShare function.
Tap to lock the video.
To change the volume while watching a video, press the Volume keys on
the right side of the tablet.
Touch and hold a video in the list to access the following options:
Share, Delete, Trim, and Details.
Music
Your tablet has a music player that lets you play all of your favorite tracks.
To access the music player, from the Home screen, tap Apps (in the
Quick Access Bar) > Music .
Add music files to your tablet
Start by transferring music files to your tablet:
4 Transfer music using Media sync (MTP).
4 Download from the Web.
4 Synchronize your tablet to a computer.
4 Receive files via Bluetooth.
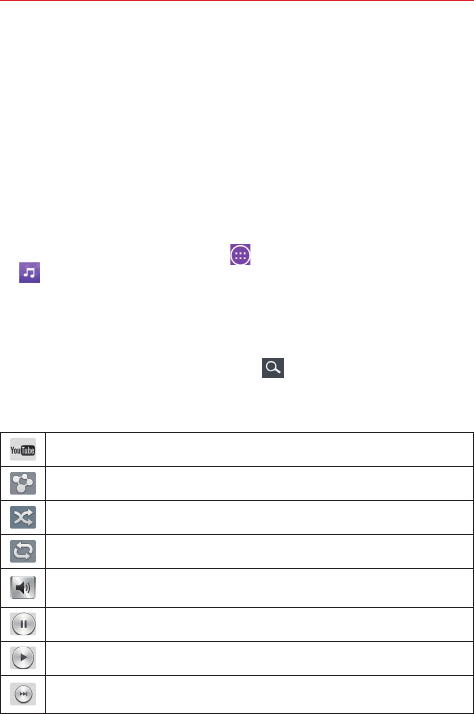
63
Entertainment
Transfer music using Media sync (MTP)
1. Connect the tablet to your PC using the USB Cable.
2. Select the Media sync (MTP) option. Your tablet will appear as another
hard drive on your computer. Click on the drive to view it. Copy the files
from your PC to the drive folder.
3. When you’re finished transferring files, swipe the Status Bar downward
and tap USB connected > Charge tablet. You may now safely unplug
your tablet.
Playing a song
1. From the Home screen, tap Apps (in the Quick Access Bar) > Music
.
2. Tap the Songs tab (Music tabs are displayed along the right side of the
screen).
3. Tap the song you want to play.
TIP! To find a song, you can tap the Search icon at the top of the screen or tap the letter
the song begins with using the alphabet listed along the right side of the screen.
Music player icons
Tap to find the song on YouTube.
Tap to share your music via the SmartShare function.
Tap to set shuffle mode.
Tap to set repeat mode.
Tap to manage the music volume. You can also use the Volume keys on
the right side of the tablet to adjust the volume.
Tap to pause playback.
Tap to resume playback.
Tap to skip to the next track on the album or in the playlist. Touch and hold
to fast-forward 3 seconds.
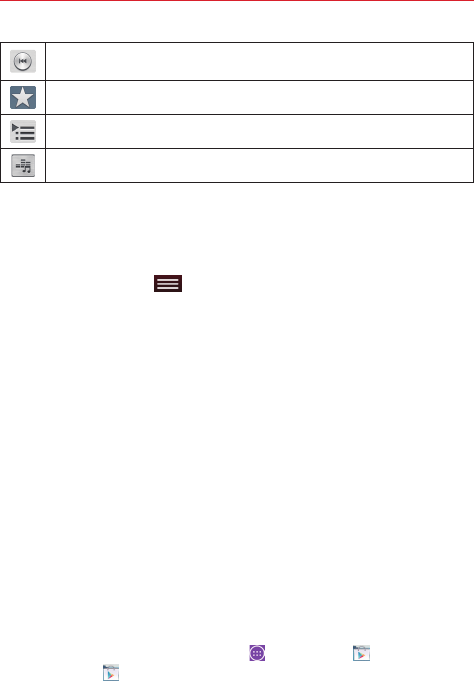
64 Entertainment
Tap to go back to the beginning of the song. Tap 2 times to return to the
previous song. Touch and hold to rewind 3 seconds.
Tap to set the current song as a favorite.
Tap to see the current playlist.
Tap to set the audio effect.
Other music player options
4 Touch and hold any song in the list to access
Play, Add to playlist, Share, Delete, Details, and Search.
4 Tap the Menu key (in the Touch Keys Bar) to access Select to
play, Search, Add to playlist, Remove from playlist, Share, Delete,
Details, Edit tabs, Help, and Settings.
Turning the music player off
To stop the music player, swipe the Status Bar downward, then flick the
music entry to the right (or left) off the screen.
NOTES • Some file formats are not supported, depending on the device software.
• If the file size exceeds the available memory, an error can occur when you open files.
• Music file copyrights may be protected by international treaties and national copyright
laws. Therefore, it may be necessary to obtain permission or a licence to reproduce or
copy music. In some countries, national laws prohibit private copying of copyrighted
material. Before downloading or copying the file, check the national laws of the relevant
country concerning the use of such material.
Play Store
Play Store allows you to browse and search for free and paid applications.
To open the Play Store app
4 From the Home screen, tap Apps > Play Store or tap the Play
Store icon on the Home screen.
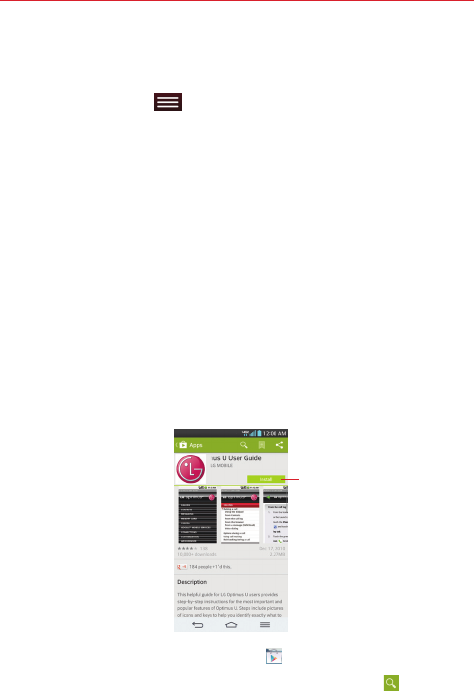
65
Entertainment
To get help with Play Store
Play Store Help web pages are available from all Play Store screens.
4 Tap the Menu key (in the Touch Keys Bar), then tap Help.
The Chrome app opens to the Play Store Help page, with links to
many help topics.
To open a screen with details about an app
4 At any time while browsing in Play Store, tap an app to open its
details screen.
The App details screens include a description, ratings, comments, and
related information about the app. From this screen, you can
download, install, uninstall, rate the app, and more.
Downloading and Installing Apps
When you find an app you want, you can install it on your tablet.
To download and install an app
NOTE Before you can download a paid app, you must set up a billing arrangement.
Price/Install button
Indicates the cost or
install for free apps.
1. From the Home screen, tap Play Store .
2. Tap a category from the homepage or tap the Search icon (in the top
right corner of the screen) to search for an app.
66 Entertainment
3. Tap INSTALL or the Price button to download the selected app.
4. If you agree with the app's access requirements, tap ACCEPT.
5. The app will be downloaded and installed.
Play Store Options
On the Play Store homepage, drag the left edge of the screen to the right
to access Store home, My apps, Shop apps, My wishlist, and Redeem.
Play Store menu options
Tap the Menu key (in the Touch Keys Bar) to access Settings and
Help.
Your Wishlist
While viewing an app (or music, games, etc.), tap the Wishlist icon at
the top of the screen to add it to your wishlist for future reference.