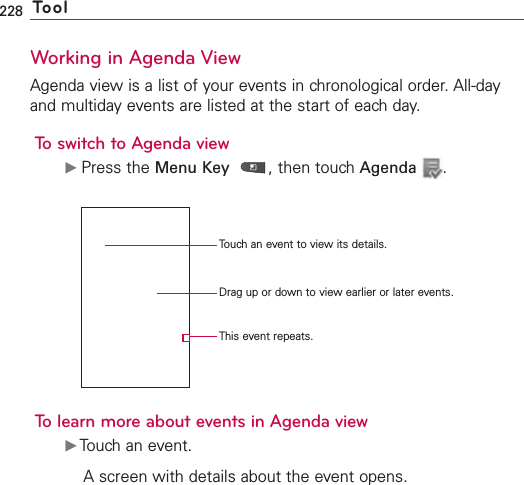
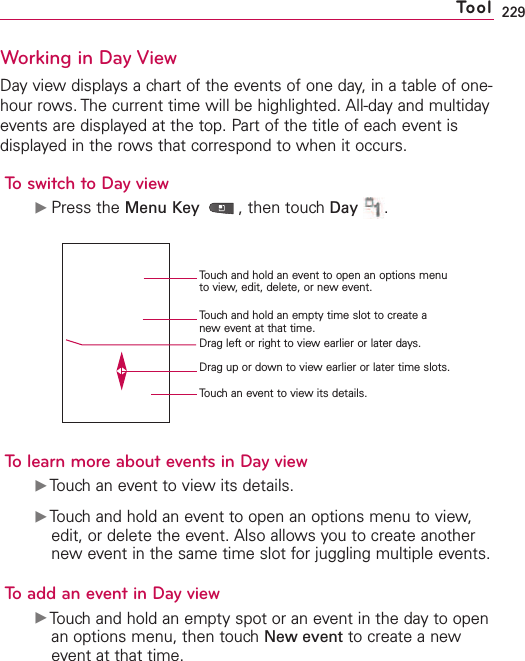
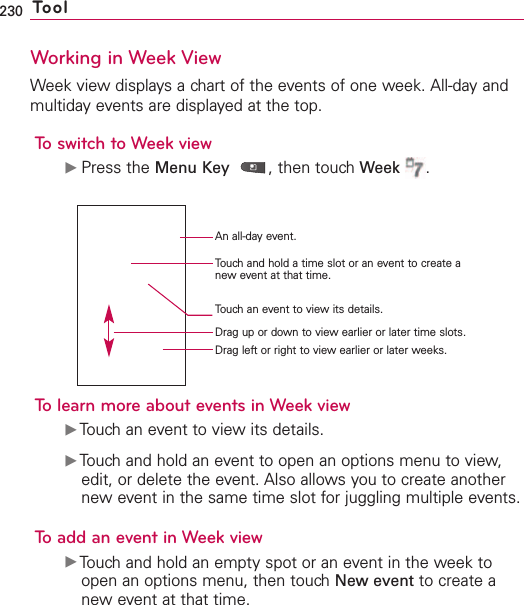
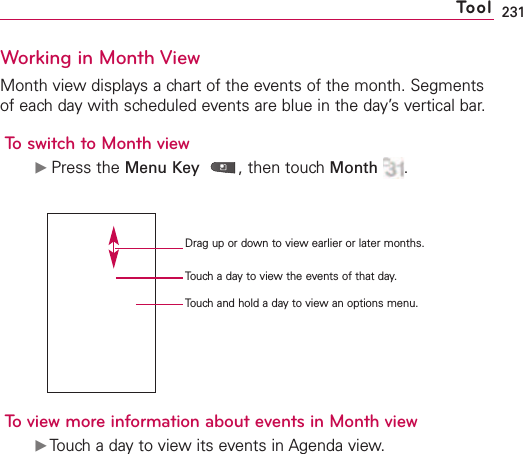
LG Electronics USA VS700 Cellular/PCS CDMA Phone with WLAN and Bluetooth User Manual Layout 1
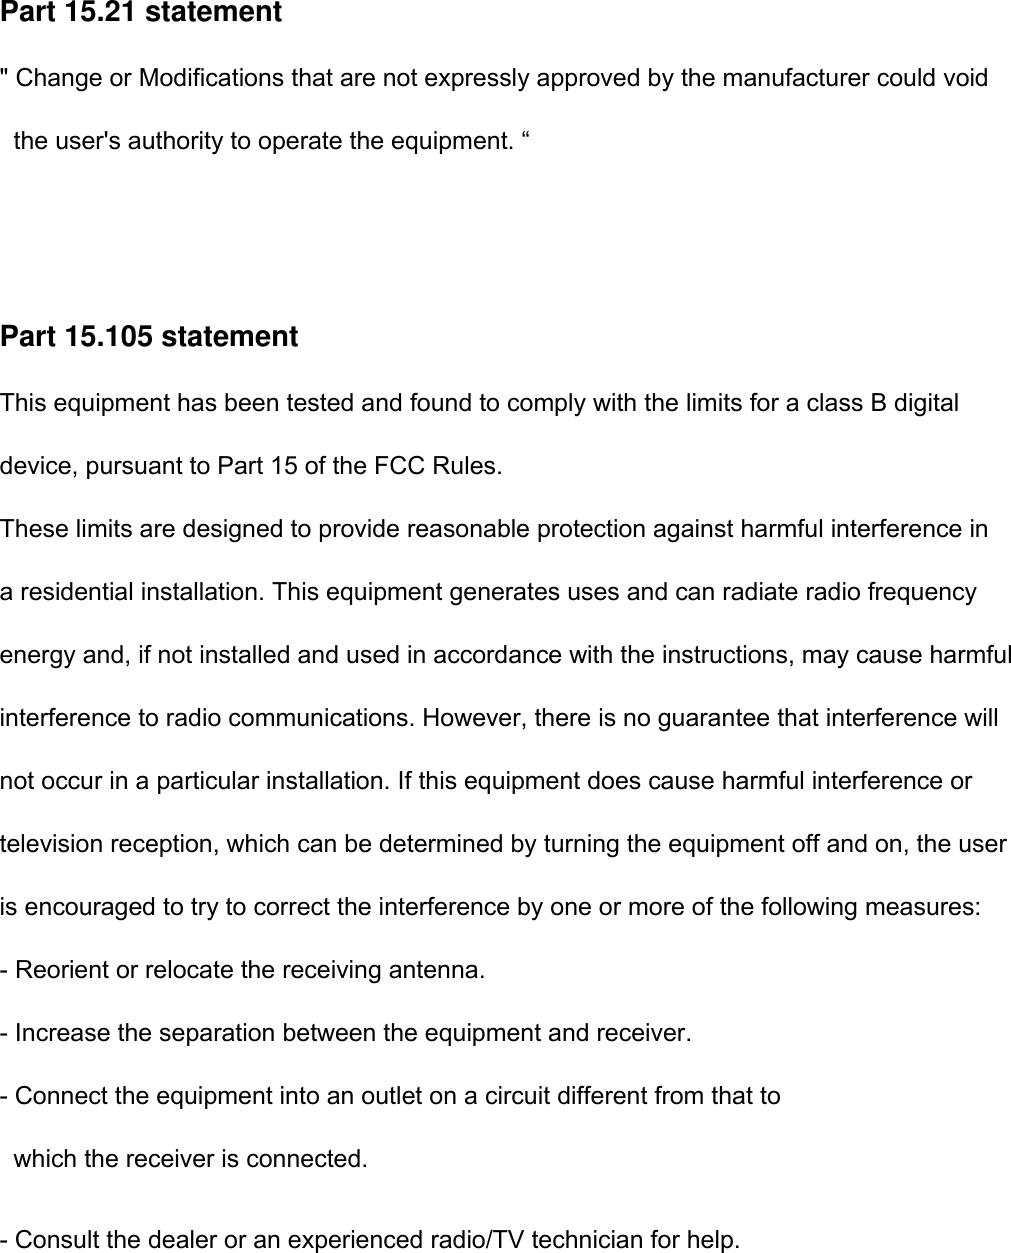
LG Electronics USA Cellular/PCS CDMA Phone with WLAN and Bluetooth Layout 1
UserManual.wiki
>
LG Electronics USA
>
VS700 User Manual
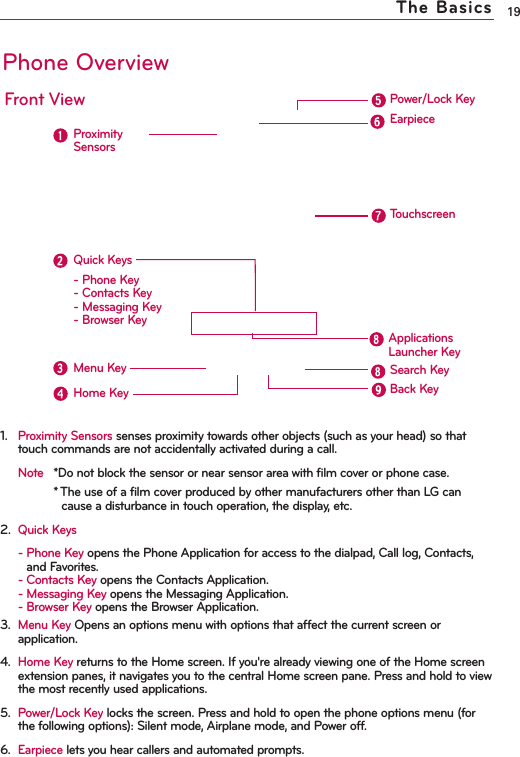
Users Manual
Navigation menu
Upload a User Manual
Namespaces
Wiki Guide
HTML
PDF
Info
Views
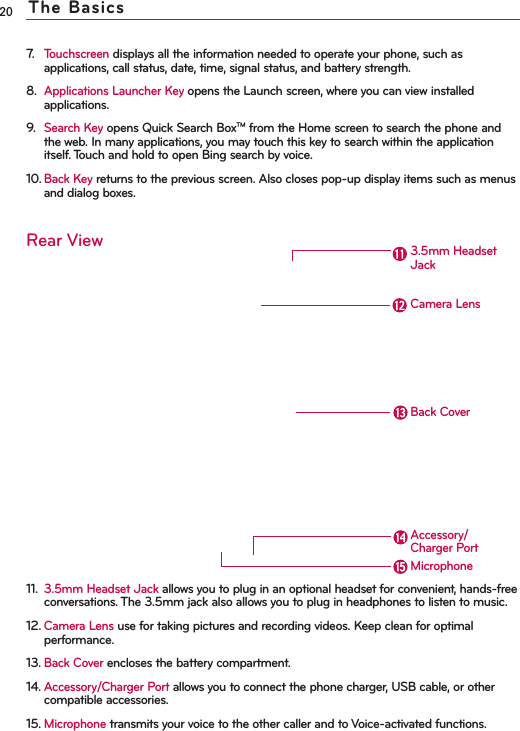
User Manual
Discussion / Help
Navigation
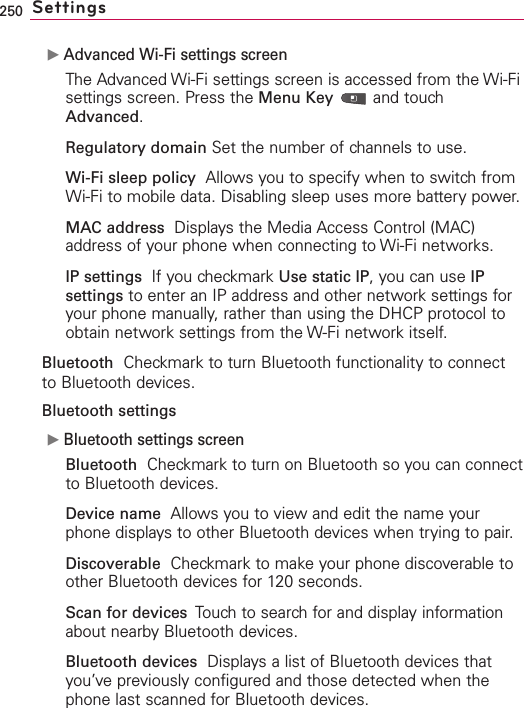
![Part 15 Class B ComplianceThis device and its accessories comply with part15 of FCC rules.Operation is subject to the following two conditions:(1) This device & its accessories may not cause harmful interference.(2) This device & its accessories must accept any interference received, including interference that may cause undesired operation.Body-worn OperationThis device has been tested for typical body-worn operations with the distance of 0.39inches (1.0cm) from the user’s body. To comply with FCC RF exposure requirements, a minimum separation distance of 0.39inches(1.0cm) must be maintained from the user's body.For example, this device must be maintained from the user's body with an appropriatebelt-clip accessory.[More than 0.39inches(1.0cm)] Additionally, Belt clips, holsters & other body-worn accessories may not containmetallic components.HAC statement This phone has been tested and rated for use with hearing aids for some of the wireless technologies that it uses. However, there may be some newer wireless technologies used in this phone that have not been tested yet for use with hearing aids. It is important to try the different features of this phone thoroughly and in different locations, using your hearing aid or cochlear implant, to determine if you hear any interfering noise. Consult your service provider or the manufacturer of this phone for information on hearing aid compatibility. If you have questions about return or exchange policies, consult your service provider or phone retailer.](https://usermanual.wiki/LG-Electronics-USA/VS700/User-Guide-1485586-Page-2.png)


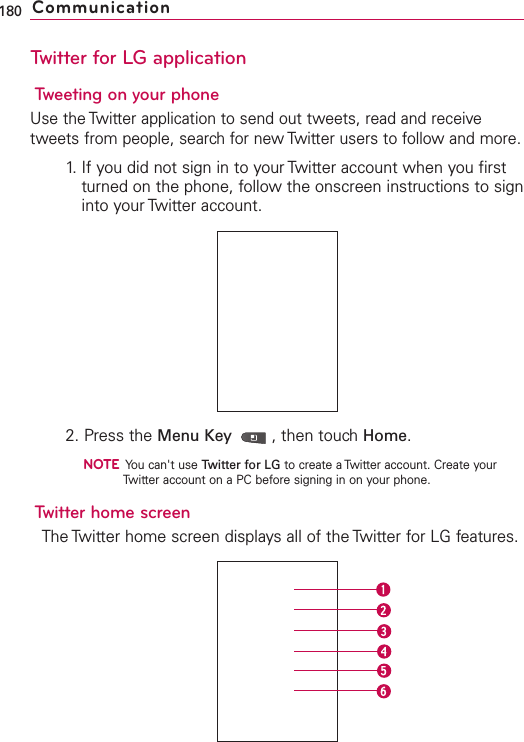
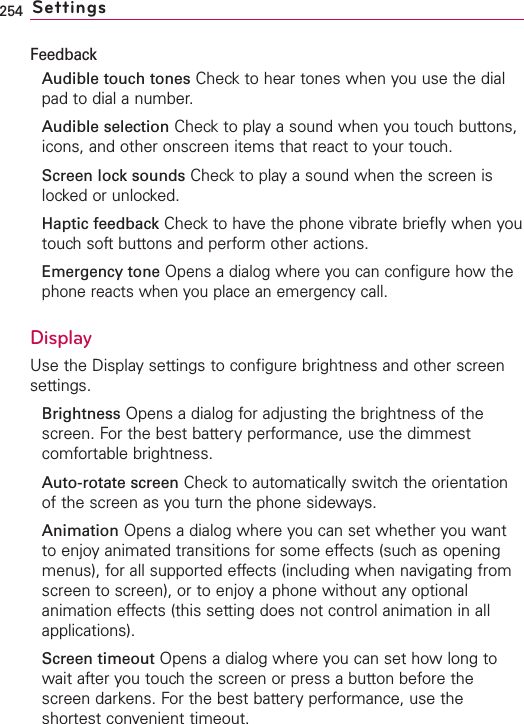
![1. Shows all tweets from people you follow. Press and hold atweet to open an options menu to let you retweet.Touch the username to view its profile. You can also tap thethumbnail image to open a Quick Contact menu.2. Shows all tweets that mention your username using the“@[your username]” convention.3. Touch to view your Twitter profile. This displays all of youraccount tweets.4. Lists people who you choose as your favorites to follow.5. Lists all people you follow and tweets that they've updated.6. Lists all direct messages you have received.Sending a tweet1. On the 'You + Friends' screen, touchthe text field with thewords “What’shappening?”.2. Enter your tweet, then touchUpdate.3. Touch the Photo icon to the right of the status field to post apicture from Gallery or Camera and add the picture link intothe tweet.181Communication](https://usermanual.wiki/LG-Electronics-USA/VS700/User-Guide-1485586-Page-165.png)