LG Electronics USA VS760 Cellular/PCS CDMA/EvDO/WCDMA/GSM/EDGE Phone with WLAN and Bluetooth User Manual Layout 1
LG Electronics USA Cellular/PCS CDMA/EvDO/WCDMA/GSM/EDGE Phone with WLAN and Bluetooth Layout 1
Users Manual

Part 15.21 statement
" Change or Modifications that are not expressly approved by the manufacturer could void
the user's authority to operate the equipment. “
Part 15.105 statement
This equipment has been tested and found to comply with the limits for a class B digital
device, pursuant to Part 15 of the FCC Rules.
These limits are designed to provide reasonable protection against harmful interference in
a residential installation. This equipment generates uses and can radiate radio frequency
energy and, if not installed and used in accordance with the instructions, may cause harmful
interference to radio communications. However, there is no guarantee that interference will
not occur in a particular installation. If this equipment does cause harmful interference or
television reception, which can be determined by turning the equipment off and on, the user
is encouraged to try to correct the interference by one or more of the following measures:
- Reorient or relocate the receiving antenna.
- Increase the separation between the equipment and receiver.
- Connect the equipment into an outlet on a circuit different from that to
which the receiver is connected.
- Consult the dealer or an experienced radio/TV technician for help.

Part 15 Class B Compliance
This device and its accessories comply with part15 of FCC rules.
Operation is subject to the following two conditions:
(1) This device & its accessories may not cause harmful interference.
(2) This device & its accessories must accept any interference received,
including interference that may cause undesired operation.
Body-worn Operation
This device has been tested for typical body-worn operations
with the distance of 0.79inches (2.0cm) from the user’s body.
To comply with FCC RF exposure requirements, a minimum separation distance
of 0.79inches(2.0cm) must be maintained from the user's body.
For example, this device must be maintained from the user's body with
an appropriatebelt-clip accessory.[More than 0.79inches(2.0cm)]
Additionally, Belt clips, holsters & other body-worn accessories may not contain
metallic components.

19
The Basics
1.
Earpiece
lets you hear callers and automated prompts.
2.
Short Key
3.
Home Key
returns to the Home screen. If you're already viewing one of the Home screen
extension panes, it opens the central Home screen pane. Press and hold to view the most
recently used applications.
4.
Touchscreen
displays all the information needed to operate your phone, such as
applications, call status, date, time, signal status, and battery strength.
5.
Back Key
returns to the previous screen. Also closes pop-up display items such as menus
and dialog boxes.
6.
Search Key
opens Quick Search Box
TM
, from the Home screen, to search the phone and
the web. In many applications, you may touch this key to search within the application
itself.Touch twice to open the Quick Search Box from any application. Touch and hold to
open Google
TM
search by voice.
7.
Microphone
transmitsyour voice to the other caller and to Voice-activated functions.
Phone Overview
Front View
Earpiece
Home Key
Touchscreen
Search Key
Back Key
Microphone

20 The Basics
8.
Camera Lens
use for taking pictures and recording videos. Keep clean for optimal
performance.
9.
Camera Flash helps picture quality when taking pictures in low light conditions.
10.
Back Cover
encloses the battery compartment.
11.
Speaker
lets you hear ringers and sounds. Also lets you hear the caller’s voice when in
speakerphone mode.
Rear View
Camera Flash
Camera Lens
Back Cover
Speaker

21
The Basics
12.
Camera Key
activates the camera. Once the Camera function is open, you can access the
Video recorder function as well. For more information, see page 197.
13.
Volume Keys
allowyou to adjust the ringer and media volumes, or to adjust the in-call
volume during a call.
14. Power/Lock
Key
locks the screen. Press and hold to open the phone options menu (for
the following options): Silentmode, Airplane mode, and Power off.
15.
Headset Jack
allowsyou toplug in an optional headsetfor convenient, hands-free
conversations. The 3.5mm jack also allows you to plug in headphones to listen to music.
16.
Accessory/Charger Port
allows you to connect the phone charger, USB cable, or other
compatible accessories.
Accessory/
Charger Port
Headset Jack
Power/Lock
Key
Volume Keys
Camera Key
Left Side Right Side

1.
Short Key
2.
Home Key
returns to the Home screen. If you were viewing one of the Home screen
extension panes, opens the central Home screen pane. Press and hold to open a list of
the applications you accessed most recently.
3.
Back Key
returns to the previous screen. Also closes pop-up display items such as menus
and dialog boxes.
4.
Search Key
opens Quick Search Box, from the Home screen, to search the phone and the
web. In many applications, you may touch this key to search within the application itself.
Touch twice to open the Quick Search Box from any application. Touch and hold to open
Google search by voice.
5.
Speaker
letsyou hear ringers and sounds. Also lets you hear the caller’s voice when in
speakerphone mode.
6.
Caps/Shift Key
lets you enter capital letters. To lock the Caps/Shift key, press twice. To
unlock it, press again.
7.
VibrateKey
switches to vibrate mode. Press Alt key then the Vibrate key to switch to
vibrate mode.
8.
Space Key
enters spaces when in a text entry field.
22 The Basics
Short Key
Home Key
Back Key
Search Key
Speaker Key
Caps/Shift Key
Vibrate Key Space Key
Delete Key
SEND Key
OK Key
Directional
Key
END Key
Enter Key
Slide Out QWERTY Keyboard

9.
Delete Key
deletes a single space or character with each press. Press and hold to delete
text more quickly.
10.
SEND Key
Use to answer incoming calls and to place calls from the Dialpad. From
Standby mode, pressing this key will open the All Calls list.
11.
Directional Key
scrolls through the menu items and highlights a specific field or object by
pressing up, down, left or right.
12.
OK Key
selects the highlighted choice.
13.
END Key
locks the screen. Press and hold to open the phone options menu (for the
following options): Silent mode, Airplane mode, and Power off.
14.
Enter Key
moves the cursor to the next field or text line. In Messaging, this key sends the
message you entered.
NOTES
●
All screen shots in this guide are simulated. Actual displays may vary.
●
Instructions to perform tasks in this guide are based on the default phone
settings and may change depending on the software version on your phone.
23
The Basics

24
Installing the Battery and microSD Card
NOTE
It is important to fully charge the battery before initial use of the phone.
The phone comes with a rechargeable battery. Keep the battery
charged while not in use in order to maximize talk, use, and standby
time. The battery charge level is shown at the top of the screen.
Installing the battery
Removing the battery
Turn power off. Remove the battery cover (as demonstrated in
the previous instructions). Then use the fingertip cutout to lift the
top edge of the battery out.
The Basics
1.Press the bump
on the bottom
part of the cover
and slide the
battery cover
upward to remove
from the back of
the phone.
2.Align the battery
with the terminals
near the bottom
of the phone, then
press the battery
into place.
3.Replace the
battery cover over
the back of the
phone (as
demonstrated).
Slide the battery
cover downward
while applying
steady downward
pressure until it
clicks into place.
25
Inserting a microSD card
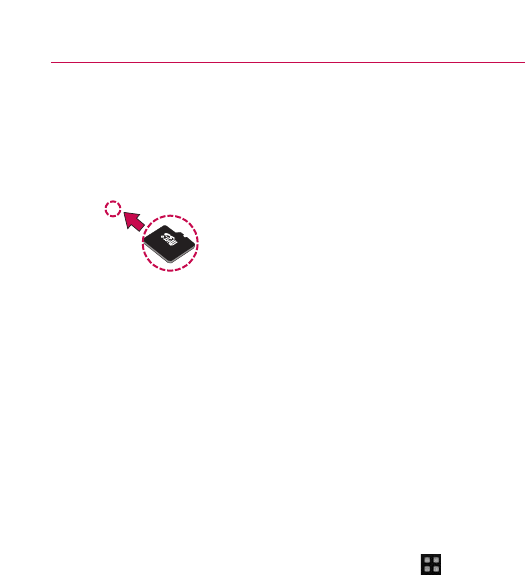
Gently uncover the microSD slot located on the right side of the
phone. Position the microSD card facing up and slide it into place
until it is fully inserted and locked in place.
NOTE
The microSD card can be easily damaged by improper operation. Please be
careful when inserting, removing or handling it.
Removing the microSD card
Unmount the microSD card (see the steps below). Then, uncover
the microSD slot located on the right side of the phone. Gently
push the exposed edge of the microSD card in with your fingertip
to release it from the slot. Carefully pull the microSD card out of
the slot.
NOTE
To safely remove the microSD card from your phone, unmount it from your
phone first, as described below.
To unmount the microSD card
1. From the Home screen, press the Menu Key .
2. Touch Settings > (scroll the screen up) > SD card & phone
storage.
3. Touch Unmount SD card.
The Basics
26
Charging the Phone
Your LG enV-T2 device comes with a cableless travel adapter and a
USB data cable which connect together to charge your phone. To
charge your phone:
NOTICE
Please use only an approved charging accessory to charge your LG phone.
Improper handling of the charging port, as well as the use of an incompatible charger,
may cause damage to your phone and void the warranty.
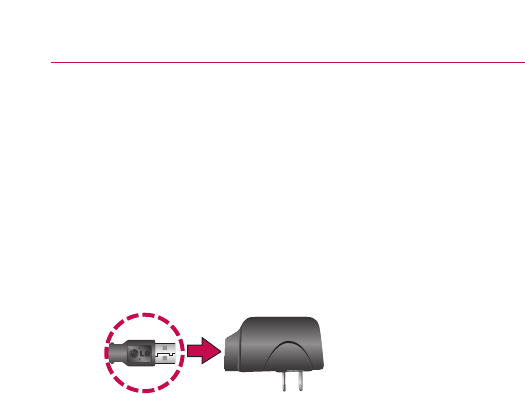
1. Connect the cableless wall adapter and USB data cable.
Connect as shown; the LG logo on the USB cable should
face toward you.
2. Gently uncover the Accessory/Charging port, then plug one
end of the USB cable into the phone's charger port and the
other end into an electrical outlet. The charge time varies
depending upon the battery level.
Battery temperature protection
Though extremely rare, if the battery becomes overheated, the
phone will automatically turn off.
Battery charge level
You can find the battery charge level at the top right of the
screen. When the battery level becomes low, the phone will
notify you and the status light will turn red. Once the battery level
becomes exceedingly low, the phone will shut off without notice.
As a result, unsaved items may be lost.
The Basics

27
Charging with USB
You can use your computer to charge your phone. To be able to
charge with the USB cable, you need to have the necessary USB
drivers installed on your PC first. Connect one end of the USB
cable to the charging accessory port on your phone and connect
the other end to a USB port on your PC (commonly located on the
front panel of the computer). It is best to use the rear USB port
when connecting to a desktop PC. The USB hub should be
powered by an external power source (see NOTES below).
NOTES
●
Low-power USB ports are not supported, such as the USB port on your
keyboard or bus-powered USB hub.
●
LG USB Driver is downloadable from the following site:
http://www.lgmobilephones.com > Click Mobile Support >Select the
Carrier(Verizon) > Select the Model (Ally) > Click USB Cable Driver to
download.
Turning the Phone On and Off
Turning the phone on
©Press and hold the Power/Lock Key for a couple of
seconds.
NOTE
When you turn on your phone for the first time, follow the instructions on
the screen to activate your device.
Turning the phone off
1. Press and hold the Power/Lock Key until the pop-up
menu appears.
2. Touch Power Off in the pop-up menu.
3. Touch OK to confirm that you want to turn off the phone.
The Basics
28 The Basics
To wake up the phone
If you don
’
tuse the phone for a while, the screen and backlight
will shut off to conserve battery power. To wake up the phone:
1. Press the Power/Lock Key .
Your Lock Screen will appear. See
“
Locking the Screen
”
on
page 51
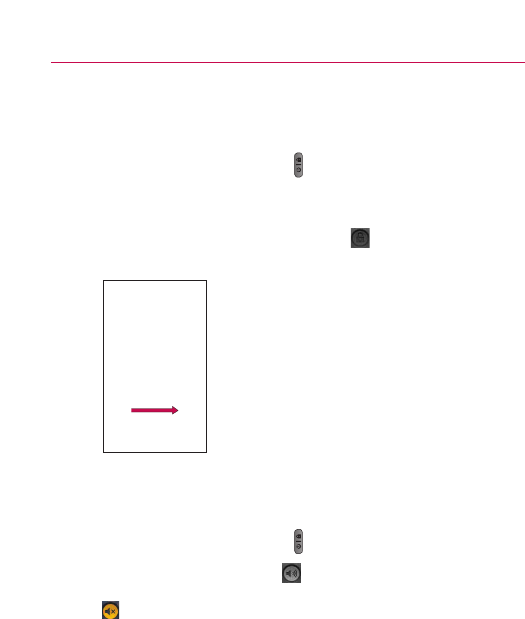
2. Touch and drag the green lock icon to the right.
The last screen you were working on opens.
NOTE
This is the default Lock Screen. If you have set up
an Unlock Pattern, use your fingertip to draw the
pattern.
Toturn the phone sounds off
If you're in a place where your phone sounds may disturb others,
you can quickly silence your phone from the lock screen.
1. Press the Power/Lock Key .
2. Drag the Sounds off icon to the left.
To turn the phone sounds back on, drag the Sounds on icon
to the left.

29
The Basics
Getting started with your AndroidTM phone
The first time you power on your phone, you’re
prompted to touch the Android logo to begin using
your phone.
You will be offered a chance to learn about your
phone, you will be prompted to create or to sign
into your Google Account, and you will be asked
to make some initial decisions about how you
want to use Android and Google features.
Your Google account
You must sign into a Google Account to use GmailTM,Google
TalkTM,Google CalendarTM,and other Google Apps; to download
applications from Android MarketTM;to back up your settings to
Google servers; and to take advantage of other Google services
on your phone.
If you don’t have a Google Account, you will be prompted to
create one. If you have an enterprise account through your
company or other organization, your IT department may have
special instructions on how to sign into that account.
IMPORTANT
●
Some applications, such as Calendar, work only with the first Google Account you add.
If you plan to use more than one Google Account with your phone, be sure to sign
into the one you want to use with such applications first.
When you sign in, your contacts, Gmail messages, Calendar events, and other
information from these applications and services on the web are synchronized with
your phone.
If you don’t sign into a Google Account during setup, you will be prompted to sign in
or to create a Google Account the first time you start an application that requires one,
such as Gmail or Android Market.
●
If you want to use the backup feature to restore your settings to this phone from
another phone that was running Android release 2.0 or later, you must sign into your
Google Account now, during setup. If you wait until after setup is complete, your
settings will not be restored.
Touch to begin.
30
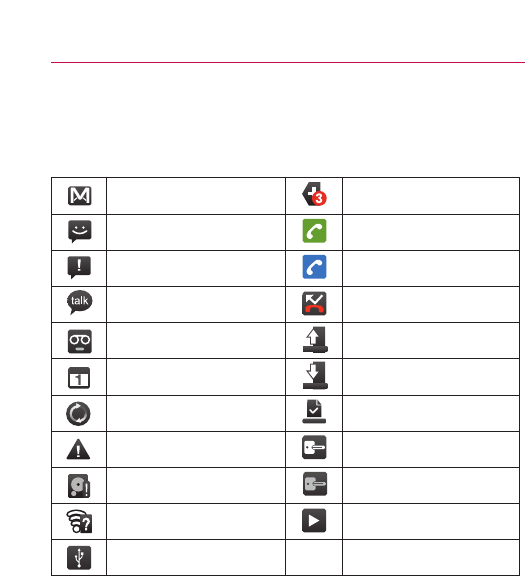
Phone’s Status Icons
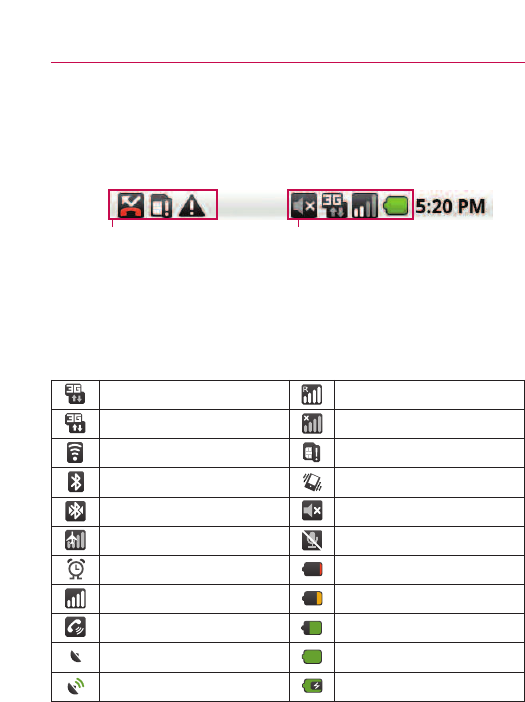
The Status bar appears at the top of every screen. It displays icons
indicating that you
’
ve received notifications (on the left) and icons
indicating the phone
’
sstatus (on the right), along with the current time.
If you have more notifications than can fit in the status bar, a plus
icon prompts you to open the Notifications panel to view them all.
See
“
Managing Notifications
”
on page 46.
Status icons
The following icons indicate the status of your phone.
The Basics
Notification icons Status icons
3G connected Roaming
3G in use No signal
Connected to a Wi-Fi network No microSD card installed
Bluetooth is on Vibrate mode
Connected to a Bluetooth device Ringer is silenced
Airplane mode Phone microphone is muted
Alarm is set Battery is very low
Signal strength Battery is low
Speakerphone is on Battery is partially drained
GPS is on Battery is full
Receiving location data from GPS Battery is charging
31
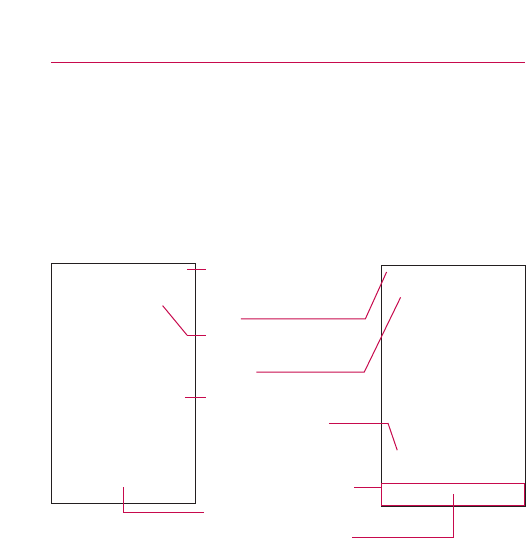
Notification icons
The following icons indicate that you've received a notification.
See
“
Managing Notifications
”
on page 46 for information about
responding to these notifications.
The Basics
New Gmail message 3more notifications not
displayed
New text or multimedia
message Call in progress
Problem with text or
multimedia message delivery
Call in progress using
Bluetooth head-set
New Google Talk message Missed call
New voicemail Uploading data
Upcoming event Downloading data
Data is syncing Download finished
Problem with sign-in or sync Connected to VPN
microSD card is full Disconnected from VPN
An open Wi-Fi network is
available Song is playing
Phone is connected via USB
cable
32 The Basics
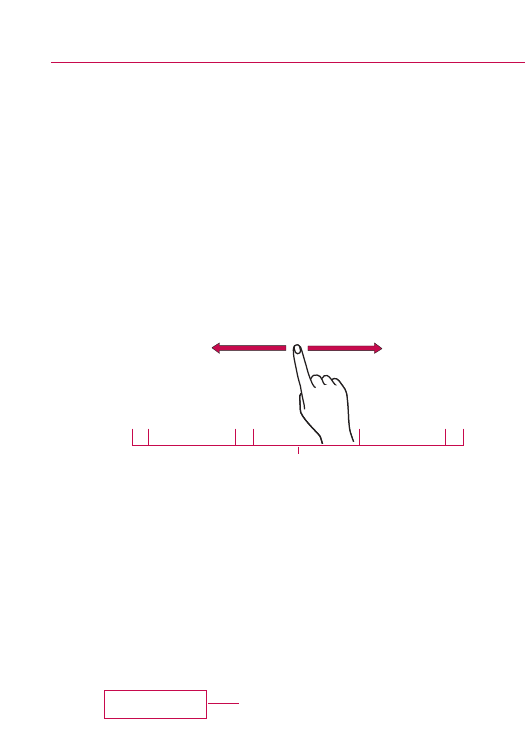
Getting to Know the Home Screen
The Home screen is your starting point to access all the features on
your phone. It displays application shortcuts, icons, widgets,
shortcuts, and other features. You can choose between two Home
screen themes: Android Home and LG Home.They work
essentially the same with slight differences that you may prefer
depending on how you use your device.
Android Home LG Home
Status Bar
Shows device status information
including the time, signal strength,
battery status, and notification
icons.
Search Bar
Touch to search for items saved
on your phone. It also searches
the web.
Application Icon
Touch an icon (application, folder,
etc.) to open and use it.
Launch Key
Touch to open the Launch screen
to view installed applications.
Quick Keys
Provide easy, one-touch access to
the functions you use the most.

33
Quick Keys
When using the LG Home theme, the Quick Keys are located on
the bottom of the screen. If you choose Android Home as your
display theme, these functionalities are moved onto the Home
screen.
:opens the Phone application which displays the dialpad so
you can dial an unsaved number. Also provides additional
tabs to access Call log, Contacts, and your Favorites.
:opens your Contacts list.
:opens the Launch screen and displays phone options and
applications.
:opens the Messaging application.
:opens the Browser application.
Selecting a Home Screen Theme
Initially, you will be prompted to choose a Home screen theme.
You can change themes any time, just access the Launch screen
and open the Theme application.
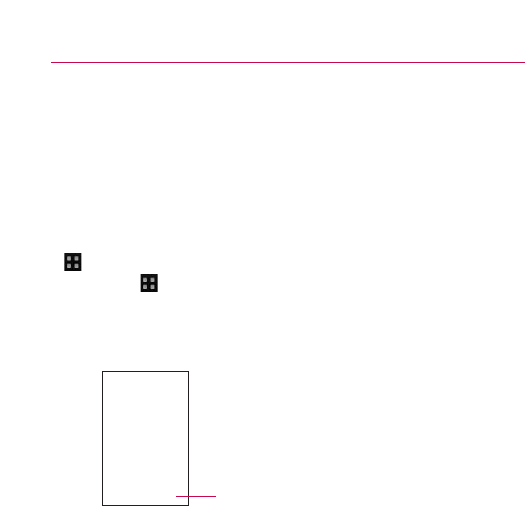
1. From the Home screen, touch the Launch icon:
●On Android Home, touch .
●On LG Home, touch .
2. Touch the Themes icon .
3. Touch either Android Home or LG Home,depending on
your preference.
To return to the Home screen
©Press the Home Key at any time, from any application.
The Basics
34
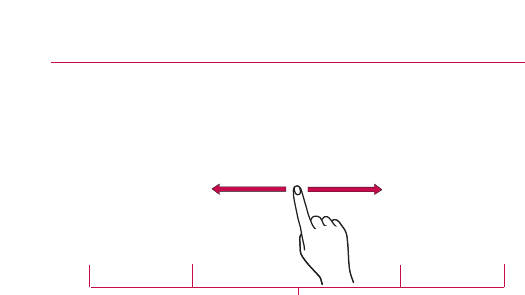
To view other Home screen panes
©Slide your finger left or right across the Home screen.
The Home screen spans five screen widths allowing more
space for icons, widgets, shortcuts, and other items. The
main pane is in the center with two extension panes on
either side of it. For more information on sliding, see
"Touchscreen" on page 35.
©Touch and hold the Home screen pane dots on the lower
left or right of the screen to view thumbnails of the Home
screen panes, then touch one to go to that specific pane.
The Basics
Android Home screen
Location Indicator
The dots indicate which Home screen pane you are viewing.
Home screen pane thumbnails.
Touch one for immediate access.
35
The Basics
Touchscreen
Your touchscreen provides an excellent way to interact with and
use your Android phone. With the touch of your finger, you can
download and use available applications, make menu selections,
and access data saved to your phone.
The following terms are used for describing the different available
actions using the touchscreen:
Touch Asingle finger touch selects items. For example, touch an
icon (e.g., application or menu item), touch words (e.g., menu
selection or to answer onscreen question), or touch letters to type.
Touch and hold Touch and hold an item on the screen by
touching it and not lifting your finger until an action occurs. For
example, to open a pop-up menu for customizing the Home
screen, touch an empty area on the Home screen until the menu
pops up.
Drag Touch and hold an item for a moment and then, without
lifting your finger, move your finger on the screen until you reach
the target position. You can drag items on the Home screen to
reposition them, as described in
“
Customizing the Home Screen
”
on page 52, and you drag to open the Notifications panel, as
described in
“
Managing Notifications
”
on page 46.
LG Home screen
Home screen pane dots
Asolid dot on the Launch quick key indicates which Home screen pane you are viewing.
36
Swipe or slide To swipe or slide, quickly move your finger across
the surface of the screen, without pausing when you first touch it
(so you don
’
tdrag an item instead). For example, you can drag
slide the screen up or down to scroll a list, or browse through the
different Homescreens by swiping from left to right (and vice
versa).
Double-tap Double-tap to zoom a webpage or a map. For
example, quickly double-tap a section of a webpage to zoom that
section to fit the width of the screen. You can also double-tap to
control the Camera zoom, in Google Maps,and in other applications.
Dynamic touch Use your index finger and thumb in a pinch or
spread motion to zoom in or out when using the browser, map or
pictures.
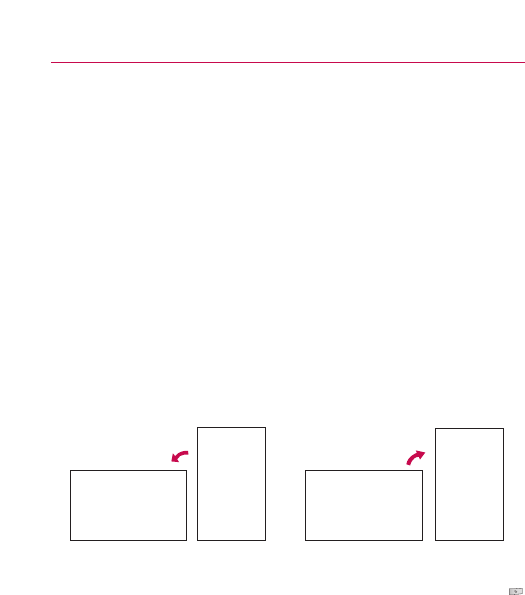
Rotate the screen From many applications, the orientation of the
screen rotates with the phone as you turn it from upright to
sideways and back again.
NOTE
To turn this feature on and off, from the Home screen, press the Menu Key
and touch Settings > Sound & display >then, select/deselect Orientation.
QWERTY Keyboard
Your device has a built-in, slide out QWERTY keyboard, specifically
designed for easy and comfortable text entry. The QWERTY
keyboard uses the same layout and works just like the keyboard on
your computer. Slide the QWERTY keyboard out when you are
ready to enter text. See
“
Slide Out QWERTY Keyboard
”
on page 22
for the special key functions.
The Basics
Rotate the phone counter-clockwise for
landscape orientation.
Rotate the phone clockwise for portrait
orientation.

37
The Basics
Onscreen Keyboard
You can also enter text using the onscreen keyboard. The onscreen
keyboard displays automatically on the screen when you need to
enter text. To manually display the keyboard, simply touch a text
field where you want to enter text.
Entering Text
Using the QWERTY keyboard
1. Slide the QWERTY keyboard out to enter text.
2. Use your fingers to enter text.
●Press to delete characters to the left of the cursor.
●Press once to capitalize the next letter you type.
●Press twice for all caps; press it again to switch back.
Delete Key
Emoticon Key
Touch to enter an
emoticon. Touch and hold
for additional emoticons.
Shift Key
Touch once to capitalize the
next letter you type.
Double-tap for all caps.
Number and Symbols Key
Touch to change input to
number and symbol entry.
Voice to Text Key
Touch to enter text by voice.

38 The Basics
●Press and hold vowels, or the C, N, or S keys, to open a
pop-up window where you can touch other variations for
the letter (e.g., accents, tilda, etc.).
●Press and to open a pop-up window with a set
of commonly used symbol keys.
●Press to enter alternate characters, such as @ for the
.To lock the Alt key function, press twice; press it
again to switch back to normal entry mode.
Using the onscreen keyboard
1. Touch a text field where you want to type. The onscreen
keyboard will open automatically.Text fields for phone
numbers and other special purposes may display numbers
and symbols or other custom keyboards to make it easier to
enter the required information.
2. Touch the keys on the keyboard to start typing.
●Touch to delete characters to the left of the cursor.
●Touch once to capitalize the next letter you type.
●Touch and hold for all caps. Touch again to switch back
to normal entry.
●Touch and hold a vowel or the C, N, or S key to open a
small, pop-up window where you can touch other
variations for the letter (e.g., accents, tilda, etc.).
●Touch and hold to open a pop-up window with a set of
commonly used symbol keys.
●Touch to switch to the numbers and symbols keyboard.
Touch to view additional symbols; touch it again to
switch back.
●Touch and hold almost any of the number and symbol keys
to open a window of additional symbols.
3. When you're finished typing, touch the Back Key to
close the keyboard.
ALT
?123
.
DEL
X

3939
NOTE
To change the keyboard orientation, turn the phone sideways or upright.
The keyboard rotates to take best advantage of the new phone
orientation. Many people find the larger horizontal onscreen keyboard
easier to use.
You can control whether the screen
changes orientation automatically
when you turn the phone. See
"Orientation" under "Sound & display
settings screen" on page 245.
Editing text
You can edit the text you enter in text fields and use menu
commands to cut, copy, and paste text, within or across
applications.
To cut or copy and paste all the text
1. Touch and hold the text field that contains the text to edit.
2. Apop-up menu opens with options for cutting, copying, and
performing other tasks with the text field.
3. Touch Cut all or Copy all.
4. Touch the text field where you want to paste the text.
You can paste text that you cut or copied from one
application into a text field in any application.
5. Put the cursor on the location where you want to paste the
text.
●Touch the location where to move the cursor.
●Press the Directional Key left or right on the QWERTY
Keyboard.
6. Touch and hold the text field.
The Basics

7. When the pop-up menu opens, touch Paste.
The text is inserted at the cursor. The text that you pasted
also remains in a temporary area on the phone, so you can
paste that same text in another location.
To cut or copy and paste some of the text
1. Put the cursor on the starting or ending point of the text to
copy or paste.
●Touch the location where to move the cursor.
●Press the Directional Key left or right on the QWERTY
Keyboard.
2. Touch and hold the text field that contains the text to edit.
3. Apop-up menu opens with options for cutting, copying, and
performing other tasks with the text field.
4. Touch Select text.
5. Touch the text to select or press the Directional Key left or
right. Selected text is highlighted in orange.
6. Touch and hold the text field again.
7. When the pop-up menu opens, touch Cut or Copy.
8. Touch the text field where you want to paste the text.
You can paste text that you cut or copied from one
application into a text field in any application.
9. Put the cursor on the location where you want to paste the
text.
●Touch the location where to move the cursor.
●Press the Directional Key left or right on the QWERTY
Keyboard.
10. Touch and hold the text field.
40 The Basics
11. When the pop-up menu opens, touch Paste.
The text is inserted at the cursor. The text that you pasted
also remains in a temporary area on the phone, so you can
paste that same text in another location.
Applications: How to View, Open and Switch
All of the applications on your phone, including any applications that
you downloaded and installed from Android MarketTM or other
sources, are grouped together on one Launch screen that you
access from your Home screen. If you have more applications than
can fit on the Launch screen, you can slide the screen up or down
to view more.
41
The Basics
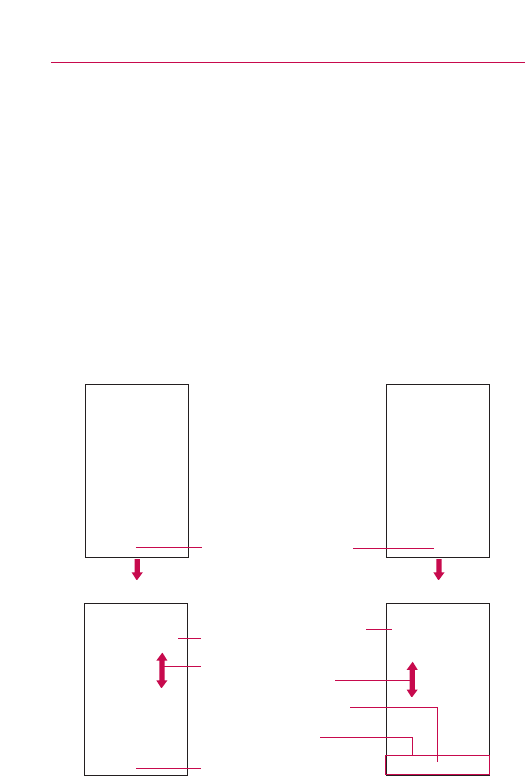
Launch screen Launch screen
Android Home screen LGHome screen
Quick Keys
Touch an application icon to open
the application
Slide the screen up or down to
bring more icons into view
Touch to close Launch screen
Touch to close Launch screen
Overview
Touch to open Launch screen

42
Opening and Closing the Launch screen
Opening the Launch screen
Touch the Launch icon on your Home screen:
©From Android Home, touch .
©From LG Home,touch .
Closing the Launch screen
To manually close the Launch screen, press the Home Key ,
or:
©From Android Home, touch .
©From LG Home,touch .
NOTE
The Launch screen closes automatically when you touch an icon to
open its application. Dragging an icon onto your Home screen also
closes the Launch screen automatically.
Customizing the LG Home Launch Screen
You can customize the LG Home Launch screen by moving the
position of applications so that you don't have to scroll the screen
up to access the applications you use most often. You can also
add additional categories to the screen to organize your files.
Moving application positions
1. From the Home screen, touch the Launch icon .
2. Press the Menu Key and touch Move Items.
3. Drag the application icon to the position you want, then lift
your finger. Application icons to the right of the position shift
accordingly.
The Basics

43
Adding a category
1. From the Home screen, touch Launch icon .
2. Press the Menu Key and touch Add category.
3. Touch New category,enter a category name, then touch the
OK button.
Opening and Switching Applications
Multi-tasking is easy with AndroidTM because open applications
keep running even when you open another application. There’s
no need to quit an application before opening another. You can
use and switch among several open applications. Android
manages each application, stopping and starting them as needed,
to ensure that idle applications don’t consume resources
unnecessarily.
Opening an application
©Open an application simply by touching its icon on the
screen.
TIP
You can customize your Home screen with the application icons you use
most often. Applications are located on the Launch screen, but you can
copy any application icon to your Home screen for faster access. No
matter where the icon is, on the Launch screen or your Home screen,
just touch it to open and use it.
Opening multiple applications
1. Touch an application icon to open it.
2. Press the Home Key .
NOTE
If the application icon you want is on your Home screen, simply touch
the icon to open and use it.
3. Touch the Launch icon.
©On Android Home, touch .
©On LG Home,touch .
4. Touch the icon for the other application you want to open.
The Basics
44
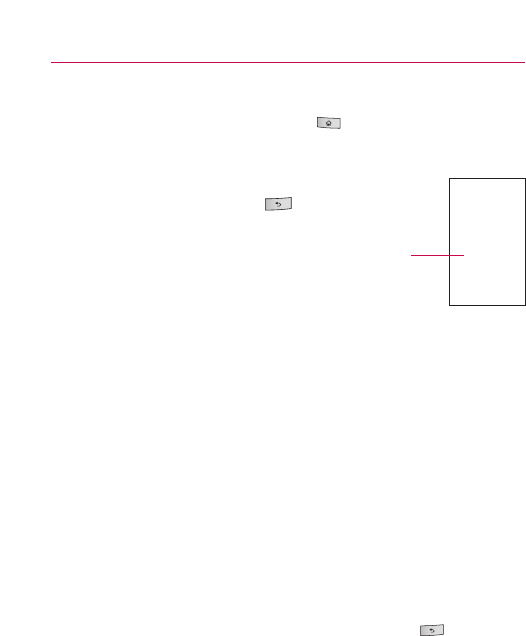
Switching between multiple applications
1. Press and hold the Home Key .
Asmall window opens with icons of applications that
you’ve used recently.
2. Touch the application icon you want to open.
Or touch the Back Key to return to the
current application.
Adding application icons to the Home screen
Customize your Home screen with the applications you use most
often.
1. Open the Launch screen.
2. Touch and hold the application icon you want to add to your
Home screen. Your Launch screen will be minimized so that
you can place the icon on a Home screen.
3. Lift your finger to place it, or drag the icon to where you
want it on the screen, then lift your finger.
Setting KeyboardShortcutsto Applications
You can set certain keys to launch selected applications. This may
be helpful for multitasking when you are using the slideout
QWERTY keyboard.
©From the Home screen, press the Menu Key >touch
Settings >touch Applications >touch Quick launch,then
select the keyboard shortcuts you want to set.
The Basics
Touch an icon to open an application
you've used recently.
45
Working with Menus
There are two kinds of Android menus: Options menus and Context
menus.
Options menus
Options menus contain tools that apply to the activities of the
current screen or application, not to any specific item on the
screen. To open the available options menu, press the Menu Key
.Not all applications have Options menus; if you press the
Menu Key on a screen that has no Options menu, nothing will
happen.
Some applications have more Options menu items than can fit in
the options menu; touch More to open the additional items.
The Basics
Touch to open more menu items.
Options menus contain items that
apply to the current screen or
to the application as a whole.
46
Context menus
Context menus contain options that apply to a specific item on
the screen. To open a Context menu, touch and hold an item on
the screen. Not all items have Context menus. If you touch and
hold an item that has no Context menu, nothing will happen.
Managing Notifications
Notification icons report the arrival of new messages, calendar
events, alarms, as well as ongoing events, such as when you are in
a call.
When you receive a notification, text appears briefly and the
notification icon will be displayed in the Status bar. For descriptions
of the various notification icons, see
“
Notification icons
”
on page 31.
You can open the Notifications panel to view a list of all recent
notifications. Depending on your settings, you may hear a
notification sound, the phone may vibrate, and the Status Light may
blink.
NOTE
Adjusting sound volume and other general notifications settings is described in
“Sound & display” on page 245.
Applications whose activities produce notifications, such as GmailTM
and Google Talk, have their own settings, which you can use to
configure whether, and how, they send notifications. See the
sections on those applications for details.
The Basics
When you touch and hold
certain items on a screen, a
Context menu opens.

47
To open the Notifications panel
©Touch and drag the Status bar to the bottom of the screen.
OR
©From the Home screen, press the Menu Key
and touch Notifications.
The Notifications panel displays your wireless
provider and a list of your current notifications,
organized into ongoing and
event-based notifications.
To respond to a notification
1. Open the Notifications panel. Your current notifications are
listed in the panel, each with a brief description.
2. Touch a notification to view it.
The Notification panel will close and the application that
corresponds to your response will open. For example, new
voicemail notifications dial your voicemail box, and network
disconnect notifications open the list of configured networks
so you can reconnect.
Toclear all notifications
1. Open the Notifications panel.
2. Touch the Clear button at the top right of the panel.
All event-based notifications will be cleared; ongoing
notifications will remain in the list.
Toclose the notifications panel
Touch and drag the tab at the bottom of the Notifications panel to
the top of the screen or just touch the Back Key .
The panel will also close when you touch a notification.
The Basics
Touch a notification to open it in
its application.

48
Searching Your Phone and the Web
You can search for information on your phone and on the web by
using the Quick Search BoxTM or Google searchTM.
Some applications, such as Contacts, GmailTM,and Google MapsTM,
have the ability to search contents within those specific
applications.
Along with being able to search by typing in search terms, you are
also able to search by voice.
NOTE
Using the Voice Search application, you can also use Voice Commands, such as
voice dialing, as described in
“
Dialing by Voice
”
on page 77.
Phone and Web search using text entry
1. Touch the Search Key .
When you touch the Search Key on the Home screen
or in the other applications that support this, the Quick
Search Box will open automatically.
NOTE
If you're using the phone with the slide open, press the Search Key to open
the Quick Search Box to conduct a search.
The Basics
Voice Search
Touch to search by voice.
Recent search results
Provides one touch shortcut to
previously searched terms.
49
In some applications, such as Gmail, Contacts, and Browser,
the application's own search box opens when you touch the
Search Key .This is indicated by the application's icon
on the left side of the search box.
To change from the application's search feature, touch the
Search Key again, this will switch the search box to the
Quick Search Box. No matter what application you're
working in (except for Camera), touching the Search Key
twice will open the Quick Search Box.
2. Enter the text you're searching for in the Quick Search Box.
You can use the Search preferences to configure some
aspects of Google web search (for example, whether it
makes suggestions below the Quick Search Box as you
type), and what phone features you want to include in
searches. See
“
Search
”
on page 254.
3. Touch to search for the entered terms.
OR
If what you want to search for what appears in the
suggestions list, touch that item to conduct the search.
The Basics
Touch to conduct the search.
As you type, search results from
your phone, previous search
terms, and web search
suggestions appear. Touch an
item to search that term.

50
Web search using voice command
©Touch and hold the Search Key .
OR
©Touch the Microphone icon from the Quick Search Box.
When you stop speaking, Google Search by Voice analyzes
your speech and displays the results of your search.
The available Voice Commands are:
●Say
“
Call,
”
followed by a name from your contacts,
followed by the kind of phone number (
“
mobile,
” “
work,
”
and so on). For example,
“
Call Mike home.
”
If there is a
single match, the number is dialed automatically. See
“
Dialing by Voice
”
on page 77.
●Say
“
Directions to,
”
followed by an address, name,
business name, type of business, or other destination, to
get directions to that location from Google MapsTM.
●Say
“
Navigate to,
”
followed by an address, name,
business name, type of business, or other destination to
get spoken, turn-by-turn directions to that destination.
●Say
“
Map of,
”
followed by an address, name, business
name, type of business, or other location, to view that
location on Google Maps.
The Basics
51
Locking the Screen
You can lock your screen so that only you can unlock it to make
calls, access your data, buy applications, and so on. See
“
Location &
security
”
on page 247 for other ways to protect your phone and
privacy.
Setting a Lock Pattern
1. From the Home screen, press the Menu Key .
2. Touch Settings > Location & security.
3. Touch Set unlock pattern (under the Screen unlock pattern
section of the settings). The first time you do this, you will
see a tutorial with instructions on how to create an unlock
pattern.
4. You're prompted to draw and redraw your own pattern.
From then on, any time you wish to turn the phone on or
unlock the screen, you will need to draw your unlock pattern to
unlock the screen.
The Basics
Draw your unlock pattern.
Touch Continue to draw your
pattern again to confirm it.

52
Customizing the Home Screen
You can personalize your Home screen by adding application icons,
shortcuts, widgets, and other items to any Home screen pane. You
can also change the wallpaper.
To add an item to the Home screen
1. Go to the Home screen pane where you want to add the
item. For an introduction to working with the Home screen,
see
“
Getting to Know the Home Screen
”
on page 32.
2. Press the Menu Key and touch Add.
Or, just touch and hold an empty spot on the Home screen
pane.
NOTE
If there is no available space on a particular Home screen pane, Add will
not be available; you must delete or remove an item before you can add
another item. In this case, you have the option of switching to another
Home screen pane.
3. In the menu that opens, touch the type of item to add.
You can add the following types of items to the Home screen:
Shortcuts Add shortcuts to applications, a bookmarked webpage,
afavorite contact, a destination in Google Maps, a Gmail label, a
music playlist, and more. The shortcuts available depend on the
applications you have installed.
Widgets Add any of a variety of widget applications to your Home
screen, including a clock, a music player, a picture frame, Google
search bar, a power manager, a calendar of upcoming
appointments, a News and Weather widget, and more. Note that
more widgets can also be found on Android MarketTM.
Folders Add a folder where you can organize other Home screen
shortcuts and icons, or folders that contain all your contacts,
contacts with phone numbers, or starred contacts. Your folders'
contents are kept up to date automatically. For information on
how to rename a folder, go to page 54.
The Basics

53
To move an item on the Home screen
1. Touch and hold the item.
2. Drag the item to a new location on the screen.
Pause at the left or right edge of the screen to drag the item
onto the next available Home screen pane.
3. When the item is where you want it, lift your finger.
To remove an item from the Home screen
1. Touch and hold the item, note that the Launch icon changes
to an icon of a trash can.
2. Drag the item to the Trash Can icon.
3. When the icon turns red, lift your finger.
Tochange the Home screen wallpaper
1. From the Home screen, press the Menu Key and touch
Wallpaper.
You can also touch and hold an empty spot on the Home
screen, then touch Wallpapers in the menu that opens.
2. Touch Gallery,Live wallpapers,or Wallpapers.
Touch Gallery to use a picture on your phone as a
wallpaper. You can crop the picture before setting it as a
wallpaper.
Touch Live wallpapers to open a list of animated wallpapers
installed on your phone. Live wallpapers can change
according to the time of day, respond to touching the
screen, tell the time, or offer other information.
Touch Wallpapers to open a screen of wallpaper images
that come with the phone. Slide the thumbnail images left
and right to view the available images.
3. Touch Set wallpaper or Save.
The Basics

54
To rename a folder
1. Touch the folder icon to open it.
2. Touch and hold the folder window's title bar.
3. Touch the current folder name in the text box that appears,
then enter the new folder name.
4. Touch OK.
Connecting Quickly With Your Contacts
As you build up your list of contacts on your phone, you can use
Quick Contact for Android to quickly chat, email, text message,
place a call, or to locate your contacts. Quick Contact for Android is
aspecial set of icons that you can use to quickly and easily connect
to a contact.
©Open your Contacts list and touch the contact icon to the
left of the contact's name. A bubble will open with the
available options, displayed as icons. This is the Quick
Contact bubble. Depending on the contact information
saved, the available actions will be displayed above the
name.
©Touch a Quick Contact icon to communicate with the
contact.
Depending on the icon you've touched, a different
application will open. For example, the Google Maps icon
will be available if an address is saved in that contact entry.
By touching the Google Maps icon, the Google Maps
application will open and the address mapped in Google Maps.
The Basics

55
If you add a shortcut for a contact to your Home screen, you will be
able to open Quick Contact for that contact.
Optimizing Battery Life
You can extend your battery's life between charges by turning off
features that run in the background. You can also monitor how
applications and system resources consume battery power.
Tips to extend the life of your battery
©Turn off radio communications that you aren't using.
If you aren't using Wi-Fi, Bluetooth, or GPS, use the Settings
menu to turn them off. See
“
Wireless & networks
”
on page
241 and
“
Location & security
”
on page 247. (Note that the
GPS receiver is only turned on when you're using an
application that makes use of it.)
©Turn down screen brightness and set a shorter screen timeout.
See
“
Sound & display settings screen
”
on page 245.
©If you don't need them, turn off automatic syncing for Gmail,
Calendar, Contacts, and other applications.
See
“
Configuring Account Sync and Display Options
”
on page 99.
©Use the Power Control widget (located on the fourth Home
screen pane) to control the wireless connections, GPS
connection, Bluetooth power, display brightness, and
syncing activity.
The Basics

56
To check the battery charge level
©From the Home screen, press the Menu Key and touch:
Settings > (scroll the screen up) >About phone > Status.
The battery status (charging, discharging) and level (as a
percentage of fully charged) will be displayed at the top of
the screen.
To monitor and control what uses the battery
The Battery Use screen allows you to see which applications are
consuming the most battery power. Information on this screen
allows you to identify downloaded applications you may want to
turn off when not being used, so you can get the most out of your
battery power.
©From the Home screen, press the Menu Key and touch:
Settings > (scroll the screen up) >About phone > Batteryuse.
The screen will display battery usage time. Either how long
since last connected to a power source, if connected to a
power source, and how long you were last running on
battery power.
The list of applications or services using battery power are
displayed in order of energy used, from greatest amount to
least.
©Touch an application in the Battery Use screen to see the
details about its power consumption.
Different applications offer different kinds of information, and
they may even include buttons that open settings you can
use to reduce power consumption by that application.
The Basics
57
Connecting to Mobile Networks
When you buy your phone and sign up for service, your phone is
configured to use your provider's mobile networks for voice calls
and for transmitting data.
Different locations may have different mobile networks available.
Initially, your phone is configured to use the fastest mobile network
available for data. But you can configure your phone to use only a
slower 1X network for data, to extend the life of your battery,
between charges. You can also configure your phone to access a
different set of networks entirely, or to behave in specific ways
when roaming.
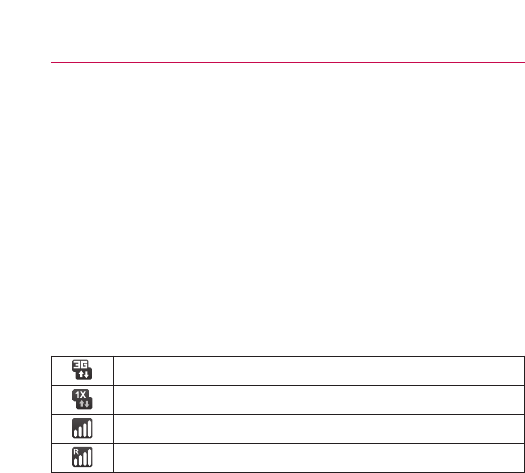
The icons in the Status bar indicate which kind of data network
you're connected to and the network signal strength.
When connected to slower networks, you may want to postpone
using your phone for data-intensive tasks until you are connected to
afaster network again, or find a Wi-Fi network to connect to. See
“
Connecting to Wi-Fi Networks
”
on page 59.
Connecting to Networks and Devices
Connected to the high-speed EVDO
Connected to the 1x data network
The more bars the stronger the wireless signal
Connected to another wireless service provider
'
snetwork (roaming)

58
To disable data when roaming
You can prevent your phone from transmitting data over other
carriers' mobile networks when you leave an area that is covered
by your carrier's networks. This is useful for controlling expenses
if your cell plan doesn't include data roaming.
1. From the Home screen, press the Menu Key .
2. Touch Settings > Wireless & networks > Mobile networks.
3. Touch Data roaming to remove the checkmark from the
box.
With Data roaming unchecked, you can still transmit data
with a Wi-Fi connection. See
“
Connecting to Wi-Fi Networks
”
on page 59.
Tolimit your data connection to 2G networks
You can extend your battery life by limiting your data connections
to 2G networks. When you are connected to a 2G network, you
may want to postpone activities that transmit a lot of data, such
as sending, uploading, or downloading pictures or video, until you
are connected to a faster mobile or other wireless network.
1. From the Home screen, press the Menu Key .
2. Touch Settings > Wireless & networks > Mobile networks >
Network mode.
3. Touch 1x only.
Connecting to Networks and Devices
59
Connecting to Wi-Fi Networks
Wi-Fi is a wireless networking technology that can provide Internet
access at distances of up to 100 meters, depending on the Wi-Fi
router and your surroundings.
To use Wi-Fi on your phone, you must connect to a wireless access
point, or
“
hotspot.
”
Some access points are open and you can
simply connect to them. Others are hidden or implement other
security features, so you must configure your phone so it can
connect to them.
Turn off Wi-Fi when you're not using it, to extend the life of your
battery.
The following Status bar icon indicates your Wi-Fi status.
When you connect to a Wi-Fi network, the phone obtains a network
address and other information it needs from the network, using the
DHCP protocol. To configure the phone with a static IP address and
other advanced settings, press the Menu Key and touch
Advanced.See
“
Advanced Wi-Fi settings screen
”
on page 242.
Toturn Wi-Fi on and connect to a Wi-Fi network
1. From the Home screen, press the Menu Key .
2. Touch Settings > Wireless & networks > Wi-Fi settings.
3. Touch Wi-Fi to turn Wi-Fi on and scan for available Wi-Fi
networks.
●List of available Wi-Fi networks will be displayed. Secured
networks are indicated by a lock icon.
●If the phone finds a network that you have connected to
previously, it automatically connects to it.
Connecting to Networks and Devices
Connected to the fastest networks

60
4. Touch a network to connect to it.
●If the network is open, you will be prompted to confirm
that you want to connect to that network by touching
Connect.
●If the network is secured, you will be prompted to enter a
password. (Ask your network administrator for details.)
●When you're connected to a network, you can touch the
network name in the Wi-Fi settings screen for details about
the speed, security, address, and related settings.
To receive notifications when open networks are in range
By default, when Wi-Fi is on, you receive notifications in the
Status bar when your phone detects an open Wi-Fi network.
1. Turn on Wi-Fi, if it's not already on.
2. From the Wi-Fi settings screen, touch Network notification
to checkmark the box.
Touch again to remove the checkmark, and stop receiving
notifications.
To add a Wi-Fi network
You can add a Wi-Fi network so the phone will remember it, along
with any security credentials, and connect to it automatically when
it is in range. You can also add a Wi-Fi network manually if it does
not broadcast its name (SSID) or if you want to add a Wi-Fi
network when you are out of its range.
To add a secured network, you need to contact the network's
administrator to obtain the password or other required security
credentials.
1. Turn on Wi-Fi, if it's not already on.
2. From the Wi-Fi settings screen, touch Add Wi-Fi network.
Connecting to Networks and Devices

61
3. Enter the SSID (name) of the network. If the network is
secured, touch the Security drop-down menu and touch the
type of security deployed on the network.
4. Enter the required passwords and security credentials.
5. Touch Save.
The phone will connect to the wireless network. Any
credentials that you entered are saved, so you are
connected automatically the next time you come within
range of this network.
To forget a Wi-Fi network
You can make the phone forget about the details of a Wi-Fi
network that you added. For example, if you don't want the phone
to connect to it automatically or if it is a network that you no
longer use.
1. Turn on Wi-Fi, if it's not already on.
2. In the Wi-Fi settings screen, touch and hold the name of the
network.
3. Touch Forget network.
Connecting to Networks and Devices
62
Connecting to Bluetooth Devices
Bluetooth is a short-range wireless communications technology that
devices can use to exchange information over a distance of about
30 feet. The most common Bluetooth devices are headphones for
making calls or listening to music, hands-free kits for cars, and other
portable devices, including laptops and cell phones.
There are several Bluetooth profiles that define the features and
communications standards for Bluetooth devices.
To connect to a Bluetooth device, you must turn on your phone's
Bluetooth. To use your phone's Bluetooth with another device, you
must first pair the two devices. Pairing creates a secure
connections between the two devices.
Turn off Bluetooth when you're not using it to extend the life of
your battery between charges. Bluetooth is one of the wireless
functions that is turned off when Airplane mode is set to On.
The Status bar displays icons that indicate Bluetooth status.
To turn Bluetooth on or off
1. From the Home screen, press the Menu Key .
2. Touch Settings > Wireless & networks.
3. Touch Bluetooth to turn on or off.
The phone supports HFP, HSP, A2DP, AVRCP, OPP, PBAP, FTP.
Bluetooth
®
QD ID B016383
Connecting to Networks and Devices
Bluetooth is on
Connected to a Bluetooth device

63
To change your phone’s Bluetooth name
Your phone has a generic Bluetooth name by default, which is
visible to other devices when you set the phone as 'Discoverable'.
You can change the name to customize it to your preference.
1. From the Home screen, press the Menu Key .
2. Touch Settings > Wireless & networks > Bluetooth settings.
●If Bluetooth is off, touch Bluetooth to turn it on.
3. Touch Device name,enter a new name then touch OK.
To pair your phone with a Bluetooth device
You must pair your phone with another device before you can
connect to it.
1. From the Home screen, press the Menu Key .
2. Touch Settings > Wireless & networks > Bluetooth settings.
●If Bluetooth is off, touch Bluetooth to turn it on.
●Your phone will scan for and display the IDs of all available
Bluetooth in-range devices.
●If the device you want to pair with isn't on the list, make
sure the target device is set to be discoverable, then touch
Scan for devices to scan again.
3. Touch the ID of the device you want to pair with your phone.
●Often, the target device will be discovered and pairing will
occur automatically.
●If you're prompted to enter a passcode, try entering 0000
or 1234 (the most common passcodes), or consult the
documentation that came with the target device to find its
passcode.
●Once the pairing is successful, your phone will connect to
the device.
Connecting to Networks and Devices

64
To connect to a Bluetooth device
Once paired, you can connect to a Bluetooth device as needed.
1. From the Home screen, press the Menu Key .
2. Touch Settings > Wireless & networks > Bluetooth settings.
●If Bluetooth is off, touch Bluetooth to turn it on.
3. In the list of Bluetooth devices, touch the name for the
paired device on the list.
To configure the Bluetooth features you want to use
Some Bluetooth devices have multiple profiles. Profiles can be the
ability to transmit your phone conversations, to play music with
Bluetooth stereo headphones, or to transfer files or other data.
1. Touch and hold the device listed in the Bluetooth settings
screen.
2. Touch Options in the menu that opens.
Ascreen opens with a list of the available profiles.
3. Touch a profile to add or remove the checkmark (to enable
or disable the profile).
4. When you're finished, touch the Back Key .
Todisconnect from a Bluetooth device
1. Touch the device in the Bluetooth settings screen.
2. Touch OK to confirm that you want to disconnect.
Connecting to Networks and Devices

65
To unpair a Bluetooth device
You can unpair a Bluetooth device and erase all pairing information
about it.
1. Touch and hold the device listed in the Bluetooth settings
screen.
2. Touch Disconnect or Disconnect and unpair in the menu
that opens.
Connecting to a Computer via USB
You can connect your phone to a computer with a USB cable to
transfer music, pictures, and other files between your phone's
microSD card and the computer.
WARNING!
When connecting your phone to a computer (and mounting its microSD
card), you must follow your computer's instructions for connecting and
disconnecting USB devices, to avoid damaging or corrupting the files on
your microSD card.
Connecting to Networks and Devices

66
To connect your phone to a computer via USB
1. Use the USB cable that came with your phone to connect
the phone to a USB port on your computer.
2. Open the Notifications panel then touch USB connected.
3. Touch Mount in the dialog box that opens to confirm that
you want to transfer files.
●When the phone is connected as USB storage, you receive
anotification.
●You phone's microSD card is mounted as a removable
drive on your computer. You can now copy files to and
from the microSD card. For more information, see the
documentation for your computer.
●During this time, you will not be able to access the
microSD card in your phone, so you can't use applications
that rely on the microSD card, such as Camera, Gallery,
and Music.
Todisconnect your phone from the computer
WARNING!
Carefully follow your computer's instructions to unmount, remove,
or disconnect any removable USB devices or disks, to avoid losing
information on the microSD card when disconnecting your phone
from your computer.
1. On your computer, complete the process to safely Stop, or
Remove, the USB device (in this case, the phone). For
example, use the Safely Remove Hardware option to Stop
the USB device, on Windows®XP.
2. Open the Notifications panel (on your phone) and touch Turn
off USB storage to unmount the microSD card.
3. Touch Turn off on the dialog box that opens.
Connecting to Networks and Devices

67
To safely remove the microSD card from your phone
You can safely remove the microSD card from your phone any
time the phone is turned off. If you need to remove the microSD
card while the phone is on, you must unmount the storage card
from the phone first, to prevent corrupting or damaging the
storage card.
1. From the Home screen, press the Menu Key .
2. Touch Settings > (scroll the screen up) >SD card & phone
storage.
3. Touch Unmount SD card.
Once the notification SD cardsafe to remove appears in the
notification bar, you can safely remove the microSD card from the
phone.
Toformat a microSD card
If you purchase a new microSD card, you may need to format it
before you can use it with your phone. You can also format a
microSD card anytime to erase its contents.
1. From the Home screen, press the Menu Key .
2. Touch Settings > SD card & phone storage.
NOTE
You can only format a microSD card only when it is unmounted. If
necessary, touch Unmount SD card before proceeding.
3. Touch Format SD card.
●Touch Format SD card on the warning screen to format
the SD card.
OR
●Touch the Back Key to exit without formatting.
Connecting to Networks and Devices

68
Connecting to Virtual Private Networks
Virtual private networks (VPNs) allow you to connect to resources
inside a secured local network, from outside that network. VPNs
are commonly deployed by corporations, schools, and other
institutions so that their users can access local network resources
when not on campus, or when connected to a wireless network.
There are numerous systems for securing VPN connections,
including some that rely on secure certificates or other methods to
ensure that only authorized users can connect. For information
about installing secure certificates, see
“
Working With Secure
Certificates
”
on page 70.
To configure VPN access from your phone, you must obtain the
details from your network administrator.
To add a VPN
1. From the Home screen, press the Menu Key .
2. Touch Settings > Wireless & networks > VPN settings.
3. Touch Add VPN.
4. Touch the type of VPN to add.
5. In the screen that opens, follow the instructions from your
network administrator to configure each component of the
VPN settings.
6. Press the Menu Key and touch Save.
The VPN will be added to the list on the VPN settings
screen.
Connecting to Networks and Devices

69
To connect to a VPN
1. From the Home screen, press the Menu Key .
2. Touch Settings > Wireless & networks > VPN settings.
The VPNs you've added are listed on the VPN settings
screen.
3. Touch the VPN to which you want to connect.
4. In the dialog box that opens, enter any requested credentials
then touch Connect.
●When you're connected to a VPN, you will receive an
ongoing notification in the Status bar.
●If you are disconnected, you will receive a notification that
you can touch to return to the VPN settings screen.
Todisconnect from a VPN
©Open the Notifications panel then touch the ongoing
notification for the VPN connection, this will allow you to
disconnect.
Connecting to Networks and Devices

70
Working With Secure Certificates
If your organization's VPN or Wi-Fi network relies on secure
certificates, you must obtain the certificates and store them in your
phone's secure credential storage before you can configure access
to that VPN or Wi-Fi network on your phone.
For specific instructions, contact your network administrator.
For more information about working with credential storage, see
“
Location & security
”
on page 247.
To install a secure certificate from the microSD card
1. Copy the certificate from your computer to the root (that is,
not in a folder) of the microSD card.
See
“
Connecting to a Computer via USB
”
on page 65 for
information about connecting your phone to a computer and
copying files to the microSD card.
2. From the Home screen, press the Menu Key .
3. Touch Settings > Location & security.
4. Scroll the screen up, then touch Install from SD card.
5. Touch the file name of the certificate to install.
Only the names of certificates that you have not already
installed on your phone are displayed.
6. If prompted, enter the certificate's password then touch OK.
7. Enter a name for the certificate then touch OK.
If you have not already set a password for your phone's
credential storage, you will be prompted to enter a
password for it, twice, then touch OK.For more information
about credential storage, see
“
Location & security
”
on page
247.
You can now use the certificate that you installed when
connecting to a secure network. For security purposes, the
certificate will be deleted from the microSD card.
Connecting to Networks and Devices
71
Placing and Ending Calls
You can place calls using the Phone application. You can dial calls
manually using the Phone tab. You can dial using your phone's
memory, using the Call log tab (see "Working with the Call Log" on
page 74); the Contacts tab (see "Communicating with Your
Contacts" on page 90); or the Favorites tab (see "Communicating
with Your Contacts" on page 90).
To open the Phone application
©From the Home screen, or the Launch screen, touch the Phone
icon .
OR
©Press the Send Key ,then touch the Phone tab.
To place a call by dialing
1. Open the Phone application, Phone tab.
Placing and Receiving Calls
Touch and hold to enter +, for
international calls.
Touch to erase a digit. Touch and hold
to erase the entire number.
72
2. Touch the keys on the Phone tab to enter the phone
number.
●If you enter a wrong number, touch to erase digits one
by one.
●To erase the entire number, touch and hold .
●To dial an international number, touch and hold the 0key
to enter the plus ( +)symbol. Then, enter the international
prefix for the country; followed by the full phone number.
3. Touch the green phone button to dial the number that
you entered.
●You can open other applications during a call. For example,
to use another application. The green phone icon will
appear in the Status bar while the call is underway.
●Press the Volume Up/Down keys to adjust the call volume.
●Use the onscreen buttons to add another call on hold, to
use the speakerphone, and for other options, as described
in
“
Options During a Call
”
on page 77.
To end a call
©Touch the End or press the End Key .
NOTE
If you opened other applications while on a call, press the Send Key
to redisplay the Phone keypad.
X
X
Placing and Receiving Calls
Information from Contacts about the
person you're calling.
The duration of the call.
Touch to enter additional numbers
during your call.

73
Airplane mode (to disable wireless communication)
Some locations may require you to turn off your phone's wireless
connections by placing your phone in Airplane mode.
1. Press and hold the Power/Lock Key .
2. Touch Airplane mode.
You can set to Airplane mode with the Wireless & networks
menu. See
“
Wireless & networks
”
on page 241.
Answering or Rejecting Calls
When you receive a phone call, the Incoming Call screen opens
with the caller ID and any additional information about the caller that
you have saved in the Contacts list.
All incoming calls are recorded in the Call log. See
“
Working with
the Call log
”
on page 74.
To answer a call
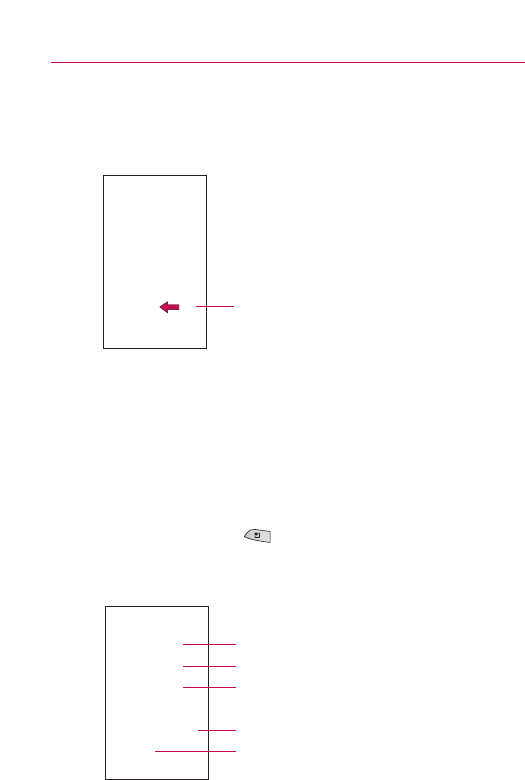
©Drag the green Answer button to the right.
If you were already on a call, the first call is placed on hold
while you answer the new call.
To silence the ringer of an incoming call, press the up/down
Volume Key.
Placing and Receiving Calls
Drag the green Answer button to the
right to answer the call.
74 Placing and Receiving Calls
To decline a call and divert it to voicemail
©Drag the red Reject call button to the left.
The caller is sent directly to your voicemail box to leave a
message.
©To silence the ringer, press the Volume Down Key.
Working with the Call Log
The Call log is a list of all the calls you’ve placed, received, or
missed. It offers a convenient way to redial a number, return a call,
or add a number to your Contacts.
Toopen the Call log
©Press the Send Key .
Calls are listed in the Call log tab, the most recent calls are
located at the top of the list. Scroll down to see older
entries.
Touch to call back
Dialed call
Missed call
Received call
Touch and hold an entry for more options
Drag the red Reject call button to the
left to reject the call and send to
voicemail.

75
To dial a number in the Call log
©From the Call log, touch the green Dial button at the right
of the entry.
You can also touch and hold the entry to open a menu with
more options, to communicate with that contact in other
ways.
To add an entry’s number to your Contacts
1. Touch and hold the entry.
2. Touch Add to contacts.
3. In the list of contacts that opens, touch Create new contact
at the top, or touch an existing contact to add the new
number to that existing contact.
For more information about creating and editing contacts,
see
“
Contacts
”
on page 82.
To take other actions on a Call log entry
©Touch a Call log entry to open a screen from where you can
call the contact, send the contact a message, add the
number to your Contacts list, and learn more about the
original call.
©Touch and hold a Call log entry to open a menu where you
can call the contact, view contact information, edit the
number before you redial, and more.
To clear the Call log
©Press the Send Key and press the Menu Key then
touch Delete Call Logs.
You can also touch and hold an entry in the log. In the menu
that opens, touch Remove from call log to remove just that
entry from the log.
Placing and Receiving Calls

76
Calling Your Contacts
Instead of manually dialing phone numbers using the dialpad, you
can use your Contacts list to dial quickly and easily.
You can also quickly call a contact by using Quick Contact. See
“
Connecting Quickly With Your Contacts
”
on page 54.
Adding, editing, and performing other tasks with your contacts is
described in
“
Contacts
”
on page 82. If you have contacts on the
web, they're synchronized with your phone when you first connect
to your GoogleTM Account.
To call a contact
1. From the Home screen, touch the Contacts icon .
2. Touch the contact to call.
3. Touch the phone number to use to call the contact.
See
“
Communicating with your contacts
”
on page 90 for
more options.
To call a favorite contact
1. From the Home screen, touch the Contacts icon then
touch the Favorites tab.
You can add and remove favorites by touching the star next
to their names (when you're viewing information about the
contact). See
“
Adding a Contact to Your Favorites
”
on page
87.
2. Touch the favorite to call.
3. Touch the phone number to use to call the contact.
Placing and Receiving Calls

77
Dialing by Voice
You can search for and dial a contact by speaking, rather than by
using the Phone tab or touching a contact's number.
To place a call by speaking
You can call a contact by using Google search by voice.
1. Touch and hold the Search Key until the Speak now
prompt appears.
2. Say
“
Call
”
followed by the name of the contact to call.
If Google search by voice finds a match, it dials the
contact's default number.
For details about setting a contact's default number, see
“
Editing Contact Details
”
on page 88.
Options During a Call
When a call is in progress, you have various convenient features at
your disposal, such as muting your microphone or using the
speakerphone. For information on how to initiate a conference call,
see
“
Managing Multiple Calls
”
on page 78.
To mute the microphone during a call
©Touch the Mute button .
The Mute button lights up to indicate that the microphone is
muted. The Mute icon will appear in the Status bar to remind
you that the microphone is turned off.
When viewing the current call screen, you can unmute the
microphone by touching the Mute button again.
The microphone is unmuted automatically when the call
ends.
Mute
Placing and Receiving Calls

78
To turn the speakerphone on or off
©Touch the Speaker button .
The Speaker button lights up to indicate that the
speakerphone is on. The Speaker icon will appear in the
Status bar and the sound from your call is played through the
phone's speaker.
When viewing the current call screen, you can turn the
speakerphone off by touching the Speaker button icon again.
The speaker is turned off automatically when the call ends.
WARNING!
To avoid damage to your hearing, do not hold the phone against
your ear when the speakerphone is turned on.
To switch between a Bluetooth headset and the phone
When a Bluetooth headset is paired and connected to your phone,
you can conduct calls on the headset for hands-free conversation.
During a call, you can opt to use the Bluetooth headset or just the
phone.
For details about pairing the phone with a Bluetooth headset, see
“
Connecting to Bluetooth Devices
”
on page 62.
When using the Bluetooth headset during a call, the Ongoing Call
notification icon is blue in the Status bar.
©Touch the Bluetooth button to switch the call from the
headset to the phone, or vice versa.
Managing Multiple Calls
If you accept a new call when you're already on a call, you can
switch between the two calls or merge the two calls into a single
conference call. You can also set up a conference call with multiple
callers.
To switch between current calls
©Touch the Swap button .
The current call will be placed on hold and you will be
connected with the other call.
Bluetooth
Speaker
Placing and Receiving Calls
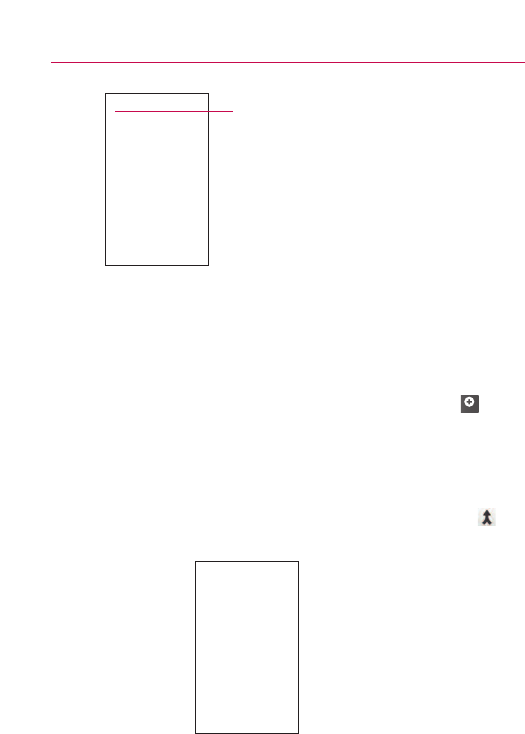
79
To set up a conference call
Contact your wireless service provider to learn whether they
support conference calls and how many participants you can
include.
1. Place a call to the first participant.
2. When you're connected, touch the Add call button .
The first participant is put on hold and you're prompted to
dial the second caller.
3. Place the next call, using the Phone,Call log,Contacts, or
Favorites tab.
4. After you're connected, touch the Merge calls button .
The participant is added to the conference call.
Add call
Placing and Receiving Calls
Touch to swap calls.

80
To end a conference call and disconnect all callers
©Touch the End or press the End key .
NOTE
If you opened other applications while on a call, press the Send Key
to redisplay the Phone keypad, then touch the End button or press the
End key .
Listening to Your Voice mail
When you have a new Voice mail message, the Voice mail icon
appears in the Status bar. If you have not set up your Voice mail
number, or if you need to change it, you can do that with the Call
settings. See
“
Call settings
”
on page 244.
Tolisten to your Voice mail
©Open the Notifications panel then touch New voicemail.
Responding to notifications is described in
“
Managing
Notifications
”
on page 46.
OR
©From the Home screen, touch the phone icon then touch
the Voicemail button .Typically, your carrier's voicemail
system guides you through the process of listening to and
managing your voicemail. The first time you call your
voicemail, it also guides you through the process of
recording greetings, setting a password, and so on.
Placing and Receiving Calls
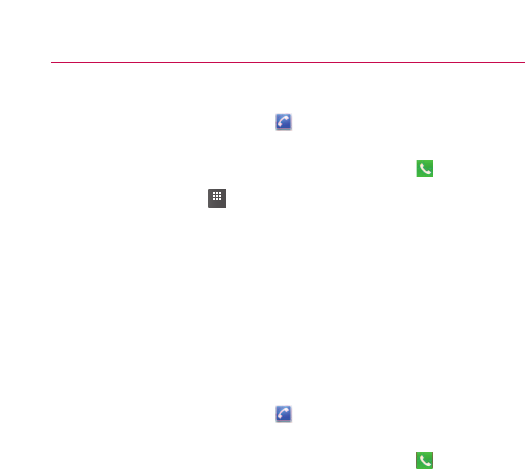
81
To set up your voice mail
1. Touch the Phone button on the Home screen or in the
Launch screen.
2. Dial *86, then touch the green phone button .
3. Touch Dialpad so you can enter numbers.
4. If you hear a system greeting, touch # to interrupt it, if
applicable.
5. Follow the setup tutorial.
6. Select a password.
7. Record a voice signature and greetings for your Voice
Mailbox.
Toaccessyour voice mail from your wireless device
1. Touch the Phone button on the Home screen or in the
Launch screen.
2. Dial *86, then touch the green phone button .If you hear a
system greeting or your own greeting, touch # immediately
to interrupt the system greeting and follow the prompts.
3. Follow the prompts to enter your password and retrieve
your messages.
Dialpad
Placing and Receiving Calls
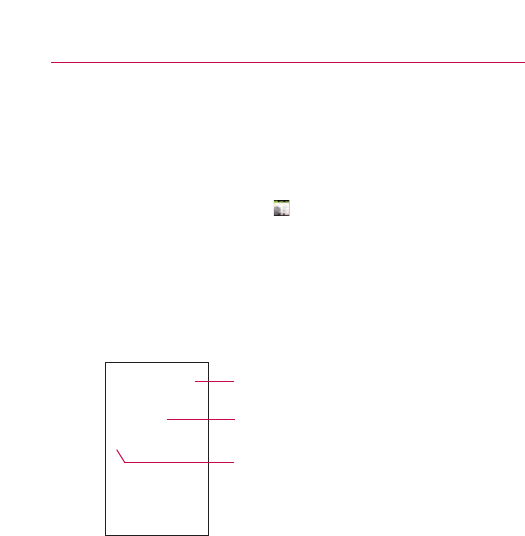
82
Using Your Contacts
Use the Contacts application to add, view, and communicate with
your friends and acquaintances.
To open your Contacts application
©Touch the Contacts icon on the Home screen or in the
Launch screen.
NOTE
You can also access your contacts by using Quick Contact. See
“Connecting Quickly With Your Contacts” on page 54.
All of your contacts are displayed alphabetically in a list. If you
have a new phone and haven't added any contacts yet, The
Contacts application will display hints on how to start adding
contacts to your phone.
To open a list of your favorite contacts
©Open your Contacts application then touch the Favorites tab.
The Favorites tab lists the contacts you've added to the list
(see
“
Adding a Contact to Your Favorites
”
on page 87),
followed by a list of your most frequently called contacts.
Contacts
Touch to view only your favorite contacts.
Touch a contact to view its details.
Touch icon to open Quick Contact for that contact.
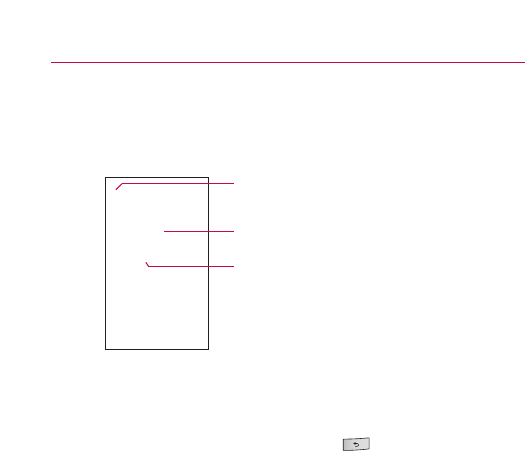
83
To view details about a contact
1. Open your Contacts application.
2. Touch the contact whose details you want to view.
Touch the green phone icon to call the number or touch the
Text icon to start a text message.
Touch an address to view it on Google Maps.
See
“
Google MapsTM
”
on page 180.
You can also press the Menu Key and touch Edit
contact to edit the contact's information (see
“
Editing
Contact Details
”
on page 88), or touch Delete contact to
delete the contact entry.
Contacts
Touch to open Quick Contact.
Touch a contact method to start
communicating with the contact.
Touch an address to view it on Google
Maps
TM
.
84
Adding Contacts
You can add contacts on your phone and synchronize them with the
contacts in your GoogleTM Account, Microsoft Exchange ActiveSync
account, or other accounts that support syncing contacts.
The Contacts application tries to join new addresses with existing
contacts, to create a single entry. You can also manage that
process manually. See
“
Joining Contacts
”
on page 94 and
“
Separating Contact Information
”
on page 95.
To add a new contact
1. From the Home screen, touch Contacts .
2. Press the Menu Key and touch New contact.
3. If you have more than one account with contacts, touch the
account to which you want to add the contact.
4. Enter the contact's name.
5. Touch a category of contact information, such as phone
numbers and email addresses, to enter that kind of
information about your contact.
6. Touch a category's plus button to add more than one
entry for that category. For example, in the phone number
category, add a work number and a home number. Touch
the label button to the left of the entry item information to
open a drop-down menu of preset labels. For example,
Mobile and Work for a phone number, or touch Custom in
the menu to create your own label.
7. Touch the Picture Frame button to select a picture to
display next to the name in your list of contacts and in other
applications.
8. When you're finished, touch the Done button.
Contacts

85
Importing, Exporting, and Sharing Contacts
If you have contacts stored in vCard format on a microSD card you
can import them into your Contacts application on your phone. You
can also export contacts in vCard format onto a microSD card.
Export to back them up to a computer or other device or so you can
send a contact via email.
To import contacts from your microSD card
You can copy contacts, in vCard format, onto your microSD card
then import them into your phone. See
“
Connecting to a
Computer via USB
”
on page 65 for details about copying files to a
microSD card from your computer.
1. Insert the memory card (that contains the vCard files) into
your phone.
2. From the Home screen, touch Contacts .
3. Press the Menu Key and touch Import/Export.
4. Touch Importfrom SD card.
5. If you have more than one account on your phone, touch the
account into which you want to import the contacts.
6. Touch the importing option and then touch OK.
Contacts

86
To export contacts to your microSD card
You can export all of the contacts on your phone to your microSD
card, as a vCard files. You can then copy this file to a computer or
another device that is compatible with this format, such as an
address book application. See
“
Connecting to a Computer via
USB
”
on page 65.
1. From the Home screen, touch Contacts .
2. Press the Menu Key and touch Import/Export.
3. Touch Export to SD card.
4. Touch OK to confirm your selection and to begin export to
the microSD card.
Toshare a contact
You can share a contact with someone by sending it to them as a
vCard file.
1. From the Home screen, touch Contacts .
2. Open the contact you want to share.
3. Press the Menu Key and touch Share.
4. Choose the method for sending.
Contacts

87
Adding a Contact to Your Favorites
The Favorites tab contains a short list of the contacts you
communicate with most often.
To add a contact to your favorites
1. From the Home screen, touch Contacts .
2. Touch a contact to view its details.
3. Touch the star to the right of the contact's name.
When the contact is added to your favorites list, the star will
be gold-colored
To remove a contact from your favorites list
1. From the Home screen, touch Contacts then touch the
Favorites tab.
2. Touch a contact to view its details.
3. Touch the gold star to the right of the contact's name.
The removed star will indicate that the contact was removed
from your Favorites list.
Searching for a Contact
It is easy to search for a contact by name.
To search for a contact
1. From the Home screen, touch Contacts .
2. Touch the Search Key .
3. Start entering the name of the contact you're searching for.
As you type, contacts with matching names will appear
below the search box.
4. Touch a matching contact in the list to open its entry. You
can also touch the Search button (on the touch
keyboard) to open a screen with a list of matching contacts.
Contacts

88
Editing Contact Details
You can change or add details saved in your contact entries. You
can also set specific ringtones to specific contacts or determine
whether calls from specific contacts are diverted to your voicemail.
Some contact entries contain information from multiple sources:
information that you added manually, information that Contacts
joined from multiple accounts to consolidate duplicates, and so on.
If you find duplicate entries in Contacts, you can join them into a
single entry, as described in
“
Joining Contacts
”
on page 94. If you
that find information from unrelated contacts was joined in error,
you can separate them, as described in
“
Separating Contact
Information
”
on page 95.
Changes made to information from one source do not automatically
change the information on the other sources. For example, if you
have information about a contact from a Google Account and an
Exchange ActiveSync account and both are configured to sync
contacts, changes to the contact from the Google Account are
synced to that account on the web, but the information from the
Exchange ActiveSync account will remain unchanged.
For more information about working with multiple accounts, see
“
Accounts
”
on page 96.
To edit contact details
1. From the Home screen, touch Contacts .
2. Touch and hold the contact whose details you want to edit.
In the menu that opens, touch Edit contact.
3. Edit the contact information. For more information entering
contact information, see
“
Adding Contacts
”
on page 84.
4. Touch the Done button.
Contacts

89
To change a contact’s default phone number
The default phone number is used when you initiate a call or send
atext message using the context menu (by touching and holding
acontact).
1. From the Home screen, touch Contacts .
2. Touch the name of a contact in the list to view its details.
3. Touch and hold the phone number to use as the contact's
default phone number.
4. Touch Make default number in the menu that opens.
The default phone number will be marked with a checkmark
.
To divert calls from a contact to your voicemail
1. From the Home screen, touch Contacts .
2. Touch the name of a contact in the list to view its details.
3. Press the Menu Key and touch Options.
4. Touch Incoming Calls to checkmark it.
5. Touch the Back Key .
When this contact calls you, your phone will not ring and the
caller will be forwarded directly to your voicemail.
To set a ringtone for a contact
1. From the Home screen, touch Contacts .
2. Touch the name of a contact in the list to view its details.
3. Press the Menu Key and touch Options.
4. Touch Ringtone.and touch a ringtone to select it.
5. Touch the OK button.
Contacts

90
To delete a contact
1. From the Home screen, touch Contacts .
2. Touch the name of a contact in the list to view its details.
3. Press the Menu Key and touch Delete contact.
If the contact contains information from a read-only account,
you will not be able to delete it; you will only be able to
change the sync settings for that account or delete the
account itself.
If the contact contains information joined from a read-only
account, a dialog box will inform you that you must separate
the contact entry into individual contacts to delete the
contact.
4. Touch the OK button to confirm that you want to delete the
contact.
Communicating with Your Contacts
From the Contacts or Favorites tab, you can quickly call or send a
text (SMS) or multimedia message (MMS) to a contact's default
phone number. You can also open a list of all the ways you can
communicate with that contact.
This section describes ways to initiate communication when
viewing your list of contacts. The Contacts application shares your
contacts with many other applications, such as GmailTM (see
“
GmailTM
”
on page 102) and Messaging (see
“
Messaging
”
on page
158).
Contacts
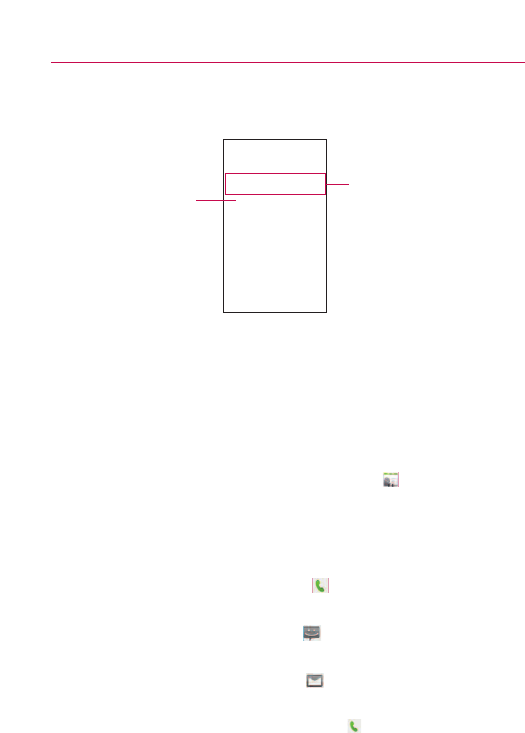
91
To connect by using Quick Contact for Android
TM
1. Touch a contact's picture to open Quick Contact for Android.
2. Touch the icon corresponding to the type of communication
you want to start.
Depending on the contact information saved, the available
actions will be displayed above the name.
For more information, see
“
Connecting Quickly With Your
Contacts
”
on page 54.
To communicatewith a contact
1. From the Home screen, touch Contacts .
2. Touch the contact with whom you want to communicate.
3. In the contact's details screen, touch the way to start
communicating with the contact.
●Touch the green Dial button next to the number you
want to call to automatically.
●Touch the Message button next to the number you
want to message.
●Touch the Envelope button next to the email address
you want to email.
NOTE
Anytime you see the green Dial button next to a number, such as in
your Favorites or Call log, just touch it to call that number.
Contacts
Touch a contact's
picture.
Touch the icon for the
way you want to
connect.

92
To call a contact’s default number
1. From the Home screen, touch Contacts .
2. Touch and hold the entry for the contact to call.
3. Touch Call contact in the menu that opens.
For more information about placing phone calls, see
“
Placing
and Ending Calls
”
on page 71.
To send a text or multimedia message to a contact’s
default number
1. From the Home screen, touch Contacts .
2. Touch and hold the contact to call.
3. Touch Text contact in the menu that opens.
For more information about sending text and multimedia
messages, see
“
Messaging
”
on page 158.
Contacts
93
Selecting which Contacts are Displayed
You can hide contacts that don't have phone numbers. You can also
configure which groups of contacts you want to display in the
Contacts list.
To set whether contacts without phone numbers are
displayed
If you use your list of contacts only to call people, you can hide
any contacts that don't have phone numbers.
1. From the Home screen, touch Contacts .
2. Press the Menu Key and touch Display options.
3. Touch Only contacts with phones to select or deselect this
option. When selected, a gold checkmark will appear.
To change which groups are displayed
1. Open your Contacts application.
2. Press the Menu Key and touch Display options.
3. Touch an account to open its list of available groups.
Contacts
94
4. Touch each group whose contacts you want to view in your
Contacts application, contact types with a gold checkmark
will appear in your contacts list.
This action affects only which contacts are displayed. Your
sync settings will not be affected.
5. Touch the Done button. A message appears while your
changes are made. If your change affects a great many
contacts, this can take a short while.
Joining Contacts
When you add an account or add contacts in other ways, such as
by exchanging emails, the Contacts application attempts to avoid
duplication by joining contact information automatically. You can
also join contacts manually.
To join contacts
1. From the Home screen, touch Contacts .
2. Touch the contact entry to which you want to add
information.
The contact name for this entry will remain unchanged after
you join with another contact.
3. Press the Menu Key and touch Edit contact.
4. Press the Menu Key and touch Join.
Full list of contacts are displayed at the top of the screen.
Contacts
Touch the contact whose information
you want to join.

95
5. Touch the contact whose information you want to join with the
first contact. The information from the two contacts will be
merged and displayed under the name from the first contact.
See
“
Separating Contact Information
”
on page 95 for
information about how to separate contacts that were
previously joined.
Separating Contact Information
Each contact entry on your phone may contain
‘
joined
’
information
from a variety of sources.
If contact information from different sources was joined in error,
you can separate the information back into individual contact entries
on your phone.
To separate contact information
1. From the Home screen, touch Contacts .
2. Touch the contact entry whose information you want to
separate.
3. Press the Menu Key and touch Edit contact.
4. Press the Menu Key and touch Separate.
Touch the OK button to confirm you want to separate the
entries. The contact information will separated into individual
contact entries in the contacts list.
Contacts

96
Adding and Removing Accounts
You can add multiple GoogleTM Accounts and Exchange ActiveSync
accounts. You may also be able to add other kinds of accounts,
depending on the applications downloaded and installed on your
phone.
When you add an account, the Contacts application compares any
new contacts with your existing contacts and will join contact
entries if matches are found. This does not join that data on the
accounts themselves; they are only displayed as a single contact on
your phone. See
“
Joining Contacts
”
on page 94 for information
about joining contacts manually.
See
“
Configuring Account Sync and Display Options
”
on page 99 to
learn how to separate contact information that was joined
incorrectly.
Toadd an account
To add some accounts, you will need to contact a network
administrator for account setup information. For example, you
may need to know the account's domain or server address.
1. From the Home screen, press the Menu Key ,touch
Settings,and touch Accounts & sync.
The Accounts & sync settings screen displays your current
sync settings and accounts.
For more information, see
“
Configuring Account Sync and
Display Options
”
on page 99.
2. Touch the Add account button.
Accounts
Add account

97
3. Touch the account you want to add.
4. Follow the onscreen steps to enter the required (and
optional) account information.
Many accounts require only a username and password, but
some accounts will require more information. For details
about adding Microsoft Exchange ActiveSync accounts, see
“
Adding and Editing Email Accounts
”
on page 151 and the
detailed tables in
“
Changing Email Account Settings
”
on
page 154. These sections also describe how to add an email
account that uses IMAP, POP3, or SMTP.
5. Configure the account.
Depending on the kind of account, you may be asked to
configure what kinds of data you want to sync to the phone,
name of the account, and other details. When you're
finished, the account will be added to the list in the
Accounts & sync settings screen.
See
“
Configuring Account Sync and Display Options
”
on
page 99 for account configuration details.
Accounts
List of available accounts

98
To remove an account
You can remove an account to delete all information associated
with it from your phone, including email, contacts, settings, and
so on.
You can't remove some accounts, such the first Google Account
you set up on the phone. That account can only be removed by
resetting your phone entirely.
1. From the Home screen, press the Menu Key ,touch
Settings,and touch Accounts & sync.
The Accounts & sync settings screen displays your current
sync settings and accounts.
For more information, see
“
Configuring Account Sync and
Display Options
”
on page 99.
2. Touch the account you want to delete.
3. Touch the Remove account button.
4. Touch the Remove account button again to confirm that you
want to remove the account.
Accounts

99
Configuring Account Sync and Display Options
You can configure background data and synchronization options for
the applications on your phone. You can also configure
synchronization options for each account. Some applications, such
as GmailTM and Calendar, have their own synchronization settings.
Some applications, such as Contacts and Gmail, can sync data for
multiple accounts. Others, such as Calendar, sync data only from
the first Google Account you set up with your phone, or from an
account associated specifically with that application.
For some accounts, syncing is two-directional; changes that you
make to the information on your phone are synchronized with the
accounts on the web or PC. Your Google Account synchronizes in a
two-directional manner. Other accounts support only one-way sync;
the information changed on your phone is only changed on your
phone.
Toconfigure general sync settings
1. From the Home screen, press the Menu Key ,touch
Settings,and touch Accounts & sync.
The Accounts & sync settings screen displays your current
sync settings and accounts.
For more information, see
“
Configuring Account Sync and
Display Options
”
on page 99.
The screen displays your current sync settings and a list of
your current accounts.
Accounts
Touch the account to configure it.
Sync status

100
:indicates that some, or all, of an account's information
is configured to sync automatically with your phone.
:indicates that none of an account's information is
configured to sync automatically with your phone.
2. Touch Background data to enable or disable whether
applications can use your data connection to synchronize
data while the applications run in the background.
If you disable this option, the Gmail and Calendar
applications will not automatically receive updates until they
are manually refreshed (using their respective options
menu).
3. Touch Auto-sync to checkmark it (or uncheck it) to control
whether changes you make to information on the phone or
on the web are automatically synced with each other.
For example, when this option is enabled, changes that you
make in the Contacts application on your phone are
automatically made to your on-the-web Google ContactsTM.
If you uncheck this option, you may be able to use an
application's tools to sync data manually. See the following
section
“
To sync information manually
”
.
To sync information manually
1. From the Home screen, press the Menu Key ,touch
Settings,and touch Accounts & sync.
The Accounts & sync settings screen displays your current
sync settings and accounts.
For more information, see
“
Configuring Account Sync and
Display Options
”
on page 99.
2. Touch the account whose data you want to sync.
3. Press the Menu Key and touch Sync now.
Accounts
101
To change an account’s sync settings
1. From the Home screen, press the Menu Key ,touch
Settings,and touch Accounts & sync.
The Accounts & sync settings screen displays your current
sync settings and accounts.
For more information, see
“
Configuring Account Sync and
Display Options
”
on page 99.
2. Touch the account whose sync settings you want to
change.
The Data and synchronization screen will open, displaying a
list of the kinds of information the account can sync.
3. Touch the items you want to sync, a green checkmark
indicates that synchronization has been enabled. By
disabling synchronization for an item, it will not remove the
previously synchronized data from your phone, it will simply
stop future syncs. To remove the information previously
synced for the account, you must remove the account.
Accounts

102
Gmail is Different
Gmail is web-based:Your messages are stored on-line, on
GoogleTM servers; but you read, write, and organize messages by
using the Gmail application on your phone, or by using a web
browser on a computer. Because your mail is stored on Google
servers, you can search your entire message history, backed by
the speed and power of Google search.
Actions that you take in one place are reflected everywhere. For
example, if you read a message in Gmail on your phone, it will be
marked as read in a web browser. And a message that you send
using a browser, or even a draft of a message, is visible in Gmail
on the phone.
Gmail is conversation-based:Each message and all replies to it
are grouped in your Inbox as a single conversation. In other email
applications, replies to messages are spread across your Inbox,
typically by date received, so a message and the replies to it are
separated by other messages. Gmail makes it easy to follow the
thread of a conversation.
Gmail is organized by labels, not by folders:By tagging
messages with labels, you can organize your conversations in
many different ways. Whereas in other email applications, each
message can live in only one folder. For example, with Gmail you
can label a conversation with your mother about your brother's
birthday present with both
“
Mom
”
and
“
Dave.
”
Later, you can look
for the all messages containing either label. Using folders, you'd
have to store the message in the
“
Mom
”
folder or the
“
Dave
”
folder, not both.
Gmail for the phone is optimized for mobile: Some features are
only accessible on your computer browser The best place to
organize and learn about Gmail is the web. For example, you can't
use the Gmail application on the phone to create the labels and
filters that you use to organize your messages, but you can label a
message. Gmail on the web offers complete information about
the service, so it's the best place to learn about all of the features
of Gmail.
GmailTM

103
Gmail is for Gmail: Of course you can use Gmail to send email to
any email address, and anyone can send email to you at your
Gmail address. But if you want to read messages from another
email service provider (using your AOL, Yahoo!, or other email
account), you must use the Email application. See
“
Email
”
on page
143.
Opening Gmail and Your Inbox
When you open the Gmail application, the most recent
conversations are displayed in your Inbox.
To open the Gmail application
©Touch the Gmail icon on the Home screen or in the
Launch screen.
See
“
Opening and Switching Applications
”
on page 43 to
learn more about opening and switching applications.
All of your conversations are displayed in your Inbox unless you
delete, archive, or filter them.
The current Google Account is displayed at the top right of the
Inbox. If you have more than one account, you can switch
accounts to view the messages in each Inbox, as described in “To
switch accounts” on page 104. Adding accounts is described in
“Accounts” on page 96.
Conversations with new messages are displayed with bold
subject lines. To read a message in a conversation, touch its
subject line text. See “Reading Your Messages” on page 105.
Gmail
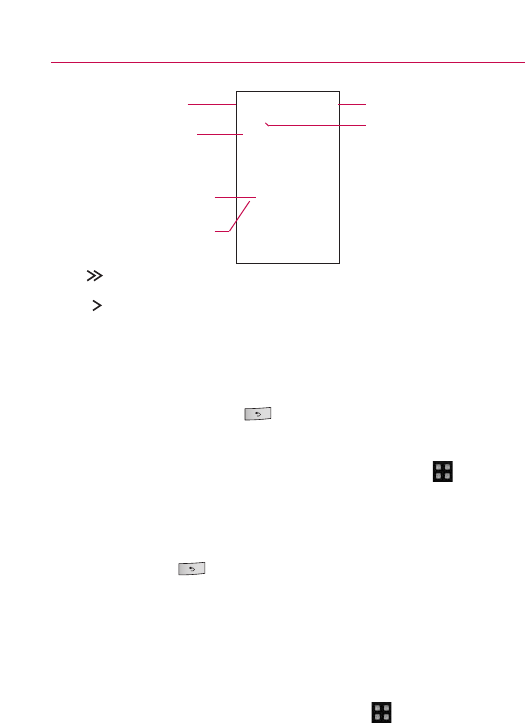
104
:indicates that this message was sent directly to you.
:indicates that this message was that you were CC'd on.
(No indicator): indicates that this message was sent to a group
that includes you.
To open your Inbox when Gmail is running
©Touch the Back Key until you return to your Inbox.
OR
©When reading a message, press the Menu Key and
touch Back to Inbox.
OR
©When viewing a list of labeled conversations, press the
Menu Key and touch More > Back to Inbox.
To switch accounts
Gmail displays conversations and messages from one Google
Account at a time. If you have more than one account, you can
open the Accounts screen to view how many unread messages
you have in each account and to switch accounts.
1. From your Inbox, press the Menu Key and touch
Accounts.
Gmail
Your account.
Bold subject lines indicate
conversations with new
(unread) messages.
The number in
parentheses indicates the
number of messages in
the conversation
The number of unread
messages in your Inbox.
Touch a conversation to open
it and read its messages.
Recipient indicator (see below)

105
2. Touch the account that contains the email you want to read.
Reading Your Messages
When viewing a list of conversations in your Inbox or in any list of
labeled conversations, you can open a conversation to read its
messages.
To read a message
©Touch a conversation that contains the message you want to
read.
Aconversation opens to the first new (unread) message, or
to the first starred message, if you've previously starred a
message in the conversation. See
“
Starring a Message
”
on
page 112.
Gmail
This conversation has one label.
This conversation has one other message.
It has been minimized because the
message has already been read.
Touch a sender's Google Talk
TM
Status icon to open the Quick
Contact menu.
You can archive or delete the
entire conversation or read your
next, oldest, unread message.

106
The Google Talk online status will appear next to the name
of the sender of each message if the sender has a Google
account. Touch that status indicator to open Quick Contact.
See
“
Connecting Quickly With Your Contacts
”
on page 54.
When reading messages in a conversation, you can use the
buttons at the bottom of the screen to archive the entire
conversation (see
“
Archiving Conversations
”
on page 115) or
Delete to delete it. After you delete a conversation, you can
touch Undo in the yellow bar that appears at the top of the
screen to undelete it.
You can also touch Older to read the next, oldest, unread
message in a conversation in your Inbox (or the conversation
list you're working in).
You can scroll to the bottom of a message to access
buttons for replying to or forwarding the message, as
described in
“
Replying to or Forwarding a Message
”
on page
109.
Gmail
107
To reread a message
When you open a conversation, messages that you've already
read are minimized into a tab that indicates the number of hidden
messages.
1. From the Home screen, touch Gmail ,touch the
conversation you want to view, then touch the tab indicating
minimized messages.
2. Touch the contact name to open that message.
When reading a message or when its tab is selected, you can
press the Menu Key and touch Mark Unread to return a read
message to the unread state. For example, to remind yourself to
read it again later.
Gmail
Touch the tab that indicates
the number of read
messages to view their
summary tabs.
Touch the contact name
of a message to open it,
so you can read it again.
108
Composing and Sending a Message
You can compose and send a message to people or groups with
Gmail addresses or other email addresses.
To compose and send a message
1. From the Home screen, touch Gmail , press the Menu
Key and touch Compose.
2. Enter a recipient's address.
As you enter text, matching addresses are offered from your
Contacts list. You can touch a suggested address or
continue entering text to enter a new one.
3. Press the Menu Key and touch Add Cc/Bcc to Cc or Bcc
recipients, if necessary.
4. Enter a subject for the message in the Subject field.
5. Continue into the next field to enter your email message.
6. Press the Menu Key and touch Attach to add an
attachment to the email.
7. Touch the Send button.
If you're not ready to send the message, touch the Save as
draft button instead. You can read your drafts by opening
messages with the Draft label. See
“
Viewing Conversations
by Label
”
on page 113.
Touch the Discard button to erase the message (including
any saved drafts).
If you aren't connected to a network - for example, if you're
working in Airplane mode - the messages that you send are
stored on your phone with the Outbox label until you
connect to a network again.
Gmail

109
Replying to or Forwarding a Message
You can continue an email conversation by replying to a message or
by forwarding it.
To reply to or forward a message
1. Scroll to the bottom of a message.
2. Touch Reply,Reply to all,or Forward.
Replying to or forwarding messages without changing the
subject adds your reply to the current conversation.
Changing the subject starts a new conversation.
The message will open in a new screen where you can add
or remove addresses, edit the subject, and add or remove
text or attachments, as described in
“
Composing and
Sending a Message
”
on page 108.
You can add one or more people to an ongoing conversation
by replying to all and then adding the new person's
address(es) to the reply.
Note that the conversation text and previous messages are
also included in your reply (or forward).
3. Touch the Send button.
Gmail
Touch Reply to reply just to the sender of
the message. Touch Reply to all to
include all recipients of the message.
Touch Forward to send the conversation
to someone new.
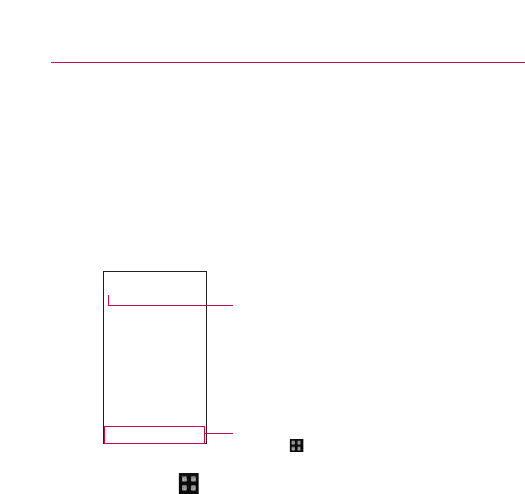
110
Working with Conversations in Batches
You can archive, label, delete, or perform other actions on a batch
of conversations at once, in your Inbox or in another label views.
1. From the Inbox or messages with another label, touch the
checkmark for all the messages you want to include in the
batch.
When you checkmark a conversation, the Archive,Label,
and Delete buttons appear at the bottom of the screen.
2. Touch the Archive,Label,or Delete button. Or press the
Menu Key and touch Add star,Report spam,Mute,
Mark read/ Mark unread,or Deselect all.
You action affects the selected batch of messages.
If you accidentally delete a batch of conversations, you can
touch Undo in the yellow bar (that appears briefly after the
action) at the top of the screen to undelete them. You can
also use Undo after muting, archiving, and reporting spam.
If you never work with batches of messages, you can hide the
checkboxes to leave more room for the subjects of conversations.
See
“
Changing Gmail Settings
”
on page 118.
Gmail
Touch to select an action for the batch or press the
Menu Key for more options.
Touch to include the message in the batch.

111
Labeling a Conversation
As mentioned previously, conversations are organized by labels.
Gmail has several default labels, but you can also add your own
through Gmail on the web. Viewing labeled conversations is
described, along with a list of standard labels, in
“
Viewing
Conversations by Label
”
on page 113.
To label a conversation
1. When reading a conversation's messages, press the Menu
Key and touch Change labels.
2. In the dialog box that opens, check the labels you want to
assign to the conversation.
To label a batch of conversations at once
You can assign or change the labels of one or more conversations
at once.
1. From your Inbox or messages with another label, checkmark
the conversations to select a batch.
See
“
Working with Conversations in Batches
”
on page 110.
2. Touch the Labels button at the bottom of the screen.
3. In the dialog box that opens, check the labels you want to
assign to the conversation.
4. Touch the OK button.
Tochange a conversation’s labels
1. When reading a specific conversation, press the Menu Key
and touch Change labels.
2. In the dialog box that opens, check the labels you want to
assign to the conversation.
3. Touch the OK button.
Gmail

112
Starring a Message
You can star an important message or conversation to make it easy
to locate again. To view just conversations with starred messages,
see
“
Viewing Conversations by Label
”
on page 113 and view the
Starred-labeled messages and conversations.
To star a message
©When reading a message, touch the star in its header.
OR
©When viewing a conversation, touch its star to star the
newest message in the conversation.
To unstar a message
©Touch its star again.
To star or unstar all messages in a conversation
©Touch a star in a conversation list.
Gmail
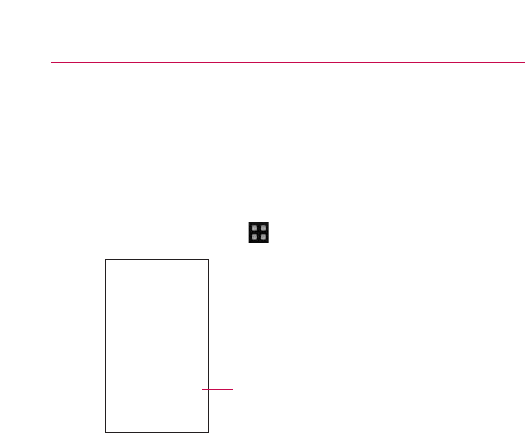
113
Viewing Conversations by Label
You can view a list of the conversations that have the same label,
including conversations with starred messages.
See
“
Labeling a Conversation
”
on page 111 or
“
Starring a Message
”
on page 112 for information about assigning labels and stars.
1. When viewing your Inbox or messages with another label,
press the Menu Key and touch Labels.
2. Touch a label to view a list of conversations with that label.
Note that the conversation list will resemble your Inbox.
Most of the options available while using your Inbox will
also be available while viewing these lists of labeled
messages.
Gmail
The number of conversations with this label that
have unread messages.

114
Reporting Spam
The Gmail webmail service is quite effective at preventing spam
(junk mail) from reaching your Inbox. But when spam does make it
through, you can help improve the Gmail service by reporting the
conversation as spam.
To report a conversation as spam
©When reading the email, press the Menu Key and touch
More > Report spam.
OR
©From the Inbox, touch the checkmark to select the
messages, press the Menu Key and touch Report spam.
When you report a conversation
as spam, the conversation (and all its messages) are
removed from your Inbox. You can view the messages
you've marked as spam by viewing messages with the
Spam label. See
“
Viewing Conversations by Label
”
on page
113.
Searching for Messages
With the Gmail application, it is very easy to search and find specific
emails. When you search for emails, all of the emails in your Google
account on the web are included in your search (except those
labeled Trash or Spam), not just those that you've synchronized
onto your phone.
You can also use the advanced search options as described on the
Gmail website.
1. From the Inbox, press the Menu Key and touch Search.
Or from the Inbox, touch the Search Key .
Gmail

115
2. Enter the word or words to search for then touch the
Search icon to the right of the text field.
Alist of results will appear, displaying all of the
conversations with emails that contain the words you
searched for.
You can open these emails as you would any email in your
Inbox; you also have the same options available.
Archiving Conversations
You can archive conversations, to move them out of your Inbox
without deleting them. Archived conversations are assigned the All
Mail label, and also retain any other labels you've assigned to them.
See
“
Viewing Conversations by Label
”
on page 113. Archived
conversations are also included in search results. If someone replies
to a message that you've archived, its conversation will be restored
to your Inbox.
To Archive a conversation:
©From your Inbox, touch and hold a conversation then touch
Archive in the menu that opens.
OR
©Checkmark one or a batch of conversations in your Inbox
then touch the Archive button.
See
“
Working with Conversations in Batches
”
on page 110.
OR
©When reading a message, touch the Archive button at the
bottom of the screen.
Gmail

116
Synchronizing Your Messages
The Gmail webmail service has the resources to store all the
messages you've ever sent or received; your phone does not. To
save space, Gmail downloads only some of your messages to your
phone. Use the Settings application to control how and when
applications synchronize their data. See
“
Accounts & sync
”
on page
251.
To select which conversations to synchronize
1. From the Home screen, touch Gmail .
2. Press the Menu Key and touch Settings > Labels.
The Synchronization settings screen opens, displaying a list
of your Gmail labels. Below each label is its current
synchronization setting: Sync all,Sync 4 days,or with no
label. (Conversations with no label are not synchronized.)
3. Touch a conversation label whose synchronization settings
you want to change.
Adialog box for that conversation label opens, with three
options:
●Sync none Don't download any conversations that have
only this label.
●Sync 4 days Download the previous 4 days (or number of
days you set) of conversations.
●Sync all Download all conversations with this label.
Gmail

117
To set how many days of conversations to synchronize
1. From the Home screen, touch Gmail .
2. Press the Menu Key and touch Settings > Labels.
3. Touch Number of days to Sync.
4. Enter the number of days then touch the OK button.
Appending a Signature to Your Messages
You add information to every email you send, such as your name,
contact information, or even
“
Sent from my AndroidTM phone
”.
1. From the Home screen, touch Gmail .
2. Press the Menu Key and touch Settings > Signature.
3. Enter a signature or other information.
4. Touch the OK button.
Gmail
Enter a signature to append your messages.

118
Changing Gmail Settings
You can change a number of settings for Gmail. Each Google
account has its own settings, so your changes affect only the
current account. See
“
To switch accounts
”
on page 104.
Notification volumes and some synchronization settings can also be
changed in the Settings application. See
“
Settings
”
on page 241.
©From the Home screen, touch Gmail ,press the Menu
Key and touch Settings.
General Settings
Signature Opens a dialog box where you can enter text to
append to every message you send. See
“
Appending a Signature
to Your Messages
”
on page 117.
Confirm delete Checkmark this setting to open a dialog box each
time you delete messages, asking you to confirm that you want to
delete them.
Batch operations Checkmark this setting to allow batch
operations. See
“
Working with Conversations in Batches
”
on page
110.
Clear search history Removes the search history for searches
performed.
Labels Opens the Labels screen, from where you can manage
which conversations are synchronized. See
“
Synchronizing Your
Messages
”
on page 116.
Notification settings
Email notifications Checkmark this setting to receive a
notification whenever you receive new email. See
“
Managing
Notifications
”
on page 46.
Select ringtone Opens a dialog box to select the ringtone to
sound when you receive a new email notification.
Vibrate Checkmark this setting to vibrate the phone when you
receive a new email notification.
Gmail

119
Viewing Your Calendar and Events
Open the Calendar application to view the events you have
scheduled in the coming days, weeks, or months.
To open your Calendar application
©Open the Launch screen and touch Calendar .
If you have created or subscribed to more than one calendar
through Google CalendarTM on the web, events from each
calendar are displayed in a different color. For information
about which calendars are displayed on your phone, see
“
Displaying and Synchronizing Calendars
”
on page 130.
NOTE
To go to the current day in any Calendar view, press the Menu Key ,
and touch Today.
Calendar
Agenda view
In Agenda, Day, or Week view, touch an event to view its details.
Month viewWeek view
Touch a day in
Month view to open
that day’s events.
Day view

120
To change your Calendar view
©Press the Menu Key and touch Agenda,Day,Week, or
Month.
Each view displays the events in your calendar for the period
of time that you specify. For details, see:
“
Working in Agenda View
”
on page 121
“
Working in Day View
”
on page 122
“
Working in Week View
”
on page 123
“
Working in Month View
”
on page 124
©To view more information about an event from Agenda view,
touch the event.
©To view more information about an event from Day or Week
view, touch the event to open a summary.
©To view the events on a particular day from Month view,
touch a day that has events.
Calendar
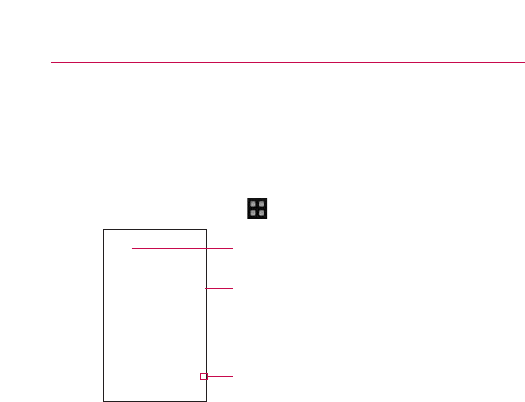
121
Working in Agenda View
Agenda view is a list of your events in chronological order. All-day
and multi-day events are listed at the start of each day.
To switch to Agenda view
©Press the Menu Key and touch Agenda.
Tolearn more about events in Agenda view
©Touch an event.
Ascreen with details about the event opens. See
“
Viewing
Event Details
”
on page 125.
Calendar
Touch an event to view its details.
Drag the screen up or down to view earlier or
later events.
Repeat indicator
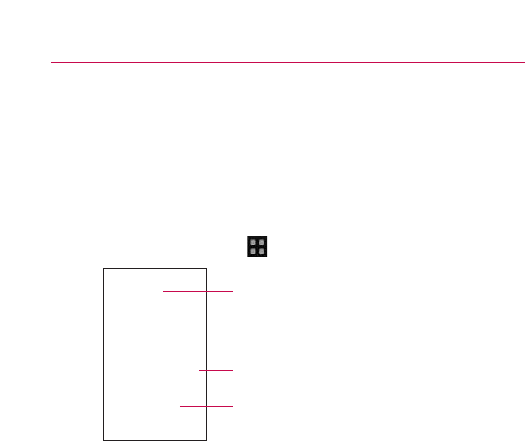
122
Working in Day View
Day view displays the events of one day, in a table of one-hour
rows. All-day and multi-day events are displayed at the top. Part of
the title of each event is displayed in the row(s) that correspond to
when it occurs.
To switch to Day view
©Press the Menu Key and touch Day.
Tolearn more about events in Day view
©Touch an event to view its details.
See
“
Viewing Event Details
”
on page 125.
©Touch and hold an event to open a menu with options for
viewing, editing, or deleting the event and for creating a new
event at that time.
To add an event in Day view
©Touch and hold an empty spot or an event in the day to
open a menu with the option for creating a new event at
that time.
See
“
Creating an Event
”
on page 126.
Calendar
Drag left or right to view earlier or later days.
Touch an event to view its details.
Touch and hold a time slot or an event to create a
new event at that time.
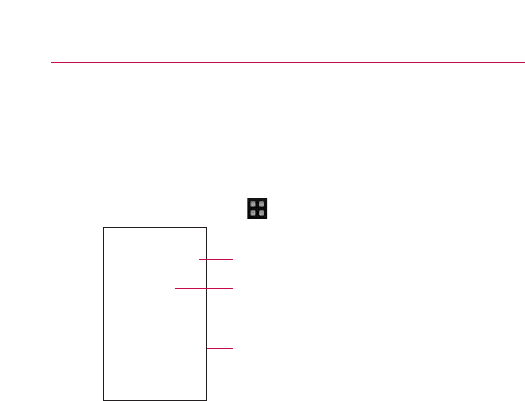
123
Working in Week View
Week view displays a chart of the events for one week. All-day and
multi-day events are displayed at the top.
To switch to Week view
©Press the Menu Key and touch Week.
Tolearn moreabout eventsin Week view
©Touch an event to view its details.
See
“
Viewing Event Details
”
on page 125.
©Touch and hold an event to open a menu with options for
viewing, editing, or deleting the event, and for creating a
new event at that time.
Toadd an event in Week view
©Touch and hold an empty spot or an event in the week to
open a menu with the option for creating a new event at
that time.
See
“
Creating an Event
”
on page 126.
Calendar
Touch and hold a time slot or an event to create a
new event at that time.
Touch an event to view its details.
Drag the screen left or right to view earlier or
later days.
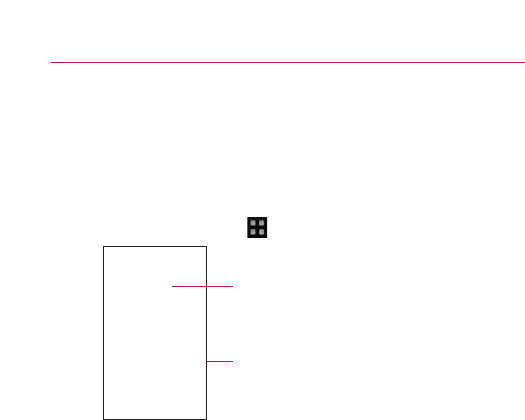
124
Working in Month View
Month view displays a chart of the events of the month. Segments
of each day with scheduled events are green in the day's vertical
bar.
To switch to Month view
©Press the Menu Key and touch Month.
To view more information about events in Month view
©Touch a day to view its events in Day view.
See
“
Working in Day View
”
on page 122.
To add an event in Month view
©Touch and hold an empty spot or an event in the month to
open a menu with the option for creating a new event.
See “Creating an Event” on page 126.
Calendar
Drag the screen up or down to view earlier or
later months.
Touch a day to view the events of that day.

125
Viewing Event Details
You can view more information about an event in a number of
ways, depending on the current view.
To view information about an event
©In Agenda, Day, or Week view, touch an event to view its
details.
©In Month view, touch a day to switch to Day view. Then
touch an event to open the event summary.
If applicable, you can RSVP to an event by using the Attending?
drop-down options.
You can change any event reminders or touch the Plus button
to add more reminders for this event. See
“
Setting an Event
Reminder
”
on page 128.
If you have permission to change event details, you can press the
Menu Key to edit or delete the event, as described in
“
Editing
or Deleting an Event
”
on page 127.
Calendar
If available, RSVP to the event.
Other attendees' RSVPs.
Touch to change when you want to be reminded
about this event.
Touch to delete this reminder.
Touch to add another reminder for this event.

126
Creating an Event
You can use Calendar on your phone to create events that appear
on your phone and in your Google Calendar on the web.
To create an event
1. Open the Calendar, press the Menu Key and touch New
event.
You can also touch and hold a spot in Day, Week, or Month
view. In the menu that opens, touch New event to open the
new event screen with that day and time already entered.
2. Add details about the event.
Enter a name, time, and optional additional details about the
event, just as you would on Google Calendar (on the web).
If you have more than one calendar, you can choose the
calendar to which to add the event. Touch the Plus button
to add more reminders. See
“
Setting an Event Reminder
”
on page 128.
3. Invite guests to the event.
In the Guests field, enter the email addresses of everyone
you want to invite to the event. Separate multiple addresses
with commas ( , ). If the people to whom you send
invitations use Google Calendar, they'll receive an invitation
through their Google Calendar and by email.
4. Press the Menu Key and touch Show extra options to
add additional event details.
5. Scroll to the bottom of the screen and touch the Done
button. The event will be added to your Calendar. You can
also access and configure the event from Google Calendar
on the web.
Calendar

127
Editing or Deleting an Event
You can edit or delete an event that you created on the phone or on
the web. You can also edit or delete events created by others, if
they have given you permission.
To edit an event
1. Open Calendar and touch the event, to open it.
See
“
Viewing Event Details
”
on page 125.
2. Press the Menu Key and touch Edit event.
For information on how to create or change event
information, see
“
Creating an Event
”
on page 126.
NOTE
Press the Menu Key and touch Show extra options to add or edit
additional event details.
3. Make your changes to the event.
4. Scroll to the bottom of the screen then touch the Done
button.
To delete an event
There are a number of ways to delete an event.
©From Agenda, Day, or Week view, touch an event to view
the event details. Then, press the Menu Key and touch
Delete event.
©From Day or Week view, touch and hold the event then
touch Delete event in the menu that opens.
©When editing an event, scroll to the bottom of the Event
Details screen and touch the Delete button.
Calendar

128
Setting an Event Reminder
You can set one or more reminders for an event, whether or not
you created the event or have permission to edit its other details.
To set an event reminder
1. Open Calendar and touch the event, to open it.
See
“
Viewing Event Details
”
on page 125.
2. Touch the Add reminder plus button to add a reminder.
Touch the reminder's arrow button to access the various
available reminder time options.
3. Touch the reminder time.
At the designated time, you will receive a notification to
remind you about the event. See
“
Responding to an Event
Reminder
”
on page 129.
You can also use Google Calendar (on the web) to configure
additional reminders.
Todeletean event reminder
1. Open Calendar and touch the event, to open it.
2. Touch the reminder's Minus button .
Calendar

129
Responding to an Event Reminder
If you set a reminder for an event, the Upcoming Event icon
appears in the Notifications area of the Status bar when the
reminder time arrives. See
“
Managing Notifications
”
on page 46.
To respond to an event reminder
©If you receive notifications in the Status bar, drag the Status
bar down to open the Notifications panel. Touch the event
notification to open the list of Calendar notifications.
©Touch an event in the Calendar Notifications list to view
more information about that event.
©Touch Snooze all in the Calendar Notifications list to receive
the reminder again 5 minutes later.
©Touch Dismiss all in the Calendar Notifications list to delete
all reminders in the list.
©Touch the Back Key when viewing the Calendar
Notifications list to keep the reminders. The reminders will
remain in the Notifications panel.
Calendar

130
Displaying and Synchronizing Calendars
Initially, all calendars that you create or subscribe to through Google
Calendar on the web are also displayed in the Calendar application
on your phone. You can select which calendars to show or hide on
the phone, and which to keep synchronized.
You can also control whether any data is synchronized to your
phone by using the general sync settings in the Settings menu's
Accounts & sync settings screen.
For more information, see
“
Configuring Account Sync and Display
Options
”
on page 99.
To show or hide calendars
©To show or hide a calendar, open the Calendar, press the
Menu Key ,touch More > My calendars,then select
which calendars to show or hide.
Calendars in the My Calendars list are kept synchronized on
your phone, whether or not you hide them.
Tosetwhich calendersaresynchronized on your phone
©To stop syncing calendars to your phone, open the Calendar
application, press the Menu Key , touch More > My
calendars,press the Menu Key again, touch Remove
calendars,checkmark the calendars to remove from the My
Calendars list, then touch the OK button.
Calendars that you remove from the My Calendars list are no
longer synchronized on your phone. However, you will
remain subscribed to them and will be able to use them
through Google Calendar on the web.
©To synchronize calendars to your phone, open the Calendar
application, press the Menu Key ,touch More>My
calendars,press the Menu Key again, touch Add
calendars,checkmark the calendars you want to add to the
My Calendars list, then touch the OK button.
Only the calendars that you've created or subscribed to on
the web, or previously removed from the My Calendars list,
are shown in the list of calendars that you can add.
Calendar

131
Changing Calendar Settings
You can change the following settings for how the Calendar
application displays events and how it notifies you of upcoming
events.
©To change Calendar settings, open the Calendar, press the
Menu Key and touch More > Settings.
Hide declined events Checkmark so that events you've declined
are not displayed in your calendar views. Touch to remove the
checkmark and display all events in your calendar views.
Set alerts and notifications Opens a dialog box to configure
event reminders. You can select to be alerted, to be notified with
aStatus bar notification or to turn off notifications. See
“
Setting an
Event Reminder
”
on page 128 and
“
Responding to an Event
Reminder
”
on page 129.
Select ringtone Allows you to select which ringtone is used for
the Calendar event reminders.
Vibrate Checkmark to vibrate the phone when you receive an
event notification.
Set default reminder Allows you to select the default time set for
event reminders.
Calendar

132
Signing in and Opening your Friends List
You sign into Google Talk to chat with your friends.
You remain signed in, even when you're using other applications,
until you deliberately sign out.
To open Google Talk and sign in
©Open the Launch screen and touch Talk icon .
When you first open Google Talk, your Friends list will be
displayed. This list includes all of the friends you've added by
using Google Talk on the web or on the phone.
Adding friends to your Google Talk list is described in
“
Managing Your Friends List
”
on page 138.
Inviting friends to chat and accepting invitations to chat is
described in
“
Chatting with Friends
”
on page 134.
Google TalkTM
Your online status.
Touch to open an ongoing chat
Touch a friend to invite them to chat.

133
To return to your friends list
You can return to your Friends list when chatting with a friend, so
that you can invite another friend to chat, add a friend, and so on.
©Press the Menu Key and touch Friends list.
To sign out of Google Talk
You can sign out of Google Talk. For example, if you want to limit
Google Talk conversations to your computer. Also, signing out can
also extend your battery life.
©From your Friends list, press the Menu Key and touch
More > Sign out.
You will no longer receive chat notifications or see others'
Google Talk status in other applications, such as GmailTM.
Google Talk
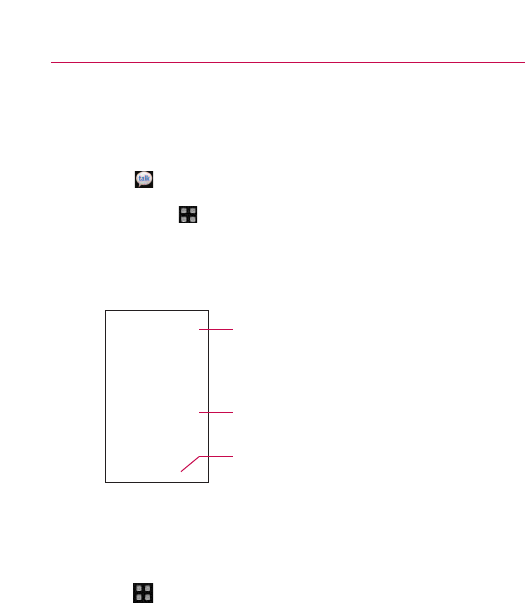
134
Chatting with Friends
To chat with a friend
1. From the Home screen, open the Launch screen and touch
Talk .
If you're already chatting with someone, you can press the
Menu Key and touch Friends list to return to the friend's
list.
2. Touch the friend you want to chat with.
3. Enter your message then touch Send.
The messages that you exchange are interleaved on the
screen and include information about the chat, such as
whether it's on the record, the time a message was sent (if
there's no response after a short while), and so on.
You can enter an emoticon (smiley), just press the Menu
Key and touch More> Insert smiley to open a scrolling
list of emoticons to touch to select.
Your chat session will remain open until you end it.
Friends you're chatting with are displayed at the top of your
Friends list, with the most recent message displayed in a
black-on-white balloon.
Google Talk
Who you’re chatting with and their online status.
Messages sent and received.
Enter a message then touch Send.

135
To accept an invitation to chat
When a friend sends you a Google Talk message, you will receive
anotification. The friend's name in the Friends list turns white and
displays the message.
©Touch the friend in your Friends list.
OR
©Open the Notifications panel then touch the chat notification.
Achat window will open where you can exchange
messages with your friend.
To switch between active chats
If you have more than one chat going, you can switch between
chats.
©From the Friends list, touch the name of the person you
want to chat with.
OR
©From a chat screen or in the Friends list, press the Menu
Key and touch Switch chats,then touch the friend you
want to chat with.
OR
©While chatting with a friend, swipe left or right across the
screen.
Google Talk

136
To invite a friend to join a group chat
When you're chatting, you can invite additional friends to join a
group chat.
1. On a chat screen, press the Menu Key and touch Add to
chat.
2. Touch the name of the friend to invite.
The friend you invited and the current participants will
receive an invitation to a group chat. Each one who accepts
the invitation will join the group chat. In a group chat,
everyone can see everyone else's messages. Group chats
appear at the top of your Friends list, with a group chat icon.
Tochaton or off the record
Your Google Talk messages are stored, so you can review them
later and even search for them, in the Chats folder in Gmail. If
you'd rather not store the messages in a chat, you can chat off
the record.
©While chatting, press the Menu Key and touch Chat off
record.
To return to on-the-record chatting, press the Menu Key
and touch Chat on record.
Toend a chat
When you've finished your conversation, it is easy to end a chat
session.
©From your Friends list, touch and hold the friend you want to
stop chatting with. In the menu that opens, touch End chat.
OR
©From a chat screen, press the Menu Key and touch End
chat.
Google Talk
137
Changing and Monitoring Online Status
Google Talk allows you to change how you appear to others; you
can change your online status and status messages, as well as the
picture that appears next to your name on your friend's Friends list.
To change your online status
1. From the Home screen, open the Launch screen and touch
Talk .
2. Touch the Status icon at the top right of your Friends list.
3. In the menu that opens, touch a status option.
In addition to the standard status settings described in the
table, you can also select a message that you've entered
previously. Or touch Clear custom messages to erase them
and start over.
Your status and any message appear in your contact's
Friends lists and in other locations where your status or
status message are displayed.
Status Icons
Icons in Google Talk, Gmail, Google MapsTM,and other
applications indicate your and your friends' Google Talk status.
Google Talk
Available: Signed into Google Talk and available to chat
Away: Signed into Google Talk but not active
Busy: Signed into Google Talk but too busy to chat
Signed out of Google Talk
Invisible: Signed into Google Talk but appear signed out to others

138
To change your status message
1. From the Home screen, open the Launch screen and touch
Talk .
2. Touch the status message field, at the top of your Friends
list.
3. Enter a new status message.
4. Touch the Done button.
To change your picture
1. Touch your picture at the top left of your Friends list.
The Select Picture screen opens with all the pictures on
your microSD card displayed as thumbnails.
2. Touch the picture you want to use.
3. Crop the picture.
Cropping pictures is described in
“
Working with Pictures
”
on
page 209.
4. Touch the Save button.
Managing Your Friends List
Your Google Talk Friends list contains the friends you've invited to
become friends or whose invitations you've accepted in Google
Talk. Friends can invite each other to chat in Google Talk and see
each others' online status in Google Talk and other applications,
such as in Gmail and Google Maps.
The Google Talk Friends list is sorted by your friends' online status:
active chats, online, busy, and offline. Within each grouping, friends
are listed alphabetically.
Google Talk

139
To add a friend to your Friends list
You can invite anyone with a Google Account to become your
friend in Google Talk, so you can chat with each other and stay up
to date with each others' online status.
1. From the Friends list, press the Menu Key and touch
Add friend.
2. Enter your friend's Gmail address and touch Send invitation.
To view and accept an invitation to become a friend
When a contact invites you to become a friend in Google Talk, you
receive a notification in the Status bar and the invitation appears in
your Friends list.
1. Touch the invitation from either the Status bar or the Friends
list.
2. Touch Accept or touch Cancel,if you don't want to chat
with and share your Google Talk status with the sender.
To view a list of pending invitations to friends
©From the Friends list, press the Menu Key and touch
Invites.
All the friends to whom you've extended invitations to
become friends on Google Talk appear in the list until they
accept or cancel your invitation.
To view all friends or only those most popular with you
By default, only the friends that you frequently chat with (the
most popular) are shown in the Friends list. But you can view all
friends instead.
©In the Friends list, press the Menu Key and touch All
friends.
To switch back to just the friends with whom you chat most
frequently, touch Most popular in the menu.
Google Talk

140
To add a friend to the 'Most popular' group
You can set a friend to always appear in your Most popular
Friends list.
1. From the Friends list, touch and hold a friend's name.
If you don't see the friend's name, press the Menu Key
and touch All friends.
2. Touch Always show friend in the menu that opens.
To remove a friend from this list, touch and hold the friend's
name from the Friends list.
In the menu that opens, touch Hide friend.
Toblock a friend
You can block a friend from sending you messages. When
blocked, your friend will be removed from your Friends list.
1. From the Friends list, touch and hold the friend's name.
If you don't see the friend, press the Menu Key and
touch All friends.
2. Touch Block friend in the menu that opens.
You can view a list of your blocked friends by opening your
Friends list, pressing the Menu Key and touching
Blocked.You can unblock a friend by touching the friend's
name in the blocked list and then touching OK in the dialog
box that opens.
Google Talk

141
Changing Google Talk Settings
You can configure Google Talk to send you a notification with the
contents of each message that you receive in a chat, and also to
sound a ringtone or vibrate the phone.
You can also configure Google Talk to sign you in automatically
when you turn on your phone, and you can set whether the mobile
indicator is displayed next to your name in other people's Friends
lists.
To configure notifications for new Google Talk messages
1. From the Friends list, press the Menu Key and touch
More > Settings.
2. Checkmark IM notifications to receive a notification in the
Status bar when a new chat message arrives.
3. Touch Select ringtone to open a list of the ringtones that
will ring to notify you of a new chat.
4. Checkmark Vibrate to set the phone to vibrate when you
receive notification of a new chat.
To show or hide the mobile indicator to friends
1. From the Friends list, press the Menu Key and touch
More > Settings.
2. Checkmark or uncheck Mobile indicator.
If Mobile indicator is checked, your friends see an outline of
an AndroidTM next to your name in their Friends list when
you're signed into Google Talk on the phone.
Google Talk
Your friend is signed into Google Talk on his or
her phone.

142
To set whether you sign into Google Talk automatically
1. From the Friends list, press the Menu Key and touch
More > Settings.
2. Checkmark or uncheck Automatically sign-in.
When Automatically sign-in is checked, you are signed into
Google Talk when you turn on your phone.
Signing in and out of Google Talk is described in
“
Signing in
and opening your Friends List
”
on page 132.
Google Talk

143
Opening Email and the Accounts Screen
You can use the Email application to read email from services other
than GmailTM.The Email application supports the following account
types: POP3, IMAP and Exchange.
To open the Email application
©From the Home screen, open the Launch screen and touch
Email .
The first time you open the Email application, a setup wizard
opens to help you add an email account, as described in
“
Adding
and Editing Email Accounts
”
on page 151.
After the initial setup, Email displays the contents of your Inbox (if
you have only one account) or the Accounts screen (if you have
multiple accounts).
You can also add a shortcut to Email on your Home screen so that
you can open it directly from the Home screen. See
“
Customizing
the Home Screen
”
on page 52 for details about adding shortcuts.
The Accountsscreen
The Accounts screen lists your Combined Inbox and each of your
email accounts. If you have starred, draft, or unsent messages in
any of your accounts, the folders for those items from all accounts
are displayed as well.
©Open the Email application. If you're not on the Account
screen, press the Menu Key and touch Accounts.
Email

144
Each folder and account on the Accounts screen displays
the number of unread messages in green, or will display the
number of messages in Starred, Drafts and Outbox in gray.
You can touch an account to view its Inbox, or an account's
folder icon to view a list of that account's folders.
The account from which you send email by default is
indicated with a checkmark.
To open your Combined Inbox
If you have configured Email to send and receive email from more
than one account, you can view all messages sent to all accounts
in your Combined Inbox.
1. From the Home screen, open the Launch screen and touch
Email .
2. Touch Combined Inbox (in the Accounts screen).
Messages in the Combined Inbox are color coded along
their left sides, by account, using the same colors that are
used for your accounts in the Accounts screen.
Email
Touch to open your Combined Inbox, with
messages sent to all of your accounts.
Touch to open a list of just your starred
messages.
Touch an account to open its Inbox.
Touch the folder icon to open the account’s
folders.
Accounts Screen

145
Only your account's most recent emails are downloaded to your
phone. To download more (earlier) email messages, touch Load
more messages at the bottom of the emails list.
Email
An unread message.
Apreviously read message.
Messages are color coded according to the
account to which they were sent.

146
Reading Your Messages
You can read messages from your Combined Inbox, from the Inbox,
or from other folders from the individual accounts.
To read a message
1. From the Home screen, open the Launch screen and touch
Email .
2. Touch the message you want to read.
The message opens in a screen that includes information
about who sent it, the date it was sent, and other related
information.
The Google TalkTM online status will be shown (if available)
next to the name of the sender of each message. You can
touch that status indicator to open Quick Contact. See
“
Connecting Quickly With Your Contacts
”
on page 54.
Options for responding to a message are described in
“
Responding to a Message
”
on page 147.
Email
Touch the arrow to read the next or previous
message in the folder.
Sender’s Google Talk online status (if available).
Touch to reply to or delete the message.

147
Responding to a Message
There are many options to how you can respond to a received email
message. You can reply to it, forward it or even just delete it.
To reply to or forward a message
©While reading a message, touch the Reply button or the
Reply all button (available at the end of the email).
OR
©Press the Menu Key and touch Reply,Reply all, or
Forward.
Anew Compose message window will open.
You can send this message as you would a new message, as
described in
“
Composing and Sending Email
”
on page 149.
To mark a message as unread
You can set a message to appear as though it has not been read
–for example, to remind yourself to read it again later.
©While reading a message, press the Menu Key and touch
Mark as unread.
To delete a message
There are a few easy ways to delete a message.
©While reading a message, touch the Delete button.
OR
©While reading a message, press the Menu Key and touch
Delete.
For many types of accounts, deleted messages are moved to a
Trash folder, so you can retrieve them in case they were deleted
by mistake.
Email

148
Starring Messages
You can add stars to important messages to make it easy to keep
track of them. When you star a message, a Starred folder will be
added to the Accounts screen.
To star a message
©While reading a message, touch the star in its header.
OR
©From a list of messages in a folder, touch a message's star.
The star turns gold .
To unstar a message
©Touch the star again.
To view your starred messages
You can open a folder that contains the starred messages from all
of your accounts.
1. Open the Accounts screen.
See
“
Opening Email and the Accounts Screen
”
on page 143.
2. Touch Starred.
Afolder opens with your starred messages.
See
“
Working with Account Folders
”
on page 150.
Email

149
Composing and Sending Email
You can send email to your contacts or to other people or groups.
To compose and send a message
1. While in the Email application, press the Menu Key and
touch Compose.
2. Enter an address for the message's intended recipient.
As you enter text, matching addresses are offered from your
Contacts. You can touch a suggested address or continue
entering a new one. Separate multiple addresses with
commas.
See
“
Contacts
”
on page 82 for more information.
3. Press the Menu Key and touch Add Cc/Bcc to be able to
Cc or Bcc other contacts/email addresses.
4. Enter a subject for the message.
5. Enter the text of the message. For information about
entering text, see "Entering Text" on page 37.
6. Press the Menu Key and touch Attach to send a photo
with the message.
7. Touch the Send button.
If you're not ready to send the message, touch the Save as
draft button to save it in a Drafts folder. Touch a draft
message in a Drafts folder to resume working on it. Your
message will also be saved as a draft if you touch the Back
Key before sending it. Touch the Discard button to
abandon and delete a message, including any saved drafts.
If you aren't connected to a network, for example, if you're
working in airplane mode, the messages that you send are
stored in your Outbox folder until you're connected to a
network again. If it contains any pending messages, the
Outbox is displayed on the Accounts screen.
Email

150
Please note that messages sent using an Exchange account will not
be located on the phone; they will, however, be located on the
Exchange server itself.
If you want to see your sent messages in the Sent folder (or with
the Sent label), you will often need to open the Sent folder/label
and select Refresh from the options menu.
Working with Account Folders
Each account has Inbox, Outbox, Sent, and Drafts folders.
Depending on the features supported by your account's service
provider, you may have additional folders.
To view an account’s folders
1. Open the Accounts screen.
See “Opening Email and the Accounts Screen” on page 143.
2. Touch an account's folder icon.
The account's Folders screen will open, with a list of the
folders in the account. Touch a folder to view a list of the
messages it contains.
Email
The account name.
Indicates the number of new messages in the
folder.
Touch a folder to open the messages it
contains.

151
Adding and Editing Email Accounts
The first time you open the Email application, you will be prompted
to set up an email account. After that, you can configure Email to
send and receive email from additional accounts. The accounts that
you configure will be displayed in the Accounts screen. See
“
Opening Email and the Accounts Screen
”
on page 143.
The Email setup wizard helps you set up your account for many
popular email systems, including those based on POP3, IMAP, and
SMTP, so you can read and work with the same email as you would
through on-line email or an email application on your desktop. If
your service provider requires additional settings or if your service
provider is unknown to the Email application, you can enter the
necessary details manually, though you will typically need to contact
your email service provider to determine the correct settings for
your account.
You can also set up a Microsoft Exchange ActiveSync account
(Exchange 2003 and 2007), so you can read and work with the
same email as you would on a computer using Microsoft Outlook.
Email supports username and password authentication for
Exchange ActiveSync accounts; it does not support other Exchange
ActiveSync security policies at this time.
To add an email account
1. Open the Accounts screen.
See
“
Opening Email and the Accounts Screen
”
on page 143.
2. Press the Menu Key and touch Add account.
In the Setup Email screen, enter your email address and
password.
If you're adding a second or subsequent email address, you
can also check the option to use the new account to send
all outgoing messages.
Email

152
3. Touch the Next button. Or, if you need to enter email
account settings the wizard can't configure for you, touch
the Manual setup button.
If you touch the Next button, Email attempts to
communicate with your email service provider to validate
your account for sending and receiving mail, using just your
email address and password. This is sufficient for most
email services.
Depending on the service provider, you may be asked what
kind of email account you have. If you're not sure, ask your
email service provider.
If the wizard determines that your service provider requires
additional information, or if you touched the Manual setup
button, you're prompted to enter your email account details.
Details are described in
“
Changing Email Account Settings
”
on page 154. Contact your email service provider for the
values required for your account.
4. Enter a name for the account, confirm how you want your
name to appear in outgoing mail, then touch the Done
button to complete adding the account.
If you are adding an Exchange ActiveSync account, you can
also decide whether you want to synchronize your contacts
from the Exchange ActiveSync server to your phone. You
can change this setting later using the Contacts application.
See
“
Configuring Account Sync and Display Options
”
on
page 99.
Email will start downloading your email messages so you
can start using it to send and receive messages.
Email

153
To change an account’s settings
You can change a number of settings for an account, including
how often email is checked and how you're notified of new mail.
1. Open the Accounts screen.
See “Opening Email and the Accounts Screen” on page
143.
2. Touch and hold the account whose settings you want to
change. In the menu that opens, touch Account settings.
For descriptions of the settings that you can change, see
“
Changing Email Account Settings
”
on page 154.
3. When you're finished changing settings, touch the Back Key
to return to the Accounts screen.
Todelete an email account
1. Open the Accounts screen.
See “Opening Email and the Accounts Screen” on page
143.
2. Touch and hold the account you want to delete.
3. Touch Remove account in the menu that opens.
4. Touch the OK button in the dialog box to confirm that you
want to delete the account.
Email

154
Changing Email Account Settings
The following settings can be changed for your Email accounts. See
“
Adding and Editing Email Accounts
”
on page 151.
Email account settings
Account name The name of the account as it appears in the
Accounts and Folders screens.
Your name Your name as it appears to others when they receive
email from you.
Email check frequency How often Email checks for new email
sent to this account.
Default account Use this account as the default account for when
you want to send an email from your phone.
Email notifications Set whether you want to receive notifications
when you receive new email sent to this account.
Select ringtone Select a ringtone to sound when you receive an
email notification for this account.
Vibrate Set the phone to vibrate when you receive an email
notification for this account.
Incoming settings Opens a screen where you can configure
settings for how you receive email for this account. See
“
Incoming
server settings
”
on page 155.
Outgoing settings Opens a screen where you can configure
settings for how you send email from this account. (Microsoft
Exchange ActiveSync accounts do not have separate outgoing
server settings.) See
“
Outgoing server settings
”
on page 157.
Sync contacts For accounts that can sync contacts, checkmark to
sync contacts from this account with your phone. See
“
Configuring Account Sync and Display Options
”
on page 99.
Email

155
Incoming server settings
Your account's incoming settings are different, depending on the
kind of email service for the account: POP3, IMAP, Exchange
ActiveSync.
Email
Domain\Username
If your Exchange ActiveSync server requires that you
specify a domain, enter it before the backslash.
Otherwise, just enter your username (the part before
the @example.com in your email address) after the
backslash. (The backslash is optional if you
'
re just
entering your username; Email uses the correct syntax
for domains and usernames when communicating with
the server.)
Password
The password for your email account.
Server
The hostname for the Exchange ActiveSync server, for
example, owa.example.com.
Use secure
connection (SSL)
Checkmark this option if your Exchange ActiveSync
server requires you to connect to the server securely,
or if you prefer to connect securely.
Accept all SSL
certificates
Checkmark this option if you want to accept a server
certificate from your Exchange ActiveSync server that
is self-signed, out of date, or in some other way not
accepted by the Email application.
Username
Depending on the requirements of your email service
provider, your full email address or just your username
(that is, the part before @example.com in your email
address).
Password
The password for your email account.
IMAP server
The domain name of your email service provider
'
s
IMAP server; for example, imap.example.com.
Settings for Microsoft Exchange ActiveSync accounts
:
Settings for IMAP accounts:

156 Email
Port
Set the Security type (following item) first for the
server port number to be entered automatically, if it is
available. Or, enter a different port number if your email
service provider requires it.
Security type
Select the security type required by your email service
provider. Select the Accept all certificates option for
your security type to accept a server certificate from
your IMAP server that is self-signed, out of date, or in
some other way not accepted by the Email application.
IMAP path prefix
Leave blank unless instructed to enter a specific prefix by
your email service provider.
Username
Depending on the requirements of your email service
provider, your full email address or just your username
(that is, the part before @example.com in your email
address).
Password
The password for your email account.
IMAP server
The fully resolved domain name of your email service
provider
'
sPOP3 server, for example,
pop3.example.com.
Port
Set the Security type (following item) first for the server
port number to be entered automatically, if it is
available. Or, enter a different port number if your email
service provider requires it.
Security type
Select the security type required by your email service
provider. Select the Accept all certificates option for
your security type to accept a server certificate from
your IMAP server that is self-signed, out of date, or in
some other way not accepted by the Email application.
IMAP path prefix
Leave blank unless instructed to enter a specific prefix
by your email service provider.
Settings for POP3 accounts:

157
Outgoing server settings
If you use an IMAP or POP3 account for receiving email, you
typically use an SMTP server to send email from that account.
Microsoft Exchange ActiveSync accounts do not have separate
outgoing server settings.
Email
SMTP server
The domain name of your email service provider
'
s
SMTP server; for example, smtp.example.com.
Port
Set the Security type (following item) first for the
server port number to be entered automatically, if it
is available. Or, enter a different port number if your
email service provider requires it.
Security type
Select the security type required by your email
service provider. Select the Accept all certificates
option for your security type to accept a server
certificate from your SMTP server that is self-signed,
out of date, or in some other way not accepted by
the Email application.
Require sign-in
Checkmark this option to enter a username and
password for your SMTP server, if your email service
provider requires that you enter them to send email.
Username
Your username on the SMTP server (this may not be
the same as your username on the POP3 or IMAP
server for incoming mail). Visible only if Require
sign-in is checkmarked.
Password
Your password on the SMTP server (this may not be
the same as your username on the POP3 or IMAP
server for incoming mail). Visible only if Require
sign-in is checkmarked.

158
Opening Messaging
To open Messaging
©From the Home screen, touch Messaging .
The Messaging window will open, where you can create a
new message or open an ongoing message thread.
©Touch New message to start a new text or multimedia
message.
©Touch an existing message thread to open it.
To delete a message thread from the Messaging window
1. Touch and hold the message thread.
2. Touch Delete thread in the menu that opens.
Messaging
Touch to compose a new text or multimedia
message.
Touch to open an ongoing message thread.
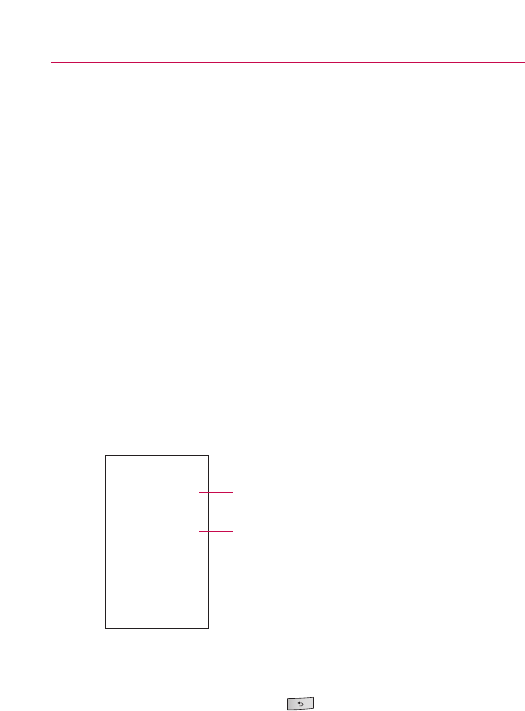
159
Exchanging Messages
You can send text (SMS) messages of up to 160 characters to
another mobile phone. If you keep typing after the limit, your
message is delivered as a series of messages.
Multimedia (MMS) messages can contain text and a picture, a
recorded voice, an audio file, a video, or a picture slideshow.
The Messaging application automatically converts a message into a
multimedia message if you send it to an email address instead of a
phone number, add a subject, or attach a media file.
To send a text message
1. On the Messaging screen, touch New message.
2. Enter a mobile phone number in the To field.
As you enter the mobile phone number, matching contacts
appear. You can touch a suggested recipient or continue
entering the phone number.
3. Touch the text field to start entering your message.
As you near the 160-character limit, a counter appears in the
top right corner of the text field to tell you how many
characters are left.
If you touch the Back Key while composing a message,
it'ssaved as a draft in your Messaging menu. Touch the
message to resume composing it.
Messaging
Enter a mobile phone number or the name of a
contact with a mobile number.
Touch the Send button to send your message.

160
4. Touch the Send button.
The Message window opens, with your message after the
word Me.Responses appear in the same window, creating
amessage thread with that contact.
To create and send a multimedia message
1. On the Messaging screen, touch New message.
2. Enter a mobile phone number or email address in the To
field. As you type, matching contacts appear. You can touch
asuggested contact or continue typing.
3. Touch the text field to start entering your message.
4. Press the Menu Key and touch Add subject to add a
message subject.
5. Press the Menu Key and touch Attach to open a menu
where you can touch the kind of media file to attach to the
message.
●If you touch Pictures,you're prompted to select a picture
from your collection.
●If you touch Capturepicture, the Camera application opens
so you can take a picture and attach it.
●If you touch Videos,you're prompted to select a video
from your collection.
Messaging

161
●If you touch Capture video, the Camcorder application
opens so you can record a video and attach it.
●If you touch Audio,you're prompted to select an audio file
from embedded audio files.
●If you touch Record audio, the voice recording function
opens and allows you to record a spoken message and
attach it to your message.
●If you touch Slideshow, a menu opens and allows you to
assemble photos into a slideshow (up to 10 slides) to
attach to the message. Use the buttons in the Compose
Message screen to preview the message, replace the
picture, or remove the slide.
6. Touch the Done button after you finish editing the
slideshow.
7. Touch the Send button.
Messaging

162
To respond to messages you receive
If you're working in a message window, messages that you
receive from that contact are displayed. Otherwise, you receive a
new message notification and a new message icon appears in the
Status bar. When you touch the new message notification, the
Message window opens, where you can reply to the message.
If Auto-retrieve is unchecked, you must touch Download to view
the message.
If the message contains a media file, touch Play to view, watch,
or listen to it. Touch and hold the media file to open a menu with
additional options.
To view details about a message
1. Touch and hold a message in a message window.
2. Touch View message details in the menu that opens.
Messaging

163
Changing Messaging Settings
You can change a number of Messaging settings.
©To change Messaging settings, open the Messaging
window, press the Menu Key and touch Settings.
Storage settings
Delete old messages Touch to place a checkmark and allow the
phone to delete older messages in a thread when the Text
message limit or Multimedia message limit is reached. Uncheck
to keep all messages.
Text message limit Touch to set the number of messages to
save per thread of text messages.
Multimedia message limit Touch to set the number of messages
to save per thread of multimedia messages.
SignatureOpens a dialog box to enter a signature to
automatically send with your messages.
Callback Number Touch to place a checkmark and open a dialog
box to view or edit the callback number sent with your messages.
Text message (SMS) settings
Delivery reports Touch to place a checkmark and allow your
phone to receive delivery reports for the messages you send.
Messaging

164
Multimedia message (MMS) settings
Delivery reports Touch to place a checkmark and allow your
phone to receive a report on the messages you send.
Read reports Touch to place a checkmark and allow your phone
to receive reports when your messages are read or deleted.
NOTE
Please check with your service provider to see if Delivery reports and Read
reports are supported.
Auto-retrieve Touch to remove the checkmark to download only
the heading of multimedia messages, which you can then touch
to open a menu to download the whole message. This is useful
for controlling how much data you download.
Roaming auto-retrieve Touch to remove the checkmark to
download only the heading of multimedia messages when
connected to other carrier'sdata networks. This is useful for
avoiding unexpected charges if your contract has limits on data
roaming.
Notification settings
Notifications Touch to place a checkmark and allow your phone
to receive a notification whenever you receive a new message.
Select ringtone Opens a dialog box where you can select the
ringtone to sound when you receive new message notifications.
Vibrate Touch to place a checkmark to have the phone vibrate
when you receive a new message notification.
Messaging
165
Opening Browser
The Browser application allows you to surf the web. Navigation of
the web varies from webpage to webpage depending on the format
of the website. Some websites are in full-size format, which are
designed for computer-based web browsers, while other websites
are in mobile format, designed for mobile browsers.
To open Browser
©Touch the Browser icon on the Home screen or in the
Launch screen.
The Browser also opens when you touch a web link - for
example, in an email or text message. When you open the
Browser application, the last webpage you were viewing is
displayed. If you have not used Browser recently, your
home page opens. The URL of the current page is displayed
at the top of the window.
Browser
The address (URL) of the current page.
Some sites scroll the URL bar off the top of
the screen, but you can drag the page down
or press the Menu Key to see it again.
166
To go to a webpage
1. Touch the URL box at the top of the Browser screen.
If the URL box isn'tvisible, scroll up until the URL box
comes into view.
2. Enter the address (URL) of the webpage.
As you enter the address, GoogleTM web search makes
suggestions of webpages and queries. You can also touch
the Microphone icon to search by voice.
3. Touch a suggestion or enter an address then touch Go.
To refresh the current page
©Press the Menu Key and touch Refresh.
The webpage is reloaded, updating any content that has
changed.
To stop opening a page
If a webpage is taking a long time to open, or if you change your
mind, you can stop it from opening.
©Touch the Cancel icon to the right of the URL.
OR
©Press the Menu Key and touch Stop.
Browser

167
To get more information about the current page
©Press the Menu Key and touch More > Page info.
Adialog box opens with the page'stitle and full address.
To set your home page
Your home page opens when you open a new Browser window,
and when you start the Browser application after restarting your
phone or after not using it for a while.
1. On a Browser screen, press the Menu Key and touch
More > Settings > Set home page.
2. Enter the address (URL) of the page then touch OK.
You may find it more convenient to copy the URL from the
page you want then paste it in the dialog box.
If you prefer to open a new Browser windows without
opening a webpage by default, leave this field blank.
Navigating within a webpage
Webpages that are optimized for mobile devices typically open at a
size appropriate for your phone. Often, you can'tzoom or even
scroll their contents.
Webpages that aren'tdesigned specifically for mobile devices
typically open in overview mode - the page is zoomed out so you
can get the big picture.
Toscroll a webpage
©Slide your finger on the screen in the direction you wish to
scroll.
Browser

168
To zoom in or out on a webpage
You may not be able to zoom in or out on webpages that are
designed for mobile devices.
1. Slide your finger lightly on the screen to reveal the Zoom
control .
2. Touch the plus or minus side of the Zoom control to zoom in
or out.
Toquickly zoom into a section of a webpage
You may not be able to zoom in or out on webpages that are
designed for mobile devices.
©Double-tap on the section of the webpage you want to view.
The webpage zooms in so that you can read all the text in
that section by scrolling up and down.
©To return to page overview, double-tap the screen again.
Browser
169
To find text on a webpage
1. Press the Menu Key and touch More > Find on page.
2. Enter the text you're looking for.
As you type, the first word with matching characters is
highlighted on the screen and subsequent matches are
boxed.
3. Touch the left or right arrow to jump to and highlight the
previous or next matching word.
Browser
Touch to jump to the previous or next
matching word.

170
Navigating Among Webpages
You can open links on a webpage, navigate back and forth, and
review your browsing history just as in any web browser.
To open a link
©Touch a link to open it.
Links that you touch are highlighted in orange until the
webpage they refer to opens in the window.
To go back and forth among the pages you’ve opened
©Touch the Back Key .
OR
©Press the Menu Key and touch Forward.
Toview your Browser history
As you browse the web, the Browser keeps track of the pages
you visit to help you find your way back later.
1. Touch the Bookmark icon at the top right of the screen.
2. Touch the History tab.
You can also touch and hold the Back Key when
viewing a webpage to open the History tab. The pages
you've visited are grouped chronologically. Bookmarked
pages have a gold star.
3. Touch a time period to view the pages you've visited.
4. Touch a page in the history to reopen it.
Browser

171
To view your most frequently visited pages
1. Touch the Bookmark icon at the top right of the screen.
2. Touch the Most visited tab.
The pages you've visited most frequently are listed in order.
Bookmarked pages have a gold star.
3. Touch a page to open it.
To follow shortcuts for links, phone numbers, and addresses
The Browser recognizes links, as well as some phone numbers
and addresses, as information that you may want to act on
directly.
©Touch and hold a link to open a menu with shortcuts for
opening, bookmarking, saving, and sharing the link via social
networking site, email, or text message.
©Touch a phone number to open the Phone application with
the number entered.
©Touch a street address to open it in the Google Maps
application.
Browser
172
Working with Multiple Browser Windows
You can open up to eight Browser windows at once and switch
among them.
To open a new Browser window
©Press the Menu Key and touch New Window.
©Press the Menu Key and touch Windows.In the screen
that opens, touch New window.
New windows open with your home page.
To switch Browser windows
1. Press the Menu Key and touch Windows.
All of your open windows are displayed.
2. Touch a window to open it.
To close a Browser window
1. Press the Menu Key and touch Windows.
All of your open windows are displayed.
2. Touch the Close icon on the window to close it.
Browser
Touch to open a new window.
Touch to open an existing window.
Touch to close a window.

173
Downloading Files
You can download files, webpages, and even applications from the
web. The files that you download are stored on your microSD card.
To allow installing applications from the web or email
By default, your phone is configured to prevent you from installing
applications that you download from the web or receive in an
email message.
WARNING!
Applications downloaded from the web can be from unknown sources. To
protect your phone and personal data, download applications only from
trusted sources, such as Android MarketTM.
1. From the Home screen, press the Menu Key .
2. Touch Settings > Applications.
3. Touch to checkmark Unknown sources.
4. Read the pop-up message and touch the OK button.
To download a file
Different webpages offer different mechanisms for downloading
pictures, documents, applications, and other files.
©Touch and hold an image or a link to a file or to another
webpage. In the menu that opens, touch Save.
If the file is in a format supported by an application on the phone,
it is downloaded to your microSD card.
Browser
174
To cancel a download
If you change your mind about downloading a file, or start
downloading one by accident, you can cancel the download in
progress.
1. Press the Menu Key and touch More > Downloads.
2. Press the Menu Key again, then touch Cancel all
downloads.
To view the files you’ve downloaded
©Press the Menu Key and touch More > Downloads.
The files you've downloaded are listed in order. Touch a file
to open it.
You can clear the list by pressing the Menu Key then
touching Clear list.
Browser
175
Working with Bookmarks
You can bookmark webpages so that you can quickly return to
them.
To bookmark a webpage
1. Open the webpage you wish to bookmark.
2. Touch the Bookmark icon at the top right side of the
screen or press the Menu Key and touch Bookmarks.
3. Touch Add at the top left side of the Bookmarks screen.
4. Edit the name and the address (if necessary) then touch OK.
The bookmark is added to the top of your list of bookmarks.
Toopen a bookmark
1. Touch the Bookmark icon at the top right side of the
screen or press the Menu Key and touch Bookmarks.
Awindow opens with a list of your bookmarks. Bookmarks
are displayed in thumbnail view by default. To see them as a
list, press the Menu Key and touch List view.
2. Touch a bookmark to open it.
The bookmarked webpage opens in the current window. If
you prefer to open it in a new window, touch and hold the
bookmark, then touch Open in new window in the menu
that opens.
To edit a bookmark
1. Touch the Bookmark icon at the top right side of the
screen or press the Menu Key and touch Bookmarks.
2. Touch and hold the bookmark to edit.
3. Touch Edit bookmark in the menu that opens.
4. Edit the name or address in the dialog box that opens.
5. Touch the OK button.
Browser
176
To share a bookmark
1. Touch the Bookmark icon at the top right side of the
screen or press the Menu Key and touch Bookmarks.
2. Touch and hold the bookmark to share.
3. Touch Share link in the menu that opens.
4. Touch the application you want to use to send the
bookmark.
To add a bookmark shortcut to the Home screen
You can add a shortcut to your phone'sHome screen that you can
touch to open one of your bookmarks in a Browser window.
1. Touch and hold an empty spot on your phone'sHome
screen.
2. Touch Shortcut.
3. Touch Bookmarks.
4. Touch the desired bookmark to add it.
The Bookmark icon is added to the Home screen.
To delete a bookmark
1. Touch the Bookmark icon at the top right side of the
screen or press the Menu Key and touch Bookmarks.
2. Touch and hold a bookmark to delete it.
3. Touch Delete bookmark in the menu that opens.
4. Touch the OK button.
Browser

177
Changing Browser Settings
You can configure a number of Browser settings, including several
that you can use to manage your privacy.
©To open the Browser settings screen, start the Browser,
then press the Menu Key and touch More > Settings.
Page content settings
Text size Allows you to increase or decrease the size of the text
that the Browser uses when displaying webpages.
Default zoom Allows you to increase or decrease the
magnification level that the Browser uses when first opening a
webpage.
Open pages in overview When checkmarked, webpages are
displayed in an overview. If the checkmark is removed, the
webpage is displayed at 100% size.
Text encoding Allows you to change the character-encoding
standard that the Browser uses when displaying text on a
webpage.
Block pop-up windows Touch to place a checkmark and allow
the phone to block pop-up windows and prevent websites from
opening windows unless you request it.
Load images Touch to place a checkmark and allow the Browser
to load images when displaying a webpage. Remove the checkmark
to allow the Browser to omit images when displaying a webpage.
Auto-fit pages When checkmarked, the Browser optimizes the
presentation text and other elements of webpages to fit your
phone's screen. If the checkmark is removed, webpages can be
viewed as designed for a computer screen.
Landscape-only display Touch to place a checkmark and allow
your phone to display pages in landscape (horizontal) orientation
on your screen, regardless of how you are holding the phone.
Browser

178
Enable JavaScript When checkmarked, the Browser allows
JavaScript to run. Remove the checkmark to prevent JavaScript
from running.
Enable plug-ins When checkmarked, plug-ins are enabled on
webpages. Remove the checkmark to disable plug-ins from
webpages.
Open in background When checkmarked, links opened in a new
window will open in the background. If the checkmark is
removed, new windows will open in place of the current window.
Set home page Allows you to enter the URL of a page to set as
your Home page.
Privacy settings
Clear cache Allows you to delete the temporary files your
Browser stores in order to open webpages more quickly.
Clear history Allows you to delete the Browser history of pages
you have visited.
Accept cookies When checkmarked, your phone allows
webpages to store cookies. Remove checkmark to prevent
webpages from storing cookies on your phone.
Clear all cookie data Touch to delete all cookies from your phone.
Remember form data When checkmarked, the Browser
remembers what you enter in a form on a site and helps you
reenter that text the next time you use that form. Remove
checkmark to disable this feature.
Clear form data Touch to delete all the information the Browser
remembers about what you've entered in forms.
Browser

179
Enable location When checkmarked, you permit websites with
location-specific content to ask whether you want to share your
location, using your phone'slocation information. To provide a
website with your location, you must also have location sharing
enabled in the Settings application.
Clear location access Allows you to clear the permissions to
access your location that you've granted to websites in the past. If
those websites want permission to access your location again,
you must grant it again.
Security settings
Remember passwords The Browser can remember your
passwords for some webpages that require you to log in to make
it quicker to access those pages on repeat visits. Remove
checkmark to prevent the Browser from storing passwords.
Clear passwords Touch to delete any passwords that the
Browser has stored.
Show security warnings When checkmarked, the Browser warns
you about websites with common security problems, such as
outdated or invalid certificates. Remove checkmark to prevent
these warnings.
Advanced settings
Website settings Opens a screen where you can view advanced
settings for particular websites.
Reset to default Touch to delete all Browser data, including your
browsing history, cookies, passwords, and bookmarks, and to
restore all the Browser settings to their original values.
Browser

180
Opening Google Maps and Viewing Your Location
First, turn on location services to use information about your
location when navigating and searching in Google Maps. Then open
the Google Maps application to view your location.
To use location services with Google Maps
You must have location services turned on to view your location in
Google Maps and to use your location to find local resources.
1. From the Home screen, press the Menu Key .
2. Touch Settings > Location & security.
3. Touch to place a checkmark on the My Location options that
you want to use.
●Checkmark Use wireless networks to allow the phone to
determine your approximate location by using Wi-Fi and
mobile networks.
●Checkmark Use GPS satellites to allow your phone to
determine your location to street-level accuracy.
4. From the Home screen, press the Menu Key .
5. Touch Settings > Privacy.
Checkmark Use My Location to use your location when you
search.
Google MapsTM
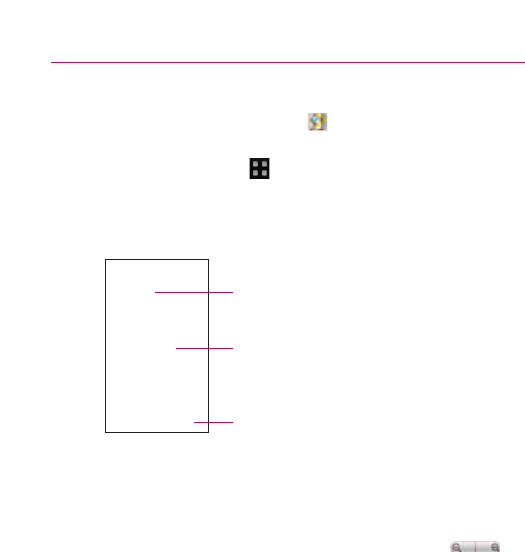
181
To open Google Maps and view your location
1. Touch the Google Maps icon on the Home screen or in
the Launch screen.
2. Press the Menu Key and touch My location.
The map centers on a blue dot that indicates your location.
Ablue circle around the dot indicates that your actual
location is within the circle.
To move the map
©Drag the map with your finger in the desired direction.
To zoom in and out of a map
©Touch the plus or minus side of the Zoom control .
OR
©Double-tap a location on the map to zoom in to that location.
Not all magnification levels are available for all locations.
Google Maps
Drag the map to move in any direction.
Your location.
Zoom in or out.

182
To get an address and additional information for a location
©Touch and hold a location on the map. A balloon with the
address and a thumbnail from Street View (if available)
opens over the location.
©Touch the balloon to access additional options.
To clear the map
After you get directions or search on a map, you can clear the
markers that are left from those activities.
©While viewing a map, press the Menu Key and touch
More > Clear Map.
Changing Map Layers
Initially, Google Maps opens with a street map. You can also view a
satellite image of a location, check on traffic, and even look at a
location as if you were standing on the street. You can also view
Google Maps that you have created in Google Maps on the web.
Android 2.0 Layers: A layer is any content that can be overlaid on
the map. Today Google Maps can show the following layers: Traffic
Latitude friends, Directions, real-time Transit, Wikipedia, and My
Google Maps. Recent Search results also appear under the Layers
menu so you can see several at once.
Google Maps
Touch and hold a location to open a balloon
with its address.
Touch the balloon to access additional
options.
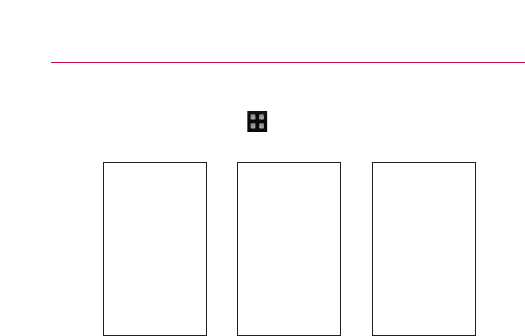
183
To view map, satellite, or traffic layers
©Press the Menu Key ,touch Layers,then touch Traffic,
Satellite,Latitude,or another layer.
Map layer is the default view. It displays a street map with
the names of streets, rivers, lakes, mountains, parks, and
other features.
Satellite layer uses the same satellite data as Google EarthTM.
Satellite images are not real time. Google Earth acquires the
best imagery available, most of which is between 1 and 3
years old.
Traffic layer offers real-time traffic conditions, displayed over
roads as color-coded lines, from green through black.
Not all locations have information to support all Map layers
or all zoom levels. Visit Google Maps on the web to learn
more about layers.
Google Maps
Map layer Satellite layer Traffic layer
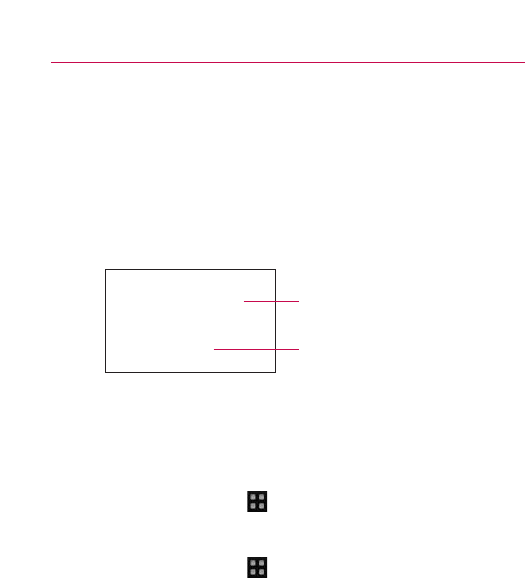
184
To open Street View for a location
Street View offers street-level images of a location, which you can
navigate and zoom in and out of. Street View is not available for all
areas.
1. Touch and hold a location on a map to open the balloon with
the address and a Street View thumbnail.
2. Touch the balloon. In the menu that opens, touch the Street
View tab.
To navigatein Street View
©Drag the image in any direction to pan up or down or to look
in other directions.
©Zoom in to the direction you're looking.
©Press the Menu Key and touch Step forward or Step
backward to move up and down the street or just touch a
navigation arrow in the image.
©Press the Menu Key and touch Compass mode to use
the phone itself to navigate Street View. Tilt, pan, or turn the
phone to change the view. Touch Compass mode again to
end it.
NOTES
●
Please keep away from magnetic materials when you use the Compass
feature.
●
Please calibrate the Compass when you use it for the first time and
occasionally after that. Wave your phone in a figure 8 pattern to reset the
magnetometer in your device.
●
It is recommended to use the Compass feature outside for more
accuracy.
Google Maps
Touch the arrows to shift the view up or
down the street.
Touch the screen to display navigation tools.
185
©Press the Menu Key and touch Report image to open a
web-based form for reporting images with inappropriate
content or privacy concerns to GoogleTM.
©Press the Menu Key and touch Go to map to leave
Street View.
Searching For Locations and Places
You can search for a location and view it on a map. You can also
search for places on the map that you're viewing.
Tosearch for a location
1. While viewing a map, press the Menu Key and touch
Search or touch the Search Key .
2. In the search box, enter the place you're looking for. You
can enter an address, a city, or a type of business or
establishment. For example,
“
theater in New York
”
.
3. Touch the Search icon .
Markers with letter labels indicate search matches on the
map.
You can touch a marker to open a balloon that contains a
label. Touch the balloon to open a screen with more
information about the location, as well as options for
obtaining directions.
Google Maps
Touch a balloon to open a screen with
more information about the location.
Touch a marker to open a balloon with
more information.
Touch to open a list of all the results
on the map.
Touch to select the next or previous
marker on the map and view its label.
186
Getting Directions
Google Maps can provide directions for travel by foot, public
transportation, or car. You can add a destination shortcut to your
Home screen so that you can simply touch the shortcut to get
directions to that location from wherever you are.
To get directions
1. While viewing a map, press the Menu Key and touch
Directions.
2. Enter a starting point in the first text box and your
destination in the second text box. You can also touch to
open a menu with options for selecting an address from
your Contacts or a point that you touch on a map.
To reverse directions, press the Menu Key and touch
Reverse Start & End.
3. Touch the icon for car, public transit, or walking directions.
4. Touch the Go button.
The directions to your destination appear in a list.
Google Maps
Touch a mode of transport.
Touch to get directions.
Enter starting and ending locations.
187
You can choose the directions format:
●Read directions as text.
●Touch Show on map to see the directions on a map.
●Touch Navigate to get spoken, turn-by-turn directions from
Google Maps Navigation.
●When you're finished, press the Menu Key and touch
More > Clear map to clear the map.
Navigating with Spoken, Turn-by-turn Directions
You can use Google Maps Navigation to get turn-by-turn driving
directions, both spoken and displayed on your screen.
To navigate with turn-by-turn directions
©Get directions to a location, then touch Navigate in the
Directions screen.
OR
Google Maps
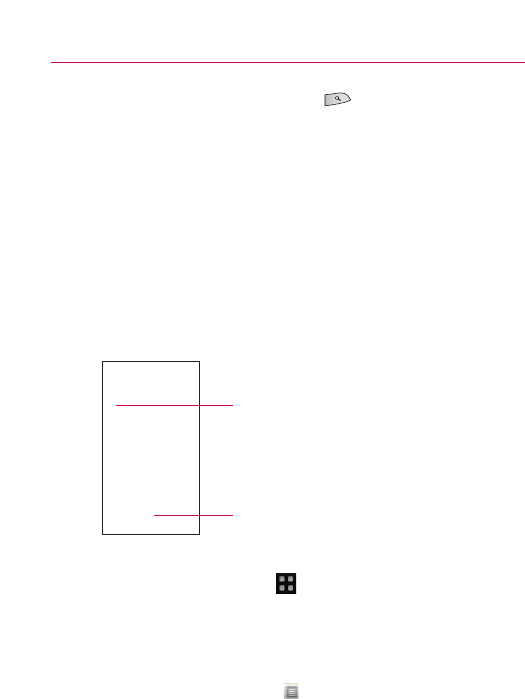
188
©Touch and hold the Search Key .
●When prompted to speak, say “Navigate to” followed by a
location.
●If prompted,touch a destination in the list of suggestions. A
map opens with your route drawn in blue and your next
turn described at the top.
●As you navigate your route, each direction is spoken in
turn, and the next turn is displayed.
●The Google Maps application downloads and temporarily
stores a copy of the directions and other information about
your route on the phone, so if you lose your connection to
adata network, you can still navigate to your destination.
You can control the volume of the spoken directions with
the Volume Up/Down keys. To turn the spoken directions
off, press the Menu Key and touch Mute.
To view turn-by-turn directions in a list
You can view each turn in your route as a scrolling list of written
directions.
©Touch the Directions icon .
Ascreen opens with a scrolling list of turn-by-turn directions
to your destination.
Google Maps
Acompass indicates north.
Your current location and direction
189
©Touch the Back Key to return to Navigation View.
To return to Navigation View
If you are navigating to a destination and use Google Maps to
explore areas, you can quickly return to your current location in
Navigation View.
©Open the Notifications panel and touch the Navigation
ongoing alert.
OR
©Touch the Navigation icon on the map.
You return to Navigation View with your current location and the
next direction displayed.
To change views of your route
You can view your progress on your route as a map with a
number of layers of information. You can zoom in and out of the
map and drag it to view adjacent areas.
©Press the Menu Key and touch Layers to switch to views
that show traffic or satellite view, the locations of parking,
restaurants, and other landmarks along your route.
Google Maps
190
©Press the Menu Key and touch Route Info for a high-
level summary view of your route, with options for picking a
new route, traffic information, and more.
©Drag on the map to view adjacent areas or touch the map to
see controls for zooming in and out.
To search for locations along your route
You can search for businesses, points of interest, and other
features along your route. When you search while navigating, your
results include locations along your route, rather than locations
that are near your current location.
©Touch the Search Key and search for locations of
interest.
The results are displayed as markers along your route; the
first result is labeled. You can use the left and right arrow
buttons to move from result to result, zoom in and out, or
touch a label for more information about the marker.
©When you're finished, touch the Navigation icon to return
to Navigation View.
Google Maps
Navigation

191
To preview your route
You can preview each turn on your route with Navigation,
Satellite, and other views.
1. Touch the direction on the screen. Left and right arrows
appear.
2. Touch a left or right arrow to preview the next or previous
leg of your route.
3. When you're finished previewing, touch the Navigation icon
to return to your current location and next turn direction.
Toview traffic conditions on your route
At the lower-left corner of the Navigation View, a traffic light
indicates the overall traffic conditions on your route, next to the
estimated time until you arrive at your destination. You can also
view the traffic conditions on each segment of your route.
©Touch the traffic light at the lower left of the Navigation
View. Your route opens in Traffic View, with color coding to
indicate the traffic along the way.
Google Maps
192
©Touch the Navigation icon to return to your current
location in Navigation View.
To get an alternate route to your destination
If traffic is slow on your current route, or if you just want to try a
different route, you can request an alternate route from the
Google Maps Navigation service.
1. Press the Menu Key and touch Route Info.
2. Touch the Alternate route icon at the bottom of the
screen. An alternate route is drawn on the map.
Toexit navigation
You can exit Navigation View when you reach your destination or
at any time during your trip.
©Press the Menu Key and touch Exit Navigation.
Finding Your Friends with Google LatitudeTM
Google Latitude lets you and your friends view each others'
locations on maps and share status messages with each other. You
can also send messages and emails, make phone calls, and get
directions to your friends'locations using Google Latitude.
Your location is not shared automatically. It is by invitation only.
You must join Latitude and then invite your friends to view your
location or accept invitations from your friends.
Google Maps

193
To join Latitude
©While viewing a map, press the Menu Key and touch
Join Latitude.
The first time you join Latitude, you're prompted to accept
or reject the Google privacy policy. After you've joined
Latitude, the Menu Key item changes to Latitude.
To open Latitude
After you join Latitude, you can open it to find your friends and
view their updates.
©While viewing a map, press the Menu Key and touch
Latitude.
To invite friends to share their locations
After you join Latitude, you can start sharing your location with
your friends. Only friends whom you have explicitly invited or
accepted can see your location.
1. Open Latitude, press the Menu Key and touch Add
friends.
2. Touch Select from Contacts or Add via email address in the
menu that opens.
●Select from Contacts allows you to invite your Contacts to
join Latitude.
●Add via email address allows you to invite your friends to
join Latitude by email.
Google Maps

194
3. Touch Add friends at the bottom of the screen.
If your friends already use Latitude, they receive an email
request and a notification on Latitude. If they have not yet
joined Latitude, they receive an email inviting them to sign
in to Latitude with their Google Account.
To respond to an invitation
When a friend invites you to share your location in Latitude, you
can respond in the following ways.
Accept and shareback You and your friend can see each other's
locations.
Accept, but hide my location You can see your friend'slocation,
but they can'tsee yours.
Don’t accept No location information is shared between you and
your friend.
To view your friends’ locations
You can view your friends'locations on a map or in a list.
When you open the Google Maps application, your friends'
locations are shown. Each friend is represented by their picture
(from Contacts) with an arrow pointing to their approximate
location. If a friend has chosen to share city-level locations, their
picture does not have an arrow and appears in the middle of the
city.
To see a friend'sprofile and connect, touch the photo. Your
friend'sname appears in a balloon. Touch the balloon to open a
screen with details about your friend and many connection
options. When you open Latitude, you see a list of your Latitude
friends with a summary of their last known locations, status, and
so on. Touch a friend in the list to open a screen with details
about the friend and many connection options.
Google Maps

195
To connect with and manage connections with your friends
Touch a friend'scontact details balloon in Map view or touch a
friend name in List view to open the friend'sprofile. In the Profile
screen, you can communicate with your friend and set privacy
options.
Show on map Shows the friend'slocation on the map.
Chat using Google Talk
TM
Opens a Google Talk chat window with
that friend.
Send email Opens GmailTM with a message addressed to the
friend.
Directions Gets directions to the friend'slocation.
Navigate Opens Google Maps Navigation.
What’snearby? Opens a list of nearby businesses, restaurants,
and other points of interest.
Sharing options Allows you to set the options for sharing your
location. You can choose from the following options:
●Hide from this friend Stop sharing your location with this
friend in Latitude, in a list, or on a map.
●Share only city-level location Share only the city you are in,
not your street-level location. Your friend sees your picture in
the middle of the city you are in.
●Share best available location Shares your street-level location
with your friend.
Remove this friend Removes the friend from your list and stop
sharing locations altogether.
Google Maps

196
To control what you share
You have control over how and when your friends can find you.
Only the last location sent to Latitude is stored with your Google
Account. If you turn off Latitude or are hiding, no location is
stored.
©Open Latitude, touch your own name, then touch Edit
privacy settings.
You can set the following privacy options.
Detect your location Latitude detects and updates your location
as you move. The update frequency is determined by several
factors, such as your phone'sbattery charge level and how
recently your location has changed.
Set your location Opens a dialog box for you to select how your
location is set. You can enter an address, set an address from
Contacts, pick a spot on a map, or let Latitude share your actual
location.
Hide your location Latitude hides your location from all your
friends.
Turn off Latitude. Disables Latitude and stops sharing your
location or status. You can always join Latitude again.
Google Maps
197
Opening Camera and Taking Pictures
You take pictures and record videos using the Camera application.
You can also view your pictures with the Gallery application.
IMPORTANT
Be sure to clean the protective lens cover with a microfiber cloth before
taking pictures. A lens cover with smudges from fingers can cause blurry
pictures with a
“
halo
”
effect.
To open the Camera application
©Touch the Camera icon on the Home screen or in the
Launch screen.
Camera opens in Landscape mode, ready to take a picture
or record a video.
Camera
Drag to switch between Camera and Video
modes.
Touch to take a picture or to begin recording
avideo.
Touch the screen to change settings.
Touch to access your pictures gallery.
198
To take a picture
1. Open the Camera application.
2. To control your picture exposure manually, touch the screen
to open the camera settings.
3. Frame your subject on the screen.
You can zoom in or out by touching the screen and then
touching the Zoom control .
4. Touch the Shutter icon .
The camera brings the image into focus. When the image is
in focus, the focus indicators in each corner turn green and
the camera takes a picture.
Totakepictureswith digital zoom
©Touch the screen to display the settings controls, touch the
Zoom control ,and slide the Zoom bar left (zoom out) or
right (zoom in).
OR
Touch to zoom in or to zoom out.
Camera
199
To shoot a video
1. Open the Camera application and drag the control to the
Video position.
2. To change the length of your video or control your video
exposure manually, touch the screen to open the camcorder
settings.
3. Point the lens to frame the scene where you want to start.
4. Touch the Start Video icon .
The camcorder starts recording the video. The length of the
recording is displayed on the bottom right part of the screen.
5. Touch the Stop Video icon to stop shooting.
Camera

200
Reviewing Your Pictures
You can review the pictures you’ve taken in the Camera
application, view them in a slideshow, share them with your
friends, and delete and edit them.
To review your pictures
1. Open the Camera application.
2. Touch the Picture review icon .
The picture review screen opens.
●Use the slider bar at the bottom of the screen to
scroll horizontally through your pictures.
●Use the Album View switch at the top right of the
screen to switch between grid and stack view.
●Touch the Gallery icon at the top left of the screen,
then touch the Camera icon at the top right of the screen
to switch to Camera mode.
3. Touch a picture to view it.
●Swipe your finger across the screen to the left or right to
scroll through your pictures in full screen view.
●Touch the screen or press the Menu Key twice and
touch Slideshow to play a slideshow of all your pictures.
●Touch the screen or press the Menu Key and touch
Menu to share, delete or edit the selected picture.
Camera

201
Reviewing Your Videos
You can review the videos you’ve recorded, share them with
friends, delete them, or view them in a slideshow.
1. Open the Camera application.
2. Touch the Gallery icon .
The main Gallery screen opens. Pictures and videos are
displayed together. Videos are indicated by a translucent
play arrow.
●Use the slider bar at the bottom of the screen to
scroll horizontally through your pictures and videos.
●Use the Album View switch at the top right of the
screen to switch between grid and stack view.
●Touch the Gallery icon at the top left of the screen,
touch the Camera icon at the top right of the screen to
switch to Camera mode, then drag the control to the
Video position to switch to Video mode.
3. Touch a video to play it.
To access more features in the Gallery for viewing and sharing your
videos, press the Menu Key twice.
Camera

202
Changing Camera Settings
The Camera application has automatic settings that you can use to
take quick point-and-shoot photographs and videos. It also has a
number of ways to control your exposures, including controlling the
focus, turning the flash on and off, and adjusting the white balance.
You can even shoot negatives and other special effects.
The Camera application also includes settings for controlling picture
quality, video length, whether to store the location where you take
your pictures, and more.
To change Camera settings
1. Open the Camera application, then touch the screen or
press the Menu Key ,and touch Settings icon .
2. Touch the setting category you want to change and then
touch a setting.
3. Touch the Back Key to close the Settings menus.
4. Take your pictures using the new settings.
5. When you're finished, touch the screen, touch the Shot
settings icon ,then touch the Reset icon to restore the
settings back to the default values.
Camera

203
Camera settings
When you change some Camera settings, the current settings are
indicated by icons along the left side of the screen.
Flash mode Touch to set the Camera’s flash mode.
:Automatic
:Off
:On
Image size Touch to set the size (in pixels) of the pictures you
take.
Scene mode Touch to select the scene mode you would like to
take the picture in.
ISO Touch to select the ISO settings for your camera.
White balance Touch to select how the Camera adjusts colors in
different kinds of light in order to achieve the most natural-looking
colors for your pictures.
Color effect Touch to select a special effect for your pictures,
such as monochrome, sepia tone, or negative.
Timer Touch to set your camera’s timer for automatic pictures.
Shot mode Touch to set the shot mode you would like to take
your pictures in.
Image quality Touch to set the quality of the pictures you take.
Auto review Touch to set if you would like to review your picture
after taking it.
Shutter sound Touch to set the shutter sound when taking
pictures.
Grid View Touch to set a grid view to display on the screen when
taking pictures.
Store location Touch On to use the phone’s GPS to include the
location of each picture you take.
Camera

204
Camcorder settings
In addition to the white balance and color effect controls that the
camcorder shares with the camera the camcorder has its own
distinct settings.
Video quality Touch to set the video quality.
Audio recording Touch to set your phone to record audio along
with video.
Camera
205
Opening Gallery and viewing Your Albums
Open the Gallery application to view albums of your pictures and
videos.
To open Gallery and view your albums
©Touch the Gallery icon on the Home screen or in the
Launcher.
OR
©Open Gallery from the Camera application by touching the
Gallery icon .
The Gallery application presents the pictures and videos on
your microSD card, including those you've taken with the
Camera application and those you downloaded from the
web or other locations.
If you have a PicasaTM account associated with one of your
phone's GoogleTM Accounts configured to sync with Picassa,
you'll also see your Picasa web albums in Gallery.
©Touch an album to open it and view its contents.
The pictures and videos in the album are displayed in
chronological order.
©Touch a picture or video in an album to view it.
©Return to the main Gallery screen at any time by touching its
icon at the top left of the screen.
Gallery
Touch to open Camera.
Touch in any view to return to the main
Gallery screen.
Typical view of an album.
Scroll left or right to view more albums.

206
Working with Albums
Albums are groups of images and videos in folders on your microSD
card or in Picasa web albums.
To open an album and view its contents
©Open the Gallery application and touch the album whose
contents you want to view.
©Use the slider bar at the bottom of the screen to
scroll horizontally through your pictures and videos.
©The date of the images in view is displayed, so you can
scroll by date.
©You can also scroll through an album by swiping the screen
left or right.
Gallery
Toggle between grid and stack view.
Displays the name of the current album.
Touch a picture or video to view it.
Slide the bar to scroll horizontally through
your pictures.
207
To change how the contents of an album are displayed
You can view the images and videos in your albums in a
chronological grid or in stacks, sorted by the date and the location
where they were taken. You switch album views with the Album
View switch at the top right of the screen.
©Drag the Album View switch to the right to view the
contents of the album in stacks.
©Drag the Album View switch to the left to view the
album contents in a chronological grid again.
Gallery
Stacks are sorted by date and location
Album View switch

208
To Work with Batches of Pictures or Videos
In addition to working with whole albums and with individual
pictures, you can select one or more pictures or videos in an album
to work on them in batches. For example, to send a few pictures
from an album to a friend.
1. Open the album to view the pictures and videos to work
with as a batch.
2. Press the Menu Key twice.
3. Checkmark or uncheck the items you want to work with.
You can select all items by touching Select All at the top left
of the screen or you can uncheck all items you've selected
by touching Deselect All at the top right of the screen.
4. Use the control buttons at the bottom of the screen to act
on the checked items. The control buttons available depend
on the mix of items you've selected.
Tosharean album
You can share the entire contents of one or more albums or
individual images or videos from an album.
1. Open the main Gallery window.
2. Press the Menu Key twice.
3. Checkmark or uncheck the album(s) you want to share.
4. Touch the Share button at the bottom left of the screen and
select the application you would like to use to share the
selected albums.
5. Enter the necessary information and send it.
Gallery

209
To get details about an album
1. Open the main Gallery window.
2. Press the Menu Key twice.
3. Checkmark or uncheck the album(s) you want to see details
about.
4. Touch the More button at the bottom right of the screen,
then touch Details from the pop-up menu.
To delete an album
You can delete an album and its contents from your microSD card.
1. Open the main Gallery window.
2. Press the Menu Key twice.
3. Checkmark or uncheck the album(s) you want to delete.
4. Touch the Delete button at the bottom center of the screen.
Touch ConfirmDelete in the balloon that pops up.
Working with Pictures
Use Gallery to view pictures that you've taken with the Camera
application, downloaded, copied onto your microSD card, or that are
stored in Picasa web albums. You can also edit the pictures on your
microSD card and share them with friends.
To view and browse pictures
©Open a Gallery album and touch a picture.
Gallery
Touch the picture to see
the controls.
Drag left or right to see
the next or previous
picture in the album.
Touch to zoom in or
out; simply pinch; or
just double-tap the
picture.

210
©Turn the phone to view the picture in upright (portrait) or
sideways (landscape) orientation. The picture is displayed
(but not saved) in the new orientation.
©Touch the picture to view the Navigation, Zoom, and other
control buttons.
©Touch the Zoom icon to zoom in our out or just double-tap
the screen.
©When the picture is zoomed in, drag the picture to view
parts that are not in view.
©When the picture is zoomed to fit in the window, drag left or
right to view the next or previous picture in the album.
To watch a slideshow of your pictures
©Touch a picture to view the control buttons, then touch the
Slideshow button.
©Touch a picture to end the slideshow.
To rotate a picture
1. Touch a picture to view the control buttons then press the
Menu Key .
2. Touch the More button.
Amenu opens with tools for working with the picture.
3. Touch Rotate Left or Rotate Right.
The picture is saved with the new orientation.
Gallery
211
To use a picture as a contact icon or as Home screen
wallpaper
1. Press the Menu Key while viewing the picture.
2. Touch the More button.
3. Touch Set as.
4. Touch Contact icon to set the picture to a Contact or touch
Wallpaper to set the picture as your wallpaper.
To crop a picture
You can crop and save pictures that are stored on your microSD
card.
1. Press the Menu Key while viewing the picture to crop.
2. Touch the More button.
3. Touch Crop.
The cropping rectangle appears on top of the picture.
4. Use the cropping box to select the portion of the picture to
crop.
●Drag from the inside of the cropping box to move it.
●Drag an edge of the cropping box to resize it to any
proportion.
●Drag a corner of the cropping box to resize it with fixed
proportions.
Gallery

212
5. Touch the Save button to save a copy of the picture as you
cropped it. The original uncropped version remains on your
microSD card.
Togetdetails about a picture
1. Press the Menu Key while viewing a picture.
2. Touch the More button.
3. Touch Details.
To view the location of a picture in Google Maps
TM
If you have configured the Camera application to save location
data with your pictures, you can view the location where you took
the picture in Google Maps.
1. Press the Menu Key while viewing the picture you
want to view its location in Google Maps.
2. Touch the More button.
3. Touch Details.
Google Maps opens, centered on the location stored in the
picture.
Gallery
Drag from inside the cropping box to
move it.
Drag a corner or edge to resize the
cropping box and zoom in or out.
When you're finished, touch Save.

213
To share a picture
You can share a picture by sending it to friends or posting it in a
Picasa web album.
1. Press the Menu Key while viewing the picture to share,
then touch the Share button.
2. In the menu that opens, touch the application to use to
share the selected picture.
The application you selected opens with the picture (or a
link) attached to a new message. For information about
addressing and sending the message, see the section about
that application.
Todelete a picture
You can delete a picture from your microSD card.
1. Press the Menu Key while viewing the picture to
delete.
2. Touch the Delete button then touch Confirm Delete in the
dialog box that opens.
Working with Videos
Use the Gallery application, to play videos that you've taken with
the Camera application and to share them with friends.
To play videos
©Open a Gallery album then touch a video.
The video plays, with the orientation (portrait or landscape)
you shot it in.
Gallery
Touch the video to view the playback
controls for pausing, resuming, and skipping
backward and forward.

214
©Touch the video to view the playback controls.
To share a video
You can share a video by sending it in an email or with a
multimedia (MMS) message. MMS messages have size limits,
typically 1.2MB, or approximately 1 minute of low-quality video. In
the case of hight-quality, the time is shorter than 1 minute.You
can also share a video by uploading it to the YouTubeTM web site.
1. While viewing an album, press the Menu Key twice.
2. Checkmark the videos or pictures to share.
3. Touch the Share button.
4. In the menu that opens, touch the application you would like
to use to share the selected videos.
5. Enter the necessary information and send it.
Todelete a video
1. While viewing an album, press the Menu Key twice.
2. Checkmark the videos to delete.
3. Touch the Delete button.
4. Touch Confirm Delete.
Gallery
215
Opening YouTube and Watching Videos
You can browse, search for, view, upload, and rank YouTube videos
on your phone with the YouTube application.
To open the YouTube application
©Touch the YouTube icon on the Home screen or in the
Launch screen.
YouTube presents the videos grouped into categories, such
as Most viewed, Most discussed, Most recent, and Top
rated. Touch a video to watch it or touch to learn more
about it.
YouTubeTM
Touch to search for a video. You can also
search by voice.
Touch to record and share a video.
Touch a video to play it.
Touch to learn more about a video.
216
To watch and interact with YouTube videos
©On a YouTube screen, touch a video to play it.
©Touch the video to view the Playback controls. You can
pause, skip forward or backward, or drag the slider to the
point in the video you want to watch.
©Touch the Back Key to stop playback and return to the
videos list.
©Press the Menu Key to rank, comment on, share, flag as
inappropriate, and interact with the video in other ways.
For details about these features, visit the YouTube web site.
Tosearch for videos
1. At the top of the main YouTube screen, touch the Search
icon .
2. Enter the text to search for or touch the Microphone icon
to search by voice.
3. Touch a suggestion below the search box or touch the
Search icon .
4. Scroll through the search results and touch a video to watch
it.
YouTube

217
To share your videos on YouTube
You can record and share a video using YouTube. First, you must
create a YouTube account and sign into it on your phone.
You can also share the videos you record with the Camera
application by uploading them to YouTube.
1. Touch the Camera icon at the top right of main YouTube
screen.
2. If you want to set any configurations manually, touch the
screen to open the camcorder settings.
3. Point the lens to frame the scene where you want to start.
4. Touch the Recording key .
5. Touch the Stop key to stop recording.
6. Touch OK.
You return to the YouTube Upload details screen.
7. Enter a title, description, and tags for your video.
8. If you want to share the video with everyone, checkmark
Public.
9. Touch Upload.
YouTube

218
Transferring Music Files to Your Phone
The Music application plays audio files that are stored on your
phone'smicroSD card. Copy audio files from your computer onto
the microSD card before you open the Music application. The Music
application supports audio files in numerous formats, including
MP3, M4A (DRM-free AAC files, from iTunes®)AMR , MIDI, and
OGG Vorbis.
To copy music files onto the phone's microSD card
1. Connect the phone to your computer with a USB cable and
mount the microSD card from the Notifications panel.
2. To organize your audio files, you can use the computer to
create a music folder at the top level of the microSD card.
3. Use the computer to copy music and other audio files into
the folder that you created on the microSD card.
●You can use subfolders on the microSD card to organize
your music files or you can simply copy the audio files to
the top level of the microSD card.
●If the music files have accompanying artwork in JPEG
format, rename the art file albumart.jpg and include it in
the same folder as the music files.
●If you have created any playlists, create a subfolder for
them in your music folder on the microSD card and copy
the playlists into it.
4. Unmount the microSD card from the computer and
disconnect the phone.
WARNING
To prevent damage to the files on your microSD card, follow your
computer's instructions and the instructions in
“
Connecting to a
Computer via USB
”
on page 65.
Music
219
Opening Music and Working with Your Library
After you've copied some music onto your microSD card you can
open the Music application and see your library of music files,
sorted in one of four ways.
To open Music and view your music library
©Touch the Music icon on the Home screen or in the
Launch screen.
The Music application searches the microSD card for music
files you copied to your card, then builds a catalog of your
music based on the information contained in each music file.
This can take from a few seconds to several minutes,
depending on how may files you have copied onto the
microSD card.
When the catalog is complete, the Music library screen
opens, with tabs that you can touch to view your music
library organized by Artists, Albums, Songs, or Playlists.
You can return to the main Library screen from most other
screens in the Music application by pressing the Menu Key
then touching Library.
Music
Touch a tab to view your library according to
the theme.
Touch to show a summary of information of
the current track.

220
To search for music in your library
1. Open the main Library screen then touch the Search Key
.
2. Start typing the name of the artist, album, or track you're
looking for. Matching songs are displayed in the list below
the search box.
3. Touch a matching song to play it or touch a matching album
or artist to view a list of associated songs.
To delete a song from the microSD card
You can delete music from the storage card.
©Touch and hold a song in a library list. In the menu that
opens, touch Delete.
OR
©On the Playback screen, press the Menu Key and touch
Delete.
You can also delete music files from the microSD card when
your phone is connected to the computer. To do this,
browse for the music files you wish to delete and delete
them from the folder.
Music
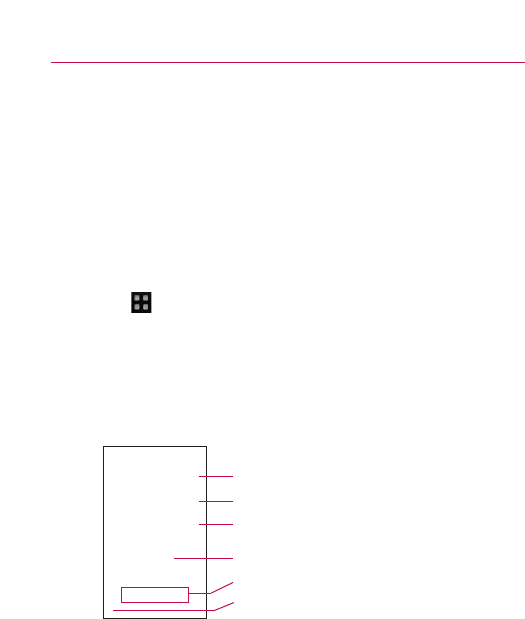
221
Playing Music
You can listen to music by using the phone'sbuilt-in speaker,
through a wired headset, or through a wireless Bluetooth stereo
headset that supports the A2DP profile.
To play music
©Touch a song in your library to listen to it.
OR
©While viewing a list of tracks in an album, press the Menu
Key and touch Play all.
The Playback screen opens and the song you touched or the
first song in the album or other playlist starts to play. The
tracks in the current playlist play in order until you reach the
end of the playlist (unless you choose a repeat option).
Otherwise, playback stops only if you stop it, even when
you switch applications or receive a phone call.
You can return to the Playback screen from most other
screens in the Music application by touching the currently
playing song at the bottom of the screen.
You can return to the Playback screen from any other
application by opening the Notifications panel and touching
the ongoing music notification.
Music
Touch to open the current playlist.
Touch to shuffle the current playlist.
Touch to repeat the current playlist; touch
again to repeat the current track.
Touch and hold to search for information.
Skip tracks or pause and resume playback.
Drag the slider to go directly to a specific
section of a track.
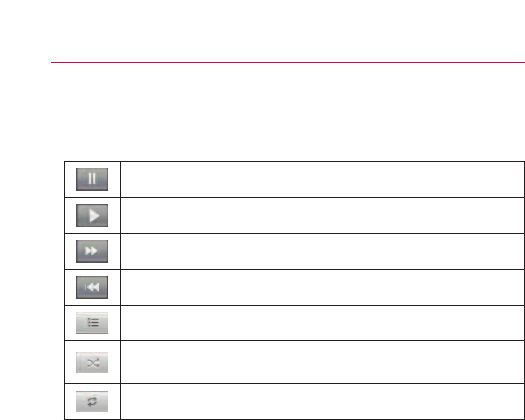
222
To control playback
The Playback screen contains several icons that you can touch to
control the playback of songs, albums, and playlists:
To control playback volume
In addition to the techniques for setting media volume described
in
“
Sound & display
”
on page 245, you can control the volume of
music in the Music application.
©Press the phone'sVolume Up/Down keys.
Apanel opens to show the current media volume.
Some headsets include their own volume controls or ways
to pause and resume playback or to skip tracks.
Music
Touch to pause playback.
Touch to resume playback.
Touch to skip to the next track in the album, playlist, or shuffle.
Touch to skip to the previous track in the album, playlist, or shuffle.
Touch to open the current playlist.
Touch to play the current playlist in shuffle mode (tracks are played in
random order).
Touch to set repeat mode: Don
'
trepeat, Repeat the playlist, or Repeat
the current track.

223
To play your tracks in a party shuffle
When you turn on Party Shuffle, the Music application plays tracks
from your microSD card in random until Party Shuffle is turned off.
©In the Playback or a Library screen, press the Menu Key
and touch Party shuffle.
The Music application creates a current playlist of seven
tracks selected randomly from your microSD card and starts
playing them. When it finishes playing the first seven tracks,
it adds another six tracks and keeps playing.
©View the current playlist that Party Shuffle is playing by
touching the Playlist icon on the Playback screen.
©Add a track to the end of the Party Shuffle playlist by
touching and holding the name of a track in your library. In
the menu that opens, touch Add to playlist, then touch
Current playlist.
©Stop Party Shuffle by pressing Menu Key and touching
Party shuffle off.
To use a song as a ringtone
You can use a song as your phone ringtone, in place of one of the
ringtones that come with the phone.
©Touch and hold a song in a library list. In the menu that
opens, touch Use as phone ringtone.
OR
©On the Playback screen, press the Menu Key and touch
Use as ringtone.
Music

224
Working with Playlists
You can create playlists to organize your music files into sets of
songs, which you can play in the order you set or in a shuffle.
To create a playlist
1. When viewing a list of songs in the library, touch and hold
the first song you want to add to the new playlist.
2. Touch Add to playlist.
3. Touch New.
4. Enter a name for the playlist, then touch Save.
The new playlist is added to the Playlist library.
You can also add the song that is playing in the Playback
screen as the first song in a playlist by pressing the Menu
Key and touching Add to playlist or touch Save as
playlist to save all the songs in an album that you're playing
as a playlist.
To add a song to a playlist
1. While viewing a list of tracks in the Library, touch and hold a
song to display an options menu.
2. Touch Add to playlist.
3. Touch the name of the playlist to add the song to.
You can also add the song that is playing in the Playback
screen to a playlist by pressing the Menu Key and
touching Add to playlist.
Music

225
To remove a song from a playlist
1. Open a playlist.
2. Touch and hold the song you want to remove, then touch
Remove from playlist or press the Menu Key and touch
Clear playlist to remove all the songs from the playlist.
To rename or delete a playlist
1. Open the Playlist library.
2. Touch and hold the playlist to display the options menu,
then touch Delete or Rename.
To create playlists on your computer
You can create playlists on your computer to use in the Music
application. The Music application is compatible with pre-saved
playlists that you can save, from your computer to your microSD
card, in the .m3u, .wpl, and .pls formats.
If you don'thave a dedicated application on your computer that
can create playlists, you can create a playlist in a text editor using
the following guidelines:
1. Create a new file with your text editor and enter each music
file name you want to include in the playlist, each on its own
line.
●Use music file names as displayed on your computer.
Make sure you include the file extension after the file
name (for example, .mp3). The Music application ignores
all but the track names when displaying the playlist.
2. Save the file with the .m3u extension.
Music

226
Viewing the Date, Time, and Other Information
You use the Clock application to monitor several kinds of
information at once, in addition to the current date and time.
To open the Clock application
©Touch the Clock icon on the Home screen or in the
Launch screen.
The Clock application opens with the date and time
displayed on your Home screen wallpaper, along with your
local weather and other useful information.
When the Clock application is running, it switches to screen-
saver mode after a few minutes. Simply press a phone key
to wake the phone up again.
To return to the Home screen, touch the Home icon at
the bottom of the Clock screen.
Clock
Touch to dim the screen.
The time when the next alarm is set.
Displays the battery charge level when the
phone is plugged into a charger.
Touch an icon to set an alarm, view a
slideshow, listen to music, or go to the
Home screen.
227
To play a slideshow
You can play a slideshow of the pictures in your Gallery albums
from the Clock application.
©Touch the Slideshow icon at the bottom of the Clock
screen.
©Press the Back Key to end the show.
Toplay music
You can play music while the Clock is displayed.
©Touch the Music icon at the bottom of the Clock screen.
The Music application opens, where you can select music to
play. You can return to the Clock application or use another
application while the music is playing.
Clock

228
To dim the Clock display
©If you want to use your phone as a bedside clock, you can
set the screen brightness very low. Touch the Dimmer icon
on the top right of the screen to dim the clock.
©Touch the Dimmer icon again to restore normal
brightness.
If you can'tsee the Dimmer icon, press and hold the Home
Key and touch the Clock icon to reopen the Clock
application at normal brightness.
Setting Alarms
You can set an alarm by modifying an existing alarm or by adding a
new one.
To set an alarm
1. Touch the Alarm icon at the bottom of the Clock screen.
Clock
Touch to add an alarm.
Touch to turn an alarm on or off.
Touch to open a screen where you can set
an alarm.
Touch to return to the main Clock screen.

229
2. Touch an existing alarm to change its time and other
attributes or touch Add alarm to add a new one.
3. Touch Time to set the time of the alarm.
You can change the time by touching the + or - buttons and
the AM or PM buttons or touch the hour and minutes
section to enter the time with the keyboard.
4. Touch Repeat to set the days when you want the alarm to
sound. If you don'tset a repeat, the alarm sounds only the
one day.
5. Touch Ringtone to select a ringtone for the alarm.
The ringtone plays briefly when you select it.
6. Touch Vibrate to have the phone vibrate, in addition to
playing the ringtone.
7. Touch Label to enter a name for the alarm.
8. When you're finished, touch the Done button.
9. Press the Back Key to return to the main Clock screen.
Clock

230
Changing Clock Alarm Settings
You can change a number of settings for the alarms you set.
You can also change how times are displayed in Clock in the
Settings applications.
©To change Clock alarm settings, touch the Alarm icon at
the bottom of the Clock screen, press the Menu Key ,
and touch Settings.
Alarm in silent mode Touch to place a checkmark and allow your
phone to play alarms even when it is in Silent mode.
Alarmvolume Allows you to set the volume of alarms.
Snooze duration Allows you to set how long the Clock waits
before playing an alarm again.
Side button behavior Allows you to set the desired behavior of
the side Volume Keys when pressed during an alarm.
Clock
231
Using Car Home
You can use the Car Home application whether or not you have a
LG enV-T2 car dock (the optional accessory.)
©Insert the phone into the LG enV-T2 car dock.
OR
©Touch the Car Home icon on the Home screen or in the
Launch screen.
The Car Home application opens with five large icons that
you can touch to access Google MapsTM,Navigation, Voice
Search, Contacts, and Search, as well as a Home icon.
When the phone is in the car dock, the Car Home notification icon
is added to the status bar, so you can quickly return to Car Home
from another application by opening the Notifications panel and
touching the Car Home notification.
Car Home
Touch an icon to access that application or
service while driving.
Touch to return to the Home screen.
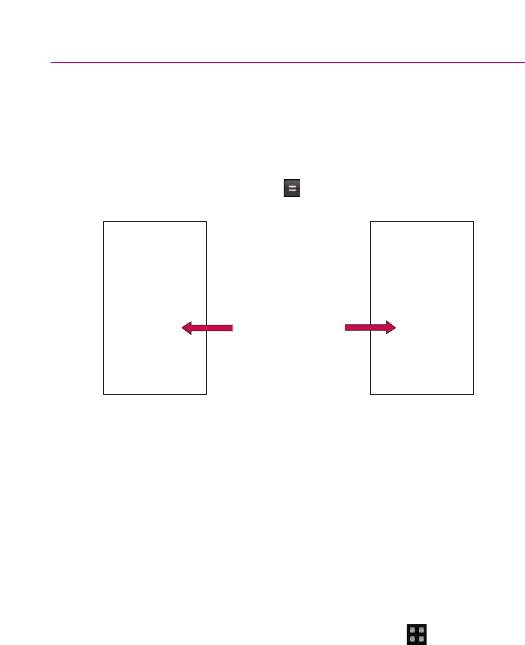
232
Using the Calculator
Use the Calculator application to solve math problems.
To open and use the Calculator
©Touch the Calculator icon on the Home screen or in the
Launch screen.
©Enter numbers and arithmetic operators on the basic screen.
©Drag the basic screen to the left to open the advanced screen.
©Touch and hold the Calculator’s display to open a menu
where you can copy what you’ve entered and access other
tools.
©Touch the Clear button to delete the last number or operator
you entered. Touch and hold the Clear button to delete all of
the entered information.
To clear your history of operations
©Clear the history by pressing the Menu Key then
touching Clear history.
Calculator
Drag to switch
between basic and
advanced screens.
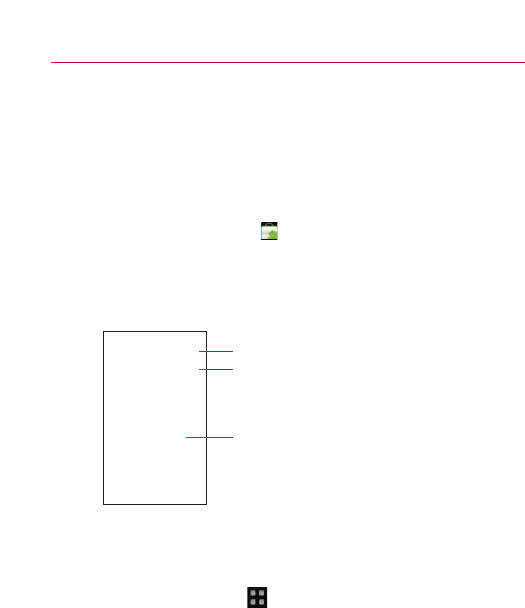
233
Opening Android Market and Finding
Applications
Open Android Market to browse and search for free and paid
applications.
To open Android Market application
©Touch the Market icon on the Home screen or in the
Launch screen.
When you open Android Market application for the first
time, you must read and accept the terms of service to
continue.
To get help with Android Market
Android Market Help webpages are available from all Android
Market screens.
©Press the Menu Key and touch Help.
The Browser application opens to Android Market Help page,
with links to many help topics.
Android MarketTM
Touch to search Market for specific applications.
Touch a category to view its contents.
Touch a featured application to view more
information.
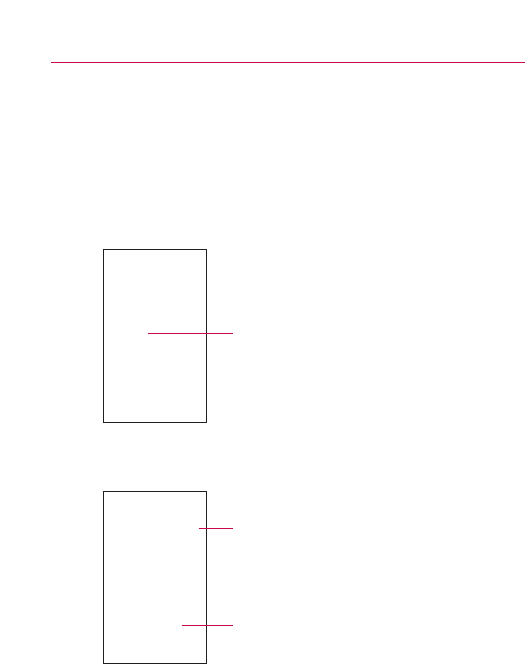
234
To browse for applications
You can browse applications by category and sort them in
different ways.
1. On Android Market home page, touch a top-level category,
such as Apps or Games.
2. Scroll to view subcategories and touch the one you want to
explore.
3. Touch Top paid,Top free,or Just in to further sort the
subcategory.
Android Market
Touch a subcategory to view its list of
applications.
Touch a tab to view top paid, top free, or
recent applications in this subcategory.
Touch an application to open its details
screen.

235
To open a screen with details about an application
©At any time while browsing Android Market, touch an
application to open its details screen.
The Application details screens include a description, ratings,
comments, and related information about the application.
From this screen, you can download, install, uninstall, and
rate the application, and more.
To search for applications
1. Touch the Search icon at the top right of the screen or
touch the Search Key .
2. Enter all or part of an application’s name or description, or
the developer’s name you want to search for and touch
Search again.
3. Touch a search result to open that application’s details
screen.
To return to Android Market home screen
You can return to the home screen from most other screens in
Android Market.
©Touch the Market icon at the top left of the screen.
OR
©Press the Menu Key and touch Home.
Android Market

236
Downloading and Installing Applications
When you find an application you want, you can install it on your
phone.
To download and install an application
Before you can download a paid application, you must set up a
billing arrangement.
1. Find an application you want and open its details screen.
In the application’s details screen, you can read more about
the application, including its cost, overall rating, and
comments by users. Scroll down to the About the
developer section to view more applications by this
developer, visit the developer’s web site, or send the
developer an email message.
2. Press the Menu Key and touch Security to preview the
functions and data the application can access on your phone
if you install it.
If you’re not comfortable with the access the application
requires, don’t continue.
Android Market
Scroll an application’s details screen to learn
more about the application, the developer,
and what others think of it.
Touch to download and install the application. (If
it’s a paid application, the icon is labeled Buy.)

237
3. Touch Install (for free applications) or Buy (for paid
applications).
If the application requires access to your data or control of
any functions on your phone, Market tells you what the
application can access.
WARNING!
Read this screen carefully. Be especially cautious with applications
that have access to many functions or to a significant amount of
your data. Once you touch OK on this screen, you are responsible
for the results of using this item on your phone.
4. If you agree to the application’s access requirements, touch
OK.
●If you selected a paid application, you’re redirected to the
GoogleTM Checkout screen to pay for the application
before it’s downloaded to your phone.
●If you selected a free application (or after touching Buy
now in Google Checkout), you receive a series of
notifications as the application is downloaded and then
installed on your phone.
When the application is installed, you can touch the
notification to open the application or open it by touching
its icon in the Launch screen.
You have 24 hours to try out an application and, if you
decide you don’t want it, to uninstall it for a refund.
If you have another AndroidTM phone, you can download a
paid application to that phone using the same Android
Market account, at no additional charge.
To create a Google Checkout account
You must have a Google Checkout account associated with your
Google Account to purchase items from Android Market.
©On your computer, go to http://checkout.google.com to
establish a Google Checkout account.
Android Market

238
OR
©The first time you use your phone to buy an item from
Android Market, you’re prompted to enter your billing
information to set up a Google Checkout account.
WARNING!
When you’ve used Google Checkout once to purchase an
application from Android Market, the phone remembers your
password, so you don’t need to enter it the next time. For this
reason, you should secure your phone to prevent others from using
it without your permission. See “Locking the Screen” on page 51.
Managing Your Downloads
After you’ve downloaded and installed an application, you can rate
it, view it in a list with your other downloaded applications, and so
on.
To view your downloaded applications
You can view a list of the applications you’ve downloaded from
Android Market and use the list for a number of purposes.
©On Android Market home screen, press the Menu Key
and touch Downloads.
In the list of the free and paid applications that opens, you
can touch one to rate it, uninstall it and request a refund.
To uninstall an application
1. On Android Market home screen, press the Menu Key
and touch Downloads.
2. Touch the application to uninstall.
3. Touch Uninstall.
4. Touch OK in the confirmation dialog box.
Android Market

239
5. Touch the explanation that best matches why you’re
uninstalling then touch OK.
The application is uninstalled. You can install the application
again at any time without charge if it was a paid application.
To request a refund for an application
If you are not satisfied with an application, you can ask for a
refund within 24 hours of the purchase. Your credit card is not
charged and the application is uninstalled from your phone.
If you change your mind, you can install the application again, but
you can’t request a refund a second time.
1. On Android Market home screen, press the Menu Key
and touch Downloads.
2. Touch the application to uninstall for a refund.
3. Touch Uninstall and refund.
Your application is uninstalled and the charge is cancelled.
4. Touch the explanation that best matches why you’re
uninstalling then touch OK.
Tosetwhether you’re notified about updated applications
1. On Android Market home screen, press the Menu Key
and touch Downloads.
2. Press the Menu Key and touch Notifications.
3. Select whether or not to be notified of updates to the
applications you’ve downloaded.
4. Touch the OK button.
Android Market

240
To rate an application
You can award an application from one to five stars and share
what you think about the application with other shoppers.
1. Open the details screen for an application.
2. Touch the stars under My review.
3. Touch the number of stars to award the application, then
touch the OK button.
4. If you want to share a comment about the application, back
on the details screen, touch Post a comment.
Toflag inappropriate applications
If you discover an application with graphically violent, sexual, or
otherwise hateful or offensive content, you can report it to
Android Market team.
1. Open the details screen for an application.
2. Scroll to the bottom of the details screen and touch Flag as
inappropriate.
3. Touch the reason you find the application objectionable.
4. Touch the Submit button.
Your comments are sent to Android Market team.
Android Market

241
Opening Settings
The Settings application contains most of the tools for customizing
and configuring your phone. All of the settings in the Settings
application are described in this section.
To open Settings
©From the Home screen, press the Menu Key and touch
Settings.
OR
©Touch the Settings icon on the Home screen or in the
Launch screen.
Wireless & networks
Wireless & networks settings allows you to configure and manage
wireless radio communications. These settings include Airplane
mode.
Airplane mode Checkmark indicates all wireless radio
communications are turned off.
Wi-Fi Checkmark to turn on Wi-Fi functionality to connect to
available Wi-Fi networks.
Wi-Fi settings See “Wi-Fi settings screen” on page 242.
Bluetooth Checkmark to turn Bluetooth functionality to connect
to Bluetooth devices.
Bluetooth settings See “Bluetooth settings screen” on page 243.
VPN settings See “VPN settings screen” on page 243.
Mobile networks See “Mobile networks settings screen” on
page 243.
Settings

242
Wi-Fi settings screen
The Wi-Fi settings menu allows you to set up and manage
wireless access points.
Wi-Fi Checkmark to turn on Wi-Fi so you can connect to Wi-Fi
networks.
Network notification Checkmark to receive a notification when an
open Wi-Fi network becomes available.
Wi-Fi networks Displays a list of Wi-Fi networks you’ve
previously configured and those detected when the phone last
scanned for Wi-Fi networks.
Add Wi-Fi network Allows you to add a Wi-Fi network by
entering its SSID (the name it broadcasts) and security type.
Advanced Wi-Fi settings screen
The Advanced Wi-Fi settings screen is accessed from the Wi-Fi
settings screen. Press the Menu Key and touch Advanced.
Wi-Fi sleep policy Allows you to specify when to switch from Wi-
Fi to mobile data. Disabling sleep uses more battery power.
MAC address Displays the Media Access Control (MAC) address
of your phone when connecting to Wi-Fi networks.
IP settings If you checkmark Use static IP,you can use IP
settings to enter an IP address and other network settings for
your phone manually, rather than using the DHCP protocol to
obtain network settings from the W-Fi network itself.
Settings

243
Bluetooth settings screen
Bluetooth Checkmark to turn on Bluetooth so you can connect to
Bluetooth devices.
Device name Allows you to view and edit the name your phone
displays to other Bluetooth devices when trying to pair.
Discoverable Checkmark to make your phone discoverable to
other Bluetooth devices for 120 seconds.
Scan for devices Touch to search for and display information
about nearby Bluetooth devices.
Bluetooth devices Displays a list of Bluetooth devices that
you’ve previously configured and those detected when the phone
last scanned for Bluetooth devices.
VPN settings screen
Add VPN Allows you to add different types of Virtual Private
Networks (VPNs).
VPNs Displays the list of VPNs that you’ve previously
configured.
Mobile networks settings screen
Data roaming Allows you to set whether you want your phone to
connect to data services when roaming or prevent it from
transmitting data on other carriers’ mobile networks when you
can’t access your carrier’s mobile network.
Network Mode Allows you to select the preferred network mode.
System select Allows you to select the system.
ERI Allows you to display the enhanced roaming indicator.
Settings

244
Call settings
Use Call settings to configure phone call settings.
Call settings screen
Voicemail service Allows you to select your carrier’s voicemail
service or another service, such as Google VoiceTM.
Voicemail settings If you are using your carrier’s voicemail
service, this option allows you to enter the phone number to use
for listening to and managing your voicemail. You can enter a
comma (,) to insert a pause into the number. For example, to add
apassword after the phone number. If you are using Google
Voice, this opens a screen where you can view the Google Voice
number or sign out of Google Voice.
Other call settings
Auto RetryAllows you to enable or disable Auto Retry mode. You
can configure the phone to automatically redial a number after a
certain amount of time.
TTY mode Allows you to set TTY mode to communicate with
other TTY devices.
DTMF Tones Allows you to set the lenght of DTMF tones.
Voice Privacy Allows you to enable or disable enhanced privacy
mode.
Auto Answer Allows you to enable or disable Auto Answer with
Handsfree.
Settings

245
Sound & display
Use the Sound & display settings to configure many aspects of call
and notification ringtones, music, and other audio, as well as the
brightness and other screen settings.
Sound & display settings screen
Silent mode Allows you to silence all sounds (including call and
notification ringtones) except the audio from music, videos, and
other media and any alarms you have set. (You must silence
media and alarms in their own applications.)
Ringer volume Allows you to set the incoming call and
notification volume. If you uncheck the option to use the same
volume for both calls and notifications, you can set both volumes
separately.
Media volume Allows you to set the volume for music, videos,
and other media.
Phone ringtone Allows you to set your default incoming call
ringtone.
Phone vibrate Allows you to set your phone to vibrate when you
receive an incoming call, independent of your ringtone or volume
settings.
Notification ringtone Allows you to set your default notification
ringtone.
Audible touch tones Allows you to set the phone to play tones
when using the dial pad to dial numbers.
Audible selection Allows you to set your phone to play a sound
when you touch buttons, icons, and other onscreen items that
react to your touch.
Haptic feedback Allows you to set your phone to vibrate briefly
when you touch the Back Key, Search Key, and perform other
actions.
Settings

246
SD card notifications Allows you to set your phone to play a
sound when you receive microSD card notifications.
Emergency tone Allows you to configure how the phone reacts
when you place an emergency call.
Orientation Allows you to set the orientation to automatically
switch to landscape mode or portrait mode when you turn the
phone sideways or upright.
Animation Allows you to set animated transitions when
navigating from screen to screen.
Brightness Allows you to adjust the brightness of the screen. For
the best battery performance, use the dimmest comfortable
brightness.
Screen timeout Allows you to adjust the delay time before the
screen automatically turns off. For the best battery performance,
use the shortest convenient timeout.
Settings

247
Location & security
Use the Location & security settings to set your preferences for
using and sharing your location when you search for information
and use location-based applications, such as Google MapsTM.
You can also configure settings that help secure your phone and its
data.
Use wireless networks Allows you to use information from Wi-Fi
and mobile networks to determine your approximate location, for
use in Google Maps, when you search, and others. When you
checkmark this option, you’re asked whether you consent to
sharing your location anonymously with Google’s location service.
Use GPS satellites Allows you to use your phone’s global
positioning system (GPS) satellite receiver to pinpoint your
location to within an accuracy as close as several meters (“street
level”). Actual GPS accuracy depends on a clear view of the sky
and other factors.
Set unlock pattern Allows you to set a pattern to unlock your
phone.
Requirepattern Uncheck to stop requiring an unlock pattern to
unlock your screen. You must draw your current pattern when you
uncheck this option.
Use visible patternAllows you to set the pattern to be visible
when unlocking your phone.
Use tactile feedback Allows you to set your phone to vibrate
briefly as you touch each dot when you draw an unlock pattern.
Visible passwords Allows you to set your phone to briefly show
each character of passwords as you enter them so that you can
see what you enter.
Settings

248
Use secure credentials Checkmark to allow applications to
access your phone’s encrypted store of secure certificates and
related passwords and other credentials. You use credential
storage to establish some kinds of VPN and Wi-Fi connections. If
you have not set a password for the credential storage, this
setting is dimmed.
Install from SD card Allows you to install encrypted certificates
from a microSD card.
Set passwordAllows you to set or change the password for your
secure credential storage. Your password must have at least 8
characters.
Clear storage Deletes all secure certificates and related
credentials and erases the secure storage’s own password.
Applications
You use the Applications settings to view details about the
applications installed on your phone, manage their data, force them
to stop, and to set whether you want to permit installation of
applications that you obtain from websites and email.
Applications settings screen
Unknown sources Permits installation of applications that you
obtain from websites, email, or other locations other than Android
MarketTM.
WARNING!
To protect your phone and personal data, download
applications only from trusted sources, such as Android
Market.
Quick launch Allows you to set keyboard shortcuts to launch
applications using the keys instead of its icon.
Manage applications Opens a list of all the applications and other
software installed on your phone, along with their sizes. By
default, only downloaded applications are displayed and they are
sorted in alphabetical order. Press the Menu Key and touch
Settings

249
Filter to change the list to show all applications, only running
applications, or only downloaded applications. Press the Menu
Key and touch Sort by size to display applications in order by
size. Touch an application to open its Application Info screen.
Running services Allows you to view and control currently
running services and applications. This option displays what
processes each running service needs and how much memory it
is using.
Development Allows you to set options for application
development.
Application Info screen
The Application Info screen for each application lists its name and
version, along with details about the application. Depending on
the application and where it came from, it may also include
options for managing the application’s data, forcing the
application to stop, and uninstalling the application. It also lists
details about the kinds of information about your phone and data
that the application has access to.
Storage Gives details about the amount of phone storage that an
application uses. If you installed the application from Android
Market or another source, an Uninstall icon is included so that
you can remove the application and all of its data and settings
from the phone.
Cache Allows you to view how much data is stored in the
phone’s cache memory and clear the data from your phone’s
memory.
Launch by default If you have configured an application to launch
certain file types by default, you can clear that setting here.
Controls Use the Force stop icon to stop an application that is
malfunctioning. The application is stopped without confirmation.
Permissions Lists the kinds of information about your phone and
data the application has access to.
Settings

250
Development screen
The Development screen contains settings that are useful for
developing AndroidTM applications. For full information, including
documentation of the Android APIs and development tools, see
the Android developer web site (http://developer.android.com).
USB debugging Permits debugging tools on a computer to
communicate with your phone via a USB connection.
Stay awake Allows you to set the phone to prevent the screen
from dimming and locking when it is connected to a charger or to
aUSB device that provides power. Don’t use this setting with a
static image on the phone for long periods of time, or the screen
may be marked with that image.
Allow mock locations Permits a development tool on a computer
to control where the phone believes it is located, rather than using
the phone’s own internal tools for this purpose.
Settings

251
Accounts & sync
Use the Accounts & sync settings to add, remove, and manage
your GoogleTM and other supported accounts. You also use these
settings to control how and whether all applications send, receive,
and sync data on their own schedules and whether all applications
can synchronize user data automatically.
GmailTM,Calendar, and other applications may also have their own
settings to control how they synchronize data; see the sections on
those applications for details.
Accounts & sync settings screen
Background data Permits applications to synchronize data in the
background, whether or not you are actively working in them.
Unchecking this setting can save battery power and lowers (but
does not eliminate) data use.
Auto-sync Permits applications to synchronize, send, and receive
data on their own schedule. If you uncheck this setting, you must
touch an account in the list on this screen or press the Menu Key
and touch Sync now to synchronize data for that account.
Synchronizing data automatically is disabled if Background data is
unchecked.
Manage accounts List of all Google Accounts and other accounts
you’ve added to the phone.
If you touch an account in this screen, its account screen opens.
Settings

252
Account screen
This screen contains different options, depending on the kind of
account.
For Google Accounts, it lists the kinds of data you can synchronize
to the phone, with checkboxes so you can turn synchronizing on
and off for each kind. You can also press the Menu Key and
touch Sync now to synchronize data. Touch the Remove Account
icon to remove the account along with all its data (contacts, mail,
settings, and so on). You can’t remove the first Google Account
you added to your phone except by resetting your phone to the
factory defaults and erasing all of your user data.
Privacy
You use the Privacy settings to manage your personal information.
Use My Location Allows you to include your position when using
Google search and other Google services. When you checkmark
this option, you’re asked whether you consent to allowing Google
to use your location when providing these services.
Back up my settings Allows you to back up your phone’s
settings to Google servers, with your Google Account. If you
replace your phone, the settings you’ve backed up are restored
onto the new phone the first time you sign in with your Google
Account. If you checkmark this option, a wide variety of settings
are backed up, including your Wi-Fi passwords, bookmarks, a list
of the applications you’ve installed, the words you’ve added to
the dictionary used by the onscreen keyboard, and most of the
settings that you configure with the Settings application. If you
uncheck this option, you stop backing up your settings, and any
existing backups are deleted from Google servers.
Settings

253
Factory data reset Erases all of your personal data from internal
phone storage, including information about your Google Account,
any other accounts, your system and application data and
settings, and any downloaded applications. Resetting the phone
does not erase any system software updates you’ve downloaded
or any files on your microSD card, such as music or photos. If you
reset the phone in this way, you’re prompted to reenter the same
kind of information as when you first started Android.
SD Card & Phone Storage
Use the SD card & phone storage settings to monitor the used and
available space on your phone and on your microSD card, to
manage your microSD card, and if necessary, to reset the phone,
erasing all of your personal information.
SD card & phone storage screen
SD card, Total space and Available space Lists the amount of
space on any microSD card installed in your phone and the
amount you have used to store photos, videos, music, and other
files.
Unmount SD card Unmounts the microSD card from your phone
so that you can format the card or safely remove it when the
phone is on. This setting is dimmed if there is no microSD card
installed, if you have already unmounted it, or if you have
mounted the microSD card on your computer.
Format SD card Permanently erases everything on a microSD
card and prepares it for use with your phone. You must unmount
amicroSD card before you can format it.
Internal phone storage, Available space Lists the amount of
internal phone storage used by the operating system, its
components, applications (including those you downloaded), and
their permanent and temporary data.
Settings

254
Search
You use the Search settings to configure Google search, Quick
Search Box, and the data on the phone that you want to include in
searches.
Search settings screen
Google search settings Opens a screen where you can set your
preferences for whether Google search on the web makes
suggestions that appear below the Quick Search Box and whether
the suggestions take into account your previous searches. You
can also open the Google web search history settings page in the
Browser application.
Searchable items Allows you to set what kinds of data to include
in phone searches.
Clear search shortcuts Erases the list of search results that you
touched below the Quick Search Box.
Settings

255
Language & keyboard
Use the Language & keyboard settings to select the language for
the text on your phone and for configuring the onscreen keyboard,
including words that you’ve added to its dictionary.
Language & Keyboard screen
Select locale Allows you to choose a language to use on your
phone.
Android keyboard Allows you to use the onscreen touch
keyboard and adjust its settings.
Device keyboard Allows you to configure the settings for your
physical keyboard.
User dictionaryAllows you to view, add, and remove words from
your user dictionary. Touch a word to edit or delete it. Press the
Menu Key and touch the Add button to add a word.
Android Keyboard settings screen
The Android Keyboard settings apply to the onscreen keyboard
that is included with your phone. The correction and capitalization
features affect only the English version of the keyboard.
Vibrate on keypress Allows you to set the phone to vibrate briefly
each time you touch a key on the onscreen keyboard.
Sound on keypress Allows you to set the phone to play a brief
sound each time you touch a key on the onscreen keyboard.
Auto-capitalization Allows you to set the onscreen keyboard to
automatically capitalize the first letter of the first word after a
period, the first word in a text field, and each word in name fields.
Voice input Allows you to enable or disable voice input.
Quick fixes Allows the phone to automatically correct some
common misspellings as you type.
Settings

256
Show suggestions Allows the phone to show suggested words
as you type.
Auto-complete Allows the phone to automatically enter a
suggested word when you enter a space or punctuation.
Device Keyboard settings screen
Auto-replace Allows the phone to correct misspelled words as
you type.
Auto-cap Allows the phone to capitalize the first letter of the first
word in sentences.
Auto-punctuate Allows the phone to insert a period ( . ) when
you press the Space key twice in a row.
Accessibility
You use the Accessibility settings to configure any accessibility
plug-ins you have installed on your phone.
Accessibility Allows you to enable all installed accessibility
plug-ins.
TalkBack Allows an installed speech synthesizer to speak the
labels or names of items as you navigate the phone’s user
interface.
SoundBack Allows the phone to play a sound as you navigate the
phone’s user interface.
KickBack Allows the phone to vibrate briefly as feedback as you
navigate the user interface and press keys.
Settings

257
Text-to-speech
You use the Text-to-Speech settings to configure the Android text-
to-speech synthesizer for applications that can take advantage of it,
such as TalkBack.
Text-to-Speech settings screen
If you don’t have speech synthesizer data installed, only the
Install voice data setting is available.
Listen to an example Plays a brief sample of the speech
synthesizer, using your current settings.
Install voice data If your phone does not have speech synthesizer
data installed, this option connects to Android Market and guides
you through the process of downloading and installing the data.
This setting is not available if the data is already installed.
Always use my settings Allows the phone to use your default
settings and override the application settings.
Speech rate Allows you to select how quickly you want the
synthesizer to speak.
Language Allows you to select the language of the text you want
the synthesizer to read. This is particularly useful in combination
with the Always Use My Settings setting, to ensure that text is
spoken correctly in a variety of applications.
Date & time
Use Date & time settings to set your preferences for how dates are
displayed. You can also use these settings to set your own time
and time zone rather than obtaining the current time from the
mobile network.
Use 24-hour format Allows the phone to display the time using
24-hour time format-for example, 13:00 rather than 1:00 pm.
Select date format Allows you to select the format for displaying
dates.
Settings

258
About phone
About phone includes information about your phone.
About phone screen
System updates Allows you to check for Android system
software updates.
Status Allows to view a list of information about your battery,
mobile network connection, and other details.
Battery use Opens a list of the applications and operating system
components that have used and are currently using battery
power. Touch an application in the list to view details about its
power use and, if available, touch a button to open a settings or
information screen for that component or application.
Legal information Allows you to view legal information about the
software included with your phone.
System tutorial Allows you to start a tutorial to introduce some
of your phone’s features.
DivX VOD registration Displays information to register your
device to play DivX protected videos.
Version information Lists details about the model numbers and
versions of your phone’s hardware and operating system
software. This information is useful if you need to work with your
carrier’s support team.
Settings

282
FCC Hearing-Aid Compatibility (HAC)
Regulations for Wireless Devices
On July 10, 2003, the U.S. Federal Communications Commission
(FCC) Report and Order in WT Docket 01-309 modified the
exception of wireless phones under the Hearing Aid Compatibility
Act of 1988 (HAC Act) to require digital wireless phones be
compatible with hearing-aids. The intent of the HAC Act is to
ensure reasonable access to telecommunications services for
persons with hearing disabilities.
While some wireless phones are used near some hearing devices
(hearing aids and cochlear implants), users may detect a buzzing,
humming, or whining noise. Some hearing devices are more
immune than others to this interference noise, and phones also
vary in the amount of interference they generate.
The wireless telephone industry has developed a rating system for
wireless phones, to assist hearing device users to find phones that
may be compatible with their hearing devices. Not all phones have
been rated. Phones that are rated have the rating on their box or a
label located on the box.
The ratings are not guarantees. Results will vary depending on the
user's hearing device and hearing loss. If your hearing device
happens to be vulnerable to interference, you may not be able to
use a rated phone successfully. Trying out the phone with your
hearing device is the best way to evaluate it for your personal
needs.
M-Ratings: Phones rated M3 or M4 meet FCC requirements and
are likely to generate less interference to hearing devices than
phones that are not labeled. M4 is the better/higher of the two
ratings.
T-Ratings: Phones rated T3 or T4 meet FCC requirements and are
likely to generate less interference to hearing devices than phones
that are not labeled. T4 is the better/ higher of the two ratings.
Safety
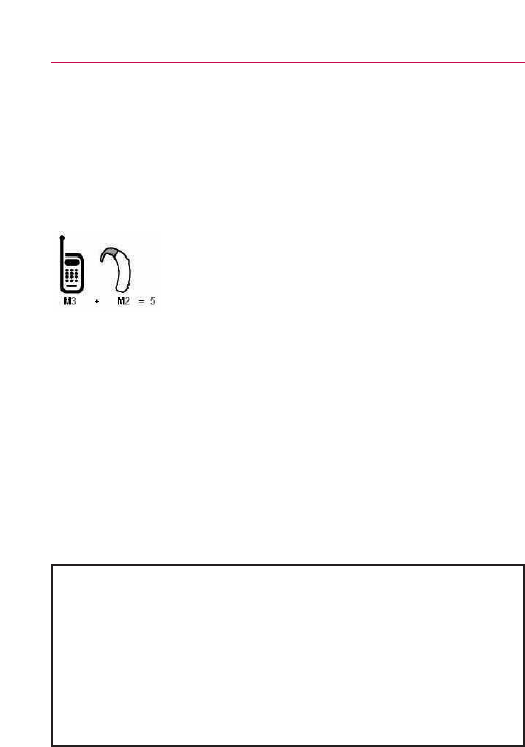
283
Hearing devices may also be rated. Your hearing device
manufacturer or hearing health professional may help you find this
rating. Higher ratings mean that the hearing device is relatively
immune to interference noise. The hearing aid and wireless phone
rating values are then added together. A sum of 5 is considered
acceptable for normal use. A sum of 6 is considered for best use.
In the example to the left, if a hearing aid meets
the M2 level rating and the wireless phone meets
the M3 level rating, the sum of the two values
equal M5. This should provide the hearing aid user
with “normal usage” while using their hearing aid
with the particular wireless phone. “Normal usage” in this context
is defined as a signal quality that’s acceptable for normal
operation.
The M mark is intended to be synonymous with the U mark. The T
mark is intended to be synonymous with the UT mark. The M and T
marks are recommended by the Alliance for Telecommunications
Industries Solutions (ATIS). The U and UT marks are referenced in
Section 20.19 of the FCC Rules. The HAC rating and measurement
procedure are described in the American National Standards
Institute (ANSI) C63.19 standard.
When you're talking on a cell phone, it's recommended that you
turn the BT (Bluetooth) mode off for HAC.
Safety
For information about hearing aids and digital wireless phones
Wireless Phones and Hearing Aid Accessibility
http://www.accesswireless.org/hearingaid/
FCC Hearing Aid Compatibility and Volume Control
http://www.fcc.gov/cgb/consumerfacts/hac_wireless.html