LG Electronics USA VS930 Cell Phone GSM/CDMA/WCDMA/LTE+BT+WLAN+NFC User Manual VS930 VZW UG EN V1 0 120612
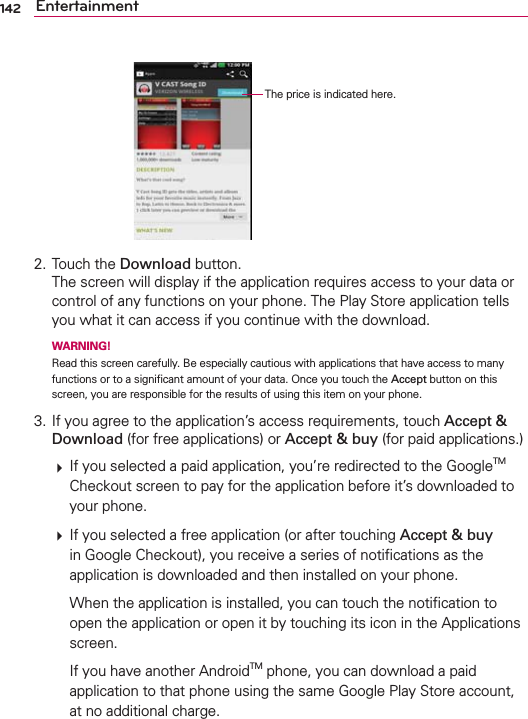
LG Electronics MobileComm USA, Inc. Cell Phone GSM/CDMA/WCDMA/LTE+BT+WLAN+NFC VS930 VZW UG EN V1 0 120612
Contents
- 1. users manual
- 2. user manual
- 3. Users Manual rev 6-18
Users Manual rev 6-18
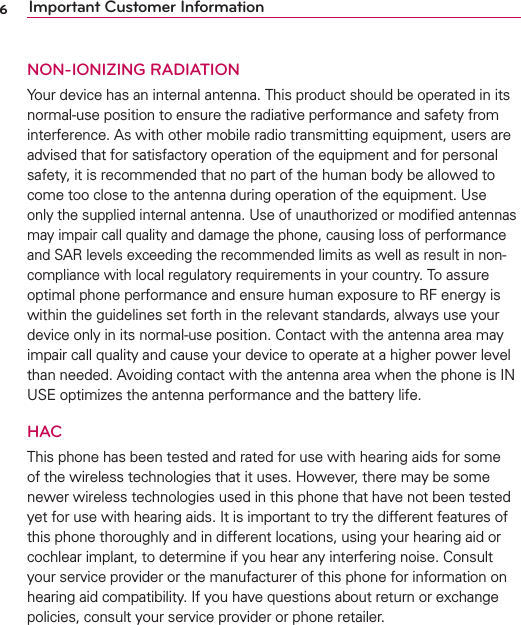
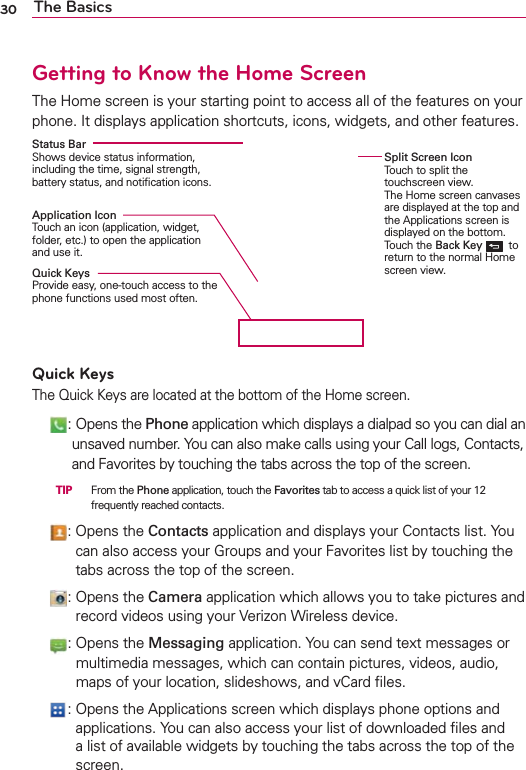
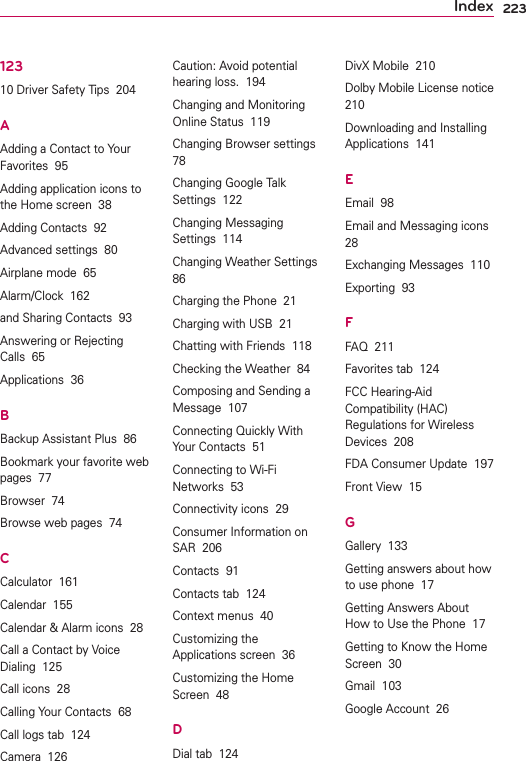
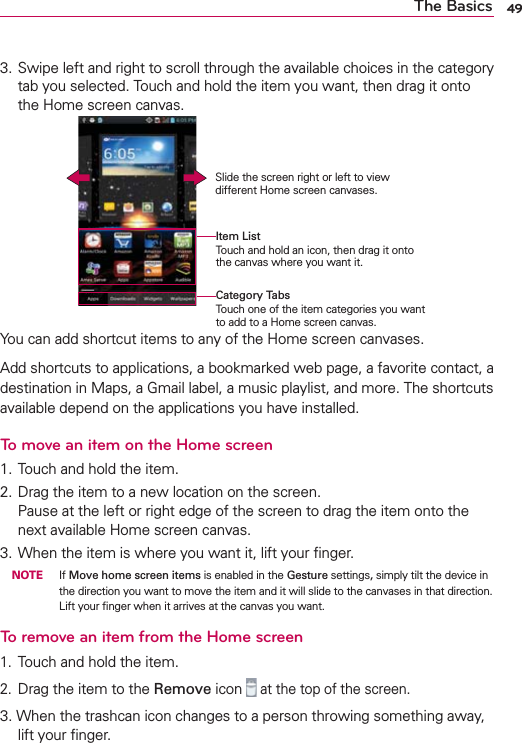
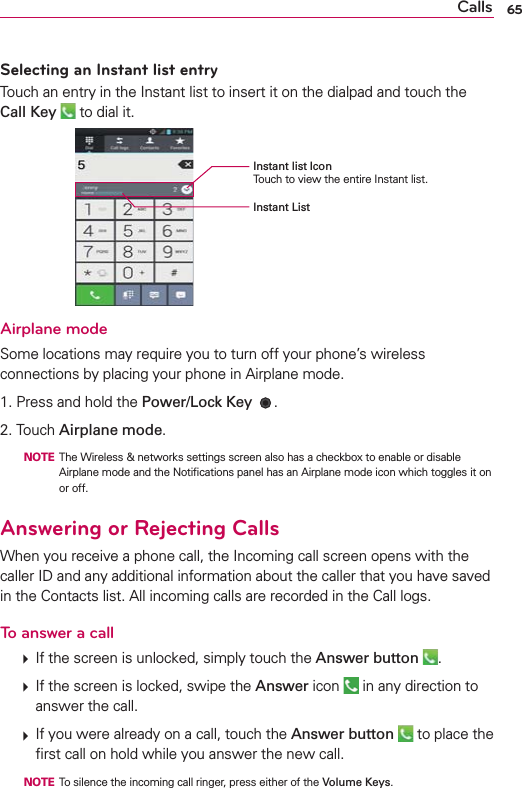
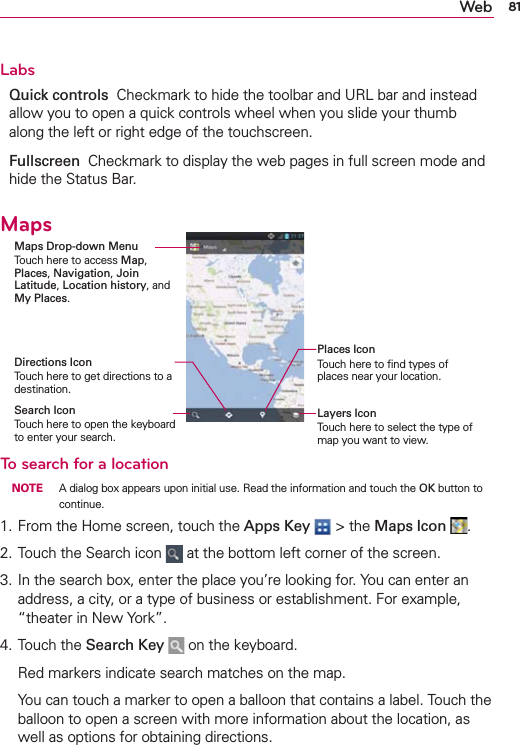
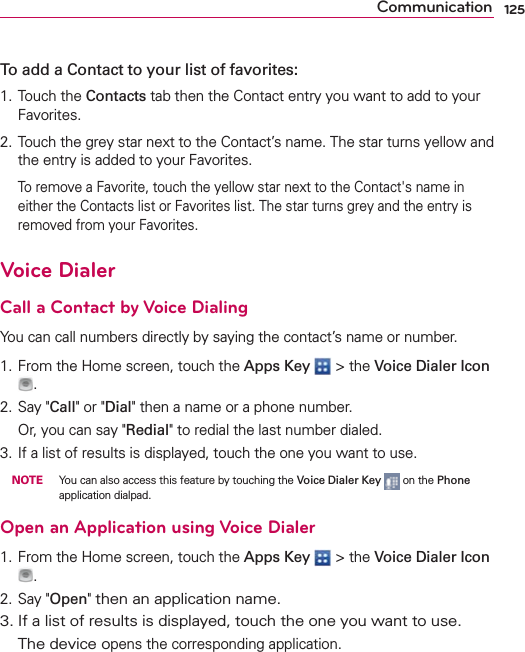
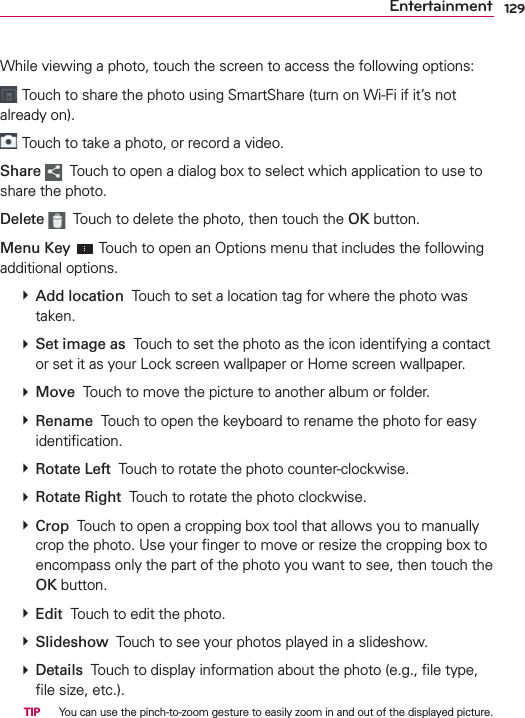
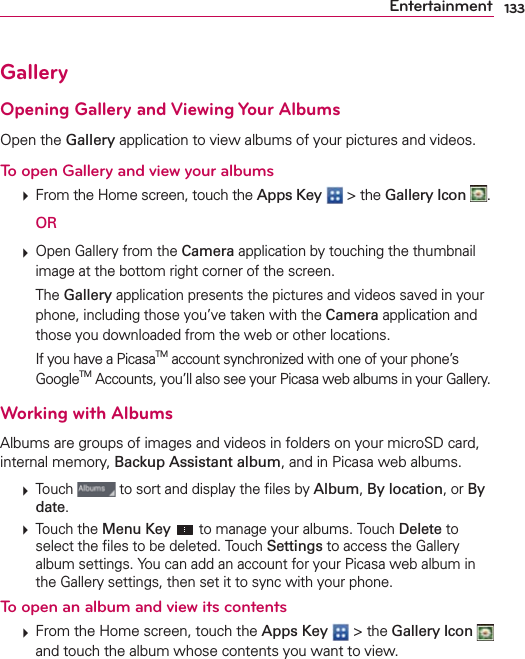
![31The BasicsTo return to the Home screen㻌 Touch the Home Key at any time, from any application.To view other Home screen canvases㻌 Swipe (or flick) your finger left or right across the Home screen. The Home screen spans up to seven screen widths, allowing more space for icons, widgets, shortcuts, and other items. Pinch in on the Home screen to display the mini canvas view, then touch the Home screen canvas you want to view.Touch here to set the default Home screen.Home Screen Canvas Indicator The white line above the Quick white line indicate which Home screen canvas you are viewing. Touch the plus icon [plus icon graphic] in the top right corner of the Home screen to split the screen. The Home screen canvases reduce in size and are displayed on the top half of the screen. You can scroll horizontally, then touch the Home screen canvas you want to view.Mini Canvas View Mini canvas view allows direct access to any of the Home screen canvases and also allows you to manage the canvases. You can delete canvases, and even rearrange the canvas order to suit your needs.Pinch in on any of the Home screen canvases to change from full screen view to mini canvas view. From mini canvas view you have the following options:㻌 To go directly to any Home screen canvas, simply touch the one you want.](https://usermanual.wiki/LG-Electronics-USA/VS930.Users-Manual-rev-6-18/User-Guide-1725933-Page-31.png)


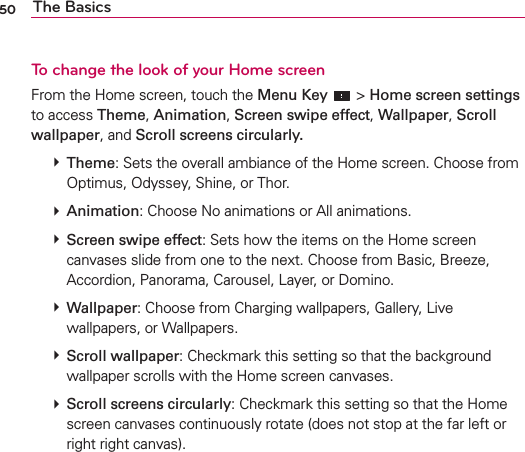
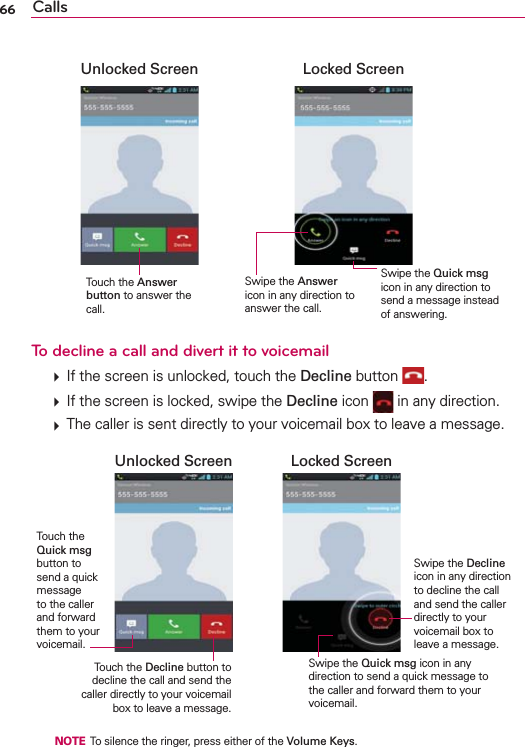
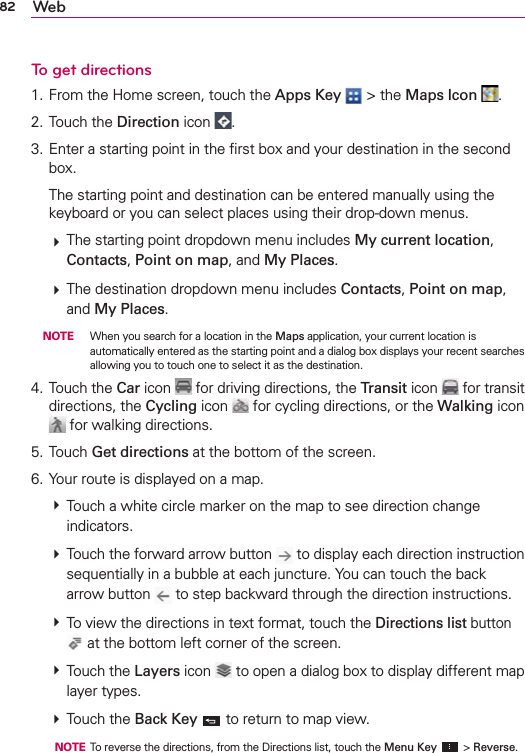


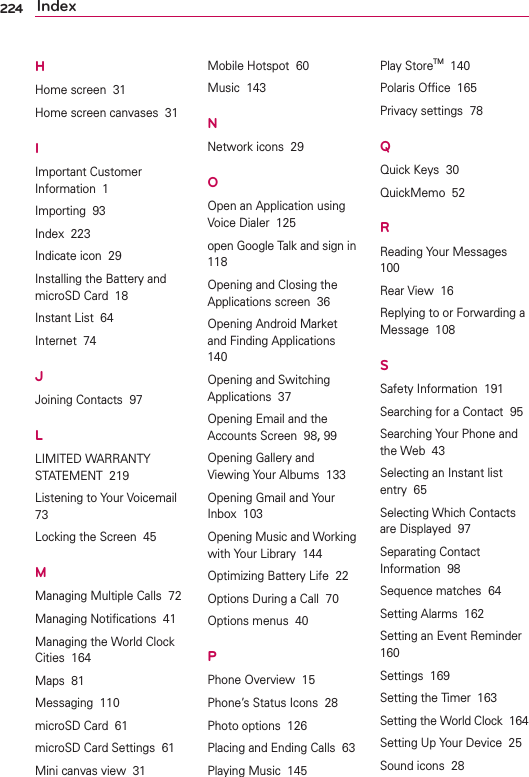
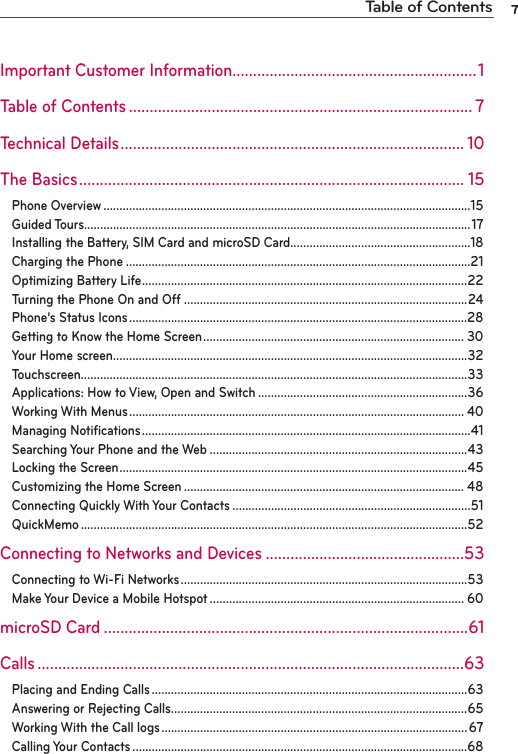
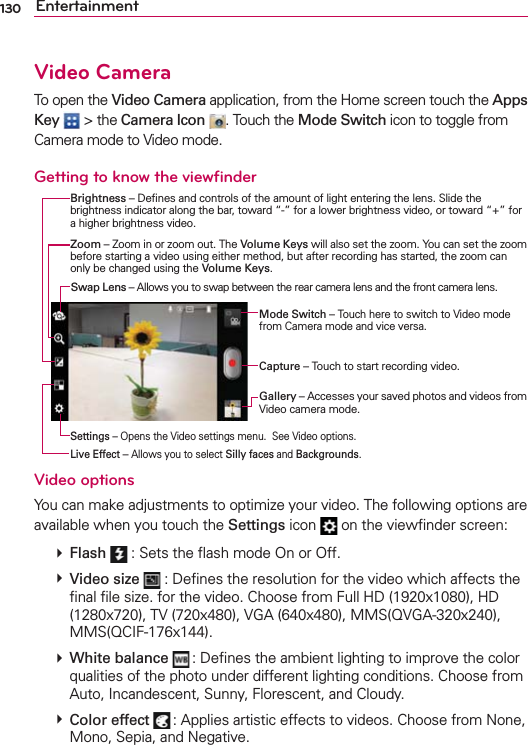
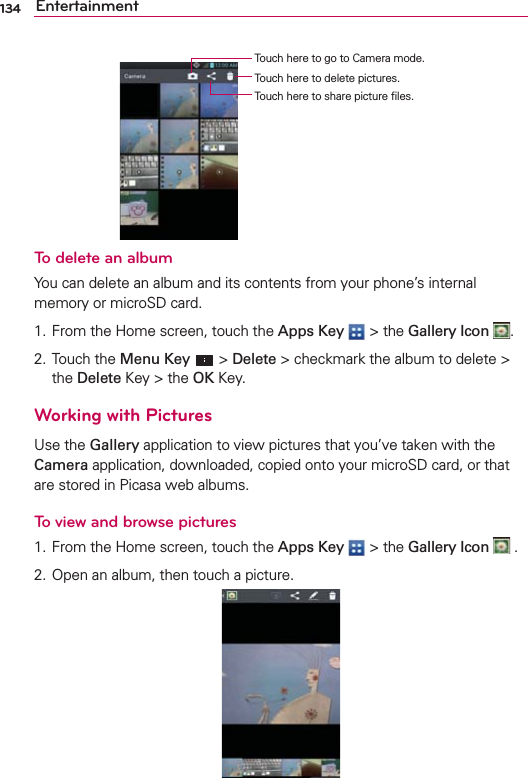
![102 CommunicationVoicemailThe Voicemail application allows the management of voicemail directly from the device rather than accessing voicemail via traditional methods.Voicemail displays a list of your messages and allows you to choose which message(s) to listen to or delete, without having to dial into your mailbox and listen to voice instructions or prior messages.To be able to use Voicemail1. From the Home screen, touch the Apps Key > the Voicemail Icon . NOTE Listening to voicemail and setting up your voicemail service depends on subscription to the visual mail service. When you touch the Voicemail Key [voicemail key graphic] and you have subscribed to the visual mail service, the Visual Voicemail application will be launched. If you are not subscribed, you will be dialed into your traditional voicemail box.2. The first time you access the Voicemail application, you will have to subscribe to the Visual Voicemail service to be able to use it.3. After subscription to the Visual Voicemail service, you will be prompted to enter the password. To change the password call voicemail (dial *86).4. After entering the password, your voicemail entries will be displayed in your Inbox. While viewing the voicemail list, you can select an entry (see step 5). For additional options, touch the Menu Key > New, Delete, Save as, Set as Heard, Sort by, or More (Saved messages, Refresh, Settings, Search, Logout).5. Touch a voicemail entry to listen to it. Then you can touch Call back, Save, or Delete. To forward or reply to a message, touch the Menu Key > Forward or Reply.6. If you decide to reply with a voicemail or forward it, record a message. The keys at the bottom of the screen allow you to record, stop, re-record, or cancel the message. NOTE To send a voice message to a number in your Contacts list, use the To: field to search for it.](https://usermanual.wiki/LG-Electronics-USA/VS930.Users-Manual-rev-6-18/User-Guide-1725933-Page-102.png)

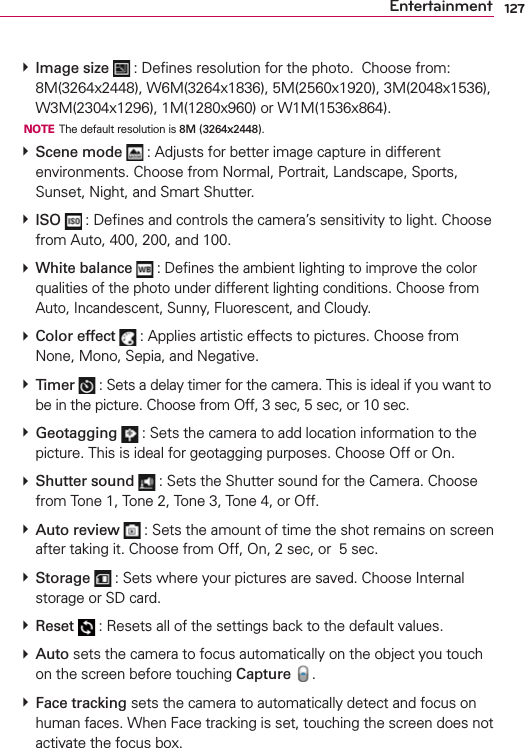
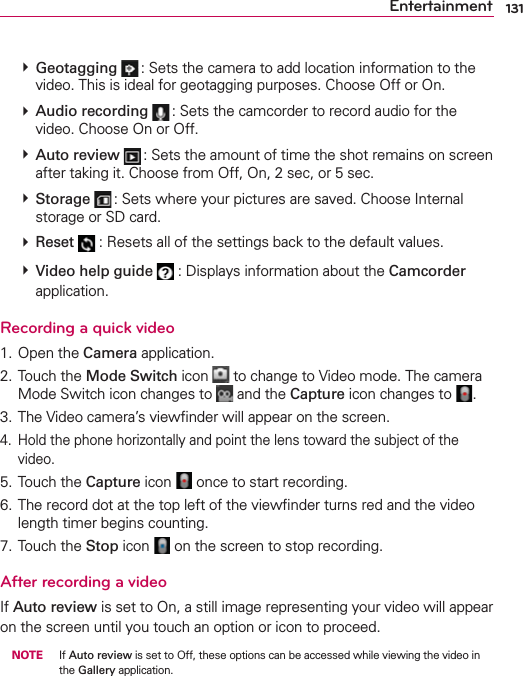
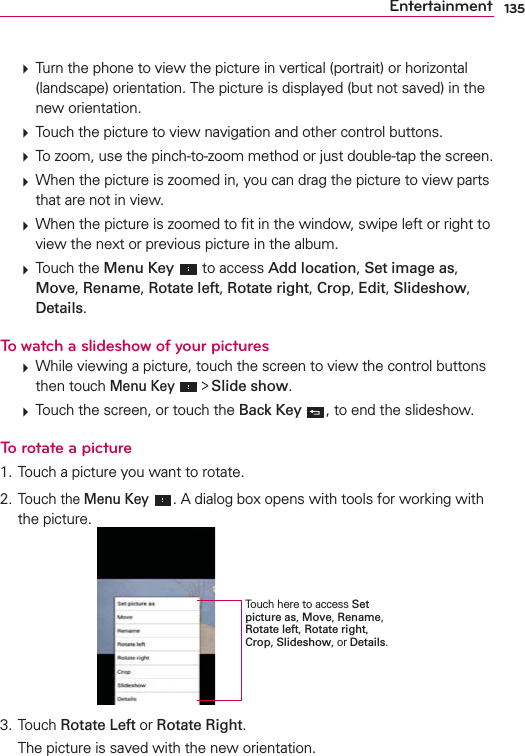


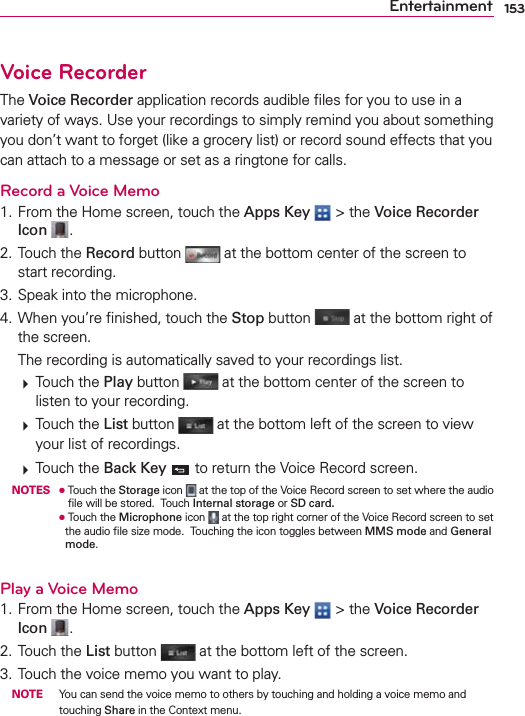

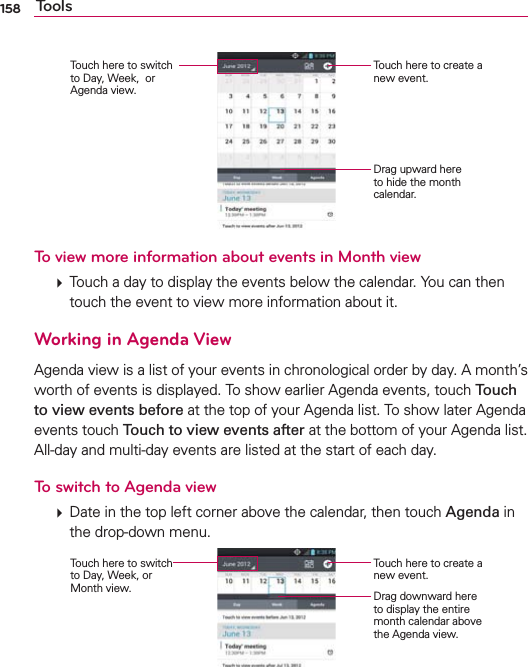

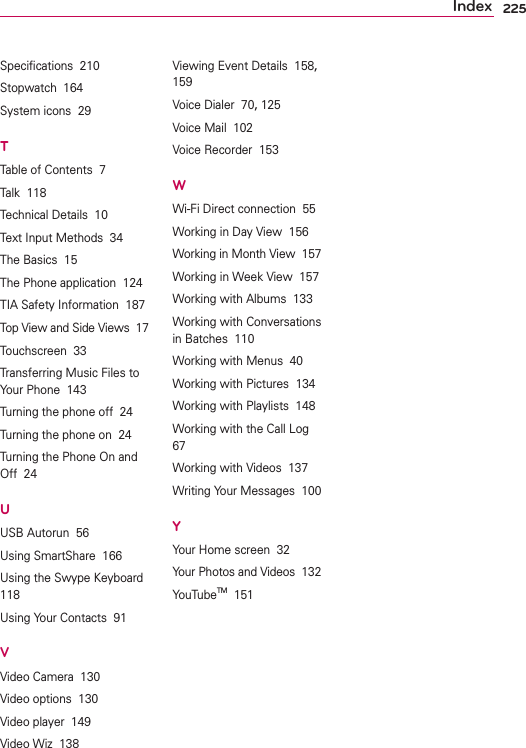
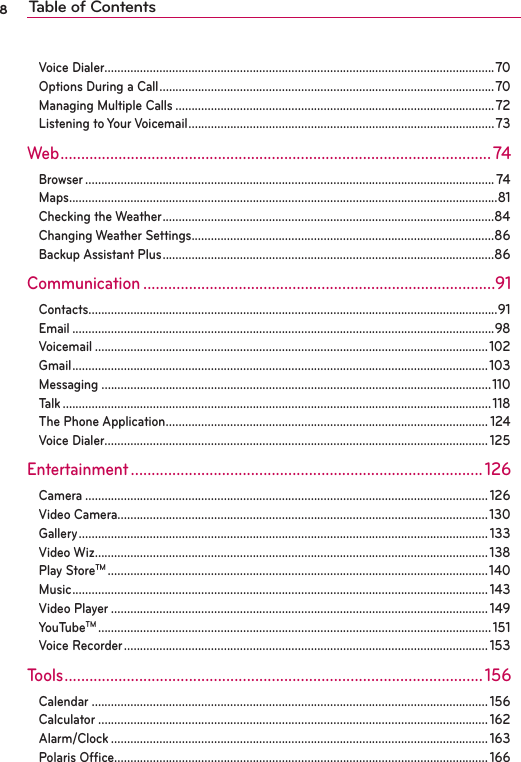
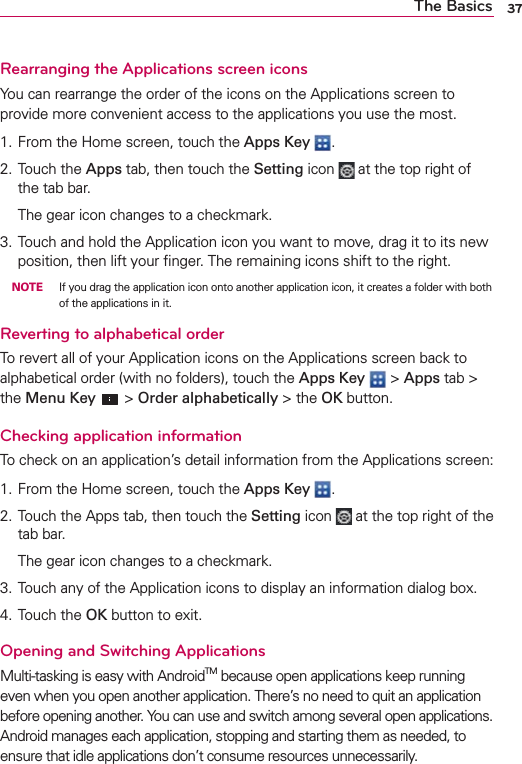
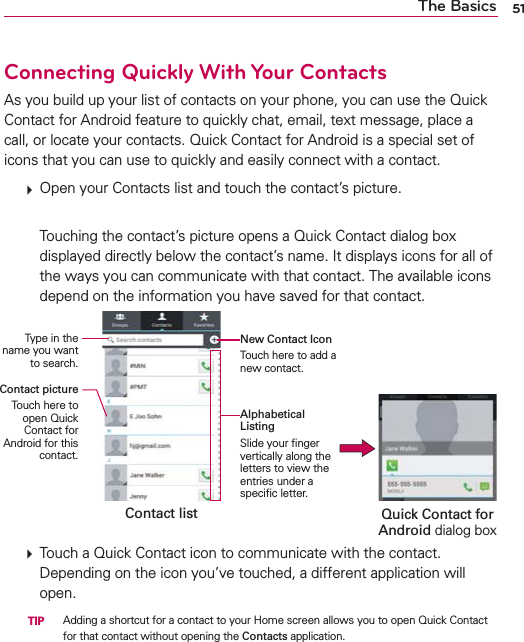
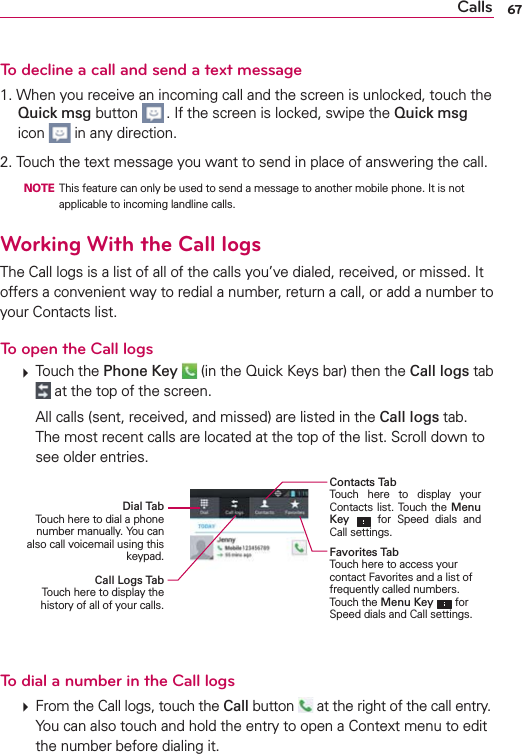
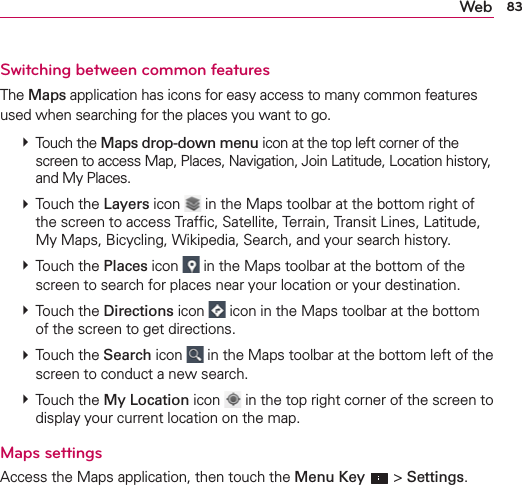
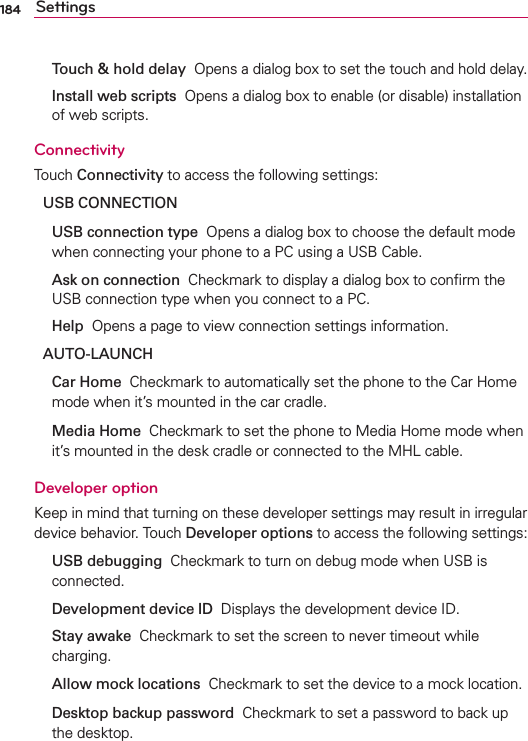
![162 ToolsAlarm/ClockYou use the Alarm/Clock application to access the Alarms, Timer, World clock, and Stopwatch functions. These functions are accessed by touching the tabs across the top of the screen.To open the Clock application From the Home screen, touch the Apps Key > the Alarm/Clock Icon . Touch the Alarms tab at the top of the screen, if necessary.Setting AlarmsYou can set an alarm by modifying an existing alarm or by adding a new one. After you’ve created one or more alarms, you can easily activate or deactivate them using slide the button on the On/Off switch [on off switch icon graphic]. Slide it to the right to turn it on and to the left to turn it off. To set an alarm1. Touch the New alarm icon or touch an existing alarm to modify it.Delete Icon Touch here to delete an alarm.Repeat Field Touch here to set which days to activate the alarm.Alarm ScreenExisting AlarmTouch here to modify this alarm's settings. Time Wheel Scroll here to change the alarm time.New Alarm Icon Touch here to create a new alarm. Set Alarm Screen2. Scroll the time wheel to set the alarm time. Enter the alarm time manually by scrolling the hour (or minutes) field. Scroll to AM or PM to set for morning or afternoon.3. Touch the day(s) when you want the alarm to sound in the Repeat field.](https://usermanual.wiki/LG-Electronics-USA/VS930.Users-Manual-rev-6-18/User-Guide-1725933-Page-162.png)


![222 LIMITED WARRANTY STATEMENT7.11 Warranty LawsThe following laws govern warranties that arise in retail sales of consumer goods:ţThe California Song-Beverly Consumer Warranty Act [CC §§1790 et seq],ţThe California Uniform Commercial Code, Division Two [Com C §§2101 et seq], andţThe federal Magnuson-Moss Warranty Federal Trade Commission Improvement Act [15 USC §§2301 et seq; 16 CFR Parts 701– 703]. A typical Magnuson-Moss Act warranty is a written promise that the product is free of defects or a written promise to refund, repair, or replace defective goods. [See 15 USC §2301(6).] Remedies include damages for failing to honor a written warranty or service contract or for violating disclosure provisions. [See 15 USC §2310(d).] Except for some labeling and disclosure requirements, the federal Act does not preempt state law. [See 15 USC §2311.]The Consumer Warranty Act does not affect the rights and obligations of parties under the state Uniform Commercial Code, except the provisions of the Act prevail over provisions of the Commercial Code when they conflict. [CC §1790.3.]For purposes of small claims actions, this course will focus on rights and duties under the state laws.](https://usermanual.wiki/LG-Electronics-USA/VS930.Users-Manual-rev-6-18/User-Guide-1725933-Page-222.png)