LG Electronics USA W2262TQV LCD Monitor User Manual GEN
LG Electronics USA LCD Monitor GEN
UserManual.wiki
>
LG Electronics USA
>
W2262TQV User Manual
User manual version 01
Navigation menu
Upload a User Manual
Namespaces
Wiki Guide
HTML
PDF
Info
Views
User Manual
Discussion / Help
Navigation


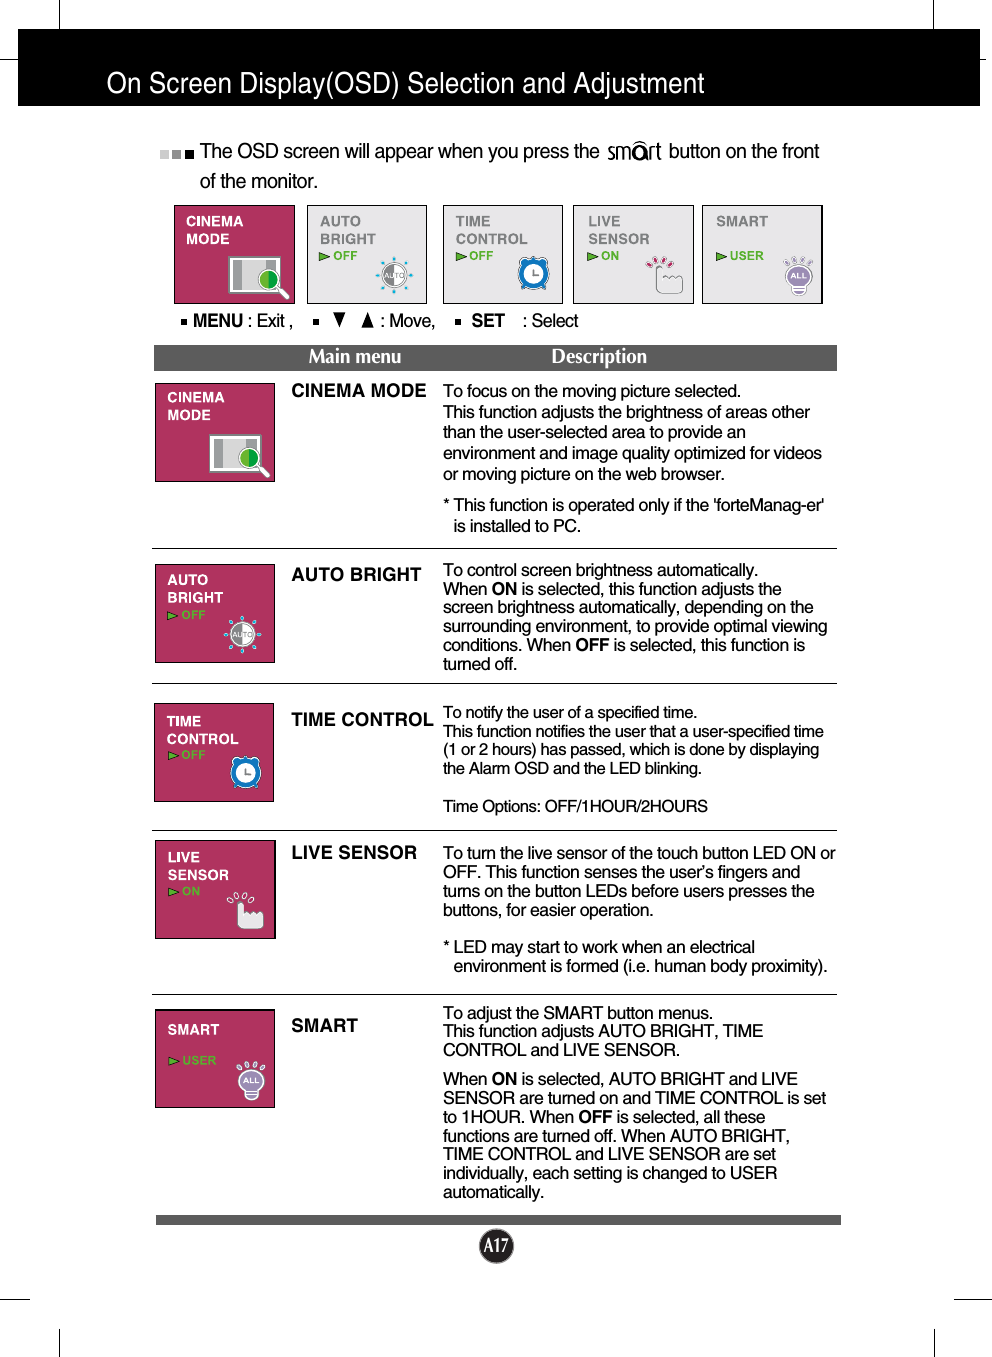
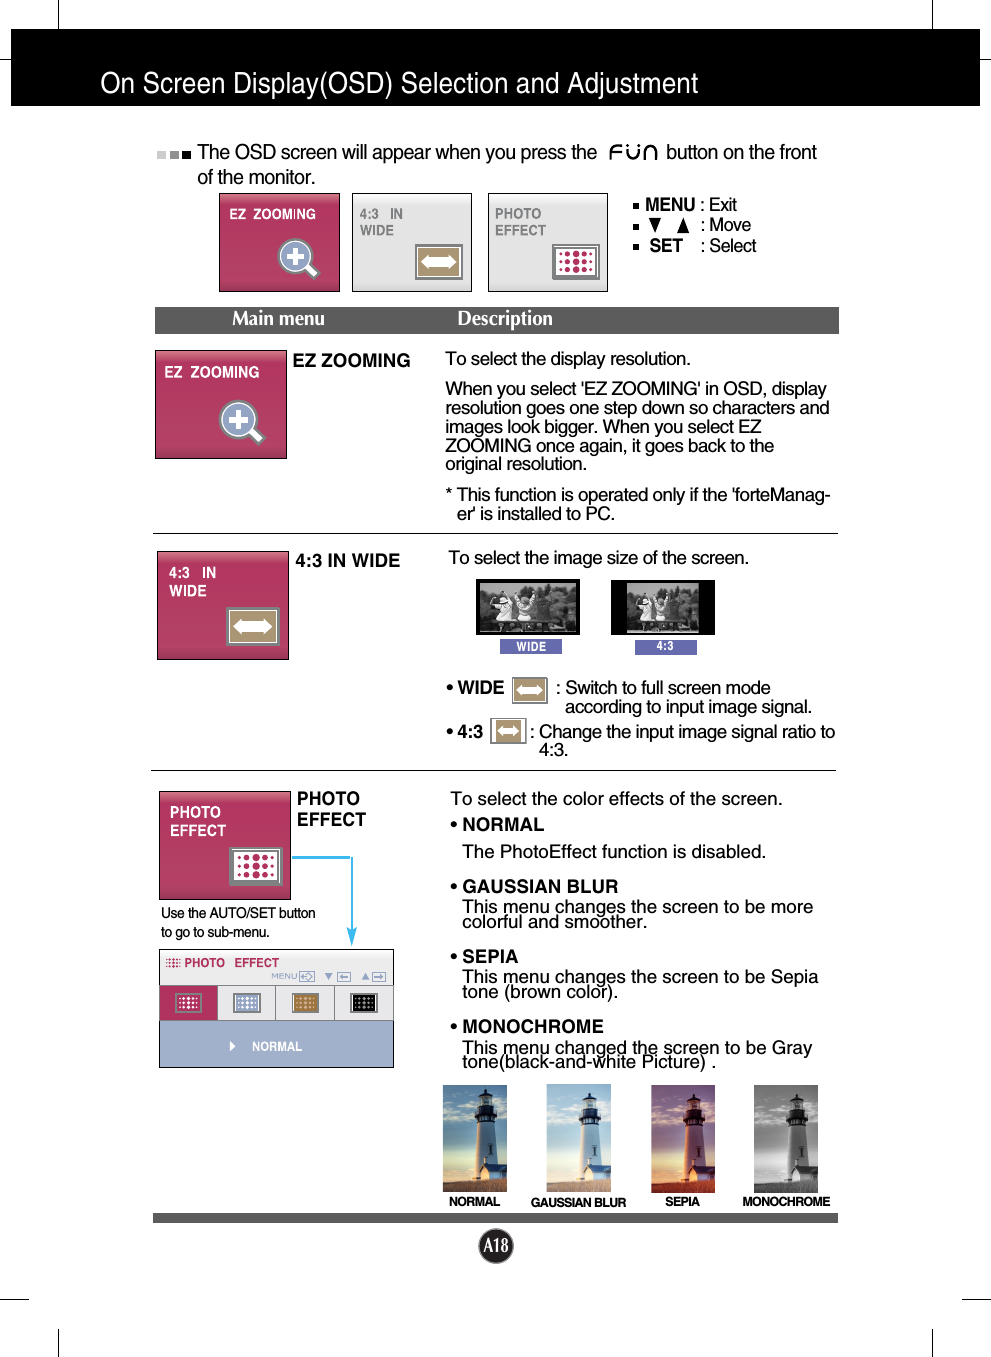
![On Screen Display(OSD) Selection and Adjustment IconsMenu NameSub-menu NameMain menu Sub menu DescriptionTo adjust the USER sub-menu function,press the AUTO/SET ButtonMOVIEINTERNETNORMALDEMOUSERWhen the F-ENGINE is executed, two kinds of tonesare displayed as shown in the image. The activestate is to the left and the inactive state is to the rightside of the screen. Select the function you want andpress the [MENU] button to save the setting. F-ENGINEActive state Inactive stateThe OSD screen will appear when you press the button on thefront of the monitor.This is under normal operating conditions.* Normal mode is when f-ENGINE is turned off.This feature lets you easily select the best desiredimage condition optimized to the environment(ambient illumination, image types etc).MOVIE: For animation images in videos or movies INTERNET: For text images (Word processing etc.)USER You can manually adjust ACE or RCM. You can save or restore the adjusted value even when using a different condition.Not appliedGreen enhanceMENU : Save & Exit, : MoveMENU : Exit: Decrease: IncreaseSET : Select another sub-menuSalmon color toneColor Enhance• ACE (Adaptive Clarity Enhancer): Selects the clarity mode.Not appliedWeak clarity and luminosity contrast. Strong clarity and luminosity contrast. • RCM (Real Color Management): Selects the color mode.This is used for advertising in the store. The screen willbe divided to show the standard mode on the left andvideo mode on the right so that the consumers cancheck the difference after applying the video mode. A19](https://usermanual.wiki/LG-Electronics-USA/W2262TQV/User-Guide-1108070-Page-21.png)