LG Electronics USA W2486LV LCD MONITOR User Manual User s Manual H ok
LG Electronics USA LCD MONITOR User s Manual H ok
UserManual.wiki
>
LG Electronics USA
>
W2486LV User Manual
Users Manual
Navigation menu
Upload a User Manual
Namespaces
Wiki Guide
HTML
PDF
Info
Views
User Manual
Discussion / Help
Navigation

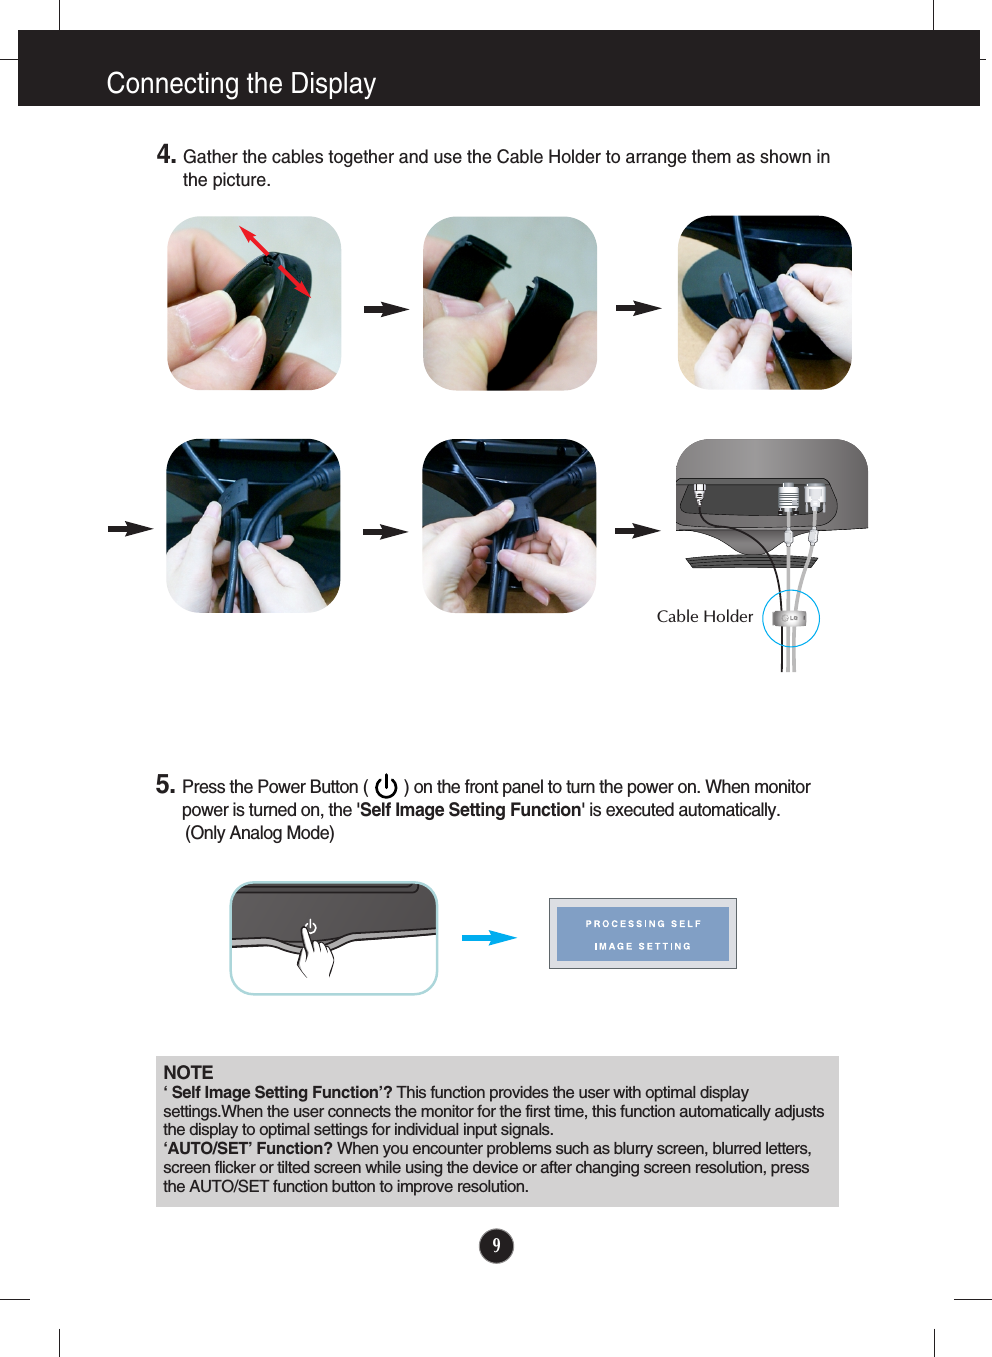
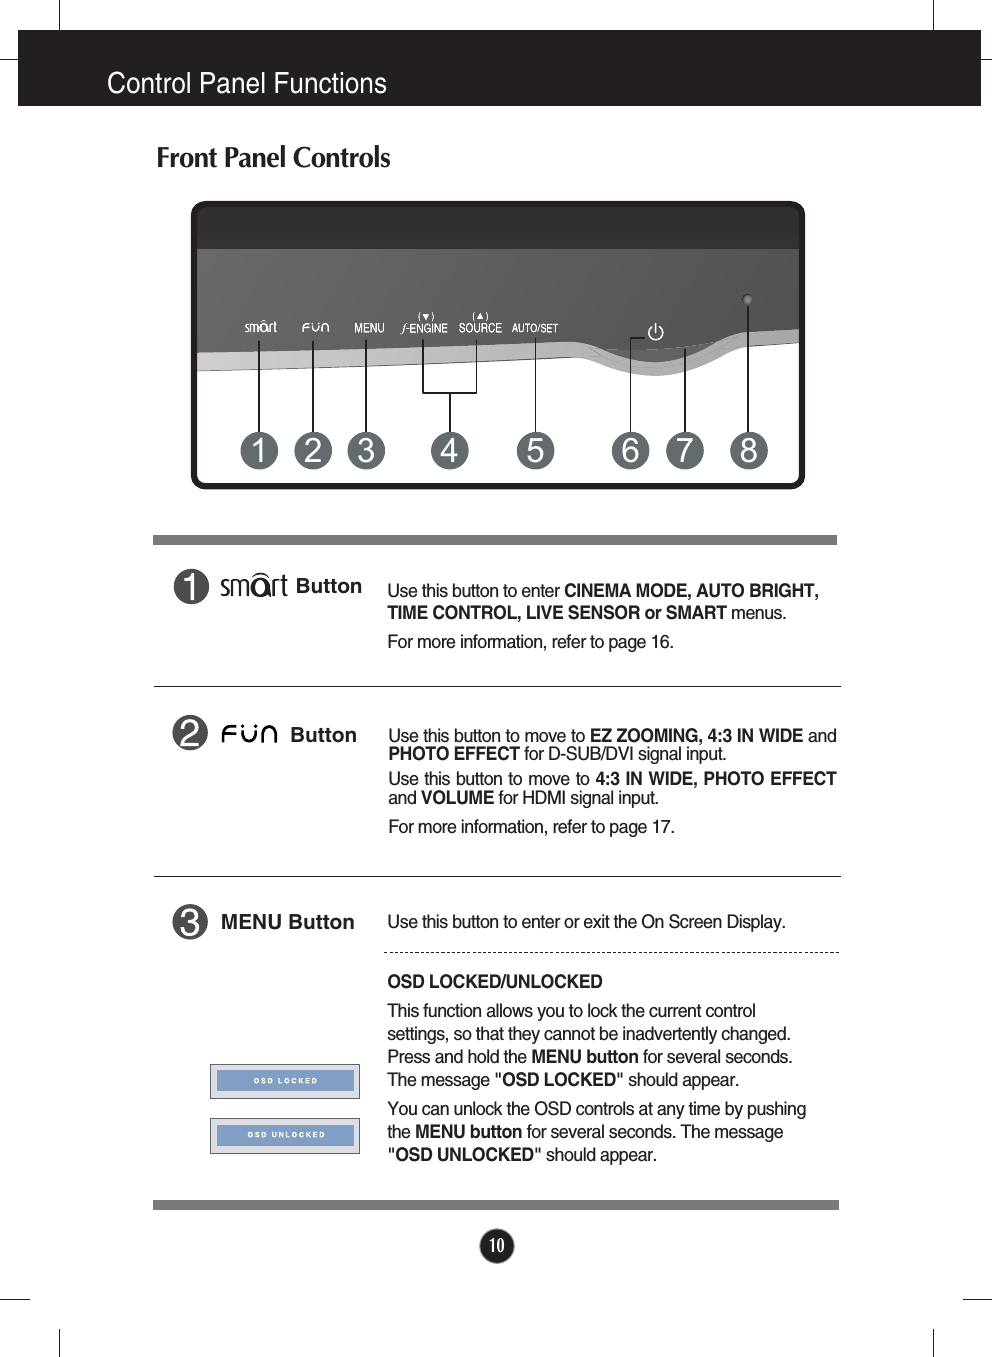
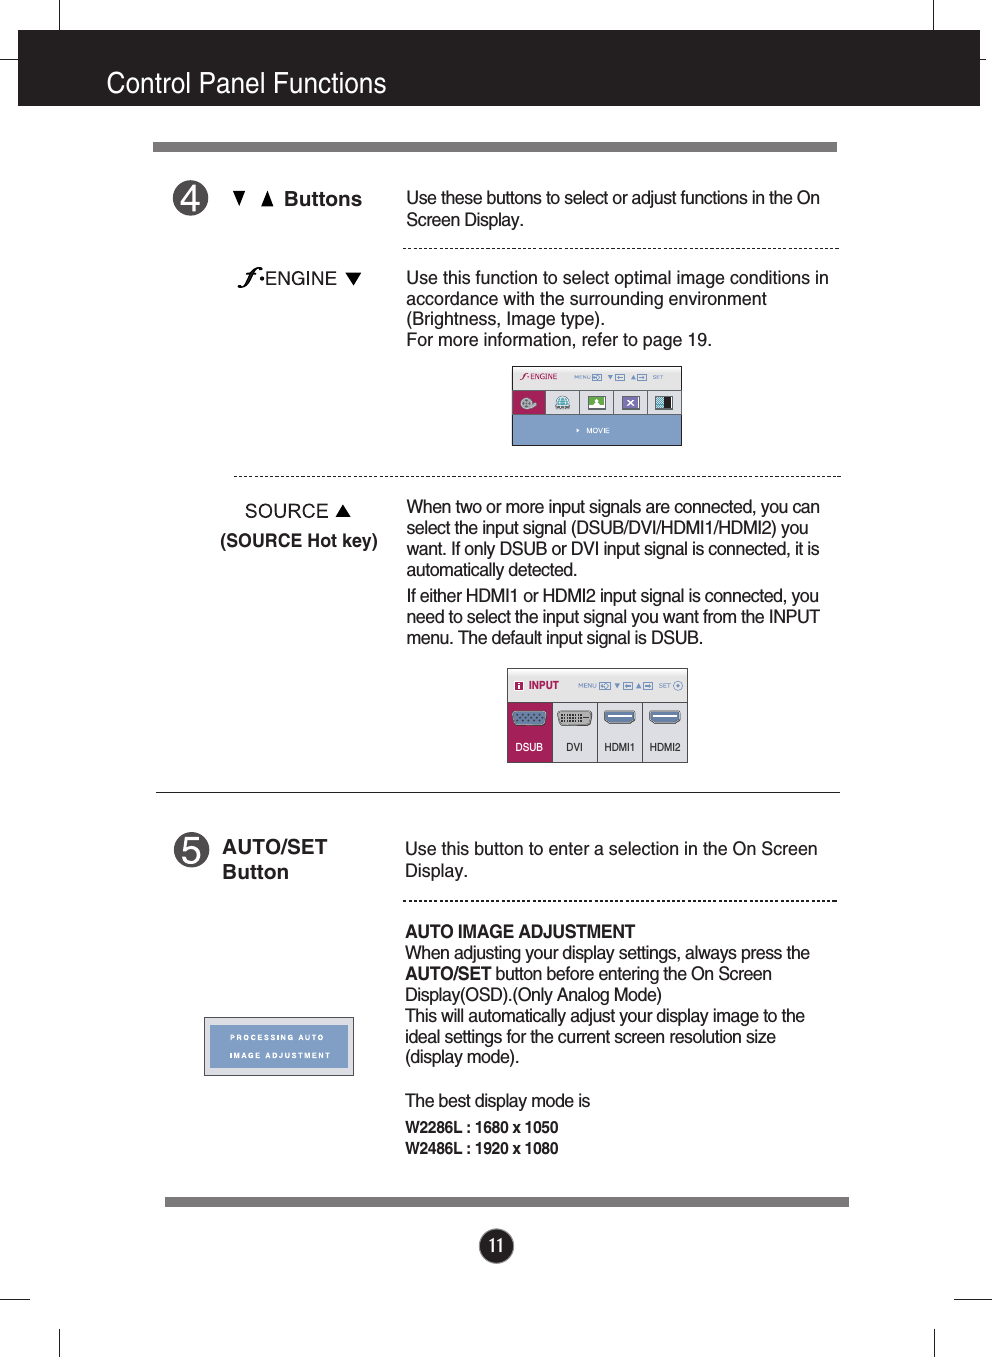
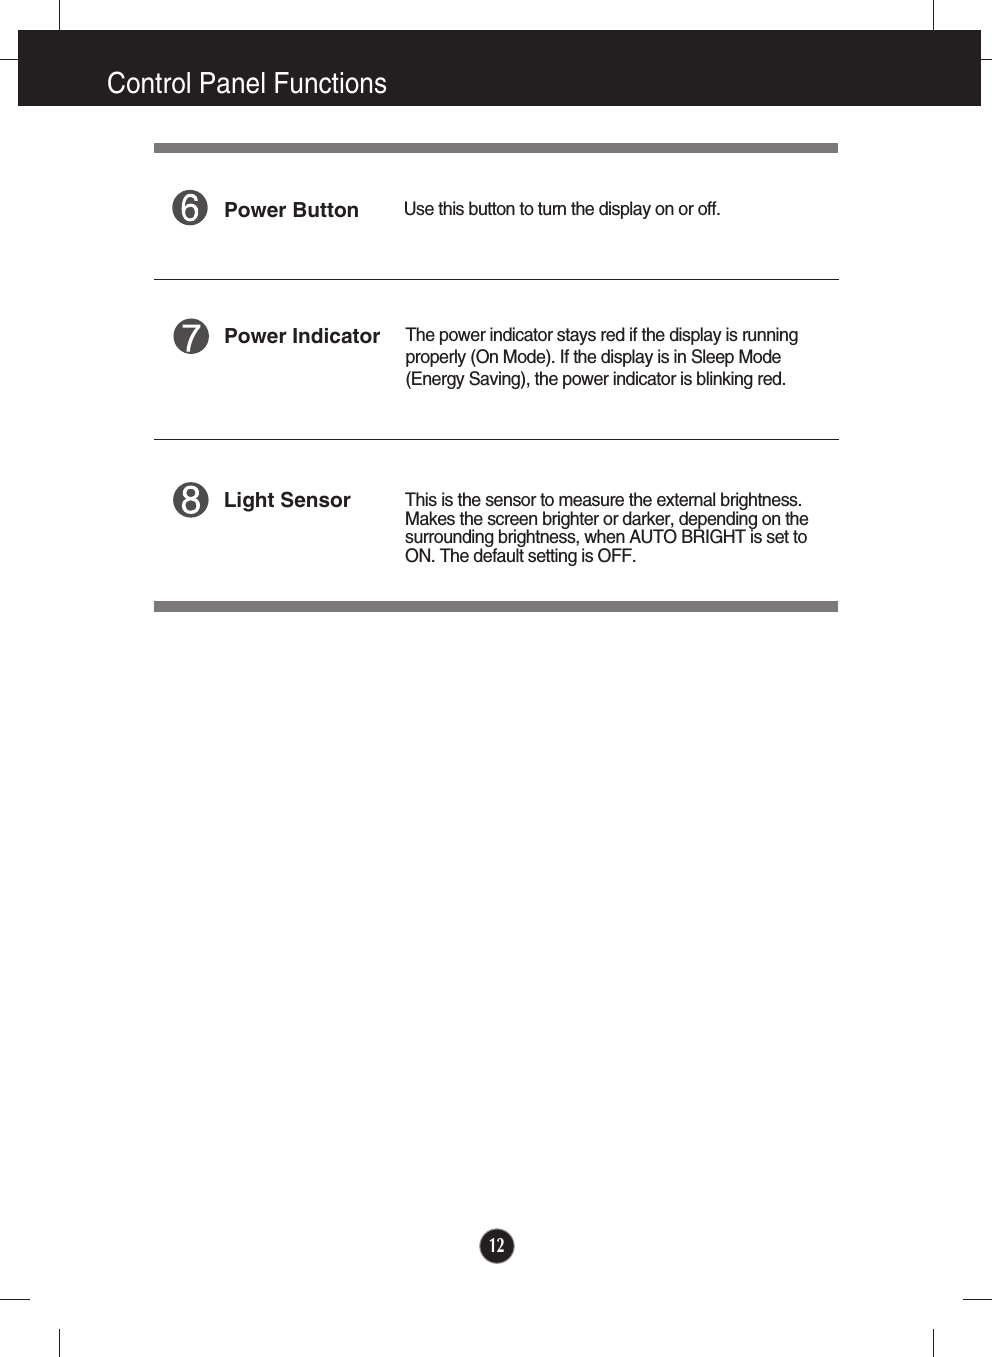

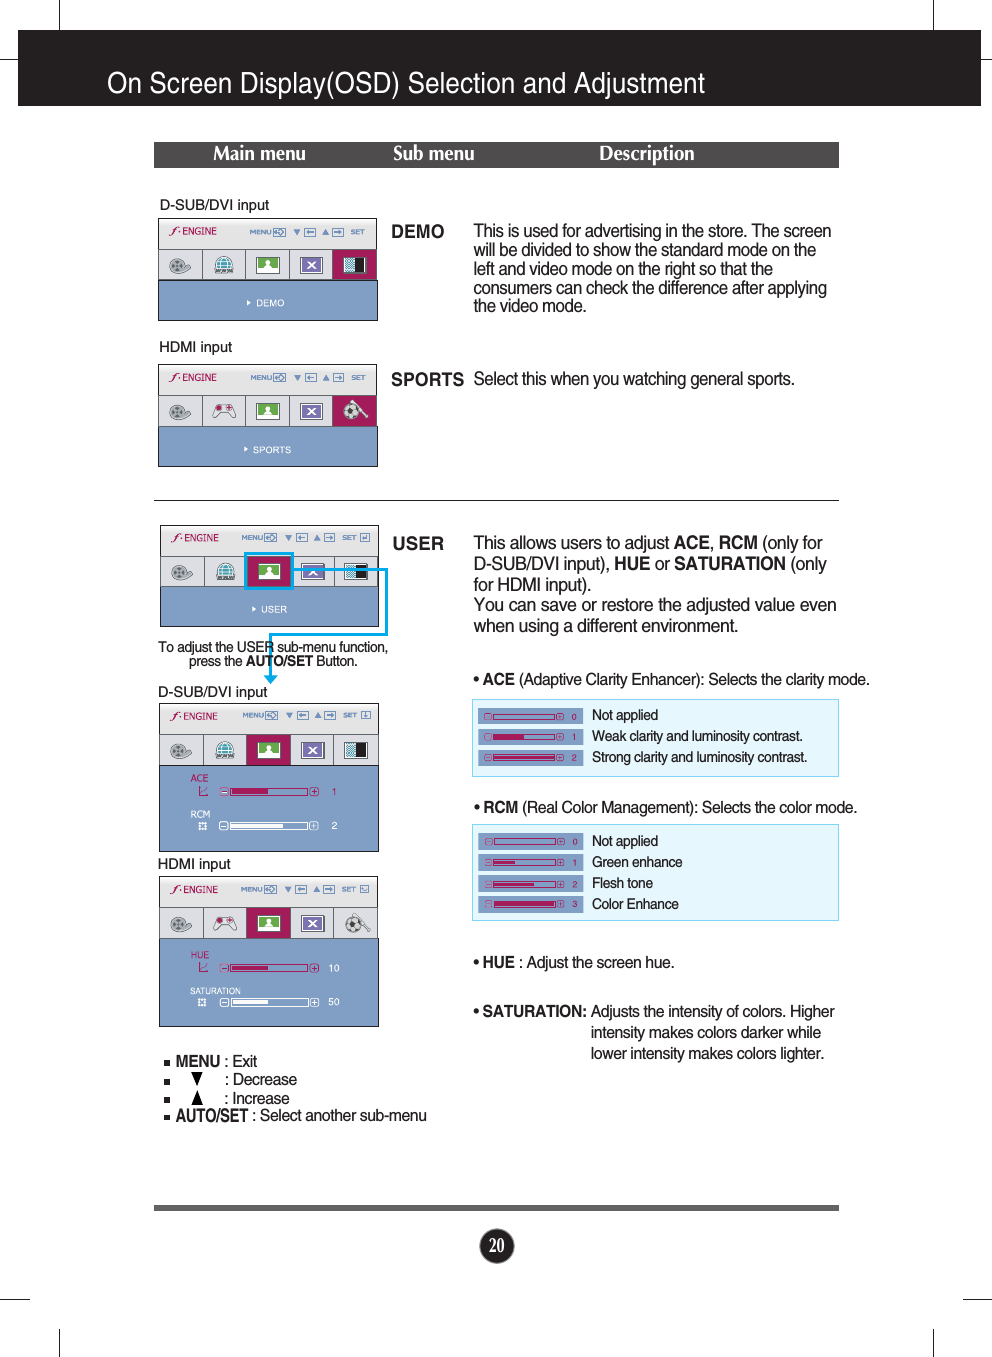
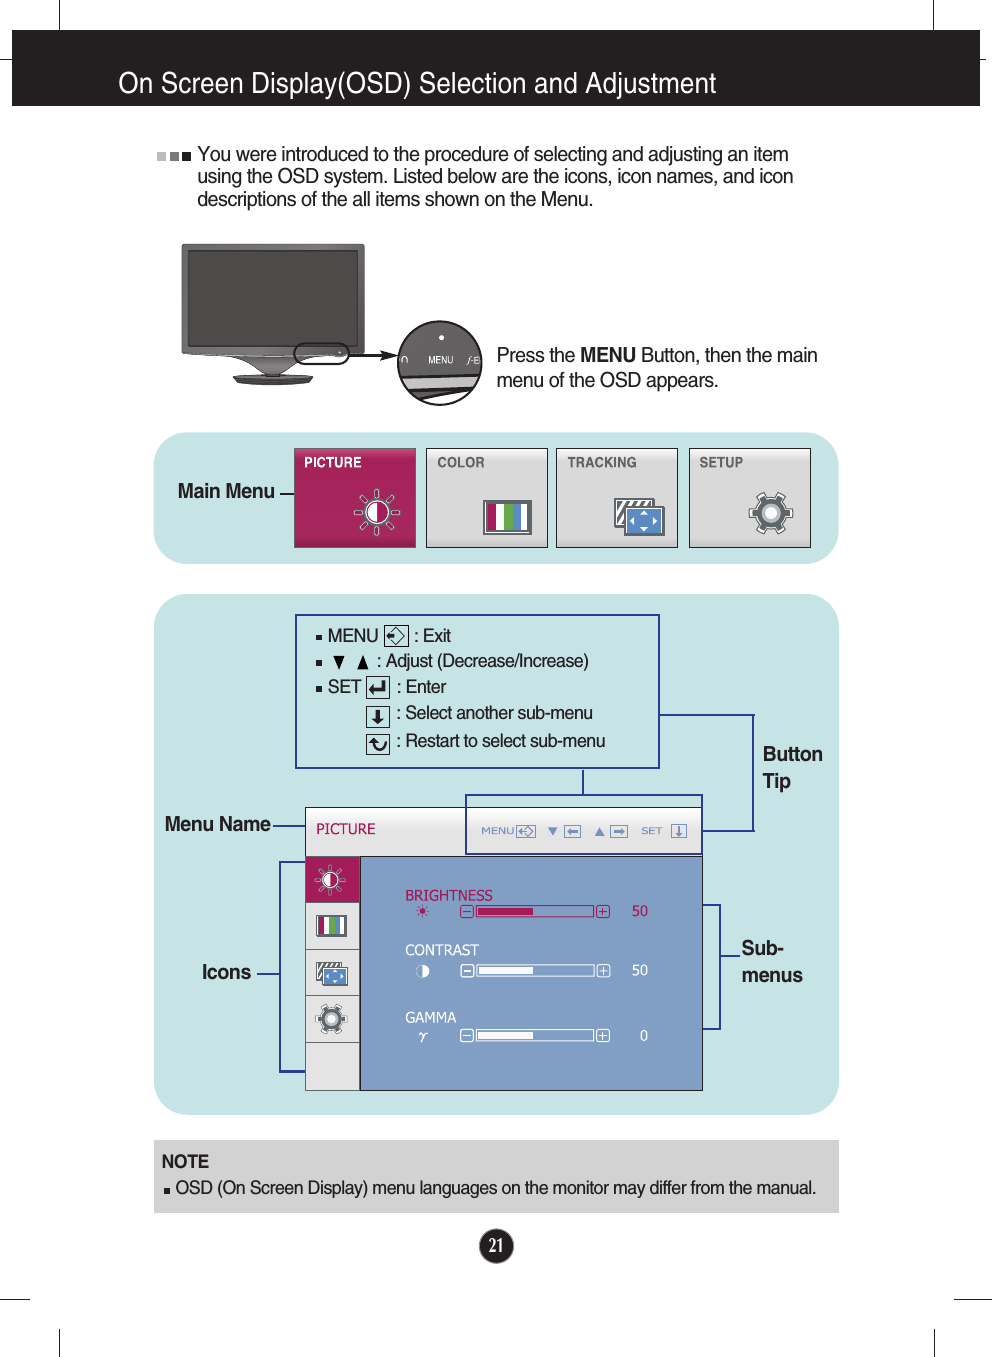
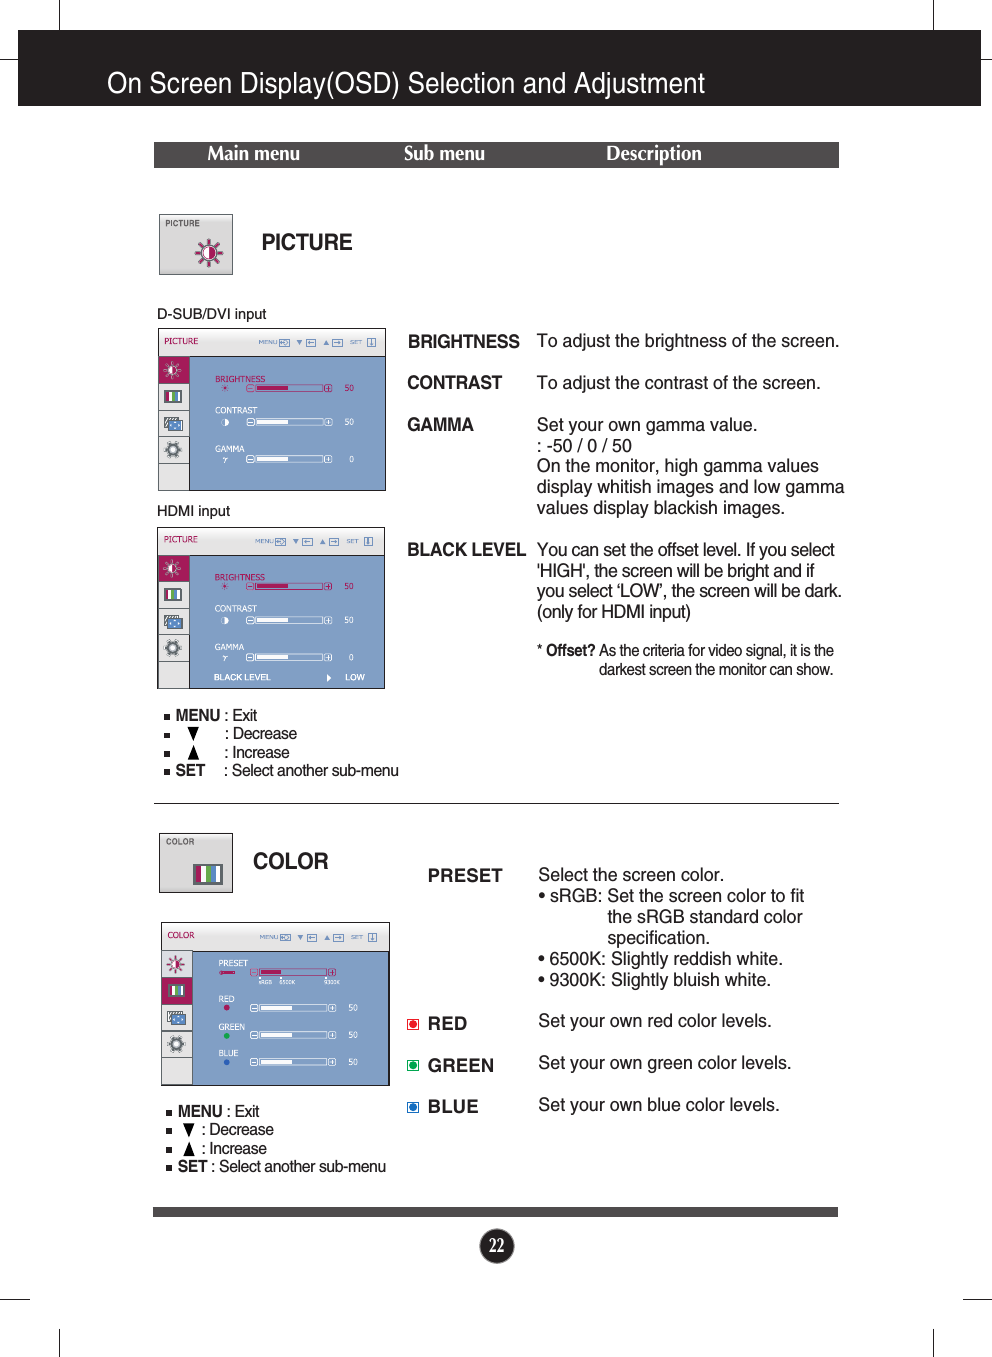
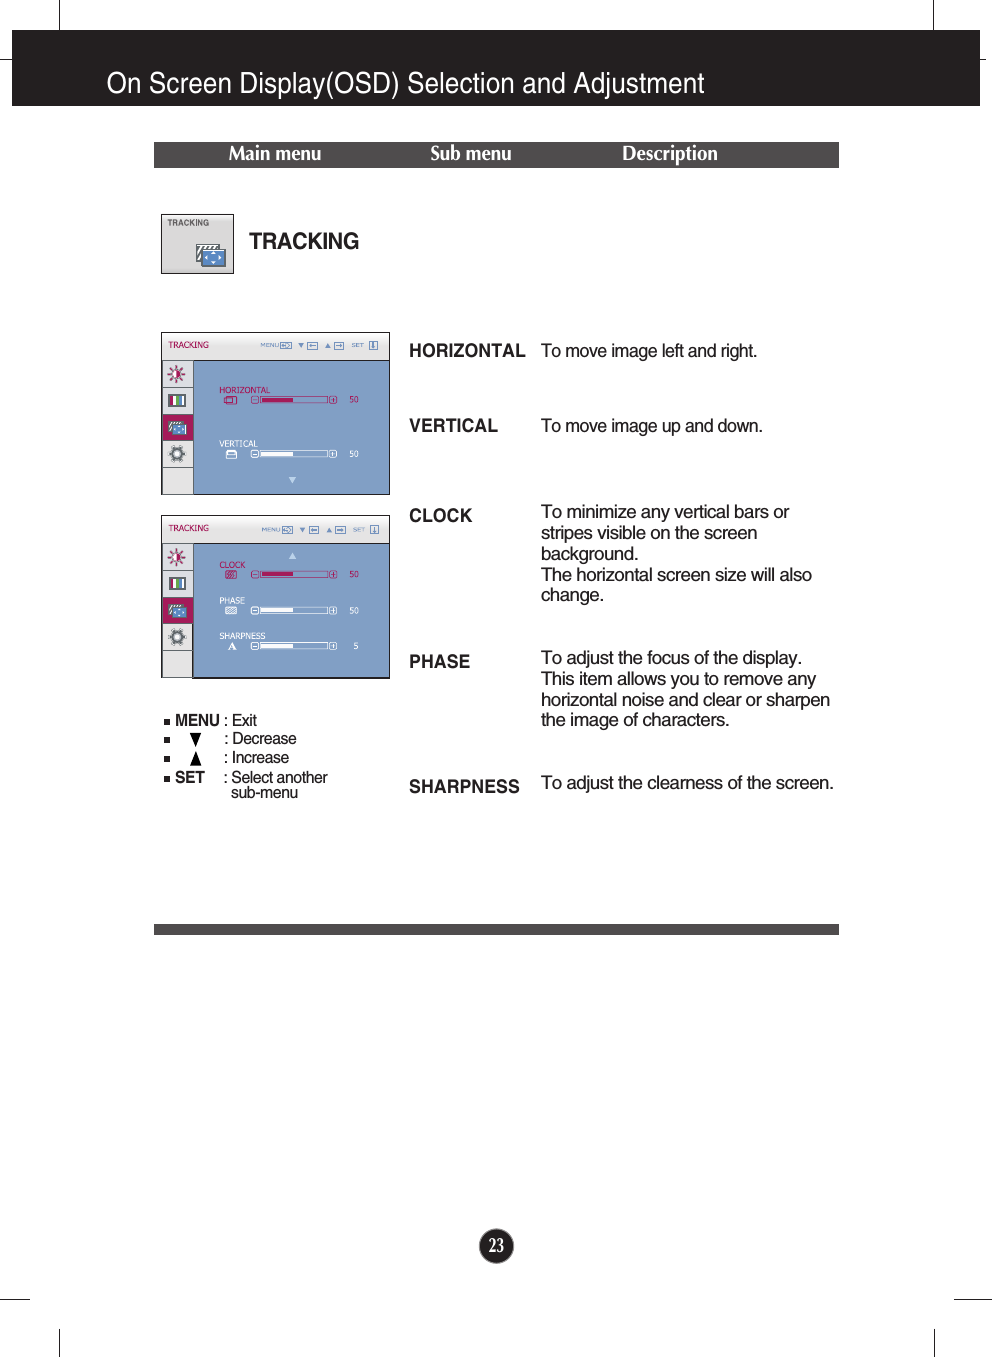
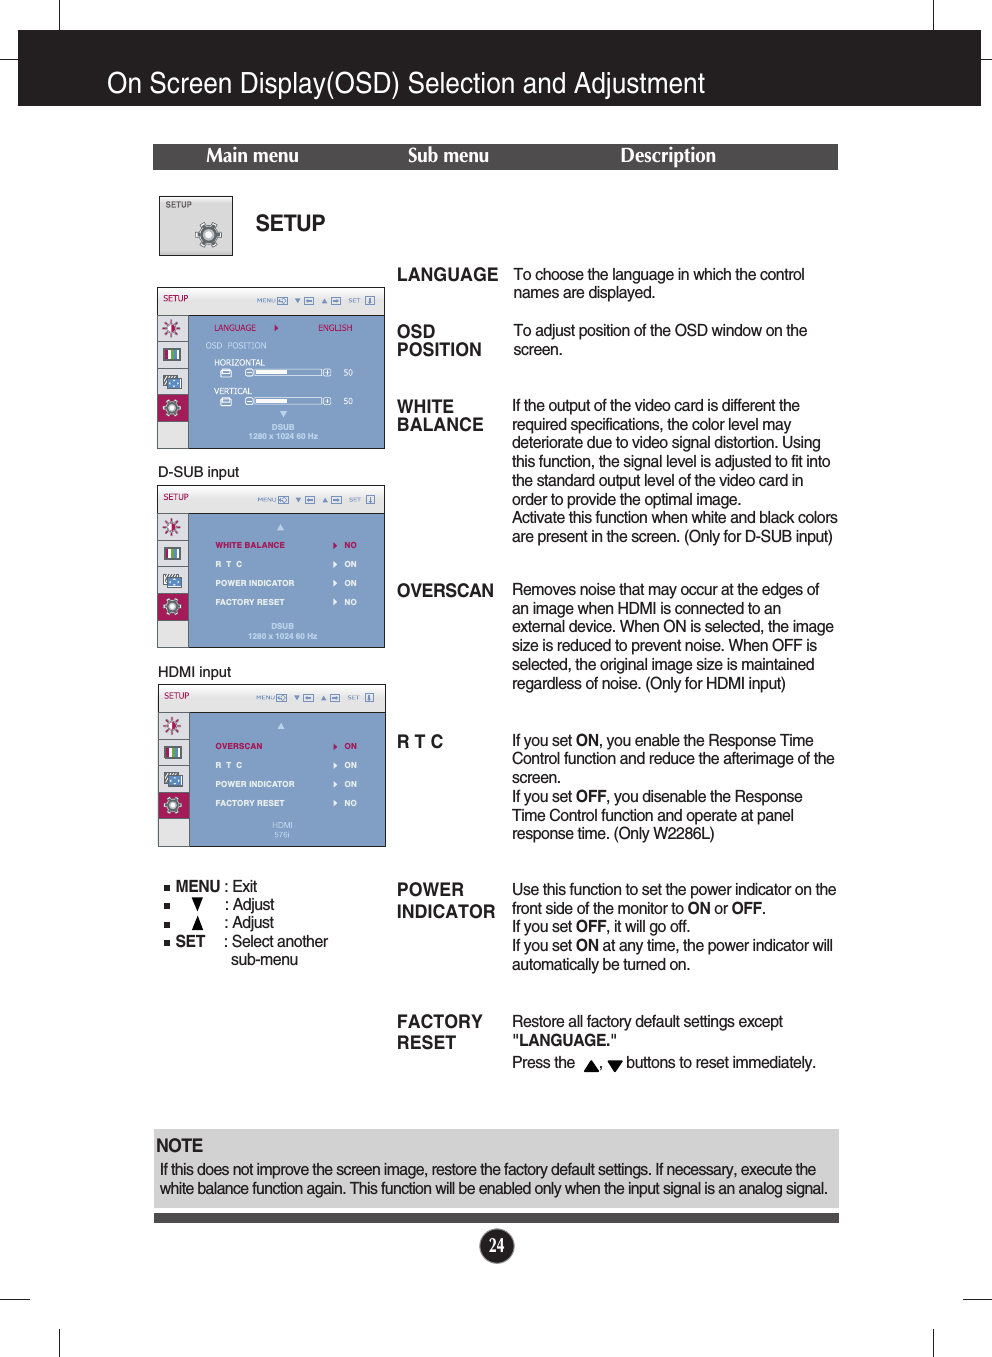
![19On Screen Display(OSD) Selection and Adjustment The OSD screen will appear when you touch the button on the left bottomof the monitor. These features let you easily select the best desired image conditionoptimized to the environment (ambient illumination, image types etc).Main menu Sub menu DescriptionD-SUB/DVI inputHDMI inputD-SUB/DVI inputHDMI inputMOVIE Select this when you are watching a video ormovie.INTERNETGAMESelect this when you are working on thedocument (Word etc.)Select this when you are playing a game.NORMALSTANDARDSelect this when you want to use the product inthe most general using environment. Select this when you want to use the originalstandard video.* In the General (Standard) mode, the is turned off.Inactive stateActive stateIconsMenu NameSub-menu NameWhen F-ENGINE is executed, two kinds of tone are displayed as shown in the image. The active stateis on the left and the inactive state is on the right side of the screen. Select the function you want andpress the [MENU] button to save the setting.MENU : Save & Exit, : Move](https://usermanual.wiki/LG-Electronics-USA/W2486LV/User-Guide-1101331-Page-21.png)