LG LHB335 User Manual HOME THEATER Manuals And Guides L1001315
LG Home Theatre Manual L1001315 LG Home Theatre Owner's Manual, LG Home Theatre installation guides
User Manual: LG LHB335 LHB335 LG HOME THEATER - Manuals and Guides View the owners manual for your LG HOME THEATER #LHB335. Home:Electronics Parts:LG Parts:LG HOME THEATER Manual
Open the PDF directly: View PDF ![]() .
.
Page Count: 96

Life's Good
i _ iii xila
iiii i
i i
x iiii
OWNER'S
Network Blu-ray Disc T_
Home Theater System
Please read this manual carefully before operating
your set and retain it for future reference.
MODEL
LHB335
P/NO : MFL62863597 www.lgusa.com
HB905SA-AH.BUSALL_OM.indd 1 2010-01-08 4,_,_,Li11:49:58
2 Safety Information
Co
F
o
1
Safety Information
CAUTION
CAUTION: TO REDUCETHERISKOF ELECTRIC
SHOCKDO NOT REMOVECOVER(ORBACK)NO
USER-SERVICEABLEPARTSINSIDEREFERSERVICING
TO QUALIFIEDSERVICEPERSONNEL.
This lightning flash with arrowhead
symbol within an equilateral
triangle is intended to alert the
user to the presence of uninsulated
dangerous voltage within the
product's enclosure that may be of
sufficient magnitude to constitute
a risk of electric shock to persons.
The exclamation point within an
equilateral triangle is intended
to alert the user to the presence
of important operating and
maintenance (servicing)
instructions in the literature
accompanying the product.
Cautions and Warnings
WARNING: TO PREVENT FIREOR ELECTRIC SHOCK
HAZARD, DO NOT EXPOSETHIS PRODUCTTO RAIN
OR MOISTURE.
WARNING: Do not install this equipment in a
confined space such as a book case or similar unit.
CLASS1 LASERP_OOUCr
K_SSS1 CASS_PRO_UKI
LUOKaN1 LaSeRLAIRS
K_SS 1 _SS_ APPARA_
CLASSS1 _£OaUlr L_SS£
CAUTION: Do not block any ventilation openings.
Install in accordance with the manufacturer's
instructions.
Slots and openings in the cabinet are provided for
ventilation and to ensure reliable operation of the
product and to protect it from over heating.The
openings shall be never be blocked by placing
the product on a bed, sofa, rug or other similar
surface.This product shall not be placed in a built-
in installation such as a bookcase or rack unless
proper ventilation is provided or the manufacturer's
instruction has been adhered to.
CAUTION: This product employs a Laser System.
To ensure proper use of this product, please read
this owner's manual carefully and retain it for future
reference. Shall the unit require maintenance,
contact an authorized service center.
Use of controls, adjustments or the performance of
procedures other than those specified herein may
result in hazardous radiation exposure.
To prevent direct exposure to laser beam, do not try
to open the enclosure.Visible laser radiation when
open. DO NOT STARE INTO BEAM.
HB905SA-AH.BUSALL_OM.indd 2 2010-01-08 &AA{i 11:50:17
Safety Information 3
CAUTION concerning the Power Cord
Most appliances recommend they be placed upon a
dedicated circuit;
That is, a single outlet circuit which powers only
that appliance and has no additional outlets or
branch circuits. Check the specification page of this
owner's manual to be certain. Do not overload wall
outlets. Overloaded wall outlets, loose or damaged
wall outlets, extension cords, frayed power cords, or
damaged or cracked wire insulation are dangerous.
Any of these conditions could result in electric
shock or fire. Periodically examine the cord of your
appliance, and if its appearance indicates damage
or deterioration, unplug it, discontinue use of the
appliance, and have the cord replaced with an exact
replacement part by an authorized service center.
Protect the power cord from physical or mechanical
abuse, such as being twisted, kinked, pinched, closed
in a door, or walked upon. Pay particular attention
to plugs, wall outlets, and the point where the cord
exits the appliance.To disconnect power from the
mains, pull out the mains cord plug.When installing
the product, ensure that the plug is easily accessible.
CAUTION:The apparatus shall not be exposed to
water (dripping or splashing) and no objects filled
with liquids, such as vases, shall be placed on the
apparatus.
This device is equipped with a portable battery or
accumulator.
Safety way to remove the battery or the battery
from the equipment: Remove the old battery
or battery pack, follow the steps in reverse order
than the assembly.To prevent contamination of
the environment and bring on possible threat
to human and animal health, the old battery or
the battery put it in the appropriate container at
designated collection points. Do not dispose of
batteries or battery together with other waste.
It is recommended that you use local, flee
reimbursement systems batteries and accumulators.
The battery shall not be exposed to excessive heat
such as sunshine, fire or the ]fie.
FCC Compliance Statement
This device complies with part 15 of the FCC rules.
Operation is subject to the following two conditions:
(1) This device may not cause harmful interference,
and
(2) This device must accept any interference received,
including interference that may cause undesired
operation.
NOTE:This equipment has been tested and found
to comply with the limits for a Class B digital device,
pursuant to Part 15 of the FCC Rules.These limits are
designed to provide reasonable protection against
harmful interference in a residential installation.This
equipment generates, uses, and can radiate radio
frequency energy and, if not installed and used in
accordance with the instructions, may cause harmful
interference to radio communications. However,
there is no guarantee that interference will not occur
in a particular installation.
If this equipment does cause harmful interference
to radio or television reception, which can be
determined by turning the equipment off and
on, the user is encouraged to try to correct the
interference by one or more of the following
measures:
• Reorient or relocate the receiving antenna.
• Increase the separation between the equipment
and receiver.
• Connect the equipment into an outlet on a
circuit different from that to which the receiver is
connected.
• Consult the dealer or an experienced radio/TV
technician for help.
CAUTION : Any changes or modifications not
expressly approved by the party responsible for
compliance could void the user's authority to
operate this equipment.
th
o
HB905SA-AH.BUSALL_OM.indd 3 2010-01-08 6,_,,_,_11:50:1
4 Safety Information
co
,<
F
o
Notes on Copyrights
• Because AACS (Advanced Access Content System)
is approved as content protection system for BD
format, similar to use of CSS (Content Scramble
System) for DVD format, certain restrictions are
imposed on playback, analog signal output, etc.,
of AACS protected contents. The operation of this
product and restrictions on this product may vary
depending on your time of purchase as those
restrictions may be adopted and/or changed by
AACS after the production of this product.
• Furthermore, BD-ROM Mark and BD+ are
additionally used as content protection systems
for BD format, which imposes certain restrictions
including playback restrictions for BD-ROM
Mark and/or BD+ protected contents. To obtain
additional information on AACS, BD-ROM Mark,
BD+, or this product, please contact an authorized
Customer Service Center.
• Many BD-ROM/DVD discs are encoded with
copy protection. Because of this, you should only
connect your player directly to your TV, not to a
VCR. Connecting to aVCR results in a distorted
picture from copy-protected discs.
• This product incorporates copyright protection
technology that is protected by U.S.patents
and other intellectual property rights. Use of
this copyright protection technology must be
authorized by Macrovision, and is intended for
home and other limited viewing uses only unless
otherwise authorized by Macrovision. Reverse
engineering or disassembly is prohibited.
• Under the U.S. Copyright laws and Copyright
laws of other countries, unauthorized recording,
use, display, distribution, or revision of television
programs, videotapes, BD-ROM discs, DVDs, CDs
and other materials may subject you to civil and/
or criminal liability.
HB905SA-AH.BUSALL_OM.indd 4 2010-01-08 &,_,,_,Q11:50:1_
Safety Information 5
IMPORTANT SAFETY
INSTRUCTIONS
1. Read these instructions.
2. Keep these instructions.
3. Heed all warnings.
4. Followall instructions.
5. Do not use this apparatus near water.
6. Clean only with dry cloth.
7. Do not block any ventilation openings. Install in
accordance with the manufacturer's instructions.
8. Do not install near any heat sources such as
radiators, heat registers, stoves, or other apparatus
(including amplifiers) that produce heat.
9. Do not defeat the safety purpose of the polarized
or grounding-type plug. A polarized plug has
two blades with one wider than the other. A
grounding type plug has two blades and a third
grounding prong.The wide blade or the third
prong are provided for your safety. If the provided
plug does not fit into your outlet, consult an
electrician For replacement of the obsolete outlet.
10. Protect the power cord from being walked on
or pinched particularly at plugs, convenience
receptacles, and the point where they exit from
the apparatus.
11. Only use attachments/accessories specified by
the manufacturer.
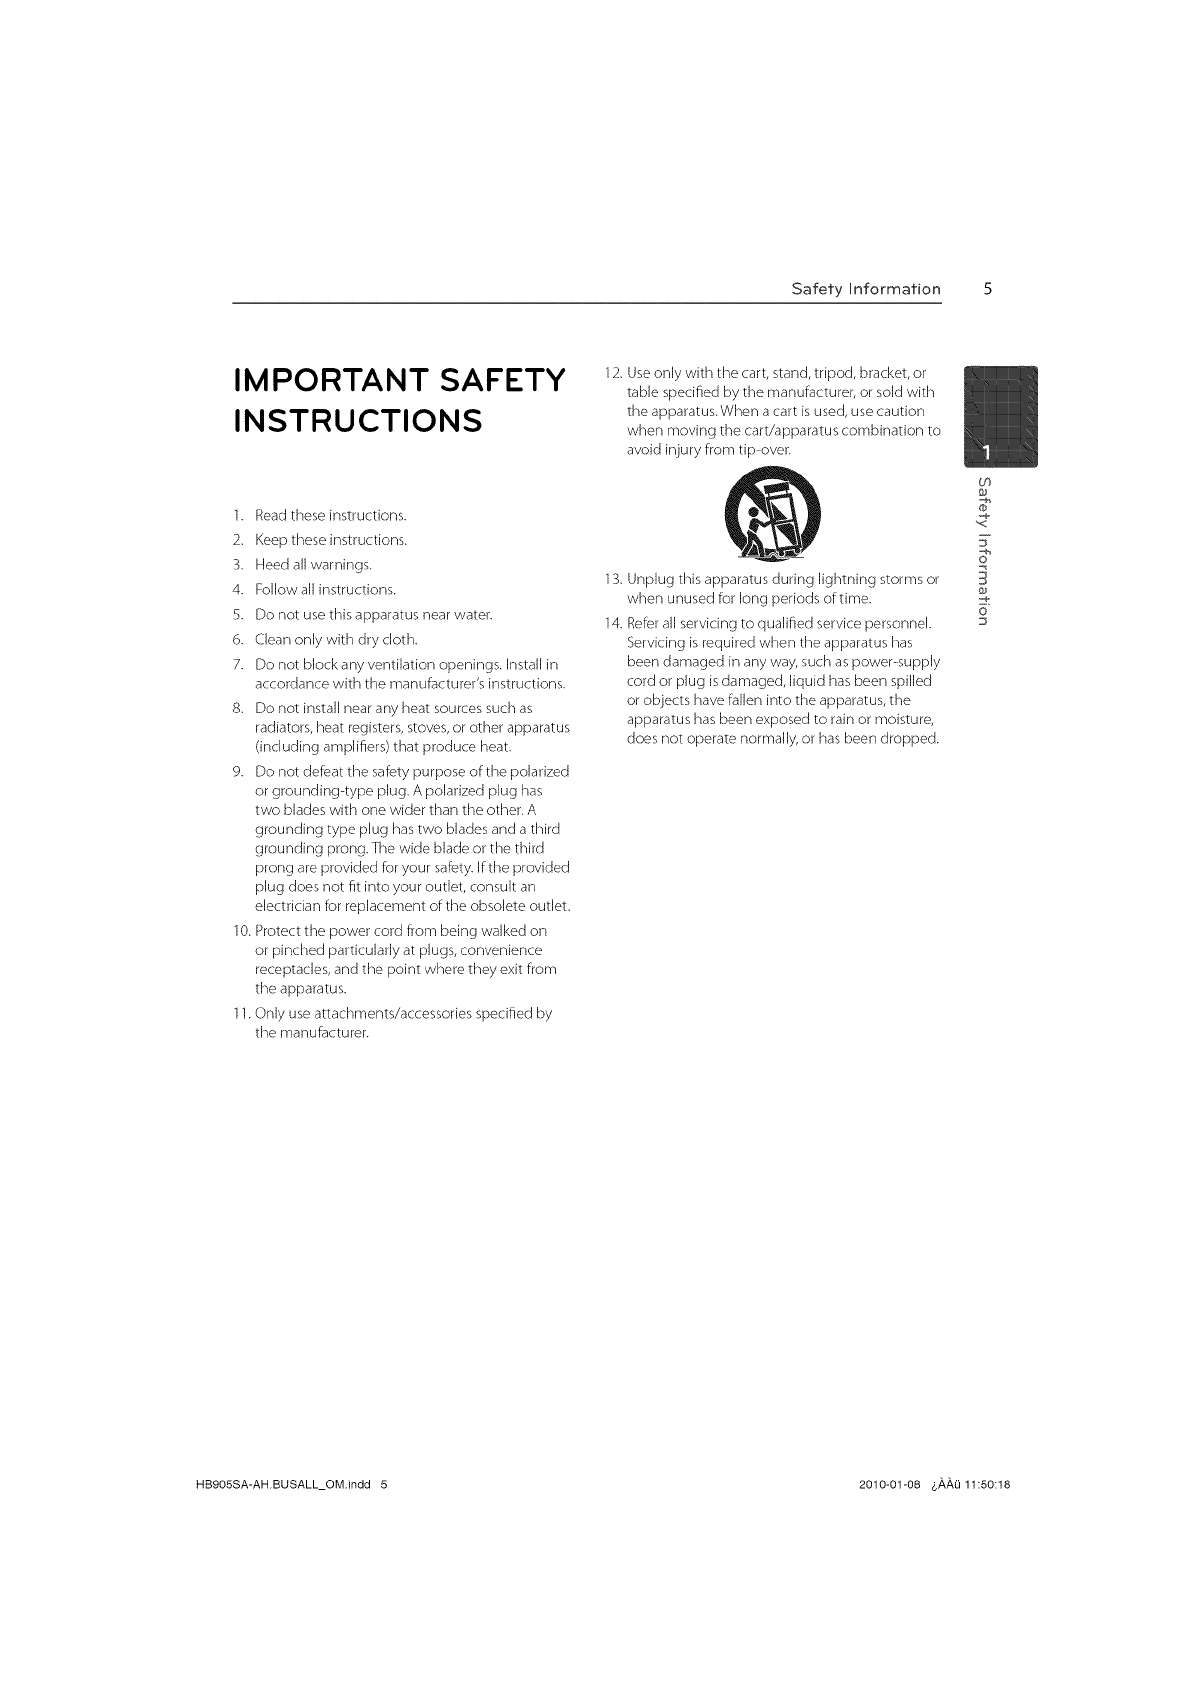
12. Use only with the cart, stand, tripod, bracket, or
table specified by the manufacturer, or sold with
the apparatus.When a cart is used, use caution
when moving the cart/apparatus combination to
avoid injury from tip-over.
13. Unplug this apparatus during lightning storms or
when unused for long periods of time.
14. Refer all servicing to qualified service personnel.
Servicing is required when the apparatus has
been damaged in any way, such as power-supply
cord or plug is damaged, liquid has been spilled
or objects have fallen into the apparatus, the
apparatus has been exposed to rain or moisture,
does not operate normally, or has been dropped.
to
,<
F
o
HB905SA-AH.BUSALL_OM.indd 5 2010-01-08 &,&,,&,Q11:50:18
Contents
1
Safely Informafion
2 Cautions and Warnings
Preparation
8 Introduction
8 About the "(_)" Symbol
Display
S Symbols Used in this
Manual
9 Supplied Accessories
9 Playable Discs
11 File compatibility
12 Regional Code
12 AVCHD (Advanced Video
Codec High Definition)
12 Certain System
Requirements
12 Compatibility Notes
13 Remote control
14 Front panel
15 Rear panel
16 Speaker Connection
1.6 Attaching the speakers to
the player
17 Positioning the system
18 Connecting to Your TV
1S HDMI Connection
19 What is SIMPLINK?
20 Component Video
Connection
20 Video Connection
21 Resolution Setting
21 Connections with external device
21 Antenna connection
22 AUX Connection
22 PORT. IN connection
23 OPTICAL IN 1/2 connection
23 HDMI IN connection
24 Connecting to your Home Network
24 Wired network connection
25 Wired Network Setup
28 USB device connection
30 Settings
30 Adjust the Setup Settings
30 [DISPLAY] Menu
32 [LANGUAGE] Menu
32 [AUDIO] Menu
33 [LOCK] Menu
34 [NETWORK] Menu
35 [OTHERS] Menu
37 Sound Effect
HB905SA-AH.BUSALL_OM.indd 6 2010-01-08 &,_,,_,Q11:50:
38 General Playback
40 Advanced Playback
43 On-Screen display
46 Enjoying BD-LIVE
47 Playing a movie file and VR disc
49 Viewing a photo
51 Listening to music
54 Playing the iPod
56 Radio Operations
56 Listening to the radio
56 Presetting the Radio
Stations
56 Deleting all the saved
stations
56 Improving poor FM
reception
57 Using NetCast TM Entertainment
Access
57 Using Netflix
60 VUDU
63 CinemaNow
67 YouTube TM
70 Enjoying Pandora internet
radio
73 Picasa TM Web Albums
76 Using the AccuWeather
6
Troubleshooting
79 General
80 Picture
80 Sound
81 Network
7
Appendix
82 Controlling a TV with the supplied
remote control
82 Setting up the remote to
control your TV
83 Area Code List
84 Language code List
85 Network Software Update
85 Network update notification
85 Software Update
87 Available resolution according to
the resolution setting
88 Trademarks and Licenses
90 Specifications
92 Important Information Relating to
Network Services
93 Open source software notice
94 Gracenote ® End User License
Agreement
78 Notes on Discs
78 Handling the Unit
8
Warranty
95 Warranty
HB905SA-AH.BUSALL_OM.indd 7 2010-01-08 &AA{) 11:50:1
8 Preparation
2
Preparation
Introduction
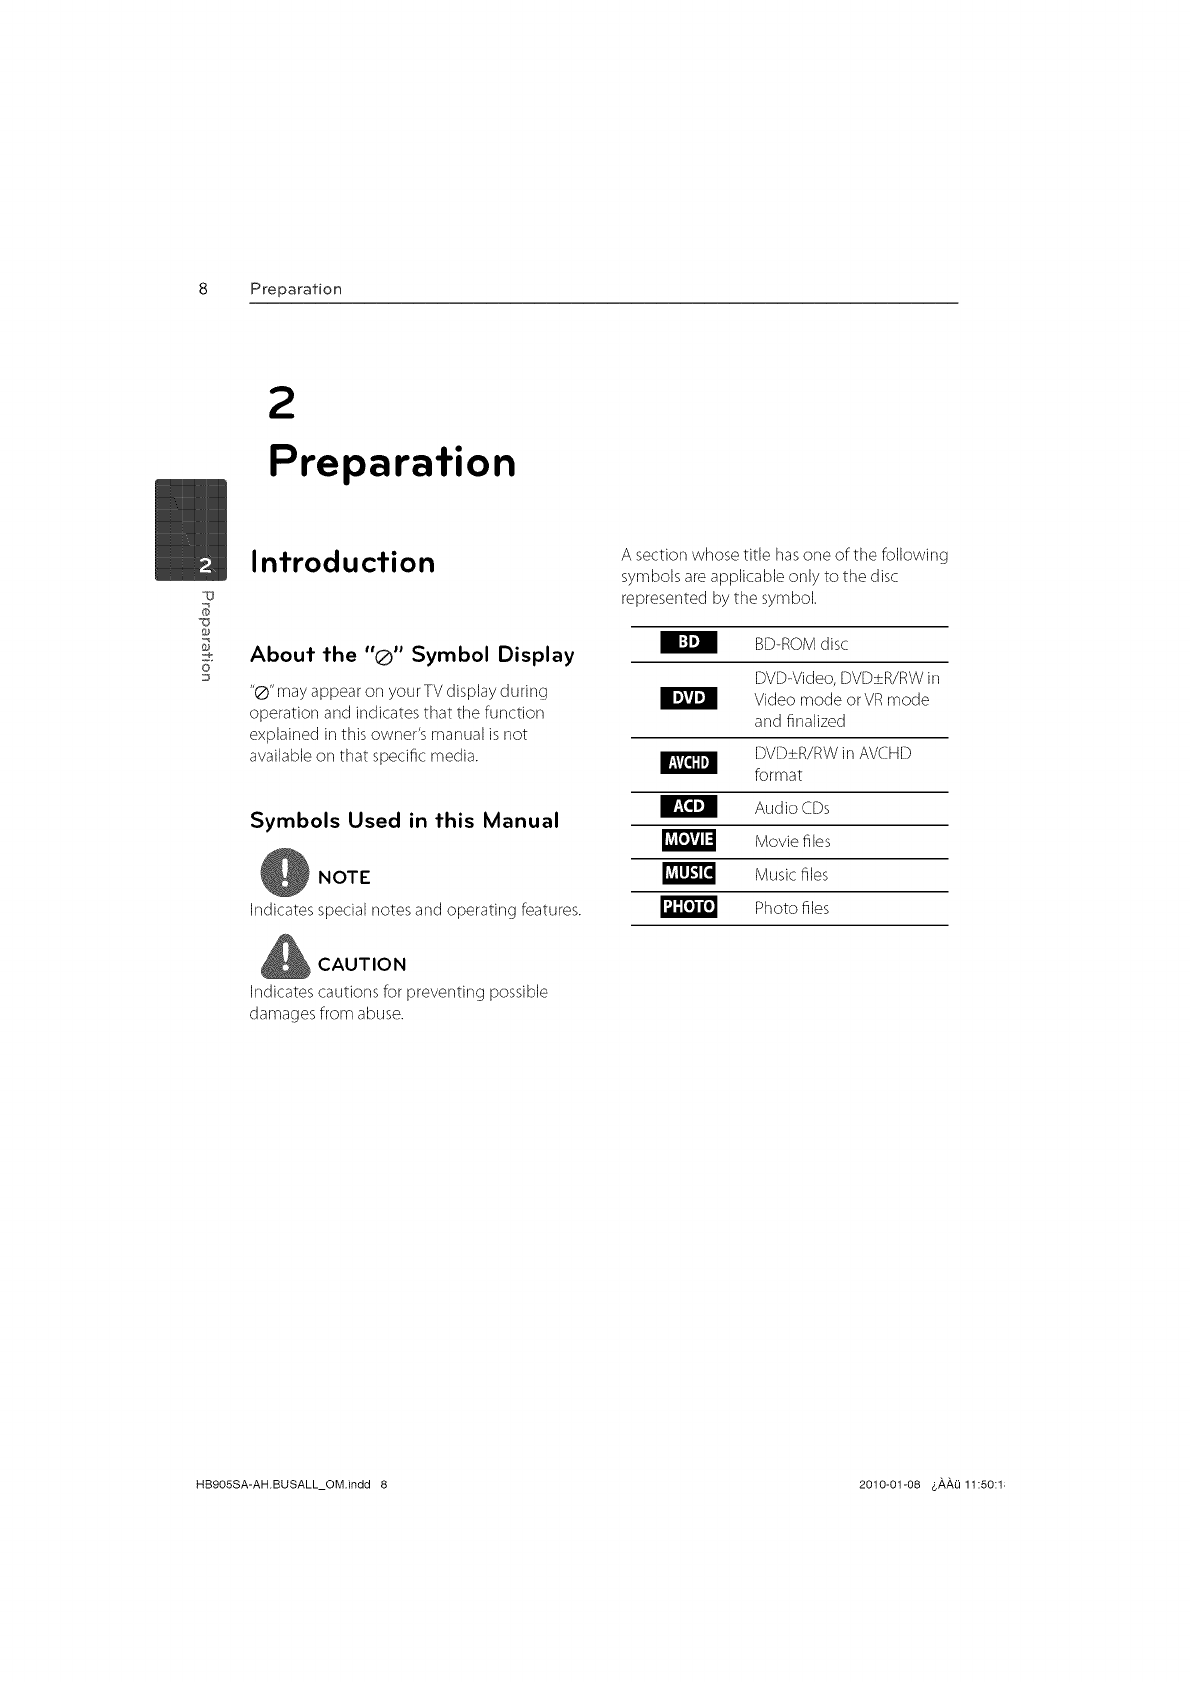
About the "®" Symbol Display
"®" may appear on your TV display during
operation and indicates that the function
explained in this owner's manual is not
available on that specific media.
I ID_V4D]
I r:\V['lll,]
Ir:T,ID]
Symbols Used in this Manual
JLv_[,lvl1:1
_Lv_Ll_'J[,I
NOTE
Indicates special notes and operating features.
A section whose title hasone of tile following
symbols are applicable only to the disc
represented by the symbol.
I:]D] BD-ROMdisc
DVD-Video,DVD_+R/RWin
Video mode or VRmode
and finalized
DVD_+R/RWin AVCHD
format
Audio CDs
Movie files
Music files
Photo files
i',,1:[,)I[,]
CAUTION
Indicates cautions for preventing possible
damages from abuse.
IqB9OSSA-AH.BUSALL_OM.indd 8 2010-01-08 4,_,_,0 11:50:1;

Preparation 9
Supplied Accessories
Video cable (1)
[
Remote control (1)
FM anterma (1)
Color<oded Speaker
Cables(6)
Batteries (2)
AM anterma (1)
Playable Discs
Blu-rayDisc
8/,-r_yo,-sc - Discssuch as movies that carl
be purchased or rented.
BD-R/REdiscs that contain,
Movie, Musicor Photo files.
DVD-VIDEO
..... 8 /12cm (3.2/4.7 inches) disc
Discssuch asmovies that carl be
purchased or rented.
DVD±R
8/12cm (32/4.7 inches) disc
Video mode and finalized only
Supports the dual layer disc
DVD_R aJSO
FinalizedAVCHDformat
DVD±Rdiscsthat contain
Movie, Musicor Photo files
DVD-RW
RW 8/12cm (3.2/4.7 inches) disc
VRmode, Video mode and
finalized only
FinalizedAVCHDformat
DVD-RWdiscsthat contain
Movie, Musicor Photo files.
DVD+RW
.............. 8 /12cm (3.2/4.7 inches) disc
Video mode and finalized only
AVCHDformat
FinalizedAVCHDformat
DVD+RWdiscs that contain
Movie, Musicor Photo files.
Audio :D
............ 8 /12cm (3.2/4.7 inches) disc
Audio CDsor CD-Rs/CD-RWs
in audio CD format
DiGiTAL AUDIO
CD-R/RW
8/12cm (S.2/4.7 inches) disc
CD-R/RWdiscs that contain
audio titles, Movie, Music or
Photo files.
S3_
6"
HB9OSSA-AHBUSALL_OMindd 9 2010-01-08 4,_,_,Li11:50:1;
10 Preparation
qJ
HB905SA-AH.BUSALL_OM.indd 10 2010-01-08 &,_,,_,Q11:50:2(
Preparation 11
File compatibility
Overall
Available File extensions:
"jpg","j peg",".png",".avi",".divx",".rnpg",".mpeg","
.mkv",'tm p4",'tm p3",'twma",'twav"
Some"wav"files are not supported on this
player.
The file name is limited to 180 characters.
Depending on tile sizeand number of tile
files, it maytake several minutes to readthe
contents on the media.
Maximum Files/Folder: Lessthan 2000(total
number of files and folders)
CD-R/RW, DVD_+R/RW,BD-R/RE Format:
ISO9660+JOLIET,UDF and UDFBridge format
Video files
Available resolution size:
Less than 1920 x 1080 (W x H) pixels
Playable subtitle: SubRip (.srt/.txt), SAMI
(.smi), SubStation Alpha (.ssa/.txt), MicroDVD
(.sub/.txt), VobSub (.sub), SubViewer 1.0 (.sub),
SubViewer 2.0 (.sub/.txt), TMPlayer (.txt), DVD
Subtitle System (.txt)
Playable Codec format: "DIVX3.xx", "DIVX4.
xx", "DIVXS.xx", "XVID", "DIVX6.xx" (Stand ard
playback only), H.264/MPEG-4 AVE, MPEG1 SS,
MPEG2 PS,MPEG2 TS
Playable Audio format: "Dolby Digital", "DTS",
"MP3", "WMA", "AAC", "AC3"
Not all tile WMA and AAC Audio format is
compatible with this unit.
Sampling frequency:
within 32 kHz to 48 kHz (WMA),
within 16 kHz to 48 kHz (MP3)
Bit rate:
within 20 kbps to 320 kbps (WMA),
within 32 kbps to 320 kbps (MP3)
Audio files
Sampling frequency:
within 8 kHz to 48 KHz(WMA),
within 11kHzto48 kHz(MP3)
Bit rate:
within 8 kbps to 320 kbps (WMA, MP3)
Photo files
Recommended size:
Lessthan 4,000x 3,000x 24 bit/pixel
Lessthan 3,000x 3,000x 32 bit/pixel
Progressiveand Iosslesscompression photo
image files are not supported.
6"
HB905SA-AH.BUSALL_OM.indd 11 2010-01-08 4,#,#,L111:50::
12 Preparation
_o
S3_
-e
Regional Code
This unit hasa regional code printed on the
rearof the unit. This unit carl play only BD-ROM
or DVD discs labeled same as tile rearof the
unit or "ALL't
AVCHD (Advanced Video Codec
High Definition)
This player carl playback AVCHDformat
discs.Thesediscsare normally recorded and
used in camcorders.
The AVCHDformat is a high definition
digital video camera format.
The MPEG4 AVC/H.264format iscapable
of compressing images at higher eMciency
than that of the conventional image
compressing format.
SomeAVCHDdiscs usethe"x.v.Color"
format.
This player carl playback AVCHDdiscs using
"x.v.Color"format.
SomeAVCHDformat discs may not play,
depending on the recording condition.
AVCHDformat discs need to befinalized.
"x.v.Color"offersa wider color range than
normal DVDcamcorder discs.
Certain System Requirements
Forhigh definition video playback:
High definition display that has
COMPONENTor HDMI input jacks.
BD-ROMdisc with high definition content.
HDMI or HDCPcapable DVIinput on your
display device is required for some content
(asspecified by disc authors).
Forup-conversion of standard definition
DVD,a HDMIor HDCPcapable DVIinput
on your display device is required for copy
protected content.
Compatibility Notes
BecauseBD-ROMis a new format,
certain disc, digital connection and other
compatibility issuesare possible. If you
experience compatibility problems, please
contact an authorized Customer Service
Center.
Viewing high-definition content and up-
converting standard DVD content may
require a HDMl<apable input or HDCP-
capable DVIinput on your display device.
Some BD-ROMand DVDdiscs may restrict
the useof some operation commands or
features.
You carl use a USBdevice that is used
to store some disc related information,
including downloaded omline content. The
disc you are using will control how long this
information isretained.
HB9OSSA-AH.BUSALL_OM.indd 12 2010-01-08 4,_,_,0 11:50:;
Preparation 13
Remote control
s"
H
s"
E!
El
i"
=]
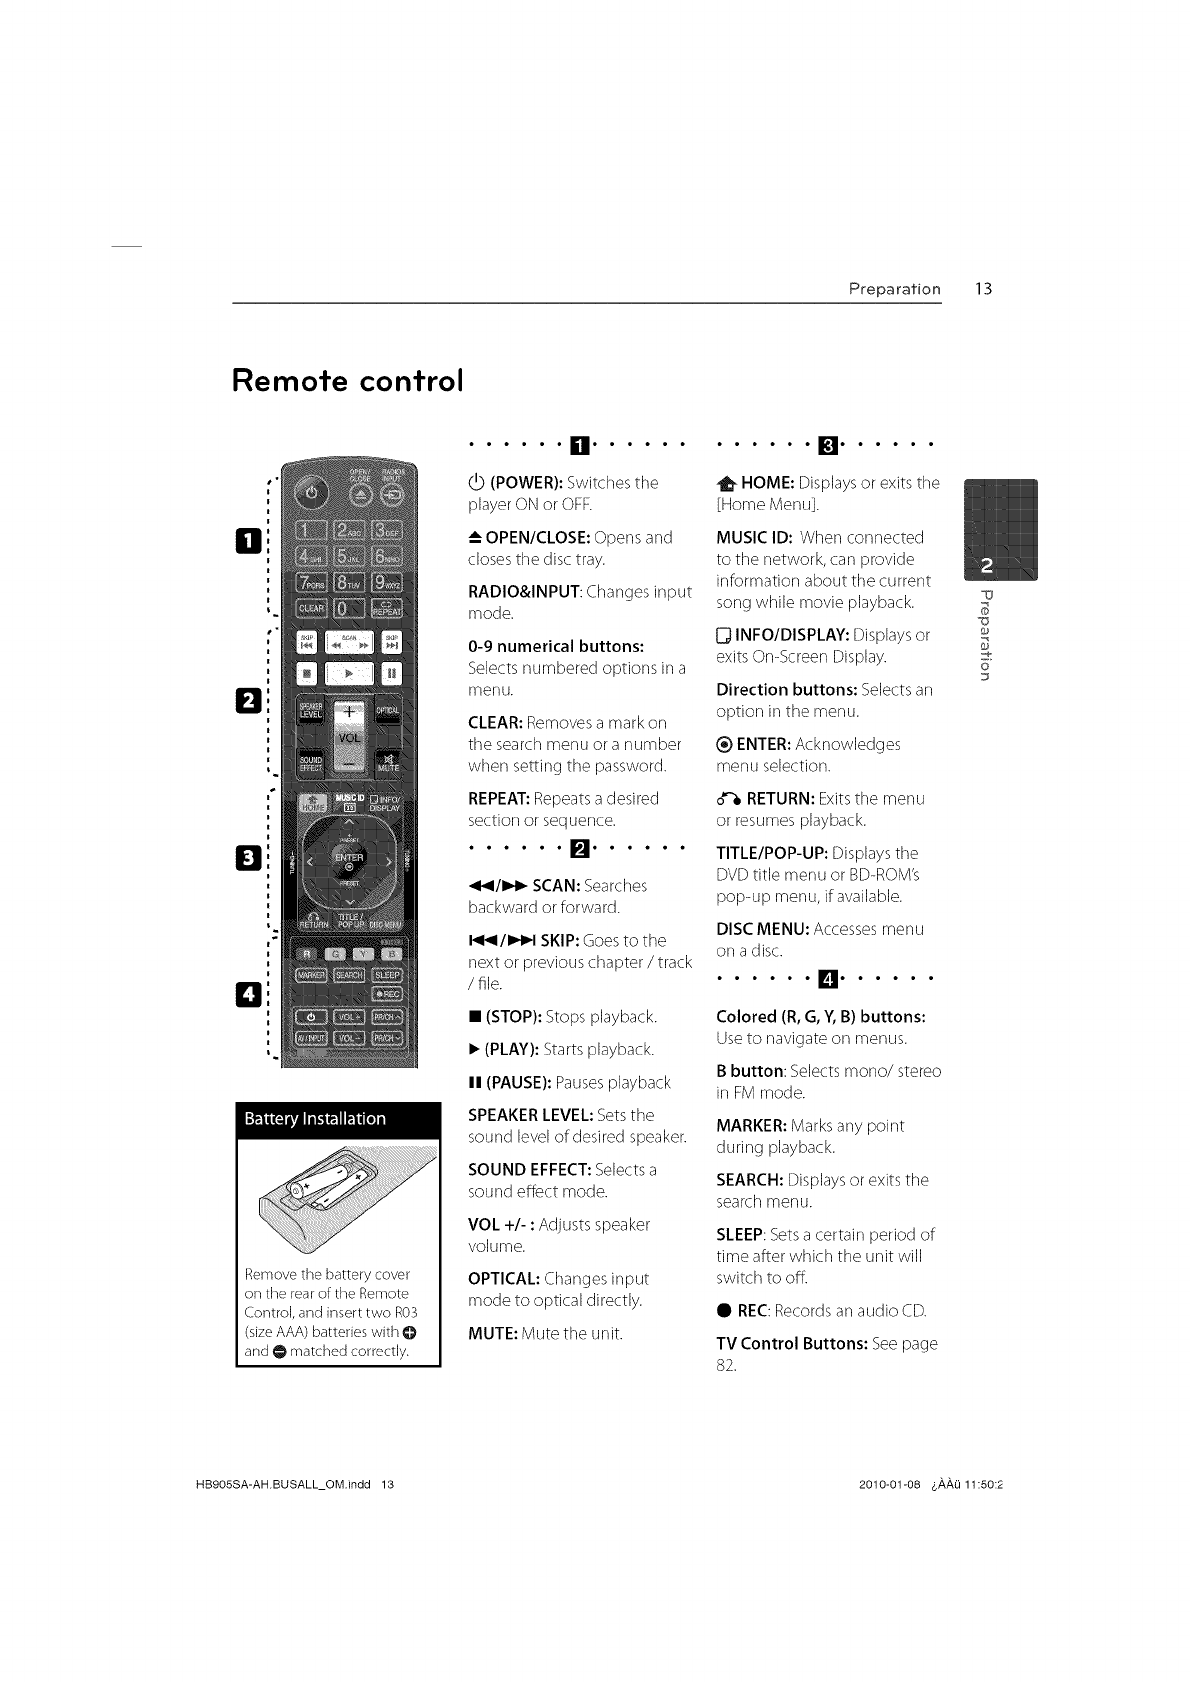
Remove the battery cover
on the rear o[ the Remote
Control, and insert two R03
(size AAA) batteries with @
and O matched correctly.
••••••n• •••••
(POWER):Switches the
playerON or OFR
OPEN/CLOSE:Opens and
closestile disc tray.
RADIO&INPUT: Changesinput
mode.
0-9 numerical buttons:
Selectsnumbered options in a
menu.
CLEAR:Removes a mark on
tile searchmenu or a number
when setting the password.
REPEAT:Repeatsa desired
section or sequence.
••••••[]• •••••
_1_1/1_1_SCAN: Searches
backward or forward.
I_1_111,,t_1SKIP:Goesto the
next or previous chapter /track
/file.
•(STOP): Stops playback.
•(PLAY): Starts playback.
II (PAUSE): Pauses playback
SPEAKER LEVEL: Sets the
sound level of desired speaker.
SOUND EFFECT: Selects a
sound effect mode.
VOL +/- : Adjusts speaker
volume.
OPTICAL: Changesinput
mode to optical directly.
MUTE: Mute the unit.
HOME: Displaysor exits the
[Home Menu].
MUSICID: When connected
to the network, carl provide
information about tile current
song while movie playback.
0 INFOIDISPLAY: Displaysor
exits On-Screen Display.
Direction buttons: Selectsan
option in the menu.
_) ENTER:Acknowledges
menu selection.
RETURN:Exitsthe menu
or resumes playback.
TITLE/POP-UP: Displaystile
DVDtitle menu or BD-ROM's
pop-up menu, if available.
DISCMENU: Accessesmenu
on a disc.
Colored (R, G,Y, B) buttons:
Useto navigate on menus.
B button: Selectsmono/stereo
in FM mode.
MARKER:Marksany point
during playback.
SEARCH:Displaysor exits the
searchmenu.
SLEEP:Setsa certain period of
time after which the unit will
switch to off.
• REC:Recordsan audio CD.
TV Control Buttons: See page
82.
6"
HB9OSSA-AH.BUSALL_OM.indd 13 2010-01-08 _,_,_,0 11:50:2
14 Preparation
Front panel
[] [] [] [] [] []
__ []
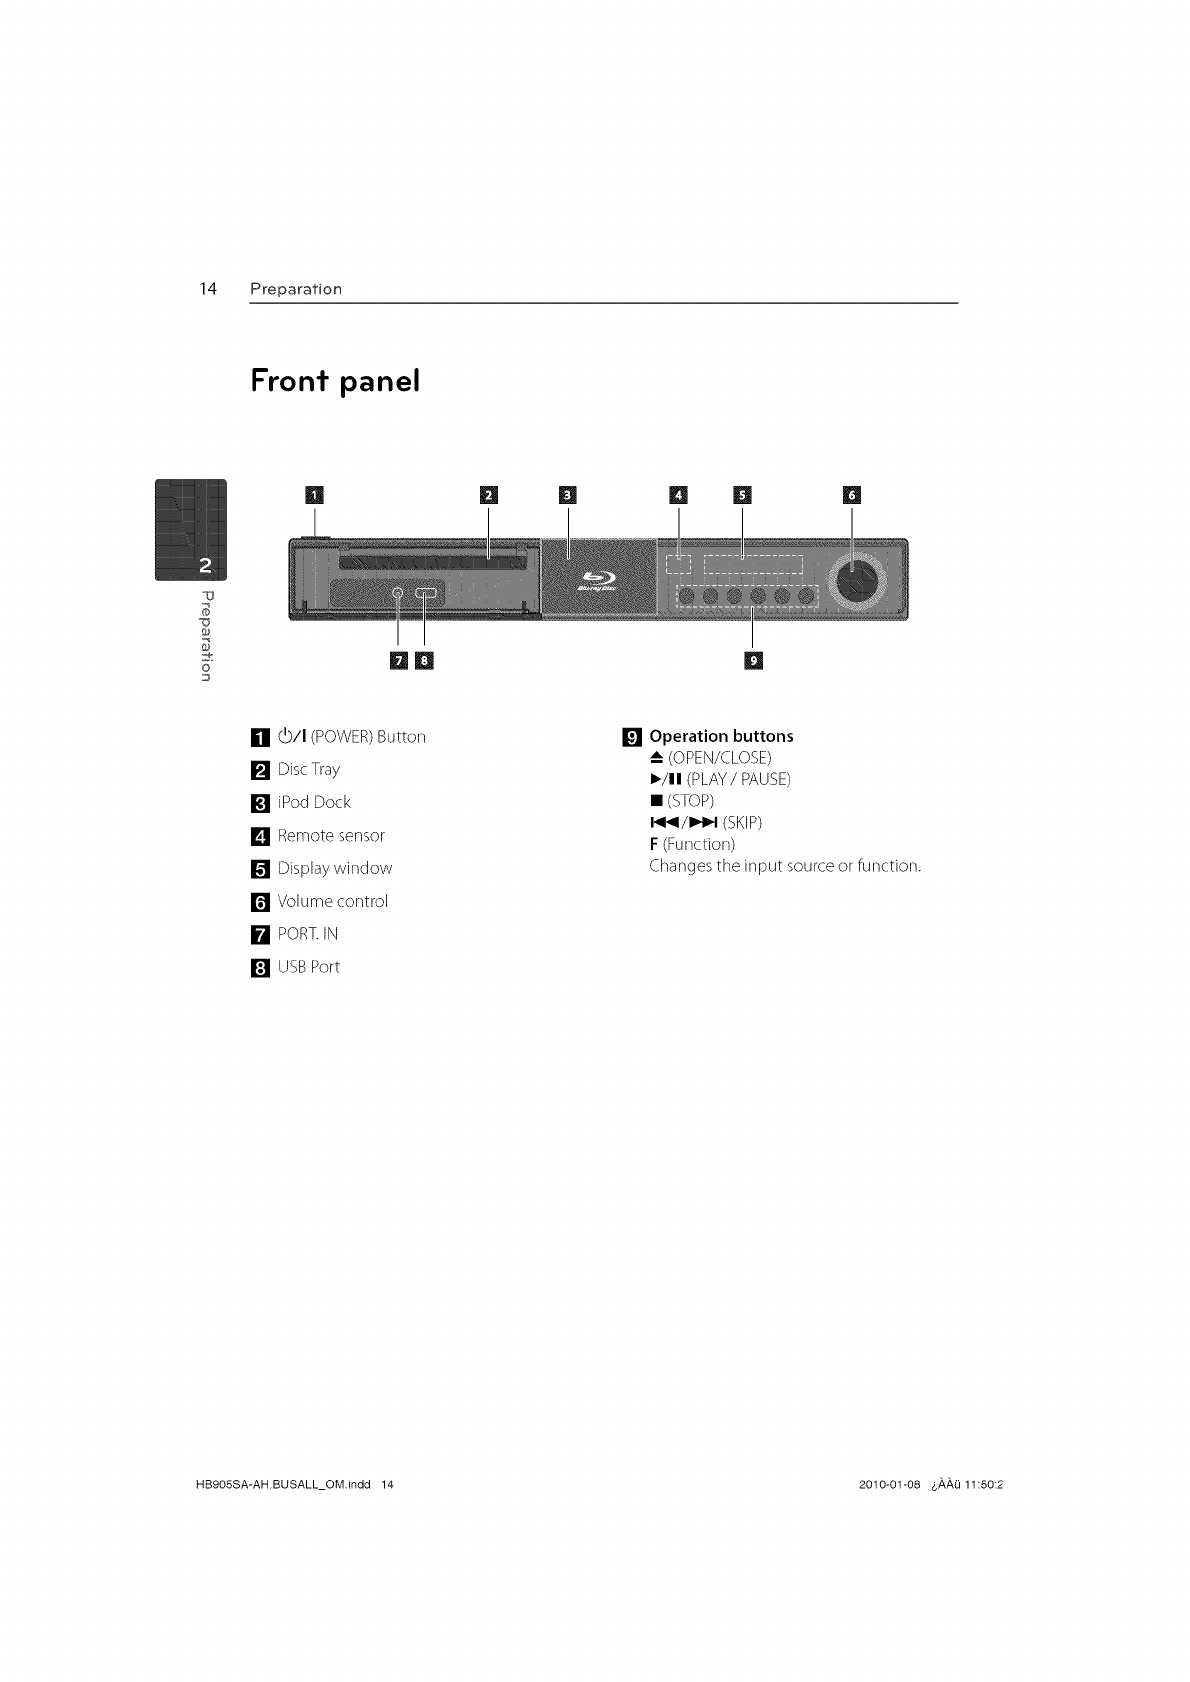
[] (b/I (POWER)Button
[] DiscTray
[] iPod Dock
] Remote sensor
[] Displaywindow
[] Volume control
[] PORT.IN
[] USBPort
[] Operation buttons
-_ (OPEN/CLOSE)
I_/11(PLAY/PAUSE)
• (STOP)
I_/I_1 (SKIP)
F(Function)
Changes the input source or function.
HB905SA-AH.BUSALL_OM.indd 14 2010-01-08 _,,&,,&,O11:50:2
Preparation 15
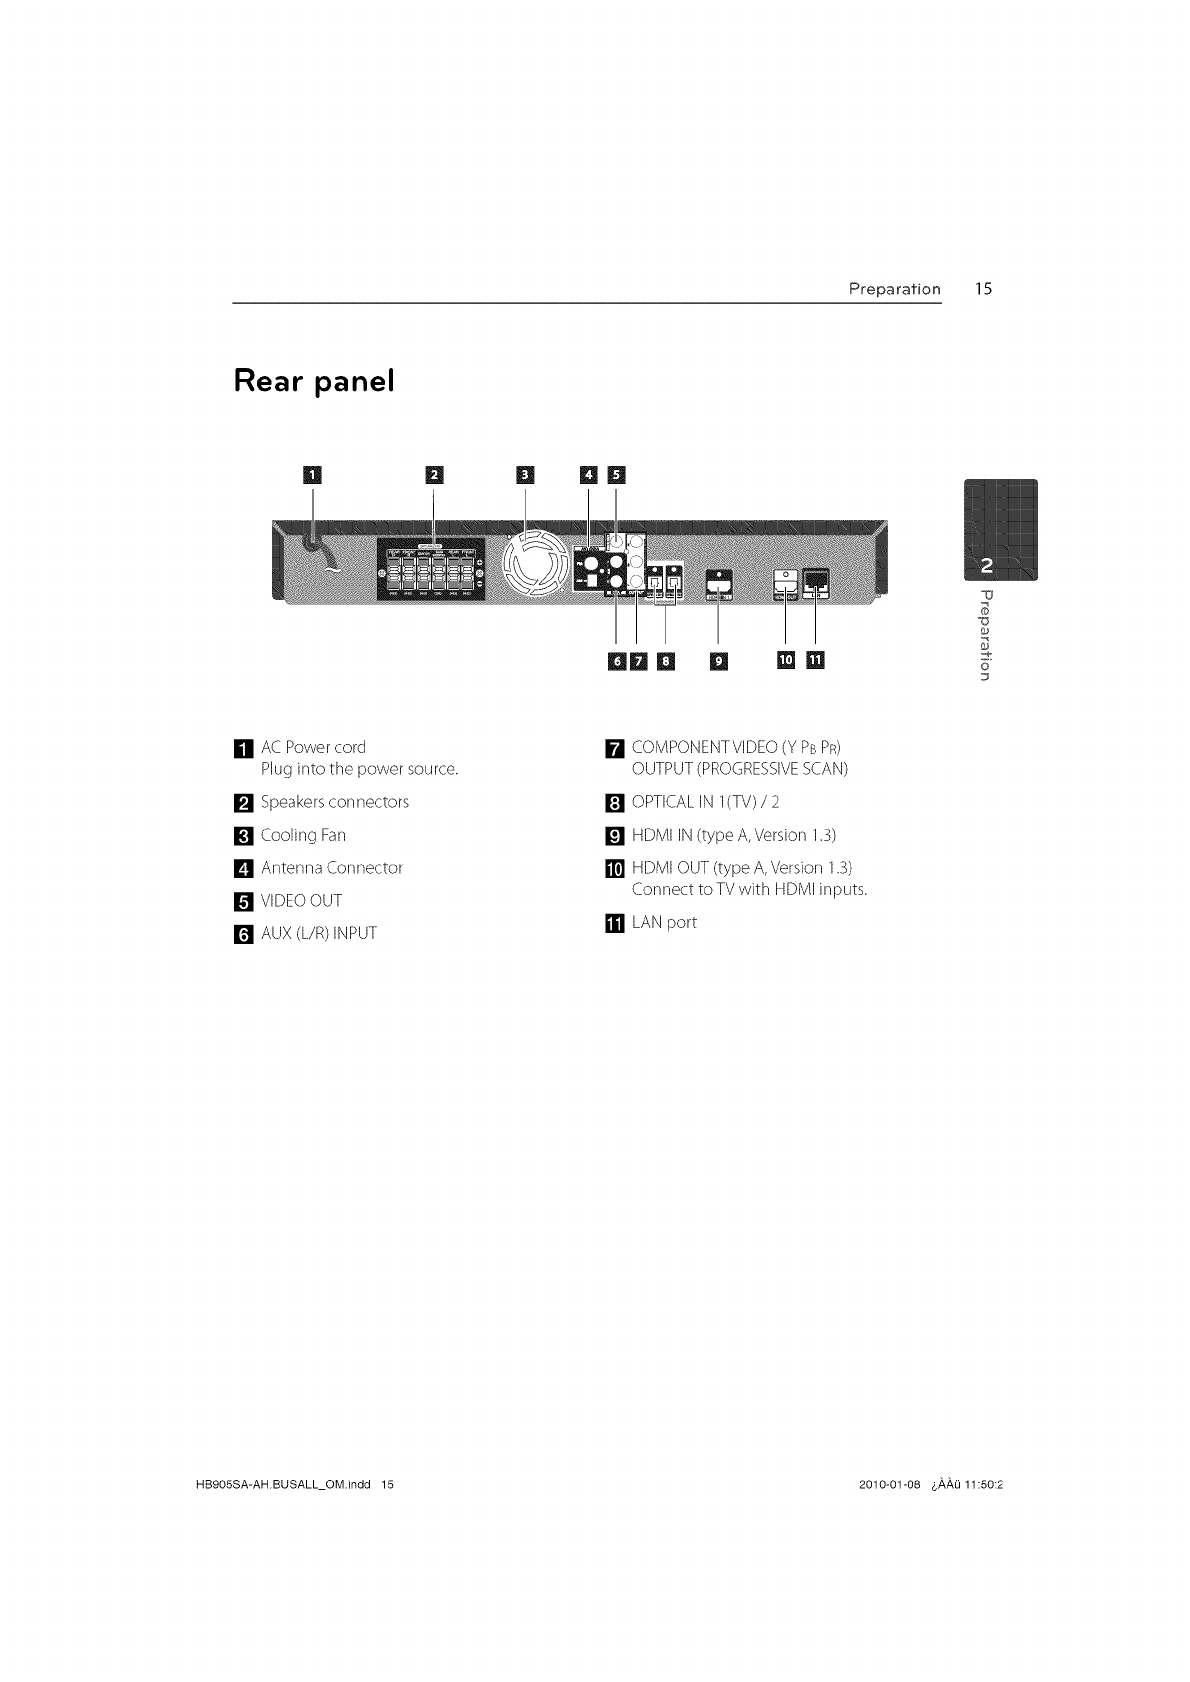
Rear panel
H n m nm
DmD D []in 6"
[] AC Power cord
Pluginto the power source.
[] Speakersconnectors
[] Cooling Fan
[] Ar_ter_naConnector
[] VIDEOOUT
[] AUX (L/R)INPUT
[] COMPONENTVIDEO(Y PBPR)
OUTPUT(PROGRESSIVESCAN)
[] OPTICALIN I(TV)/2
[] HDMI IN(type A, Version 1.3)
[] HDMI OUT (type A, Version 1.3)
Connect to TV with HDMI inputs.
[] LAN port
HB9OSSA-AH.BUSALL_OM.indd 15 2010-01-08 6#,#,0 11:50:2
16 installation
3
Installation
F
o
Speaker Connection
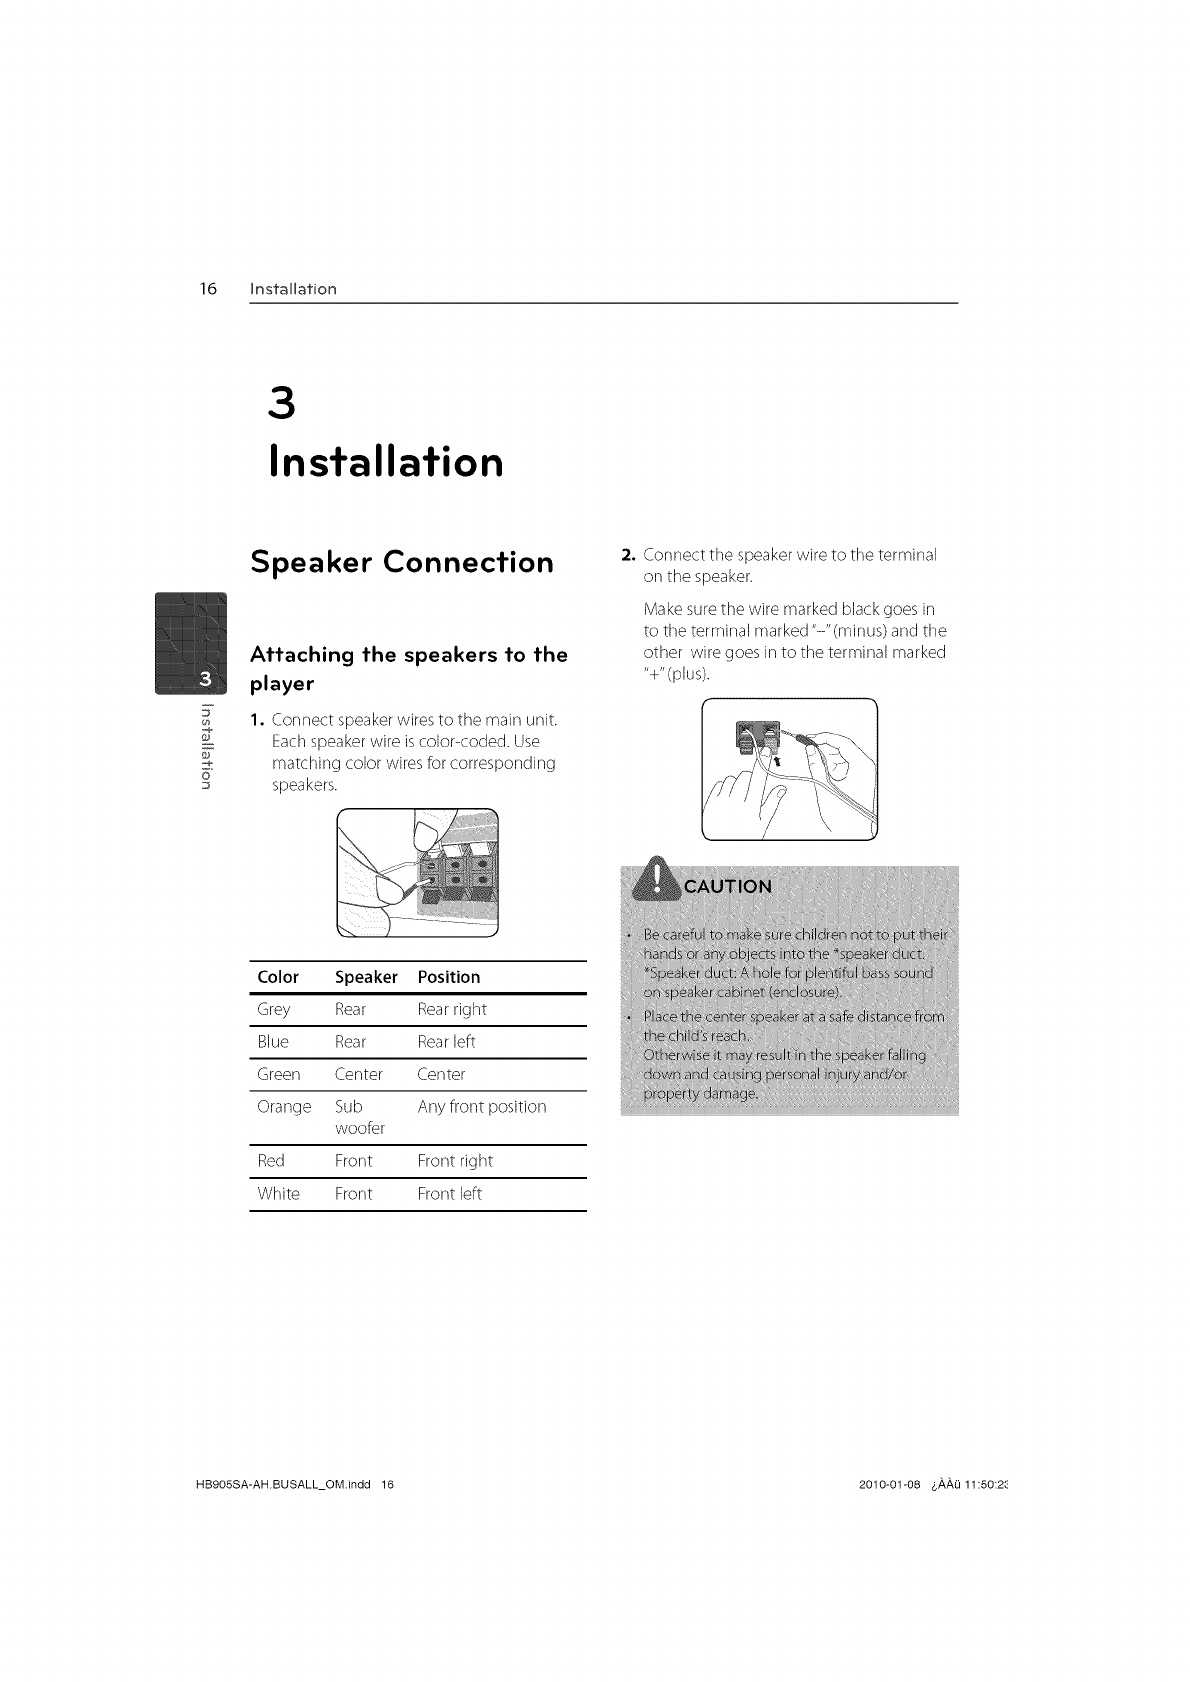
Attaching the speakers to the
player
I. Connect speakerwires to the main unit.
Eachspeaker wire is color<oded. Use
matching color wires for corresponding
speakers.
2. Connect tile speaker wire to tile terminal
on the speaker.
Make sure the wire marked black goes in
to the terminal marked "-"(minus) and the
other wire goes in to tile terminal marked
"+"(plus).
Color Speaker Position
Grey Rear Rearright
Blue Rear Rearleft
Green Center Center
Orange Sub Any front position
woofer
Red Front Front right
White Front Front left
fui! ss
k:
HB9OSSA-AH.BUSALL_OM.indd 16 2010-01-08 $#,#,1_11:50:28
installation 17
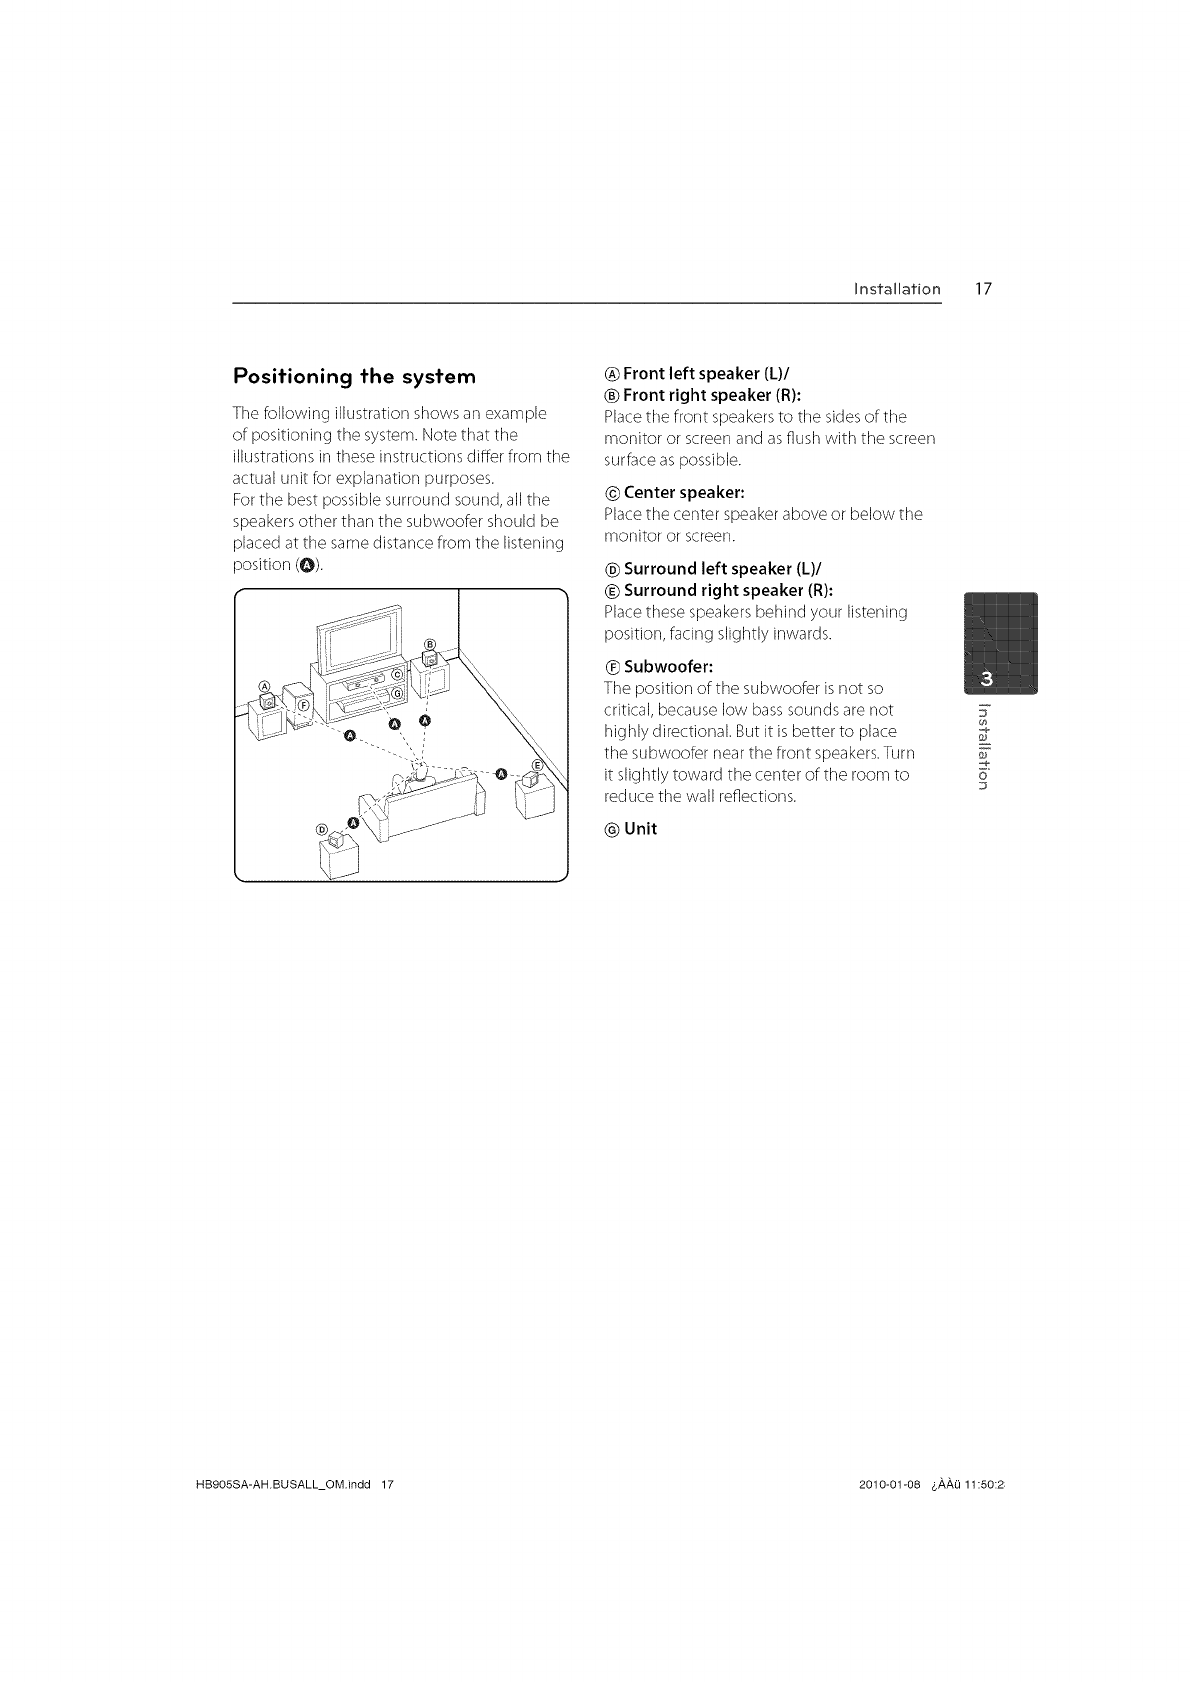
Positioning the system
The following illustration shows an example
of positioning the system. Note that the
illustrations in these instructions differ from tile
actual unit for explanation purposes.
Forthe best possible surround sound, all tile
speakersother than the subwoofer should be
placed at tile same distance from tile listening
position (@).
_) Front left speaker (L)/
® Front right speaker (R):
Place the front speakers to the sides of the
monitor or screen and as flush with the screen
surface as possible.
© Center speaker:
Placethe center speaker above or below the
monitor or screen.
© Surround left speaker (L)/
Surround right speaker (R):
Placethese speakers behind your listening
position, facing slightly inwards.
® Subwoofer:
The position of the subwoofer is not so
critical, because low basssounds are not
highly directional. But it is better to place
the subwoofer near the front speakers.Turn
it slightly toward the center of tile room to
reduce tile wall reflections.
@ Unit
7
o
HB905SA-AH.BUSALL_OM.indd 17 2010-01-08 &,a,,a,O11:50:2;
18 Installation
g
o
Connecting to Your TV
Make one of tile following cormections,
depending on the capabilities of your existing
equipment
HDMI cormection (pages 18-19)
Component Video connection (page 20)
Video connection (page 20)
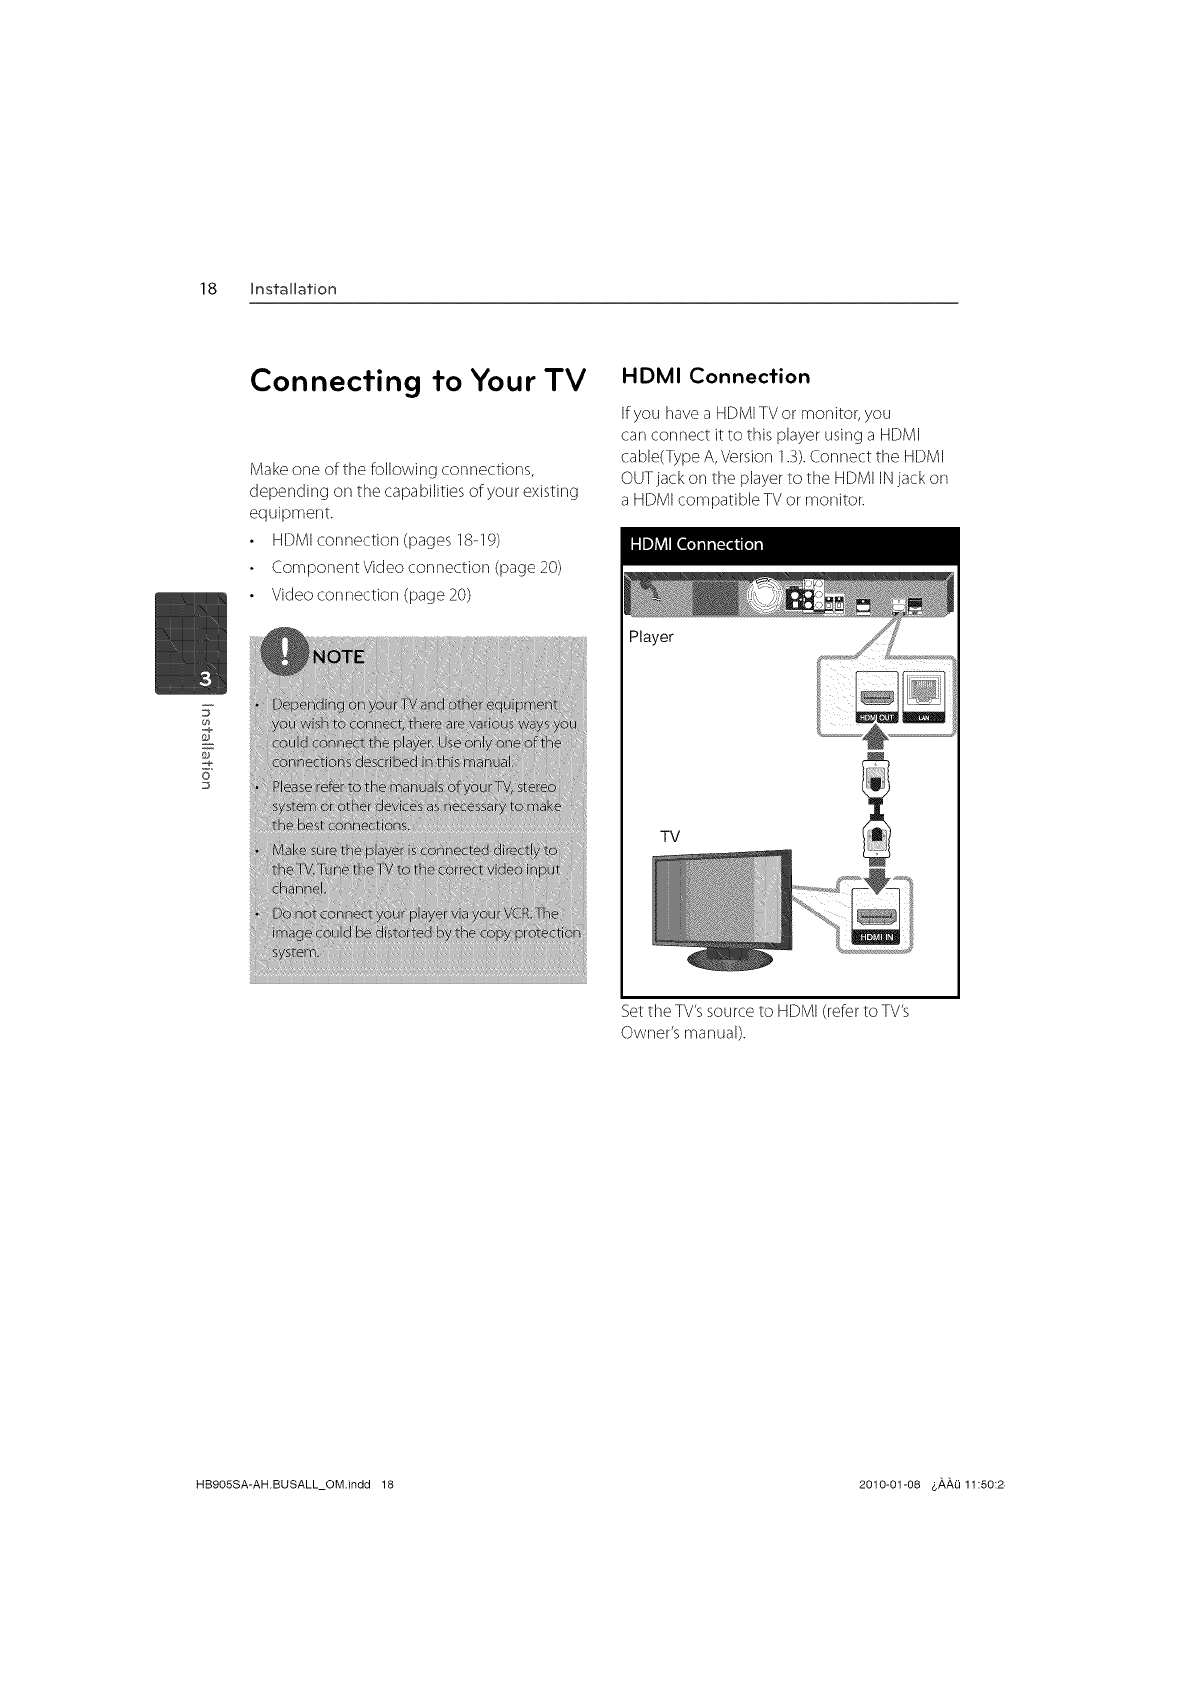
HDMI Connection
Ifyou [lave a HDMITVor monitor, you
carl connect it to this player using a HDMI
cable(Type A, Version 1.3).Connect tile HDMI
OUTjack on tile player to the HDMI INjack on
a HDMIcompatible TVor monitor.
Player
TV
Setthe TV'ssource to HDMI (referto TV's
Owner's manual).
HB905SA-AH.BUSALL_OM.indd 18 2010-01-08 &AAO 11:50:2
installation 19
What is SIMPLINK?
IITIPLInK
Some functions of this unit are controlled by
the TV's remote control when this unit and LG
TV's with SIMPLINK are connected through
HDMI connection.
Controllable functions by LGTV's remote
control; Play, Pause, Scan, Skip, Stop, Power Off,
etc.
Refer to tile TV owner's manual for tile details
of SIMPLINK function.
LGTV's with SIMPLINK function has tile logo as
shown above. 7
F
o
HB905SA-AH.BUSALL_OM.indd 19 2010-01-08 &,_,_Q 11:50:2,
20 Installation
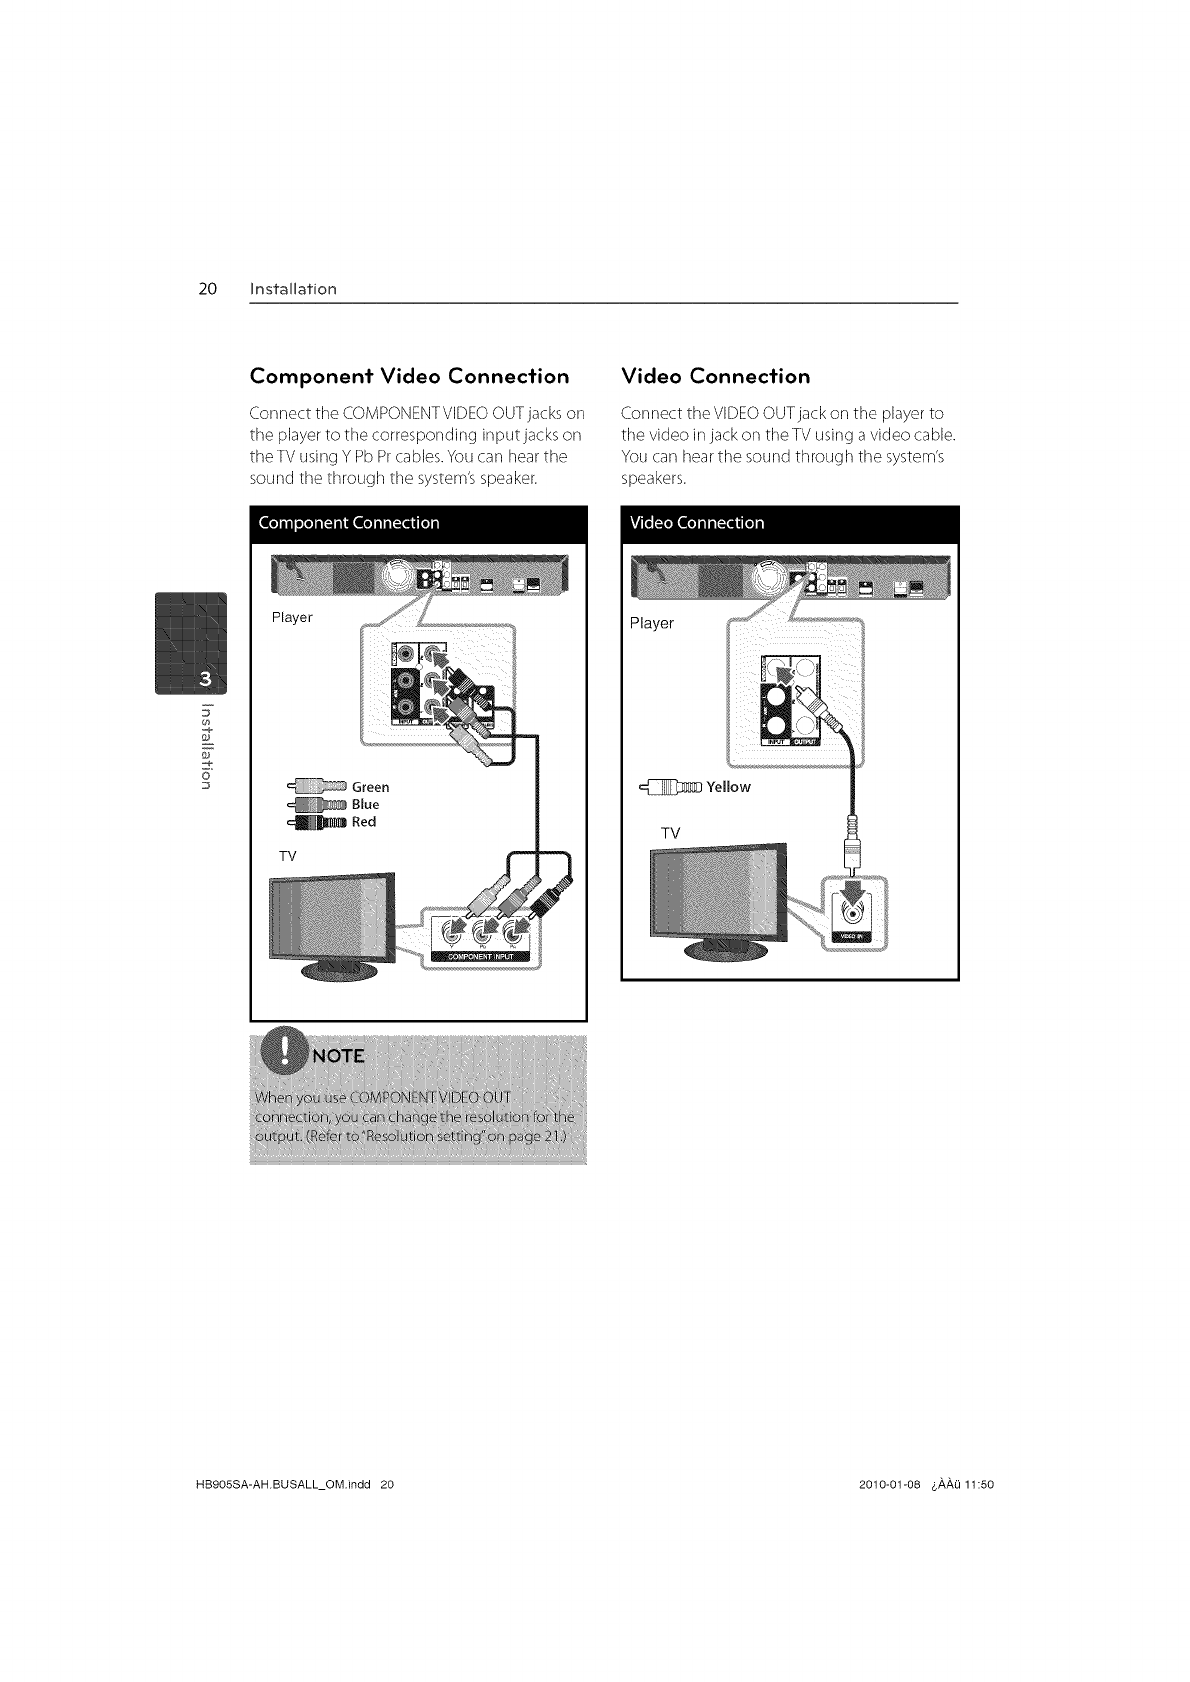
Component Video Connection
Connect the COMPONENTVIDEO OUTjacks on
the player to the corresponding input jacks on
the TV using Y Pb Pr cables. You carl hear the
sound tile through tile system's speaker.
Video Connection
Connect the VIDEOOUTjack on the player to
tile video in jack on theTV using a video cable.
You carl hear the sound through tile system's
speakers.
o
Player
Green
Blue
Red
TV
Player
=E]]_;ZD Yellow
TV
HB905SA-AH.BUSALL_OM.indd 20 2010-01-08 &,_,,_,Q11:50
Installation 21
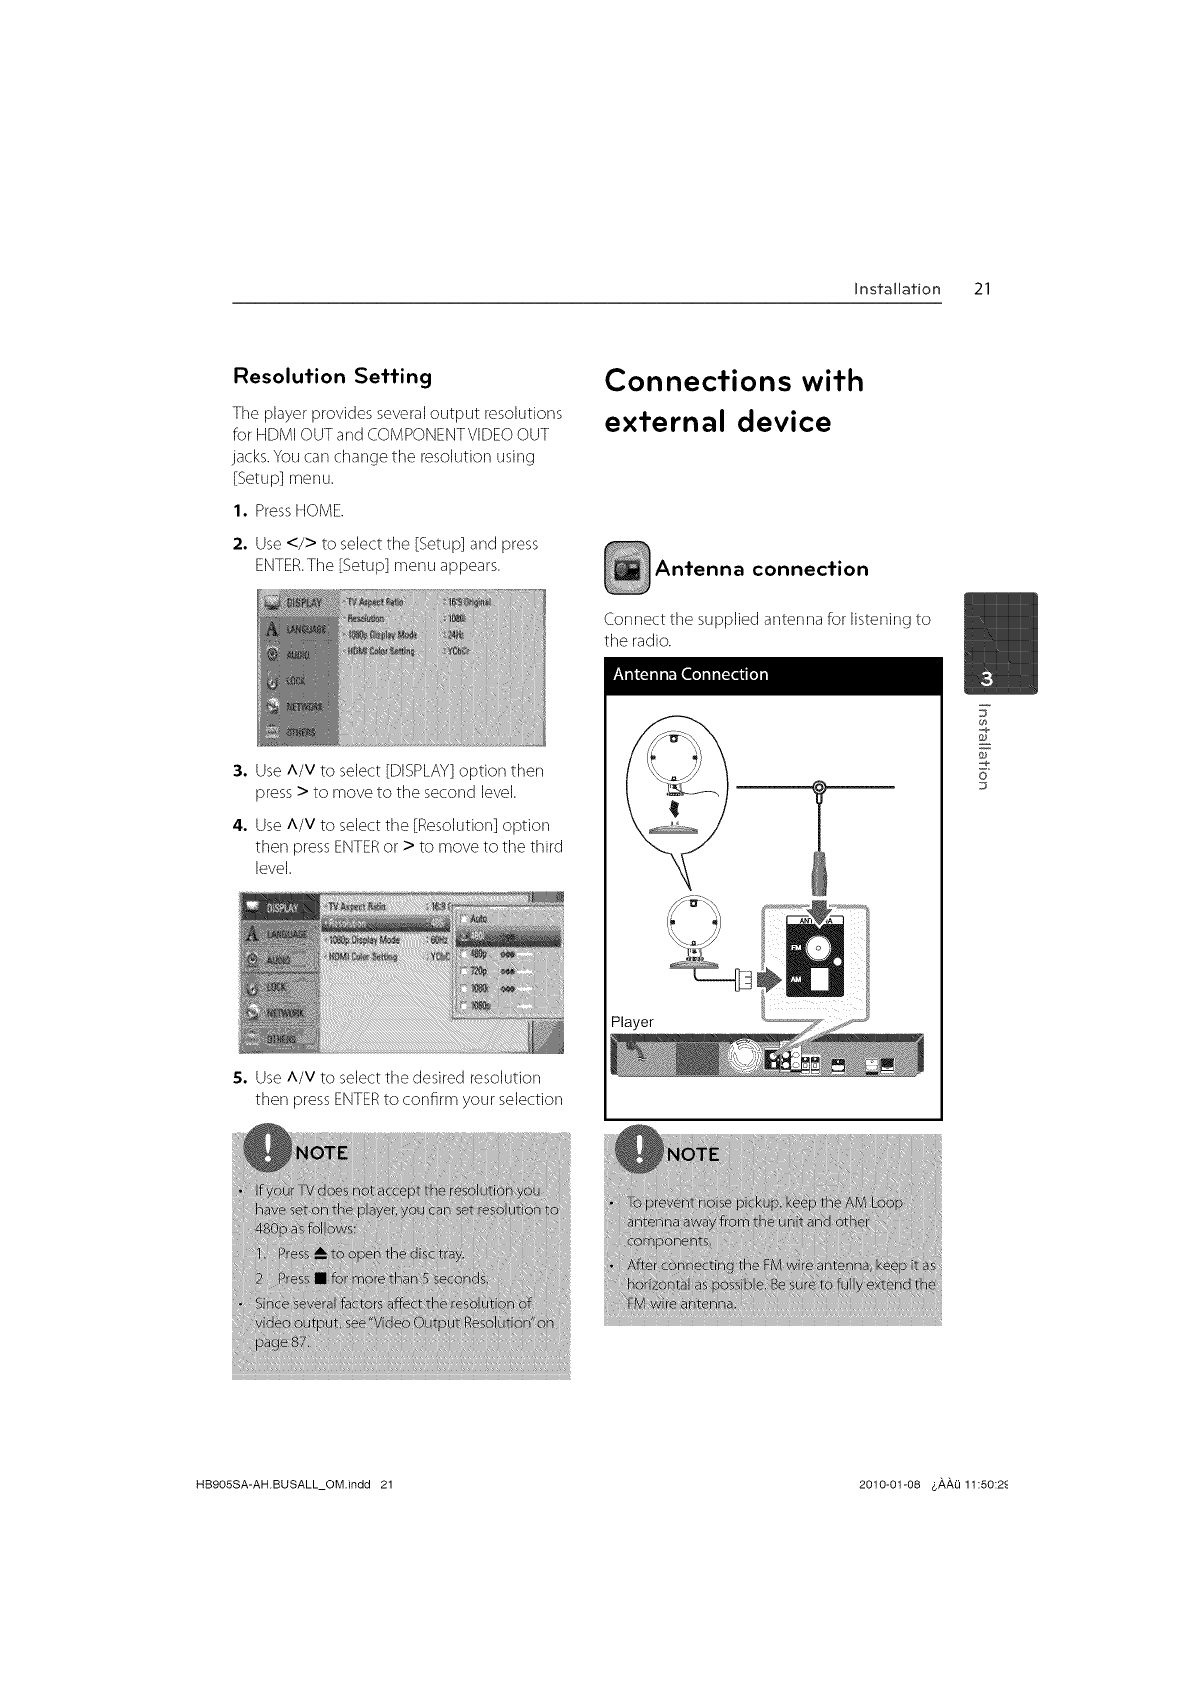
Resolution Setting
Tile player provides several output resolutions
for HDMI OUT and COMPONENTVIDEOOUT
jacks.You carl change the resolution using
[Setup] menu.
1, PressHOME.
2. Use </> to select tile [Setup] and press
ENTER.Tile [Setup] menu appears.
Connections with
external device
Antenna connection
Connect the supplied anterma for listening to
the radio.
3. Use A/V to select [DISPLAY] option then
press >to move to the second level.
4. Use A/V to select tile [Resolution] option
then press ENTERor > to move to tile third
level.
5. Use A/V to select tile desired resolution
then press ENTERto confirm your selection
7
F
o
D
HB9OSSA-AH.BUSALL_OM.indd 21 2010-01-08 4,#,#,Li11:50:2_
22 Installation
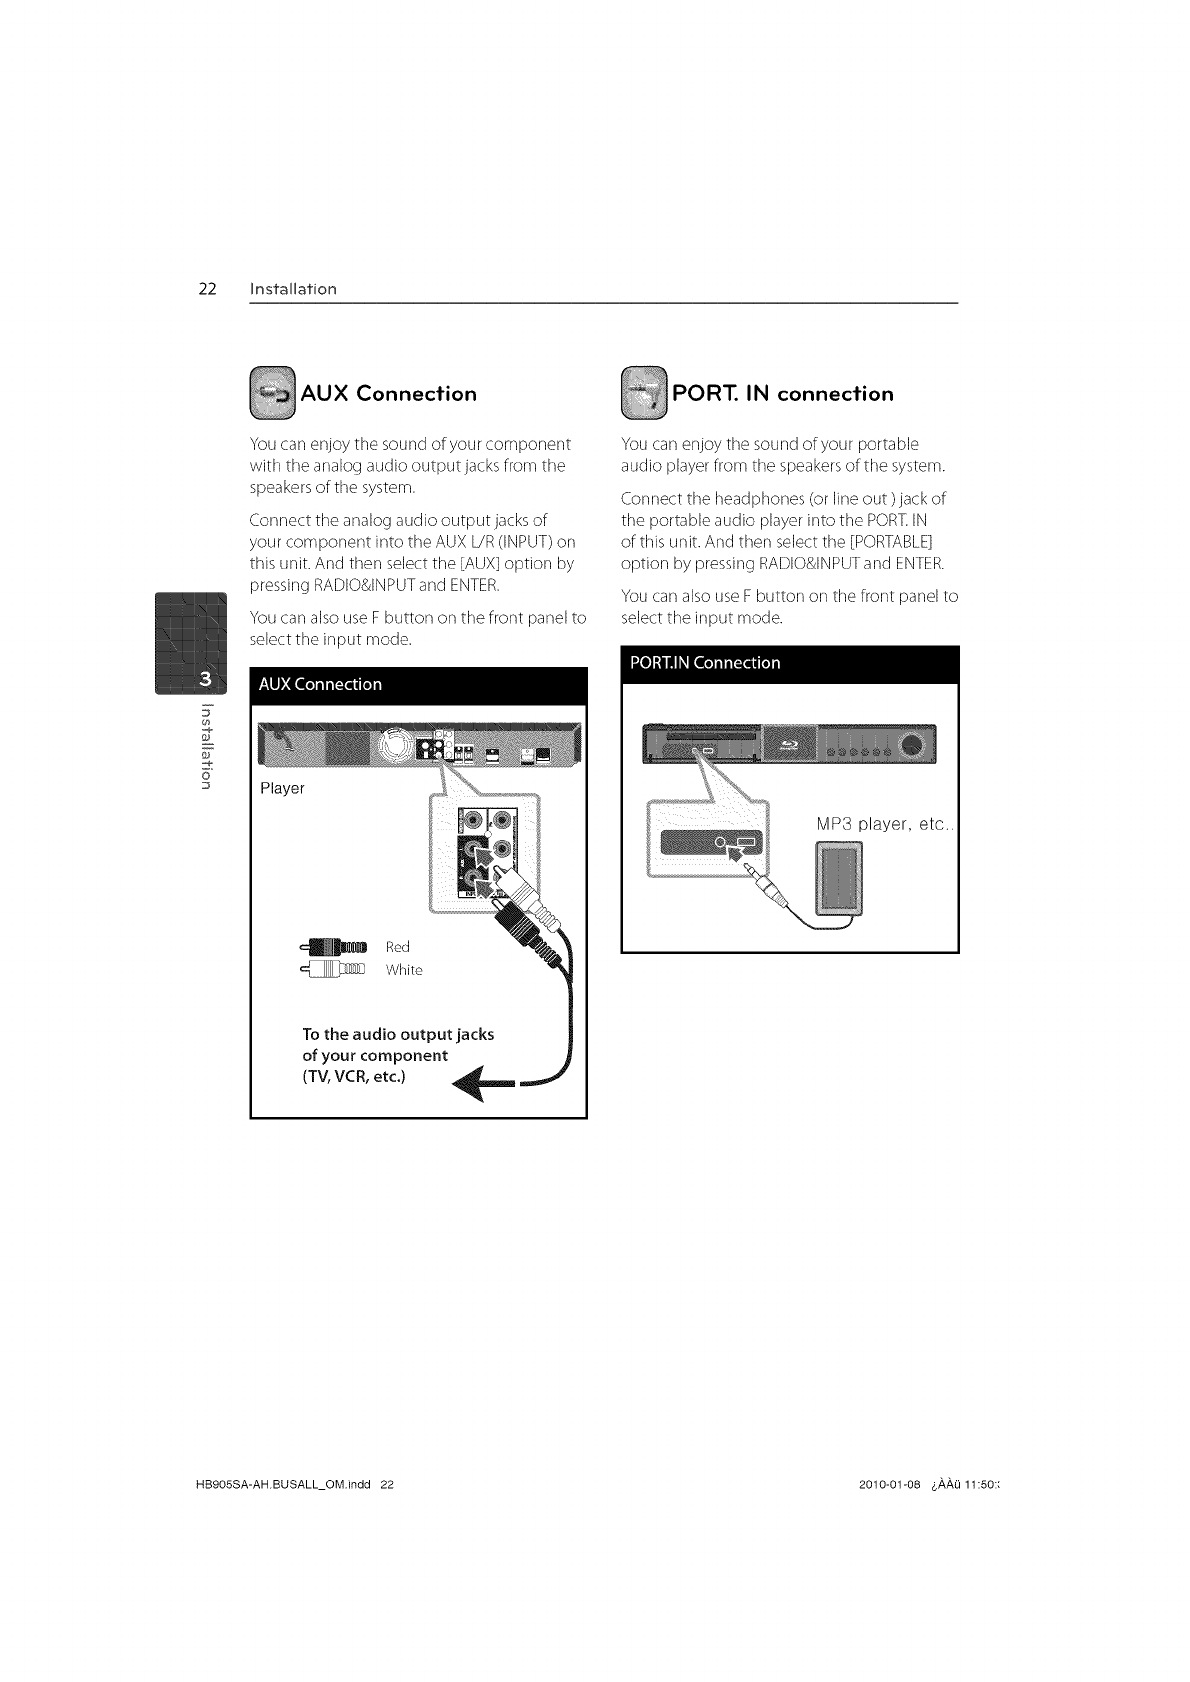
AUX Connection
You carl enjoy the sound of your component
with the analog audio outputjacks from the
speakersof tile system.
Connecttile analogaudiooutputjacksof
your componentinto the AUXL/R(INPUT)orl
this unit.Andthen selecttile [AUX]option by
pressirlgRADIO&INPUTandENTER.
You carl also use F button on the front panel to
selectthe input mode.
PORT. IN connection
You carl enjoy tile sound of your portable
audio playerfrom tile speakersof the system.
Connect the headphones (or line out )lack of
tile portable audio player into the PORT.IN
of this unit. And then selecttile [PORTABLE]
option by pressing RADIO&INPUTandENTER.
You carl also use F button on tile front panel to
select the input mode.
oPlayer
Red
White
To the audio output jacks
of your component
(TV, VCR, etc.)
MP3 player, etc..
HB905SA-AH.BUSALL_OM.indd 22 2010-01-08 &,a,,a,Q11:50::
Installation 23
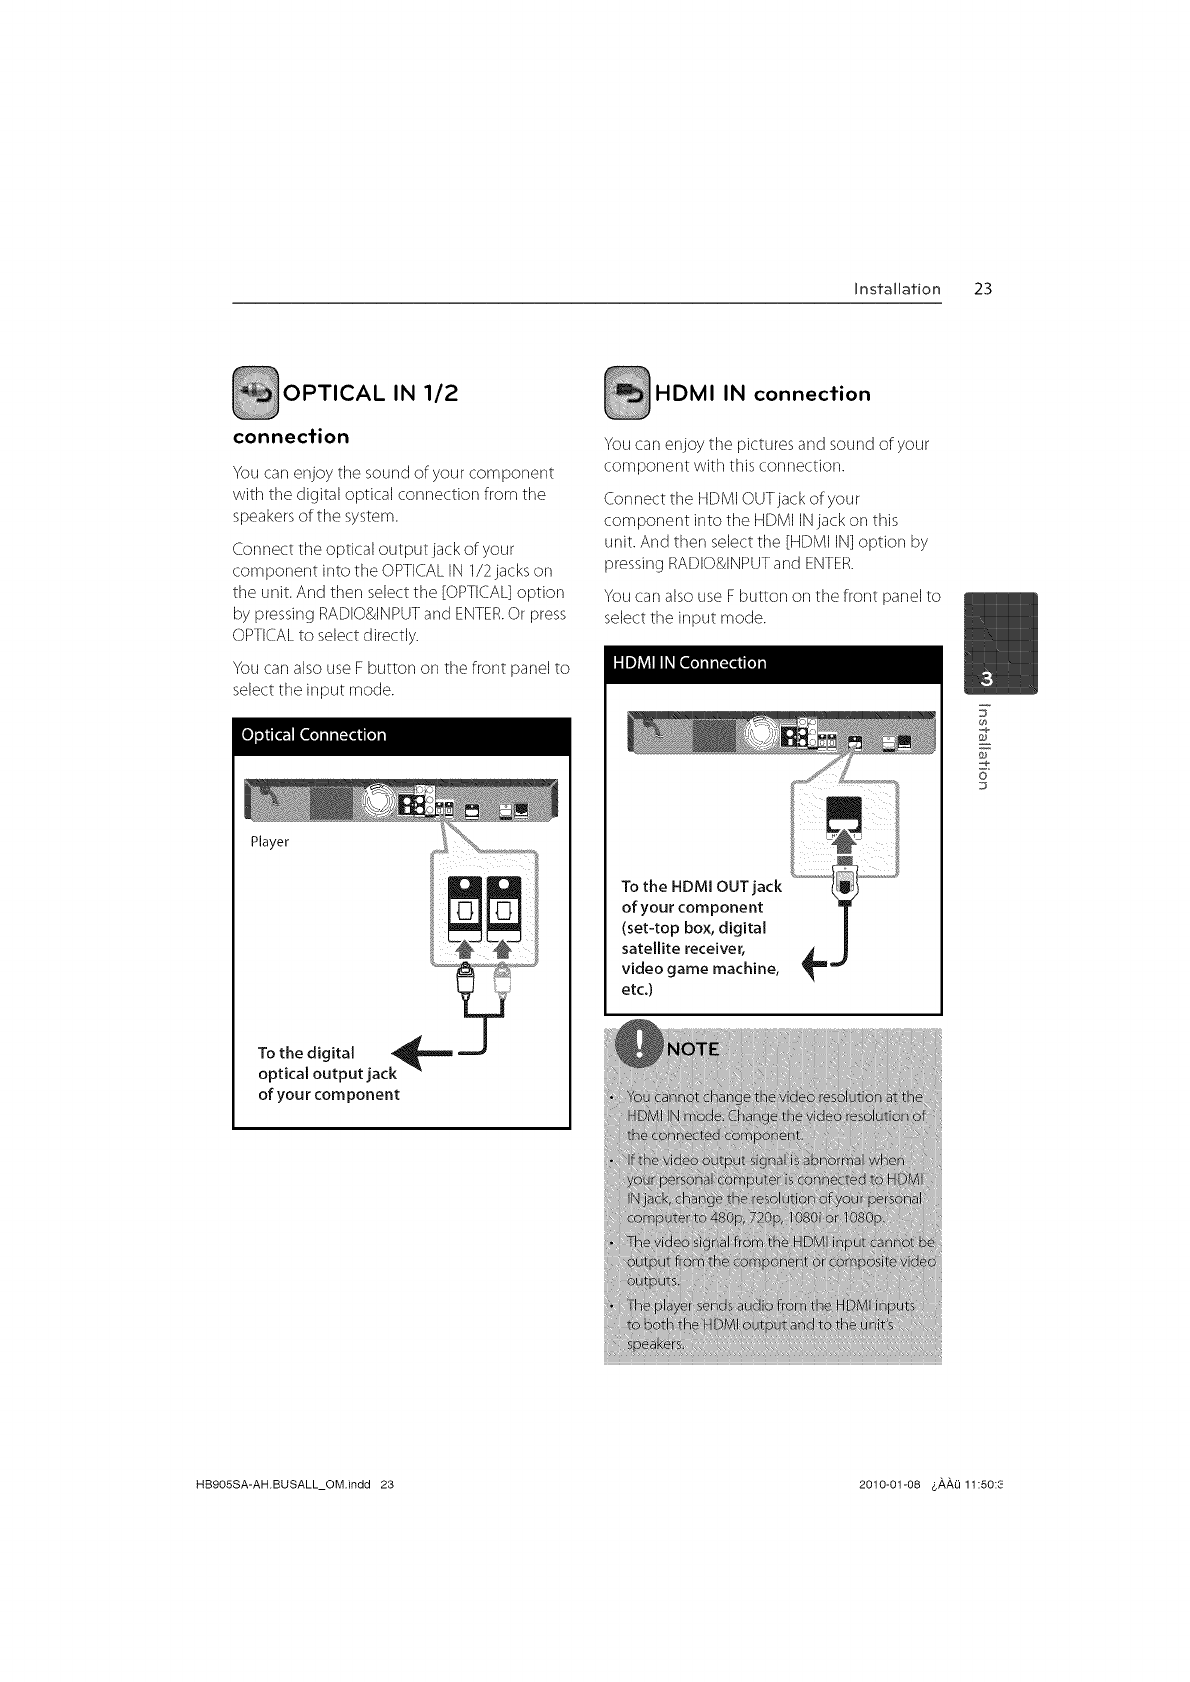
OPTICAL IN 1/2
connection
You carlenjoy the sound of your component
with the digital optical corlrlection from the
speakersof the system.
Connect the optical output jack of your
component into the OPTICALIN 112jacks on
tile unit. And then selectthe [OPTICAL]option
by pressing RADIO&INPUTand ENTER.Or press
OPTICALto select directly.
You carlalso use F button on tile front panel to
select the input mode.
Player
irT,iml
To the digital _,_m J
optical output jack
of your cornponent
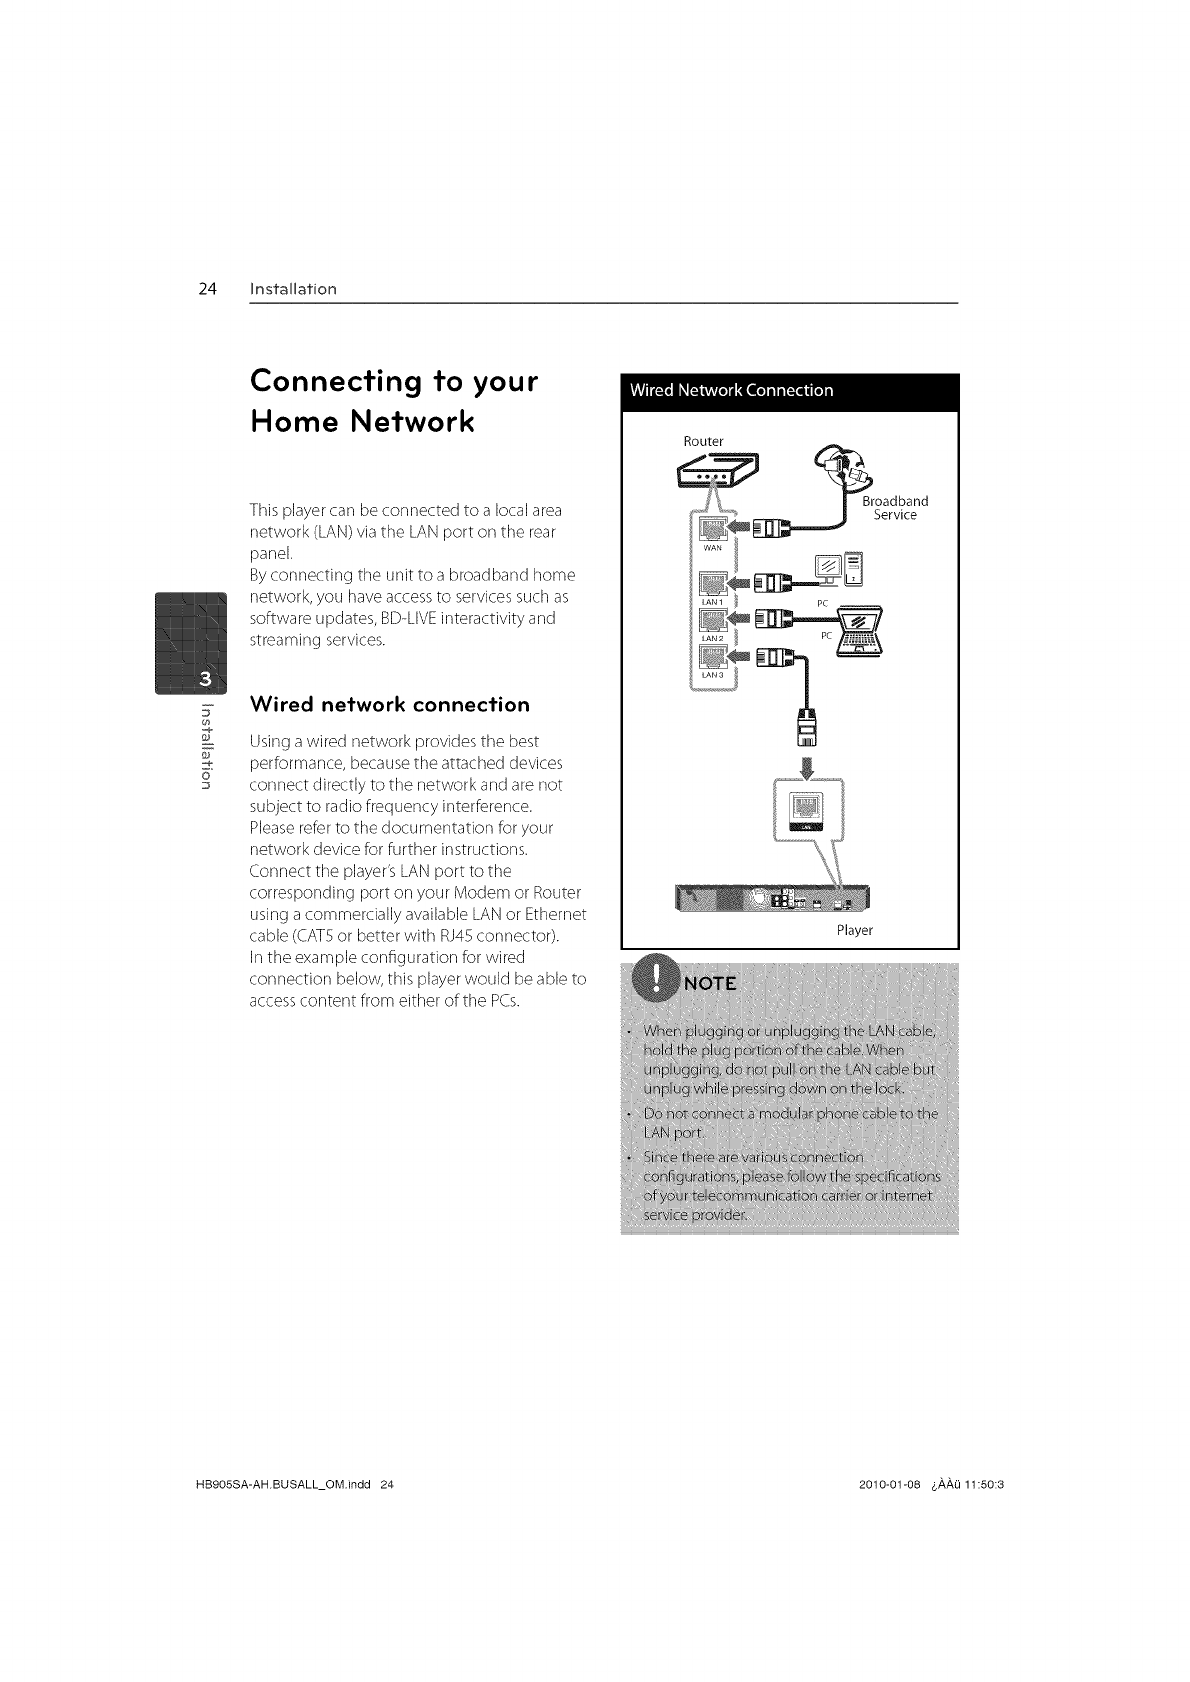
HDMI IN connection
You carl enjoy the pictures and sound of your
component with this corlrlection.
Con nect the HDMI OUTjack of your
component into the HDMI INjack on this
unit. And then select tile [HDMI IN] option by
pressing RADIO&INPUTand ENTER.
You carl also use F button on the front panel to
selecttile input mode.
To the HDMI OUT jack
of your component
(set-top box, digital
satellite receiver,
video game machine,
etc.)
7
F
o
HB905SA-AH.BUSALL_OM.indd 23 2010-01-08 &#,#,O 11:50:3
24 Installation
F
o
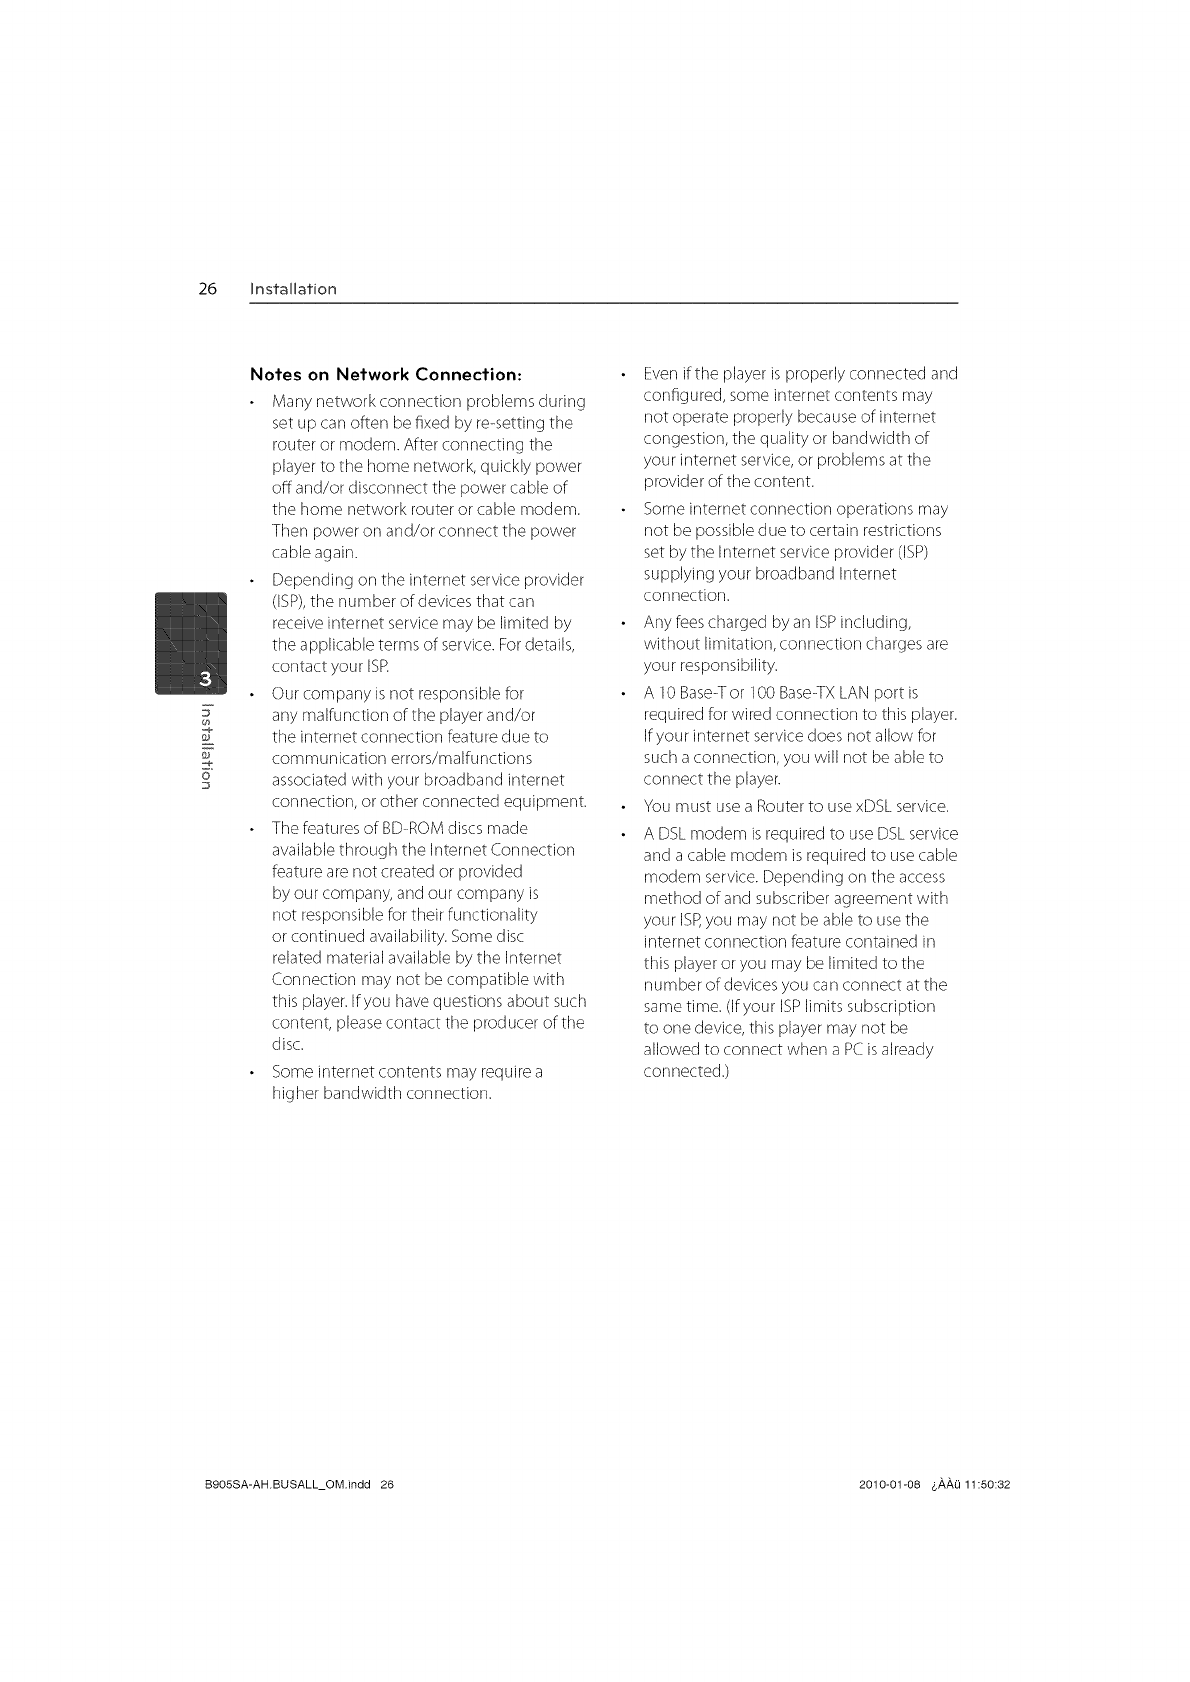
Connecting to your
Home Network
This player carl be connected to a local area
network (LAN) via the LAN port on the rear
panel.
By corlnecting tile unit to a broadband home
network, you have access to services such as
software updates, BD-LIVE interactivity and
streaming services.
Wired network connection
Using a wired network provides the best
performance, becausethe attached devices
connect directly to the network and are not
subject to radio frequency interference.
Pleaserefer to the documentation for your
network device for further instructions.
Connect tile player'sLAN port to the
corresponding port on your Modem or Router
using a commercially available LANor Ethernet
cable (CAT5or better with RJ45 connector).
In the example configuration for wired
connection below, this playerwould be able to
accesscontent from either of tile PCs.
Router
_ _Broadband
Serw_e
Player
HB905SA-AH.BUSALL_OM.indd 24 2010-01-08 &,&,,&,Q11:50:3

Installation 25
Wired Network Setup
Before setting the wired network, you need to
connect tile broadband intemet to your home
network.
If there isa DHCPserveron tile local area
network (LAN)via wired connection, this player
will automatically be allocated an IPaddress.
After making tile physicalconnection, a small
number of home networks may require the
player's network setting to be adjusted. Adjust
tile [NETWORK]setting asfollow.
1. Select [Corlrlection Setting] option in tile
[Setup] menu then pressENTER.
3. Select [OK]and press ENTERto apply
network settings.
4. Tile playerwill askyou to test tile network
connection. Select [OK]and press ENTERto
corn plete tile network connection. 7
F
o
D
:2. Use A/V/</> to select tile IP mode
between [Dynamic] and [Static].
Normally,select [Dynamic] to allocate an IP
address automatically.
5. If you select [Test] and press ENTERat step
4 above, the network connection status is
displayed on tile screen.
You carl also test it on tile [Corlrlection
Status] in tile [Setup] menu.
HB9OSSA-AH.BUSALL_OM.indd 25 2010-01-08 &#,#,O 11:50:3
26 installation
(h
F
o
Notes on Network Connection:
Marly network cormection problems during
set up carl often be fixed by re-setting the
router or modem. After connecting tile
player to the home network, quickly power
off and/or disconnect the power cable of
the home network router or cable modem.
Then power on and/or connect the power
cable again.
Depending on the internet service provider
(ISP),the number of devices that carl
receiveinternet service may be limited by
the applicable terms of service.Fordetails,
contact your ISR
Our company is not responsible for
any malfunction of the playerand/or
the internet connection feature due to
communLation errors/malfunctions
associatedwith your broadband internet
connection, or other connected equipment.
The featuresof BD-ROMdiscs made
available through the Internet Connection
feature are not created or provided
by our company, and our company is
not responsible for their functionality
or continued availability. Some disc
related material available by tile Internet
Connection may not be compatible with
this player.Ifyou havequestions about such
content, pleasecontact tile prod ucer of tile
disc.
Some internet contents may require a
higher bandwidth cormection.
Evenif the player is properly connected and
configured, some internet contents may
not operate properly because of internet
congestion, tile quality or bandwidth of
your internet service,or problems at tile
provider of tile content.
Someinternet connection operations may
not be possibledue to certain restrictions
set by tile Internet service provider (ISP)
supplying your broadband Internet
corlrlection.
Any fees charged by an ISPincluding,
without limitation, connection charges are
your responsibility.
A 10 Base-Tor 100 Base-TXLAN port is
required for wired connection to this player.
If your internet servicedoes not allow for
sucha connection, you will not be able to
connect the player.
You must usea Routerto usexDSL service.
A DSLmodem is required to useDSLservice
and a cable modem isrequired to usecable
modem service. Depending on the access
method of and subscriberagreement with
your ISP,you may not be able to use the
internet corlnection feature contained in
this playeror you may be limited to tile
number of devices you carl connect at tile
sametime. (Ifyour ISPlimits subscription
to one device, this player may not be
allowed to connect when a PCis already
con netted.)
B9OSSA-AH.BUSALL_OM.indd 26 2010-01@8 4,#,#,Li11:50:82
Installation 27
The useof a "Router"may not be allowed
or its usage may be limited depending on
the policies and restrictions of your ISRFor
details, contact your ISPdirectly.
Turn offall unused network equipment in
your local home network. Some devices
maygenerate network traffic.
Fortile purpose of the better transmission,
placing the playerfrom the accesspoint as
close aspossible.
Move closer to tile access point if possible
or re-orient the player so there is nothing
between it and the accesspoint.
7
o
HB9OSSA-AH.BUSALL_OM.indd 27 2010-01-08 6#,#,Li 11:50:3;
28 Installation
USB device
connection
This player carl play movie, music and photo
files contained in the USBdevice.
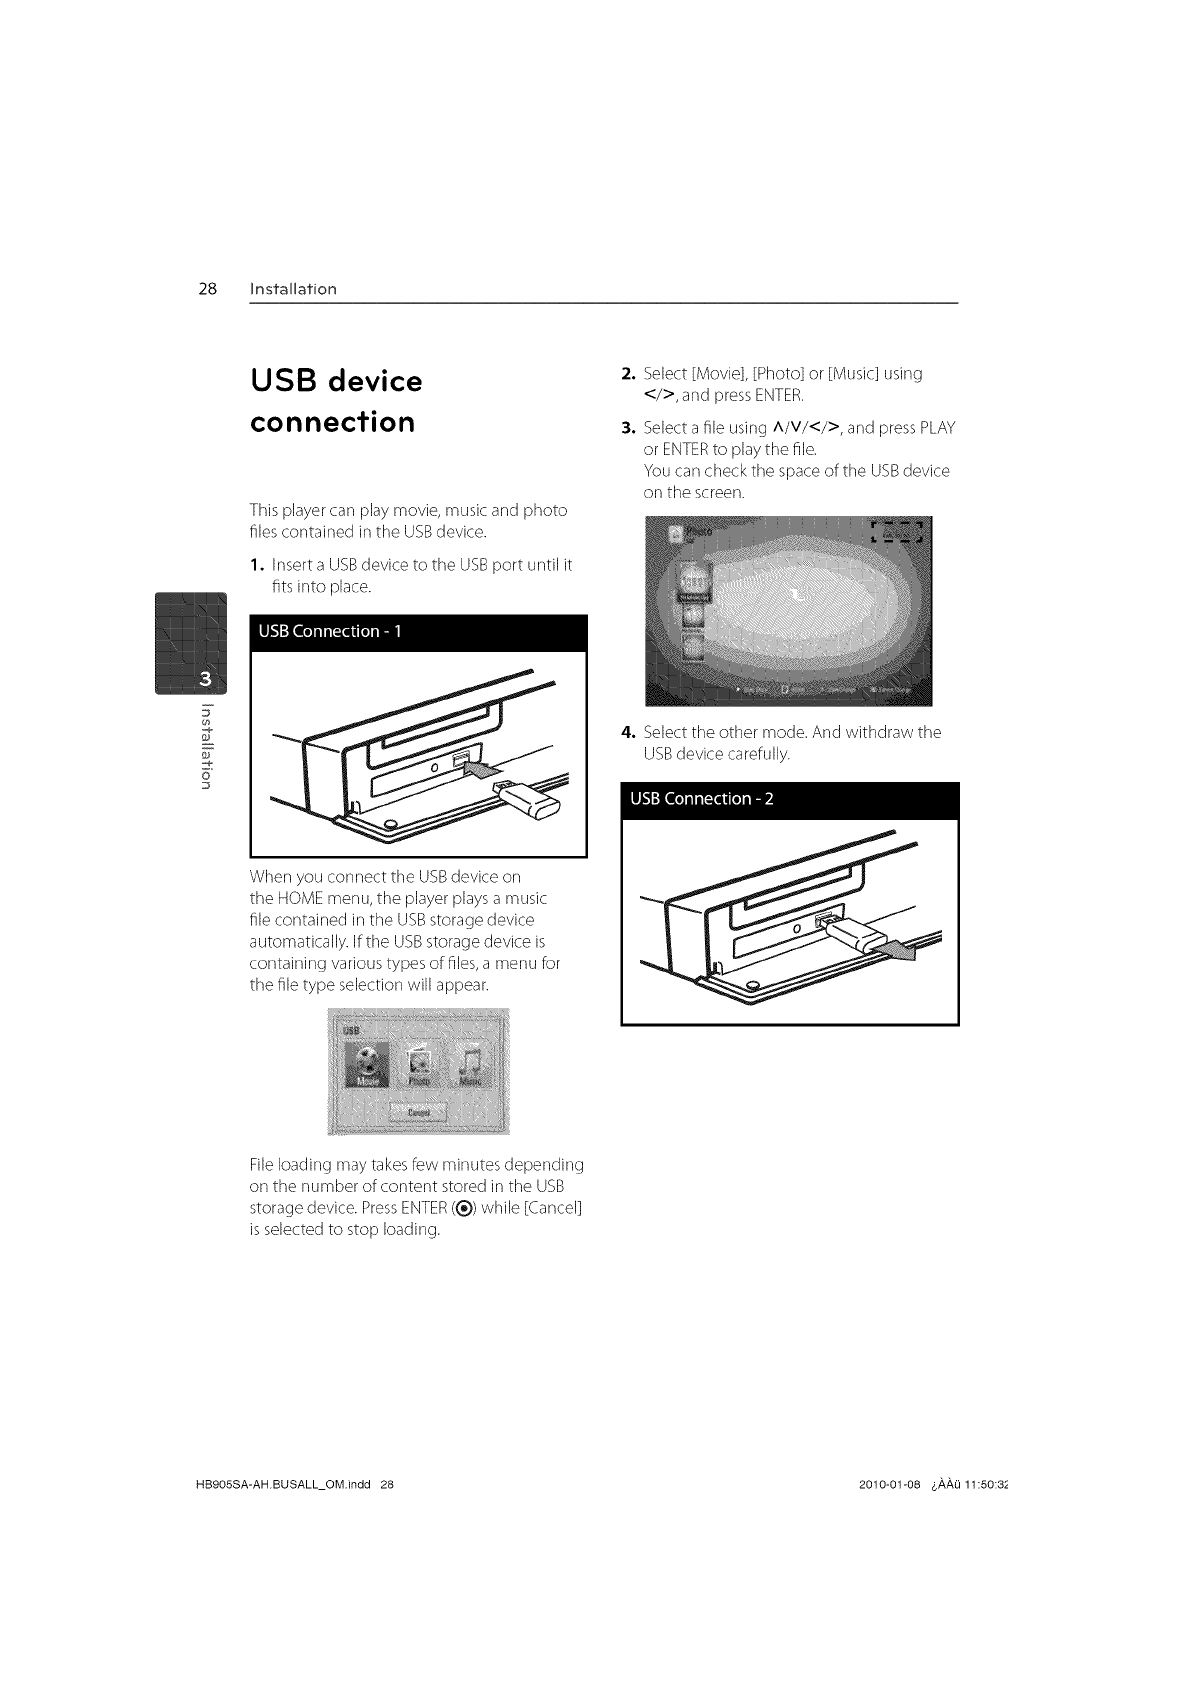
1. Insert a USBdevice to the USBport until it
fits into place.
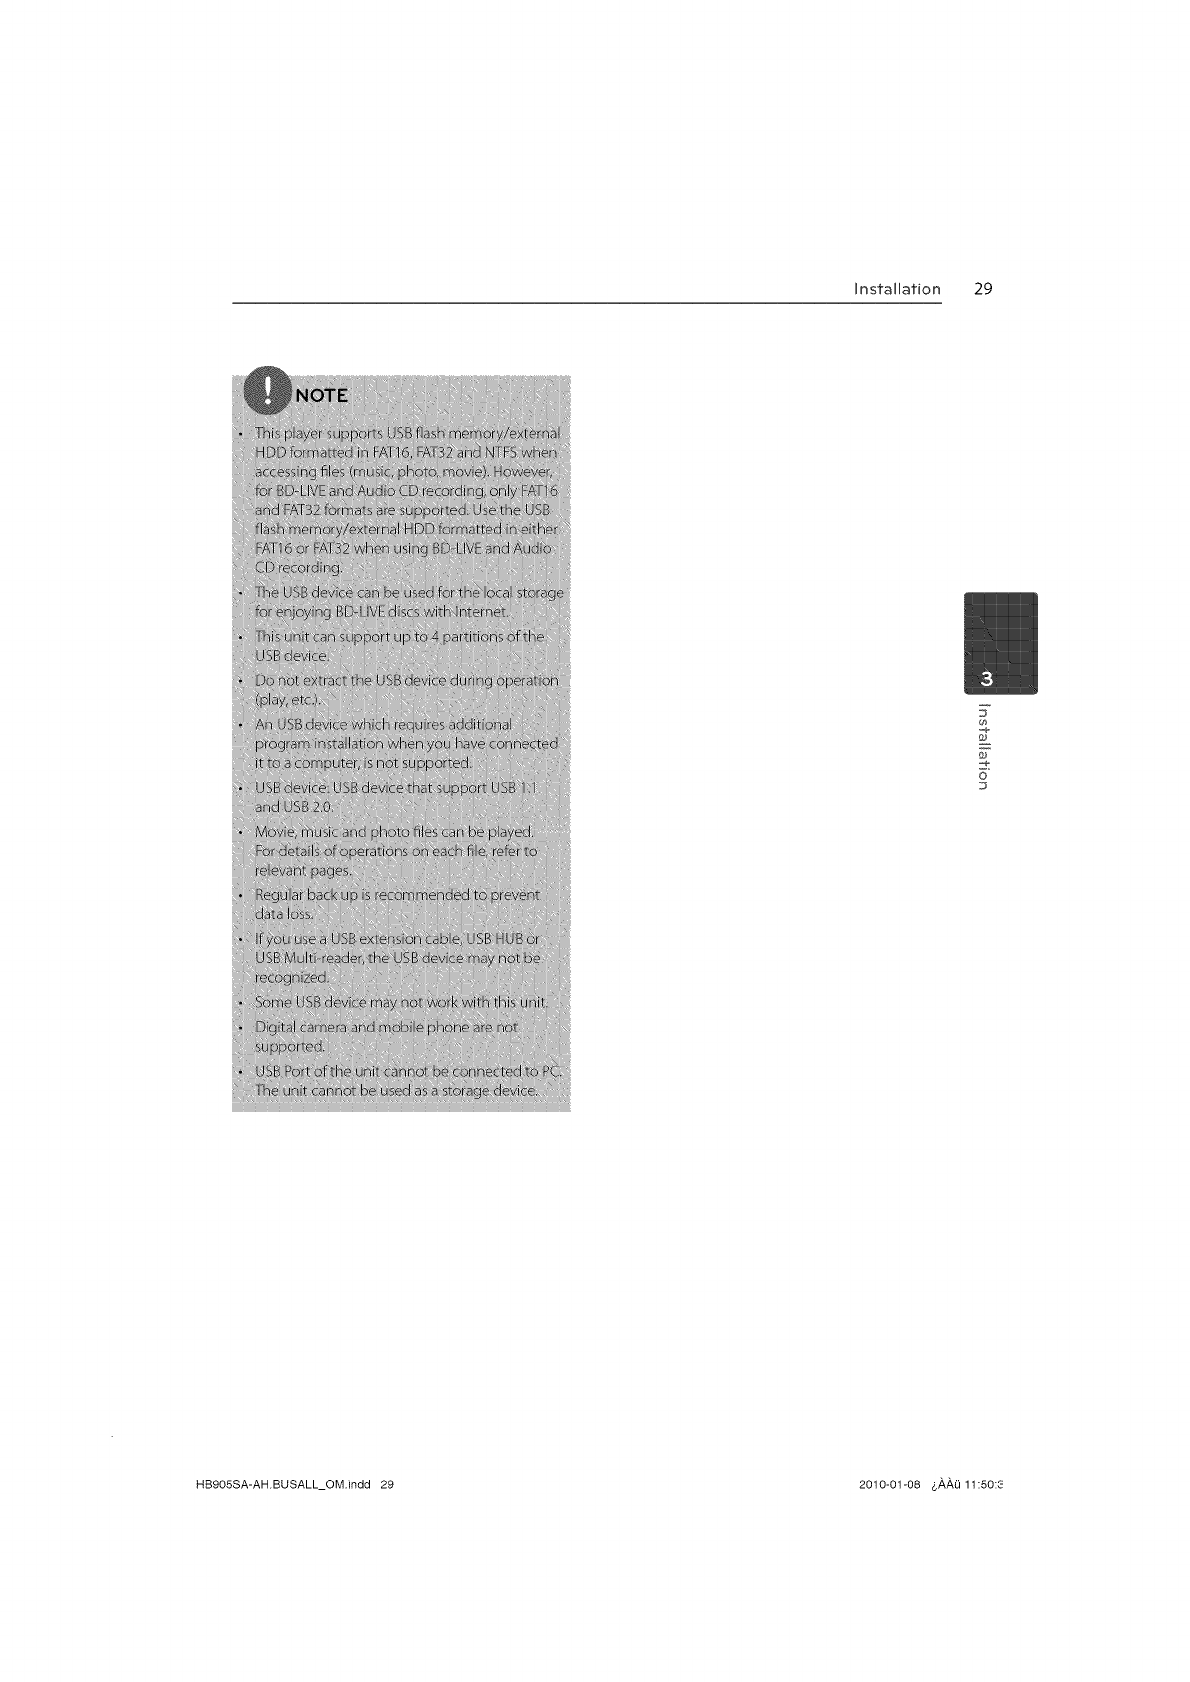
2. Select [Movie], [Photo] or [Music] using
</>, and press ENTER.
3. Selecta file using A/V/</>, and press PLAY
or ENTERto play the file.
You carl check tile space of the USBdevice
on the screen.
o
When you connect the USBdevice on
the HOMEmenu, the player plays a music
file contained in the USBstorage device
automatically. If tile USBstorage device is
containing various types of files, a menu for
the file type selection will appear.
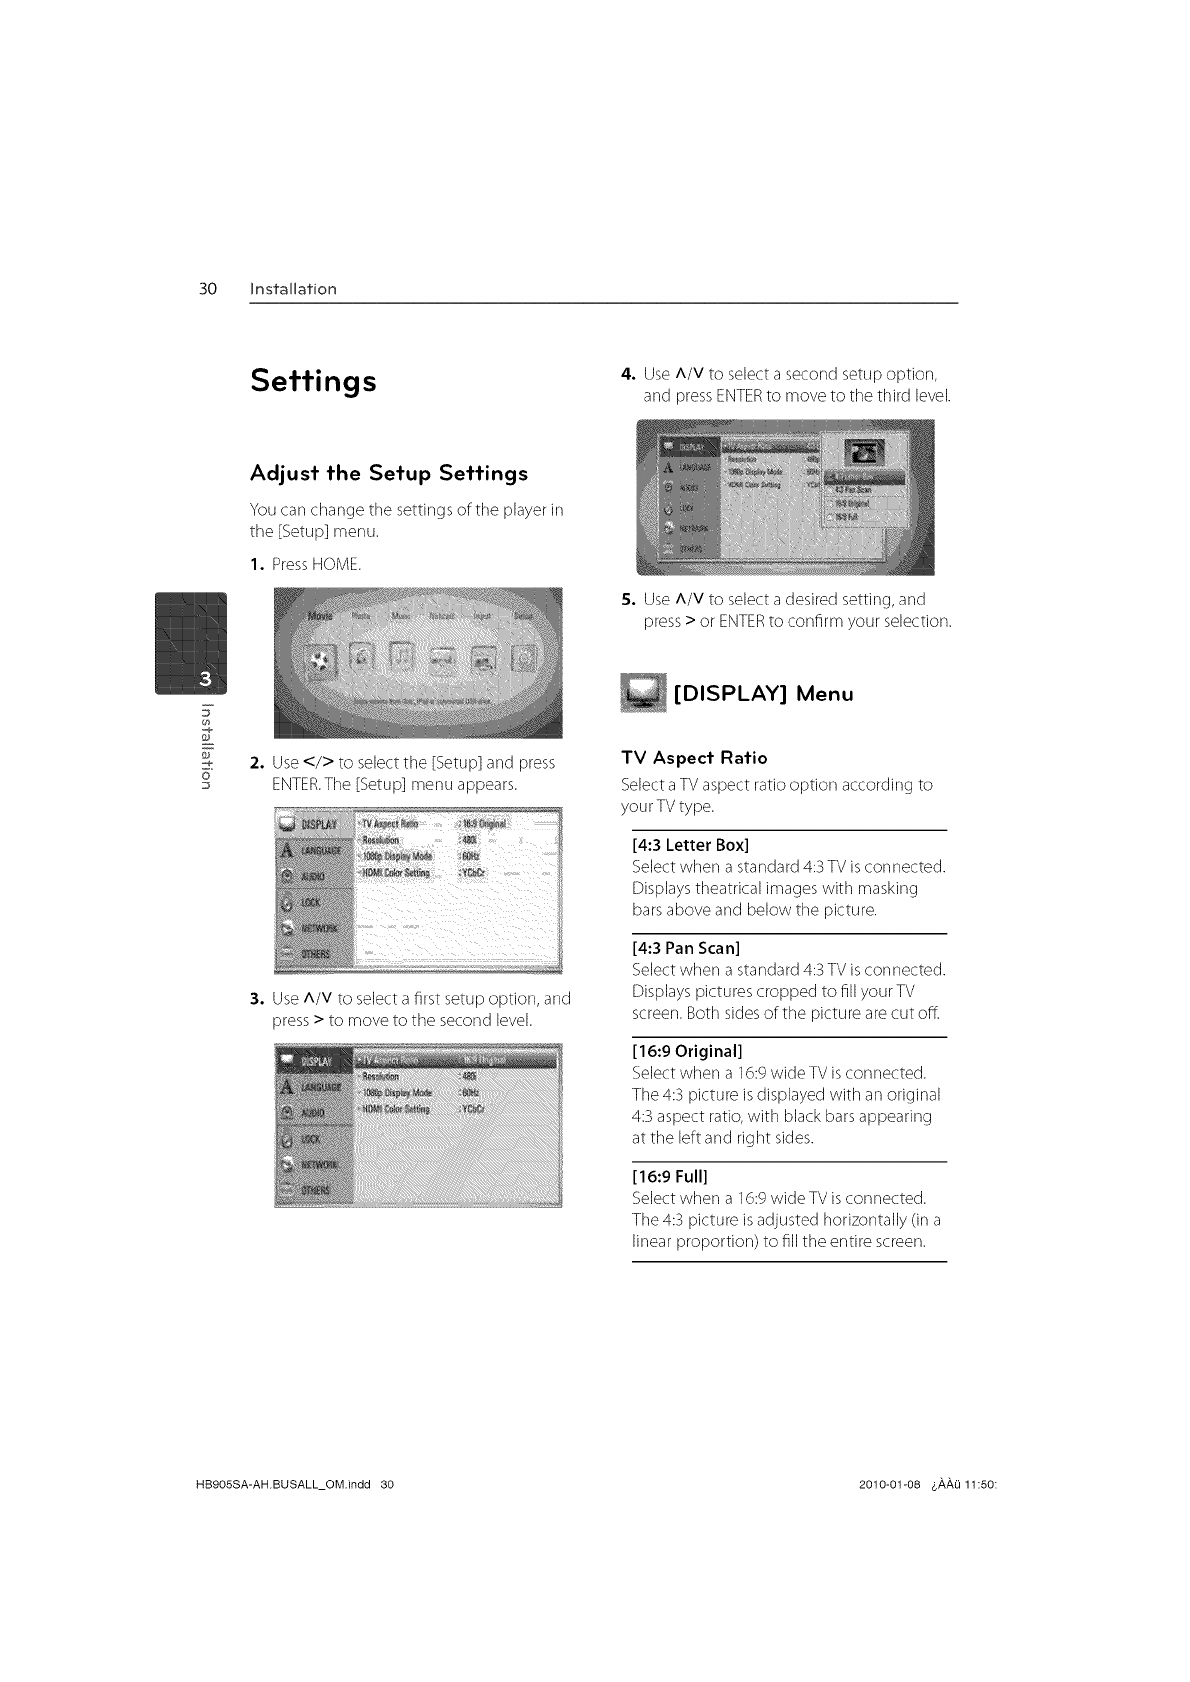
4. Selecttile other mode. And withdraw the
USBdevice carefully.
Fileloading may takesfew minutes depending
on the number of content stored in tile USB
storage device. PressENTER((_))willie [Cancel]
isselected to stop loading.
HB9OSSA-AH.BUSALL_OM.indd 28 2010-01-08 4,_,_,Li 11:50:8 _-
Installation 29
7
F
o
HB905SA-AH.BUSALL_OM.indd 29 2010-01-08 &,&,,&,Q11:50:_
30 installation
Settings 4. UseA/V to selecta second setup option,
and pressENTERto move to tile third level.
0o
F
o
Adjust the Setup Settings
You carl change tile settings of tile playerin
the [Setup] menu.
1. PressHOME.
2. Use </> to select tile [Setup] and press
ENTER.Tile [Setup] menu appears.
3. UseA/V to selecta first setup option, and
press> to move to tile second level.
5. UseA/V to selecta desired setting, and
press> or ENTERto confirm your selection.
[DISPLAY] Menu
TV Aspect Ratio
Select aTV aspect ratio option according to
your TVtype.
[4:3 Letter Box]
Select when a standard 4:3 TV is connected.
Displays theatrical images with masking
bars above and below tile picture.
[4:3 Pan Scan]
Selectwhen a standard 4:3TV is connected.
Displays pictures cropped to fill your TV
screen.Both sidesof the picture are cut off.
[16:9 Original]
Selectwhen a 16:9wide TVis connected.
Tile 4:3 picture is displayed with an original
4:3 aspect ratio, with black bars appearing
at the left and right sides.
[16:9 Full]
Selectwhen a 16:9wide TVis connected.
Tile 4:3 picture is adjusted horizontally (in a
linear proportion) to fill the entire screen.
HB905SA-AH.BUSALL_OM.indd 30 2010-01-08 &#,#,Li 11:50:
Installation 31
Resolution
Setsthe output resolution of tile Component
and HDMI video signal. Referto page 21 and
87 or details about the resolution setting.
[Auto]
If tile HDMI OUTjack is connected to
TVsproviding display information (EDID),
automatically selects tile resolution
best suited to tile connected TV.If the
COMPONENTVIDEOOUT is only connected,
this changes tile resolution to 1080i as
default resolution.
[1080p]
Outputs 1080 lines of progressive video.
[1080i]
Outputs 1080lines of interlaced video.
[720p]
Outputs 720 linesof progressive video.
[480p]
Outputs 480 linesof progressive video.
[480i]
Outputs 480 linesof interlaced video.
1080p Display Mode
When tile resolution is set to 1080p,select
[24 Hz]for smooth presentation of film material
(1080p/24 Hz)with a HDMI-equipped display
compatible with 1080p/24 Hz input.
iEi_i'iiiii]iii;
se!_c I
J_!i;i :
26)t_z_)h
_rce:_om
HDMI Color Setting
Selectthe type of output from tile HDMI
OUTjack. Forthis setting, please referto the
manuals of your display device.
[YCbCr]
Select when connecting to a HDMI display
device.
[RGB]
Select when connecting to a DVI (RGB)
display device.
7
0o
F
o
HB9OSSA-AH.BUSALL_OM.indd 31 2010-01-08 4,#,#,Li11:50:83
32 Installation
[LANGUAGE] Menu [AUDIO] Menu
F
o
Display Menu
Select a language for the [Setup] menu and
on-screen display.
Disc Menu/Disc Audio/
Disc Subtitle
Select the language you prefer for the audio
track (disc audio), subtitles, and the disc menu.
[Original]
Refersto the original language in which the
disc was recorded.
[Other]
PressENTERto select another language. Use
number buttons then ENTERto enter tile
corresponding 4-digit number according to
tile language code list on page 84.
[Off] (for Disc Subtitle only)
Turn off Subtitle.
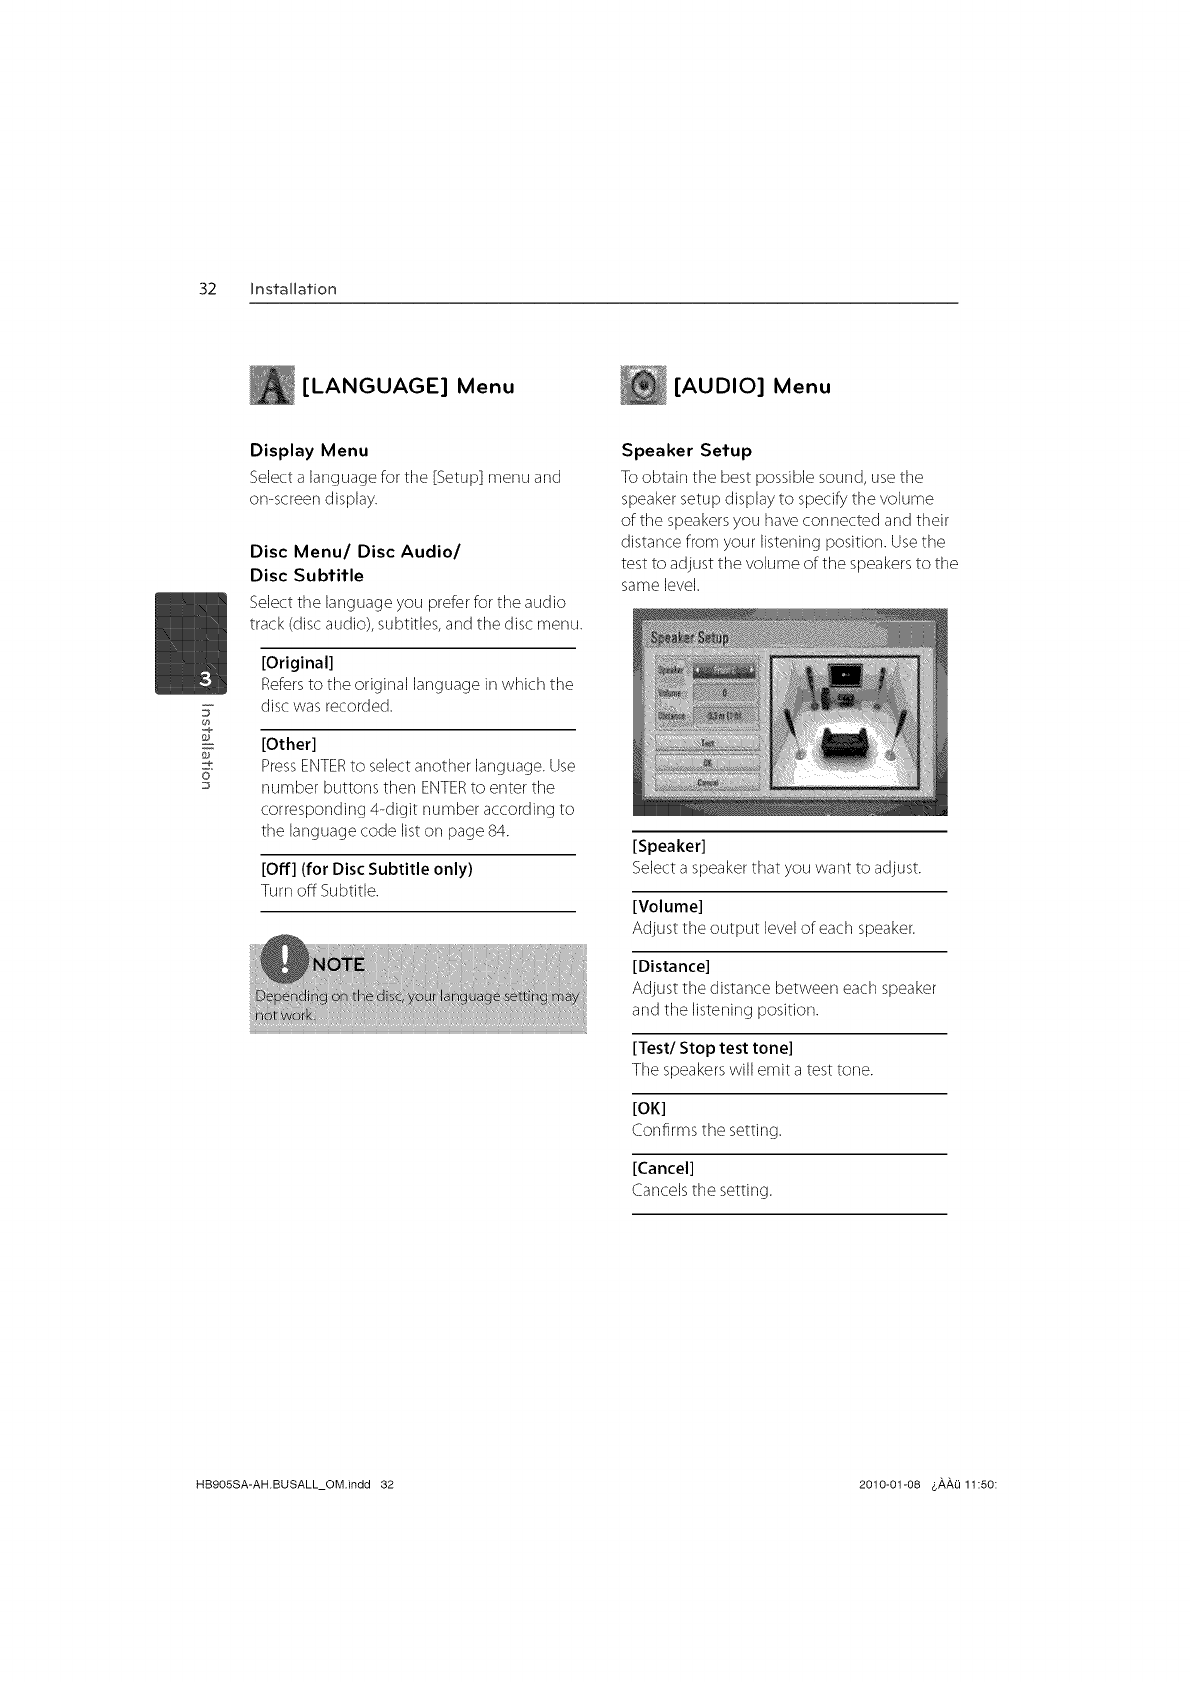
Speaker Setup
Toobtain the best possible sound, usetile
speaker setup display to specifytile volume
of the speakersyou have connected and their
distance from your listening position. Usethe
test to adjust the volume of the speakersto tile
same level.
[Speaker]
Select a speaker that you want to adjust.
[Volume]
Adjust the output level of each speaker.
[Distance]
Adiust the distance between each speaker
and the listening position.
[Test/Stop test tone]
The speakers will emit a test tone.
[OK]
Confirms the setting.
[Cancel]
Cancels the setting.
HB905SA-AH.BUSALL_OM.indd 32 2010-01-08 &#,#,O 11:50:
installation 33
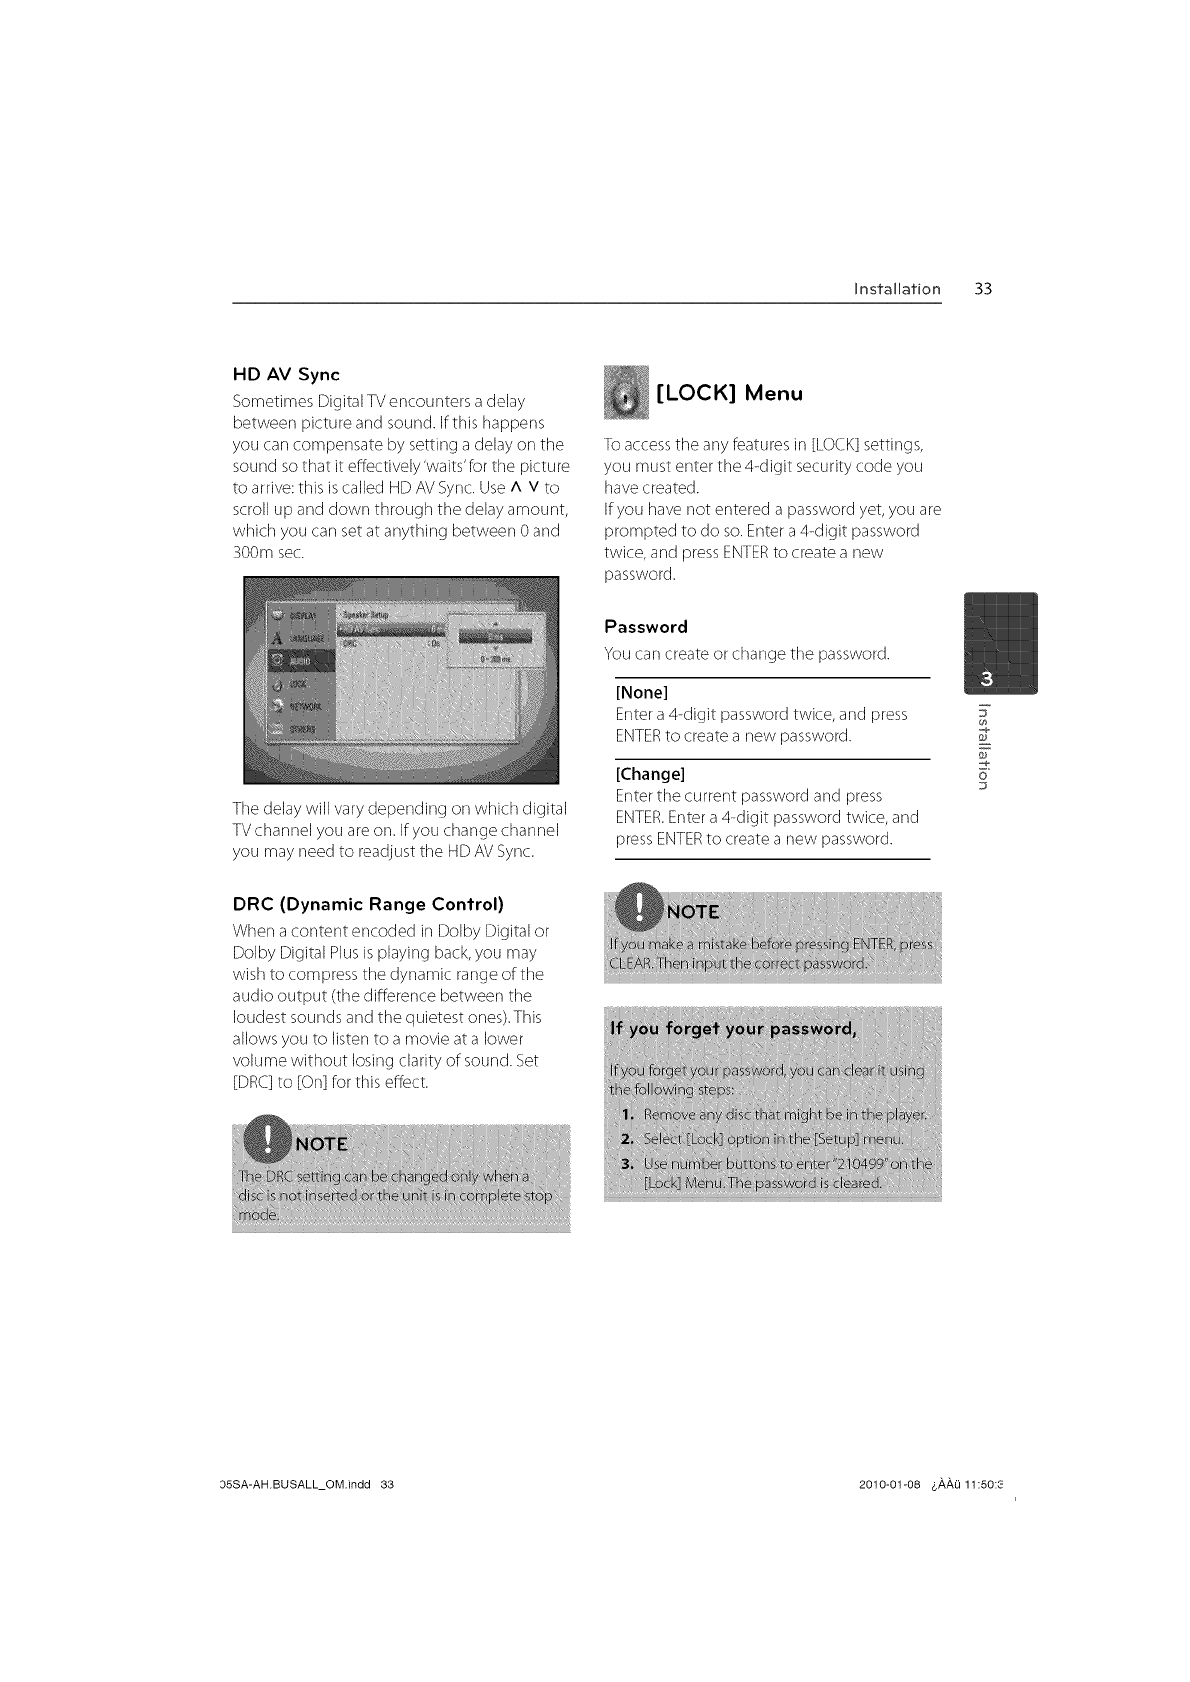
HD AV Sync
Sometimes Digital TVencounters a delay
between picture and sound. If this happens
you carl compensate by setting a delay on the
sound sothat it effectively'waits'for tile picture
to arrive: this is called HD AV Sync. UseA V to
scroll up and down through the delay amount,
which you carl set at anything between 0 and
300m sec.
[LOCK] Menu
To accessthe any featuresin [LOCK]settings,
you must enter the 4-digit security code you
have created.
If you have not entered a password yet, you are
prompted to do so. Enter a4-digit password
twice, and pressENTERto create a new
password.
Thedelay will vary depending on which digital
TVchannel you are on. If you change channel
you may need to readjust tile HD AVSync.
Password
You carl create or change tile password.
[None]
Entera 4-digit password twice, and press
ENTERto create a new password.
[Change]
Entertile current password and press
ENTER.Entera 4-digit password twice, and
pressENTERto create a new password.
7
0o
F
o
DRC (Dynamic Range Control)
When a content encoded in Dolby Digital or
Dolby Digital Plusis playing back,you may
wish to compress tile dynamic range of tile
audio output (tile difference between tile
loudest sounds and the quietest ones).This
allows you to listen to a movie at a lower
volume without losing clarity of sound. Set
[DRC]to IOn] for tills effect.
@
D5SA-AHBUSALL_OM.indd 33 2010-01@8 $#,#,1311:50:8
34 installation
DVD Rating
Blocksplayback of rated DVDbasedon their
content. (Not all discsare rated.)
[Rating 1-8]
Rating one (1) has tile most restrictions and
rating eight (8) is tile least restrictive.
[Unlock]
Ifyou select this, parental control is not
active and the disc plays in full.
Area Code
Enterthe code of tile areawhose standards
were used to rate tile DVDvideo disc, based
on the list on page 83.
[NETWORK] Menu
Tile [NETWORK]settings are needed to use tile
software update, BD-LIVEand onqine features.
F
o
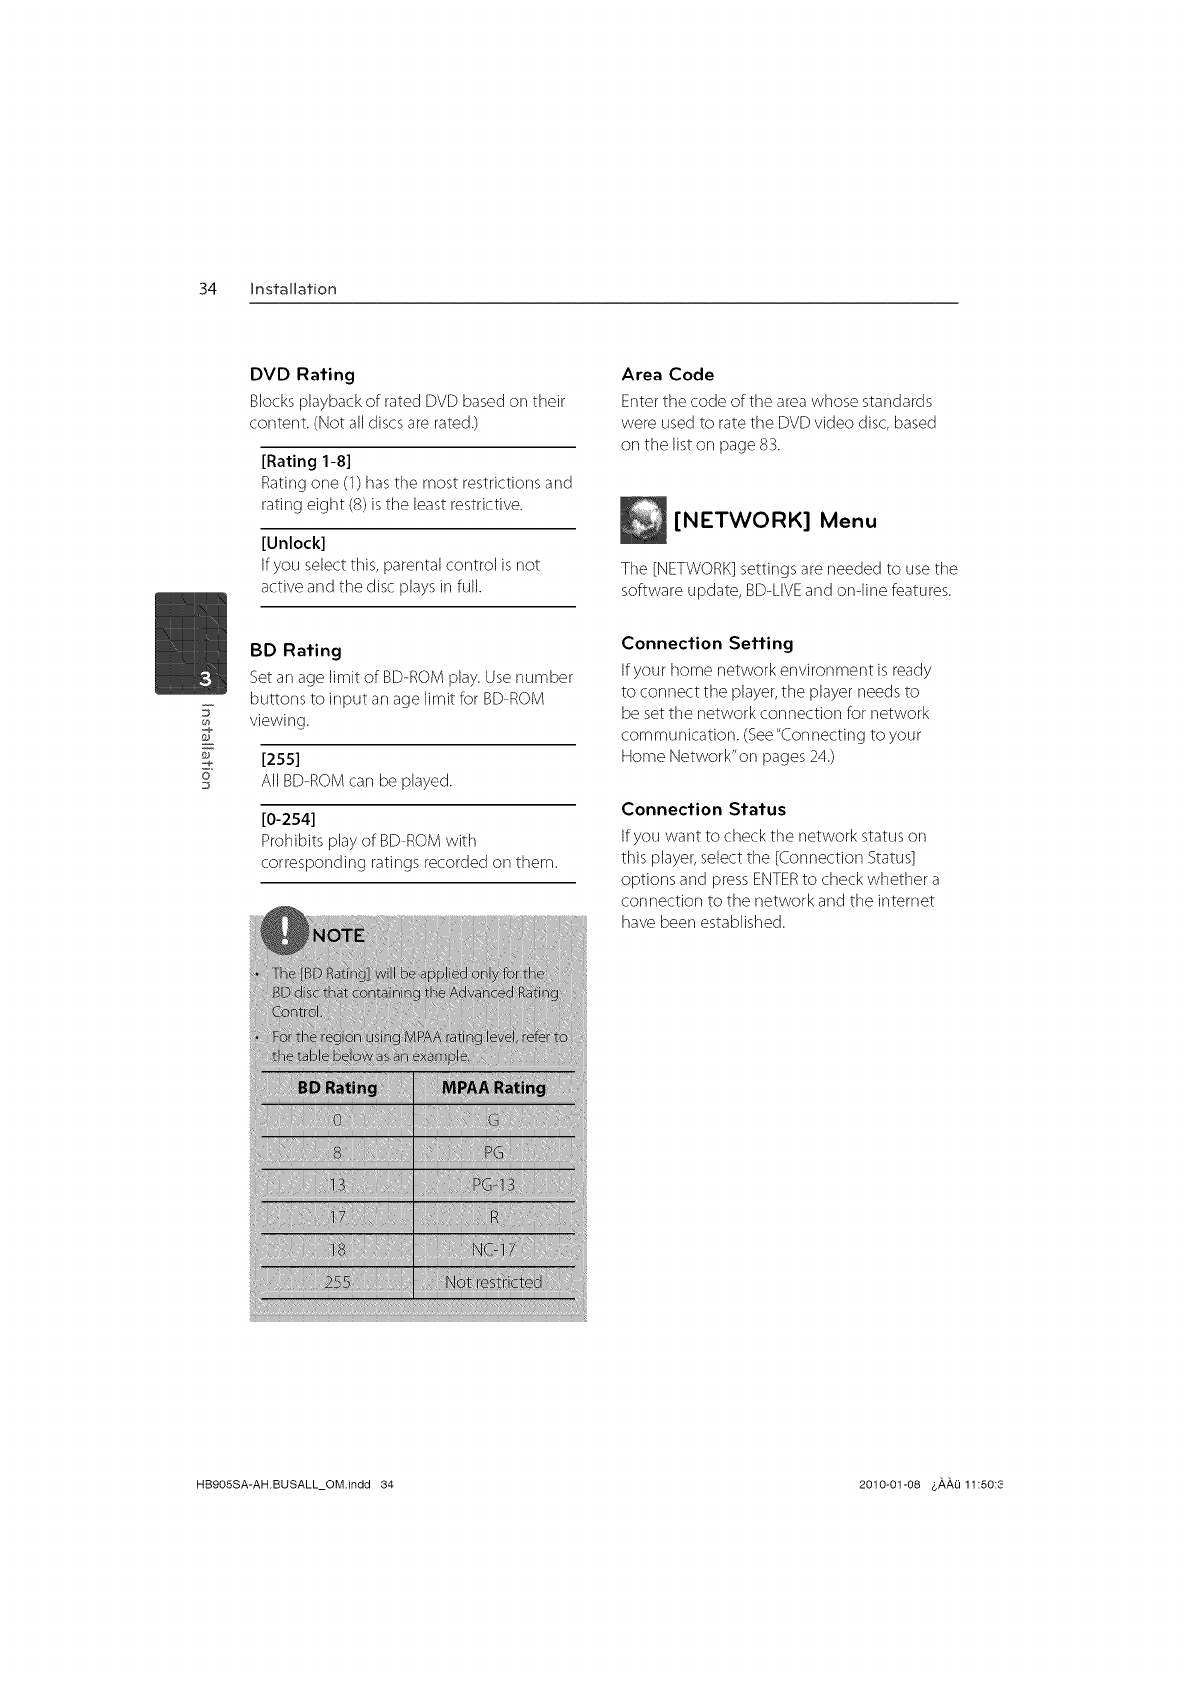
BD Rating
Betan age limit of BD-ROMplay. Use number
buttons to input an age limit for BD-ROM
viewing.
[255]
All BD-ROM carl be played.
[0-254]
Prohibits play of BD-ROM with
corresponding ratings recorded on them.
Connection Setting
Ifyour home network environment is ready
to connect tile player,the player needs to
be set tile network connection for network
communication. (See"Connetting to your
Home Network"on pages 24.)
Connection Status
If you want to check tile network status on
tills player, select tile [Corlrlection Status]
options and press ENTER to check whether a
connection to the network and tile internet
have been established.
HB9OSSA-AH.BUSALL_OM.indd 34 2010-01-08 &#,#,O 11:50:_
Installation 35
BD-LIVE connection
You carl restrict Intemet accesswhen BD-LIVE
functions are used.
[Permitted]
Intemet access is permitted for all BD-LIVE
contents.
[Partially permitted]
Intemet access is permitted only for BD-
LIVEcontents which have content owner
certificates. Intemet accessand AACS
Online functions are prohibited for all BD-
LIVEcontents without a certificate.
[Prohibited]
Intemet access is prohibited for all BD-LIVE
contents.
Netflix
[Netflix ESN]
Display its unique Netflix ESN(Electronic
SerialNumber) that allows you to use tile
Netflix streaming.
[Deactivate Netflix]
Deactivates your player. To activate tile
Netflix again, see page 57.
[OTHERS] Menu
DivX VOD
ABOUT DIVXVIDEO:DivX_is a digital video
format created by DivX,Inc.This isan official
DivX Certified device that plays DivX video.
Visit www.divx.com for more information and
software tools to convert your files into DivX
video.
ABOUT DIVXVIDEO-ON-DEMAND:This DivX
Certified'_device must be registered in order to
play DivXVideo-on-Demand (VOD) content.
To generate the registration code, locate the
DivXVOD section in tile device setup menu.
Go to vod.divx.com with tills code to complete
the registration processand learn more about
DivXVOD.
[Register]
Displaysthe registration code of your player.
[Deregister]
Deactivate your player and display tile
deactivation code.
7
F
o
Deactivate Vudu
You carldeactivate your player from yourVudu
account. It is recommended that you do this
if you give your player to someone else who
should not shareyour Vudu account.
HB905SA-AH.BUSALL_OM.indd 35 2010-01@8 &#,#,Li 11:50:3_
36 Installation
Auto Power Off
Tile screensaver appearswhen you leave
the player in Stop mode for about five
minutes. Ifyou set this option to [On], the unit
automatically turns itself off after the Screen
Saveris displayed for 25 minutes.
Setthis option to [Off] to leavetile screen
saveruntil tile unit isoperated by tile user.
Software
Information
Displays tile current software version.
Update
Youcarl update the software by cormecting
the unit directly to the software update
server (seepage 85).
0o
F
o
Initialize
Factory Set
You carl reset the player to its original
factory settings.
BD Storage Clear
Initializesthe BDcontents from the
connected USBstorage.
Disclaimer Notice
Press ENTER ((_)) to view the notice of Network
Service Disclaimer on page 92.
HB905SA-AH.BUSALL_OM.indd 36 2010-01-08 $#,#,Li 11:50:8z
installation 37
Sound Effect
You carl select a suitable sound mode. Press
SOUND EFFECTrepeatedly until tile desired
mode appears on tile front panel display or tile
TVscreen.Tile displayed items for tile equalizer
maybe diff erent depending on sound sources
and effects.
[Natural]: Youcarl enjoy comfortable and
natural sound.
[Bypass]: Software with multichannel surround
audio signals is played according to the way it
was recorded.
[Bass Blast]: Reinforcetile basssound
effect from front left and right speakerand
subwoofer.
[PL II Movie]: PerformsPro Logic II movie
mode decoding to the input signaland
produces five full-bandwidth output channels
from 2 channel sources.This setting is ideal for
watching videos of overdubbed or old movies.
Tills mode is available only to 2 channel
sources.
[PL II Music]: Performs Pro Logic II music mode
decoding to the input signal and produces
five full-bandwidth output channels from
2 channel sources.This setting isideal for
normal stereo sourcessuch asCD.This mode is
available only to 2 channel sources.
[Clear Voice]:This mode makes voice sound
clear, improving tile quality of voice sound.
[Virtual]: Youcarl enjoy more dynamic sound
with improved center channel.
[Game]: You carl enjoy more virtual sound
while playing video games.
[Night]:This may be useful when you want to
watch movies at low volumes late at night.
[Mus. ReTouch]: When listening to MP3files or
other compressed music, you carl enhance tile
sound.This mode is available only to 2 channel
sources.
[Loudness]: Improves bassand treble sound.
[Natural Plus]:You carl enjoy tile natural
sound effect same as5.1channel.
7
o
4B9OSSA-AH.BUSALL_OMindd 37 2010-01-08 4,_,_,Li11:50:34
38 Operation
4
Operation
0
0
6"
General Playback
Playing Discs
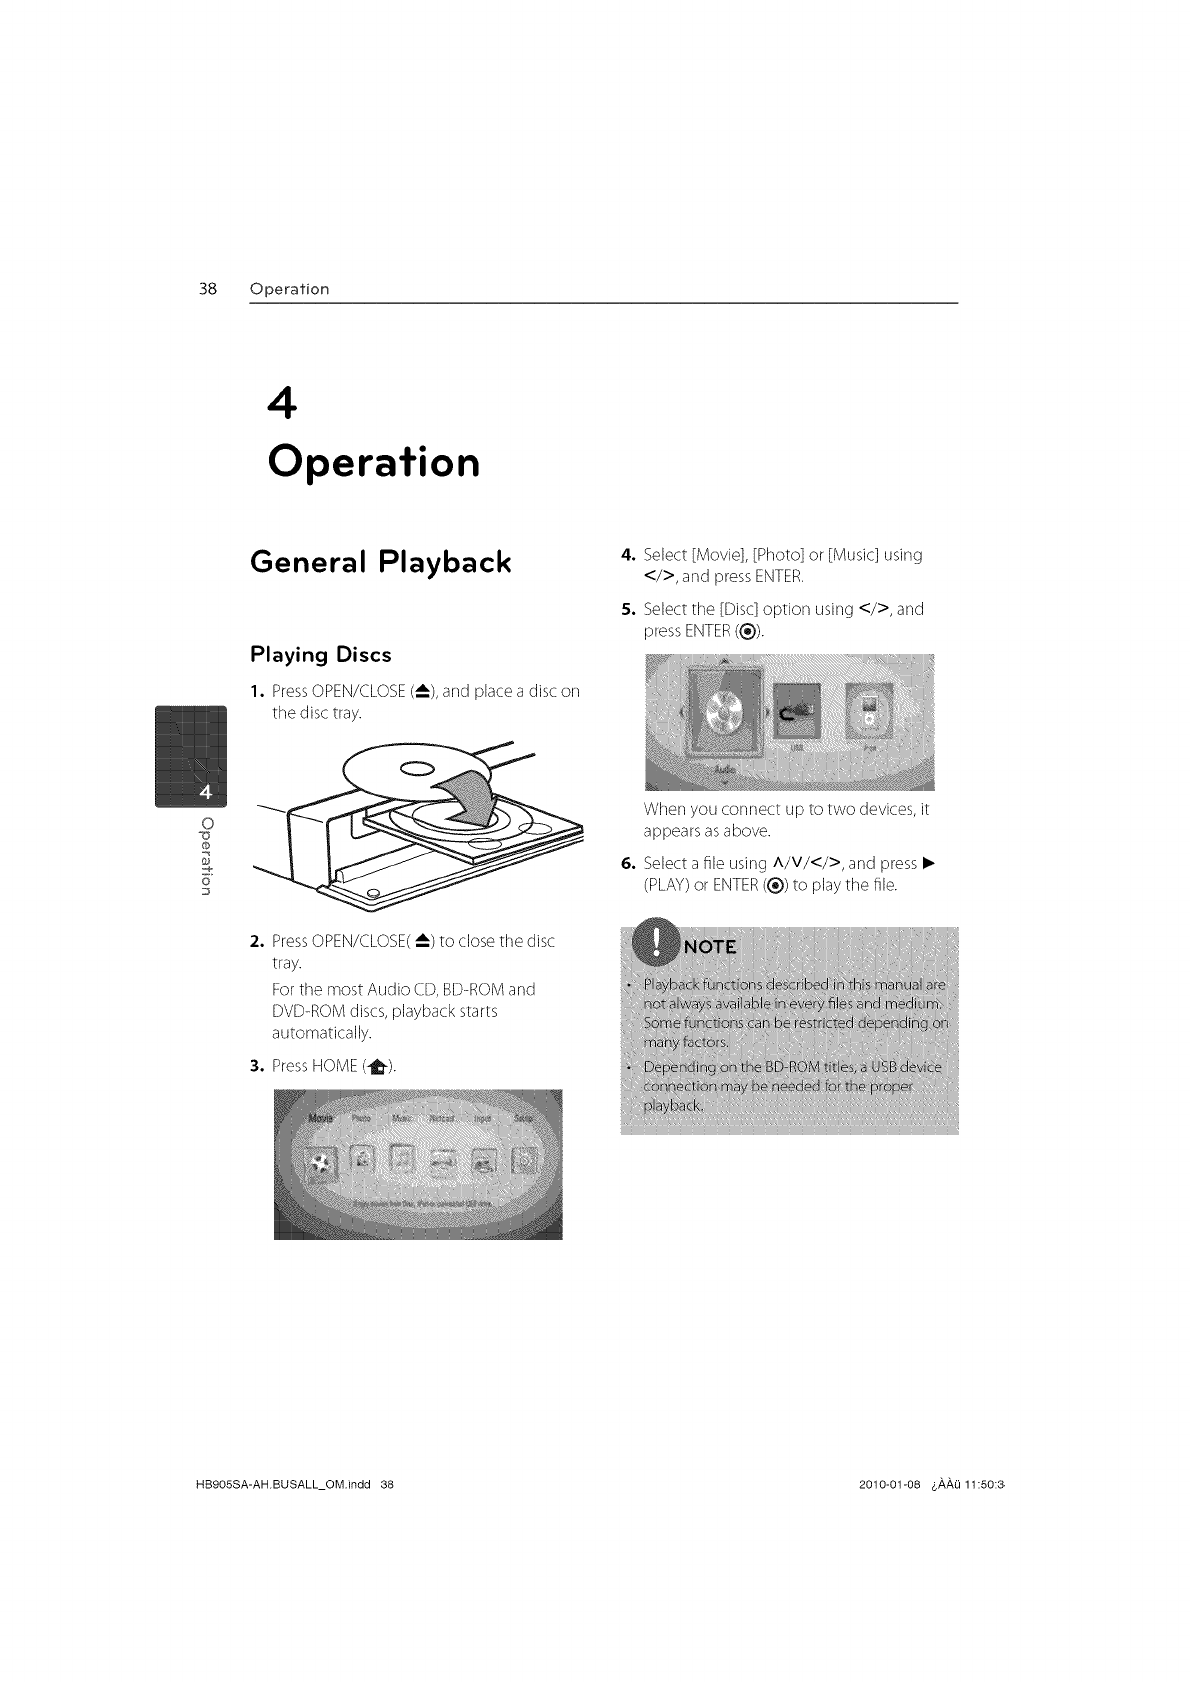
I. PressOPEN/CLOSE(_), and place a disc on
the disc tray.
2. Press OPEN/CLOSE(_) to close tile disc
tray.
For the most Audio CD, BD-ROM and
DVD-ROM discs, playback starts
automatically.
3. Press HOME (_).
4. Select [Movie], [Photo] or [Music] using
</>, and press ENTER.
5. Selecttile [Disc]option using </>, and
pressENTER(®).
When you connect up to two devices, it
appears asabove.
6. Selecta file using A/V/</> and press •
(PLAY)or ENTER(®) to play the file.
HB9OSSA-AH.BUSALL_OM.indd 38 2010-01-08 &#,#,{_ 11:50:8,
Operation 39
To stop playback
Press• (STOP)while playback.
To pause playback
PressII (PAUSE)while playback.
Press• (PLAY)to resume playback.
To playframe-by-frame
PressII(PAUSE)while movie playback.
PressII (PAUSE)repeatedly to play Frame-by-
Frame playback.
To scan forward or backward
Press_ or I_ to play fast forward or fast
reverse during playback.
You carlchange the various playback speeds
by pressing _ or I_ repeatedly.
To slow down the playing speed
While the playback is paused, press I_
repeatedly to play various speeds of slow
motion. l,,,t,j..+[,
To skip to the next/previous
chapter/track/file
During playback, press_ or _ to go to
tile next chapter/traclVfile or to return to the
beginning of tile current chapter/traclVflle.
Press_ twice briefly to step backto tile
previous chapter/traclVflle.
Using the disc menu
To display the disc menu
Tile menu screen may bedisplayed first after
loading a disc which contains a menu. If you
want to display the disc menu willie playback,
press DISCMENU.
Use A/V/</> buttons to navigate through
menu items.
To display the Pop-up menu
Some BD-ROM discs contain Pop-up menu
that appears willie playback.
Press TITLE/POPUP while playback, and use
A/V/</> buttons to navigate through menu
items.
Resume playback
The unit records the point where you pressed
the • (STOP)depending on the disc.
If'H• (ResumeStop)'appears on tile screen
briefly, press• (PLAY)to resume playback
(from tile scene point).
If you press• (STOP)twice or unload tile disc,
"•"(Complete Stop) appearson tile screen.
The unit will clear the stopped point.
0
0
6"
HB9OSSA-AH.BUSALL_OM.indd 39 2010-01@8 6#,#,_ 11:50:3,
40 Operation
o
@
=e
6"
Advanced Playback
Repeat Playback
During playback,press REPEATrepeatedly to
selecta desired repeat mode.
BDs/DVDs
A- -Selectedportion will be repeated
continually.
Chapter -The current chapter will be
played back repeatedly.
Title -The current title will be played
backrepeatedly.
To return to normal playback,press REPEAT
repeatedly to select [Off].
Audio CDs/Music files
_Z'%.Track -The current track or file will be
played back repeatedly.
_"_"All- All the tracks or files will be played
backrepeatedly.
-Tile tracks or fileswill be played back
in random order.
*.,_],All- All tile tracksor files will be
played back repeatedly in random order.
_q, A-B - Selected portion will be repeated
continually. (Audio CD only)
To return to normal playback,press CLEAR.
Repeating a specific portion
This player carl repeat a portion you have
selected.
1.
2.
3.
While playback, pressREPEATto select [A-]
at the begirlning ofthe portion you wish to
repeat.And then press ENTER.
Press ENTERat the end of the portion.
Your selected portion will be repeated
continually.
To return to normal playback, pressREPEAT
repeatedly to select [OFF]or pressCLEAR.
Marker Search
You carl start playback from up to nine
memorized points.
To enter a marker
1. While playback, pressMARKERat tile
desired point. Tile Markericon appears on
the TVscreen briefly.
2. Repeat step 1 to add up to nine markers.
To recall a marked scene
1. PressSEARCHand tile searchmenu appears
on the screen.
2. Pressa number button to select a marker
number that you want to recall. Playback
startsfrom tile marked scene.
HB9OSSA-AH.BUSALL_OM.indd 40 2010-01-08 _,_,_,l] 11:50:;
Operation 41
To delete a Marker
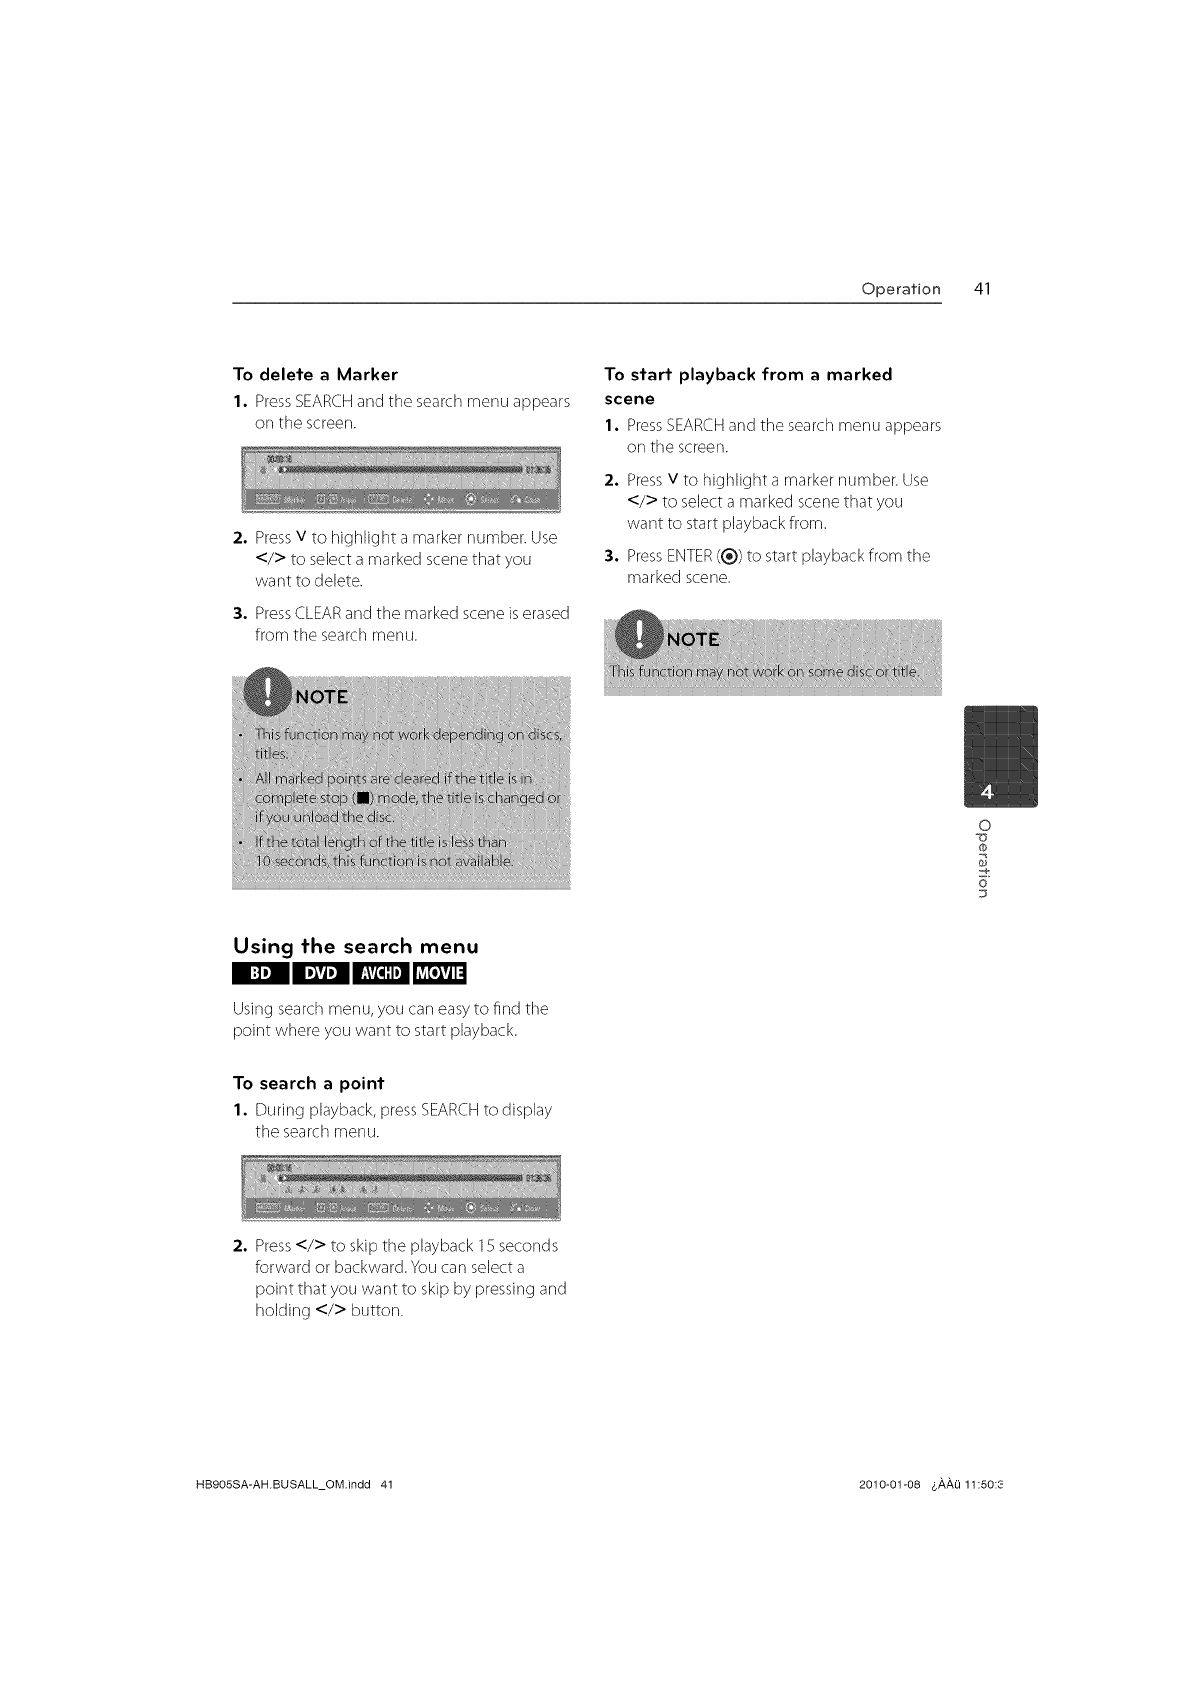
1. PressSEARCHand the searchmenu appears
on the screen.
2, Press v to highlight a marker number. Use
</> to select a marked scene that you
want to delete.
3, Press CLEAR and the marked scene is erased
from the search menu.
To start playback from a marked
scene
1. Press SEARCH and the search menu appears
or]thescreen.
2. Pressv to highlight a marker number. Use
</> to select a marked scenethat you
want to start playback from.
3. PressENTER((_))to start playback from the
marked scene.
0
0
6"
Using the search menu
Using searchmenu, you carl easyto find the
point where you want to start playback.
To search a point
1. Durklg playback, press SEARCH to display
the search menu.
2. Press</> to skip the playback 15 seconds
forward or backward. Youcarl select a
point that you want to skip by pressing and
holding </> button.
HB905SA-AH.BUSALL_OM.indd 41 2010-01-08 $,&,,&,O11:50:8
42 Operation
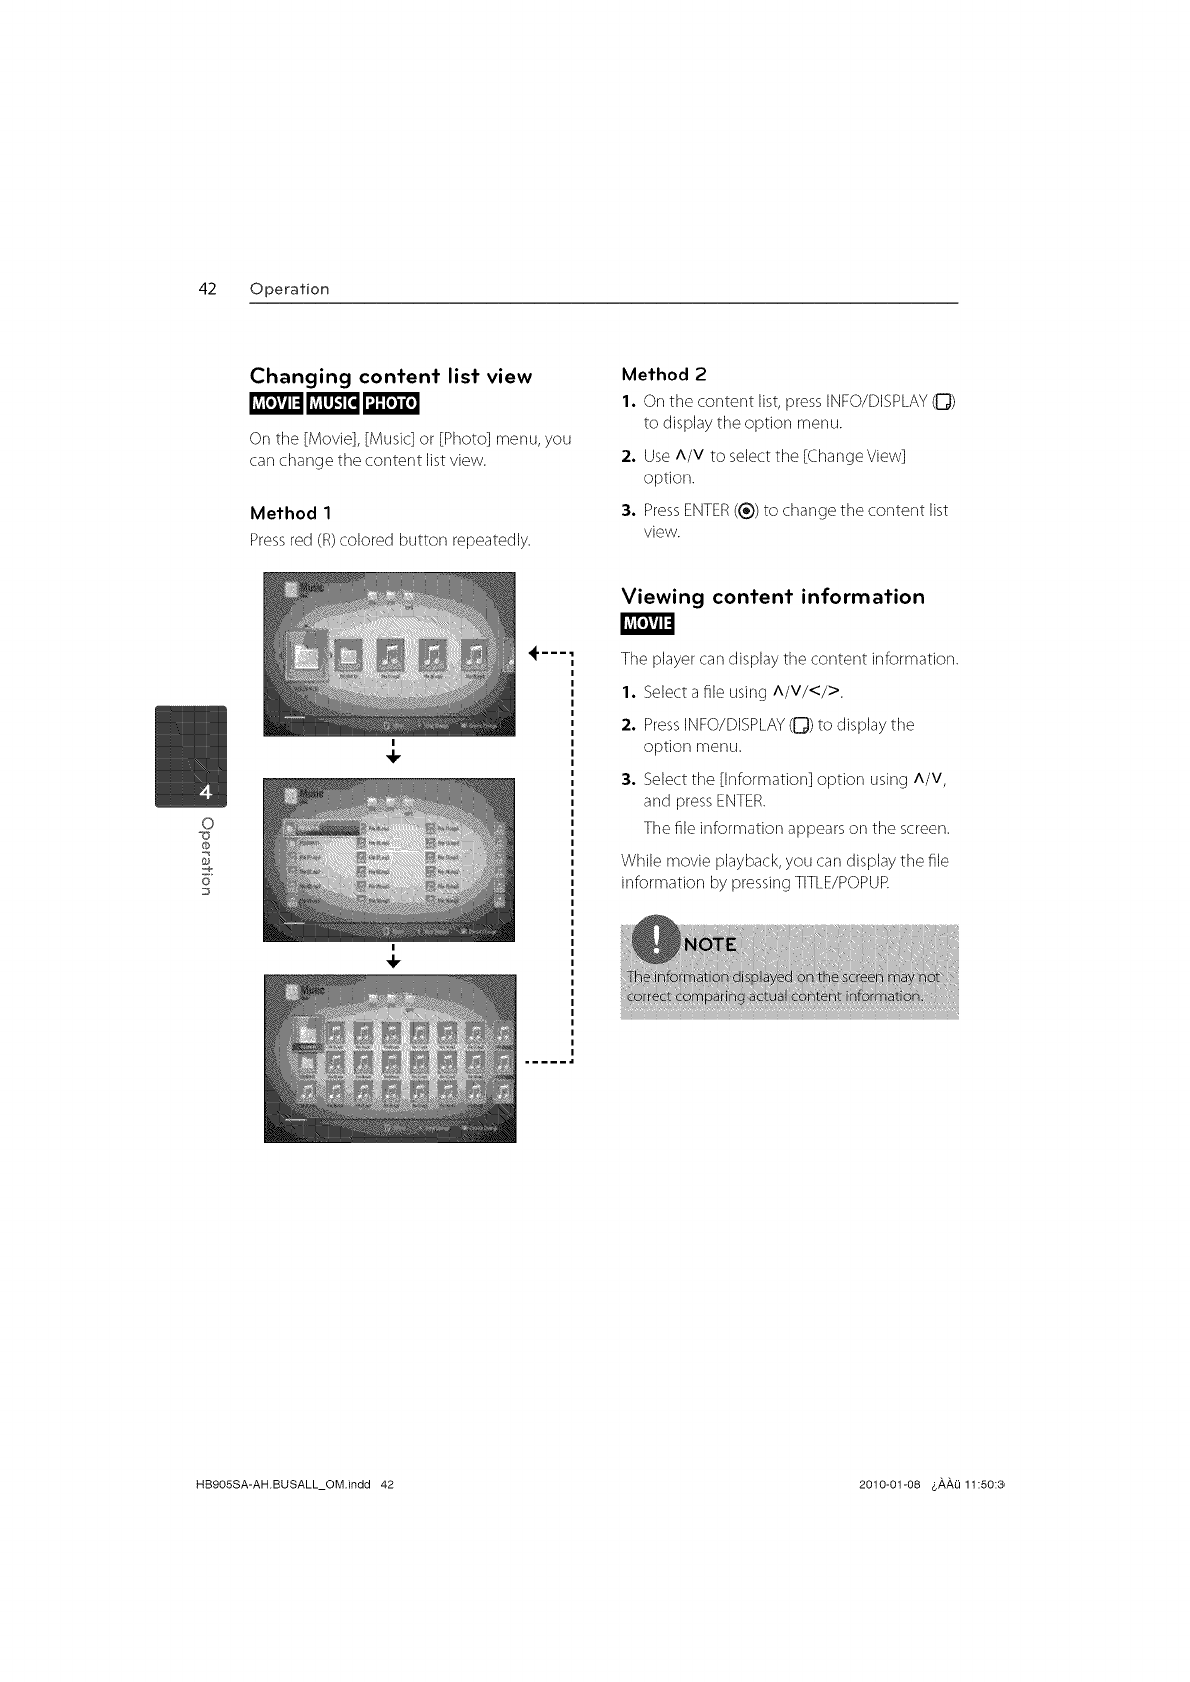
Changing content list view
On tile [Movie], [Music] or [Photo] menu, you
carl change the content list view.
Method 1
Pressred (E)colored button repeatedly.
_Lvi[e_Vl1:1
Method 2
1. On the content list,press INFO/DISPLAY(0)
to display the option menu.
2. UseA/V to select the [ChangeView]
option.
3. PressENTER((_))to change the content list
view.
Viewing content information
o
0
6"
The player carl display tile content information.
1. Selecta file using A/V/</>.
2. PressINFO/DISPLAY(G) to display the
option menu.
3. Selecttile [Information] option using A/V,
and pressENTER.
The file information appears on the screen.
While movie playback, you carl display the file
information by pressingTITLE/POPUR
HB9OSSA-AH.BUSALL_OM.indd 42 2010-01-08 6_,_,_ 11:50:8,
Operation 43
Last Scene Memory
Thisunit memorizes tile last scene from the
last disc that is viewed.Tile lastscene remains
in memory even if you remove tile disc from
tile unit or switch off the unit. Ifyou load a disc
that hastile scene memorized, tile scene is
automatically recalled.
On-Screen display
You carl display and adjust various information
and settings about the content.
Displaying content information
on-screen
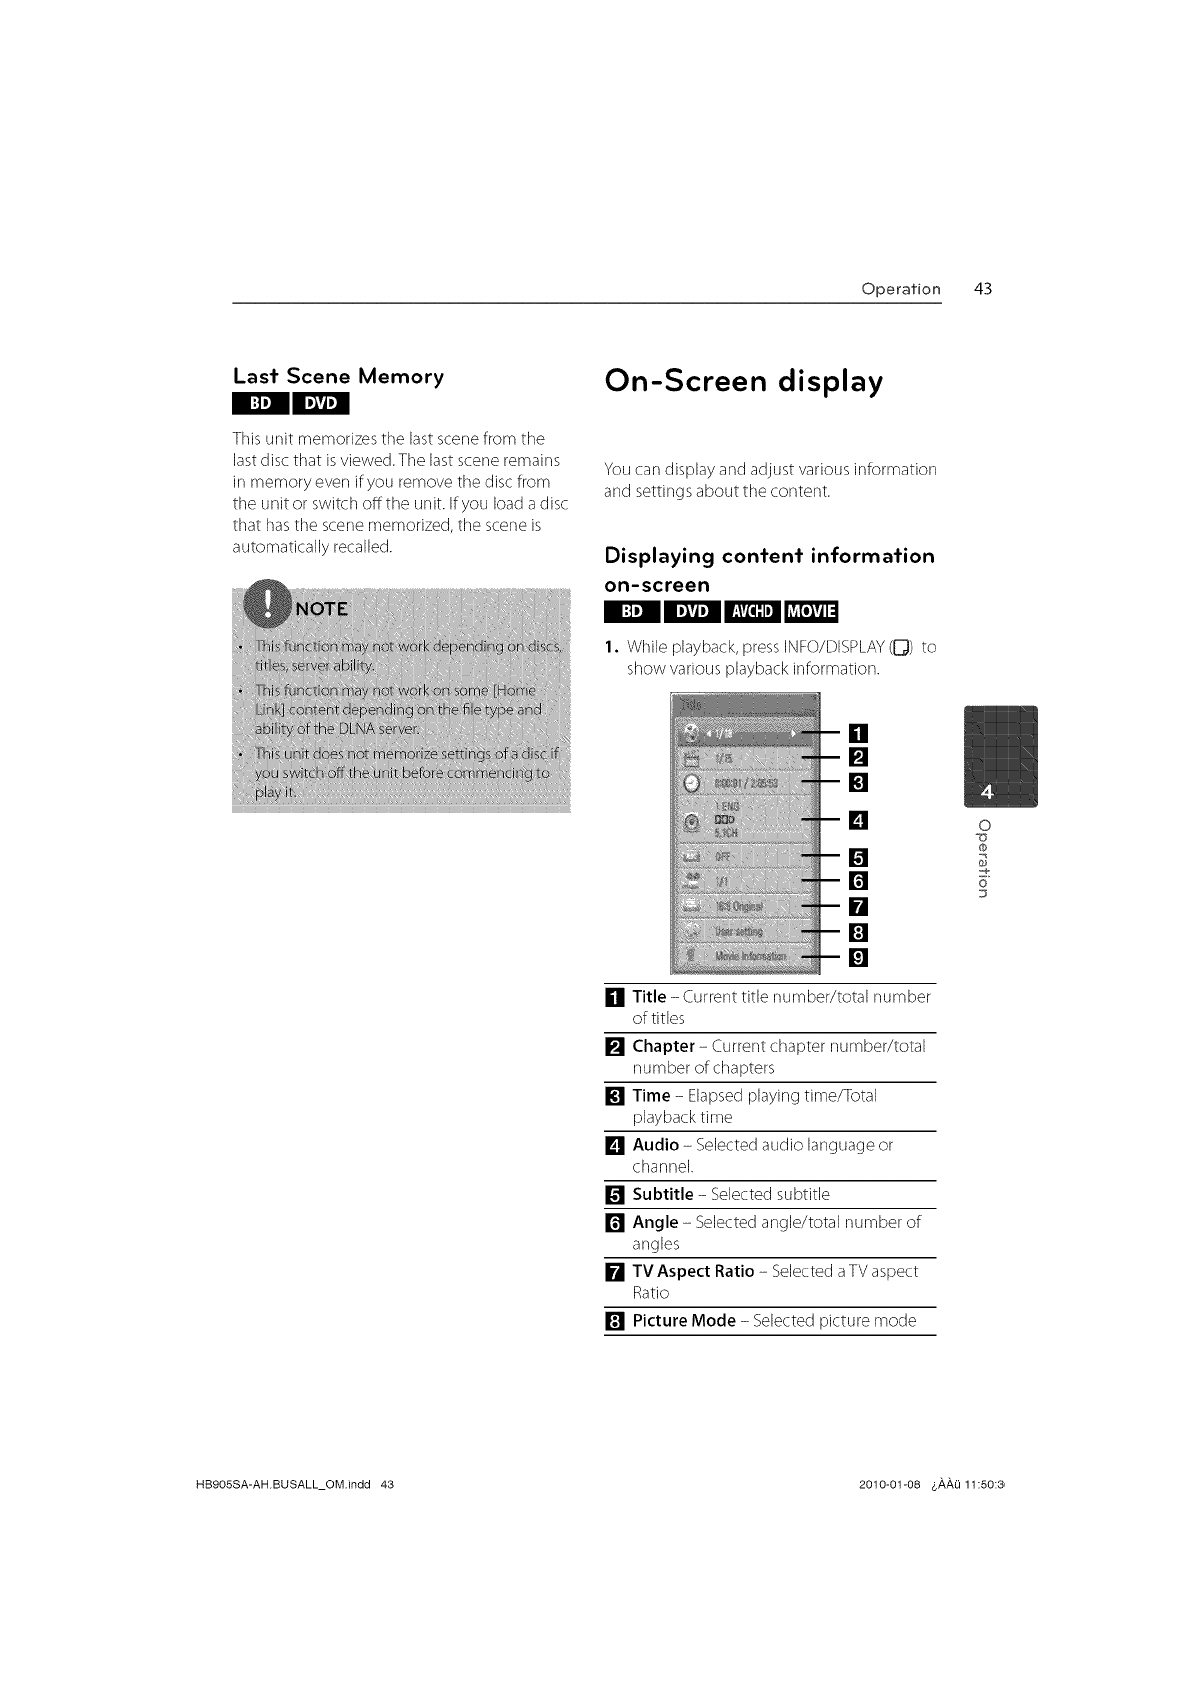
I. While playback, press INFO/DISPLAY(_) to
show various playback information.
[]
[]
m
[]
Title - Current title number/total number
of titles
[]
[] Chapter -Current chapter number/total
number of chapters
[] Time - Elapsedplaying time/Total
playback time
[] Audio - Selectedaudio language or
channel.
[] Subtitle - Selected subtitle
[] Angle - Selectedangle/total number of
angles
[] TV Aspect Ratio - Selecteda TVaspect
Ratio
[] Picture Mode - Selected picture mode
0
0
6"
HB9OSSA-AH.BUSALL_OM.indd 43 2010-01-08 $#,#,1_11:50:8,
44 Operation
[] Movie Information - Selectthis option
and pressENTERto display movie
information
2. Select an option using A/V.
3. Use </> to adjust tile selected option
value.
4, Press RETURN (Sqb) to exit the On-Screen
display.
Press</> to skip tile playback 60 seconds
forward or backward.
3. PressENTER((_))to start playback from
selected time.
0
tb
6"
Hearing a different audio
1. During playback, press INFO/DISPLAY(0) to
display the on-screen display.
2. UseA/V to select the [Audio] option.
3. Use</> to select desired audio language,
audio track or audio channel.
Playing from selected time
1. PressINFO/DISPLAY([]})during playback.
Tile time searchbox shows tile elapsed
playing time.
2° Selectthe [Time] option and then input
the required start time in hours, minutes,
and seconds from left to right.
Forexample, to find a scene at 2 hours, 10
minutes, and 20seconds,enter"21020't
Selecting a subtitle language
1. During playback, press INFO/DISPLAY(0) to
display the playback menu.
2. UseA/V to select the [Subtitle] option.
3. Use</> to select desired subtitle language.
4. PressRETURN(Sqb)to exit the On-Screen
HB905SA-AH.BUSALL_OM.indd 44 2010-01-08 _,,A,,A,{)11:50:_
Operation 45
display.
Watching from a different
angle
If the disc contains scenesrecorded at different
camera angles, you carl change to a different
camera angle during playback.
1. During playback, pressINFO/DISPLAY(D) to
display the on-screen display.
2. UseA/V to select tile [Angle] option.
3. Use</> to select desired angle.
4. PressRETURN(d'-_) to exit the On-Screen
display.
Changing the TV Aspect Ratio
You carlchange the TVaspect ratio setting
while playback.
1. During playback, pressINFO/DISPLAY(D) to
display the on-screen display.
2. UseA/V to select tile [TV Aspect Ratio]
option.
3. Use</> to select desired option.
4. PressRETURN(d'-_)to exit tile On-Screen
display.
Changing the Picture Mode
You carl change the [Picture mode] option
while playback.
1. During playback, pressINFO/DISPLAY(0) to
display the on-screen display.
2. Use A/V to select tile [Picture Mode]
option.
3. Use</> to select desired option.
4. PressRETURN(d'-_)to exit tile On-Screen
display.
Setting the [User setting] option
1. During playback, pressINFO/DISPLAY(0) to
display the on-screen display.
2. Use A/V to select tile [Picture Mode]
option.
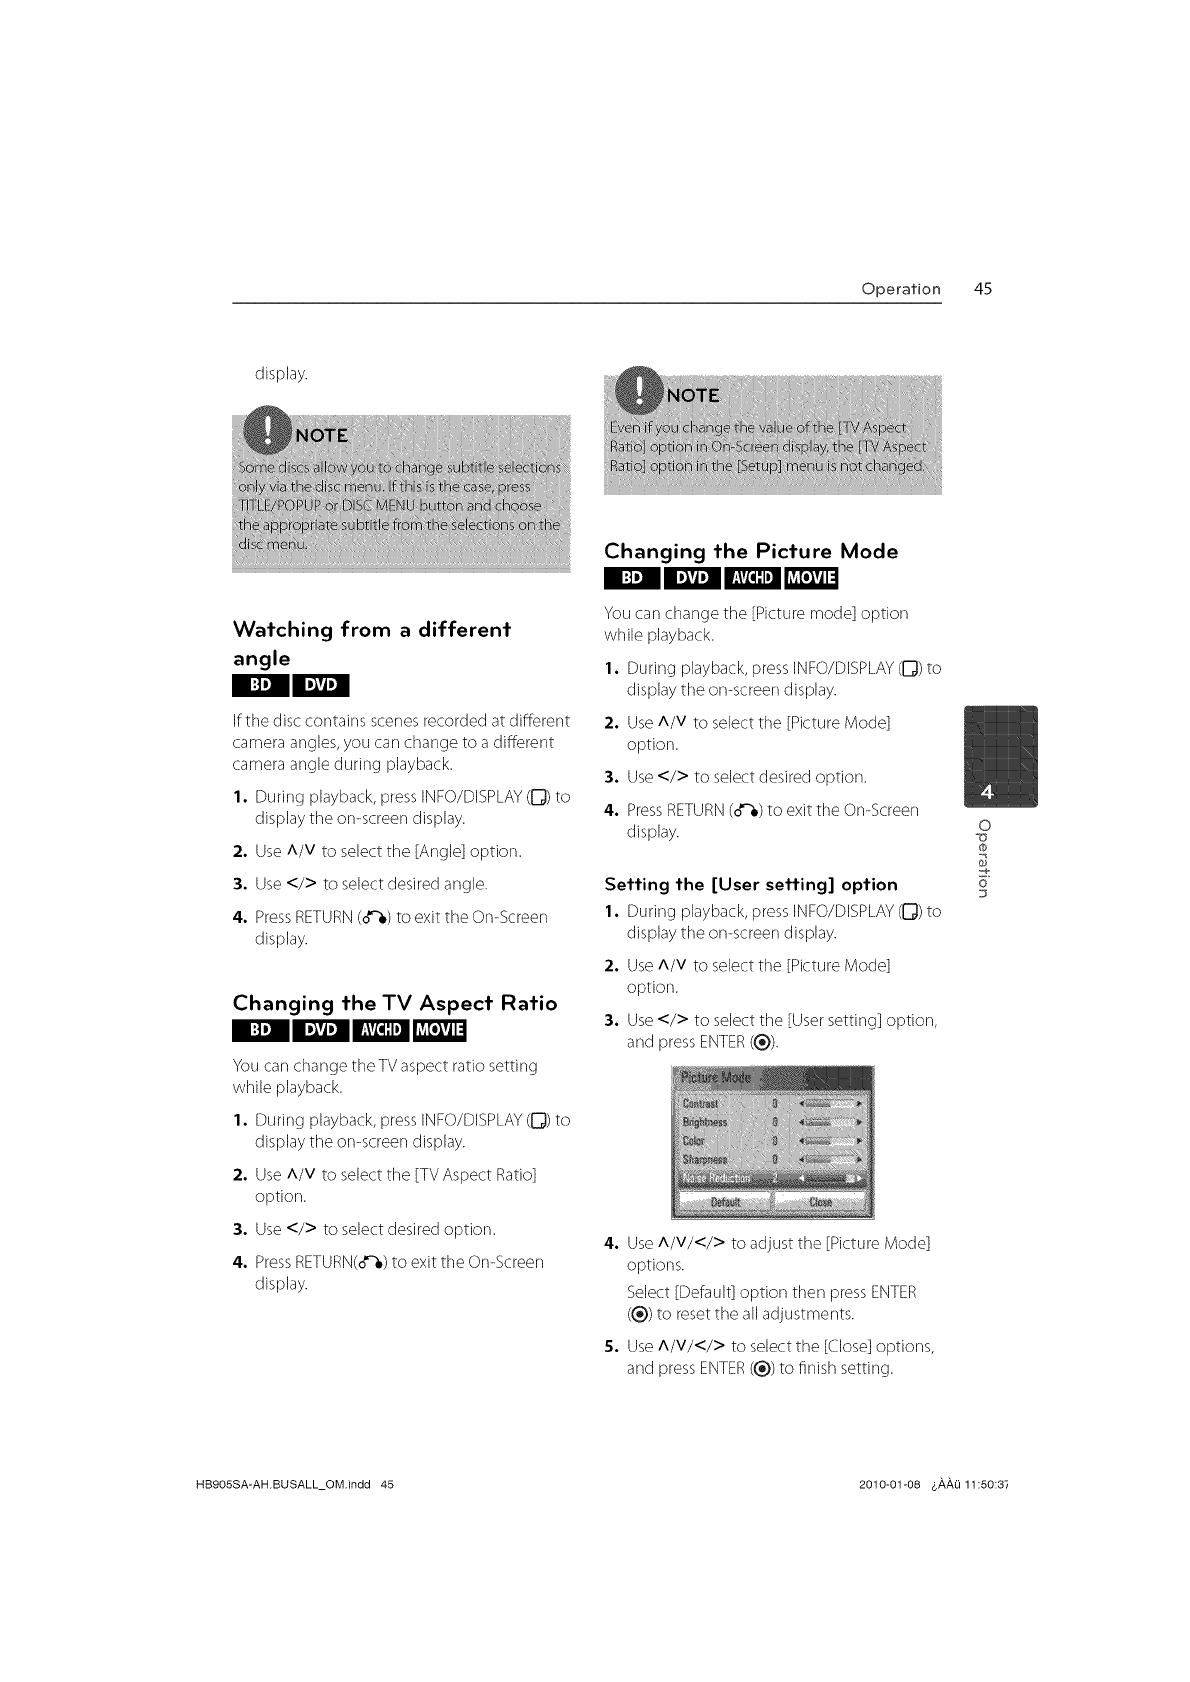
3. Use</> to select tile [User setting] option,
and press ENTER((_)).
4. Use A/V/</> to adjust the [Picture Mode]
options.
Select [Default] option then pressENTER
(l_))to resetthe all adjustments.
S. Use A/V/</> to selectthe [Close]options,
and press ENTER(®) to finish setting.
0
0
=e
6"
HB9OSSA-AH.BUSALL_OM.indd 45 2010-01@8 4,#,#,Li11:50:37
46 Operation
o
@
6+
Enjoying BD-LIVE
This unit allows you to en]oy functions such as
picturedn-picture, secondary audio and Virtual
packages,etc.,with BD-Videosupporting
BONUSVIEW(BD-ROMversion 2 Profile 1
version 1.1/Final Standard Profile).
Secondaryvideo and audio carl be played from
a disc compatible with tile picture-in-picture
function. Fortile playback method, refer to tile
instructions in tile disc.
In addition to tile BONUSVIEWfunction, BD-
Video supporting BD-LIVE(BD-ROMversion
2 Profile 2) that hasa network extension
function allows you to enjoy more functions
suchas downloading new movie trailers by
connecting this unit to the internet
1. Check the network cormection and settings
(pages 24-27).
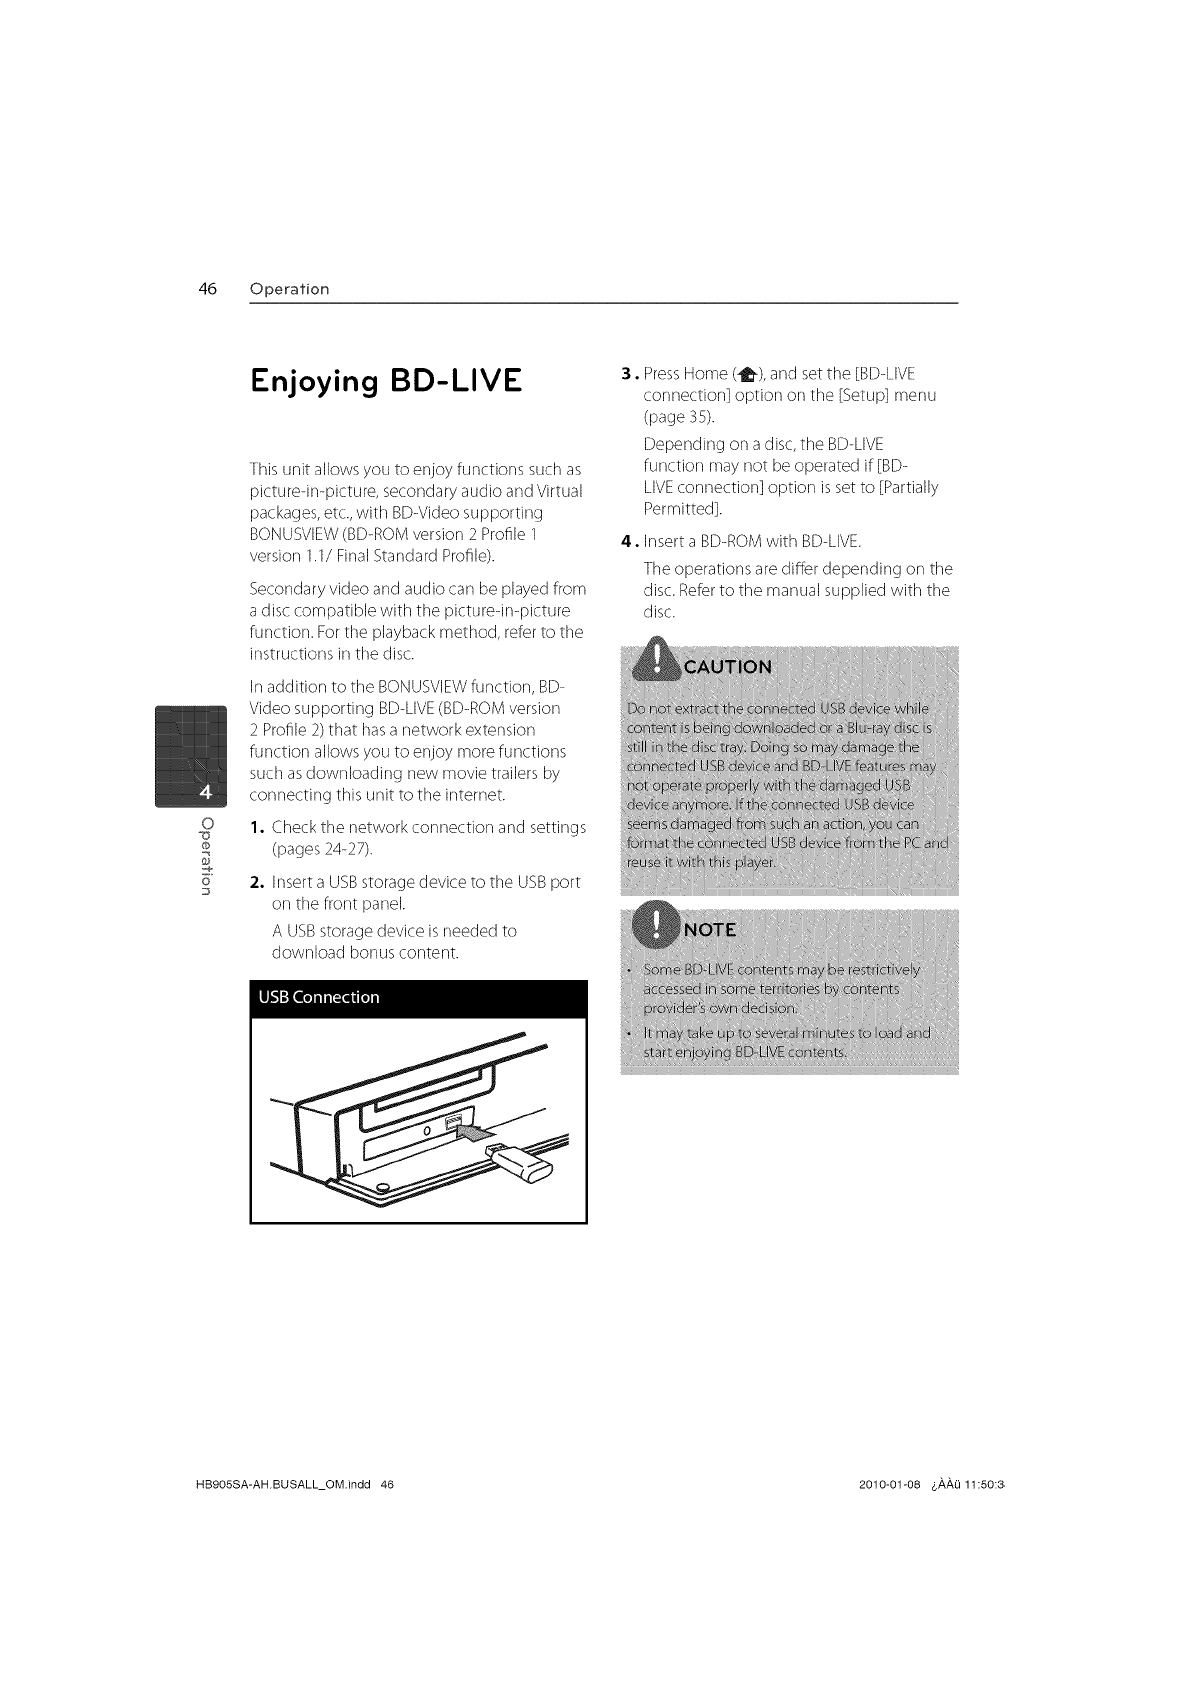
2. Insert a USB storage device to tile USB port
on tile front panel.
A USB storage device is needed to
download bonus content
3. PressHome (_), and set the [BD-LIVE
cormection] option on the [Setup] menu
(page 35).
Depending on a disc,the BD-LIVE
function may not be operated if [BD-
LIVEcormection] option isset to [Partially
Permitted].
4. Insert a BD-ROMwith BD-LIVE.
The operations are differ depending on the
disc. Referto tile manual supplied with tile
disc.
HB9OSSA-AHBUSALL_OM.indd 46 2010-01-08 $_,_,0 11:50:8,
Operation 47
Playing a movie file
and VR disc
You carl play DVD-RWdiscs that are recorded
in Video Recording (VR)format and movie files
contained in a disc or USBdevice.
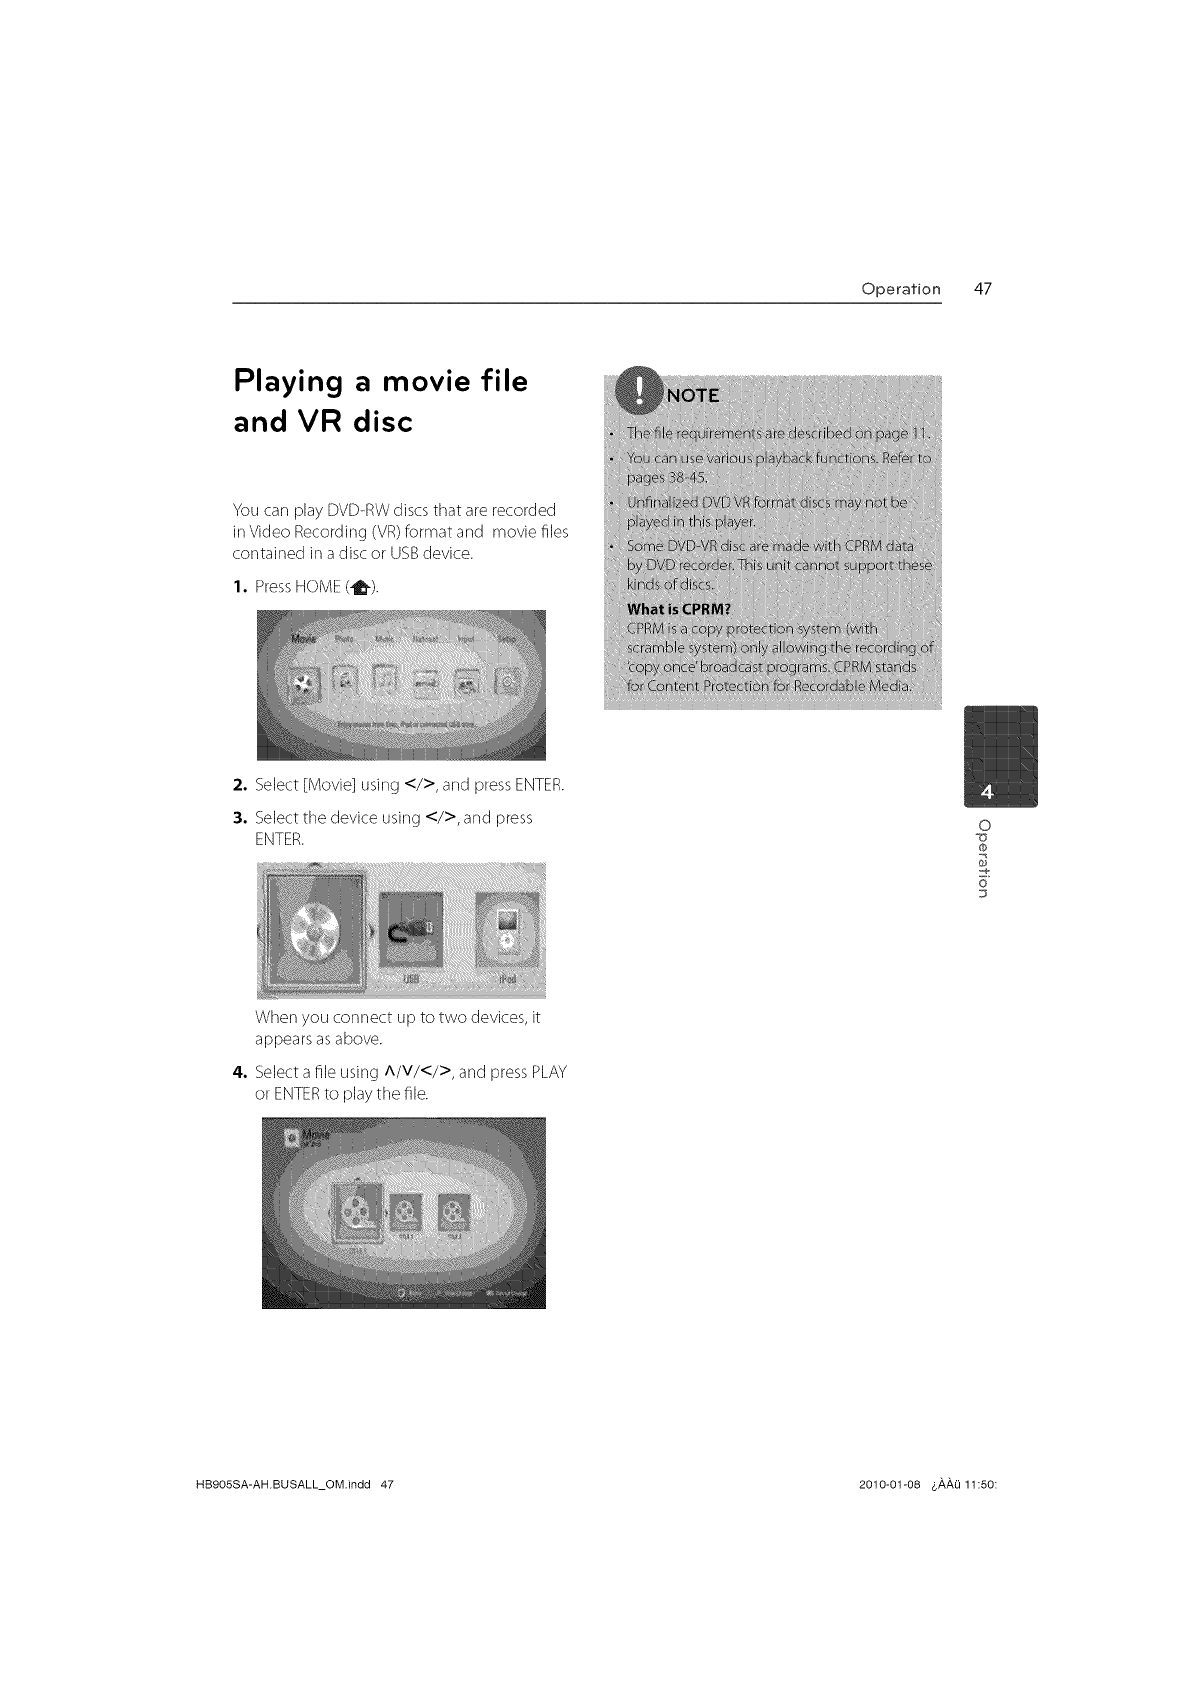
1. PressHOME('El').
2. Select [Movie] using </>, and press ENTER.
3. Select tile device using </>, and press
ENTER.
When you connect up to two devices, it
appears asabove.
0
0
6"
4. Select a file using A/V/</>, and press PLAY
or ENTERto play the file.
HB905SA-AH.BUSALL_OM.indd 47 2010-01-08 _,#,#,_ 11:50:
48 Operation
Selecting a subtitle file Changing subtitle code page
o
tb
6"
Ifa movie file name and the subtitle file
name are the same, subtitle file is played
automatically when playing the movie file.
If the subtitle file name isdifferent with the
movie file name,you need to select the subtitle
file on tile [Movie] menu before playing the
movie.
1. UseA/V/</> to select the subtitle file you
wish to play in tile [Movie] menu.
2. PressENTER(1_)).
PressENTER((_) again to deselect the
subtitle file. Selected subtitle file will be
displayed when you play the movie file.
If the subtitle is not displayed properly, You
carl change the subtitle code page to view the
subtitle file properly.
1. During playback, press INFO/DISPLAY(_) to
display the playback menu.
2. Use A/V to select tile [Code Page] option.
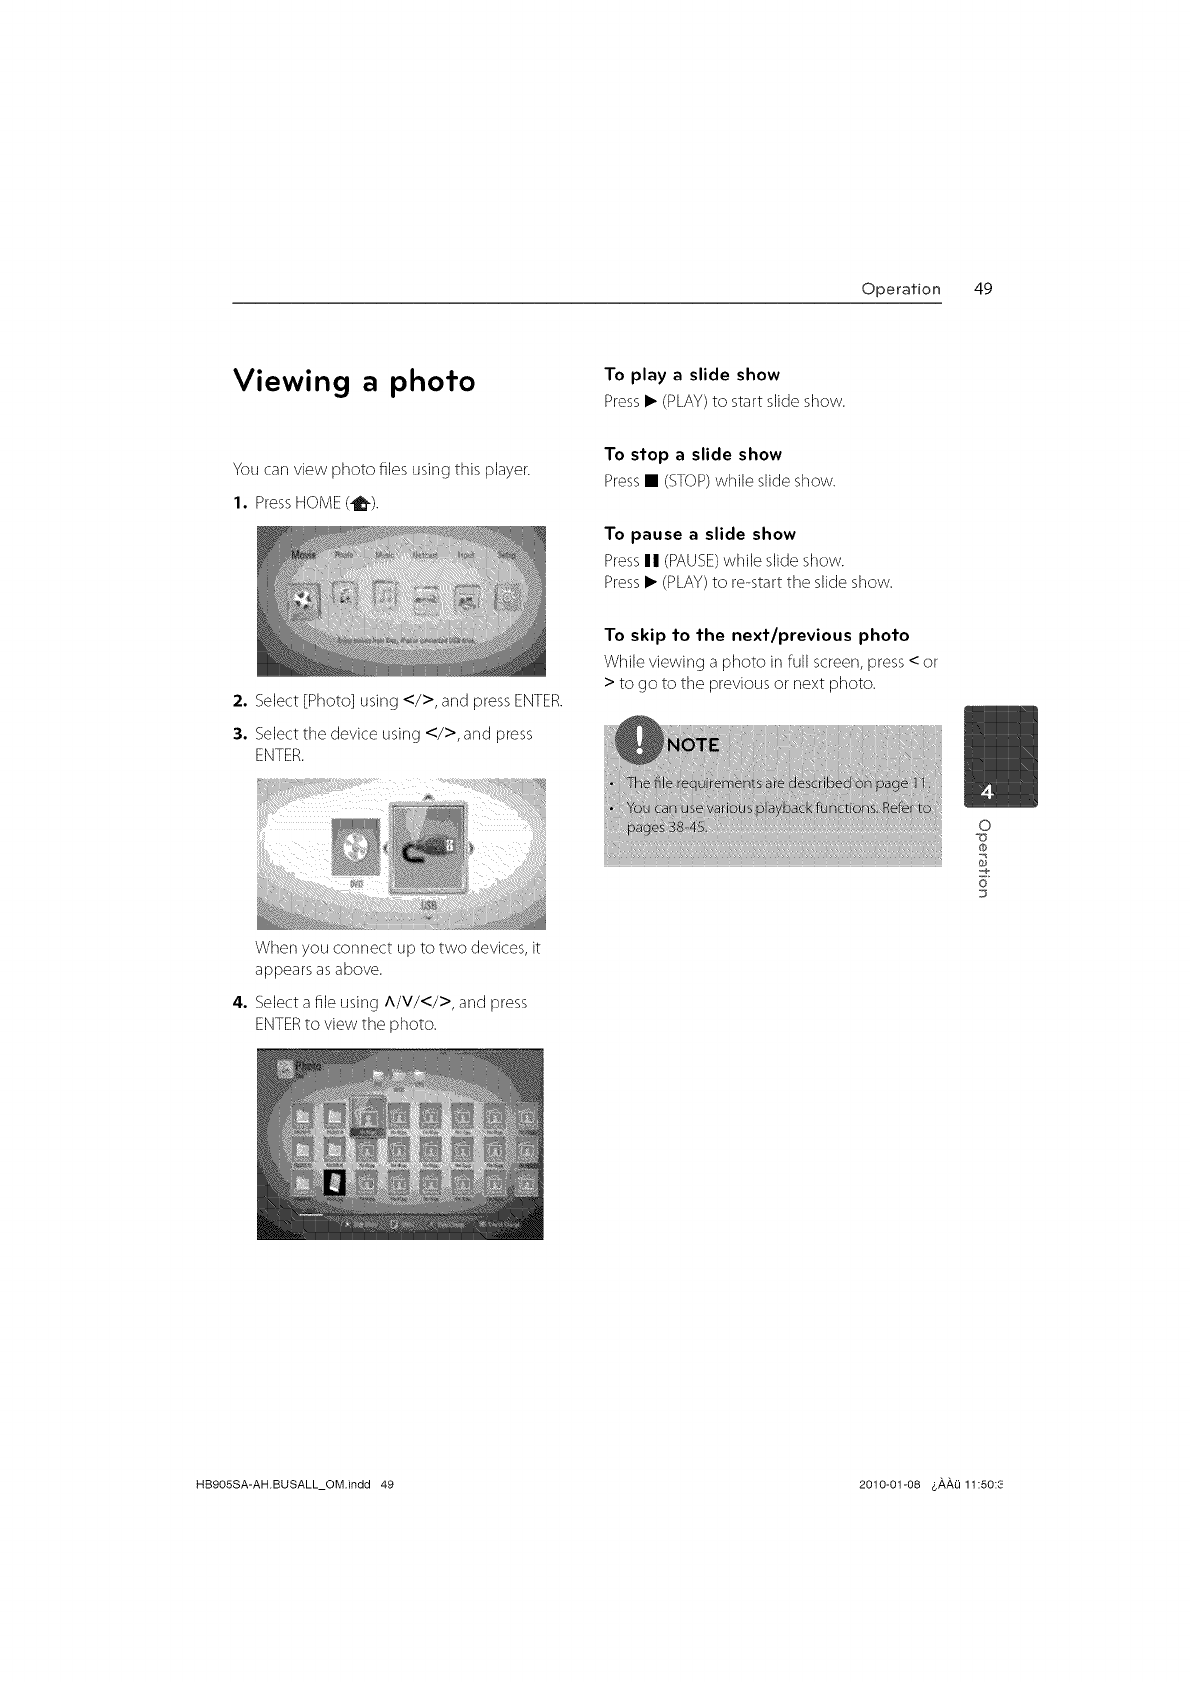
3. Use</> to select desired code option.
4. PressRETURN(Sqb)to exit the On-Screen
display.
HB905SA-AH.BUSALL_OM.indd 48 2010-01-08 &,_,,_,Q11:50:_
Operation 49
Viewing a photo To play a slide show
Press• (PLAY)to start slide show.
You carlview photo files using this player.
1. PressHOME(-_-).
To stop a slide show
Press• (STOP)while slide show.
To pause a slide show
Press II (PAUSE)while slide show.
Press • (PLAY) to re-start the slide show.
2. Select [Photo] using </>, and press ENTER.
3. Select tile device using </>, and press
ENTER.
When you connect up to two devices, it
appears asabove.
To skip to the next/previous photo
While viewing a photo in full screen, press < or
> to go to tile previous or next photo.
0
0
6"
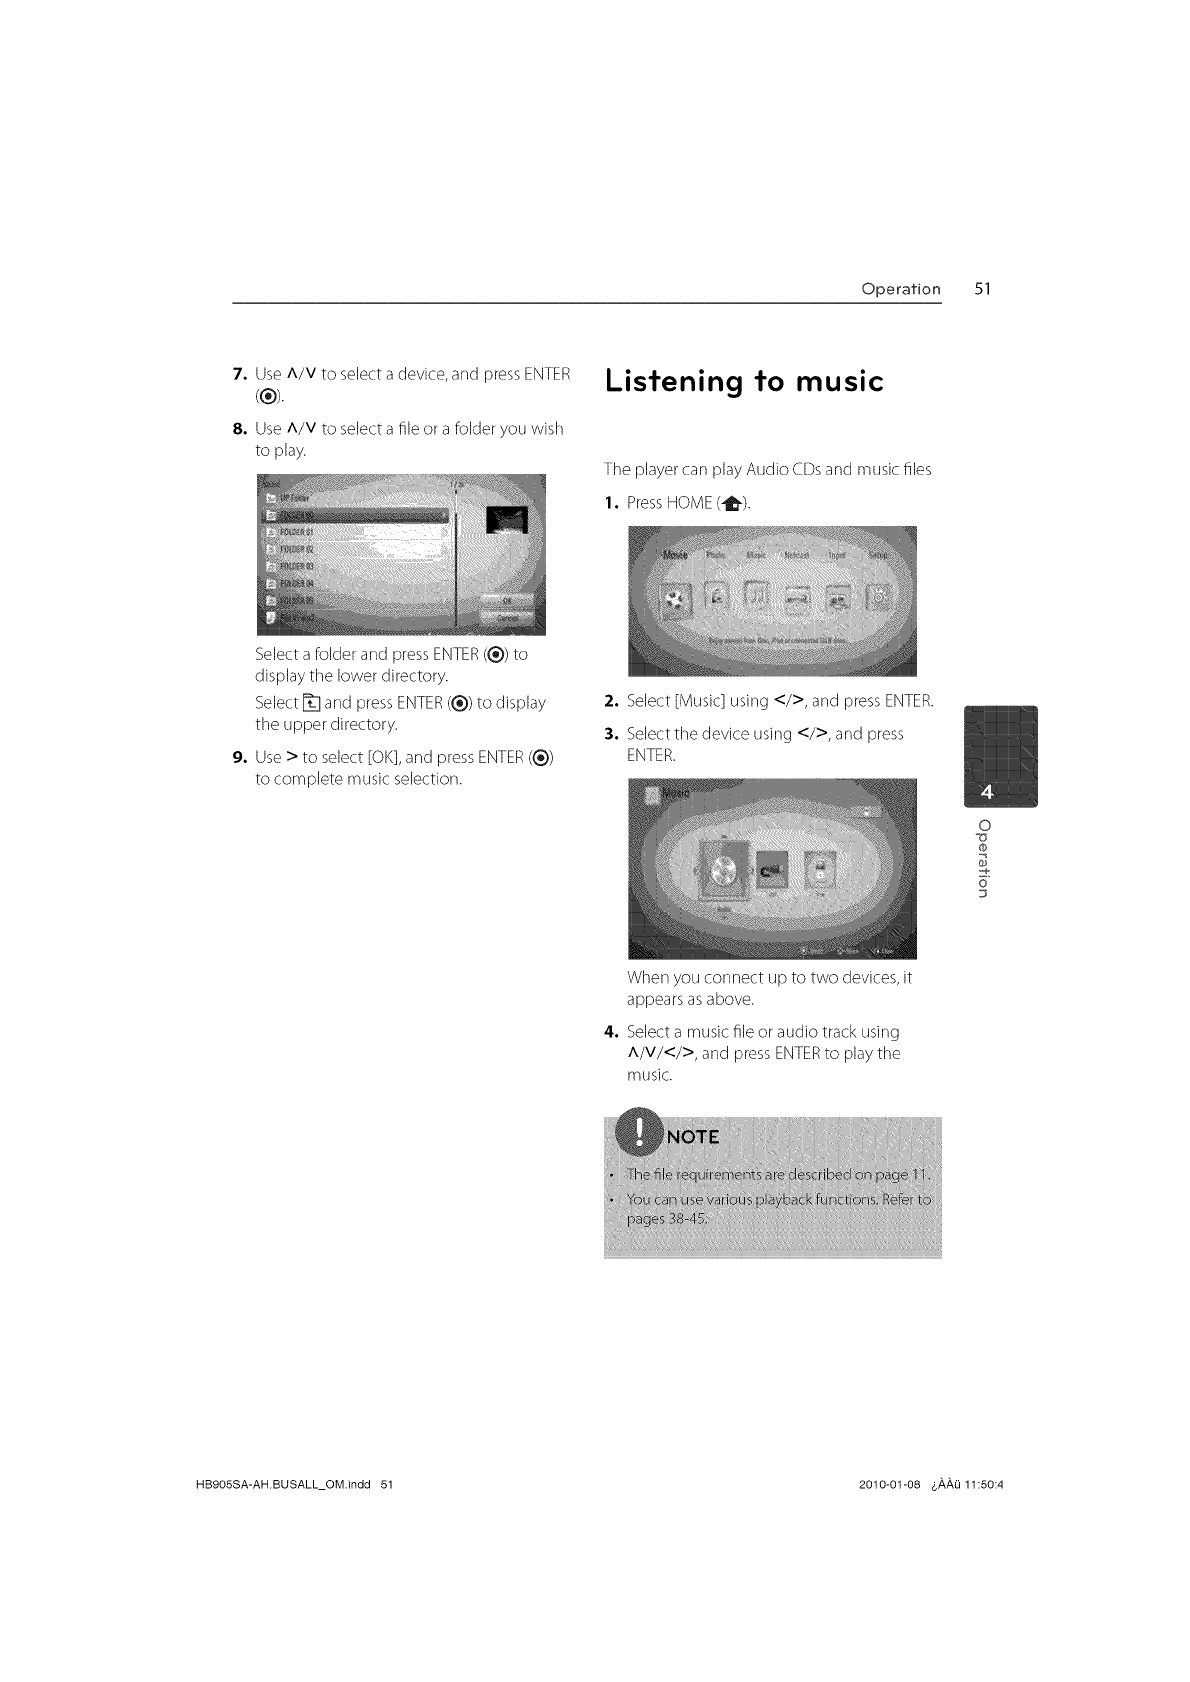
4. Select a file using A/V/</>, and press
ENTERto view the photo.
HB9OSSA-AH.BUSALL_OM.indd 49 2010-01-08 4,#,#,Li11:50:3
50 Operation
Options while viewing a photo
You carl use various options during viewing a
photo in full screen.
1. While viewing a photo in full screen, press
INFO/DISPLAY(t_) to display the option
menu.
2. Selectan option using ^/v.
Listening to music while slide
show
You carl display photo files while listening to
musicfiles.
1. PressHOME(-_-).
0
@
6"
[] Current photo/Total number of photos
- Use</> to view previous/next photo.
[] Slide Show- PressENTERto start or
pauseslide show.
[] Music Select - Selectthe background
music for tile slide show.
[] Music -Press ENTERto start or pause
background music.
[] Rotate - PressENTERto rotate tile photo
clockwise.
[] Zoom - PressENTERto display the [Zoom]
menu.
[] Effect - Use</> to selecta transition
effect between photos in a slide show.
[] Speed - Use</> to select a delaying
speed between photos in a slide show.
3. Press RETURN (d'%) to exit the option menu.
2. Select [Photo] using </>, and press
ENTER((_)).
3. Selecttile [Disc]or [USB]option using </>,
and pressENTER((_)).
4. Select a file using A/V/</>, and press
ENTER((_)) to view the photo.
S. PressINFO/DISPLAY(O) to display the
option menu.
6. UseA/V to select [Music Select] option,
and pressENTER((_))to display the [Music
Select] menu.
HB9OSSA-AH.BUSALL_OM.indd 50 2010-01-08 4,_,_,0 11:50:3_
Operation 51
7, UseA/V to selecta device, and pressENTER
(®).
8. Use A/V to select a file or a folder you wish
to play.
Listening to music
The player carl play Audio CDsand music files
1. PressHOME(_).
Select a folder and pressENTER(®) to
display tile lower directory.
Select It] and pressENTER(®) to display
the upper directory.
9. Use>to select [OK],and press ENTER(®)
to complete music selection.
2. Select [Music] using </>, and pressENTER.
3. Selecttile device using </>, and press
ENTER.
When you connect up to two devices,it
appearsas above.
0
0
=e
6"
4. Select a music file or audio track using
A/V/</>, and press ENTER to play tile
music.
HB9OSSA-AH.BUSALL_OM.indd 51 2010-01-08 3_,_,0 11:50:4
52 Operation
o
0
6"
Audio CD Recording
You carl record one desired track or all of the
tracks in Audio CD to a USBstorage device.
1. Insert a USBstorage device to tile USBport
on tile front panel.
2. Press_ (OPEN/CLOSE),and place an Audio
CD on tile disc tray.
Press_ (OPEN/CLOSE)to close tile disc
tray.The playback starts automatically.
3. PressINFO/DISPLAY(0) to display the
option menu.
Or
Press • REC button on tile remote control.
You carl record all musics in tile audio CD.
4° Use A/V to select [CD Recording] option,
and press ENTER((_)) to display the [CD
Recording] menu.
Repeat this step to select tracks as marly as
you carl.
S° Use A/V to select a track you wish to copy
on tile menu, and press ENTER((_)).
Repeat this step to select tracks as marly as
you carl.
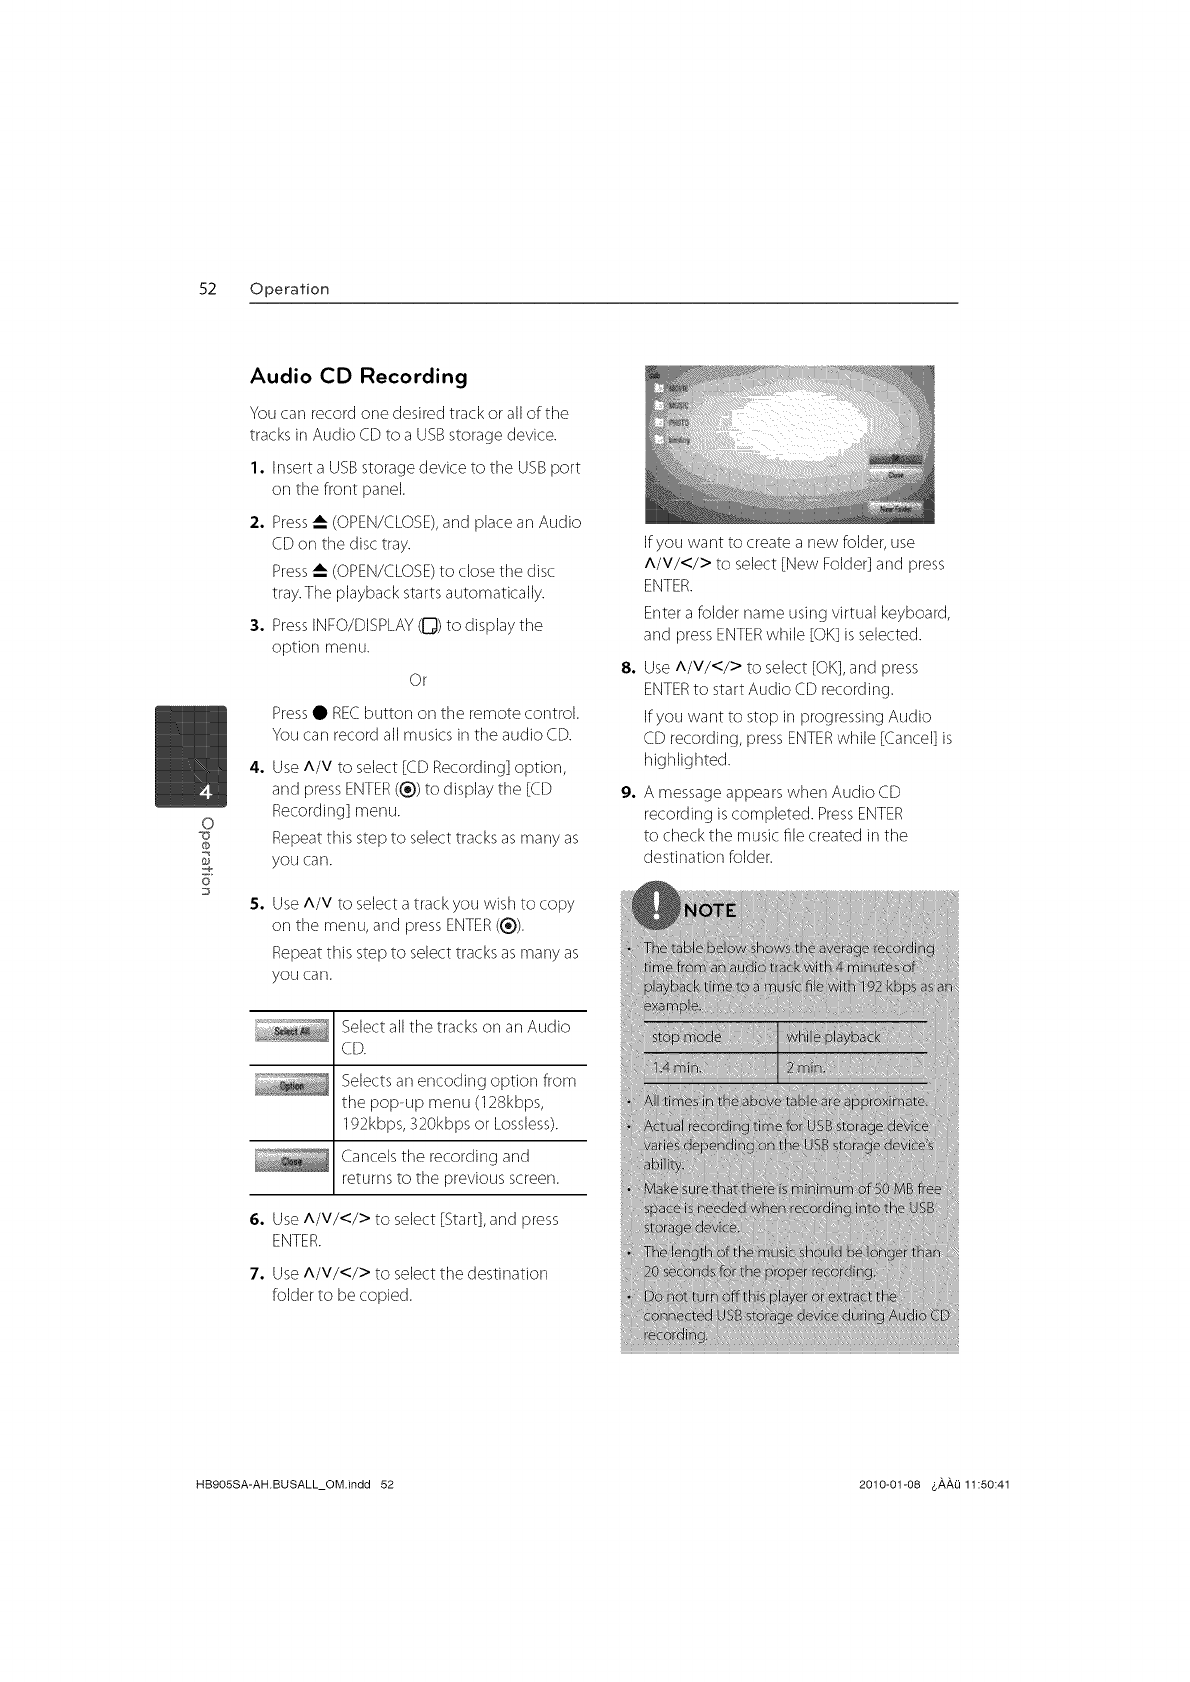
If you want to create a new folder, use
A/V/</> to select [New Folder] and press
ENTER.
Entera folder name using virtual keyboard,
and pressENTERwhile [OK] is selected.
8. UseA/V/</> to select [OK],and press
ENTERto start Audio CD recording.
If you want to stop in progressing Audio
CD recording, press ENTERwhile [Cancel] is
highlighted.
9. A messageappears when Audio CD
recording iscompleted. PressENTER
to check the music file created in the
destination folder.
Selectall the tracks on an Audio
CD.
Selectsan encoding option from
the pop-up menu (128kbps,
192kbps,320kbps or Lossless).
Cancelstile recording and
returns to tile previous screen.
6. UseA/V/</> to select [Start],and press
ENTER.
7. UseA/V/</> to selectthe destination
folder to be copied.
HB905SA-AHBUSALL_OM.indd 52 2010-01-08 &,_,,_,011:50:41
Operation 53
BD/DVD
While listening to a music from tile movie
playback, press MUSICIDto start loading
music information from the Gracenote Media
Database.
Viewing information from
Gracenote Media Database
Tile playercarl accessto the Gracenote Media
Databaseand loadsthe music information so
that Trackname,Artist Name,Genre and other
text information carl be displayed on tile list.
Audio CD
When you insert an Audio CD,tile playerstarts
playback automatically and load tile music title
from the Gracenote®Media Database.
If there is no music information from the
database,music titles will not appear on tile
screen.
Music file
I. Select a music file or audio track using
A/V/</>.
2. Press INFO/DISPLAY (D) to display tile
option menu.
3. Select the [Information] option using A/V
and pressENTER ((_)).
The player accesses to Gracenote Media
Database for the music information.
@
@
@
@
@
@
o
0
6"
HB9OSSA-AHBUSALL_OM.indd 53 2010-01-08 $#,#,1_11:50:4
54 Operation
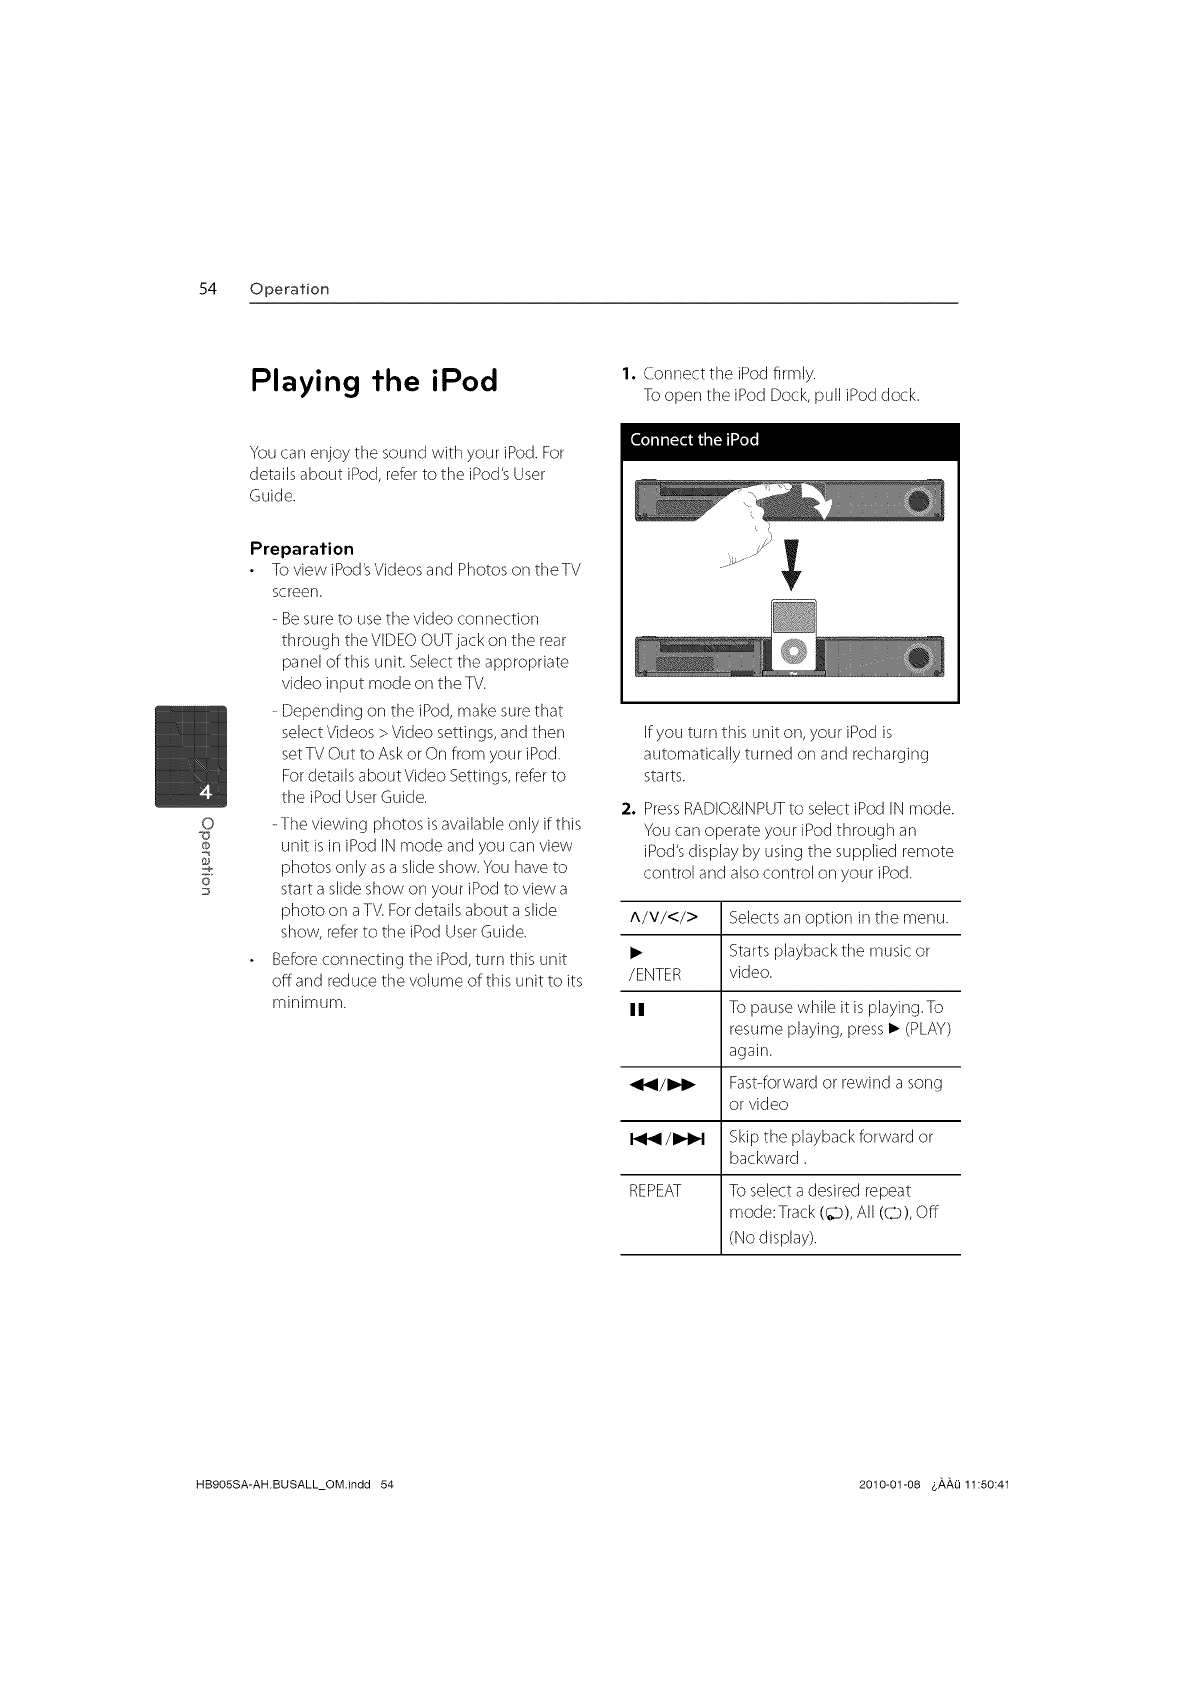
Playing the iPod 1. Connect the iPod firmly.
To open the iPod Dock, pull iPod dock.
0
@
6"
You carl enjoy the sound with your iPod.For
details about iPod, referto the iPod's User
Guide.
Preparation
To view iPod'sVideos and Photoson theTV
screen.
- Besure to usethe video corlnection
through tile VIDEOOUTjack on tile rear
panel of this unit. Select tile appropriate
video input mode on the TV.
- Depending on tile iPod,make sure that
select Videos > Video settings, and then
setTV Out to Askor On from your iPod.
Fordetails about Video Settings,refer to
tile iPod UserGuide.
-The viewing photos is available only if this
unit is in iPod IN mode and you carl view
photos only asa slide show.You have to
start a slide show on your iPodto view a
photo on aTV.Fordetails about a slide
show, refer to tile iPod User Guide.
Before connecting the iPod,turn this unit
offand reduce tile volume of this unit to its
minimum.
If you turn this unit on, your iPod is
automatically turned on and recharging
starts.
2. PressRADIO&INPUTto select iPod IN mode.
You carl operate your iPod through an
iPod'sdisplay by using the supplied remote
control and also control on your iPod.
A/V/</> Selectsan option in tile menu.
• Starts playback tile music or
/ENTER video.
II To pausewhile it is playing.To
resume playing, press I_ (PLAY)
again.
_141/1_ Fast-forwardor rewind a song
or video
/1_1 Skip the playback forward or
backward.
REPEAT To selecta desired repeat
mode:Track (_), All (0), OFF
(No display).
HB905SA-AH.BUSALL_OM.indd 54 2010-01-08 &,&,,&,Li11:50:41
Operation 55
Enjoying iPod on the screen
1. Connect the iPod firmly.
To open the iPod Dock, pull iPod dock.
2. Press HOME (_).
3. Select [Music] or [Movie] using </>, and
pressENTER((_).
Ifyou connectectthe other device
(CD or USB),select tile iPod on tile menu.
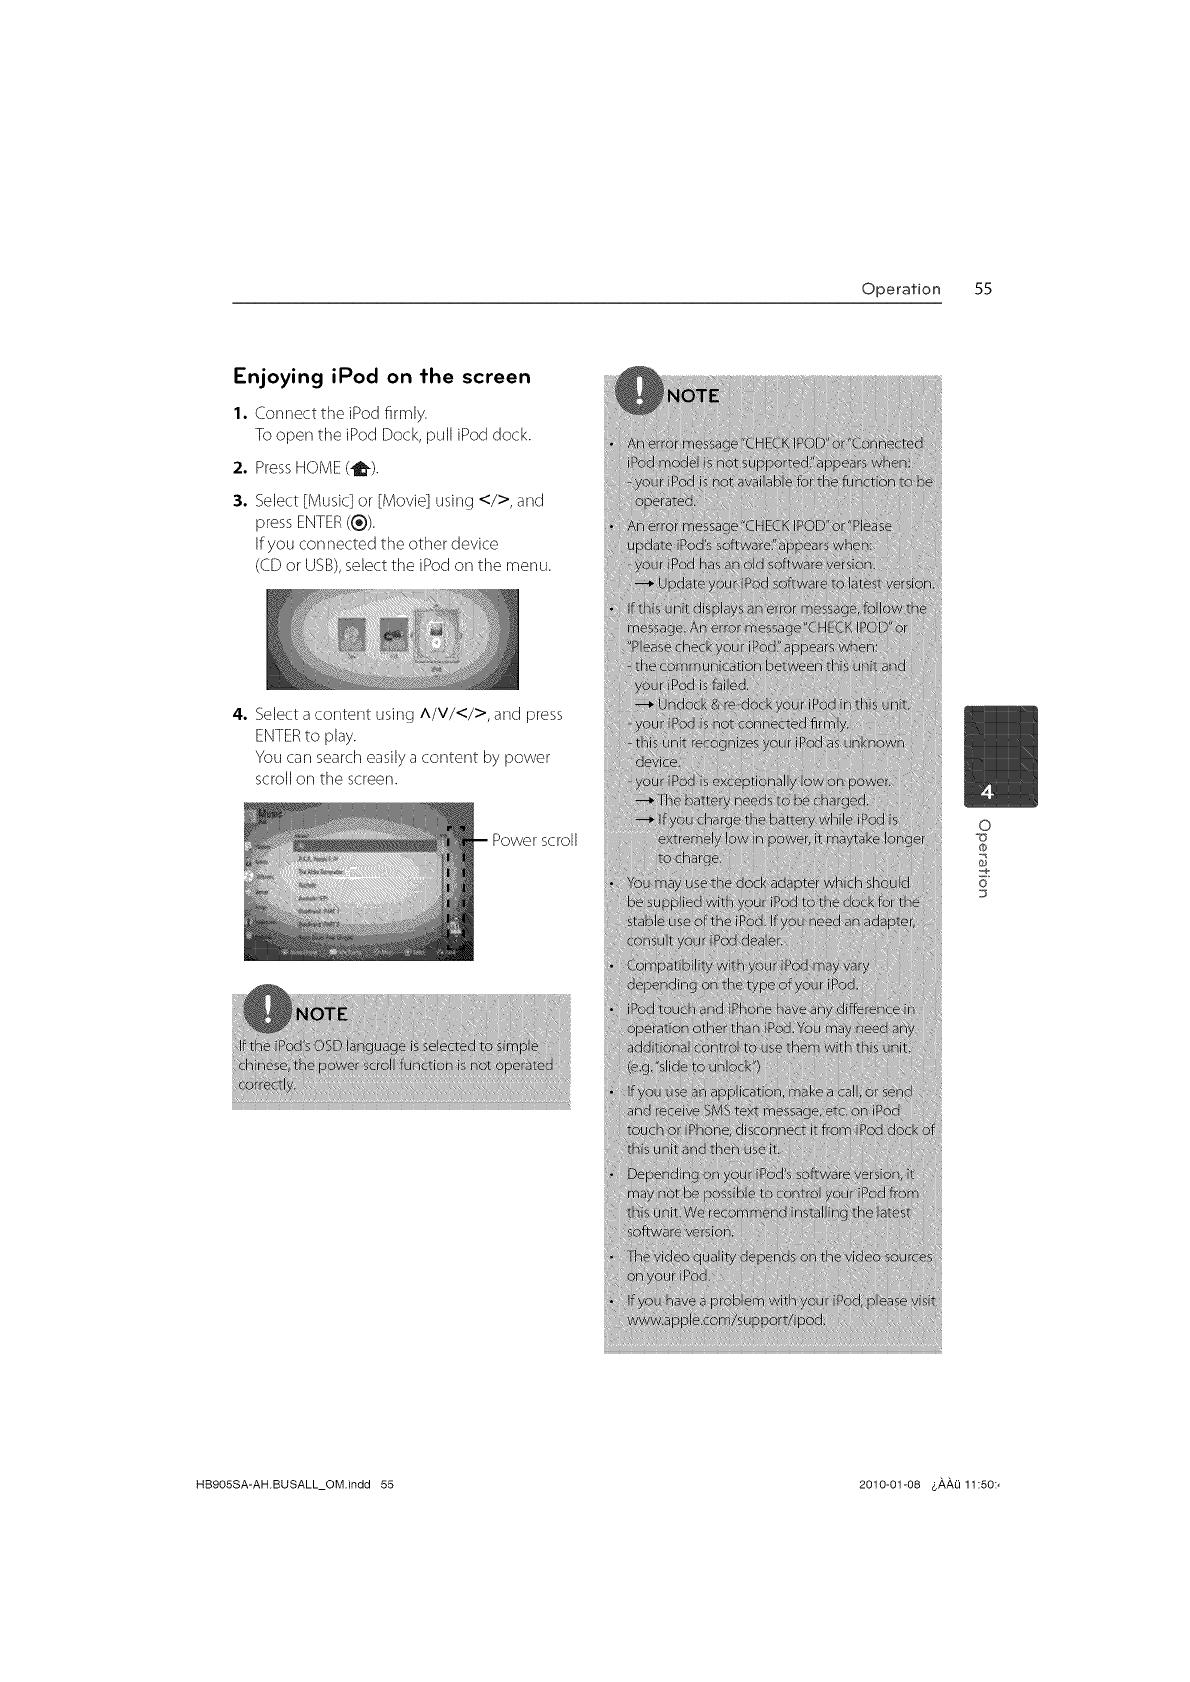
4. Select a content using A/V/</>, and press
ENTERto play.
You carl searcheasilya content by power
scroll on the screen.
Power scroll o
,,.+
6"
HB905SA-AH.BUSALL_OM.indd 55 2010-01-08 4,#,#,0 11:50:,
56 Operation
o
6
Radio Operations
Besure that both arlterlnas are connected.
(Referto tile page 21)
Listening to the radio
1. Press RADIO&INPUT until TUNER (FM/AM)
appears in the display window. The last
received station is tuned in.
2°
3°
Pressand hold TUNING (q+) for about two
seconds until tile frequency indication
starts to change. Scanning stops when the
unit tunes in a station. Or PressTUNING(q+)
repeatedly.
Adjust the volume by rotating VOLUME on
the front panel or by pressing VOL (+/-) on
tile remote control
Presetting the Radio Stations
You carl preset 50 stations for FM and AM(MW).
Beforetuning, make sure that you haveturned
down tile volume.
1°
2°
3°
4°
PressRADIO&INPUTuntil the TUNER(FM/
AM) appears in the display window.
Selectthe desired frequency by using
TUNING (q+).
PressENTERa preset number will flash in
the display window.
Press PRESET(q+) to select the preset
number you want.
5, PressENTER.Thestation is stored.
6. Repeat tile steps 2 to 5 to store other
stations.
Deleting all the saved stations
Pressand hold CLEARfor two seconds.
"ERASEALL"will flash up.Then all tile saved
stations are deleted.
Improving poor FM reception
PressB (blue) (MONO/STEREO)colored button
on the remote control. This will change
tile tuner from stereo to mono and usually
improve tile reception.
HB9OSSA-AH.BUSALL_OM.indd 56 2010-01-08 &#,#,ki 11:50:,
Operation 57
Using NetCast TM
Entertainment Access
You car] usevarious content servicesvia
Intemet with NetCastErltertairlment Access
feature.
1. Check tile network corlrlection and settings
(pages 24-27).
2. PressHOME(_).
3. Select tile [NetCast] using </>, and press
ENTER((_).
4. Select an option using </>, and press
ENTER((_)).
Netflix - See pages 57-59
Vudu - See pages 60-63
CinemaNow - See pages 63-66
YouTube TM - See pages 67-70
Pandora - See pages 70-73
Picasa TM Web Albums - See pages 73-76
AccuWeather - See pages 76-77
5. While enjoying ondine content from
NetCast,press blue (B)colored button to go
to NetCast Home screen.
Using Netflix
You carl instantly watch movies (very few new
releases) &TV episodes from Netflix streamed
over tile internet to your TV via your LG Blu-ray
disc player.
Activating your player
You must activate your player before you carl
useit to watch movies streamed over tile
INTERNETfrom Netflix.
1.
2.
3.
To watch movies and TV episodes instantly
form Netflix, you must be a netflix member.
If you are already a member of Netflix, tills
step is not needed.
On your computer, visit:
www.netflix.com/LG
Follow tile instructions to become a Netflix
member and get a free trial.
On the player,selectthe [Netflix] option in
tile [NetCast] menu using </>, and press
ENTER((_)).
Follow tile on-screen instruction until you
seean activation code.
0
0
6"
Tile activation code appears on the screen.
Note the activation code.
HB9OSSA-AH.BUSALL_OM.indd 57 2010-01-08 t,_,_,Li 11:50:4
58 Operation
o
0
6"
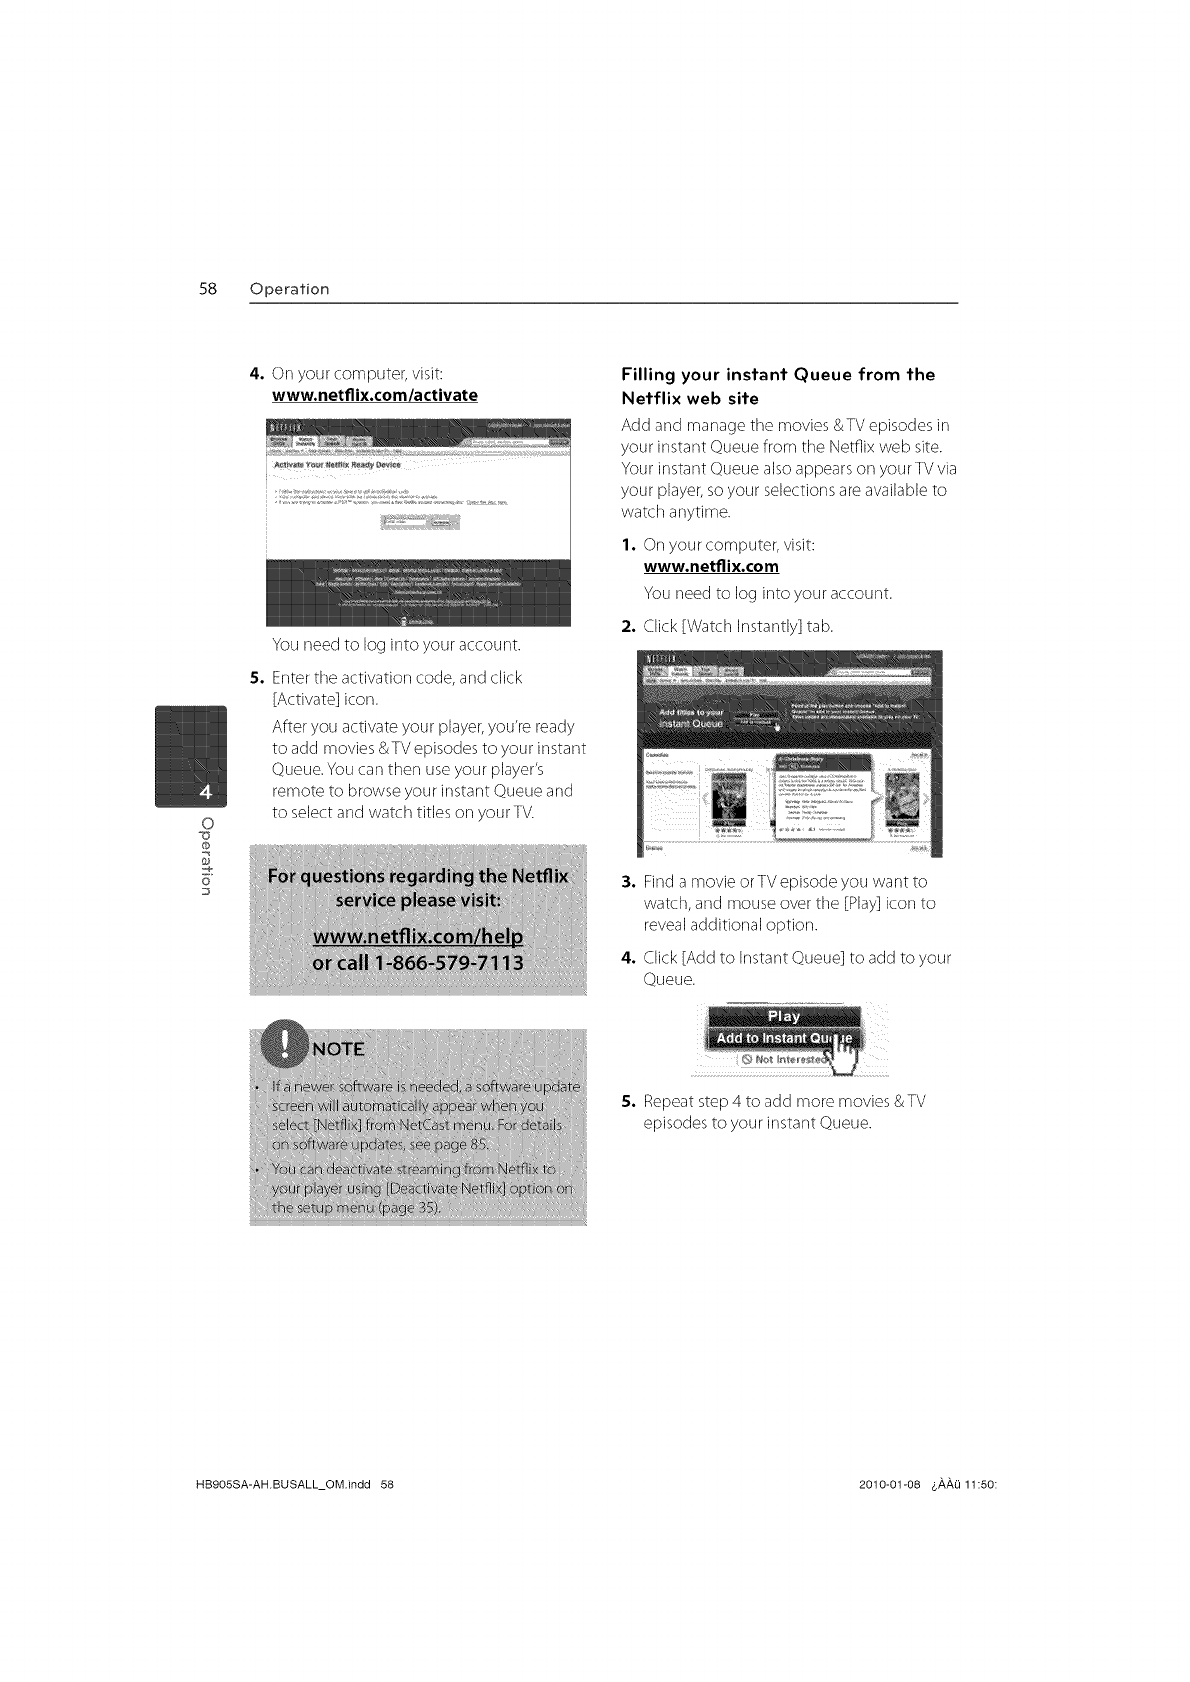
4. On your computer, visit:
www.netflix.com/activate
You need to log into your account.
5. Enterthe activation code, and click
[Activate] icon.
After you activate your player, you're ready
to add movies &TV episodesto your instant
Queue.You carl then useyour player's
remote to browse your instant Queue and
to select and watch titles on your TV.
Filling your instant Queue from the
Netflix web site
Add and manage tile movies &TV episodes in
your instant Queue from tile Netflix web site.
Your instant Queue also appears on your TVvia
your player,so your selections are available to
watch anytime.
1. On your computer, visit:
www.netflix.com
You need to log into your account.
2. Click [Watch Instantly] tab.
3. Find a movie orTV episode you want to
watch, and mouse over the [Play] icon to
reveal additional option.
4. Click [Add to Instant Queue] to add to your
Queue.
5. Repeatstep 4 to add more movies &TV
episodes to your instant Queue.
HB9OSSA-AH.BUSALL_OM.indd 58 2010-01-08 4,#,#,Li11:50:
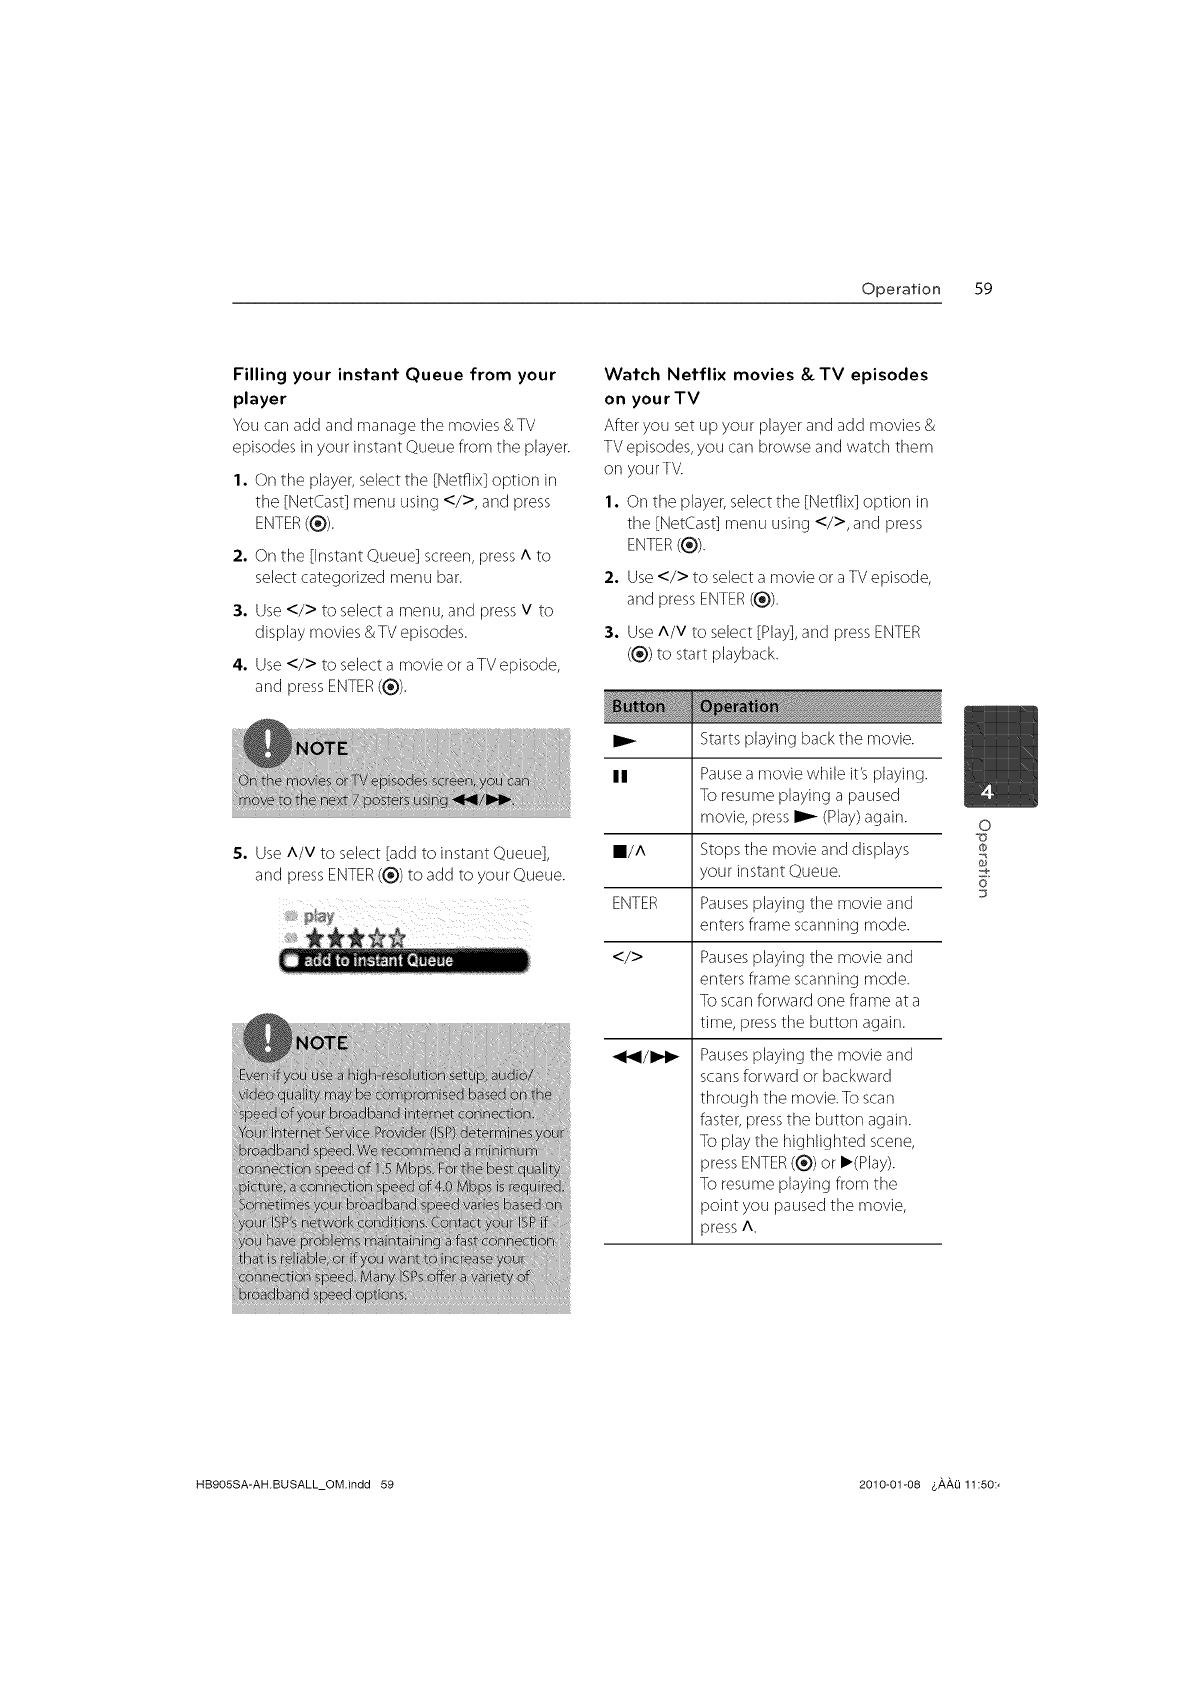
Operation 59
Filling your instant Queue from your
player
You carladd and manage the movies &TV
episodes in your instant Queue from the player.
1, On the player,select tile [Netflix] option in
the [NetCast] menu using </>, and press
ENTER((_)).
2, On the [Instant Queue] screen,press A to
select categorized menu bar.
3. Use</> to select a menu, and pressv to
display movies &TV episodes.
4, Use</> to select a movie or aTVepisode,
and pressENTER((_)).
5. UseA/V to select [add to instant Queue],
and pressENTER((_) to add to your Queue.
Watch Netflix movies &TV episodes
on your TV
After you set up your player and add movies &
TV episodes,you carl browse and watch them
on your TV.
1. On the player,selectthe [Netflix] option in
tile [NetCast] menu using </>, and press
ENTER((_).
2, Use</> to select a movie or a TVepisode,
and press ENTER((_)).
3. Use A/V to select [Play],and pressENTER
((_))to start playback.
ID_ Startsplaying back the movie.
II Pausea movie while it's playing.
To resume playing a paused
movie, pressI_- (Play)again.
N/A Stops the movie and displays
your instant Queue.
ENTER Pausesplaying the movie and
enters frame scanning mode.
</> Pausesplaying tile movie and
enters frame scanning mode.
To scanforward one frame at a
time, presstile button again.
Pausesplaying tile movie and
scansforward or backward
through the movie. To scan
faster, pressthe button again.
To play tile highlighted scene,
press ENTER((_))or I_(Play).
To resume playing from the
point you pausedthe movie,
press A.
0
0
6"
HB9OSSA-AH.BUSALL_OM.indd 59 2010-01-08 $,g,,g,O11:50:,
60 Operation
o
6
VUDU
You carl browse, searchand watch movies &
TV episodesfrom VUDU streamed over the
internet to yourTV via your LGBlu-raydisc
player.
Activating your player
You must activate your player before using
the player to watch movies streamed over tile
internet from VUDU.
I. Select [Vudu] in tile [NetCast] menu and
press ENTER((_)).
2. Use</> to selectthe [FREEHD Rental]and
press ENTER(®).
3. Enteryour e-mail addressfor the activation
on tile virtual keyboard,and pressENTER
((_))while [Done] icon is highlighted.
5. If you are not a member of Vudu yet,
complete the required fields and click
[Createan Account] to become a member.
If you already havea Vudu account, enter
the password in the [Password]field, and
click [Iogin] to complete tile activation.
An e-mail will be sent to your e-mail
address for the activation.
4. After you submit your e-mail, you will
receive an activation e-mail from Vudu to
that e-mail address. Click on tile activation
URL in the e-mail to activate VUDU.
HB9OSSA-AH.BUSALL_OM.indd 60 2010-01-08 &#,#,h 11:50
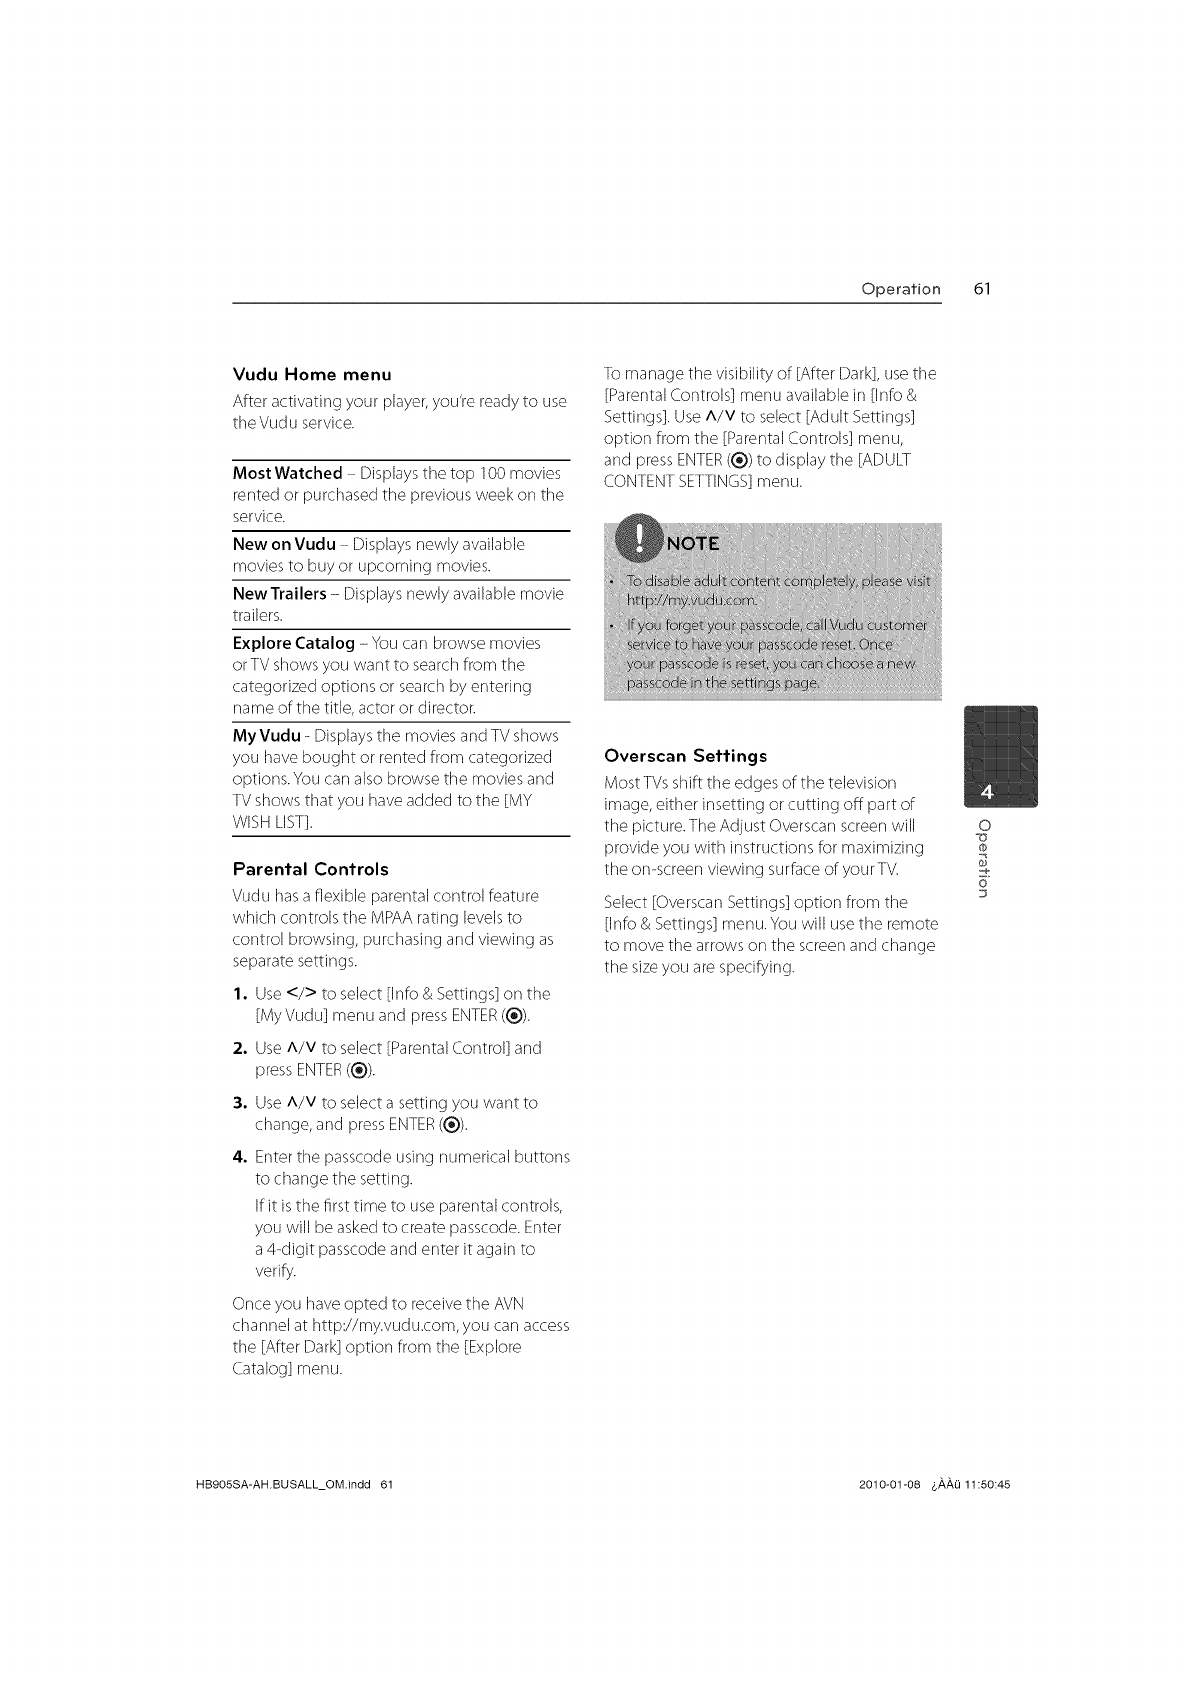
Operation 61
Vudu Home menu
After activating your player, you're ready to use
tile Vud u service.
Most Watched - Displaystile top 1O0movies
rented or purchased the previous week on tile
service.
New on Vudu - Displays newly available
movies to buy or upcoming movies.
NewTrailers - Displaysnewly available movie
trailers.
Explore Catalog - You carl browse movies
orTV shows you want to searchfrom the
categorized options or search by entering
name of the title, actor or director.
MyVudu - Displaystile movies and TVshows
you have bought or rented from categorized
options. You carl also browse tile movies and
TVshows that you have added to the [MY
WISHLIST].
Parental Controls
Vudu hasa flexible parental control feature
which controls tile MPAArating levelsto
control browsing, purchasing and viewing as
separate settings.
1. Use</> to select [Into & Settings] on the
[MyVudu] menu and press ENTER(®).
2. UseA/V to select [ParentalControl] and
pressENTER((_)).
3. UseA/V to selecta setting you want to
change, and pressENTER((_)).
4, Entertile passcode using numerical buttons
to change the setting.
If it is the first time to useparental controls,
you will be asked to create passcode.Enter
a 4-digit passcode and enter it again to
verify.
Once you have opted to receivethe AVN
channel at http://my.vudu.com, you carl access
tile [After Dark]option from tile [Explore
Catalog] menu.
To manage the visibility of [After Dark], use tile
[ParentalControls] menu available in [Into &
Settings]. UseA/V to select [Adult Settings]
option from the [ParentalControls] menu,
and pressENTER(1_))to display tile [ADULT
CONTENTSETTINGS]menu.
Overscan Settings
Most TVsshift the edgesof the television
image, either insetting or cutting off part of
the picture. The Adjust Overscan screenwill
provide you with instructions for maximizing
the on-screen viewing surface of yourTV.
Select [OverscanSettings] option from tile
[Into & Settings] menu.You will use tile remote
to move tile arrowson the screenand change
the sizeyou are specifying.
0
0
6"
HB905SA-AH.BUSALL_OM.indd 61 2010-01-08 &,&,,&,O11:50:45
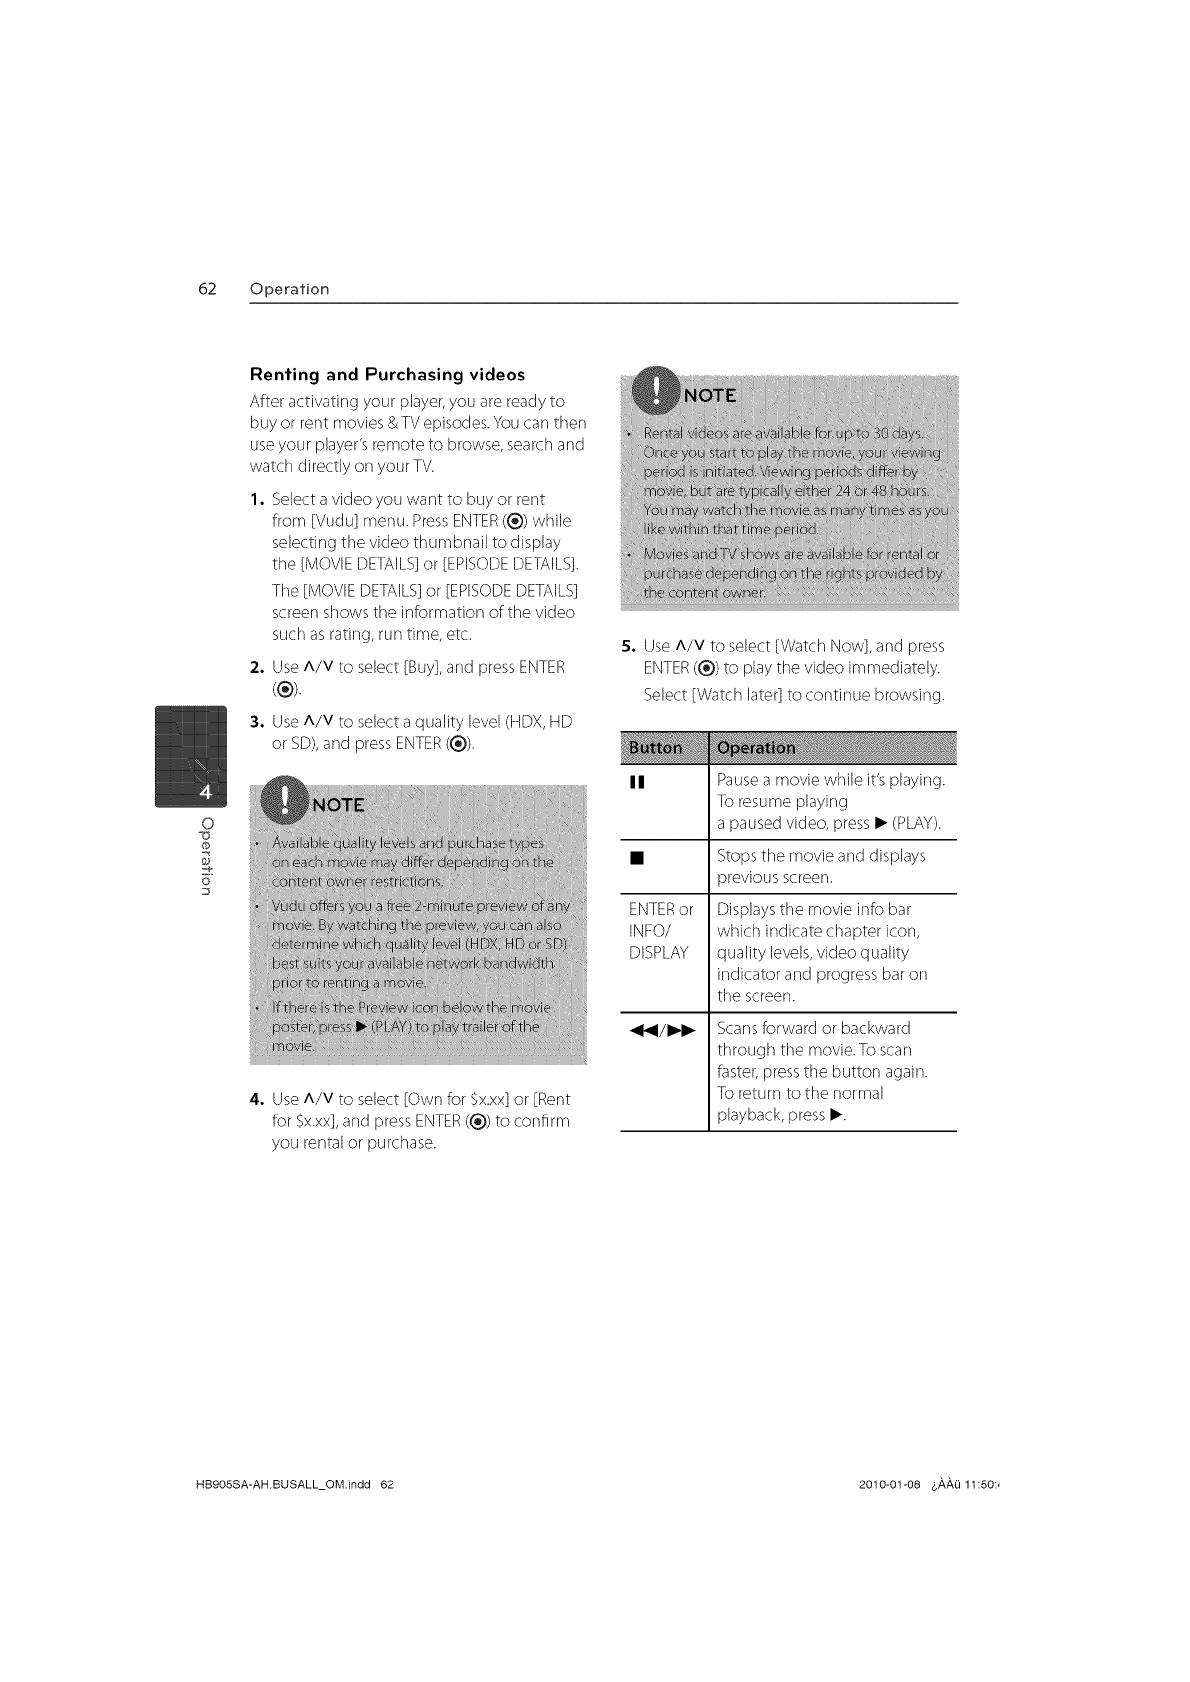
62 Operation
o
@
6"
Renting and Purchasing videos
Afteractivatingyourplayer,you arereadyto
buy or rent movies &TV episodes.Youcarl then
useyour player's remote to browse, searchand
watch directly on your TV.
1, Selecta video you want to buy or rent
from [Vudu] menu. PressENTER(®) while
selecting tile video thumbnail to display
the [MOVIEDETAILS]or [EPISODEDETAILS].
Tile [MOVIEDETAILS]or [EPISODEDETAILS]
screenshows tile information of tile video
such as rating, run time, etc.
2. UseA/V to select [Buy],and pressENTER
(®).
3. UseA/V to selecta quality level (HDX, HD
or SD),and press ENTER(®).
4. UseA/V to select [Own for Sx.xx]or [Rent
for Sx.xx],and press ENTER(®) to confirm
you rental or purchase.
f] r/q
ima
5. UseA/V to select [Watch Now], and press
ENTER(®) to play tile video immediately.
Select [Watch later] to continue browsing.
II Pausea movie while it's playing.
To resume playing
a pausedvideo, press • (PLAY).
• Stops the movie and displays
previous screen.
ENTERor
INFO/
DISPLAY
Displaysthe movie info bar
which indicate chapter icon,
quality levels,video quality
indicator and progress bar on
tile screen.
Scansforward or backward
through tile movie. Toscan
faster,presstile button again.
To return to the normal
playback,press•.
HB9OSSA-AH.BUSALL_OM.indd 62 2010-01@8 4,#,#,Li11:50:,
Operation 63
CinemaNow
Cin °aNow '
You carl browse, searchand watch movies &
TV episodes from CinemaNow streamed over
the internet to your TVvia your LGBlu-raydisc
player.
Activating your player
You must activate your player before using
the player to watch movies streamed over the
internet from CinemaNow.
1. On your computer, visit:
www.cinemanow.com/activate
2. Enter your [user name] and [password] to
log into your account.
iill i II _ _!
If you are not a member of CinemaNow yet,
click [GETSTARTED]to be a member.
3. Enter the PersonalInformation, Payment
Information, Gift Code Redemption and
Adult Access Restrictions,and then click
[CONTINUE].
0
0
=e
6"
4. Tile activation code number appears. Note
tile activation code number.
905SA-AH.BUSALL_OM.indd 63 2010-01-08 &AAI] 11:50:45
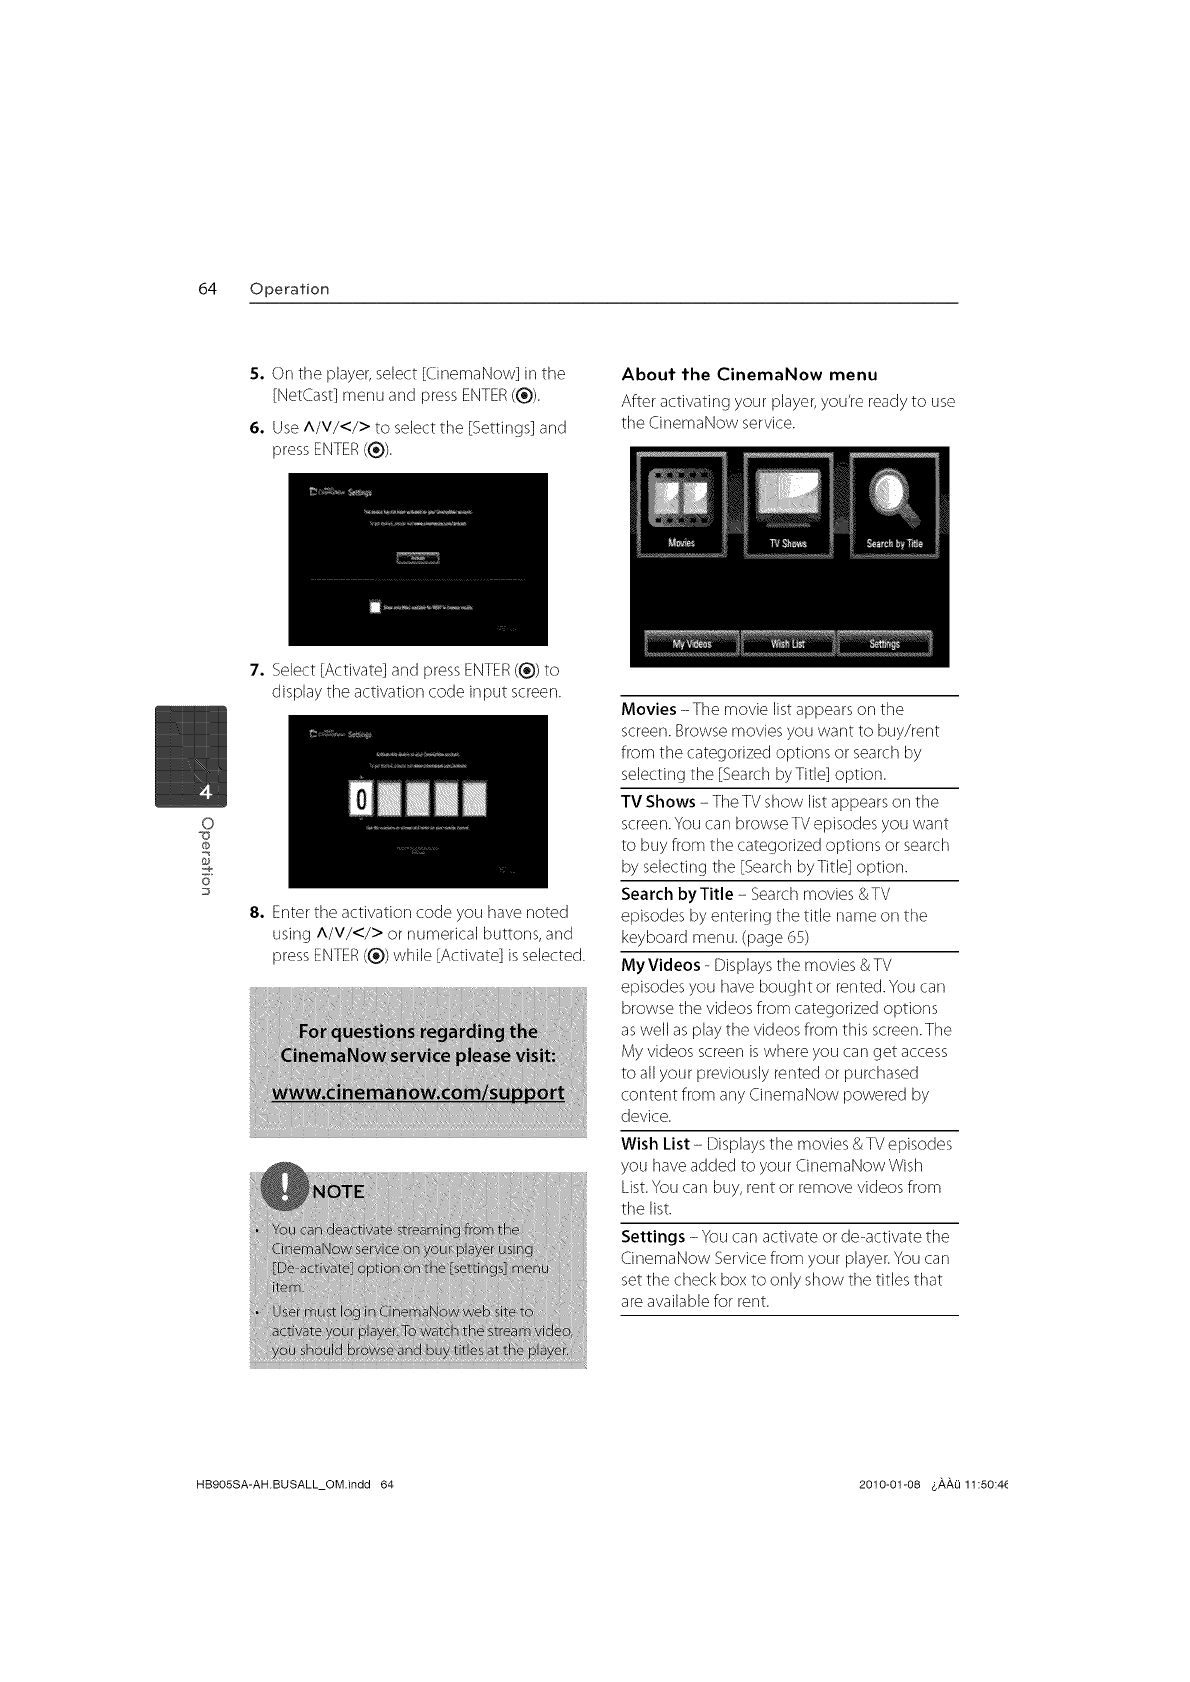
64 Operation
s, On tile player,select [CinemaNow] in the
[NetCast] menu and press ENTER((_).
6, UseA/V/</> to select the [Settings] and
press ENTER(®).
About the CinemaNow menu
After activating your player, you're ready to use
tile CinemaNow service.
o
tb
6"
7. Select [Activate] and press ENTER((_))to
display tile activation code input screen.
8. Enter the activation code you [lave noted
using A/V/</> or numerical buttons, and
press ENTER((_)) while [Activate] is selected.
Movies -Tile movie list appears on the
screen.Browse movies you want to buy/rent
from the categorized options or search by
selecting the [SearchbyTitle] option.
TV Shows -Tile TV show list appearson the
screen.You carl browse TVepisodes you want
to buy from the categorized options or search
by selecting tile [SearchbyTitle] option.
Search byTitle - Searchmovies &TV
episodes by entering the title name on the
keyboard menu. (page 65)
MyVideos - Displaysthe movies &TV
episodes you have bought or rented. Youcarl
browse tile videos from categorized options
aswell as play the videos from this screen.The
My videos screenis where you carl get access
to all your previously rented or purchased
content from any CinemaNow powered by
device.
Wish List- Displaysthe movies &TV episodes
you have added to your CinemaNow Wish
List.You carl buy, rent or remove videos from
tile list.
Settings -You carl activate or de-activate the
CinemaNow Servicefrom your player.You carl
set tile check box to only show tile titles that
are available for rent.
HB905SA-AH.BUSALL_OM.indd 64 2010-01-08 4,_,_,L111:50:4(
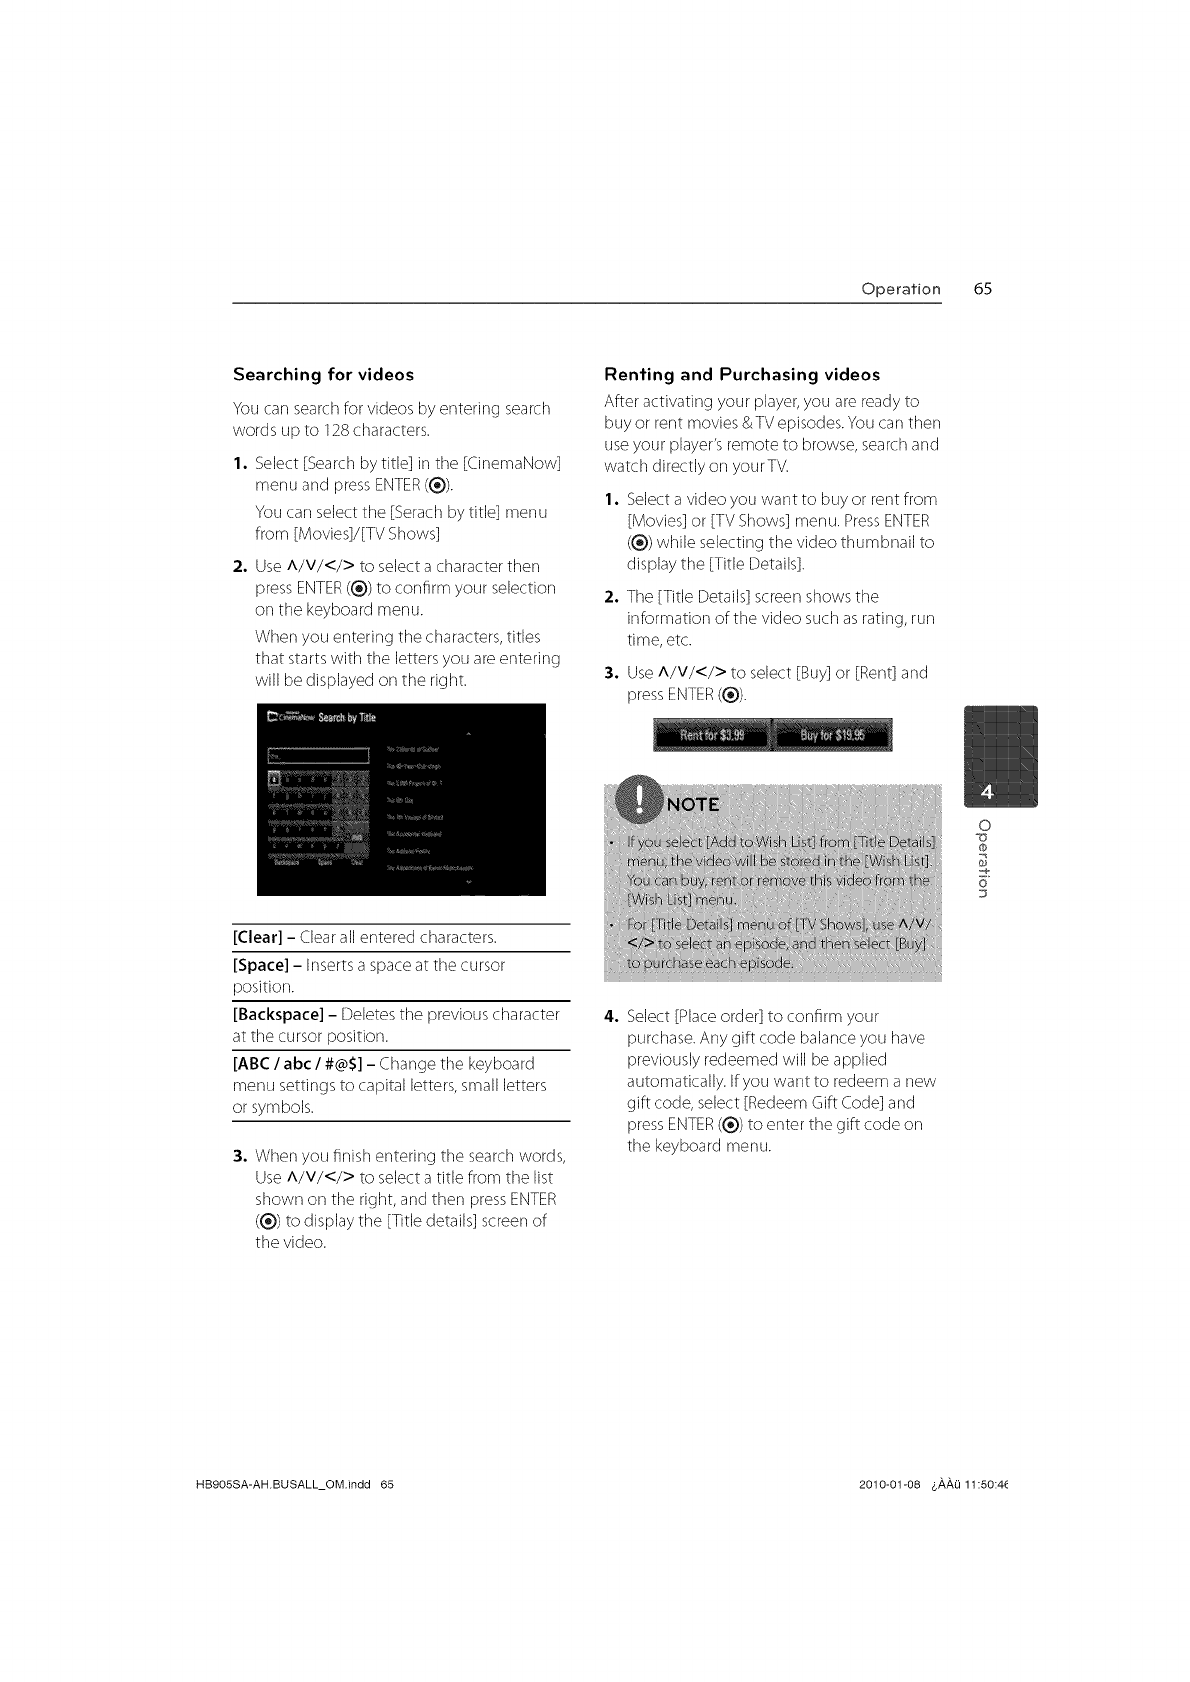
Operation 65
Searching for videos
You carl searchfor videos by entering search
words up to 128characters.
1, Select [Search by title] in tile [CinemaNow]
menu and pressENTER((_).
You carl select the [Serachby title] menu
from [Movies]/[TV Shows]
2° UseA/V/</> to select a character then
pressENTER((_))to confirm your selection
on the keyboard menu.
When you entering the characters, titles
that starts with tile letters you are entering
will be displayed on the right.
Renting and Purchasing videos
After activating your player,you are ready to
buy or rent movies &TV episodes.You carlthen
useyour player'sremote to browse, searchand
watch directly on yourTV.
1° Selecta video you want to buy or rent from
[Movies] or [TV Shows] menu. PressENTER
((_) while selecting the video thumbnail to
display the [Title Details].
2. Tile [Title Details] screen shows tile
information of the video such as rating, run
time, etc.
3. Use A/V/</> to select [Buy]or [Rent] and
press ENTER(1_)).
[Clear] -Clear all entered characters.
[Space] - Insertsa spaceat tile cursor
position.
[Backspace] - Deletestile previous character
at tile cursor position.
[ABC /abc /#@$] - Change tile keyboard
menu settings to capital letters,small letters
or symbols.
3. When you finish entering tile searchwords,
UseA/V/</> to select a title from tile list
shown on tile right, and then pressENTER
((_))to display the [Title details] screen of
the video.
4. Select [Placeorder] to confirm your
purchase.Any gift code balanceyou have
previously redeemed will be applied
automatically. If you want to redeem a new
gift code, select [RedeemGift Code] and
press ENTER((_))to enter the gift code on
tile keyboard menu.
0
0
=e
6"
HB9OSSA-AH.BUSALL_OM.indd 65 2010-01-08 3#,#,1311:50:4(
66 Operation
5. Select [Watch Now] to play the video
immediately.
Selectthe [Continue Browsing] to add tile
movie to tile [My Videos] and return to the
[Movies] menu.
O
@
6"
• Startsplaying back tile movie.
II Pausea movie while it's playing.
To resume playing a paused
movie, press• again.
• Stopstile movie and displays
previous screen.
ENTER Displaysthe video quality
indicator and progress bar on
the screen.
Scansforward or backward
through the movie. To scan
faster, pressthe button again. To
return to tile normal playback,
press•.
HB905SA-AH.BUSALL_OM.indd 66 2010-01@8 4,#,#,Li11:50:4

Operation 67
_u_be TM About the YouTube TM menu
There are variousoptions on tile YouTubeTM
menu. Use A/V/</> to selectan option
and pressENTER(_)) to select tile options as
described below.
You carl browse, searchand watch YouTubeTM
videos over tile internet to yourTV via your LG
Blu-raydisc player.
Watch YouTube TM videos on your TV
1, On tile player,select tile [YouTube]option
in the [NetCast] menu using </>, and press
ENTER((_).
2. Press A to select the option menu bar.
3. Use</> to select an option and press
ENTER((_))to searchvideos.
a, Use</> to select a video and pressENTER
(_)) or I_ (play) to play the video.
• or ENTER
INFO/
DISPLAY
II
Startsplayback the video with
content detail.
Toggle between playback in
full screenand playback screen
with content detail.
To pause a video while it is
playing. To resume playing a
paused video, press • again.
• Stops the video and displays
related videos list.
I_1_1/1_1 Skipthe playback forward or
backward.
Featured- The featured videos listwill be
displayed.
Recent Videos -The most recently updated
videos list will be displayed.
Most Viewed -The most viewed videos list
will be displayed.Tile period option appears
at the bottom of tile screen.
Top Rated -Tile best rated videos listfrom
YouTubeTM serverwill be displayed.The period
option appearsat the bottom of the screen.
Search - Thevirtual keyboard will be
displayed. See"Searching videos"on page 69
for more detail.
History - Thevideos list that you previously
played on this unit will be displayed.
Maximum of 25 videos carl be stored.
Favorites -This option will be appeared only
when tile unit is in sign-in status. Displaysthe
videos list that is arranged in tile YouTubeTM
serverwith your account. Some videos may
not appear on tile [Favorites]list,even if tile
videos are arranged in tile server.
Sign in (Sign Out) - Displaysthe virtual
keyboard to sign in or returns to the sign-out
status.See"Signin with your YouTubeTM
account"on page 70for more details.
Local site - Choose which country's videos
you would like to view. Tile countries listed on
the [Local Site]menu may different with those
listed on tile YouTubeTM web site.
0
0
-e
6"
IqB9OSSA-AH.BUSALL_OM.indd 67 2010-01-08 6_,_,0 11:50:4
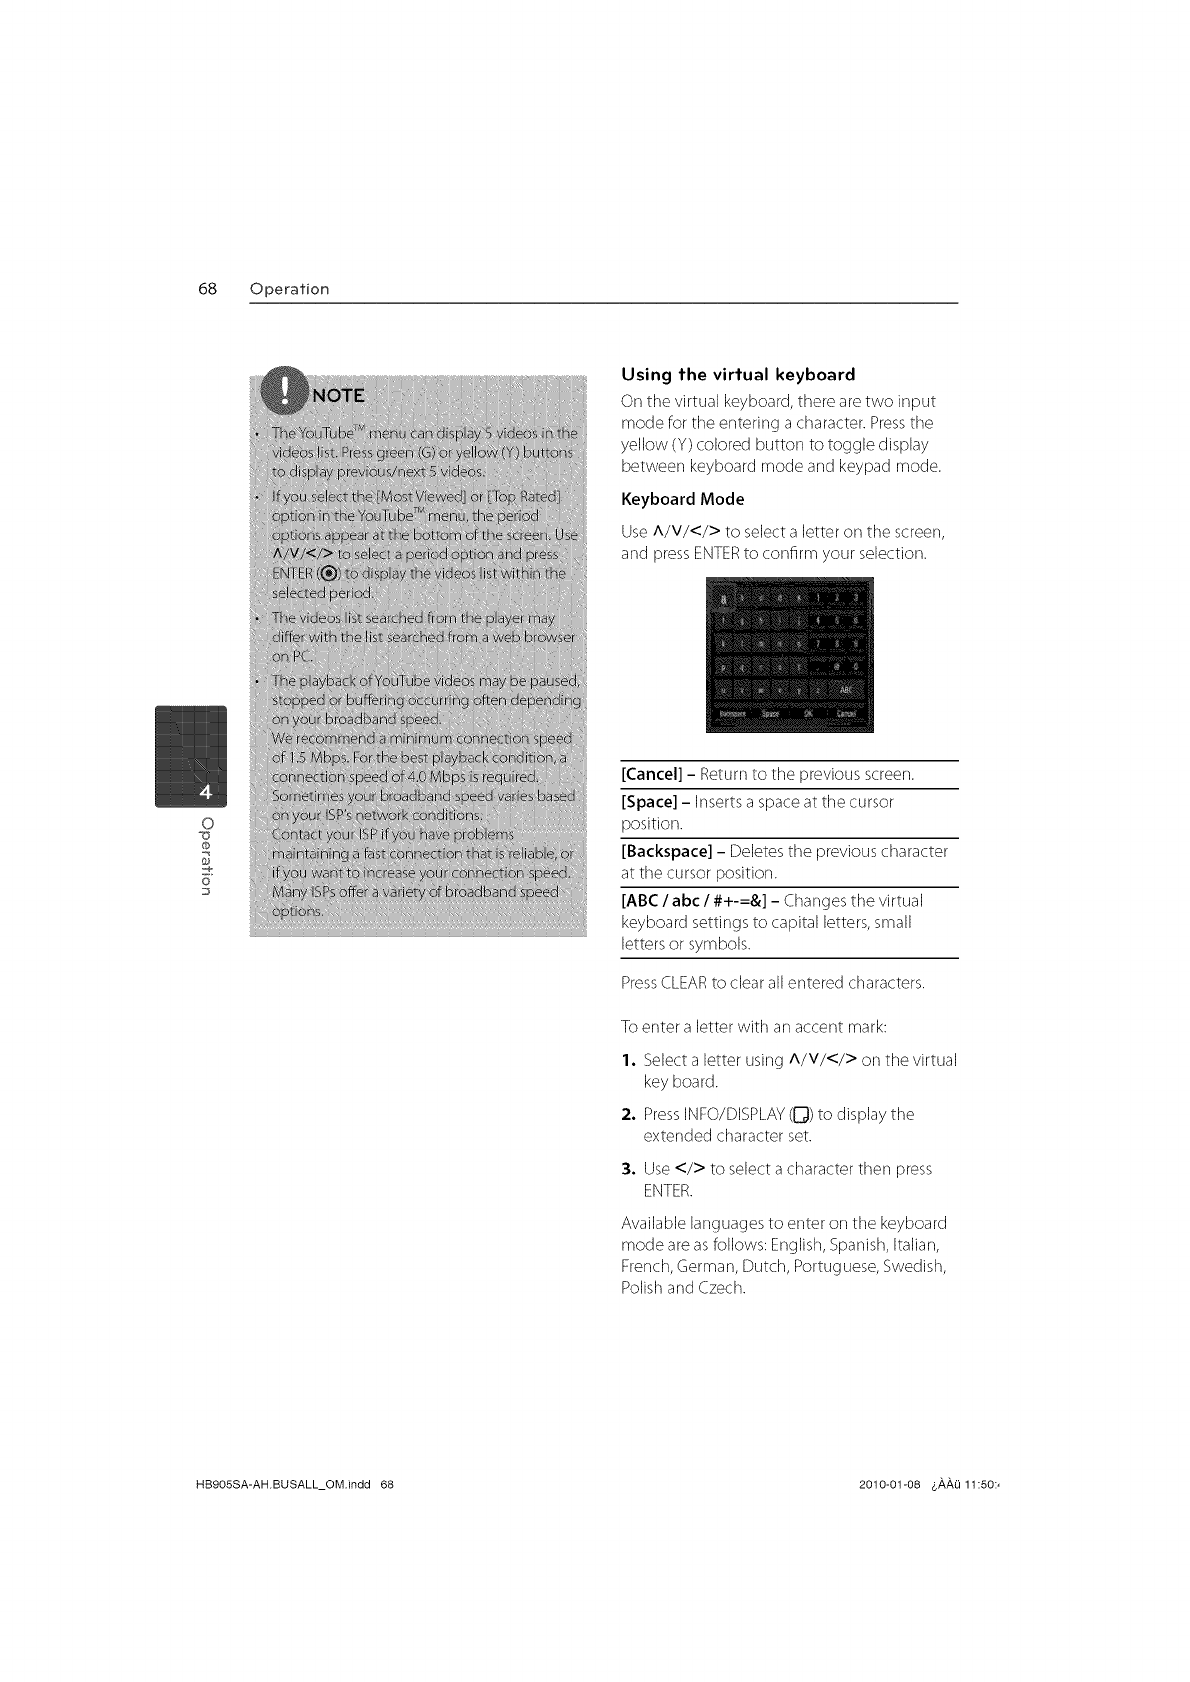
68 Operation
o
6
Using the virtual keyboard
On the virtual keyboard,there are two input
mode for the entering a character. Pressthe
yellow (Y) colored button to toggle display
between keyboard mode and keypad mode.
Keyboard Mode
UseA/V/</> to select a letter on the screen,
and press ENTERto confirm your selection.
[Cancel] - Return to the previous screen.
[Space] - Inserts a space at tile cursor
position.
[Backspace] - Deletes tile previous character
at tile cursor position.
[ABC /abc /#+-=&] - Changes the virtual
keyboard settings to capital letters, small
letters or symbols.
Press CLEAR to clear all entered characters.
Toenter a letter with an accent mark:
I. Selecta letter using A/V/</> orl the virtual
key board.
2. PressINFO/DISPLAY(0) to display the
extended character set.
3. Use</> to select a character then press
ENTER.
Available languages to enter on the keyboard
mode are as follows: English,Spanish,Italian,
French,German, Dutch, Portuguese,Swedish,
Polishand Czech.
HB9OSSA-AH.BUSALL_OM.indd 68 2010-01-08 $#,#,1_11:50:,
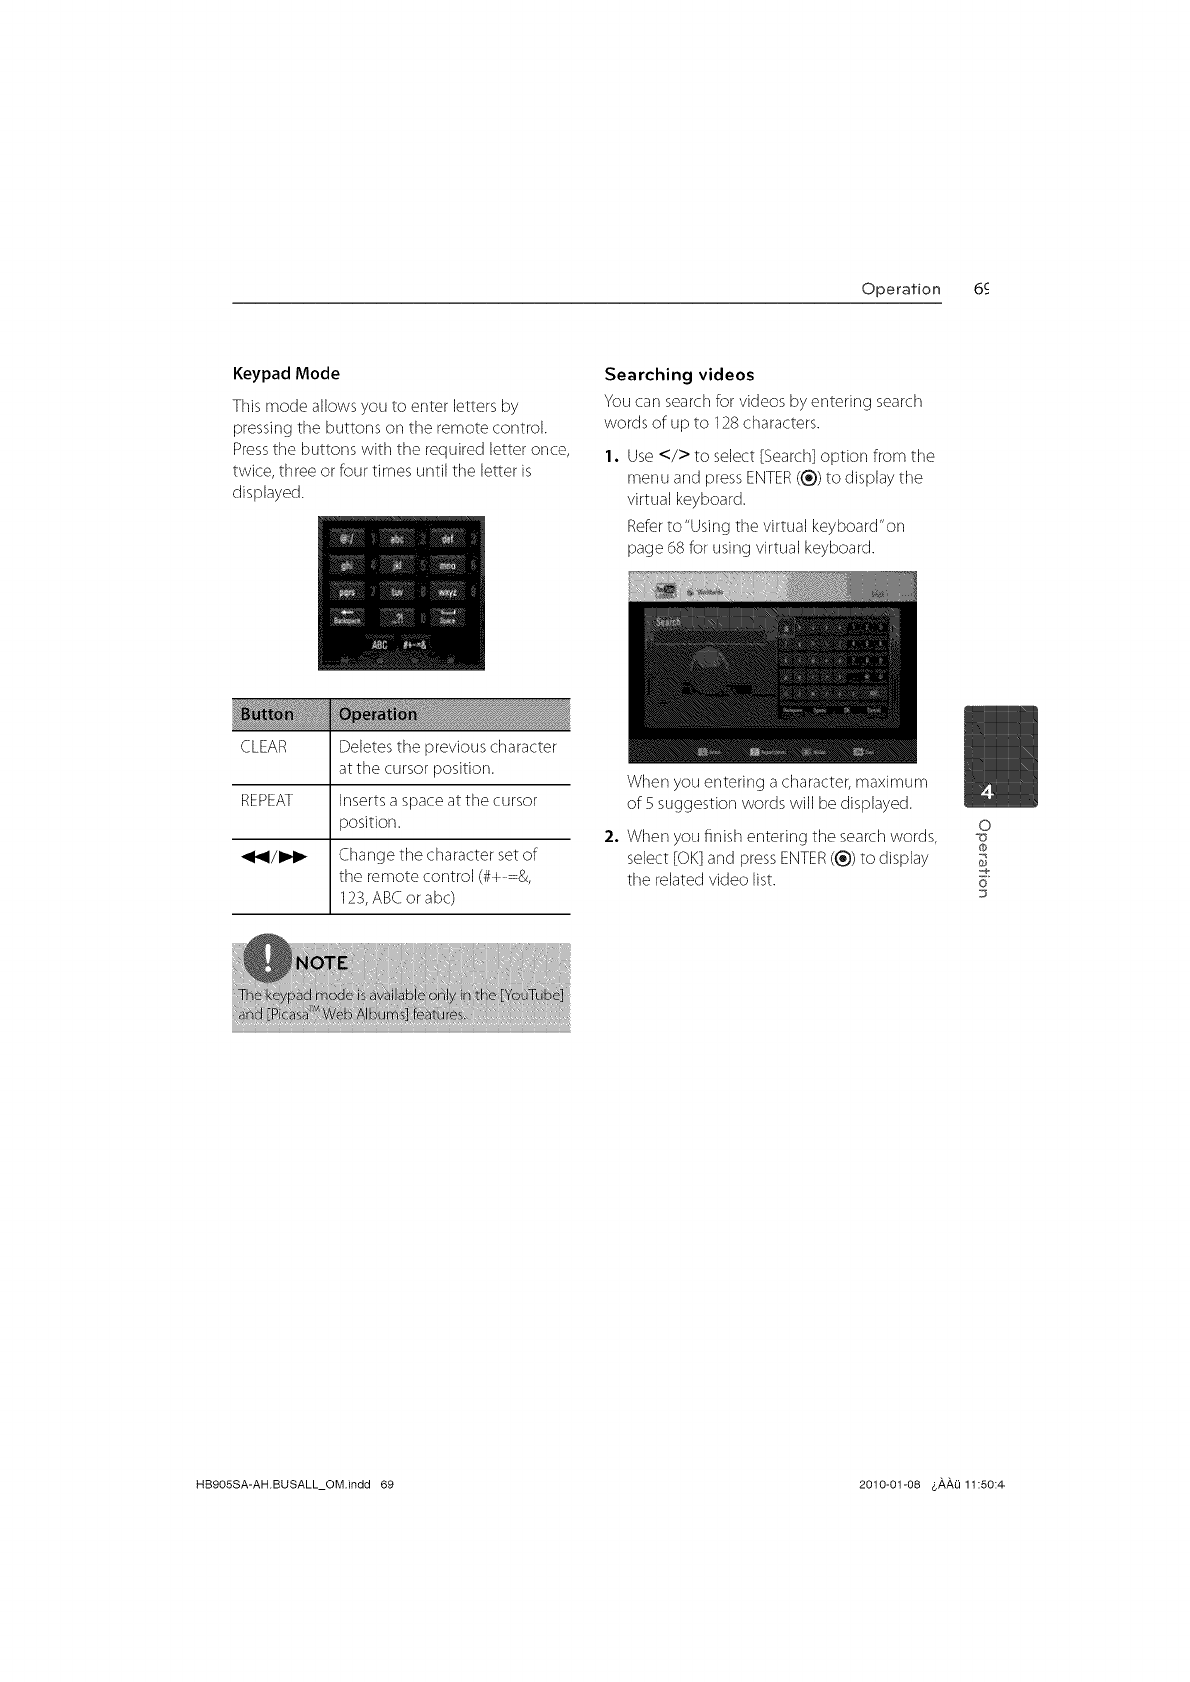
Operation 6c
Keypad Mode
Thismode allows you to enter letters by
pressing tile buttons on tile remote control.
Presstile buttons with the required letter once,
twice, three or four times until tile letter is
displayed.
Searching videos
You carl searchfor videos by entering search
words of up to 128characters.
1. Use </> to select [Search] option from tile
menu and press ENTER((_))to display the
virtual keyboard.
Referto "Using tile virtual keyboard"on
page 68 for using virtual keyboard.
CLEAR
REPEAT
Deletes the previous character
at the cursor position.
Inserts a space at the cursor
position.
Change the character set of
tile remote control (#+-=&,
123, ABC or abc)
When you entering a character, maximum
of 5 suggestion words will be displayed.
2. When you finish entering the searchwords,
select [OK]and pressENTER((_) to display
tile related video list.
0
0
6"
HB9OSSA-AHBUSALL_OM.indd 69 2010-01-08 6#,#£i 11:50:4,
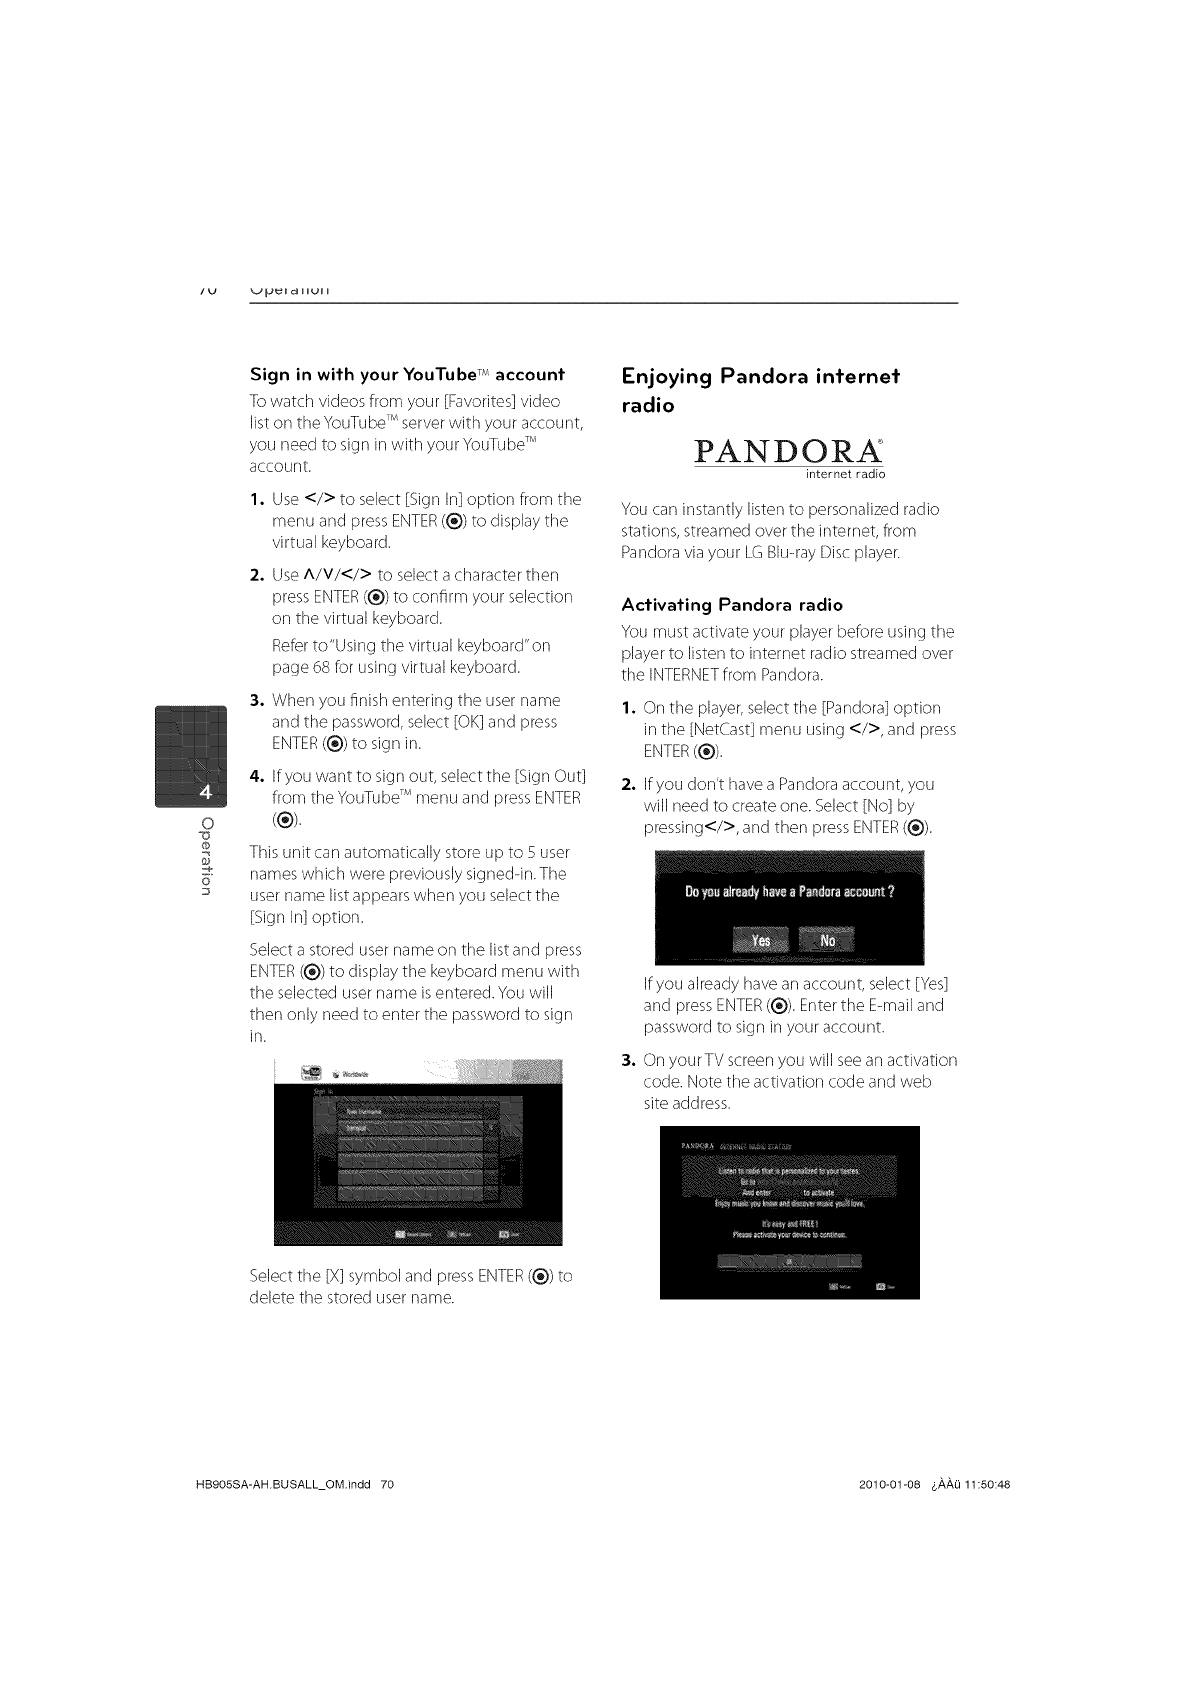
o
0
6"
Sign in with your YouTube TM account
To watch videos from your [Favorites]video
liston the YouTubeTM serverwith your account,
you need to sign in with your YouTubeTM
account.
1,
2o
3°
4o
Use </> to select [Sign In] option from the
menu and press ENTER((_))to display tile
virtual keyboard.
UseA/V/</> to select a character then
press ENTER(_) to confirm your selection
on tile virtual keyboard.
Referto"Using tile virtual keyboard"on
page 68 for using virtual keyboard.
When you finish entering the user name
and the password, select [OK] and press
ENTER ((_))to sign in.
If you want to sign out, select the [Sign Out]
from tile YouTubeTM menu and pressENTER
(®).
This unit carl automatically store up to 5 user
nameswhich were previously signed-in. Tile
user name list appearswhen you selectthe
[Sign In] option.
Selecta stored user name on tile list and press
ENTER((_))to display tile keyboard menu with
the selected user name is entered. You will
then only need to enter tile password to sign
in.
Enjoying Pandora infernef
radio
PANDORA
internet radio
You carl instantly listen to personalized radio
stations, streamed over the internet, from
Pandora via your LG Blu-ray Disc player.
Activating Pandora radio
You must activate your player before using the
playerto listen to intemet radio streamed over
tile INTERNETfrom Pandora.
1. On the player,select the [Pandora] option
in the [NetCast] menu using </>, and press
ENTER((_)).
2. If you don't have a Pandoraaccount, you
will need to create one. Select [No] by
pressing</>, and then pressENTER((_).
If you already havean account, select [Yes]
and pressENTER((_)).Enterthe E-mail and
password to sign in your account.
3. On yourTV screen you will see an activation
code. Note tile activation code and web
site address.
Selectthe [X] symbol and press ENTER((_))to
delete the stored user name.
HB905SA-AH.BUSALL_OM.indd 70 2010-01-08 d,,ik,ik0 11:50:48
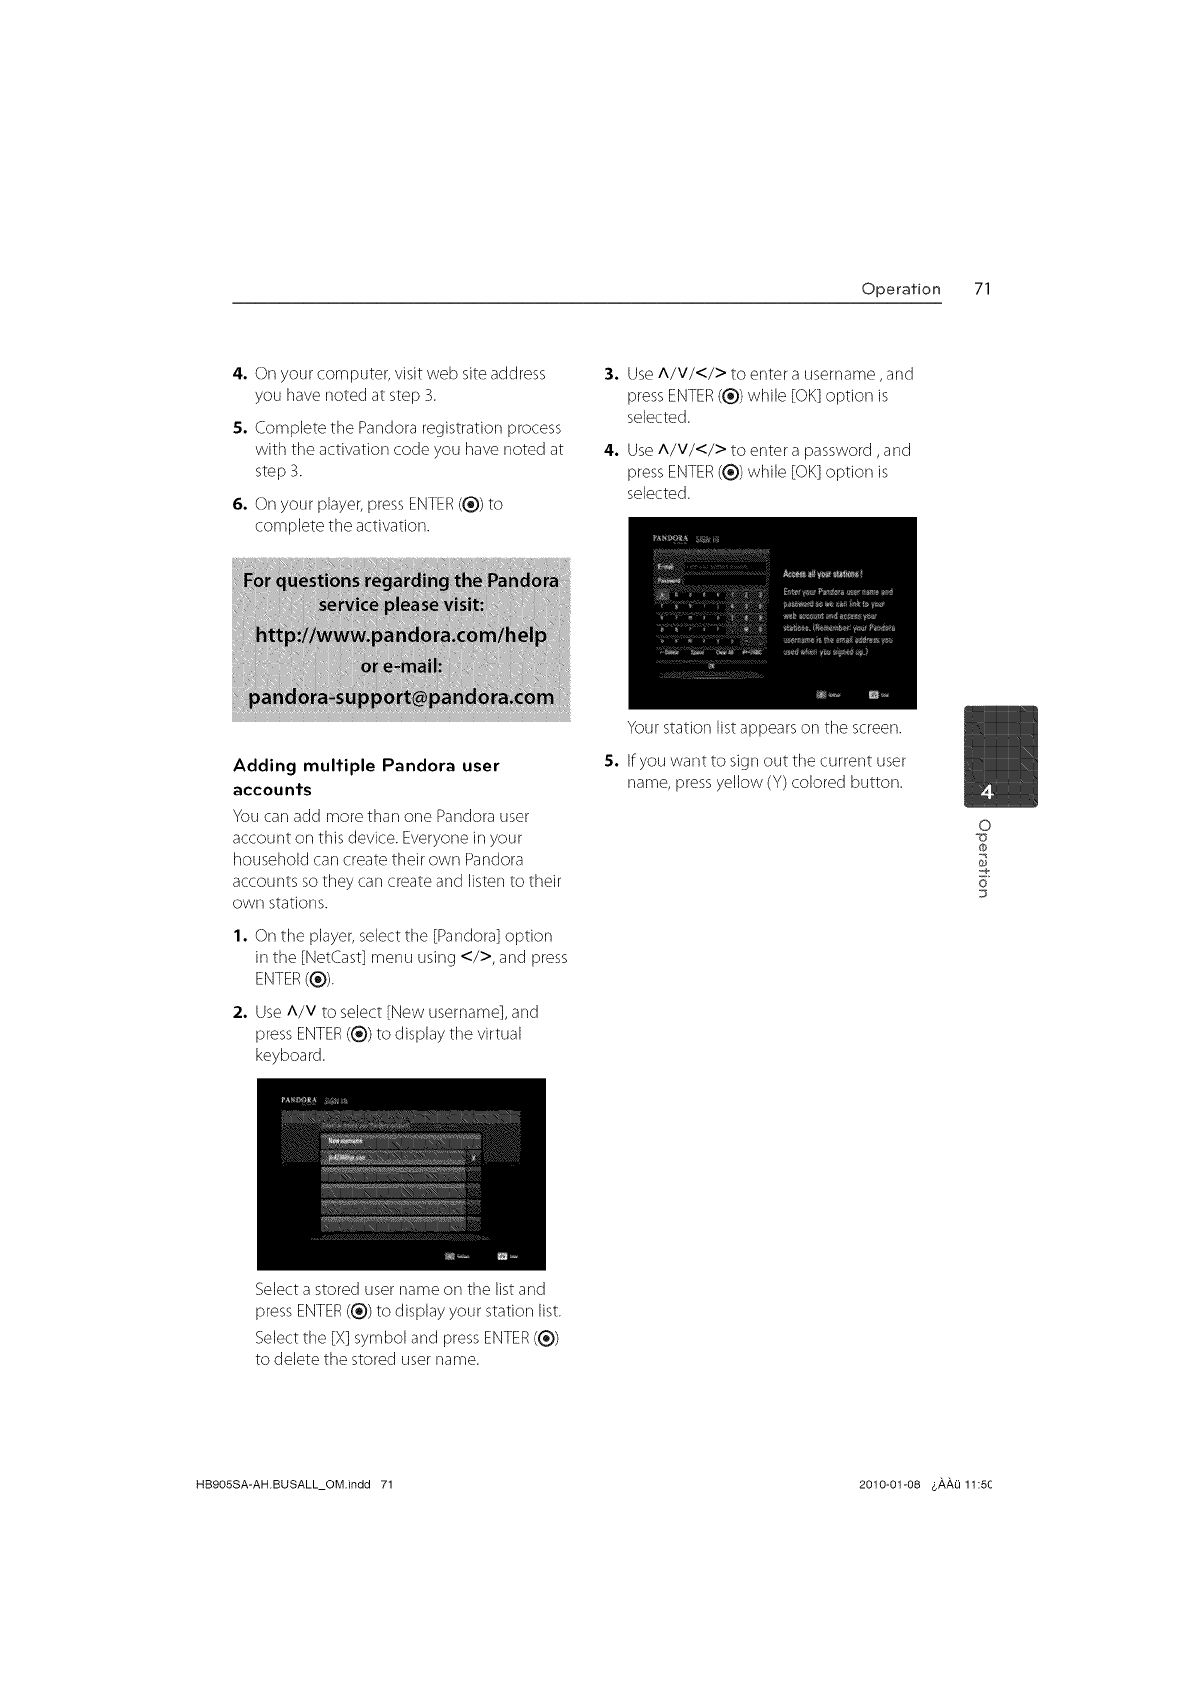
Operation 71
4. On your computer, visit web site address
you have noted at step 3.
5, Complete the Pandora registration process
with tile activation code you have noted at
step 3.
6, On your player, press ENTER ((_) to
complete the activation.
3. Use A/V/</> to enter a username, and
press ENTER((_))willie [OK]option is
selected.
4. Use A/V/</> to enter a password, and
press ENTER((_))while [OK] option is
selected.
set
Adding multiple Pandora user
accounts
You carl add more than one Pandora user
account on this device. Everyone in your
household carl create their own Pandora
accounts so they carl create and listen to their
own stations.
1. On tile player,select tile [Pandora] option
in the [NetCast] menu using </>, and press
ENTER((_)).
2. Use A/V to select [New username], and
press ENTER (1_))to display the virtual
keyboard.
Select a stored user name on the list and
Your station list appears on tile screen.
5. If you want to sign out tile current user
name, press yellow (Y) colored button.
0
0
6"
pressENTER((_) to display your station list.
Select tile [X] symbol and press ENTER((_))
to delete the stored user name.
HB905SA-AH.BUSALL_OM.indd 71 2010-01-08 6,_,,_,_11:5C
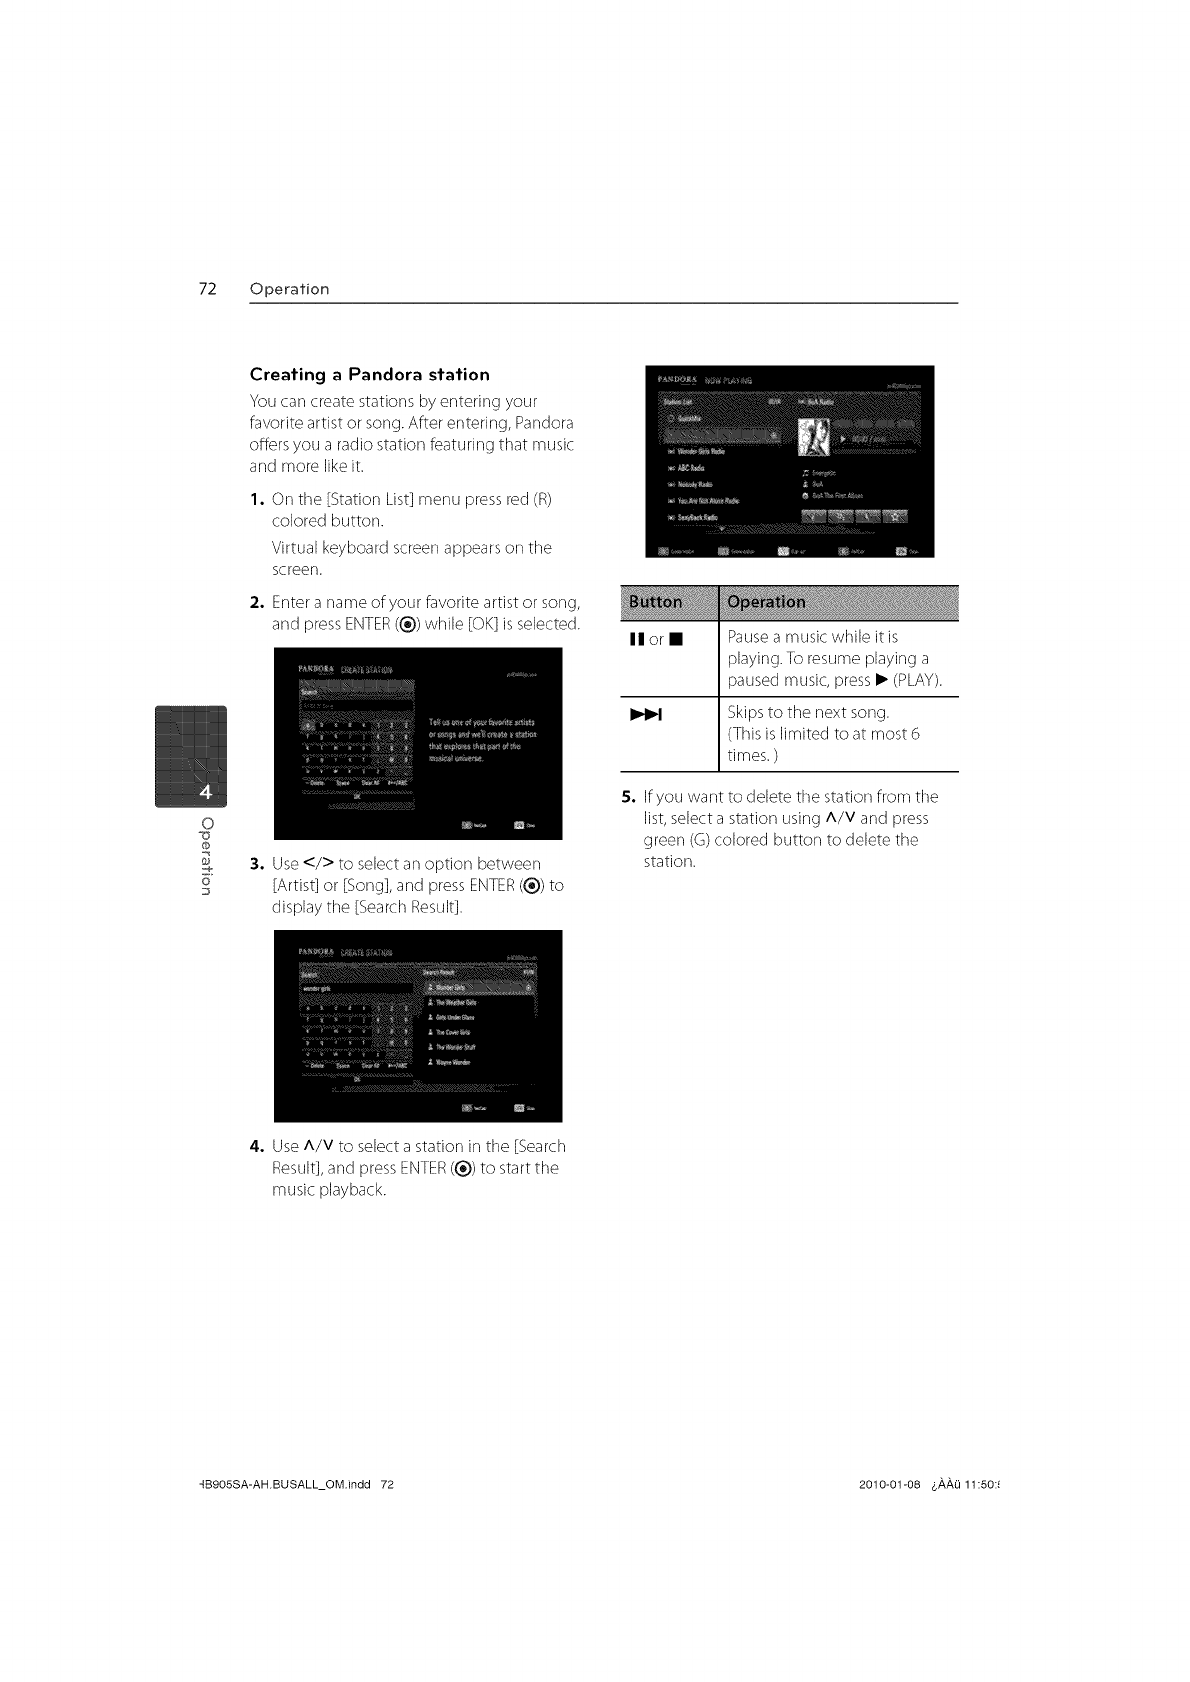
72 Operation
o
@
6"
23
Creating a Pandora station
You carl create stations by entering your
favorite artist or song. After entering, Pandora
offers you a radio station featuring that music
and more likeit.
1. On tile [Station List] menu press red (R)
colored button.
Virtual keyboard screen appears on the
screen.
2. Entera name of your favorite artist or song,
and press ENTER((_) while [OK] isselected.
3. Use</> to selectan option between
[Artist] or [Song], and press ENTER((_) to
display tile [SearchResult].
Ilorl Pausea music while it is
playing.To resume playing a
paused music, press• (PLAY).
Skipsto the next song.
(Thisis limited to at most 6
times. )
S. If you want to delete tile station from tile
list,select a station using A/V and press
green (G) colored button to delete the
station.
4. UseA/V to select a station in tile [Search
Result],and pressENTER((_))to start the
music playback.
qB9OSSA-AH.BUSALL_OM.indd 72 2010-01-08 3#,#,1_11:50:!
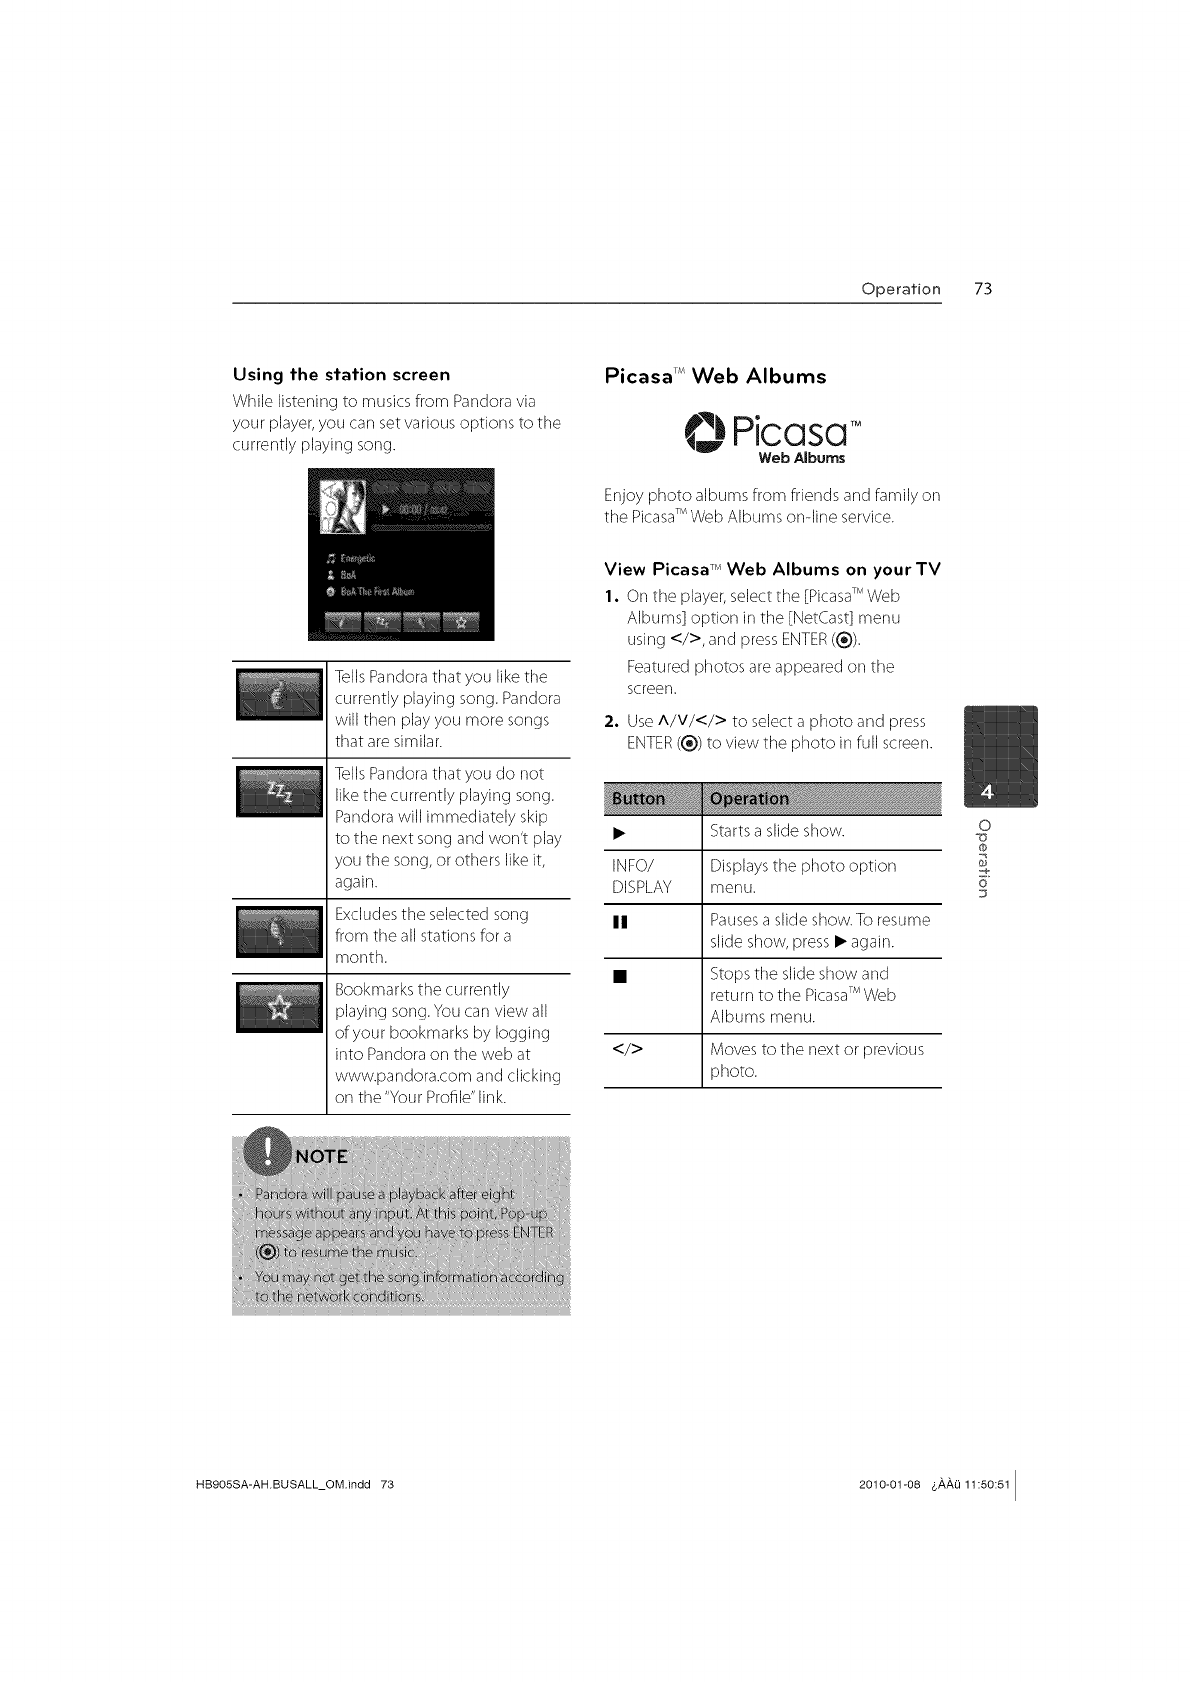
Operation 73
Using the station screen
While listening to musicsfrom Pandoravia
your player,you carl set various options to the
currently playing song.
Picasa TM Web Albums
PicasaTM
Web Albums
Enioy photo albums from friends and family on
the PicasaTM Web Albums ondine service.
Tells Pandora that you like tile
currently playing song. Pandora
will then play you more songs
that are similar.
TellsPandorathat you do not
likethe currently playing song.
Pandorawill immediately skip
to the next song and won't play
you tile song, or others like it,
again.
Excludes the selected song
from tile all stations for a
month.
Bookmarksthe currently
playing song.You carl view all
of your bookmarks by logging
into Pandoraon tile web at
www.pandora.com and clicking
on tile "Your Profile"link.
View Picasa TM Web Albums on your TV
1. On the player,selectthe [PicasaTM Web
Albums] option in the [NetCast] menu
using </>, and press ENTER((_)).
Featured photos are appeared on the
screeR.
2. Use A/V/</> to select a photo and press
ENTER((_))to view the photo in full screen.
• Startsa slide show.
INFO/ Displaysthe photo option
DISPLAY menu.
II Pausesa slide show.To resume
slide show, press • again.
•Stops tile slide show and
return to tile PicasaTM Web
Albums menu.
</> Moves to the next or previous
photo.
0
0
6"
D
HB905SA-AH.BUSALL_OM.indd 73 2010-01-08 &,_,,_,Q11:50:51
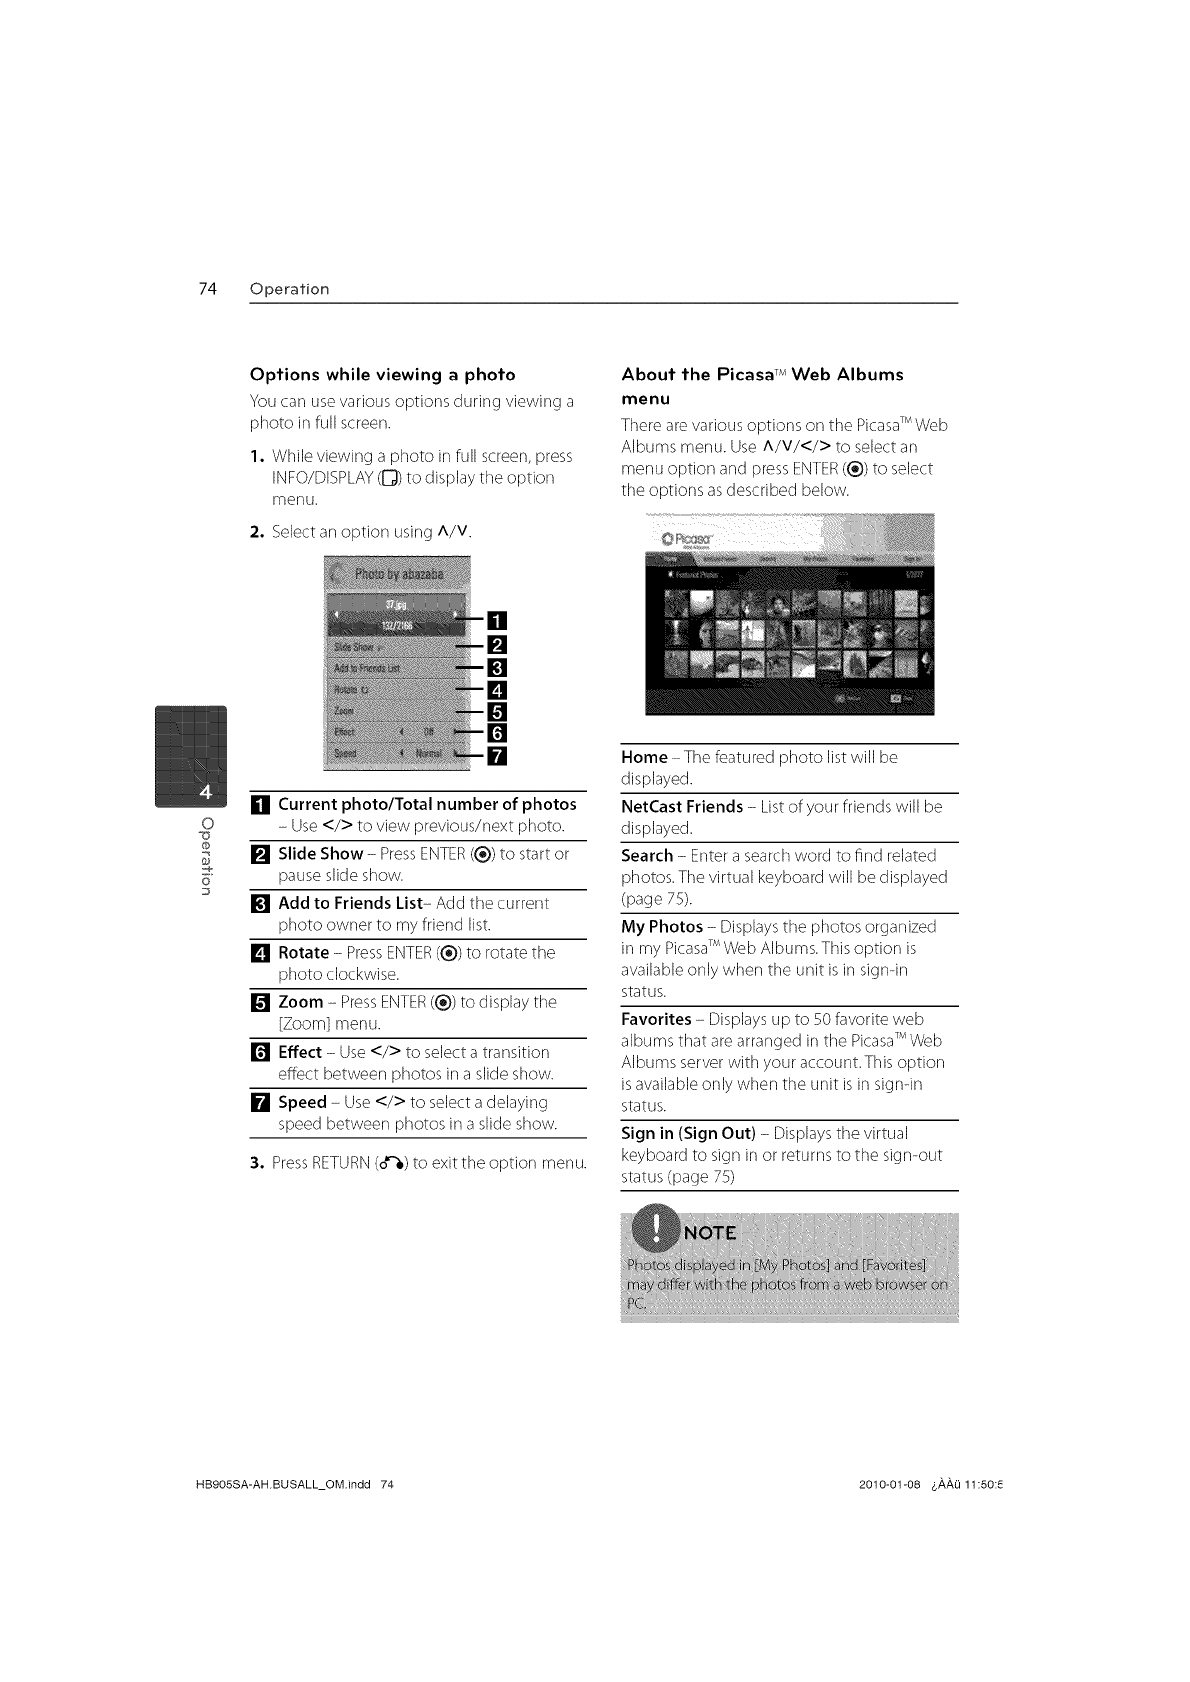
74 Operation
Options while viewing a photo
You carl use various options during viewing a
photo in full screen.
1, While viewing a photo in full screen, press
INFO/DISPLAY([])) to display the option
menu.
2. Select an option using A/V.
About the Picasa TM Web Albums
menu
Thereare various options on the PicasaTM Web
Albums menu. Use A/V/</> to select an
menu option and pressENTER(_)) to select
tile options as described below.
0
tb
6"
[] Current photo/Total number of photos
-Use</> to view previous/next photo.
[] Slide Show- PressENTER((_))to start or
pauseslide show.
[] Add to Friends List- Add the current
photo owner to my friend list.
[] Rotate - PressENTER((_))to rotate the
photo clockwise.
[] Zoom -PressENTER((_))to display tile
[Zoom] menu.
[] Effect -Use</> to select a transition
effect between photos in a slide show.
[] Speed -Use</> to select a delaying
speed between photos in a slide show.
3. Press RETURN (Sqb) to exit the option menu.
Home- The featured photo list will be
displayed.
NetCast Friends- List of your friends will be
displayed.
Search -Enter a searchword to find related
photos.The virtual keyboard will be displayed
(page 75).
My Photos -Displaysthe photos organized
in my PicasaTM Web Albums.Thisoption is
available only when tile unit is in sign-in
status.
Favorites - Displays up to 50 favorite web
albums that are arranged in tile PicasaTM Web
Albums server with your account. Tills option
is available only when the unit is in sign-in
status.
Sign in (Sign Out) - Displays tile virtual
keyboard to sign in or returns to the sign-out
status (page 75)
HB905SA-AH.BUSALL_OM.indd 74 2010-01-08 _,_,_,_ 11:50:_
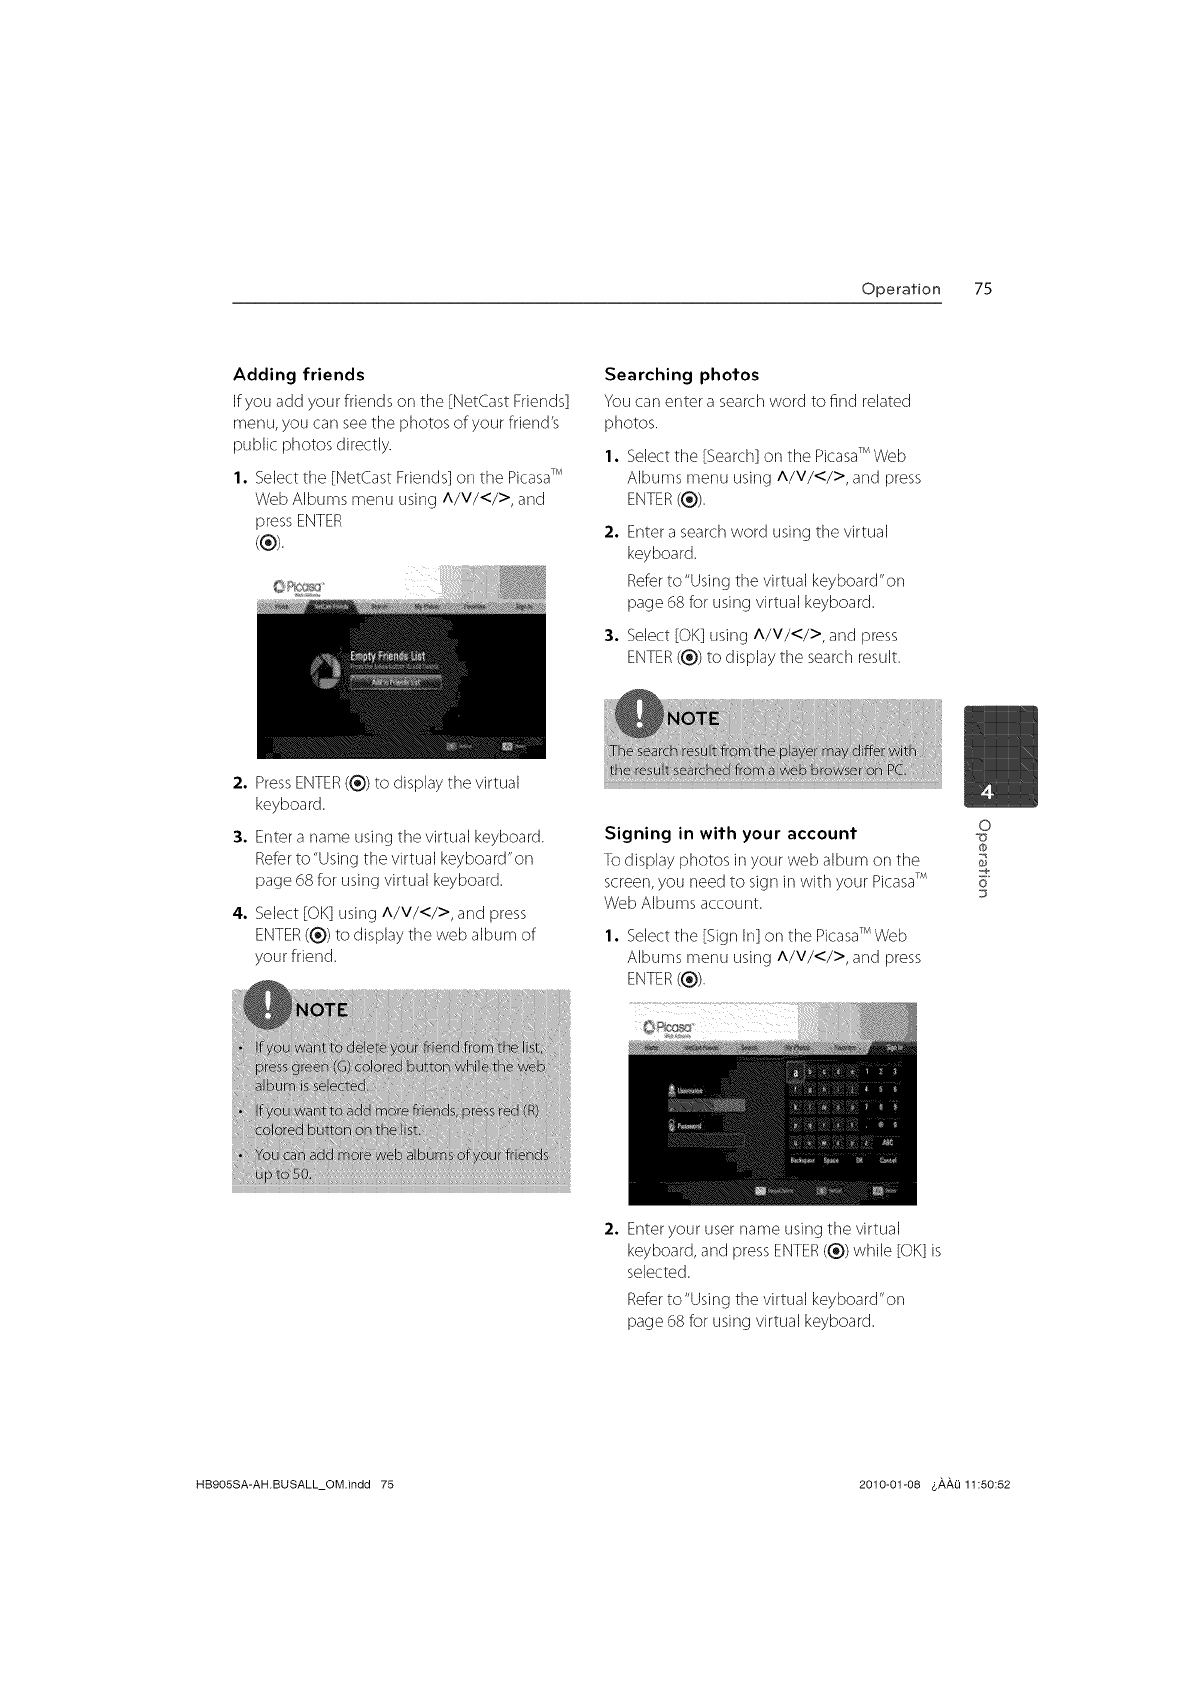
Operation 75
Adding friends
If you add your friends on the [NetCast Friends]
menu, you carl seethe photos of your friend's
public photos directly.
1, Select tile [NetCast Friends] on the PicasaTM
Web Albums menu using A/V/</>, and
press ENTER
(®).
Searching photos
You carl enter a searchword to find related
photos.
1. Selecttile [Search]on the PicasaTM Web
Albums menu using A/V/</>, and press
ENTER(®).
2° Enter a searchword using the virtual
keyboard.
Referto "Using tile virtual keyboard"on
page 68 for using virtual keyboard.
3. Select [OK] using A/V/</>, and press
ENTER (®) to display the search result.
2°
3°
4°
PressENTER(®) to display the virtual
keyboard.
Enter a name using the virtual keyboard.
Refer to "Using the virtual keyboard"on
page 68 for using virtual keyboard.
Select [OK] using A/V/</>, and press
ENTER(®) to display the web album of
your friend.
Signing in with your account
To display photos in your web album on tile
screen,you need to sign in with your PicasaTM
Web Albums account.
1. Selecttile [Sign In] on the PicasaTM Web
Albums menu using A/V/</>, and press
ENTER(®).
0
0
6"
2. Enter your user name using the virtual
keyboard, and press ENTER(®) while [OK]is
selected.
Referto "Using tile virtual keyboard"on
page 68 for using virtual keyboard.
HB9OSSA-AH.BUSALL_OM.indd 75 2010-01-08 6_,_,0 11:50:52
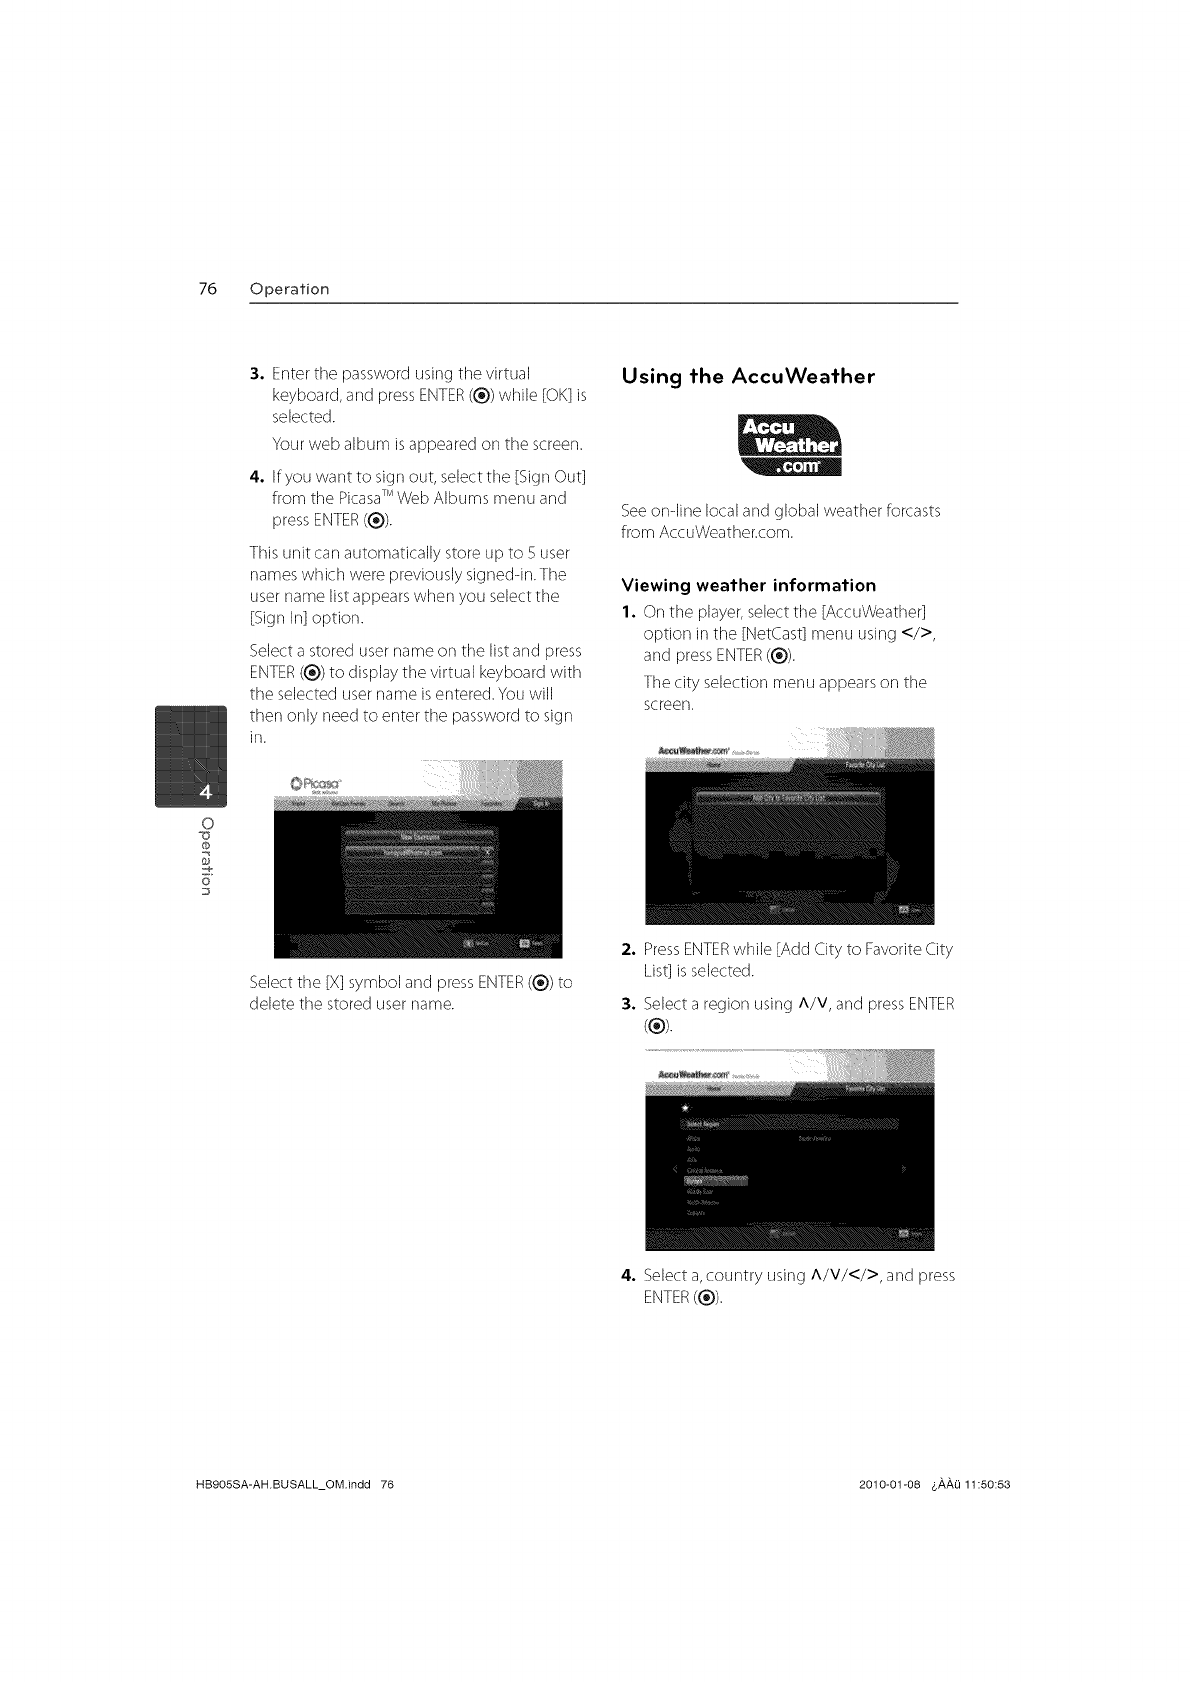
76 Operation
3, Entertile password using tile virtual
keyboard, and press ENTER(®) while [OK]is
selected.
Yourweb album isappeared on the screen.
4, If you want to sign out, select tile [Sign Out]
from tile PicasaTM Web Albums menu and
press ENTER(®).
This unit carl automatically store up to 5 user
nameswhich were previously signed-in. Tile
user name list appearswhen you selectthe
[Sign In] option.
Selecta stored user name on the list and press
ENTER(®) to display tile virtual keyboard with
the selected user name is entered. You will
then only need to enter tile password to sign
in.
Using the AccuWeather
Seeon-line local and global weather forcasts
from AccuWeather.com.
Viewing weather information
1. On the player,select tile [AccuWeather]
option in tile [NetCast]menu using </>,
and pressENTER(®).
Tile city selection menu appearson tile
screen.
0
0
-e
6"
Selectthe [X] symbol and press ENTER(®) to
delete the stored user name.
2. PressENTERwhile [Add City to FavoriteCity
List] is selected.
3. Selecta region using A/V, and pressENTER
(®).
4. Selecta, country using A/V/</>, and press
ENTER(®).
HB9OSSA-AH.BUSALL_OMindd 76 2010-01-08 4,_,_,0 11:50:53
Operation 77
5, Select a city using A/V/</>, and press
ENTER((_)).
6. UseA/V/</> to select [Home] and press
ENTER(1_))to display weather information
of the selected city.
Adding more cities
1. Use</> to select [FavoriteCity List] on tile
AccuWeather menu, and press ENTER(1_)).
Pressred (R)colored button to toggle
display between Fahrenheitor Celsius
thermometer.
7. Use</> to select previous or next city, and
pressENTER((_))to display tile weather
information.
This step works only when you add more
than 1cities to the [Favoritecity List].
2o
3°
4o
So
PressENTER((_))while [Add City to Favorite
City List] is selected.
Selecta region, country and city using
A/V/</> and ENTER(®).
Repeats step 2-3 to add up to 5 cities.
Select the IX] symbol and press ENTER (_))
to delete tile stored favorite city.
Use A/V to select a city from tile [Favorite
City List], and press ENTER((_)) to display
tile weather information.
o
0
6"
D
HB905SA-AH.BUSALL_OM.indd 77 2010-01-08 $_,_,1_11:5C
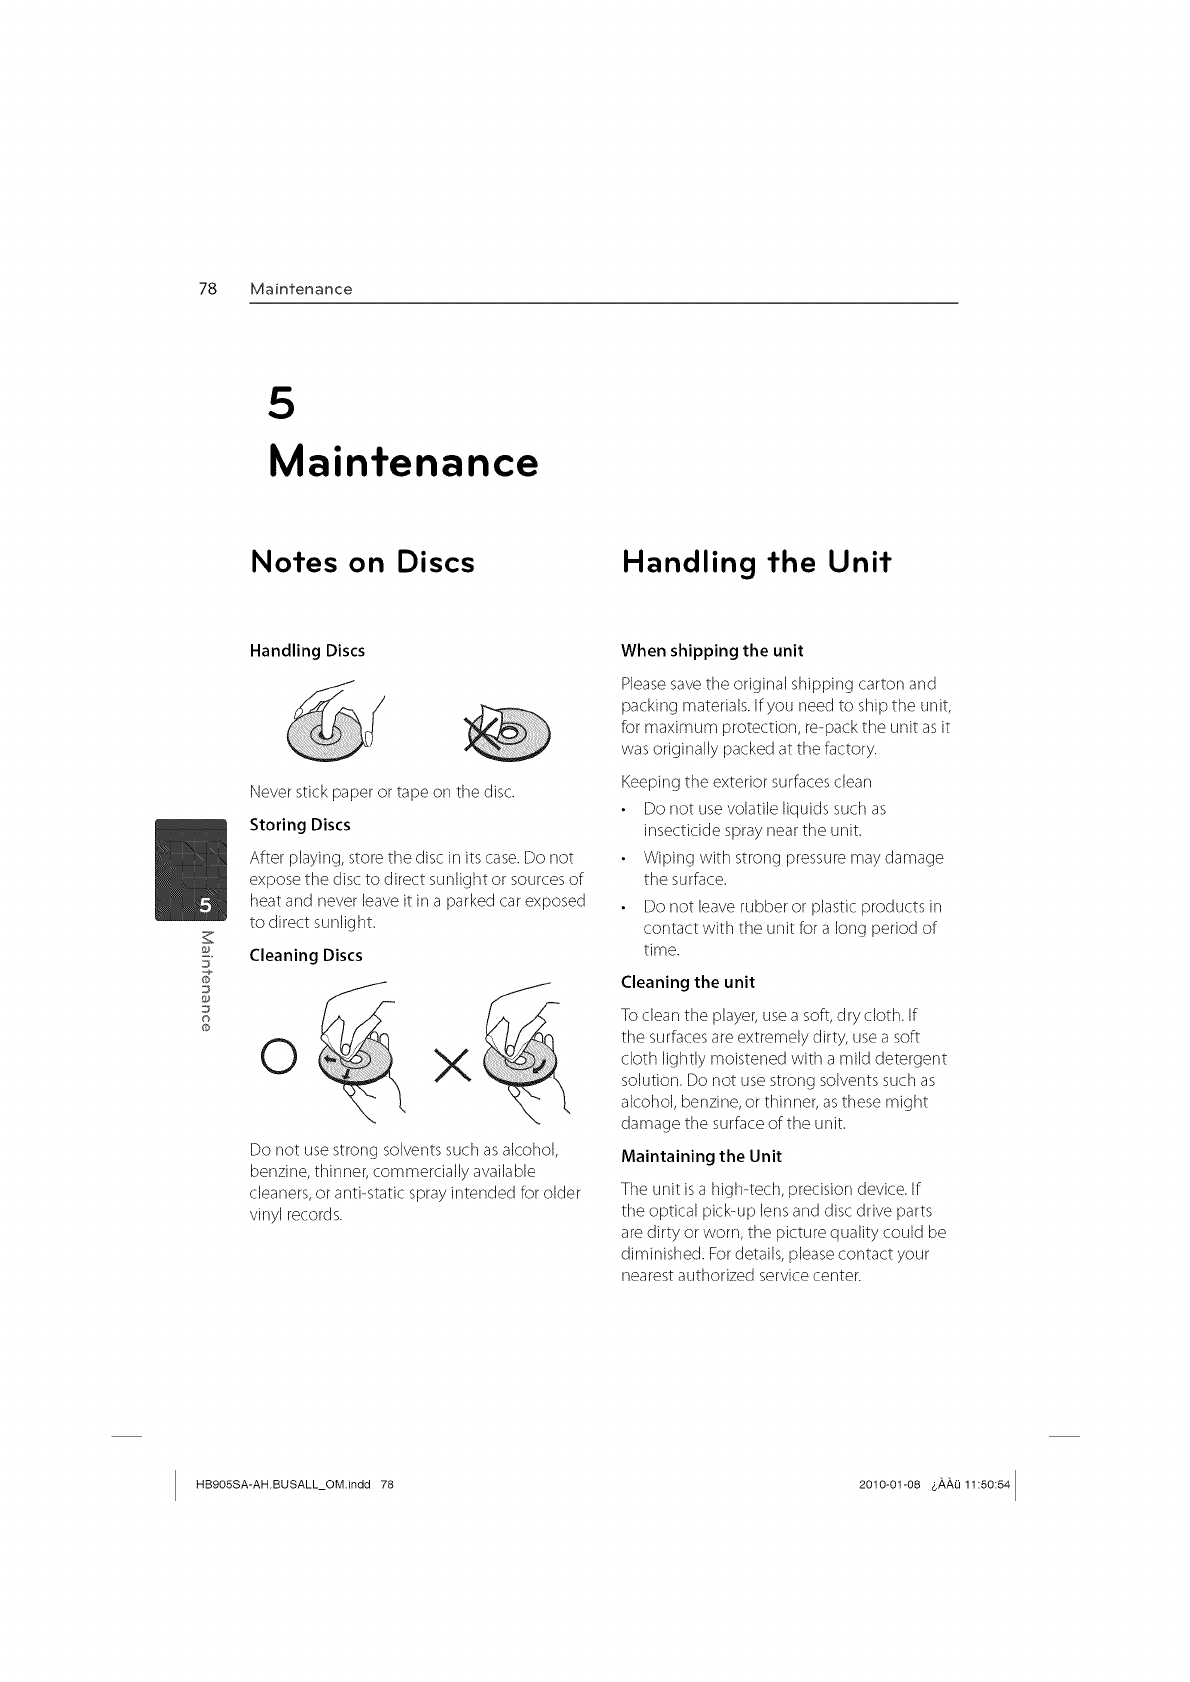
78 Maintenance
z
5
Mainfenance
Notes on Discs Handling the Unit
©
@
Handling Discs
Never stick paper or tape on tile disc.
Storing Discs
After playing, storethe disc in its case.Do not
expose the disc to direct sunlight or sourcesof
heat and never leaveit in a parked car exposed
to direct sunlight.
Cleaning Discs
0X
Do not usestrong solvents such as alcohol,
benzine, thinner, commercially available
cleaners,or anti-static spray intended for older
vinyl records.
When shipping the unit
Pleasesavetile original shipping carton and
packing materials. If you need to ship the unit,
for maximum protection, re-pack the unit asit
was originally packed at the factory.
Keeping the exterior surfacesclean
Do not usevolatile liquids such as
insecticide spray near tile unit.
Wiping with strong pressuremay damage
the surface.
Do not leave rubber or plastic products in
contact with the unit for a long period of
time.
Cleaning the unit
Toclean the player,usea soft, dry cloth. If
tile surfacesare extremely dirty, usea soft
cloth lightly moistened with a mild detergent
solution. Do not use strong solvents such as
alcohol, benzine, or thinner, asthese might
damage tile surface of the unit.
Maintaining the Unit
Tile unit is a high-tech, precision device. If
tile optical pick-up lens and disc drive parts
are dirty or worn, the picture quality could be
diminished. Fordetails, please contact your
nearestauthorized service center.
HB905SA-AH.BUSALL_OM.indd 78 2010-01-08 &AALi 11:50:54
Troubleshooting 79
6
Troubleshooting
General
Plug the power cord into the wall outlet securely.
The Power does not turned
OD.
Tile unit does not start
playback.
The angle cannot be
changed.
Tile subtitle language
cannot be changed or
turned off.
Cannot play MP3/WMA/
JPEG/DivXfiles.
Tile remote control does
not work properly.
Insert a playable disc. (Checktile disc type, color system, and
regional code.)
Placetile disc with tile playback side down.
Placetile disc on the disc tray correctly inside the guide.
Cleanthe disc.
Canceltile rating function or change tile rating level.
Multi-angles are not recorded on the DVDVideo being
played.
Subtitles are not recorded on the DVD Video being played.
The files are not recorded in a format that tile unit carl play.
The unit does not support the codec of the movie file.
Tile remote control is not pointed at tile remote sensorof
the unit.
The remote control is too far from the unit.
There isan obstacle in tile path of the remote control and
the unit.
The batteries in tile remote control areexhausted.
o
o
o
5
HB905SA-AH.BUSALL_OM.indd 79 2010-01-08 $_,_,0 11:50:55
80 Troubleshooting
Picfure
There is no aicture.
Picture noise appears
Select the appropriate video input mode on tile TV so tile
picture from the unit appears on theTV screen.
Connect the video connection securely.
Check the [HDMI Color Setting] in the [Setup] menu is
set to the appropriate item that conforms to your video
corlnection.
YourTVmay not suppot the resolution you have set on the
player.Change tile resolution that your TVaccepts.
The player'sHDMI OUTjack is connected to a DVIdevice that
does not support copyright protection.
You are playing a disc recorded in a color system that is
different from your TV.
Settile resolution which yourTV accepts.
Sound
There is no sound orthe
sound is distorted.
The unit is in scan,slow motion, or pausemode.
The sound volume is low.
Check the speaker cable connection. (page 16)
o
C
Y
o
o
HB9OSSA-AH.BUSALL_OM.indd 80 2010-01-08 6_,_,0 11:50:55
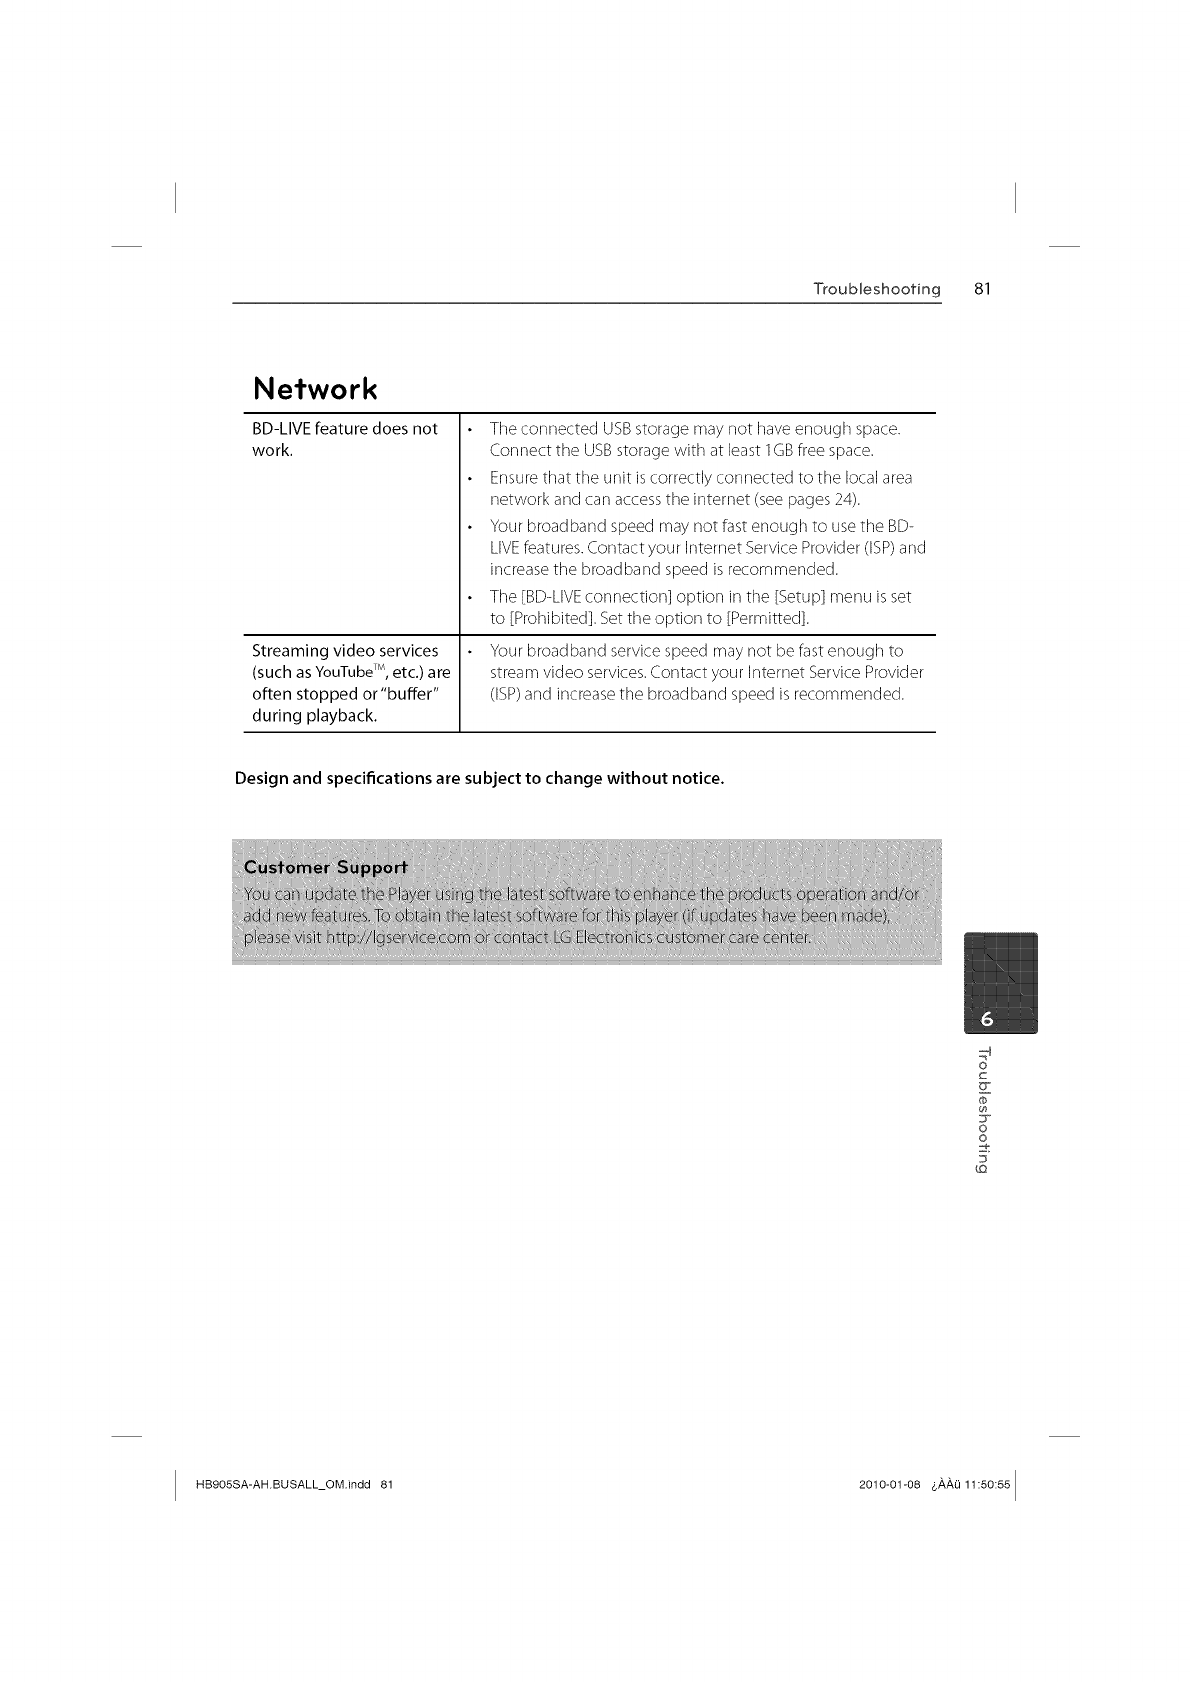
Troubleshooting 81
Network
BD-LIVEfeature does not
work.
Streaming video services
(such as YouTube TM, etc.) are
often stopped or"buffer"
during playback.
Tile connected USBstorage may not have enough space.
Connect the USBstorage with at least 1GBfree space.
Ensurethat the unit iscorrectly connected to the local area
network and carl accessthe internet (see pages 24).
Yourbroadband speed may not fast enough to use the BD-
LIVEfeatures.Contact your Internet Service Provider(ISP)and
increasethe broadband speed is recommended.
The [BD-LIVEconnection] option in tile [Setup] menu isset
to [Prohibited]. Settile option to [Permitted].
Yourbroadband service speed may not be fastenough to
stream video services.Contact your Internet Service Provider
(ISP)and increasethe broadband speed is recommended.
Design and specifications are subject to change without notice.
o
@
o
5"
HB905SA-AH.BUSALL_OM.indd 81 2010-01-08 &,&,,&,O11:50:55
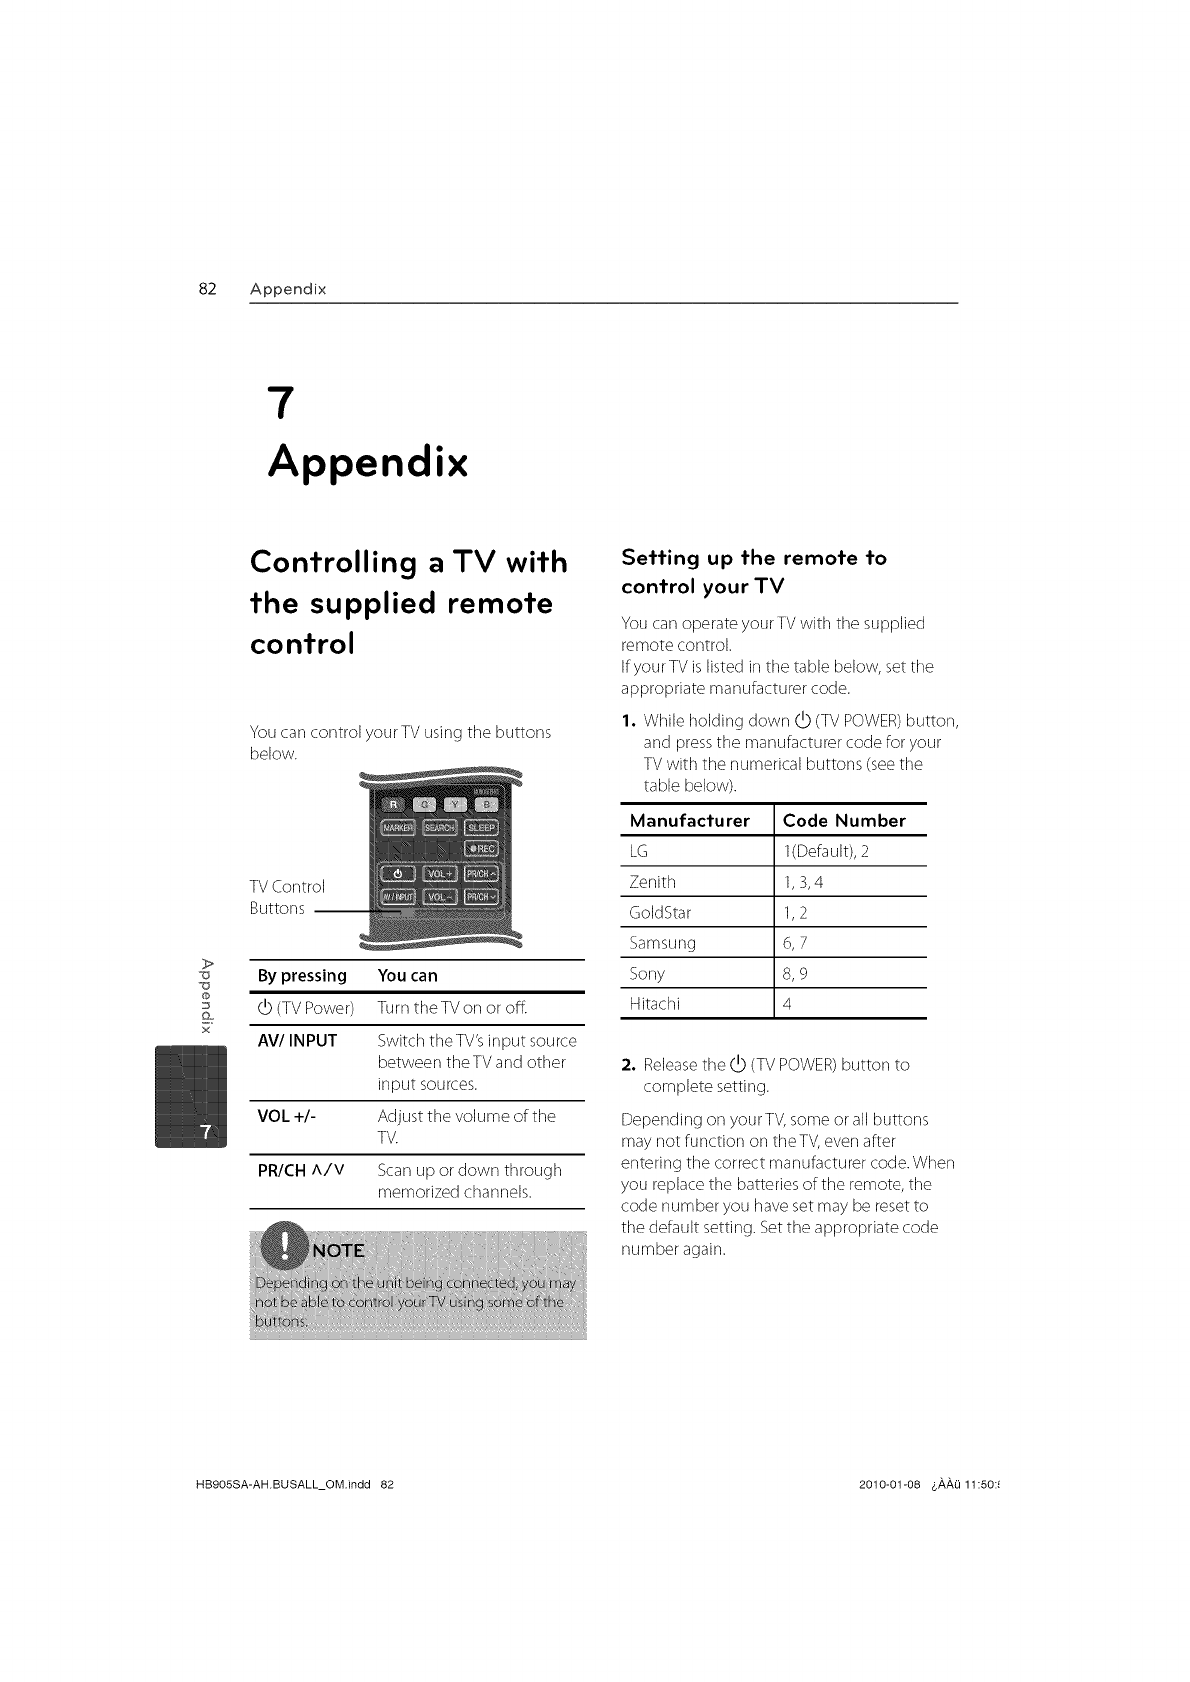
82 Appendix
7
Appendix
0
x
Controlling a TV with
the supplied remote
control
You carl control your TV using the buttons
below.
TV Control
Buttons --
By pressing You can
(TVPower) Turn theTV on or off.
AV/INPUT Switch theTV's input source
between theTV and other
input sources.
VOL +/- Adjust the volume of the
TV.
PR/CHA/V Scanup or down through
memorized channels.
Setting up the remote to
control your TV
You carl operate your TVwith tile supplied
remote control.
IfyourTV is listed in tile table below, set tile
appropriate manufacturer code.
1. While holding down _ (TV POWER)button,
and pressthe manufacturer code for your
TV with the numerical buttons (seetile
table below).
Manufacturer
LG
Zenith
GoldStar
Samsung
Sony
Hitachi
Code Number
1(Default),2
1,3,4
1,2
6,7
8,9
4
2. Release tile 1_)(TV POWER) button to
complete setting.
Depending on yourTV, some or all buttons
may not function on theTV, even after
entering tile correct manufacturer code. When
you replace tile batteries of tile remote, tile
code number you have set may be reset to
tile default setting. Setthe appropriate code
number again.
HB9OSSA-AH.BUSALL_OM.indd 82 2010-01-08 6_,_,_ 11:50:!
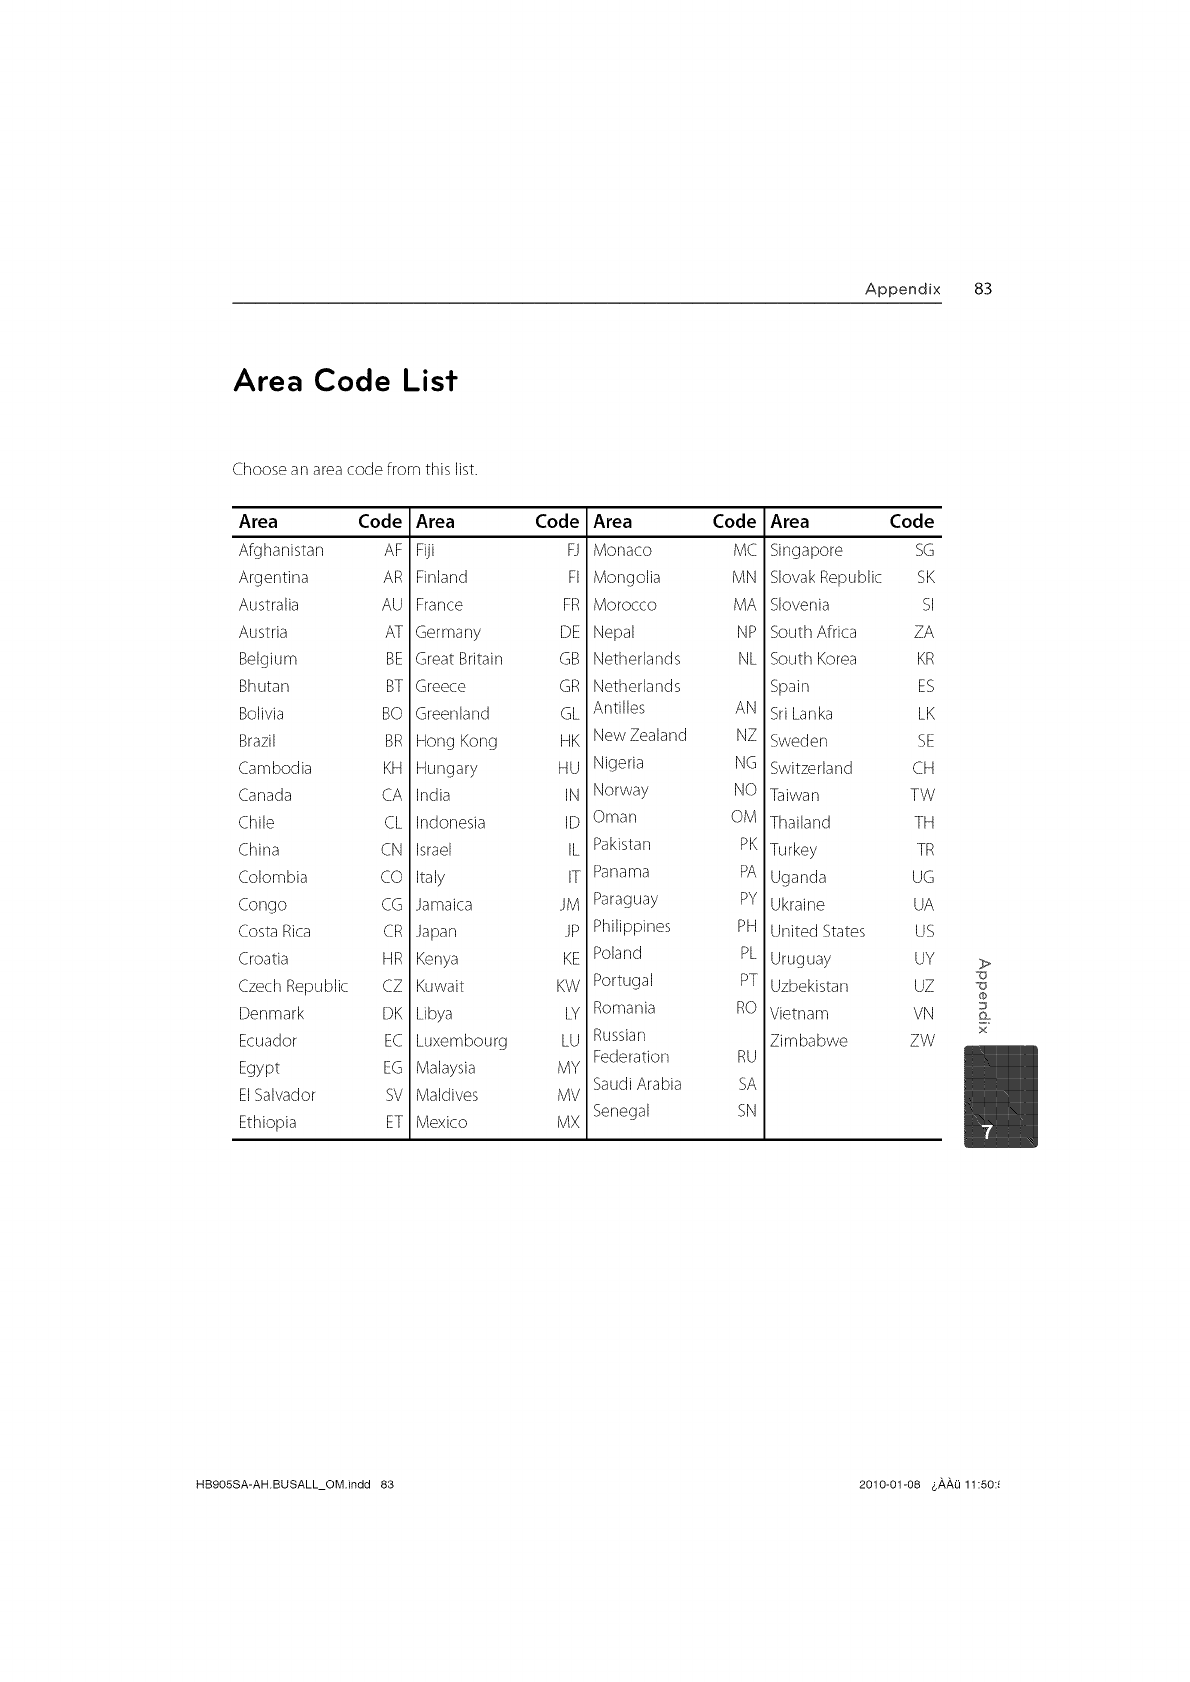
Appendix 83
Area Code List
Choose an area code from this list.
Area Code
Afghanistan AF
Argentina AR
Australia AU
Austria AT
Belgium BE
Bhutan BT
Bolivia BO
Brazil BR
Cambodia KH
Canada CA
Chile CL
China CN
Colombia CO
Congo CG
CostaRica CR
Croatia HR
Czech Republic CZ
Denmark DK
Ecuador EC
Egypt EG
ElSalvador SV
Ethiopia ET
Area
Fiji
Finland
France
Germany
Great Britain
Greece
Greenland
Hong Kong
Hungary
India
Indonesia
Israel
Italy
Jamaica
Japan
Kenya
Kuwait
Libya
Luxembourg
Malaysia
Maldives
Mexico
Code
FI
FR
DE
GB
GR
GL
HK
HU
IN
ID
IL
IT
JM
JP
KE
KW
LY
LU
MY
MV
MX
Area
Monaco
Mongolia
Morocco
Nepal
Netherlands
Netherlands
Antilles
New Zealand
Nigeria
Norway
Oman
Pakistan
Panama
Paraguay
Philippines
Poland
Portugal
Romania
Russian
Federation
Saudi Arabia
Senegal
Code
MC
MN
MA
NP
NL
Area
Singapore
SlovakRepublic
Slovenia
South Africa
South Korea
Spain
AN SriLanka
NZ Sweden
NG Switzerland
NO Taiwan
OM Thailand
PK Turkey
PA Uganda
PY Ukraine
PH United States
PL Uruguay
PT Uzbekistan
RO Vietnam
Zimbabwe
RU
SA
SN
Code
SG
SK
SI
ZA
KR
ES
LK
SE
CH
TW
TH
TR
UG
UA
US
UY
UZ
VN
ZW
}>
S3
tb
x
HB905SA-AH.BUSALL_OM.indd 83 2010-01-08 &,a,,a,Q11:50:!
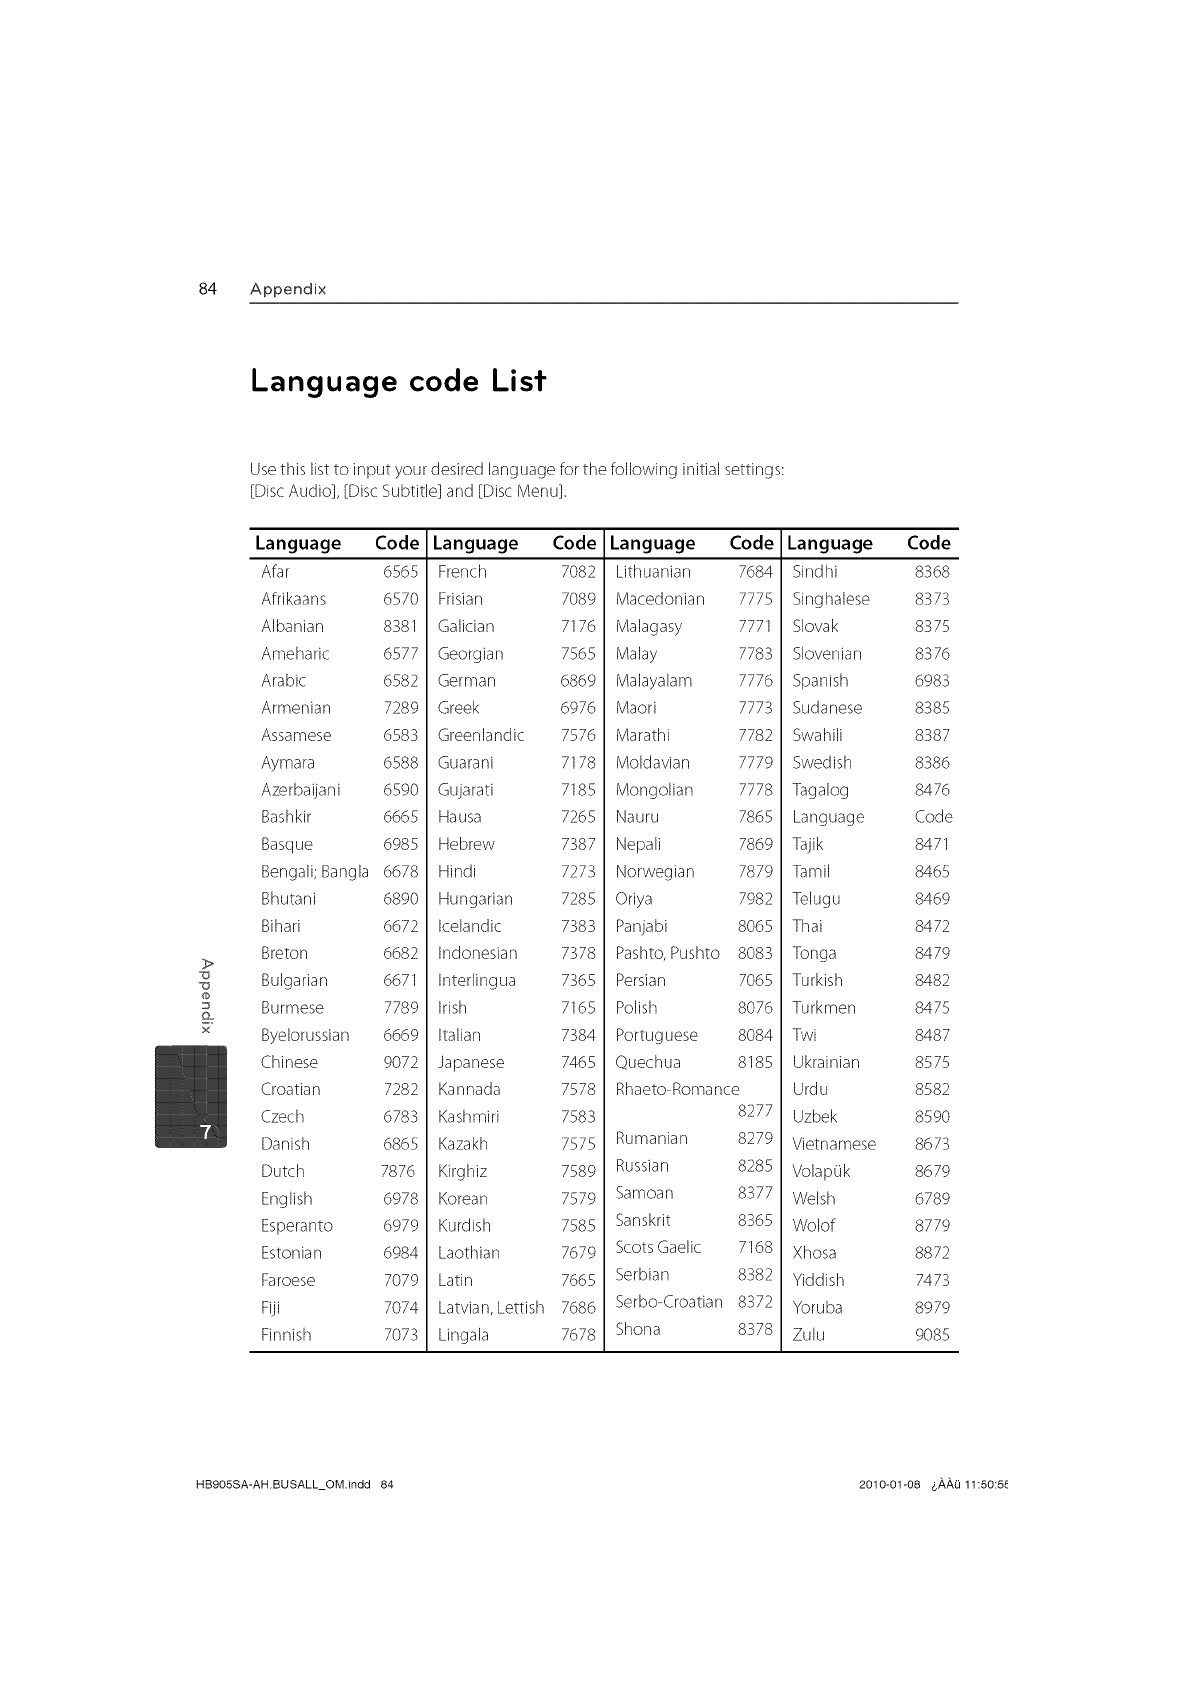
84 Appendix
Language code List
>
@
x
Usethis listto input your desired language for the following Mtial settings:
[DiscAudio], [Disc Subtitle] and [DiscMenu].
Language Code
Afar 6565
Afri kaan s 6570
Albanian 8381
Ameharic 6577
Arabic 6582
Armenian 7289
Assamese 6583
Aymara 6588
AzerbaUani 6590
Bashkir 6665
Basque 6985
Bengali; Bangla 6678
Bhutani 6890
Bihari 6672
Breton 6682
Bulgarian 6671
Burmese 7789
Byelorussian 6669
Chinese 9072
Croatia n 7282
Czech 6783
Danish 6865
Dutch 7876
English 6978
Esperanto 6979
Estonia n 6984
Faroese 7079
Fiji 7074
Finnish 7073
Language Code
French 7082
Frisian 7089
Galician 7176
Georgian 7565
German 6869
Greek 6976
Greenlandic 7576
Guarani 7178
Gujarati 7185
Hausa 7265
Hebrew 7387
Hindi 7273
Hungarian 7285
Icelandic 7383
Indonesiarl 7378
Interlingua 7365
Irish 7165
Italian 7384
Japa nese 7465
Kan nada 7578
Language Code
Lithuanian 7684
Macedonian 7775
Malagasy 7771
Malay 7783
Malayalam 7776
Maori 7773
Marathi 7782
Moldavian 7779
Mongolian 7778
Nauru 7865
Nepali 7869
Norwegian 7879
Oriya 7982
Panja bi 8065
Pashto, Pushto 8083
Persian 7065
Polish 8076
Portuguese 8084
quechua 8185
Rhaeto-Romance
Language
Sindhi
Singhalese
Slovak
Slovenian
Spanish
Sudanese
Swahili
Swedish
Tagalog
Language
Tajik
Tamil
Telugu
Thai
Tonga
Turkish
Turkmen
Twi
UkraMan
Urdu
Kashmiri 7583
Kazakh 7575
Kirghiz 7589
Korean 7579
Kurdish 7585
Laothian 7679
Latin 7665
Latvian, Lettish 7686
Lingala 7678
Rumanian
Russian
Samoan
Sanskrit
Scots Gaelic
Serbian
Serbo-Croatian
Shona
8277 Uzbek
8279 Vietnamese
8285 Volap@k
8377 Welsh
8365 Wolof
7168 Xhosa
8382 Yiddish
8372 Yoruba
8378 Zulu
Code
8368
8373
8375
8376
6983
8385
8387
8386
8476
Code
8471
8465
8469
8472
8479
8482
8475
8487
8575
8582
8590
8673
8679
6789
8779
8872
7473
8979
9085
HB9OSSA-AH.BUSALL_OM.indd 84 2010-01-08 6AAO 11:50:5. _
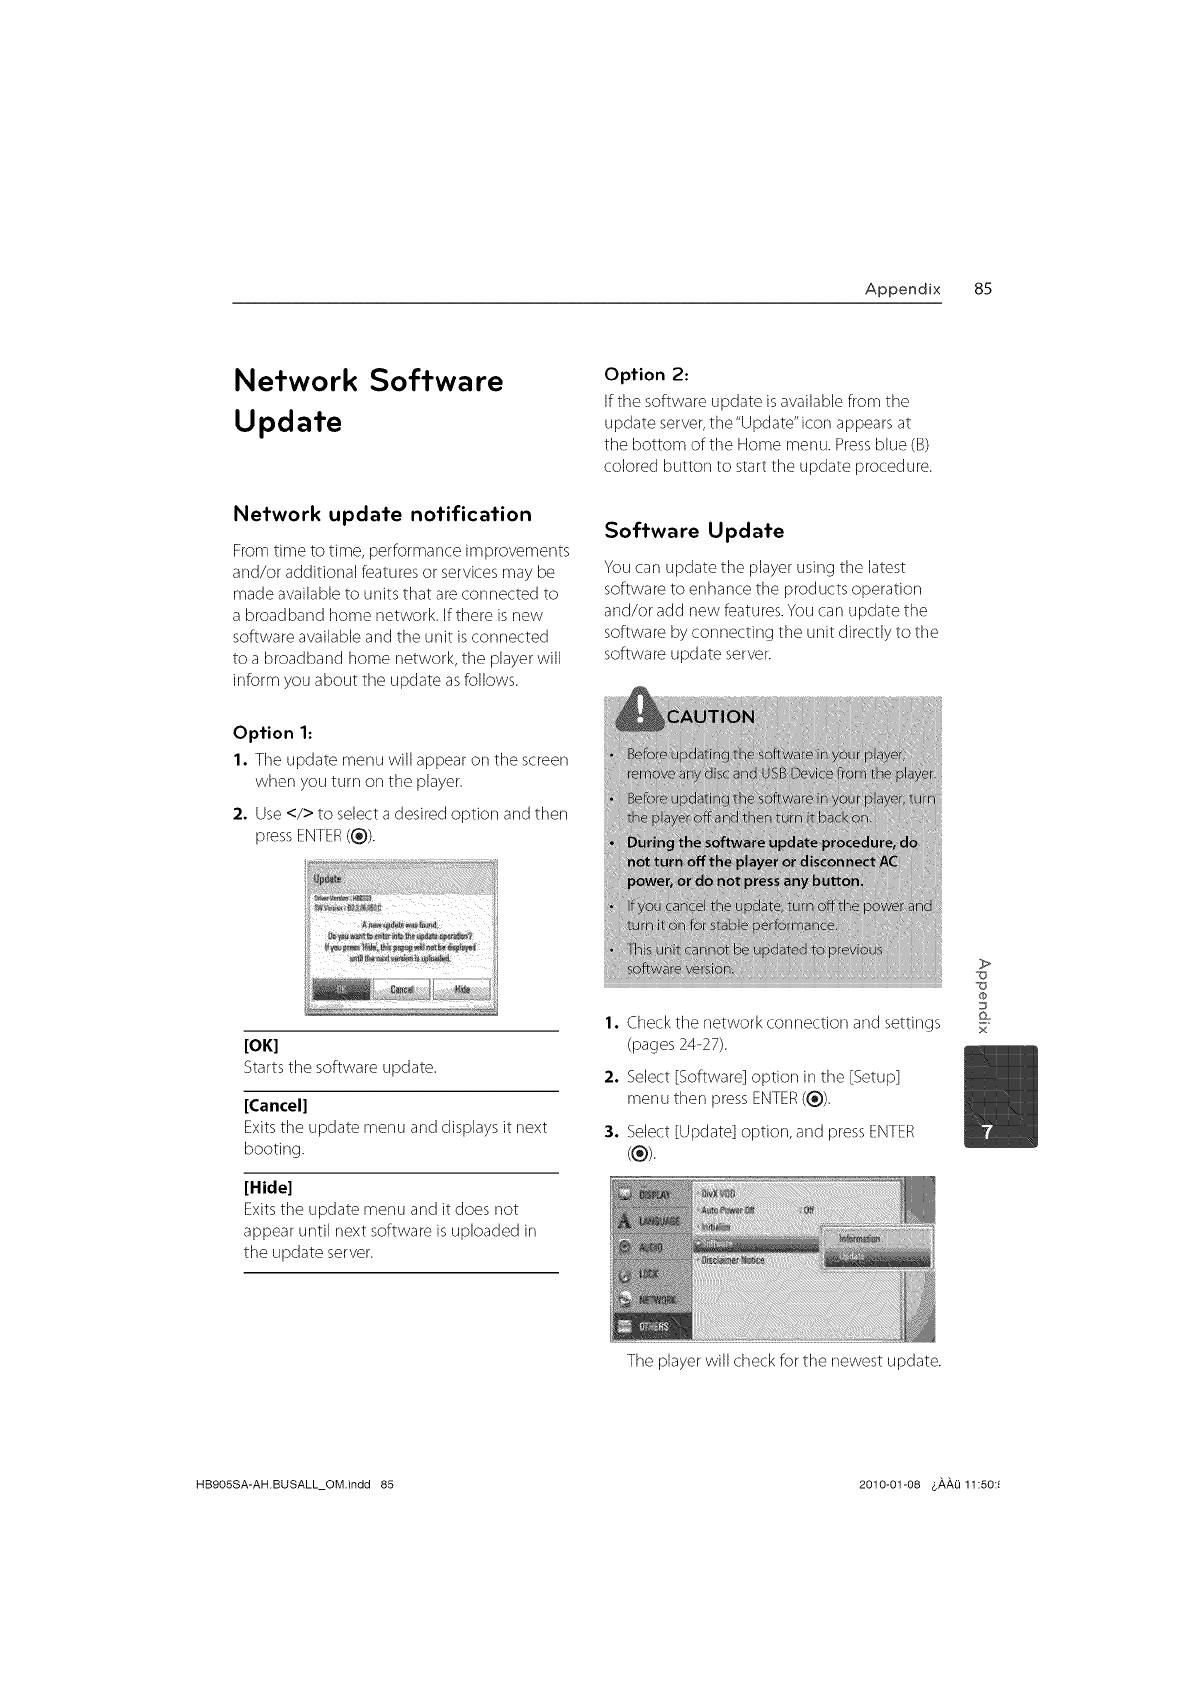
Appendix 85
Network Software
Update
Network update notification
From time to time, performance improvements
and/or additional features or services may be
made available to units that are connected to
a broad band home network. If there is new
software available and the unit is connected
to a broadband home network, tile playerwill
inform you about tile update as follows.
Option 2:
If the software update is available from the
update server,the "Update" icon appears at
the bottom of the Home menu. Pressblue (B)
colored button to start the update procedure.
Software Update
You carl update the player using tile latest
software to enhance tile products operation
and/or add new features.Youcarl update the
software by connecting the unit directly to tile
software update server.
Option 1:
1. Tile update menu will appear on the screen
when you turn on the player.
2. Use</> to select a desired option and then
pressENTER(®).
[OK]
Startsthe software update.
[Cancel]
Exitsthe update menu and displays it next
booting.
[Hide]
Exitsthe update menu and it does not
appear until next software is uploaded in
the update server.
I. Check the network corlrlection and settings
(pages 24-27).
2. Select [Software] option in the [Setup]
menu then press ENTER (®).
3. Select [Update] option, and pressENTER
(®).
)>
x
The player will check for the newest update.
HB9OSSA-AH.BUSALL_OM.indd 85 2010-01-08 4,#,#,Li11:50:!
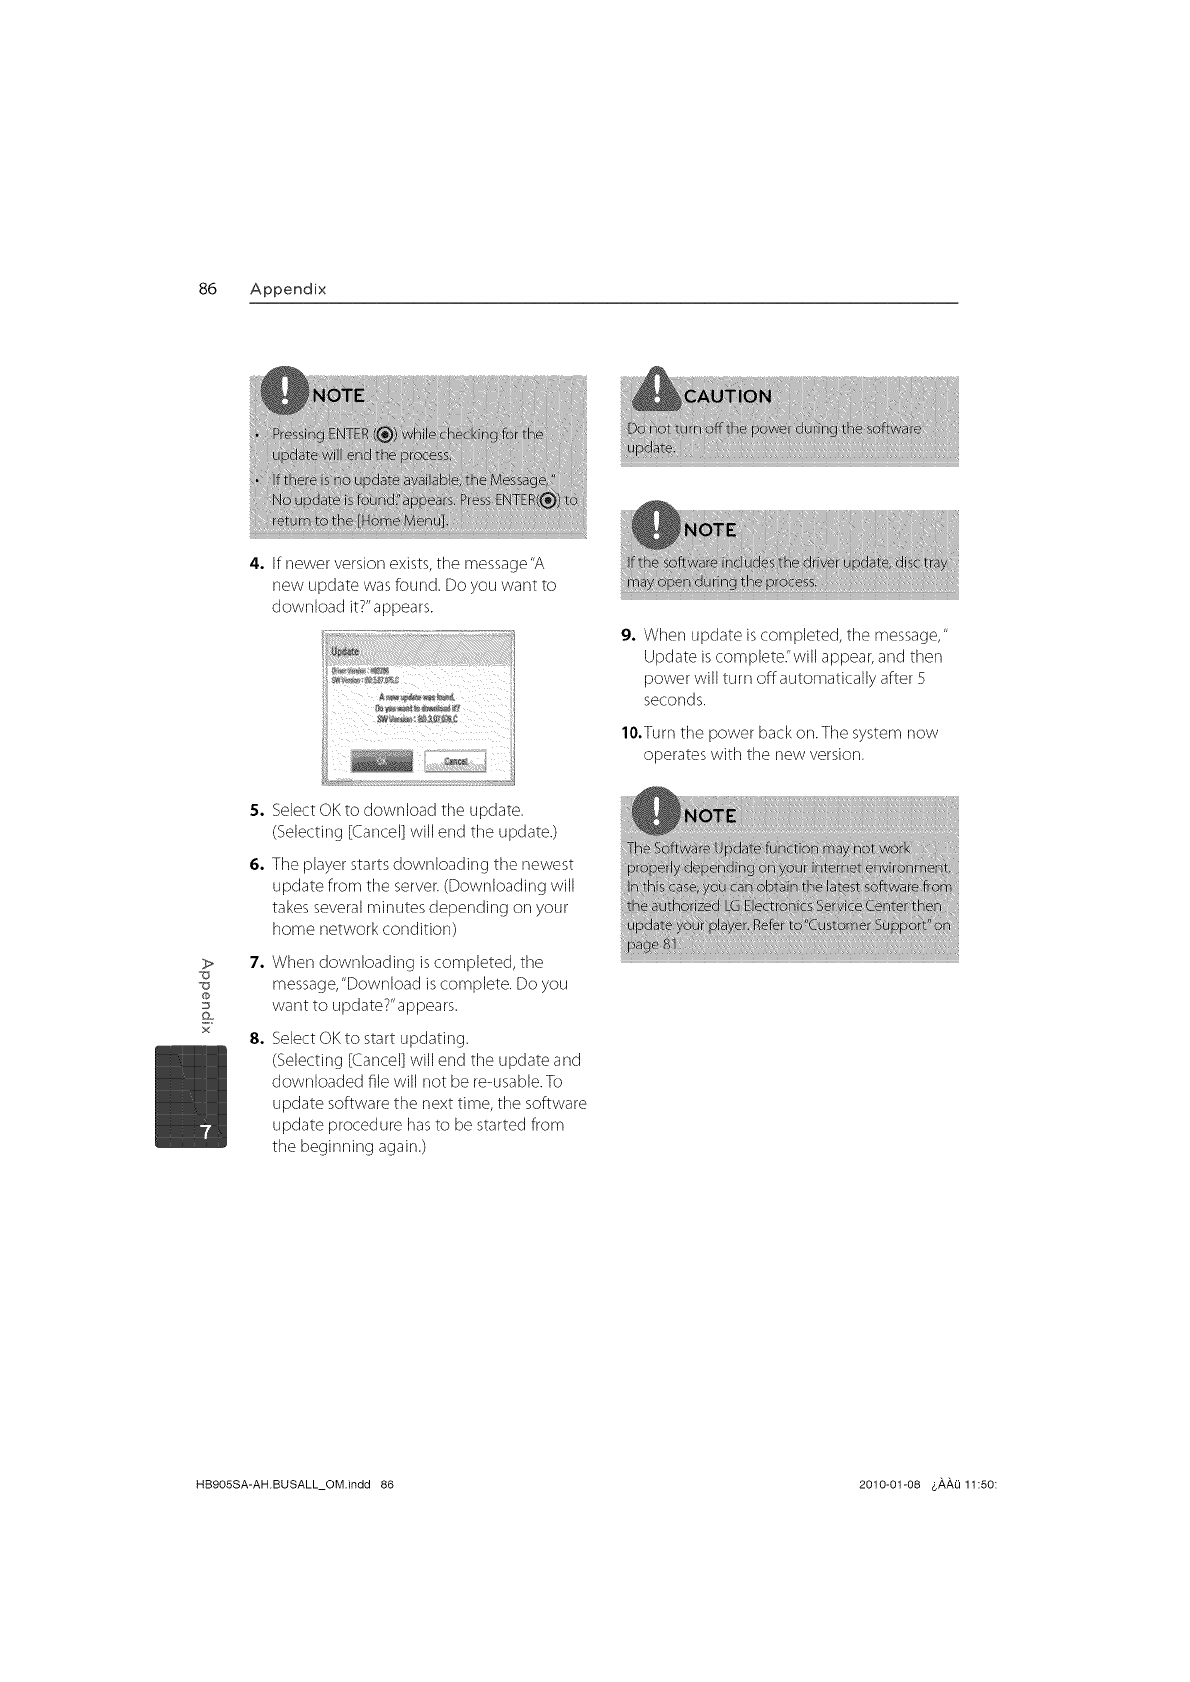
86 Appendix
4. If newer version exists, tile message"A
new update was found. Do you want to
download it?"appears.
9, When update is completed, tile message,"
Update iscomplete."will appear,and then
power will turn offautomatically after 5
seconds.
lO,Turn tile power back on. The system now
operates with tile new version.
0
x
So
6°
7°
8°
SelectOK to download the update.
(Selecting [Cancel]will end the update.)
The player starts downloading tile newest
update from tile server.(Downloading will
takesseveralminutes depending on your
home network condition)
When downloading is completed, tile
message, "Download is complete. Do you
want to update?"appears.
SelectOK to start updating.
(Selecting [Cancel]will end the update and
downloaded file will not be re-usable.To
update software the next time, tile software
update procedure has to be started from
the beginning again.)
HB9OSSA-AH.BUSALL_OM.indd 86 2010-01-08 _,_,_,_ 11:50:

Appendix 87
Available resolution according to the
resolution setting
When the non-copy protected media is playing back
__.Video Out
Resolution
480i
480p
720p
1080i
1080p /24 Hz
1080p /60 Hz
HDMI OUT
480p
480p
720p
1080i
1080p/24 Hz
1080p/60 Hz
COMPONENT VIDEO OUT
HDMI connected HDMI disconnected
480i
480p
720p
1080i
480i 1080i
480i 1080i
When the copy protected media is plal
ideo Out
Resolution
480i
480p
720p
1080i
1080p /24 Hz
1080p /60 Hz
HDMI OUT
ring back
HDMIconnected
480i
480p
COMPONENT VIDEO OUT
HDMI disconnected
480p
480p
720p 480i 480p
1080i 480i 480p
1080p/24 Hz 480i 480p
1080p/60 Hz 480i 480p
HDMI OUT connection
Forthe 480i resolution setting, real output
resolution of HDMI OUTwill change to
480p.
Ifyou select a resolution manually and then
connect the HDMIjack to TVand your TV
does not accept it, the resolution setting is
set to [Auto].
Ifyou select a resolution that your TV
does not accept, the warning message
will appear. After resolution change,
if you cannot see tile screen, please
wait 20 seconds and tile resolution will
automatically revert back to tile previous
resolution.
Tile 1080p video output frame rate may
be automatically set to either 24 Hzor
60 Hzdepending both on tile capability
and preference of the connected TV and
basedon the native video frame rateof the
content on the BD-ROMdisc.
COMPONENT VIDEO OUT
connection
BD,DVD,Netflix or CinemaNow video stream
could prevent up-scaling on analog output.
VIDEO OUT connection
The resolution of tile VIDEO OUT jack is always
outputted at 480i resolution.
)>
_Z3
_b
x
HB905SA-AH.BUSALL_OM.indd 87 2010-01-08 &_,_,Q 11:50:5

88 Appendix
Trademarks and Licenses
@
x
_lu-r_yLT/sc
"Blu-ray Disc"is a trademark.
"BD-LIVE"Iogo is a trademark of Blu-ray Disc
Association.
"BONUSVIEW"is trademark of Blu-ray Disc
Association.
Java and all Java-based trademarks and Iogos
are trademarks or registered trademarks of Sun
Microsystems, Inc. in the United States and other
countries.
Manufactured under license from Dolby
Laboratories. Dolby, Pro Logic, and the double-D
symbol are trademarks of Dolby Laboratories.
@ -HD
Master Audio I Essential
Manufactured under license under U.S. Patent
#'s: 5,451,942; 5,956,674; 5,974,380; 5,978,762;
6,226,616; 6,487,535; 7,392,195; 7,272,567;
7,333,929; 7,212,872 & other U.S. and worldwide
patents issued & pending. DTS is a registered
trademark and the DTS Iogos, Symbol, DTS-HD and
DTS-HD Master Audio I Essential are trademarks of
DTS, Inc. ¢) 1996-2008 DTS, Inc. All Rights Reserved.
H rlnll TM
HIGH DEFiNiTiON MULTiMEDiA iNTERFACE
HDMI, the HDMI logo and High-Definition
Multimedia Interface are trademarks or registered
trademarks of HDMI licensing LLC.
VIDEO
"DVD Logo"is a trademark of DVD Format/Logo
Licensing Corporation.
lid
DivX is a registered trademark of DivX, Inc., and is
used under license.
"x.v.Color" is a trademark of Sony Corporation.
PicasaTM
Web Albums
Picasa TM Web Albums is a trademark of Google Inc.
YouTube TMis a trademark of Google Inc.
HB905SA-AH.BUSALL_OM.indd 88 2010-01-08 &,a,,a,Q11:50:56

Appendix 89
AVCHD TM
"AVCHD" and the "AVCHD" logo are trademarks of
Panasonic Corporation and Sony Corporation.
This product is licensed under the AVC patent
portfolio license and VCq patent portfolio license
for the personal and non-commercial use of a
consumer to (i) encode video in compliance
with the AVC Standard and VCq Standard ("AVC/
VCq Video") and/or (ii) decode AVC/VCq Video
that was encoded by a consumer engaged in
a personal and non-commercial activity and/or
was obtained from a video provider licensed to
provide AVC/VCq Video. No license is granted
or shall be implied for any other use. Additional
information may be obtained from MPEG LA, LLC.
See htt p://www.m pegla.com.
iPod is a trademark of Apple Inc., registered in the
U.S. and other countries.
iPhone is a trademark of Apple Inc.
"Made for iPod"means that an electronic accessory
has been designed to connect specifically to iPod
and has been certified by the developer to meet
Apple performance standards.
"Works with iPhone"means that an electronic
accessory has been designed to connect
specifically to iPhone and has been certified
by the developer to meet Apple performance
standards.
Apple is not responsible for the operation of
this device or its compliance with safety and
regulatory standards.
o gracenobeo
Gracenote ®, Gracenote logo and logotype, and the
"Powered by Gracenote" logo are either registered
trademarks or trademarks of Gracenote, Inc. in the
United States and/or other countries.
Music recognition technology and related data are
provided by Gracenote ®.
Portions of the content is copyright © Gracenote or
its providers.
Energy Saving
(Extremely Low Power Consumption)
Saving
On the LG products, an innovative power
consumption system in stand-by mode is built.
It consumes less than 0.09 watts in that mode.
Therefore, the small amounts of electricity are
consumed even though the power plug is inserted.
)>
x
HB9OSSA-AH.BUSALL_OM.indd 89 2010-01-08 &,a,,a,O11:50:_
90 Appendix
Specifications
General
Power requirements:
AC 120V, 60 Hz
Power consumption:
150W
Dimensions (W x H x D):
Approx. 430 x 63 x 281 mm
(17 x 2.5 x 11 inches) without foot
Net Weight (Approx.):
4.0 kg (8.8 Ibs)
Operating temperature:
S °C to 35 °C (41 °Fto 95 °F)
Operating humidity:
5%to90%
Bus Power supply (USB):
DC 5V _ 500 mA
Tuner
• FMTuning Range:
87.5 to 108.0 MHz
• AMTuning Range:
520 to 1,710 kHz
Amplifier
• Power output (4 @/PEAK)
Total 1100 W
Front 180 W x 2
Center 180 W
Rear 180 W x 2
Sub-Woofer 200 W (Passive)
• Power output (4 @/RMS)THD 10 % (4 @ /3 _))
Total 980 W
Front 160 W x 2
Center 160 W
Rear 160 W x 2
Sub-Woofer 180 W (Passive)
>
@
x
Inputs/Outputs
• VIDEO OUT:
10V (p-p), 75 @,sync negative, RCAjack x 1
• COMPONENTVIDEO OUT:
(Y) 10 V (p-p), 75 _, sync negative, RCAjack x 1,
(Pb)/(Pr) 07 V (p-p), 75 _), RCAjack x 2
• HDMI IN/OUT(video/audio):
19 pin (HDMI standard, Type A, Version 13)
• ANALOG AUDIO IN:
2 0Vrms (1 kHz, 0 dB), 600 @, RCAjack (L, R)x 1
• DIGITAL IN (OPTICAL IN 1/2):
3 V (p-p), Optical jack x 2
• PORT IN:
05 Vrms (35 mm stereo jack)
System
• Laser:
Semiconductor laser
Wavelength: 405 nm /650 nm
• Signal system:
Standard NTSC color TV system
• Frequency response:
20 Hz to 20 kHz (48 kHz, 96 kHz, 192 kHz sampling)
• Signal-to-noise ratio:
More than 85 dB
• Total harmonic distortion:
0.05 % at ] W
• Dynamic range:
More than 95 dB
• LAN port:
Ethernet jack x 1, 10 BASE-T/100 BASE-TX
HB905SA-AH.BUSALL_OM.indd 90 2010-O1-O8 6,_,,_,_11:50:58

Appendix 91
Speakers
• Front speaker (Left/Right)
Type:
Impedance Rated:
input Power:
Max. input power:
Net Dimensions
(WxH xD):
Net Weight:
• Rear speaker (Left/Right)
Type:
Impedance
input Power:
Max. Input power:
Net Dimensions
(WxH xD):
Net Weight:
• Center speaker
Type:
Impedance Rated:
input Power:
Max. input power:
Net Dimensions
(WxH xD):
Net Weight:
• Subwoofer
Type:
Impedance Rated:
Input Power:
Max. Input power:
Net Dimensions
(WxH xD):
Net Weight:
2 Way 2 speaker
4 C)
180W
360 W
100x 186 x 97mm
(3.9 x 7.3 x 3.8 inches)
05 kg (1.1 Ibs)
1 Way 1 speaker
4 C)
180W
360 W
lOOx 186 x 97mm
(3.9 x 7.3 x 3.8 inches)
0.45 kg (1 Ibs)
1 Way 1 speaker
4 _)
180W
360 W
200x 103 x86 mm
(7.8 x4 x 3.4 inches)
0.5 kg (1.1 Ibs)
1 Way 1 speaker
200 W
400 W
198 x 385 x 275 mm
(7.8 x 15.2 x 11 inches)
4.3 kg (9.5 Ibs)
}>
@
x
HB9OSSA-AH.BUSALL_OM.indd 91 2010-01-08 6#,#4i 11:50:!
g2 Appendix
@
x
Important Information
Relating to Network
Services
PLEASEREADCAREFULLY.USEOFTHE NETWORK
SERVICESISSUBJECTTOTHEFOLLOWINGTERMS
AND CONDITIONS.
Useof the Network Services requires an Intemet
connection which is sold separately and for which
you are solely responsible. The Network Services may
be limited or restricted depending upon the quality,
capabilities and technical limitations of your Internet
service.
The Network Services belong to third parties and
may be protected by copyright, patent, trademark
and/or other intellectual property laws.The Network
Servicesare provided solely for your personal and
noncommercial use.Unlessexpressly authorized by
the respective content owner or service provider,
you shall not modify, copy, republish, upload, post,
transmit, translate, sell,create derivative works,
exploit, or distribute in any manner or medium any
content or servicesaccessible through this product.
LGISNOT RESPONSIBLEFORYOURUSEOF
THENETWORKSERVICES.THENETWORK
SERVICESAREPROVIDED"ASIS'TOTHEFULLEST
EXTENTPERMISSIBLEBYLAW,LGMAKESNO
REPRESENTATIONSORWARRANTIESOF ANY KIND
WHATSOEVER(i) FORTHEACCURACY,VALIDITY,
TIMELINESS,LEGALITY,ORCOMPLETENESSOF ANY
NETWORKSERVICEMADEAVAILABLETHROUGH
THISPRODUCT;OR (ii)THATTHENETWORKSERVICES
AREFREEOFVIRUSESOROTHERCOMPONENTS
THATMAYINFECT,HARM,OR CAUSEDAMAGETO
THISPRODUCT,YOURCOMPUTER,TELEVISION,
OTHEREQUIPMENT,ORANY OTHERPROPERTY.LG
EXPRESSLYDISCLAIMSANY IMPLIEDWARRANTIES,
INCLUDINGBUTNOT LIMITEDTO,WARRANTIESOF
MERCHANTABILITYOR FITNESSFORA PARTICULAR
PURPOSE.
UNDERNO CIRCUMSTANCESAND UNDERNO
LEGALTHEORY,WHETHERINCONTRACT,TORT,
STRICTLIABILITYOROTHERWISE,SHALLLGBE
LIABLETOYOUORANYTHIRD PARTYFORANY
DIRECT,INDIRECT,INCIDENTAL,SPECIAL,STATUTORY,
CONSEQUENTIALOROTHERDAMAGESOR
ATTORNEYFEESOR EXPENSESRELATINGTO OR
ARISINGOUT OFTHENETWORKSERVICESEVENIF
ADVISEDOFTHE POSSIBILITYOF SUCHDAMAGESOR
IFSUCHDAMAGESCOULD HAVEBEENREASONABLY
FORESEEN.
The Network Services may be terminated or
interrupted at any time, and LGmakes no
representation or warranty that any Network Service
will remain available for any period of time. Useof the
Network Services may be subject to additional terms
and conditions of the respective third party service
provider. The Network Services are transmitted by
third parties by means of networks and transmission
facilities over which LGhas no control. LG EXPRESSLY
DISCLAIMSANY RESPONSIBILITYOR LIABILITY
FORANY INTERRUPTIONORSUSPENSIONOFANY
NETWORKSERVICE.
LGshall be neither responsible nor liable for
customer service related to the Network Services.
Any question or request should be made directly to
the respective Network Service providers.
"Network Service(s)"means the third party services
accessible through this product including but
not limited to all data, software, links, messages,
video and other content found thereon or used in
connection therewith.
"LG'means LGElectronics,Inc. itsparent company
and all of their respective subsidiaries, affiliates and
related companies worldwide.
HB905SA-AH.BUSALL_OM.indd 92 2010-01-08 &,_,,_,Q11:50:!
Appendix 93
Open source software
notice
The following GPL executables and LGPL libraries
used in this product are subject to the GPL2.0/
LGPL2.1 License Agreements:
GPL EXECUTABLES: Linux kernel 2.6, bash, busybox,
dhcpcd, mtd-utils, net-tools, procps, sysutiJs,
tinylogin, Samba-3.0.25b
LGPL LIBRARIES: uClibc, DirectFB, iconv, cairo,
gnutls, Iibcrypt, Iibgpg-err, libusb
gSOAP Public License 1.3 LIBRARY: gsoap
LG El ectronics offers to provide source code to
you on CD-ROM for a charge covering the cost of
performing such distribution, such as the cost of
media, shipping and handling upon e-mail request
to LG Electronics at: opensource@Jge.com
This offer is valid for a period of three(3) years from
the date of the distribution of this product by LG
Electronics.
You can obtain a copy of the GPL, LGPL licenses from
htt p://www.g nu.org/licenses/old-licenses/gpl-
2.0.html and http://www.gnu.org/licenses/old-
licenses/Igpl-2.1 .html.
Also you can obtain a copy of gSOAP public license
from http:llwww, cs.fsu.edul~engelenllicense.
html.
This software is based in part on the work of the
Independent JPEG Group copyright ¢) 1991 - 1998,
Thomas G. Lane.
This product includes
• Freetype library : copyright (0 2003 The FreeType
Project (www.freetype.org).
• libpng library : copyright _) 2004 Glenn Randers-
Pehrson
• Zlib compression library: Copyright _) 1995-2002
Jean-loup Gailly and Mark Adler.
• Expat library :copyright _) 2006 expat maintainers.
• OpenSSLlibrary:
cryptographic software written by EricYoung
(eay@cryptsoft.com).
software written by Tim Hudson (tjh@cryptsoft.
COrn).
software developed by the OpenSSL Project
for use in the OpenSSLToolkit. (http://vvww.
openssl.org)
• libcurl library:Copyright © 1996 - 2008, Daniel
Stenberg, daniel@haxx.se
• boost C++ library : ¢) Copyright Beman Dawes
1999-2003
UPnP SDK : Copyright ¢) 2000-2003 Intel
Corporation
Libnet :¢) 1998 - 2004 Mike D. Schiffman mike@
infonexus.com
Libpcap
This product includes other open source software.
Copyright ¢) David L. Mills 1992-2006
• Copyright ¢) 1998-2003 Daniel Veillard.
• Copyright © 1998, 1999Thai Open Source
Software Center Ltd.
• Copyright ¢) 1990The Regents of the University of
California.
• Copyright (O 1998-2005 The OpenSSL Project.
Copyright ¢) 1991, 1992 Paul Kranenburg <pk@
cs.few.eur.nl>
Copyright _) 1993 Branko Lankester <branko@
hacktic.nl>
Copyright _) 1993 Ulrich Pegelow <pegelow@
moorea.u ni-muenster.de>
Copyright ¢) 1995, 1996 Michael Elizabeth
Chastain <mec@du racer.shout.net>
Copyright ¢) 1993, 1994, 1995, 1996 Rick Sladkey
<jrs@world.std.com>
Copyright _) 1999,2000 Wichert Akkerman
<wakkerma@debian.org
All rights reserved.
Permission is hereby granted, free of charge, to
any person obtaining a copy of this software and
associated documentation files (the "Software"), to
deal in the Software without restriction, including
without limitation the rights to use, copy, modify,
merge, publish, distribute, sublicense, and/or sell
copies of the Software, and to permit persons to
whom the Software is furnished to do so, subject to
the following conditions:
THE SOFTWARE ISPROVIDED"AS IS',WlTHOUT
WARRANTY OF ANY KIND, EXPRESSOR IMPLIED,
INCLUDING BUT NOT LIMFED TO THE WARRANTIES
OF MERCHANTABILITY, FITNESS FOR A PARTICULAR
PURPOSE AND NONINFRINGEMENT. IN NO EVENT
SHALLTHE AUTHORS OR COPYRIGHT HOLDERS
BE LIABLE FOR ANY CLAIM, DAMAGES OR OTHER
LIABILITY, WHETHER IN AN ACTION OF CONTRACT,
TORT OR OTHERWlSE, ARISING FROM, OUT OF OR IN
CONNECTION WITH THE SOFTWARE OR THE USEOR
OTHER DEALINGS IN THE SOFTWARE.
)>
x
HB9OSSA-AHBUSALL_OM.indd 93 2010-01@8 &#,#,_11:50:5,
94 Appendix
o
x
Gracenote ®End User
License Agreement
This application or device contains software from
Gracenote, Inc. of Emeryville, California ("Gracenote
"). The software from Gracenote (the"Gracenote
Software") enables this application to perform disc
and/or file identification and obtain music-related
information, including name, artist, track, and title
information ("Gracenote Data") from online servers
or embedded databases (collectively,"Gracenote
Servers") and to perform other functions. You may
use Gracenote Data only by means of the intended
End-User functions of this application or device.
You agree that you will use Gracenote Data, the
Gracenote Software, and Gracenote Servers for
your own personal non-commercial use only. You
agree not to assign, copy, transfer or transmit the
Gracenote Software or any Gracenote Data to any
third party. YOU AGREE NOTTO USE OR EXPLOIT
GRACENOTE DATA, THE GRACENOTE SOFTWARE,
OR GRACENOTE SERVERS,EXCEPT AS EXPRESSLY
PERMITTED HEREIN.
You agree that your non-exclusive license to use
the Gracenote Data, the Gracenote Software, and
Gracenote Servers will terminate if you violate
these restrictions. If your license terminates, you
agree to cease any and all use of the Gracenote
Data, the Gracenote Software, and Gracenote
Servers. Gracenote reserves all rights in Gracenote
Data, the Gracenote Software, and the Gracenote
Servers, including all ownership rights. Under no
circumstances will Gracenote become liable for any
payment to you for any information that you provide.
You agree that Gracenote, Inc. may enforce its rights
under this Agreement against you directly in its own
name.
The Gracenote service uses a unique identifier to
track queries for statistical purposes. The purpose of
a randomly assigned numeric identifier is to allow
the Gracenote service to count queries without
knowing anything about who you are. For more
information, see the web page for the Gracenote
Privacy Policy for the Gracenote service.
The Gracenote Software and each item of Gracenote
Data are licensed to you "AS IS/' Gracenote makes
no representations or warranties, express or implied,
regarding the accuracy of any Gracenote Data from
in the Gracenote Servers. Gracenote reserves the
right to delete data from the Gracenote Servers or to
change data categories for any cause that Gracenote
deems suMcient. No warranty is made that the
Gracenote Software or Gracenote Servers are error-
free or that functioning of Gracenote Software or
Gracenote Servers will be uninterrupted. Gracenote
is not obligated to provide you with new enhanced
or additional data types or categories that Gracenote
may provide in the future and is free to discontinue
its services at any time.
GRACENOTE DISCLAIMS ALLWARRANTIES EXPRESS
OR IMPLIED, INCLUDING, BUT NOT LIMITEDTO,
IMPLIED WARRANTIES OF MERCHANTABILITY,
FITNESS FOR A PARTICULAR PURPOSE, TITLE, AND
NON-INFRINGEMENT. GRACENOTE DOES NOT
WARRANTTHE RESULTSTHATWlLL BE OBTAINED BY
YOUR USE OF THE GRACENOTE SOFTWARE OR ANY
GRACENOTE SERVER. IN NO CASEWlLL GRACENOTE
BE LIABLE FOR ANY CONSEQUENTIAL OR INCIDENTAL
DAMAGES OR FOR ANY LOST PROFITS OR LOST
REVENUES.
© Gracenote, Inc. 2009
HB905SA-AH.BUSALL_OM.indd 94 2010-01-08 &,_,,_,Q11:50:_
Warranty 95
I.G
Life's Good
This LG Electronics product, will be repaired or replaced, at LG's option, if it proves to be defective in material
or workmanship, under normal use, during the warranty period ("Warranty Period") listed below, effective
from the date ("Date of Purchase") of original consumer purchase of the product.This warranty is good only
to the original purchaser of the product and effective only when used in the United States, excluding U.S.
Territories.
WARRANTY PERIOD:
LABOR: 90 days from tile Date of
Purchase.
PARTS: One Year from the Date of
Purchase.
•Parts replaced are warranted for the
remaining portion of the original
warranty period
HOW SERVICE IS HANDLED:
Call 1-800-243-0000 for klstrucdons on getting tile defective
unit repaired or replaced.
Please retain dated sales receipt and your box to return the
unit to LG for repair or replacement.
Shipping both ways will be paid by LG during the Warranty
Period. After the Warranty Period, you pay inbound shipping
charges and LG pays return shipping charges.
Visit our web site at: httpY/us.lgservice.com
THIS WARRANTY IS IN LIEU OF ANY OTHER WARRANTIES, EXPRESS OR IMPLIED, INCLUDING WITHOUT
LIMITATION, ANY WARRANTY OF MERCHANTABILITY OR FITNESS FOR A PARTICULAR PURPOSE. TO
THE EXTENT ANY IMPLIED WARRANTY IS REQUIRED BY LAW, IT IS LIMITED IN DURATION TO THE
EXPRESS WARRANTY PERIOD ABOVE. LG ELECTRONICS WILL NOT BE LIABLE FOR ANY INCIDENTAL,
CONSEQUENTIAL, INDIRECT, SPECIAL OR PUNITIVE DAMAGES OF ANY NATURE, EVEN IF ADVISED
OF THE POSSIBILITY OF SUCH DAMAGES, INCLUDING WITHOUT LIMITATION, LOST REVENUES OR
PROFITS, LOST OR CORRUPTED PROGRAMMING OR DATA, OR ANY OTHER DAMAGE WHETHER BASED
IN CONTRACT, TORT OR OTHERWISE. Some states do not allow the exclusion or limitation of incidental
or consequential damages or limitation on how long an implied warranty lasts, so the above exclusion or
limitation may not apply to you. This warranty gives you specific legal rights and you may also have other
rights that may vary from state to state.
THIS LIMITED WARRANTY DOES NOT APPLY TO:
• Damages or operating problems that result from shipping, installation, adjustment of user controls,
calibration, maintenance or failure to maintain, or separate system components; and
• Damages or operating problems that result from normal wear and tear, misuse, abuse, operation outside
environmental specifications or contrary to the requirements or precautions in the Operating Guide,
accident, lightning strikes or other natural causes, unauthorized modification or alteration, incorrect
electrical current or voltage, reception problem caused by inadequate home antenna or faulty antenna
connections, computer software, institutional or commercial use, or other causes not arising out of defect
in material or workmanship.
Therefore, the cost of repair or replacement of such defective product shall be borne by the consumer.
CUSTOMER INTER-ACTIVE CENTER NUMBERS:
For nearest Authorized Service Center,
Where to buy, Product Assistance, or
Customer Assistance
LGELECTRONICSU.S.A.,INC.
1000SYLVANAVENUE
ENGLEWOODCLIFFS,NJ
l Call 1-800-243-0000 (24 hours a day, 365 days per year) and I
I
select appropriate options from the menu. IOr visit our web site at http://us.lgservice.com
q
HB905SA-AH.BUSALL_OM.indd 95 2010-01-08 _,_,_,0 11:50:!
Forinquires<>rco/s_nqents,visitwww,Jge,comorcaN;
Life's Good
1-800-243-0000 USA, Consumer
1-888-865-3026 USA, Commercial
wwwJge.com
Printed in Indonesia
As an ENEROYSTAR< Partner, LG
has determined that this product
or product models meet the
ENEROYSTAR< guidelines for energy
efficiency.
ENERGY STAR iS a U.S. registered mark.
HB9OSSA-AH.BUSALL_OM.indd 96 2010-01-08 &AALi 11:50:!
