LINKSYS DP-608 HIGH DEFINITION MEDIA PLAYER User Manual Manual DP 600 v1 2 indd

LINKSYS LLC HIGH DEFINITION MEDIA PLAYER Manual DP 600 v1 2 indd

USERS MANUAL 4

19englishRepeat: This option can be toggled between repeating the whole disc, the current chapter only or none.Change subtitle: Toggle between available subtitles for the video playing. A quicker shortcut to this function is pressing the SUBTITLE button on the remote control. Pressing it additional times will allow you to cycle through available subtitles.Change audio track: Toggle between available audio tracks/languages. If none are available, you cannot use this option. A quicker shortcut to this function is pressing the AUDIO button on the remote control. Pressing it additional times will allow you to cycle through available audio tracks.Mute: This menu item simply mutes the sound.OK: Apply settings and exit the Options menu.Apart from DVD discs, the DP-600 is also capable of playing a wide variety of other video formats. Video files in these formats will in many cases not look as good as DVD material since these formats were originally created for higher compression of video and audio. The advantage of this is that you are able to fit more video on a disc, but at a slight quality loss. Other restrictions also apply, as some of them will not support interactive menus, subtitles, multiple soundtracks and spoken languages.To play discs containing files in the above mentioned formats, press EJECT to open the disc tray and place a disc with supported video content in it. Press EJECT again to close the tray. After the disc has been recognized you will be presented with the content of the disc on screen. Select the video you wish to see and press OK.Options: At any time during playback you can press the OPTIONS button on the remote control for a list of additional video playback related options.Time Search: Time Search allows you to skip into the video by a specified number of minutes.Media information: Entering this item will provide you with a view of the technical data for the video playing.Repeat: This option can be toggled between repeating the whole disc, the current chapter/video clip only or none.Change subtitle: Toggle between available subtitles for the video playing. A quicker shortcut to this function is pressing the SUBTITLE button on the remote control. Pressing it additional times will allow you to cycle through available subtitles.Change audio track: Toggle between available audio tracks/languages. If none are available or if they are provided in an unrecognized format, you cannot use this option. A quicker shortcut to this function is pressing the AUDIO button on the remote control. Pressing it additional times will allow you to cycle through available audio tracks.Mute: This menu item simply mutes the sound. Press it again to unmute.OK: Apply settings and exit the Options menu.Playing Video Files, MPEG, MPEG-4, DivX, XviD, Nero Digital, WMVPlaying Audio CDs, MP3, Ogg VorbisPress the EJECT button on the front of the player or on the remote to open the disc tray. Place the Audio CD in it and press either the PLAY or EJECT button again to start it automatically. After a few seconds the CD track list will appear. You can navigate it using the arrow buttons on your remote and press OK to play a track.Apart from Audio CD’s, the DP-600 is also capable of playing a number of different compressed audio formats. Compressing audio will enable you to fit more songs on a single disc with an almost inaudible decrease in quality depending on the amount of compression used. The DP-600 currently has support for the following formats: MP3, Ogg Vorbis (.OGG), and Windows Media Audio (.WMA).When a CD is already inserted into the DP-600, you can start it by pressing PLAY on your remote. From the menu you can also access it by selecting the Disc menu and select “Play disc”.Options: While viewing the track list you can press the OPTIONS button on the remote control for a list of additional CD playback related options.Repeat: This option can be toggled between repeating the whole disc, the current track or none.english
20englishShuffle: Enabling this option will shuffle the order in which tracks are played. Disable it to play back tracks in their proper order.Media information: Entering this item while playing audio files will provide you with a view of the available metadata for the audio file playing. Metadata can contain information such as artist, album, release year, genre and more. Note that metadata availability may vary greatly between files.OK: Apply settings and exit the Options menu.Viewing Jpeg picturesPress EJECT to open the drawer and place a CD with picture content in. Press EJECT again to close the drawer. After a few seconds, the menu DISC will appear on your screen. Select PICTURE FILES to view the list of images on the CD, choose the one you want to watch and press ENTER. Use the NEXT/PREVIOUS arrow to view other pictures from the CD. You can enlarge the picture by pressing ZOOM on your remote. To eject the CD, press STOP to go out of the menu and come back to the DISC section. Choose EJECT.KiSS PC-Link is the software provided with your DP-600. Once the connection established between your DP-600 and your PC, load your Audio, Video and Picture content located on your PC to KiSS PC-Link to play/see them on your television.KiSS PC-Link is a software to be installed on a Windows PC enabling you to view and play audio, video and picture files from a connected PC on the DVD Player. KiSS PC-Link can only be installed on a Windows PC running Windows XP or later.    Installing KiSS PC-Link: Insert the KiSS PC-Link CD in your PC. The installation software    will start automatically. Follow the on-screen instructions until installation is complete.    A shortcut will be created on your desktop. Double click it to start the program. KiSS MacLink: Mac users can download KiSS MacLink, a Macintosh alternative to KiSS   PC-Link at www.kiss-technology.com/support under SOFTWARE. Instructions are also  available from the same place.KiSS PC-Link10 Using KiSS PC-LinkNetwork settingsIn order for PC-Link to work, your PC must be connected to your DVD Player either wirelessly or via the ethernet connection found at the back of the player. Please refer to the CONNECTING YOUR PLAYER TO A NETWORK  chapter of this manual for extra help. To valid the connection, you can either press MENU on your remote, go to PC-LINK, select ENTER IP ADDRESS OF PC-LINK HOST and enter the IP address found in the info tab of KiSS PC-Link, or you can press MENU on your remote, go to PC-LINK, select SELECT HOSTS and pick your server from the list of available servers.- KiSS PC-Link can only be used on a Windows PC running at least Windows XP.-  KiSS MacLink can only be used on a Macintosh running at least Mac OS 10.2. - If you have a network of PCs running KiSS PC-Link, they can be selected from your player by selecting “Select Host”.english
21englishOnce the connection has been validated, start KiSS PC-Link. The program is divided into Video, Audio and Picture files. Load the files to be shared by clicking ADD or SEARCH if you want the software to look for the files itself. Do not quit KiSS PC-Link, it must stay on on your PC for sharing to happen. Once this is done, press MENU on your remote, go to PC-LINK and choose AUDIO, VIDEO or PICTURE FILES. The files shared on your PC are now available to be played or copied on your Player. You can copy a whole folder to KiSS PC-Link by dragging it on the software's window on your PC.Accessing your filesPressing the ONLINE button on your remote will unravel KiSS Online - A portfolio of free online services accessible directly on your player. Using KiSS Online requires your player to have access to the Internet. Please consult the “Connecting your player to a network” section of this User Guide for instructions on how to set this up. Since everything happens online, it allows us to constantly keep the services growing with new features. As more features and services are added, information on their usage can be obtained by downloading an updated version of this User Guide on our site www.kiss-technology.com/manuals. This section will explain how to use the available services as of this writing.11 KiSS OnlineWebradio is an application that enables you to browse and choose between thousands of internet-based streaming radio stations, allowing you to listen to exactly the kind of music you prefer. The Webradio front page provides you with two different ways of browsing:Music Genres: Enter this menu item to browse by musical genre. The list is broken up into a number of different main categories and subcategories to make finding what you wish to listen to easier. Usage example: If you wish to listen to disco, simply enter the “Pop/Rock” category and select “Disco”. In the disco category you will be presented with disco related stations. Page information in the top right corner will inform you of how many pages of channels there are. Press the NEXT CHAPTER or PREVIOUS CHAPTER buttons on your remote to browse additional pages. Use the BACK button to go back to previous sections.World Radio: Enter this menu item to browse by geography. Usage example: If you wish to listen to radio stations from Belgium, enter “Europe”, then select “Belgium” for a list of radio channels streamed from there. Page information in the top right corner will inform you of how many pages of stations there are. Press the NEXT CHAPTER or PREVIOUS CHAPTER buttons on your remote to browse additional pages.Listening: Once a station is selected, the music will commence playing after a few seconds depending on the speed of your Internet connection. A playback screen will present you with current information about what song the station is playing, its audio quality (measured in kilobytes per second) and how many listeners are currently tuned in to the station.Adding a station to your favorites: Whenever you find a station that you like, you can add the station to your personal favorites list. Simply enter the station you wish to add and press “Add to favorites”. Adding stations to your favorites list saves you the trouble of looking for it at a later time. To remove a station from your favorites, simply enter the particular station and press “Remove from favorites” on the playback information screen.Favorites list: You can always access your favourites list either in the top of the screen or in the right hand menu on the front page by pressing the “Favorites” button. From here you can simply pick any one of the stations you have added to play it at your convenience.Settings: Accessible from the Webradio main page only is the “Settings” page. Pressing it will enable you to set a minimum quality criteria for the stations displayed while browsing. Usage example: If you would like to avoid listening to radio stations streamed in a quality below 80 Kbps, please select “80 Kbit or better”. You can always go back and redefine your criteria at any time.WebRadio- To use any of these features, you need to be connected to a Broadband Internet Connection.english
22english- To use any of these features, you need to be connected to a Broadband Internet Connection.TV GuideThe KiSS TV Guide is an online Electronic Program Guide (EPG) that enables you to browse information on current and upcoming TV programs. To use it to browse program information on your available TV stations, you will need to add some stations first.Adding stations1. From the TV Guide main screen, select “Add a favorite” from the “Favorite stations” menu bar. You will now be presented with a list of countries. Select yours. For additional countries, press the NEXT CHAPTER or PREVIOUS CHAPTER buttons on your remote control.2. After selecting your country you will be presented with a list of available channels for your country. Select a channel available to you.3. Select “Add favorite” from the bottom of the screen that comes up.Repeat steps 2 and 3 for adding additional stations. Stars will appear next to the stations you have added to the list so you do not have to remember which ones you have added. Press BACK to return to the main screen when you are done adding stations.THE FAVORITE STATIONS BARWhat’s on now?: Once you have added some stations to your favorites you are ready to browse the TV program. Press “What’s on now?” from the “Favorite stations” bar to get a full view of what is showing on your stations now and in the next two hours. If you have added more stations than we are able to show on screen, press the arrows in either the top or bottom of the left hand stations list.As a default the grid view will show you two hours of programming at a time. The vertical white line on the screen indicates the time right now. To reduce the screen to a one-hour view, just press the ZOOM button on your remote. Pressing it again will return the screen to two-hour view. To browse programs later in the day, press the NEXT CHAPTER button on the remote. To see programs earlier in the day, use the PREVIOUS CHAPTER button.To get information on a particular show, point your cursor to the station it is on and move to the right using the directional buttons on your remote, then press OK on the item you would like to learn more about. You will be able to see date, time of broadcast, duration, and - depending on the information available - episode number and a description. If what you have selected is a movie (movies show up as purple blocks in the grid view), you will be able to do an IMDb (Internet Movie Database) search on the particular movie for more information. To do this, simply press the IMDb button in the bottom of the screen.What’s on?: The purpose of the “What’s on?” screen is to give you an overview of what is showing on your favorite stations on different times of the day or up to six days ahead. Want to know what is showing tonight? Just press “Evening” and you will be shown everything showing on your stations from 8 p.m.Favorites: Enter Favorites to see a list of the stations you have added. If you are unhappy with the order in which your stations are listed, just use the left or right navigational buttons on your remote to move a selected item up or down the list.Press either one of the items on the list to enter the “What’s on?” screen for that particular station. Should you choose to remove the station from your favorites, simply select “Delete favorite” from this screen.The Favorite shows bar: Before you are able to browse information on your favorite shows in this bar, you will first need to add some to your favorites.Adding favorite shows: There are two ways of adding favorite shows: Searching and browsing.If you would like to search for a show to add to your favorites, please enter “Add a favorite” from the “favorite shows” bar. This brings up a search menu from where you are able to enter either part or the entire name of the show you wish to search for. Once you find what you are searching for, press the name of the show you wish to add from the results screen. Pressing a show brings up all instances of the show for this week on the channel. From here you can either press “Add for this channel” to add this as a favorite for this specific channel or press “Add for all channels” if you would like the show to be added as a favorite regardless of which channel it is on.If you would rather like to add shows to your favorites by browsing for them in the grid view, this is also possible. Just enter the grid by either selecting “What’s on now?” or “What’s on?” from the “Favorite stations” bar and browse your way to the show you wish to add. Once you have found it, enter it and press the “When is it on?” button in the bottom of the screen. Select an instance of the show on the results screen and press either “Add for this channel” to add this as a favorite for this specific channel or press “Add for all channels” if you would like the show to be added as a favorite regardless of which channel it is on.Favorite shows will turn up in an orange color on the program grid.english
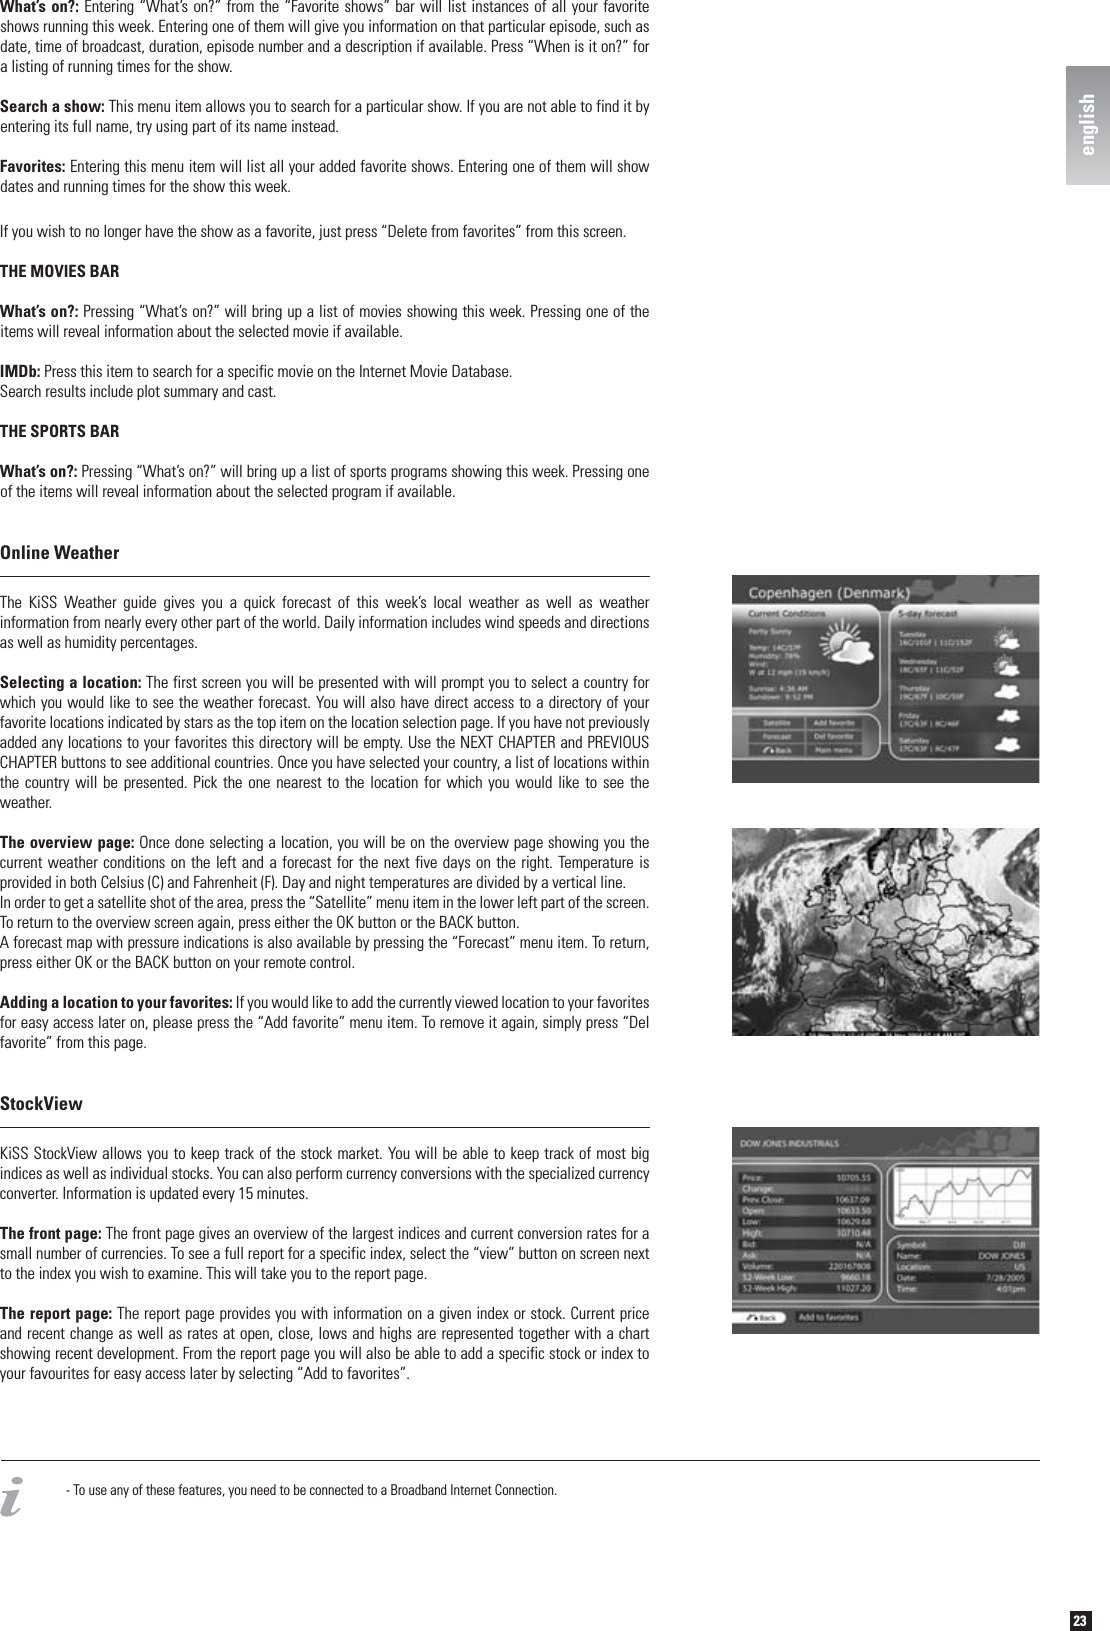
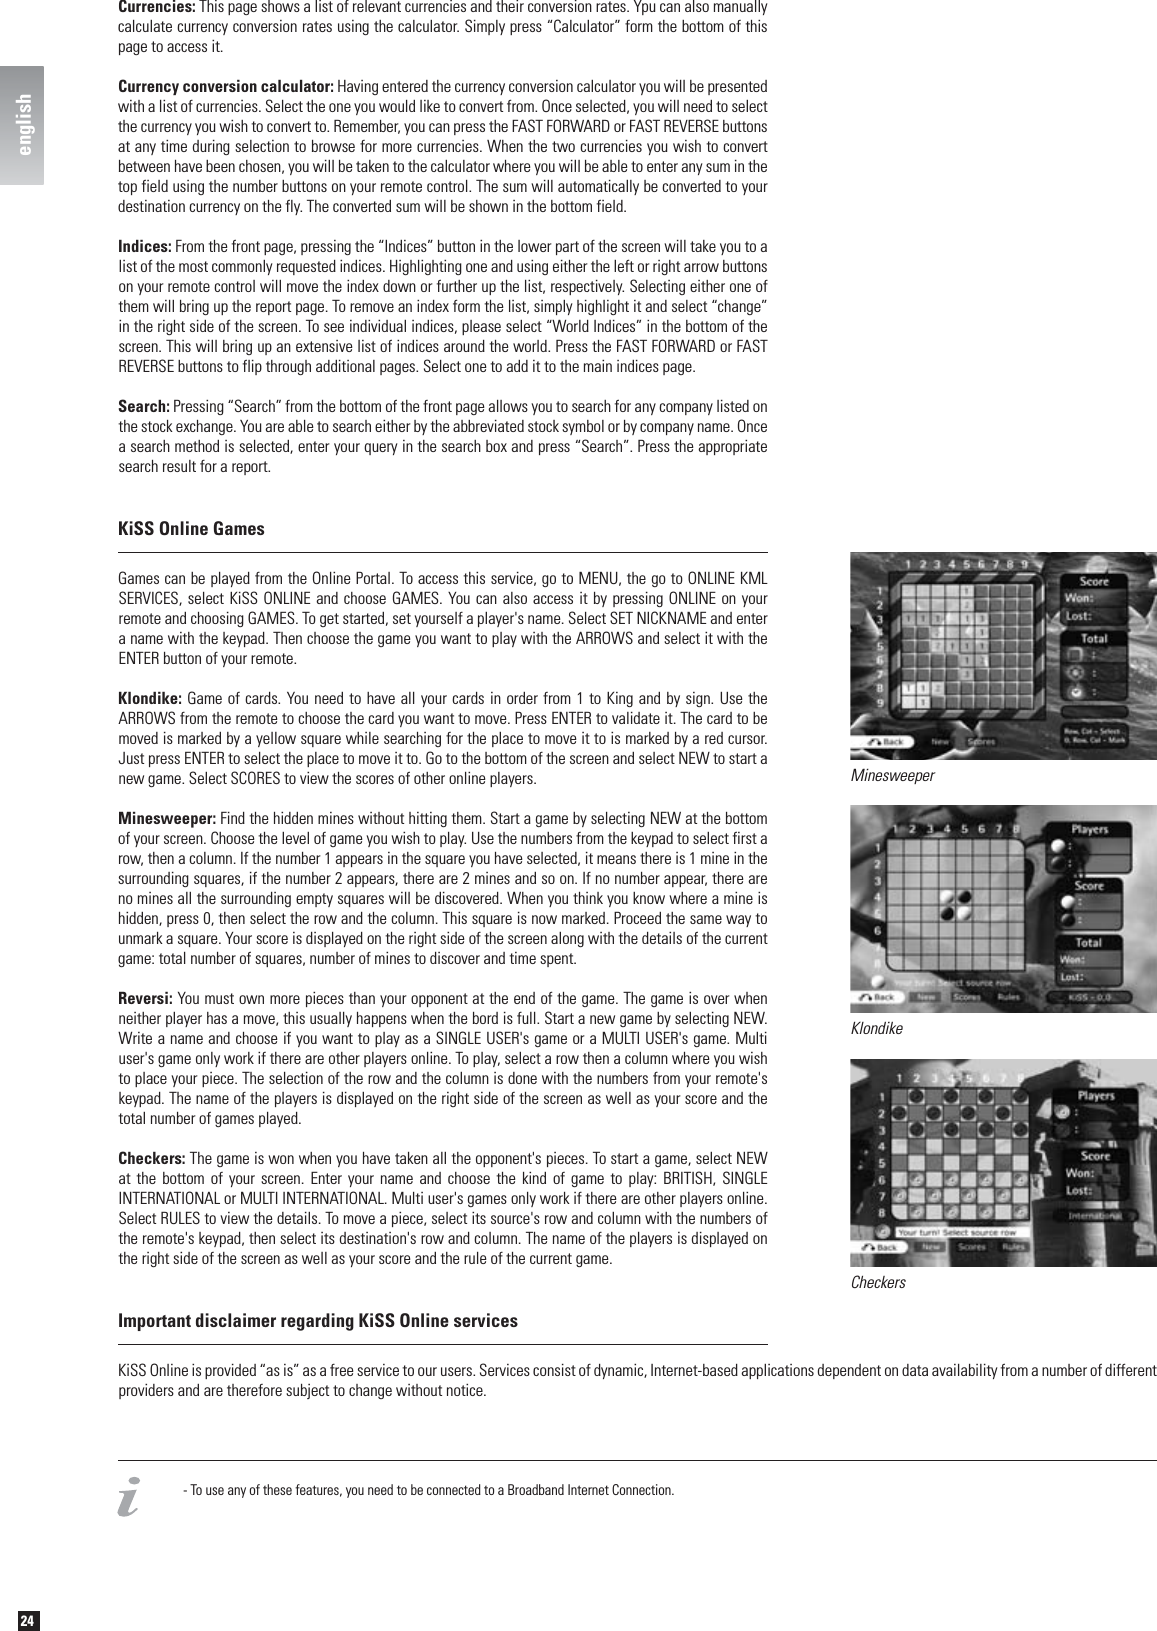
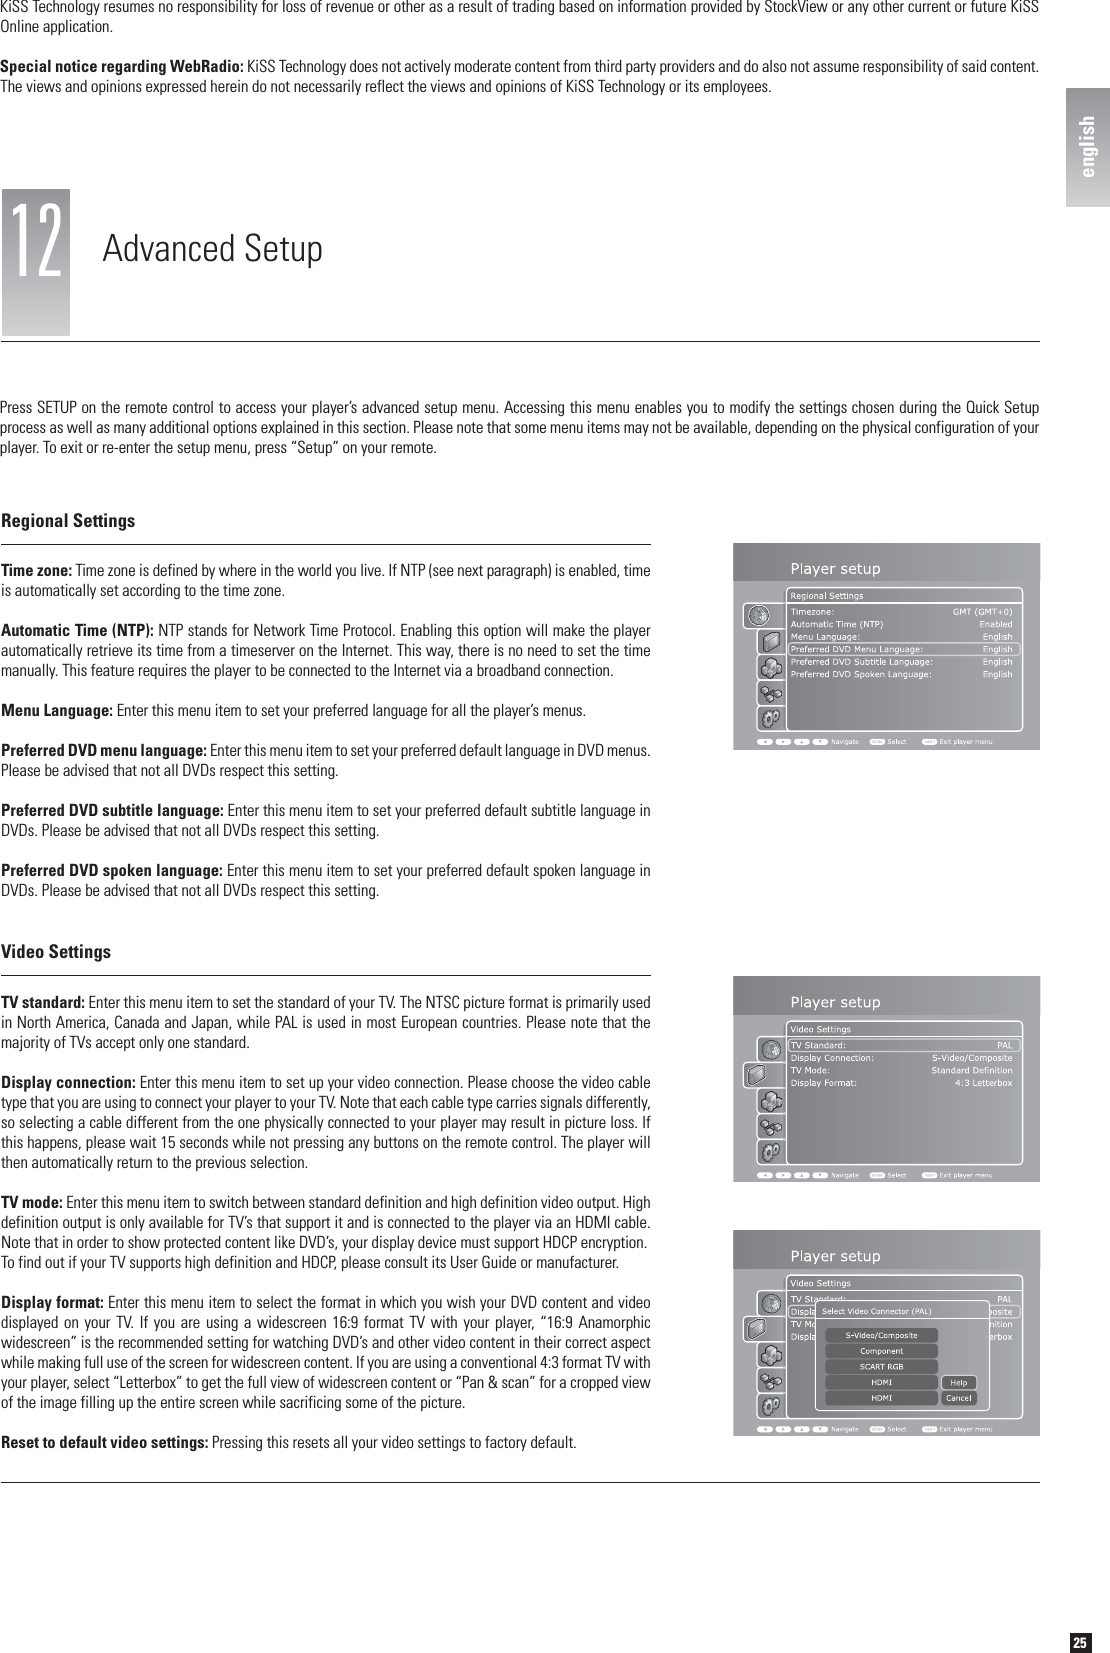
23english- To use any of these features, you need to be connected to a Broadband Internet Connection.What’s on?: Entering “What’s on?” from the “Favorite shows” bar will list instances of all your favorite shows running this week. Entering one of them will give you information on that particular episode, such as date, time of broadcast, duration, episode number and a description if available. Press “When is it on?” for a listing of running times for the show.Search a show: This menu item allows you to search for a particular show. If you are not able to find it by entering its full name, try using part of its name instead.Favorites: Entering this menu item will list all your added favorite shows. Entering one of them will show dates and running times for the show this week.If you wish to no longer have the show as a favorite, just press “Delete from favorites” from this screen.THE MOVIES BARWhat’s on?: Pressing “What’s on?” will bring up a list of movies showing this week. Pressing one of the items will reveal information about the selected movie if available.IMDb: Press this item to search for a specific movie on the Internet Movie Database.Search results include plot summary and cast.THE SPORTS BARWhat’s on?: Pressing “What’s on?” will bring up a list of sports programs showing this week. Pressing one of the items will reveal information about the selected program if available.The KiSS Weather guide gives you a quick forecast of this week’s local weather as well as weather information from nearly every other part of the world. Daily information includes wind speeds and directions as well as humidity percentages.Selecting a location: The first screen you will be presented with will prompt you to select a country for which you would like to see the weather forecast. You will also have direct access to a directory of your favorite locations indicated by stars as the top item on the location selection page. If you have not previously added any locations to your favorites this directory will be empty. Use the NEXT CHAPTER and PREVIOUS CHAPTER buttons to see additional countries. Once you have selected your country, a list of locations within the country will be presented. Pick the one nearest to the location for which you would like to see the weather.The overview page: Once done selecting a location, you will be on the overview page showing you the current weather conditions on the left and a forecast for the next five days on the right. Temperature is provided in both Celsius (C) and Fahrenheit (F). Day and night temperatures are divided by a vertical line.In order to get a satellite shot of the area, press the “Satellite” menu item in the lower left part of the screen. To return to the overview screen again, press either the OK button or the BACK button.A forecast map with pressure indications is also available by pressing the “Forecast” menu item. To return, press either OK or the BACK button on your remote control.Adding a location to your favorites: If you would like to add the currently viewed location to your favorites for easy access later on, please press the “Add favorite” menu item. To remove it again, simply press “Del favorite” from this page.Online WeatherStockViewKiSS StockView allows you to keep track of the stock market. You will be able to keep track of most big indices as well as individual stocks. You can also perform currency conversions with the specialized currency converter. Information is updated every 15 minutes.The front page: The front page gives an overview of the largest indices and current conversion rates for a small number of currencies. To see a full report for a specific index, select the “view” button on screen next to the index you wish to examine. This will take you to the report page.The report page: The report page provides you with information on a given index or stock. Current price and recent change as well as rates at open, close, lows and highs are represented together with a chart showing recent development. From the report page you will also be able to add a specific stock or index to your favourites for easy access later by selecting “Add to favorites”.english
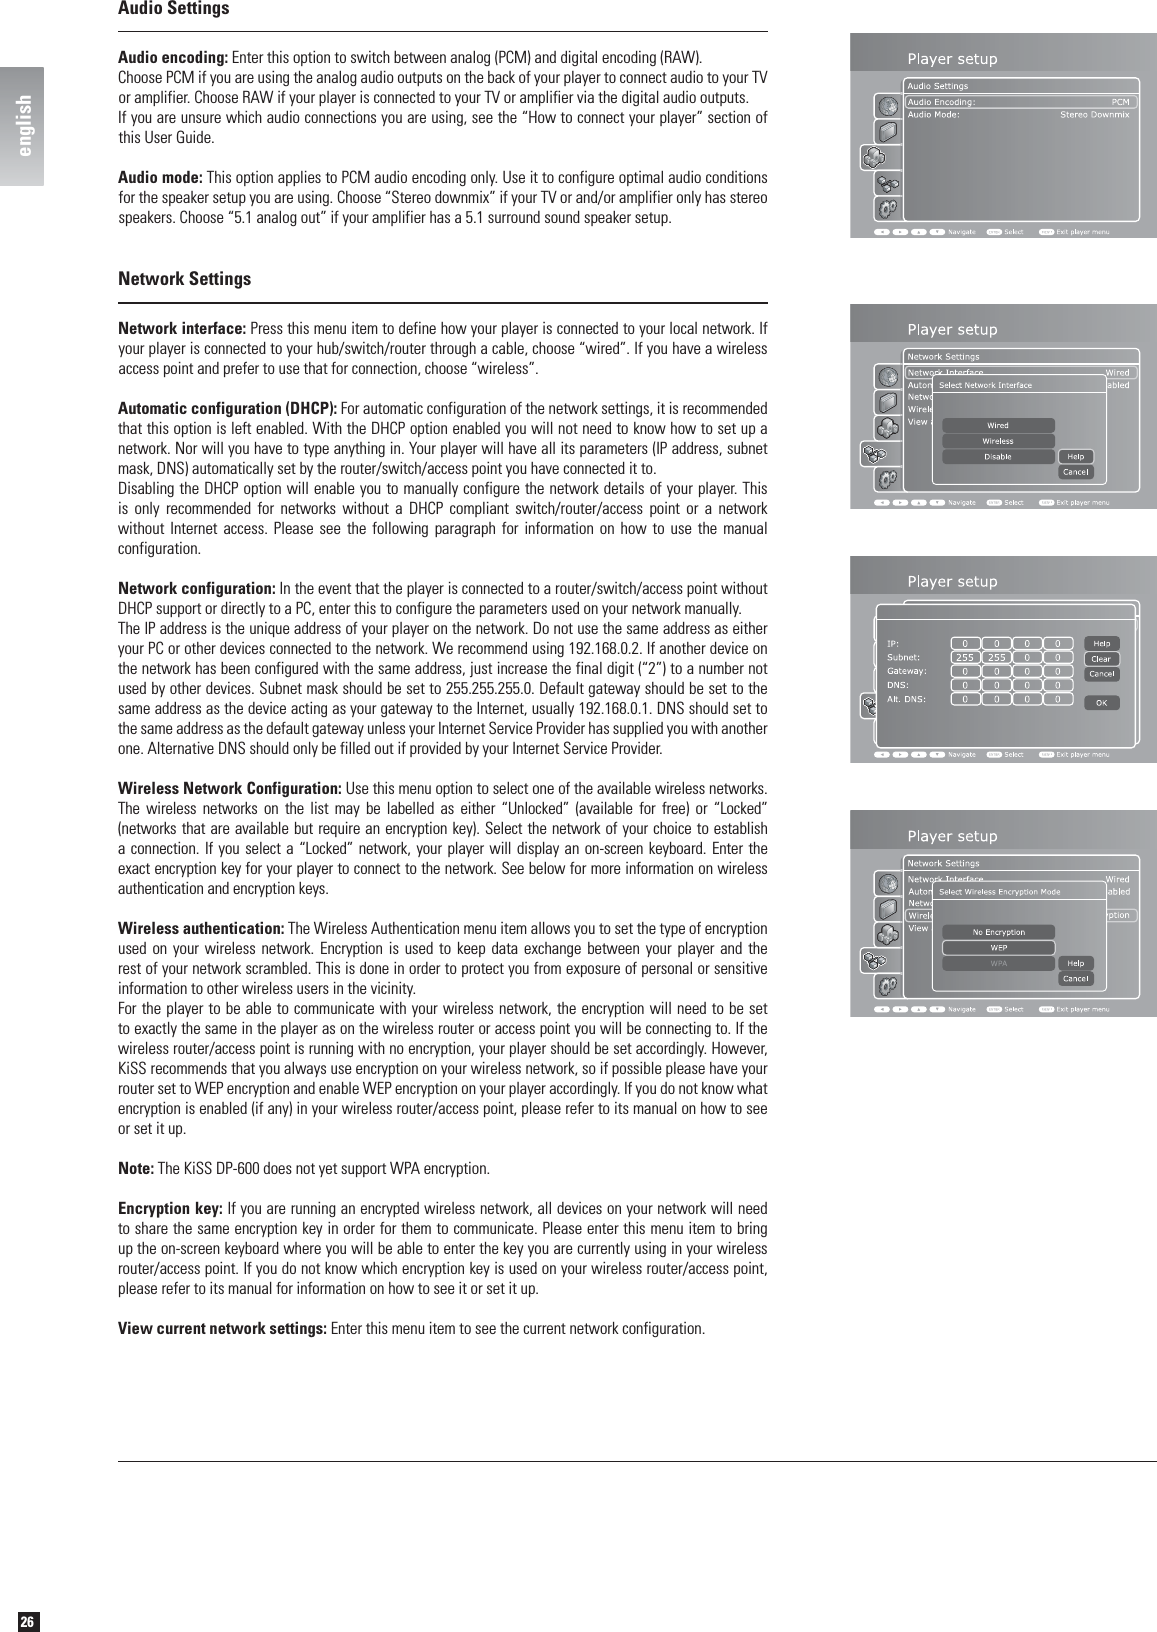
24englishCurrencies: This page shows a list of relevant currencies and their conversion rates. Ypu can also manually calculate currency conversion rates using the calculator. Simply press “Calculator” form the bottom of this page to access it.Currency conversion calculator: Having entered the currency conversion calculator you will be presented with a list of currencies. Select the one you would like to convert from. Once selected, you will need to select the currency you wish to convert to. Remember, you can press the FAST FORWARD or FAST REVERSE buttons at any time during selection to browse for more currencies. When the two currencies you wish to convert between have been chosen, you will be taken to the calculator where you will be able to enter any sum in the top field using the number buttons on your remote control. The sum will automatically be converted to your destination currency on the fly. The converted sum will be shown in the bottom field.Indices: From the front page, pressing the “Indices” button in the lower part of the screen will take you to a list of the most commonly requested indices. Highlighting one and using either the left or right arrow buttons on your remote control will move the index down or further up the list, respectively. Selecting either one of them will bring up the report page. To remove an index form the list, simply highlight it and select “change” in the right side of the screen. To see individual indices, please select “World Indices” in the bottom of the screen. This will bring up an extensive list of indices around the world. Press the FAST FORWARD or FAST REVERSE buttons to flip through additional pages. Select one to add it to the main indices page.Search: Pressing “Search” from the bottom of the front page allows you to search for any company listed on the stock exchange. You are able to search either by the abbreviated stock symbol or by company name. Once a search method is selected, enter your query in the search box and press “Search”. Press the appropriate search result for a report.- To use any of these features, you need to be connected to a Broadband Internet Connection.KiSS Online GamesGames can be played from the Online Portal. To access this service, go to MENU, the go to ONLINE KML SERVICES, select KiSS ONLINE and choose GAMES. You can also access it by pressing ONLINE on your remote and choosing GAMES. To get started, set yourself a player's name. Select SET NICKNAME and enter a name with the keypad. Then choose the game you want to play with the ARROWS and select it with the ENTER button of your remote.Klondike: Game of cards. You need to have all your cards in order from 1 to King and by sign. Use the ARROWS from the remote to choose the card you want to move. Press ENTER to validate it. The card to be moved is marked by a yellow square while searching for the place to move it to is marked by a red cursor. Just press ENTER to select the place to move it to. Go to the bottom of the screen and select NEW to start a new game. Select SCORES to view the scores of other online players.Minesweeper: Find the hidden mines without hitting them. Start a game by selecting NEW at the bottom of your screen. Choose the level of game you wish to play. Use the numbers from the keypad to select first a row, then a column. If the number 1 appears in the square you have selected, it means there is 1 mine in the surrounding squares, if the number 2 appears, there are 2 mines and so on. If no number appear, there are no mines all the surrounding empty squares will be discovered. When you think you know where a mine is hidden, press 0, then select the row and the column. This square is now marked. Proceed the same way to unmark a square. Your score is displayed on the right side of the screen along with the details of the current game: total number of squares, number of mines to discover and time spent.Reversi: You must own more pieces than your opponent at the end of the game. The game is over when neither player has a move, this usually happens when the bord is full. Start a new game by selecting NEW. Write a name and choose if you want to play as a SINGLE USER's game or a MULTI USER's game. Multi user's game only work if there are other players online. To play, select a row then a column where you wish to place your piece. The selection of the row and the column is done with the numbers from your remote's keypad. The name of the players is displayed on the right side of the screen as well as your score and the total number of games played.Checkers: The game is won when you have taken all the opponent's pieces. To start a game, select NEW at the bottom of your screen. Enter your name and choose the kind of game to play: BRITISH, SINGLE INTERNATIONAL or MULTI INTERNATIONAL. Multi user's games only work if there are other players online. Select RULES to view the details. To move a piece, select its source's row and column with the numbers of the remote's keypad, then select its destination's row and column. The name of the players is displayed on the right side of the screen as well as your score and the rule of the current game.Important disclaimer regarding KiSS Online servicesKiSS Online is provided “as is” as a free service to our users. Services consist of dynamic, Internet-based applications dependent on data availability from a number of different providers and are therefore subject to change without notice.MinesweeperKlondikeCheckersenglish
25englishPress SETUP on the remote control to access your player’s advanced setup menu. Accessing this menu enables you to modify the settings chosen during the Quick Setup process as well as many additional options explained in this section. Please note that some menu items may not be available, depending on the physical configuration of your player. To exit or re-enter the setup menu, press “Setup” on your remote.12 Advanced SetupTime zone: Time zone is defined by where in the world you live. If NTP (see next paragraph) is enabled, time is automatically set according to the time zone.Automatic Time (NTP): NTP stands for Network Time Protocol. Enabling this option will make the player automatically retrieve its time from a timeserver on the Internet. This way, there is no need to set the time manually. This feature requires the player to be connected to the Internet via a broadband connection.Menu Language: Enter this menu item to set your preferred language for all the player’s menus.Preferred DVD menu language: Enter this menu item to set your preferred default language in DVD menus. Please be advised that not all DVDs respect this setting.Preferred DVD subtitle language: Enter this menu item to set your preferred default subtitle language in DVDs. Please be advised that not all DVDs respect this setting.Preferred DVD spoken language: Enter this menu item to set your preferred default spoken language in DVDs. Please be advised that not all DVDs respect this setting.Regional SettingsTV standard: Enter this menu item to set the standard of your TV. The NTSC picture format is primarily used in North America, Canada and Japan, while PAL is used in most European countries. Please note that the majority of TVs accept only one standard.Display connection: Enter this menu item to set up your video connection. Please choose the video cable type that you are using to connect your player to your TV. Note that each cable type carries signals differently, so selecting a cable different from the one physically connected to your player may result in picture loss. If this happens, please wait 15 seconds while not pressing any buttons on the remote control. The player will then automatically return to the previous selection.TV mode: Enter this menu item to switch between standard definition and high definition video output. High definition output is only available for TV’s that support it and is connected to the player via an HDMI cable. Note that in order to show protected content like DVD’s, your display device must support HDCP encryption.To find out if your TV supports high definition and HDCP, please consult its User Guide or manufacturer. Display format: Enter this menu item to select the format in which you wish your DVD content and video displayed on your TV. If you are using a widescreen 16:9 format TV with your player, “16:9 Anamorphic widescreen” is the recommended setting for watching DVD’s and other video content in their correct aspect while making full use of the screen for widescreen content. If you are using a conventional 4:3 format TV with your player, select “Letterbox” to get the full view of widescreen content or “Pan & scan” for a cropped view of the image filling up the entire screen while sacrificing some of the picture.Reset to default video settings: Pressing this resets all your video settings to factory default.Video SettingsKiSS Technology resumes no responsibility for loss of revenue or other as a result of trading based on information provided by StockView or any other current or future KiSS Online application.Special notice regarding WebRadio: KiSS Technology does not actively moderate content from third party providers and do also not assume responsibility of said content. The views and opinions expressed herein do not necessarily reflect the views and opinions of KiSS Technology or its employees.english
26englishAudio SettingsAudio encoding: Enter this option to switch between analog (PCM) and digital encoding (RAW).Choose PCM if you are using the analog audio outputs on the back of your player to connect audio to your TV or amplifier. Choose RAW if your player is connected to your TV or amplifier via the digital audio outputs.If you are unsure which audio connections you are using, see the “How to connect your player” section of this User Guide.Audio mode: This option applies to PCM audio encoding only. Use it to configure optimal audio conditions for the speaker setup you are using. Choose “Stereo downmix” if your TV or and/or amplifier only has stereo speakers. Choose “5.1 analog out” if your amplifier has a 5.1 surround sound speaker setup.Network SettingsNetwork interface: Press this menu item to define how your player is connected to your local network. If your player is connected to your hub/switch/router through a cable, choose “wired”. If you have a wireless access point and prefer to use that for connection, choose “wireless”.Automatic configuration (DHCP): For automatic configuration of the network settings, it is recommended that this option is left enabled. With the DHCP option enabled you will not need to know how to set up a network. Nor will you have to type anything in. Your player will have all its parameters (IP address, subnet mask, DNS) automatically set by the router/switch/access point you have connected it to.Disabling the DHCP option will enable you to manually configure the network details of your player. This is only recommended for networks without a DHCP compliant switch/router/access point or a network without Internet access. Please see the following paragraph for information on how to use the manual configuration.Network configuration: In the event that the player is connected to a router/switch/access point without DHCP support or directly to a PC, enter this to configure the parameters used on your network manually.The IP address is the unique address of your player on the network. Do not use the same address as either your PC or other devices connected to the network. We recommend using 192.168.0.2. If another device on the network has been configured with the same address, just increase the final digit (“2”) to a number not used by other devices. Subnet mask should be set to 255.255.255.0. Default gateway should be set to the same address as the device acting as your gateway to the Internet, usually 192.168.0.1. DNS should set to the same address as the default gateway unless your Internet Service Provider has supplied you with another one. Alternative DNS should only be filled out if provided by your Internet Service Provider.Wireless Network Configuration: Use this menu option to select one of the available wireless networks. The wireless networks on the list may be labelled as either “Unlocked” (available for free) or “Locked” (networks that are available but require an encryption key). Select the network of your choice to establish a connection. If you select a “Locked” network, your player will display an on-screen keyboard. Enter the exact encryption key for your player to connect to the network. See below for more information on wireless authentication and encryption keys.  Wireless authentication: The Wireless Authentication menu item allows you to set the type of encryption used on your wireless network. Encryption is used to keep data exchange between your player and the rest of your network scrambled. This is done in order to protect you from exposure of personal or sensitive information to other wireless users in the vicinity.For the player to be able to communicate with your wireless network, the encryption will need to be set to exactly the same in the player as on the wireless router or access point you will be connecting to. If the wireless router/access point is running with no encryption, your player should be set accordingly. However, KiSS recommends that you always use encryption on your wireless network, so if possible please have your router set to WEP encryption and enable WEP encryption on your player accordingly. If you do not know what encryption is enabled (if any) in your wireless router/access point, please refer to its manual on how to see or set it up.Note: The KiSS DP-600 does not yet support WPA encryption.Encryption key: If you are running an encrypted wireless network, all devices on your network will need to share the same encryption key in order for them to communicate. Please enter this menu item to bring up the on-screen keyboard where you will be able to enter the key you are currently using in your wireless router/access point. If you do not know which encryption key is used on your wireless router/access point, please refer to its manual for information on how to see it or set it up.View current network settings: Enter this menu item to see the current network configuration.english
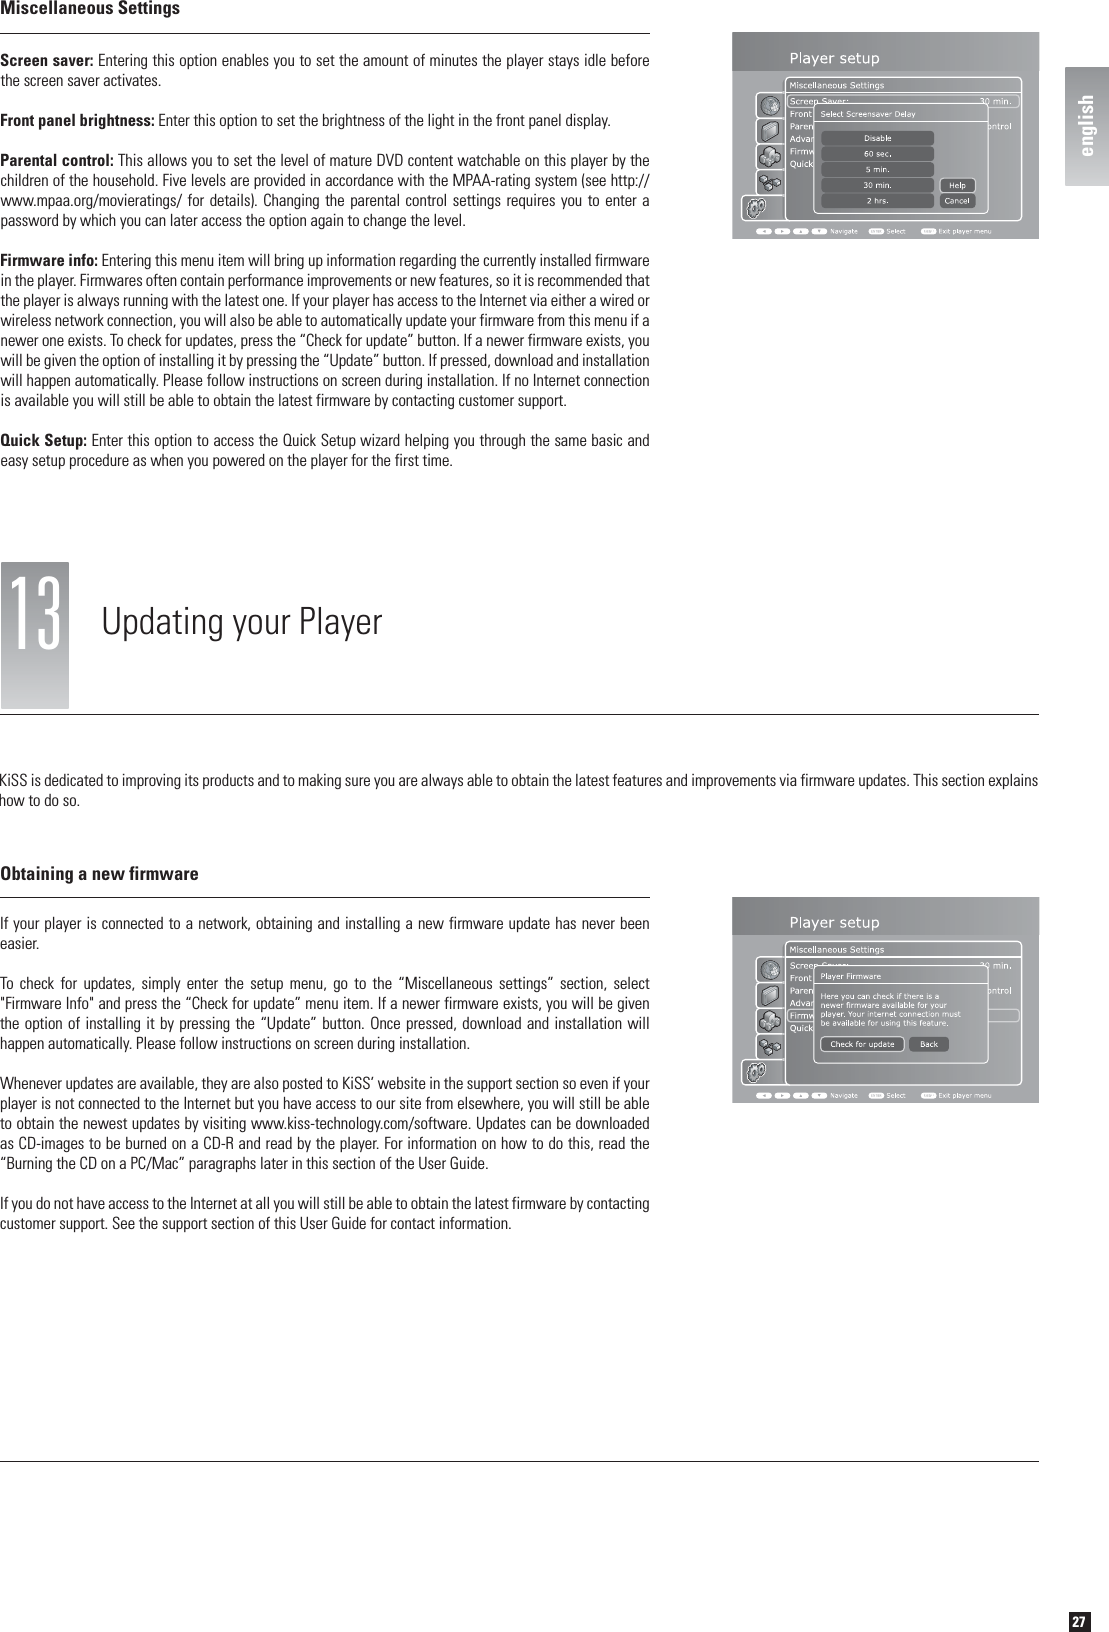
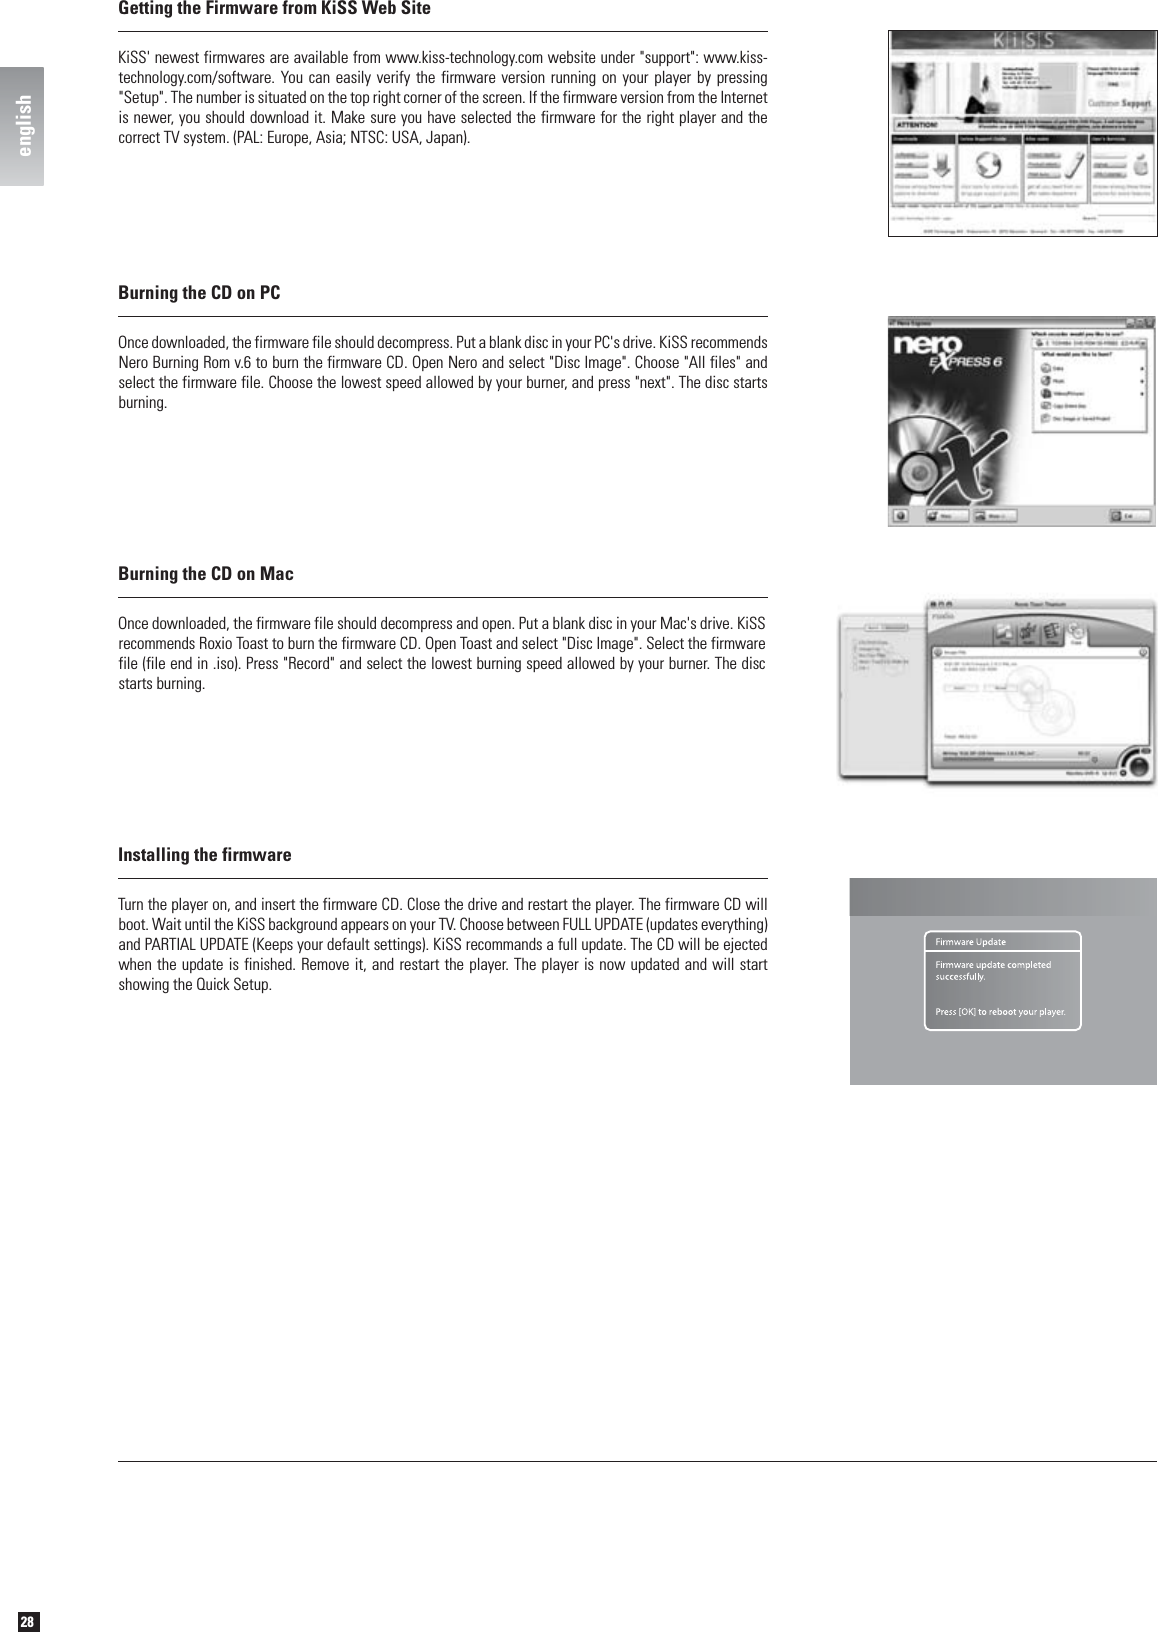
27englishMiscellaneous SettingsScreen saver: Entering this option enables you to set the amount of minutes the player stays idle before the screen saver activates.Front panel brightness: Enter this option to set the brightness of the light in the front panel display.Parental control: This allows you to set the level of mature DVD content watchable on this player by the children of the household. Five levels are provided in accordance with the MPAA-rating system (see http://www.mpaa.org/movieratings/ for details). Changing the parental control settings requires you to enter a password by which you can later access the option again to change the level.Firmware info: Entering this menu item will bring up information regarding the currently installed firmware in the player. Firmwares often contain performance improvements or new features, so it is recommended that the player is always running with the latest one. If your player has access to the Internet via either a wired or wireless network connection, you will also be able to automatically update your firmware from this menu if a newer one exists. To check for updates, press the “Check for update” button. If a newer firmware exists, you will be given the option of installing it by pressing the “Update” button. If pressed, download and installation will happen automatically. Please follow instructions on screen during installation. If no Internet connection is available you will still be able to obtain the latest firmware by contacting customer support.Quick Setup: Enter this option to access the Quick Setup wizard helping you through the same basic and easy setup procedure as when you powered on the player for the first time.KiSS is dedicated to improving its products and to making sure you are always able to obtain the latest features and improvements via firmware updates. This section explains how to do so.13 Updating your PlayerIf your player is connected to a network, obtaining and installing a new firmware update has never been easier.To check for updates, simply enter the setup menu, go to the “Miscellaneous settings” section, select "Firmware Info" and press the “Check for update” menu item. If a newer firmware exists, you will be given the option of installing it by pressing the “Update” button. Once pressed, download and installation will happen automatically. Please follow instructions on screen during installation.Whenever updates are available, they are also posted to KiSS’ website in the support section so even if your player is not connected to the Internet but you have access to our site from elsewhere, you will still be able to obtain the newest updates by visiting www.kiss-technology.com/software. Updates can be downloaded as CD-images to be burned on a CD-R and read by the player. For information on how to do this, read the “Burning the CD on a PC/Mac” paragraphs later in this section of the User Guide.If you do not have access to the Internet at all you will still be able to obtain the latest firmware by contacting customer support. See the support section of this User Guide for contact information.Obtaining a new firmwareenglish
28englishOnce downloaded, the firmware file should decompress and open. Put a blank disc in your Mac's drive. KiSS recommends Roxio Toast to burn the firmware CD. Open Toast and select "Disc Image". Select the firmware file (file end in .iso). Press "Record" and select the lowest burning speed allowed by your burner. The disc starts burning.Burning the CD on MacInstalling the firmwareTurn the player on, and insert the firmware CD. Close the drive and restart the player. The firmware CD will boot. Wait until the KiSS background appears on your TV. Choose between FULL UPDATE (updates everything) and PARTIAL UPDATE (Keeps your default settings). KiSS recommands a full update. The CD will be ejected when the update is finished. Remove it, and restart the player. The player is now updated and will start showing the Quick Setup. Once downloaded, the firmware file should decompress. Put a blank disc in your PC's drive. KiSS recommends Nero Burning Rom v.6 to burn the firmware CD. Open Nero and select "Disc Image". Choose "All files" and select the firmware file. Choose the lowest speed allowed by your burner, and press "next". The disc starts burning.Burning the CD on PCKiSS' newest firmwares are available from www.kiss-technology.com website under "support": www.kiss-technology.com/software. You can easily verify the firmware version running on your player by pressing "Setup". The number is situated on the top right corner of the screen. If the firmware version from the Internet is newer, you should download it. Make sure you have selected the firmware for the right player and the correct TV system. (PAL: Europe, Asia; NTSC: USA, Japan).Getting the Firmware from KiSS Web Siteenglish

Navigation menu