LINKSYS EA4500V3 802.11 a/b/g/nAP User Manual
LINKSYS LLC 802.11 a/b/g/nAP
UserManual.wiki
>
LINKSYS
>
EA4500V3 User Manual
>
User Manual.pdf
Contents
1.
User Manual (Statements) rev.pdf
2.
User Manual.pdf
User Manual.pdf
Navigation menu
Upload a User Manual
Namespaces
Wiki Guide
HTML
PDF
Info
Views
User Manual
Discussion / Help
Navigation

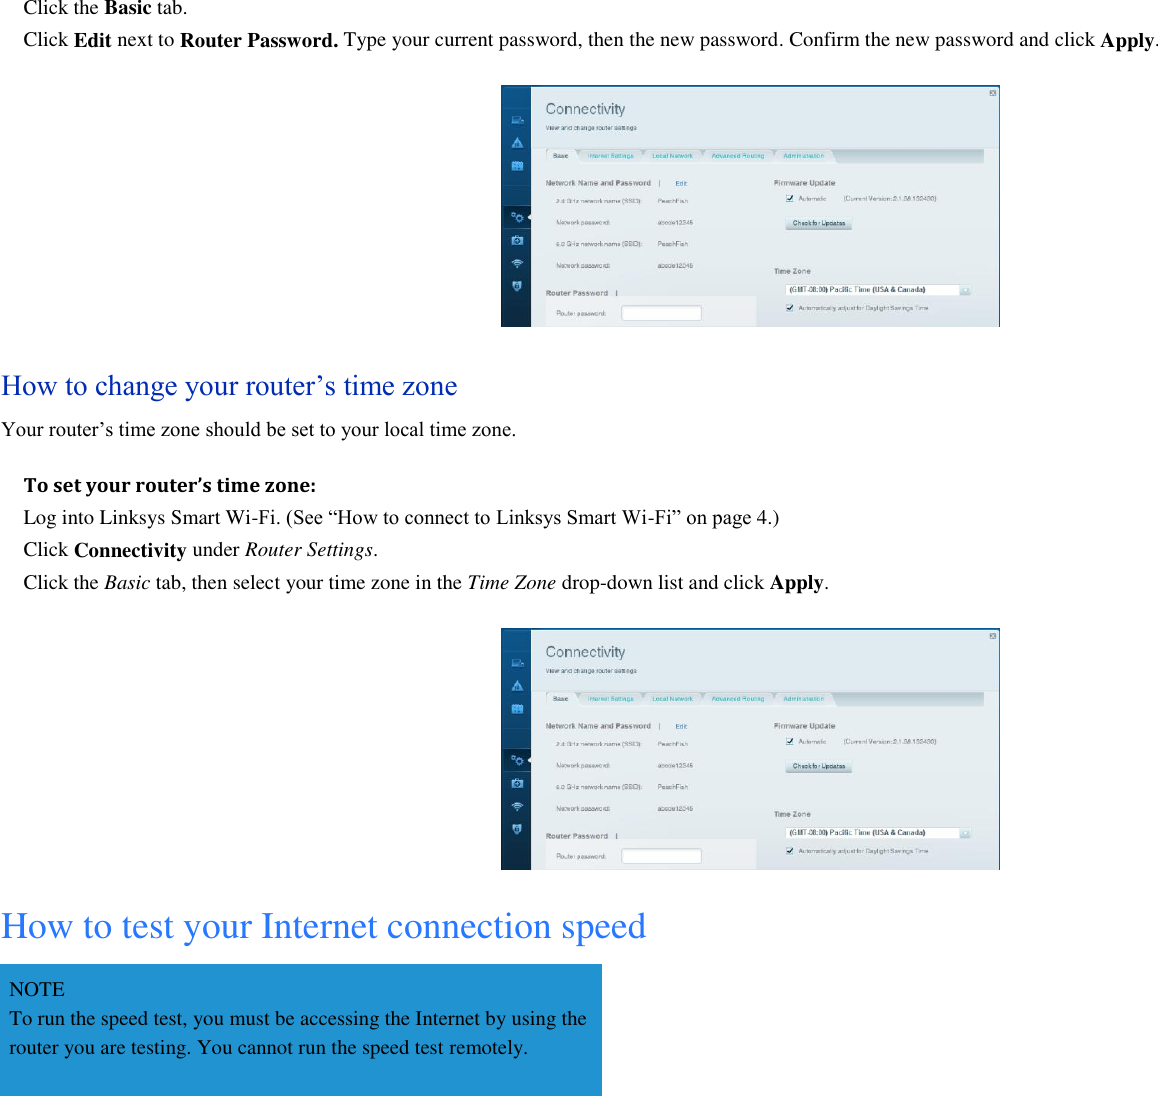
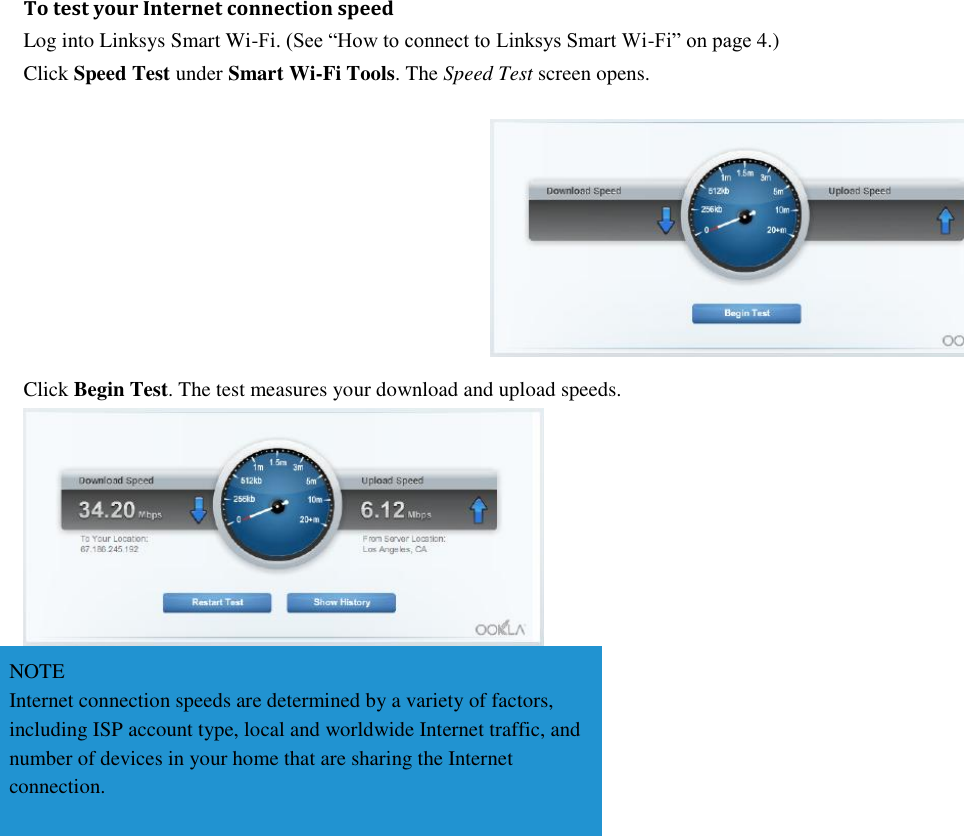
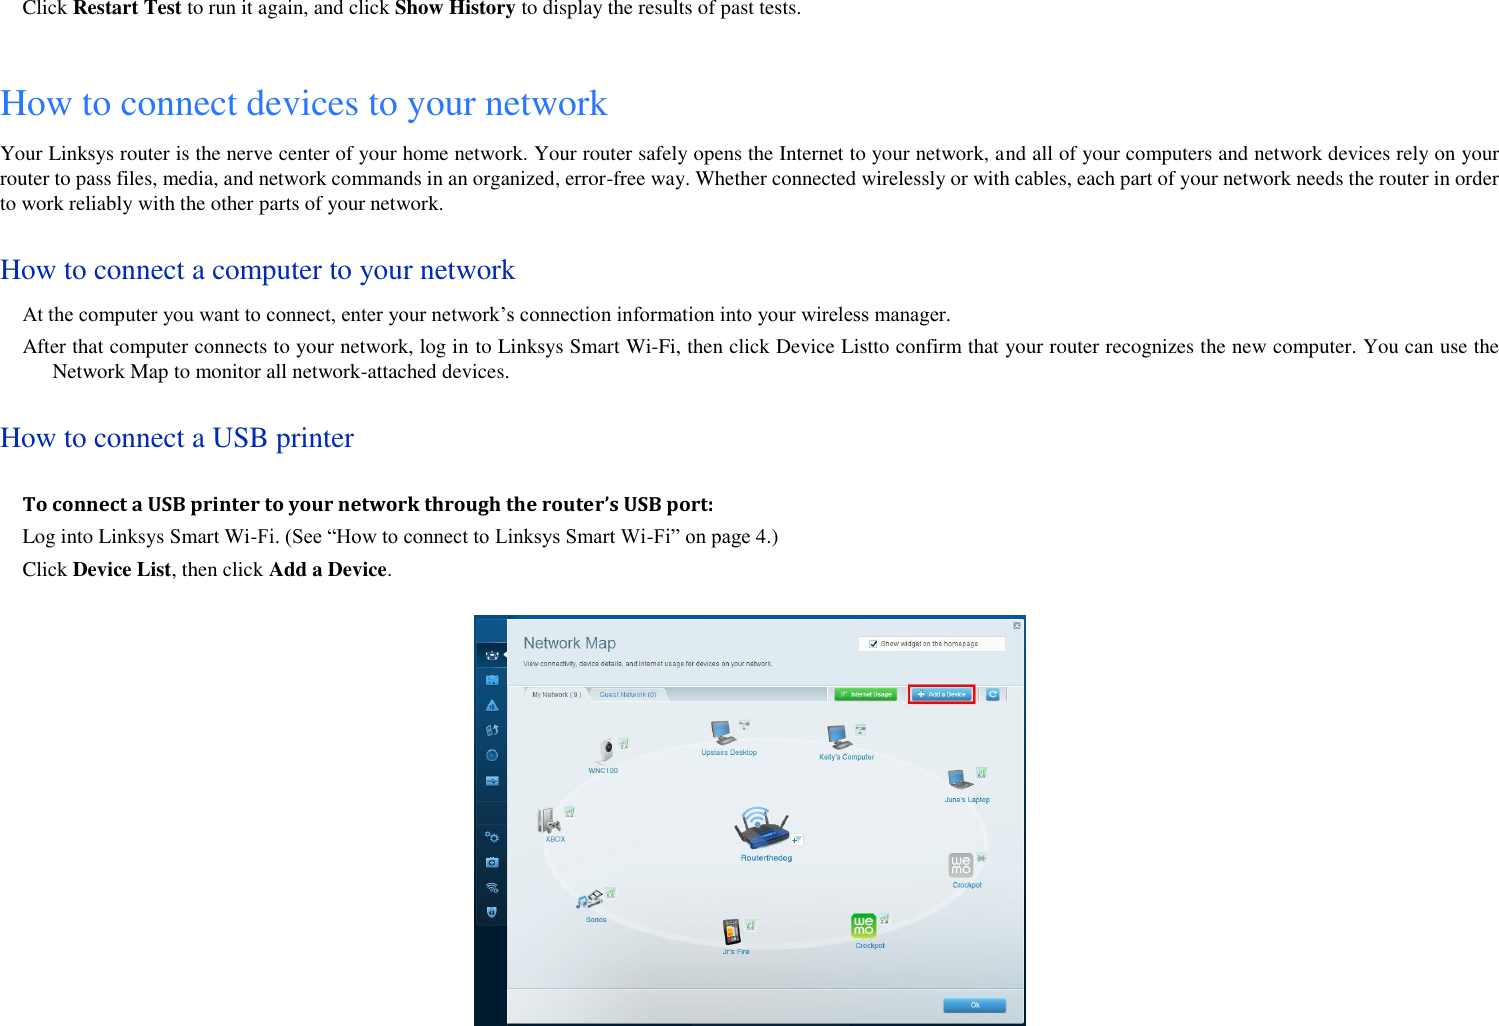
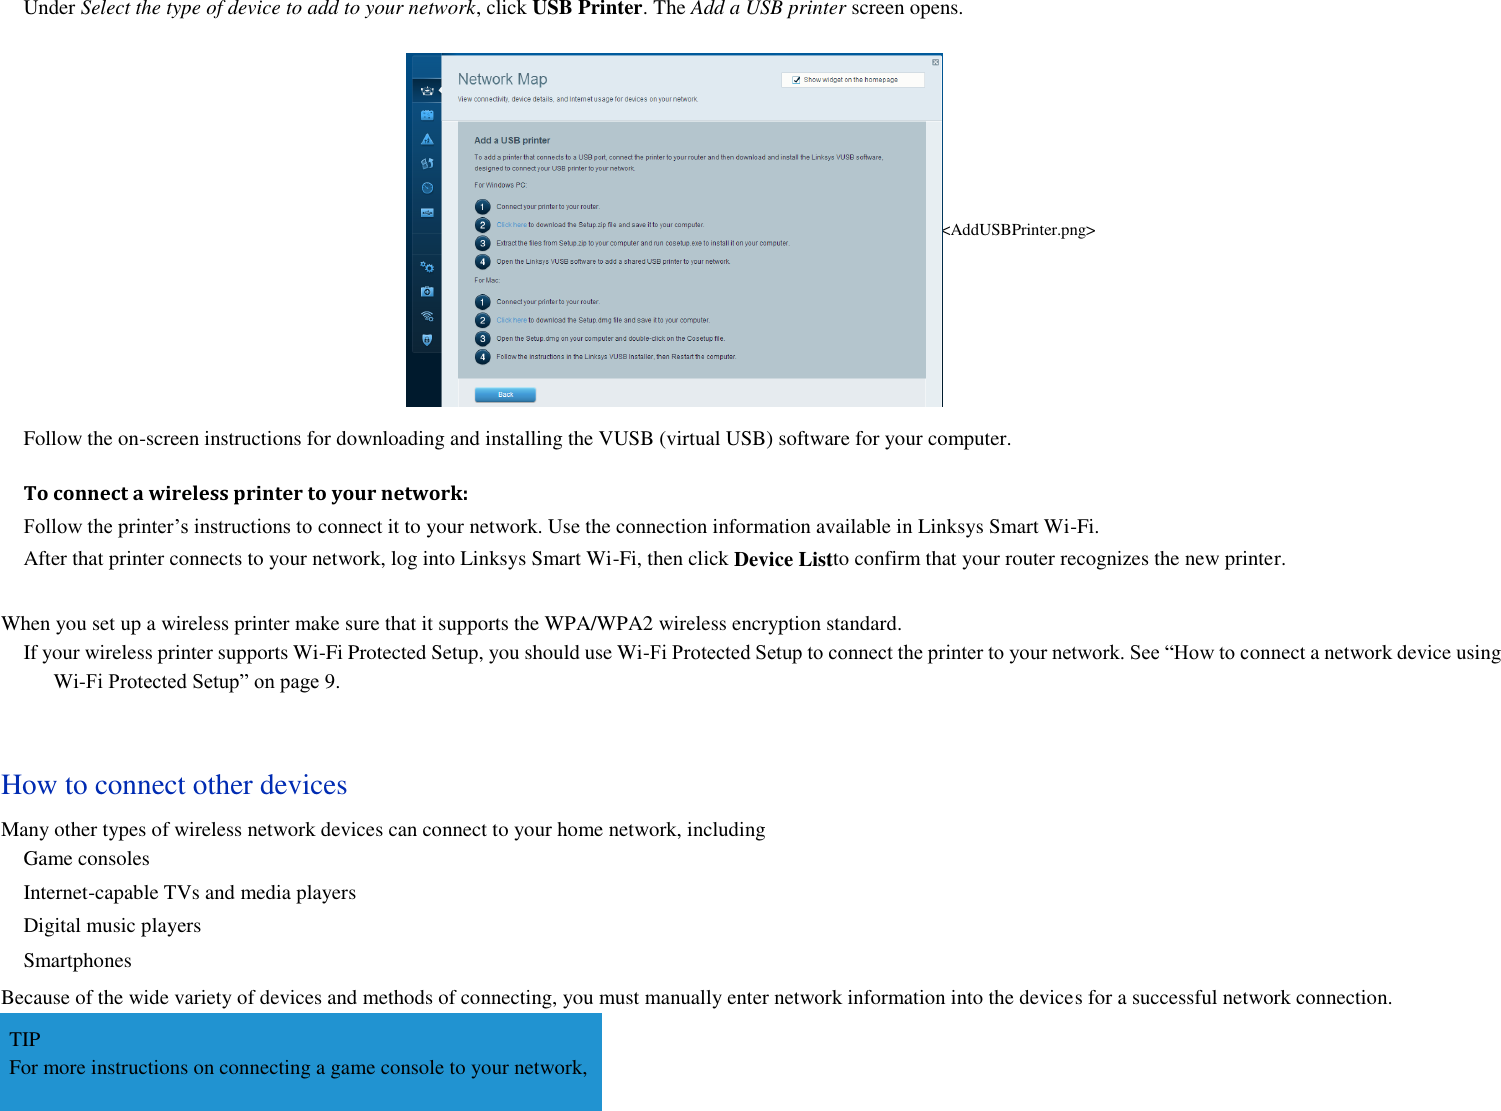

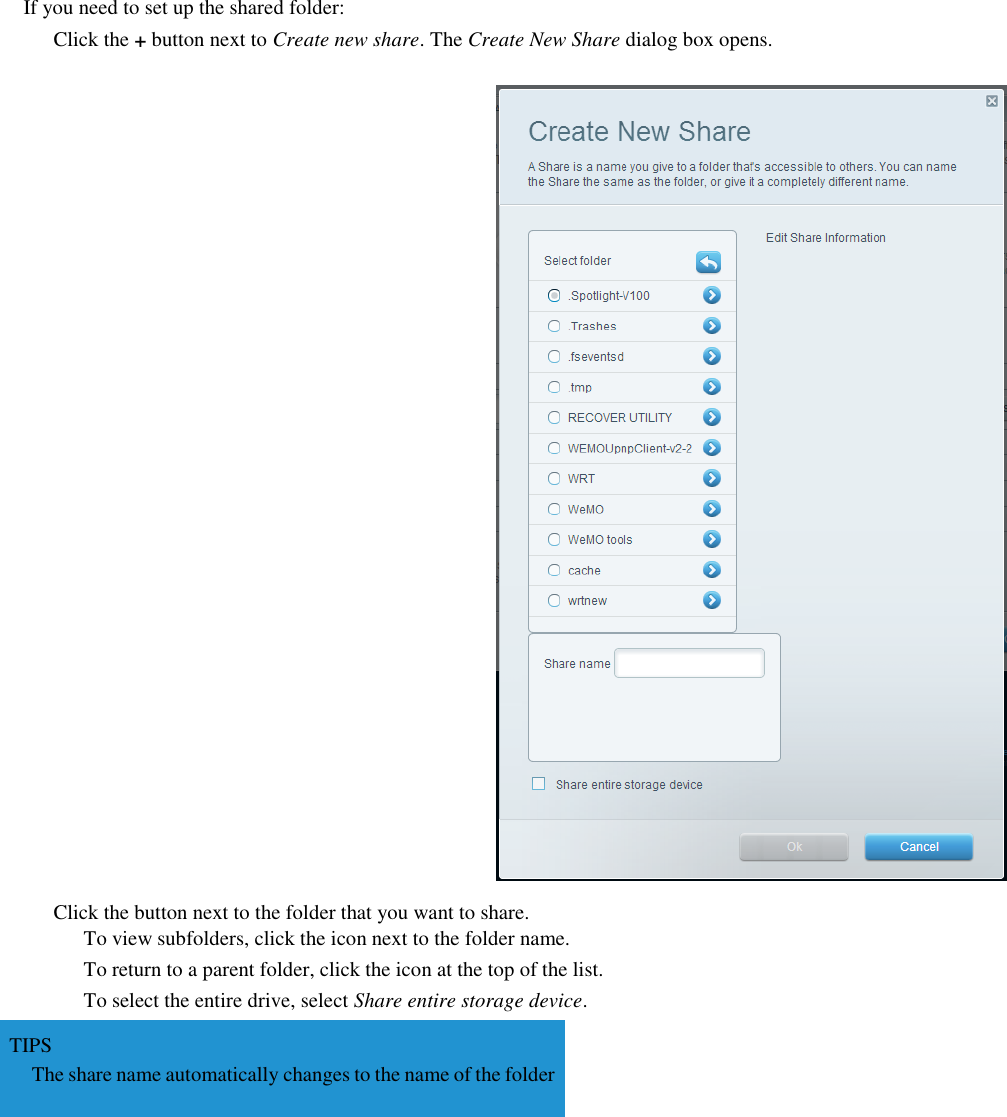
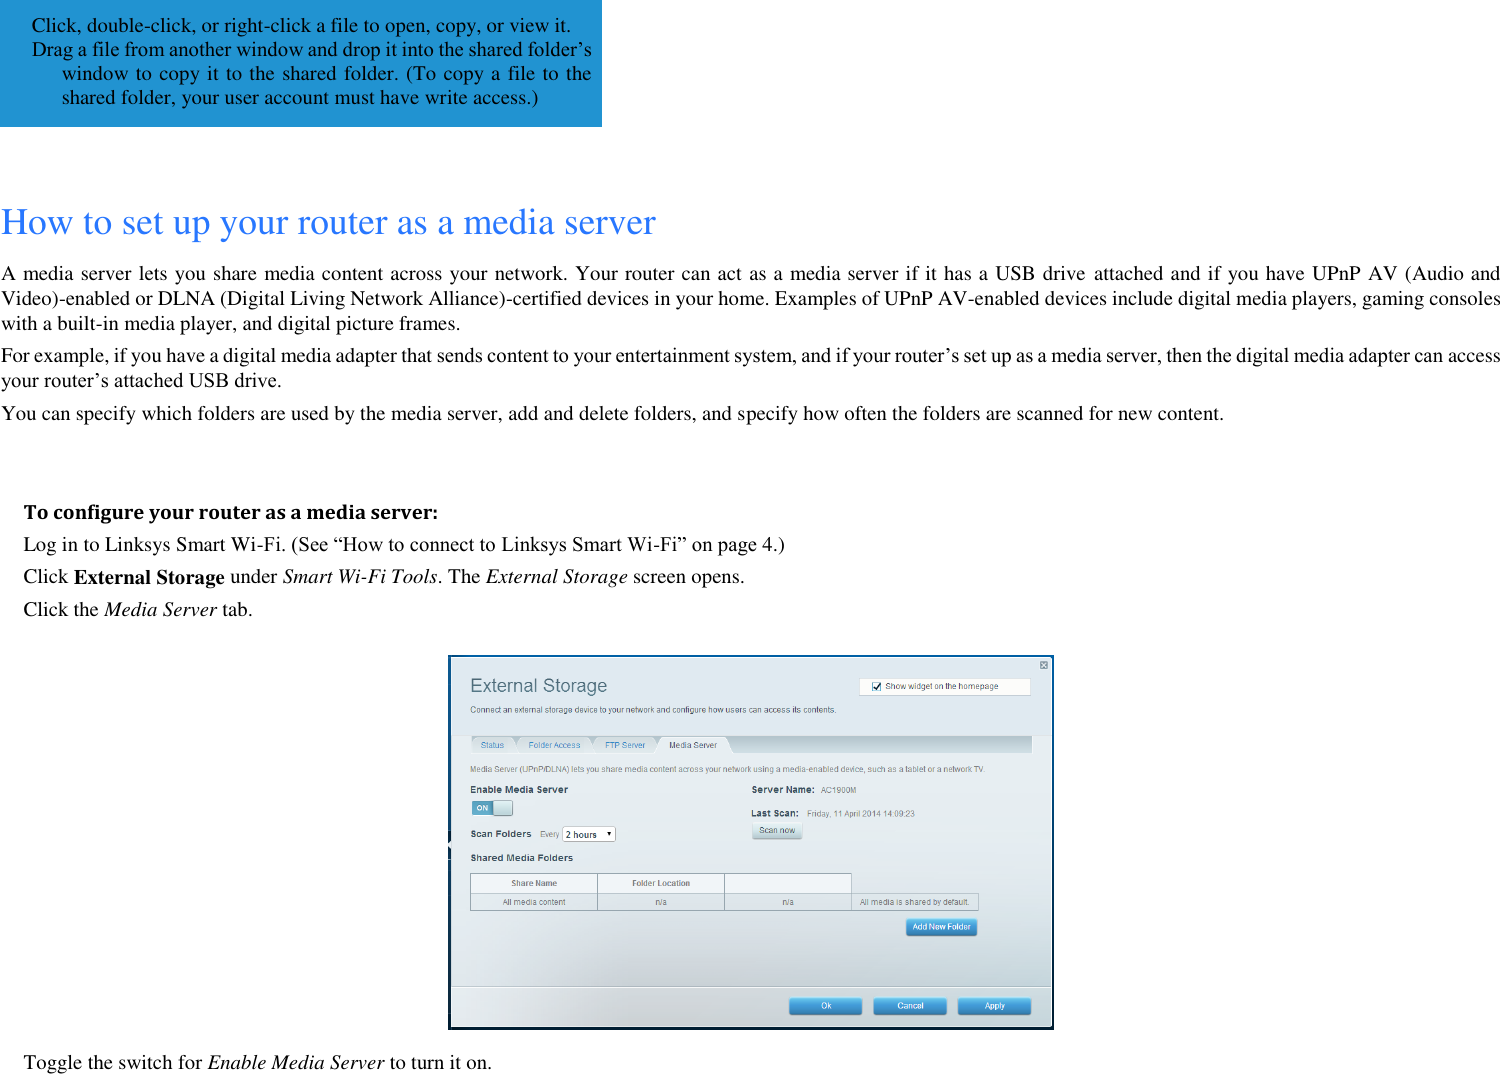
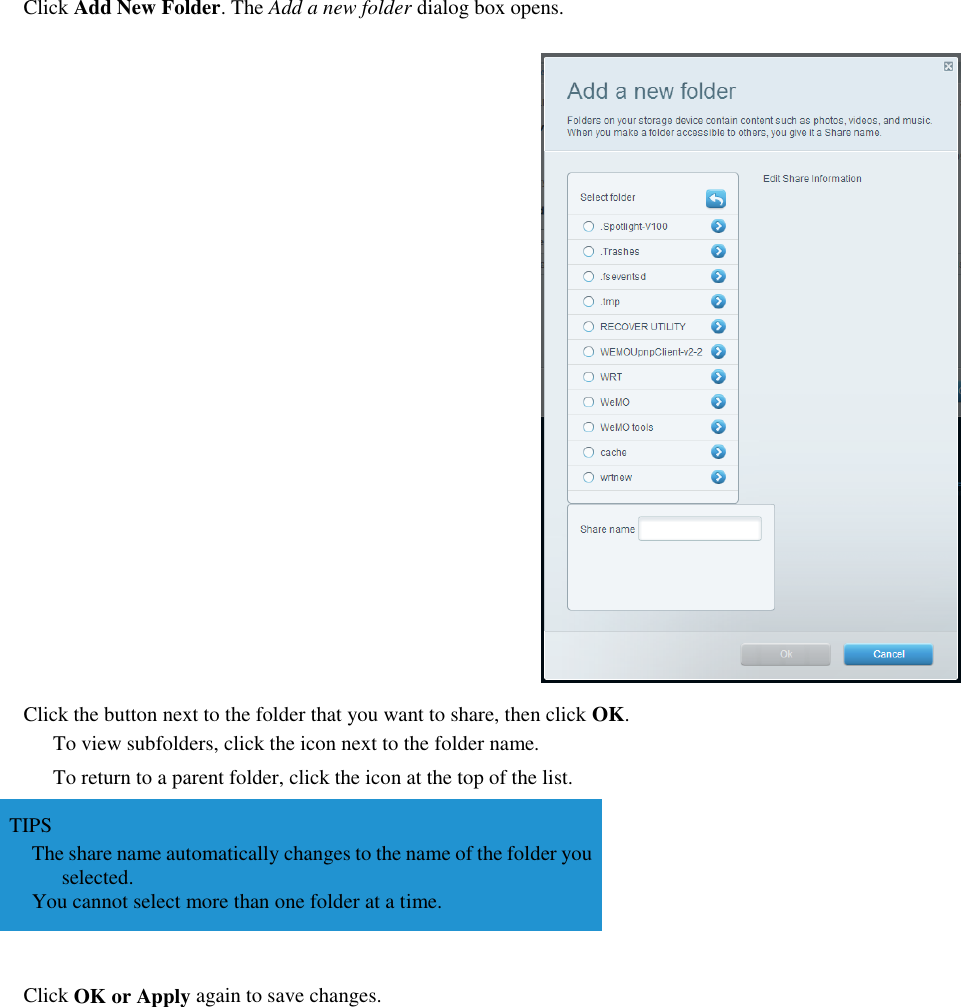


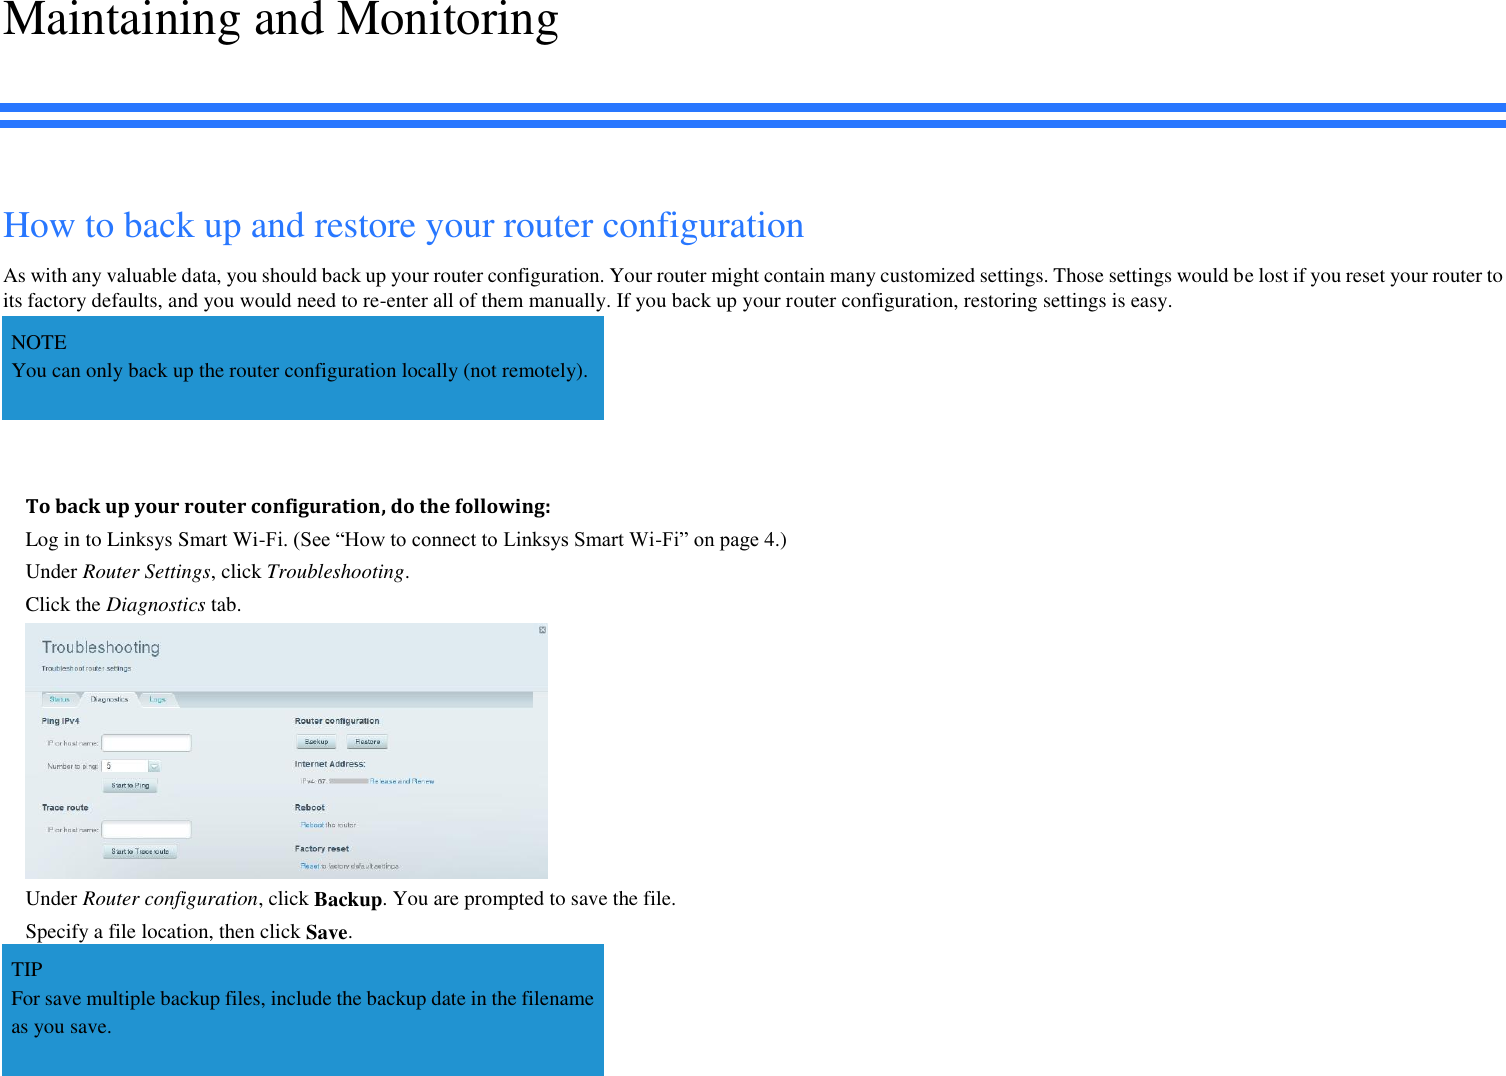
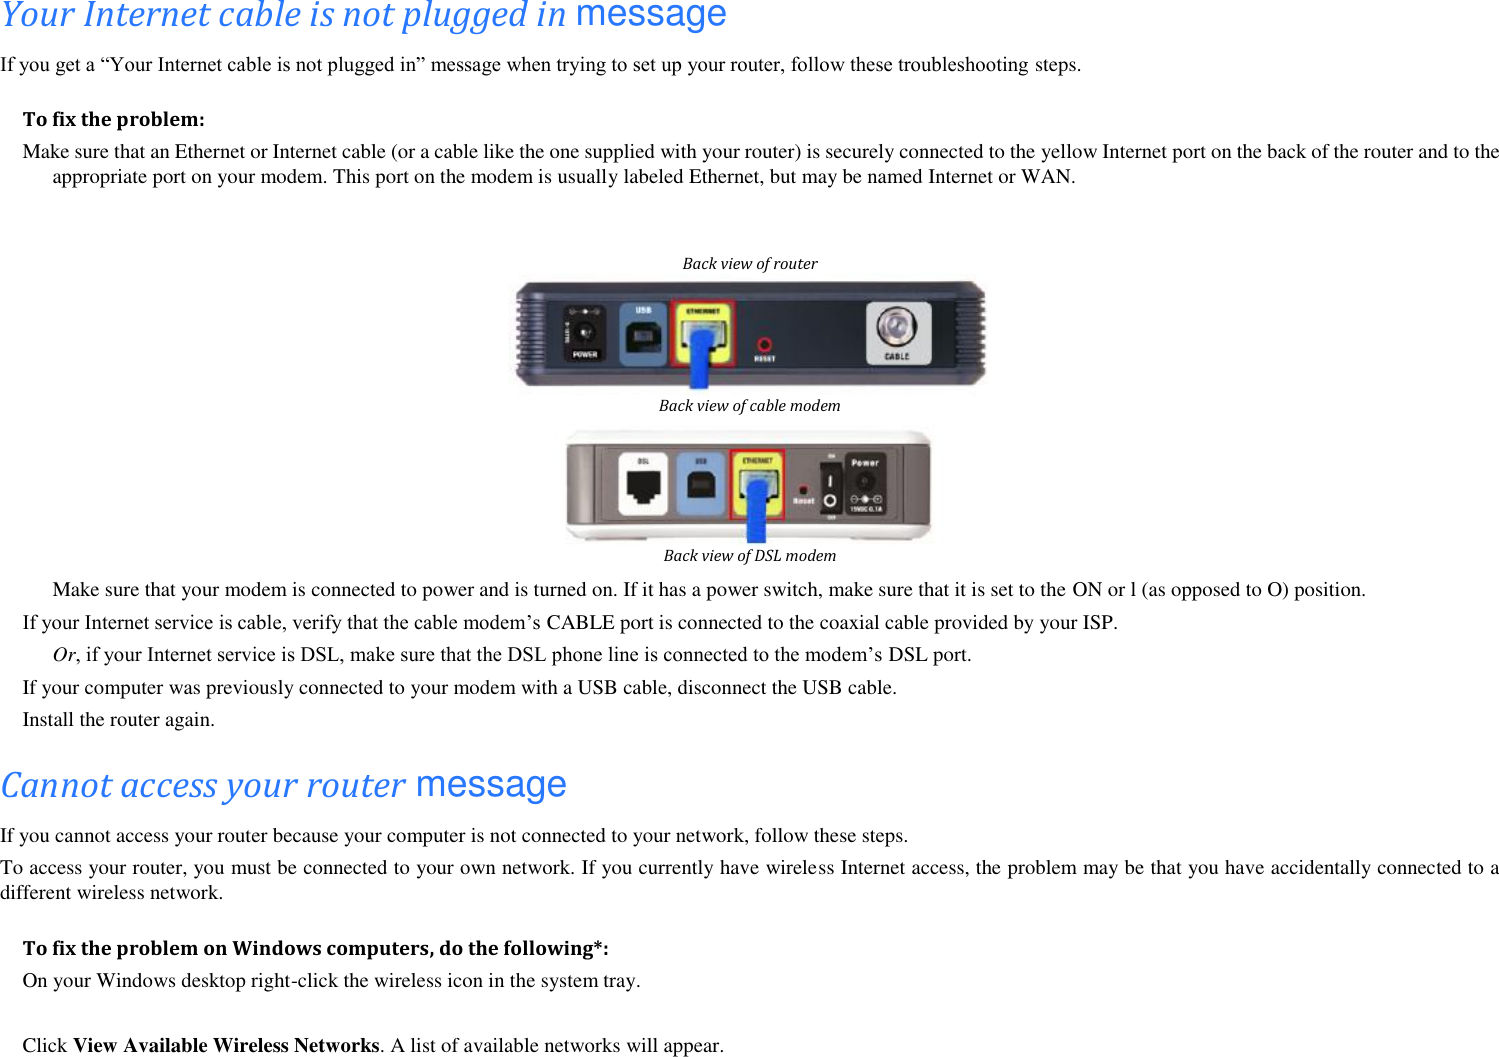
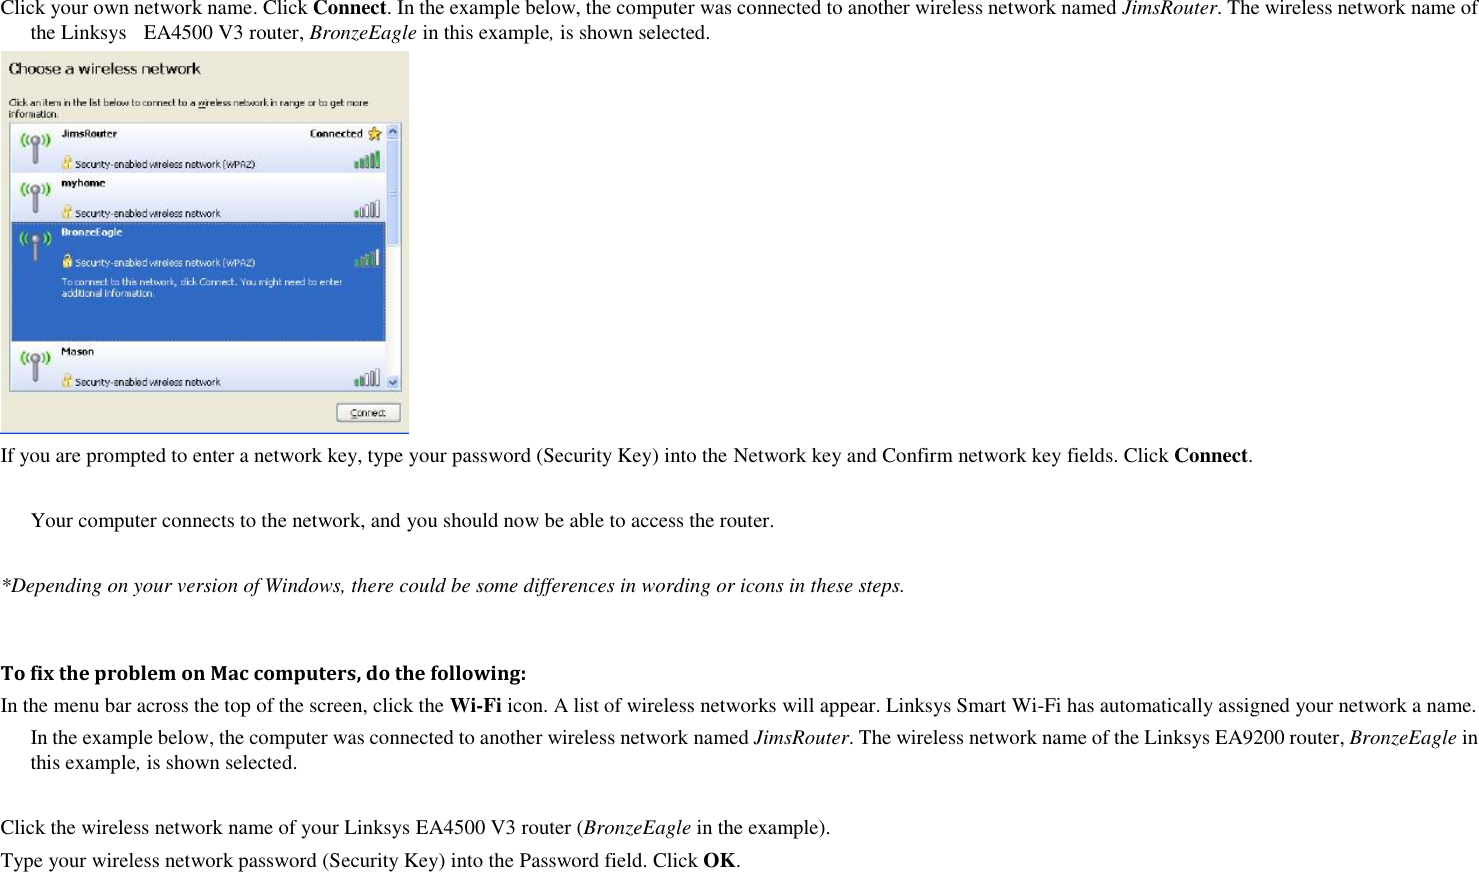
![After setup The Internet appears to be unavailable If the Internet has difficulty communicating with your router, the problem may appear as a “Cannot find [Internet address]” message in your Web browser. If you know that the Internet address is correct, and if you’ve tried several valid Internet addresses with the same result, the message could mean that there’s a problem with your ISP or modem communicating with your router. Try the following: Make sure that the network and power cables are securely connected. Make sure that the power outlet that your router is connected to has power. Reboot your router. Contact your ISP and ask about outages in your area. The most common method of troubleshooting your router is to turn it off, then back on again. Your router can then reload its custom settings, and other devices (such as the modem) will be able to rediscover the router and communicate with it. This process is called rebooting. Rebooting your router To reboot your router using the power cord, do the following: Disconnect the power cord from the router and the modem. Wait 10 seconds, and reconnect the power cord to the modem. Make sure it has power. Wait until the modem’s online indicator has stopped blinking, or two minutes. Reconnect the power cord to the router. Wait until the power indicator stops blinking. Wait two minutes before trying to connect to the Internet from a computer. To reboot your router using Linksys Smart Wi-Fi, do the following: Log in to Linksys Smart Wi-Fi. (See “How to connect to Linksys Smart Wi-Fi” on page 4.) Under Router Settings, click Troubleshooting. Click the Diagnostics tab. Under Reboot, click Reboot. A confirmation screen opens.](https://usermanual.wiki/LINKSYS/EA4500V3.User-Manual-pdf/User-Guide-2532777-Page-77.png)