LINKSYS WIP300 Wireless-G IP Phone User Manual SRP C1 Draft Eng v0 3 20051215
LINKSYS LLC Wireless-G IP Phone SRP C1 Draft Eng v0 3 20051215
UserManual.wiki
>
LINKSYS
>
WIP300 User Manual
Manual
Navigation menu
Upload a User Manual
Namespaces
Wiki Guide
HTML
PDF
Info
Views
User Manual
Discussion / Help
Navigation
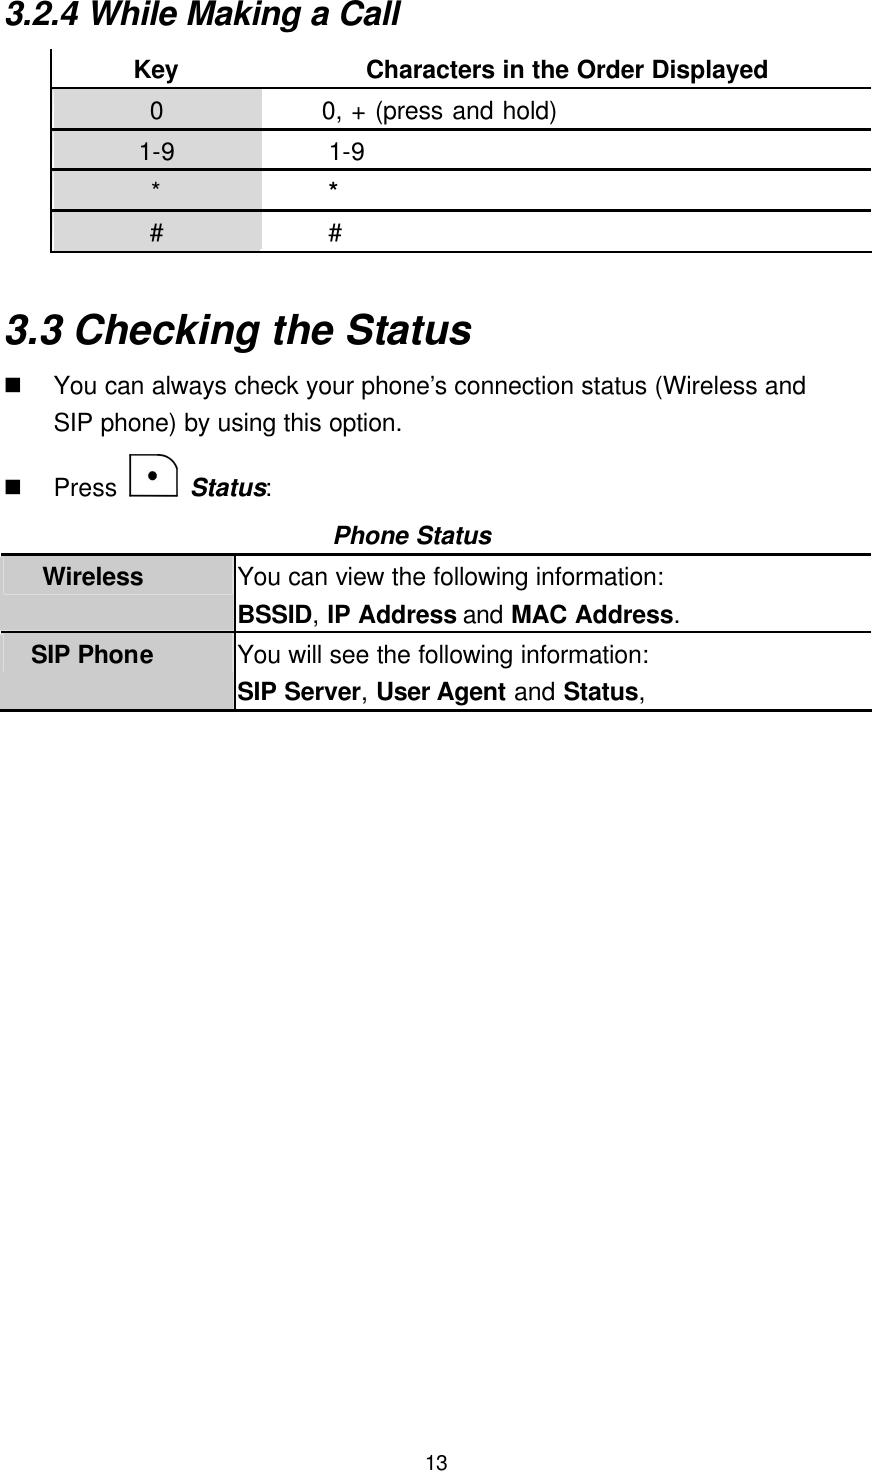
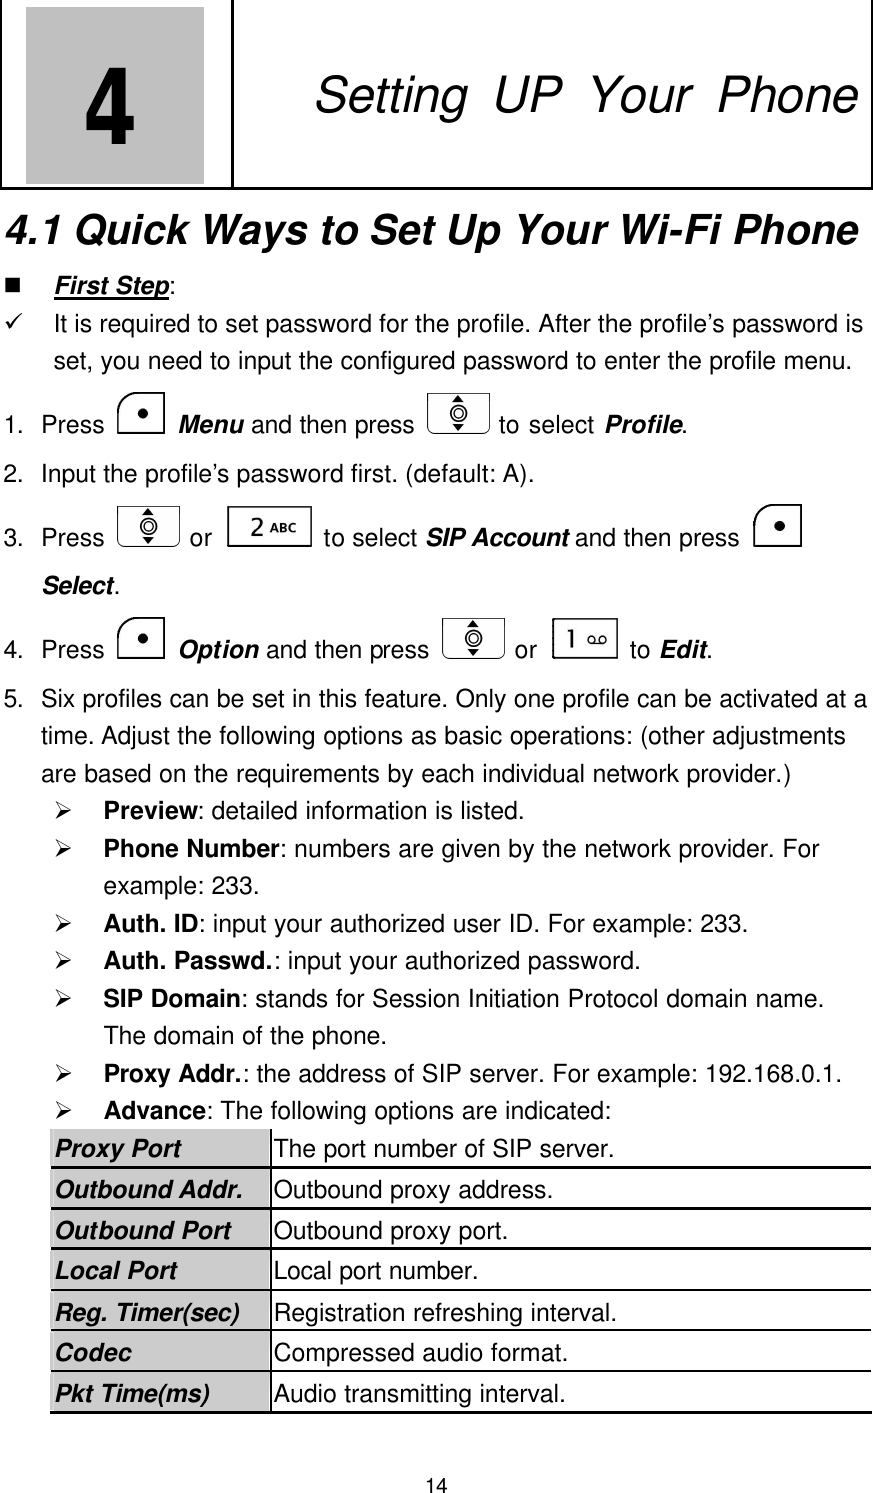
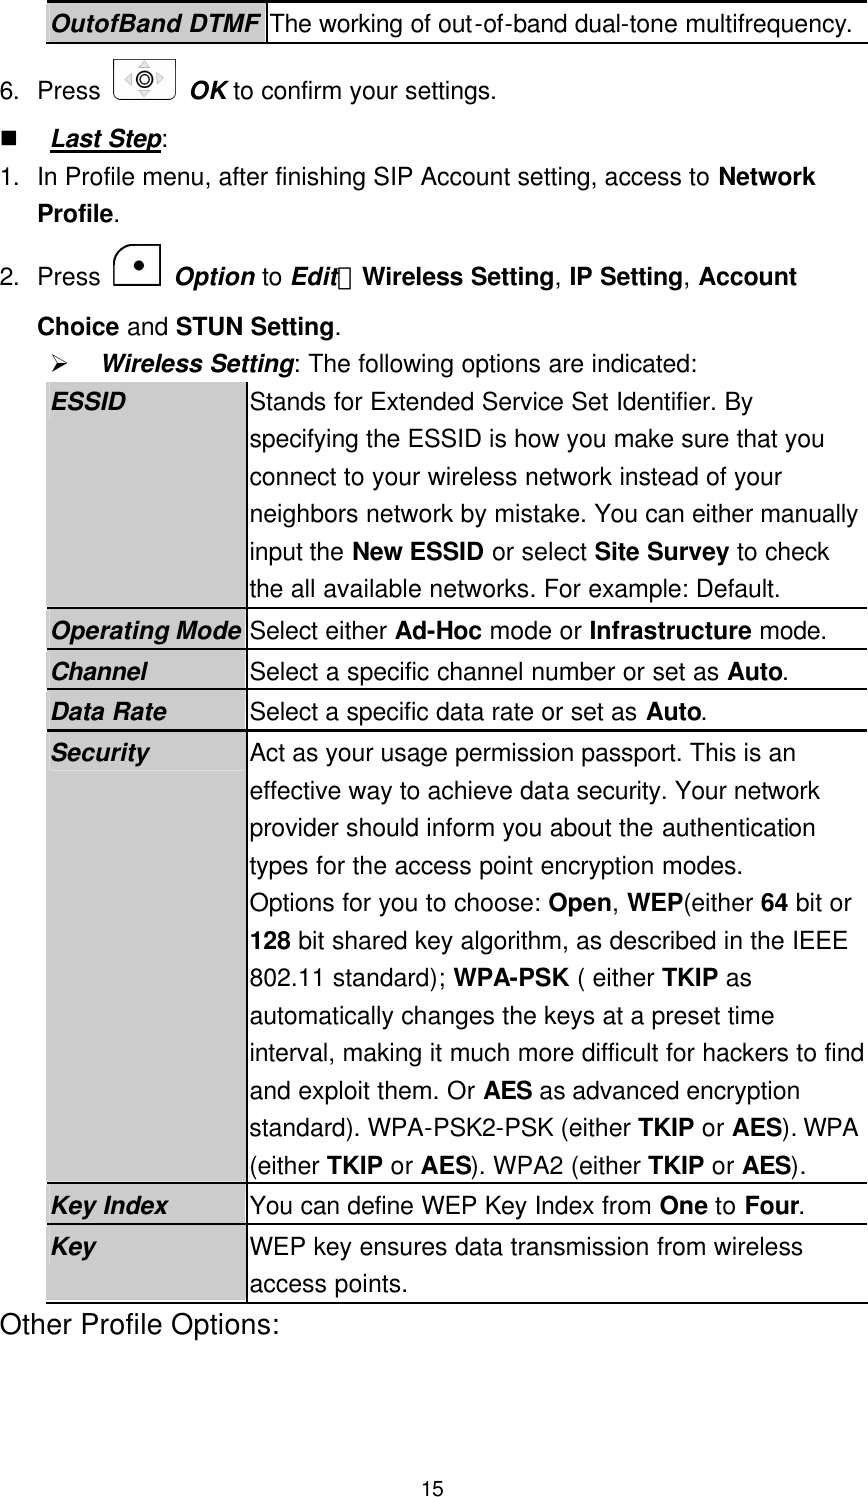
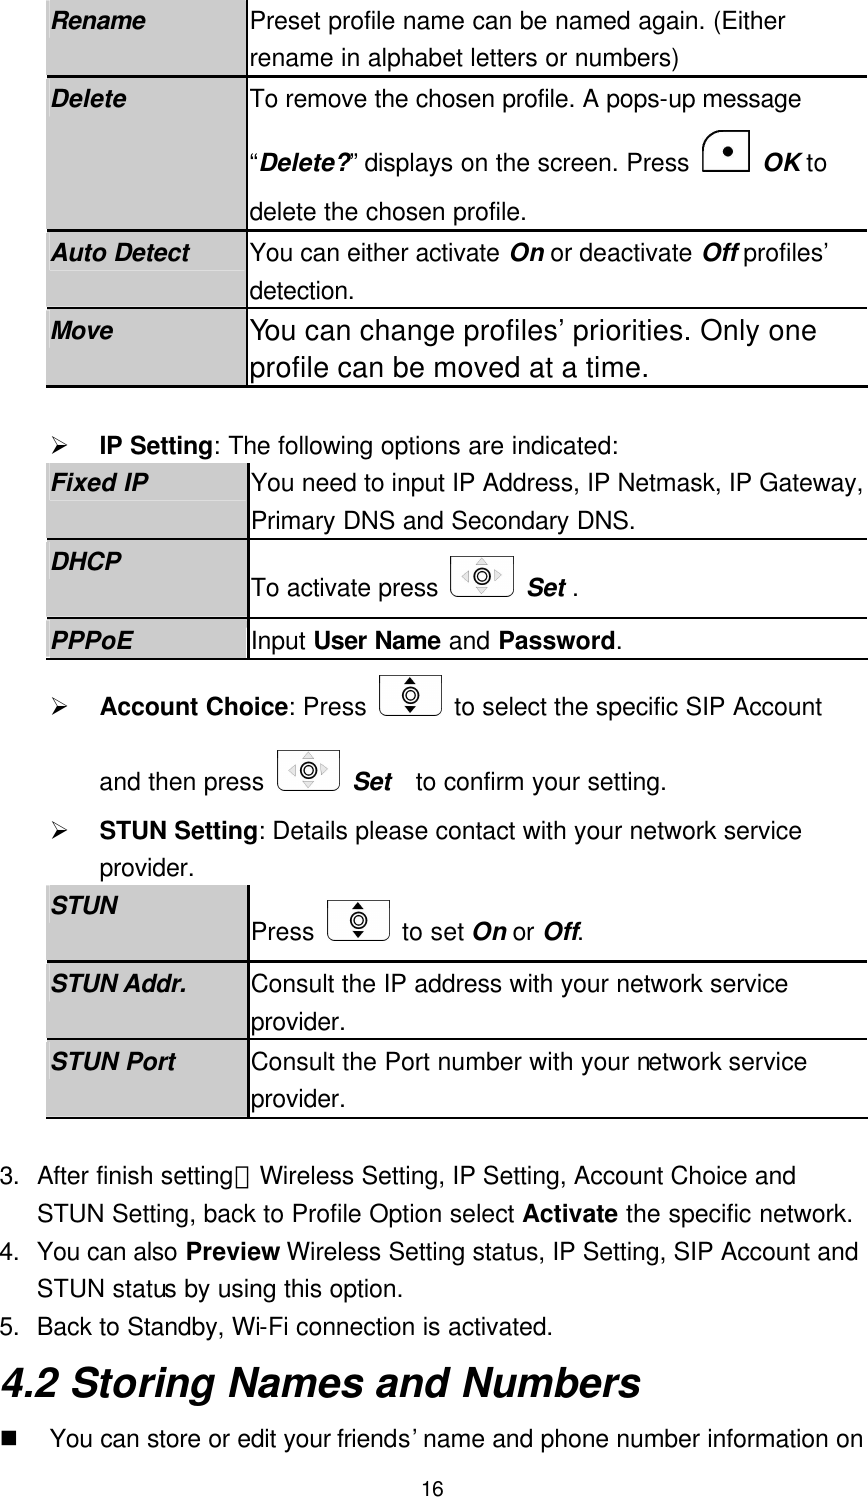
![12 For example, you have to press the 5 key twice display the character “K”, the 3 key five times to display the character “e” and the 6 key five times again to display “n”. n The cursor moves to the right when you press a different key. When entering the same letter twice or a different letter on the same key, just wait for a few seconds for the cursor to move to the right automatically, and then select the next letter. n You can insert a space between words/letters by pressing the 0 key. n Refer to the chart below for detailed information about the characters available: Key Characters in the Order Displayed 0 space 1 " ' [ ] < > ( ) { } 2 ABCabc 3 DEFdef 4 GHIghi 5 JKLjkl 6 MNOmno 7 PQRSpqrs 8 TUVtuv 9 WXYZwxyz * * . + - / , : ; = ? ! # # @ $ % & \ ^ _ ` | ~ n Clearing Letters and Words: To delete letters, press the Clear key. 3.2.2 Using Numeric Mode n Numeric mode enables you to input numbers in your text, such as phone number. Press the keys accordingly to the digits you want before manually switching back to the appropriate text input mode. 3.2.3 Using IP Mode Key Characters in the Order Displayed 0-9 0-9 * *](https://usermanual.wiki/LINKSYS/WIP300/User-Guide-614970-Page-13.png)