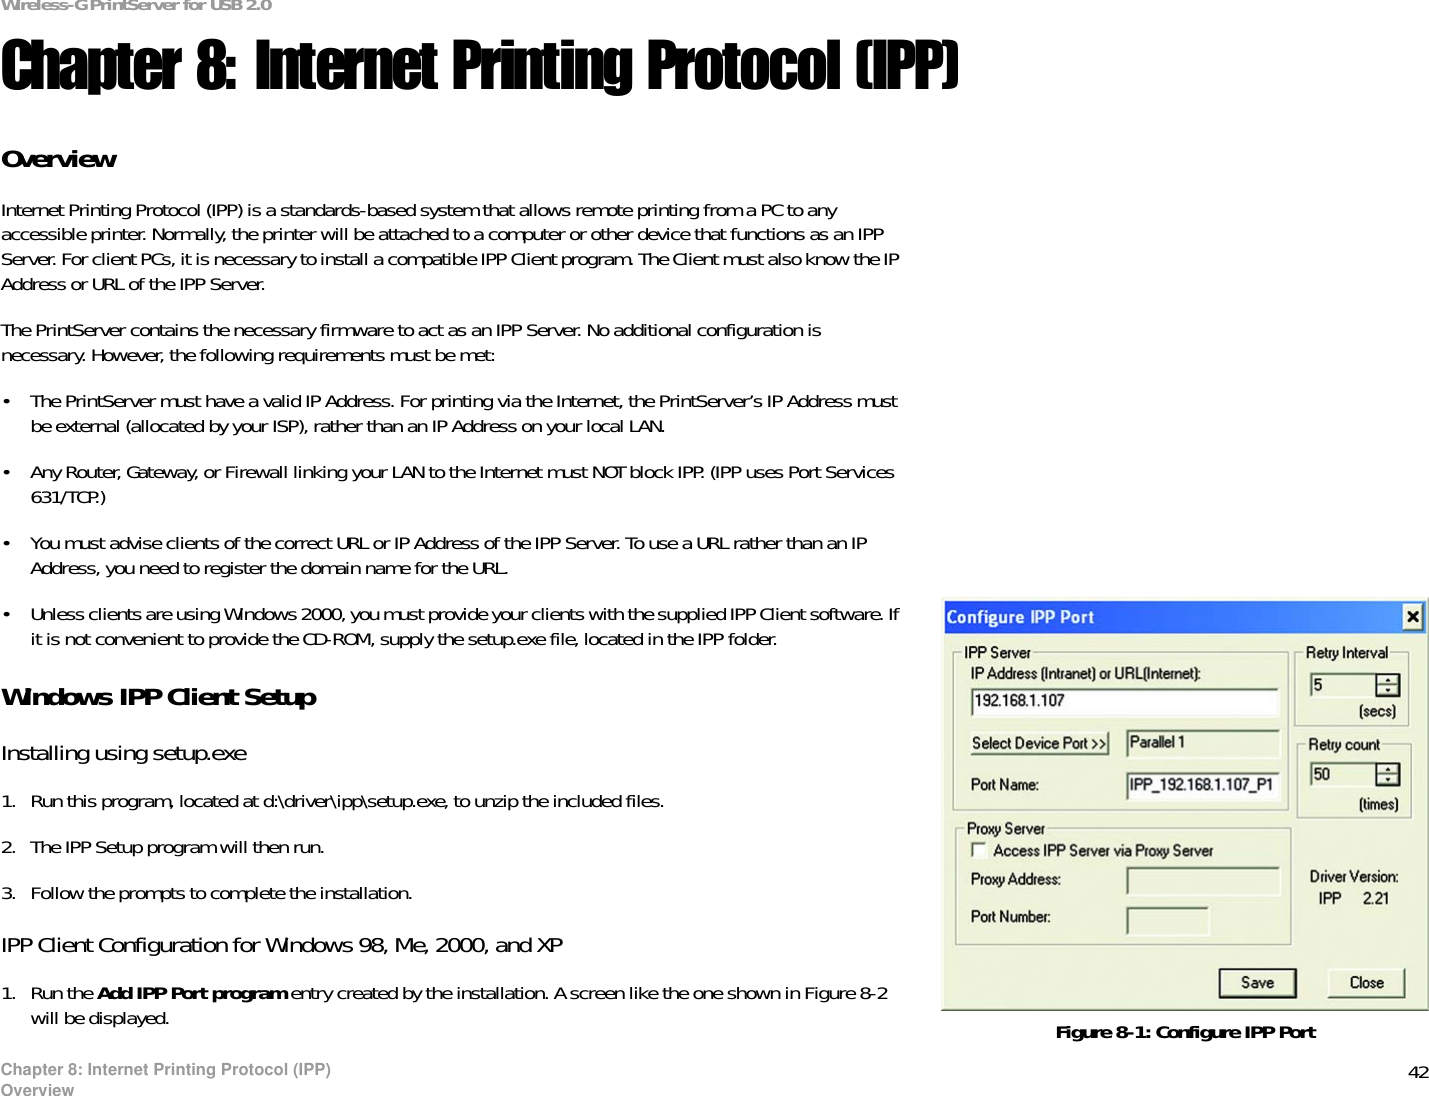
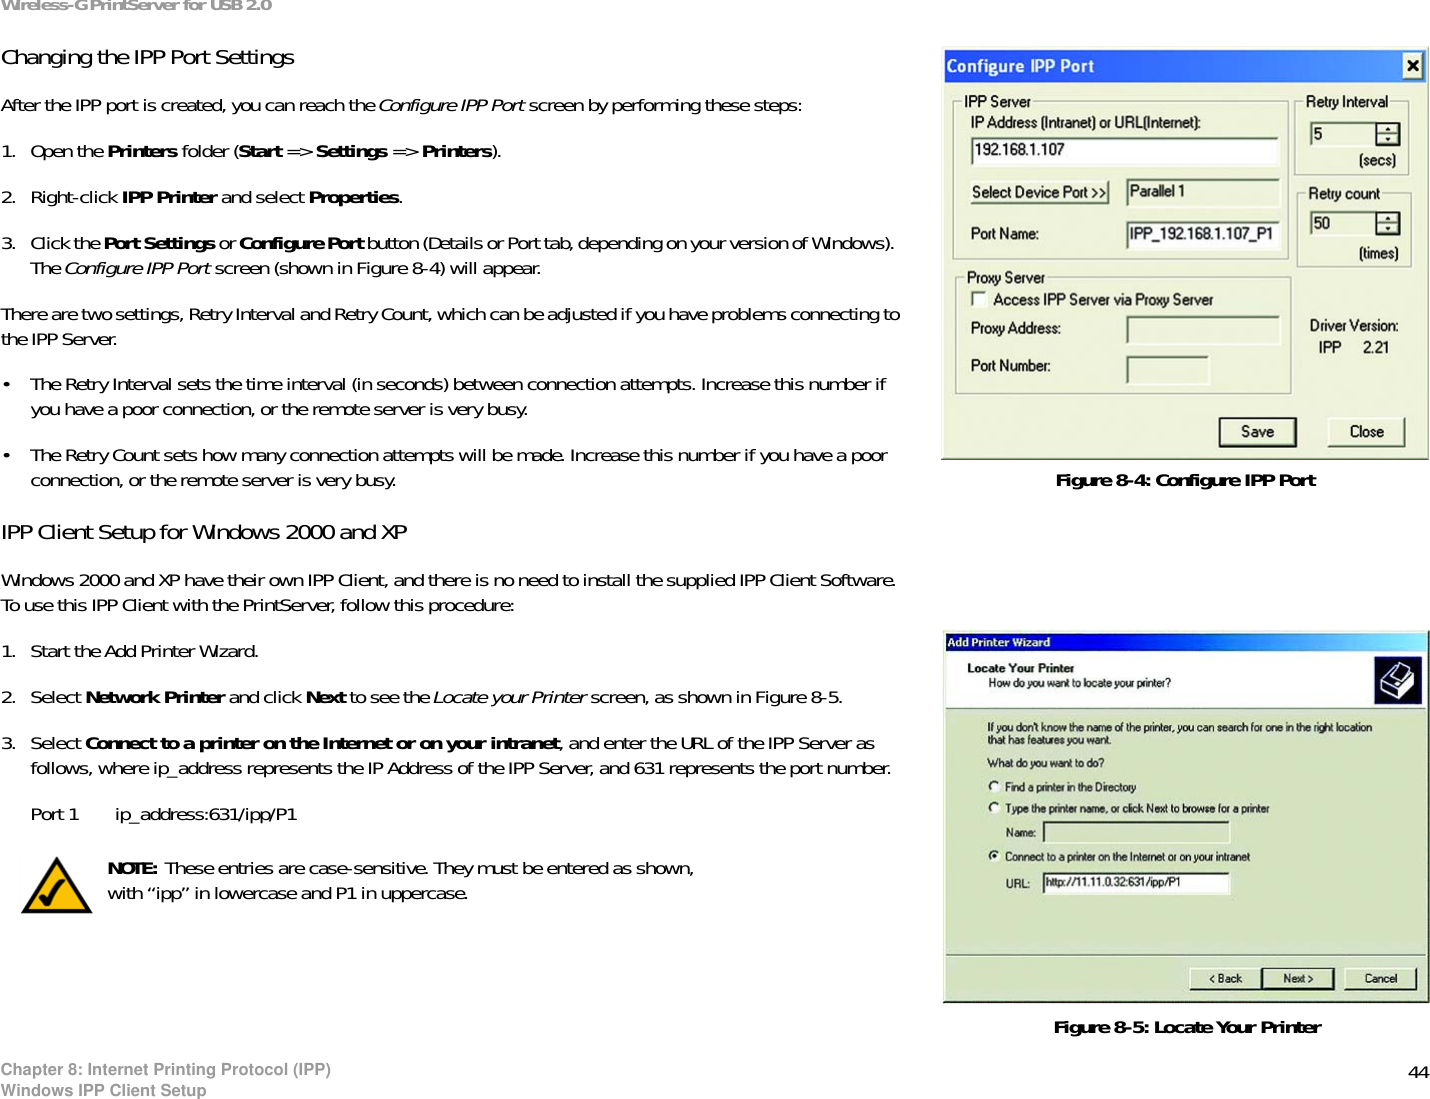
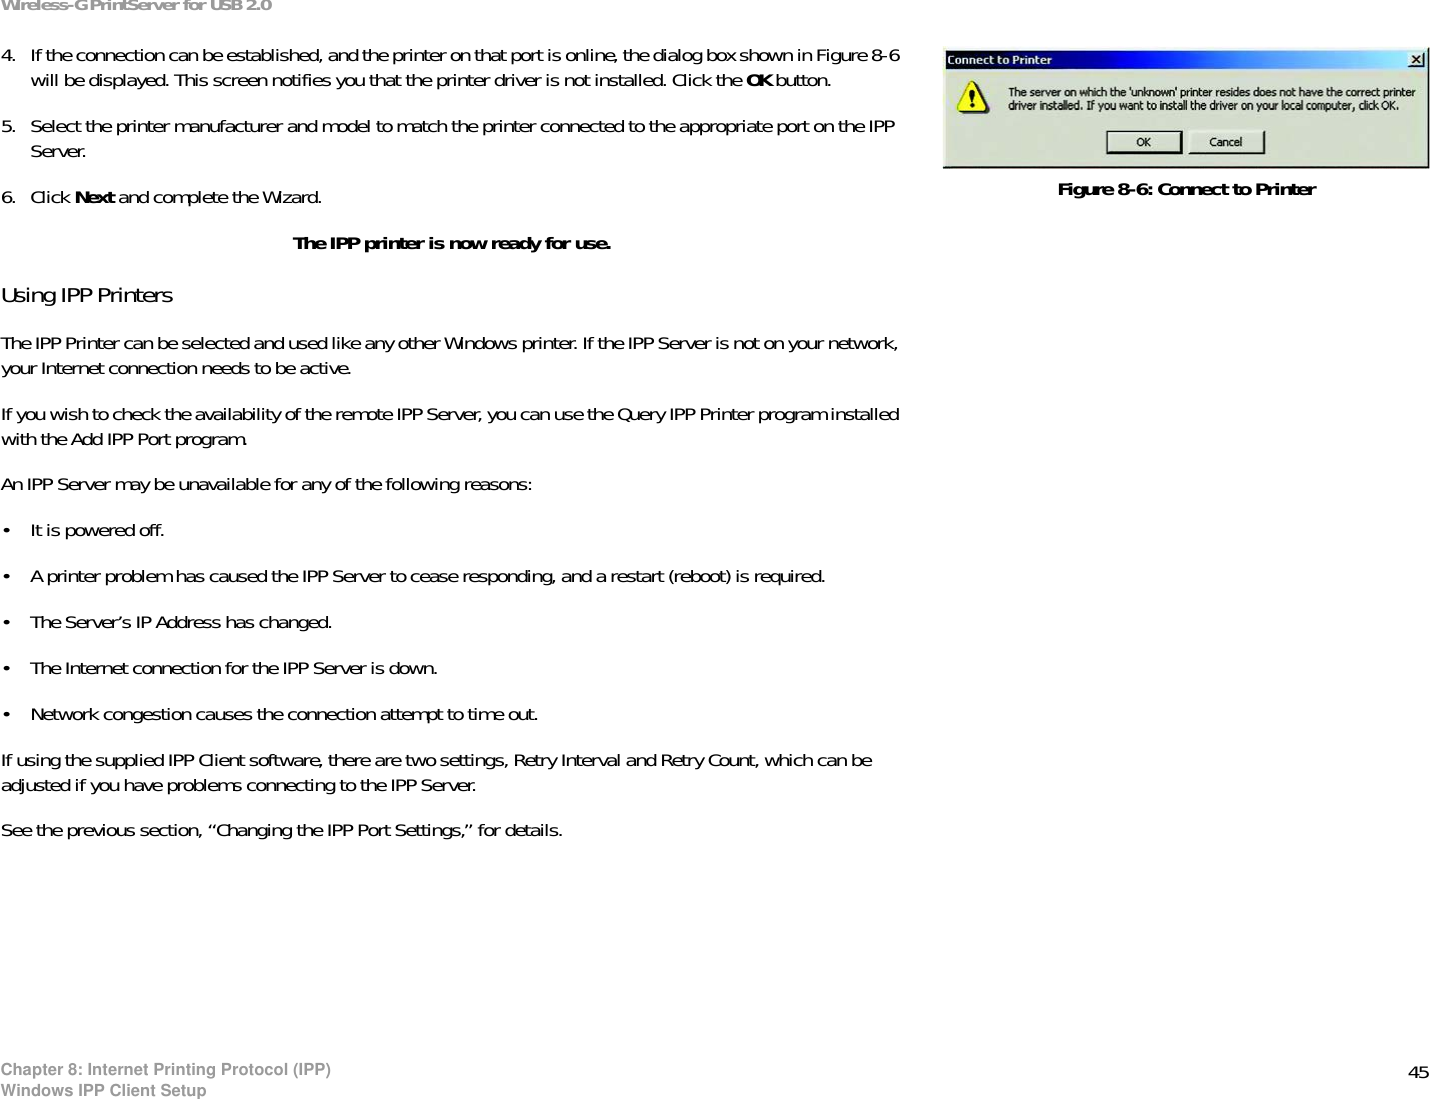
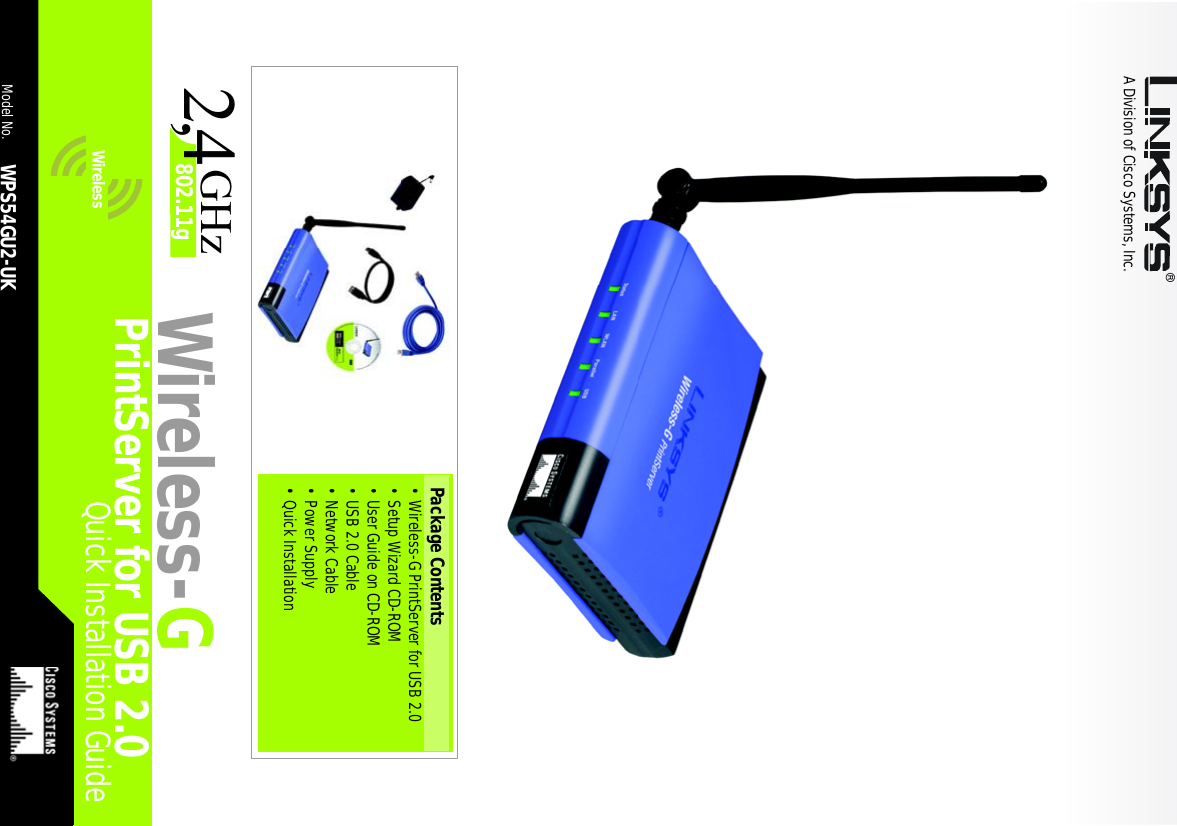
LINKSYS WPS54GU2 Wireless-G Printer Server User Manual
LINKSYS LLC Wireless-G Printer Server
UserManual.wiki
>
LINKSYS
>
WPS54GU2 User Manual
User Manual
Navigation menu
Upload a User Manual
Namespaces
Wiki Guide
HTML
PDF
Info
Views
User Manual
Discussion / Help
Navigation
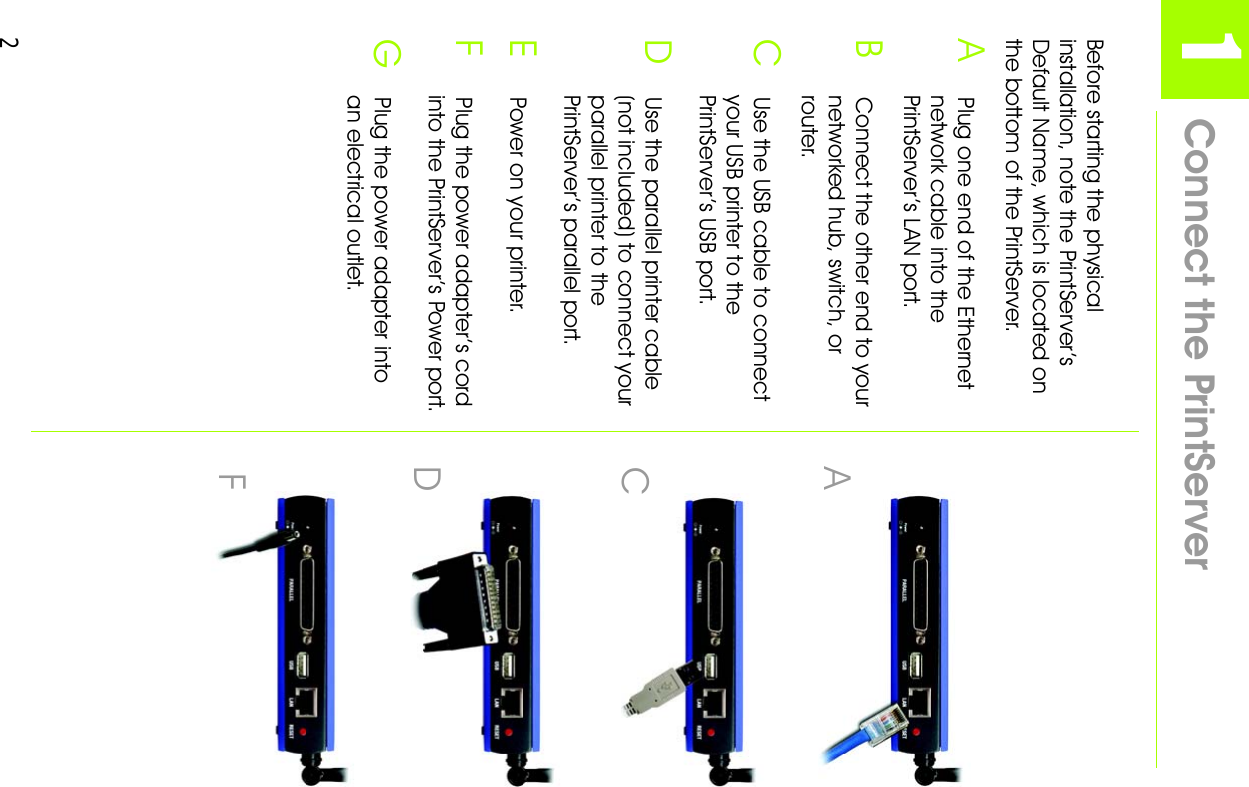
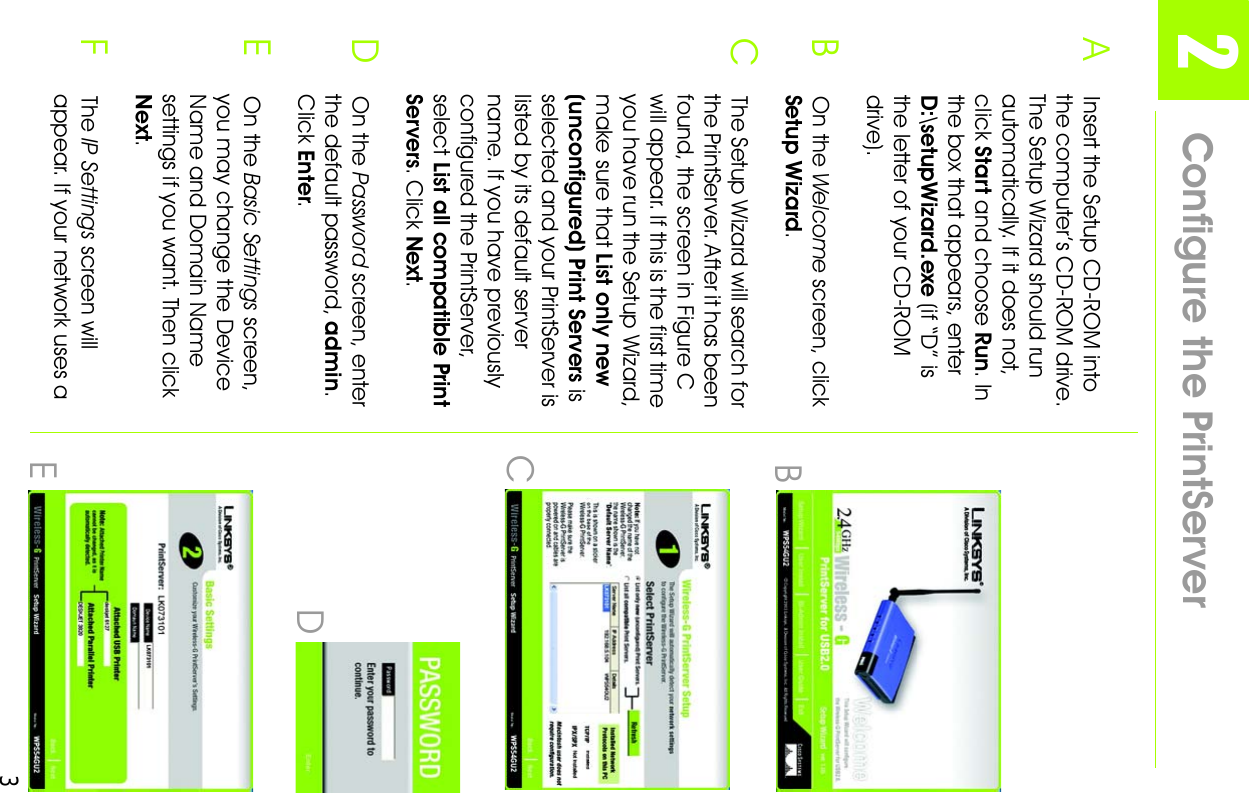
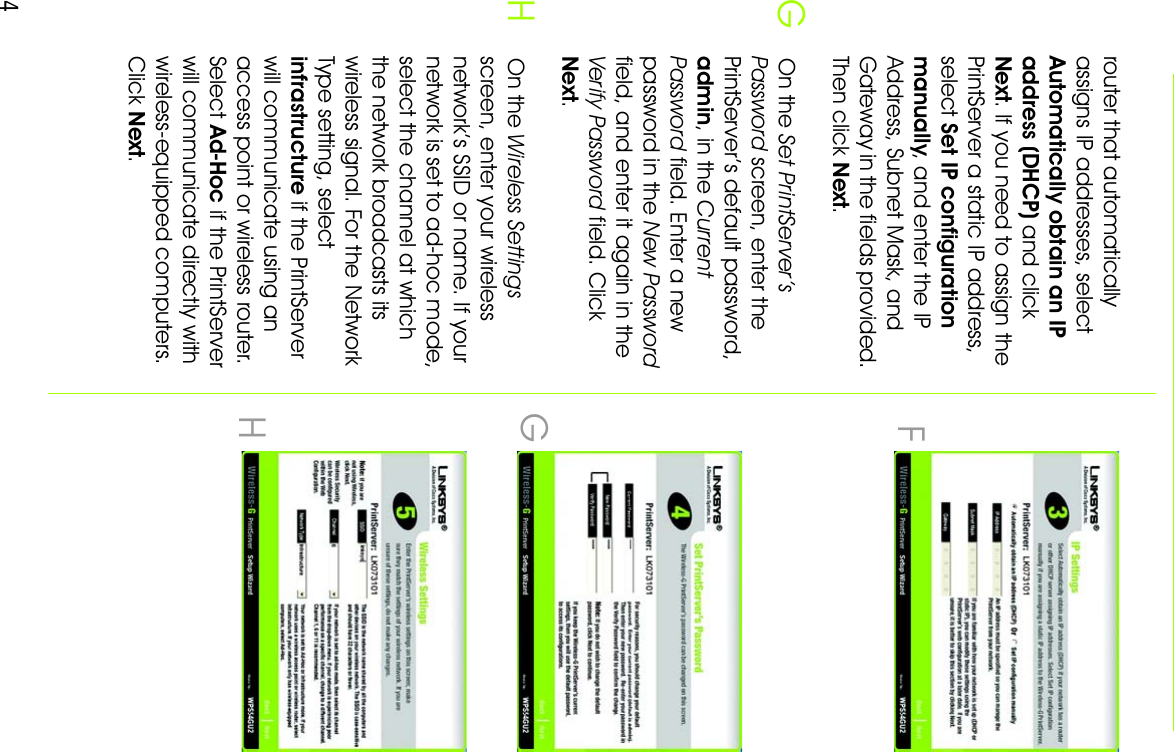

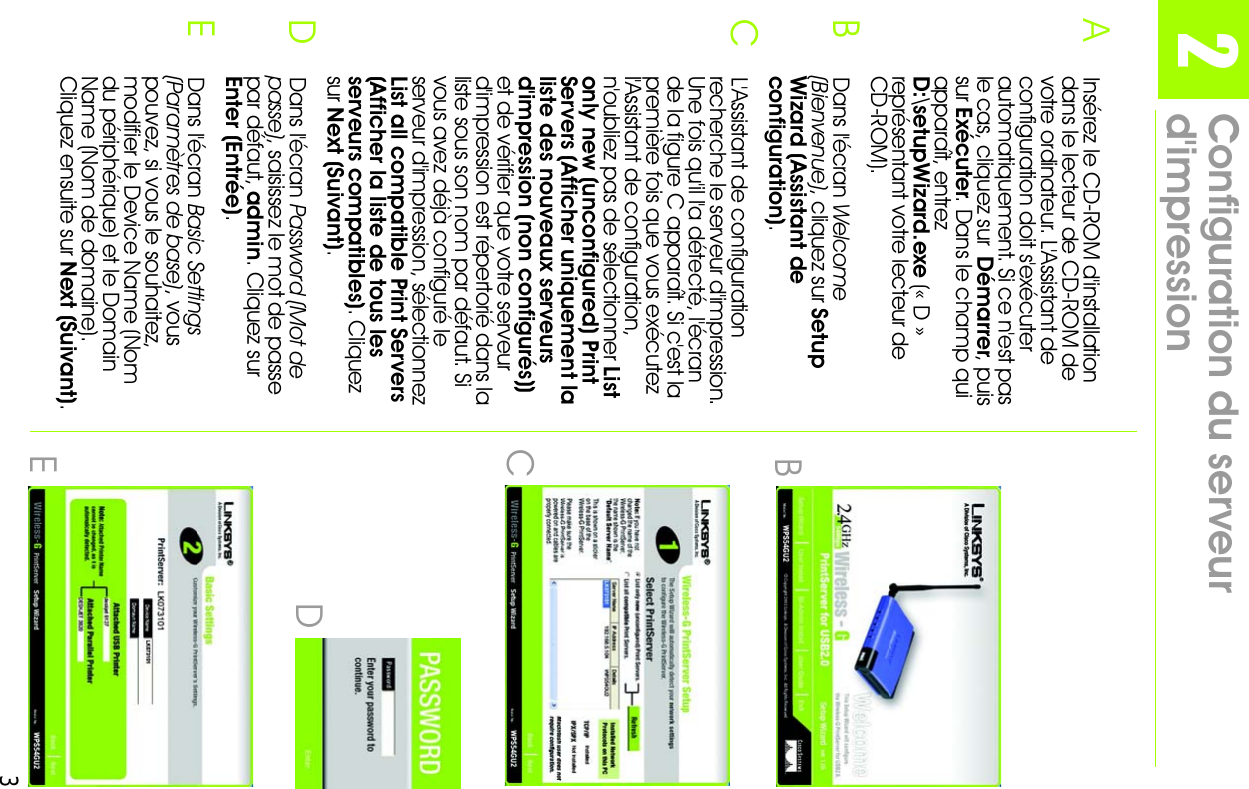
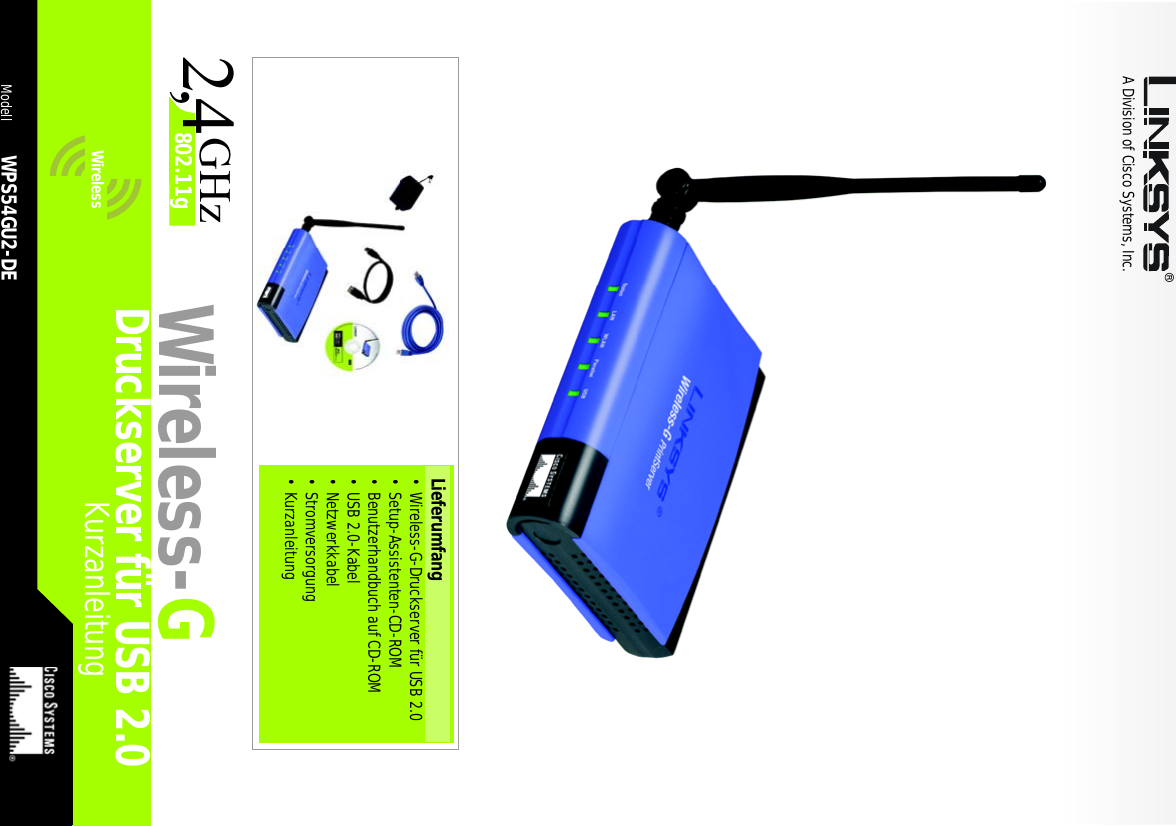

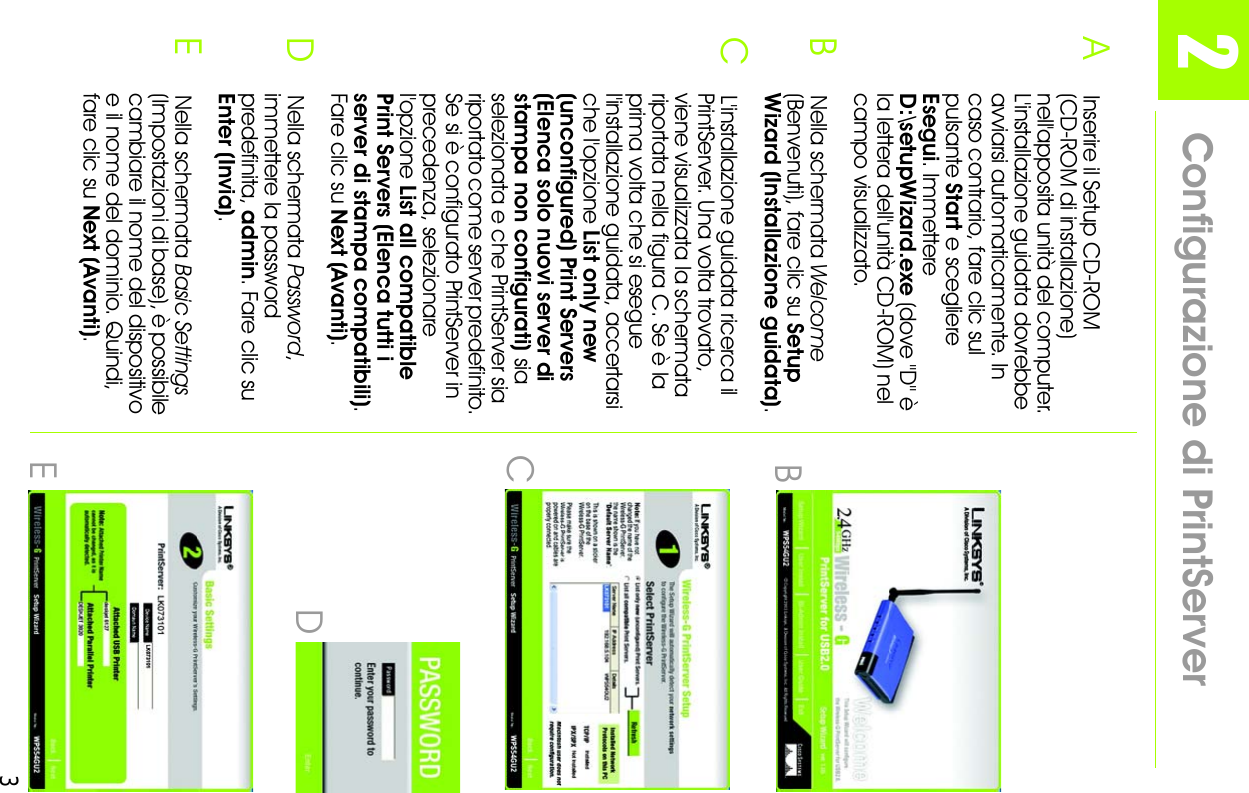
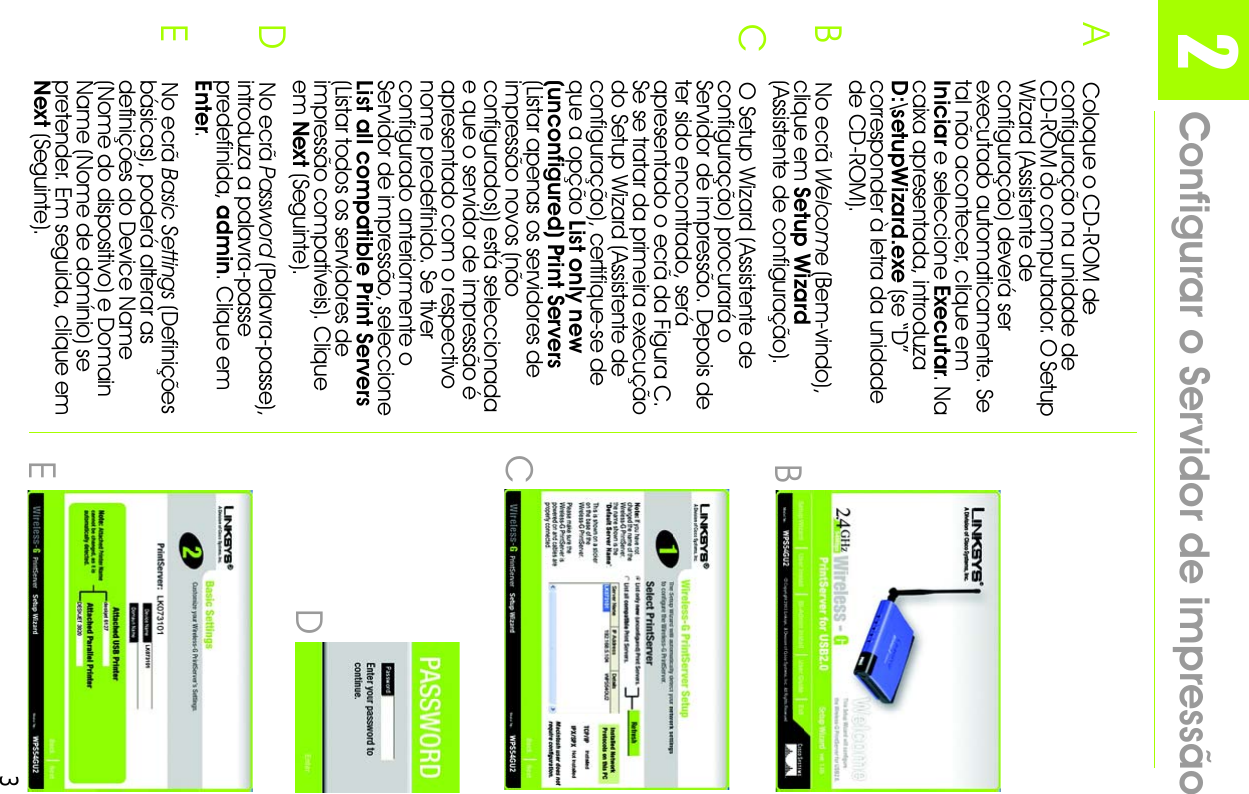
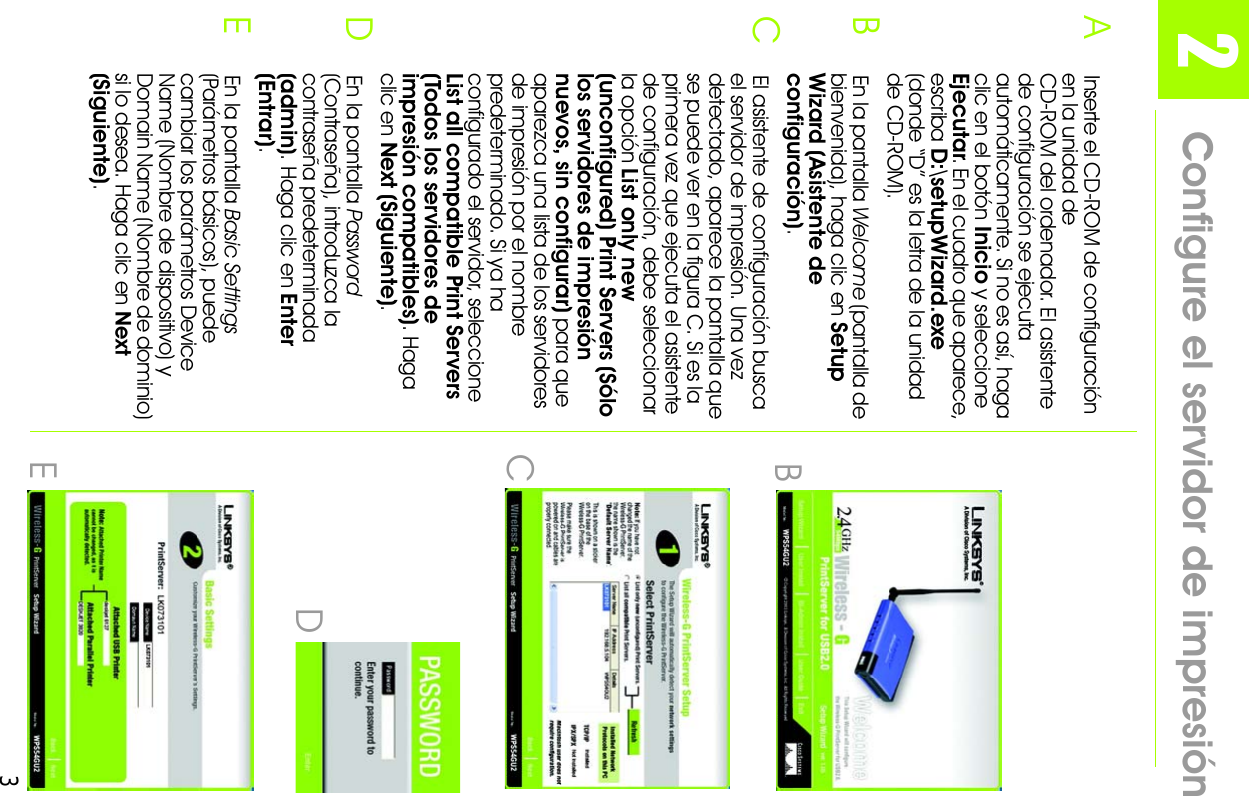
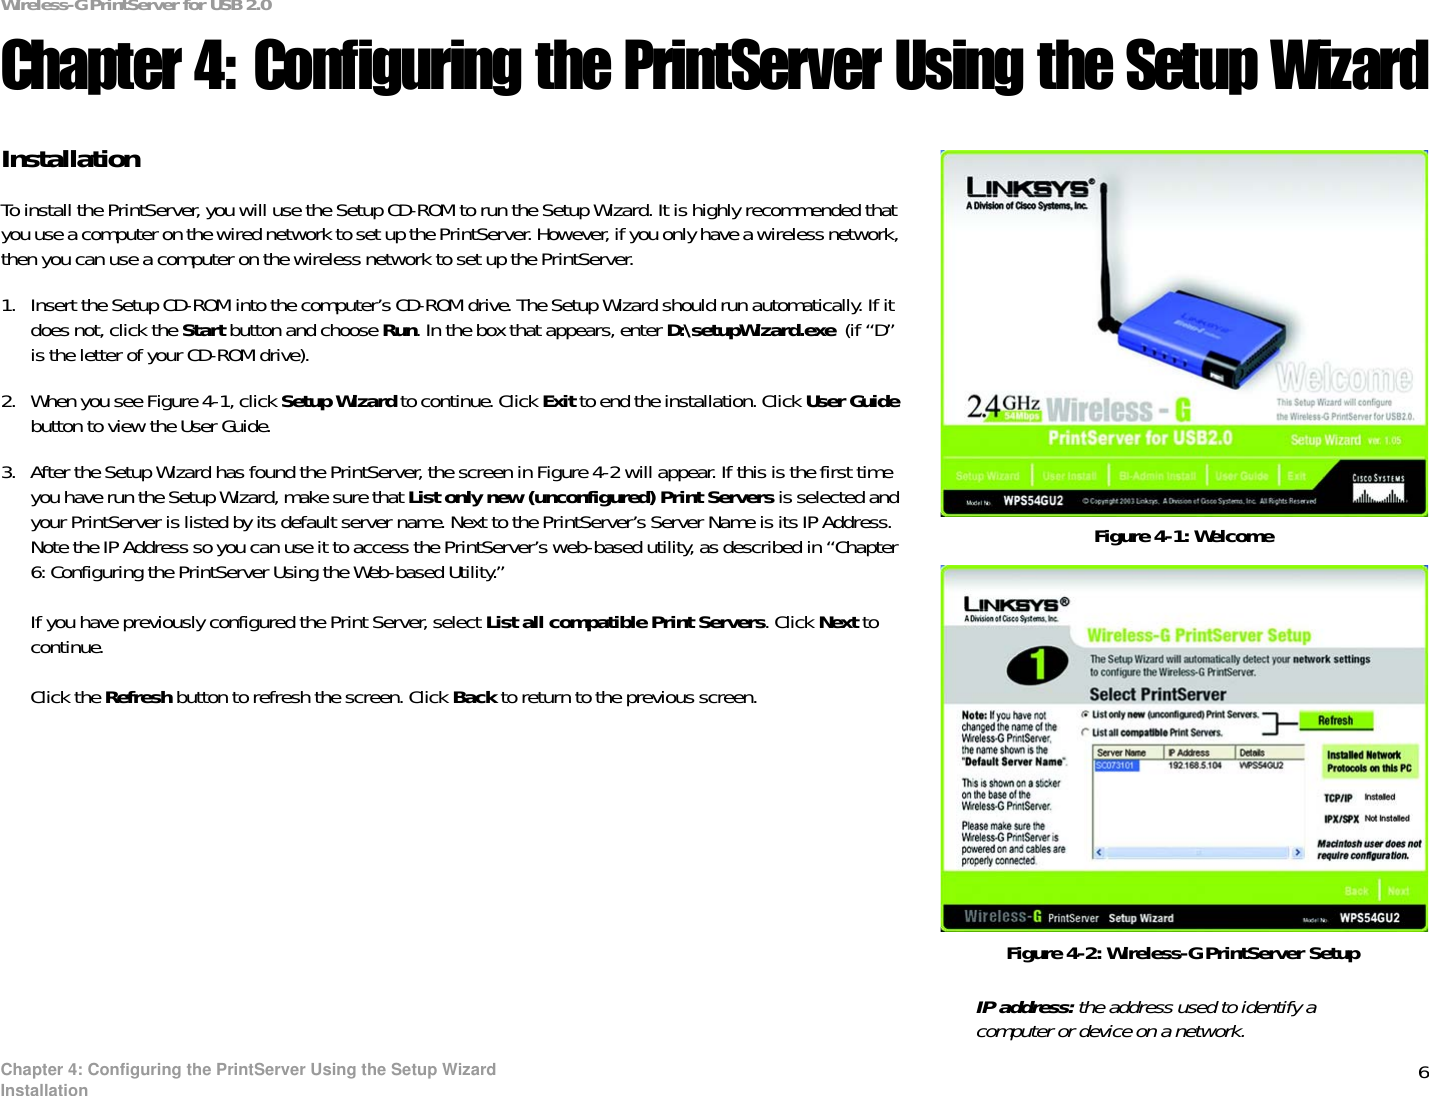
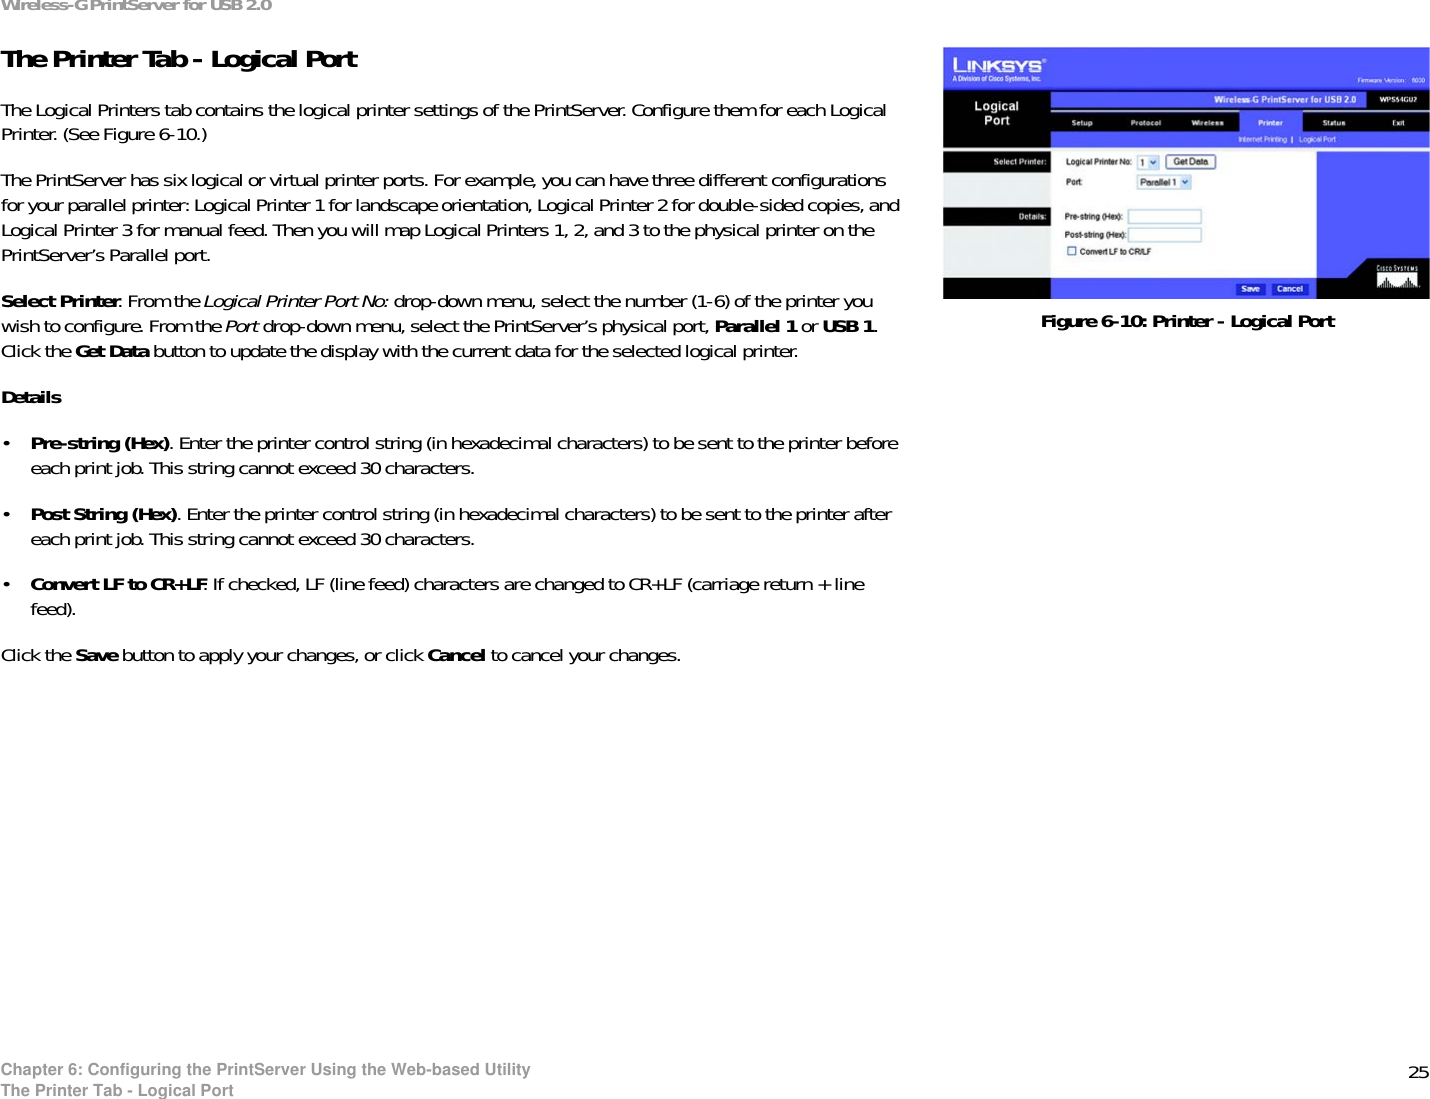
![32BKonfigurieren des DruckserversALegen Sie die Installations-CD-ROM in das CD-ROM-Laufwerk des Computers ein. Der Setup-Assistent sollte automatisch ausgeführt werden. Wenn dies nicht der Fall ist, klicken Sie auf Start und wählen Sie Ausführen aus. Geben Sie im angezeigten Feld D:\setupWizard.exe ein (wobei „D“ für den Buchstaben Ihres CD-ROM-Laufwerks steht).BKlicken Sie im Willkommensfensterauf den Setup Wizard (Setup-Assistenten).CDer Setup-Assistent sucht nach dem Druckserver. Wenn der Druckserver gefunden wurde, wird das in Abbildung C dargestellte Fenster angezeigt. Wenn Sie den Setup-Assistenten das erste Mal ausführen, stellen Sie sicher, dass die Option List only new (unconfigured) Print Servers [Nur neue (unkonfigurierte) Druckserver aufführen] ausgewählt und Ihr Druckserver unter seinem Standard-Servernamen aufgeführt ist. Wenn Sie den Druckserver bereits zuvor konfiguriert haben, wählen Sie die Option List all compatible Print Servers (Alle kompatiblen Druckserver aufführen) aus. Klicken Sie auf Next (Weiter).DGeben Sie im Fenster Password(Kennwort) das Standard-Kennwort admin ein. Klicken Sie auf Enter(Eingabe).EIm Fenster Basic Settings(Grundlegende Einstellungen) können Sie gegebenenfalls die Einstellungen für den Geräte- und den Domänennamen ändern. Klicken Sie anschließend auf Next (Weiter).CDE](https://usermanual.wiki/LINKSYS/WPS54GU2/User-Guide-389210-Page-19.png)
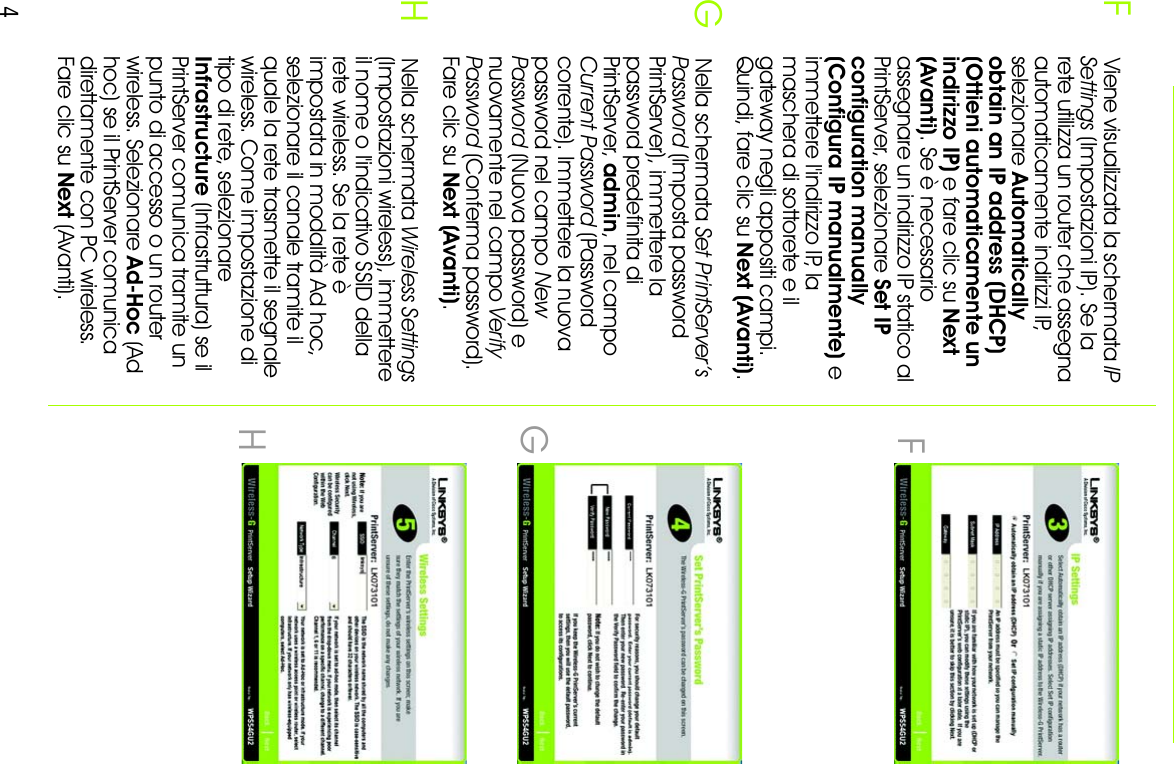
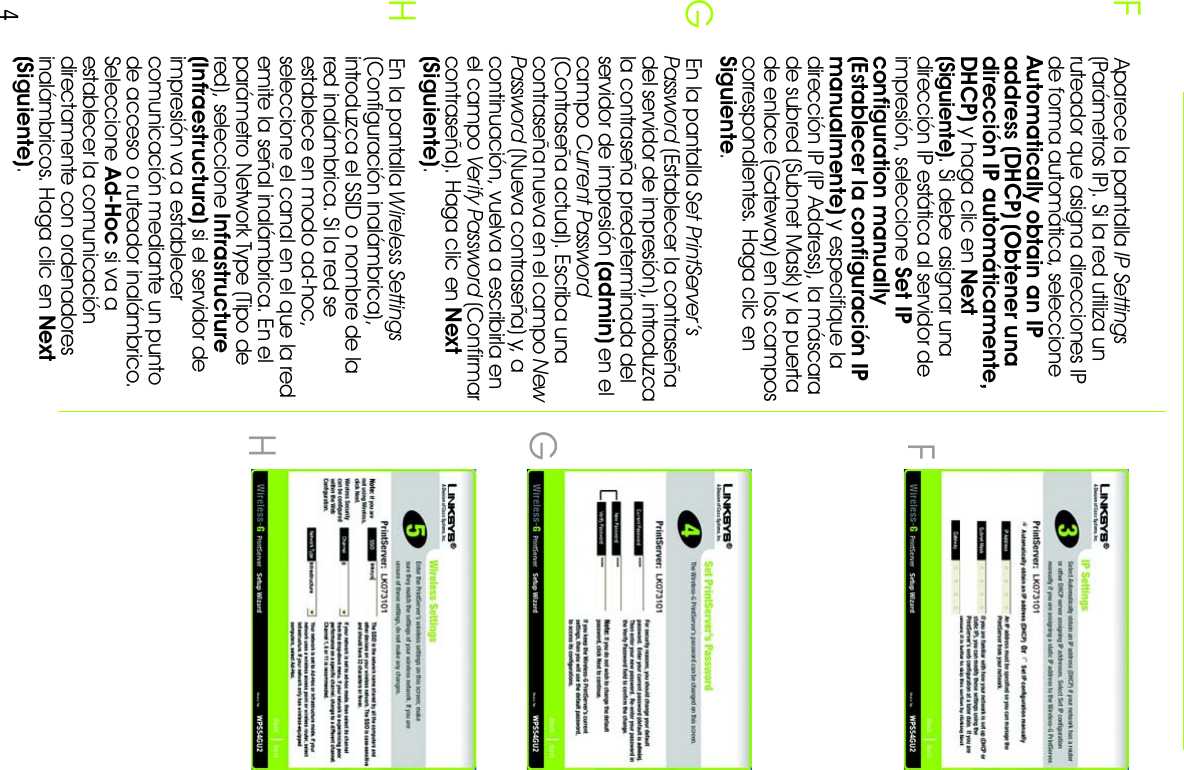
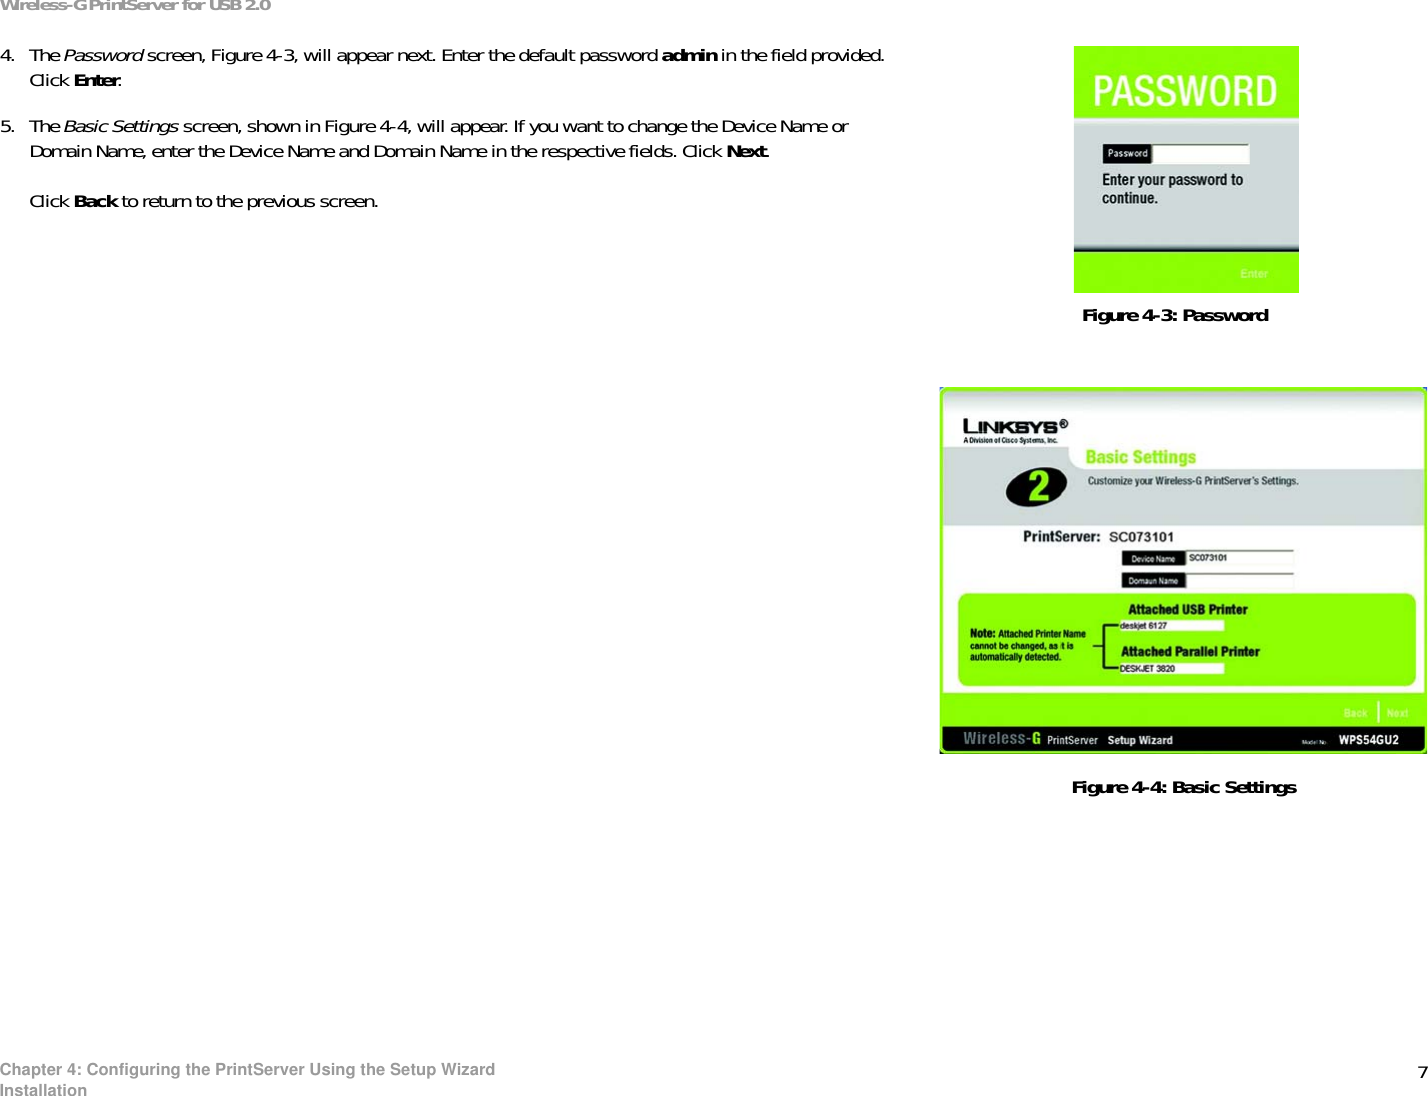
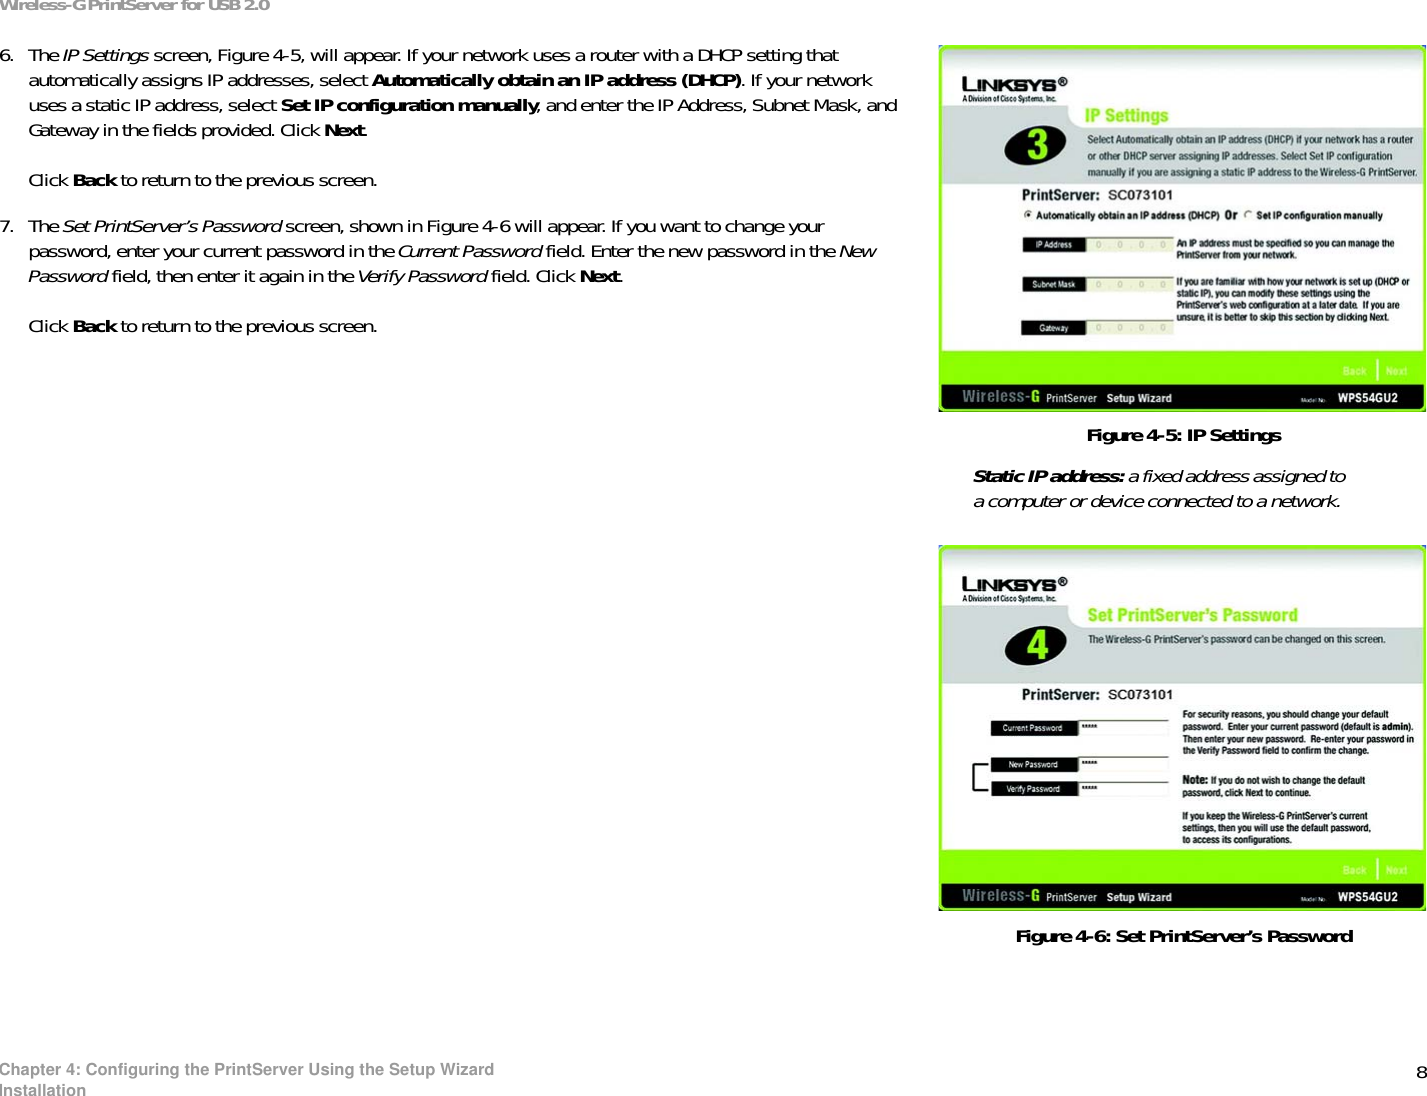
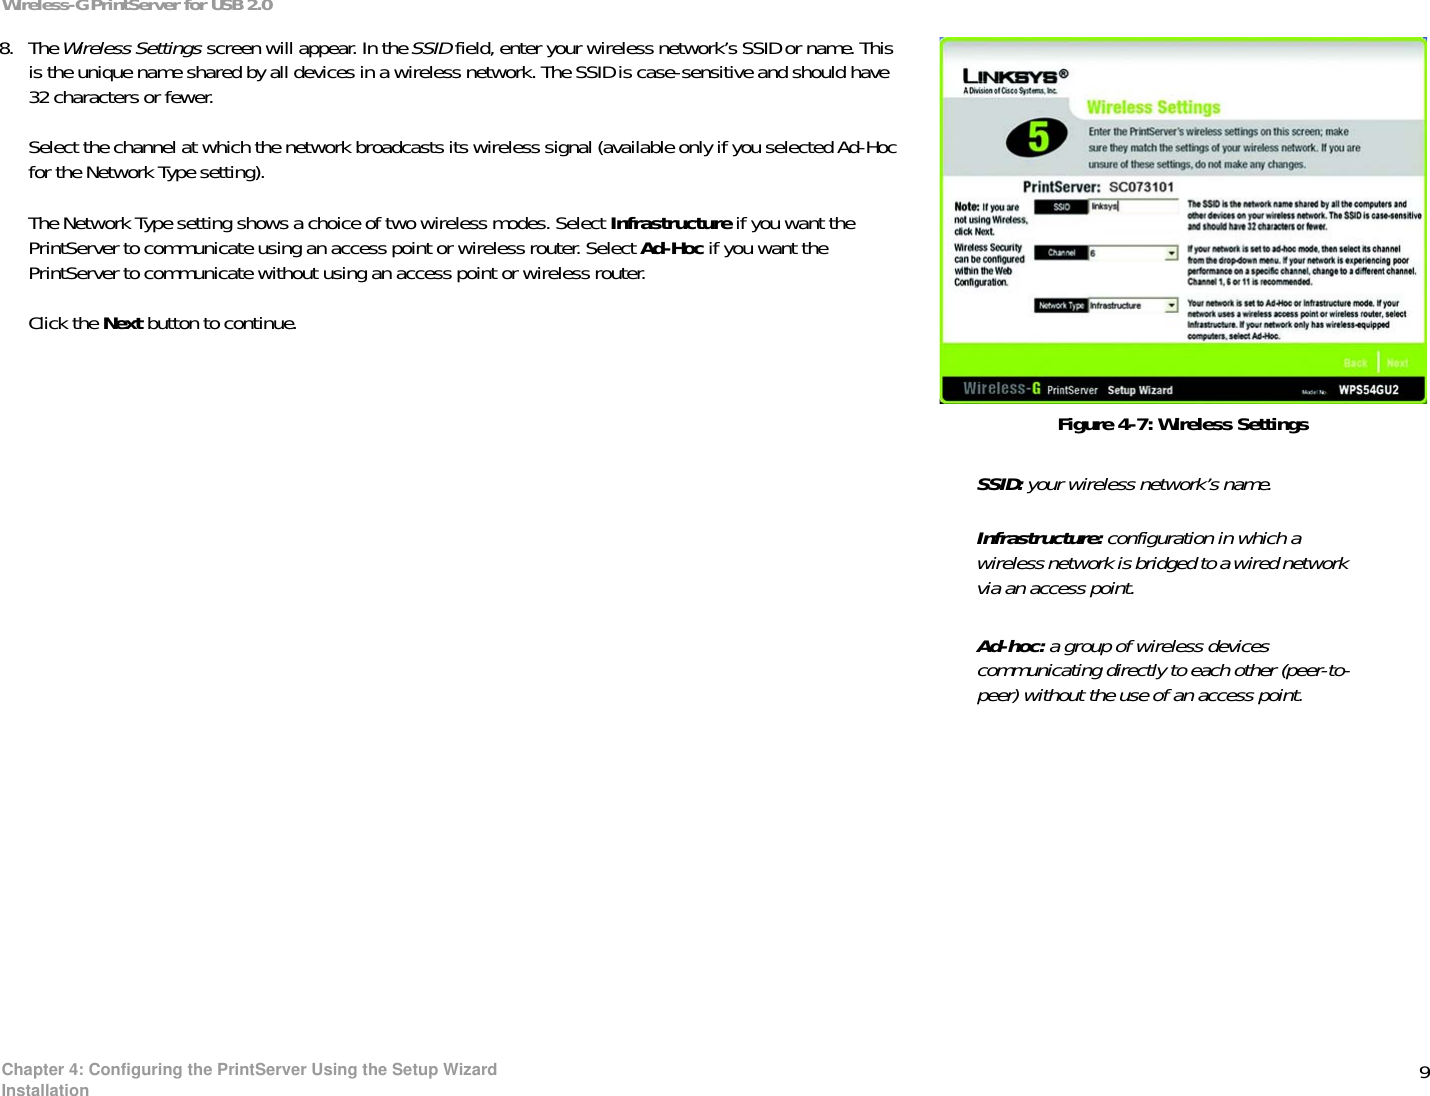
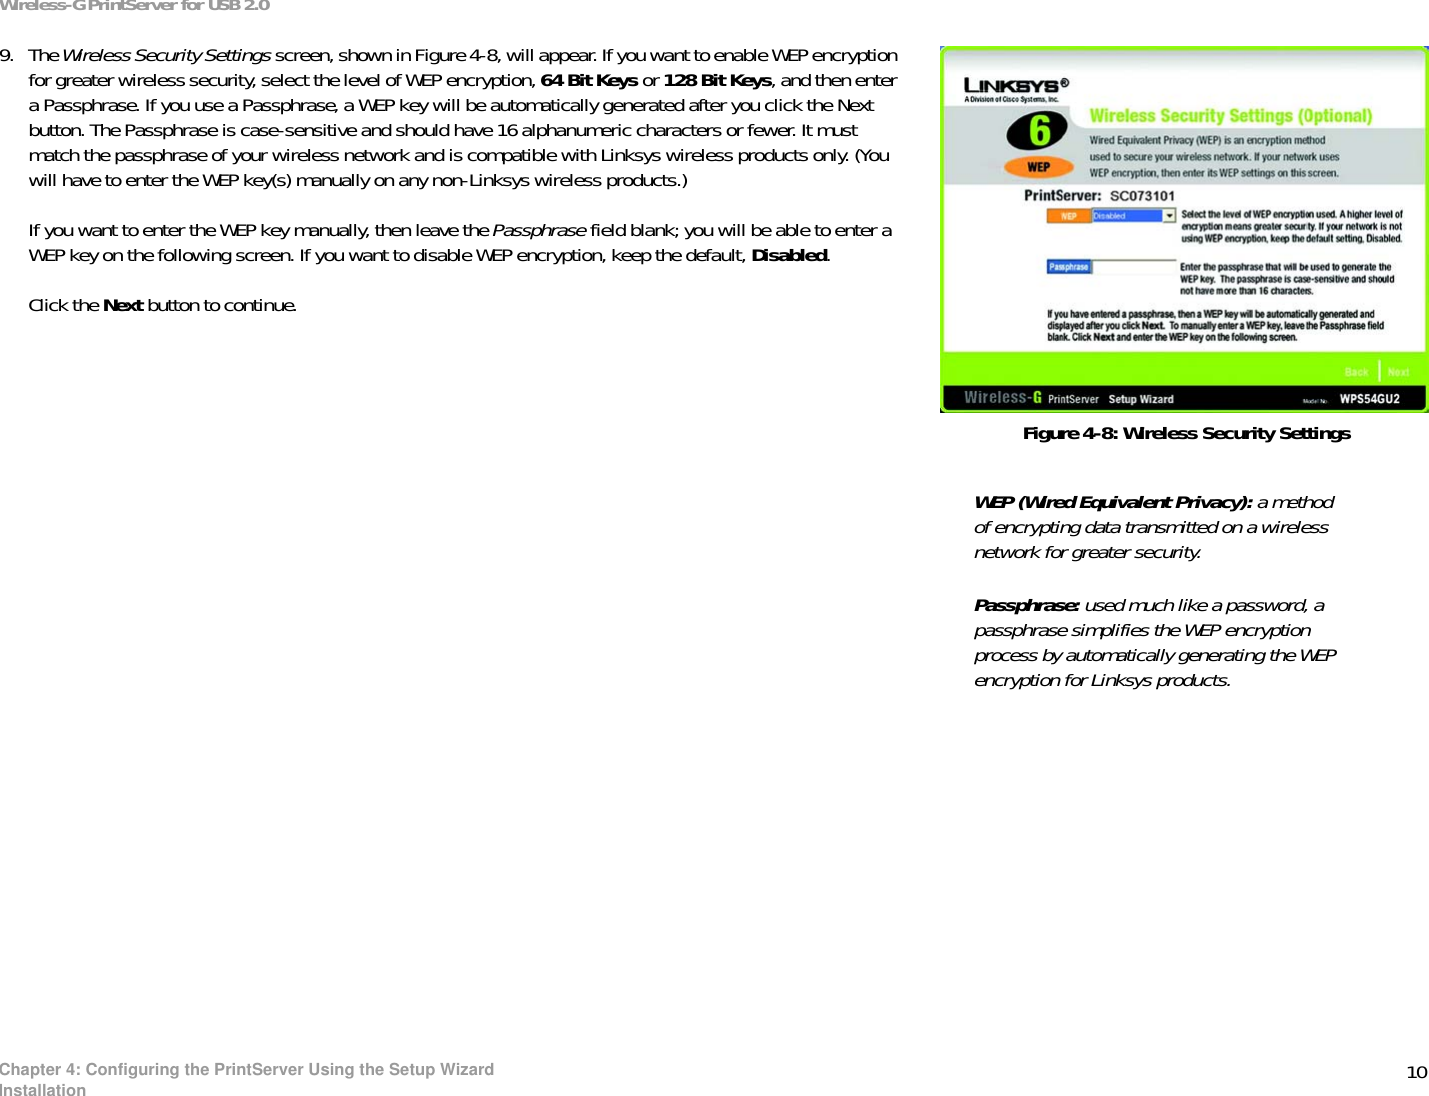
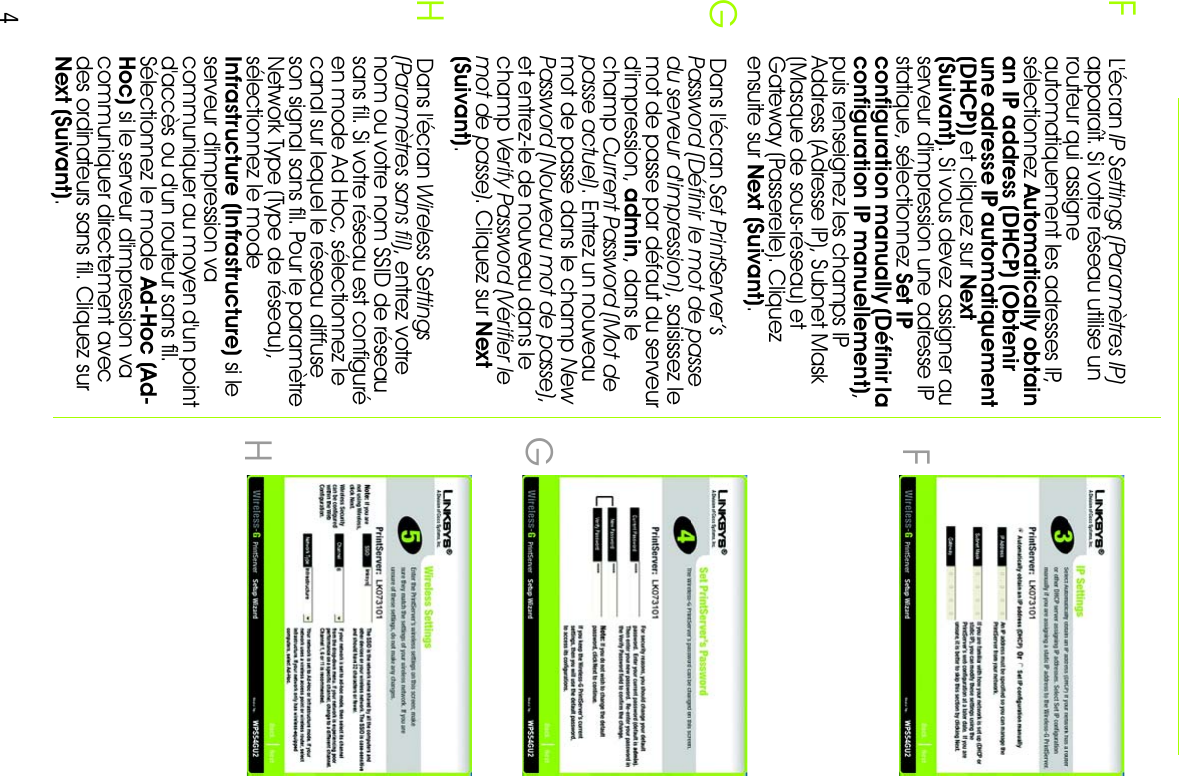
![4FDas Fenster IP Settings (IP-Einstellungen) wird angezeigt. Wenn Ihr Netzwerk einen Router verwendet, der automatisch IP-Adressen zuweist, wählen Sie die Option Automaticallyobtain an IP address (DHCP)[IP-Adresse (DHCP) automatisch beziehen] aus und klicken Sie auf Next (Weiter). Wenn Sie dem Druckserver eine statische IP-Adresse zuweisen müssen, wählen Sie die Option Set IP configuration manually (IP-Konfiguration manuell einrichten) aus und geben Sie dann in die vorgesehenen Felder dieIP-Adresse, die Subnetzmaske und das Gateway ein. Klicken Sie anschließend auf Next (Weiter).GGeben Sie im Fenster Set PrintServer’s Password (Druckserver-Kennwort festlegen) das standardmäßige Druckserver-Kennwort admin in das Feld Current Password (Aktuelles Kennwort) ein. Geben Sie ein neues Kennwort in das Feld New Password(Neues Kennwort) und nochmals in das Feld Verify Password (Kennwort bestätigen) ein. Klicken Sie auf Next (Weiter).HGeben Sie im Fenster Wireless Settings (Wireless-Einstellungen) die SSID oder den Namen Ihres drahtlosen Netzwerks ein. Wenn der Ad-Hoc-Modus für Ihr Netzwerk eingestellt ist, wählen Sie den Kanal aus, über den das drahtlose Netzwerksignal gesendet wird. Wählen Sie als Netzwerk-typeinstellung Infrastructure (Infrastruktur) aus, wenn der Druckserver über einen Zugriffspunkt oder drahtlosen Router kommunizieren soll. Wählen SieAd-Hoc (Ad-Hoc) aus, wenn der Druckserver direkt mit drahtlosen Computern kommunizieren soll. Klicken Sie auf Next (Weiter).GFH](https://usermanual.wiki/LINKSYS/WPS54GU2/User-Guide-389210-Page-20.png)