LINKSYS WRTU54GV2 Wireless-G Broadband Router with two phone port User Manual WRTU54G TM User Guide
LINKSYS LLC Wireless-G Broadband Router with two phone port WRTU54G TM User Guide
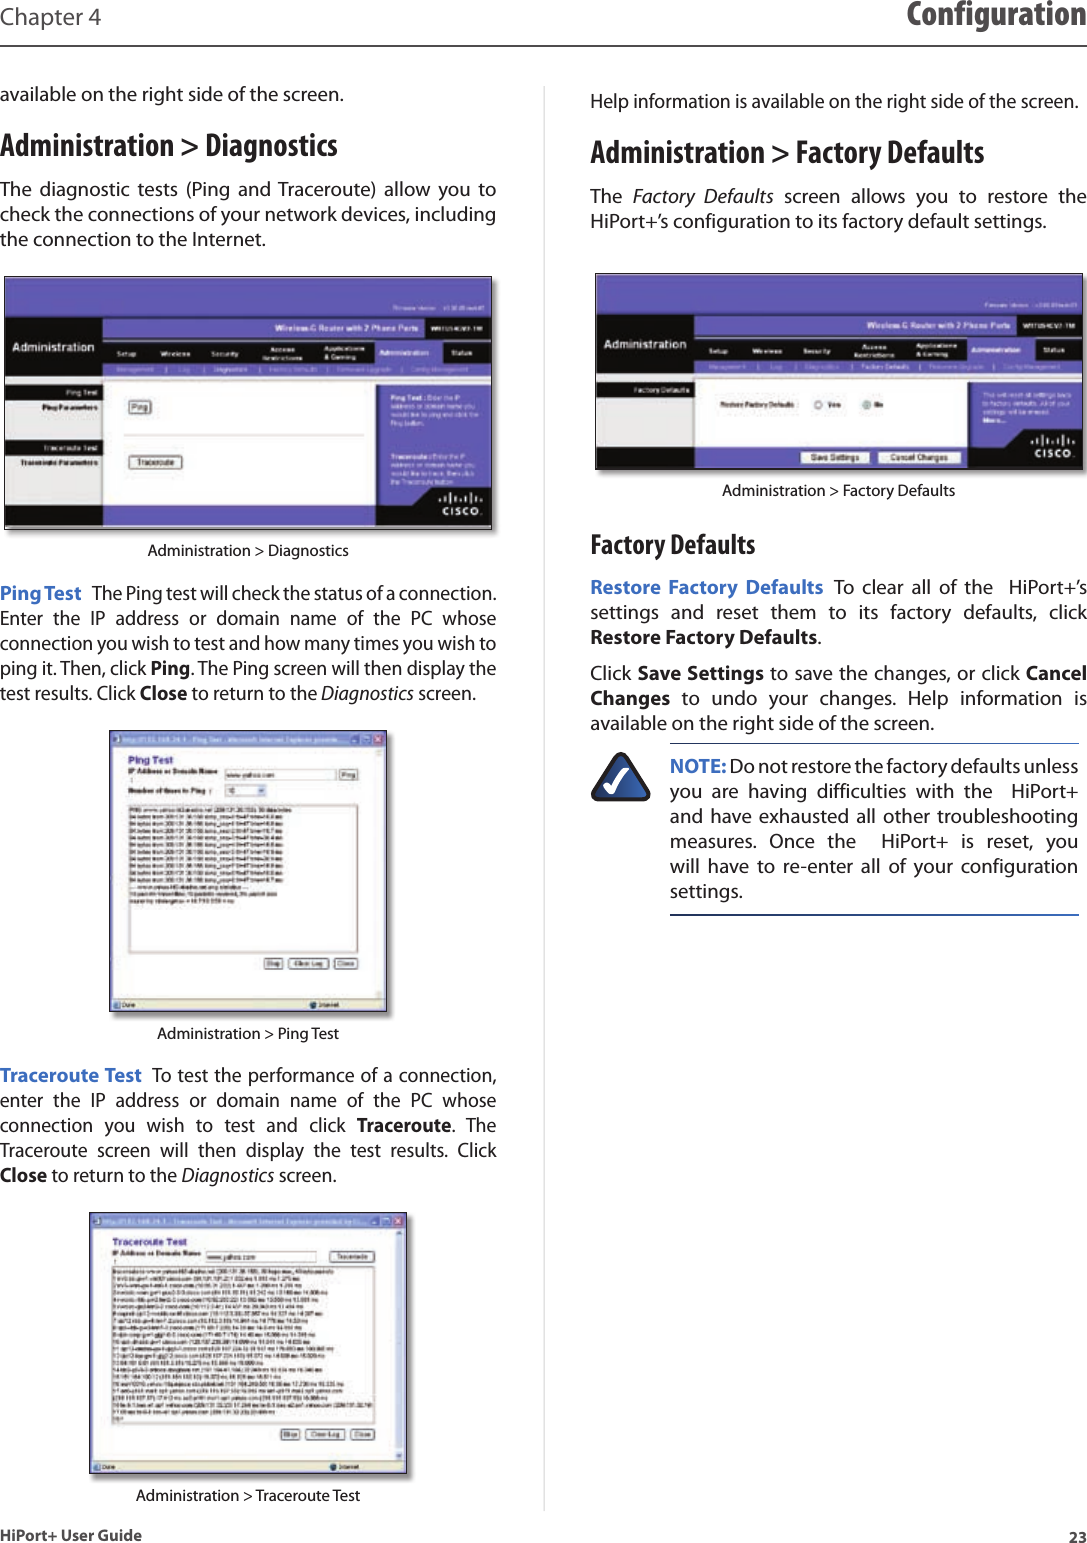
LINKSYS >
Contents
- 1. Manual Part 1
- 2. Manual Part 2
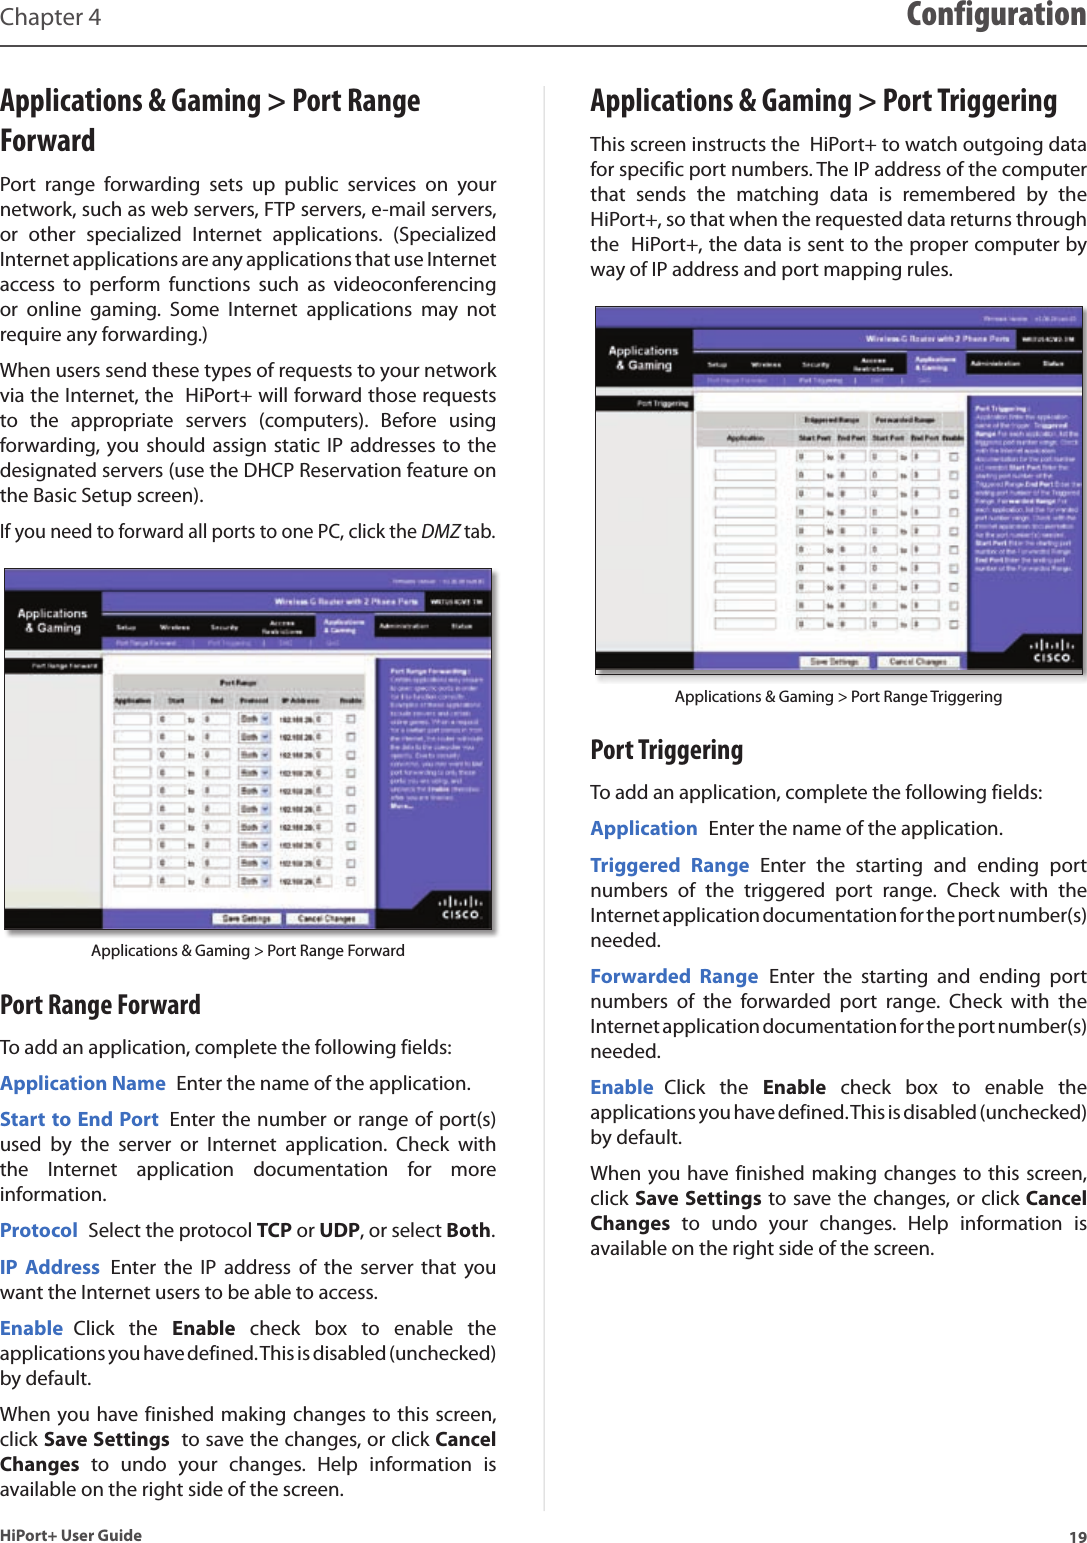
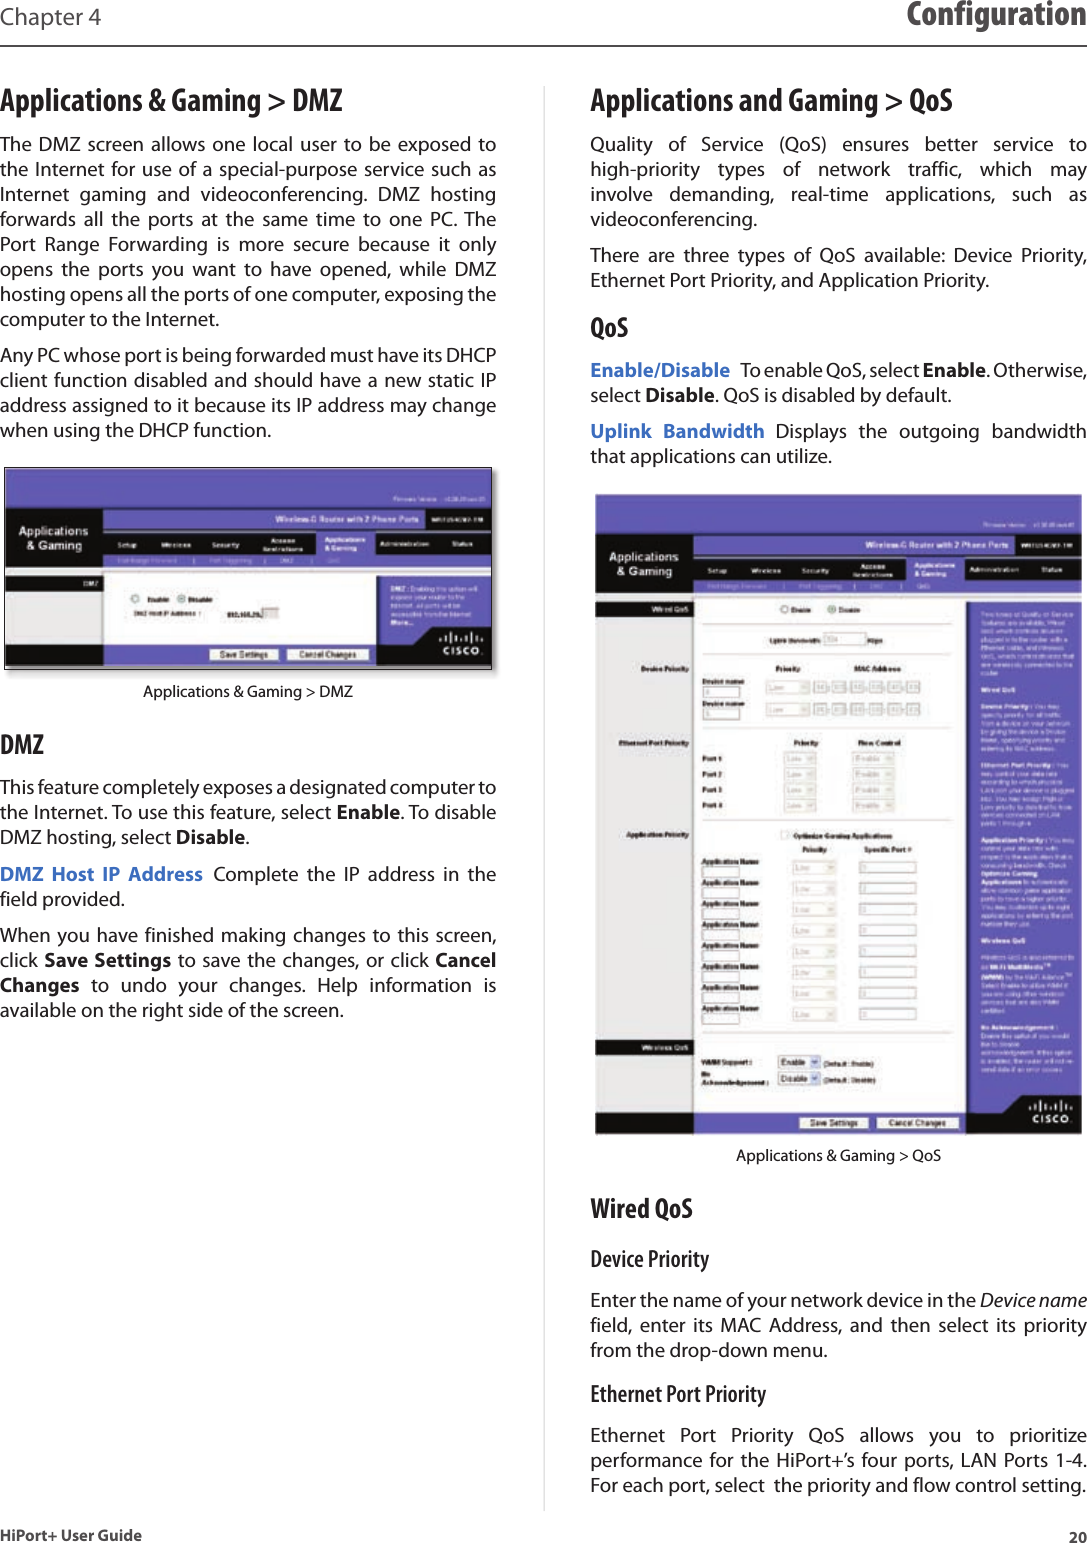
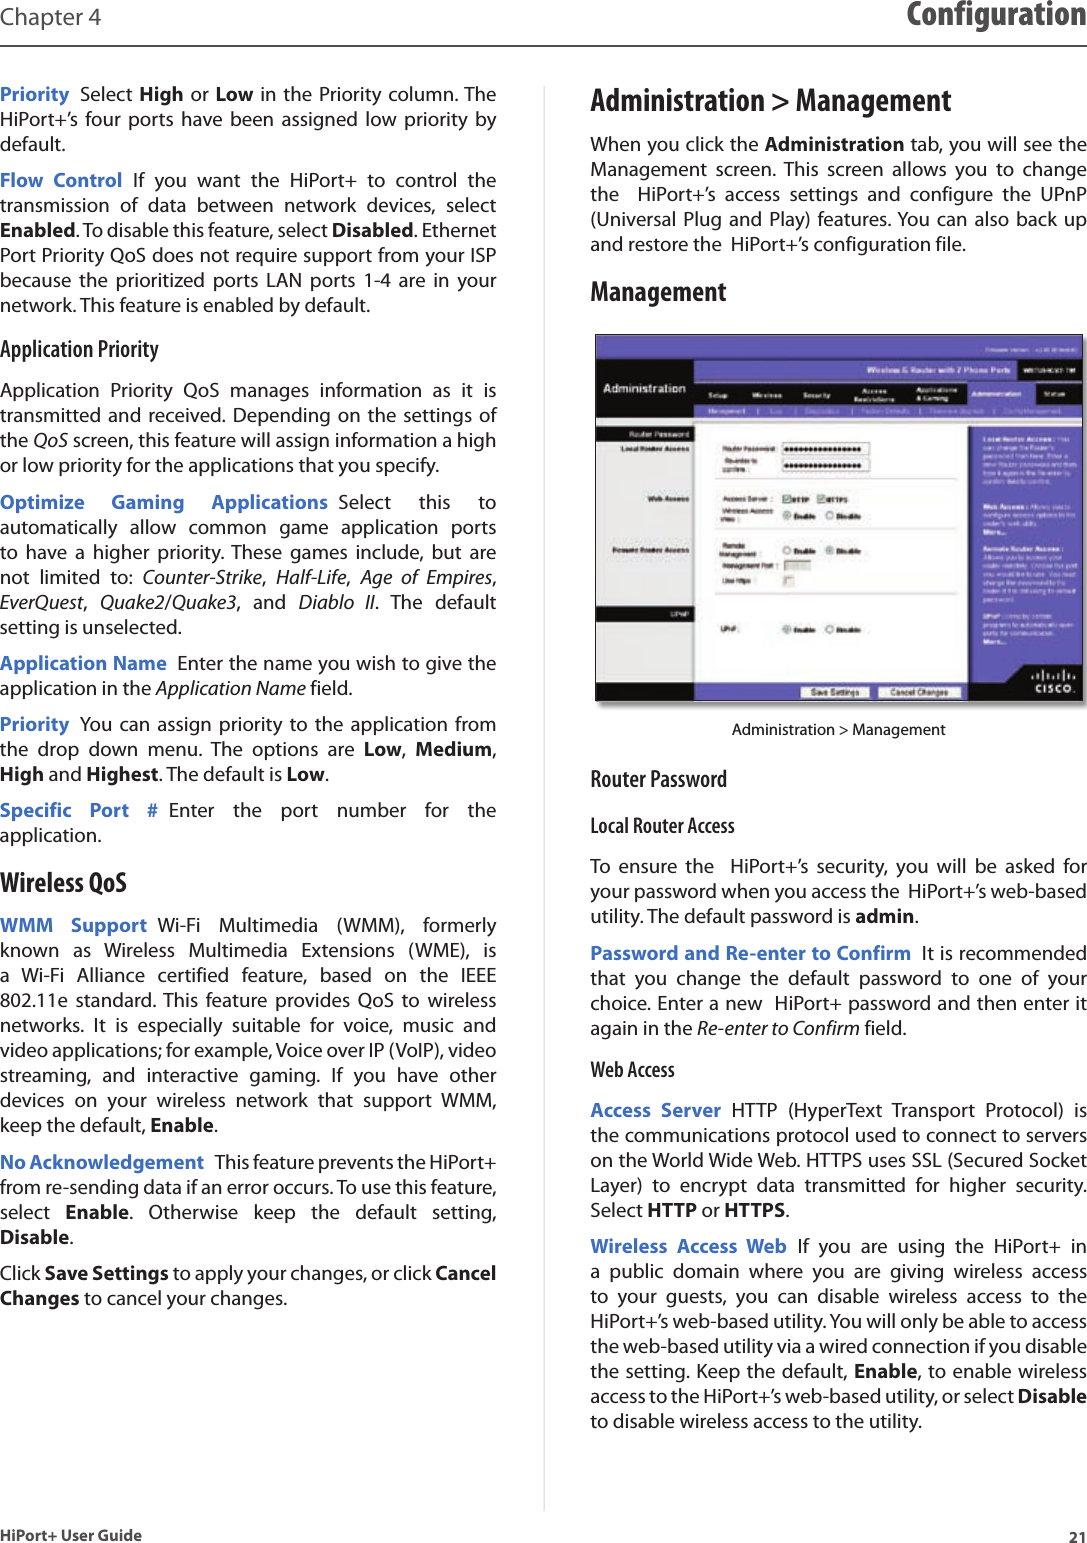
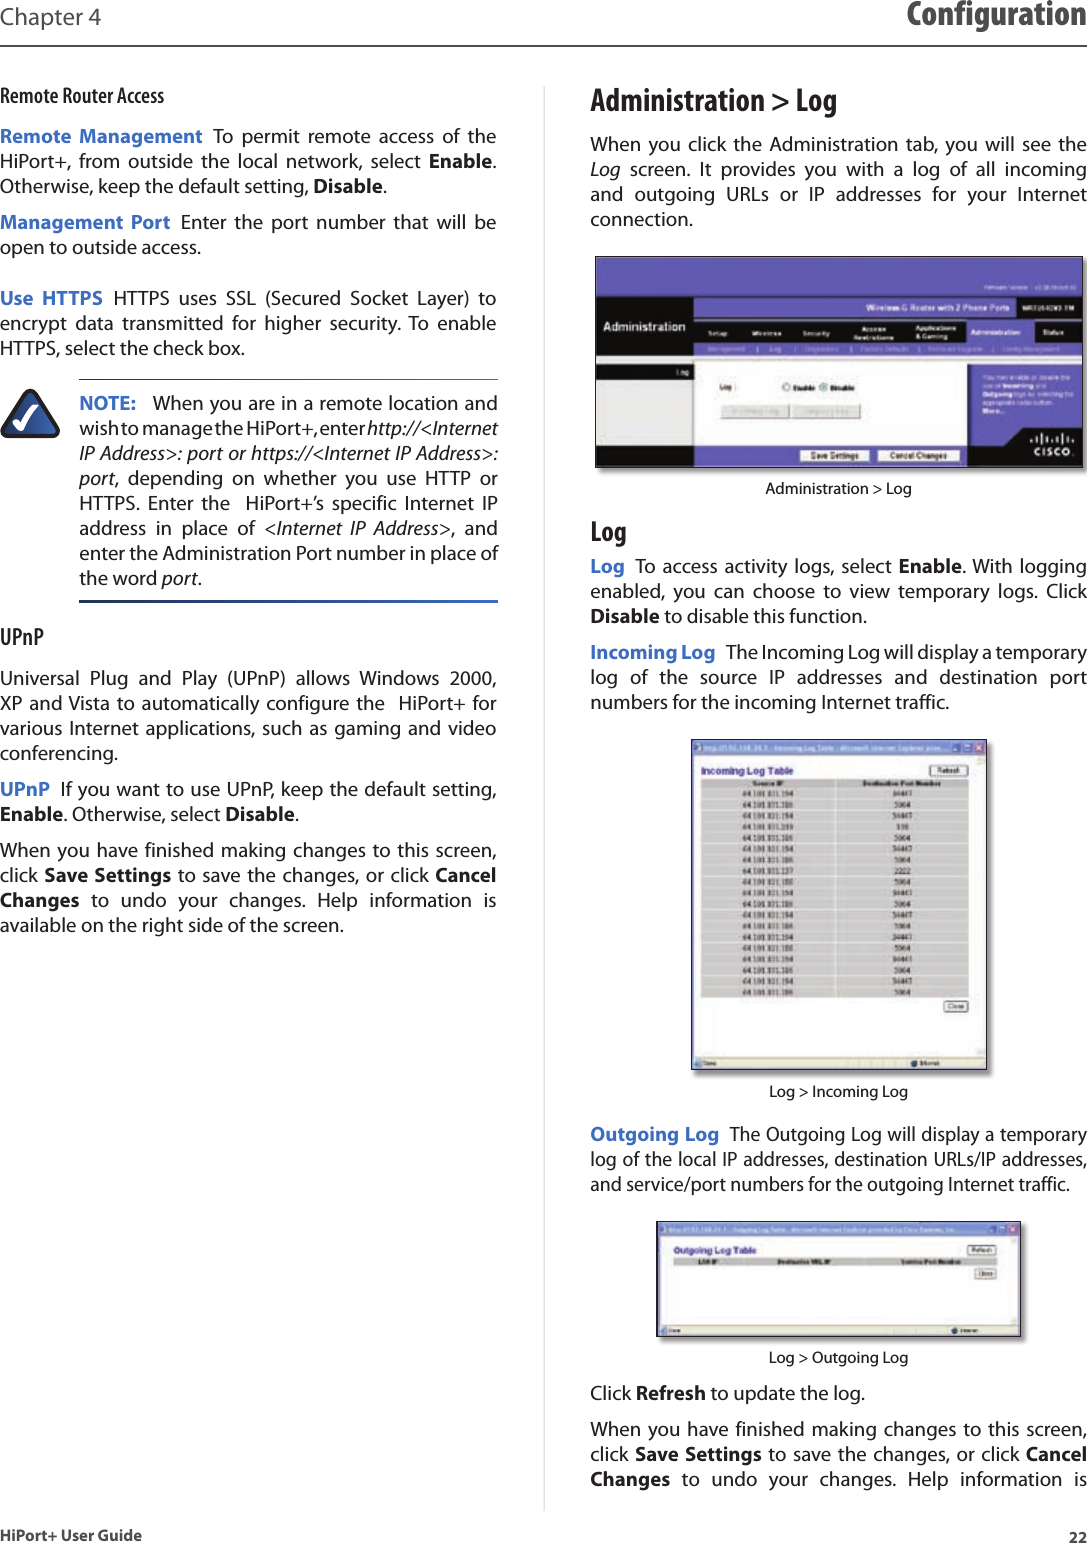
Manual Part 1