LINKSYS WU54GPV4 Wireless-G Portable USB Adapter User Manual Book
LINKSYS LLC Wireless-G Portable USB Adapter Book
UserManual.wiki
>
LINKSYS
>
WU54GPV4 User Manual
>
Users Manual Revised
Contents
1.
DoC
2.
Users Manual Revised
Users Manual Revised
Navigation menu
Upload a User Manual
Namespaces
Wiki Guide
HTML
PDF
Info
Views
User Manual
Discussion / Help
Navigation


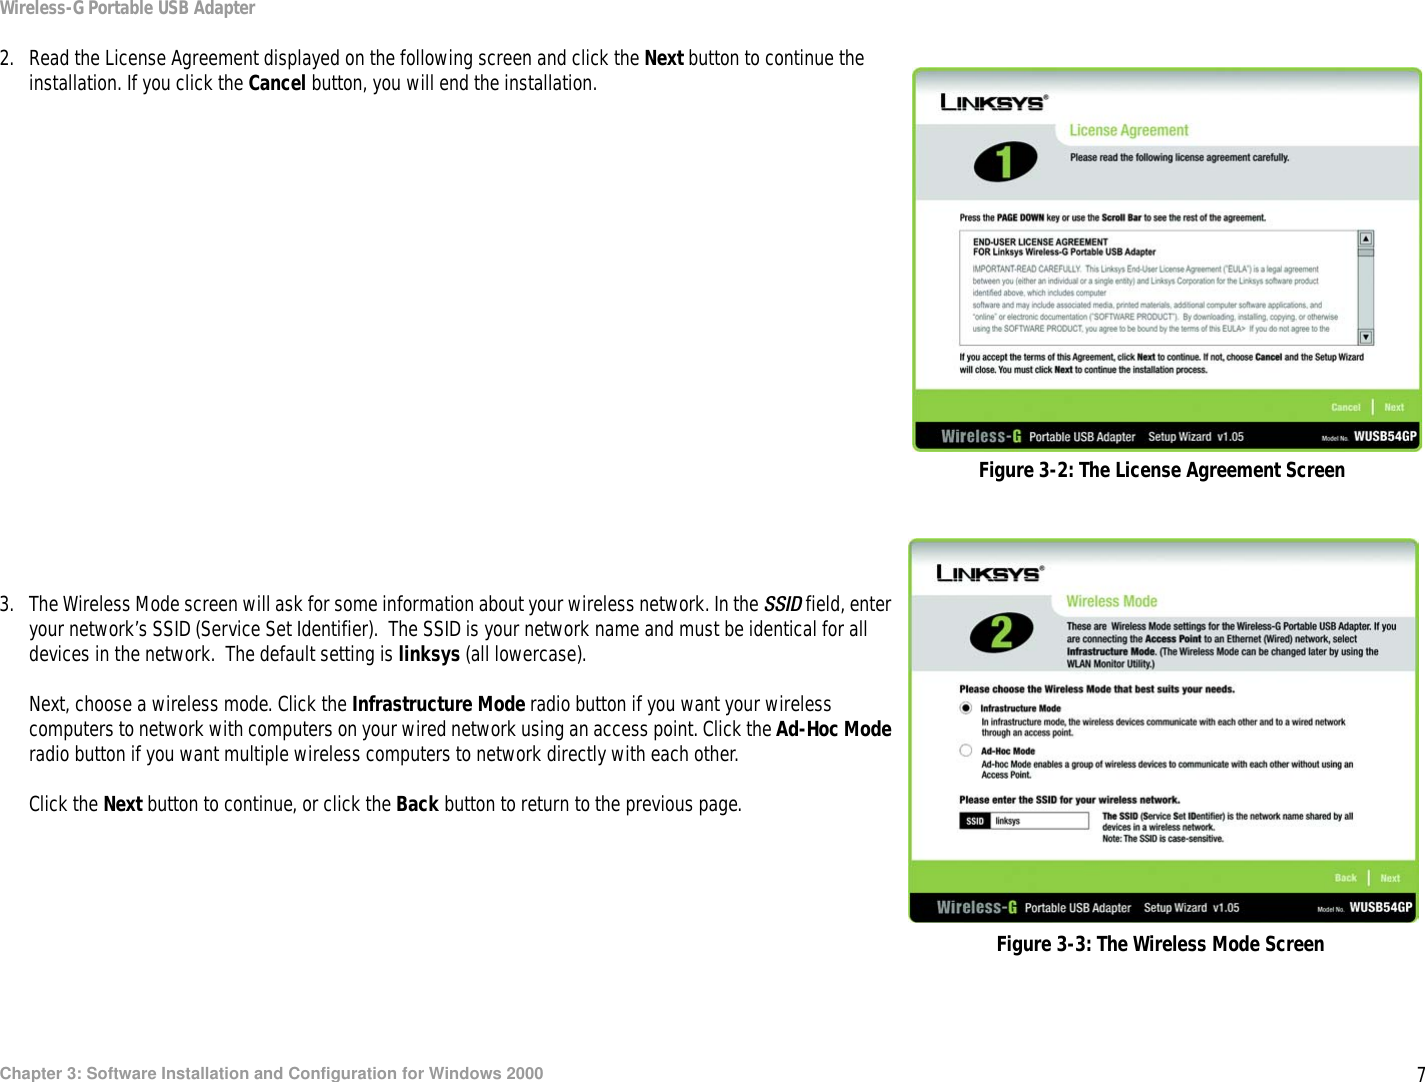
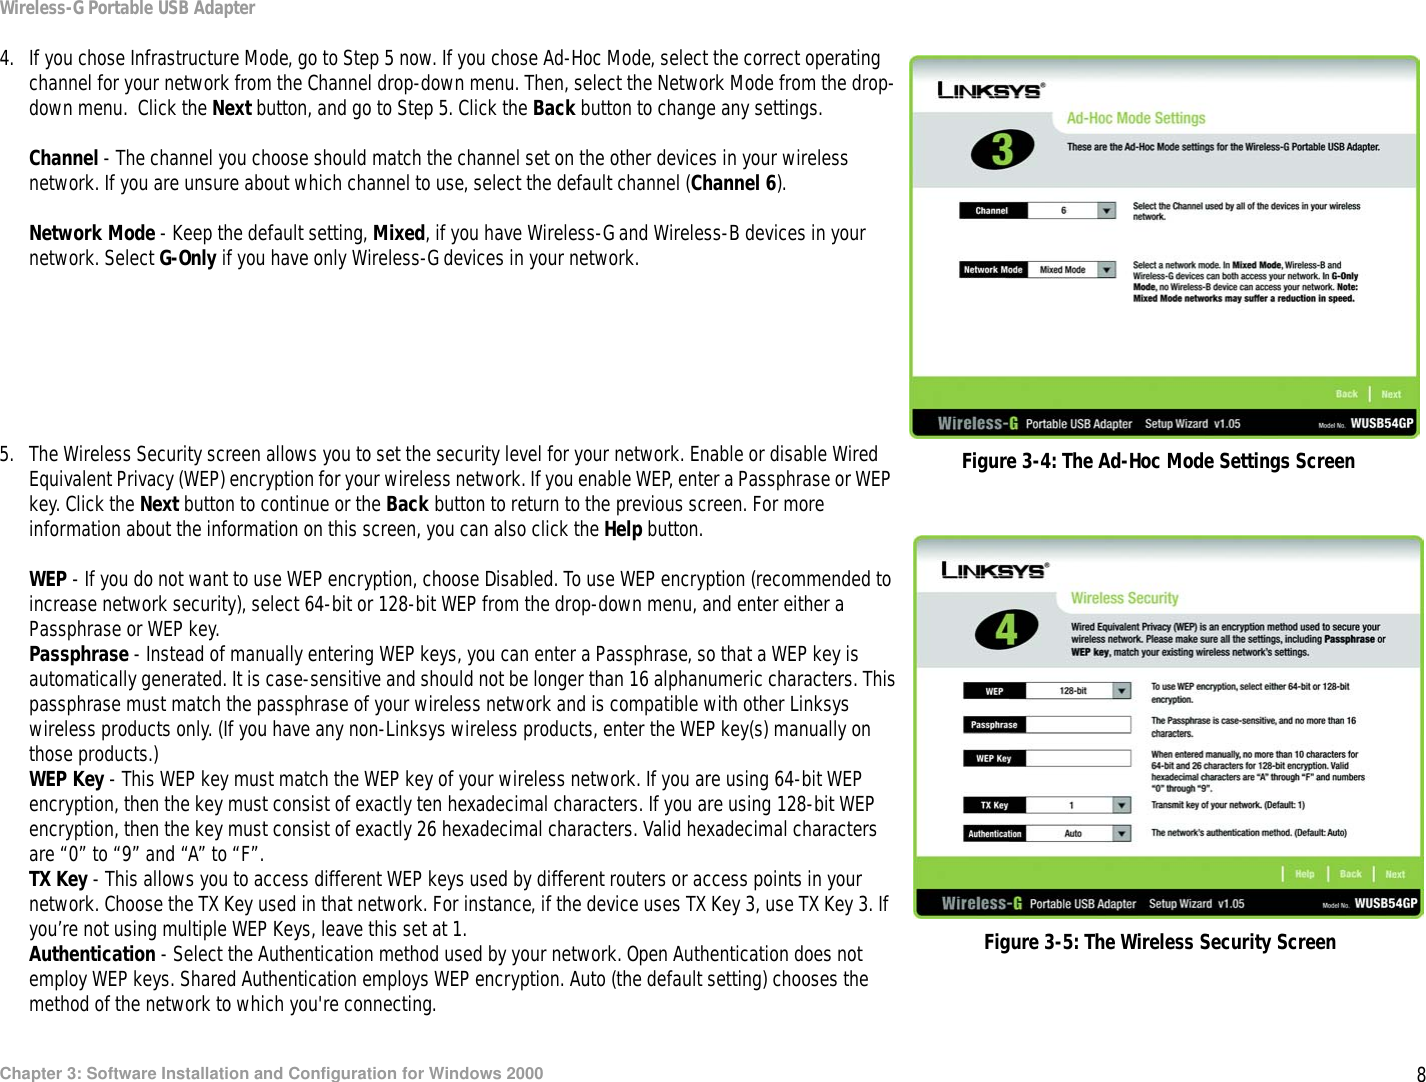
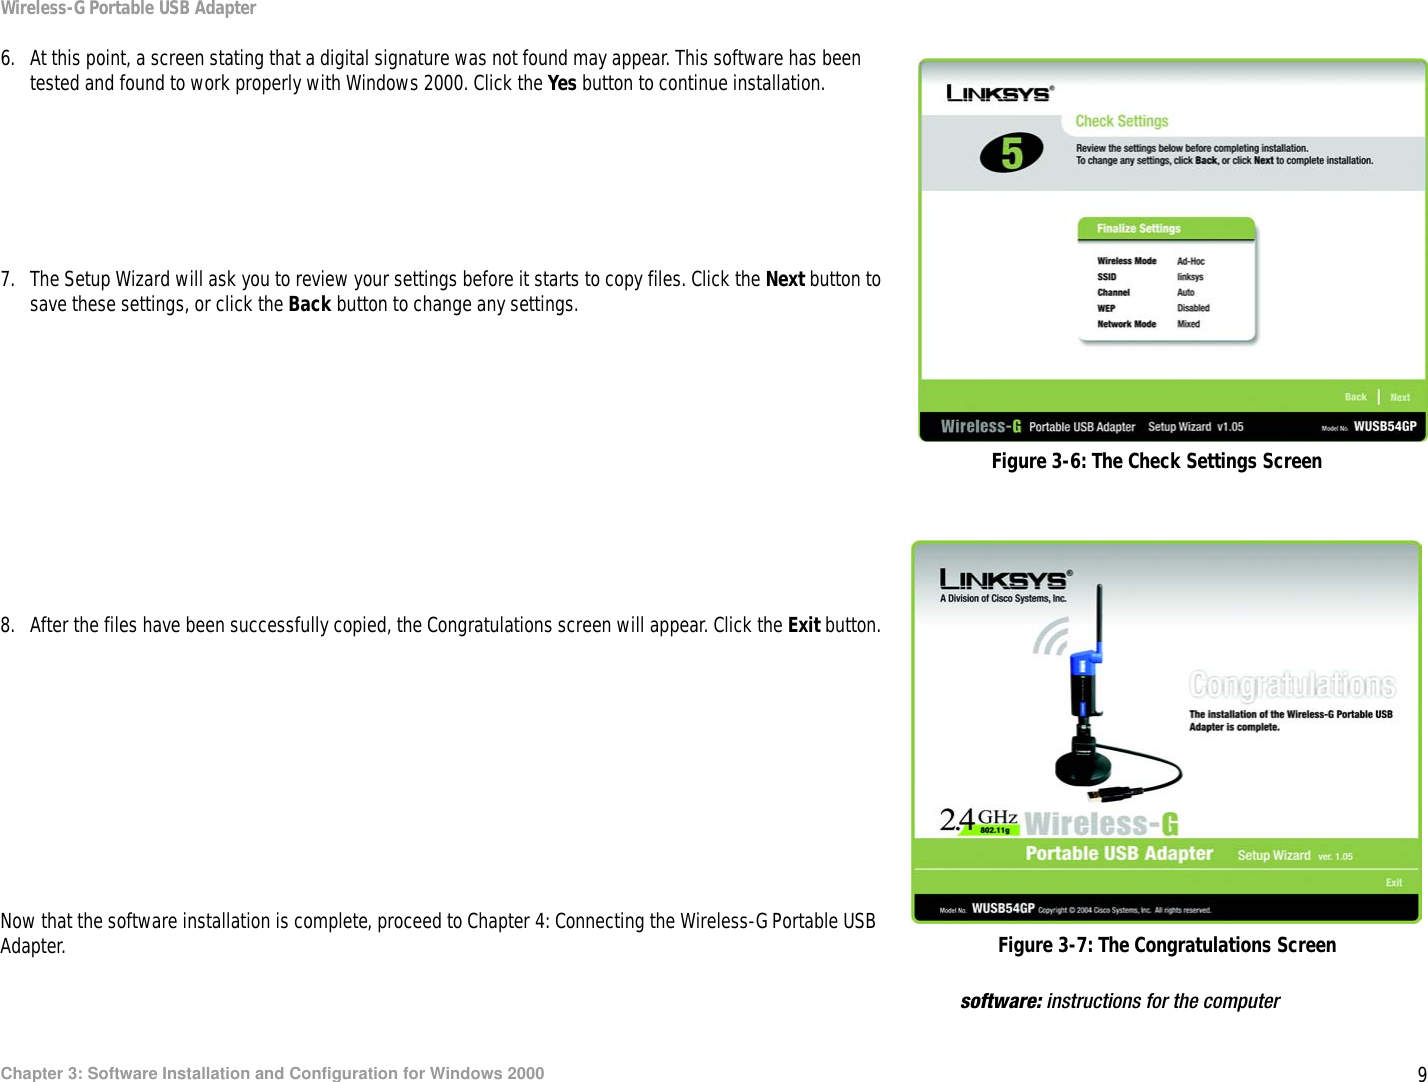
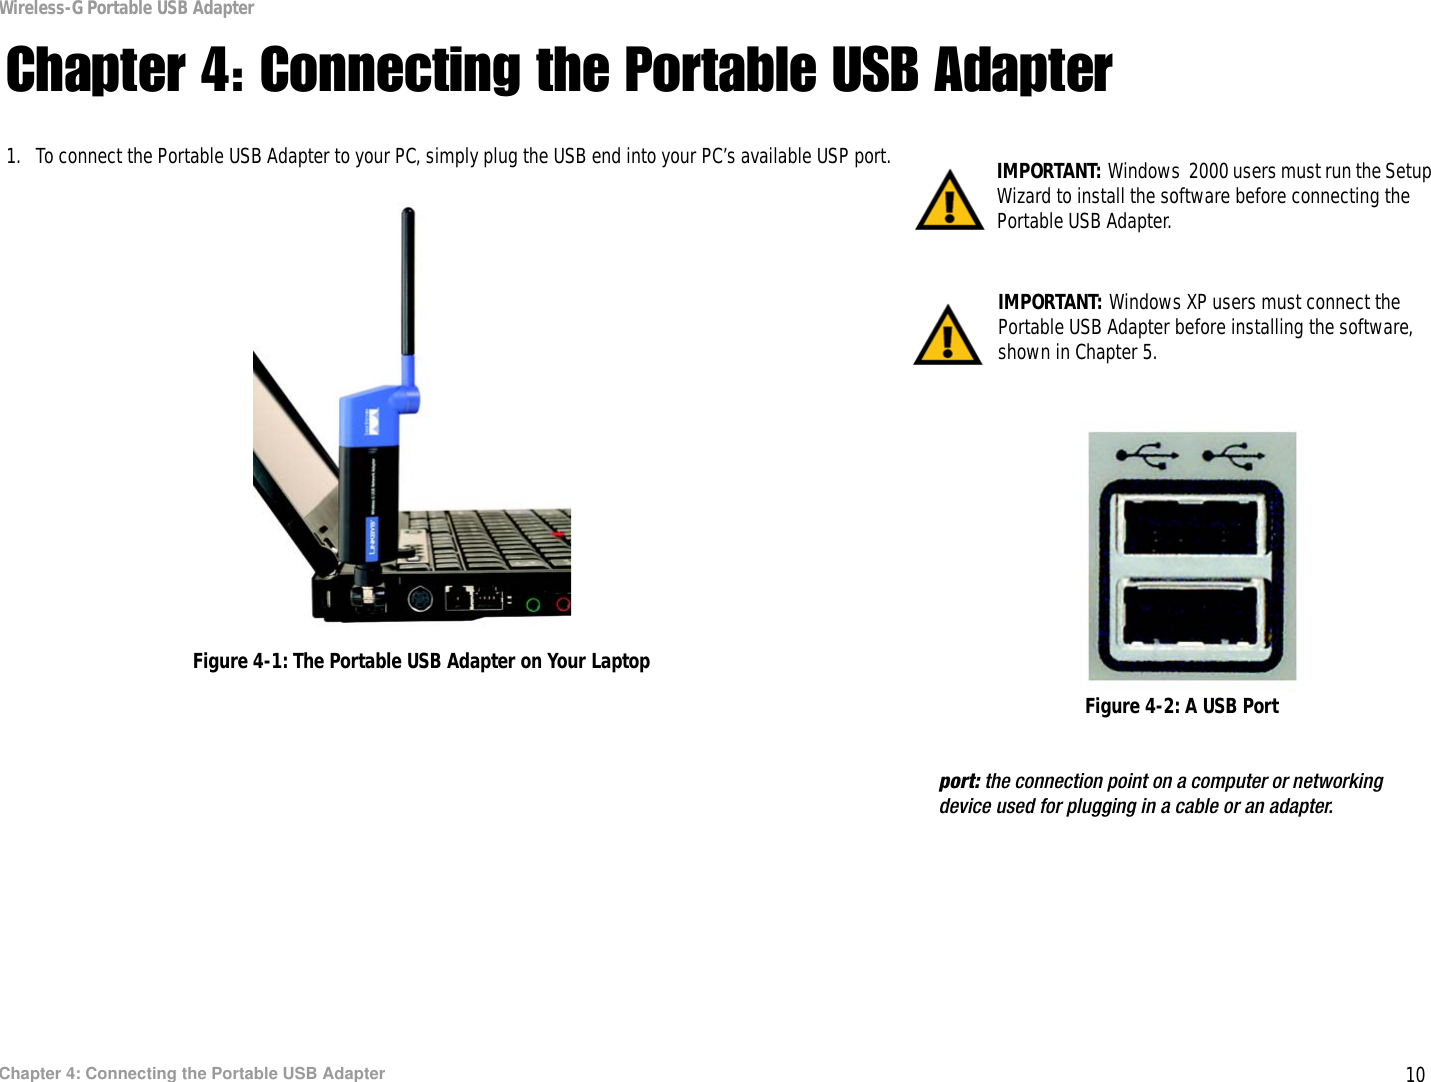
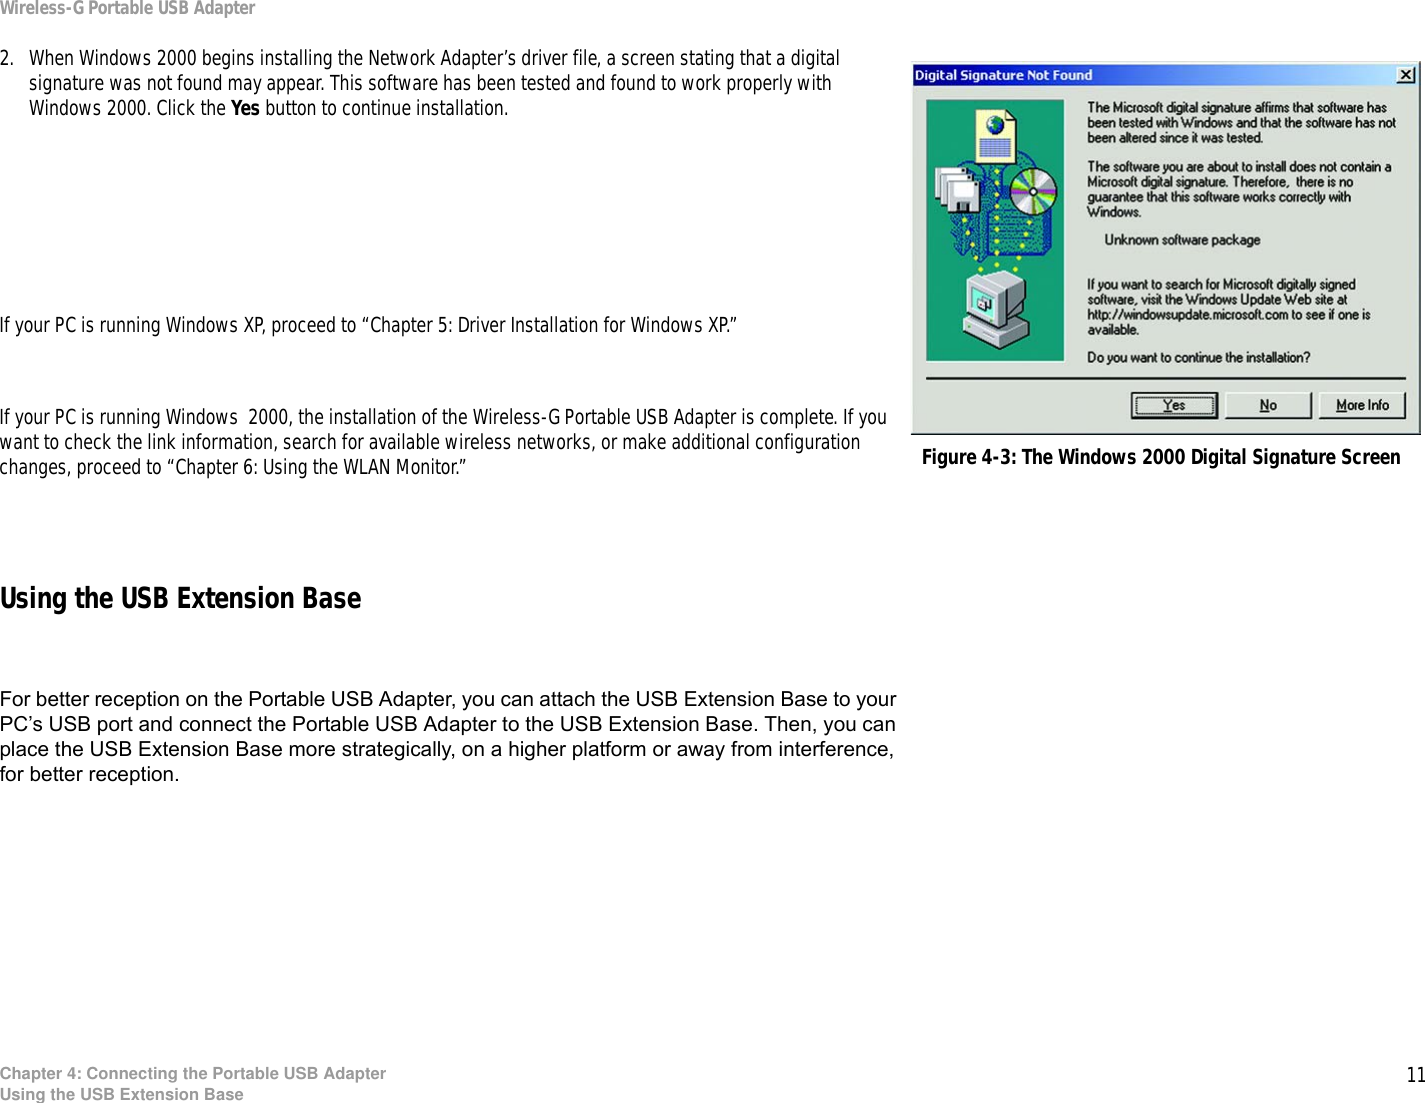
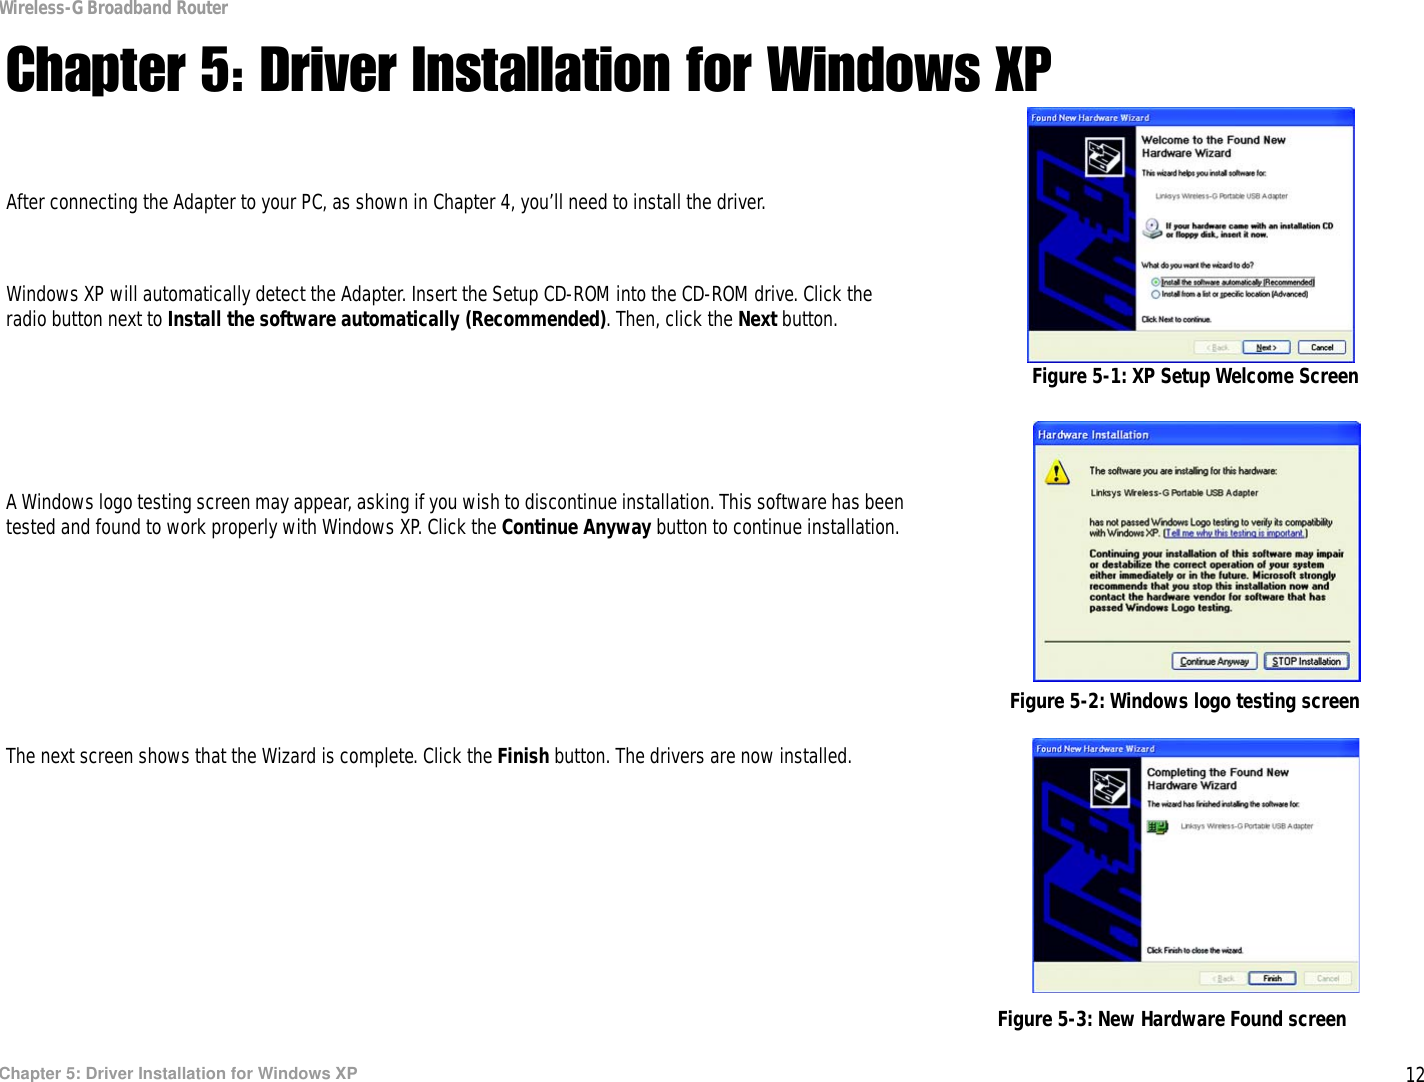
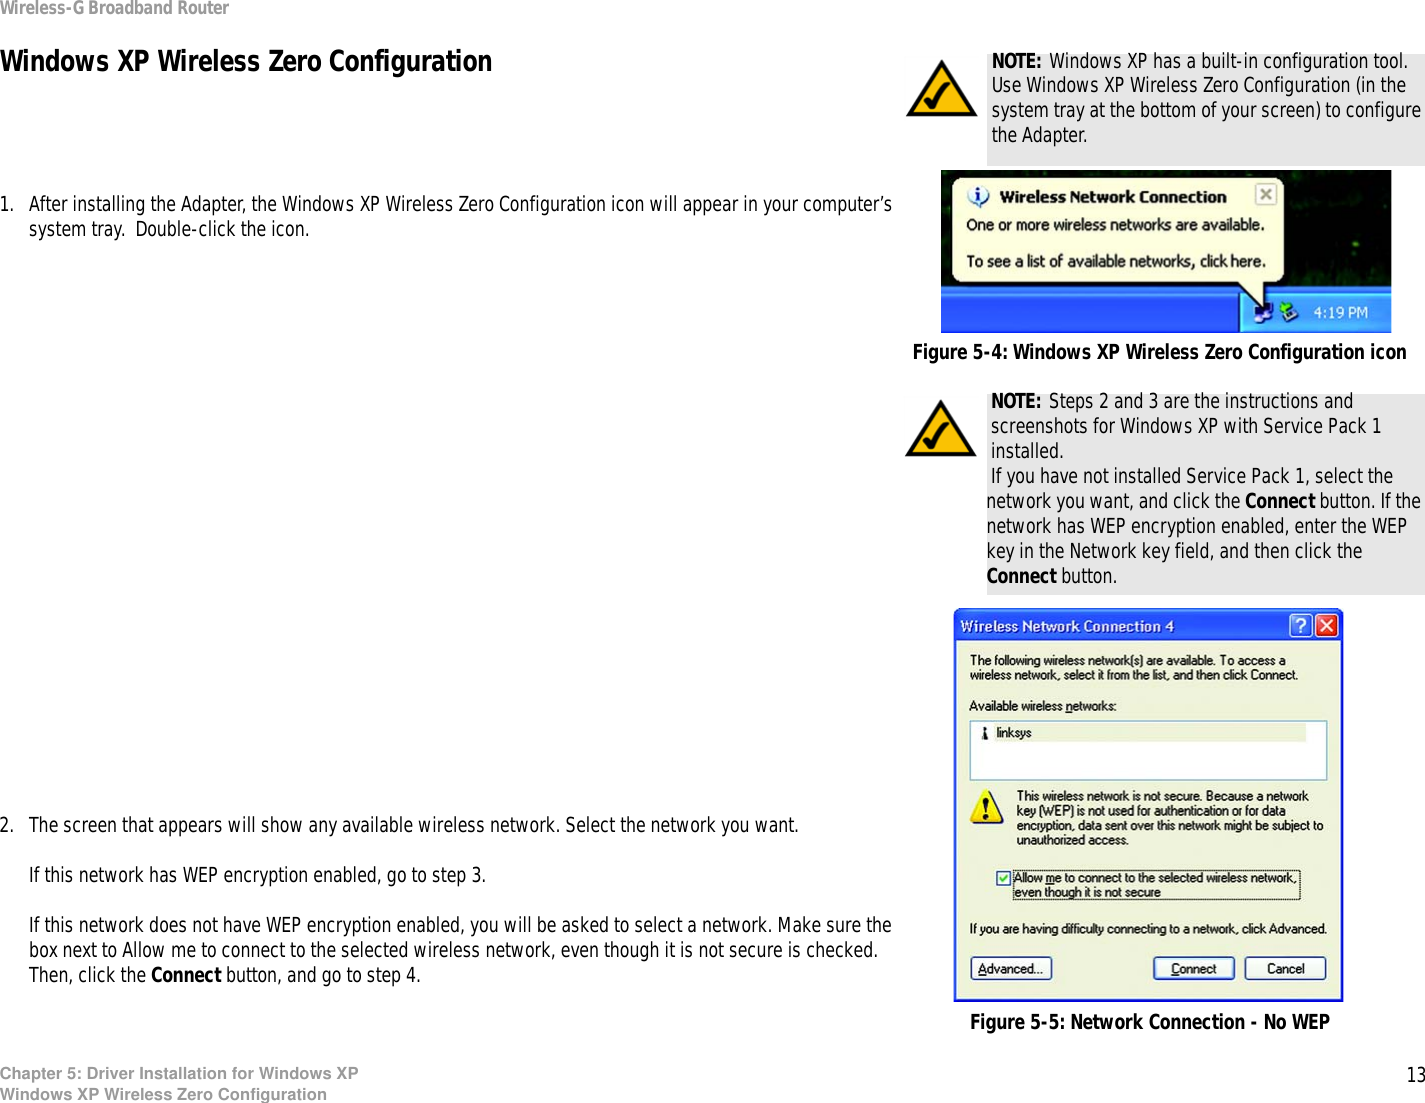
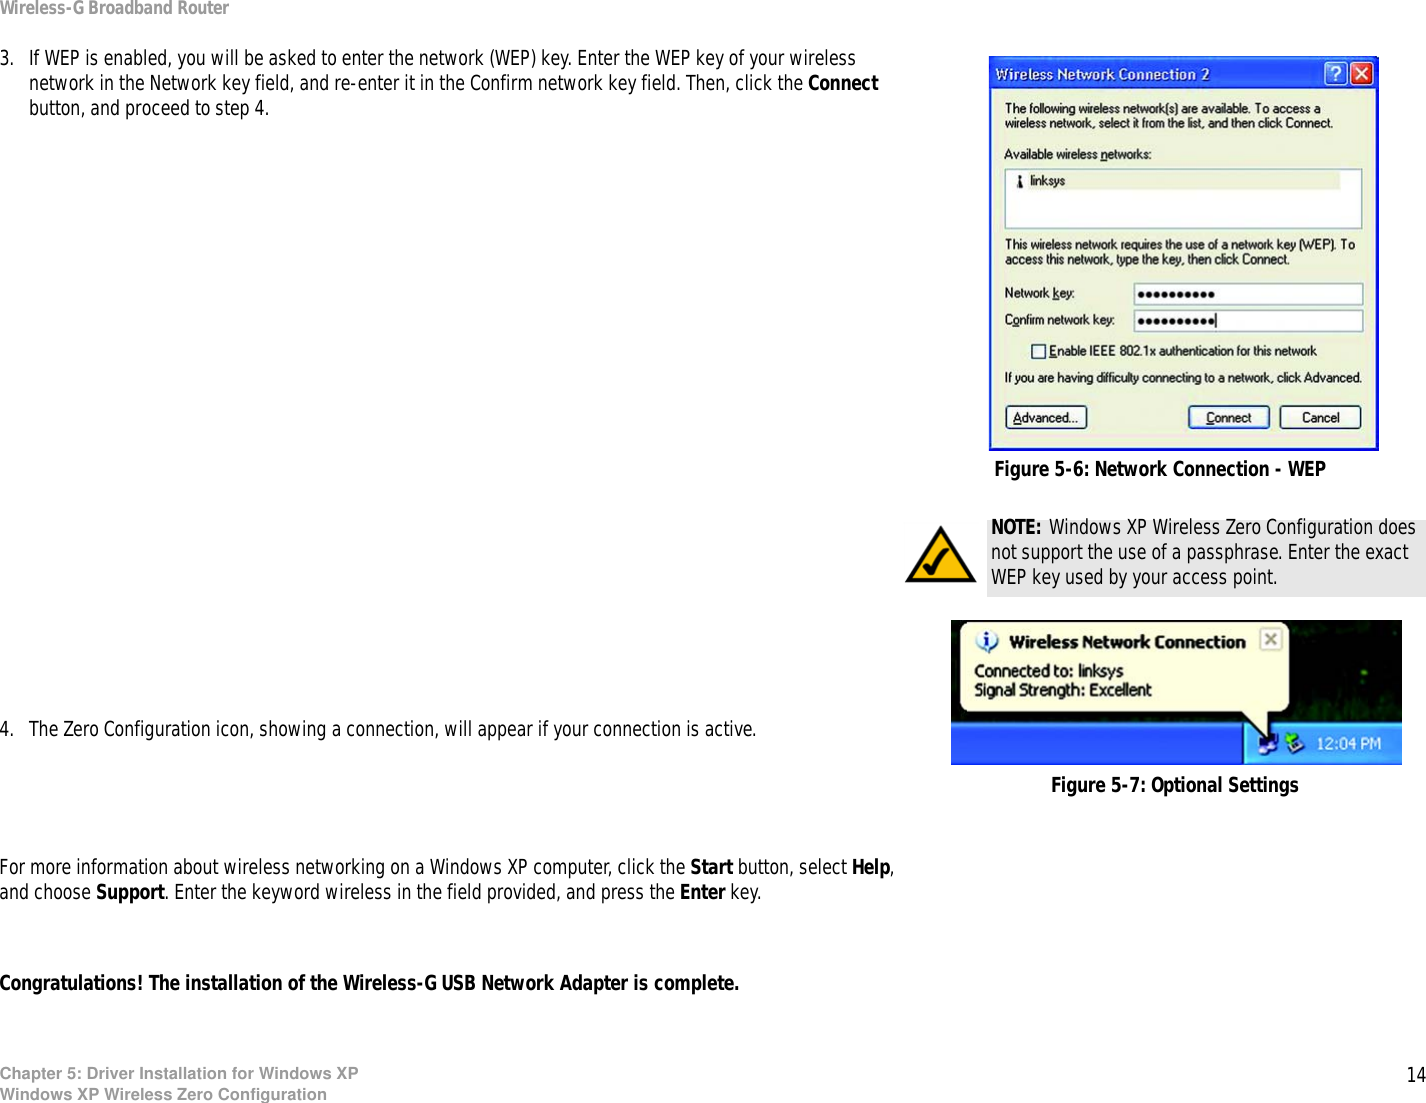

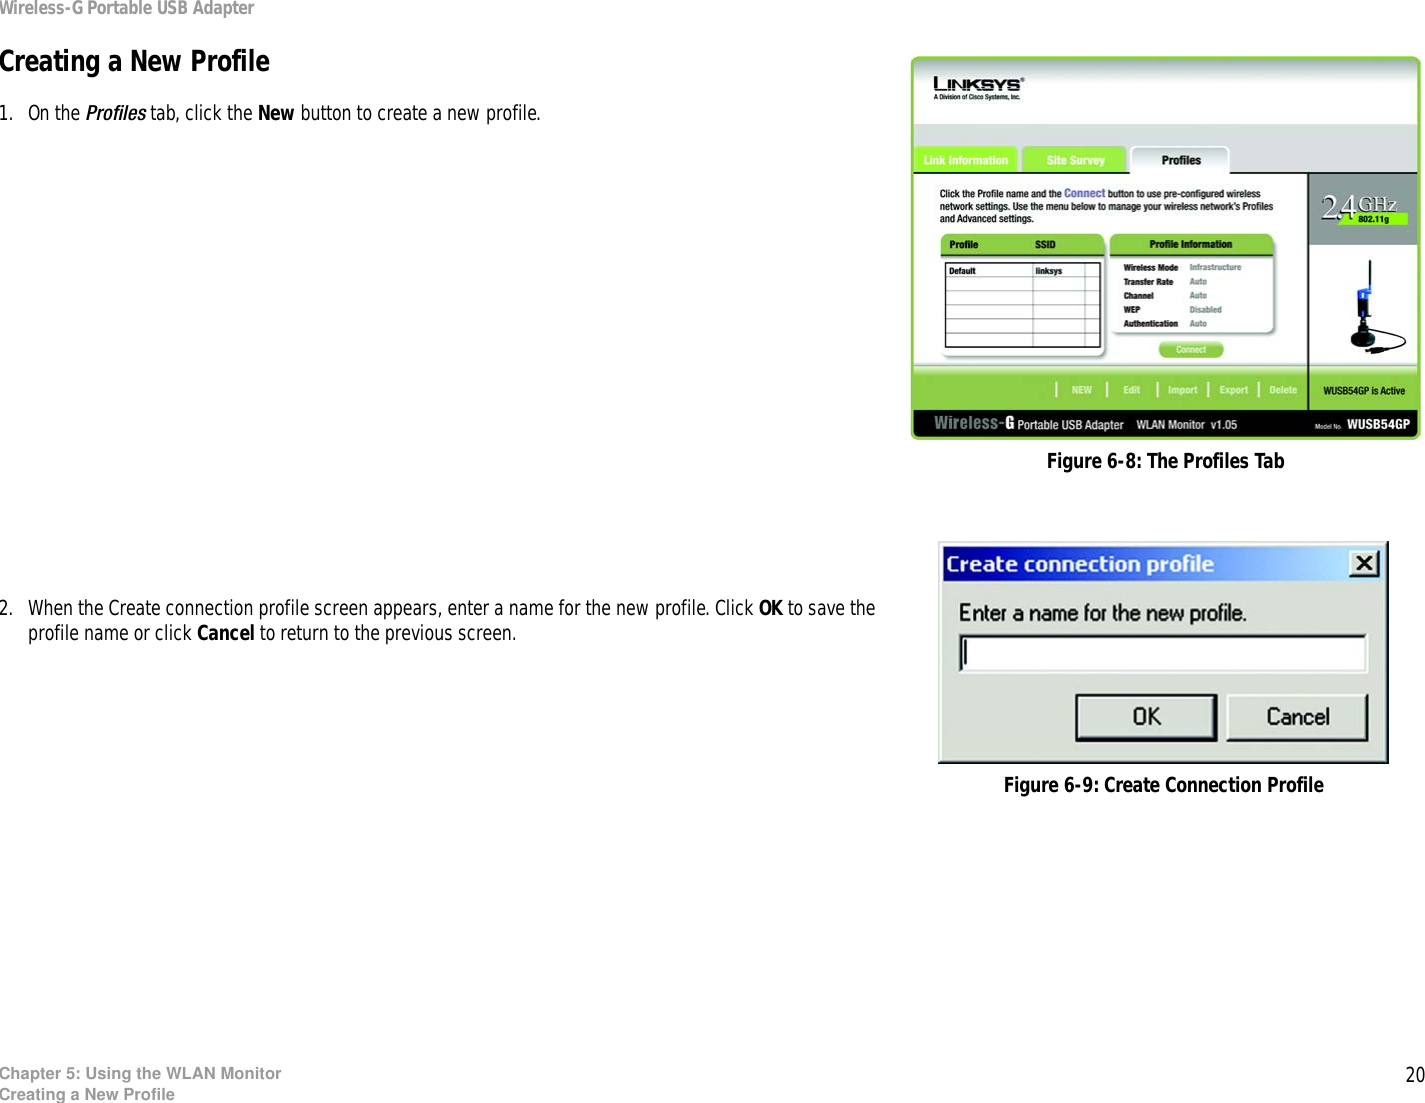
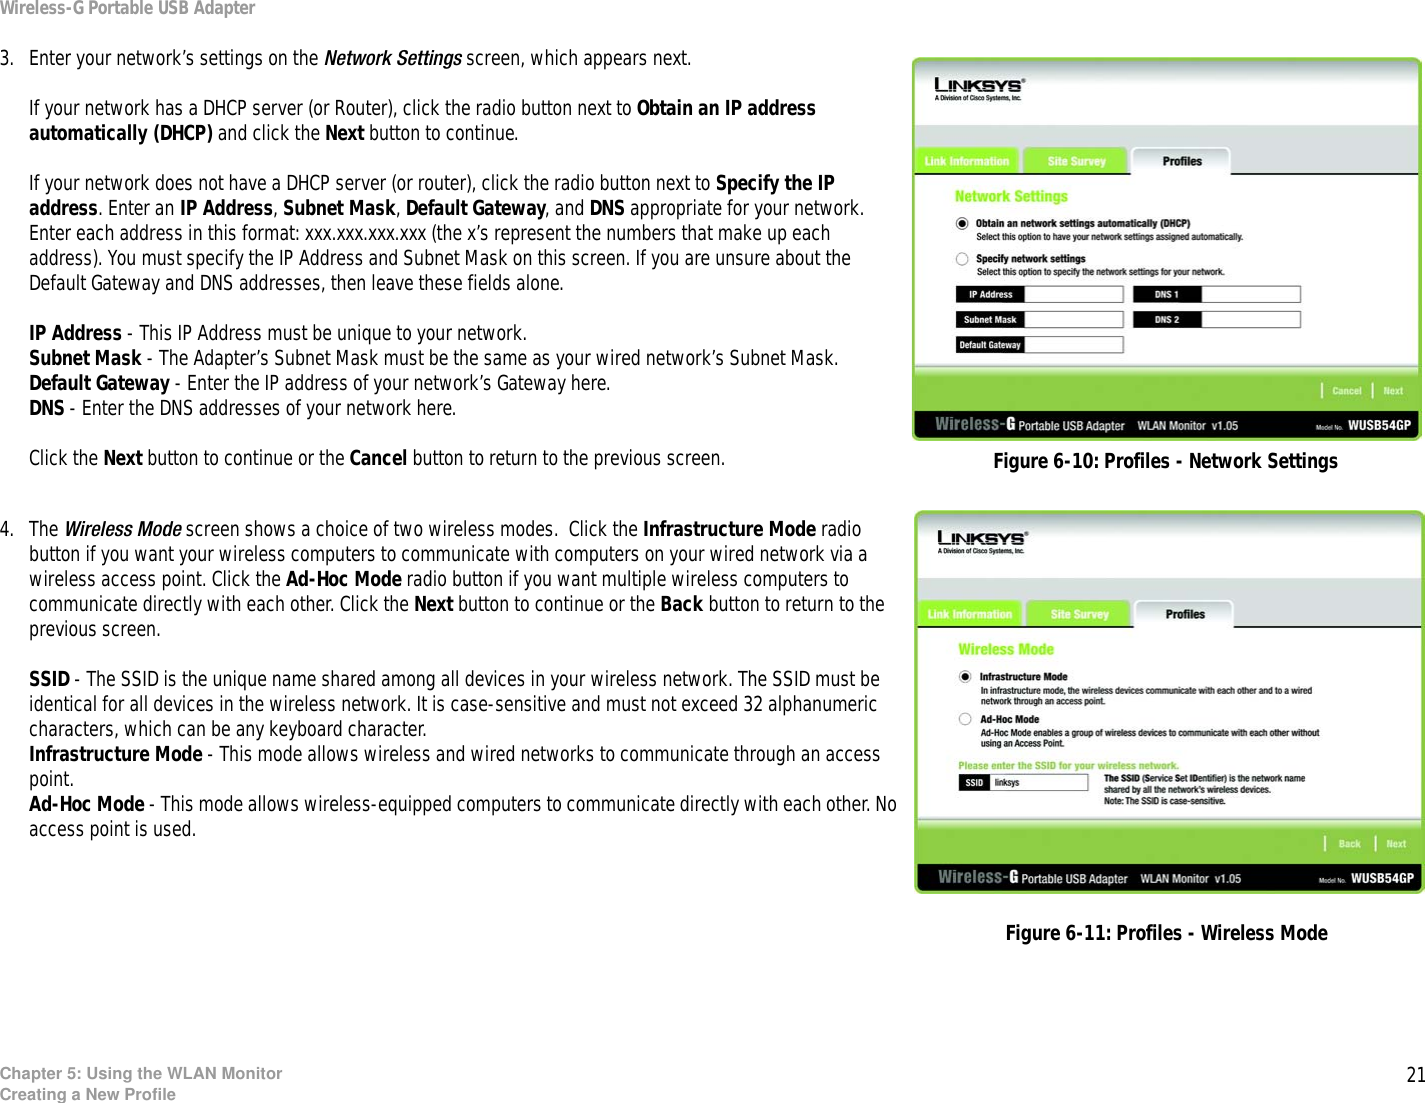
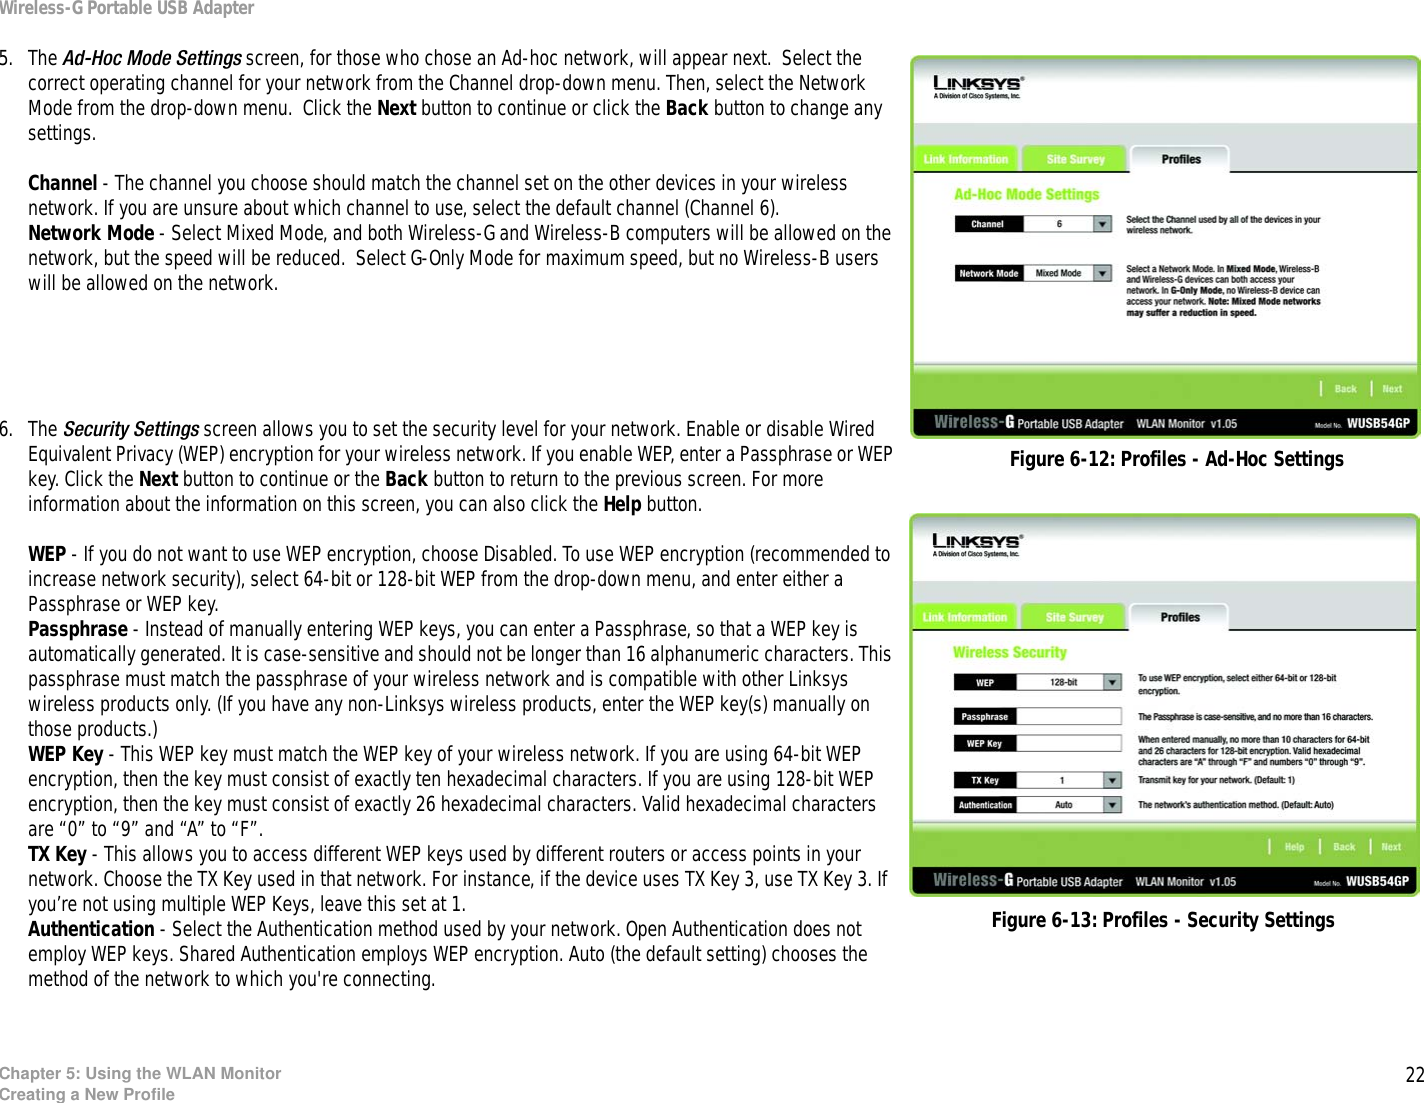
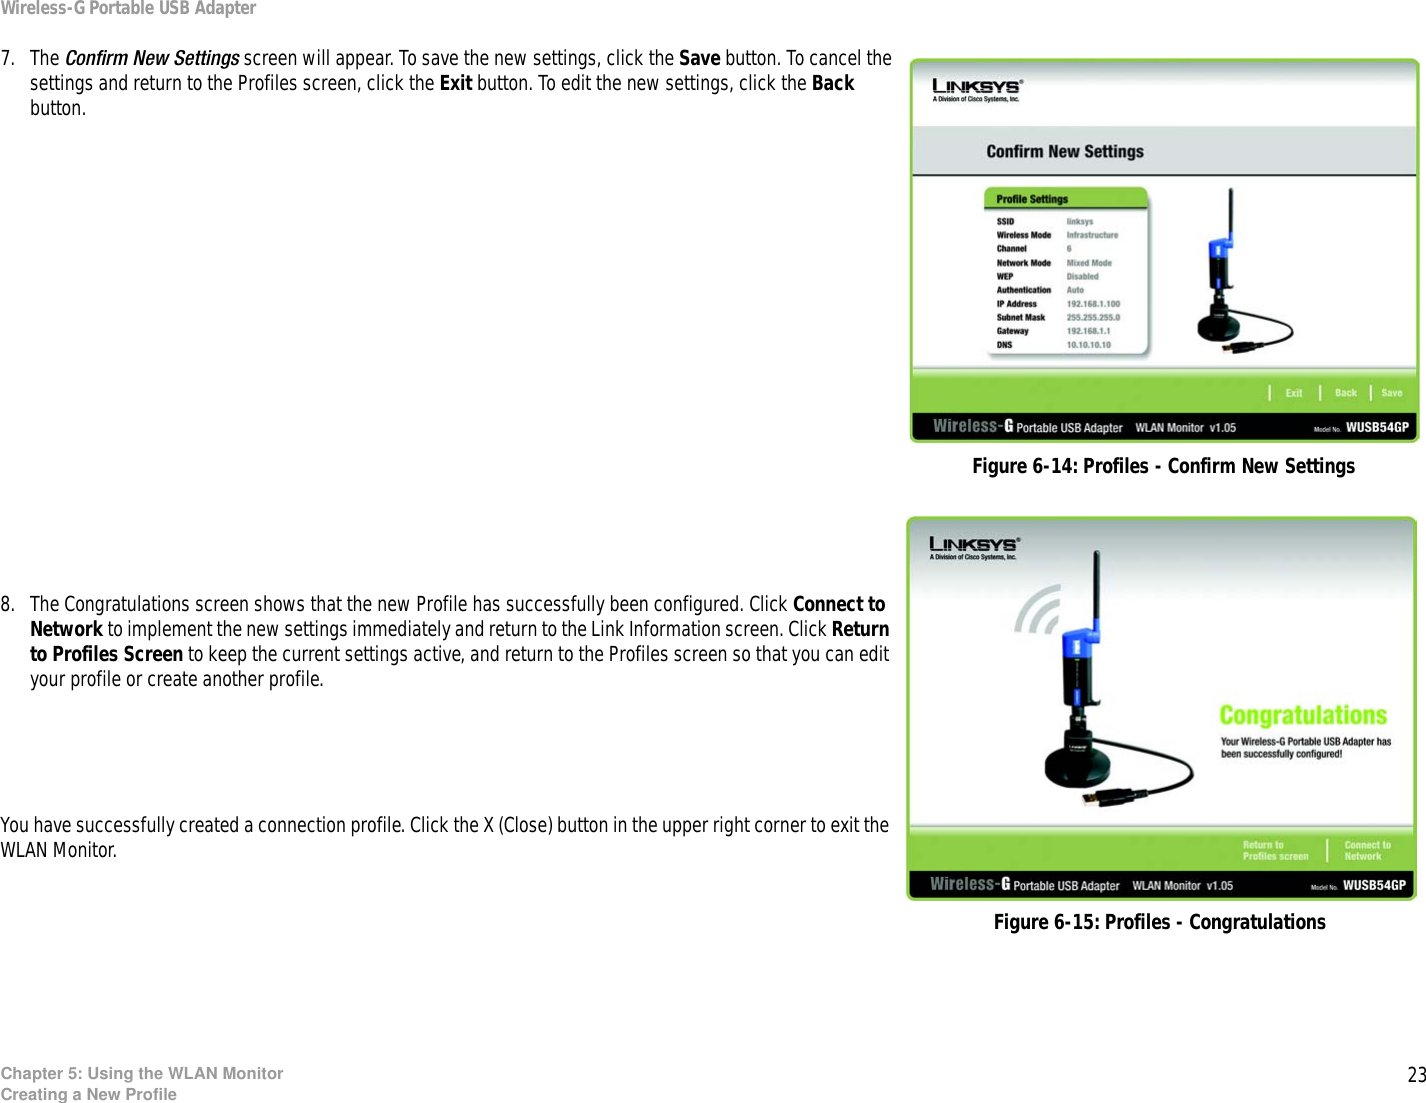
![37Appendix F: Warranty InformationWireless-G Portable USB AdapterAppendix F: Warranty InformationLIMITED WARRANTYLinksys warrants to the original end user purchaser ("You") that, for a period of [ ], (the "Warranty Period") Your Linksys product will be free of defects in materials and workmanship under normal use. Your exclusive remedy and Linksys's entire liability under this warranty will be for Linksys at its option to repair or replace the product or refund Your purchase price less any rebates.If the product proves defective during the Warranty Period call Linksys Technical Support in order to obtain a Return Authorization Number. BE SURE TO HAVE YOUR PROOF OF PURCHASE ON HAND WHEN CALLING. When returning a product, mark the Return Authorization Number clearly on the outside of the package and include a copy of your original proof of purchase. RETURN REQUESTS CANNOT BE PROCESSED WITHOUT PROOF OF PURCHASE. You are responsible for shipping defective products to Linksys. Linksys pays for UPS Ground shipping from Linksys back to You only. Customers located outside of the United States of America and Canada are responsible for all shipping and handling charges. ALL IMPLIED WARRANTIES AND CONDITIONS OF MERCHANTABILITY OR FITNESS FOR A PARTICULAR PURPOSE ARE LIMITED TO THE DURATION OF THE WARRANTY PERIOD. ALL OTHER EXPRESS OR IMPLIED CONDITIONS, REPRESENTATIONS AND WARRANTIES, INCLUDING ANY IMPLIED WARRANTY OF NON-INFRINGEMENT, ARE DISCLAIMED. Some jurisdictions do not allow limitations on how long an implied warranty lasts, so the above limitation may not apply to You. This warranty gives You specific legal rights, and You may also have other rights which vary by jurisdiction.TO THE EXTENT NOT PROHIBITED BY LAW, IN NO EVENT WILL LINKSYS BE LIABLE FOR ANY LOST DATA, REVENUE OR PROFIT, OR FOR SPECIAL, INDIRECT, CONSEQUENTIAL, INCIDENTAL OR PUNITIVE DAMAGES, HOWEVER CAUSED REGARDLESS OF THE THEORY OF LIABILITY, ARISING OUT OF OR RELATED TO THE USE OF OR INABILITY TO USE THE PRODUCT, EVEN IF LINKSYS HAS BEEN ADVISED OF THE POSSIBILITY OF SUCH DAMAGES. IN NO EVENT WILL LINKSYS' LIABILITY EXCEED THE AMOUNT PAID BY YOU FOR THE PRODUCT. The foregoing limitations will apply even if any warranty or remedy provided under this Section fails of its essential purpose. Some jurisdictions do not allow the exclusion or limitation of incidental or consequential damages, so the above limitation or exclusion may not apply to You.Please direct all inquiries to: Linksys, P.O. Box 18558, Irvine, CA 92623 USA.](https://usermanual.wiki/LINKSYS/WU54GPV4.Users-Manual-Revised/User-Guide-452233-Page-43.png)