LITE ON TECHNOLOGY WN5401A Wireless LAN PCI 802.11a/b/g Adapter User Manual Manual
LITE-ON Technology Corp. Wireless LAN PCI 802.11a/b/g Adapter Manual
Manual
Wireless LAN 802.11a/b/g Device
1
Welcome!
Congratulations on the purchase of your
PC with the Wireless LAN 802.11a/b/g
Device.
You can establish a wireless network
using your PC as a Wireless Access Point
or you can use your PC as a client if you
already have a wireless network
functioning.
Introduction
Your PC functions as a Wireless Local Area Network
(WLAN) connecting with other wireless product(s) via
802.11 technology.
802.11 technology allows over-the-air connection
between devices. Your PC is equipped with an
802.11a/b/g product which allows fast (54Mbps)
connection rates.
If your PC is connected to the internet and you would
like instructions on how to wirelessly connect other
machines to this PC please refer to section C of this
guide or refer to the section on Access Point Mode
include in the User’s Manual available on the CD.
If another machine is connected to the Internet and
you would like to wirelessly connect this PC to the
other connected machine, start with page 2 of this
guide or find additional information on Station Mode
in the full User’s Manual available on the CD.
Wireless LAN 802.11a/b/g Device
2
Installing the Wireless LAN 802.11a/b/g
Device Antenna
The Wireless LAN 802.11a/b/g Device is embedded in
the PC and needs the antenna supplied with your PC
to be connected. Once connected, your PC is ready to
begin functioning in station mode (as a client) with
your Wireless Local Area Network.
Note:
It is assumed that there is an existing wireless
LAN network with an Internet connection (please
consult your ISP for further information).
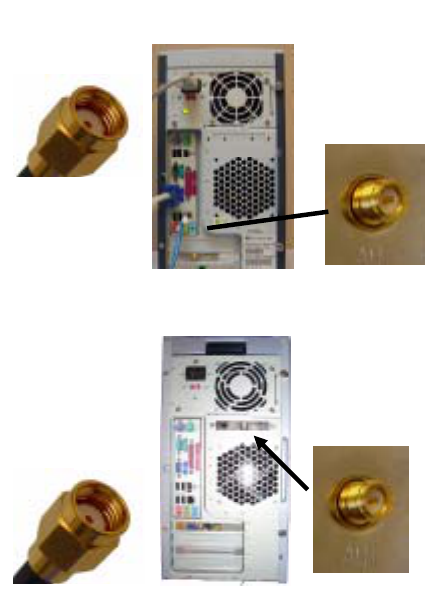
Package content consist of an antenna with a
connector located at the end (A) that screws into the
antenna jack located on the back of the PC (B).
A) Antenna Installation
1. Screw the antenna connector (A) to the antenna
jack (B) located on the back of the PC.
2. Place the PC on a table or place the antenna in an
elevated and open area to achieve the best
wireless performance.
A
B
B
OR
A
Wireless LAN 802.11a/b/g Device
3
B) Windows XP Wireless Zero
Configuration
The PC will begin functioning in Station Mode (as a
Client) with your Wireless LAN Network as soon as the
Network Key is set-up.
Important
If you do not have an existing wireless network you will need to set
up your Gateway prior to using your PC in Station Mode.
If you are attempting to set your PC up to function as an Access Point
please see Section C of this Quick Install Guide and / or refer to the
complete User’s Manual provided on CD.
1. Find the Network Key (WEP Key or WPA Key) for
your Wireless Network.
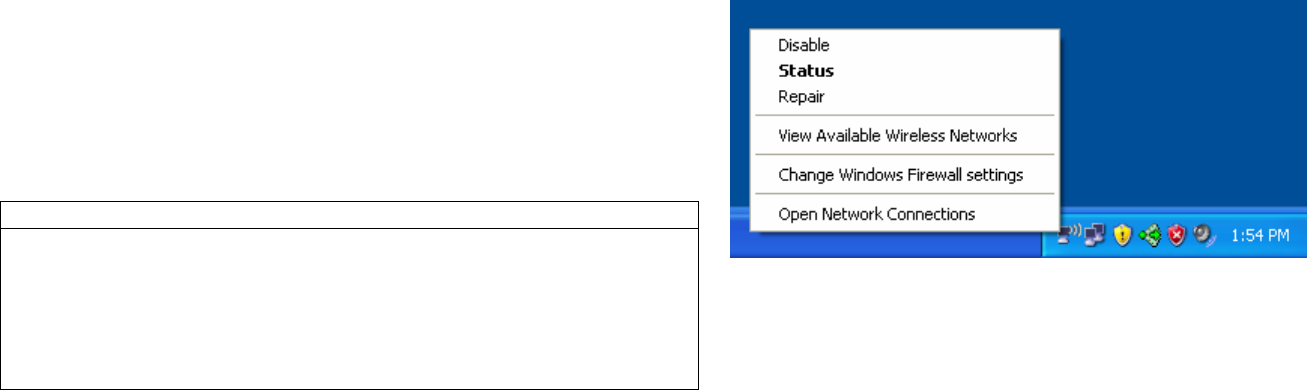
2. Start your PC
3. Right click on the Wireless Network icon in the
system tray
Note: There are two Network icons in the system tray.
The wireless network connection icon is shown below.
4. Select View Available Wireless Networks from
the Wireless Network icon menu.
Wireless LAN 802.11a/b/g Device
4
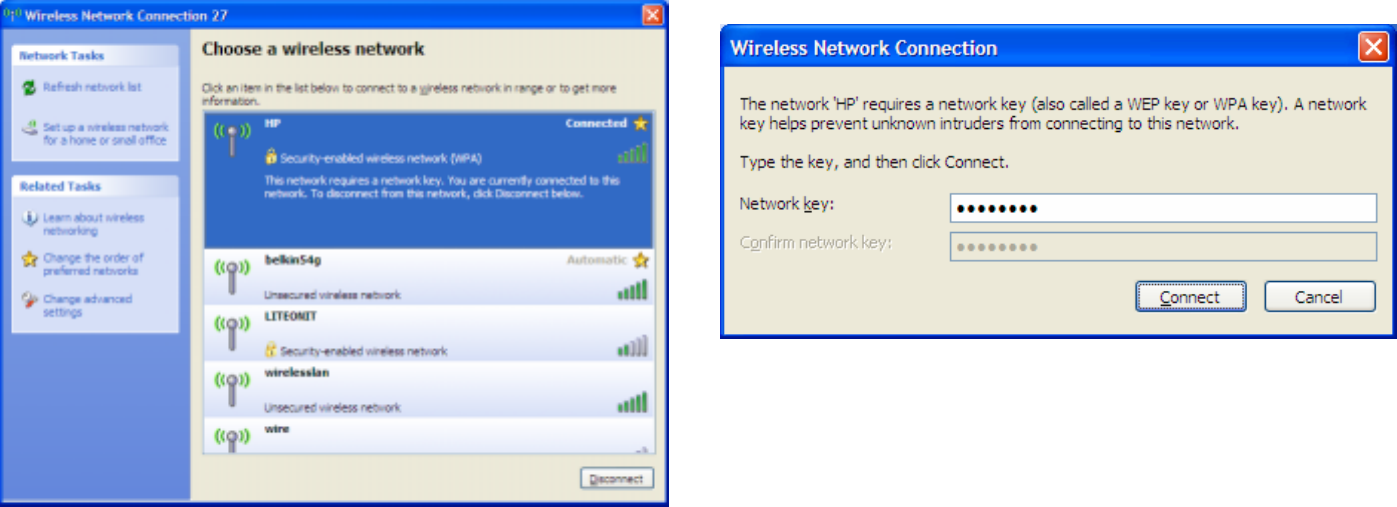
The Wireless Network Connection dialog will appear.
5. Select the Wireless Network of your choice by
clicking on its name and the entire block will
become highlighted
6. Select Connect in the lower right corner
The Wireless Network Connection dialog box will
appear as shown below.
7. Enter your Network Key (WEP Key or WPA Key) for
your Wireless Network
8. Input the Network Key a second time into the
“Confirm network key” box
Note:
If your network is using WEP encryption, then
a HEX or an ASCII format is necessary when entering
your Network key:
z HEX: 10 Characters in HEX notation for 40 bit or
26 characters for 128 bit encryption.
z ASCII: 5 Characters for 40 bit or 13 characters for
128 bit encryption.
Wireless LAN 802.11a/b/g Device
5
If your network is using WPA it is necessary to enter
an 8 – 63 character alphanumeric key-phrase.
The Network Key will accept any of these as it
supports both WEP and WPA.
9. Select Connect
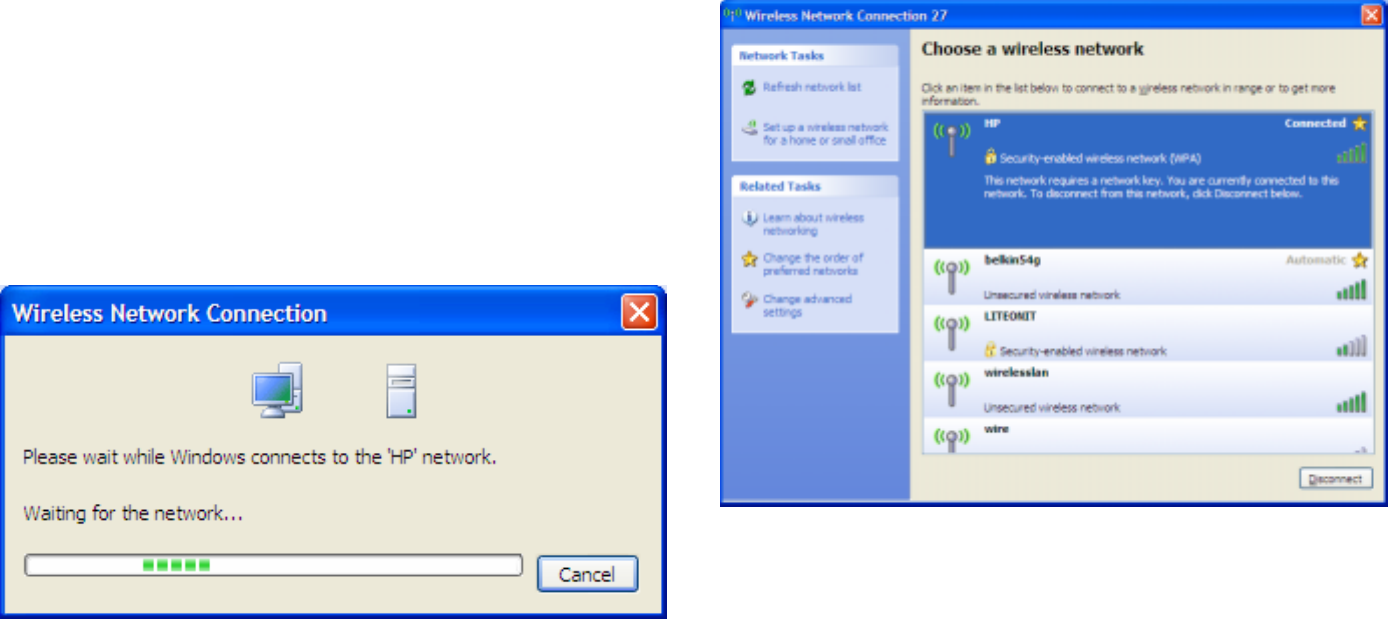
The Wireless Network Connecting dialog box appears
as you are being connected.
After connection to the network the Wireless Network
Connection dialog box will reappear showing the
connection.
To close this dialog box select the red X in the upper
right corner.
Wireless LAN 802.11a/b/g Device
6
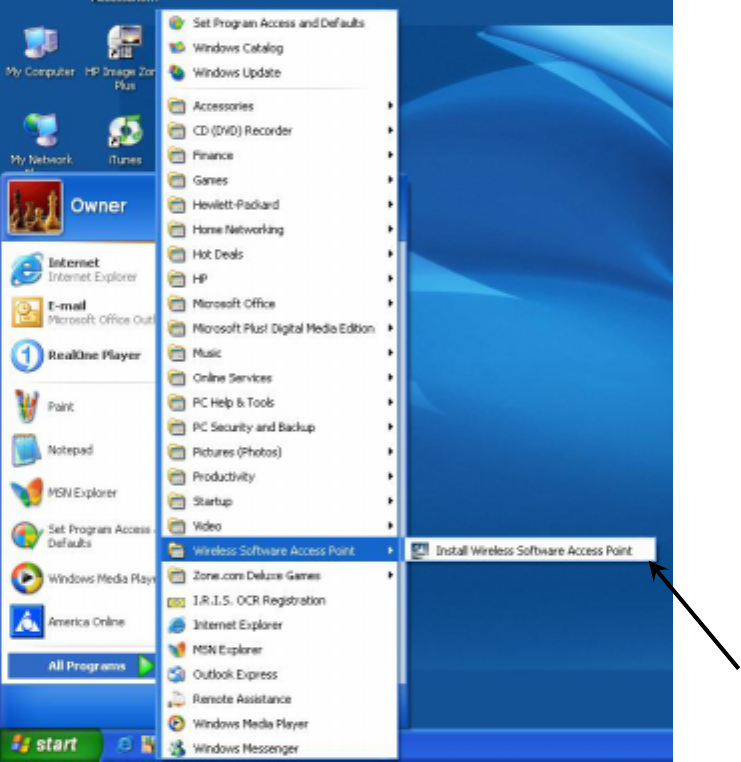
C) Software Access Point
Your PC is communicating wirelessly via an embedded
Wireless LAN 802.11a/b/g Device. The Wireless
Software Access Point installed on your HP PC has the
capability to turn your PC into a fully function high
performance access point.
The main purpose of the Software Access Point is to
provide internet sharing with other PCs through a
common gateway (your home access point or wireless
broadband router).
If you have followed the instruction in this Quick
Installation Guide, then your PC is now functioning in
station mode (as a client).
In order to switch your PC into access point mode:
1. Go to the Start menu.
2. Select All Programs.
3. Select Wireless Software Access Point.
4. Select Install Wireless Software Access Point.
Wireless LAN 802.11a/b/g Device
7
The Software Access Point will install on your PC and
your will be connected in access point mode.
Please consult the User’s Manual available on the CD
that came with this product for complete operating
instructions and individual setting details.
D) Troubleshooting
Prior to contacting customer support check the
following items and reboot the PC:
1. Verify that both the PC as well as the wireless
broadband router/access point are powered.
2. Verify that the antenna is connected securely to the
back of your PC.
3. Verify that both the Network name (SSID) and the
necessary network key are correctly entered and
consistent with those of the access point or
wireless broadband router that is being used.
4. If experiencing difficulties with connection under
WPA settings, please reconfigure your wireless
network and the Software Access Point settings to
WEP security.
5. Consult he User’s Manual located on the CD for
further information on the Wireless LAN
802.11a/b/g Device.
Wireless LAN 802.11a/b/g Device
8
E) Customer Support
Customer support information can be obtained from
your PC:
1. Click on Start
2. Right click on My Computer
3. Select Properties
4. Select General tab
5. Select Support Information
The necessary contact information will be displayed.
OR
Refer to System Warranty and Support Guide.
Federal Communication Commission Interference Statement
This equipment has been tested and found to comply with the limits for a Class B
digital device, pursuant to Part 15 of the FCC Rules. These limits are designed
to provide reasonable protection against harmful interference in a residential
installation. This equipment generates, uses and can radiate radio frequency
energy and, if not installed and used in accordance with the instructions, may
cause harmful interference to radio communications. However, there is no
guarantee that interference will not occur in a particular installation. If this
equipment does cause harmful interference to radio or television reception, which
can be determined by turning the equipment off and on, the user is encouraged
to try to correct the interference by one of the following measures:
- Reorient or relocate the receiving antenna.
- Increase the separation between the equipment and receiver.
- Connect the equipment into an outlet on a circuit different from that
to which the receiver is connected.
- Consult the dealer or an experienced radio/TV technician for help.
FCC Caution: Any changes or modifications not expressly approved by the party
responsible for compliance could void the user's authority to operate this
equipment.
This device complies with Part 15 of the FCC Rules. Operation is subject to the
following two conditions: (1) This device may not cause harmful interference, and
(2) this device must accept any interference received, including interference that
may cause undesired operation.
IMPORTANT NOTE:
FCC Radiation Exposure Statement:
This equipment complies with FCC radiation exposure limits set forth for an
uncontrolled environment. This equipment should be installed and operated with
minimum distance 20cm between the radiator & your body.
If this device is going to be operated in 5.15 ~ 5.25GHz frequency range, then it
is restricted in indoor environment only.