LXI 93444709990 User Manual 13 COLOR TV/VCR COMBINATION Manuals And Guides 99030418
LXI TV/VCR or DVD Combo Manual 99030418 LXI TV/VCR or DVD Combo Owner's Manual, LXI TV/VCR or DVD Combo installation guides
User Manual: LXI 93444709990 93444709990 LXI 13 COLOR TV/VCR COMBINATION - Manuals and Guides View the owners manual for your LXI 13 COLOR TV/VCR COMBINATION #93444709990. Home:Electronics Parts:Lxi Parts:Lxi 13 COLOR TV/VCR COMBINATION Manual
Open the PDF directly: View PDF ![]() .
.
Page Count: 32
Owner's Manual
13" COLOR
TV/VCR COMBINATION
Model No: 934.44709990
CAUTION:
Beforeusingthisproduct,
readthismanual and follow
allits SafetyRules and
Operating Instructions.
•Safety
•Operation
• Maintenance
• Troubleshooting
Sears, Roebuck and Co., Hoffman Estates, IL 60179 USA
TABLE OF CONTENTS
•IMPORTANT SAFEGUARDS ............................... 3
•SPECIFICATIONS ............................................. _... 5
•SUPPLIED ACCESSORIES .................................. 5
•PRECAUTIONS ..................................................... 6
Location .................................................................. 6
Avoid the Hazards of Electrical Shock and Fire..... 6
CAUTION ............................................................... 6
•FEATURES ............................................................ 7
•VIDEO CASSETTE ................................................ 8
•OPERATING CONTROLS AND FUNCTIONS ..... 9
•PREPARATION FOR USE .................................. 11
Antenna/Cable Connections ................................ 11
Installing the Batteries .......................................... 12
External Input Mode ............................................. 12
•SET UP FOR USE ............................................... 13
Channel Set Up for the First Time ....................... 13
Deleting (orAdding) Channel .............................. 13
Channel Set Up Again ......................................... 14
Selecting the Language ....................................... 14
Daylight-Saving Time ........................................... 14
Clock Set Up (Auto /Manual) .............................. 15
•ON-SCREEN DISPLAY ....................................... 17
•SPECIAL FEATURES ......................................... 17
Degaussing .......................................................... 17
Real Time Tape Counter ...................................... 17
Auto Rewind-Eject ................................................ 17
•TV OPERATION .................................................. 18
Watching a TV Program ....................................... 18
Game Mode ......................................................... 18
Picture Control ..................................................... 18
Closed Caption System ....................................... 19
•PLAYBACK ......................................................... 20
Normal Playback .................................................. 20
Tracking Adjustment ............................................ 20
Picture Search ...................................................... 20
Still Picture ........................................................... 20
Noise line Reduction (in the Still mode) ............... 20
Vertical Hold Control ............................................ 20
mSPECIAL PLAYBACK ........................................ 21
Rental Playback ................................................... 21
Auto Repeat Playback ......................................... 21
•SEARCH .............................................................. 22
Zero Return .......................................................... 22
Time Seamh ......................................................... 22
•RECORDING ....................................................... 23
Normal Recording ................................................ 23
Skippinq Unwanted
Scenes-During Recording .................................... 23
OTR (One Touch Recording) ............................... 24
Copying a Video Cassette
(Requires a VCR or camcorder) .......................... 24
•TIMER .................................................................. 25
Automatic Timer Recording ................................. 25
Timer Program Extension .................................... 26
Auto Return .......................................................... 27
Wake Up Timer .................................................... 28
Sleop Timer .......................................................... 28
•MAINTENANCE .................................................. 29
•TROUBLESHOOTING GUIDE ............................ 30
FULL 90 DAY WARRANTY
For 90 days from the date of purchase, Sears will repair any defect in material or workmanship in
this TV/VCR combination, free of charge. For one year from the date of purchase, Sears will supply,
at no charge, replacement for defective parts.
The above warranty coverage applies only to "I'VNCR combinations which are used for private
household purposes.
TO OBTAIN WARRANTY SERVICE, SIMPLY RETURN THE TVNCR COMBINATION TO THE
NEAREST SEARS SERVICE CENTER IN THE UNITED STATES.
This warranty gives you specific legal rights,and you may also have other rights which vary from
state to state.
Sears Roebuck and Co., Dept. 817WA Hoffman Estates, IL 60179
For the location of a Sears Service Center in your area : 1-800-488-1222
-2-
WARNING: To reduce the risk offire or electric shock,donot exposethis appliance to rain or moisture. ]
-n_ aboveCAUTIONislocated_nthe backofthe"FVNCRcabinet.
I CAUTION: To reduce the risk of electric shock, do
not remove cover (or back). No user serviceable
parts inside. Refer servicing to qualified service
personnel.
This symbol indicates that dangerous
voltage constituting a risk of electric
shock is present within this unit.
This symbol indicates that there are im-
porfant operating and maintenance in-
structions in the literature
accompanying the appliance.
IMPORTANT SAFEGUARDS
1,Read Instructions-Read all safety and operating
instructions before operating this appliance.
2,Save Instructions-Save these safety and
operating instructionsfor future reference.
3.Heed Warnlngs-Adhera to all warnings and
cautions on the appliance and in this operating
guide.
4.Follow Instructions-Follow all safety and
operation instructions.
5.Cleanlng-Unplug TVNCR from the wall outlet be-
fore cleaning. Do not use liquid cleaners or aerosol
cleaners. Use adamp cloth for cleaning.
6.Attachments-Do not use attachments not recom-
mended by the "rVNCR manufacturer as they may
cause hazards.
7.Water and Moisture-Do not use this TV/VCR near
water, for example, near a bath tub, wash bowl,
kitchen sink, or laundry tub, in a wet basement, or
near a swimming pool, and the like.
8.Accessories-Do not place this "rVNGR on an un-
stable cart, stand, tripod, bracket, or table. The
TVNCR may fall, causing serious injury to some-
one, and serious damage to the appliance. Use
only with a cart, stand, tripod, bracket, or table rec-
ommended by the manufacturer, or sold with the
TV/VCR. Any mounting of the appliance should fol-
low the manufacturer's instructionsand should use
amounting accessory recommended by the manu-
facturer. An appliance and cart combination should
be moved with care.
Quick stops, excessive force,
and uneven surfaces may PORTABUECAFffWARNING
cause the appliance and cart
combination to overturn.
9.VentllaUon-There are slots and openings in the
TVNCR cabinet to provide ventilation and protect it
from overheating. These openings must not be
blocked or covered. Do not place the TVNCR on
a bed, sofa, rug, or similar surface that will cause
the ventilation openings to be blocked. Never place
the TV/VCR near or over a radiator or heat register.
Never place the TVNCR in a built-in installation
such as abookcase or rack unless proper ventila-
tion space is provided for itaccording to the instruc-
tions in this owner's manual.
1O.Power Sources-This TVNCR should be operated
only from the type of power source indicated on the
marking label. If you are not sure of the type of
power supply to your home, consult your appliance
dealer or local power company. For TVNCRs in-
tended to operate from battery power, or other
sources, refer to the operating instructions.
11.Grounding or Polarization-This TV/VCR is
equipped with a polarized alternating-current line
plug (a plug having one blade wider than the
other). This plug will fit into the power outlet only
one way. This is a safety feature. If you are unable
to insert the plug fully into the outlet, try reversing
the plug. If the plug should stillfail to fit, contact
your electrician to replace your obsolete outlet. Do
not defeat the safety purpose of the polarized plug.
12.Power Cord Protection-Route power supply cords
so that they are not likely to be walked on or
pinched by items placed on or against them. Take
special care to keep all TV/VCR plug and cord-exit
points clear of contact with other items.
-3-EN
8J14
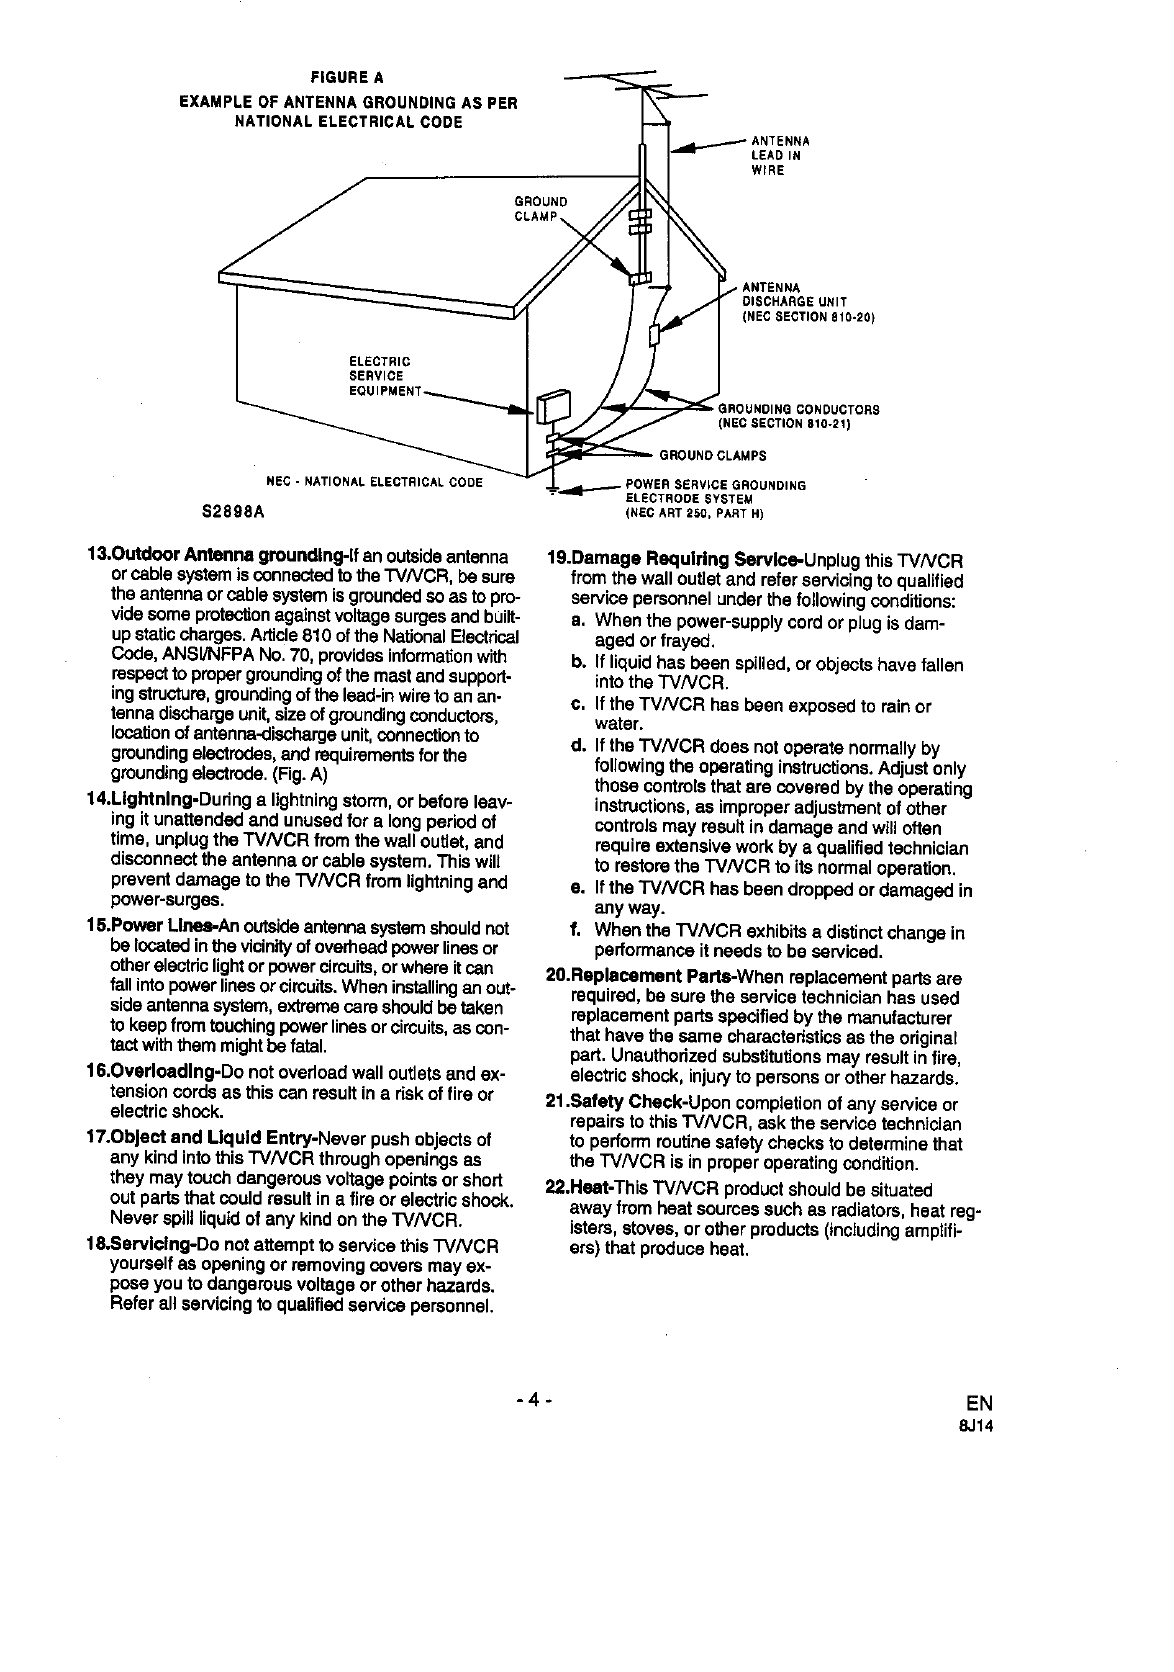
FIGUREA
EXAMPLEOFANTENNAGROUNDINGASPER I_
NATIONALELECTRICALCODE ANTENNA
I----"-"LEAO'N
GROUND
CLAMP
ANTENNA
DISCHARGE UNIT
(NEC SECTION 910-20)
SERVICE
EQUIPMENT
ROUNDING CONDUCTORS
_(NEC SECTION E,O-21)
NEC--CN,LELEDTO NO
ELECTRODE SYSTEM
$2898A (NSC ART 250, PART H)
13.OutdoorAntennagrounding-Ifan outsideantenna
orcablesystemisconnectodto the"FV/VCR,besure
theantenna orcablesystemisgroundedsoasto pro-
videsome pretectionagainstvoltagesurgesandbuilt-
upstaticcharges.Article810 oftheNationalElectrical
Code,ANSI/NFPANo. 70, providesinformationwith
respecttopropergroundingofthe mastandsupport-
ingstructure,groundingof the lead-inwiretoan an-
tennadischargeunit,sizeofgroundingconductors,
locationofantenna-dischargeunit,connectionto
groundingelectrodes,and requirementsfor the
groundingelectrode.(Fig.A)
14.Lightning-Duringa lightningstorm,or beforeleav-
ing it unattendedand unusedfor a longperiodof
time,unplugthe TV/VCR from the walloutJet,and
disconnectthe antennaor cablesystem.Thiswill
preventdamageto the TV/VCR from lightningand
power-surges.
15.PowerLines-Anoutsideantennasystemshouldnot
be locatedinthe vicinityof overheadpowerlinesor
otherelectriclightorpowercircuits,orwhereitcan
fall intopowerlinesorcimuits.Wheninstallingan out-
sideantennasystem,extremecare shouldbe taken
tokeepfromtouching powerlinesorcircuits,ascon-
tactwiththem mightbe fatal.
16.Overloading-Donotoverloadwalloufietsandex-
tensioncordsas thiscan resultina riskoffire or
electricshock.
17.Object and Liquid Entry-Neverpushobjectsof
any kindintothisTV/VCR throughopeningsas
theymaytouchdangerousvoltagepointsorshort
outpartsthatcouldresultina fireor electricshock.
Neverspillliquidof any kindon the TV/VCR.
18,Servicing-Donotattemptto servicethis"I'V/VCR
yourselfas openingorremovingcovers mayex-
poseyouto dangerousvoltageorotherhazards.
Referallservicingto qualifiedservicepersonnel.
19.Damage Requiring Service-Unplug this "I'V/VCR
from.the wall outlet and refer servicing to qualified
service personnel under the following conditions:
a. When the power-supply cord or plug is dam-
aged or frayed.
b. If liquid has been spilled, or objects have fallen
into the TV/VCR.
c. If the TV/VCR has been exposed to rain or
water.
d. Ifthe TV/VCR does not operate normally by
following the operating instructions. Adjust only
those controls that are covered by the operating
instructions, as improper adjustment of other
controls may result in damage and will often
require extensive work by aqualified technician
to restore the TV/VCR to its normal operation.
e. Ifthe TV/VCR has been dropped or damaged in
any way.
f. When the "FV/VCR exhibits a distinct change in
performance it needs to be serviced.
20.Replasement Parts-Whan replacement parts are
required, be sure the service technician has used
replacement parts specified by the manufacturer
that have the same characteristics as the original
part. Unauthorized substitutions may result in fire,
electric shock, injuej to persons or other hazards.
21 .Safety Check-Upon completion of any service or
repairs to this TV/VCR, ask the service technician
to perform routine safety checks to determine that
the TV/VCR is in proper operating condition.
22.Heat-This TV/VCR product should be situated
away from heat sources such as radiators, heat reg-
isters, stoves, or other products (including amplifi-
ers) that produce heat,
-4- EN
8J14
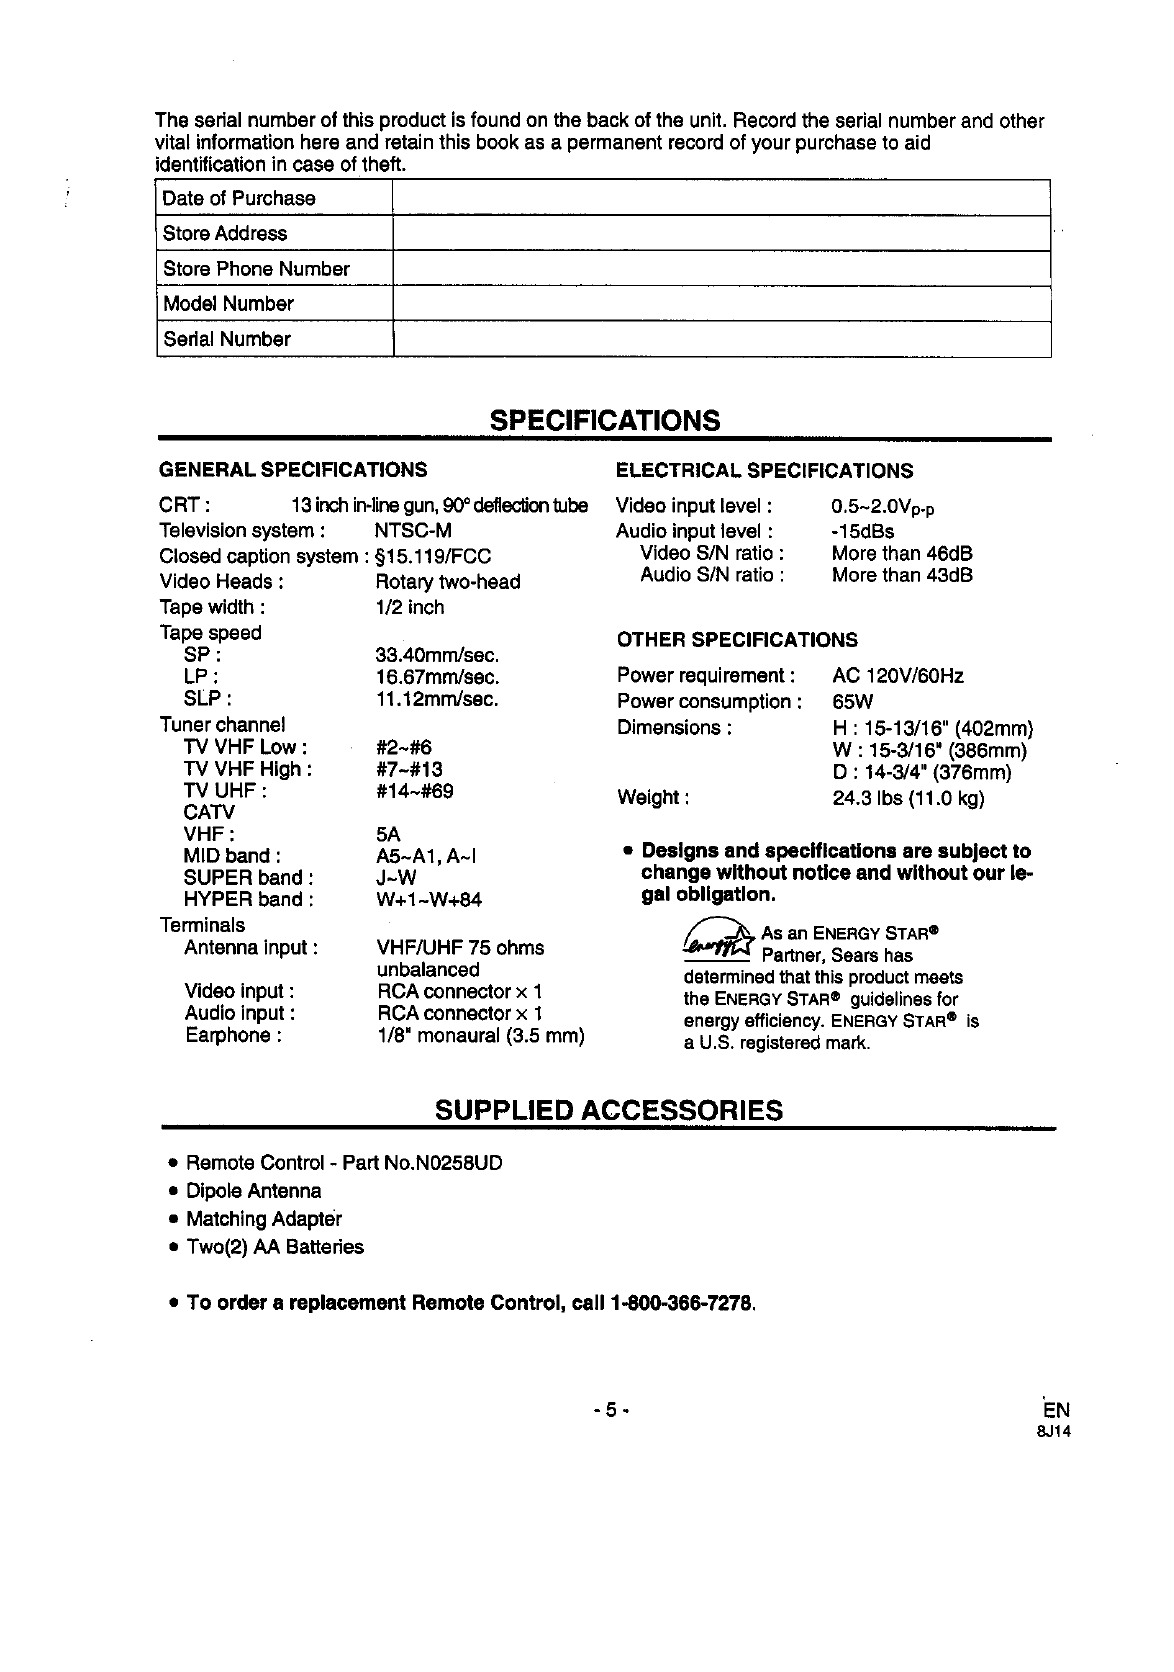
The serial number of this product is found on the back of the unit. Record the serial number and other
vital information here and retain this book as a permanent record of your purchase to aid
identification in case of theft.
Date of Purchase
Store Address
Store Phone Number
Model Number
Serial Number
SPECIFICATIONS
GENERAL SPECIFICATIONS
CRT : 13 inchin-linegun,90°deflection tube
Television system : NTSC-M
Closed caption system : §15.119/FCC
Video Heads : Rotary two-head
Tape width : 1/2 inch
Tape speed
SP : 33.40mm/sec.
LP : 16.67ram/sac.
SLP : 11.12mm/sec.
Tuner channel
"rv VHF Low : #2-#6
TV VHF High : #7-#13
TV UHF : #14-#69
CATV
VHF : 5A
MID band : A5-A1, A-I
SUPER band :J-W
HYPER band : W+1-W+84
Terminals
Antenna input : VHF/UHF 75 ohms
unbalanced
Video input : RCA connector x 1
Audio input : RCA connector x 1
Earphone : 1/8" monaural (3.5 ram)
ELECTRICAL SPECIFICATIONS
Video input level :
Audio input level :
Video S/N ratio :
Audio S/N ratio :
0.5-2.0Vp.p
-15dBs
More than 46dB
More than 43dB
OTHER SPECIFICATIONS
Power requirement :
Power consumption :
Dimensions :
Weight
AC 120V/60Hz
65W
H : 15-13/16" (402mm)
W : 15-3/16" (386mm)
D : 14-3/4" (376mm)
24.3 Ibs (11.0 kg)
• Designs and specifications are subject to
change without notice and without our le-
gal obligation.
_, As an ENERGYSTARe
Partner,Sears has
determinedthat thisproductmeets
the ENERGYSTAReguidelinesfor
energyefficiency. ENERGY STAR e is
aU.S. registeredmark.
SUPPLIED ACCESSORIES
•Remote Control - Part No.N0258UD
=Dipole Antenna
•Matching Adapter
• Two(2) AA Batteries
• TO order areplacement Remote Control, call 1-800-366-7278.
-5- 'EN
8,.114
PRECAUTIONS
For safe operation and satisfactory performance
of your TVNCR, keep the following in mind when
selecting a place for its installation:
•Shield it from direct sunlight and keep it away
from sources of intense heat.
•Avoid dusty or humid places.
• For proper heat dissipation, avoid places with
insufficient ventilation. Do not block the ventila-
tion holes at the top and bottom of the unit. Do
not place the unit on a carpet because this will
block the ventilation holes.
•Install unit in a horizontal position.
• Avoid locations subject to strong vibration.
• Do not place the TVNCR near strong mag-
netic fields.
• Avoid moving TV/VCR to locations where tem-
perature differences are extreme.
• Do not handle the power cord with wet hands.
• Do not pull on the power cord when discon-
necting it from an AC wall outlet. Grasp it by
the plug.
• If, by accident, water is spilled on your unit, un-
plug the power cord immediately and take the
unit to a Sears Service Center for servicing.
• Do not put your fingers or objects into the
TVNCR cassette holder.
• Do not place anythingdirectly on top of the unit.
Moisture condensation may occur inside the unit
when it is moved from acold place to a warm
place, or after heating a cold room or under con-
ditions of high humidity. If a tape is played in a
TVNCR which has moisture, it may damage the
tape and TV/VCR. Therefore when you suspect
that condensation has occurred inside the unit,
turn the POWER button ON and allow at least 2
hours for the unit to dry out.
IMPORTANT COPYRIGHT INFORMATION
Unauthorized recording or use of broadcast televi-
sion programming, videotape, film or other copy-
righted material may violate applicable copyright
laws. Sears assumes no responslbUityfor un-
authorized duplication, use, or other acts which
infringe upon the rights of copyright owners.
FCC WARNING
This equipment may generate or use radio fre-
quency energy. Changes or modifications to
this equipment may cause harmful interfer-
ence unless the modifications are expressly
approved in the instruction manual. Do not op-
erate this equipment if an unauthorized
change or modification is made.
This equipment has been tested and found to com-
ply with the limits for a Class B digital device, pursu-
ant to Part 15 of the FCC Rules. These limits are
designed to provide reasonable protection against
harmful interference in a residential installation.This
equipment generates, uses, and can radiate radio
frequency energy and, if not installedand used in
accordance withthe instructions,may cause harm-
ful interferenceto radio communications.
However, there is no guarantee that interference
will not occur in a particular installation. Ifthis
equipment does cause harmful interferenceto
radioor television reception,which can be deter-
mined by turningthe equipment offand on, the
user is encouraged to try to correct the interfer-
ence by one or more of the following measures:
1) Reorient or relocate the receiving antenna.
2) Increase the separation between the equip-
ment and receiver.
3) Connect the equipment into an outlet on a
circuit different from that to which the re-
ceiver is connected.
4) Consult the dealer or an experienced re-
dio/TV technician for help.
A NOTE ABOUT RECYCLING
This product's packaging materials are recyclable and can be reused. Please dispose of any
materials in accordance with your local recycling regulations.
Batteries should never be thrown away or incinerated but disposed of in accordance with your
local regulations concerning chemical wastes.
-6 - EN
8J14

FEATURES
• Infrared remote control
•Bilingual on-screen menu display select-
able In English or Spanish
•Real time counter-
This showsthe elapsedrecordingor playbacktime
in hours,minutes,and seconds.The "-" indication
willappearwhenthe tape is rewoundfurther than
the tape counterposition"0:00:00".
•181 channel capability PLL frequency
synthesizer tuner with direct station call-
Aconverter may be necessary to view scrambled
cablechannels.
•Auto Clock Setting-
Allowsyouto setthe clockfunctionfroma PBS
broadcaststation.
• Closed capUon system-
You.mayviewspeciallylabeled (cc)TV programs,
movies, news,prerecordedtapes, etc.witheithera
dialoguecaptionortextdisplayadded tothe pro-
gram.
•Game mode-
Automaticallysetsexternalinputmodeand allows
TVNCR displayto be suitablefor use withTV
games.
•Auto power on and off system-
Automaticallyturnson theTV/VCR whenyouinsert
the cassette,turnsoffafterauto-rewind,and ejects
whenthe beginningof the tape is reached,
•Auto rewind when the end of a tape is
reached-
Thisfunctiondoesn'toccurwhenusingtimerre-
cording.
•Three different playback tape speeds :
SP/LP/S LP
•Two different recording tape speeds :
SP/SLP
•2 Step picture search operation-
You can view a video program at high speed or su-
per high speed in either a forward or reverse direc-
tion in LP and SLP mode. High speed only in SP
mode.
•Zero Return-
The tape returns to counter of 0:00:00 by rewinding
or fast-forwarding.
•Still-
"Freeze" the picture at any time, for close
viewing of a particular scene. Only tapes recorded
in SLP mode will show a faidy clear picture.
•Digital Auto Tracking (DTR)-
Automatically adjusts the tracking for each tape you
play.
•Rental play mode-
Improves playback picture quality from wom tapes,
such as rental tapes.
•Auto repeat-
Allows you to repeat a tape indefinitely without
pressing the PLAY button.
•Time search-
Let you set the TV/VCR to advance the tape by
entedng the desired playback time you want to skip.
•OTR (One Touch Recording)-
Instant timed recording from 30 to 480 minutes is
possible at the push of the REC/OTR button.
•1 Year, 8 events (Including Daily and
Weekly Timer Recording)-
The built-in timer allows you to record up to 8 pro-
grams at different times on different channels up to
1year in advance. The Daily timer allows record-
ings to be made of daily broadcasts, and the
Weekly timer allows recording to be made once a
week up to the end of the tape.
•Auto return-
After timer recording is finished, the TVNCR can re-
turn to the beginning of the recording.
•Wake up/Sleep timer-
Allows you to have the TVNCR automatically turn
on or off at a desired time.
•Timer Program Extension-
Allowsyouto shiftthe time schedulefor automatic
timerrecording.
- 7 - EN
8J14
VIDEO CASSE'I-FE
This TVNCR will operate with any cassette that has the _ mark. For best results,we
recommend the use of high-qualitytapes. Do not use poorqualityor damaged tapes.
PRECAUTIONS INSERTING A CASSETTE
•Avoid moisture. Moisture condensation may
occur insidethe unit when it is moved from a
cold place to a warm place, or after heatinga
cold room or under conditions of high humidity.
If a tape is played in a TVNCR which has mois-
ture, it may damage the tape and "rVNCR.
Therefore when you suspect that condensation
has occurred insidethe unit,turn the POWER
buttonON and allow at least 2 hoursfor the unit
to dry out.
• Avoid extreme heat, high humidity and mag-
netic fields.
•Do not tamper with the cassette mechanism.
• Do not touch the tape with your fingers.
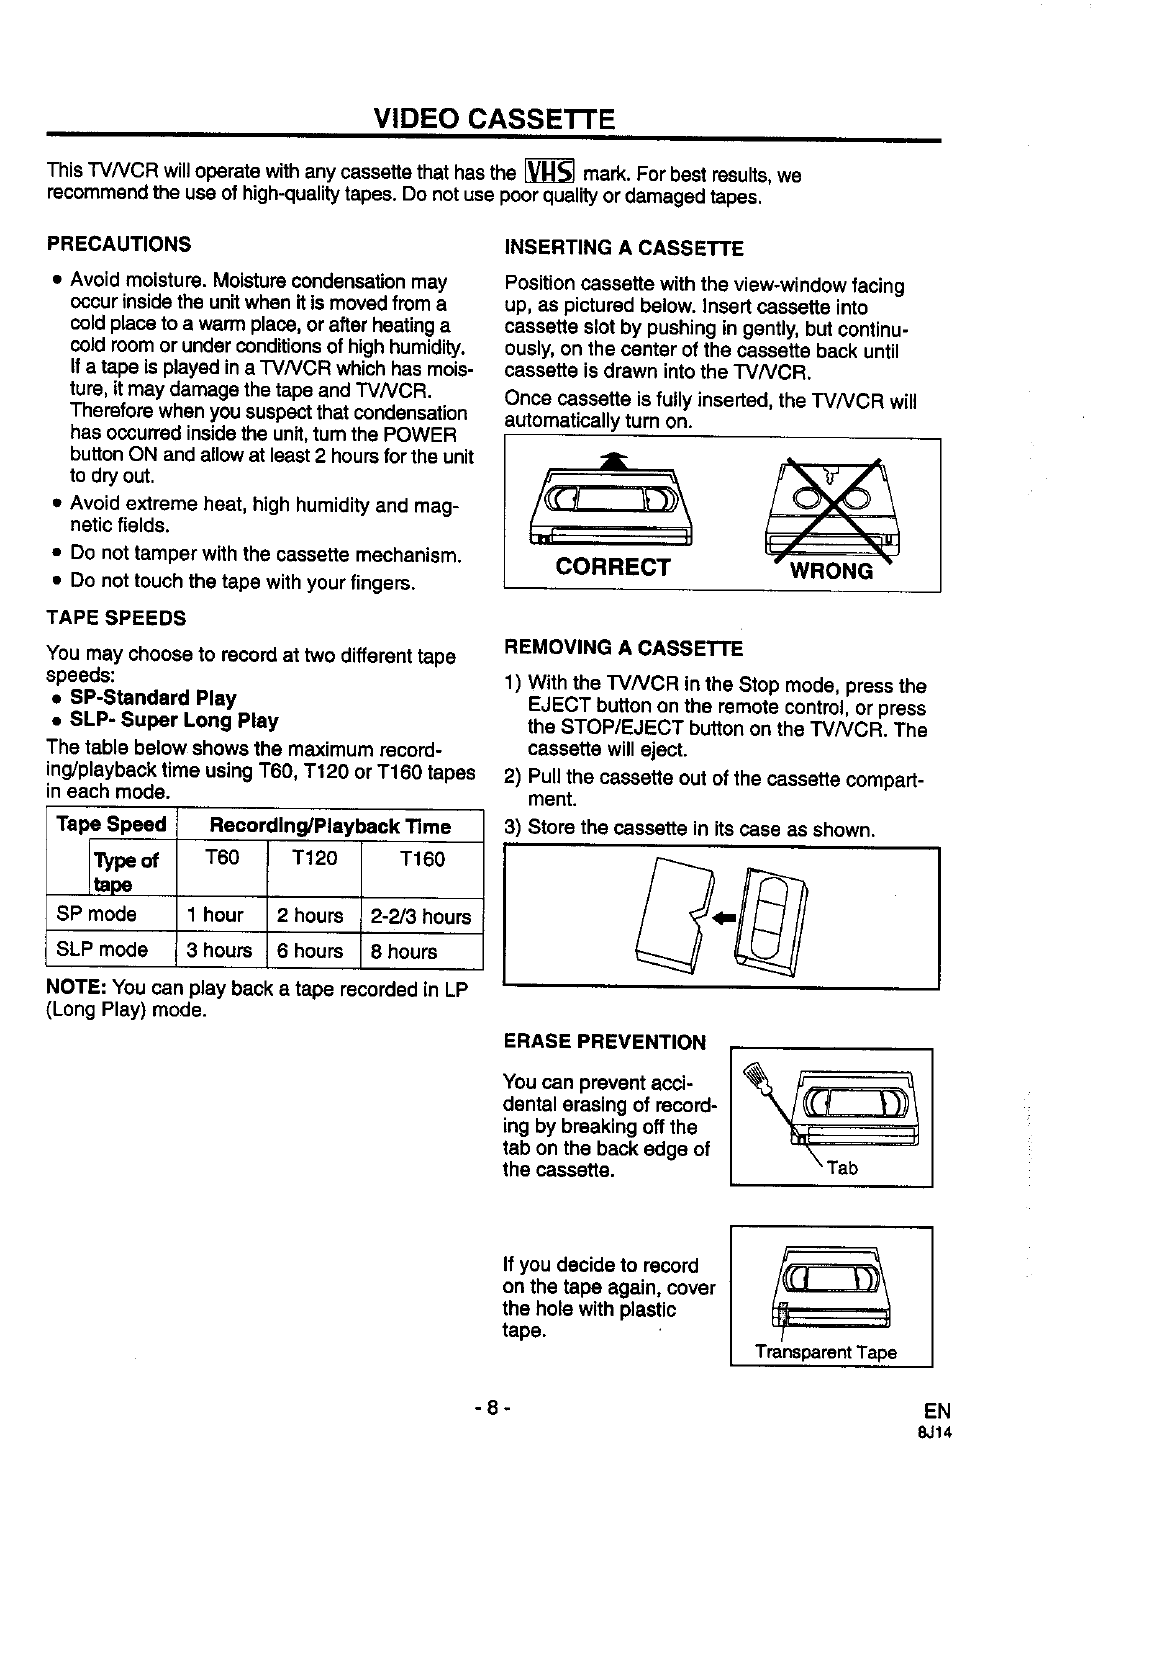
Position cassette with the view-window facing
up, as pictured below. Insert cassette into
cassette slot by pushing in gently, but continu-
ously, on the center of the cassette back until
cassette is drawn into the I'VNCR.
Once cassette is fully inserted, the TVNCR will
automatically turn on.
CORRECT
TAPE SPEEDS
You may choose to record at two different tape
speeds:
•SP-Standard Play
•SLP- Super Long Play
The table below shows the maximum record-
ing/playback time using T60, T120 or T160 tapes
in each mode.
Tape Speed
"lype of
tape
SP mode
SLP mode
Recording/Playback Time
3"60 T120 T160
1hour 2 hours 2-2/3 hours
3 hours 6 hours 8hours
NOTE: You can play back a tape recorded in LP
(Long Play) mode.
REMOVING A CASSETTE
1) With the FVNCR in the Stop mode, press the
EJECT button on the remote control, or press
the STOP/EJECT button on the TVNCR. The
cassette will eject.
2) Pull the cassette out of the cassette compart-
ment.
3) Store the cassette in its case as shown.
ERASE PREVENTION
You can prevent acci-
dental erasing of record-
ing by breaking off the
tab on the back edge of
the cassette.
If you decide to record
on the tape again, cover
the hole with plastic
tape. TransparentTape
- 8 - EN
8J14
OPERATING CONTROLS AND FUNCTIONS
NOTES:
•We do not recommend that you use a "universal" remote controlto operate this TVNCR. Not all of the functions
may work. Call the manufacturer of the universalremote control,not Sears, ifyou have problemswith it.
• Depending on your antenna system, you may need other connectors in addition to the coaxial cable supplied
with this unit. See AntennaJCable Connections section of this manual.
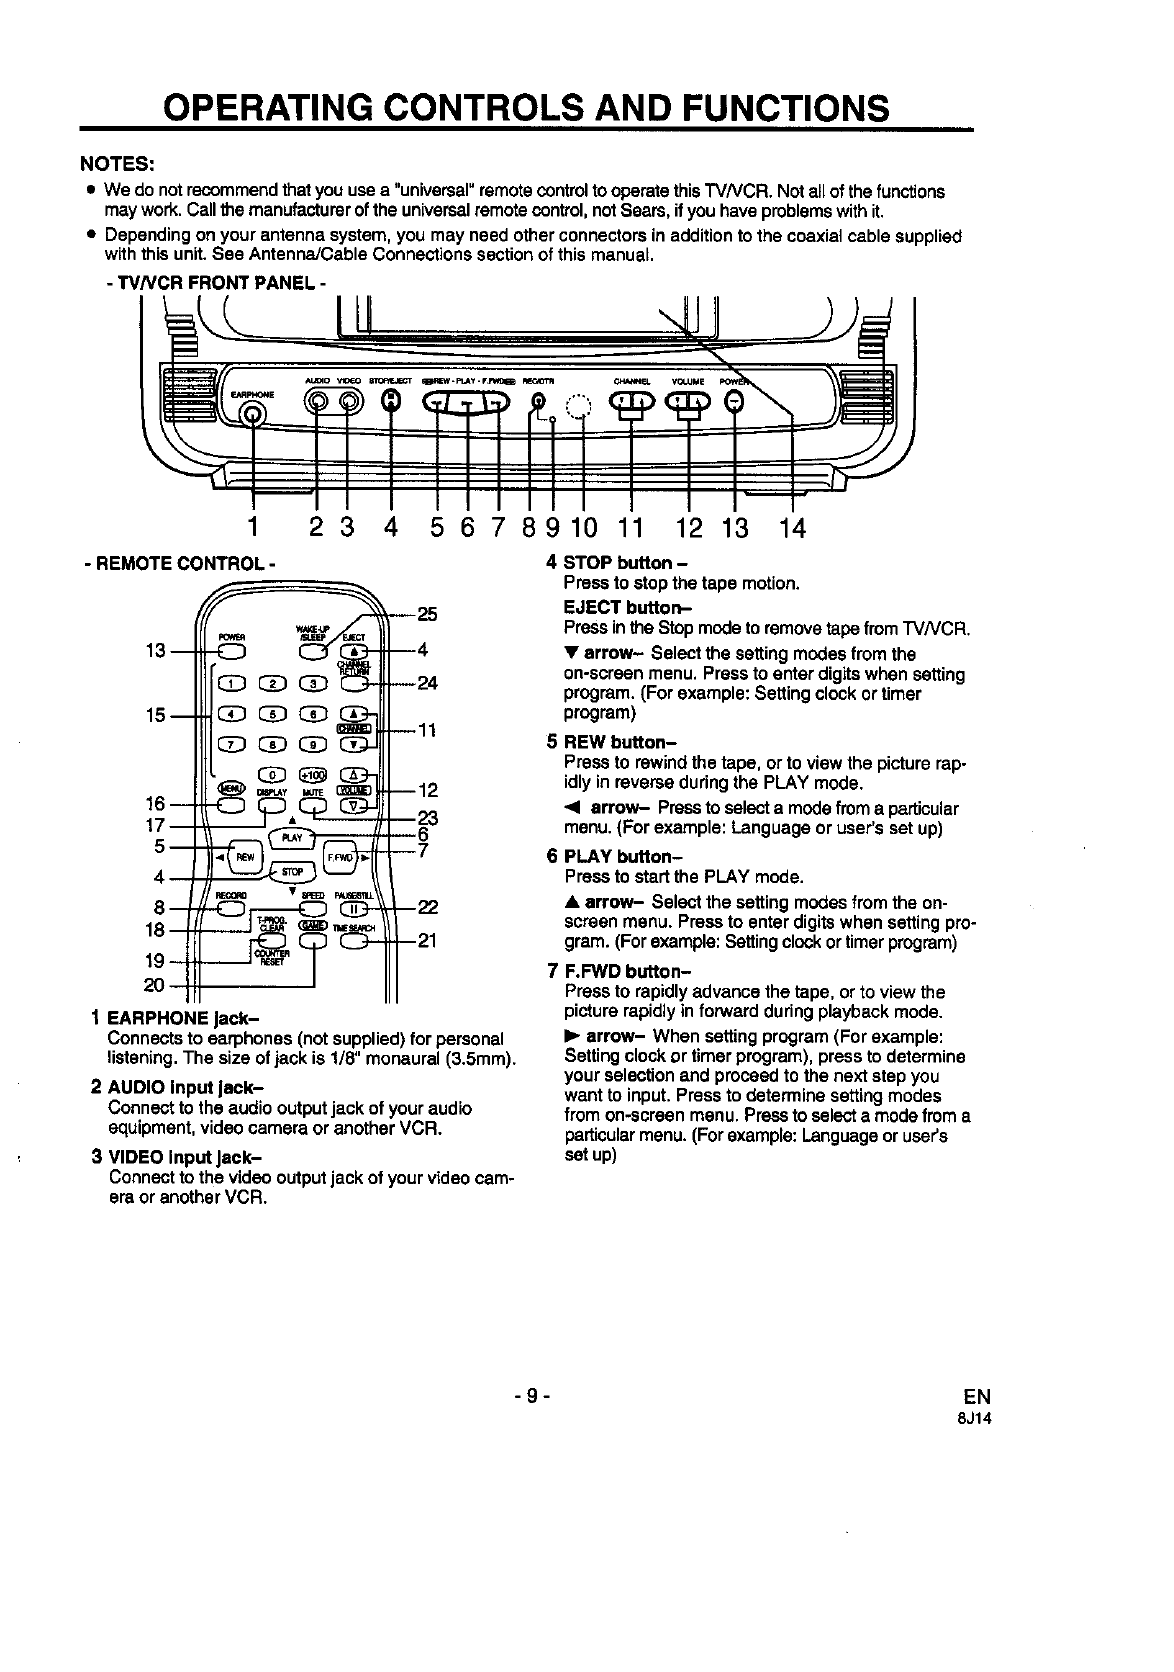
- TV/VCR FRONT PANEL -
1 2 3 4 5 6 7 8910 11 12 13 14
--25
--4
--24
--11
--12
--23
--6
--7
--22
-21
1 EARPHONE ack-
Connects to earphones (not supplied) for personal
listening. The size of jack is 1/8" monaural (3.5mm).
2 AUDIO input Jack-
Connect to the audio output jack of your audio
equipment, video camera or another VCR.
3 VIDEO input Jeok-
Connect to the video output jack of your video cam-
era or another VCR.
4 STOP button -
Pressto stopthe tape motion.
EJECT button-
Pressinthe Stopmodeto removetapefrom"r'VNCR.
•arrow- Selectthe settingmodesfrom the
on-screenmenu. Pressto enterdigitswhensetting
program.(For example:Settingclockor timer
program)
5REW button-
Press to rewind the tape, or to view the picture rap-
idly in reverse dudng the PLAY mode.
"4 arrow- Press to select a mode from a particular
menu. (For example: Language or user's set up)
PLAY button-
Press to start the PLAY mode.
• arrow- Select the setting modes from the on-
screen menu. Press to enter digits when setting pro-
gram. (For example: Setting clock or timer program)
F.FWD button-
Pressto rapidlyadvancethe tape, orto view the
picture rapidlyinforward dudngplaybackmode.
•arrow- When settingprogram(Forexample:
Settingclockortimerprogram),pressto determine
yourselectionandproceedto the nextstepyou
wantto input.Pressto determinesettingmodes
from on-screenmenu.Pressto selectamodefroma
particularmenu.(Forexample: Languageoruser's
setup)
-9- EN
8J14
8 RECbutton-
Pressfor manual recording.
OTR button- Activates One Touch Recording.
(Only on the TV/VCR)
9 RECORD Indicator-
Flashes during recording.
Lights up in the Stand-by mode for
Timer Recording.
10 Remote Sensor Window-
Receives the infrared signals from the remote
control.
11 CHANNEL •I•buttons-
Press to select the desired channels for viewing or
recording.
TRACKING function- Press to minimize video
'noise' (lines or dots on screen) dudng playback
mode.
12 VOLUME,', IV buttons-
Adjustthevolumelevel.
13 POWER button-
Press to turn "I'V/VCR on and off. Press to activate
timer recording.
14 Cassette slot-
Insert the cassette here.
15 Number buttons.--
Pressto selectdesiredchannelsforviewingor re-
cording.Toselect channelsfrom 1 to 9, first press
the 0 buttonand then 1 to 9.
+100 button- When selectingcable channels
whichare higherthan 99, pressthisbuttonfirst,
thenpressthe lasttwodigits.(To selectchannel
125, first pressthe "+100"buttonthen press"2"
and"5').
16 MENU button-
" Pressto displaythe mainmenuon the TV screen.
17 DISPLAY button-
Display the counter or the current channel number
and current time on the TV screen.
18 SPEED button-
Press to choose the desired recording speed:
SP/SLP.
19 T-PROG. CLEAR button-
Press to cancel a timer program setting
(See page 27),
COUNTER RESET button- Press to reset
counter to 0:00:00.
20 GAME button-
Sets the game mode and extemal input mode at
the same time.
21 TIME SEARCH button-
Press to activate Time Search mode.
22 PAUSE/STILL button-
Press to temporerily stop the tape during the record-
ing or to view a still picture dudng playback.
23 MUTE button-
Mutes the sound. Press itagain to resume sound.
24 CHANNEL RETURN button-
Press to go back to the previously viewed channel
For example, pressing this button once willchange
channel display from 3 (present channel) to 10
(previously viewed channel), and pressing it
a second time will return from 10 to 3.
25 WAKE UP/SLEEP button-
Setsthe Wake upor SleepTimer.
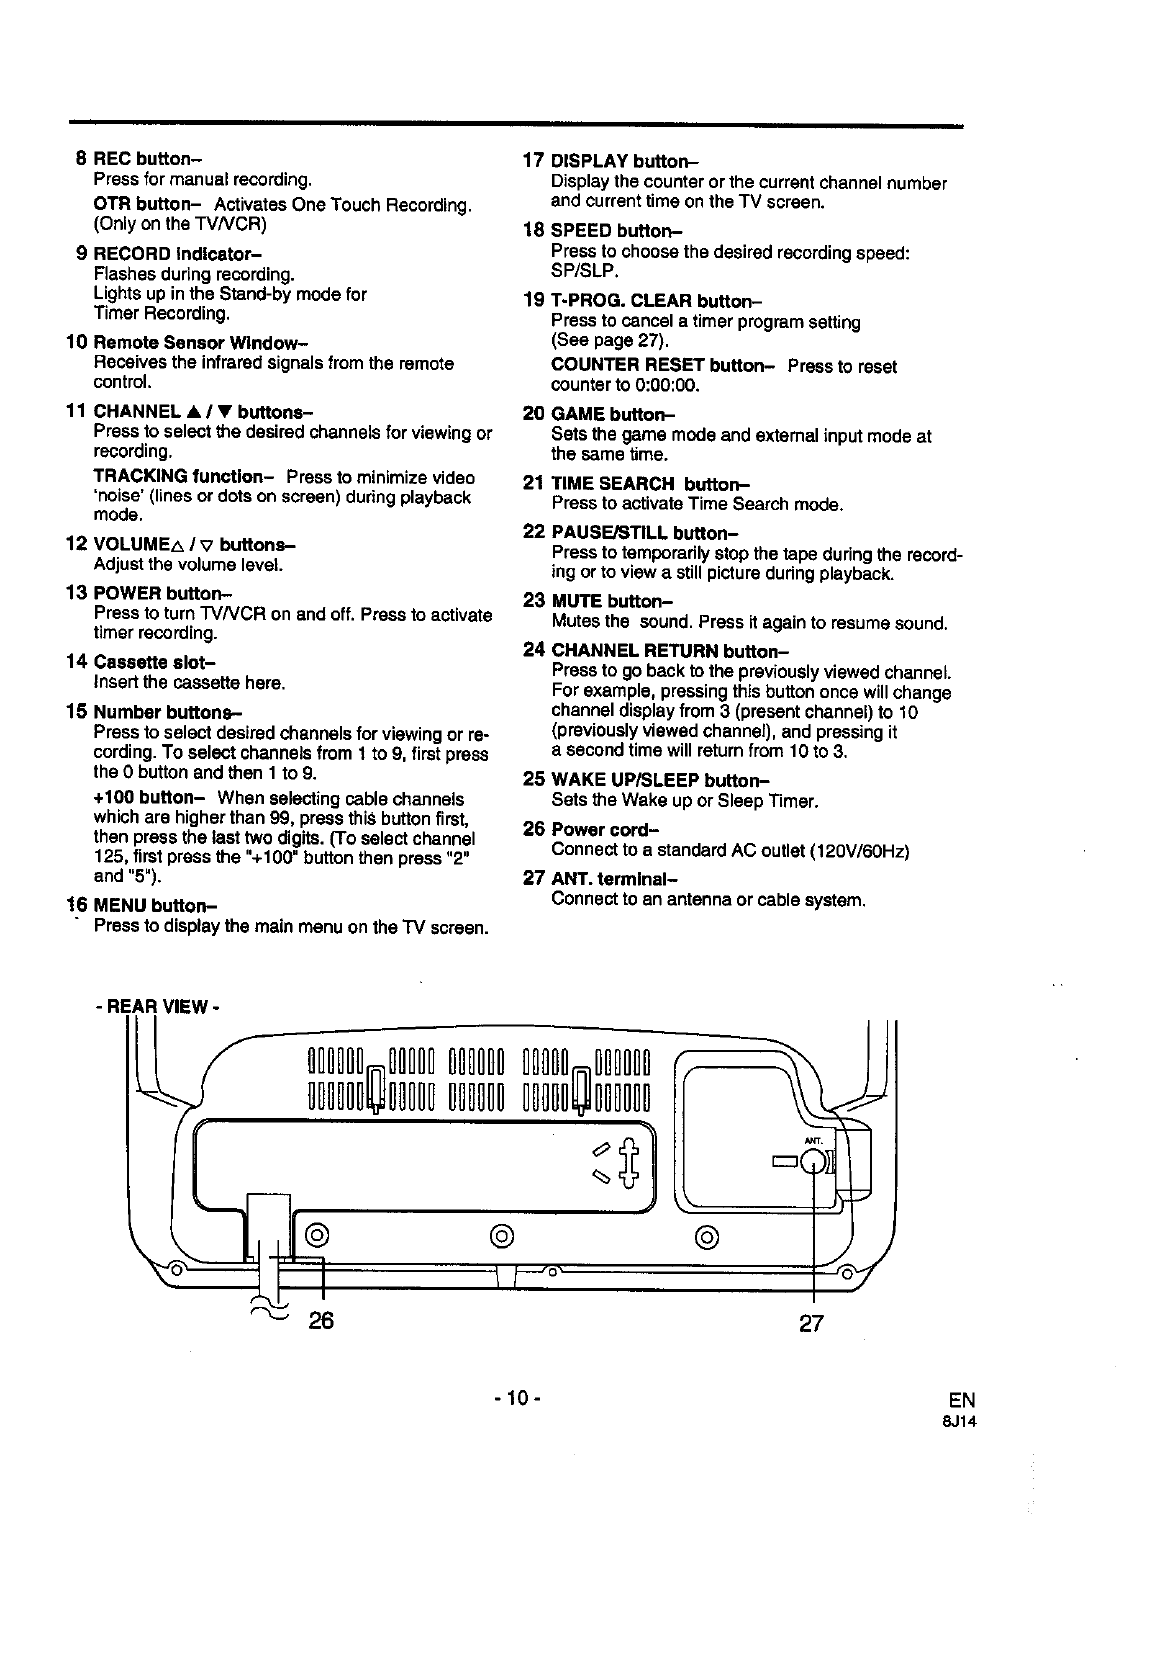
26 Power cord-
Connectto a standardAC outlet(120V/60Hz)
27 ANT. terminal-
Connectto an antennaor cable system.
-REAR VIEW -
llIIIl lllIl IllIII llllI IllIll
llllIll llIll lllllI llllll IIIIll
i---_o,
26
k
©
27
- 10 - EN
8J14
PREPARATION FOR USE
VHF/UHF COMBINED ANTENNA
VHF/UHF OUTDOOR ANTENNAS
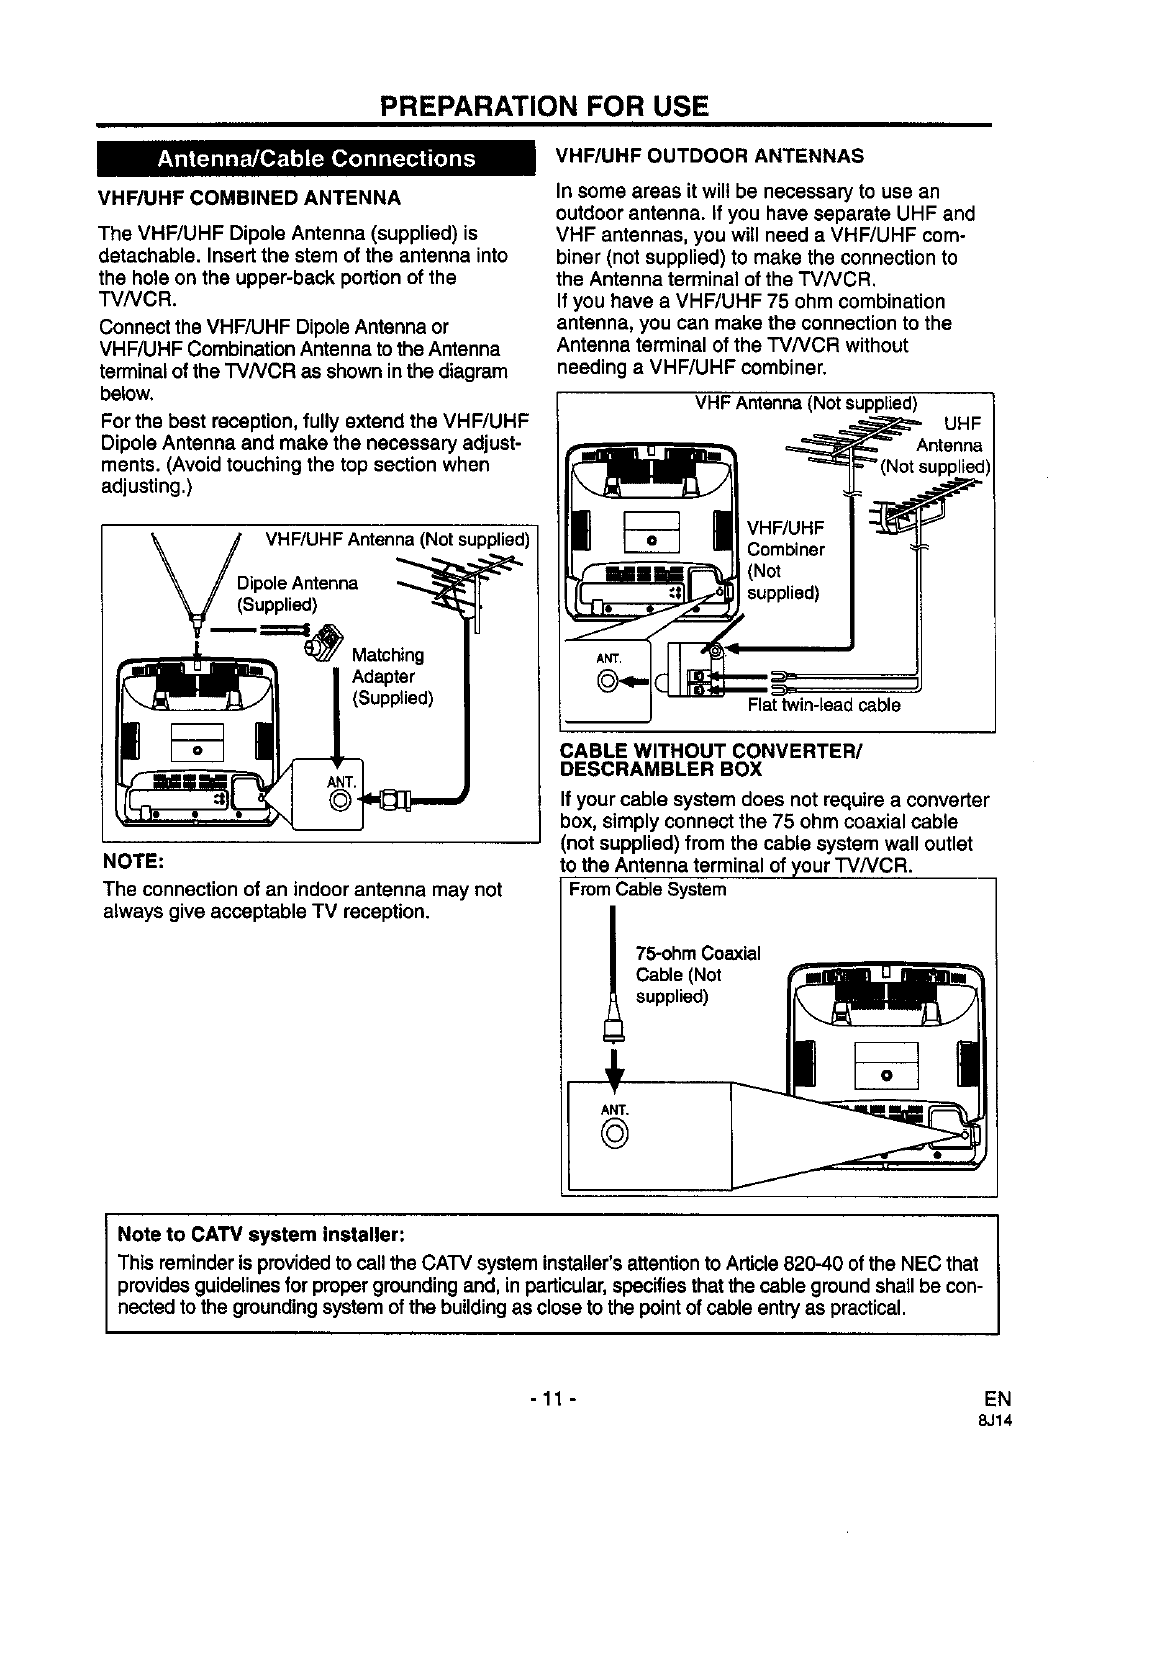
The VHF/UHF Dipole Antenna (supplied) is
detachable. Insert the stem of the antenna into
the hole on the upper-back portion of the
TVNCR.
Connect the VHF/UHF Dipole Antenna or
VHF/UHF Combination Antenna to the Antenna
terminal of the "IVNCR as shown inthe diagram
below.
For the best reception, fully extend the VHF/UHF
Dipole Antenna and make the necessary adjust-
ments. (Avoid touching the top section when
adjusting.)
VHF/UHF Antenna (Not supplied)
)ipole Antenna
(Supplied)
NOTE:
The connection of an indoor antenna may not
always give acceptable TV reception.
In some areas it will be necessary to use an
outdoor antenna. If you have separate UHF and
VHF antennas, you will need a VHF/UHF com-
biner (not supplied) to make the connection to
the Antenna terminal of the TVNCR.
If you have a VHF/UHF 75 ohm combination
antenna, you can make the connection to the
Antenna terminal of the TVNCR without
needing a VHF/UHF combiner.
VHF Antenna (Not supplied) UHF
Antenna
pplied)
Flat twin-lead cable
CABLE WITHOUT CONVERTER/
DESCRAMBLER BOX
If your cable system does not require a converter
box, simply connect the 75 ohm coaxial cable
(not supplied) from the cable system wall outlet
to the Antenna terminal of your TVNCR.
FromCable System
I 5-ohm Coaxial
Cable (Not
supplied)
ANT.
©
Note to CATV system installer:
This reminder is provided to call the CAI-V system installer'sattention to Article820-40 of the NEC that
providesguidelinesfor proper groundingand, inparticular,specifiesthat the cable ground shall be con-
nected to the groundingsystem of the building as close to the pointof cable entryas practical.
-11 - EN
8J14
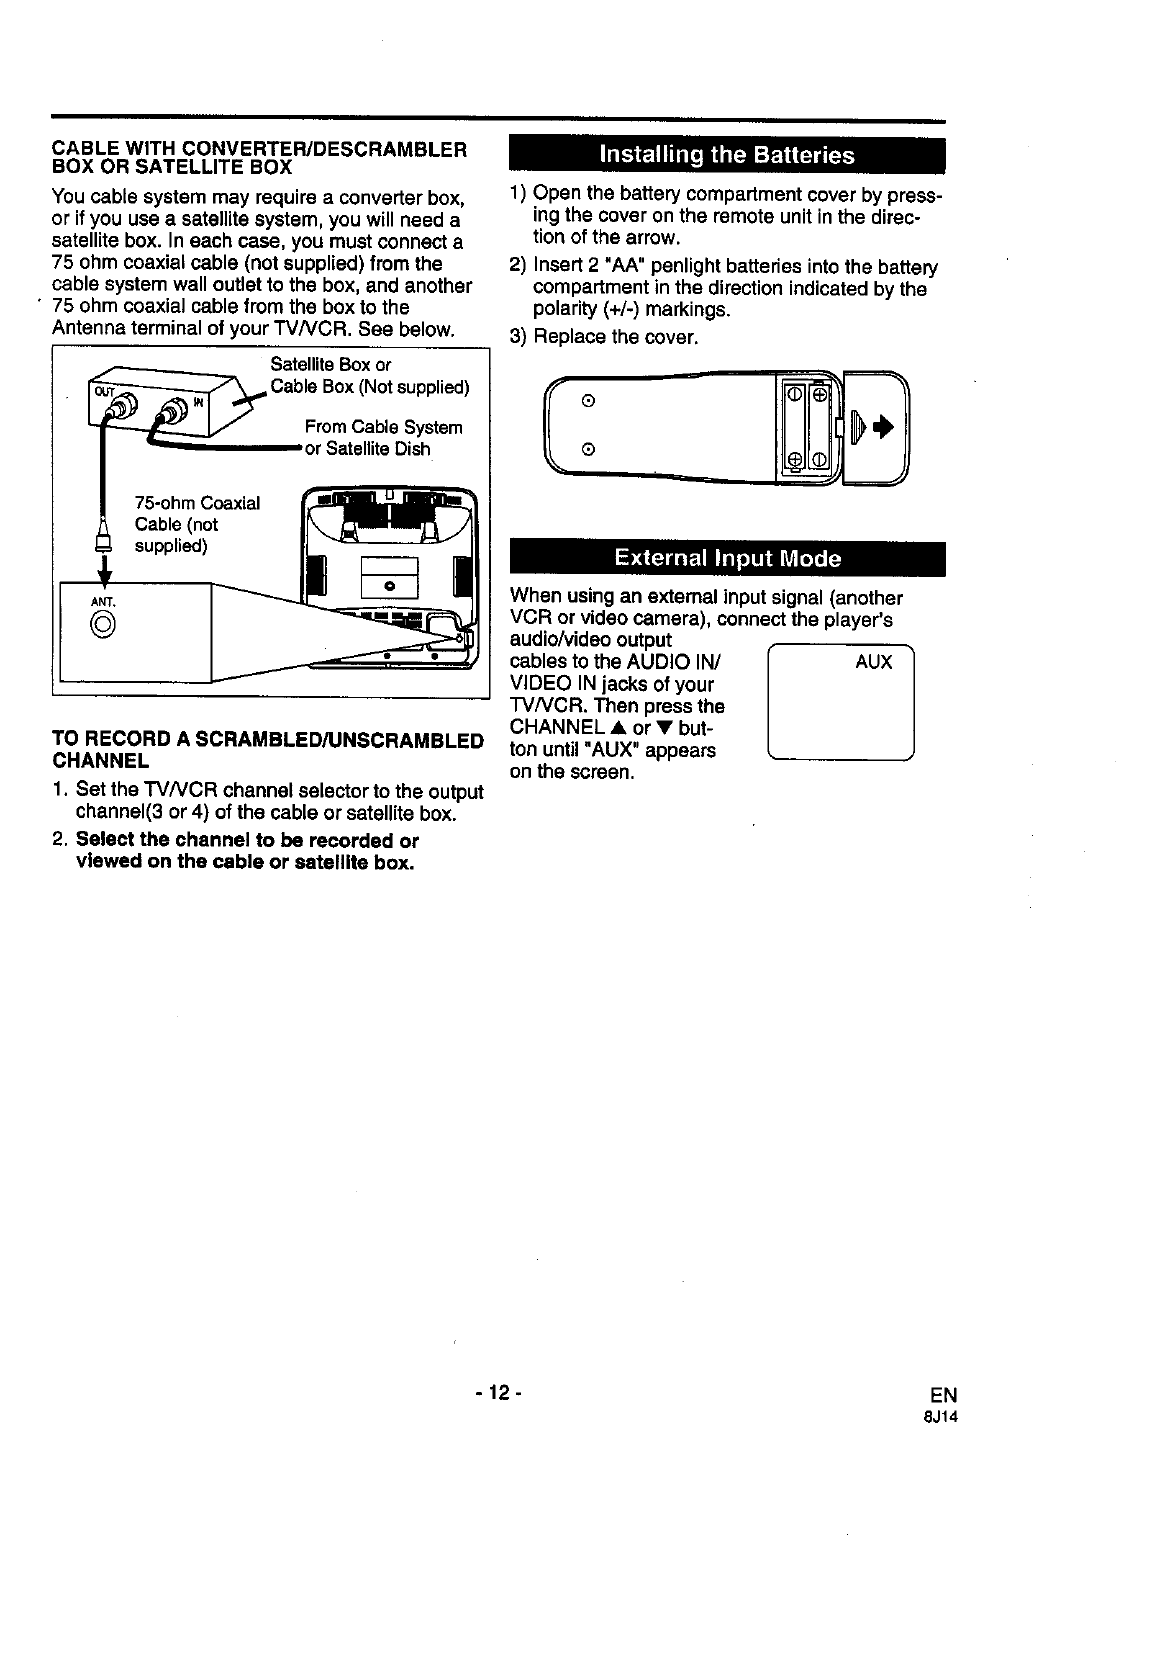
CABLE WITH CONVERTEPJDESCRAMBLER
BOX OR SATELLITE BOX
You cable system may require a converter box,
or if you use a satellite system, you will need a
satellite box. In each case, you must connect a
75 ohm coaxial cable (not supplied) from the
cable system wall outlet to the box, and another
•75 ohm coaxial cable from the box to the
Antenna terminal of your TV/VCR. See below.
_Satellite Box or
Cable Box (Not supplied)
From Cable System
or Satellite Dish
75-ohmCoaxial
Cable (not
supplied)
ANT,
©
TO RECORD A SCRAMBLED/UNSCRAMBLED
CHANNEL
1. Set the TV/VCR channel selector to the output
channel(3 or 4) of the cable or satellite box.
2. Select the channel to be recorded or
viewed on the cable or satellite box.
1) Open the battery compartment cover by press-
ing the cover on the remote unit in the direc-
tion of the arrow.
2) Insert 2"AA" penlight batteries into the battery
compartment in the direction indicated by the
polarity (+/-) markings.
3) Replace the cover.
When using an external input signal (another
VCR or video camera), connect the player's
audioA4deo output
cables to the AUDIO IN/ AUX
VIDEO IN jacks of your
IVNCR. Then press the
CHANNEL • or •but-
ton until "AUX" appears
on the screen.
- 12 -EN
8J14
SET UP FOR USE
CHANNEL MEMORY PROGRAMMING
Use this feature to program the TV/VCR tuner to scan and memorize all the channels you receive in
your area. Use the remote control for this procedure.
You can use this feature to memodze cable channels only if your cable system connects directly from
its wall outlet to the Antenna terminal of your TV/VCR, You cannot use this feature when the TVNCR
is connected to acable or satellite box.
1Plug in the TVNCR power cord
Plug the TV/VCR power cord into a
standard AC outlet.
2Turn on the TV/VCR
Press the POWER button to turn on
the TV/VCR.
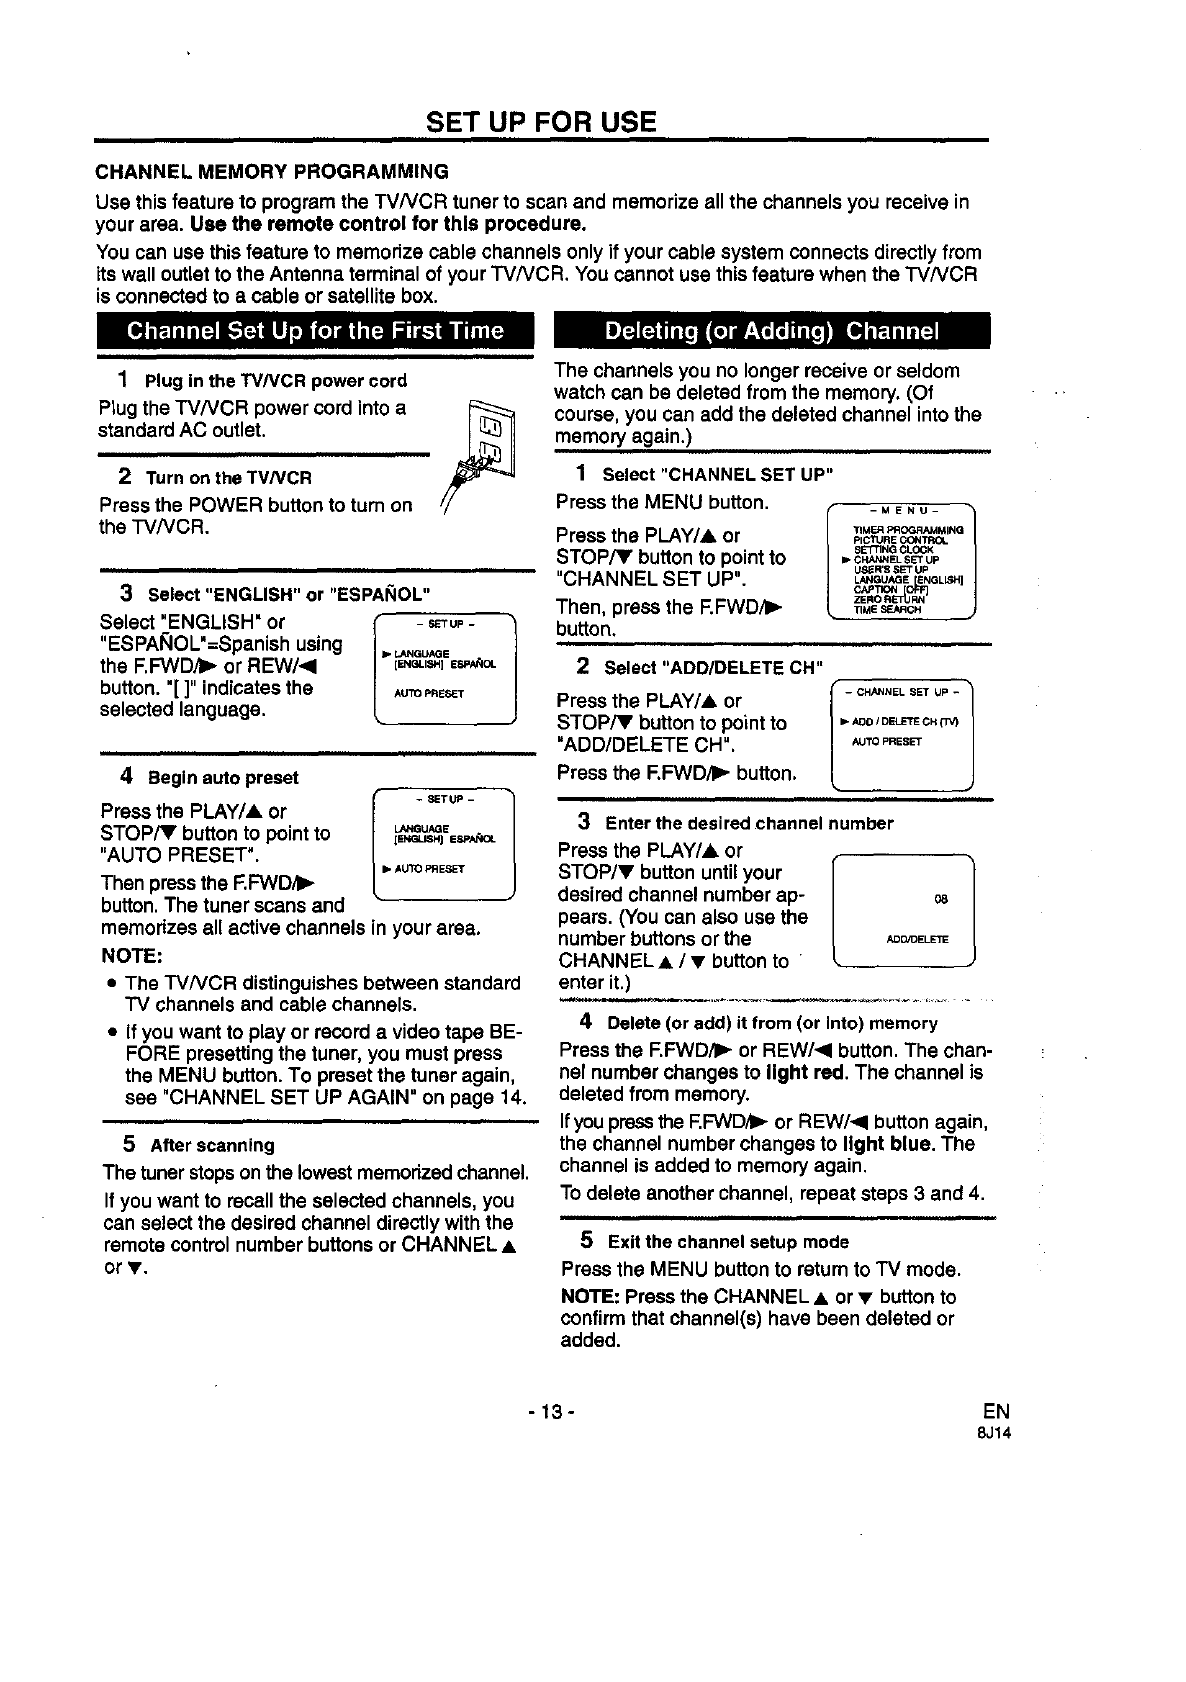
3Select"ENGLISH" or =ESPANOL"
Select "ENGLISH" or
"ESPAl_lOL"=Spanish using
the F.FWD,_. or REW/.<I
button. "[ ]" indicates the
selected language. I- SETup - 1
U_NGUAGE
AUTO PRESET
4Begin auto preset
Press the PLAY/A or
STOP/V button to point to
"AUTO PRESET".
Then press the RFWD,I_
button. The tuner scans and •
memorizes all active channels in your area.
NOTE:
-SETUP -
LANGUAGE
[ENGLIS_ ESPAN_-
I=,AUIO PRESET
• The TVNCR distinguishes between standard
"IV channels and cable channels.
• If you want to play or record avideo tape BE-
FORE presetting the tuner, you must press
the MENU button. To preset the tuner again,
see "CHANNEL SET UP AGAIN =on page 14.
5 After scanning
The tuner stopson the lowestmemorized channel.
If you want to recall the selected channels, you
can select the desired channel directly with the
remote control number buttons or CHANNEL •
orY.
The channels you no longer receive or seldom
watch can be deleted from the memory. (Of
course, you can add the deleted channel into the
memory again.) ll,i
1Select "CHANNEL SET UP"
Press the MENU button.
Press the PLAY/=, or
STOP/Y button to point to
"CHANNEL SET UP".
Then, press the F.FWD/I_
button.
2Select "ADD/DELETECH"
Press the PLAY/=, or
STOP/T button to point to
=ADD/DELETE CH=.
Press the F.FWD/I_ button.
I_MENU_ !
TIMER PROGRAMMING
pIC*nJRE C43_Tp_(.
SETTING CLOCK
p, CP, AN_EL SET Up
U_R'S SET UP
ZEI_ R_r_RN
TIME SEARCH
- CHANNEL SET UP - 1
m,-ADD /DELETE CH (T,/)
AUTO PRESET
3 Enterthedesiredchannelnumber
Press the PLAY/=, or
STOP/V button until your I 1
desired channel number ap- 08
pears. (You can also use the
number buttons or the _O_ELE_
CHANNEL•/• button to
enter it.)
4 Delete (or add) it from (or Into) memory
Press the F.FWD/P- or REW/<I button. The chan-
nel number changes to Ught red. The channel is
deleted from memory.
Ifyou pressthe F.F'WD/_ or REW/<I button again,
the channel number changes to light blue. The
channel is added to memory again.
To delete another channel, repeat steps 3 and 4.
5Exit the channel setup mode
Pressthe MENU button to return to TV mode.
NOTE: Press the CHANNEL •or •button to
confirm that channel(s) have been deleted or
added.
-13 - EN
8J14
Make sure:
• Press the POWER button to tum on the TVNCR.
• You must use the remote control for the follow-
ing steps.
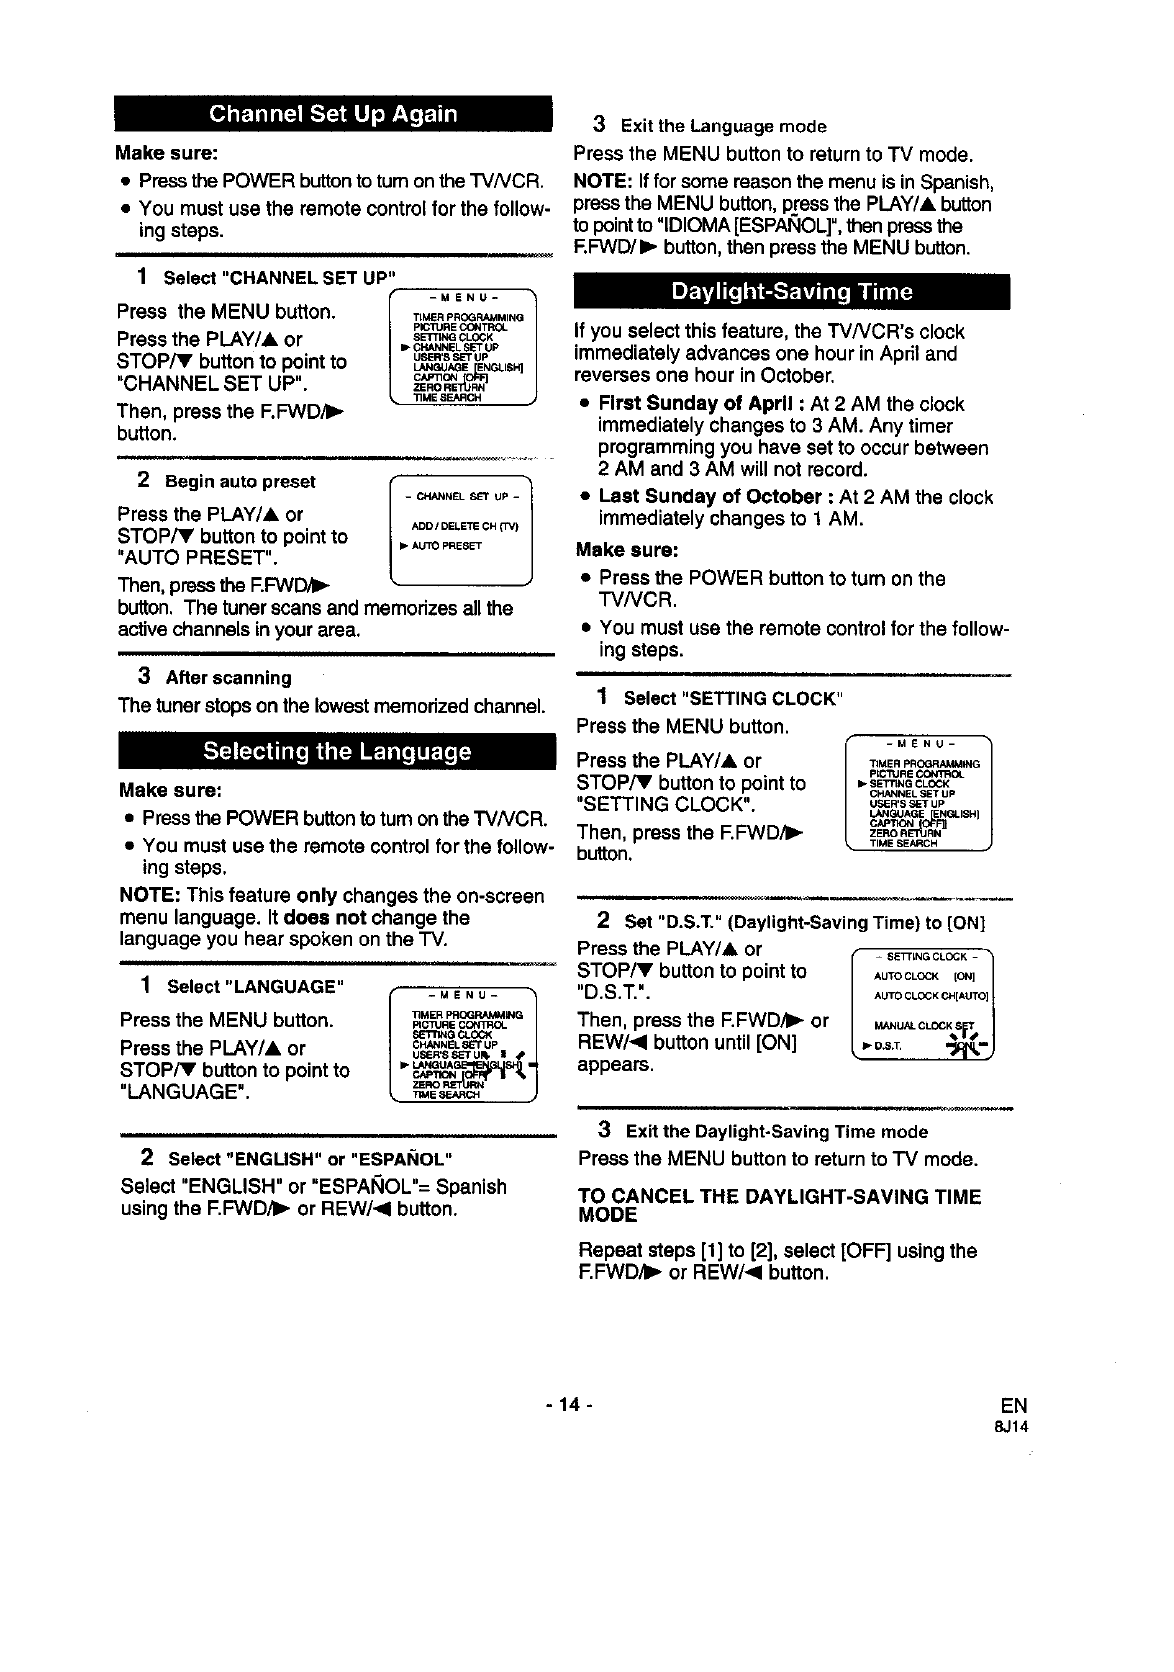
1Select "CHANNEL SET UP"
Press the MENU button.
Press the PLAY/& or
STOP/V button to point to
"CHANNEL SET UP".
Then, press the F.FWD/I_
button.
I-MENU-
TIMER pROGRAMMING
pICIURE CCNTRCL
SETTING CLOCK
I_ CHANNELSET Up
USER'SSET UP
CAPTIONLANGUAGE_ENGLISH]
k"riMESEARCH
2 Begin auto preset
Press the PLAY/A or
STOP/Y button to point to
"AUTO PRESET".
Then, pressthe F.FWD/_
I _ CHANNEL _UP - 1
ADD IDELETE CH (TV)
I_ AUTO PRESET
button. The tuner scans and memorizes all the
active channels in your area.
3 After scanning
The tuner stops on the lowest memorized channel.
Make sure:
•Press the POWER button to turnon the TVNCR.
• You must use the remote control for the follow-
ing steps.
NOTE: This feature only changes the on-screen
menu language. It does not change the
language you hear spoken on the "I-V.
1Select "LANGUAGE"
Press the MENU button.
Press the PLAY/& or
STOP/Y button to point to
"LANGUAGE".
-MENU-
33MER PRCG_ING
PICTURE
_"rrlNG CLOC_
CHANNEL _-r Up
USF.R'SSErUR, I •
2Select "ENGLISH" or "ESPANOL"
Select "ENGLISH" or "ESPAI_IOL"=Spanish
using the F.FWD/I_ or REW/_I button.
3Exit the Language mode
Press the MENU button to return to TV mode.
NOTE: Iffor some reason the menu is in Spanish,
press the MENU button, press the PLAY/A button
to pointto "IDIOMA[ESPANOL]",then pressthe
F.FWD/I_ button,then pressthe MENU button.
If you select this feature, the TVNCR's clock
immediately advances one hour in April and
reverses one hour in October.
•First Sunday of April : At 2 AM the clock
immediately changes to 3 AM. Any timer
programming you have set to occur between
2 AM and 3 AM will not record.
•Last Sunday of October : At 2 AM the clock
immediately changes to 1 AM.
Make sure:
• Press the POWER button to turn on the
TVNCR.
•You must use the remote control for the follow-
ing steps.
1Select "SETTING CLOCK"
Press the MENU button.
Press the PLAY/& or
STOP/V button to pointto
"SETTING CLOCK".
Then, press the EFWD,I_
button.
-MENU-
TIMER PR(X_AMMING
ptC'_JRE CONI_OL
_- SETTtNG CLOCK
CHANNEL SET Up
U_ER'S SET Up
I_Ie_JAGE ENGLISH}
ZEF_ R_IARN
TIME SEARCH
2Set "D.S.T." (Daylight-SavingTime) to [ON]
Press the PLAY/A or
STOP/V button to point to
"D.S.T.".
Then, press the F.FWD/I_ or
REW/.<I button until [ON]
appears.
AUTO CLOCK {ON]
AUTO CLOCK P_H[AUTO]
MANUALCLOC
L*o.8.T. "_l_'J
3 Exit the Daylight-SavingTime mode
Press the MENU button to return to TV mode.
TO CANCEL THE DAYLIGHT-SAVING TIME
MODE
Repeat steps [1] to [2], select [OFF] using the
F.FWD/I_ or REW/,<I button.
- 14 - EN
8J14
Set the clockaccurately for proper automatic timer
recording. If a Public BroadcastingStation (PBS) is
available inyour area, follow "AUTO CLOCK
SETTING". If there isn't one, then follow "MAN-
UAL CLOCK SETTING".
AUTO CLOCK SETTING
You can have the TVNCR set the clock time and
date automatically via the Extended Data
Service (XDS) of your local Public Broadcasting
Station (PBS) channel.
Make sure:
• Use the remote control for this procedure.
•TVNCR power must be turned on.
•Antennaconnectionsare correct.
• Cable converter box is turned on if your
TVNCR is connected to one.
• The channel is properly set in advance. (See
page 14.)
NOTES:
• Auto clock setting only needs to be set once.
But it can be done again if the clock's time
has become incorrect for some reason,
• if the TV/VCR is connected directly to a cable
converter box or satellite box, the local PBS
station must be selected on the cable box it-
self. The TVNCR must be set to the output
channel of the cable or satellite box (usually
channel 3 or 4), to be able to set up or correct
the clock automatically.
• The TVNCR cannot control the channels of the
cable or satellite box.
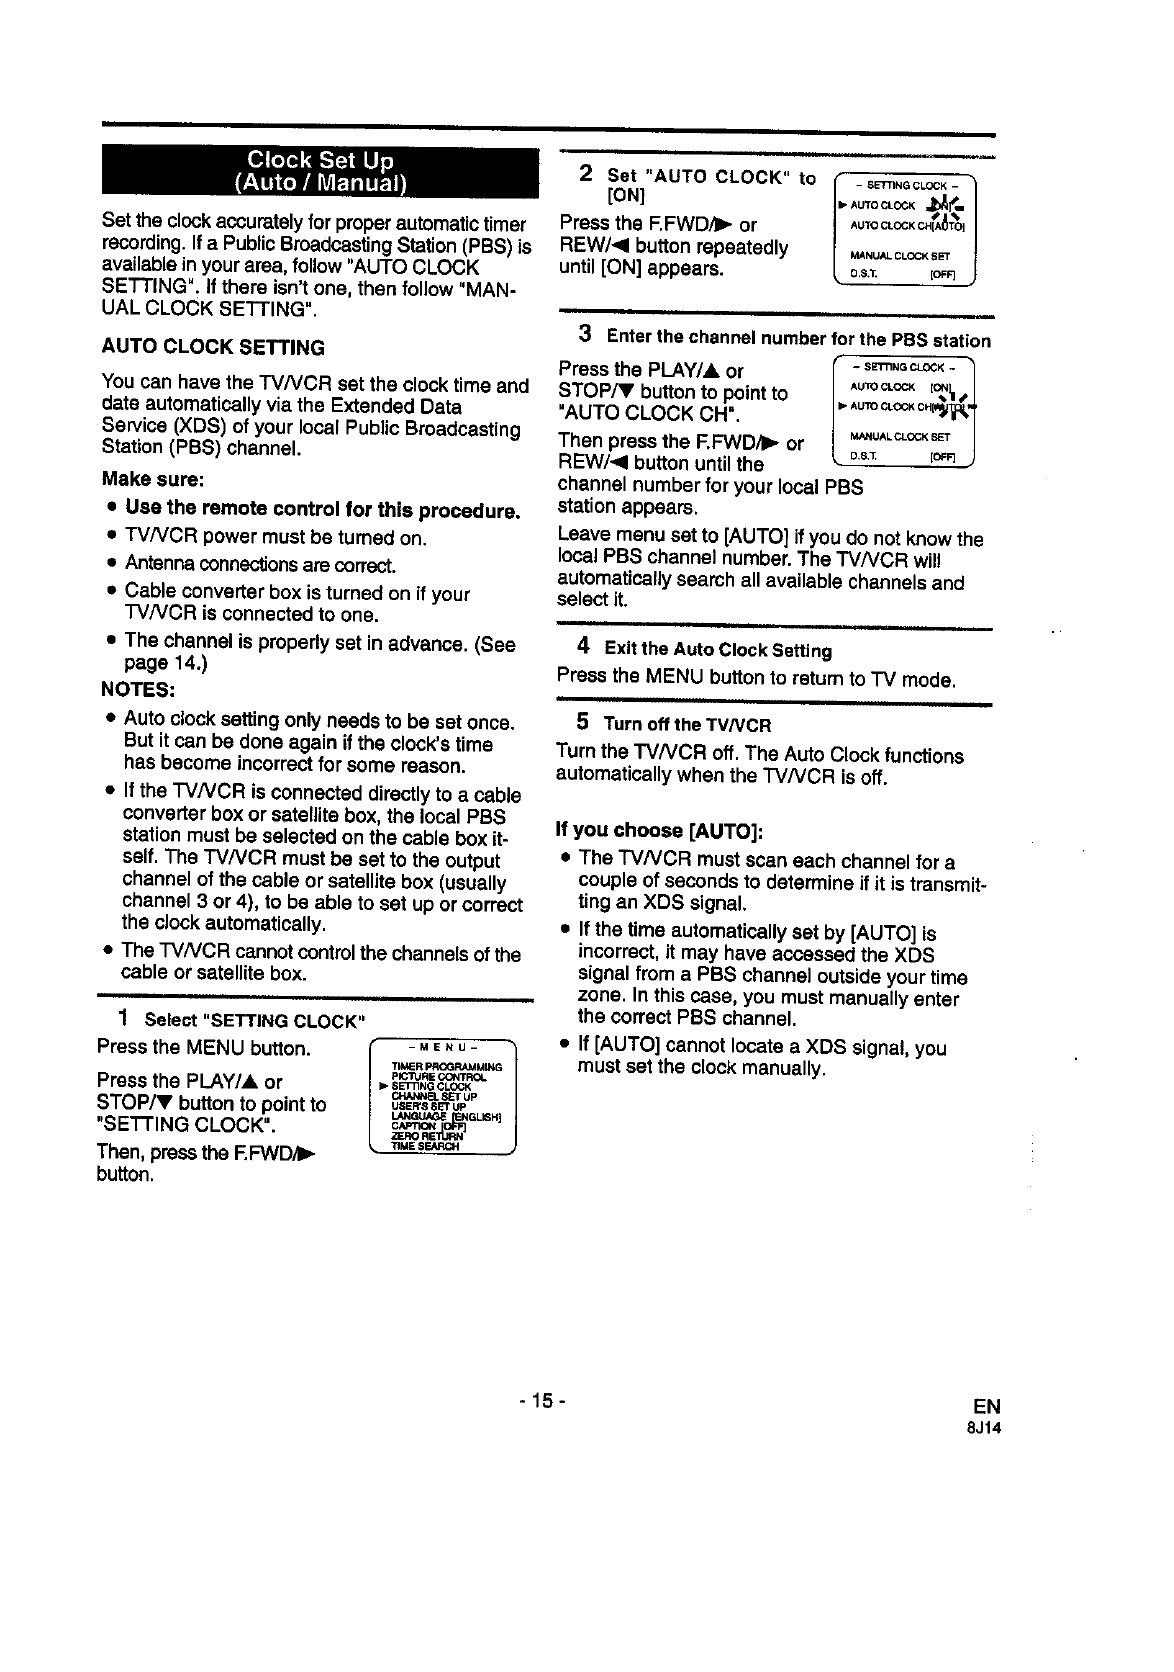
1 Select "SETTING CLOCK"
Press the MENU button.
Press the PLAY/A or
STOP/V button to point to
"SETTING CLOCK".
Then, press the F.P'WD,_-
button.
-MENU-
TIME R PROGRAMMING
pICtURE C(3N_
W,S_GI_G CLOCK
(;p_NNEL SET Up
USERS SET UP
•11ME SEARCH
i i i i
2 [oN]Set"AUTO CLOCK" to i_SETTINGCLOC=_I_1AUTOCLOCK
Press the F, FWD_-or |AUTOCLOCKCH[A_TO] |
nEW/4 button repeatedly / i_,_c_Ks_
until[ON] appears, lo.s._ [oF_j
3Enter the chsnnel number for the PBS station
Press the PLAY/A or
STOP/V button to point to
"AUTO CLOCK CH".
Then press the F.FWD/I_ or
REW/_I button untilthe
-SEITING CLOCK -
AUTO CLOC_ [C_t
MANUALCLOCK_*ET J
•O,S'_;' IOFF]
channel number for your local PBS
station appears.
Leave menu set to [AUTO] if you do not know the
local PBS channel number. The TV/VCR will
automatically search all available channels and
select it.
4ExittheAutoClock Setting
Press the MENU button to retum to "IV mode.
5 Turn off the TV/VCR
Turn the TV/VCR off. The Auto Clock functions
automatically when the "i-VNCR is off.
If you choose [AUTO]:
•The TVNCR must scan each channel for a
couple of seconds to determine if it is transmit-
ting an XDS signal,
•If the time automatically set by [AUTO] is
incorrect, it may have accessed the XDS
signal from aPBS channel outside your time
zone. In this case, you must manually enter
the correct PBS channel.
•if [AUTO] cannot locate a XDS signal, you
must set the clock manually.
-15- EN
8J14
MANUAL CLOCK SETTING
Make sure:
• Use the remote control for this procedure.
•"I-V/VCR power must be turned on.
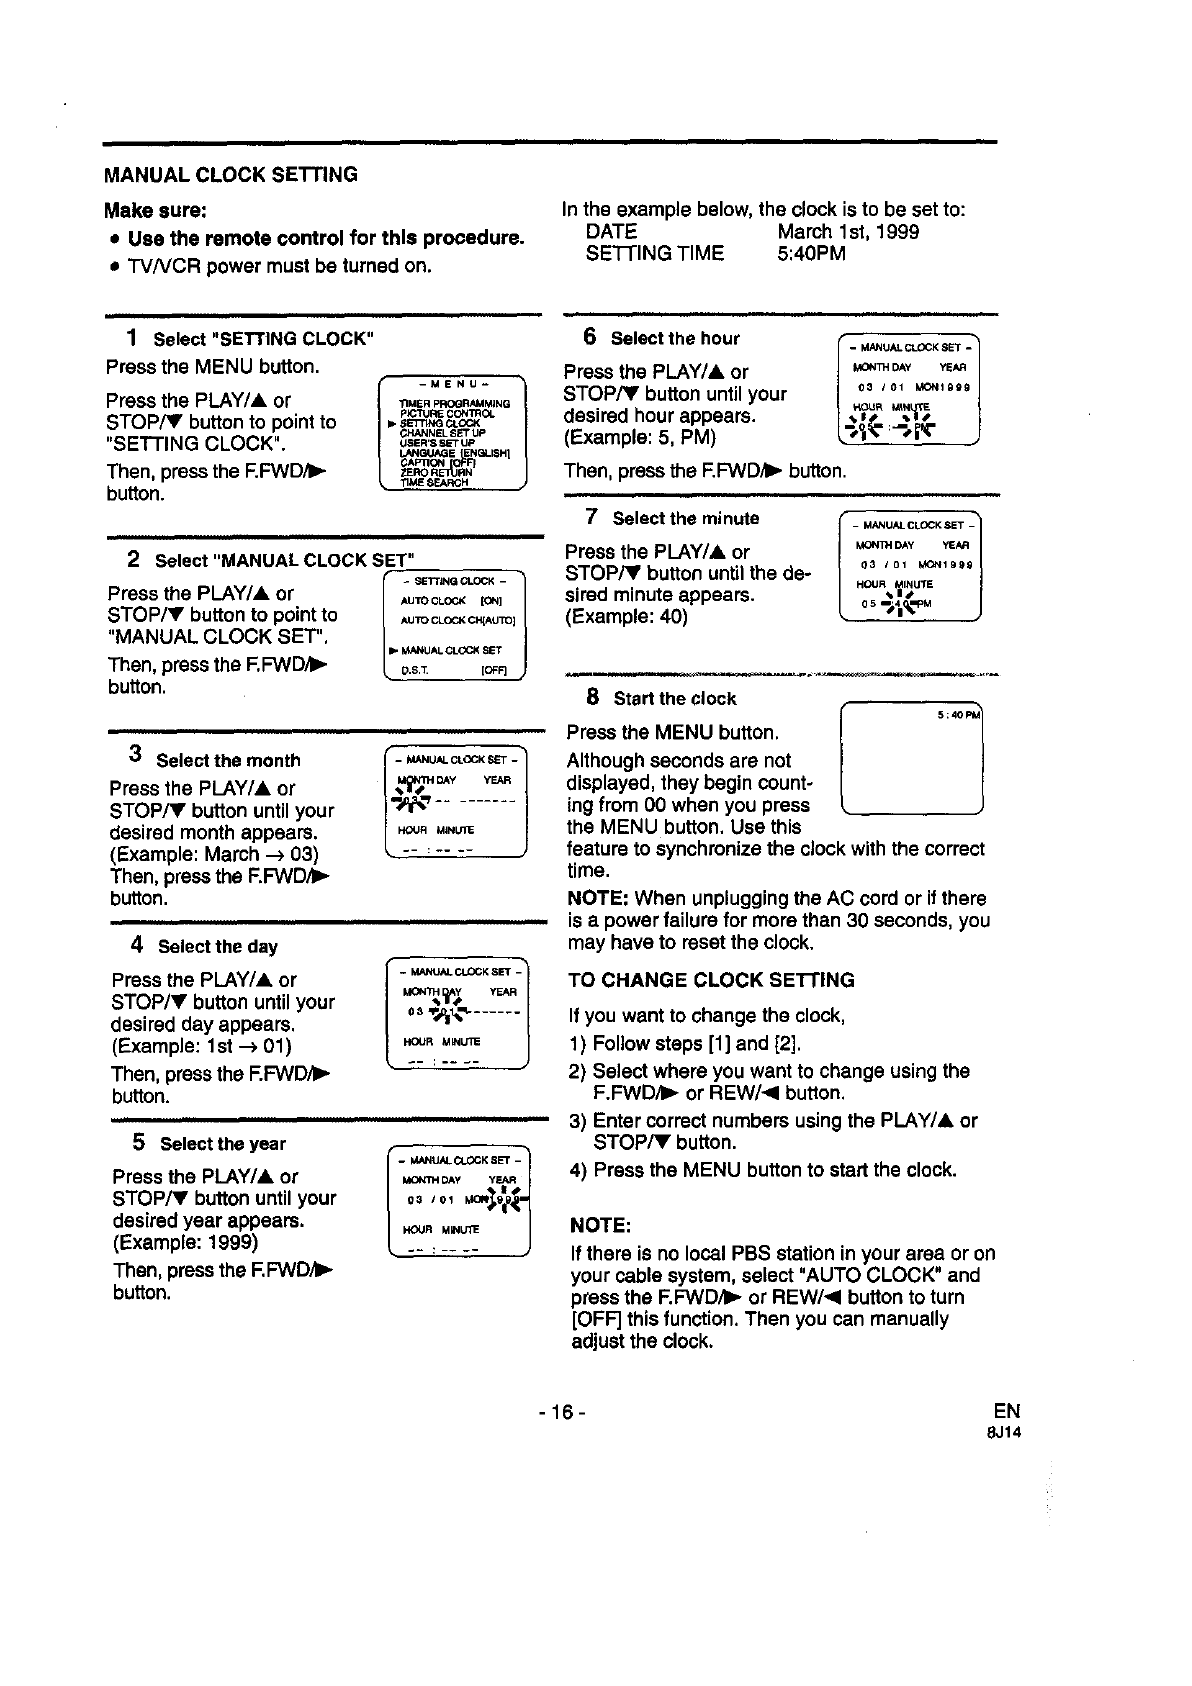
In the example below, the clock is to be set to:
DATE March 1st, 1999
SE'I-I'ING TIME 5:40PM
1Select "SETTING CLOCK"
Press the MENU button.
Press the PLAY/A or
STOP/Y button to pointto
"SETTING CLOCK'.
Then, press the F.FWD/I_
button.
-MENU- 1
TIMER pROGRAMMING
pICT,JRE CONTROL
_- SETTING Q.OC_
CHANNEL S_:FUP
USER'S P_=TUp
LANGUAGE_ENGLISHI
_TIML=S_.A_H
2Select "MANUAL CLOCK SET"
i-+l
Press the PLAY/A or AU+OCLC_to,]
STOP/Y button to point to ,u_ocLoc,c_u+o]
"MANUAL CLOCK SET". I_ MANUALCLOCK SET
Then, press the F.FWD/I_ _.s.'_ [oF_
button.
3Select the month
Press the PLAY/A or
STOP/V button until your
desired month appears.
(Example: March --) 03)
Then, pressthe F,FWD/I_
button.
- MANUAL CLOCK S_'T -
DAy YEAR
HOUR MINUll_
4Select the day
Press the PLAY/A or
STOP/Y button untilyour
desired day appears,
(Example: 1st -->01)
Then, press the F.FWD/I_
button.
- MANtJN.GLOCK SET -"
0__,_........
HOUR MINUTE
5 Select the year
Press the PLAY/& or
STOP/Y button until your
desired year appears.
(Example: 1999)
Then, press the F,FWD/I_
button.
- MANUALCLOCK SET -
k_ DAy yEAR
03 101 |LP
HOUR MINUTE J
6Select the hour
Press the PLAY/& or
STOP/Y button until your
desired hour appears.
(Example: 5, PM)
- MANUALCLOCKSET -'_
L
MON_'I DAY YEAR
03 101 MON19gg
_OUFt t/_
_f_ _
Then, press the F.FWD_ button.
7Selectthe minute
Press the PLAY/a, or
STOP/_' button untilthe de-
sired minute appears.
(Example: 40)
i •
-MANUAL CLOCK SET -
MONIH DAy YEN_
03 101 MON1999
HOUR MINUTE
Although seconds are not
displayed, they begin count-
ing from 00 when you press
the MENU button. Use this
•,11i,i i
8 Start the clock (
Press the MENU button. /
t5:40 1
feature to synchronize the clock with the correct
time.
NOTE: When unpluggingthe AC cord or if there
is apower failure for mere than 30 seconds, you
may have to reset the clock.
TO CHANGE CLOCK SETTING
If you want to change the clock,
1) Follow steps [1] and [2].
2) Select where you want to change using the
F.FWD/b- or REW/<I button.
3) Enter correct numbers using the PLAY/& or
STOP/Y button.
4) Press the MENU button to start the clock.
NOTE:
If there is no local PBS station in your area or on
your cable system, select "AUTO CLOCK" and
press the F.FWD/I_ or REW/<I button to turn
[OFF] this function. Then you can manually
adjust the clock.
-16- EN
8J14
ON-SCREEN DISPLAY
To view the Counter or Clock/Channel informa-
tion, press the DISPLAY button once for Counter
mode and twice for Clock/Channel mode.
When the Closed-Caption mode is OFF, press
the DISPLAY button to clear the Counter or
Clock/Channel information.
When the Closed-Caption mode is ON, the On-
Screen display disappears after 5 seconds.
SPECIAL FEATURES
Magnetism from nearby appliances might affect
the color of the TV picture.
If this happens, move this unit away from the
appliance. If the color is still not correct, discon-
nect the power cord from the AC outlet, then
reconnect it after 30 minutes.
This sllows the elapsed recording or playback
time in hours, minutes, and seconds. (The dis-
played time will not change on a blank tape or
blank portions on the tape.)
The "-" indication will appear when the tape has
rewound further than "0:00:00" on the tape
counter.
•When the end of a tape is reached during
recording, playback, or fast-forward, the tape
will automatically rewind to the beginning.
After rewinding finishes, the "I-VNCR will eject
the tape and turn itself off.
•This function will operate when Repeat Play is
turned off.
•The tape will not auto-rewind during timer
recording or One Touch Recording.
- 17- EN
8J14
TV OPERATION
ii
1Turn on the TV/VCR
Press the POWER button to turn on the TV/VCR.
2 Select the channel number
Press the CHANNEL • or •buttonto select your
desired channel number or press the number but-
tons on the remote control.
Remember: If the TV/VCR is connected to a ca-
ble box or satellite box, the TVNCR must be on
CH3 or CH4, then the channel to be viewed must
be selected on the cable box or satellite box.
3Adjust sound
Press the VOLUME z_ or _'
button to adjust the volume. IvOLUME 20 1
lllllllllllll
This function enables you to decrease the TV
screen contrast, making it better for Video
games.
NOTE: This function cannot be set duringrecording.
Press the GAME button on
the remote control. "GAME"
appears on the screen.
When you press the GAME button;
•The TVNCR comes on automatically if it is off.
•The I'VNCR will be in external input mode
automatically.
TO CANCEL THE GAME MODE
Press the GAME button or CHANNEL •or •
button on the remote control.
The TVNCR's picture controls - BRIGHT,
CONTRAST, COLOR, TINT and SHARPNESS -
are preset at the factory. Although they are usu-
ally the best, you may need to make some
further adjustments for a natural looking image.
NOTE:
•Procedures must be performed within 5
seconds or the Picture Control mode will be
cancelled.
• When setting the Picture Control, the Game
mode will be cancelled.
Make sure:
•Use the remote control for this procedure.
•TV/VCR power must be turned on.
,,,,,i
1Select "PICTURE CON-
TROL"
Press the MENU button.
Press the PLAY/• or
STOP/• button to point to
"PICTURE CONTROL".
-MENU-
TI_ER pROGRAMMING
I=- PICTURE CONTROL
SETRNG CLOCK
CHANNEL ,SET Up
USER'8 ,_IET Up
P.,_PTIONLANGUAGE_ ENGLISH}
ZERO R_RN
Then, press the F.FWD/I_ button.
2Select item you want to adjust
Press the PLAY/A or
STOP/V button until desired
control is displayed.
BRIGHT
CONTRAST
COLOR
TINT
SHARPNESS
BRK_Er
:3CO0[I_III D[:3C_[33D •
,,,i iii ,,i,. ii
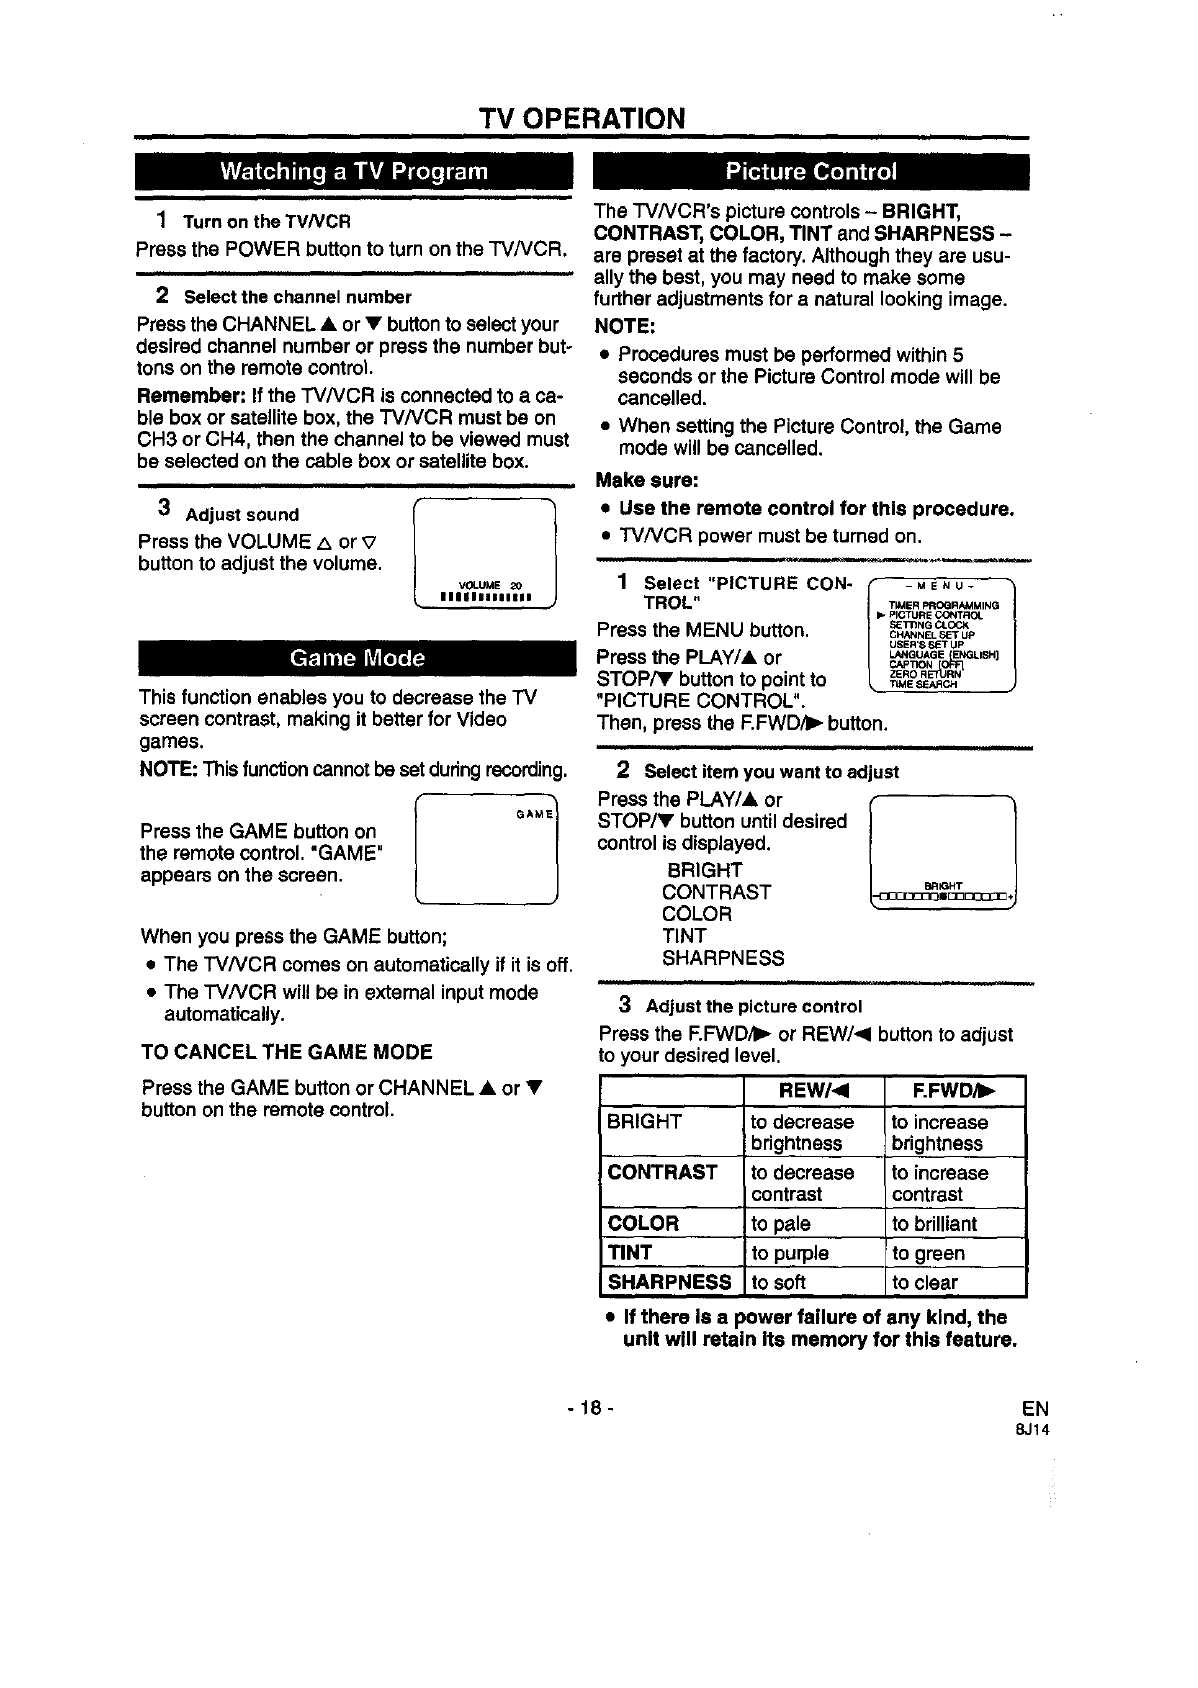
3Adjust the picture control
Press the F.F"WD/b,-or REW/.<I button to adjust
to your desired level.
BRIGHT
CONTRAST
COLOR
TINT
SHARPNESS
REWHII
to decrease
brightness
to decrease
contrast
to pale
to purple
to soft
F.FWD/II_
to increase
brightness
to increase
contrast
to brilliant
to green
to clear
•If there Is a power failure of any kind, the
unit will retain Its memory for this feature.
-18- EN
8J14

You can view specially labeled (co) IV programs,
movies, news and prerecorded tapes with either
adialogue caption or text display.
CAPTION mode: When you choose the Caption
mode, program dialogue will be captioned at
the bottom of the screen.
TEXT mode: By choosing the text mode, you can
watch half-screen text information.
NOTE: Within Caption or Text mode, you have a
choice of selecting "1" or "2". Selection "2"
usually offers captions or text in a second
language, if one is available.
NOTE:
Not all programs are broadcast with closed
captions. Your television is designed to provide
error free closed captions from high quality
antenna, cable and VCR signals. Conversely,
poor quality signals are likely to result in caption
errors or no captions at all Common signal
conditions that may cause caption errors are
listed below:
• Automobile ignition noise.
•Electric motor brush noise.
• Weak snowy reception on IV screen.
• Multiplex signal reception displaying picture
ghosts or airplane flutter.
•Playback of poorly recorded or worn tapes.
NOTE: If there is a black box on the IV screen,
the TVNCR is set to TEXT mode. To clear
screen, select [CAPTION1],
[CAPTION2] or [OFF].
Make sure:
•Use the remote control
for this procedure.
1 Select "CAPTION"
Press the MENU button.
Press the PLAY/& or
STOP/T button to point to
"CAPTION"•
-MENU-
TIMER PROGRAMMING
PIC'PJRECONTROL
SETTINGCLOCK
CHANNEL _ET UP
USER'S SET Up
i_ _Gt_JA mlSH]
• "rIMESEARCH )
2Select your desired caption menu
Pressthe F.FWDiI_ or l -" _" u-
REW/<I button untilyour de- / _E._CGFW,',.Q
pIC'I[URE C(_NTR(3L
sired caption menu appears, sE-m.a_
CHANNEL SL=T UP
([CAPTION1], [CAPTION2], U_.'SSETUP
LANQU_H]
I_ CAPTION 1)m
[TEXT1] or [TEXT2]) zE.o.
TIME SEARCH
3Exit the caption setting mode
Press the MENU buttonto return to TV mode.
TO CANCEL THE CLOSED CAPTION MODE
Repeat steps [1] and [2], select [OFF] using the
F.FWD/I_ or REW/<I button. Press the MENU
button to return to TV mode.
WHEN THE CLOSED CAPTION MODE IS ON
The On-Screen Display will disappear after 5
seconds.
•This is also true when the MUTE button is
pressed, and when the PAUSE/STILL button
is pressed while recording.
•If there Is a power failure of any kind, the
unit will retain its memory for this feature.
-19- EN
8J14
Make sure:
•"IVNCR power must be turned on.
PLAYBACK
JI
1Insert a prerecorded tape
If the erase-protection tab has been removed,
the TV/VCR will start playback automatically,
2 To begin playback
Press the PLAY button.
=,l, ,,, i,,, i
3 To stop playback
Press the STOP button
when playback is completed.
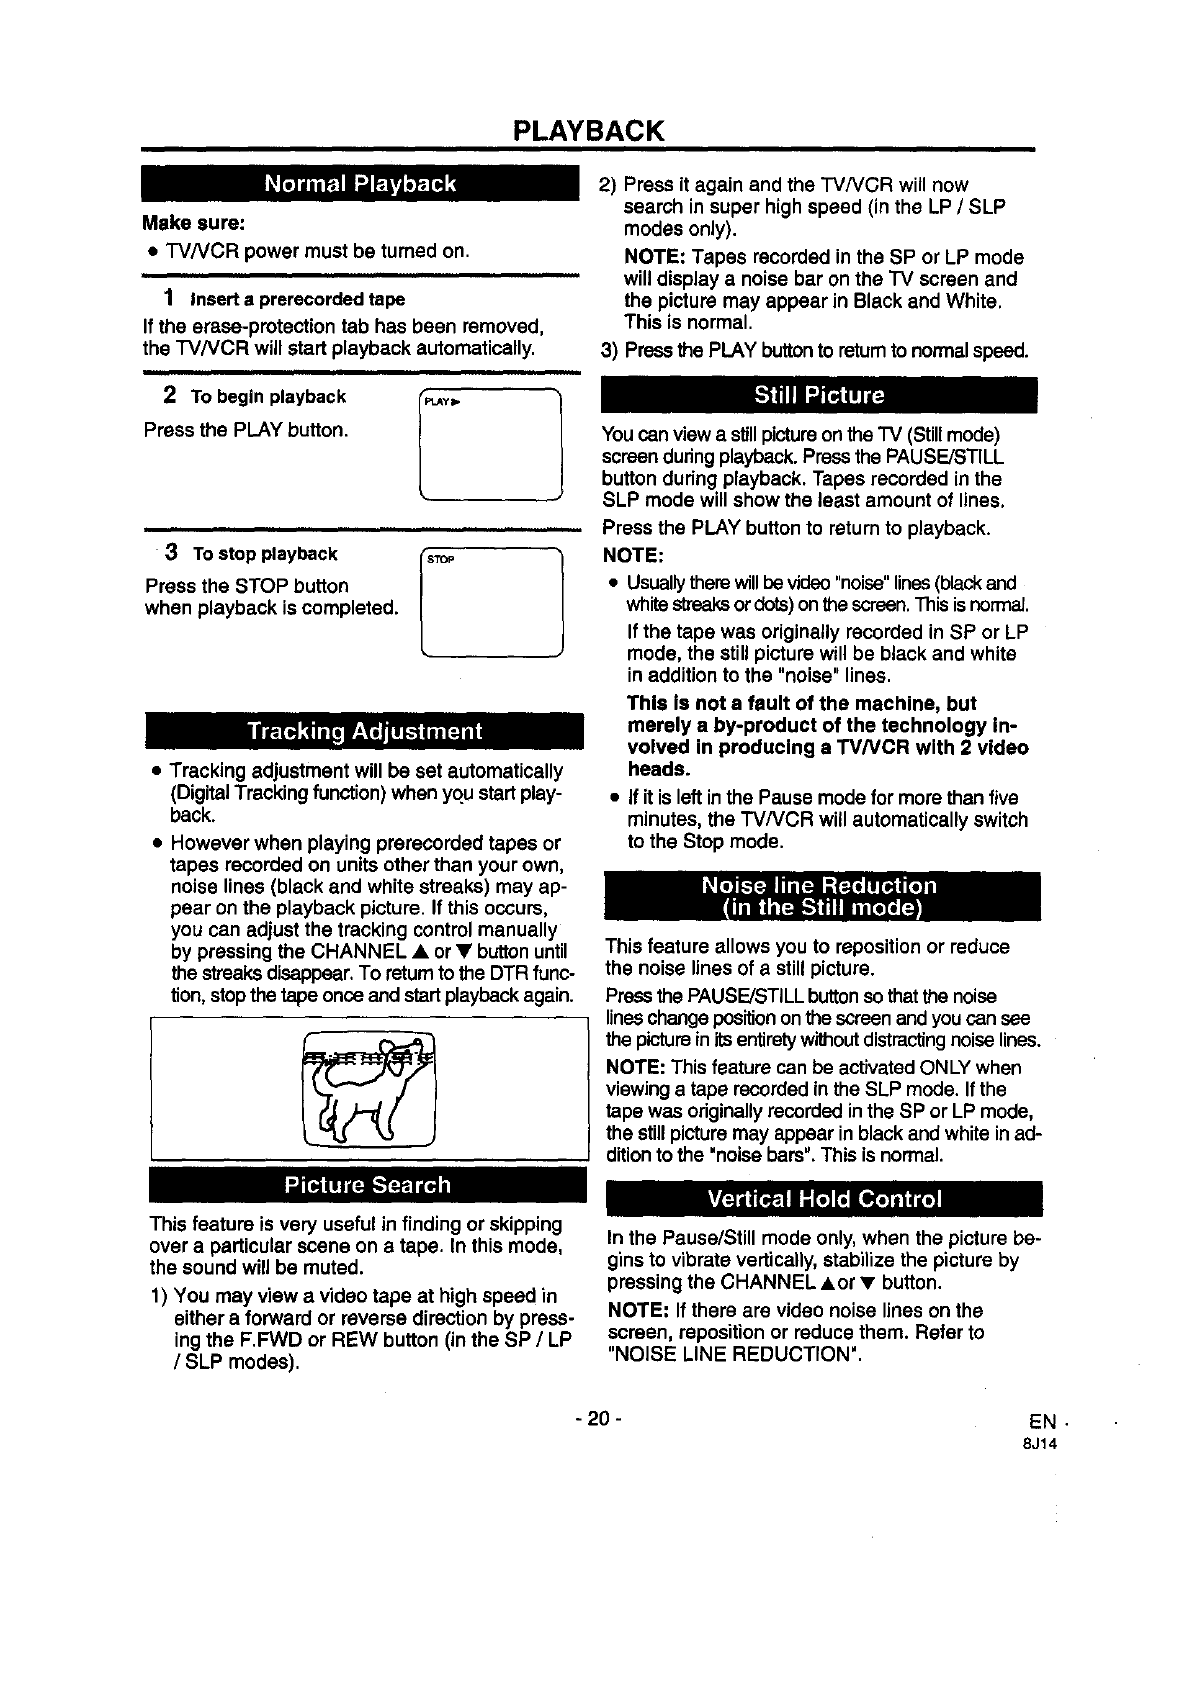
•Tracking adjustment will be set automatically
(Digital Tracking function) when you start play-
back.
• However when playing prerecorded tapes or
tapes recorded on units other than your own,
noise lines (black and white streaks) may ap-
pear on the playback picture. If this occurs,
you can adjust the tracking control manually
by pressing the CHANNEL • or• button until
the streaks disappear. To return to the DTR func-
tion, stop the tape once and start playback again.
2) Press it again and the "I'V/VCR will now
search in super high speed (in the LP /SLP
modes only).
NOTE: Tapes recorded in the SP or LP mode
will display a noise bar on the "IV screen and
the picture may appear in Black and White.
This is normal.
3) Press the PLAY buttonto returnto normalspeed.
Youcan view a stillpicture on the TV (Still mode)
screen duringplayback. Press the PAUSE/STILL
button during playback. Tapes recorded in the
SLP mode will show the least amount of lines.
Press the PLAY button to return to playback.
NOTE:
•Usuallythere will be video "noise" lines (blackand
white streaks ordots) on the screen. This isnormal
If the tape was originally recorded in SP or LP
mode, the still picture will be black and white
in addition to the "noise" lines.
This Is not a fault of the machine, but
merely a by-product of the technology in-
volved in producing a TV/VCR with 2 video
heads.
• If it is left inthe Pause mode for more than five
minutes, the TVNCR will automatically switch
to the Stop mode.
This feature allows you to reposition or reduce
the noise lines of astill picture.
Press the PAUSE/STILL buttonso that the noise
lineschange positiononthe screenand youcan see
the picturein itsentiretywithoutdistracting noiselines.
NOTE: This feature can be activatedONLY when
viewing a tape recorded in the SLP mode. If the
tape was originallyrecorded inthe SP or LP mode,
the still picturemay appear in blackand white inad-
ditionto the "noise bars". This is normal.
This feature is very useful in finding or skipping
over a particular scene on a tape. In this mode,
the sound will be muted.
1) You may view a video tape at high speed in
either a forward or reverse direction by press-
ing the F.FWD or REW button (in the SP /LP
/SLP modes).
In the Pause/Still mode only,when the picture be-
gainsto vibrate vertically, stabilize the picture by
pressing the CHANNEL Aor • button.
NOTE: If there are video noise lines on the
screen, reposition or reduce them. Refer to
"NOISE LINE REDUCTION".
-20 - EN .
8J14
SPECIAL PLAYBACK
Make sure:
• Use the remote control for this procedure.
• TVNCR power must be turned on.
• Insert a prerecorded tape.
• Before playback, follow steps below.
This function enables you to improve the picture
quality when playing back worn cassettes such
as rented tapes.
1Select "USER'S SET UP"
Press the MENU button.
Press the PLAY/A or
STOP/V button to point to
"USER'S SET UP".
Then, pressthe F.FWD/I_
button.
TIMER PROGRAMMING
pICllJRE CONTROL
S_£71NGCLC_K
CHANNEL Sl_i* Up
b, USER'S SET UP
LANGUAGE ENGLISH]
ZERO RLm_IRN
TIME SEARCH
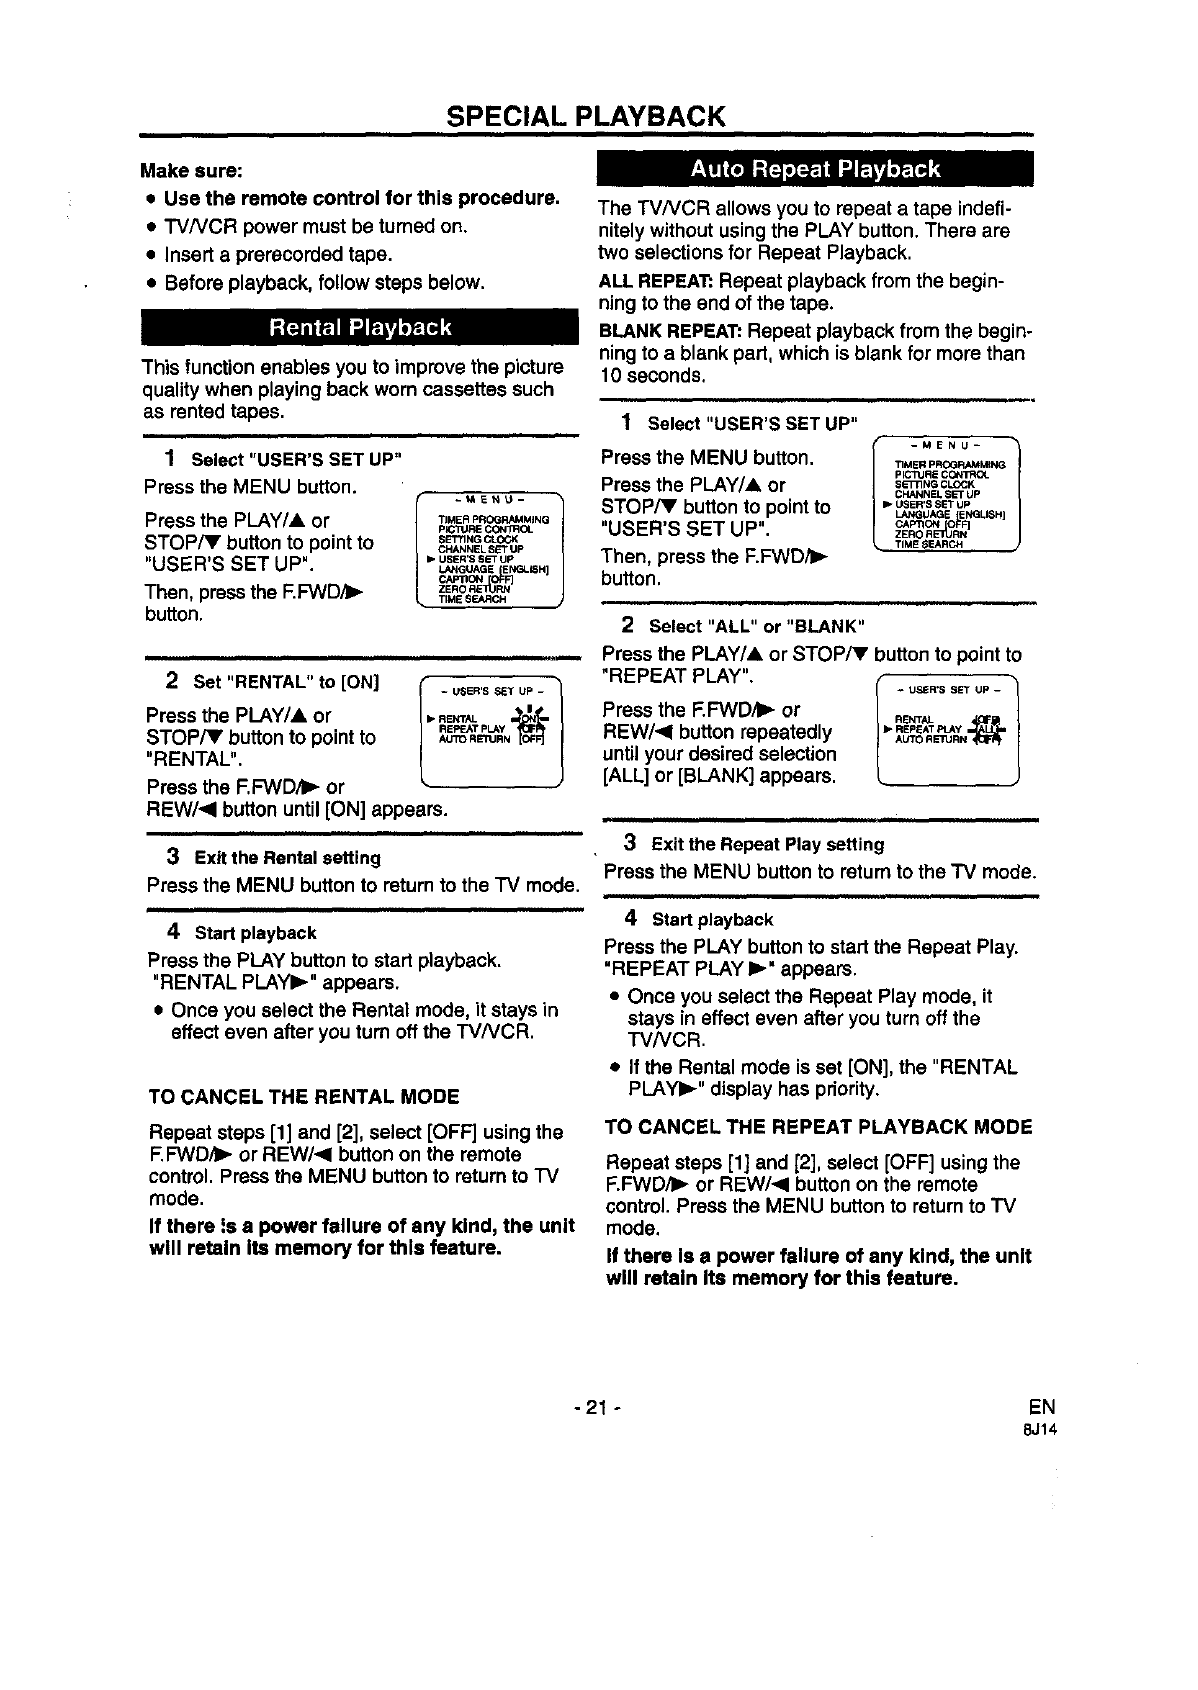
2set--.toEoNf.s.up01
Press the PLAY/& or ,-,_-r_ =
STOP/V button to point to _"T_?r_RVN
"RENTAL".
Press the F.FVVD/I_ or
REW/<I button until [ON] appears.
3Exit the Rental setting
Press the MENU button to return to the TV mode.
4Start playback
Press the PLAY button to start playback.
"RENTAL PLAYI_" appears.
•Once you select the Rental mode, it stays in
effect even after you turn off the TV/VCR.
TO CANCEL THE RENTAL MODE
Repeat steps [1] and [2], select [OFF] using the
F.FWD/_- or REW/_I button on the remote
control. Press the MENU button to return to IV
mode.
If there is a power failure of any kind, the unit
will retsln Its memory for this feature.
The TVNCR allows you to repeat a tape indefi-
nitely without using the PLAY button. There are
two selections for Repeat Playback.
ALL REPEAT:Repeat playback from the begin-
ning to the end of the tape.
BLANK REPEAT: Repeat playback from the begin-
ning to a blank part, which is blank for more than
10 seconds.
1Select "USER'S SET UP"
I_MENU_ l
Press the MENU button. TIME.P.OOFV_..._
pICllJflE CGt4TRCJ_
Press the PLAY/A or S_Tn.Gc_OC_
CHANNEL SET UP
STOP/V button to point to =.usE.,ss_up
L_AGE ENGLISH]
"USER'S SET UP". cAFm_-_J_]
ZERO REn_JRN
•TIME SEARCH
Then, press the F.FWDiI_
button.
i
2 Select "ALL" or "BLANK"
Press the PLAY/A or STOP/V button to point to
"REPEAT PLAY". 1
-USEWS SET Up -
Press the F.FWD/I_ or RENTAL
REPEATPLAY
REW/II button repeatedly *UrO._U.N'_
until your desired selection
[ALL] or [BLANK] appears.
3Exit the Repeat Play setting
Press the MENU button to return to the TV mode.
4Start playback
Press the PLAY buttonto start the Repeat Play.
"REPEAT PLAY I_" appears.
•Once you select the Repeat Play mode, it
stays in effect even after you turn off the
TV/VCR.
•If the Rental mode is set [ON], the "RENTAL
PLAYI_" display has priority.
TO CANCEL THE REPEAT PLAYBACK MODE
Repeat steps [1] and [2], select [OFF] using the
F.FWD/I_ or REW/_I button on the remote
control. Press the MENU buttonto retum to TV
mode.
If there Is a power failure of any kind, the unit
will retain Its memory for this feature.
- 21 -EN
8J14
SEARCH
Make sure:
• Use the remote control for this procedure.
• TV/VCR power must be turned on.
•Insert a tape.
• This function will not operate without a tape in
the TVNCR.
Time Search Example
To skip a program that is 2 hours and 50 minutes
of tape length, in either direction, from the pre-
sent tape position.
USe this functionto mark a pointon the tape that you
wishto quickly returnto later.
NOTE: You cannot mark a blank spot on the tape.
1Stop a tape at your desired point
Rewind or fast forward the tape to the beginning
point you want to review.
2Reset the counter to 0:00:00
Press the COUNTER RESET button repeatedly.
3Begin recording or playback
Press the RECORD or PLAY button.
Press the STOP button when recording or play-
back is completed.
4To return to marked point
Press the MENU button.
Press the PLAY/& or
STOPiY button to point to
"ZERO RETURN".
Then, press the F,FWD_
button.
I_MENU_ 1
TIMER pROGRAM_NG
pICTURE CONmOL
SETT1NG CLOCK
CHANNEL S_'T Up
USER'SSET Up
i1_ZERO RNL_O_N_
k TIMESFJ_RCH
The counter will appear on the IV screen.
The tape will automatically stop when the
counter retums to 0:00:00.
Press the PLAY button to view tape.
This function advances the tape to a specific
position when you enter the amount of playback
time you want to skip.
NOTE:
•Time Search can be set up to a maximum of 9
hours 50 minutes (9:50) by 10 minutes at a
time.
•This function will not operate in recording
mode.
1Insert a tape.
2Select "TIME SEARCH" mode
Press the TIME SEARCH button (with each push
it will increase by 10 minutes).
OR
Press the MENU button.
Press the PLAY/,& or
STOP/V button to point to
"TIME SEARCH".
Then, pressthe F.F-WD/I_
button.
-MENU- 1
TIMER PROGF_MMING
PLC3_RE COt_
SE331NG CLOCK
CHANNEL SET Up
USER'SSET Up
ZERO R_RN
lp TJME S_JLRCH
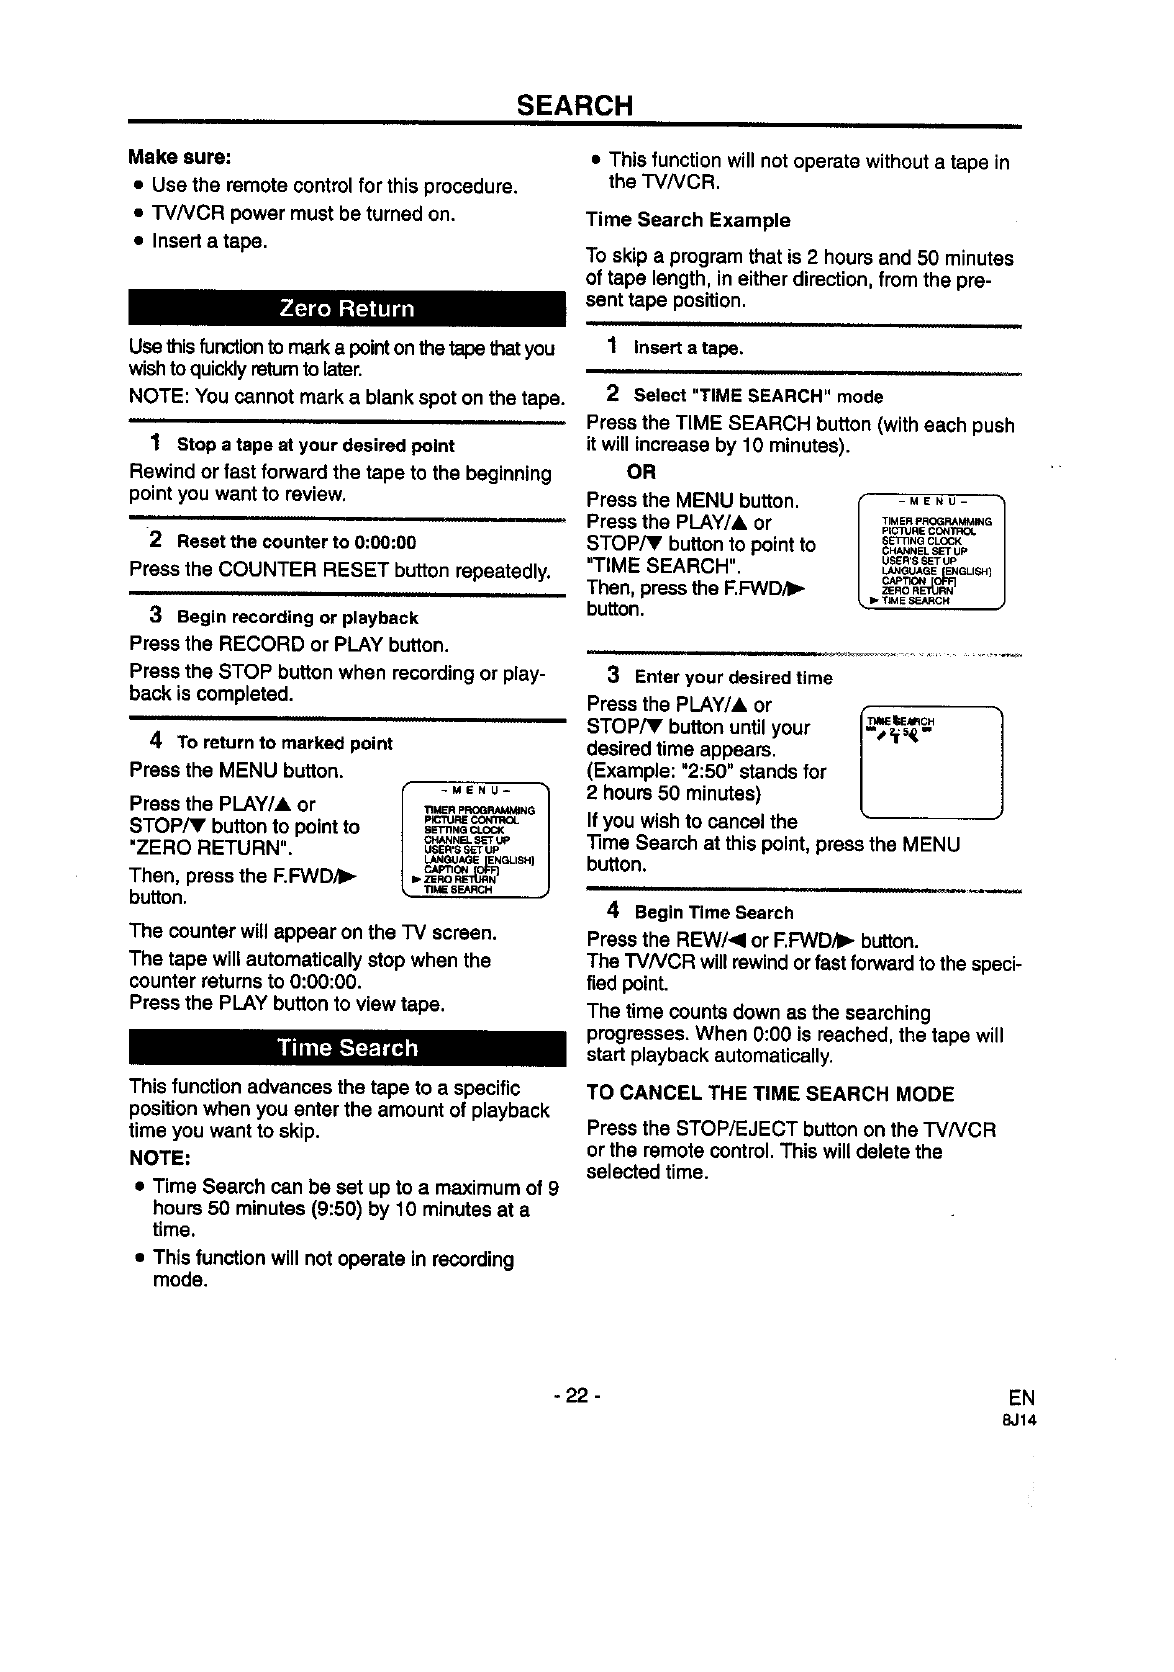
3Enter your desired time
Press the PLAY/,& or
desired time appears.
(Example: "2:50" stands for
2 hours 50 minutes)
If you wish to cancel the
13me Search at this point, press the MENU
button.
4Begin Time Search
Press the REW/4 or F.FWD_- button.
The TVNCR will rewind orfast forward to the speci-
fied point.
The time counts down as the searching
progresses. When 0:00 is reached, the tape will
start playback automatically.
TO CANCEL THE TIME SEARCH MODE
Press the STOP/EJECT button on the TVNCR
or the remote control. This will delete the
selected time.
- 22 - EN
8J14
RECORDING
Make sure:
•TVNCR power must be tumed on.
• Insert a cassette tape with its erase prevention tab in place. (If necessary, rewind or fast forward
the tape to the point you want to begin recording.)
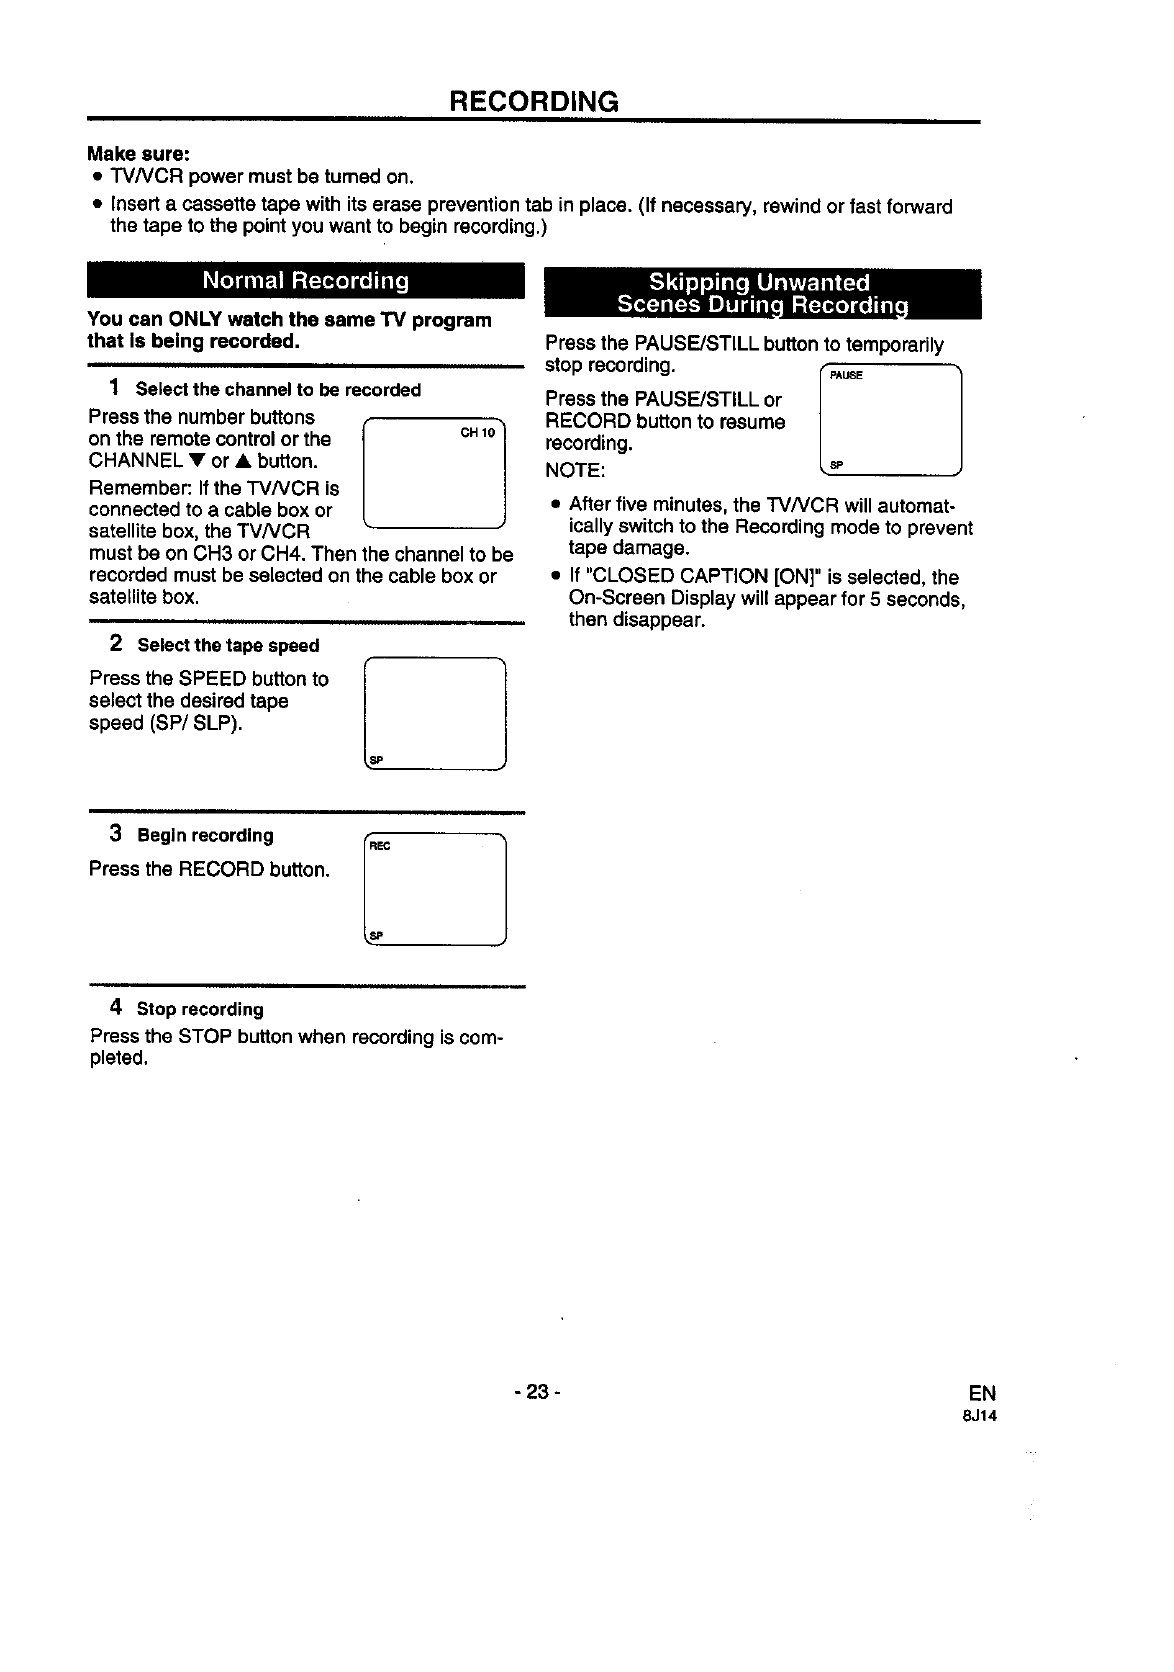
You can ONLY watch the same "IV program
that Is being recorded.
1Select the channel to be recorded
Press the number buttons
on the remote control or the
CHANNEL •or • button.
Remember: If the TVNCR is
connected to a cable box or
satellite box, the TVNCR
CH10 /
must be on CH3 or CH4. Then the channel to be
recorded must be selected on the cable box or
satellite box.
2Select the tape speed f
Press the SPEED button to |
select the desired tape L
speed (SP/SLP).
Press the PAUSE/STILL button to temporarily
st°pr--0"IPA"1
Press the PAUSE/STILL or
RECORD button to resume
recording.
NOTE: sP
• After five minutes, the TV/VCR will automat-
ically switch to the Recording mode to prevent
tape damage.
• If "CLOSED CAPTION [ON]" is selected, the
On-Screen Display will appear for 5 seconds,
then disappear.
3Begin recording f.,c
Press the RECORD button. |
L.
4Stop recording
Press the STOPbuttonwhen recording is com-
pleted.
- 23 - EN
8J14
This function enables you to set a recording
length simply by pressing the REC/OTR button
on the TVNCR.
Make sure:
• TVNCR power must be turned on.
•Insert a cassette tape with its erase preven-
tion tab in place. (If necessary, rewind or fast
forward the tape to the point you want to be-
gin recording.)
NOTE"
•This function CANNOT be done from the re-
mote control.
•Recording starts immediately when the
REC/OTR button is pressed.
•When the REC/OTR button is pressed 18
times, the TVNCR returns to the Normal
Recording mode.
•To stop the OTR operation, press the STOP
button on the TVNCR or on the remote con-
trol.
•To show the remaining time, press the DIS-
PLAY button on the remote control so that
"OTR" appears on the TV screen. (It will show
up momentarily then disappear.)
•Recording stops when 0:00 is reached.
•Please note that in the SLP mode, maximum
recording time, is 8 hours using a T-160 or 6
hours usingT-120 tape.
•If the tape runs out before the end time, the
TVNCR will switchto the Stop mode immedi-
ately, ejects the tape and turns itself off.
1Select the channel to be recorded
Press the number buttons on the remote control
or the CHANNEL • or •button.
Remember: If the rVNCR is connected to a ca-
ble box or satellite box, the TV/VCR must be on
CH3 or CH4, then the channel to be recorded is
selected on the cable box or satellite box,
2Select the tape speed
Press the SPEED button to select the desired
tape speed (SP/SLP).
3Begin OTR
Press the REC/OTR button
once to begin recording, Ii rR(2:30)
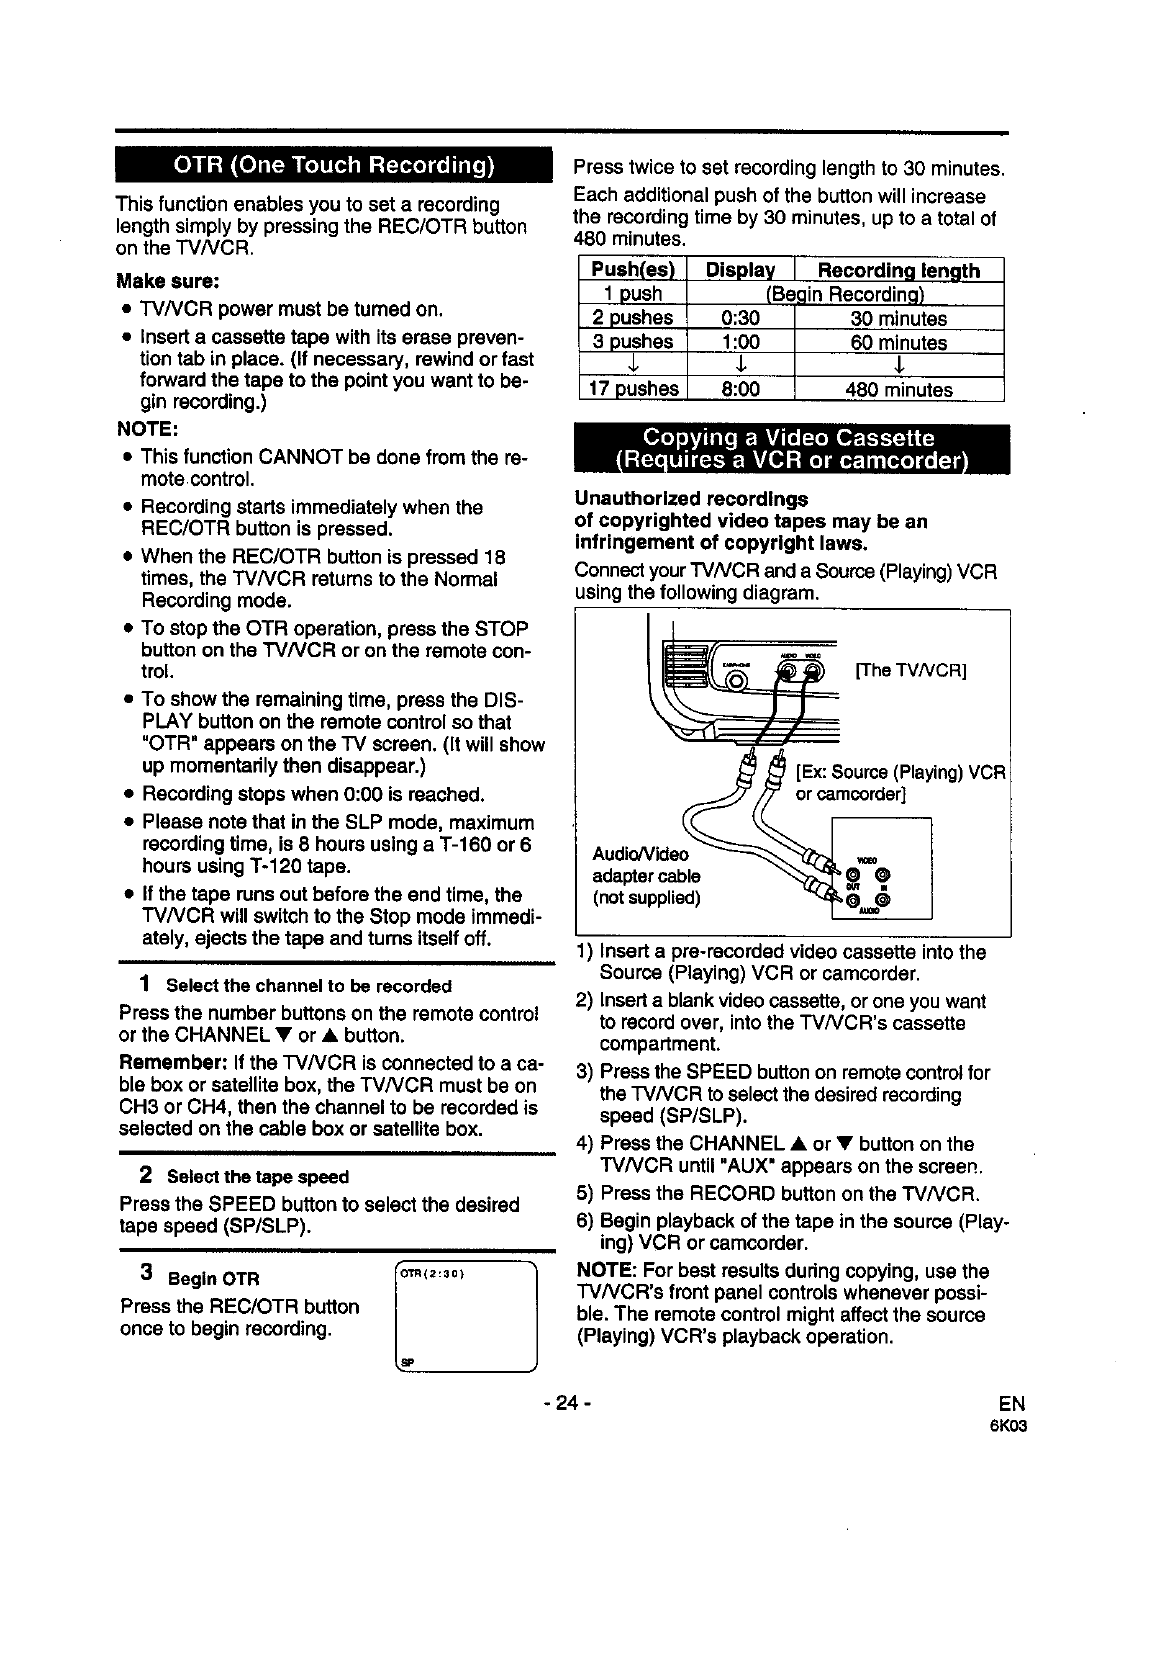
Press twice to set recording length to 30 minutes.
Each additional push of the button will increase
the recording time by 30 minutes, up to a total of
480 minutes.
Push(es)
1 push
2 pushes
3 pushes
17 pushes
Display Recording length
(Be in Recording)
0:30 30 minutes
1:00 60 minutes
J, J,
8:00 480 minutes
Unauthorized recordings
of copyrighted video tapes may be an
infringement of copyright laws,
Connectyour TVNCR and a Source (Playing)VCR
usingthe following diagram.
[The TVNCR]
[Ex:Source(Playing)VCR
orcamcordar]
adapter cable k@"=@
(notsupplied) _,_
1) Insert a pre-recorded video cassette into the
Source (Playing) VCR or camcorder.
2) Insert a blank video cassette, or one you want
to recordover, into the TVNCR's cassette
compartment.
3) Press the SPEED buttonon remote controlfor
the TVNCR to select the desired recording
speed (SP/SLP).
4) Press the CHANNEL •or •button on the
TVNCR until "AUX" appears on the screen.
5) Press the RECORD button on the TVNCR.
6) Begin playback of the tape in the source (Play-
ing) VCR or camcorder.
NOTE: For best results during copying, use the
rVNCR's front panel controls whenever possi-
ble. The remote control might affect the source
(Playing) VCR's playback operation.
- 24 - EN
6K03
TIMER
You may set the TVNCR to start and end a
recording while you are away. You can set 8 pro-
grams to record on specific days, daily or weekly
within a 1 year period.
The example to the dght shows how to set the
timer to record channel 7 on May 6th, 1999 from
7:30 PM to 8:50 PM at SP tape speed.
Make sure:
• Use the remote control for this procedure.
•If a cableor satelliteconverter is connected to the
TVNCR, you mustset the channelyou want to
recordonthe converter(The rVNCR should
always be setto channel3 or 4).
• Clock must be set to the correct time and date
before setting the timer.
• rVNCR must be turnedon to program it.
•Insert a cassette tape with its erase preven-
tion tab in place. If necessary, rewind or fast
forward the tape to the point at which you
want to begin recording.
Avoid overlapping of programs
Programs with overlapping starting times may
result in some of the programs not recording.
When programs overlap:
•The program with the eadiest starting time
has recording pdodty.
•Once the program with the eadiest starting
time finishes, recording then proceeds
according to the sequence in which the
programs were entered.
•In the example below, the first 11/2 hours of
Program 3 were not recorded. The first half-
hour was pre-empted by Program 2, which
had the eadiest starting time. The next hour
was pre-empted by Program 1, which was the
first program entered into the recording
_equence.
Recording Sequence
Program 1
10:00AM-11:00AM
Program 2
9:00AM-10:00AM m
Program 3
9:30AM-12:00PM
9:00AS 10:00AM 11:00AM 12:00PM
*Recording period I$ SHADED
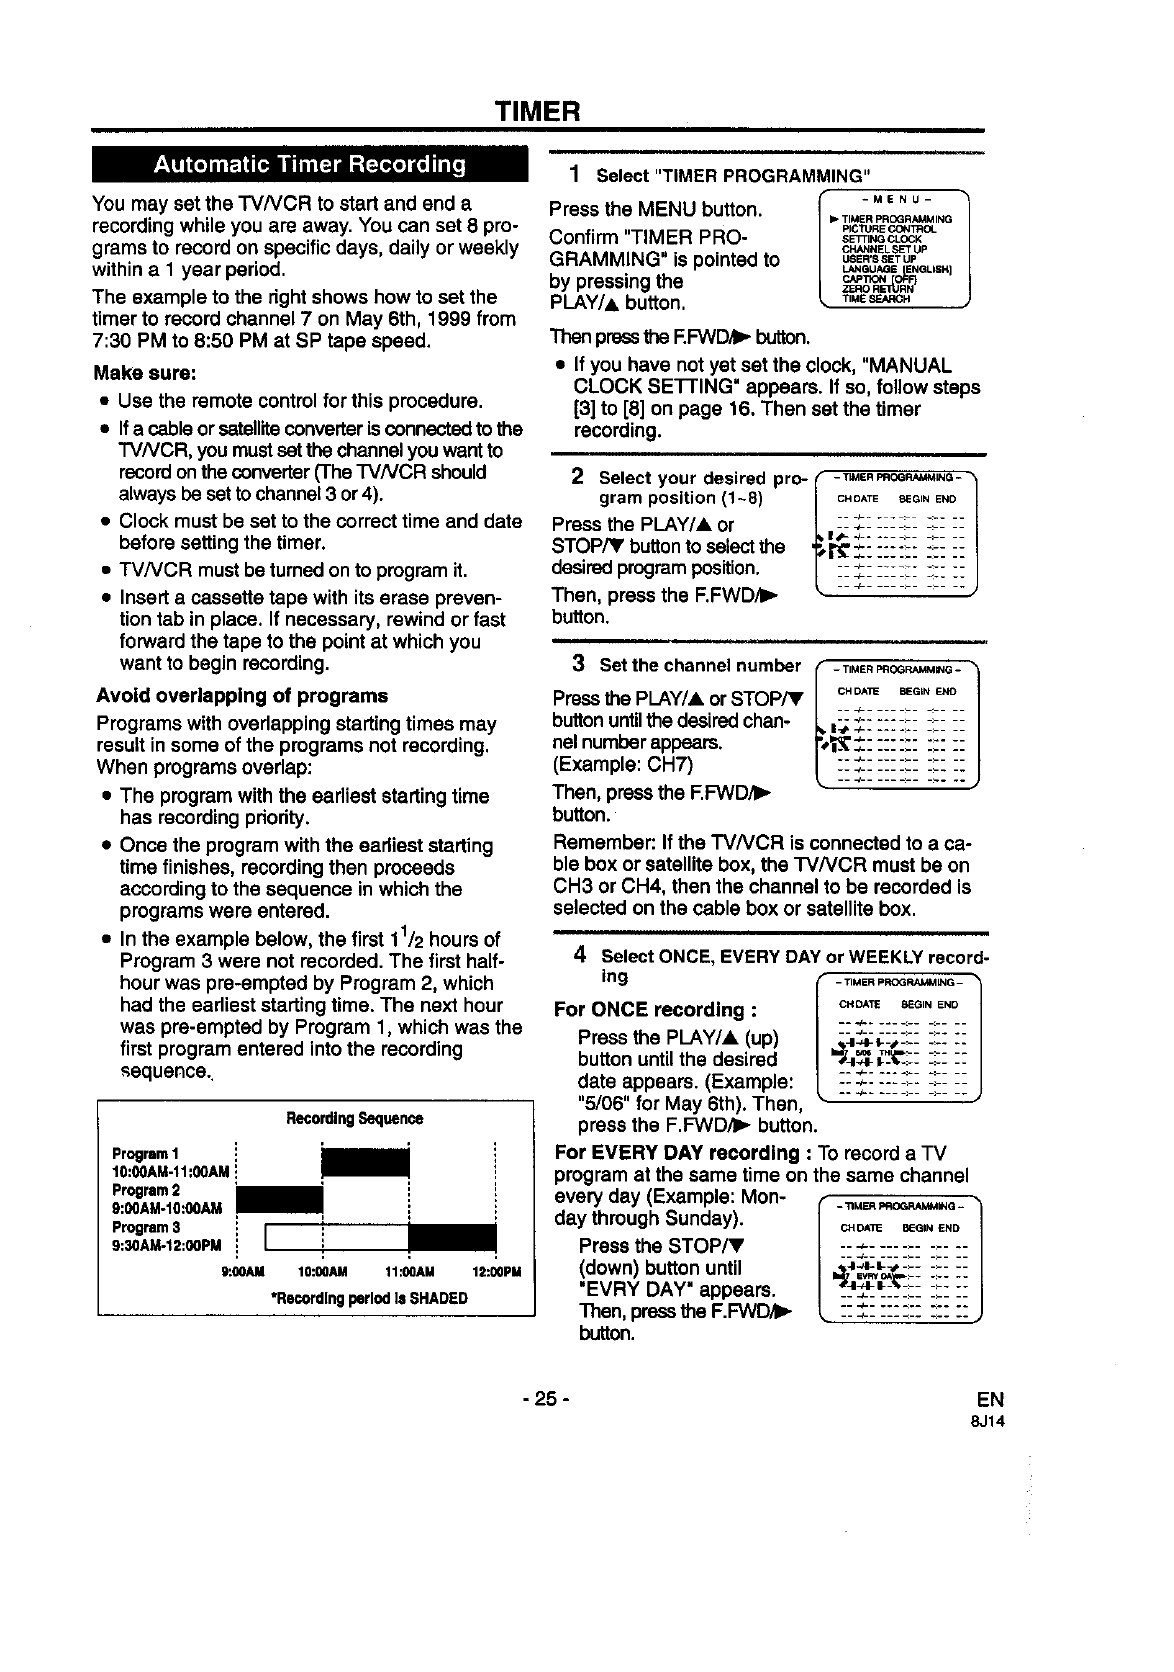
1Select "TIMER PROGRAMMING"
-MENU- ]
Press the MENU button. ,-T'ME"p.OG.,"",NG
PICTURE CC_TROL
Confirm "TIMER PRO- s_o.ocK
CHANNEL SET Up
GRAMMING" is pointed to USE.'SSETUP
LANGUAGE ENGLISH]
by pressing the z_oC_o_._U,N
PLAY/& button, T,MES_.C.
Then pressthe F.FWD,fI_button.
• If you have not yet set the clock, "MANUAL
CLOCK SEI-FING" appears. If so, follow steps
[3] to [8] on page 16. Then set the timer
recording.
2Select your desired pro- _-'nMeRmOO._uM_NG--
gram position (1~8) | CHOATE_EGINEND
Press the PLAY/A or | --:_--:-: -:-- :,:: ::
STOP[_' button to select the J_r_::::_-:_-: ::: ::
desired programposition. |:: __-_-::::: ::: ::
Then, press the F.FWD_,- k. ................. ,
button.
, , ii ,,,,i,
3set the channel number
Press the PLAY/A or STOP/V
button untilthe desiredchan-
nel numberappears.
(Example: CH7)
Then, press the F.FWDII_
button.
- IMER F'ROGRAMMI_NG -
CH DA33E BEGIN END
-- _- ------ _:....
I_÷------; ;-- ;-
L.. _- ..... __ _:.._ __
._ _- ..... __ _:... _.
__ _- ..... :__ _:.....
Remember: If the "rVNCR is connected to a ca-
ble box or satellite box, the TVNCR must be on
CH3 or CH4, then the channel to be recorded is
selected on the cable box or satellite box.
4Select ONCE, EVERY DAY or WEEKLY record-
ing
For ONCE recording :
Press the PLAY/A (up)
button untilthe desired
date appears. (Example:
"5/06" for May 6th). Then,
press the F.FWD/ll_ button.
- TIMER I:*RCq3RAMMING - 1
_ _._:.: :_: ::
For EVERY DAY recording : To record a TV
program at the same time on the same channel
every day (Example: Mon-
day through Sunday).
Press the STOP/V
(down) button until
'EVRY DAY" appears.
Then, pressthe F.FWD/I_
button.
-*RMER PROGRAMM_NGii ]
EBEGIN END
-- 4-- ..... _- -:--
_J=T,.:.....
-25 - EN
8J14
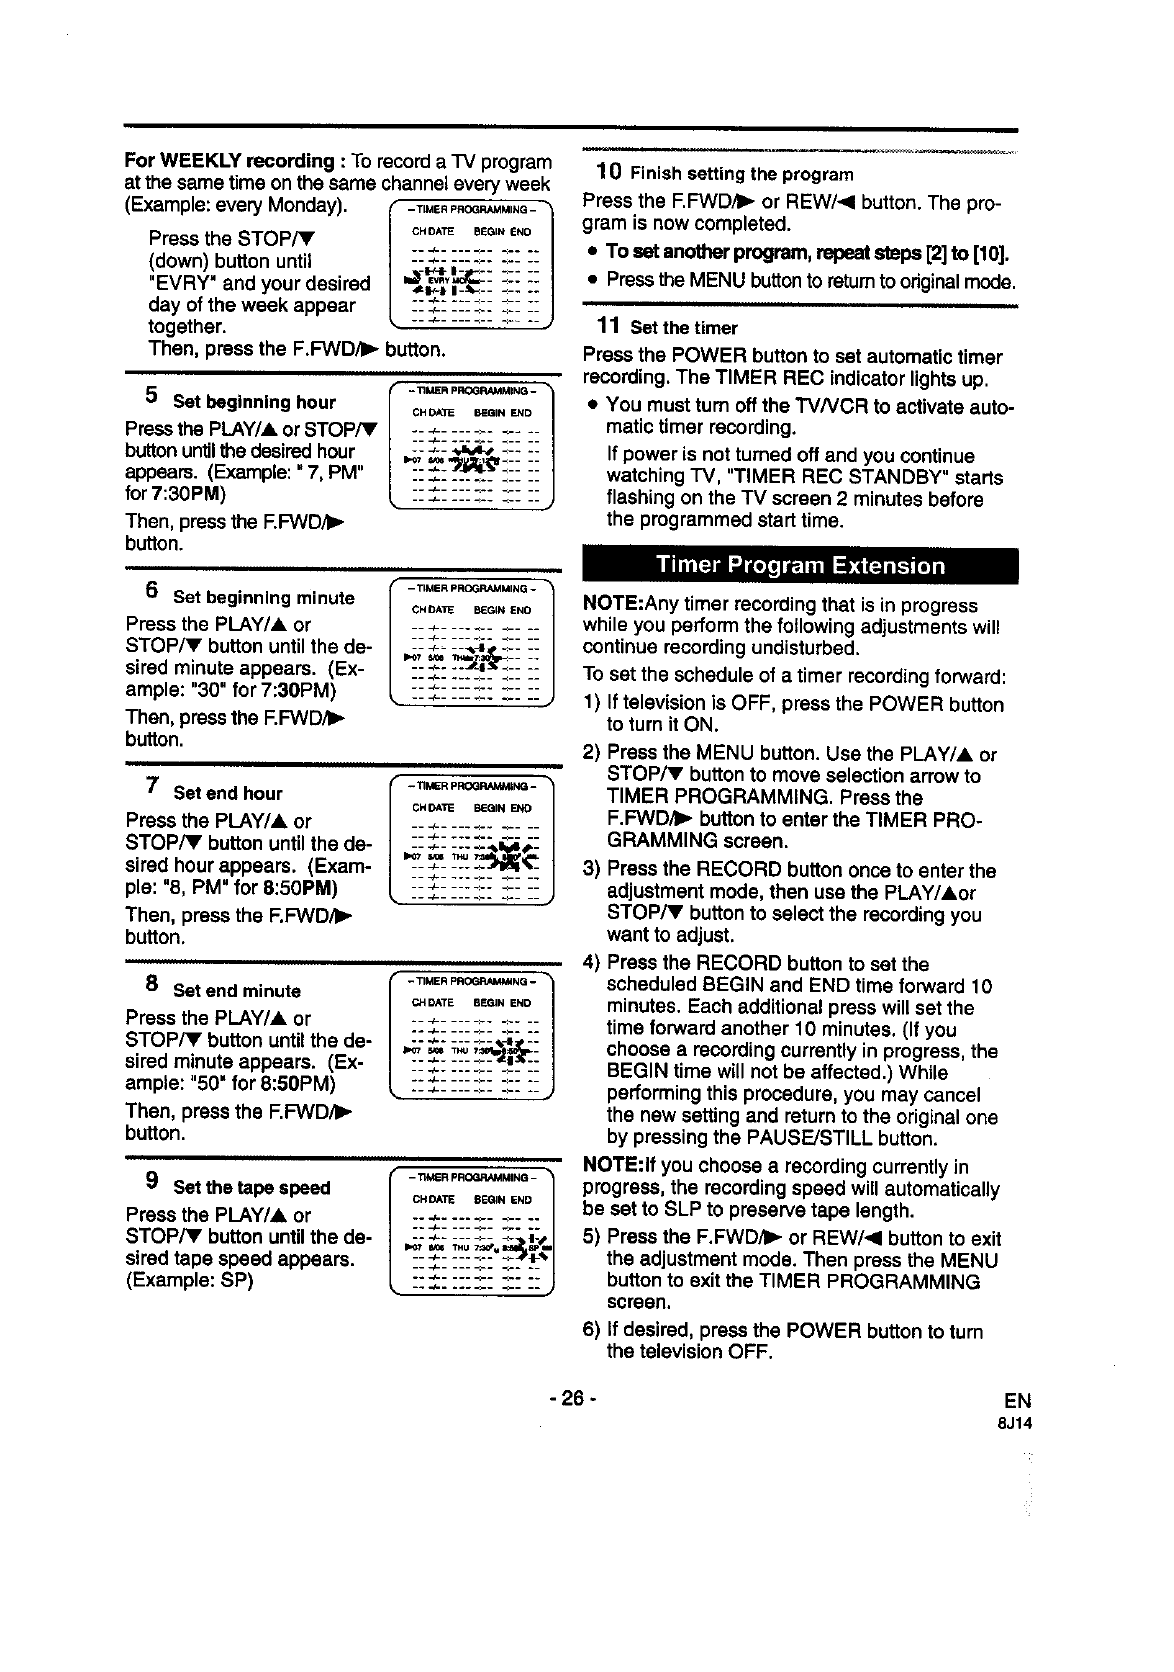
For WEEKLY recording : To record aIV program
at the same time on the same channel every week
(Example: every Monday). -T,_E.PROa_.,NQ-
Press the STOP/Y
(down) button until
"EVRY" and your desired
day of the week appear
together.
Then, press the F.FVMD/II_button.
IHOATE BEGIN END /
___-_ ______ _: ....
-- -_- ..... :_..: ....
5 Set beginning hour
Pressthe PLAY/A or STOP/V
button untilthe desiredhour
appears. (Example:"7, PM"
for 7:30PM)
Then, press the F.FWD/I_
button.
-TIMER pROGRAMMING-
CH DATE OEGIN END
,_. =. ,,_j_ ......
___-_ ____.. ___ __
-- _-- --- _._ <....
10 Finish setting the program
Press the F.FWD/I_ or REW/.<I button. The pro-
gram is now completed.
• To set another program, repeat steps [2]to [10].
•Press the MENU buttonto returnto originalmode.
11 Set the timer
Press the POWER button to set automatic timer
recording. The TIMER REC indicator lights up.
•You must turn off the TVNCR to activate auto-
matic timer recording.
If power is not turned off and you continue
watching "IV, "TIMER REC STANDBY" starts
flashing on the TV screen 2 minutes before
the programmed start time.
6Set beginning minute
Press the PLAY/A or
STOPiV button until the de-
sired minute appears. (Ex-
ample: "30" for 7:30PM)
Then, pressthe F.FWD/I_
button.
I_OT-'i3MERPROGRAMMINQ- 1
CH DATI_ EdEGIN END
---4-- --._- __ --
---4- ..... :.. _- --
,_ ._,._t._._....
::2: :-'-J-_ ::: :: J
--_-- ---_.. __ __
__-_-_ ___.:.. __ __
7 Setend hour
Press the PLAY/A or
STOP/Y button until the de-
sired hour appears. (Exam-
ple: "8, PM" for 8:50PM)
Then, press the F.FWD/I_
button.
- TIMER PRCGRAMM_NG - 1
CH DATE BEGIN
---/----._.. _---
---4--...<.. <-_--
--_----._°° _---
8 Set end minute
Press the PLAY/A or
STOP/Y button until the de-
sired minute appears. (Ex-
ample: "50" for 8:50PM)
Then, press the F.FWD/I_
button.
-TIMER PROGRAMM4NG -
CH DATE BEGIN END
.._-_____._ .>....
_,_-_- ;.;;;;-,_ -
..,4- .....
9Set the tape speed
Press the PLAY/A or
STOP/Y button until the de-
sired tape speed appears.
(Example: SP)
- TIMER PROGRAMMING -
CHDATE BEGIN END
_.
NOTE:Any timer recording that is in progress
while you perform the following adjustments will
continue recording undisturbed.
To set the schedule of a timer recording forward:
1) If television is OFF, press the POWER button
to turn it ON.
2) Press the MENU button. Use the PLAY/& or
STOP/V button to move selection arrow to
TIMER PROGRAMMING. Press the
F.FWD,_- button to enter the TIMER PRO-
GRAMMING screen.
3) Press the RECORD button once to enter the
adjustment mode, then use the PLAY/Aor
STOP/V button to select the recording you
want to adjust.
4) Press the RECORD button to set the
scheduled BEGIN and END time forward 10
minutes. Each additional press will set the
time forward another 10 minutes. (If you
choose a recording currently in progress, the
BEGIN time will not be affected.) While
performing this procedure, you may cancel
the new setting and return to the original one
by pressing the PAUSE/STILL button.
NOTE:If you choose a recording currently in
progress, the recording speed will automatically
be set to SLP to preserve tape length.
5) Press the F.FWDi_- or REW/<I button to exit
the adjustment mode. Then press the MENU
button to exit the TIMER PROGRAMMING
screen.
6) If desired, press the POWER button to turn
the television OFF.
-26 -EN
8J14
TO CORRECTAPROGRAM
• While setting a program; pressthe REW/<
buttonto go back one step and enter the correct
numbers usingthe PLAY/A or STOPS' button.
•After setting a program;
1) Press the POWER button.
2) Repeat steps [1] -[2] on page 25.
3) Press the F.FWD/b_ button (or press the
REW/.<I button to go back one step) untilthe
part you want to correct begins flashing, then
make the changes pressing the PLAY/A or
STOPiv button.
4) Press the POWER button to set automatic
timer recording.
TO CANCEL AN AUTOMATIC TIMER RE-
CORDING
•After setting a program;
1) Press the POWER button.
2) Repeat steps [1] ~ [2] on page 25 and select
a program you want to cancel.
3) Press the T-PROG. CLEAR button.
4) Press the MENU button to returnto TV mode.
•While recording Is in progress;
1) Press the POWER button.
2) Press the STOP/EJECT button on the
TVNCR.
TO CHECK THE BEGINIEND TIME
1) Press the POWER button so that the REC in-
dicator goes off.
2) Press the MENU button.
3) Confirm "TIMER PROGRAMMING" is pointed
to.
4) Press the F.FWD/b.- button. The details of pro-
grams appear on the IV screen.
5) Press the MENU button to return to TV mode.
AUTO TIMER RECORDING REMINDERS:
• Make sure the channel you want to record is
properly set in advance.
•It is not necessary to press the RECORD
button for timer recording.
•Recording begins automatically at the Start
time.
• If you are recording using a Timer mode, you
cannot operate the unit manually.
• The erase-prevention tab on the cassette
must be in place (or you must put tape over
the hole).
• If the erase-prevention tab is removed, the
cassette will be ejected when the POWER
button is pressed to off.
• If the tape runs out before the end time, the
TVNCR will switch to the Stop mode immedi-
ately, and the tape will be ejected.
With this function, after timer recording is fin-
ished, the tape will automatically rewind to the
start of the recorded program(s).
•Use the remote control for this procedure.
1Select "USER'S SET UP"
Press the MENU button.
Press the PLAY/A or
STOP/V button to pointto
"USER'S SET UP".
Then, press the F.FWD/I_
button.
-MENU- !
TIMER PROGRAtJIMING
PICTURE CONTROL
SET13NG CLOCK
CHANNEL SET Up
_USEI_S S_" UP
LANGUAGE ENGLISH]
ZERO R_rURN
TtME _IE_CH
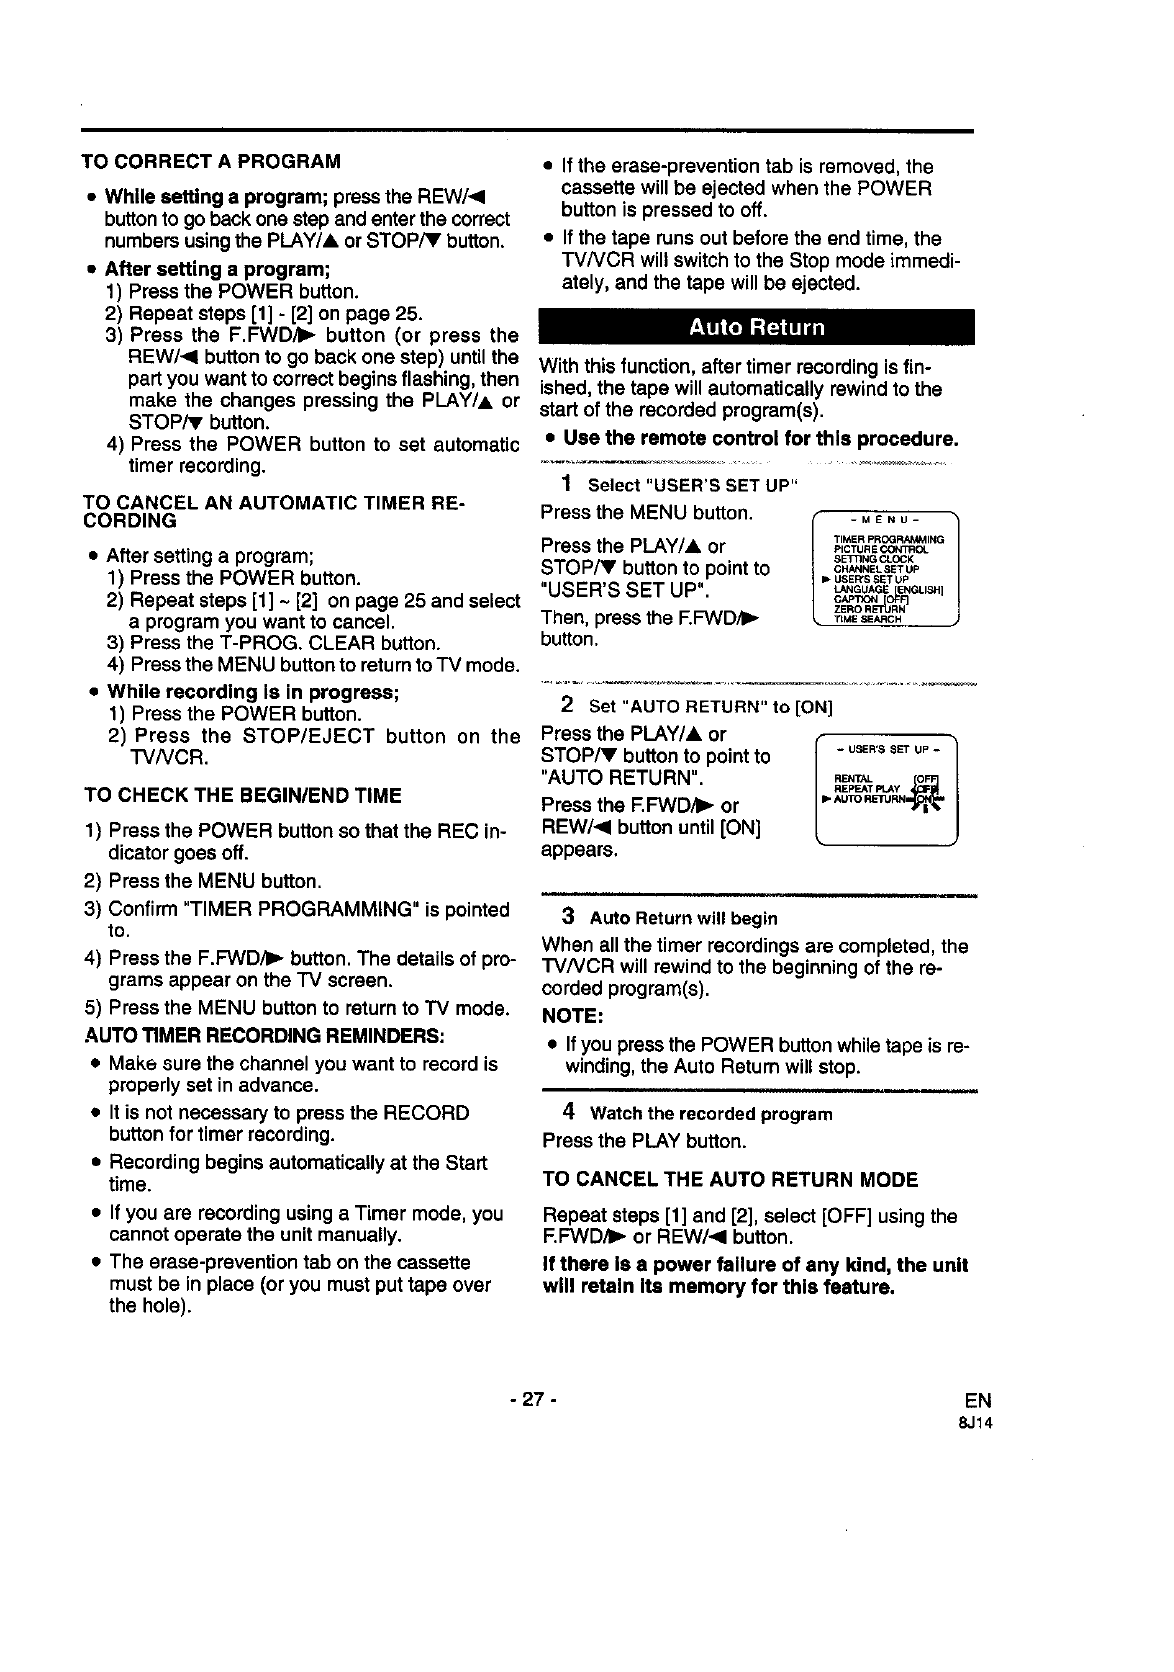
2 Set "AUTO RETURN"to [ON]
Press the PLAY/A or
STOP/V button to point to
"AUTO RETURN".
Press the F.FWD_t_ or
REW/.<I button until [ON]
appears.
- U_ER*S SET Up
RENTAL O
3 Auto Returnwill begin
When all the timer recordings are completed, the
TVNCR will rewind to the beginning of the re-
corded program(s).
NOTE:
•If you press the POWER button while tape is re-
winding, the Auto Return will stop.
4Watch the recorded program
Press the PLAY button.
TO CANCEL THE AUTO RETURN MODE
Repeat steps [1] and [2], select [OFF] using the
F.FVVD/I_ or REW/4 button.
if there Is a power failure of any kind, the unit
will retain Its memory for this feature.
- 27 - EN
8J14
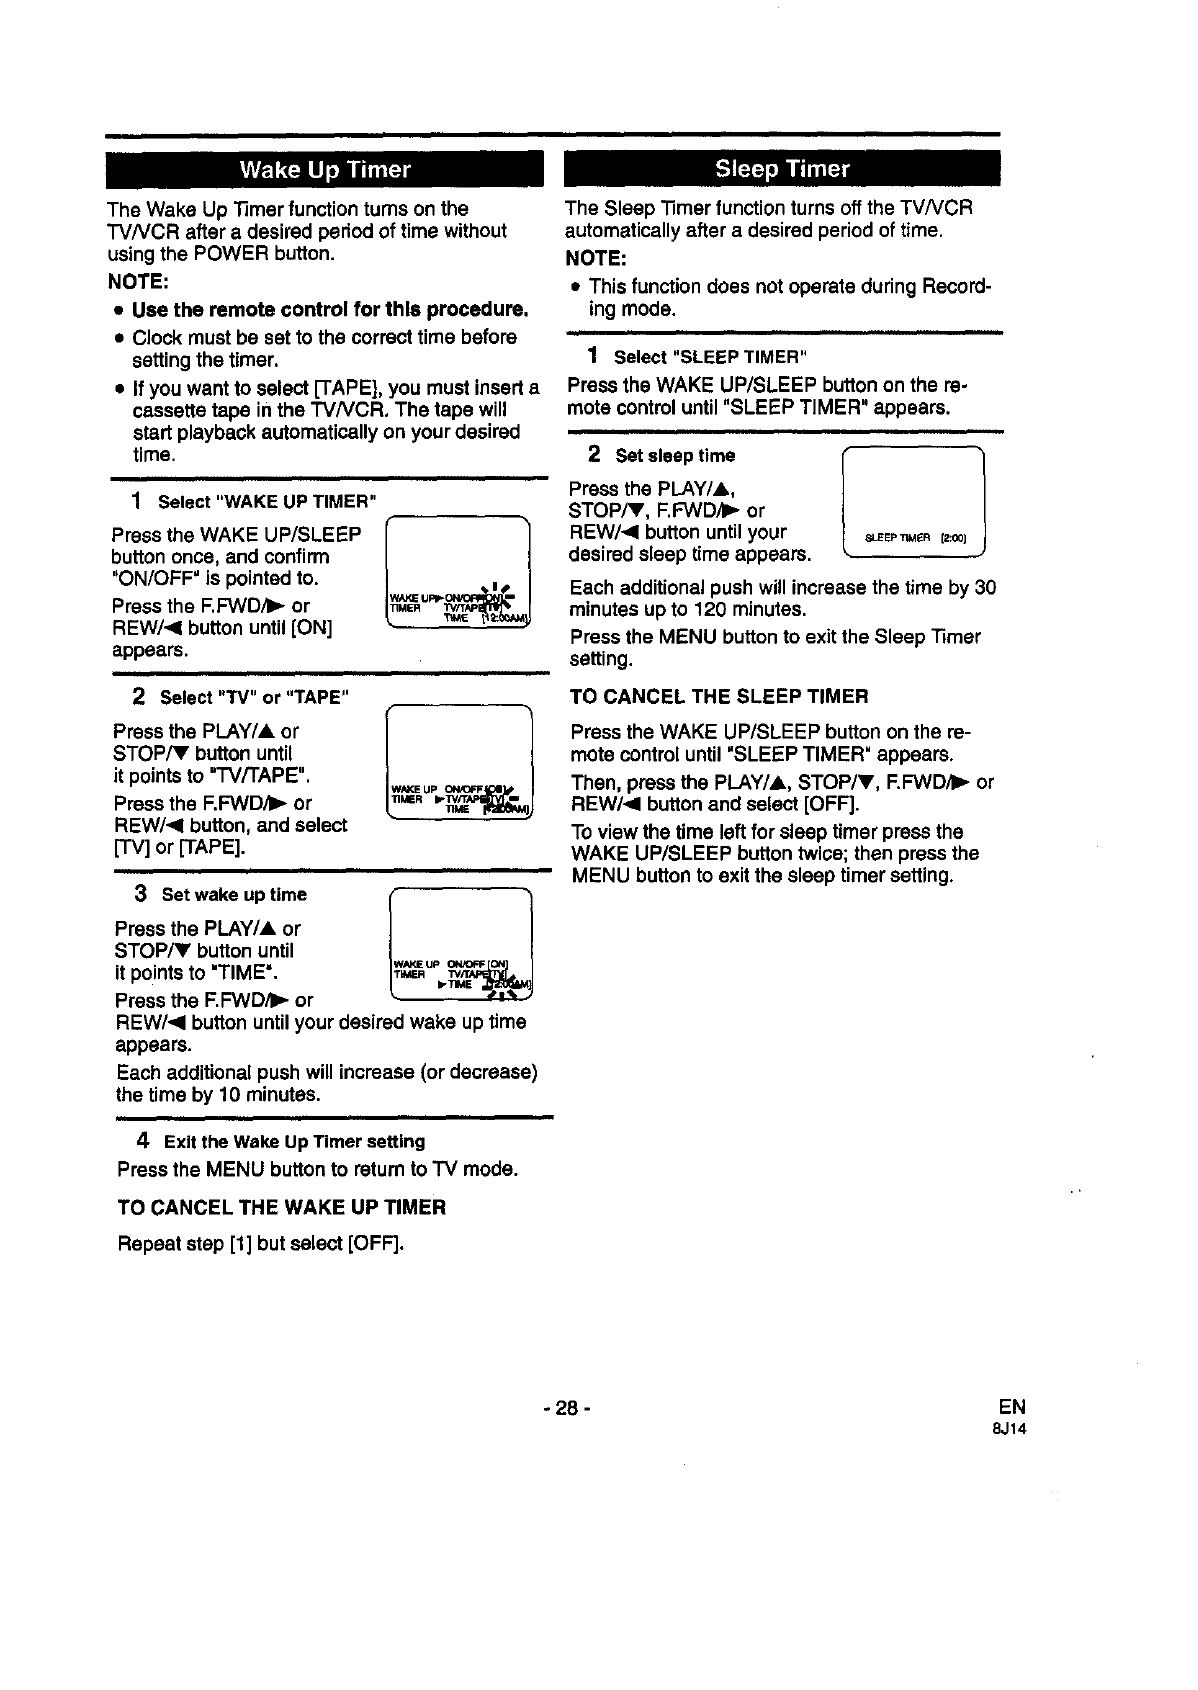
The Wake Up Timer function turns on the
TVNCR after adesired period of time without
using the POWER button.
NOTE=
• Use the remote control for this procedure,
•Clock must be set to the correct time before
setting the timer.
•If you want to select [-rAPE], you must insert a
cassette tape in the "T'VNCR, The tape will
start playback automatically on your desired
time.
1Select"WAKE UP TIMER"
Press the WAKE UP/SLEEP l_ _1
button once, end confirm
"ON/OFF" is pointed to.
Press the F.F'WD/II,,-or w_u,,. 'f-
REW/<I button until [ON]
appeam.
2Select "TV" or "TAPE"
STOP/V button until
it points to "TV/TAPE", w_uP
Press the F.FWD/I_ or _R ,-
REW/<I button, and select
[TV] or [TAPE].
3Set wake up time I._._ _,,_
Press the PLAY/A or
STOP/V button until w_,.Eup
it points to "TIME'. ,.
Press the F.FWD/I_ or
REW/.<I button until your desired wake up time
appears.
Each additional push will increase (or decrease)
the time by 10 minutes.
4Exit the Wake Up Timer setting
Press the MENU button to return to TV mode.
TO CANCEL THE WAKE UP TIMER
Repeat step [1] but select [OFF].
The Sleep "limerfunction turns off the TVNCR
automatically after adesired period of time.
NOTE:
• This function does not operate during Record-
ing mode.
1 Select "SLEEP TIMER"
Press the WAKE UP/SLEEP button on the re-
mote control until "SLEEP TIMER" appears.
St.EEP_*AFJ_ [2:001
Press the PLAY/A,
STOP/V, F.FWD/I_ or
REW/_I button untilyour
desired sleep time appears.
Each additional push will increase the time by 30
minutes up to 120 minutes.
Press the MENU button to exit the Sleep rimer
setting.
TO CANCEL THE SLEEP TIMER
Press the WAKE UP/SLEEP button on the re-
mote control until "SLEEP TIMER" appears.
Then, press the PLAY/A, STOP/Y, F.FWD/I_ or
REW/<I button and select [OFF].
To view the time left for sleep timer press the
WAKE UP/SLEEP button twice; then press the
MENU button to exit the sleep timer setting.
-28- EN
8J14
MAINTENANCE
CABINET CLEANING
• Wipe the front panel and other exterior sur-
faces of the TV/VCR with asoft cloth im-
mersed in lukewarm water and wrung dry.
• Never use a solvent or alcohol. Do not spray
insecticide liquid near the TVNCR. Such
chemicals may cause damage and discolora-
tion to the exposed surfaces.
HEAD CLEANING
•Playback picturemay become blurred of inter-
rupted while the TV program receptionis clear.
Dirt accumulatedon the video heads after long
pedodsof use, or the usage of rental or wom
tapes can cause this problem.
If a streaky or snowy picture appears dudng
playback, the heads of your TV/VCR may
need to be cleaned.
1. Please visit your local Audio/Video store and
pumhase a good quality VHS Video Head
Cleaner.
2. If a Video Head Cleaner does not solve the
problem, consult the nearest Sears Service
Center. Professional video head cleaning
requires highly technical attention.
NOTES:
•Remember to read the instructions included
with the head cleaner before use.
•Clean heads only when problems occur.
SERVICING
•Should your TV/VCR become inoperative, do
not try to correct the problem by yourself.
There are no user-serviceable parts inside.
Tum off, unplug the power cord, and take the
unit to the nearest Sears Service Center.
To locate the nearest Sears Service Center,
call 1-800-488-1222
- 29 -EN
8J14
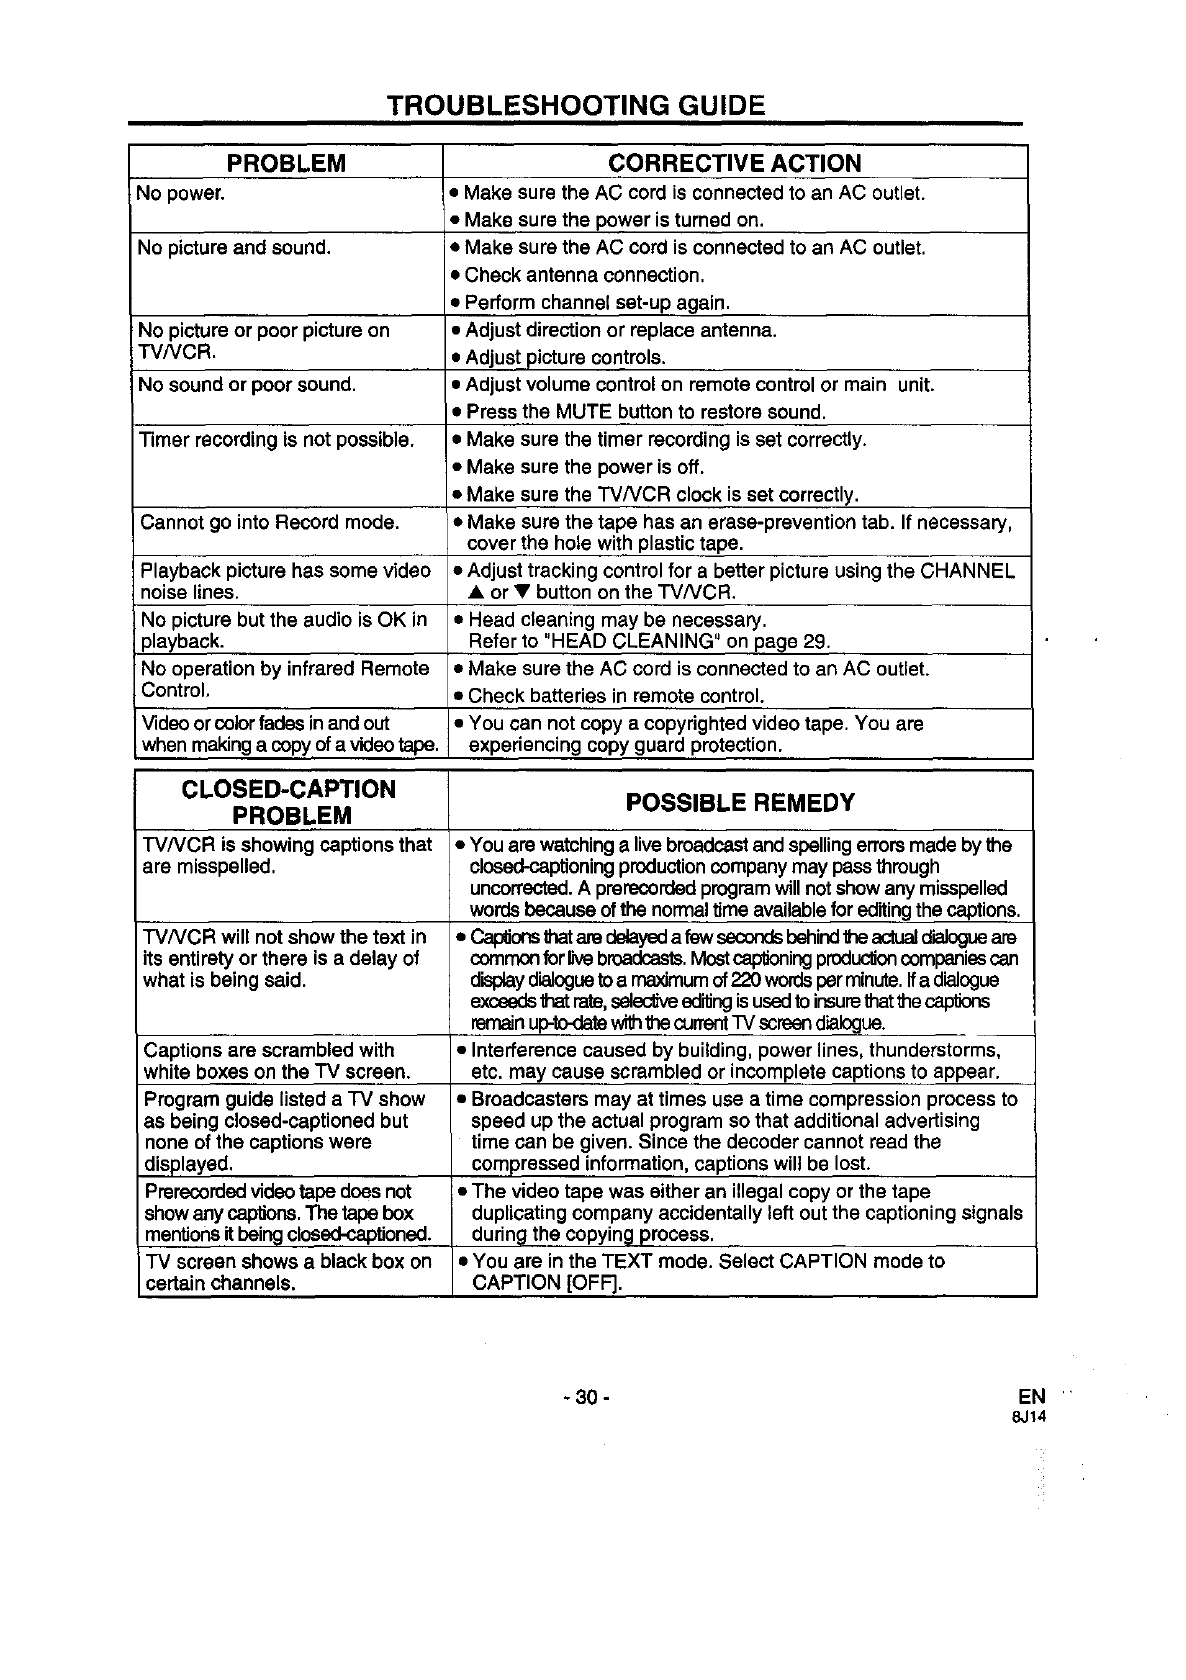
TROUBLESHOOTING GUIDE
PROBLEM
No power.
No picture and sound.
No picture or poor picture on
TV/VCR.
No sound or poor sound.
Timer recording is not possible.
Cannot go into Record mode.
Playback picture has some video
noise lines.
No picture but the audio is OK in
playback.
No operation by infrared Remote
Control.
Video or color fades in andout
when making acopy of avideo tape.
CORRECTIVE ACTION
•Make sure the AC cord is connected to an AC outlet.
•Make sure the power is turned on.
• Make sure the AC cord is connected to an AC outlet.
• Check antenna connection.
• Perform channel set-up again.
• Adjust direction or replace antenna.
• Adjust picture controls.
• Adjust volume control on remote control or main unit.
•Press the MUTE button to restore sound.
• Make sure the timer recording is set correctly.
• Make sure the power is off.
• Make sure the TV/VCR clock is set correctly.
• Make sure the tape has an erase-prevention tab. If necessary,
cover the hole with plastic tape.
• Adjust tracking control for a better picture using the CHANNEL
•or • button on the TVNCR.
• Head cleaning may be necessary.
Refer to "HEAD CLEANING" on page 29.
• Make sure the AC cord is connected to an AC outlet.
• Check batteries in remote control.
• You can not copy a copyrighted video tape. You are
experiencing copy guard protection.
CLOSED-CAPTION
PROBLEM
rVNCR is showing captions that
are misspelled.
TVNCR will not show the text in
its entirety or there is a delay of
what is being said.
Captions are scrambled with
white boxes on the TV screen.
Program guide listed arv show
as being closed-captioned but
none of the captions were
displayed.
Prerecordedvideotape doesnot
showany captions.The tape box
mentions it being clnsed-captioned.
TV screen shows ablack box on
certain channels.
POSSIBLE REMEDY
•You are watchinga live broadcast and spellingerrorsmade by the
closed-captioningproductioncompany may pass through
uncorrected.A prerecordedprogramwillnotshow any misspelled
words because ofthe normaltime available forediting the captions.
•Cap_onsthat are detayeda few secondsbehindtheactualdialogueare
commonfor rNebroadcasts.Most captioningproduc'doncompanies can
displaydialogueto emaximum of 220 words per minute.Ifa dialogue
exceeds thatrate,selec'&,eediting is used to insurethatthe captions
remain up-to-datewiththe currentTV screendialogue.
• Interference caused by building, power lines, thunderstorms,
etc. may cause scrambled or incomplete captions to appear.
• Broadcasters may at times use a time compression process to
speed up the actual program so that additional advertising
time can be given. Since the decoder cannot read the
compressed information, captions will be lost.
• The video tape was either an illegal copy or the tape
duplicating company accidentally left out the captioning signals
during the copying process.
• You are in the TEXT mode. Select CAPTION mode to
CAPTION [OFF].
- 30 - EN ''
8J14
MEMO
- 31 - EN
8J14
For in-home major brand repair service:
Call 24 hours a day, 7 days a week
1-800-4-MY-HOME" (1-600-469-4663)
Pare pedir servicio de reparaci6n a domicilio
In Canada for all your service and parts needs call
Au Canada pour tout le service ou les pi_ces
For the repair or replacement parts you need:
Call 6 am -11 pm CST, 7 days a week
PartsDirect-
1-800-366-PART (1-800-366-7278)
Para ordenar piezas con entrega a domicilio -1-800-659-7084
-1-800-676-5811
- 1-800-665-4455
For the location of a Sears Parts and Repair Center in your area:
Call 24 hours a day, 7 days a week
1-800-488-1222
For information on purchasing a Sears Maintenance Agreement
or to inquire about an existing Agreement:
Call 9 am - 5 pro, Monday -Saturday
1-800-827-6655
Pdnted in Malaysia 0EMN01460
T5008UJ "k****
