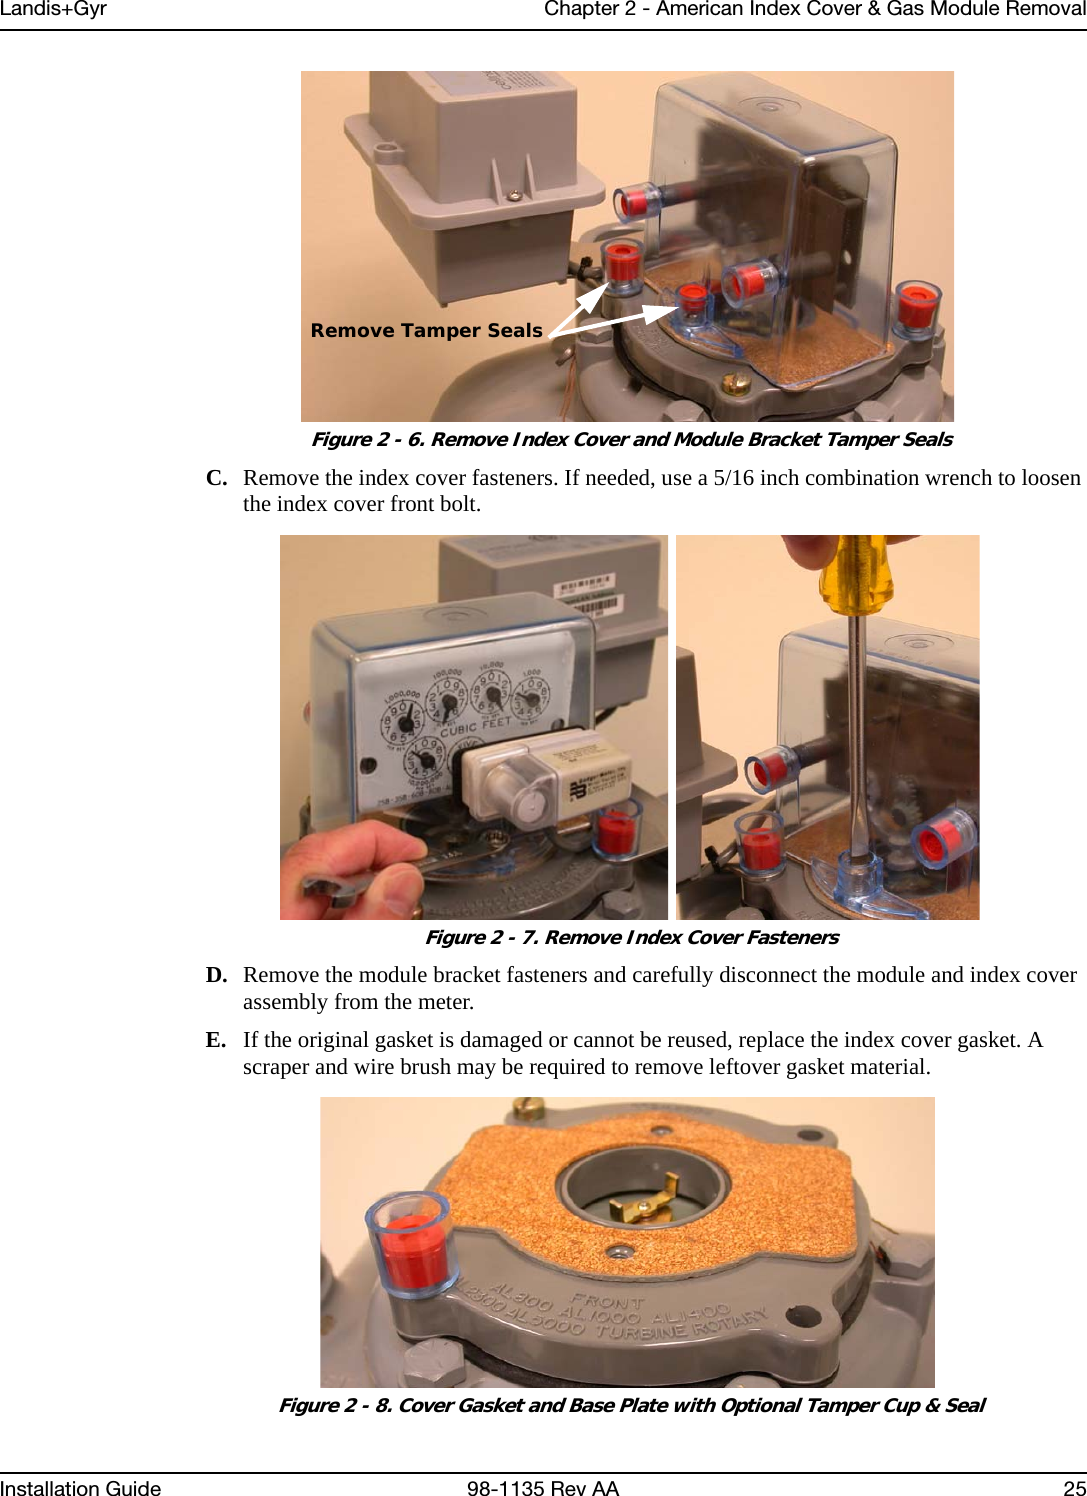
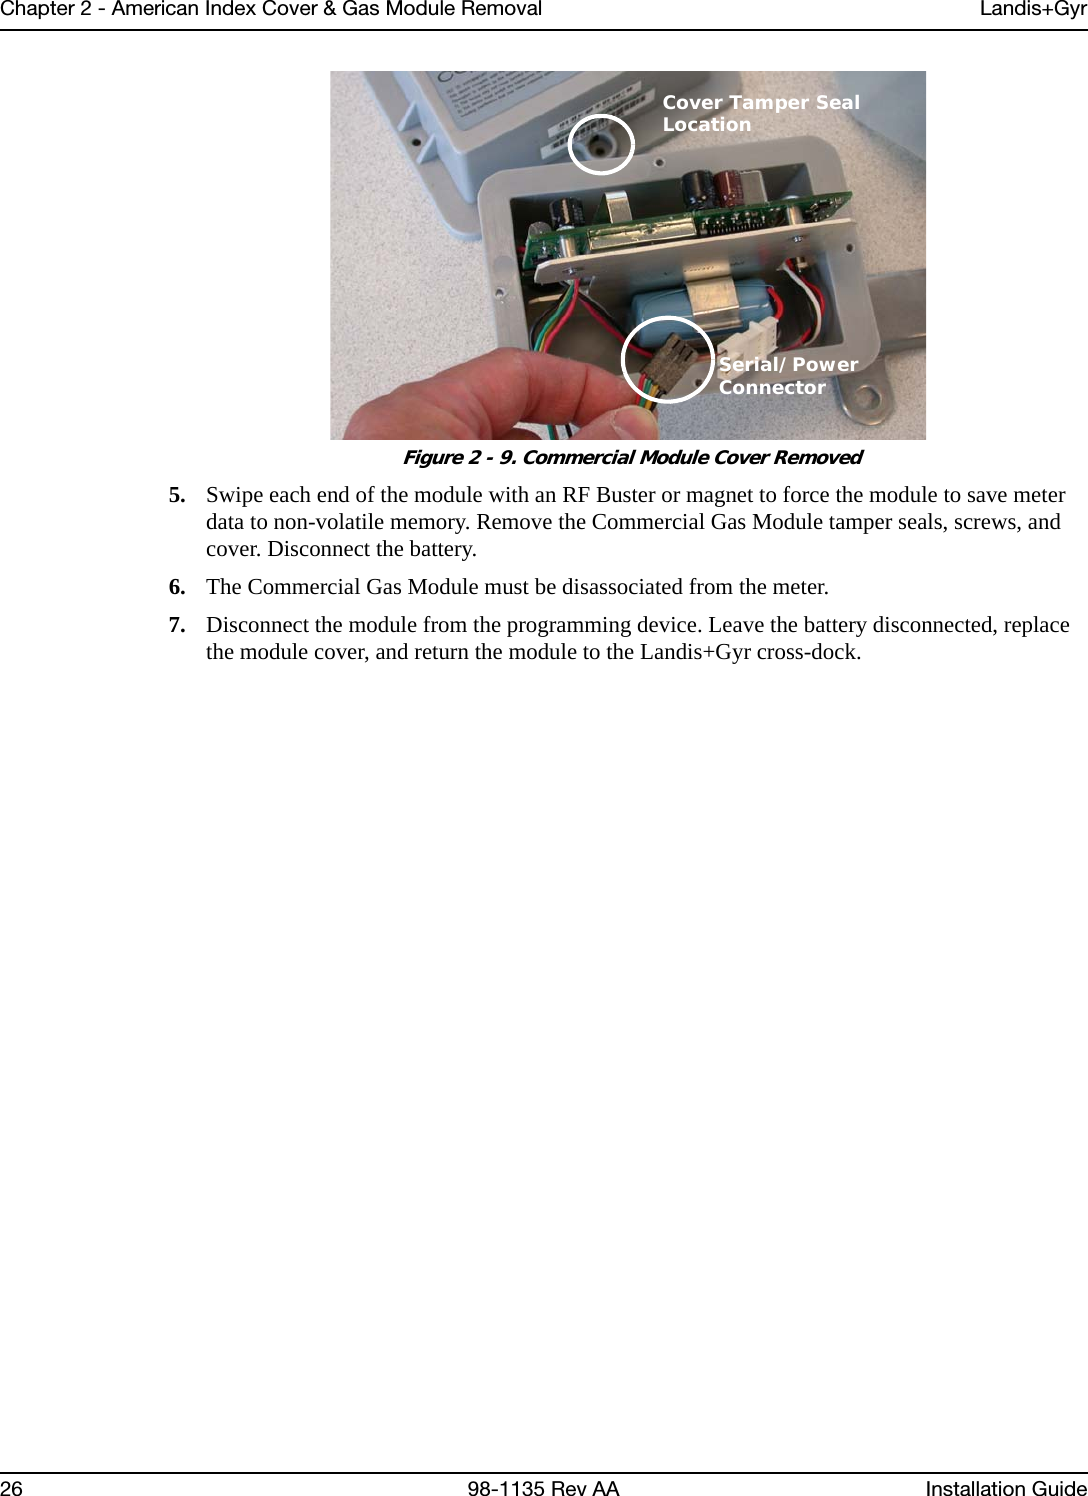
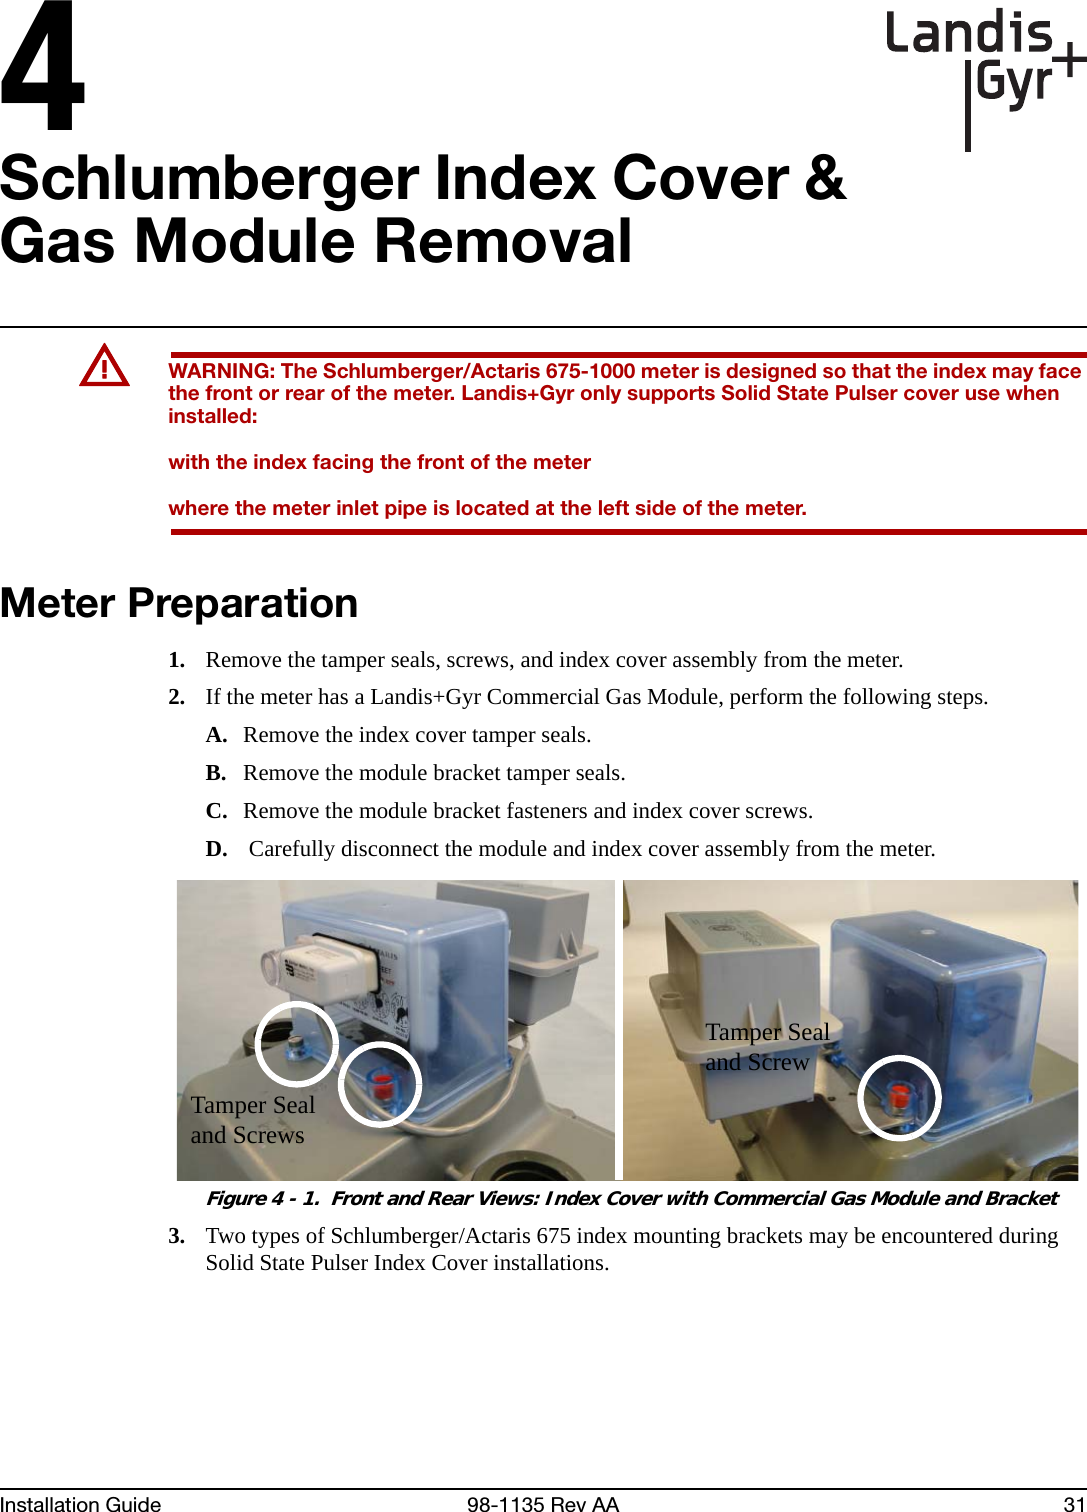
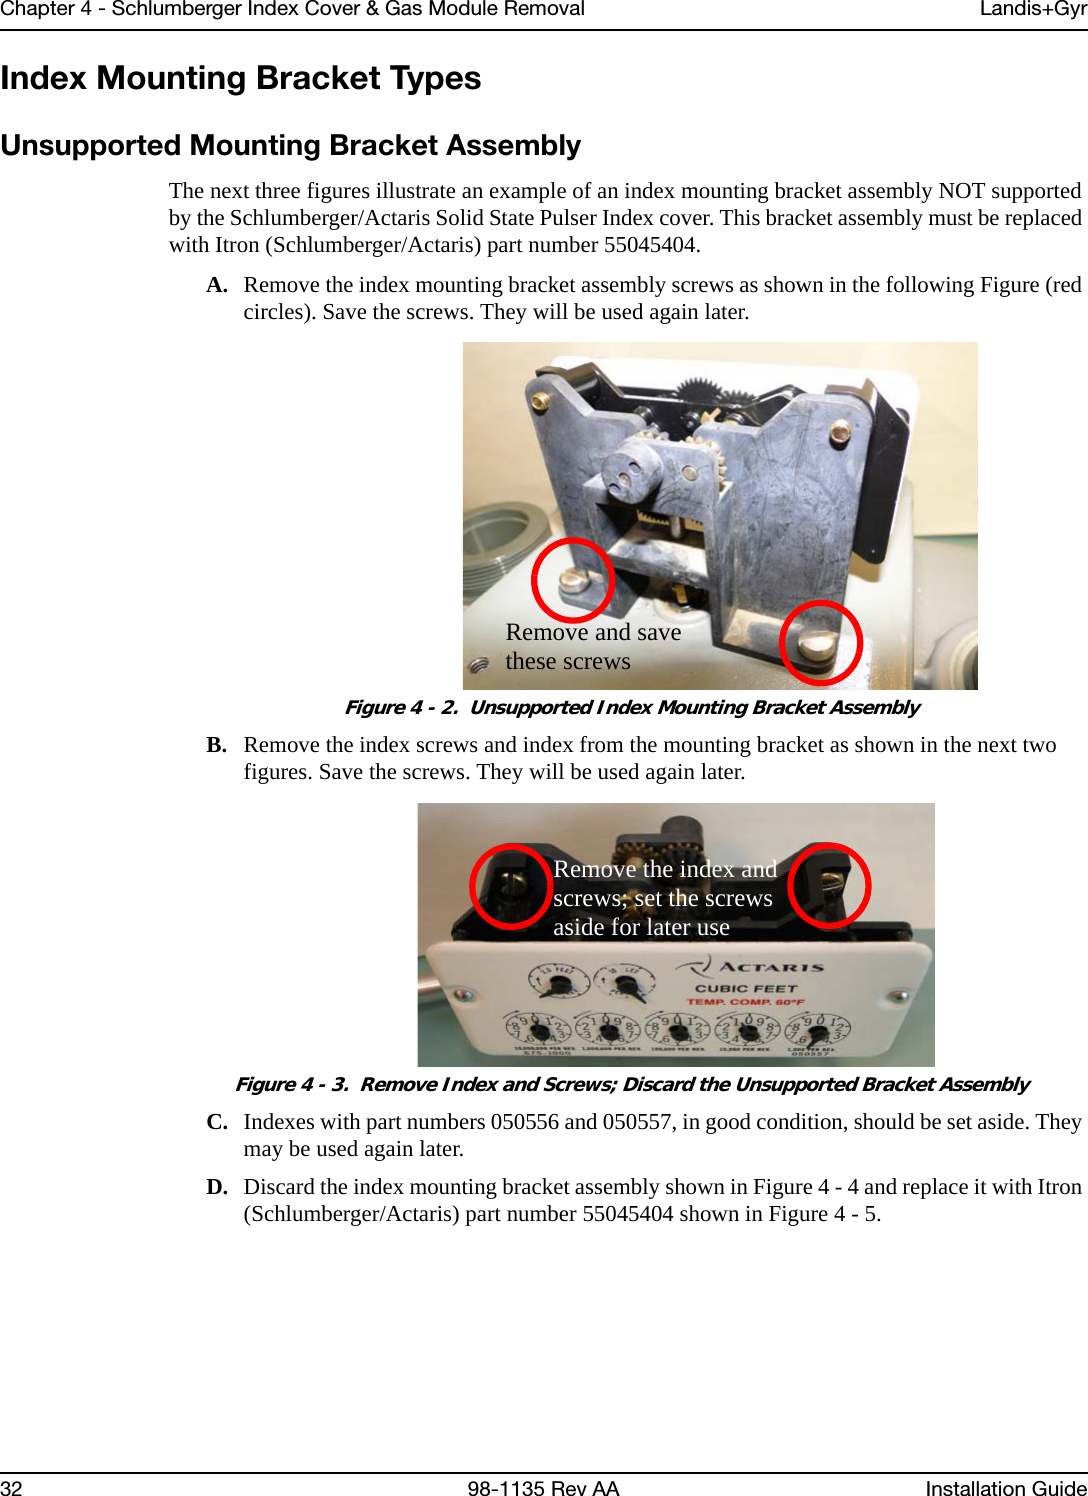
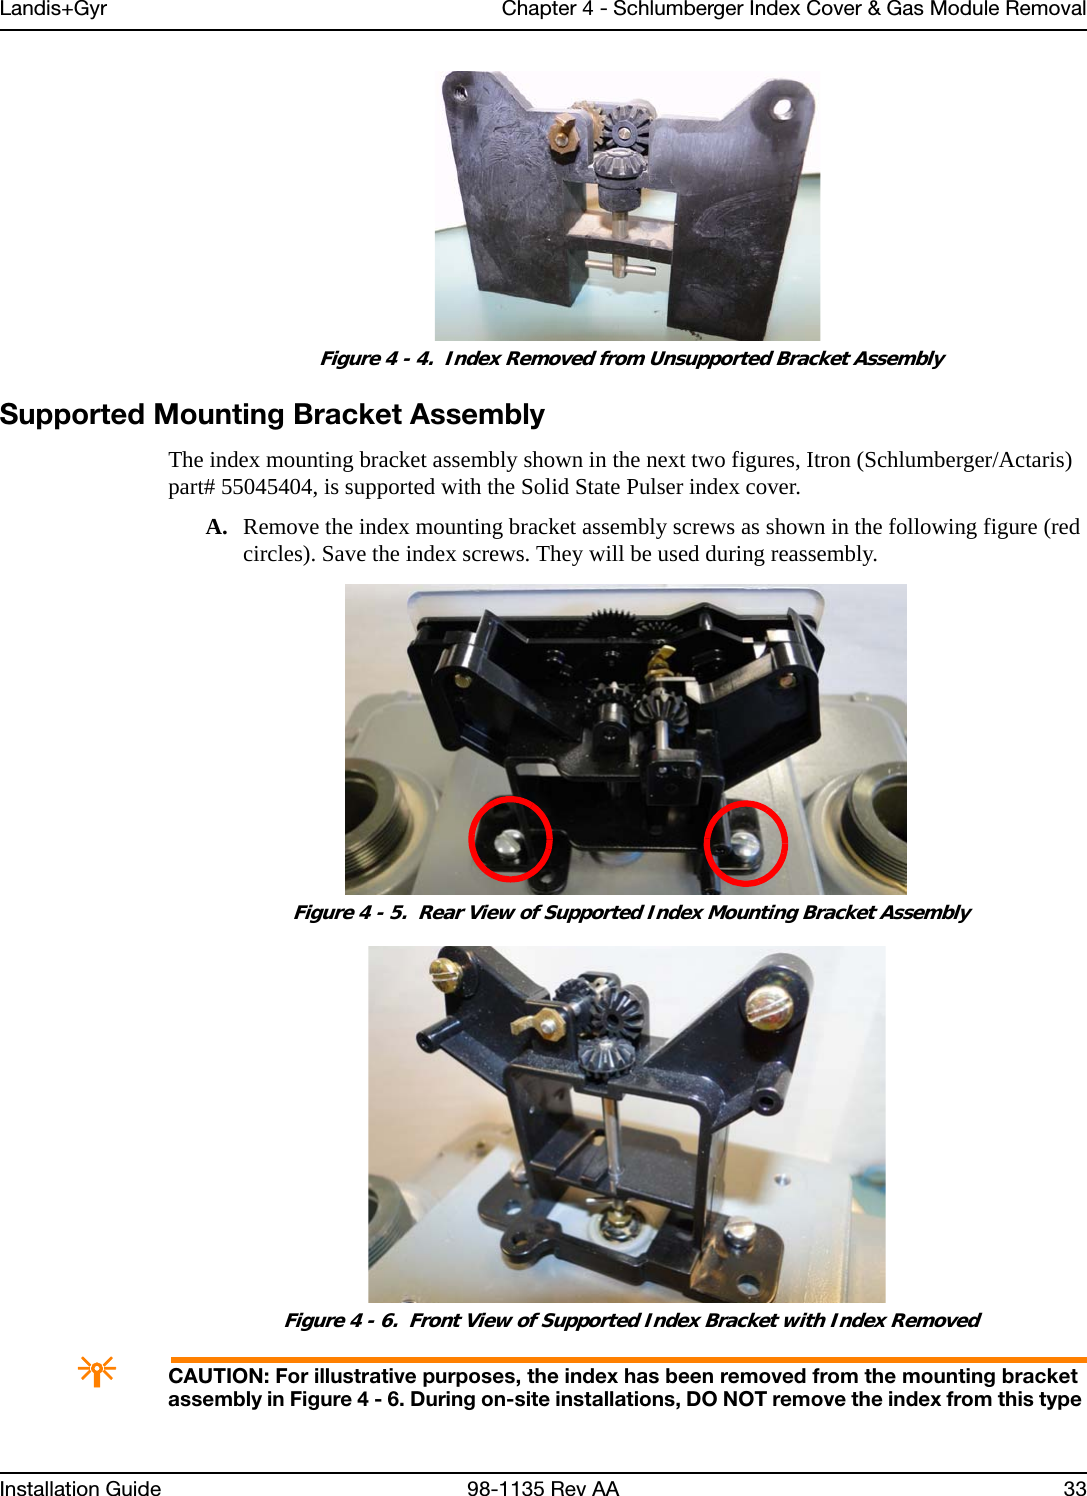
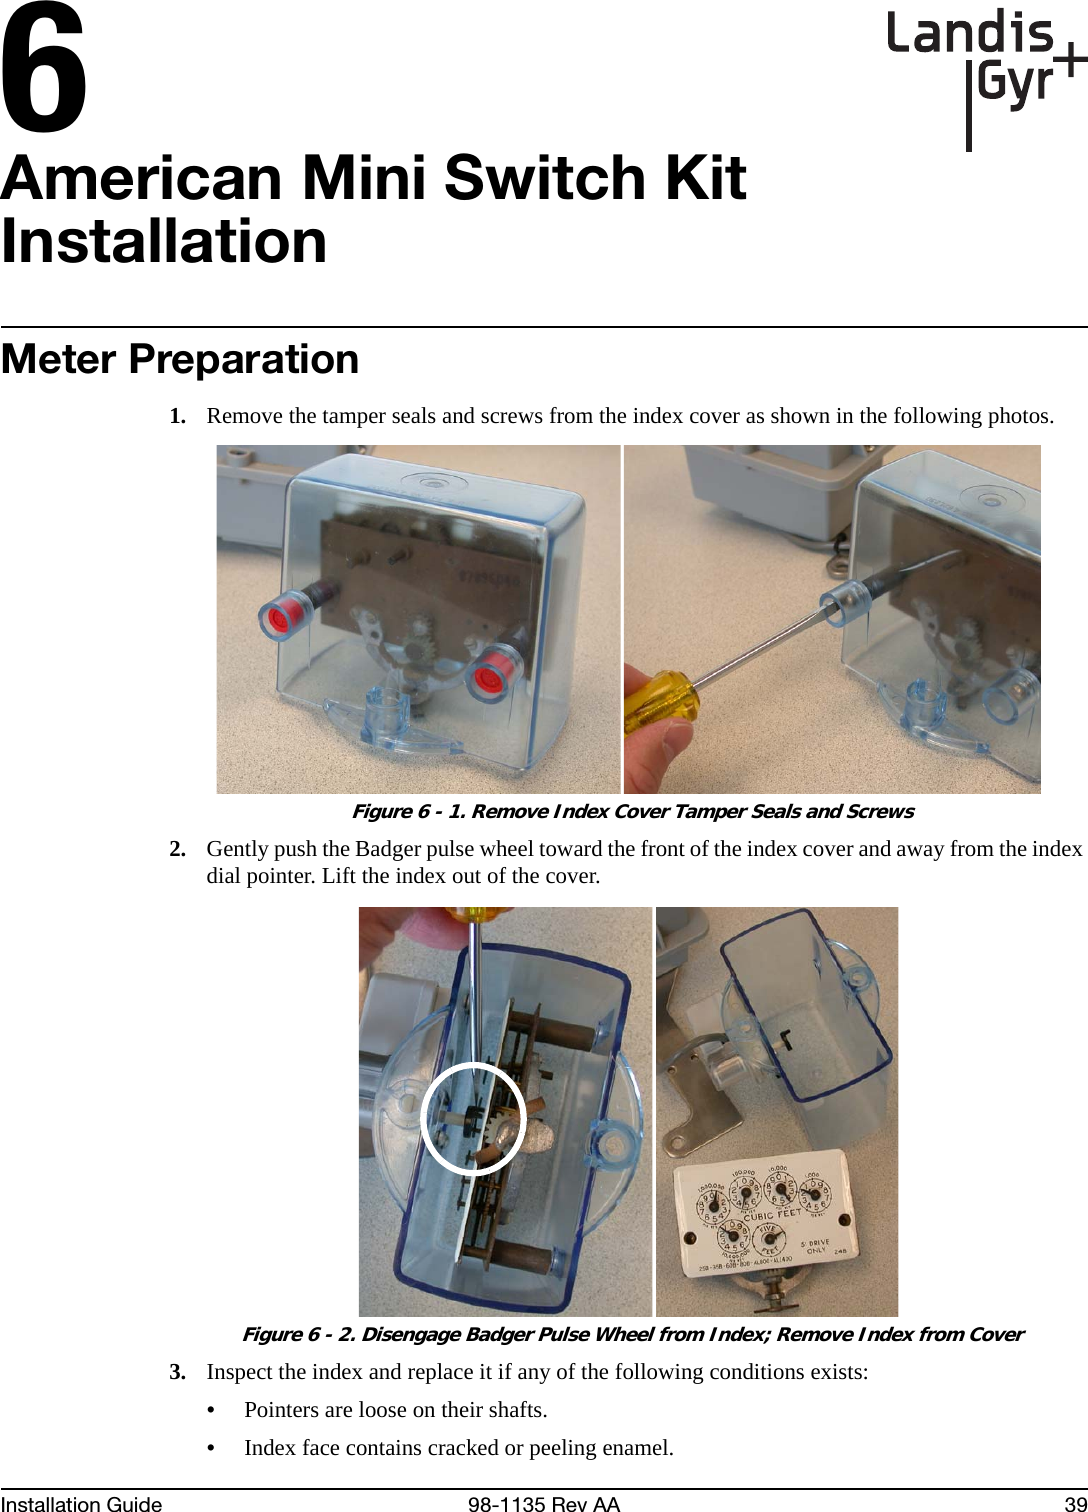
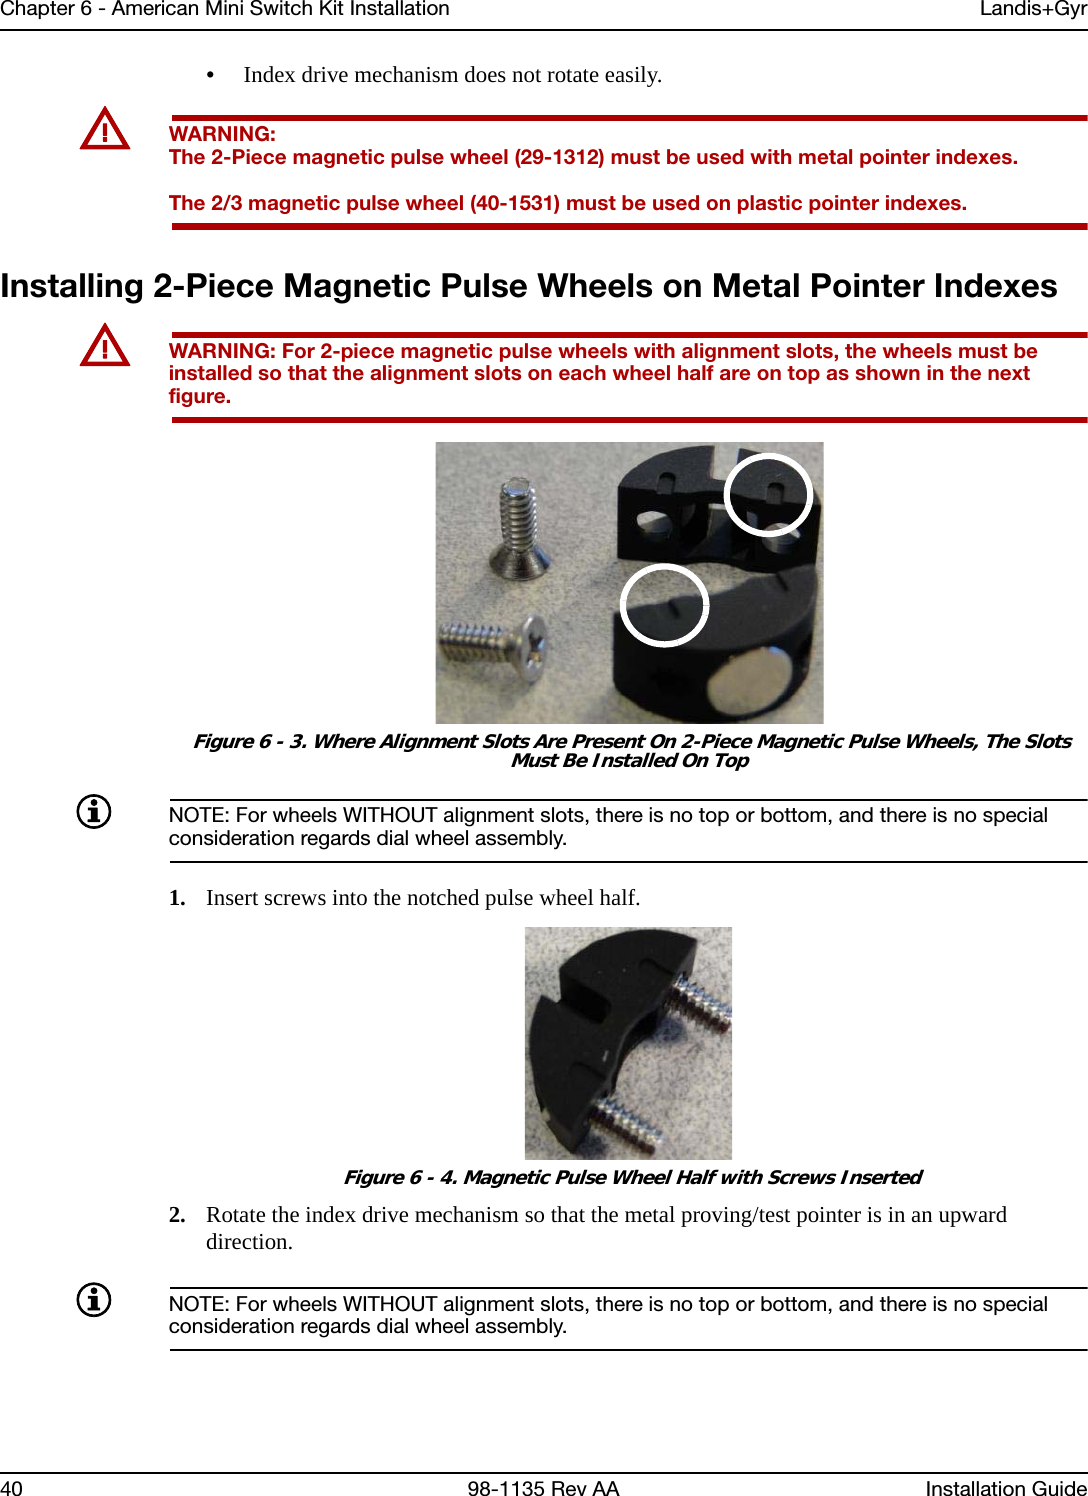
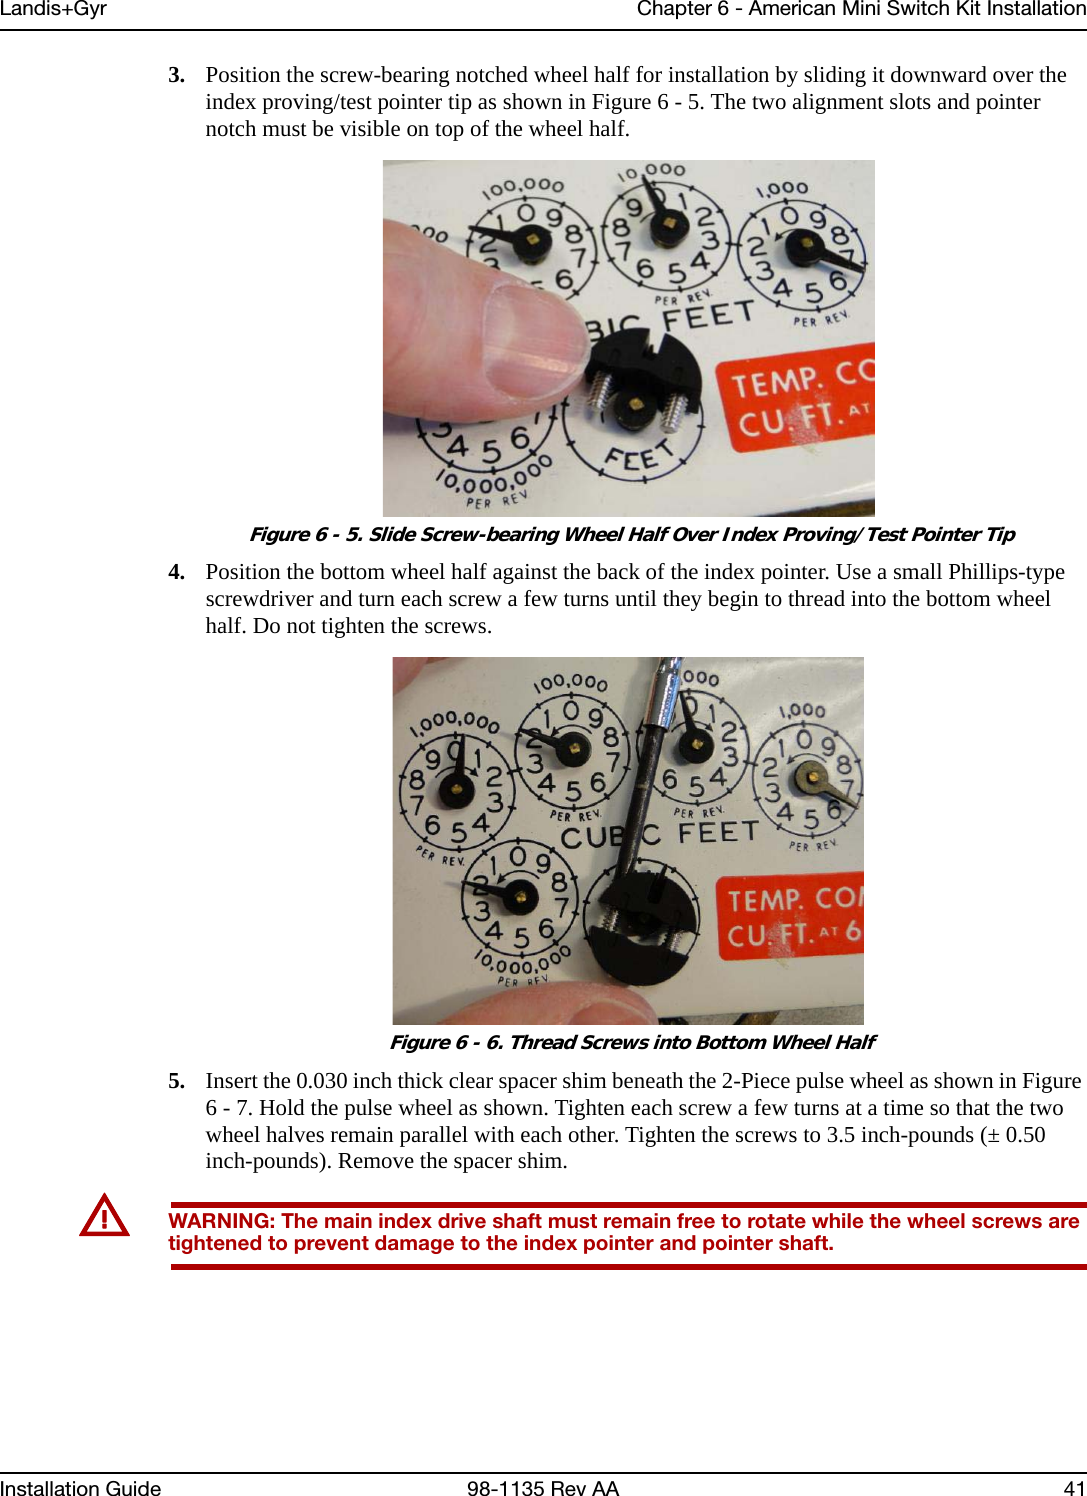
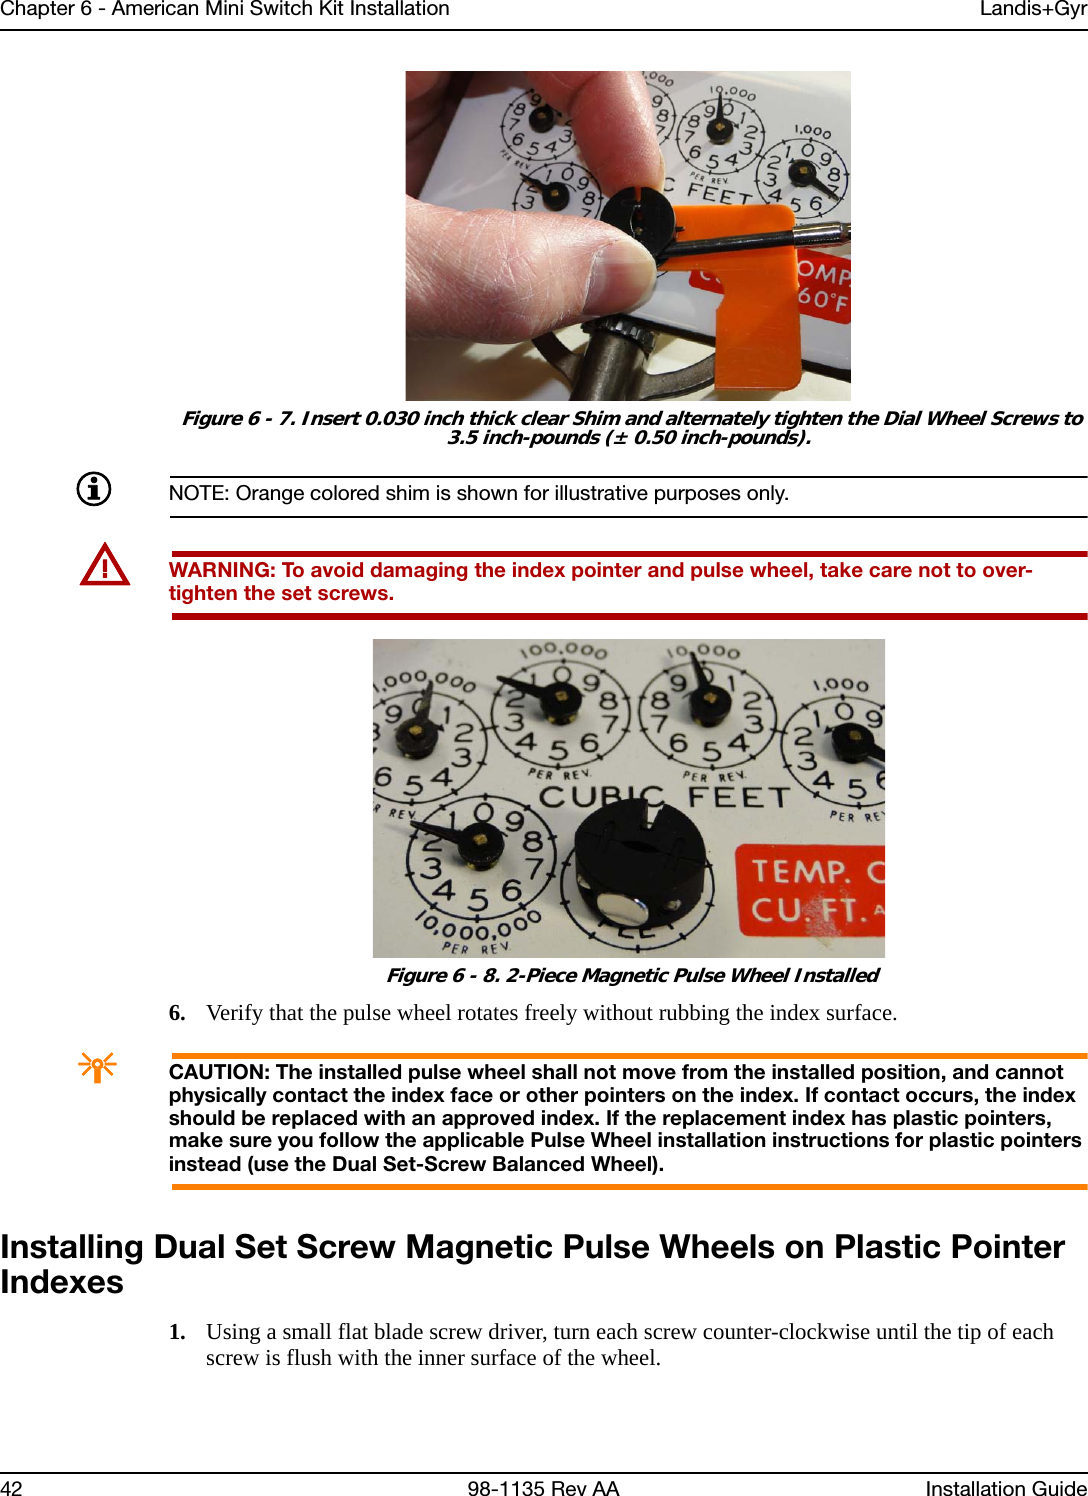
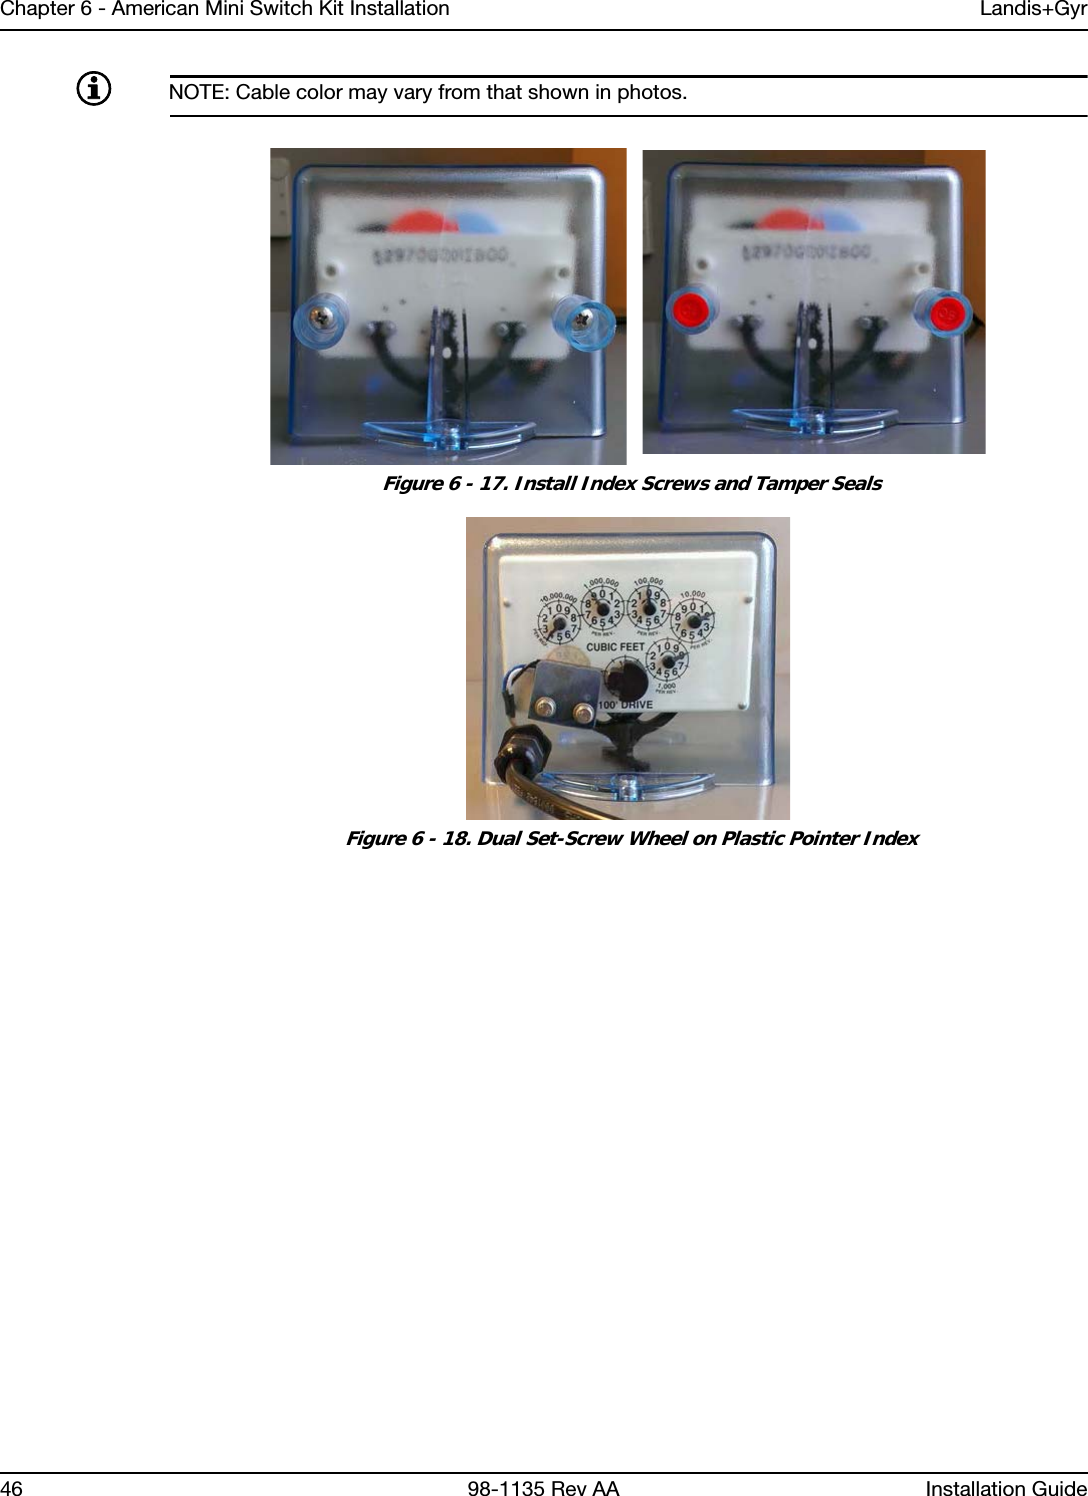
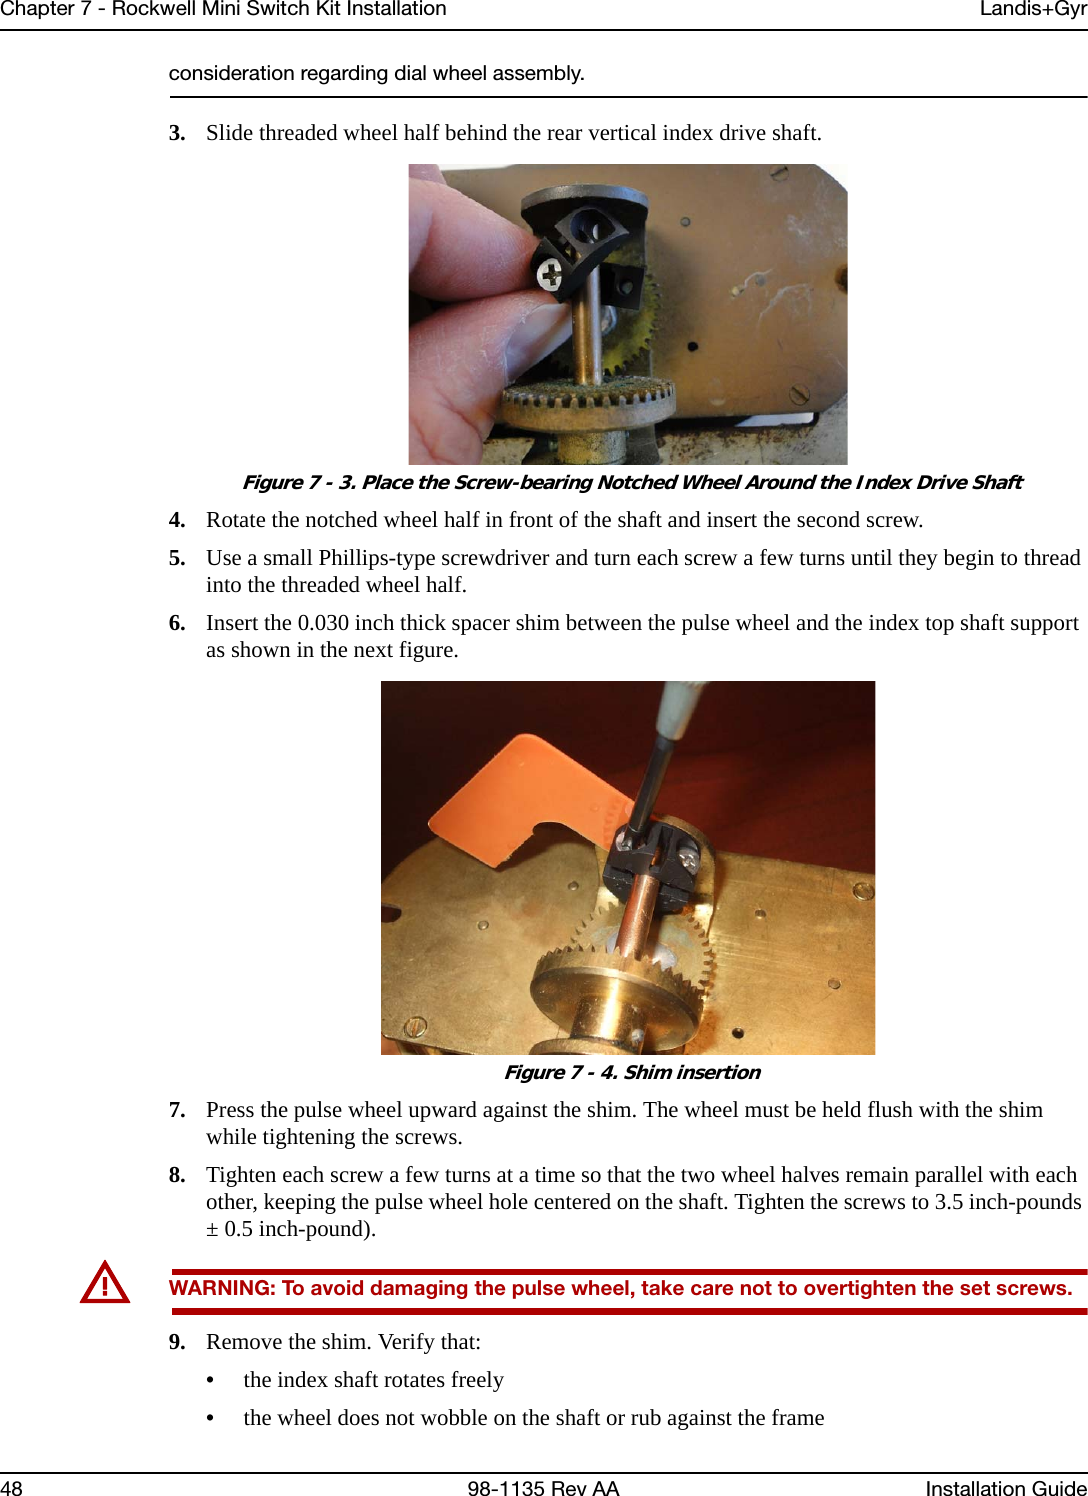
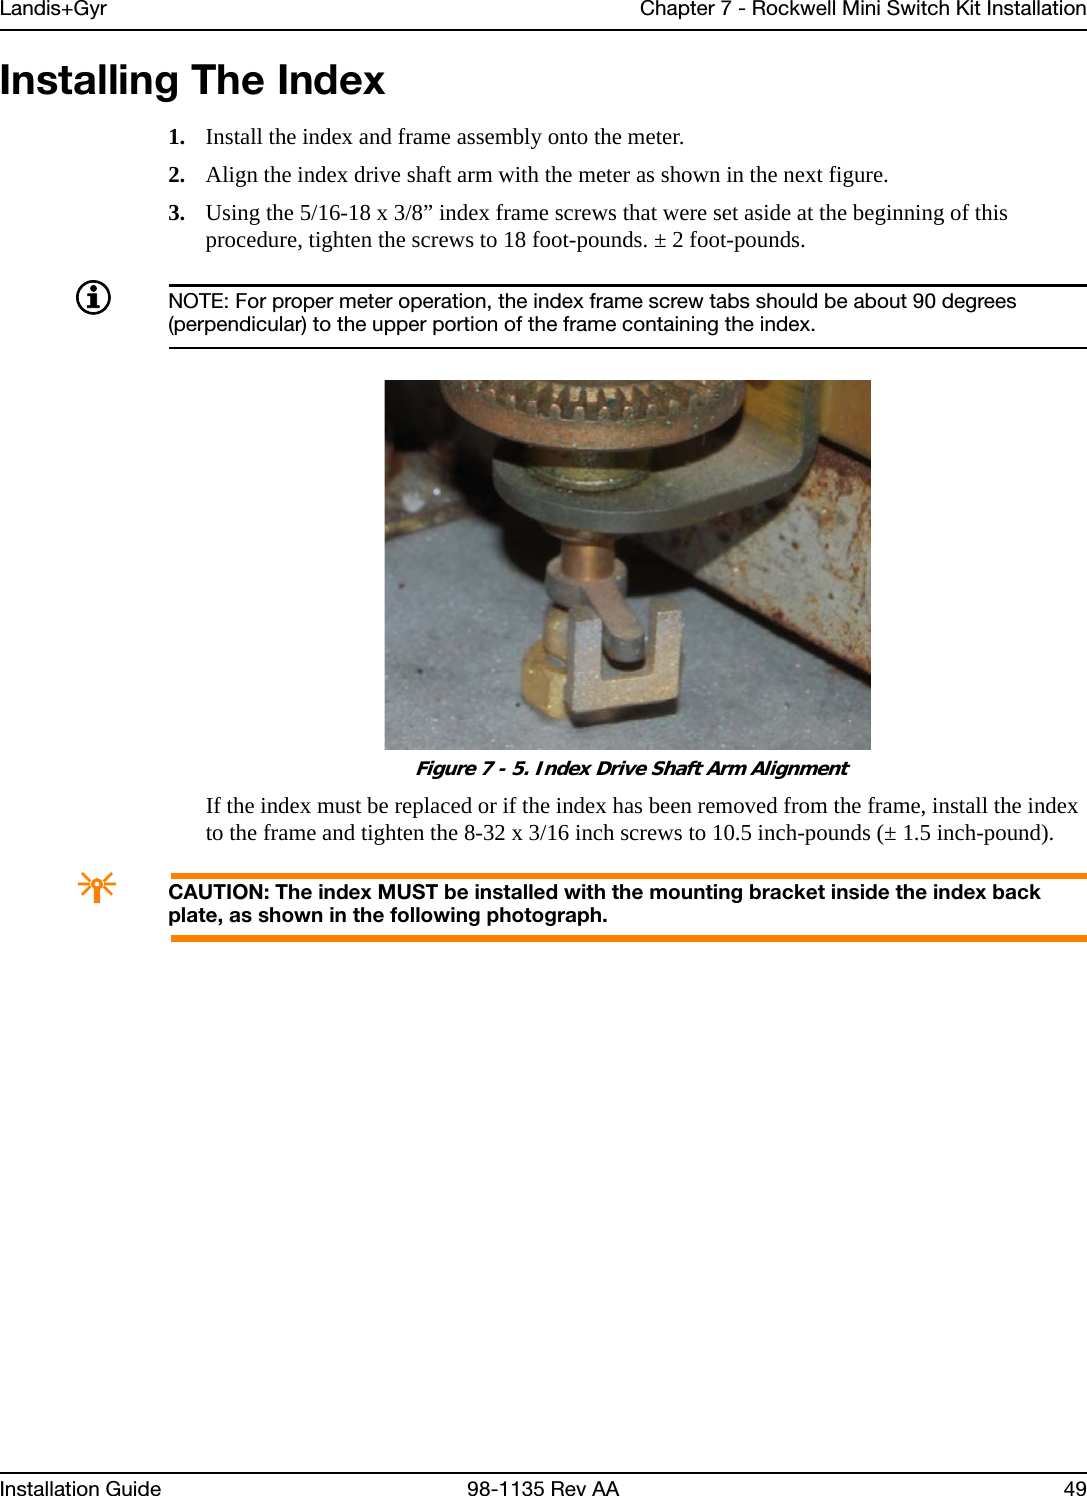
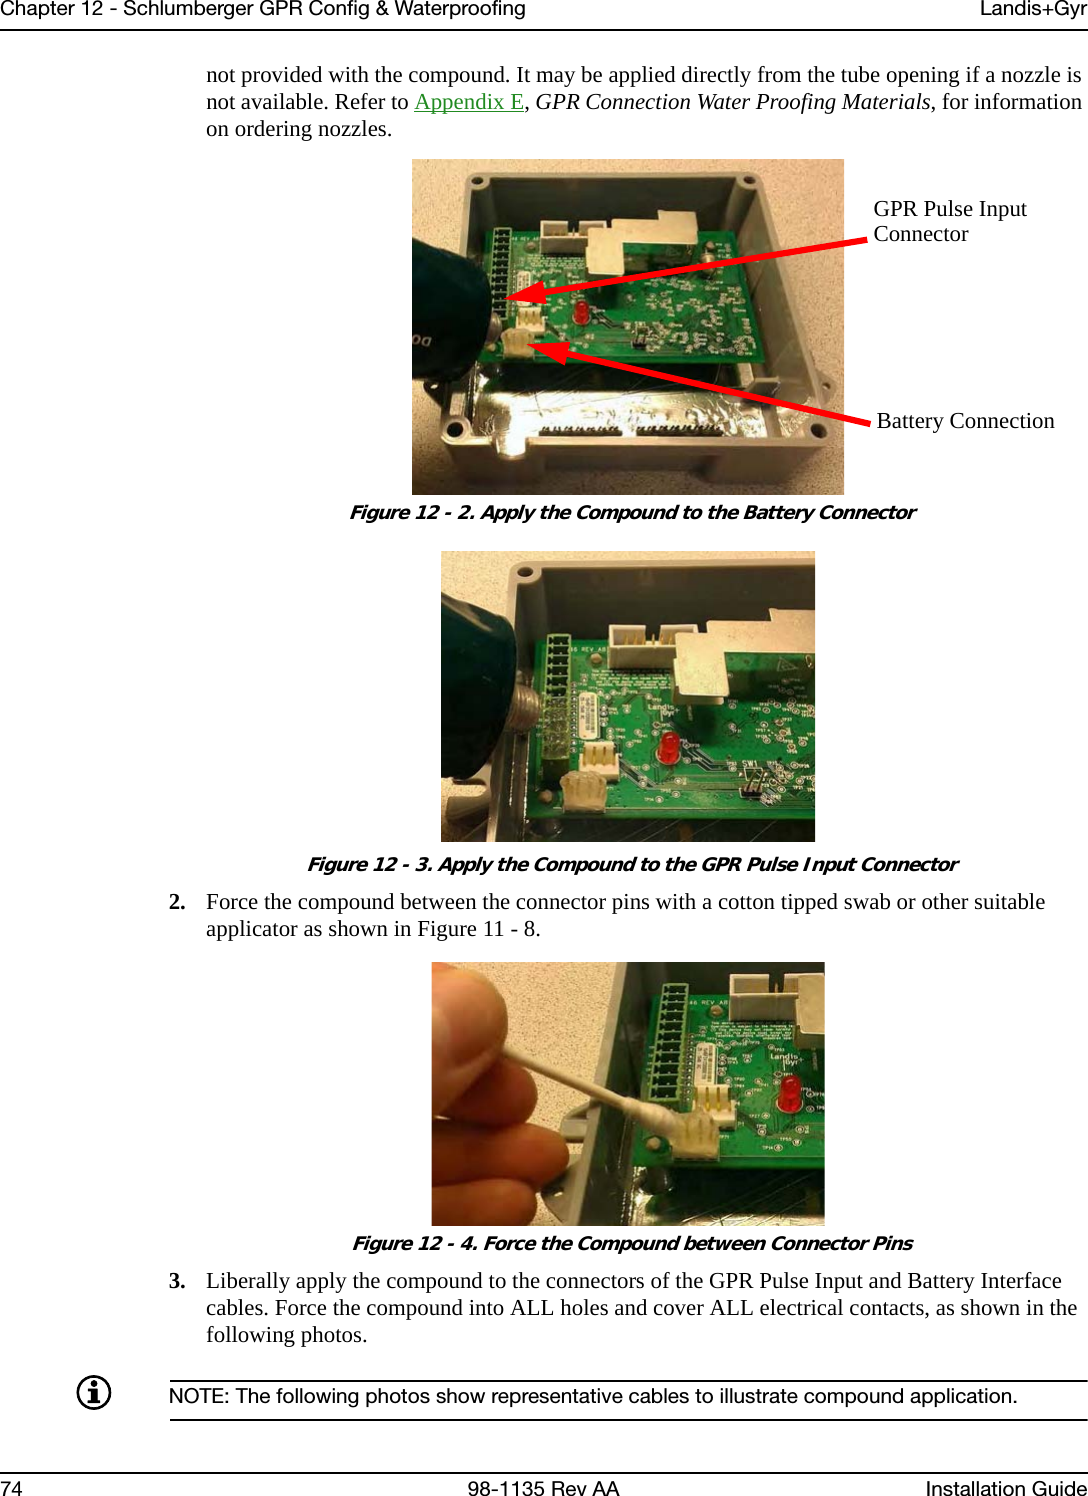
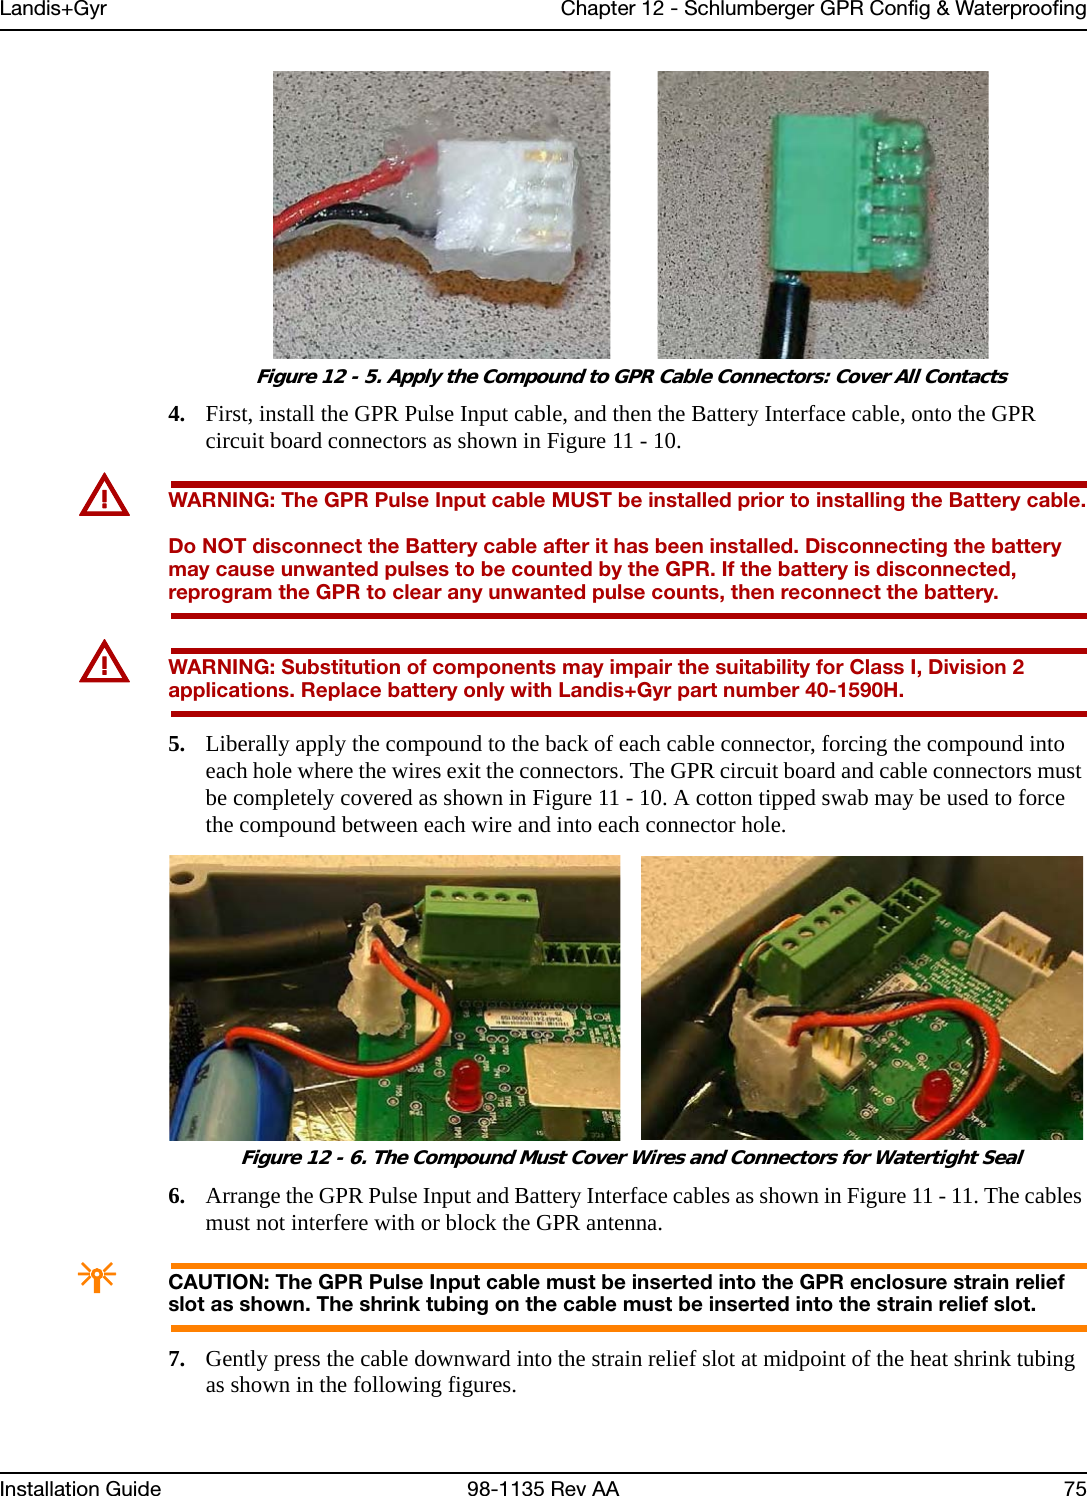
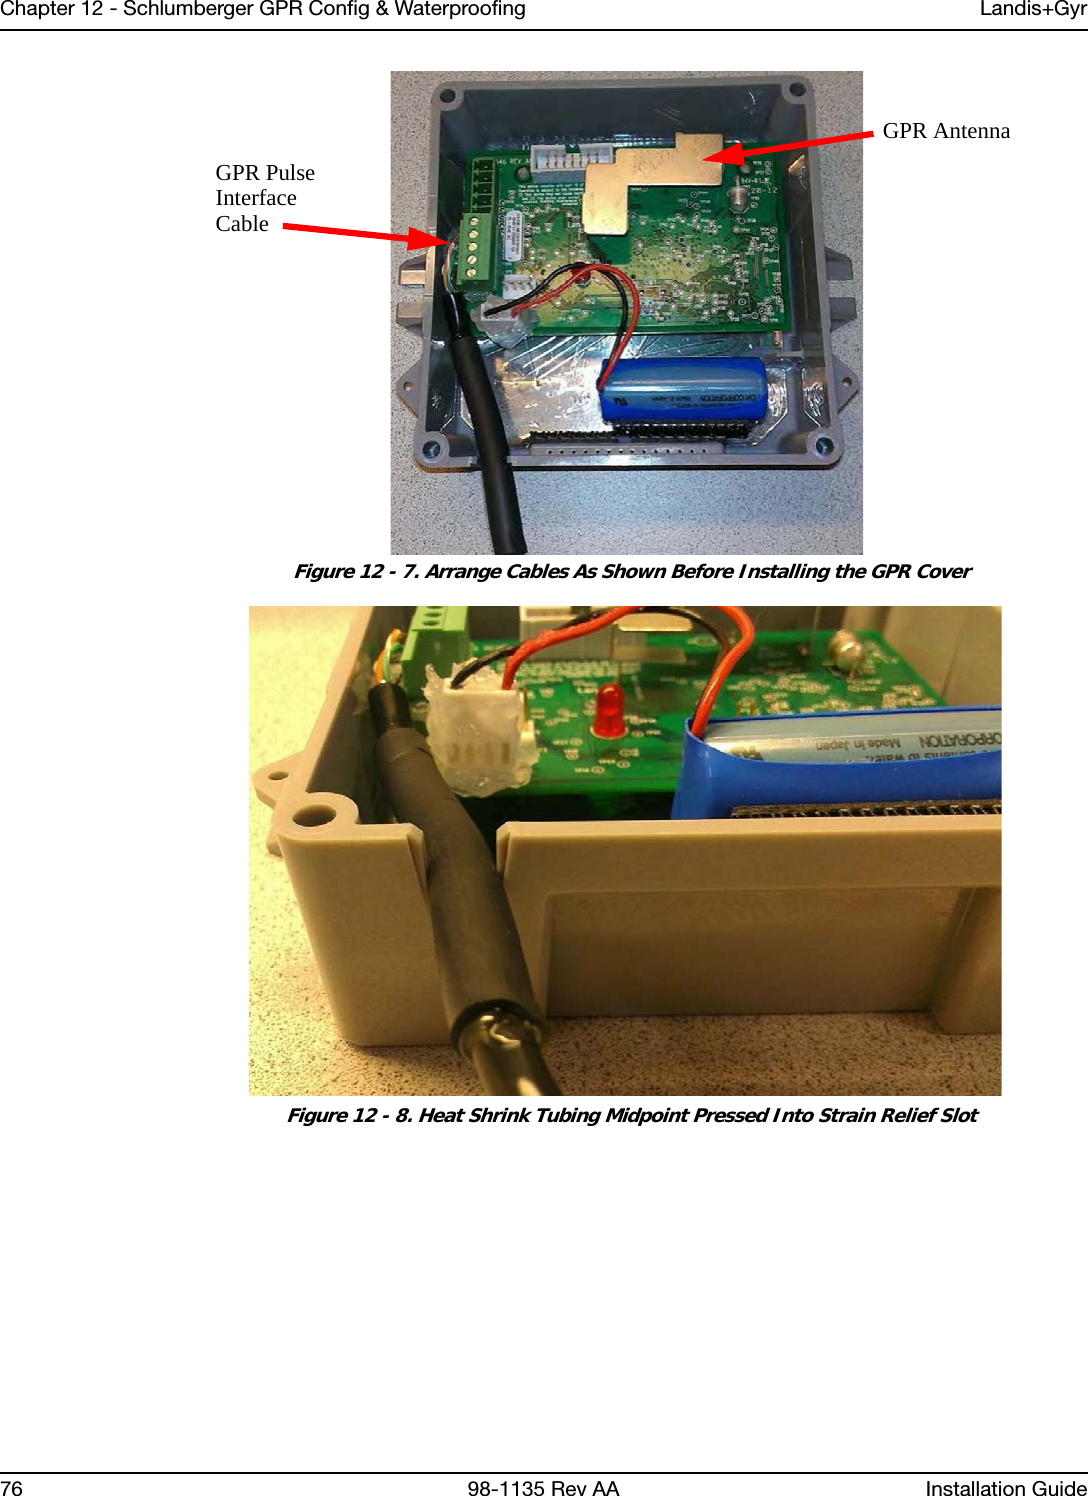
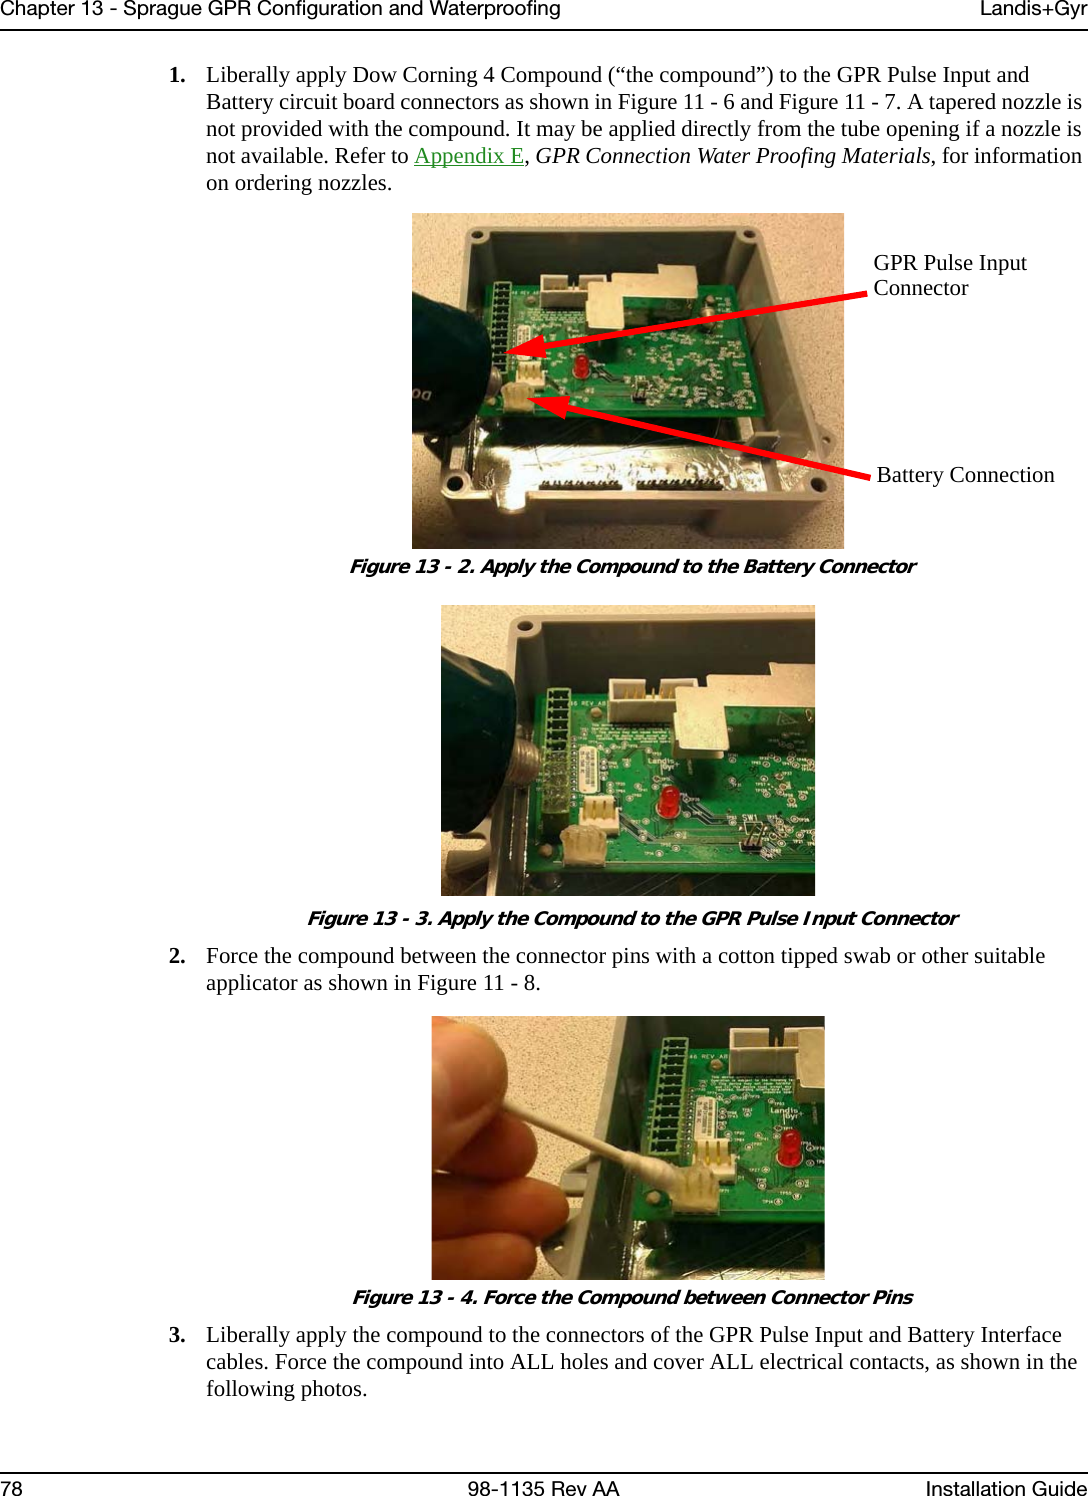
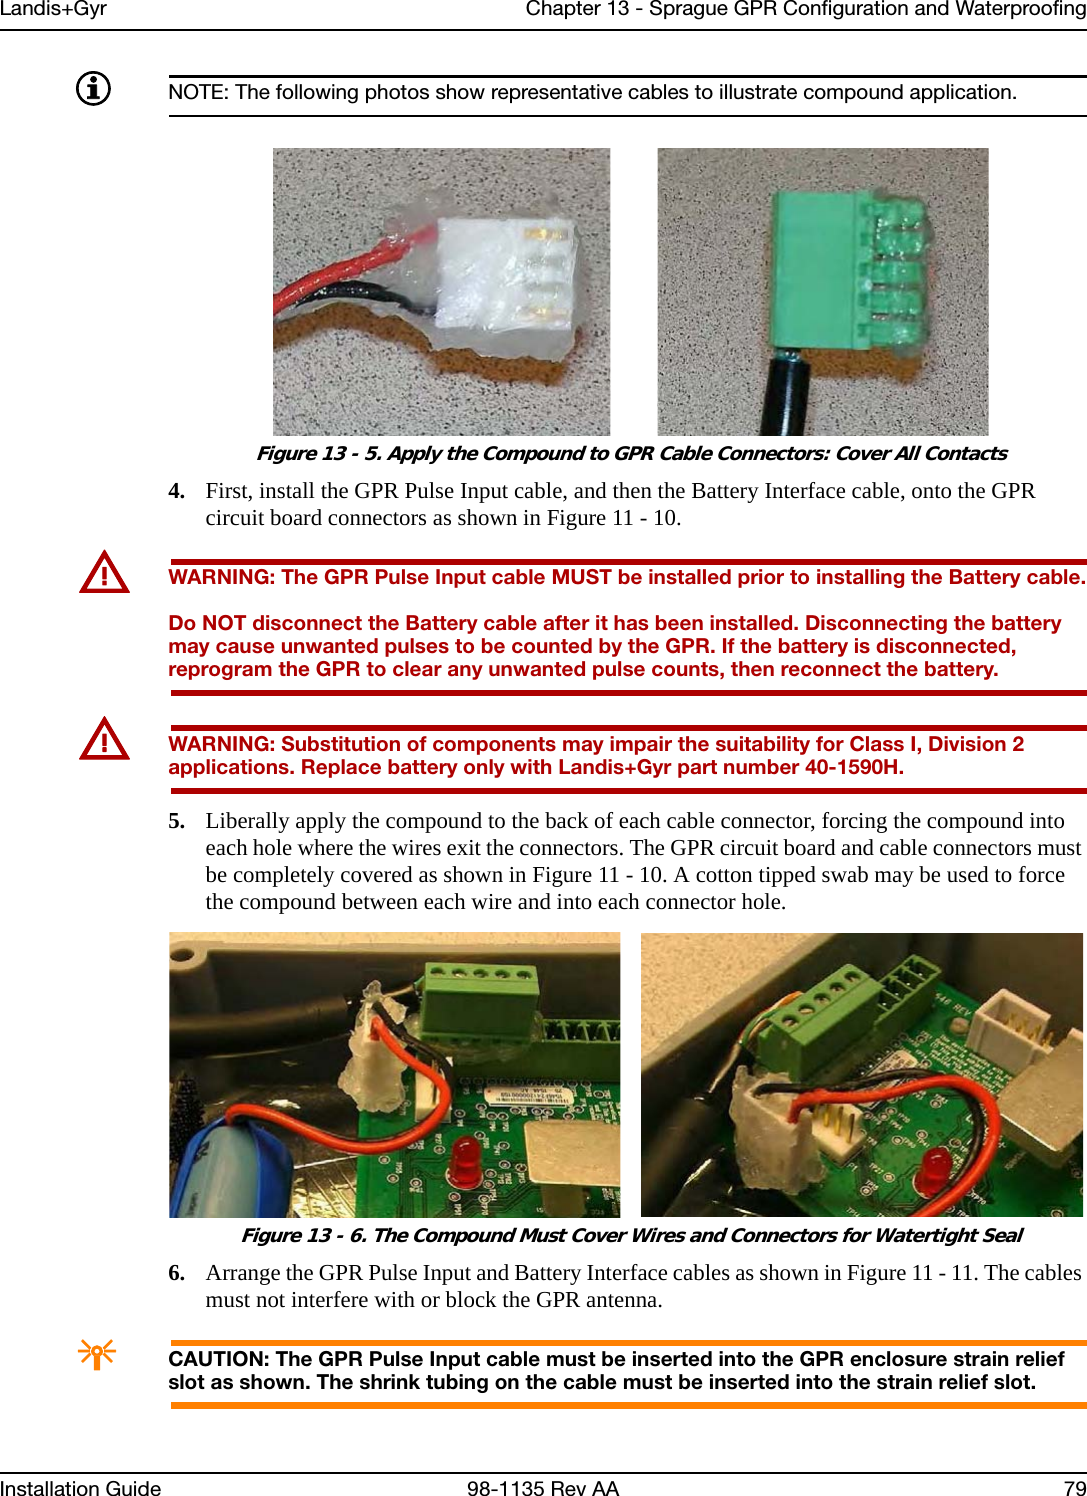
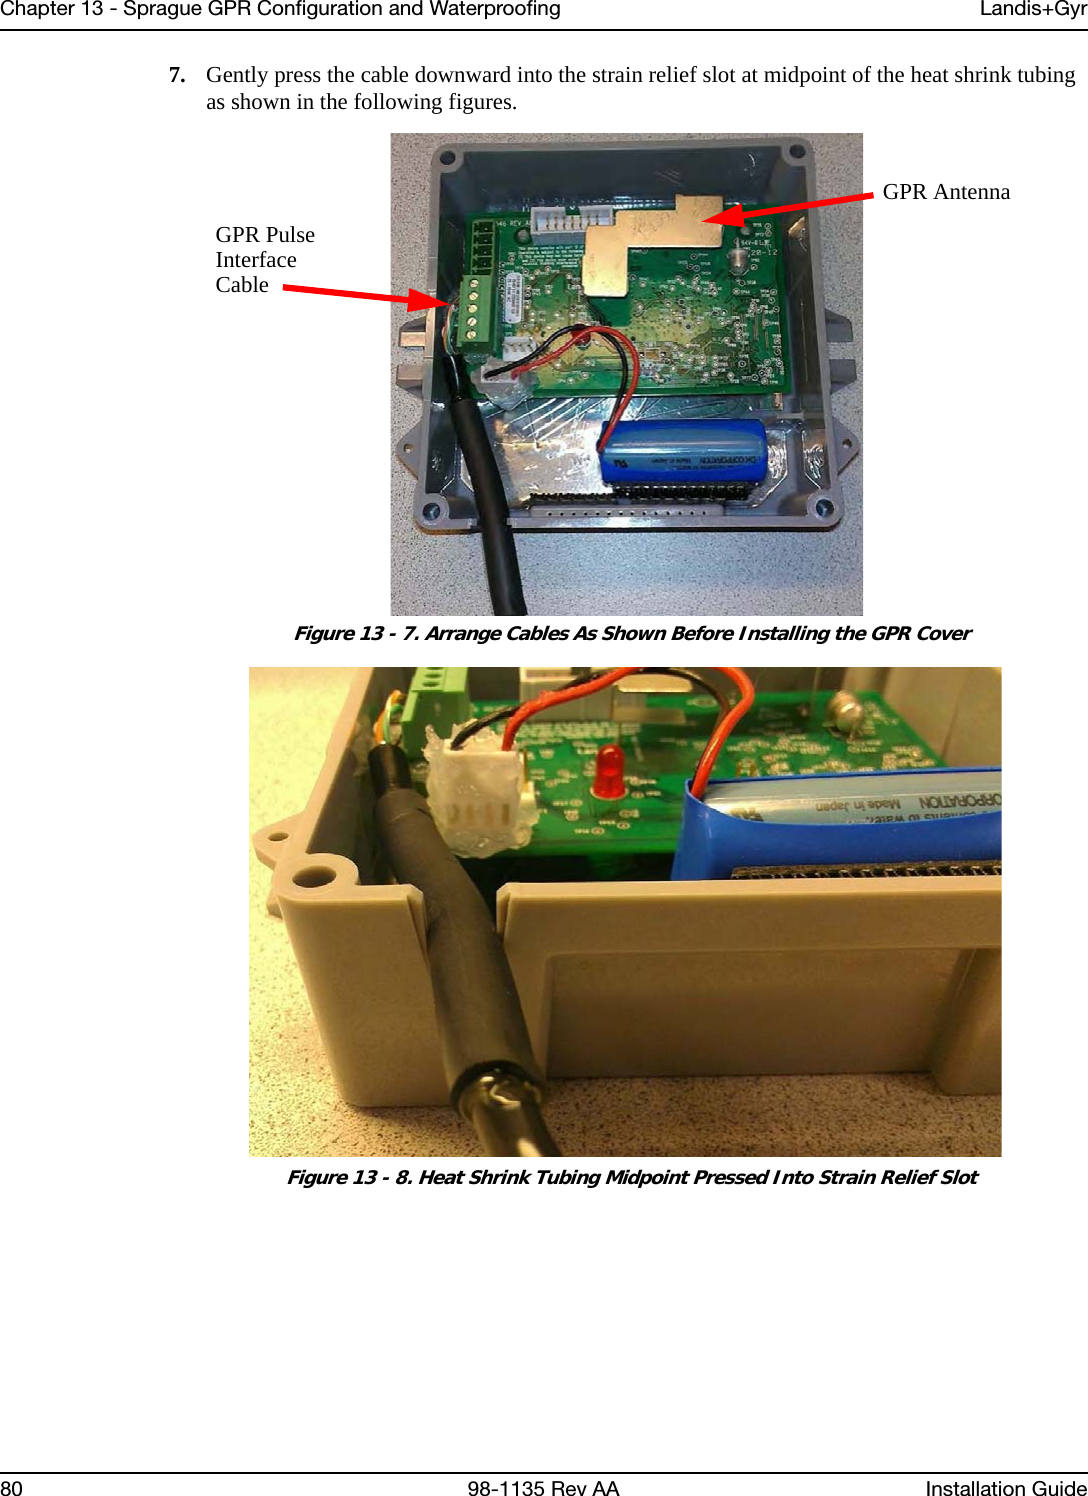
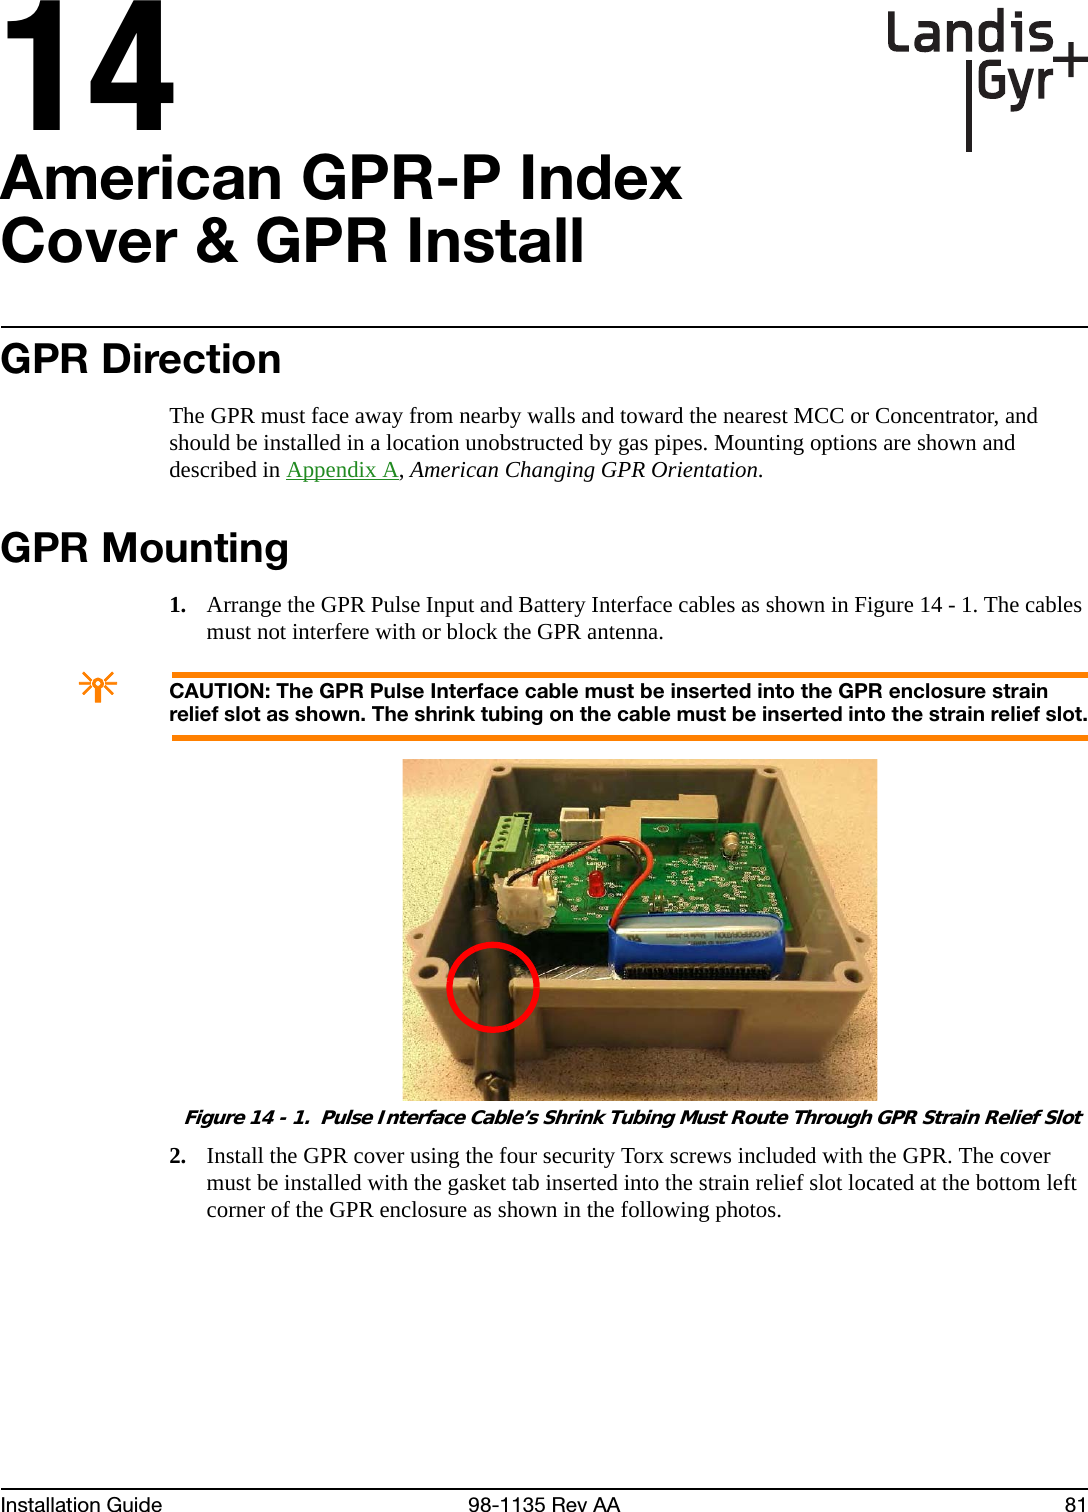
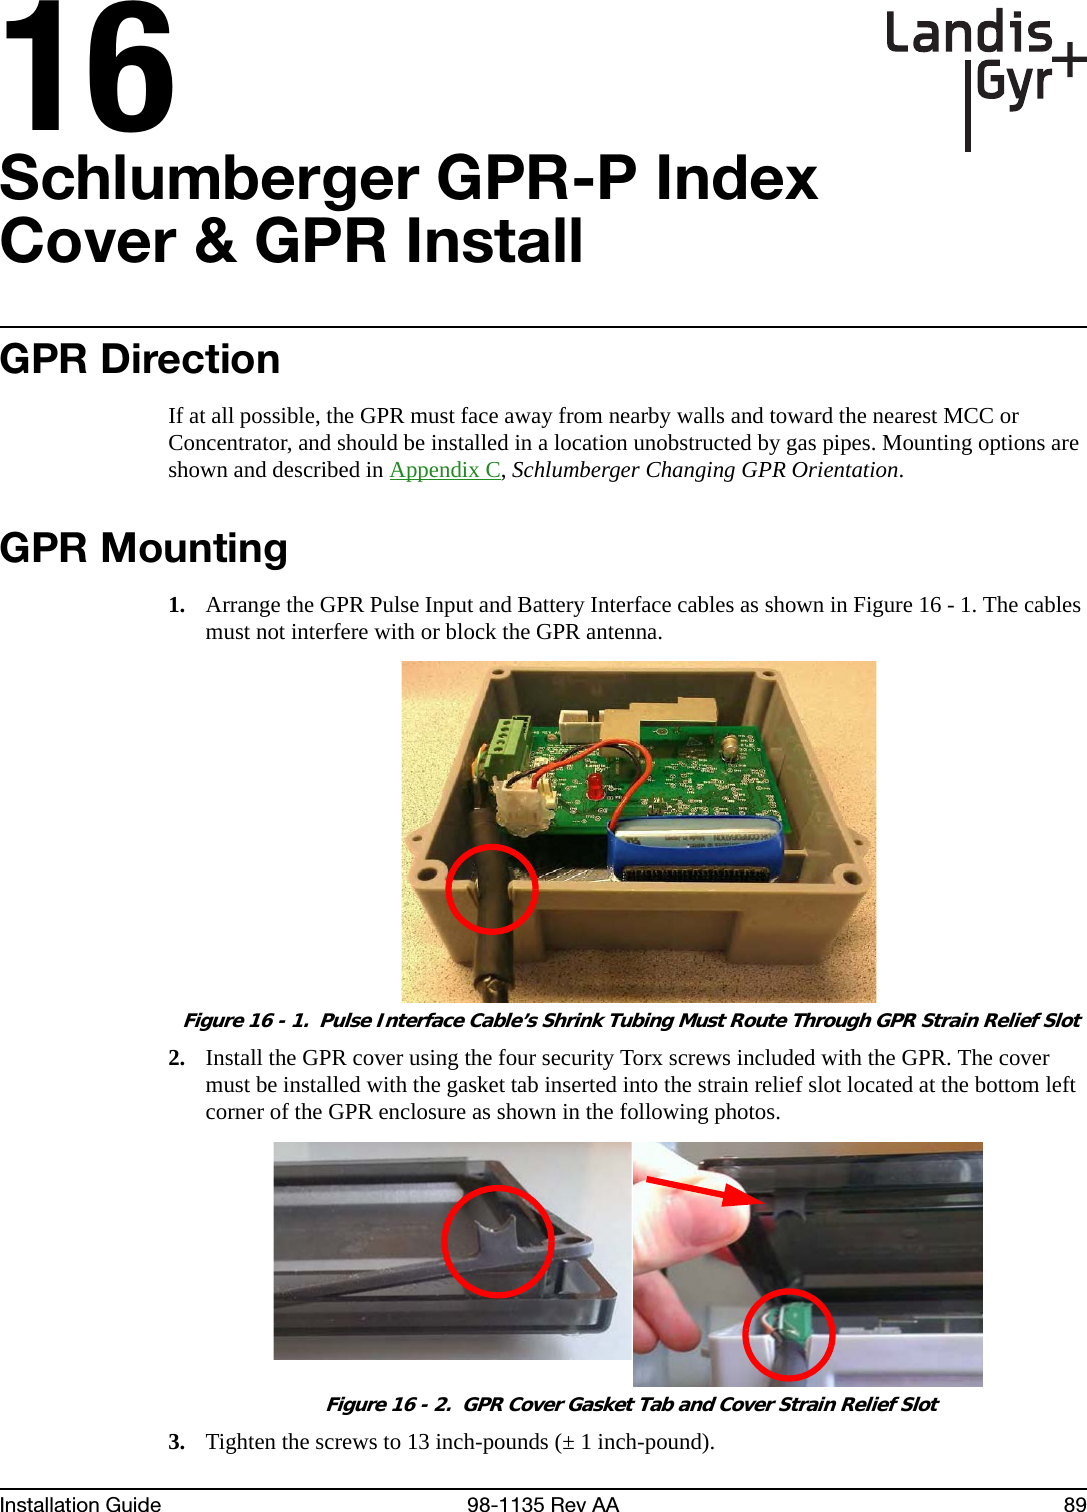
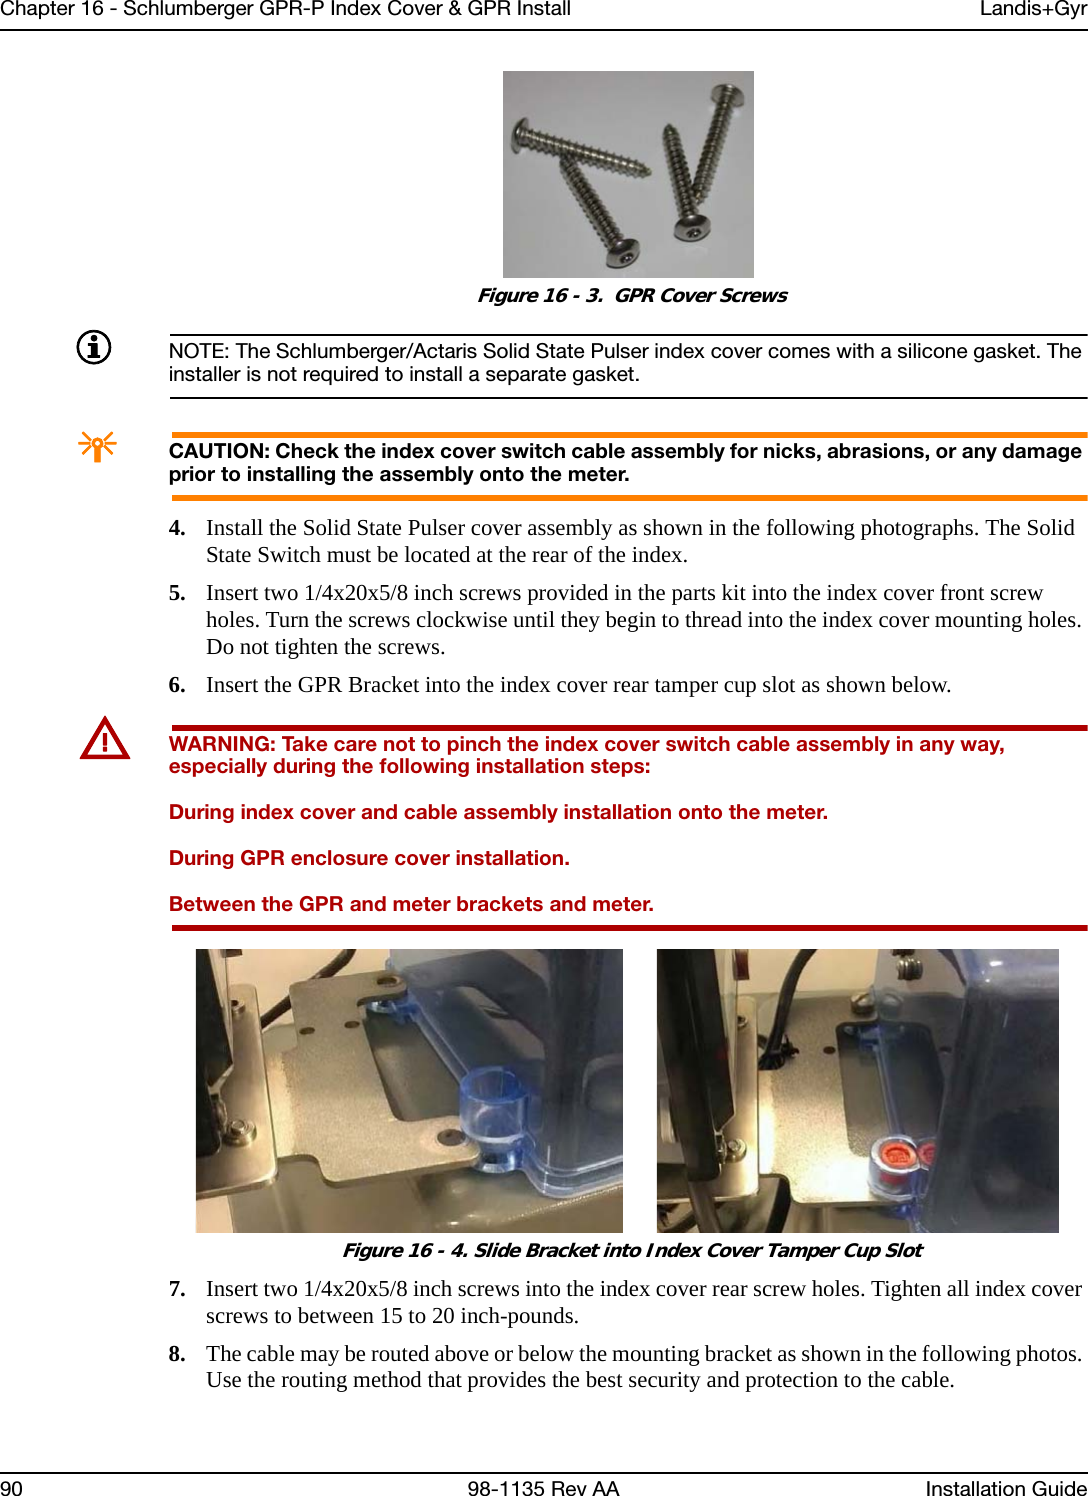
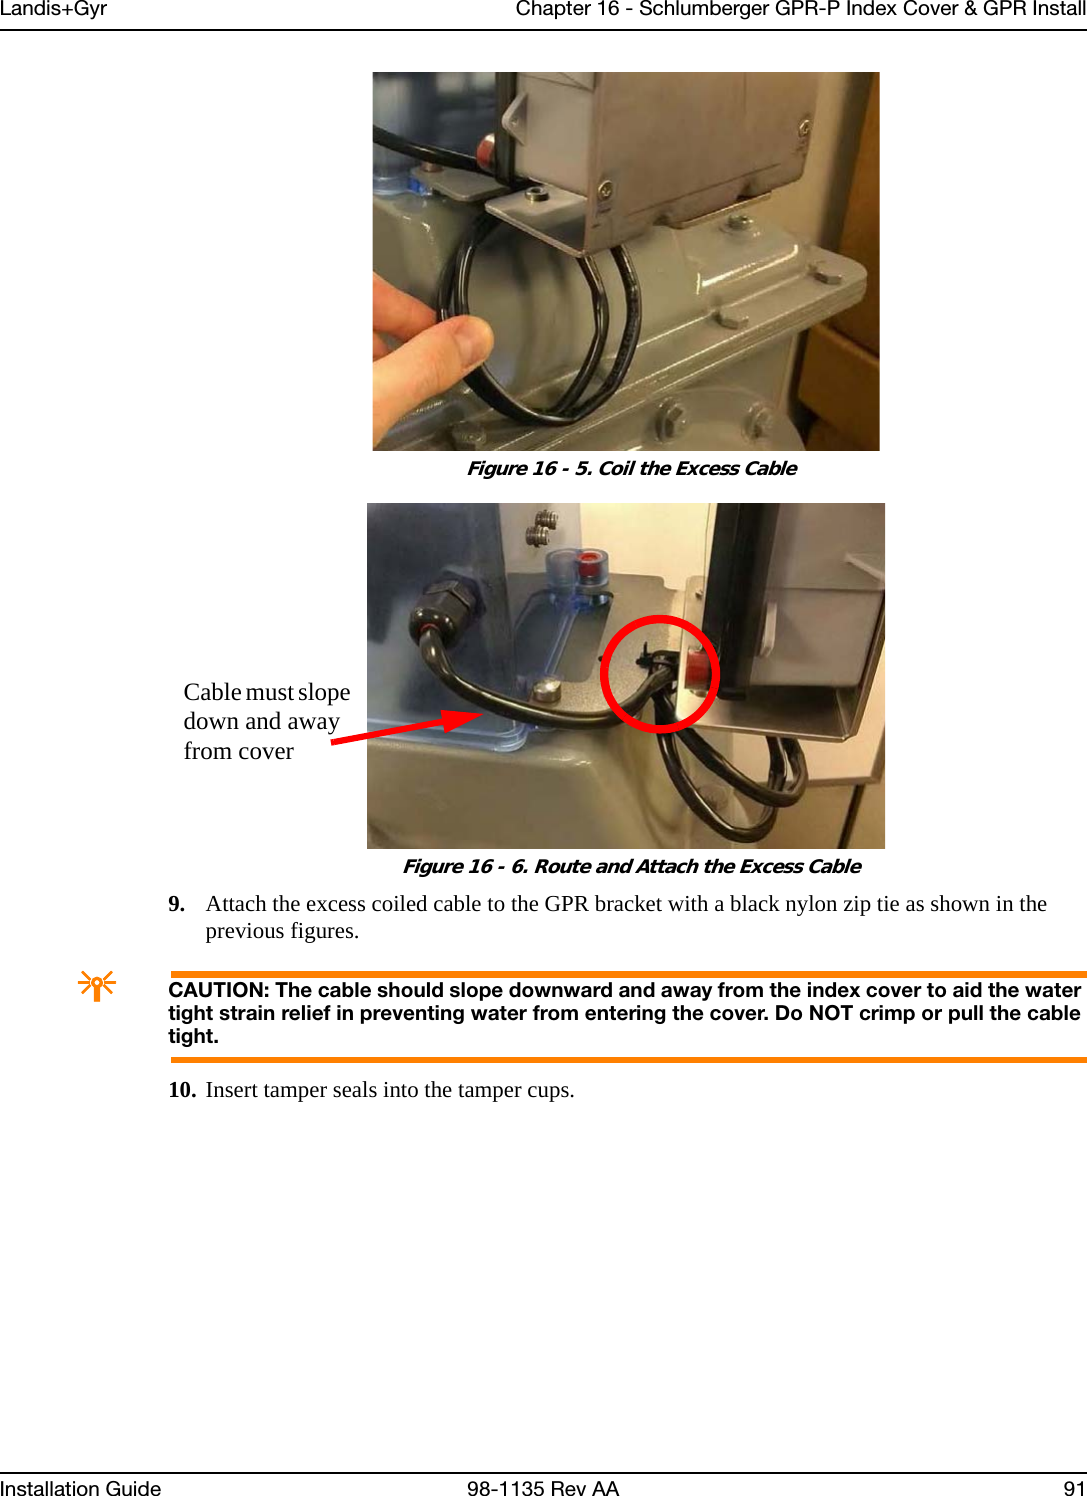
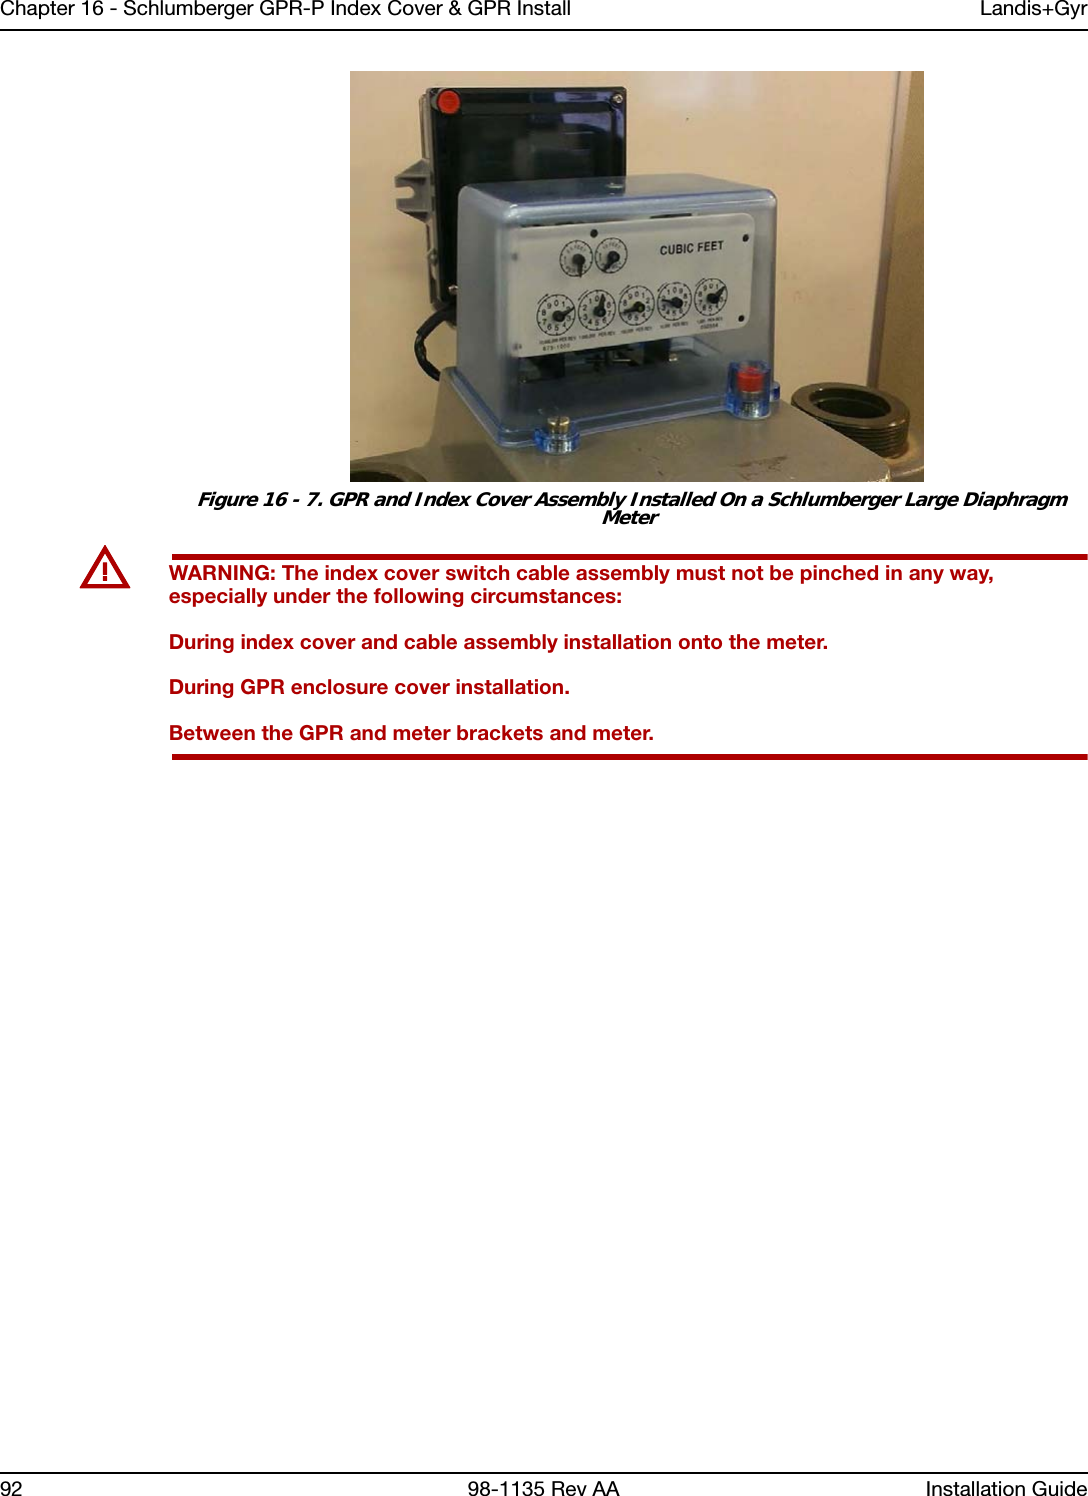
Landis Gyr Technology EC6R1S1 Gridstream Pulse Recorder User Manual 13 0144 Exhibit Cover
Landis+Gyr Technology, Inc. Gridstream Pulse Recorder 13 0144 Exhibit Cover
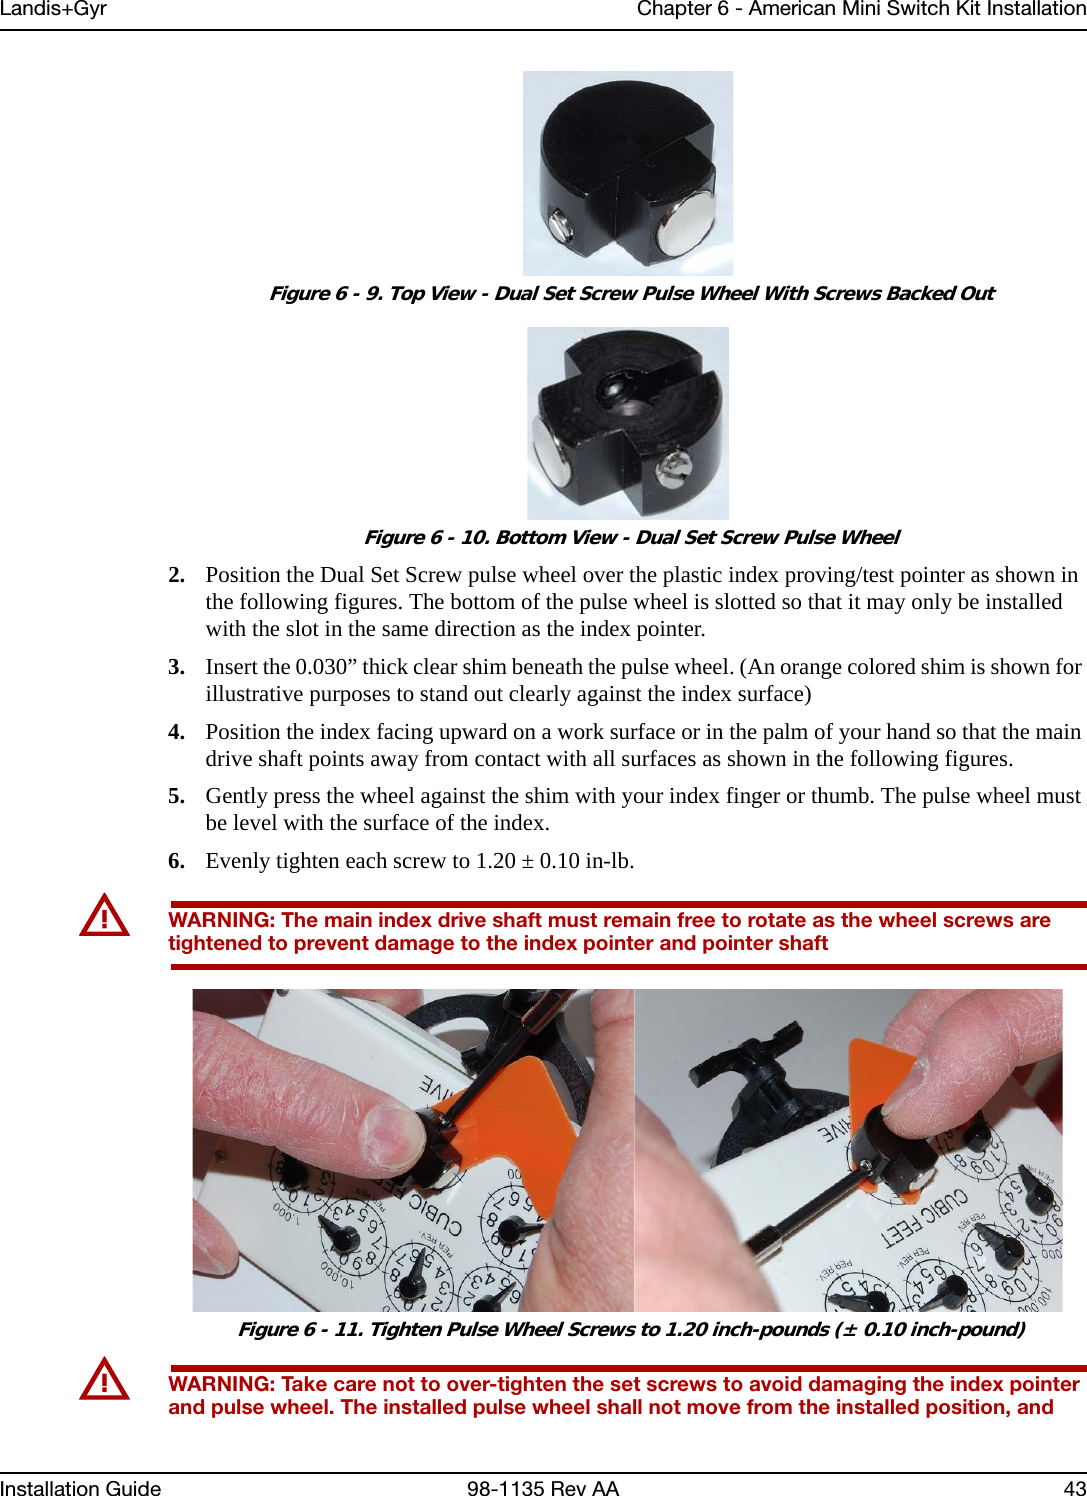
UserManual.wiki
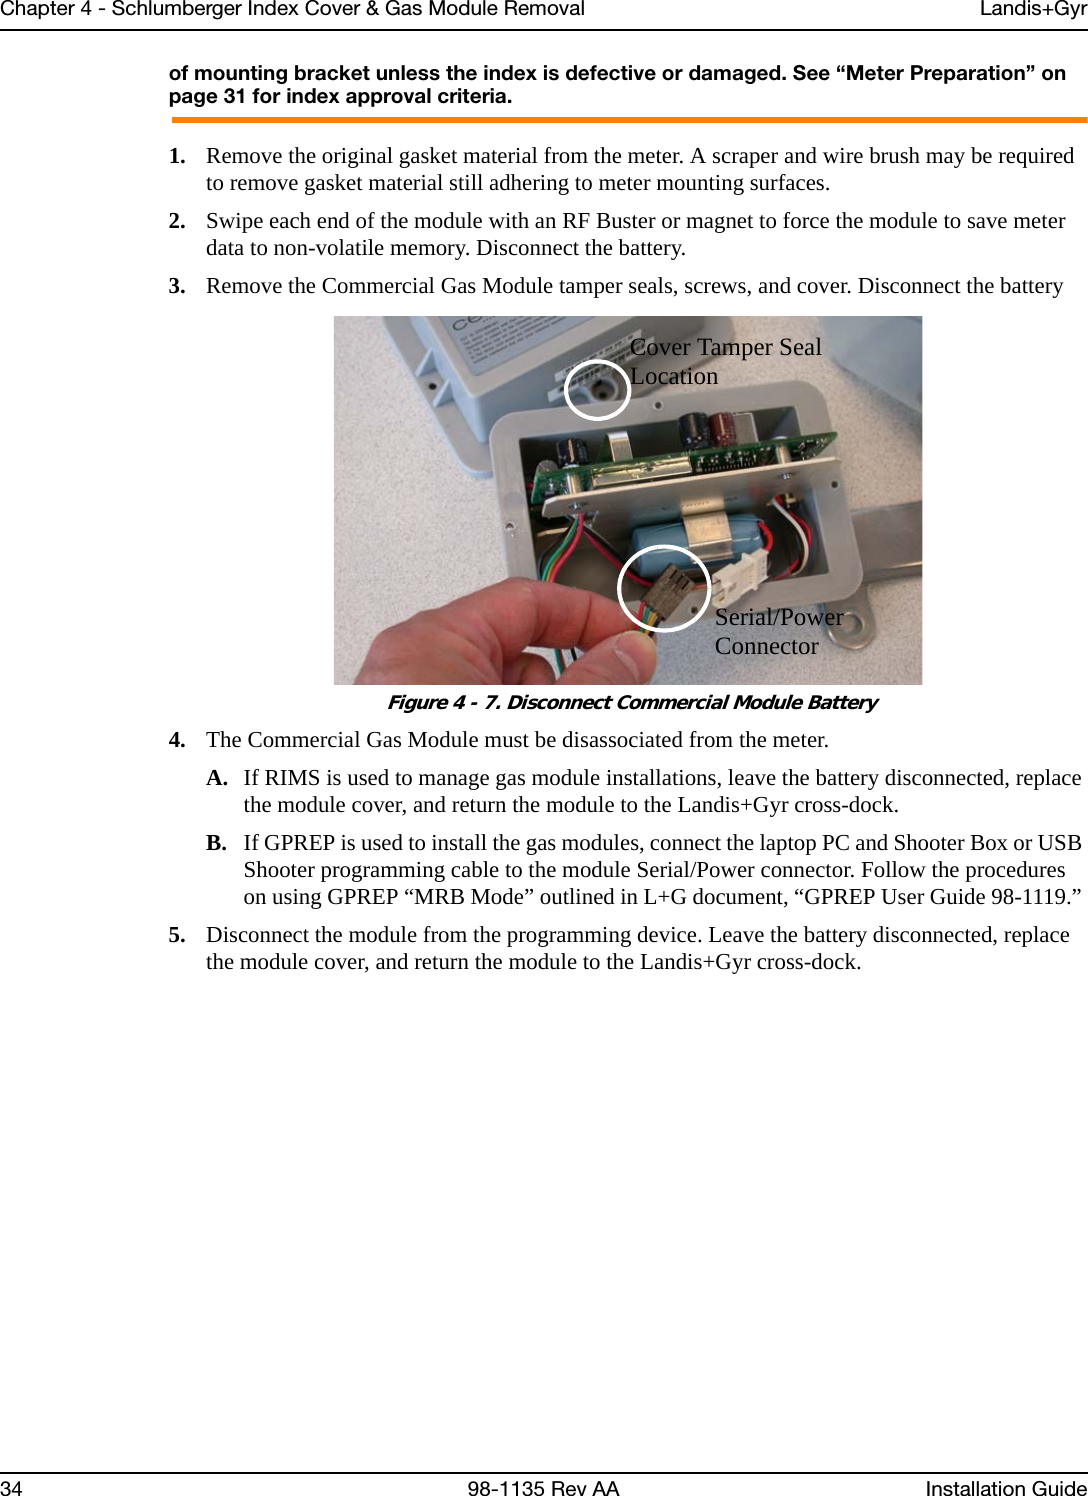
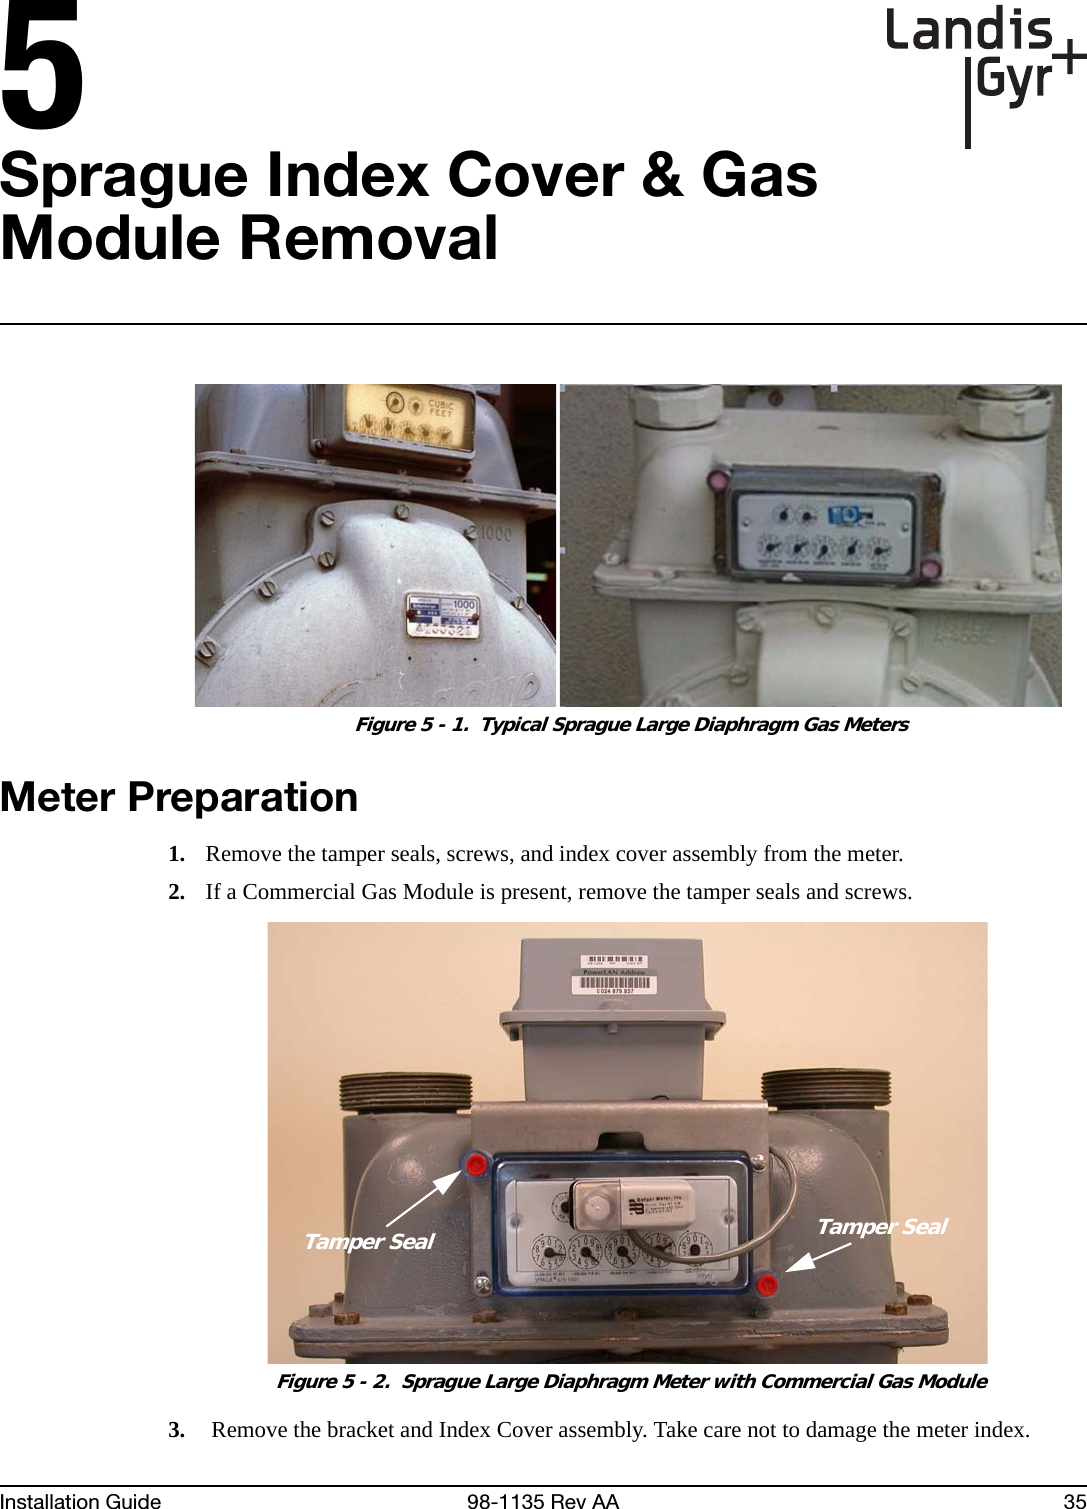
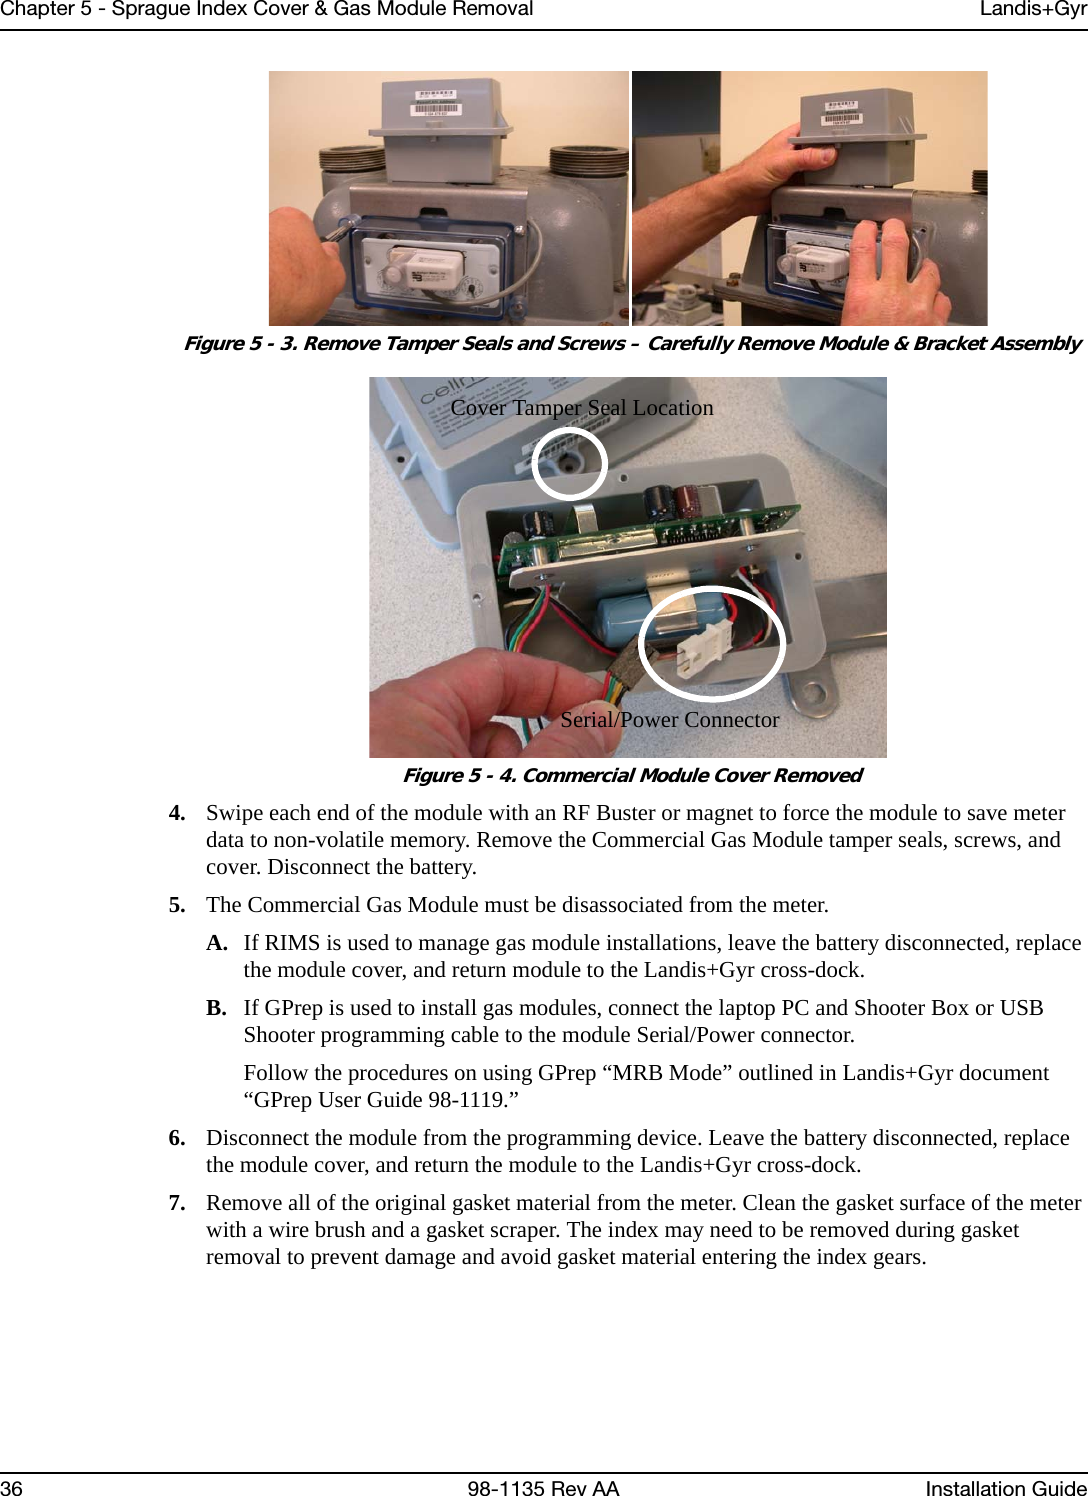
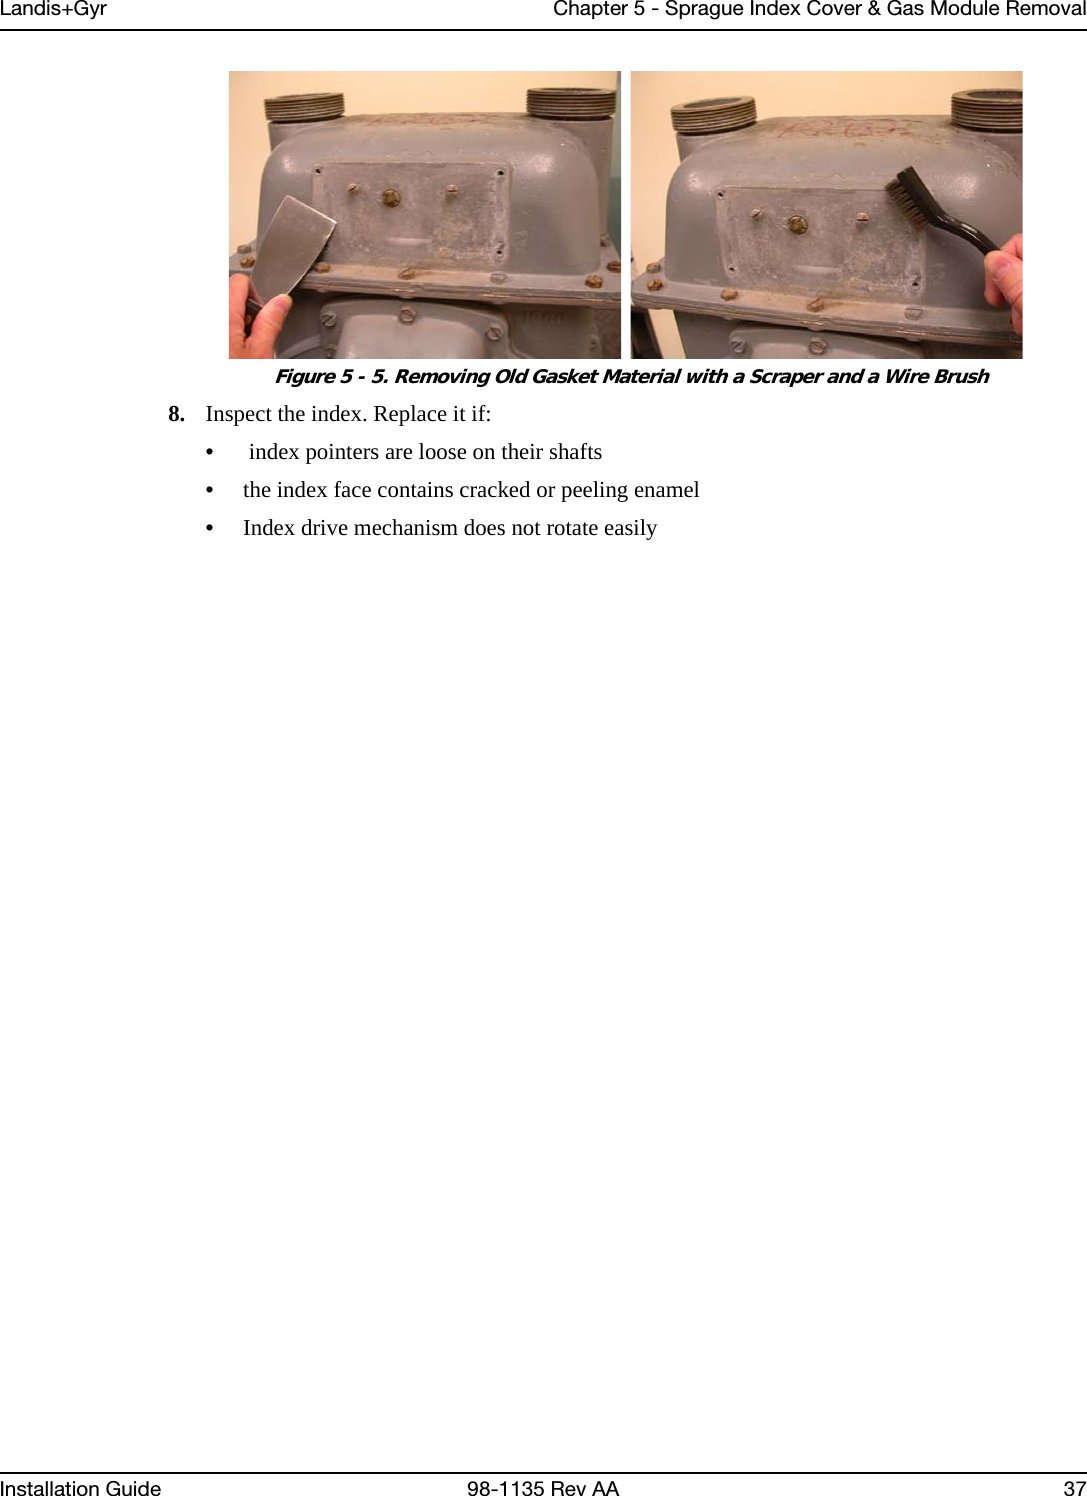
>
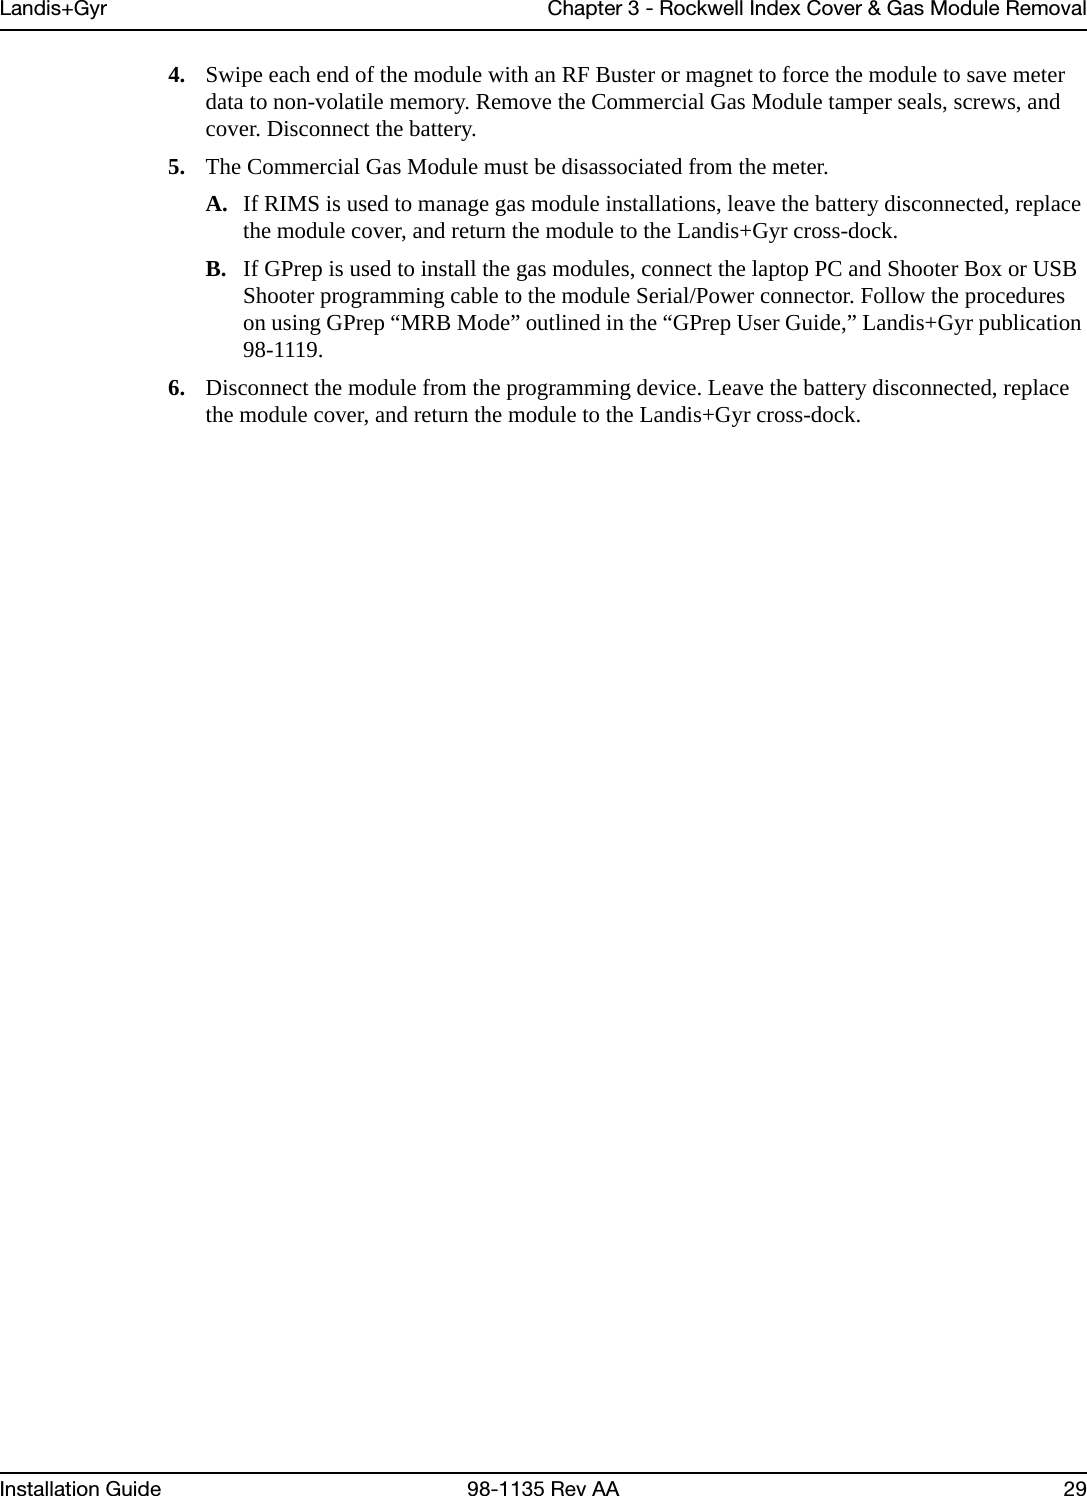
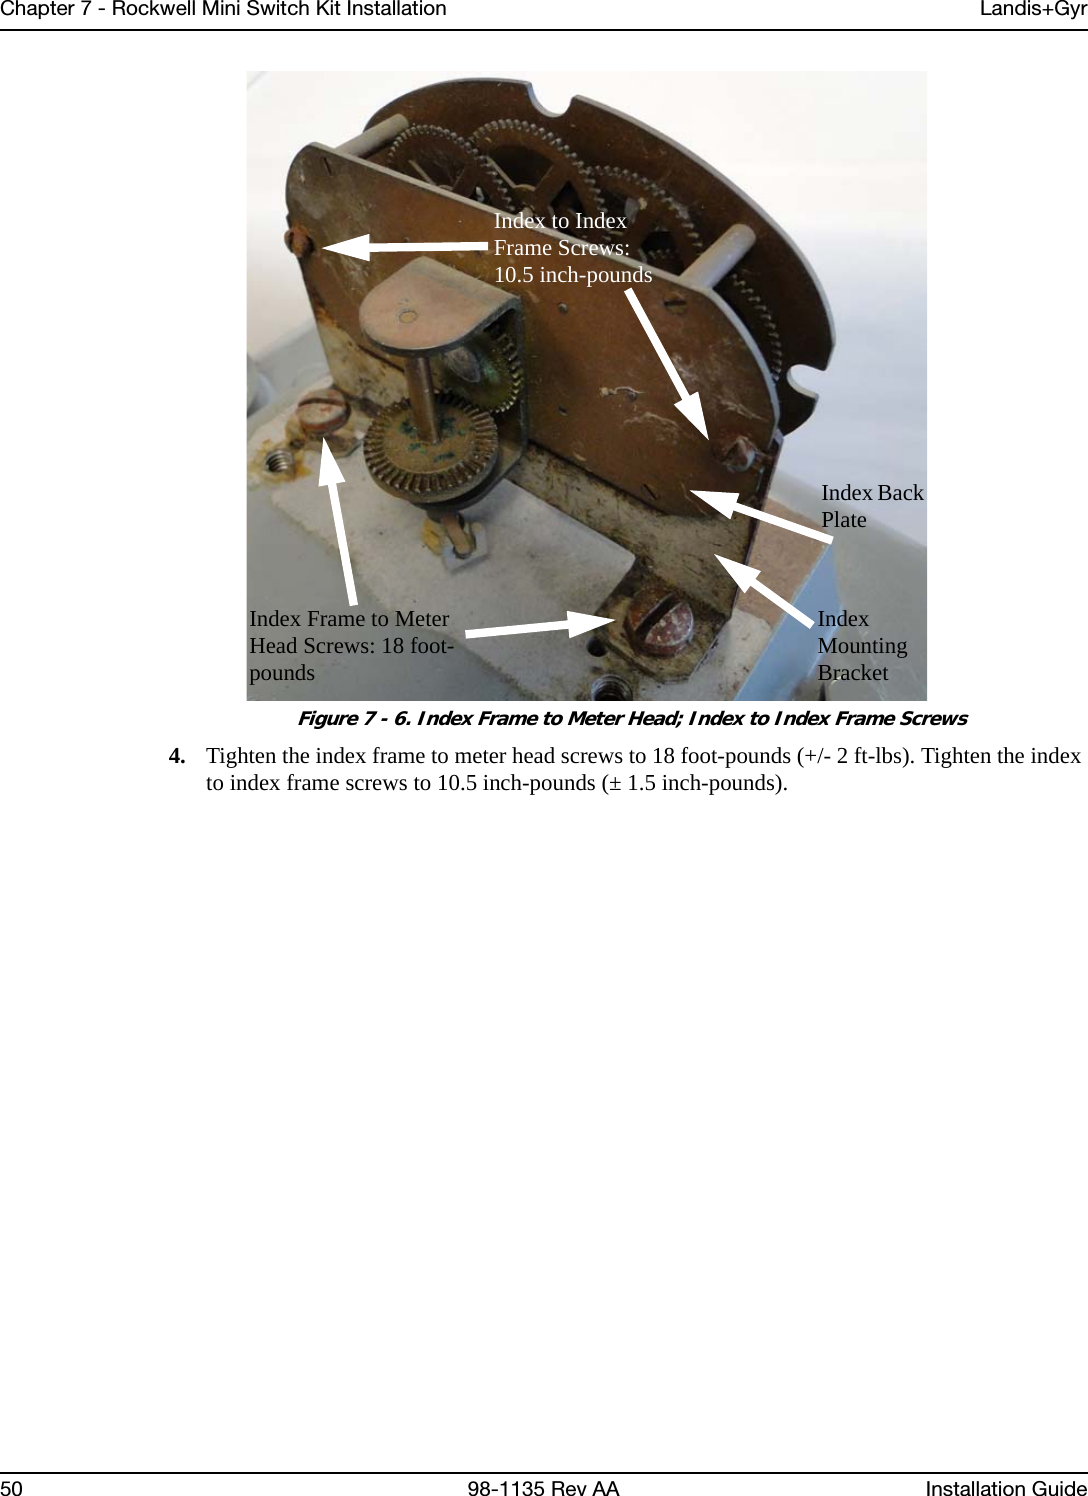
Landis Gyr Technology
>
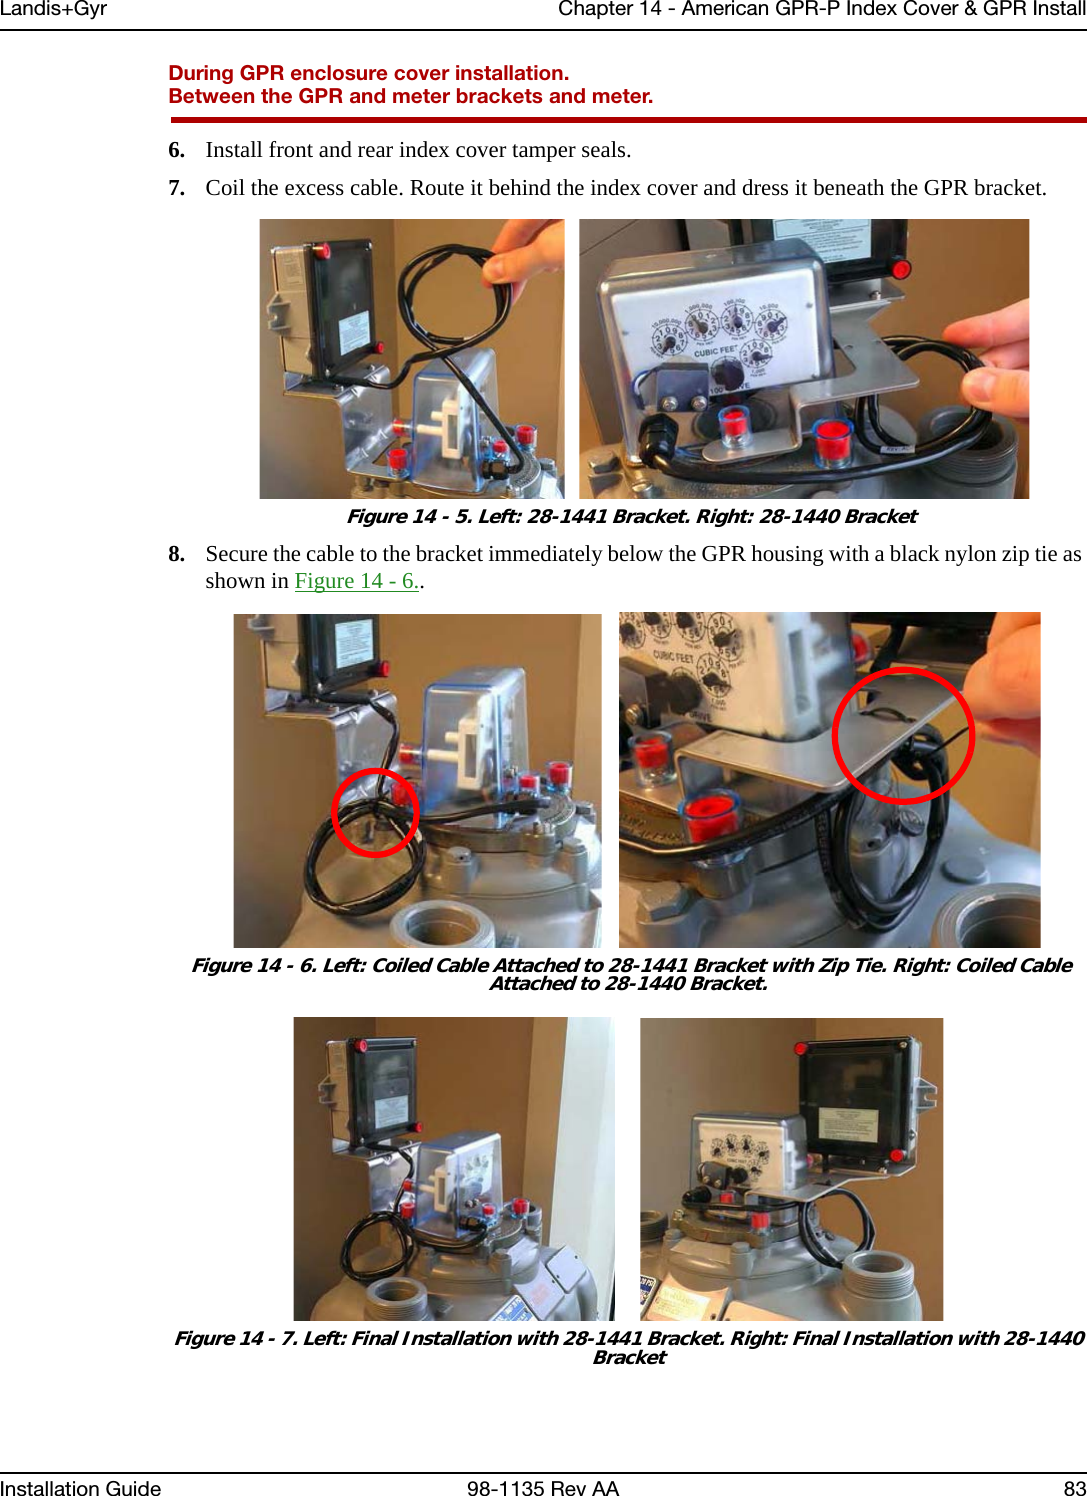
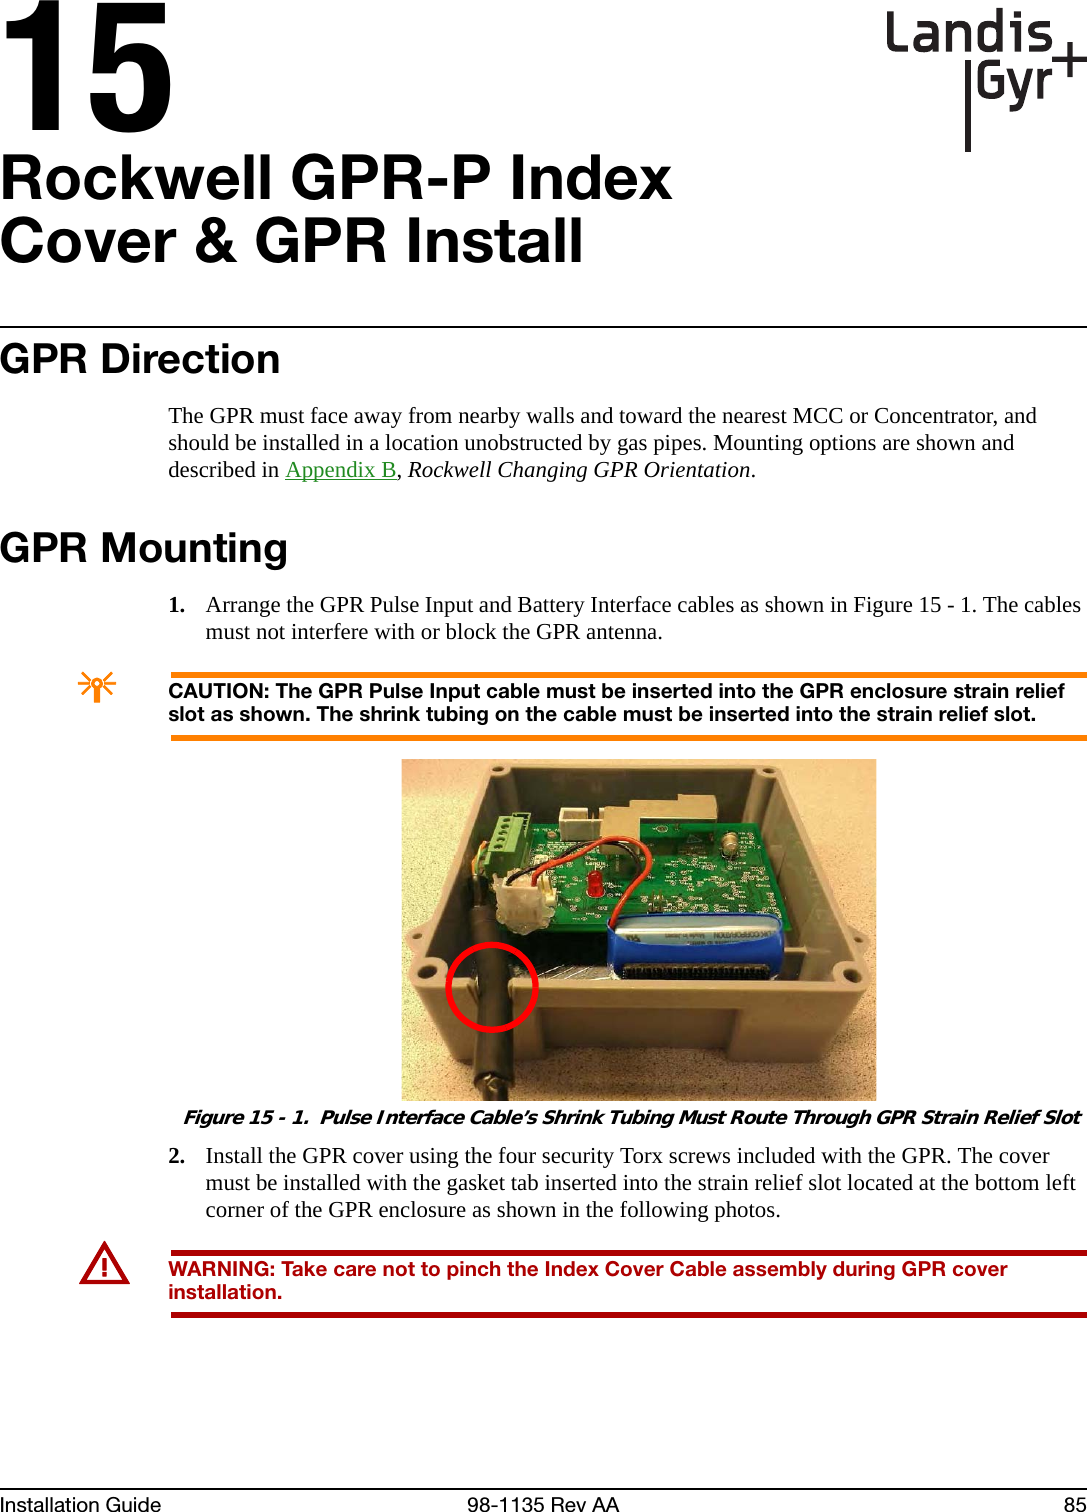
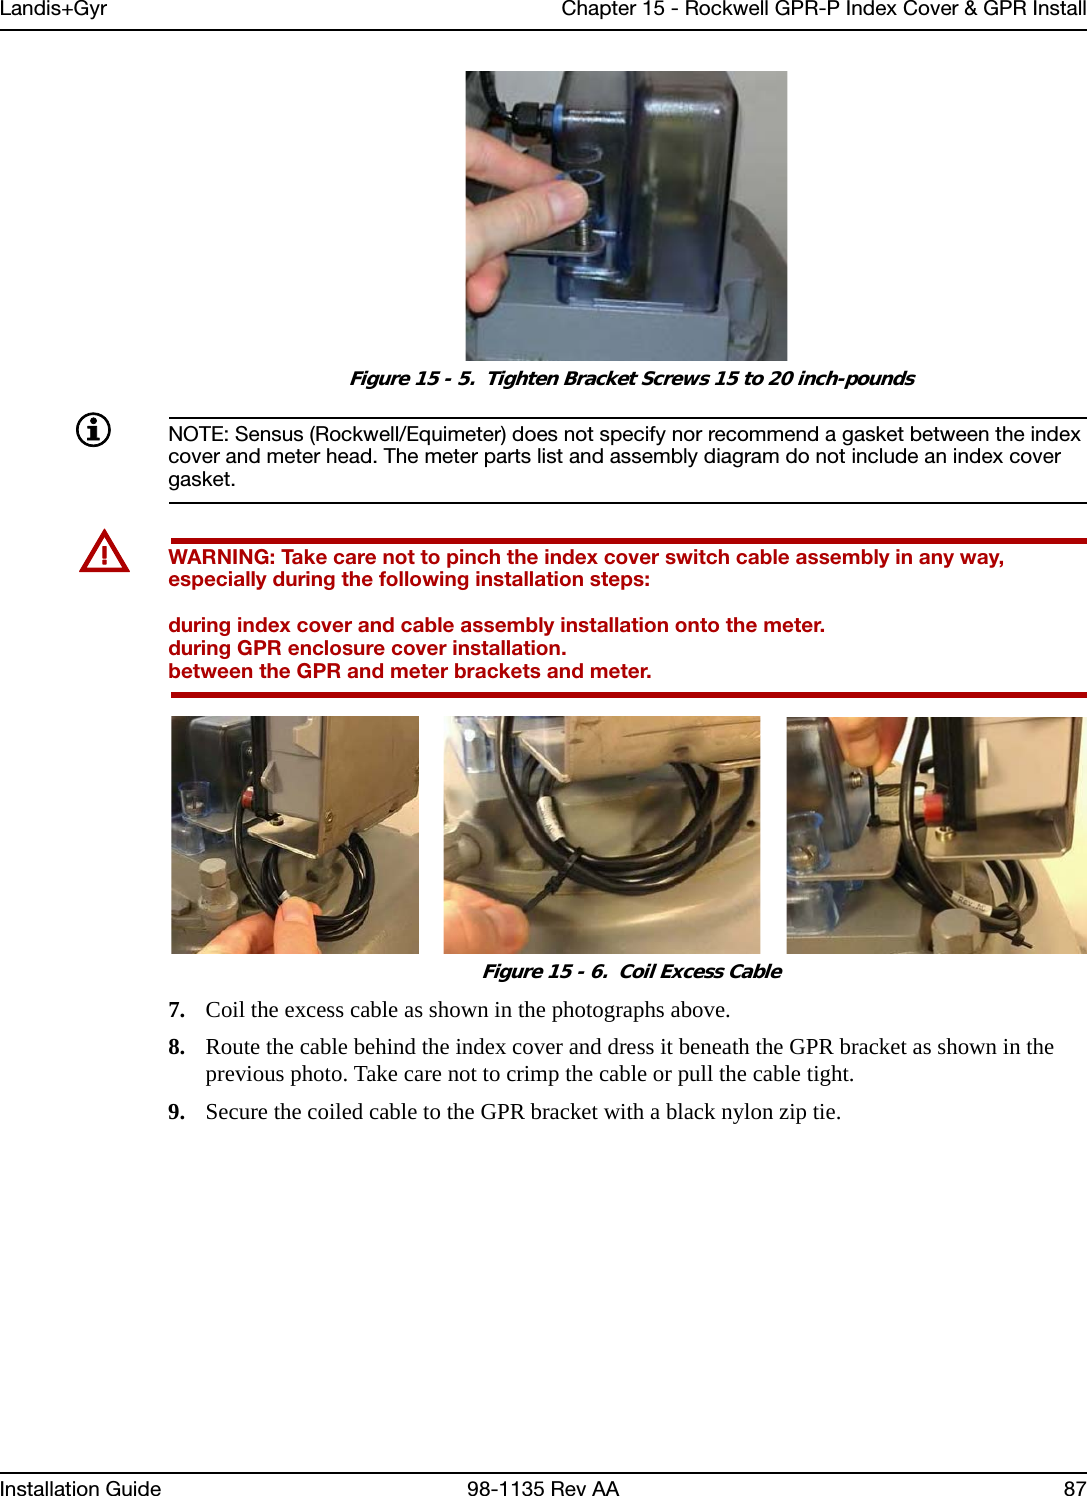
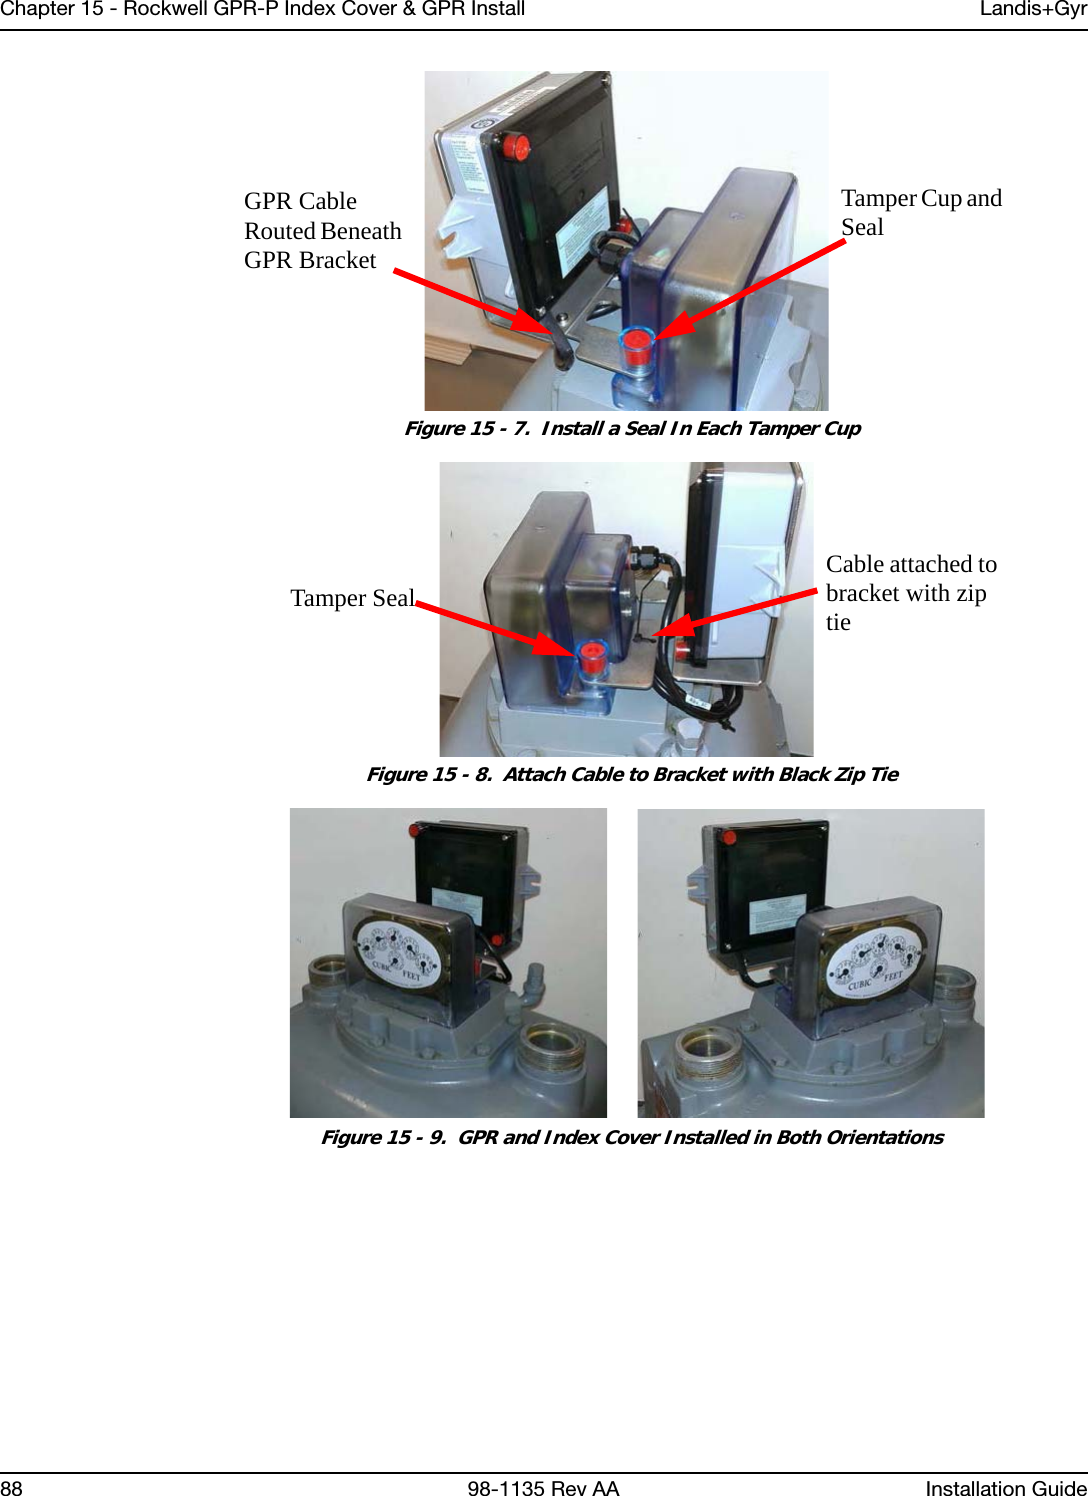
EC6R1S1 User Manual
Manual
Navigation menu
Upload a User Manual
Namespaces
Wiki Guide
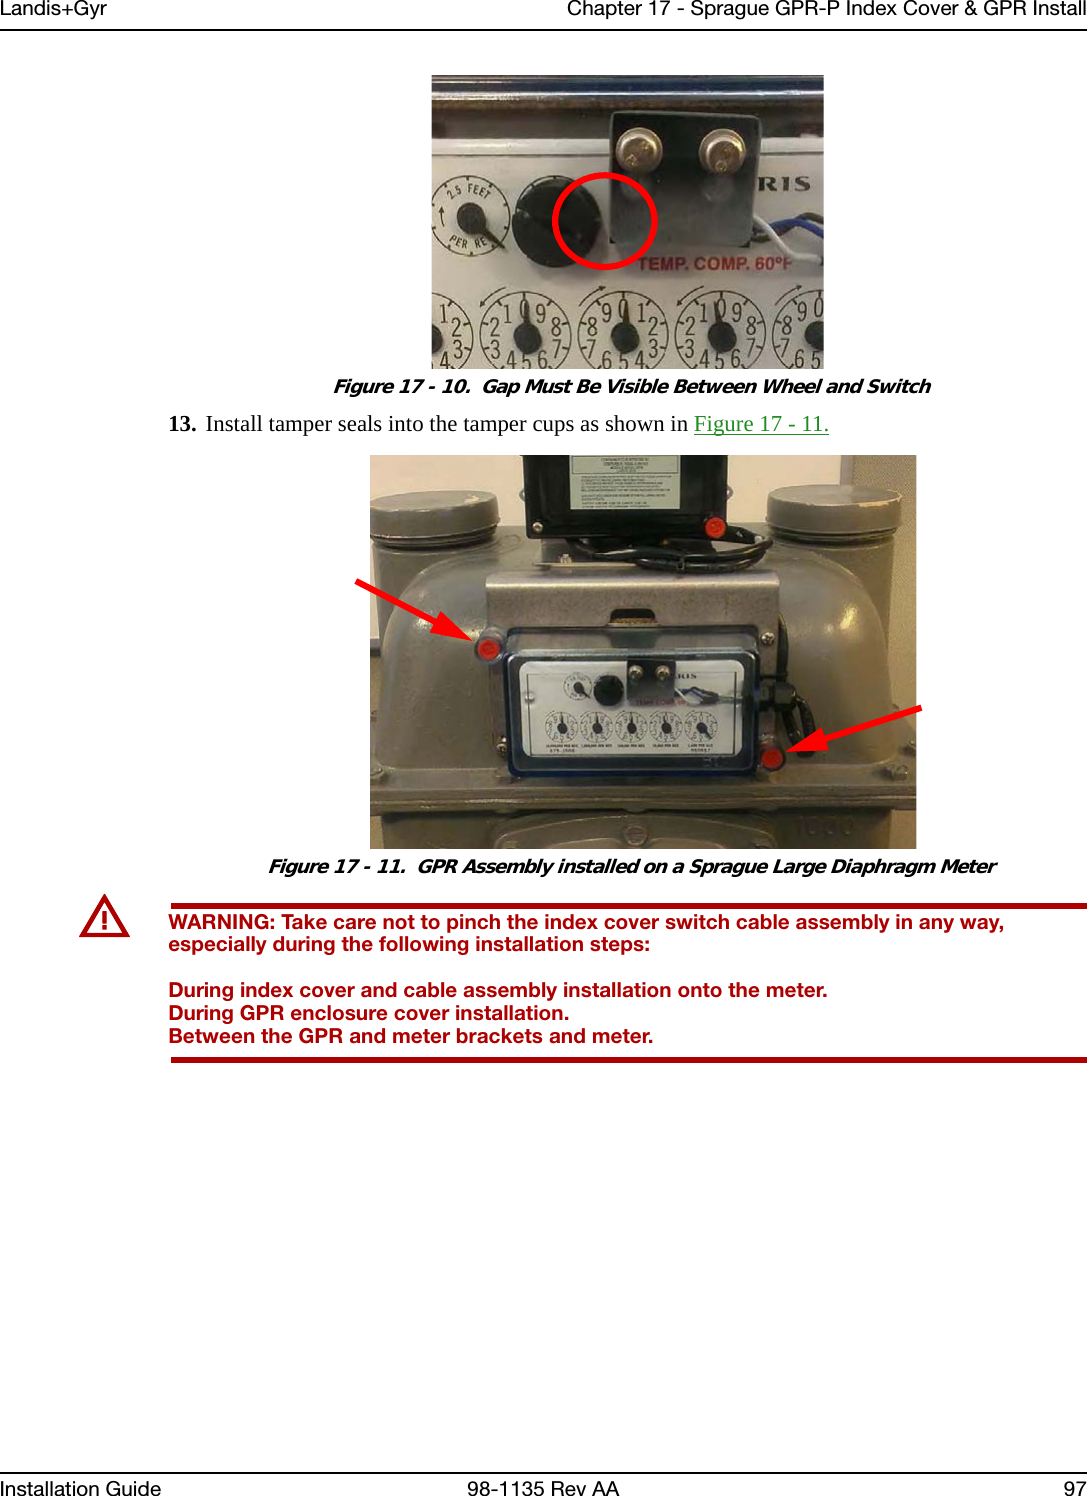
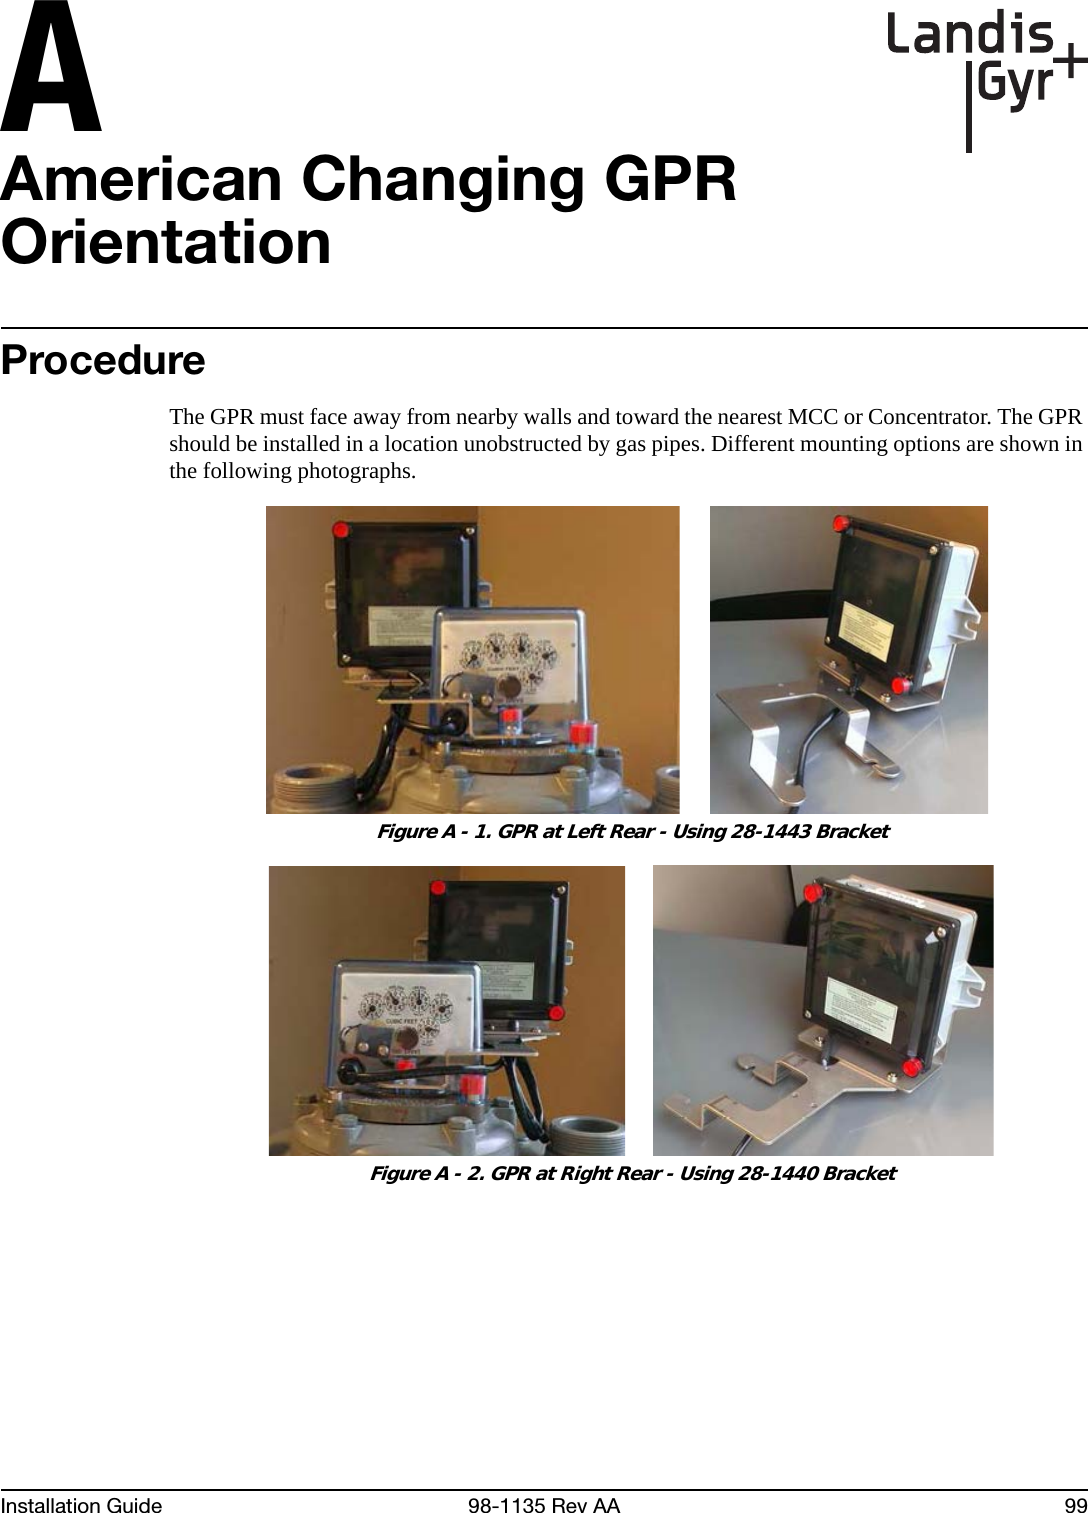
HTML
PDF
Info
Views
User Manual
Discussion / Help
Navigation